-
b
-
e
-
i
-
l
-
m
-
o
-
p
-
q
-
s
-
t
-
u
-
v
-
w
Zircon MultiScanner Pro SL — Wall Scanner Manual
Introduction
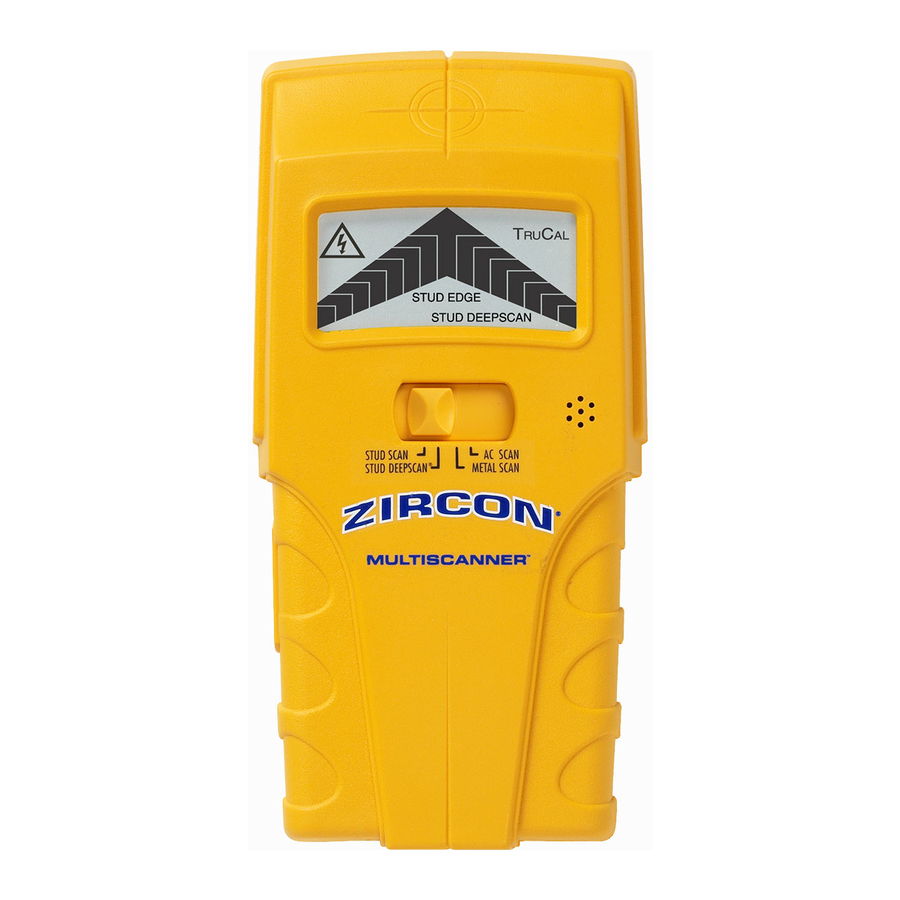
The Wall Scanner and MultiScanner® scanners use four different scanning modes to detect studs, metal, and hot unshielded AC wiring up to 11⁄2 in. (38 mm) deep behind walls, floors, and ceilings. It also detects rebar in concrete. Wall Scanner and MultiScanner® Pro SL also features the SpotLite® Pointing System, which automatically displays a beam of light over the edge of a stud or near metal/AC.
U.S. Patents 4099118, 4464622, 5352974, 5619128, 6023159, and 6259241
U.S. Design Patent D427166
Canada Patents 1106932, 2141553, and 2341385
G.B Patents 2117909B, and 2159630B
Japan Patent 3581851, and Patents Pending
P/N 62117 Rev A 12/06
MODE SELECTION
- When looking for studs, always start with the scanner in Stud Scan mode, which scans through surfaces up to 3 ⁄ 4 inch thick.
- DeepScan ® mode should only be selected if you know the surface is built-up and thicker than normal construction. You should always scan the area in Stud Scan mode first, to verify that DeepScan is needed. DeepScan is for depths between 3 ⁄ inch and 1 1 ⁄ 4 2 inches.
- When scanning for metal pipes or rebar, select Metal Scan mode.
- When scanning for electrical wires, select AC Scan mode.
IMPORTANT OPERATING TIPS
PLEASE READ CAREFULLY
- Tool Position. For proper use, always place scanner flat against the surface before turning on power.
- Power. Depress and hold in the power button continuously while in use.
- Calibration. Place unit flat on wall. Press and hold the power button. Do not move the unit until calibration is complete (1-2 seconds). When calibration is complete, the TruCal ® indicator will appear on the screen.
- Operation. Move the unit slowly, while keeping it flat against the wall. Do not rock, tilt, or lift it.
- If you calibrate over a stud in DeepScan mode, you probably will not detect any studs. Move the unit a few inches right or left, release the power button, and start over.
SCANNING IN STUD SCAN OR DEEPSCAN® MODE
After calibrating (see number 2 ), continue to hold the power button and slowly slide the unit across the surface. When full arrow appears on the LCD and steady tone sounds, you have located the edge of the stud. Mark this spot (see illustrations below). On the Wall Scanner and Pro SL version, the SpotLite® Pointing System will also shine a beam of light at the stud edge.
Continue holding power button in and scan beyond the marked spot until arrow bars disappear.
Without releasing power button, slide unit in reverse direciton to locate the other edge of stud. Mark this second spot. Middle of stud is centered between the two marks.
Note: DeepScan may report other things besides studs. Please see numbers 5 and 7
Select mode. After calibrating (see number 2 ), continue to hold the power button and slowly slide the unit across the surface. Mark the spot where the display bars peak and a steady tone sounds. On the Wall Scanner and Pro SL model the SpotLite will also shine a beam of light. Continue in the same direction until display bars disappear.
Reverse direction and mark the spot where the display bars peak from that direction. The midpoint of the two marks is the approximate center of the object.
In Metal Scan mode, if you calibrate directly over metal, you probably will not detect any metal. Move the unit a few inches right or left, release the power button, and start over.
In AC Scan mode, if you calibrate over AC voltage, the unit will automatically recalibrate when you move it. automatically recalibrate when you move it.
AC WireWarning™
For your safety AC WireWarning™ works continuously in all modes. When AC voltage is detected, the AC Alert warning icon will be displayed on the screen.
Wires deeper than 2 in. (51 mm), in conduit, or behind plywood shearwall may not be detected. Use extreme caution under these circumstances or whenever hot AC wires are present. Always turn off power when working near electrical wires.
OPERATING CAUTIONS
Depending on the proximity of electrical wiring or pipes to the wall surface, the Wall Scanner may detect them in the same manner as studs, especially in DeepScan mode. Caution should always be used when nailing, sawing, or drilling into walls, floors, and ceilings that may contain these items. Because of its increased sensitivity, DeepScan mode may also detect other things in walls that are not studs.
To avoid surprises, remember that studs or joists are normally spaced 16 in.
(406 mm) or 24 in. (610 mm) apart and are 11⁄2 in. (38 mm) in width. Anything closer together or a different width may not be a stud, joist, or firebreak. Always turn off the power when working near electrical wires.
Working With Different Materials
- Wallpaper: The Wall Scanner functions normally on walls covered with wallpaper or fabric, unless the materials are metallic foil, contain metallic fibers, or are still wet after application.
- Lath & plaster: Due to irregularities in plaster thickness, it is difficult for the Wall Scanner to locate studs in Stud Scan mode. Change to Metal mode to locate nail heads holding laths to studs. If plaster has metal mesh reinforcement, the Wall Scanner will be unable to detect anything through that material.
- Textured walls or acoustic ceilings: When scanning a ceiling or wall with an uneven surface, place thin cardboard on ceiling or wall and scan over the cardboard using DeepScan mode. Calibrate with cardboard in place.
- Wood flooring, subflooring, or gypsum drywall over plywood sheathing: use DeepScan mode.
- Wall Scanner cannot scan for wood studs and joists through ceramic floor tile or carpeting and pad.
- In problem situations, try using Metal Scan to locate nails or drywall screws that line up vertically where a stud is positioned.
Note: Sensing depth and accuracy can vary due to moisture content of materials, wall texture, and paint.
CHANGING THE BATTERY
Press battery door release down with your finger or a coin and remove door.
Connect 9-V battery to cable and place inside.
Replace battery door and snap shut. Battery will last approximately 2 years under normal conditions.
FCC Part 15 Class B Registration Warning
This equipment has been tested and found to comply with the limits for a Class B digital device, pursuant to Part 15 of FCC Rules. These limits are designed to provide reasonable protection against harmful interference when the equipment is operated in a residential installation. This equipment generates, uses, and can radiate radio frequency energy and, if not installed and used in accordance with the instructions, may cause harmful interference to radio communications. However, there is no guarantee that interference will not occur in a particular installation. If this equipment does cause harmful interference to radio or television reception, which can be determined by turning the equipment off and on, the user is encouraged to try to correct the interference by one or more of the following measures:
- Reorient or relocate the receiving antenna.
- Increase the separation between the equipment and receiver.
- Connect the equipment into an outlet on a circuit, different from that which the receiver is connected (if applicable).
- Consult the dealer or an experienced radio/TV technician for help.
HELPFUL HINTS
(See also Important Operating Tips)
| Situation | Probable Causes | Solutions |
| Not certain the object found is a stud in DeepScan mode. |
|
|
Display indicates «Restart at New Location» |
|
|
Working in DeepScan mode and can’t detect studs |
|
|
| Detects other objects besides studs in Stud Scan and DeepScan modes. |
|
|
| Area of voltage appears much larger than actual wire. (AC only) |
|
|
Center arrow doesn’t appear on LCD |
|
|
Difficulty detecting metal |
|
|
Image of metal object appears wider than actual size |
|
|
Constant readings of studs near windows and doors |
|
|
You suspect electrical wires, but do not detect any |
|
|
Documents / Resources
Download manual
Here you can download full pdf version of manual, it may contain additional safety instructions, warranty information, FCC rules, etc.
Download Zircon MultiScanner Pro SL — Wall Scanner Manual
Производитель Zircon
Категория Stud Sensor
Документы, которые мы получаем от производителя устройства Zircon Pro SL мы можем разделить на несколько групп. Это в частности:
— технические чертежи Zircon
— инструкции обслуживания Pro SL
— паспорта изделия Zircon
— информационные брошюры
— энергетические этикетки Zircon Pro SL
Все из них важны, однако самую важную информацию с точки зрения пользователя мы найдем в инструкции обслуживания Zircon Pro SL.
Группа документов, определяемая как инструкции обслуживания, делится также на более подробные типы, такие как: Инструкции монтажа Zircon Pro SL, инструкции обслуживания, короткие инструкции или инструкции пользователя Zircon Pro SL. В зависимости от потребностей, Вам необходимо поискать требуемый документ. На нашем сайте Вы можете просмотреть самую популярную инструкцию использования изделия Zircon Pro SL.
Полная инструкция обслуживания устройства Zircon Pro SL, как должна выглядеть?
Инструкция обслуживания, определяемая также как пособие пользователя, или просто «руководство» — это технический документ, цель которого заключается в использовании Zircon Pro SL пользователями. Инструкции пишет, как правило технический писатель, языком, доступным для всех пользователей Zircon Pro SL.
Полная инструкция обслуживания Zircon, должна заключать несколько основных элементов. Часть из них менее важная, как например: обложка / титульный лист или авторские страницы. Однако остальная часть, должна дать нам важную с точки зрения пользователя информацию.
1. Вступление и рекомендации, как пользоваться инструкцией Zircon Pro SL — В начале каждой инструкции, необходимо найти указания, как пользоваться данным пособием. Здесь должна находится информация, касающаяся местонахождения содержания Zircon Pro SL, FAQ и самых распространенных проблем — то есть мест, которые чаще всего ищут пользователи в каждой инструкции обслуживания
2. Содержание — индекс всех советов, касающихся Zircon Pro SL, которое найдем в данном документе
3. Советы по использованию основных функций устройства Zircon Pro SL — которые должны облегчить нам первые шаги во время использования Zircon Pro SL
4. Troubleshooting — систематизированный ряд действия, который поможет нам диагностировать а в дальнейшем очередность решения важнейших проблем Zircon Pro SL
5. FAQ — чаще всего задаваемые вопросы
6. Контактные данные Информация о том, где искать контактные данные производителя / сервисного центра Zircon Pro SL в данной стране, если самостоятельно не получится решить проблему.
StudSensor
™
Pro LCD Stud Finder
with AC WireWarning
®
and
SpotLite
®
Pointing System
The Zircon
®
StudSensor
™
Pro LCD
detects wood and metal studs
SpotLite
Stud Edge Groove
and joists in walls, floors, and
ceilings. It features two scanning
modes, a durable high-impact case,
and the patented SpotLite
®
Pointing
System. It also has WireWarning
®
to continuously detect hot
Stud DeepScan
AC voltage in both modes.
WireWarning
®
StudScan
STUD SCAN
DEEPSCAN
®
Mode
STUDSENSOR
™
LCD
PRO
On/Off Button
Visit www.zircon.com for the most current instructions.
StudSensor, WireWarning, SpotLite, TruCal, DeepScan, and Zircon are
registered trademarks, or trademarks of, Zircon Corporation.
LIMITED 1 YEAR WARRANTY
Return product freight prepaid with proof of purchase date (dated sales receipt)
and $5.00 to cover postage and handling, to:
Zircon Corporation, («Zircon») warrants this product to be free from defects
in materials and workmanship for one year from the date of purchase. Any
Zircon Corporation
in-warranty defective product returned to Zircon*, freight prepaid with proof of
*Attn: Returns Department
purchase date and $5.00 to cover postage and handling, will be repaired or
1600 Dell Avenue, Unit K
replaced at Zircon’s option. This warranty is limited to the electronic circuitry and
Campbell, CA 95008-6992 USA
original case of the product and specifically excludes damage caused by abuse,
Be sure to include your name and return address. Out of warranty service and
unreasonable use or neglect. This warranty is in lieu of all other warranties,
repair, where proof of purchase is not provided, shall be returned with repairs
express or implied, and no other representations or claims of any nature shall
charged C.O.D. Allow 4 to 6 weeks for delivery.
bind or obligate Zircon. Any implied warranties applicable to this product are
limited to the one year period following its purchase. IN NO EVENT WILL ZIRCON
Customer Service, 1-800-245-9265 or 1-408-963-4550
E-mail: info@zircon.com
BE LIABLE FOR ANY SPECIAL, INCIDENTAL OR CONSEQUENTIAL DAMAGES
RESULTING FROM POSSESSION, USE OR MALFUNCTION OF THIS PRODUCT.
U.S. Patents 4099118, 4464622, 5352974, 5619128, 6023159,
6259241, and 6291970
In accordance with government regulations, you are advised that: (i) some
Canada Patents 1106932, 2141553, 2341385, and 2353156
states do not allow limitations on how long an implied warranty lasts and/or
the exclusion or limitation of incidental or consequential damages, so the above
U.K. Patents GB2159630 and GB2117909
limitations and/or exclusions may not apply to you, and further (ii) this warranty
E.U. Patents EP0657032, EP1429148, and Patents Pending
Japan Patent 3581851
gives you specific legal rights and you may also have other rights which vary
©2006 Zircon Corporation • P/N 61295 • Rev B 03/06
from state to state.
StudSensor
™
Pro LCD
Localizador de Postes con Detector
de CA y Sistema de señalamiento SpotLite
El StudSensor
™
Pro LCD de Zircon
detecta postes de madera y metal
El Sistema de
Muesca Para
señalamiento SpotLite
Borde de Postes
en paredes, pisos y techos. Incluye
dos modos de exploración, una
caja durable de alto impacto y el
patentado sistema de señalamiento
WireWarning
®
SpotLite
®
. StudSensor
™
Pro LCD
tiene además la capacidad agregada
Stud DeepScan
de detectar continuamente cables
eléctricos vivos en ambos modos.
Indicador para
STUD SCAN
DEEPSCAN
Modo de StudScan
STUDSENSOR
™
LCD
PRO
Botón de
Encendido/Apagado
Visite la página web www.zircon.com/support para ver los
instructivos más actuales.
StudSensor, WireWarning, SpotLite, TruCal, DeepScan, y Zircon son marcas
comerciales registradas o marcas comerciales de Zircon Corporation.
GARANTIA LIMITADA DE 1 AÑO
pagado y comprobante de la fecha de compra (recibo de venta fechado) y $5.00
para cubrir el porte y el manejo, a:
Zircon Corporation («Zircon») garantiza este producto como libre de defectos en
materiales y mano de obra por un año a partir de la fecha de compra. Cualquier
Zircon Corporation
producto defectuoso dentro de la garantía enviado a Zircon* con el envio pagado,
*Attn: Returns Department
comprobante de fecha de compra y $5.00 para cubrir porte y manejo, se reparará o
1600 Dell Avenue, Unit K
reemplazará a opción de Zircon. Esta garantía se limita a los circuitos electrónicos y
Campbell, CA 95008-6992 USA
a la caja original del producto y excluye específicamente los daños provocados por
Asegúrese de incluir su nombre y dirección. El servicio y reparación fuera de garantía
uso indebido, uso no razonable o descuido. Esta garantía está en lugar de todas las
donde no se incluya el comprobante de compra se regresará con cargos de reparación
demás garantías, expresas o implícitas, y ninguna otra declaración o reclamación
C.O.D. Permita de 4 a 6 semanas para la entrega.
de cualquier naturaleza será obligatoria para Zircon. Cualquier garantía implícita
Servicio a clientes: 1-800-245-9265 ó 1-408-963-4550
aplicable para este producto se limita al periodo de un año inmediato a su compra.
Correo electrónico: info@zircon.com
EN NINGUN CASO, ZIRCON SERA RESPONSABLE DE NINGUN DAÑO ESPECIAL,
INCIDENTAL O RESULTANTE DE LA POSESION, USO O MAL FUNCIONAMIENTO
DE ESTE PRODUCTO.
Patentes de EE.UU. 4099118, 4464622, 5352974, 5619128, 6023159,
De conformidad con las reglamentaciones gubernamentales, se le notifica que: (i) en
6259241, y 6291970
algunos estados no se permiten limitaciones del tiempo de vigencia de una garantía
Patentes de Canada 1106932, 2141553, 2341385, y 2353156
implícita y/o de la exclusión o limitación de daños incidentales o consecutivos; así que
Patentes de U.K. GB2159630 y GB2117909
las limitaciones y/o exclusiones anteriores tal vez no se apliquen para usted, y
Patentes de E.U. EP0657032, EP1429148, y Patentes Pendientes
además, (ii) esta garantía le otorga derechos legales específicos y usted tal vez tenga
Patente de Japon 3581851
otros derechos que varían de estado en estado. Devuelva el producto con envio
©2006 Zircon Corporation • P/N 61295 • Rev B 03/06
1. INSTALLING THE BATTERY
Without moving unit, squeeze and
hold On/Off button. Wait for the
NOTE: DO NOT LOOSEN OR REMOVE
beeping to stop and for the
SCREW ON BACK OF THE UNIT.
TruCal
Squeeze sides of clip to
help release clip end.
®
Pointing System
Continue to hold
Slide 9-V battery into
in the On/Off
TruCal
®
compartment, terminal
button then slowly slide
Icon
side first, matching (+)
unit horizontally across the
and (–) terminals from
wall, right or left.
battery to case.
Stud DeepScan
®
Mode
Replace the clip. Battery
will last approximately
Mode Switch
two years under
As you begin to approach a stud, the arrow segments
normal conditions.
will begin to turn on.
2. CALIBRATION AND SCANNING
IN STUD SCAN OR
DEEPSCAN
®
MODES
When the full arrow is first
displayed a steady tone
Note: Unit calibrates on each use.
sounds, and the SpotLite
Use StudScan Mode for depths to about
3
⁄
in. (19 mm)
4
shines, you have located
and DeepScan
®
for depths up to 1
1
⁄
in. (38 mm) or
2
the edge of the stud. Mark
double layers.
this spot.
Note: Keep unit flat against wall. Do not lift or tilt unit
during calibration or scanning.
Slide the Mode Selector
switch to the desired
Without releasing On/Off
scanning mode. The mode
button, continue scanning
can be selected with the
beyond marked spot until
unit on or off.
some segments of the
arrow turn off. Slide unit
With StudSensor
™
Pro LCD turned
in reverse direction to
off, position the unit flat against
locate other edge of stud.
the wall.
1. INSTALACION DE LA BATERIA
Sin mover la unidad, oprima
y mantenga oprimido el
botón de encendido/apagado.
NOTA: NO AFLOJE O REMUEVA EL
Espere a que suene, para
TORNILLO DE LA PARTE
®
parar y espere a que el icono
TRASERA DE LA UNIDAD.
de Trucal se ilumine.
Apriete ambos lados de
la unidad para ayudar
®
a liberar el extremo
del gancho.
Mantenga oprimido el
botón de encendido/
Coloque una batería de
apagado, y deslice la
Indicador
9 voltios dentro del
unidad horizontalmente
TruCal
®
compartimiento, primero
sobre la pared, hacia la
del lado de las terminales,
derecha o la izquierda.
haciendo coincidir las
terminales (+) y (-) de la
batería con las indicadas
Cuando comience a acercarse a un poste los
Indicador para
®
en el compartimiento.
segmentos de las flechas empezarán a encenderse.
Modo de Stud
DeepScan
®
Vuelva a colocar el
Cuando aparezca la flecha
Interruptor
gancho. La duración de
de Modo
completa un tono auditivo
la batería es de
continuo sonará y el LED
aproximadamente 2 años
SpotLite
bajo condiciones normales.
Usted habra localizado el
borde del barrote. Marque
este punto.
2. CALIBRACION EN LOS MODOS
STUD SCAN O STUD DEEPSCAN
®
Sin soltar el botón de
Nota: La unidad se calibra en cada uso.
encendido/apagado,
Use el modo de Stud Scan para profundidades
continue escaneando en la
aproximadas de
3
⁄
de pulg. (19 mm) y Stud DeepScan
4
misma dirección hasta que
para profundidades de hasta 1
1
⁄
pulg. (38 mm).
2
algunos segmentos de la
Nota: Mantenga la unidad en posición plana contra
flecha se apaguen. Deslice
la unidad en dirección
la pared. No levante ni incline durante el calibrado
opuesta hasta que localice
o el escaneo.
el otro borde del poste.
Mueva el interruptor de modo hasta
que llegue al Modo deseado. Se
Marque este segundo
puede cambiar el modo con la
punto. El centro del
unidad encendida o apagada.
poste es el centro de las
dos marcas.
Coloque el StudSensor
™
Pro LCD
plano contra la pared sin encenderlo.
Mark this second spot.
Middle of stud is centered
between the two marks.
®
icon to turn on.
3. CONTINUOUS AC VOLTAGE
DETECTION (WireWarning
The StudSensor
™
Pro LCD
detects from 90 to 250 V
Stud DeepScan
at 50 to 60 Hz AC in a hot
STUD SCAN
DEEPSCAN
®
STUDSENSOR
PRO
LCD
™
electrical wire. The voltage
detection feature works
continuously in both
StudScan and DeepScan
®
modes. When sensing
voltage, the AC icon
comes on.
Caution: The StudSensor
™
Pro LCD will not detect hot
wires inside metal pipe or conduit, behind metallic
wall covering, or behind some plywood or other dense
materials. Use extra caution in these situations. Always
turn the power off when nailing, cutting, or drilling
near electrical wires.
®
Stud DeepScan
STUD SCAN
DEEPSCAN
®
STUDSENSOR
™
PRO
LCD
4. OPERATING CAUTIONS
Depending on the proximity of electrical wiring
or pipes to the wall surface, the scanner may
detect them in the same manner as studs. Caution
should always be used when nailing, cutting, or
drilling in walls, floors, and ceilings that may
contain these items.
To avoid surprises, remember that studs or joists are
Stud DeepScan
normally spaced 16 in. (406 mm) or 24 in. (610
STUD SCAN
DEEPSCAN
®
STUDSENSOR
™
PRO
LCD
mm) apart and are 1
1
⁄
in. (38 mm) in width.
2
Anything closer together or a different width may
not be a stud, joist, or firebreak. Always turn off the
power when working near electrical wires.
3. DETECCION CONTINUA
DE CA (WireWarning
®
El StudSensor
™
Pro LCD
detecta de 90 a 250 V en
50 a 60 Hz de CA en un
cable eléctrico con corriente.
La detección del voltaje
funciona continuamente en
los modos de Stud Scan y
DeepScan
®
. Cuando la unidad
detecta voltaje, el icono «AC»
se encenderá.
Stud DeepScan
STUD SCAN
DEEPSCAN
®
Precaución: El StudSensor
™
Pro LCD no detectará cable
STUDSENSOR
™
PRO
LCD
con corriente dentro de tuberías de metal o conductos,
detrás de coberturas metálicas de pared o planchas de
madera u otros materiales densos. Tenga precaución a
dicional en estas condiciones de construcción. Apague
siempre la energía cuando clave, corte o taladre cerca
de cables eléctricos.
4. PRECAUCIONES OPERATIVAS
®
se iluminara,
Stud DeepScan
Dependiendo de la proximidad de conexiones
STUD SCAN
DEEPSCAN
®
PRO
STUDSENSOR
LCD
™
eléctricas o tuberías a la superficie de la pared, el
StudSensor
™
Pro LCD puede detectarlos de la misma
manera que los postes. Es necesario tener precaución
al clavar, cortar o perforar paredes, pisos y cielorrasos
que puedan contener dichos elementos.
Para evitar sorpresas recuerde que, por lo general, los
postes o vigas se instalan a una separación entre sí de
16 pulg. (41 cm) ó 24 pulg. (61 cm) y tienen un ancho
Stud DeepScan
de 1
1
⁄
pulg. (3.8 cm). Todo lo que no esté instalado a
2
STUD SCAN
DEEPSCAN
®
STUDSENSOR
™
PRO
LCD
esa separación o que sea de un ancho diferente puede
no ser un poste, viga o barrera contrafuego. Siempre
desconecte la alimentación de energía eléctrica cuando
trabaje cerca de cables eléctricos.
Stud DeepScan
STUD SCAN
DEEPSCAN
®
STUDSENSOR
PRO
LCD
™
WORKING WITH DIFFERENT MATERIALS
HELPFUL HINTS
StudSensor
Pro LCD is for use on dry, interior walls only.
™
Situation
Note: Sensing depth and accuracy can vary due to
moisture content of materials, wall texture, and paint.
All LCD segments turn
Stud DeepScan
on at the same time
StudSensor
™
Pro LCD can scan effectively through most
and the unit beeps
STUD SCAN
DEEPSCAN
®
STUDSENSOR
PRO
LCD
™
sheet materials, including:
continuously.
• Bare wood flooring (in DeepScan mode)
• Linoleum on wood base
• Gypsum drywall over plywood sheathing
®
)
• Wallpapered walls (if dry)
• Textured ceilings if uniform thickness (Place a thin piece of
cardboard on ceiling and scan through it to avoid damage
to texturing.)
Center LCD segment
StudSensor
Pro LCD is not designed to scan materials with
LCD
™
doesn’t turn on, or flash,
inconsistent density such as:
in Stud Scan mode.
• Ceramic floor tile
The TruCal
®
• Carpeting and padding
on but, when scanning,
• Wallpaper with metallic fibers
unit doesn’t do anything
else.
• Freshly painted walls that are still damp (must dry at least
a week)
• Lath and plaster walls
Working in DeepScan
mode and can’t detect
• Foil covered insulation board
studs.
FCC Part 15 Class B Registration Warning
This equipment has been tested and found to comply with
the limits for a Class B digital device, pursuant to Part 15 of
FCC Rules. These limits are designed to provide reasonable
Detects other objects
besides studs.
protection against harmful interference when the
equipment is operated in a residential installation. This
equipment generates, uses, and can radiate radio frequency
energy and, if not installed and used in accordance with
the instructions, may cause harmful interference to radio
You suspect electrical
communications. However, there is no guarantee that
wires, but do not
interference will not occur in a particular installation. If
detect any.
this equipment does cause harmful interference to radio or
television reception, which can be determined by turning
the equipment off and on, the user is encouraged to try to
correct the interference by one or more of the following
measures:
Area of voltage detection
(1) Reorient or relocate the receiving antenna.
is too large.
(2) Increase the separation between the equipment and
receiver.
(3) Connect the equipment into an outlet on a circuit,
different from that which the receiver is connected
(if applicable).
(4) Consult the dealer or an experienced radio/TV
technician for help.
TRABAJAR CON DIFERENTES MATERIALES
CONSEJOS UTILES
)
StudSensor
™
Pro LCD se usa sólo para paredes secas,
Situación
interiores.
Nota: En el escaneo profundo la exactitud puede variar
Todos los segmentos del
debido al contenido de humedad en los materiales, textura
LCD se encienden al mismo
de la pared y pintura.
tiempo y la unidad suena
continuamente.
StudSensor
™
Pro LCD puede explorar eficazmente a través
LCD
de materiales en láminas, incluyendo:
• Pisos de madera pura (en modo DeepScan
®
)
• Linóleo sobre base de madera
• Pared seca de yeso sobre láminas de madera
contrachapada
• Paredes empapeladas (si están secas)
• Techos con textura si el espesor es uniforme. (Coloque un
trozo de cartulina fina sobre el techo y explore a través de
La flecha central
no se enciende en
la cartulina para evitar daños de textura.)
modo Stud Scan.
StudSensor
™
Pro LCD no está diseñado para explorar
materiales con densidad inconsistente tales como:
Se enciende el icono TruCal
se ilumne pero, durante la
• Mosaicos de cerámica para pisos
exploración, la unidad no
hace nada más.
• Alfombras y acolchado de alfombra
• Papel con fibras de metal para paredes
• Paredes recién pintadas que aun están húmedas
(se deben secar durante por lo menos una semana)
• Paredes de molduras de madera y paredes emplastadas
con yeso
Trabaja en modo
DeepScan y no se
• Tablero de aislamiento cubierto con hoja metálica
detecta ningún poste.
Advertencia de registro de la FCC, Sección 15, Clase B
Este equipo se ha probado y se encontró que cumple con
los límites para un dispositivo digital Clase B, conforme a la
Sección 15 de las Reglas de la FCC. Estos límites se
diseñaron para ofrecer una protección razonable contra la
Detecta otros objetos
interferencia dañina cuando el equipo se opere en una
ubicados al lado de
instalación residencial. Este equipo genera, usa y puede
los postes.
radiar energía de radio frecuencia y, si no se instala y
utiliza en conformidad con las instrucciones, puede
Usted sospecha que haya
provocar interferencia dañina a las comunicaciones de
cables de electricidad, pero
radio. Sin embargo, no hay garantía de que no ocurrirá
no se detecta ninguno.
interferencia en una instalación en particular. Si este equipo
provoca interferencia dañina a la recepción de radio o
televisión, lo cual puede determinarse encendiendo y
apagando el equipo, se exhorta al usuario a tratar de
corregir la interferencia mediante una o más de las
siguientes medidas:
(1) Reoriente o reubique la antena de recepción.
El área de detección de
(2) Incremente la separación entre el equipo y el receptor.
tensión es muy grande
(sólo CA).
(3) Conecte el equipo en una toma eléctrica en un circuito
diferente al que se conectó el receptor (si aplica).
(4) Consulte al distribuidor o a un técnico experimentado en
radio y televisión para recibir ayuda.
Probable Causes
Solutions
• Scan began on dense part of
• Turn unit off, move over a few inches, press On/Off button,
wall or over a stud.
and start again.
• Unit not flat against wall.
• On rough surfaces, place piece of paper on wall, scanning
• Unit tilted or lifted during scan.
through it to help slide unit more smoothly.
(All these factors affect proper
• Keep hand at least 6 in.(152 mm) from StudSensor
calibration.)
Pro LCD while you calibrate and scan. Hold unit with
• Scanning surface is too dense
thumb and index finger no higher than handgrips. Be
or too wet for unit to operate.
careful not to move your fingers after calibration.
• Always hold unit parallel to and move perpendicular to
object you’re trying to locate.
• If you are using unit on a recently taped, painted, or
wallpapered wall, allow time to dry and try again.
• Wall is particularly thick or
• Interpret the pair of LCD bars closest to center as stud edge.
dense.
• Switch to DeepScan
®
to locate the stud.
icon turns
• Unit may not be flat against
• Hold unit so two Velcro
™
strips on the back make
the wall.
contact with wall.
• If it is in the DeepScan
®
mode
• Recalibrate unit in a different place and rescan area.
(DeepScan
®
is lit), you may have
calibrated over a stud.
®
• You may have calibrated over
• Move StudSensor Pro LCD over a few inches
and recalibrate.
a stud. (The error condition is
disabled in DeepScan
®
mode
because it is twice as sensitive
as StudScan.)
• You may be holding the unit
• Hold unit so two Velcro
™
strips on the back make
like a TV remote, aiming it at
contact with wall.
the wall.
• Electrical wiring and metal or
• Remember that studs or joists are normally spaced 16 in.
plastic pipes may be near or
(406 mm) or 24 in. (610 mm) apart and are 1
1
⁄
in.
2
touching back surface of wall.
(38 mm) wide.
• Always turn off power when cutting, nailing, or drilling
near electrical wires.
• Wires may be shielded behind
• See above solution.
metallic wall coverings,
• Use extra caution if the area has plywood, thick wood
plywood shearwall or other
backing behind drywall, or thicker-than-normal walls.
dense material, or in conduit;
• If a switch controls an outlet, make sure it is ON for
StudSensor Pro LCD may not be
detection, but turned off when working near electrical wires.
able to find them.
• The wires may not be hot.
• Wires may be too deep to sense.
• Static charge may develop on
• To narrow detection, turn unit off and on again at the edge
drywall, spreading voltage
of where wire was detected and scan again.
detection as much as 12 in.
• Place other hand against wall, turn unit off and on,
(305 mm) from each side of
and scan again.
an actual electrical wire.
Causas Probables
Soluciones
• La exploración comenzó en una
• Apague la unidad, muévala unas pocas pulgadas, oprima el
parte densa de la pared o sobre
botón On/Off, y vuelva a comenzar.
un poste.
• Sobre superficies rugosas, coloque un trozo de papel sobre la
• La unidad no está colocada de
pared y explore a través del papel para ayudar a deslizar la
manera plana contra la pared.
unidad con más suavidad.
• Se elevó o inclinó la unidad
• Mantenga la mano al menos a 6 pulgadas del StudSensor Pro
durante la exploración.
LCD mientras calibra y explora. Sostenga la unidad con los
(Todos estos factores afectan la
dedos pulgar e índice no más arriba que las manijas. Asegúrese
correcta calibración.)
de no mover sus dedos después de la calibración.
• Mantenga siempre la unidad de manera paralela al área y muévala
• La superficie de exploración es
muy densa o está muy húmeda
en forma perpendicular hacia el objeto que desea encontrar.
para que funcione la unidad.
• Si está usando la unidad sobre una pared recientemente
encintada, pintada o empapelada, espere a que se seque y
vuelva a intentar.
• La pared es particularmente
• Interprete el par de barras LCD más cercanas al centro es el borde
gruesa o densa.
del poste.
• Pase a DeepScan para encontrar el poste.
• La unidad quizás no esté plana
• Sostenga la unidad para que las dos tiras de Velcro
™
ubicadas
contra la pared.
en la parte trasera hagan contacto con la pared.
• Si está en modo DeepScan (el
• Vuelva a calibrar la unidad en un lugar diferente y vuelva a
icono DeepScan está encendido),
explorar el área.
quizás haya calibrado sobre
un poste.
• Quizás haya calibrado sobre un
• Mueva el StudSensor Pro LCD unas pocas pulgadas y vuelva
poste. (La condición de error se
a calibrar.
inactiva en modo DeepScan ya
que es dos veces más sensible
que Stud Scan.)
• Quizás esté sosteniendo la
• Sostenga la unidad para que las dos tiras de Velcro
™
ubicadas
en la parte trasera hagan contacto con la pared.
unidad como si fuera el control
remoto de un TV, apuntando
hacia la pared.
• Quizás haya cableado eléctrico
• Recuerde que los postes o las vigas están colocados generalmente a
y tuberías de metal o plástico
una distancia de 16 ó 25 pulgadas y son de 1
1
⁄
pulgada de ancho.
2
cerca o tocando la superficie de
• Corte siempre el suministro eléctrico cuando corte, clave o taladre
la pared.
cerca de cables eléctricos.
• Los cables pueden estar
• Vea la solución que aparece arriba.
protegidos detrás de paredes con
• Sea muy precavido si el área tiene madera contrachapada, madera
recubrimiento metálico, madera
gruesa de soporte detrás de las paredes secas, o las paredes son
contrachapada o cualquier otro
más gruesas que lo normal.
material denso, o dentro de
• Si hay una llave de control del tomacorriente, asegúrese de que
tuberías; el StudSensor Pro LCD
esté ENCENDIDA para la detección, pero apáguela cuando trabaje
no podrá encontrarlos.
cerca de los cables de electricidad.
• Los cables pueden no estar
con corriente.
• Los cables pueden estar a mucha
profundidad para medirlos.
• Se puede producir carga
• Para estrechar la detección, apague la unidad y vuélvala a
estática sobre paredes secas,
encender en el borde del lugar en donde se detectó el cable y
diseminando la detección de
vuelva a explorar.
la tensión hasta 12 pulgadas
en forma lateral a cada lado
de un cable eléctrico real.
™
TriScanner
Stud & Metal Locator with AC Warning
The Zircon TriScanner
®
Pro SL
scanner detects wood or metal
studs, metal pipes, and hot
Metal Sensor
electrical wires in interior walls,
floors, and ceilings, as well as
AC LED
rebar in concrete. It features
the SpotLite
®
Pointing System,
Stud Scan
three different scanning modes
Mode LED
plus continuous hot electrical
wire detection.
Stud DeepScan
Mode LED
Metal Scan
Mode LED
On/Off Button
(Side of unit)
LIMITED 1 YEAR WARRANTY
Zircon Corporation, («Zircon») warrants this product to be free from defects
in materials and workmanship for one year from the date of purchase. Any
in-warranty defective product returned to Zircon*, freight prepaid with proof
of purchase date and $5.00 to cover postage and handling, will be repaired or
replaced at Zircon’s option. This warranty is limited to the electronic circuitry
and original case of the product and specifically excludes damage caused by
abuse, unreasonable use or neglect. This warranty is in lieu of all other
warranties, express or implied, and no other representations or claims of any
nature shall bind or obligate Zircon. Any implied warranties applicable to this
product are limited to the one year period following its purchase.
IN NO EVENT WILL ZIRCON BE LIABLE FOR ANY SPECIAL, INCIDENTAL OR
CONSEQUENTIAL DAMAGES RESULTING FROM POSSESSION, USE OR
MALFUNCTION OF THIS PRODUCT.
In accordance with government regulations, you are advised that:
(i) some states do not allow limitations on how long an implied warranty lasts
and/or the exclusion or limitation of incidental or consequential damages, so
the above limitations and/or exclusions may not apply to you, and further (ii)
SCANNING IN METAL MODE
Metal can be detected up to 1
1
⁄
in. (38 mm) deep
2
in walls and up to 3 in. (77 mm) deep in concrete.
While holding in On/Off
12
button, slowly move unit
on surface, to locate targets.
Reverse directions to locate other
edge of target. Lights will indicate
metal in the same way as in find-
ing studs. When tone sounds,
LEDs light up, and SpotLite comes on, you are close
to metal. Mark this spot to help ensure that you’re
not nailing into a pipe.
CONTINUOUS AC VOLTAGE
DETECTION
The TriScanner Pro SL detects from 90 to 250 V
13
at 50 to 60 Hz AC in a HOT unshielded
electrical wire that is within 1
1
⁄
in. (38 mm) of
2
wall surface. The voltage detection feature works
continuously in all modes. The sensor is located in the
center of the back of the unit.
Caution: The TriScanner Pro SL will not detect hot
wires inside metal pipe or metal conduit, behind
metallic wall covering, or behind some plywood or
other dense materials. Use extra caution in these
construction situations. Always turn the power
off when nailing, cutting, or drilling near
electrical wires.
VERIFYING IF THE UNIT WORKS
Turn unit on in the air.
14
If the LEDs light when
you bring your hand up to the
back, then the unit is working
properly.
The AC LED should
15
light with an electrical
cord an inch or two away.
®
Pro SL
®
SpotLite
Pointing System
®
TRISCANNER
PRO SL
this warranty gives you specific legal rights and you may also have other
rights which vary from state to state.
Return product freight prepaid with proof of purchase date (dated sales
receipt) and $5.00 to cover postage and handling, to:
Zircon Corporation
*Attn: Returns Department
2390 Boswell Road, Suite 300
Chula Vista, CA 91914-3510 USA
Be sure to include your name and return address. Out of warranty service and
repair, where proof of purchase is not provided, shall be returned with repairs
charged C.O.D. Allow 4 to 6 weeks for delivery.
Customer Service, 1-800-245-9265 or 1-408-866-8600
Monday–Friday, 8 a.m. to 5 p.m. PST
E-mail: customer.service@zircon.com
U.S. Patent #4464622, 5352974, 5619128, 6023159, 6249113, 6259241,
D419546, D419149, D419545, D427166, and D419544
Canada Patent #1106932 • G.B. Patent #2117909B, 2159630B
©2002 Zircon Corporation • P/N 58756 • Rev B 11/02
OPERATING CAUTIONS
Depending on the proximity of electrical wiring
16
or pipes to the wall surface, the scanner may
detect them in the same manner as studs. Caution
should always be used when nailing, cutting, or
drilling in walls, floors, and ceilings that may contain
these items.
To avoid surprises, remember that studs or joists are
normally spaced 16 in. (406 mm) or 24 in. (610 mm)
apart and are 1
1
⁄
in. (38 mm) in width. Anything
2
closer together or a different width may not be a
stud, joist, or firebreak. Always turn off the power
when working near electrical wires.
WORKING WITH DIFFERENT MATERIALS
Wallpaper: TriScanner Pro SL functions normally on
walls covered with wallpaper or fabric, unless the
materials are metallic foil, contain metallic fibers, or
are still wet after application.
Textured Ceilings: When scanning on an uneven
surface, place thin cardboard on ceiling and scan over
the cardboard. Calibrate with cardboard in place.
Note: TriScanner Pro SL cannot scan through
carpeting and pad or, in most cases, lath and plaster.
If you are having difficulty scanning through any of
these or other materials, use the Metal mode to
locate nails in the stud or joist. Try to locate several
nails to get a better idea of how the stud is oriented.
FCC Part 15 Class B Registration Warning
This equipment has been tested and found to comply with the
limits for a Class B digital device, pursuant to Part 15 of FCC
Rules. These limits are designed to provide reasonable protection
against harmful interference when the equipment is operated in
a residential installation. This equipment generates, uses, and
can radiate radio frequency energy and, if not installed and used
in accordance with the instructions, may cause harmful interfer-
ence to radio communications. However, there is no guarantee
that interference will not occur in a particular installation. If this
equipment does cause harmful interference to radio or television
reception, which can be determined by turning the equipment
off and on, the user is encouraged to try to correct the interfer-
ence by one or more of the following measures:
(1) Reorient or relocate the receiving antenna.
(2) Increase the separation between the equipment and receiver.
(3) Connect the equipment into an outlet on a circuit, different
from that which the receiver is connected (if applicable).
(4) Consult the dealer or an experienced radio/TV technician
for help.
INSTALLING THE BATTERY
Press battery door release with a coin and
1
remove door.
Stud Edge
Groove
Connect battery to cable and place inside
2
battery compartment. Replace battery door
LED Sensing
and snap shut. Battery will last approximately two
Display
years under normal conditions.
®
TruCal
LED
TURNING THE POWER ON/OFF
ON: Press and hold ON/OFF button on the left
3
side. OFF: Release ON/OFF button.
Mode Selector
Switch
Note: the Triscanner Pro SL will automatically turn
off after 15 minutes of continuous use (in case
battery button is accidently held down in a toolbox.)
Battery Door
(Back of unit)
SELECTING MODE: STUD SCAN,
STUD DEEPSCAN
®
Use Stud Scan mode for depths to about
(19 mm) and Stud DeepScan for depths up to
1
1
⁄
in. (38 mm) or double layers.
2
Slide the Mode selector switch until you reach
4
desired scanning mode. The mode can be
selected with the unit on or off.
CALIBRATING IN STUD SCAN OR
STUD DEEPSCAN MODES
Keep unit flat against wall
during calibration or scanning.
5
Position the TriScanner
Pro SL flat against the
wall. Select mode. Press and
hold On/Off button.
HELPFUL HINTS
Situation
Over-the-Stud Indicator.
• Scan began over a stud.
(Flashing lights)
• Unit not flat against wall.
• Unit tilted or lifted during
Working in DeepScan
• You may have calibrated over
mode and can’t detect
studs.
• You may be holding the unit
Detects other objects
• Electrical wiring and metal/
besides studs in stud
Scan and DeepScan
modes.
You suspect electrical
• If wires are shielded behind
wires, but do not
detect any.
• The wires may not be HOT.
• Wires may be too deep to
Area of voltage
• Static charge may develop on
detection is too large.
Red LEDs light but center
• Wall is particularly thick
pair of green LEDs don’t.
Difficulty detecting
• Unit calibrated over metal.
metal.
• Metal targets are too deep.
Image of metal stud
• Metal has greater density
appears wider than
actual size.
Red LEDs do not light up
• Battery voltage is low.
as you test the unit with
your free hand moving
toward the back of the
TriScanner Pro SL.
Questions? Check our Web site at www.zircon.com and click «Product Support.»
Mode LED and TruCal
6
quickly and then stay lit. TriScanner Pro SL
automatically calibrates in less than one second.
SCANNING IN STUD SCAN OR STUD
DEEPSCAN MODES
Slowly slide unit
7
horizontally across wall,
9 VOLT
BATTERY
left or right.
When center pair of
8
green LEDs light,
steady tone sounds, and the
SpotLite
®
Pointing System
shines, you have found the
stud edge. Mark this spot.
Continue holding
9
On/Off button in and
scan beyond marked spot until
the center green and 3 pairs
of red LEDs go out.
, OR METAL SCAN
Without releasing On/Off
10
3
⁄
in.
4
button, slide unit in reverse
direction to locate the other edge
of stud. Mark this second spot.
Middle of stud is centered
between the two marks.
CALIBRATING IN METAL MODE
Select Metal mode. Press
11
and hold ON/OFF button.
Calibrate TriScanner Pro SL in air,
away from metal objects. Position
unit flat against wall.
Probable Causes
• Turn unit off, move over a few inches, and start again.
• Hold unit with thumb and index finger no higher than
handgrips.
scan. (All these factors affect
• On rough surfaces, place a piece of paper on wall,
proper calibration.)
scanning through it to help slide unit more smoothly.
• In Stud Scan or DeepScan modes, hold unit parallel to
and move perpendicular to object you’re trying to locate.
• Move TriScanner Pro SL over a few inches and recalibrate.
a stud. (The error condition is
disabled in DeepScan mode
because it is twice as
sensitive as Stud Scan.)
• Hold the TriScanner Pro SL so that the two Velcro™ strips
like a TV remote, aiming it at
on the back make contact with the wall.
the wall.
• Switch to Metal mode, where combined with continuous
plastic pipes may be near or
AC detection, pipes and electrical wiring should be
touching back surface of
detected adequately.
wall.
• Use CAUTION when nailing, cutting, or drilling in walls,
metallic wall coverings, or in
floors, and ceilings that may contain wiring.
metal conduit, TriScanner Pro
• Use extra caution if the area has plywood, thick wood
SL will not be able to find
backing behind drywall, or thicker than normal walls.
them.
• Remember that studs or joists are normally spaced
16 in. (406 mm) or 24 in. (610 mm) apart and are 1
(38 mm) wide.
sense.
• If a switch controls an outlet, make sure it is ON for detection.
• To narrow detection, turn unit off and on again at the edge
drywall, spreading voltage
of where wire was detected and scan again.
detection as much as 12 in.
• Place free hand flat against wall near tool to discharge
(305 mm) from each side.
static.
• Interpret pair of red LEDs closest to center as stud edge.
or dense.
• Switch to DeepScan to locate the stud.
• Always calibrate in the air for best sensitivity and to avoid
calibrating over metal.
• Scan in both horizontal and vertical directions. Sometimes
metal sensitivity is greater when metal object is parallel to
sensor, which is along top of unit.
• To narrow image, scan and mark first indications and then
than wood and is sensed
calibrate TriScanner Pro SL over either of the first two marks.
farther from edge.
Scan again and mark the new, narrowed detection points.
Repeat if necessary.
• Replace battery to maintain sensitivity.
®
LED will flash
Solutions
1
⁄
in.
2

Keep unit flat against wall
during calibration or scanning.
Position the TriScanner
Pro SL flat against the
wall. Select mode. Press and
hold On/Off button.
On/Off Button
(Side of unit)
Stud Edge
Groove
LED Sensing
Display
TruCal
®
LED
Mode Selector
Switch
Battery Door
(Back of unit)
Metal Sensor
AC LED
Stud Scan
Mode LED
Stud DeepScan
®
Mode LED
Metal Scan
Mode LED
SpotLite
®
Pointing System
TRISCANNER
PRO SL
9 VOLT
BATTERY
Slide the Mode selector switch until you reach
desired scanning mode. The mode can be
selected with the unit on or off.
ON: Press and hold ON/OFF button on the left
side. OFF: Release ON/OFF button.
Press battery door release with a coin and
remove door.
Connect battery to cable and place inside
battery compartment. Replace battery door
and snap shut. Battery will last approximately two
years under normal conditions.
SELECTING MODE: STUD SCAN,
STUD DEEPSCAN
®
, OR METAL SCAN
INSTALLING THE BATTERY
CALIBRATING IN STUD SCAN OR
STUD DEEPSCAN MODES
Mode LED and TruCal
®
LED will flash
quickly and then stay lit. TriScanner Pro SL
automatically calibrates in less than one second.
SCANNING IN STUD SCAN OR STUD
DEEPSCAN MODES
Use Stud Scan mode for depths to about
3
⁄
4
in.
(19 mm) and Stud DeepScan for depths up to
1
1
⁄
2
in. (38 mm) or double layers.
TURNING THE POWER ON/OFF
Note: the Triscanner Pro SL will automatically turn
off after 15 minutes of continuous use (in case
battery button is accidently held down in a toolbox.)
When center pair of
green LEDs light,
steady tone sounds, and the
SpotLite
®
Pointing System
shines, you have found the
stud edge. Mark this spot.
Continue holding
On/Off button in and
scan beyond marked spot until
the center green and 3 pairs
of red LEDs go out.
Without releasing On/Off
button, slide unit in reverse
direction to locate the other edge
of stud. Mark this second spot.
Middle of stud is centered
between the two marks.
Select Metal mode. Press
and hold ON/OFF button.
Calibrate TriScanner Pro SL in air,
away from metal objects. Position
unit flat against wall.
CALIBRATING IN METAL MODE
While holding in On/Off
button, slowly move unit
on surface, to locate targets.
Reverse directions to locate other
edge of target. Lights will indicate
metal in the same way as in find-
ing studs. When tone sounds,
LEDs light up, and SpotLite comes on, you are close
to metal. Mark this spot to help ensure that you’re
not nailing into a pipe.
SCANNING IN METAL MODE
The TriScanner Pro SL detects from 90 to 250 V
at 50 to 60 Hz AC in a HOT unshielded
electrical wire that is within 1
1
⁄
2
in. (38 mm) of
wall surface. The voltage detection feature works
continuously in all modes. The sensor is located in the
center of the back of the unit.
Caution: The TriScanner Pro SL will not detect hot
wires inside metal pipe or metal conduit, behind
metallic wall covering, or behind some plywood or
other dense materials. Use extra caution in these
construction situations. Always turn the power
off when nailing, cutting, or drilling near
electrical wires.
CONTINUOUS AC VOLTAGE
DETECTION
Questions? Check our Web site at www.zircon.com and click “Product Support.”
The Zircon TriScanner
®
Pro SL
scanner detects wood or metal
studs, metal pipes, and hot
electrical wires in interior walls,
floors, and ceilings, as well as
rebar in concrete. It features
the SpotLite
®
Pointing System,
three different scanning modes
plus continuous hot electrical
wire detection.
4
2
3
1
5
6
13
VERIFYING IF THE UNIT WORKS
Turn unit on in the air.
If the LEDs light when
you bring your hand up to the
back, then the unit is working
properly.
14
The AC LED should
light with an electrical
cord an inch or two away.
15
Depending on the proximity of electrical wiring
or pipes to the wall surface, the scanner may
detect them in the same manner as studs. Caution
should always be used when nailing, cutting, or
drilling in walls, floors, and ceilings that may contain
these items.
To avoid surprises, remember that studs or joists are
normally spaced 16 in. (406 mm) or 24 in. (610 mm)
apart and are 1
1
⁄
2
in. (38 mm) in width. Anything
closer together or a different width may not be a
stud, joist, or firebreak. Always turn off the power
when working near electrical wires.
16
OPERATING CAUTIONS
Over-the-Stud Indicator.
(Flashing lights)
Working in DeepScan
mode and can’t detect
studs.
Detects other objects
besides studs in stud
Scan and DeepScan
modes.
You suspect electrical
wires, but do not
detect any.
Area of voltage
detection is too large.
Red LEDs light but center
pair of green LEDs don’t.
Difficulty detecting
metal.
Image of metal stud
appears wider than
actual size.
Red LEDs do not light up
as you test the unit with
your free hand moving
toward the back of the
TriScanner Pro SL.
• Scan began over a stud.
• Unit not flat against wall.
• Unit tilted or lifted during
scan. (All these factors affect
proper calibration.)
• You may have calibrated over
a stud. (The error condition is
disabled in DeepScan mode
because it is twice as
sensitive as Stud Scan.)
• You may be holding the unit
like a TV remote, aiming it at
the wall.
• Electrical wiring and metal/
plastic pipes may be near or
touching back surface of
wall.
• If wires are shielded behind
metallic wall coverings, or in
metal conduit, TriScanner Pro
SL will not be able to find
them.
• The wires may not be HOT.
• Wires may be too deep to
sense.
• Static charge may develop on
drywall, spreading voltage
detection as much as 12 in.
(305 mm) from each side.
• Wall is particularly thick
or dense.
• Unit calibrated over metal.
• Metal targets are too deep.
• Metal has greater density
than wood and is sensed
farther from edge.
• Battery voltage is low.
• Turn unit off, move over a few inches, and start again.
• Hold unit with thumb and index finger no higher than
handgrips.
• On rough surfaces, place a piece of paper on wall,
scanning through it to help slide unit more smoothly.
• In Stud Scan or DeepScan modes, hold unit parallel to
and move perpendicular to object you’re trying to locate.
• Move TriScanner Pro SL over a few inches and recalibrate.
• Hold the TriScanner Pro SL so that the two Velcro™ strips
on the back make contact with the wall.
• Switch to Metal mode, where combined with continuous
AC detection, pipes and electrical wiring should be
detected adequately.
• Use CAUTION when nailing, cutting, or drilling in walls,
floors, and ceilings that may contain wiring.
• Use extra caution if the area has plywood, thick wood
backing behind drywall, or thicker than normal walls.
• Remember that studs or joists are normally spaced
16 in. (406 mm) or 24 in. (610 mm) apart and are 1
1
⁄
2
in.
(38 mm) wide.
• If a switch controls an outlet, make sure it is ON for detection.
• To narrow detection, turn unit off and on again at the edge
of where wire was detected and scan again.
• Place free hand flat against wall near tool to discharge
static.
• Interpret pair of red LEDs closest to center as stud edge.
• Switch to DeepScan to locate the stud.
• Always calibrate in the air for best sensitivity and to avoid
calibrating over metal.
• Scan in both horizontal and vertical directions. Sometimes
metal sensitivity is greater when metal object is parallel to
sensor, which is along top of unit.
• To narrow image, scan and mark first indications and then
calibrate TriScanner Pro SL over either of the first two marks.
Scan again and mark the new, narrowed detection points.
Repeat if necessary.
• Replace battery to maintain sensitivity.
HELPFUL HINTS
Probable Causes
Solutions
Situation
WORKING WITH DIFFERENT MATERIALS
Wallpaper: TriScanner Pro SL functions normally on
walls covered with wallpaper or fabric, unless the
materials are metallic foil, contain metallic fibers, or
are still wet after application.
Textured Ceilings: When scanning on an uneven
surface, place thin cardboard on ceiling and scan over
the cardboard. Calibrate with cardboard in place.
Note: TriScanner Pro SL cannot scan through
carpeting and pad or, in most cases, lath and plaster.
If you are having difficulty scanning through any of
these or other materials, use the Metal mode to
locate nails in the stud or joist. Try to locate several
nails to get a better idea of how the stud is oriented.
FCC Part 15 Class B Registration Warning
This equipment has been tested and found to comply with the
limits for a Class B digital device, pursuant to Part 15 of FCC
Rules. These limits are designed to provide reasonable protection
against harmful interference when the equipment is operated in
a residential installation. This equipment generates, uses, and
can radiate radio frequency energy and, if not installed and used
in accordance with the instructions, may cause harmful interfer-
ence to radio communications. However, there is no guarantee
that interference will not occur in a particular installation. If this
equipment does cause harmful interference to radio or television
reception, which can be determined by turning the equipment
off and on, the user is encouraged to try to correct the interfer-
ence by one or more of the following measures:
(1) Reorient or relocate the receiving antenna.
(2) Increase the separation between the equipment and receiver.
(3) Connect the equipment into an outlet on a circuit, different
from that which the receiver is connected (if applicable).
(4) Consult the dealer or an experienced radio/TV technician
for help.
LIMITED 1 YEAR WARRANTY
Zircon Corporation, (“Zircon”) warrants this product to be free from defects
in materials and workmanship for one year from the date of purchase. Any
in-warranty defective product returned to Zircon*, freight prepaid with proof
of purchase date and $5.00 to cover postage and handling, will be repaired or
replaced at Zircon’s option. This warranty is limited to the electronic circuitry
and original case of the product and specifically excludes damage caused by
abuse, unreasonable use or neglect. This warranty is in lieu of all other
warranties, express or implied, and no other representations or claims of any
nature shall bind or obligate Zircon. Any implied warranties applicable to this
product are limited to the one year period following its purchase.
IN NO EVENT WILL ZIRCON BE LIABLE FOR ANY SPECIAL, INCIDENTAL OR
CONSEQUENTIAL DAMAGES RESULTING FROM POSSESSION, USE OR
MALFUNCTION OF THIS PRODUCT.
In accordance with government regulations, you are advised that:
(i) some states do not allow limitations on how long an implied warranty lasts
and/or the exclusion or limitation of incidental or consequential damages, so
the above limitations and/or exclusions may not apply to you, and further (ii)
this warranty gives you specific legal rights and you may also have other
rights which vary from state to state.
Return product freight prepaid with proof of purchase date (dated sales
receipt) and $5.00 to cover postage and handling, to:
Zircon Corporation
*Attn: Returns Department
2390 Boswell Road, Suite 300
Chula Vista, CA 91914-3510 USA
Be sure to include your name and return address. Out of warranty service and
repair, where proof of purchase is not provided, shall be returned with repairs
charged C.O.D. Allow 4 to 6 weeks for delivery.
Customer Service, 1-800-245-9265 or 1-408-866-8600
Monday–Friday, 8 a.m. to 5 p.m. PST
E-mail: customer.service@zircon.com
U.S. Patent #4464622, 5352974, 5619128, 6023159, 6249113, 6259241,
D419546, D419149, D419545, D427166, and D419544
Canada Patent #1106932 • G.B. Patent #2117909B, 2159630B
©2002 Zircon Corporation • P/N 58756 • Rev B 11/02
12
11
10
9
8
TriScanner
®
Pro SL
Stud & Metal Locator
with AC Warning
Slowly slide unit
horizontally across wall,
left or right.
7
Metal can be detected up to 1
1
⁄
2
in. (38 mm) deep
in walls and up to 3 in. (77 mm) deep in concrete.
ЦИРКОН, — американская компания, основанная и работающая в Северной Калифорнии с 1975 года. Наша приверженность проектированию и разработке инновационных электронных искателей шипов, металлодетекторов и электрических сканеров не имеет себе равных. Вы вряд ли ожидаете, что штаб-квартира инструментальной компании находится в Силиконовой долине. Их официальный webсайт ЦИРКОН.ру.
Каталог руководств пользователя и инструкций для продуктов ZIRCON можно найти ниже. Продукция ZIRCON запатентована и зарегистрирована под торговой маркой. Корпорация Циркон.
Контактная информация:
Адрес: 1580 Делл Авеню Сampколокол, Калифорния 95008
Телефон: 1.800.245.9265
Поиск
Найдите шпильки, трубы, проводку и другие скрытые предметы за стенами с помощью ZIRCON 73190 Wood Stud SuperScan Advanced Stud Finder. Его три режима сканирования и контроль цели обеспечивают высокую точность, но он не всегда может обнаруживать переменный ток или объекты на расстоянии более 2 дюймов. Перед сканированием обязательно нанесите на карту свою рабочую зону и сопоставьте направление батареи. Сканируйте несколько разных высот на стене для получения лучших результатов.
Электрическое одеяло Zircon Z38554 с подогревом — идеальное средство от болей в мышцах и суставах. Благодаря трем уровням нагрева на выбор, двухчасовому автоматическому отключению и карману для ног этот двусторонний плед, который можно стирать в машине, идеально подходит для взрослых, которые находятся в пути. Сохраняйте тепло во время сна и экономьте на счетах за электроэнергию с этим фланелевым покрывалом из шерпы и фланели размером 60 x 50 дюймов.
Узнайте, как использовать спа-массажер для ног ZIRCON ZR 5-в-1 и ухаживать за ним, из этого подробного руководства пользователя. Регулировка температуры, функция вибрации и 14 массажных роликов помогают предотвратить проблемы со стопами. Поддерживайте его работоспособность с помощью простых инструкций по очистке, а также узнайте, как сливать воду и сохранять ее в безопасном состоянии для использования.
Узнайте, как использовать усовершенствованный искатель шипов SuperScan A1, из руководства пользователя ZIRCON. Ознакомьтесь с советами по точному сканированию, включая отображение стены и использование режима управления мишенью. Не забывайте соблюдать осторожность при сверлении или забивании гвоздей, чтобы не задеть трубы или проводку. Получите максимум от своего искателя шипов уже сегодня.
Узнайте, как использовать расширенный поиск шипов A2 от ZIRCON с помощью этого руководства пользователя. Ознакомьтесь с передовыми методами поиска шпилек и обхода электропроводки и труб при забивании гвоздей, резке или сверлении стен. Всегда сканируйте стойки на разных высотах и «картируйте стену» для получения согласованных показаний. Следует соблюдать осторожность при наличии проводки переменного тока под напряжением. Рекомендуется только для внутреннего использования.
Откройте для себя электронный детектор воды ZIRCON Leak Alert — устройство с батарейным питанием, предназначенное для предупреждения вас о потенциальных утечках воды. Это автономное устройство легко установить и протестировать, с сенсорными контактами, которые активируют сигнал тревоги 90 дБ при намокании. Защитите свой дом от протечек или наводнений с помощью этого рекомендуемого устройства для внутреннего использования.
Узнайте, как собрать и использовать электронный уровень воды Zircon WL 25 Pro Kit с помощью этого руководства пользователя. Этот точный и надежный инструмент, идеально подходящий для различных применений, упрощает работу в одиночку или в обход углов. Заполните 25-футовый шланг водой и удалите пузырьки воздуха для точных измерений на расстоянии до 25 футов. Получите комплект WL 25 Pro уже сегодня.
Легко находите металл с помощью электронного металлодетектора ZIRCON M40 MetalliScanner. Широкие и точные позиции сканирования помогают найти спрятанный металл даже в регенерированной древесине. Следуйте простым инструкциям для получения точных результатов. Идеально подходит как для любителей рукоделия, так и для профессионалов.
Узнайте, как правильно использовать искатель краев ZIRCON StudSensor L30, с помощью этого руководства пользователя. Ознакомьтесь с советами по точному сканированию и узнайте, как избежать распространенных ошибок. Обеспечьте согласованные и воспроизводимые показания с помощью этого рекомендуемого инструмента для внутреннего использования. Установите новую щелочную батарею, прежде чем начать поиск шпилек, расположенных на расстоянии 16 или 24 дюймов друг от друга.
Узнайте, как эффективно использовать сверло ZIRCON XL500 ExitPoint для сквозных отверстий, из этого подробного руководства пользователя. Получите советы по размещению батареи, планированию стен и предотвращению опасности поражения электрическим током. Устраните распространенные проблемы и найдите советы по строительству. Обеспечьте себе безопасность и успех с XL500.