- Manuals
- Brands
- Yongnuo Manuals
- Camera Accessories
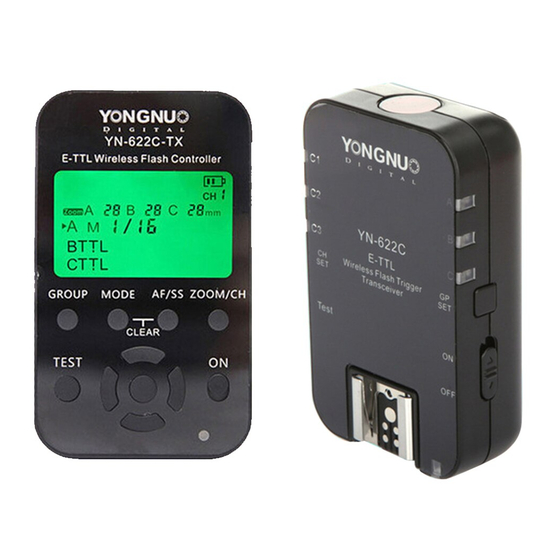
- TOYUG YN-622C
- User manual
-
Contents
-
Table of Contents
-
Troubleshooting
-
Bookmarks
Quick Links
Related Manuals for Yongnuo YN-622C
Summary of Contents for Yongnuo YN-622C
-
Page 1
User Manual… -
Page 2: Table Of Contents
注意事项 CONTENTS Cautions ….1 General Description … . . 2 Supported Functions List … 3 Compatibility List .
-
Page 3: Cautions
Cautions Ÿ Please turn off power supplies of all equipment when connecting or installing the product. Ÿ Please keep it dr y. Be sure not to use wet hand to touch the product. It is also not allowed to immerse the product into waster or make it be exposed in the rain;…
-
Page 4: General Description
General Description Thank you for purchase the products of Yongnuo firstly. Ÿ Y N — 6 2 2 C E — T T L w i re l e s s f l a s h t r i g g e r i s a h i g h performance master and slave equipment of multiple flashes photography, through digital FSK 2.4GHz radio…
-
Page 5: Supported Functions List
1st, 2nd curtain/HSS (Super Sync) Support LCD Live view triggering Ÿ Support high-speed continuous shooting trigger Ÿ Settings saved automatically Ÿ Compatible with ALL YongNuo/ Canon EXII series Ÿ flashes Support single-contact of camera & flash triggering Ÿ (max sync speed is 1/250s)
-
Page 6: Compatibility List
Canon EOS 5D,10D,20D,30D,300D,350D,1D,1D Mark II Compatible ETTL flash list (support wireless remote control through camera menu) Canon 600EX(RT)/580EXII/430EXII/320EX/270EXII YongNuo YN565C/YN468C(II)/YN467C(II)/YN465C 430EX/580EX or other par ts of the flash is not supported remote control via the camera menu, need to manually set the flash parameters.
-
Page 7: Name Of Parts
Name of Parts Indicator Blinking Keep Lighting Communicating Channel Indicator Mix Control Mode (Remote control mode) Firing group or Testing Group Indicator receiving group Communicating State Indicator(green) TX Communicating Testing Communicating State Indicator(red) RX Communicating Standby State ※The protective film can be torn out.
-
Page 8: Preparation Before Use
Preparation Before Use 1. Installing the Batteries Open the cover and install two AA batteries (excluded)according to the + and — marks , rechargeable batteries of 1.2V can be used. Replace the batteries when the product does not work stably. Remove the batteries when the product ※…
-
Page 9: Preparation Before Use
Preparation Before Use 3 . I n s t a l l F l a s h o n t h e H o t S h o e of t h e Transceiver (as Receiver) 1. Install the transceiver on the mini stand or other fixing equipment (excluded).
-
Page 10: Setting
Setting 1. Power Switch Power on when the power switch slides to [ON], channel and group indicators shows that channel and receiving group, power off when the power switch slides to [OFF]. ※ It is normal for the flash fire once when turning on/off the transceiver.
-
Page 11: Setting
Setting 4.Flash Test Group Setting (Test + GP SET Button) Set flash testing group Ÿ Type C camera uses the set firing group. Ÿ 1. H o l d d o w n [ Te s t ] b u t t o n t h e n t h e g r o u p indicators will keep lighting, the flash on the receiver group having been selected will be woken up(p.10).
-
Page 12: Flash Awaking /Testing Flash
Flash Awaking and Testing Flash When half-pressing the shutter button of the Ÿ camera, the hot-shoe flash on the receiver will be awakened. (for A/B type camera only) Under any connection type, [Test] button can be Ÿ pressed to awaken and test the flash on the transceiver and other transceivers at the same channel.
-
Page 13: Remote Control Mode
Remote Control Mode Remotely setting all the flashes through the external flash function setting (camera menu) of the camera, just likes the flash being directly installed on the camera. The settings of camera menu is prior, settings will upgraded to the receiver after pressing down camera confirmation button or half pressing shutter button without needing to operate the flash control panel, the flash’s screen will display the current setting.
-
Page 14: Automatic Flash (E-Ttl Ii)
Automatic Flash (E-TTL II) Fully-automatic Flash Shooting Ÿ 1. Select flash mode as E-TTL II mode. 2. Half press camera’s shutter button to focus, and on the flash screen the aperture and effective range etc. parameters will be displayed. 3. Ensure that the subject is in the effective flash range, full press camera’s shutter button to shoot, the flash will be fire according to the setting.
-
Page 15: Shutter Sync
Shutter Sync 1. 1st Curtain sync Ÿ The normal flash sync. 2. 2nd curtain sync Ÿ The flash fires right before the shutter closes, lower shutter speed needs to be used, support bulb 2nd curtain sync flash. 3. Hi-speed Sync(HSS/FP FLASH) Ÿ…
-
Page 16: Feb/Fec
FEB/FEC(E-TTL only) 1. FEB (Flash Exposure Bracketing) Ÿ Support 1/3-stop increments to set FEB within ±3. ※ The sequence of FEB is fixed at 0→ -→ +, even the FEB sequence of the custom setting in flash is different, the shoot sequence remains to 0→-→+ either.
-
Page 17: Zoom (Flash Coverage)
Zoom (Flash Coverage) Zoom supports automatic/manual setting. Ÿ 1. With automatic setting, focal length of the flash may change with lens focal length. 2. With manual setting, focal length of the flash supports manual setting within 24-105MM. 1. Automatic Setting 2.
-
Page 18: Manual/Multi Flash
Manual Flash / Multi Flash 1.Manual Flash: Manually set flash output (1/128~1/1 power 1/3-stop increments) Select flash mode as Manual Flash Mode, setting Ÿ flash output ,shutter sync, zoom etc. 2.Multi Flash (Stroboscopic flash) Select flash mode as Multi Flash, setting via the Ÿ…
-
Page 19: Wireless Function
Wireless Function* By setting the wireless flash function menu, in a different Ÿ flash mode or firing group, remotely set A / B / C, three groups of flash ratio or flash output. 1. Enabled the wireless function via flash control menu. 2.
-
Page 20
Wireless Function 3.Channel Setting via Wireless Function Set channel (CH1-CH4 only) of the transmitter via wireless function setting, the changed shall cover the original setting. CH1-CH7 may also be set by directly pressing [CH SET] at the transmitter(p.8). 4. Firing Group Setting via Wireless Function Sets firing group of the transmitter via wireless function setting, in transmitting communications, state indicator and… -
Page 21
Flash Ratio with E-TTL II Flash fire ratio and FEC of the A, B, C three firing Ÿ groups can be under E-TTL II flash mode. 1.All (A+B+C) R a t i o o f f, A / B / C t h r e e flashes automatically fire with same output, flash e x p o s u r e c o m p e n s a t i o n… -
Page 22
Manual/Multi Flash Output Flash output for each group A/B/C can be Ÿ separately set under Manual/Multi flash mode. 1. All (A+B+C)-The three groups of flashes shall be set with the same output. 2. A: B-Group A and B shall be separately set Group C flash will not fire. -
Page 23: Mix Control Mode
Mix Control Mode Ÿ Set the flash on each receiver in different flash modes as Manual/E-TTL/Multi for mix control, the settings of the flash is prior , channel indicator of the transmitter will keep lighting when enabled this control mode. Supports type A/B cameras using.
-
Page 24: Flash Triggering Of Type B/C Camera
Flash Triggering of B/C Type Camera Type B Cameras: There is no flash control menu of such type of cameras Ÿ that some of function will be restricted. Enable the mix control mode of the transmitter before using(P.21). 1. Setting of transmitting groups (set in the transmitter when it in transmitting status): Half press the camera’s shutter button then status indicator blinks green.
-
Page 25: Pc Port Triggering
PC Port Triggering (Support Super Sync *) Caution! Do not connect to the PC port any flash requiring trigger voltage more than 300V, or the transceiver may be damaged. Ÿ Purchase corresponding PC flash sync cord according to the different ports of the flashes needs . 1.
-
Page 26: References
References AF Assist Beam Emitter When using AF under low-light, Ÿ built-in AF-assist beam emitter of the transmitter will be emitted automatically to make it easier to autofocus, and the flash on the transmitter which support AF assist beam emitter function can also be emitted at the same time.
-
Page 27: References
References Applications 2 Transceiver Kit Packaged Multiple Transceivers one off-camera flash or one Multiple flashes application off-camera flash plus one on- b y a d d i t i o n a l l y p u r c h a s e d top flash can be used.
-
Page 28: Troubleshooting
Troubleshooting 1. Fail to power on or automatic shutdown: ● The batter y is loaded inversely or exhausted; it will power off automatically when the batter y is going to be exhausted in case of being over discharged. ▲ Install the batter y according to the correct direction the batter y compartment indicates and ensure the batter y is full and restart the power (refer to page 8).
-
Page 29
Troubleshooting 7. Can’t set the flash zoom via camera menu: When the mix control mode has been set in the transmitter (p.21) or zoom locking has been set in the receiver (p.15), zoom can’t be set via camera menu. Zoom setting of the on- top flash needs to be set separately(p.17). -
Page 30: Specifications
Specifications System type: Digital FSK 2.4GHz wireless transceiver Distance: 100M Channel: 7 Flash mode: E-TTL(II), Manual flash, Multi flash Sync mode: 1st curtain, 2nd curtain, Hi-speed sync Groups: 3Groups (A/B/C) Sync speed: 1/8000s* Input: Hot-shoe(TTL,main contact) Output: Hoe shoe, PC port Applicable batter y: AAX2 (support 1.2 V rechargeable batter y) Stand-by time: 60h…
This manual is also suitable for:
E-ttl

- Фотография
- Техника
- Отзывы
- Cancel
Недавно на ebay.com я приобрел контроллер Yongnuo YN-622N-TX и два трансивера Yongnuo YN-622N. О самих устройствах рассказывать не буду, т.к. и без меня о них в сети информации предостаточно. На данном этапе осваиваю работу с ними. Общие впечатления весьма положительные. Но немного напрягает отсутствие нормального мануала. Во-первых, та инструкция, что прилагается к устройствам, очень лаконична. Опубликованы далеко не все возможности, на которые способны эти устройства. Об этом уже упоминалось на различных форумах. Во-вторых, неудобно, что не прилагается инструкции на русском языке. Поиск в сети тоже не дал результата. Пришлось разбираться с английским мануалом.
Мой уровень владения английским языком позволил мне с частью информации разобраться без словаря. Однако этого оказалось недостаточно, чтобы из этих отрывков сложился понятный для практического использования текст. Поэтому я решил, не мудрствуя лукаво, перевести все инструкции. Главным помощником мне стал переводчик от Google. Качество перевода вышло соответствующее. Я позволил себе отредактировать стиль всезнающего толмача, отчего перевод вышел еще более изысканным. По ходу авторской правки к переводу добавились мои опечатки и орфографические ошибки. Более того, в разных местах инструкции одинаковые функции и устройства я называю по-разному, что в принципе, не приемлемо, но, тем не менее, имеет место быть. Изучая это следует знать, что трансивер и приемопередатчик, это одно и то же, трансмиттер тождественен передатчику, а ресивер – приемнику. Так же в тексте встречаются неточности, ляпы и понятия, не принятые в среде отечественных фотографов и стробистов. Я бы охарактеризовал это как авторский стиль. Для тех, кто все же, на свой страх и риск, захочет воспользоваться прилагаемым руководством, я хотел бы сделать несколько важных замечаний.
Я не готов нести ответственность, если вследствии неправильного использования вы повредите свое оборудование. Если вы найдете в тексте орфографические, стилистические, пунктуационные и другие ошибки и сообщите об этом мне, я буду вам премного благодарен, и постараюсь в ближайшее время внести изменения в инструкцию.
Пока готова только инструкция к трансиверу Yongnuo YN-622N. Закончить с переводом мануала для Yongnuo YN-622N-TX планирую в ближайшее время. Енджой!
P.S. Как и обещал, инструкция к контроллеру Yongnuo YN-622N-TX.
-
Page 1: User Manual
YN622C-TX Wireless Flash Controller User Manual 用户手册…
-
Page 3: Table Of Contents
Contents/Cautions General Description ….1 Conventions Used in the Manual Supported Functions List ….3 Name of Parts/Quick Start Guide .
-
Page 4: General Description
General Description Thank you for choosing products of YONGNUO. YN622C-TX E-TTL wireless flash controller is for supporting Ÿ the use of YN622C E-TTL wireless flash trigger transceiver. This product adopts flexible LCD menu control, supports Ÿ mixed use of E-TTL(II) mode, manual mode, or super sync flash mode of group A/B/C flash.
-
Page 5: Conventions Used In The Manual
Conventions Used in the Manual Ÿ This manual to assume using compatible camera/flash and YN622C transceiver in the same channel. The features/functions supported by the product depend on the camera and flash used. For the operation of camera, flash ant the YN622C transceiver, please refer to relevant user manuals.
-
Page 6: Supported Functions List
Supported Functions List Ÿ LCD screen display, and multi-buttons for quick operation Ÿ The firmware can be upgraded through the USB interface Ÿ Supports wireless shutter release function Ÿ The focal length(zoom)of the A/B/C three group flash can be adjusted separately Ÿ…
-
Page 7: Name Of Parts/Quick Start Guide
Name of Parts/Quick Start Guide ※The protective film can be torn out. E-TTL Ratio Battery electricity 2nd curtain Sync High speed sync Channel Multi ZOOM Flash parameter area AF assist beam emitter…
-
Page 8
Name of Parts/Quick Start Guide A-LCD: Display all the settings of controller. B-2.5MM Shutter release interface: Wireless shutter release function(P.16). C-AF assist beam emitter: (P.14) D-PC interface: Input the flash sync signal(P.15). E-USB interface: Connected to the computer to update the firmware (P.19). -
Page 9: Preparation Before Use
Preparation Before Use 1.YN622C Transceiver Settings: and channel of the Set the receiving group transceiver (refer to the user manual of the YN622C). 2.YN622C-TX Controller Settings: 1).Installing the 2 AA (1.5V)batteries (excluded). 2).Installing the Controller on the Camera . 3).Power on when the power switch slides to [ON]. 4).Channel Setting: Long press the [ZOOM/CH] button, then press the select/set button group to the same channel as the YN622C transceiver.
-
Page 10: Settings
Settings Flash Mode Setting: GR/TTL/Multi Ÿ Long press the [ ] button to switch the flash mode GR/TTL/Multi. Ÿ In GR mode, short press the [ ] button to switch the current group the arrow pointing to; in TTL/Multi mode, short press this button can also switch the flash mode.
-
Page 11
Settings 1.GR-Grouping flash mode: set different flash modes for different groups. 1).short press the [GR/*] button to choose the setting groups. 2).Short press the [ ] button to set the flash mode of the selected group, each press of the setting as below: TTL: E-TTL(II) Fully Automatic Flash The FEC adjustment range is within -3 to +3EV, It’s supported to press select/set button group to adjust the FEC… -
Page 12
Settings 2.E-TTL(II)Mode -Fully Automatic Flash 1.)Set the flash group: Long press the [GR/*] button to set the TTL flash group. 2.)Set the flash ratio or exposure compensation: Short press the [GR/*] button to select the setting items, then press the select/set button groups to set the parameters. -
Page 13
Settings The details of the flash ratio settings as below: Press[LEFT]or[RIGHT] Press[UP]or[DOWN] 3.Multi Flash Mode:Stroboscopic Flash Short press the [GR/*] button to select the items, then press the select/set button groups to set the parameters. Output power Stroboscopic frequency Stroboscopic flash count *The output power of group B/C should be set up respectively through the camera’s menu (P.13) -
Page 14: Settings
Settings 4.ZOOM:Flash Coverage Setting Ÿ It supports the controller to set the focal length of the flash on the transceiver. Short press the [ZOOM/CH]button, set the flash focal length of A/B/C group in sequence, then press the Select/Set button group and set. Settings rang supported manual 24-105mm,AU (Automatic).
-
Page 15: Flash Awaking And Triggering
Flash Awaking and Triggering 1.Flash Awaking&Testing When half press the shutter button of the camera or press the [TEST] button of the controller , the green wake-up indicator light lights on, and the flash on the hot-shoe of the transceiver will be waked up. When loosen the [TEST] button, the flash of the selected groups will be tested for once.
-
Page 16: Control From Camera’s Menu Screen
Control from Camera s Menu Screen Ÿ When using digital cameras released since 2007, can set the controller functions from camera’s menu screen. For the operation of the camera, please refer to the relevant user manual. Ÿ EOS digital cameras released since 2012:support E- TTL II, manual flash, multi flash, group flash (GR).
-
Page 17: C.fn: Custom Function Settings
Custom Function Settings(C.FN) 1).Long press the [SYNC/FN] button. 2).Press the [up] or [down] buttons to select the setting items, then press the [LEFT] or [RIGHT] buttons to set the parameters. 3).Press [OK] to confirm and exit the settings. 01-SS: Super sync delay Settings The range of settings : 0.0-2.0 (refer to P.17) 02-SHU(Shutter):Wireless shutter function…
-
Page 18: Other Trigger Modes
Other Trigger Modes 2.PC interface & Legacy Flash Trigger PC interface (input) trigger: Use LS-PC/PC cable (option)to Ÿ connect the controller and the PC interface of camera. Legacy Flash Trigger : Basic flash (Single Contact) Ÿ trigger: Install the controller on the camera hot shoe. 1).Transmitting group setup: Set base on the groups of the controller (GR).
-
Page 19: Shutter Release Function
Shutter Release Function Ÿ Use the YN622C transceiver for wireless transmitting, the YN622C-TX controller as the shutter signal output. YN622C-TX YN622C 1).Use the LS-2.5 series shutter connecting cable to connect the controller and camera’s shutter interface, as for the EOS digital cameras released after 2012, it does not need the shutter connecting cable.
-
Page 20: Reference
Reference About the Super Sync(SS) Use non-HSS (Non High Speed Sync) flash to realize High Speed Sync. This function is more applicable to strobes flashes whose flash duration is longer. It should be used with cameras which supports High Speed Sync (HSS) and setting SS time delay parameters.
-
Page 21
Reference 3.About the Ex Compat trigger When using the 430ex/550ex/580ex flash etc. which does not support camera menu controlling the flash, enable this function can use the controller to remote control the manual flash power output of the above flash. 1).Set the C.FN 05 of the controller as ON(P.14). -
Page 22
6.USB Firmware Upgrade 1).Visit YONGNUO official website: http://www.hkyongnuo.com to download the firmware upgrade software and the latest firmware. 2).Turn off . Keep pressing [mode] button and turn on again. The… -
Page 23: Troubleshooting
Troubleshooting 1. Fail to power on or automatic shutdown: Ÿ The battery is loaded inversely or exhausted. Install the battery according to the correct direction the Ø battery compartment indicates and ensure the battery is full and restart the power . 2.
-
Page 24: Specifications
The functions of this user manual are based on test conditions of our company. Further notice will not be given if the design and specifications change. The YONGNUO logo in this manual includes the registered trademark or trademark of Shenzhen Yongnuo Photography Equipment Co.,Ltd in China or/and other countries(regions).
-
Page 25
目录/注意事项 产品功能简介 ….1 说明书约定 ….. 2 支持的功能列表… -
Page 26: 产品功能简介
产品功能简介 首先感谢您选购永诺产品。 YN622C-TX E-TTL 无 线 引 闪 控 制 器 是 一 款 为YN622C E- Ÿ TTL无线引闪收发器配套使用的产品。 本 产 品 使 用 人 性 化 的LCD菜 单 控 制 , 支 持 组 闪 光 模 式 , 即…
-
Page 27: 说明书约定
说明书约定 本说明书为假定使用兼容的相机/闪光灯,并且使用相同频道 Ÿ 的YN622C收发器,本产品所支持的功能取决于使用的相机及 闪光灯,有关YN622C收发器、相机及闪光灯的操作,请阅读 其使用手册。 最 新 版 本 的 用 户 手 册 及 升 级 固 件 请 访 问 永 诺 官 方 网 站 Ÿ www.hkyongnuo.com获取。 YN622C-TX YN622C 此用户手册中使用以下图标: Ÿ 表示短按该按钮。 表示长按该按钮。…
-
Page 28: 支持的功能列表
支持的功能列表 Ÿ LCD屏幕显示,多按键快捷操作 Ÿ 可通过USB接口升级固件 Ÿ 支持无线快门线功能 Ÿ 可单独调整A/B/C三组闪光灯焦距 Ÿ 支持TTL光比A:B/A:B C Ÿ 内置辅助对焦灯(可禁用) Ÿ 闪光模式:GR(组闪光),E-TTL(II), 频闪闪光 Ÿ A/B/C三组灯可混合使用E-TTL(II)、手动闪光及超级同步 Ÿ 可单独调整A/B/C三组闪光灯曝光补偿或闪光输出(GR) Ÿ 快门同步:前帘同步,后帘同步,HSS高速同步,支持最高同步 速度为1/8000s Ÿ 支持闪光包围曝光,曝光补偿,曝光锁定功能 Ÿ 支持景深预览造型灯闪光 Ÿ 支持闪光灯头变焦(自动,手动) Ÿ Super Sync(SS)时延调整,更好支持(伪)高速同步功能 Ÿ 设置自动保存 Ÿ 可通过PC接口输入闪光同步信号 Ÿ 支 持 标 准 热 靴 (非 佳 能 机 身 )的 基 本 闪 光 引 闪 (最 高 同 步 速 度 为 1/250s) *以上功能需配合YN622C收发器使用,…
-
Page 29: 各部位名称/快速使用指南
各部位名称/快速使用指南 ※此处保护薄膜可以撕去。 显示屏 E-TTL 光比 电池电量 后帘同步 高速同步 频闪 频道 灯头变焦 闪光包围曝光 闪光参数 启用 显示区 辅助对焦灯 启用…
-
Page 30
各部位名称/快速使用指南 A-显示屏:显示控制器的所有设定。 B-2.5MM快门线接口:无线快门线功能(第 页)。 C-辅助对焦灯:辅助对焦灯功能(第14页)。 D-PC接口:输入闪光同步信号(第15页)。 E-USB接口:通过与电脑连接升级控制器固件(第19页)。 按钮:设置闪光模式。 G-GR/*按 钮 : 短 按移 动 箭 头 设 置 闪 光组或 其 他 参数 ,长按 在 不同模式下有不同功能。 H-TEST按钮:长按唤醒闪光灯,松开时测试闪光(第12页)。 I-选择/设置按钮组:多功能按钮组,包括【上】【下】【左】 【右】及【OK】按钮,可设置各种参数。 J-SYNC/FN按钮:短按为闪光快门同步设置(第11页),长按为 自定义功能设置(第14页)。 K-ZOOM/CH按钮:短按设置焦距(第11页),长按设置频道(第 7页)。 L-电源开关:滑动至ON为电源开。 M-状态指示灯:通信时亮绿灯,引闪(快门释放)时亮红灯。 N-固定环及锁定销 O-热靴固定脚及触点 P-电池仓及电池仓盖… -
Page 31: 使用前准备
使用前准备 1.YN622C收发器设置: 设置好YN622C频道及接收分 组 (根据YN622C使用说明操作) 2.YN622C-TX控制器设置: 1 ) .安装两节AA(1.5V)电池(不含)。 2).安装控制器于相机机顶热靴。 3).开启电源:将电源开关设置在ON的位置。 4).设置频道: 长按【ZOOM/CH】按钮,再按选择/设置按钮组 设置与YN622C收发器相同的频道。…
-
Page 32
设置 设置闪光模式:GR/TTL/Multi 长按【 】按钮在GR/TTL/Multi 闪光模式切换。 Ÿ GR模式下,短按【 】按钮切换当前箭头所指分组模 Ÿ 式,在TTL/Multi模式下,短按该按钮也可以切换闪光模式。 示例: 1.GR (组闪光) 2.TTL (自动闪光) 3.Multi (频闪闪光) -
Page 33
设置 1.GR-组闪光模式:为各组设定不同的闪光模式拍摄 1).短按【GR/*】按钮 选择设置组 。 2).短按【 】按钮设置所选分组 闪光模式,每按一次设置如下: TTL:E-TTL(II)全自动闪光 支持 按选择/设置组设置 调整曝光补偿,范围-3至+3EV 。如已 在闪光灯上设置了曝光补偿,将与控制器设置的补偿值叠加。 M:手动闪光 调 节 范 围1/128-1/1, 按 【 左 】 或 【 右 】 调 整 , 按 【 上 】 或 【下】微调。 SS(SuperSync):超级同步,见第14页 OFF:该组不参与闪光。 *GR模式下长按【GR/*】按钮可快速地同时关闭A/B两组闪光 灯。… -
Page 34
设置 2.E-TTL(II)模式:全自动闪光 1.)设置闪光组: 长按【GR/*】按钮设置TTL闪光组。 2.)设置光比或曝光补偿: 短按【GR/*】按钮选择项目,再按选择/设置按钮组设置参数。 1.闪光组-A+B+C(ALL) 同时设置ABC三组曝光补偿 闪光组- 设置A/B组光比 设置A/B组曝光补偿,C组不闪光 闪光组- A:B C 设置A/B组光比 设置A/B组曝光补偿 设置C组曝光补偿… -
Page 35
设置 闪光光比设置的详细说明如下: 按【左】【右】 按【上】【下】 3.Multi:频闪闪光模式 短 按 【GR/*】 选 择 设 置 的 项 目 , 按 选 择/设置按钮组设置参数。 设置频闪输出功率 设置频闪频率 设置频闪闪光次数 *单独设置B/C组频闪输出 功率 需通过相机菜单设置(见第13页) -
Page 36
设置 4.ZOOM:闪光覆盖范围设置 支持通过控制器设置收发器上的闪光灯的焦距。 Ÿ 短 按 【 ZOOM/CH】 按 钮 , 依 次 设 置 A/B/C组 闪 光 灯 焦 距 , 再 按 选 择 /设 置 按 钮 组 设 置 , 支 持 设 置 的 范 围:手动24-105mm,AU(自动)。… -
Page 37: 闪光灯唤醒、引闪
闪光灯唤醒、引闪 1.闪光灯唤醒、测试引闪 半按相机快门按钮或 按住控制器【TEST】按钮,状态指示灯将 点亮(绿色),收发器的 热靴闪光灯将被唤醒。 松开【TEST】按 钮时,所选分组闪光灯将被测试闪光一次。 2.引闪闪光灯 完全按下相机快门按钮时将同步引闪闪光灯,状态指示灯将点 亮(红色)。 示例:…
-
Page 38: 从相机的菜单画面进行控制
从相机的菜单画面进行控制 当使用2007年以后发售的EOS数码相机时,可以从相机的菜单 画面设定控制器功能。有关相机操作,请参见相机的使用说明 书。 从2012年 以 后 发 售 的EOS数 码 相 机: 支 持E-TTL II, 手 动 闪 Ÿ 光,多次闪光,组闪光(GR)。 从 2007年 到 2011年 期 间 发 售 的 EOS数 码 相 机 :支 持 E-TTL Ÿ II,手动闪光,多次闪光。 TTL模式下支持通过相机菜单设置闪光包围曝光功能,显示 Ÿ…
-
Page 39: 自定义功能设置(C.fn)
自定义功能设置(C.FN) 1).长按【SYNC/FN】。 2).按 【 上 】 【 下 】 按 钮 选 择 设 置 项 目 , 按 【 左 】 【 右 】 按 钮 设 定 参 数。 3).按【OK】按钮确认并退出设置。 01-SS:(SuperSync)超级同步时延设置 设置的范围0.0-2.0 (见第17页) 02-SHU(Shutter):无线快门功能 可设置为ON或OFF(见第16页) 03-AF:辅助对焦灯功能 可设置为ON或OFF,打开后显示屏将有相关图标显示(第4页)。 04-LEG(Legacy Flash Trigger):单触点引闪功能 见第15页,可设置为ON或OFF 05-ECO(Ex Compat ):EX系列闪光灯兼容…
-
Page 40: 其他引闪模式
其他引闪模式 PC接口、基本闪光引闪 PC接口(仅限输入使用):使用LS-PC/PC连接线(另购)连接控制 Ÿ 器及相机的PC接口。 基本闪光(单触点)引闪:安装控制器于标准热靴的相机。 Ÿ .发射分组设置: 依据控制器分组设置(GR)。 2).闪光模式设置: 通过闪光灯控制面板设置在手动闪光(M)模式,手动更改闪 光输出,使用控制器PC接口或主闪光触点引闪,不支持高速 同步或其他TTL功能(最高同步速度为1/250s或更低)。 *关于自定义功能04功能: 使用TTL引闪时请将本自定义功能设 置为OFF,若使用单触点引闪工作不正常时,设置为ON。…
-
Page 41: 快门线功能
快门线功能 使 用YN622C收 发 器 无 线 发 射 ,YN622C-TX控 制 器 作 快 门 Ÿ 信号输出。 YN622C-TX YN622C 1).使用LS-2.5系列快门连接线将控制器与相机快门接口连接, 使 用2012年以后发售的 机型,无需使用快门线。 2 ).设置自定义功能02为 ON(第14页),打开无线快门功能。 3).按下YN622C收发器(若已安装闪光灯)的【TEST】按钮并松开 时,闪光灯将被触发一次测试闪光,约1秒后将触发相机快门 并同步闪光。 只支持单张拍摄。 Ÿ 不使用快门线功能时,请将自定义功能02设置为“OFF”。 Ÿ…
-
Page 42
参考 1.关于超级同步(SS) 使用非高速同步闪光灯实现更高的同步速度,本功能更适合 Ÿ 闪光持续时间较长的影楼灯,需要相机使用高速同步,支持设 置SS时延参数。 I.在自定义功能菜单01设置控制器SS时延参数:(见14页) II.在GR模式下使用超级同步: 1.)将闪光灯设置在手动模式,支持使用热靴闪光灯或PC接口连 接闪光灯。可能需要设置全功率闪光输出(1/1)。 2.)设置控制器快门同步为“高速同步”,快门同步速度最高可 设置在1/8000s,根据使用的闪光灯、输出功率、快门速度 不同调整至一个合适的时延参数。 3.)拍摄并检查照片是否同步,可能会看到光线的层次变化,效 果将根据相机及闪光灯不同会有所不同。 2.关于自动保存功能: 控制器将自动保存频道,分组,焦距,闪光模式,辅助对焦灯等 Ÿ 设置。… -
Page 43
参考 3.关于Ex Compat 引闪 使 用 430ex/550ex/580ex等 不 支 持 相 机 菜 单 控 制 的 闪 光 灯 时,开启本自定义功能以使用控制器远程调整这类闪光灯的手 动闪光输出功率。 1).设置控制器自定义功能05为ON(第14页)。 2).将YN622C上的闪光灯设为E-TTL闪光模式。 3).将控制器设置为GR模式下使用手动闪光,设置闪光输出。 *闪光灯屏幕将不会显示输出功率。 *不使用以上型号闪光灯时请将自定义功能05设置为OFF。 4.关于LCD背光: 按任何按钮,屏幕背光将点亮5秒。 Ÿ 5.关于电池电量显示: 屏幕右上角电池图标将显示当前电量,当电量不足时,电池图标 Ÿ 闪烁,请更换电池。… -
Page 44
参考 5.恢复出厂设置 同 时 按 【MODE】 与 【SYNC/FN】 按 钮,直至屏幕出现如图所示后松开,恢 复出厂设置。 6.USB固件升级 1).访问永诺官方网站: http://www.hkyongnuo.com 下载固件升级程序及最新固件。 2).关 闭 电 源 , 按 住<MODE>按 钮 的 同 时 重 新 打 开 电 源 , 屏 幕 显示进入固件升级界面(将显示当前版本号)。 3).使用USB-MINIB连接线(不含)将控制器与PC进行连接。 4).按照软件上的提示完成固件升级操作。… -
Page 45: 故障排除
故障排除 1.无法开机或自动关机: 电池装反或电池耗尽。 Ÿ 按照电池仓指示标志的正确方向安装(更换)电池,并确保 Ø 电池有电,重新开启电源。 2.闪光灯不闪光: 确保所有设备电池电量充足, 闪光灯在就绪的状态(闪光灯 Ø 回电指示灯已点亮)。 确保 控制器(收发器),闪光灯及相机安装连接可靠。 Ø 确保控制器及收发器已设置在相同的频道及可控制的分组。 Ø 3. TTL闪光曝光过度或曝光不足 检查是否在相机机身或闪光灯上设置了曝光补偿;超出闪光 Ÿ 有效距离可能会曝光不足;TTL与手动闪光模式混合使用时可能 会过曝,此时手动灯适合作为背景灯使用。 在使用过程中遇到其他故障,建议进行以下步骤解决: 1).重启所有设备。 2).给控制器/收发器更换电池。 3).恢复控制器及收发器出厂设置。 4).恢复相机/闪光灯出厂设置。…
-
Page 46
规格 系统模式:数字FSK 2.4GHz无线控制 距离: 100M 无线通道: 7个 闪光模式: GR(E-TTL(II)、手动、超级同步)/ E-TTL(II)/频闪闪光 同步模式: 前帘、后帘、高速同步 分组控制: A/B/C 3个组别 最高同步速度:1/8000s 引闪接口:热靴、PC接口 快门接口:2.5MM快门接口 TTL光比:支持 USB固件升级:支持 辅助对焦灯功能:支持 闪光灯变焦功能:支持 电池:AAX2节 (支持1.2V充电电池)3V 待机时间:120小时 体积:89.5×53.5×39mm 重量:82克 本手册中的功能是依据本公司的测试条件获得。设计和规格如有变 更,恕不另行通知。 本手册中的永诺(YONGNUO)徽标是深圳市永诺摄影器材股份有限 公司在中国或/和其他国家(地区)的注册商标。其他所有商标均为其 各自所有者拥有。…