
- Manuals
- Brands
- LAUNCH TECH Manuals
- Diagnostic Equipment
- X-431 PRO5
- User manual
-
Contents
-
Table of Contents
-
Bookmarks
Quick Links
Version: V1.00.000
Revised date: 07-30-2021
Related Manuals for LAUNCH TECH X-431 PRO5
Summary of Contents for LAUNCH TECH X-431 PRO5
-
Page 1
Version: V1.00.000 Revised date: 07-30-2021… -
Page 2
X-431 PRO5 User Manual Copyright Information Copyright © 2021 by LAUNCH TECH CO., LTD (also called LAUNCH for short). All rights reserved. No part of this publication may be reproduced, stored in a retrieval system, or transmitted in any form or by any means, electronic, mechanical, photocopying, recording or otherwise, without the prior written permission of LAUNCH. -
Page 3
LAUNCH X-431 PRO5 User Manual Using This Manual This manual contains device usage instructions. Some illustrations shown in this manual may contain modules and optional equipment that are not included in your system. The following conventions are used. Bold Text Bold text is used to highlight selectable items such as buttons and menu options. -
Page 4
LAUNCH X-431 PRO5 User Manual Illustrations Illustrations used in this manual are samples, the actual testing screen may vary for each vehicle being tested. Observe the menu titles and on-screen instructions to make correct option selection. Important Safety Precautions To avoid personal injury, property damage, or accidental damage to the product, read all of the information in this section before using the tool. -
Page 5
LAUNCH X-431 PRO5 User Manual ignition wires and spark plugs. These components create hazardous voltage when the engine is running. To avoid damaging the tool or generating false data, please make sure the vehicle battery is fully charged and the connection to the vehicle DLC (Data Link Connector) is clear and secure. -
Page 6
LAUNCH X-431 PRO5 User Manual FCC Statement Any Changes or modifications not expressly approved by the party responsible for compliance could void the user’s authority to operate the equipment. This device complies with part 15 of the FCC Rules. Operation is subject to the… -
Page 7: Table Of Contents
LAUNCH X-431 PRO5 User Manual TABLE OF CONTENTS 1 Introduction ………………..1 1.1 Product Profile ………………1 1.2 Components & Controls …………….. 3 1.2.1 Display Tablet ……………… 3 1.2.2 VCI Device ………………4 1.3 Technical Parameters …………….7 1.4 Package List ………………. 8 2 Initial Use ………………..10…
-
Page 8
LAUNCH X-431 PRO5 User Manual 5.1 Intelligent Diagnose …………….22 5.2 Local Diagnose ………………25 5.2.1 Health Report (Quick Test) …………30 5.2.2 System Scan …………….. 34 5.2.3 System Selection …………….34 5.3 Remote Diagnose …………….. 45 5.3.1 Add Friends ………………. 46 5.3.2 Start Instant Messaging ………….. -
Page 9
LAUNCH X-431 PRO5 User Manual 7.1 Update Diagnostic Software & APP …………60 7.2 Update Frequently Used software …………61 7.3 Renew Subscription…………….61 8 Add-on Modules ………………64 8.1 ADAS (Calibration) …………….64 8.2 TPMS ………………..64 8.3 BST360 (Battery Tester) …………… 64 8.4 Videoscope………………. -
Page 10
LAUNCH X-431 PRO5 User Manual 9.12 Diagnostic Software Clear …………..74 10 J2534 Programming ……………..75 10.1 Working principle …………….75 10.2 Connection ………………75 10.3 Install the software & driver …………..77 11 FAQ ………………….78… -
Page 11: Introduction
LAUNCH X-431 PRO5 User Manual 1 Introduction 1.1 Product Profile This Android OS-based, tablet-style diagnostic tool incorporates the best possible coverage of OE-level diagnostics with multitasking capable software. Using the powerful 8-core 1.8GHz processor and a 10.1 inch IPS capacitive…
-
Page 12
LAUNCH X-431 PRO5 User Manual normal use and only works with the specific ADAS calibration tool. TPMS: Configures the tool as a professional Tire Pressure Monitoring System (TPMS) service tool. It needs to work with the TSGUN device (sold separately) to perform all kinds of various TPMS functions. -
Page 13: Components & Controls
LAUNCH X-431 PRO5 User Manual 1.2 Components & Controls There are two main components to the diagnostic system: Display Tablet – the central processor and monitor for the system (See Chapter “1.2.1”). VCI Device – the device for accessing vehicle data (See Chapter “1.2.2”).
-
Page 14: Vci Device
LAUNCH X-431 PRO5 User Manual the tablet on. In On mode: • Press it once to activate the LCD if the LCD is off. Press it once to turn off the LCD if the LCD lights up. • Press and hold it for 3 seconds to turn it off.
-
Page 15
LAUNCH X-431 PRO5 User Manual • When working with a PC, it acts as a J2534 Pass-thru device to perform the J2534 programming. For more details, refer to Chapter 10. The LEDs enable you to easily identify the working status of the module. -
Page 16
LAUNCH X-431 PRO5 User Manual Diagnostic socket Connect the diagnostic cable. Identify the working status of the VCI. It is defined as follows: Power: It illuminates solid red when the VCI is powered on. Vehicle: While communicating with the LEDs vehicle, it lights up and flashes. -
Page 17: Technical Parameters
LAUNCH X-431 PRO5 User Manual to the PC via data cable. Wireless: It lights up when the VCI is working in wireless communication mode. Connect to the VCI device to perform J2534 Data I/O port programming operations. Reset hole Reset the VCI.
-
Page 18: Package List
LAUNCH X-431 PRO5 User Manual Dimension: 200mm x 75mm x 40mm 1.4 Package List The following packing list is for reference purpose only. For different destinations, the accessories may vary. For details, please consult from the local dealer or check the packing list supplied with this tool together.
-
Page 19
LAUNCH X-431 PRO5 User Manual receptacle. For different vehicle diagnostic socket, it may be necessary to use one of the non-16pin connectors included within Non-16pin adaptor (Optional) the kit. cable kit For detailed non-16pin connectors, please check the package box. -
Page 20: Initial Use
LAUNCH X-431 PRO5 User Manual 2 Initial Use 2.1 Charging & Turning On 1. Use the included power adaptor to charge the tablet. 2. After charging is complete, press the POWER button to turn the tablet on. The system starts initializing and then enters the home screen.
-
Page 21: Change System Language
LAUNCH X-431 PRO5 User Manual Slide: To jump to different pages. Drag: Tap the application icon and drop it to other location. Spread apart/pinch together: To zoom in manually, place two fingers on the screen and then spread them apart. To zoom out, place two fingers apart on the screen and then pinch them together.
-
Page 22: Network Setup
LAUNCH X-431 PRO5 User Manual 2.7 Network Setup The tablet has built-in Wi-Fi that can be used to get online. Once you’re online, you can register your tool, surf the Internet, get apps, send email, launch the remote diagnosis, and check for software updates etc.
-
Page 23: Getting Started
LAUNCH X-431 PRO5 User Manual 3 Getting Started For new users, you will need to experience a user registration process before getting started. 3.1 Register & Update Follow the steps below to proceed registration and update: Tap the application icon on the home screen to launch it, and then tap Login to enter the login interface of diagnosis software.
-
Page 24
LAUNCH X-431 PRO5 User Manual Fill in the information in each field (Items with * must be filled). After inputting, tap Register, the following screen will appear: Input the 12-digit Product Serial Number and 8-digit Activation Code (can be obtained from the password envelope), and then tap Activate. -
Page 25: Job Menu
LAUNCH X-431 PRO5 User Manual No to ignore it. In this case, follow Chapter 7 to check for updates. After the registration is successfully complete, the wireless communication between the tablet and the VCI device is automatically established and user has no need to configure it again.
-
Page 26
LAUNCH X-431 PRO5 User Manual Perform commonly used repair & maintenance Service Function services. This option aims to help repair shops or technicians Remote Diagnose launch instant messages and remote diagnosis, making the repair job getting fixed faster. Configures this tool as a professional TPMS (Tire Pressure Monitoring System) service tool. -
Page 27: Diagnostics Toolbar
LAUNCH X-431 PRO5 User Manual 3.3 Diagnostics Toolbar The diagnostics toolbar contains a number of buttons that allow you to print the displayed data or make other controls. It is displayed on the upper right corner of the screen and goes through the whole diagnostic session. The table below…
-
Page 28: Connections
LAUNCH X-431 PRO5 User Manual 4 Connections 4.1 Preparation The ignition is turned on. The vehicle battery voltage range is 11-14 volts or 18~30 volts. The throttle is in the closed position. Find DLC location. 1. For Passenger Vehicles, The DLC(Data Link Connector) is usually located 12 inches from the center of the instrument panel, under or around the driver’s side for most vehicles.
-
Page 29: Vehicle Connection (Only For Passenger Vehicle Configuration)
LAUNCH X-431 PRO5 User Manual 4.2 Vehicle Connection (Only for Passenger Vehicle Configuration) The method used to connect the VCI device to a vehicle’s DLC depends on the vehicle’s configuration as follows: A vehicle equipped with an OBD II management system supplies both communication and 12V power through a standardized DLC.
-
Page 30: Vehicle Connection (Only For Commercial Vehicle Configuration)
LAUNCH X-431 PRO5 User Manual A. Battery Clamps Cable (optional): B. Cigarette Lighter Cable (optional): 4.2 Vehicle Connection (Only for Commercial Vehicle Configuration) 4.2.1 OBD II vehicle Connection Use the included OBD II extension cable to connect the VCI to the vehicle’s DLC…
-
Page 31: Non-Obd Ii Vehicle Connection
LAUNCH X-431 PRO5 User Manual 4.2.2 Non-OBD II vehicle Connection For non-OBDII commercial vehicle, refer to the following connection method to proceed.
-
Page 32: Diagnosis
LAUNCH X-431 PRO5 User Manual 5 Diagnosis 5.1 Intelligent Diagnose Through simple Bluetooth communication between the display tablet and VCI, you can easily get the VIN (Vehicle Identification Number) information of the currently identified vehicle. Once the VIN is successfully identified, the system will retrieve it from the remote server and then guide you to vehicle information page without the necessity of step-by-step manual menu selection.
-
Page 33
LAUNCH X-431 PRO5 User Manual • Tap “Maintenance record” to view its historical repair record. If there are records available, it will be listed on the screen in sequence of date. If no records exist, the screen will show “No Record”. -
Page 34
LAUNCH X-431 PRO5 User Manual Place the VIN inside the viewfinder rectangle to scan it. The most recognizable location for this number is in the top left corner on the vehicle’s dashboard. Other locations include the driver’s door or post, and the firewall under the hood. -
Page 35: Local Diagnose
LAUNCH X-431 PRO5 User Manual • If the VIN scanned is incorrect, tap the result field to modify it and then tap • To scan it again, tap REPEAT. If the VIN exists on the remote server, the system will enter the diagnostic function selection screen.
-
Page 36
LAUNCH X-431 PRO5 User Manual In this case, camera scan and enter VIN are available. A. Camera Scan: In this mode, the VCI should be connected to the vehicle’s DLC first, and then a Bluetooth communication should be established between the tablet and the VCI. -
Page 37
LAUNCH X-431 PRO5 User Manual • Tap to choose it from the record list if the VIN of the vehicle has been scanned before. • Tap to input the VIN manually if the tablet has failed to identify the VIN of the vehicle. -
Page 38
LAUNCH X-431 PRO5 User Manual Input the VIN, and tap OK, the tablet will automatically identify the vehicle model and directly navigate to the diagnostic function selection menu. 2. Tap a corresponding diagnostic software logo, and then follow the on-screen instruction to access the diagnostic software. -
Page 39
LAUNCH X-431 PRO5 User Manual Introduction: Tap to check the software function list. Note: Tap to read some precautions on using the current diagnostic software. Search Bluetooth: Tap to search for the available VCI. After the VCI is successfully activated, it will be bound to the user account and paired with the tablet automatically. -
Page 40: Health Report (Quick Test)
LAUNCH X-431 PRO5 User Manual 4). Read vehicle information: After reading the vehicle information, double check if the vehicle information is correct or not. If yes, tap Yes to continue. 5). Select test item: Select the desired test item to proceed.
-
Page 41
LAUNCH X-431 PRO5 User Manual The tested system with fault code appears in red and the system functioning properly displays in black (normally). Note: Diagnostic Trouble Codes or Fault Codes can be used to identify which engine systems or components that are malfunctioning. Never replace a part based only on the DTC definition. -
Page 42
LAUNCH X-431 PRO5 User Manual Note: Diagnostic report is classified into three categories: Pre-Repair report, Post-Repair report and Diagnostic Scan. No matter which type you saved the report as, the report type will be appended as a tag on the upper right corner of the diagnostic report for easier identification. -
Page 43
LAUNCH X-431 PRO5 User Manual tags on the diagnostic report. To ignore the workshop information, tap Skip to go to the report details screen. On the report details screen, tap Save to save it. All diagnostic reports are saved in Report -> Health Report. -
Page 44: System Scan
LAUNCH X-431 PRO5 User Manual • You have saved a pre-repair report of the currently tested vehicle, and • You have already made some repairs and service and cleared the DTCs after the pre-repair reported is generated. Otherwise, no differences exist between the pre- and post- repair reports.
-
Page 45
LAUNCH X-431 PRO5 User Manual Swipe the screen from the bottom to view the vehicle system on the next page. Tap the target system (take ECM for example) to navigate to the diagnostic function selection screen. Note: Different vehicle has different diagnostic menus. -
Page 46
LAUNCH X-431 PRO5 User Manual one part of an overall diagnostic strategy. Never replace a part based only on the DTC definition. Each DTC has a set of testing procedures, instructions and flow charts that must be followed to confirm the location of the problem. This information can be found in the vehicle’s service manual. -
Page 47
LAUNCH X-431 PRO5 User Manual made, the code(s) will appear again and the check engine light will illuminate as soon as the problem that cause the DTC to set manifests itself. On the diagnostic function selection screen, tap Clear Fault Code, the following screen will appear. -
Page 48
LAUNCH X-431 PRO5 User Manual On-screen Buttons: Select Page: Tap to select all items of the current page. Select All: Tap to select all items. To select certain data stream item, just check the box before the item name. Unselect: Tap to deselect all data stream items. -
Page 49
LAUNCH X-431 PRO5 User Manual Here the user can set different display style for each selected item. indicates sticky top. If it is tapped, it will change into . On the data stream display screen, the data stream item with will be shown on the top of the selected data stream list. -
Page 50
LAUNCH X-431 PRO5 User Manual Graph(Single): Tap to view the parameter in waveform graph. • Min/Max: Tap to define the maximum / minimum value. Once the value goes beyond the specified value, the system will alarm. Graph: Tap to view the parameters in waveform graphs. -
Page 51
LAUNCH X-431 PRO5 User Manual • Value: Switches the current graph display mode to the Value display mode. • Customize: Tap , a pull-down list of the data stream items appears on the screen. Select / deselect the desired items, and then screen will display / remove the waveforms corresponding to these items immediately. -
Page 52
LAUNCH X-431 PRO5 User Manual Report: Tap to save the current data in text format. All reports are saved in Report -> Health Reports. For details on report operations, please refer to Chapter 5.6. Record: Tap to start recording diagnostic data. Recorded live data can serve as valuable information to help you in troubleshooting of vehicle problems. -
Page 53
LAUNCH X-431 PRO5 User Manual current standard range. Tap it to start recording the sample data (*Note: Only data stream items with measurement units will be recorded), the following screen will appear: Once the recording process is complete, tap to stop it and navigate to the data revision screen. -
Page 54
LAUNCH X-431 PRO5 User Manual During the actuation test, the display tablet outputs commands to the ECU in order to drive the actuators, and then determines the integrity of the system or parts by reading the ECU data, or by monitoring the operation of the actuators, such as switching an injector between two operating states. -
Page 55: Remote Diagnose
LAUNCH X-431 PRO5 User Manual 5.3 Remote Diagnose This module helps repair shops or mechanics to diagnose a remote vehicle, and launch instant messages, allowing for improved efficiency and faster repairs. Tap Remote Diagnose on the Job menu, the screen appears blank by default.
-
Page 56: Add Friends
LAUNCH X-431 PRO5 User Manual 5.3.1 Add Friends Tap Contacts. By default it appears blank. In the search bar, input the partner’s username and tap Search to start searching. The partner must be the users who have registered specific diagnostic tools.
-
Page 57: Start Instant Messaging
LAUNCH X-431 PRO5 User Manual Tap Add friend to send your request. Once the partner receives the request, a beep will sound. Tap Messages: • Once the partner agreed your request, he/she will automatically be listed in the Contacts tab.
-
Page 58: Launch Remote Diagnosis (Device-To-Device)
LAUNCH X-431 PRO5 User Manual Tap the input field and use the on-screen keyboard to send the text message. to send the voice message. to send the emoj. to call out more function options. File: Choose diagnostic reports or local files to send.
-
Page 59
LAUNCH X-431 PRO5 User Manual On the function option selection screen, tap Remote Diagnostic, the following pull-down menu will appear: These options are defined as follows: Actions Results Request to control the partner’s device remotely to help him diagnose the vehicle. -
Page 60
LAUNCH X-431 PRO5 User Manual Notes: In process of remote diagnosis, tap the button to send a voice message. Once you received the report from the partner, tap View Report to view details. All diagnostic reports are saved under Report -> Remote Report. -
Page 61: Launch Remote Diagnosis (Device-To-Pc)
LAUNCH X-431 PRO5 User Manual 5.3.4 Launch Remote Diagnosis (Device-To-PC) User also can ask for remote control from a PC client technician. Tap Remote, the following screen will appear:…
-
Page 62
LAUNCH X-431 PRO5 User Manual 1. Slide the switch to ON so that the partner can find and connect to this device while using the PC. 2. Notify the partner of the PC client website http://remote.x431.com. When the partner accesses the link, the PC displays as below: Note: Before processing remote diagnosis, please make sure the tool is properly connected to the vehicle. -
Page 63: Feedback
LAUNCH X-431 PRO5 User Manual 4. Tell the partner to enter the Serial Number provided by you, and then tap Start remote diagnosis to control your device remotely. In process of remote diagnosis, please note the following things: 1) You are not suggested to execute any actions.
-
Page 64: Diagnostic History
LAUNCH X-431 PRO5 User Manual Tap it to view the diagnostic feedback logs which are marked with different color indicating the process status of the diagnostic feedback. C. Offline list Tap it to enter the diagnostic feedback offline list page. Once the tablet gets a stable network signal, it will be uploaded to the remote server automatically.
-
Page 65: Service (Reset) Function
LAUNCH X-431 PRO5 User Manual 6 Service (Reset) Function This module provides an easy dial to quickly access the most commonly performed service functions as follows. Oil Reset Service Electronic Parking Brake Reset Steering Angle Calibration ABS Bleeding …
-
Page 66: Electronic Parking Brake Reset
LAUNCH X-431 PRO5 User Manual 6.2 Electronic Parking Brake Reset This function enables you to reset the brake pad after replacing the brake pad. It needs to be performed in the following cases: 1. The brake pad and brake pad wear sensor are replaced.
-
Page 67: Immo Service
LAUNCH X-431 PRO5 User Manual It needs to be performed in the following cases: 1. After the engine ECU, crankshaft position sensor, or crankshaft flywheel is replaced. 2. The DTC ‘tooth not learned’ is present. 6.7 IMMO Service This function enables you to perform the anti-theft key matching function, so that the immobilizer control system on the car identifies and authorizes remote control keys to normally use the car.
-
Page 68: Electronic Throttle Position Reset
LAUNCH X-431 PRO5 User Manual It needs to be performed in the following cases: 1. The exhaust back pressure sensor is replaced. 2. The PM trap is removed or replaced. 3. The fuel additive nozzle is removed or replaced. 4. The catalytic oxidizer is removed or replaced.
-
Page 69: Immo Programming
LAUNCH X-431 PRO5 User Manual 6.16 IMMO Programming This function enables you to perform read-write function for vehicle key, EEPROM, MCU, and EEPROM/FLASH data of vehicle engine/gearbox ECU.
-
Page 70: Software Update
LAUNCH X-431 PRO5 User Manual 7 Software Update This module enables you to update the diagnostic software & App and frequently used software. 7.1 Update Diagnostic Software & APP Go to Software Update on the Job Menu and tap the Downloaded tab.
-
Page 71: Update Frequently Used Software
LAUNCH X-431 PRO5 User Manual To download certain software that is not frequently used, check the box before the vehicle model. Tap Update to start downloading. Once download is finished, the software packages will be installed automatically. 7.2 Update Frequently Used software If the user only intends to update the frequently used software, go to Software Update and tap the Downloaded tab.
-
Page 72
LAUNCH X-431 PRO5 User Manual renew your subscription. Tap Renewal on the bottom of the screen to enter the payment screen. There are three ways available for you to make payment: PayPal, Subscription Renewal Card (*need to buy it from the local dealer where you purchased the tool) and Credit Card. -
Page 73
LAUNCH X-431 PRO5 User Manual 2. Input the 24-digit pin code of Subscription Renewal Card and then tap Submit to finish the renewal. 3. Go to update center to update the diagnostic software. 3. Using Credit Card 1. Select Credit Card, and then follow the on-screen instructions to finish the transaction. -
Page 74: Add-On Modules
LAUNCH X-431 PRO5 User Manual 8 Add-on Modules 8.1 ADAS (Calibration) This module enables you to effectively and accurately calibrate a wide range of camera-based & radar-based driver assistance systems, e.g. the front camera for the lane departure warning system, the radar sensor for the ACC (Adaptive Cruise Control) or the camera for adaptive headlights.
-
Page 75
LAUNCH X-431 PRO5 User Manual For more details, please refer to the User Manual included with the module. -
Page 76: User Info
LAUNCH X-431 PRO5 User Manual 9 User Info This function allows users to manage personal information and VCI. 9.1 My Report This option is used to view, delete or share the saved reports. Tap Report, there are total 3 options available.
-
Page 77: Firmware Fix
LAUNCH X-431 PRO5 User Manual Input the Serial Number and Activation Code, and then tap Activate to activate the VCI. 9.5 Firmware Fix Use this item to upgrade and fix diagnostic firmware. During fixing, please do not cut power or switch to other interfaces.
-
Page 78: Change Password
LAUNCH X-431 PRO5 User Manual • Tap the user image to change it. • Tap > next to Upgrade Period to check the due date of all diagnostic software. 9.10 Change password This item allows you to modify your login password.
-
Page 79: Printer Set
LAUNCH X-431 PRO5 User Manual 9.11.3 Printer Set This option is designed to establish a wireless connection between the tablet and the Wi-Fi printer (sold separately) while performing printing operations. The App is compatible with the LAUNCH Wi-Fi Printer (sold separately) and ®…
-
Page 80
LAUNCH X-431 PRO5 User Manual Tap Scan to select the desired local Wi-Fi network from the list, and type in the security password (If it is an open network, password is not required), and then tap Confirm. 3. Once the Wi-Fi network of the printer is connected and the printer is found, tap Printing test to test the printing. -
Page 81
LAUNCH X-431 PRO5 User Manual 4. Touch next to Select a printer on the upper left corner of the screen. 5. Select All Printers -> Add printer and enable the installed printer service, the system starts searching for all available Wi-Fi printers of the brand. -
Page 82: Orientation
LAUNCH X-431 PRO5 User Manual 6. Select the desired Wi-Fi printer from the list. If the chosen Wi-Fi printer hotspot is open, the tablet can connect it directly. If it is encrypted, a password may be required. Refer to the Wi-Fi printer user manual to get the default password.
-
Page 83
LAUNCH X-431 PRO5 User Manual The newly added sub-account has a one-year validity period. After the expiration, the VCI bound to the sub-account cannot be used and the sub-account will no longer enjoy the rights and interests of the main account. The main account can modify the validity period of the sub-account. -
Page 84: Login/Logout
LAUNCH X-431 PRO5 User Manual • If you already have an account, please enter the user name and password. After inputting, tap Add Immediately to add it as a sub-account. • If you have not registered any account, tap Create sub user. Enter the user name and password, and then tap Add Immediately to add it as a sub-account.
-
Page 85: J2534 Programming
LAUNCH X-431 PRO5 User Manual 10 J2534 Programming This chapter introduces how the VCI works with the PC installed with the OEM diagnostic software to perform the J2534 reprogramming. 10.1 Working principle Below illustrates the relationship between the various components required for…
-
Page 86
LAUNCH X-431 PRO5 User Manual 1. Connect B-shaped plug of the USB cable to the B-shaped USB port of the VCI device, and the other end to the USB port of the PC. 2. Use the OBD II extension cable to connect the VCI device to the vehicle’s OBD II diagnostic socket. -
Page 87: Install The Software & Driver
LAUNCH X-431 PRO5 User Manual OBD II diagnostic socket. 10.3 Install the software & driver Note: Before installing the software, please make sure that the PC user is authorized with administrator rights and the SmartLink device has been properly connected to the PC.
-
Page 88: Faq
4. If all checks are normal, send vehicle year, make, model and VIN number to us using Feedback feature. 4. How to download the X-431 PRO5 App after resetting the tablet? Note: Before registration, please make sure the network is properly connected.
-
Page 89
LAUNCH X-431 PRO5 User Manual and tap the Download icon to start downloading. 4. After the download is complete, follow the on-screen instructions to install it. 5. After installation, use the existing username and password to login and go to update center to download the diagnostic software. -
Page 90
Warranty This warranty is expressly limited to persons who purchase LAUNCH products for purposes of resale or use in the ordinary course of the buyer’s business. LAUNCH electronic product is warranted against defects in materials and workmanship for one year (12 months) from date of delivery to the user. This warranty does not cover any part that has been abused, altered, used for a purpose other than for which it was intended, or used in a manner inconsistent with instructions regarding use.
запустить Руководство по установке устройства X431 PRO5 VCI
ВАЖНО: Внимательно прочтите инструкцию и правильно используйте устройство перед эксплуатацией. Невыполнение этого требования может привести к повреждению и/или травме, что приведет к аннулированию гарантии на продукт.
Зарядка и включение
- Используйте прилагаемый адаптер питания для зарядки планшета.
- После завершения зарядки нажмите кнопку ПИТАНИЕ, чтобы включить планшет. Система начнет инициализацию, а затем откроет главный экран.
Внимание! Пожалуйста, используйте прилагаемый адаптер питания для зарядки инструмента. Мы не несем никакой ответственности за любой ущерб или убытки, возникшие в результате использования адаптеров питания, отличных от поставляемого.
Настройка языка
Инструмент поддерживает несколько системных языков. Чтобы изменить язык инструмента, выполните следующие действия:
- На главном экране нажмите «Настройки» -> «Система» -> «Язык и ввод» -> «Языки».
- Нажмите «Добавить язык», а затем выберите нужный язык из списка.
- Нажмите и удерживайте нужный язык, перетащите его в верхнюю часть экрана, а затем отпустите, система переключится на целевой язык.
Настройка беспроводной локальной сети
Когда вы подключитесь к сети, вы можете зарегистрировать свой инструмент, обновить диагностическое программное обеспечение и APK, просматривать Интернет и отправлять электронную почту в своей сети. Чтобы продолжить, выполните следующие действия:
- На главном экране нажмите «Настройки» -> «Сеть и Интернет» -> «WLAN».
- Планшет начнет поиск всех доступных беспроводных сетей.
Выберите нужное соединение Wi-Fi из списка (для защищенных сетей может потребоваться пароль). - Когда появляется Connected, это означает, что он правильно подключен к сети.
Зарегистрироваться и обновить
Выполните следующие действия, чтобы продолжить регистрацию и обновление:
Регистрация
- Запуск приложения: коснитесь значка приложения на главном экране, а затем коснитесь «Войти» в правом верхнем углу экрана. Появится следующий экран.

- Создайте учетную запись приложения: Нажмите «Новая регистрация», введите информацию (пункты со * должны быть заполнены), а затем нажмите «Зарегистрироваться».

- Активировать VCI: Введите 12-значный серийный номер продукта и 8-значный код активации (можно получить из конверта с паролем), а затем нажмите «Активировать».

- Завершить регистрацию: Нажмите «Да», чтобы перейти в центр обновлений и обновить все доступное программное обеспечение. Нажмите «Нет», чтобы игнорировать его. В этом случае следуйте разделу 4.2 «Обновление», чтобы проверить наличие обновлений.


После успешного завершения регистрации беспроводная связь между планшетом и устройством VCI устанавливается автоматически, и пользователю не нужно настраивать ее заново.
Обновление ПО
Все программное обеспечение периодически обновляется. Рекомендуется регулярно проверять наличие обновлений и устанавливать последнюю версию программного обеспечения для лучшего обслуживания, функций и опыта.
Нажмите [Обновление ПО] в меню «Работа».
Примечание: Во время обновления убедитесь, что соединение Wi-Fi надежное и стабильное.
Подготовка и подключение автомобиля
Приготовление
- Зажигание включено.
- Объем аккумуляторной батареи автомобиляtagе 11-14В или 18-30В.
- Дроссель находится в закрытом положении.
- Найдите автомобильный порт DLC (разъем канала передачи данных).
Возможное расположение DLC:

Подключение автомобиля (только для пассажирского автомобиля)
- OBD II подключение автомобиля
Используйте прилагаемый диагностический кабель для подключения VCI к порту DLC автомобиля. - Подключение автомобиля без OBD II
Для автомобилей без OBD II выполните следующие действия:

Примечание: Если контакт DLC поврежден или имеет недостаточное питание, вы можете получить питание одним из следующих способов:
A. Через батарею Clamps Кабель (дополнительно):
B. Кабель прикуривателя (дополнительно):
Если вы решите выполнять диагностику автомобиля с помощью кабеля для передачи данных, подключите один конец кабеля для передачи данных к VCI, а другой конец — к USB-порту планшета.
Подключение к автомобилю (только для коммерческих автомобилей/автомобилей с дизельным и газовым двигателем)
- OBD II подключение автомобиля
Используйте диагностический кабель для подключения VCI к порту DLC автомобиля. - Подключение автомобиля без OBD II
Для коммерческого транспорта, выберите любой из следующих способов подключения, чтобы продолжить:

Примечание: Для легковых автомобилей замените «не 16-контактный разъем» на «адаптер OBD I» + «не 16-контактный разъем (для легкового автомобиля)».
Должны применяться и другие соединения.
Начать диагностику
Доступны три метода диагностики:
- Интеллектуальная диагностика:
Система автоматически направит вас прямо к исправлению и поможет избавиться от догадок без пошагового ручного выбора в меню. - Локальная диагностика:
Вам необходимо вручную выбрать команду из меню. - Удаленная диагностика:
Это помогает ремонтным мастерским или механикам удаленно диагностировать транспортное средство и запускать мгновенные сообщения, что позволяет повысить эффективность и ускорить ремонт.
Для новых пользователей Локальная диагностика рекомендуется следующим образом:
Резервное копирование системных данных
На этом инструменте доступны два USB-порта: USB Type A и USB Type C. Первый зарезервирован для внешнего USB-накопителя, а второй используется с ПК при выполнении резервного копирования системных данных. Для этой операции настоятельно рекомендуется использовать интерфейс USB Type C.
A. При обмене данными с внешним USB-накопителем
- Подключите USB-накопитель к интерфейсу USB Type A.
- Проведите пальцем по экрану сверху, чтобы выбрать USB-накопитель.
- Теперь вы можете обмениваться данными с USB-накопителем.
B. При обмене данными с ПК
- На главном экране нажмите «Настройки» -> «Управление USB». Сдвиньте переключатель USB в положение OFF, чтобы включить интерфейс USB Type C.
Примечание: По умолчанию переключатель USB включен. При этом интерфейс USB Type C предназначен только для зарядки и отключен для обмена данными. - Подключите конец типа C прилагаемого кабеля для передачи данных к порту типа C инструмента, а другой конец — к USB-порту ПК.
- После того, как ПК успешно идентифицирует инструмент, вы можете выполнить резервное копирование данных.
Примечание: Изображения, представленные здесь, предназначены только для справки. Из-за постоянных улучшений фактический продукт может немного отличаться от продукта, описанного здесь, и это краткое руководство может быть изменено без предварительного уведомления. Для получения более подробных сведений об операциях обратитесь к Руководству пользователя в приложении.
![]() ЕСЛИ У ВАС ЕСТЬ ВОПРОСЫ ИЛИ КОММЕНТАРИИ, СВЯЗАТЬСЯ С НАМИ.
ЕСЛИ У ВАС ЕСТЬ ВОПРОСЫ ИЛИ КОММЕНТАРИИ, СВЯЗАТЬСЯ С НАМИ.
Тел; +86-755-8455-7891
Эл. почта: www.x431.com
Документы / Ресурсы
Рекомендации

X431
Привет друзья! В этой статье хочу показать как и где выбирать нужные параметры при диагностике автомобиля через мультимарочный сканер Launch X431Pro, и вообще рассказать что и где находится.
Сама программа диагностики:
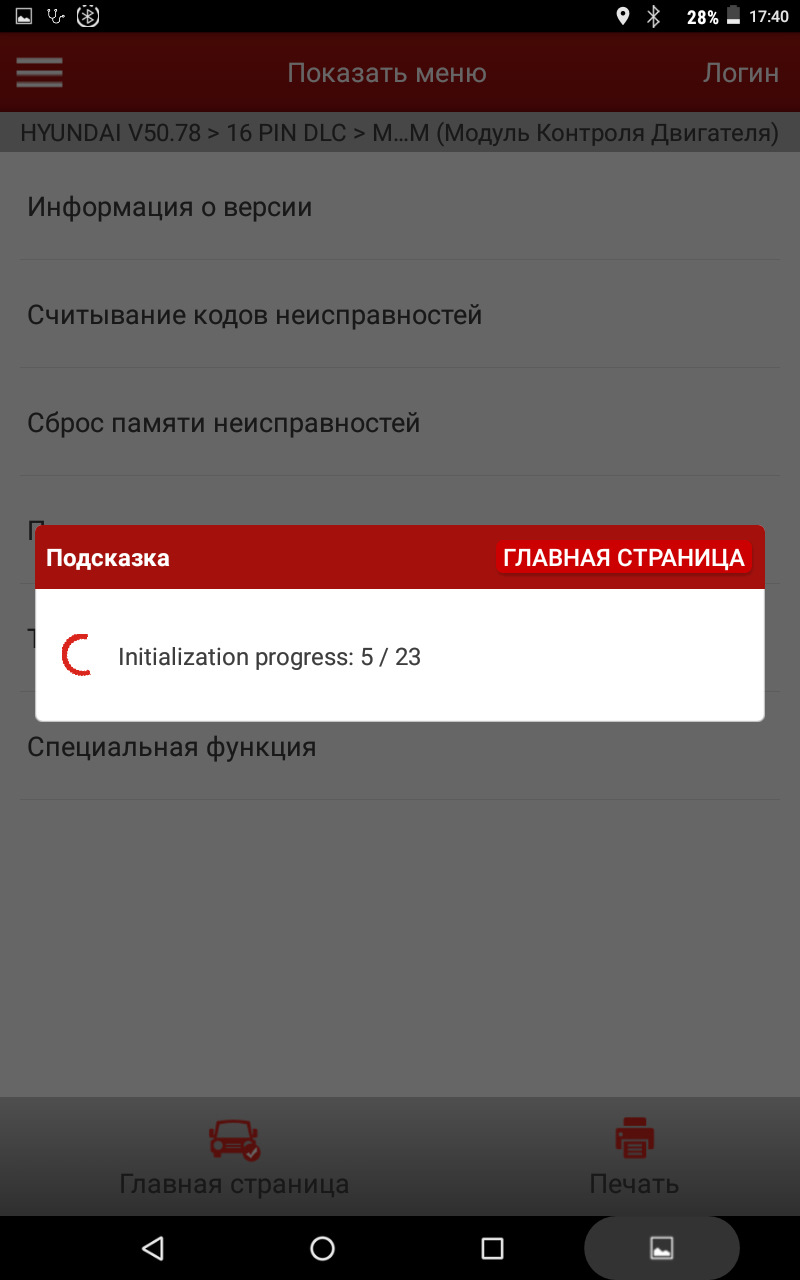
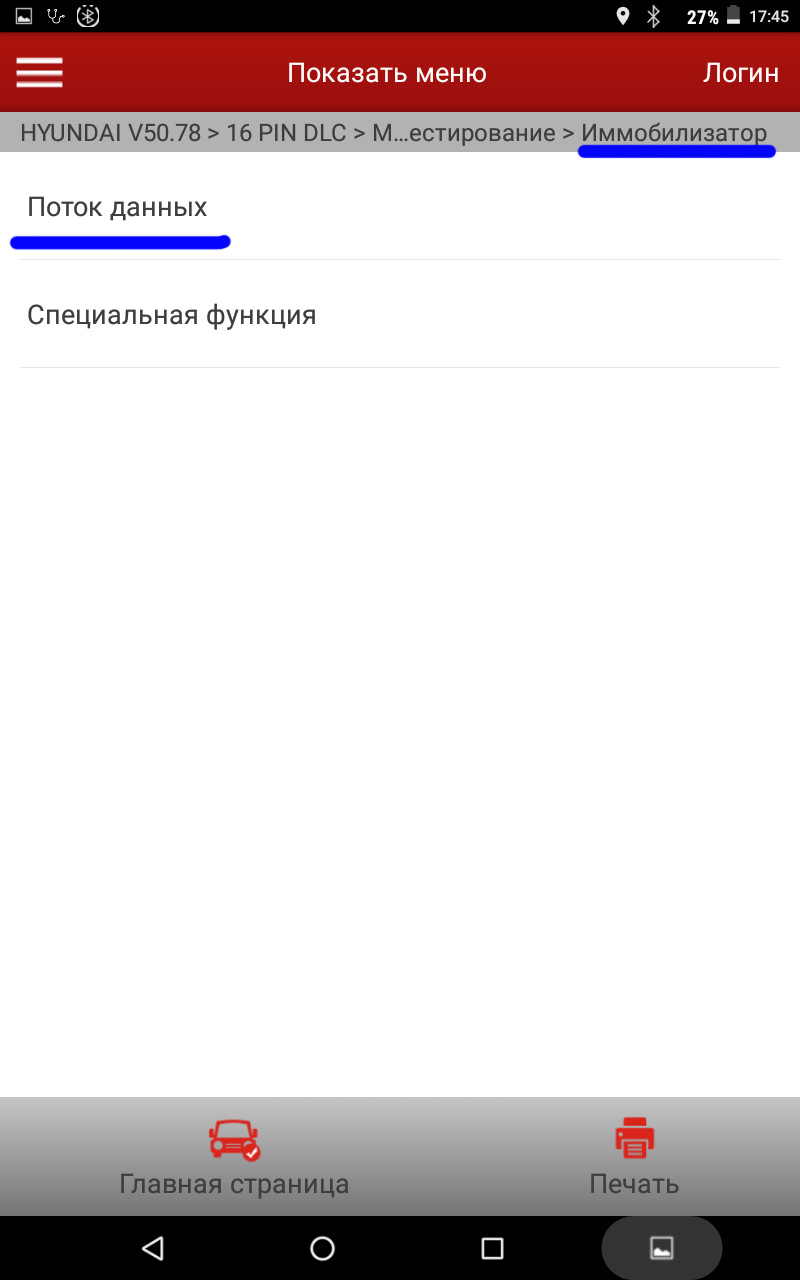
Зайдя в нее попадаем в меню:
У меня выбрано дополнительные функции, но о них позже, если посмотреть вверху изображения есть выбор рынка производителя, заходим в соответствующий раздел и выбираем марку автомобиля. Показываю на своем автомобиле не было под рукой другого, и выбираю я Hyundai (вы свой автомобиль).
Вверху видим версию вот они и обновляются, внизу выбираем подтверждение:

Далее выбираем распиновку, разъем OBD2 как правило всегда 16pin и опять подтверждаем:
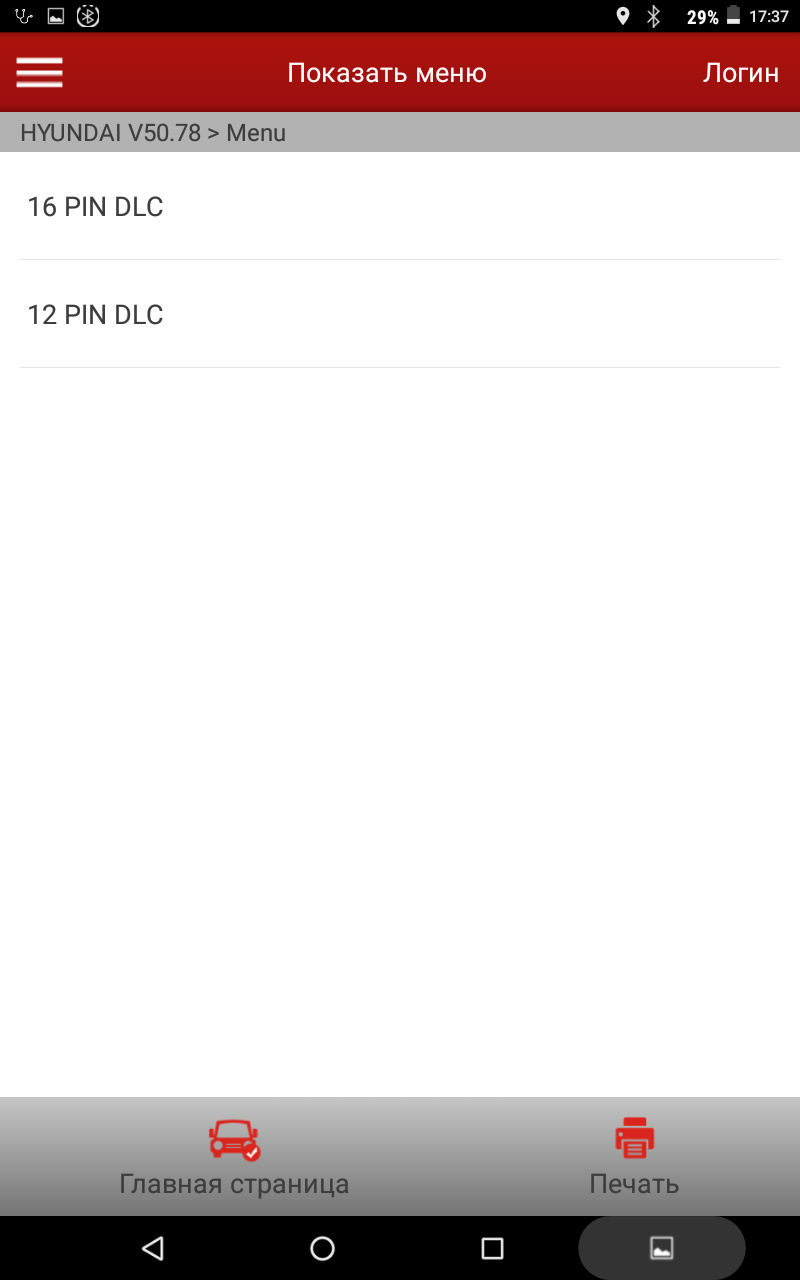
Считались данные по автомобилю выбираем OK:

Далее нам дает выбор действий:
a) Быстрое тестирование
b) Выбор системы (для того что-бы не терять время на полную диагностику если например нужен только двигатель или что то другое)
c) Специальные функции (этот раздел так же есть для каждого узла отдельно, о нем походу рассказа)

Далее видим опять возможность выбора:
a) Выбор в ручную (какой либо из узлов автомобиля)
b) Автоматический поиск (сразу начинается сканирование авто и всех установленных узлов)
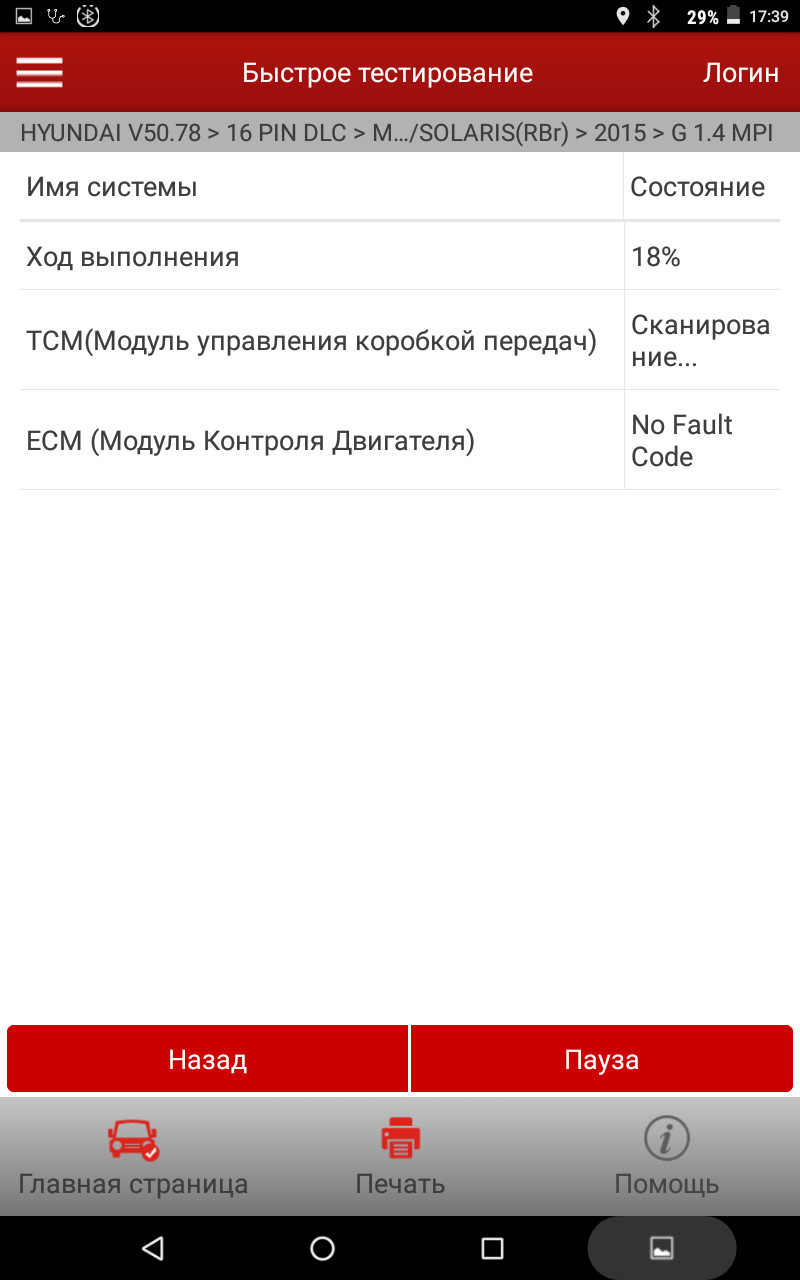
У меня ошибок нету и скрин к сожалению не сделал, ну ладно это не столь важно. Ну вот и подобрались к возможностям отдельного выбора необходимых нам параметров, после того как сканирование завершено выбираем нужный вам раздел ДВС, трансмиссия, электроника, кондиционер и т.д., выбирайте что интересно вам, я выбрал двигатель и при переходе в раздел видим опять меню:

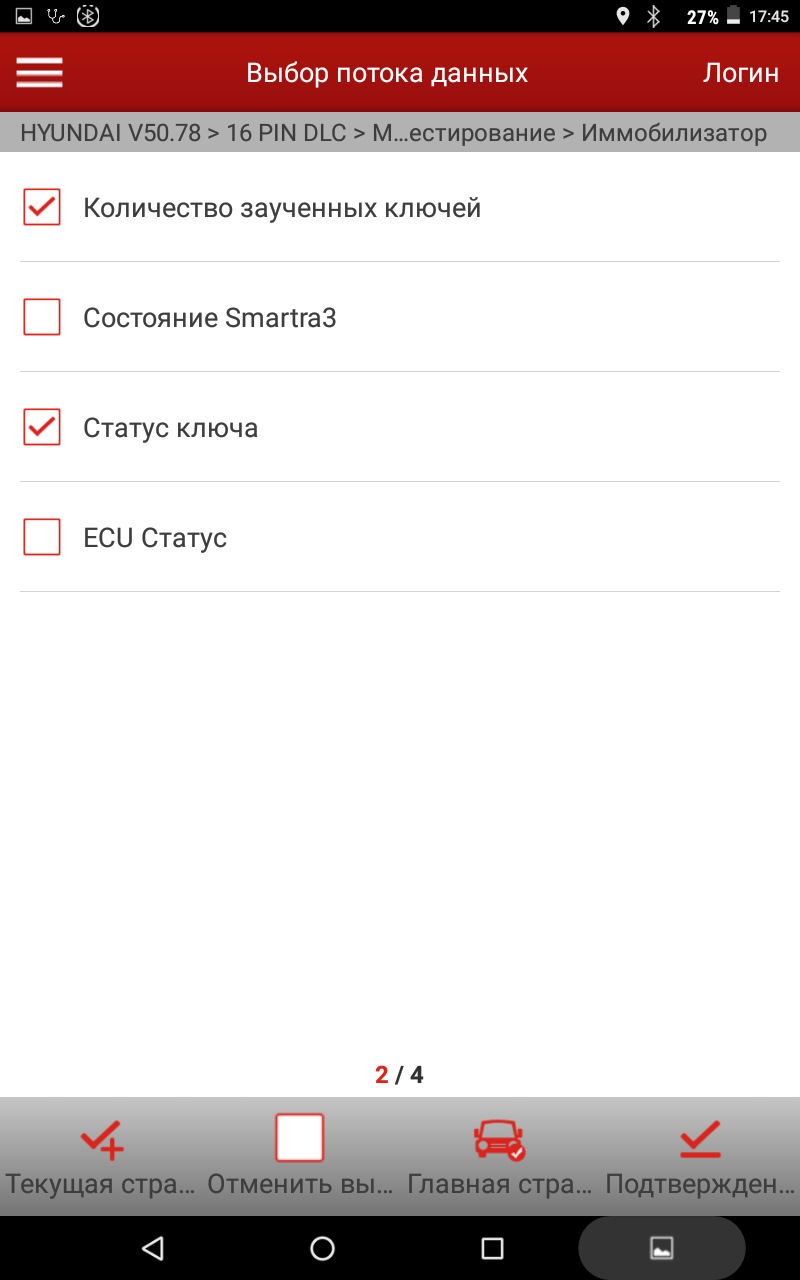
Ну первые три варианта они понятны их разбирать не будем сразу пойдем дальше и выбираем «поток данных», данный раздел есть абсолютно для всех узлов автомобиля будь это двигатель, трансмиссия или панель приборов вообщем для всех, вот именно здесь то и находятся все самые важные параметры и данные которые можно увидеть и сравнить с нормами для каждого параметра, я не стал выбирать все потому что это очень долго для примера и так будет понятно. Выбрали, пошло считывание возможных параметров которые автомобиль позволяет проверить:
После считывания выбираем интересные нам параметры:

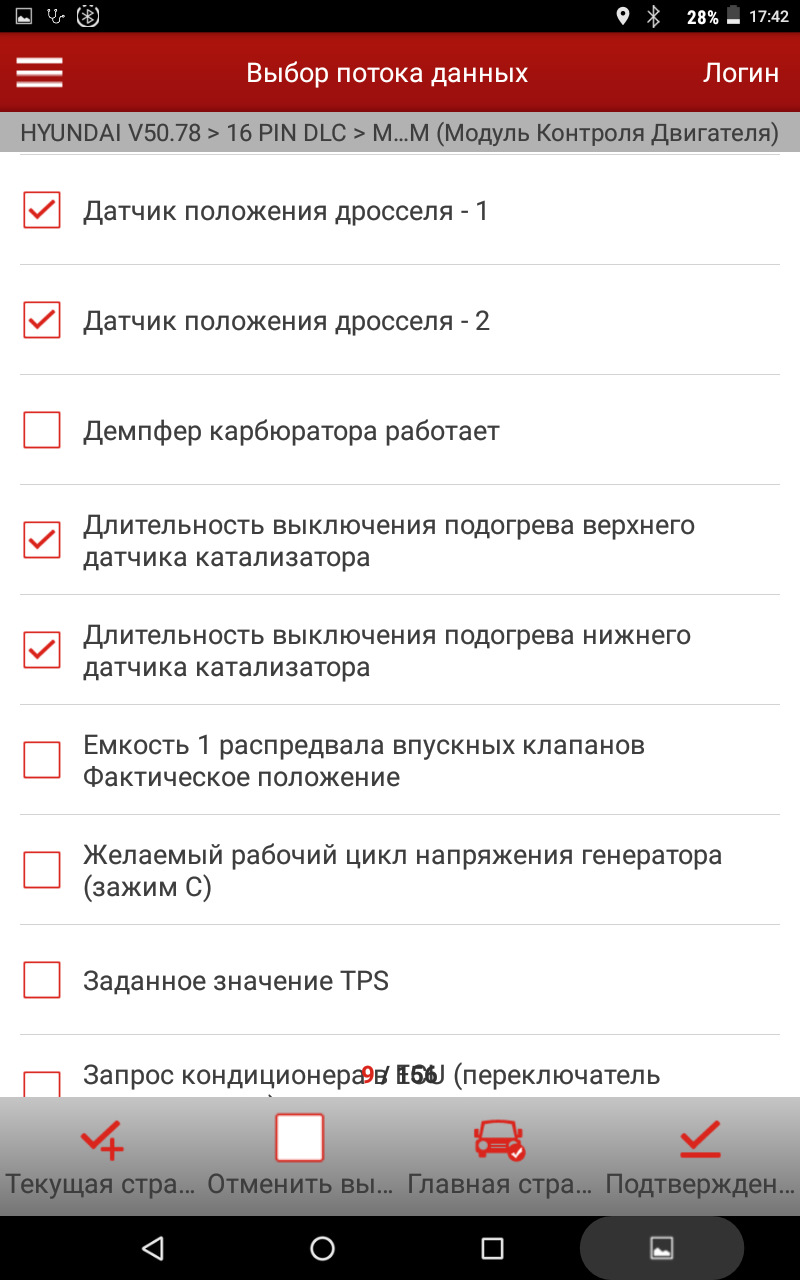


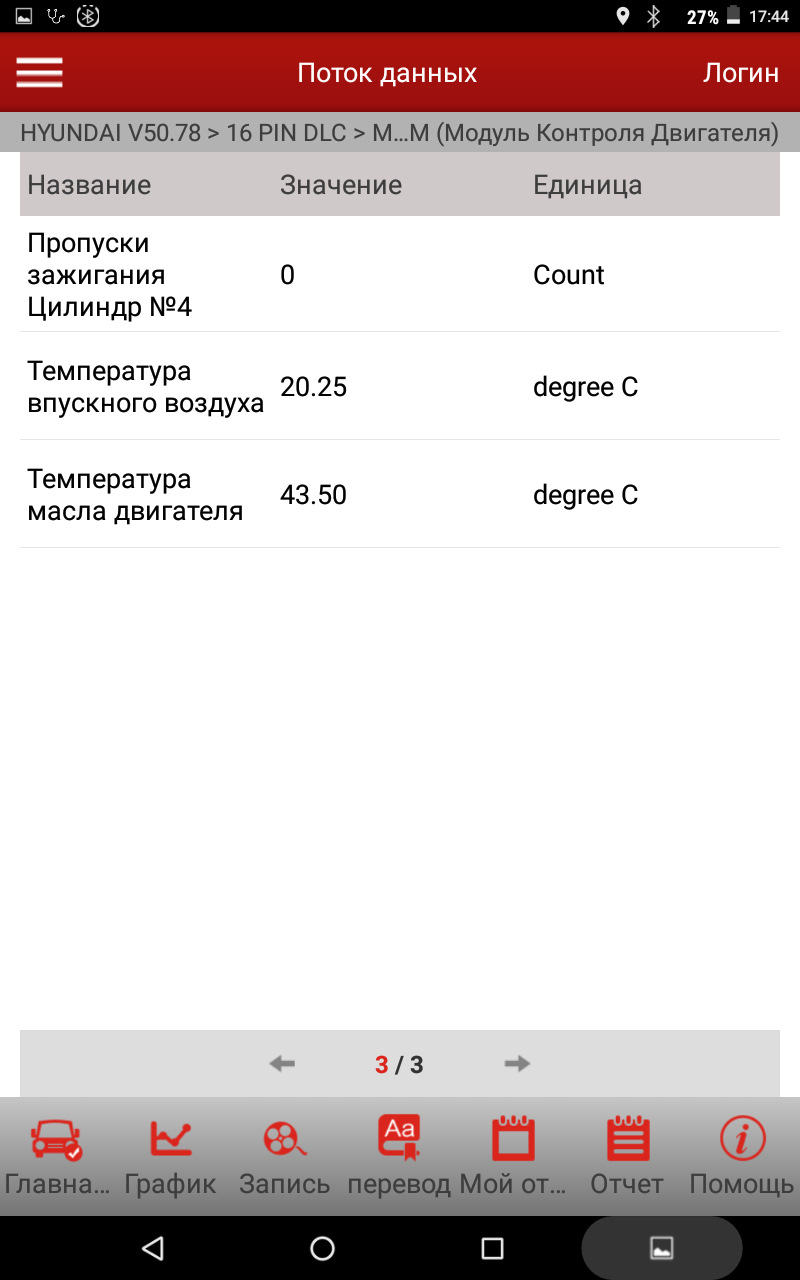
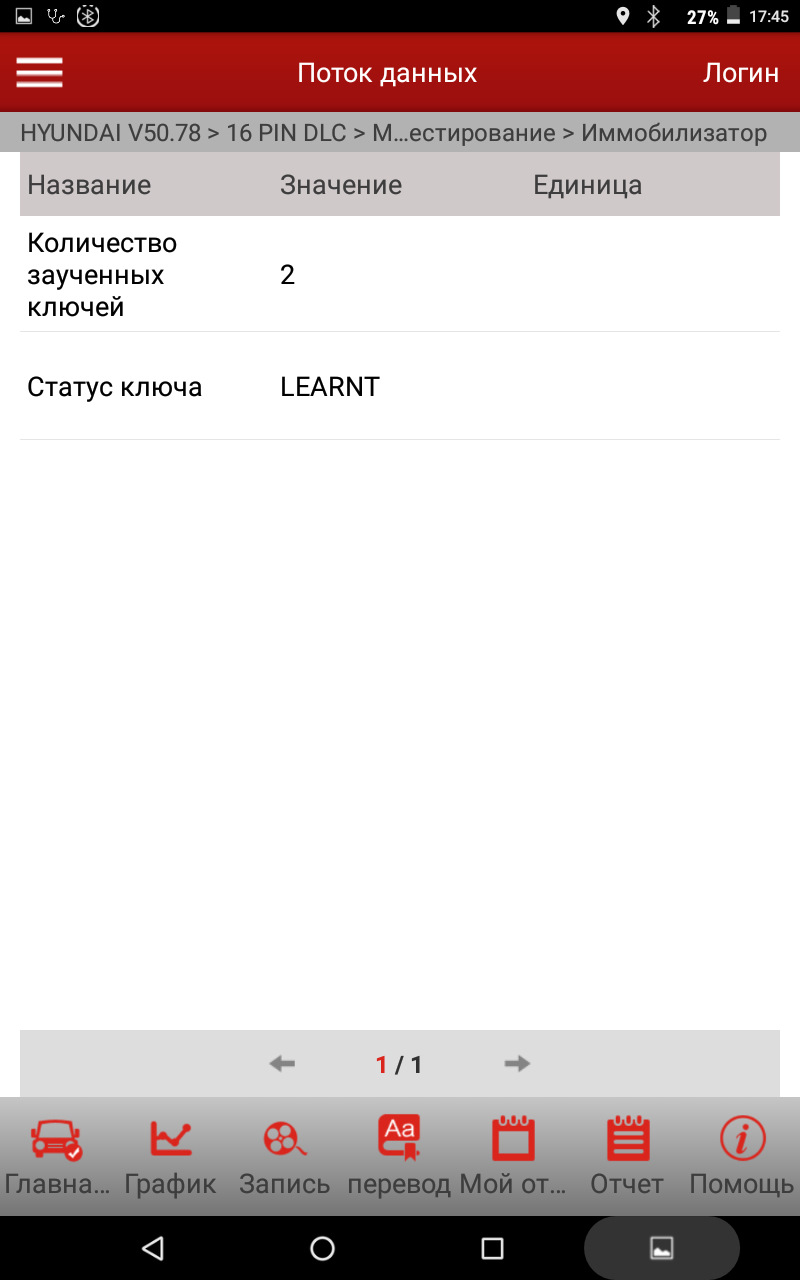
И нажимаем подтверждение, получаем данные по выбранным параметрам, так же можем внизу увидеть возможность выбора отображения в виде графиков, при необходимости сравниваем данные показатели с нормами (при неисправности):


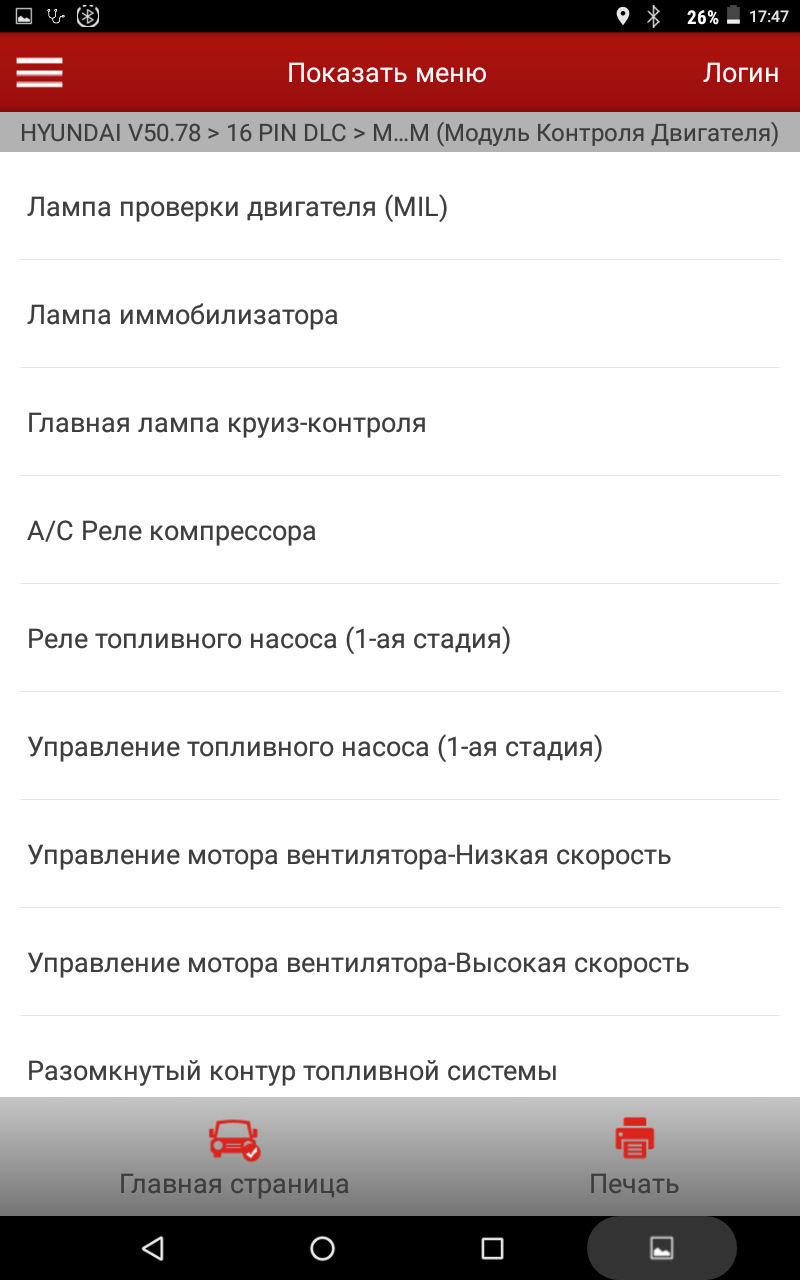
С этим разделом разобрались, теперь переходим к пункту «тестирование привода», здесь смысл простой, выбираем нужный нам параметр и он приводится в действие для проверки работоспособности, простой пример вентилятор не работает ищем выбираем и нажимаем OK:

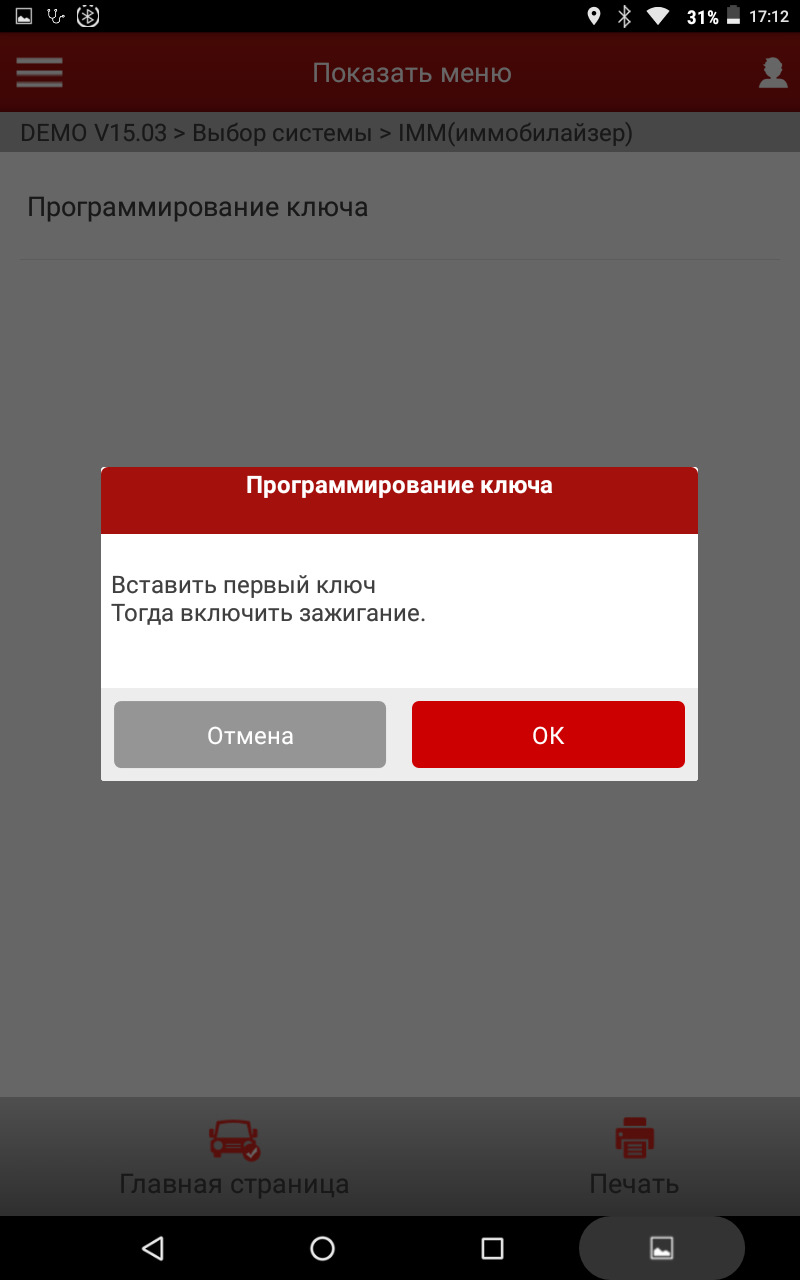
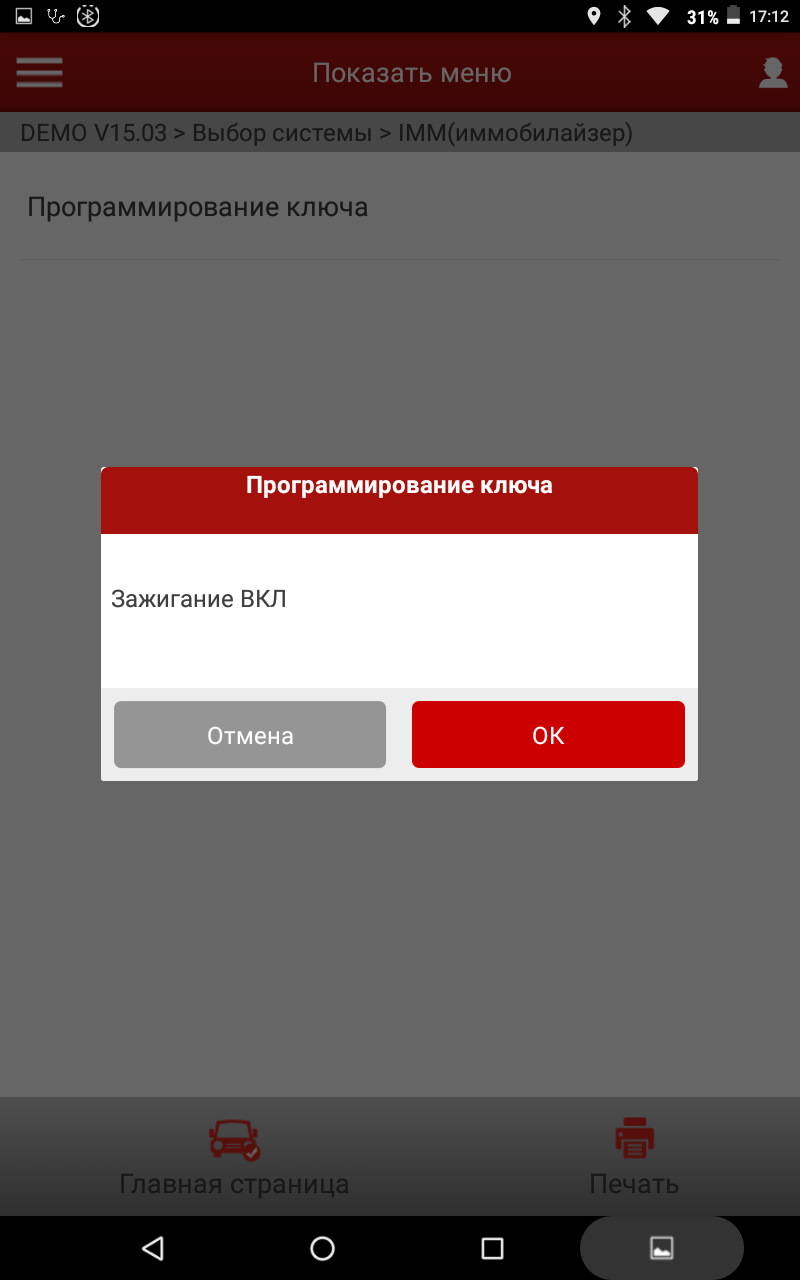
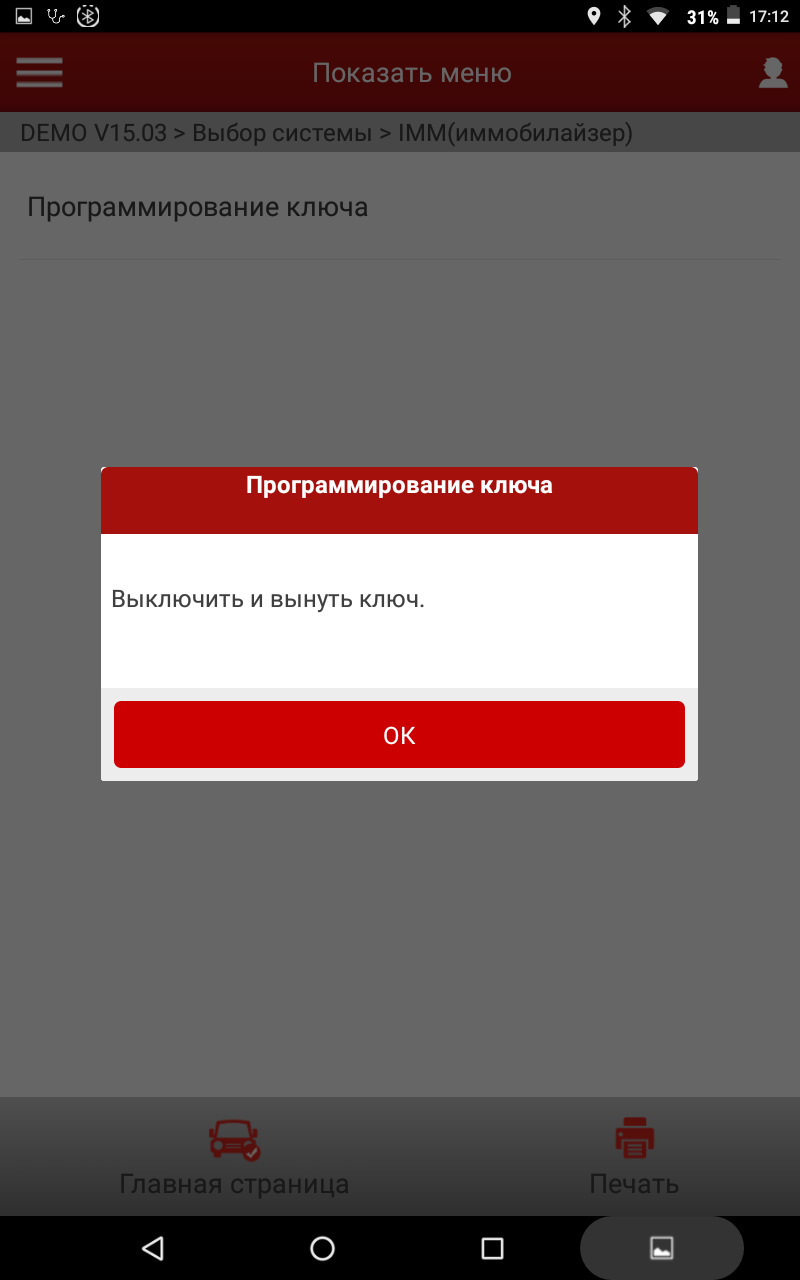
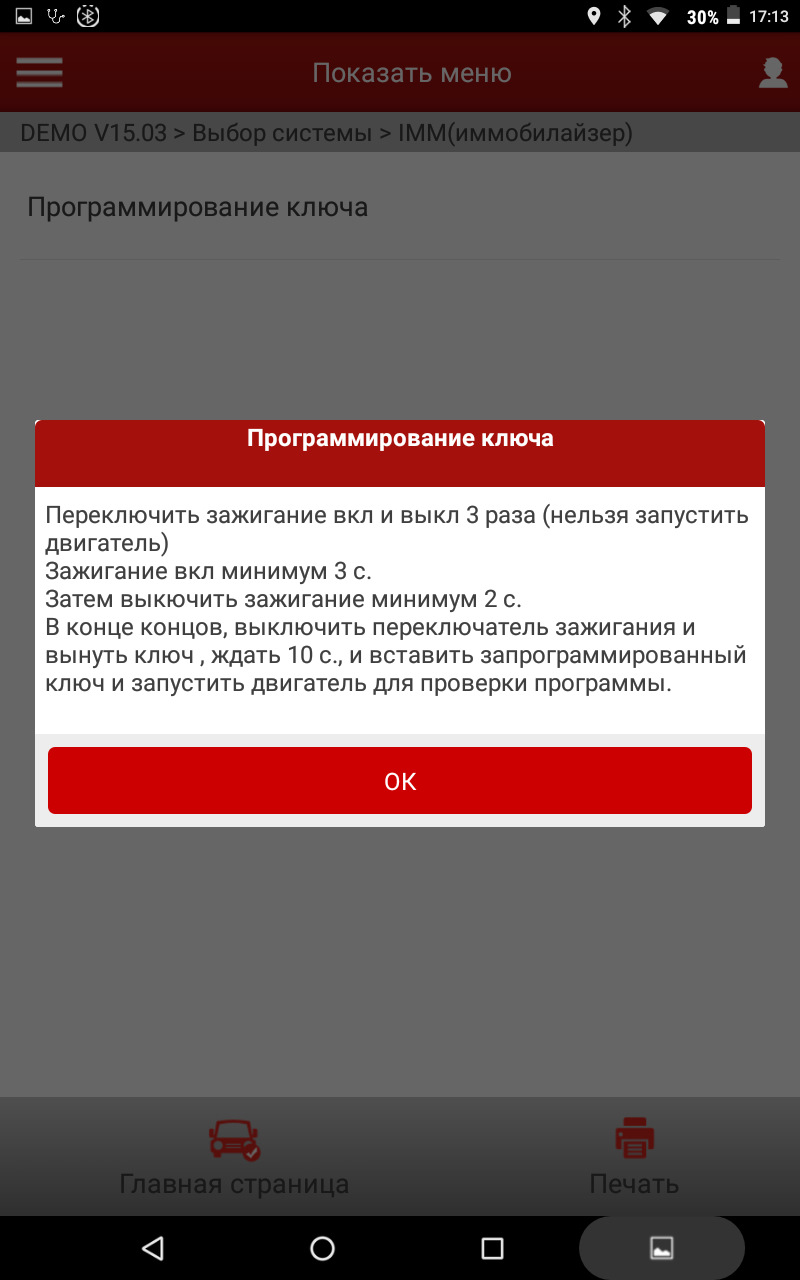
Таким же путем можно посмотреть информацию по ключам и как утверждает производитель при необходимости обучить (прописать) ключ зажигания, лично я этого не делал никогда поэтому что то утверждать не могу.Заходим в нужный раздел поток данных и видим инфу:
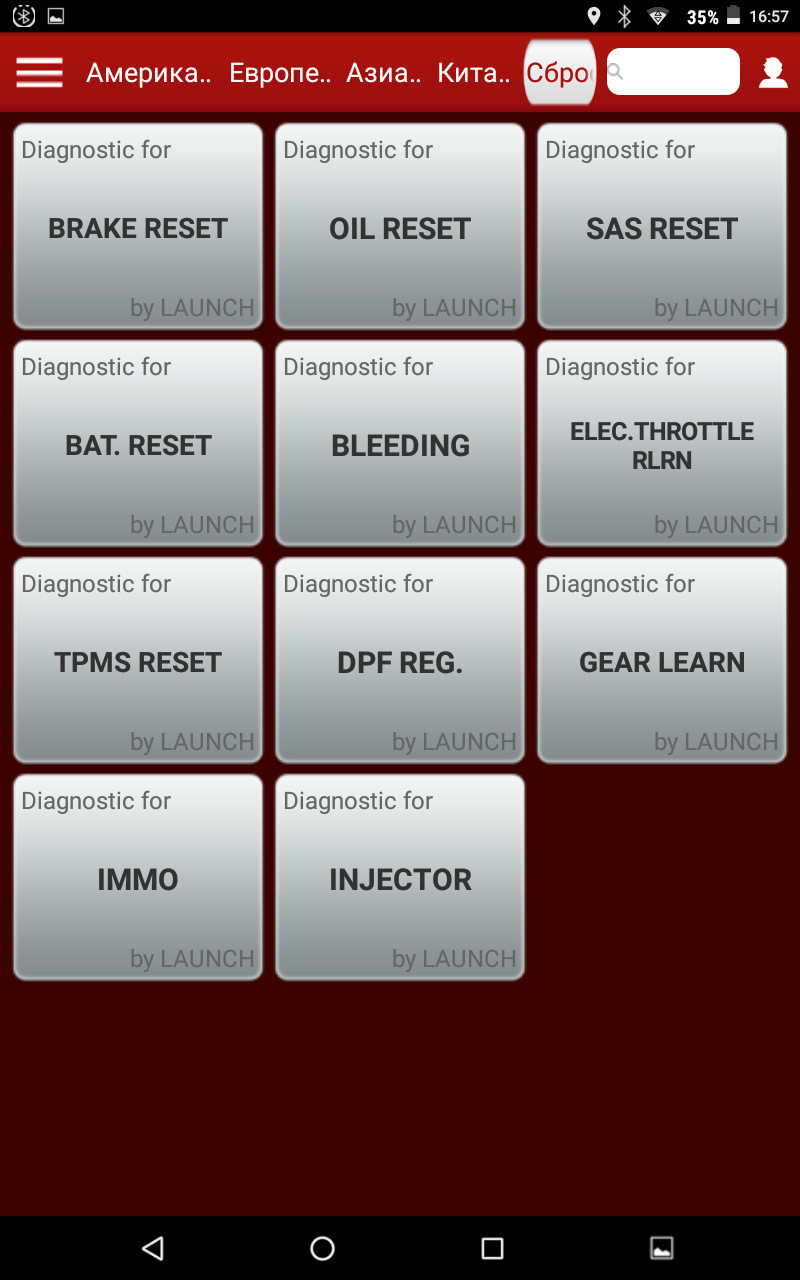
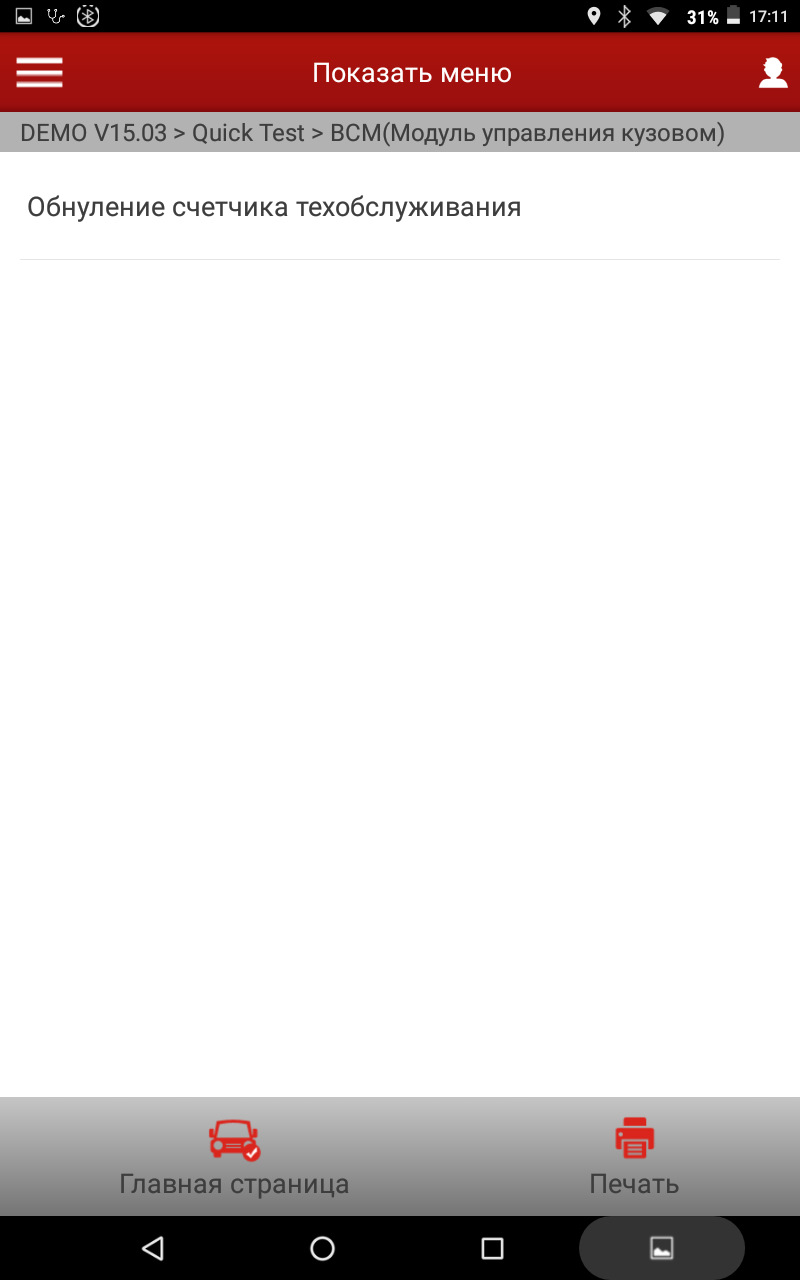
Следующий параметр «специальные функции», как я уже писал в начале статьи выбор этого раздела есть как в самом начале подключения так и в каждом выбранном узле автомобиля, вот с этим разделом не так все однозначно как с предыдущими, например если у меня солярис скажем так пустоватый то в то время когда я подключался к MB C180 w205 там просто сумасшедший список функций, а при подключении к VW Jetta в среднем исполнении больше функций чем у меня но в то же время меньше чем у «заряженных телег», простым языком чем «жирнее» исполнение у автомобиля тем больше набор функций но я настоятельно рекомендую очень внимательно отнестись к каким либо действиям, прежде чем что то исполнить поинтересуйтесь и найдите информацию потому что последствия могут быть плачевными… Вот что можно сделать в моем автомобиле.


По поводу отдельного раздела который называется «Сброс Параметров»

Здесь такие возможности как: сброс сервисных интервалов, разведение колодок, обучение ключей и т.д. по ним есть переводы не буду мусолить одно и то же, лично я им не пользуюсь, я предпочитаю делать это через специальные функции какого либо узла, например скидывал сервис обслуживания на volvo через спец функции, адаптацию ДЗ так же через спец функции в соответствующем разделе, и так далее, для меня удобнее и надежнее делать так. Если нужно произвести адаптацию АКПП заходим в узел трансмиссии-спец функция нажимаем либо сброс адаптаций либо обучение везде по разному, в Civic наоборот нет такого понятия как сброс или обучение там уже не помню как точно называется, по латинице написано не помню., но нужно учитывать тот факт что не все АКПП можно Адаптировать некоторые АКПП например на camry 3.5 самообучаемая, на VW Polo так же меня не пропускал не Launch ни VCDS, по каждому аппарату свои нюансы…
В итоге что получаем, если нужно посмотреть параметры в реальном времени или другие показатели значит заходим в нужный нам узел-поток данных-ищем что надо, если нужно привести в привод какой либо узел для проверки работоспособности заходим в нужный узел-тестирование привода-ищем что надо, если нужно провести адаптацию или развести элетро ручник либо адаптировать ДЗ и т.д., заходим в нужный узел-спец функция-выбираем что нужно… Такая последовательность по любому всегда и везде одинаковая, отличие только в возможностях самого исполнения автомобиля.
Еще раз повторюсь будьте внимательны и рассудительны при выполнении каких либо действий особенно пиратским ПО, у лицензии есть такой плюс что при выполнении какой либо спец функции он вам предоставляет помощь и подсказки что и как делать, не знаю возможно и пиратки дают я с ними не работаю…
Вот пример в демо режиме:

Все действия выполняете на свой страх и риск! Спасибо за внимание!
Launch X-431 PRO V5.0 SE (2022) — бюджетная версия X431 PRO 5.0 без комплекта адаптеров OBD-I.
-
Операционная система Android 10.0, 4 ГБ памяти и 64 ГБ памяти обеспечивают более быструю диагностику.
-
Новый дизайн VCI поддерживает новые протоколы связи, например, CAN, CAN FD, DoIP (необходим дополнительный кабель DoIP).
-
Беспроводная связь обеспечивает быстрое и простое подключение для диагностики, а кабельное соединение обеспечивает быстрое и стабильное соединение для сложных функций, например, кодирования.
-
Полная системная диагностика уровня OE для автомобилей США, Европы и Азии 1996 года выпуска и новее (для автомобилей до 2000 года необходим опциональный комплект кабелей).
-
Полная диагностическая функциональность включает комплексную диагностику OBD II, чтение/удаление кодов неисправности, двунаправленное управление, удаленную диагностику, потоковую передачу данных в реальном времени, кодирование и т. д.
-
Дополнительная возможность — модуль ADAS для калибровки систем LDW, RCW, AVM, NV, BSD и ACC с помощью калибровочного стенда X-431 ADAS.
-
Единый информационный центр содержит информацию о методах ремонта автомобиля и данные о последних обновлениях.
- Просмотр проведенных диагностических сессий.
Возможности
-
Автоопределение диагностируемого автомобиля по VIN номеру.
-
Идентификация блоков управления.
-
Чтение и удаление ошибок самодиагностики.
-
Отображение текущих параметров.
-
Активация и проверка исполнительных механизмов.
-
Адаптации исполнительных механизмов.
-
Инициализации датчиков.
-
Кодирование блоков управления.
-
Сервисные функции.
-
Настройка блоков комфорта.
Поддерживаемые марки авто:
Европа: EU Ford, Renault, Bugatti, Opel, Saab, Land Rover, Mercedes-Benz/Maybach, Smart, Porsche, Volvo, VW, Audi, Seat, Skoda, BMW/MINI/ Rolls-Royce, Citroen, Fiat, Peugeot, Aston Martin, Ferrari, Transporter V-Class, IKCO, Martha, Rover, Iveco.
Япония: Honda, Suzuki, Isuzu, Acura, Nissan, Infiniti, Toyota, Lexus, Mitsubishi, Subaru, Daihatsu Mazda.
Корея: Hyundai, Kia, SsangYong, DAEWOO.
Китай: Chery, Changan, ChangCheng, Changhe, Gonow, HaFei, Jac, Jiangling, Lifan, Brilliance, Foton, MG/SAIC, SGMW, Tianjin, Beijin, Kowloon, Luxgen, Saic, Xiamen, Xiaokang, ZhongShun, ZhongXing.
США: Chrysler/ Dodge/Jeep, GM/Buick/Cadillac/Chevrolet, Ford/Lincoln.
Россия: ВАЗ, ГАЗ, ИЖ, ПАЗ, СеАЗ, УАЗ, ЗАЗ.
Австралия: Ford, Holden, Horton.
Бразилия: GM, Fiat.Индия: Mahindra, Tata, Perodua, Proton, Maruti.
Иран: Saipa.
а также любые автомобили, поддерживающие стандарт OBDII/EOBD (шины данных SAE J1850 VPW, SAE J1850 PWM, ISO 9141-2, ISO 14230, ISO-15765-4 CAN, DoIP (ISO 13400)).
Интерактивная карта покрытия по сканеру
Удобная фильтрация по: региону, серии, модели.
Внутри каждой марки поддерживается поиск по г.в. и модели а/м, системам и функциям.
Поддерживаемые сервисные функции:
-
Oil reset (сброса индикации сервисных интервалов замены масла).
-
Brake reset (обслуживание тормозной системы).
-
Battery reset (обслуживание системы АКБ / регистрация замены АКБ).
-
Sas reset (обучение датчика угла поворота руля).
-
DPF regeration (регенерация сажевого фильтра).
-
IMMO (сервисные функции по работе с иммобилайзером).
-
TPMS reset (работа с системой контроля давления в шинах).
-
Injector encoding (прописка кодов форсунок в блок управления).
-
Sunroof initialization (инициализация люка).
-
Head lamp adaptive (коррекция головного освещения).
-
Suspension level calibration (адаптация подвески).
-
EGR reset (рециркуляция выхлопных газов) и др.
Особенности
- Все приборы имеют бесплатную двухлетнюю подписку.
- Связь между планшетом и диагностическим адаптером выполняться по Bluetooth и USB кабелю.
- Прибор обновляется по WiFi непосредственно из приложения через интернет с сервера производителя.
- Интернет соединение необходимо только для загрузки обновлений и выполнения некоторых онлайн процедур, например VIN scan, SGW, онлайн кодирование и т.п.
Планшет
| Параметры Модель | PRO | PRO в.2016 | PRO в.2017 | PRO V4.0 | PRO V5.0 |
| Поколение PRO | I | II | III | IV | V |
|---|---|---|---|---|---|
| Внешний вид |

|

|
|

|
|
| Операционная система | Android 4.4.2 | Android 5.0 | Android 7.1 | Android 7.0 | Android 10.0 |
| Процессор, ГГц / ядер | 1.0 / 2 | 1.3 / 4 | 1.4 / 4 | 1.3 / 4 | 2 / 4 |
| Диагональ экрана дюймов/пикс. | 7 / 1024 х 600 | 8 / 1280 х 800 | 8 / 1280 х 800 | 8 / 1280 х 800 | 8 / 1280 х 800 |
| Оперативная память, Гб | 0.5 | 1.0 | 2.0 | 2.0 | 4.0 |
| Встроенная память, Гб | 4 | 16 | 16 | 32 | 64 |
| Предустановленная microSD, Гб | 8 | — | — | — | — |
| Расширение памяти, Гб | до 32, microSD | до 32, microSD | до 128, microSDXC | до 32, microSD | — |
| Сенсорный экран | емкостной | емкостной | емкостной | емкостной | емкостной |
| Камера передняя/задняя, Мп | 0.3 / 3.0 | 2.0 / 5.0 | — / 5.0 | — / 5.0 | — / 8.0 |
| Интерфейсы | Wi-Fi, BT, USB | Wi-Fi, BT, USB | Wi-Fi, BT, USB | Wi-Fi, BT, USB | Wi-Fi, BT, 2хUSB |
| Батарея, мАч | 3000, Li-ion | 4200, Li-ion | 4850, Li-ion | 4680, Li-Pol | 6300, Li-Pol |
| Габариты ДхШхВ, мм | 210 х 160 х 50 | 235 х 165 х 30 | 231 х 165 х 30 | 226 x 203 x 43.5 | 234 x 166 x 39.5 |
| Вес, г | 710 | 680 | 630 | 855 | 1025 |
| APP | 3.11.014 | 5.02.020 | 7.05.004 |

- Микрофон
- Микрофон
- LCD кран
- Динамики
- Камера
- Разъем USB тип-A для проводного подключения диагностического адаптера и доп. модулей
- Разъем USB тип-C для зарядки и подключения к ПК
- Кнопка вкл/выкл питания / блокировки экрана
- Вкл/выкл — нажать&удерживать; Блокировка — короткое нажатие
Диагностический адаптер
| Параметры Модель | PRO | PRO в.2016 | PRO в.2017 | PRO V4.0 | PRO V5.0 |
| Модель адаптера | DBScar |
DBScar II (DS201) |
DBScar V (DS201) |
DBScar IV (DS301) |
DBScar VII |
| Внешний вид |

|

|

|

|

|
| Способы подключения | стандартный OBDII разъем | ||||
| Рабочее напряжение, В | 9÷15 | 9÷18 | 9÷18 | 9÷18 | 9÷18 |
| Ток покоя, мА | 25 | 25 | 25 | 25 | TBD |
| Среднее потребление, мА | 35 | 165 | 165 | 165 | TBD |
| Рабочая температура, ℃ | -20÷55 | -10÷50 | -10÷50 | -10÷50 | -10÷50 |
| Температура хранения, ℃ | -30÷70 | -30÷70 | -30÷70 | -20÷70 | -20÷70 |
| Габариты Д х Ш х В, мм | 48 х 32 х 24 | 62 х 103 х 28 | 62 x 109 x 29 | 47 х 72 х 24 | 70 x 118 x 32 |
| Вес, г | 26 | 120 | 135 | 50 | 168 |
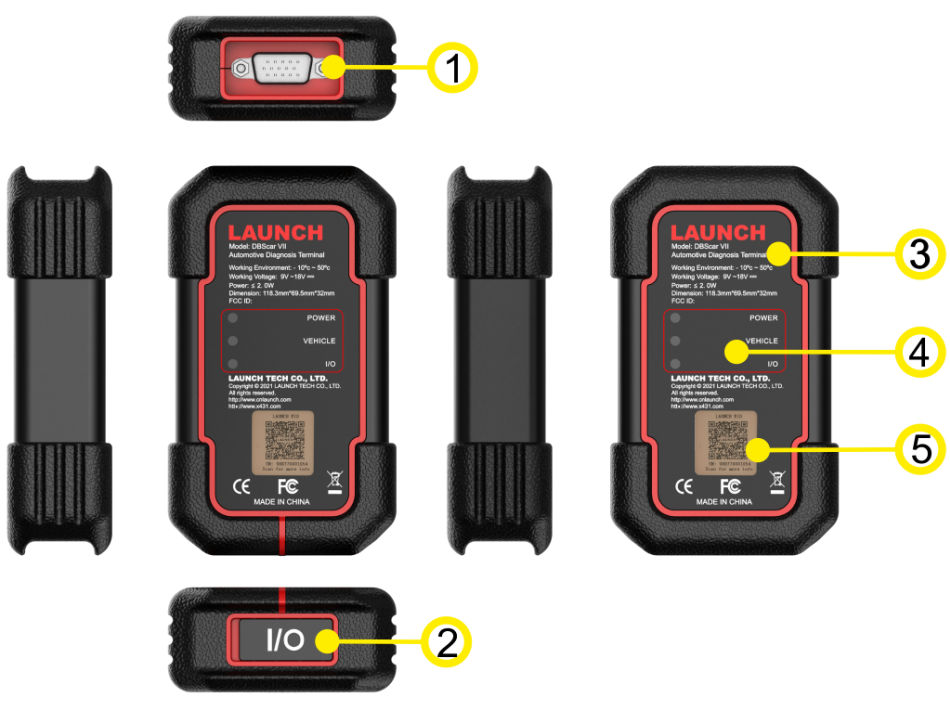
- Разъем DB15 для подключения к OBDII разъему автомобиля с помощью удлиннительного кабеля
- USB порт type-C для подключения адаптера к планшету
- Этикетка с техническими параметрами
- Световая индикация: POWER красный — питание OK;
VEHICLE зеленый мигает — обмен данными по OBD;
I/O синий/красный — Bluetooth / USB соединение - QR-код и серийный номер
Комплектация
- Сканер диагностический Launch X-431 PRO v5.0 SE (Version 2022) – 1 шт.
- Интерфейс диагностический DBScar VII – 1 шт.
- Кабель подключения адаптеров HD15F к OBDII 16-pin – 1 шт.
- Кабель-удлинитель диагностического разъема HD15F — HD15F, 600мм. – 1 шт.
- Блок питания 220V – 1 шт.
- Конверт с данными для регистрации – 1 шт.
- Блок питания 220V – 1 шт.
- Кабель Micro USB — 1 шт.
- Инструкция по быстрому запуску – 1 шт.
- Упаковочный лист – 1 шт.
Технические характеристики
- Операционная система:Android 10.0
- Дисплей:8”, 1280 х 800
- Процессор:2.0GHz, Quad-Core
- Оперативная память:4GB
- Внутренняя память:64GB
- Камера:Задняя камера, 8 Мп
- Интерфейсы:Wi-Fi (802.11 a/b/g/h), Bluetooth/USB
- Батарея:6 300 мАч
- Габариты (Д х Ш х В):234 х 166 х 39,5 мм
- Способ подключения:Стандартный OBDII разъем
- Рабочее напряжение:9-18 B
- Рабочая температура:-10 – 50 C
- Температура хранения:-20 – 70 C
Сборник обучающих видео по работе со сканерами Launch с функционалом X431 PRO3. Данный сборник покажет как правильно работать со сканерами Launch (X431 PRo3, Easydiag, iDiag, M-Diag, DBScar и др.) и выполнять диагностику, адаптацию, программирование, кодирование, обновление ПО и др.
Данный сборник подходит не только для тех, у кого уже есть данный сканер, но и для тех, кто еще планирует купить его . В обучающих видео по работе Вы получите необходимый объем знаний для профессиональной работе в области автодиагностики. Вы сразу будете погружены в практическую работу на живом примере. В одном видео рассматриваются несколько задач. Обладая знаниями из видео Вы сможете повысить качество и стоимость своих услуг в диагностики и ремонте автомобилей.
В данном курсе рассмотрена работа как для новичков, так и для профессиональных диагностов.
Список рассмотренных марок автомобилей в обучающих видео:
- Alfa Romeo
- Audi
- BMW
- GM — Chevrolet, Chrysler, Dodge
- Citroen
- Ford
- Honda
- Hyundai
- Infiniti
- Johndeere(трактор)
- Kia
- Lada
- Land Rover
- Lexus
- Mercedes
- Nissan
- Opel
- Peugeot
- Renault
- Seat
- Skoda
- Subaru
- Suzuki
- Tesla
- Toyota
- Volvo
- VW
Как получить сборник?
Объём более 8 гб. Стоимость 1000 руб.
Купить сборник обучающих видео
Специальное предложение
При покупке данного сборника предоставляется скидка на видеокурсы по автодиагностике в размере 500 руб. и составит окончательную стоимость 1000 руб. Предложение ограничено.


Данные карты защищены по международному стандарту PCI DSS через систему YooMoney. Оплачивая активацию, Вы соглашаетесь с условиями публичной оферты
Данные карты защищены по международному стандарту PCI DSS через систему YooMoney. Оплачивая активацию, Вы соглашаетесь с условиями публичной оферты