Перейти к контенту
![]()
Русские электронные инструкции по эксплуатации
Постоянно обновляемый большой каталог документации по эксплуатации и использованию современных устройств и оборудования на русском языке. Бесплатное скачивание файлов.
Поиск:
Главная
Просмотр инструкции в pdf


Инструкция по эксплуатации медиаплеера WD WD TV LIVE.
Скачать инструкцию к медиаплееру WD WD TV LIVE (5,70 МБ)

Инструкции медиаплееров WD
« Инструкция к медиаплееру Harper ABX-440
» Инструкция к медиаплееру Rombica Helios v02
Вам также может быть интересно

Инструкция к медиаплееру WD WD TV

Инструкция к фену Lumme LU-1060 Vinous Garnet
.jpg)
Инструкция к электровафельнице Clatronic HA 3494 (261683)

Инструкция к хлебопечке Midea BM-220Q3-BL

Инструкция к телевизору Smart TV LG OLED65E9PLA

Инструкция к газовой варочной панели Hi VG 6020 W

Инструкция к телевизору Smart TV Sony KD-55XG7096

Инструкция к мультиварке Moulinex Quickchef CE430832
Добавить комментарий
Имя *
Email *
Сайт
Комментарий


![]()


Сохранить моё имя, email и адрес сайта в этом браузере для последующих моих комментариев.
- Добавить инструкцию
- Заказать инструкцию
- Политика конфиденциальности
Время на прочтение
9 мин
Количество просмотров 36K
Если вы, как и я в своё время, задолбались каждый раз подключать ноут/комп к телевизору для того, чтобы насладиться фильмом на большом экране, если вы, как и я, хотите иметь простой, как тапок, девайс без лишних наворотов, который, однако, делает то, чего вы от него хотите, при помощи нескольких простых кнопок на пульте — то вы, как и я, дозрели до того, чтобы обзавестись специально отведённой для этого коробочкой, именуемой медиаплейером. Обзор одного из них, которым я пользуюсь уже пару недель, я и представляю вашему вниманию.

Преамбула
Идея организовать мультимедия-центр у меня зародилась давно, и первым вариантом была именно идея собрать самому на базе Mini-ITX, но перспектива собирать комплектуху по сусекам, ковырять всё это руками, устанавливать и настраивать софт, прикручивать пульт — не радовала совершенно. Обленился я, хотелось получить готовый и компактный девайс, выполняющий то, что от него требуется. Как, к примеру, известный многим Popcorn. Но при виде Попкорна (и цены на него) что-то у меня в голове не срасталось: ну не должна такая штука столько стоить. Ну по-любому должны быть более дешёвые аналоги! И я начал копать инет, в результате чего нарыл весьма интересный девайс Mvix Ultio стоимостью от $170 и уже практически купил его — но вовремя наткнулся на видео-обзор, который заставил меня придержать коней. Интерфейс топорненький, да ещё и тормозной впридачу — не-е, это
не Рио-де-Жанейро
не то, чего я ищу. И уже практически разочаровавшись я нашёл ЕГО! Того, который сейчас стоит под телевизором и весело подмигивает светодиодом. Надо сказать, что краткий обзор более ранней модели уже был на Хабре, но данная модель отличается от предыдущей наличием сетевого интерфейса, что является весьма существенным отличием.
А вот и он!
Итак, медиаплейер WD TV Live. Представляет из себя небольшую коробочку размерами 12.5 см х 10 см х 4 см, выполнен из тёмно-серого пластика в форме параллелепипеда со слегка скруглённой передней панелью.

На оной панели находится небольшое табло с индикаторами включения и подключения USB-дисков, а также «глазком» ИК-приёмника.
На правом торце расположены лишь щели для охлаждения, они же на левом торце, там же расположен один USB-порт. Второй USB-порт располагается сзади. Там же находится HDMI-выход, оптический аудио-выход, Ethernet-порт, компонентный и композитный видеовыходы.

Ничего экстра-ординарного нет, но всё самое необходимое — присутствует. Никаких движущихся частей, охлаждение пассивное, девайс совершенно бесшумный.
Бегло взглянем на содержимое коробки: сам девайс, сетевой шнур, шнуры для композитного/компонентного выходов, инструкция, компакт-диск, пульт ДУ, батарейки к нему. Пульт маленький, кнопок едва ли пара десятков наберётся, гадать о назначении каждой из них совершенно не приходится.

Да чего разглядывать — давайте лучше включим! Подключаем к телевизору, включаем. Грузится (~35 секунд — но это только с «холодного старта», при физическом отключении питания, а если выключать кнопкой с пульта — то включается секунд за 5) — и вот, то, чего мы так долго ждали, свершилось. Я сразу же вотнул в него Ethernet, и пока я осваивал пульт и бродил по меню, девайс обнаружил в сети обновление прошивки и предложил установить его. Надо сказать, что я иногда с подозрением отношусь к обновлениям, поэтому я в первую очередь полез в сеть проверить, нет ли каких-либо известных проблем, возникших в новой версии (а заодно разузнать поподробнее про процесс прошивки). Сам процесс прост донельзя: либо девайс делает это сам, по сети, с сайта производителя, либо можно делать вручную. Вручную делается так: скачивается архив, распаковывается на флэшку, при необходимости правится версия в текстовом файле (один из файлов на флэшке) и флэшка втыкается в девайс. После чего он сам обнаруживает наличие прошивки (если её версия выше текущей) и предлагает обновиться. Соглашаемся, ждём немного — и готово.
В процессе поиска информации по прошивкам я обнаружил интересную стороннюю прошивку от некоего товарища B-RAD, которая расширяет функциональность девайса практически «до небес». Решил проверить на своей шкуре (убедившись, что в случае чего можно откатиться обратно). Итак, фичи, добавляемые прошивкой от B-RAD (по нарастающей, в порядке возрастания значимости лично для меня):
Во-первых появляется возможность подключить внешний DVD-привод и смотреть фильмы с дисков (если вдруг у кого завалялись). Лично мне это не особо актуально.
Во-вторых, добавляется поддержка ряда Wifi-USB-адаптеров. До недавней поры для меня это представляло ценность, но теперь, при наличии гигабита по дому — не особо, но многих, знаю, порадует.
Далее: кастомизация внешнего вида (смена количества отображаемых элементов при просмотре содержимого каталогов, смена обоев, смена заставки скринсейвера)
FTP-сервер (pure-ftpd). Ну, не то чтобы прям нужен — но пусть будет. Есть не просит (к тому же можно отключить, если совсем-совсем не нужен).
SSH-сервер. См. выше 
Ну и наконец: торрент-клиент. Полноценный консольный Deluge с веб-гуём, доступным с любого соседнего компа (или даже снаружи, при должной настройке роутера). Вот это уже интереснее: берём DynDNS, пробрасываем порт на роутере — и добавляй закачки откуда угодно, хоть с работы, хоть с пляжа.
Ну, раз есть веб-гуй для Deluge — то на чём-то же он крутится? Правильно, веб-сервер lighttpd. Хотя для чего он нужен кроме как для веб-морды Deluge — не знаю, вряд ли кто-нибудь будет хостить сайт на медиацентре
Возможность монтировать NFS-шары. Всё никак руки не дойдут организовать это дело у себя в сети. Надеюсь, в ближайшем будущем обязательно воспользуюсь этой возможностью.
Не забуду упомянуть, что для особых эстетов есть возможность установить обычный Debian, но покупка мной данного девайса была как раз нацелена на то, чтобы ничего не устанавливать, поэтому данной возможностью я вряд ли воспользуюсь
В общем, сразу же вырисовывается несколько возможных сценариев использования девайса. Можно подключить к нему USB-диск и качать прямо на него, раздавая скачанное в сеть. Можно «качальные» функции с него снять, качая домашним сервером, а сабжем только играть, забирая по SMB. Можно качать девайсом на примонтированные NFS-диски, физически располагающиеся на сервере. Зачем в этом случае качать девайсом, а не самим сервером? Затем, что на девайсе уже установлен и настроен торрент-клиент с веб-гуём
В общем, сценариев много, на любой вкус. Но довольно лирики. Прошивку эту я залил, перейдём уже к картинкам. Заранее прошу прощения за фотографии с экрана, но штатного способа снятия скриншотов в девайсе не обнаружилось, а платы видеозахвата с HDMI у меня нет. Фотал немного под углом, чтобы не бликовало.
Итак, главно меню выглядит следующим образом: вертикально расположенная лента, переход между элементами которой осуществляется кнопками пульта. Выбираем пункт — переходим к следующей ленте. Переход плавный, без задержек. В главном меню находится 4 пункта: Video, Audio, Photo, Settings (я буду оперировать английскими терминами, т.к. использую именно этот язык интерфейса, но в настройках есть возможность выбрать язык, в том числе и русский). Бегло пройдёмся по пунктам меню.

Видео
Конечно, сразу же полезем в «Видео» — для чего же мы его покупали? Раздел содержит пункты «Local drives» (присутствует только если подключен USB-диск), «Media servers», «Network shares», «Youtube».
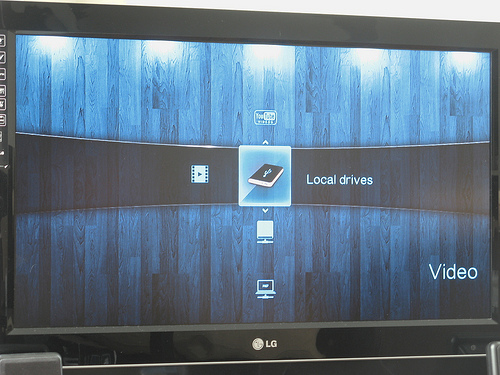
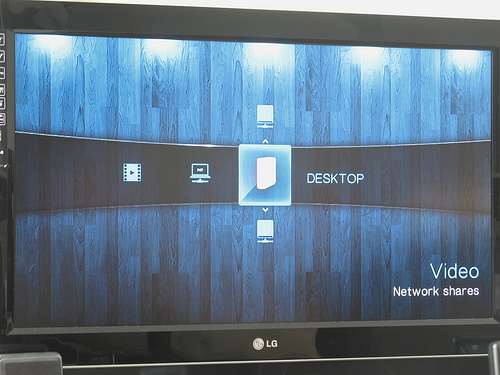
При входе в «Local drives» и выборе девайса предлагается несколько вариантов на выбор: отсортировать по дате, по каталогам, посмотреть последние видео или же пройтись по плейлистам (если имеются). Собственно, с этого момента можно начинать пользоваться девайсом по его прямому назначению: смотреть фильмы. Собственно, для чего я его и покупал: чтобы не вставая с дивана тыцнуть кнопкой — и всё. Но на флэшку много не затолкаешь, а внешнего и вместительного USB-диска я ещё не приобрёл, поэтому возвращаемся на уровень выше и переходим к следующему пункту меню «Video» — «Network shares». Захожу туда и моментально обнаруживаю там свой десктоп, при выборе которого вижу список расшаренных каталогов.
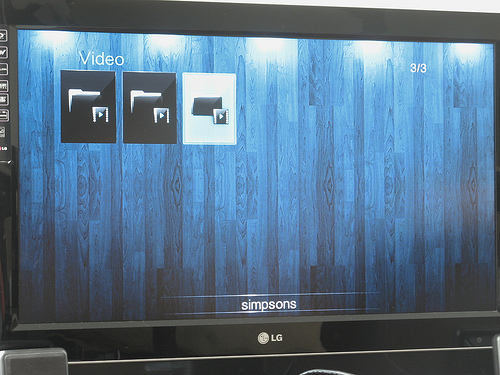
Порадовало то, что кириллица отобразилась корректно (на десктопе — Ubuntu с локалью UTF-8). Собственно, рассказывать тут особо нечего: тыкаем по каталогам, выбираем фильм — смотрим. Всё именно так, как я и хотел: просто, как тапок.


Во время просмотра фильма можно менять аудиодорожку (если фильм содержит несколько дорожек), язык субтитров, можно увеличить картинку и сдвинуть её немного в сторону. Работает перемотка вперёд/назад на скоростях 2x, 4x, 8x, 16x. К сожалению, нельзя «скакать» по файлу (например, перепрыгнуть на минуту вперёд или сразу перейти к определённой временной отметке), ну или по крайней мере я не нашёл, как это сделать (UPD: в комментариях подсказали, что можно мотать вперёд/назад скачками по 10 минут). Кушает всё, что я пытался ему скармливать. На сайте производителя заявлена поддержка AVI (Xvid); AVC; MPEG1/2/4); MPG/MPEG; VOB; MKV (h.264; x.264; AVC; MPEG1/2/4; VC-1); TS/TP/M2T (MPEG1/2/4; AVC; VC-1); MP4/MOV (MPEG4; h.264); M2TS; WMV9.
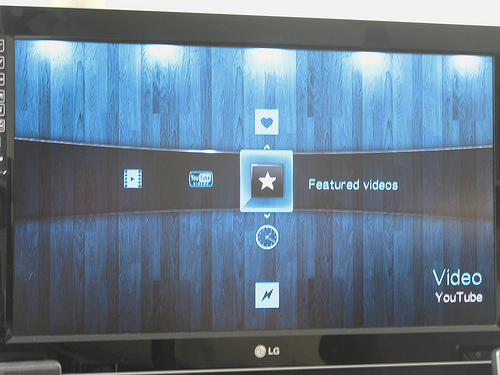
Ну и заглянем в Youtube

Хорошо, с видео разобрались, идём дальше.
Музыка

Те же пункты Local drives, Media servers, Network shares, а в качестве дополнительных сервисов идут Live365.com и Pandora. Пандора сразу же предложила мне залогиниться, поэтому я отставил её в сторону и обратил свой взор на Live365, которым можно пользоваться без регистрации (но есть возможность и залогиниться), есть набор бесплатных радиостанций, которые можно добавлять в избранное.
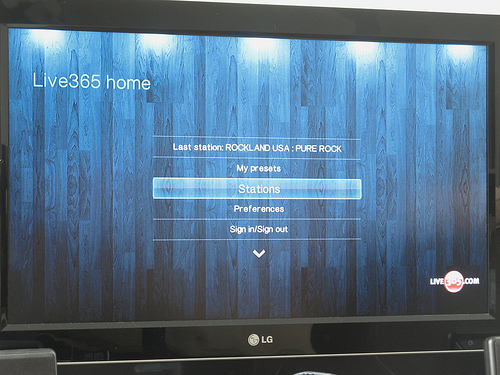
Сам список радиостанций выглядит следующим образом:

Выбрав интересующую, попадаем в окно проигрывателя, который начинает играть, сообщая при этом, какая песня какого исполнителя играет в данный момент и отображает обложку:

Ладно, с радио разобрались, вернёмся, опять же, к делам более жизненным, а именно к музыке, расшаренной с десктопа. Тут всё аналогично тому, как это было с видео: открываем список расшареных каталогов, перемещаемся по ним, выбираем чего хотим слушать. Тут хорошую службу сослужит хорошо отсортированная и упорядоченная коллекция. Вот, к примеру, что будет отображаться, если всё разложено по каталогам, отсортировано по годам/альбомам, и с заботливо найденными обложками к альбомам (как у меня:))

Проигрыватель выглядит похоже на то, что мы видели при проигрывании радиостанции. Отображается название трека, альбом, исполнитель, жанр, следующий трек. Но тут обложка почему-то не отображается — очень странный факт.

Играет всё, что я ему скармливал: mp3, ogg, flac. Производителем заявлена поддержка MP3; WAV/PCM/LPCM; WMA; AAC; FLAC; MKA; AIF/AIFF; OGG; Dolby Digital; DTS.
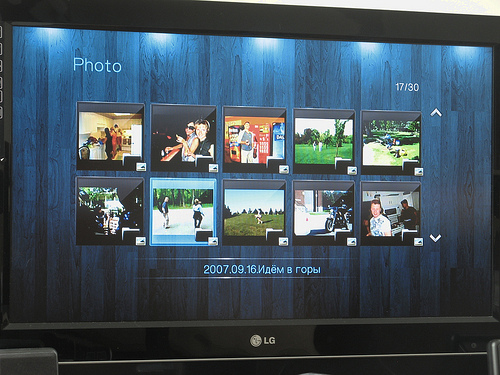
Фото
Всё очень знакомо: Local drives, Media servers, Network shares, а в качестве дополнительного сервиса — Flickr. Но как-то странно он предлагается к использованию: нельзя залогиниться в свой аккаунт и смотреть свои фотки. Можно только бесцельно бродить по «Последним интересным за 7 дней», «Недавним загрузкам» и так далее. Зачем там «Мои контакты» и «Мои теги» если нельзя указать свой аккаунт (ни тут, ни в общих настройках (до которых мы ещё дойдём) я такой опции не нашёл)? Загадка. Ну да ладно, кто о чём — а я о расшаренных ресурсах на десктопе

С ними всё так же хорошо, просто и удобно, как и с музыкой и видео: ходим, смотрим, всё легко и понятно. Если в каталоге есть фотографии, то значком самого каталога становится первая фотка из каталога (с иконкой каталога в углу), что смотрится довольно симпатично.
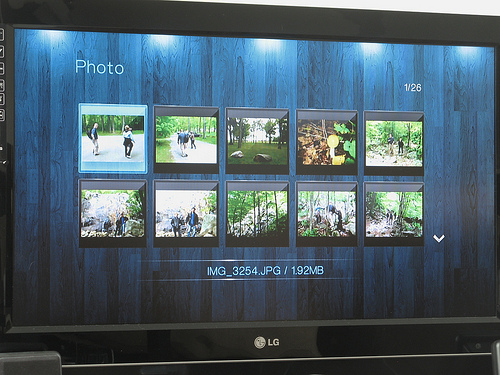
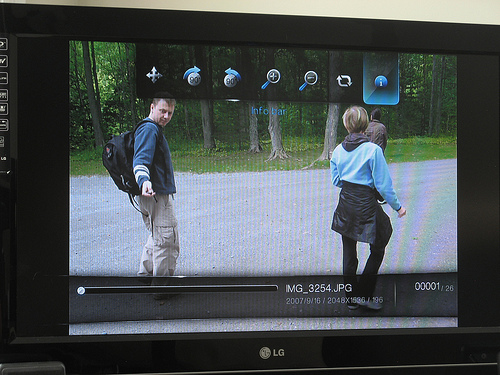
Ну, просмотр обычный. Можно переключать вручную, можно просматривать в режиме слайд-шоу (интервал настраивается). Что не очень понравилось — ручное переключение подтормаживает. То ли из-за того, что по сети, то ли само по себе — не знаю, но срабатывает с задержкой в пару секунд. При этом в режиме слайд-шоу переключается ровно с тем интервалом, с которым задано. Стандартные опции: поворот влево/вправо, зум, сдвиг, опции слайдшоу, кнопка показа/скрытия информационной панели.

Настройки
Думаю, не буду утомлять перечислением всех настроек — и так статья получилась довольно длинной. Настроек довольно много, но они практически не требуются. Единственное, что я сделал сразу — это убрал эффект затухания при переходе между экранами — раздражало ужасно, съедая по 2 секунды при каждом переходе. Остальное — на любителя.
Можно настроить сетевое подключение как на DHCP, так и вручную. Можно настроить отображение списков файлов: списком или миниатюрами. Тут же находится файл-менеджер, позволяющий скопировать, к примеру, с сетевой шары на USB-диск или удалить что-нибудь.
Цена
Если вы дочитали до этого места — значит девайс вас таки заинтересовал, а значит вам ужасно интересно узнать цену на это счастие (хотя самые нетерпеливые, возможно, уже нагуглили :)). Цена меня убила настолько, что я не поверил своему счастью: $149.99 на сайте производителя. В уже упомянутом топике называется весьма схожая цена, причём в рублях, так что скорее всего именно за эту цену девайс можно приобрести и на территории России и сопредельных государств.
Выводы
Итак, что мы имеем в сухом остатке:
Плюсы:
* маленький
* бесшумный
* умеренные энергоаппетиты
* всеядный
* при минимальных трудозатратах обрастает дополнительным функционалом (торрент, ftp, ssh, wifi, DVD).
* цена!!!
Минусы и недочёты:
* отсутствие встроенного диска
* отсутствие разъёма eSata.
* видеоплейер: отсутствие возможности перейти к определённому месту фильма (UPD: в комментариях подсказали, что можно скакать по файлу с шагом в 10 минут)
* аудиоплейер: не показывается обложка во время воспроизведения
* фото: тормозное ручное переключение.
Перевешивают ли перечисленные минусы все те плюсы, которыми девайс обладает — тут решать каждому предстоит самостоятельно.
Общее впечатление: девайс подойдёт как простому неискушённому пользователю, которому нужно «чтобы просто работатало», так и гику, любящему всласть поковыряться унутре (вплоть до установки туда обычного линукса). Обладая весьма привлекательной ценой, девайс вполне может составить конкуренцию более дорогим аналогам, при этом оставляя за собой возможность при помощи сторонней прошивки расширить свой функционал так, что «старшим товарищам» впору серьёзно задуматься о своей цене 
UPD: на случай, если кого-то заинтересует информация о процессоре:
# cat /proc/cpuinfo
system type: Sigma Designs TangoX
processor: 0
cpu model: MIPS 24K V7.12 FPU V0.0
Initial BogoMIPS: 332.59
wait instruction: yes
microsecond timers: yes
tlb_entries: 32
extra interrupt vector: yes
hardware watchpoint: yes
ASEs implemented: mips16
shadow register sets: 1
VCED exceptions: not available
VCEI exceptions: not available
System bus frequency: 333000000 Hz
CPU frequency: 499500000 Hz
DSP frequency: 333000000 Hz
Вот что говорит top при воспроизведении MKV-файла размером 6.6ГБ (разрешение 1920×816, 9680 Kbps):
Mem: 192848K used, 6016K free, 0K shrd, 1376K buff, 113744K cached
CPU: 8.7% usr 9.3% sys 0.0% nic 58.0% idle 14.1% io 0.0% irq 9.7% sirq
Многим компания Western Digital известна как разработчик жестких дисков и сетевых систем хранения, однако мы мало обращаем внимание на устройства WD развлекательного класса, появившиеся на прилавках магазинов за последние несколько лет.
Одним из первых таких устройств стал медиаплеер WD TV HD Media Player. Автору впервые удалось познакомиться с ним в далеком 2010 году, который на тот момент был весьма привлекательной покупкой из-за своих возможностей по воспроизведению популярных форматов, включая HD-контент, и относительно невысокой стоимости (возможно даже «демпинговой») на фоне более именитых конкурентов.
Сейчас уже 2015 год и компания WD продолжает совершенствовать и развивать свою линейку медиаплееров, предлагая более продвинутые варианты, но при этом не забывает о «прародителе» серии. На рынке можно встретить модель WD TV (фактически это 3-е поколение приставки, вслед за WD TV Play), которая обзавелась встроенным Wi-Fi модулем, а значит ее подключение к локальной сети станет более простым.
Технические характеристики
Название: WD TV
Модель: WDBPUF0000NBK (версия PAL)
Размер: 30 мм (Высота) х 100 мм (Глубина) х 125 мм (Ширина)
Вес: 0,19 кг
Интерфейсы: 1 x Ethernet, Wi-Fi 802.11n, 2 x USB 2.0, 1 x AV-выход (составной), 1 x оптический выход S/PDIF
Поддерживаемые форматы:
– Видео – AVI (Xvid, AVC, MPEG1/2/4), FLV (H.264), M2TS, MKV (H.264, x.264, AVC, MPEG1/2/4, VC-1), MPG/MPEG, TS/TP/M2T (MPEG1/2/4, AVC, VC-1), MP4/MOV (MPEG4, H.264), WMV9, VOB
– Фото – JPEG, GIF, TIF/TIFF, BMP, PNG
– Аудио – MP3, WAV/PCM/LPCM, WMA, AAC, FLAC, MKA, AIF/AIFF, OGG, Dolby Digital, DTS
– Плейлисты – PLS, M3U, WPL
– Субтитры – SRT, ASS, SSA, SUB, SMI
Ограничения форматов:
– MPEG2 MP@HL – разрешение до 1920x1080p (24 кадра), 1920x1080i (30 кадров) или 1280x720p (60 кадров).
– MPEG4.2 ASP@L5 – разрешение до 1280x720p (30 кадров) без поддержки глобальной компенсации перемещения.
– WMV9/VC-1 MP@HL – разрешение до 1280x720p (60 кадров) или 1920x1080p (24 кадра).
– VC-1 AP@L3 – разрешение до 1920x1080i (30 кадров), 1920x1080p (24 кадра) или 1280x720p (60 кадров).
– H.264 BP@L3 – разрешение до 720x480p (30 кадров) или 720x576p (25 кадров).
– H.264 MP@L4.1 и HP@4.1 – разрешение до 1920x1080p (24 кадра), 1920x1080i (30 кадров) или 1280x720p (60 кадров).
– Для воспроизведения цифрового многоканального объемного звука требуется аудиоресивер.
– Поддерживаются только сжатые изображения формата RGB JPEG и последовательные JPEG с разрешением до 2048×2048.
– Поддерживаются только однослойные изображения формата TIFF.
– Поддерживаются только несжатые изображения формата BMP.
Требования: обычный или HD телевизор с HDMI или композитным входом. Для беспроводной связи требуется беспроводная сеть
Температура во время работы: от 5°C до 35°C
Температура хранения: от -40°C до 65°C
Комплект поставки: медиаплеер, пульт дистанционного управления, 2 х ААА батарейки, композитный аудиовидео кабель, внешний блок питания (12 В, 1.5 А), памятка по установке и настройке
Гарантия: ограниченная 2 года (Европа, Ближний Восток и Африка/Великобритания)
Упаковка и комплектация
В оформлении коробок многих продуктов компания WD использует синие тона и, в этом плане, медиаплеер WD TV не исключение. «Действующим лицом» на ней является фото медиаплеера на фоне телевизора и подчеркивает это англоязычный текст, говоря о назначении – воспроизведение медийных файлов на телевизоре. Коробка имеет скромные размеры 200 мм (Ширина) х 175 мм (Высота) х 65 мм (Толщина).

На обратной стороне производитель подчеркивает, что медиаплеер «не всеядный» («Воспроизводите файлы практически любого типа») и поддерживает работу с медийными сервисами в сети Интернет.

Перечень поддерживаемых форматов приведен на торцах (перечислять не будем, так как они уже указаны в технических характеристиках), заявлена поддержка поддержка Miracast-, DLNA/UPnP-устройств. Как и процесс легко подключения приставки, состоящий из трех простых шагов. На одном из торцов указан тип интерфейсов и есть «упоминание» о программе WD TV Remote (возможность управления медиаплеером с помощью мобильных устройств).

Внутри есть информация о гарантии и простейшая инструкция с фото комплекта поставки и более детальными шагами подключения медиаплеера WD TV к телевизору.

Содержимое размещено в отдельных картонных коробках с соответствующими обозначением что лежит внутри.

Если все это выложить, то мы увидим: блок питания (12 В, 1.5 А), две батарейки ААА, композитный кабель и пульт дистанционного управления.

Сам медиаплеер WD TV упакован в целлофановый пакет, заклеенный специальным стикером-предупреждением о рабочем диапазоне температур 5 – 40 °C (хотя в характеристиках указан более узкий диапазон с верхней границей 35 °C) и недопустимости размещения на медиаплеере различных устройств, в частности внешних накопителей. Причина такого ограничения – сам плеер в процессе работы может прилично нагреваться.

Внешний вид
Сам медиаплеер WD TV – это стильная прямоугольная коробочка с закругленными краями и компактными размерами: 30 мм (Высота) х 100 мм (Глубина) х 125 мм (Ширина) при весе около 0,2 кг. Материал изготовления черный матовый пластик.


Верх приставки сделан монолитным, обеспечивая хороший эстетический вид. Отсутствие вентиляционных отверстий для пассивного охлаждения дает гарантию того, что пыль не будет проникать во внутреннее пространство, однако расплатой будет больший нагрев.

На крышке так же присутствуют надписи HDMI, DTS, 2.0 + Digital Out, Dolby TrueHD, подчеркивающие возможности медиаплеера по поддержке форматов вывода звука.

Вентиляционные отверстия присутствуют на нижней части корпуса и под ними видна металлическая пластина, выполняющая роль радиатора. Пазы на корпусе допускают крепление медиаплеера в вертикальном положении, правда будет актуален вопрос работы ИК-приемника пульта дистанционного управления. Наклейка на дне содержит название модели WD TV Media Player, требовании к питанию, серийный номер и MAC-адрес устройства.

Передняя сторона медиаплеера содержит: темную глянцевую полоску, под которой скрывается светодиод активности работы и ИК-приемник, и один порт USB 2.0. Именно к глянцу быстрее всего «прилепает» пыль.

Все остальные интерфейсы разместились с тыльной стороны и каждый из них подписан: разъем питания, оптический выход S/PDIF, LAN-порт, HDMI, второй порт USB 2.0 и композитный AV-выход, для которого требуется комплектный переходник. Еще один интерфейс мы не увидим, так как это Wi-Fi со стандартом 802.11n и встроенной антенной.

Бока корпуса сделаны монолитными.

Пульт дистанционного управления у медиаплеера WD TV не такой большой, как у телевизоров и проигрывателей, но он и не такой маленький, как у прародителя. Полуовальный с удобным хватом для руки – это хорошо видно по форме обратной стороны.


Аппаратная начинка медиаплеера – это производительный 700 МГц процессор Sigma SMP8670AD и оперативная память 512 Мбайт. Подобная связка используется в более дорогих продуктах.
Интерфейс и работа
Первое включение. При первом включении необходимо будет произвести первичную настройку, состоящую из простых шагов: выбора языка, часового пояса, согласия (или не согласия) передачи данных со статистикой в компанию WD и подтверждения окончания настройки.


Графический интерфейс и форматы. На главном экране находятся «популярные» элементы «Фотографии», «Видео», «Музыка» и часть «популярных» онлайн-сервисов. Через верхние пиктограммы можно получить доступ с остальным службам, разбитым на группы (социальные, спорт и игры, Web-видео, Live TV, кино и ТВ) c общим количеством сервисов 81 элемент. Практически все сервисы англязычные, но в списке можно встретить русский сервис ivi.ru или с русским интерфейсом (YouTube, Facebook*, Picasa и другие).


Для поиска можно пользоваться как пультом цифро-буквенным блоком, так и «экранной клавиатурой», выбирая буквы с помощью курсора на ПДУ – кому как нравится. Поиск на зарубежных сервисах возможен только на английской раскладке.

При выборе «Фотографии», «Музыка», «Фильмы» возможен выбор источника просмотра («Локальное хранилище», «Медиасервер», «Общая сетевая папка» и «Интерактивная служба») и смена вида отображения файлов (мелко, крупно, папки, списком с предварительным просмотром или без). Строчки, которые не полностью отображаются на экране выводятся бегущей строкой (от этого на фотографиях получились размытыми из-за использования большой выдержки).


Плеер отображает популярные форматы, но если какой-то формат не поддерживается, то выдается соответствующее сообщение. Например, не поддерживаются iso образы DVD-A и SACD.


3D-видео и с 4-к разрешением так же не поддерживаются, а вот из структуры Blu-Ray медиаплеер WD TV воспроизводит только основную часть (без меню). В зависимости от того, что воспроизводится, интерфейс «приложений» может незначительно отличаться.


Настройки. В разделе настроек находятся 9 пунктов, …

… отвечающих за:
– «Аудио-видеовыход» (использование видеовыходов, формат вывода звука, соотношение сторон, настройка динамического диапазона)


– «Сетевые настройки» – выбор проводного или беспроводного подключения, проверка соединения.


– «Внешний вид» – выбираем язык, проводим калибровку экрана, можно сменить фон, выбрать темы интерфейса, разрешаем работу интерактивных заголовков.


– «Операция». Здесь «программируем» кнопки ПДУ, разрешаем автоматическое воспроизведение и автоматическое отключение для экономии энергии.


– «Настройка Видео», «Музыкальные настройки» и «Настройки фото». В них находятся соответствующие группы настроек.


– «Система». Общая группа настроек медиаплеера из которой устройство можно отправить на перезагрузку, обновить прошивку и прочее.


А вот и обновление – «Новая версия встроенного ПО не найдена. Обновить?» (смайлик). Что исправлено можно почитать в описании.


– «Система». Оставшийся элемент выводит информацию об IP-адресе, версии текущей версии прошивки и сведения об интернет-службе.

Удаленное управление. Помимо ПДУ медиаплеером можно управлять с помощью Android-устройств через приложение WD TV Remote, дублирующие действия ПДУ. Условие – устройства должны быть в одной локальной сети. Удобнее будет и набирать текст.


Эксплуатация
Пользоваться медиаплеером WD TV достаточно просто – набор элементов понятен, навигация по меню и разделам при работе происходит достаточно быстро. Проблем с воспроизведением основных форматов так же не замечено, перемотка работает корректно – в зависимости от разрешения и битрейта можно использовать ускорение х8/х16 (в старых моделях медиаплееров такое было невозможно), однако есть особенности:
1. Подключение USB-накопителя (1 Тб) «забитого» медиафайлами может приводить к задержкам, так как сразу же после подключения диск начинает активно моргать светодиодом – идет индексация файлов для построения медиабиблиотеки (опция в настройках включена по умолчанию). Сразу начать просмотр не получиться – придется ждать отображения списка медийных файлов.
2. Воспроизведение и работа по сети. Если с проводным подключением проблем воспроизведения в локальной сети не замечено (Samba/DLNA), то при использовании беспроводного подключения придется учитывать меньшую скорость передачи, особенно если роутер находиться далеко. Причем видятся сети даже через 4-5 панельных стены, правда сигнал конечно слабоват (соединение 5-12 Мбит/сек) и для HD-контента подобное подключение не подойдет, но для фото и музыки их возможностей хватит.
При прямой видимости тяжелее всего медиаплеер воспроизводит HD-контент с высоким битрейтом (~30 мбит/сек).
Скорость работы с интернет-сервисами будет определяться возможностями провайдера и непосредственно нагрузкой на сами сервисы. В нашем случае использовался тарифный план со скоростью до 60 Мбит/сек и воспроизведение фильмов с ivi.ru не вызывало проблем, некоторые HD ролики c YouTube все-таки шли с небольшими рывками (подгружались данные) – чуть чаще это происходило при использовании беспроводной сети.
При знакомстве с медиаплеером WD TV он был подключен к многоканальному ресиверу Yamaha RX-V677 через HDMI, который без проблем «увидел» потоки DTS-HD Master Audio и TrueHD.
Небольшое отступление: если сравнивать WD TV с WD TV HD Media Player, то новый медиаплеер стал меньше и не имеет проблем с облезанием корпуса, так как производитель отказался от выпуска серых корпусов. Пульт стал крупнее и им стало более удобно пользоваться за счет лучшей эргономики.

Однако в процессе работы он по прежнему прилично нагревается – температура крышки достигает 40–43 °C и поэтому сверху на него не стоит ничего класть.
Заключение
Медиаплеера WD TV отличное устройство для домашнего использования для тех, кто не имеет современного телевизора, поддерживающего воспроизведение медиафайлов и SMART-функции. Он прост в использовании и справится с воспроизведением большинства популярных фото-, аудио-, видео-форматов. Наличие беспроводного интерфейса Wireless N может свести к минимуму количество используемых кабелей, так как потребуется только питание и применение одного из вариантов вывода изображения/звука – через HDMI или композитные выходы. В последнем случае будет поддержка стерео-звука и видео стандартного разрешения, а вот если хотите насладиться всеми преимуществами медиаплеера, то лучше использовать HDMI, обеспечивающего вывода FullHD картинки и многоканального звука.
Стоит напомнить, что медиаплеер WD TV не поддерживает работу с 3D- и 4K-видео и это стоит учитывать при выборе медиаплеера.
Цена на медиаплеер WD TV одна из невысоких (менее 3000 рублей), что делает его привлекательной покупкой.
P.S. Сам медиаплеер был выигран на аукционе ДНС за инвалюту, для участия в котором, с изменившимися правилами, потребуется написание обзора на выигранный лот в течении 10 дней после его получения.

- Manuals
- Brands
- Western Digital Manuals
- Media Player
- TV Play
- User manual
-
Contents
-
Table of Contents
-
Troubleshooting
-
Bookmarks
Quick Links
WD TV
®
Play
™
Media Player
User Manual
Related Manuals for Western Digital TV Play
Summary of Contents for Western Digital TV Play
-
Page 1
WD TV ® Play ™ Media Player User Manual… -
Page 2: Table Of Contents
Important Safety Instructions ……1 WD Service and Support ……. . . 2 Recording Your WD Product Information .
-
Page 3
All My Apps ……. . 33 App Options ……… 33 Updating Apps. -
Page 4
Tweet by WD TV …….. -
Page 5
Appendix ……. . . 145 Multiformat Content Playback ……145 Supported Formats . -
Page 6: Important User Information
Power supply cords should be routed so that they are not likely to be walked on or pinched by items placed upon them or against them. Do not overload wall outlets. For additional safety information, refer to www.wd.com. IMPORTANT USER INFORMATION – 1…
-
Page 7: Wd Service And Support
Most technical support questions can be answered through our knowledge base or e-mail support service at http://support.wd.com. If the answer is not available or, if you prefer, please contact WD at the best telephone number shown below.
-
Page 8: Recording Your Wd Product Information
User Manual Recording Your WD Product Information In the following table, write the serial and model numbers of your new WD product. You can find this information on the label on the bottom of the device. You should also note the date of purchase. This information may be required when requesting technical support.
-
Page 9: Product Overview
Don’t settle for online entertainment on your small computer screen. With WD TV Play, you can enjoy it all on your HDTV. See “Apps” on page 61 for more details.
-
Page 10
User Manual Bring the arcade to your HDTV – Swap gems with Rockswap, try your luck with Texas Hold’Em, or test your math skills with Sudoku. WD TV Play brings casual games to your big screen TV. Stay updated with news feeds – Stay posted on your favorite bloggers and websites and stream the latest audio and video with timely RSS feeds. -
Page 11: Features And Functions
WD TV Play Media Player User Manual Features and Functions Audio/Video Interface HDMI interface for digital audio and high-definition video. Composite video interface (mini-jack) for analog AV connection. S/PDIF (optical) audio for high-fidelity digital audio. Auto source function enables the HD media player to detect and switch to a new interface connection.
-
Page 12: Connections
WD TV Play Media Player User Manual Connections Item Component Description USB port Supports connection of compatible removable storage devices, portable media players, and digital cameras with USB connectors. Reset button Press for one second to reset to factory defaults (see “Device (bottom of device) Reset”…
-
Page 13: Led Indicator
WD TV Play Media Player User Manual LED Indicator Item Component Description Infrared • Receives signals from the remote control. Point the tip of the receiver remote control to the infrared receiver and ensure that the path between the two is unobstructed.
-
Page 14: Remote Control
Note: For additional information, see “Using the Remote Control” on page 26. WD TV Remote Control your WD TV experience with the tap of a soft key or the swipe of a finger using the WD TV Remote app. Get one-touch access to your favorite online services, easy text input and a gesture pad for faster navigation to your favorite content.
-
Page 15: Getting Started
WD TV Play Media Player User Manual Getting Started Package Contents WD TV Play media player Remote control and two AAA batteries AC power adapter Quick Install Guide Composite AV cable Installation Requirements Standard or HDTV with a composite (standard A/V) or HDMI input…
-
Page 16
WD TV Play Media Player User Manual Step 1 — Connecting the Power Cable 1. If applicable, connect the power clip to the power cable plug. The AC power adapter will vary, depending on your location. Some locations do not require a power plug clip. Units sold in those locations will have a fixed power plug. -
Page 17
WD TV Play Media Player User Manual Step 2 — Connecting the Media Player The following figures illustrate the cable connections supported by the media player. The standard connection uses the included composite-to-mini AV cables. Note: HDMI and S/PDIF (optical) cables are sold separately. -
Page 18
WD TV Play Media Player User Manual HDMI Video and Audio (High Definition) HDMI combines high-definition video, multi-channel audio, and inter-component control in a single digital cable. This interface provides video quality resolution of up to 1080p. To connect your media player using an HDMI cable: 1. -
Page 19
WD TV Play Media Player User Manual Composite AV Connection (Standard Definition) To use a composite connection: 1. Plug the mini-connector into the composite port on the media player. 2. Plug the opposite ends into the composite input ports on your TV, yellow to yellow, red to red, and white to white. -
Page 20
WD TV Play Media Player User Manual Home Theater (High Definition) To connect a home theater system: 1. Plug an HDMI cable into the HDMI connector on the media player. 2. Plug the opposite end into the HDMI In port on your A/V receiver. -
Page 21
Step 3 — Connecting a USB Device (Optional) The media player has a USB port that supports playback from WD USB external drives.* * For a list of supported WD external drives, see article #9525 in or knowledge base at http://support.wd.com. To connect the USB device: 1. -
Page 22
WD TV Play Media Player User Manual Removing a USB Device To prevent data loss, it is highly recommended that you first press the EJECT button on the remote control before removing a USB device. To remove a USB device: 1. -
Page 23
WD TV Play Media Player User Manual Step 4 — Connecting to Your Network The media player can be connected to your home network to access the Internet and network storage using a wired or wireless network connection. A network connection provides access to locally stored and online media content. -
Page 24: Network Setup
You can create instant high-speed, wired network connections and gain fast, reliable access to the Internet without running wires all over your house using WD Livewire™ powerline AV network kit (sold separately). For more information, visit http://products.wd.com/WDLivewire.
-
Page 25: Wireless Network Setup
WD TV Play Media Player User Manual 4. The wizard begins automatic network connection. When finished, the following screen displays. Press OK to continue, or select and press OK to exit. To change or manually configure your wired network setup (recommended for advanced users only), see “Network Setup”…
-
Page 26
WD TV Play Media Player User Manual Manual: Depending on your wireless network setup, you may want to manually type in the name of your network. In this case, navigate to the keyboard icon on the right side of the screen, press OK, and proceed to the next step. -
Page 27
WD TV Play Media Player User Manual Wi-Fi Protected Setup (WPS) 1. Press to select your language in the setup wizard Welcome screen, then press OK. 2. Navigate to the WPS icon on the right side of the screen, and press OK. -
Page 28: Checking The Network Connection
WD TV Play Media Player User Manual 2. Press OK to continue, or select and press OK to exit. After establishing a network connection, you can: Use the Internet services integrated into your media player to access streaming media. See “Apps” on page 61 for more information on these services.
-
Page 29: Finding Your Content — My Storage
WD TV Play Media Player User Manual Finding Your Content — My Storage This section describes how you can use the media player to access your digital media collection over the local network. Access network attached storage – view and play back digital media content stored on your network attached storage (NAS) device with a DLNA media server.
-
Page 30
Media Server This menu displays network attached UPnP media servers connected to your network and usage is optimized with DLNA compliant devices such as WD My Book Live personal cloud storage and WD TV Live Hub media centers. The benefit of using a media server is that it aggregates the content together from the device that is hosting it. -
Page 31: Operating The Media Player
WD TV Play Media Player User Manual Operating the Media Player Using the Remote Control The media player’s remote control lets you navigate the Home screen, browse for content or media files, enable playback options, and customize the system settings.
-
Page 32: Using A Usb Keyboard
WD TV Play Media Player User Manual Button Function • Skips to the next audio, video, or image file. NEXT • Press to page down. • During Video FF mode, press to skip forward 10 minutes. Locates a media file in the current folder. This function is only available SEARCH when the Media Library setting is enabled.
-
Page 33
WD TV Play Media Player User Manual Key or key Function sequence Toggles between pause and playback. SPACE BAR (Play/Pause) Scans forward through the audio/video playback. Supports the (FF) following speeds: 2×, 4×, 8×, 16×. • Skips to the next audio, video, or image file. -
Page 34: Using The Media Player Ui
WD TV Play Media Player User Manual Using the Media Player UI The My Favorites default screen displays when you turn on your media player. This screen displays your favorite apps. Press HOME on the remote control to view this screen when in other screens/pages.
-
Page 35
WD TV Play Media Player User Manual Main Categories The main category icons display at the top of the My Favorites screen. Navigate all the way to the top of the screen to select from the following main categories: All My Apps… -
Page 36: Pages
WD TV Play Media Player User Manual Pages Similar to newspaper sections, pages allow you to organize your apps into smaller groups by topic and category, and view them on a predetermined stage that expands horizontally. From the My Favorites default screen, press to display the list of page icons.
-
Page 37: Edit Page
WD TV Play Media Player User Manual Edit Page Use this option to edit a page’s name, subtitle, and associated icon. 1. Select Edit Page and press OK. 2. Select an icon for the page, then press OK twice. 3. Use the on-screen keyboard to enter a page title. Select Submit then press OK when finished.
-
Page 38: All My Apps
WD TV Play Media Player User Manual All My Apps With All My Apps, you can see all the apps you have installed on the media player, as well as update all your apps and install apps from another device.
-
Page 39
WD TV Play Media Player User Manual Pin App to a Page This function creates a shortcut to an app on the page of your choice. 1. Select Pin App to a Page and press OK. 2. Select an existing page from the list, then press OK. -
Page 40: Updating Apps
WD TV Play Media Player User Manual Updating Apps Individual Update 1. Navigate to an app icon displaying the update badge, then press OK. 2. Select Update Now to begin the update. You can also bypass the update by selecting Launch App.
-
Page 41: Alerts
WD TV Play Media Player User Manual Alerts Alerts provides important messages including available firmware updates and WD product info. From the home screen, navigate all the way to the top to select the Alerts icon The Alerts icon displays in amber when alerts are available.
-
Page 42: Updating Firmware
WD TV Play Media Player User Manual Updating Firmware If a firmware update is available, select it from the Alerts menu and press OK. The New Firmware Available screen displays. Select Update Firmware Now, then press OK to begin downloading the firmware update.
-
Page 43: My Storage
WD TV Play Media Player User Manual My Storage Use the My Storage app to browse and play back your media files. To access media content from a media server or USB storage: 1. From any app page, navigate to the All My Apps icon , then press OK.
-
Page 44: Upload To Facebook (Video & Photo)
WD TV Play Media Player User Manual 2. Press , then to select Filter by All, Video, Music, or Photo. Press OK to display media files by the criteria selected.. 3. With the green check mark selected, press OK again.
-
Page 45: Pin A Folder To A Page
WD TV Play Media Player User Manual 4. The screen below displays. Press OK to select “Don’t ask me again!” if you do not want this screen to appear again, then press to select the green check mark . Press OK.
-
Page 46: Search
WD TV Play Media Player User Manual Search Search for Media To search for media files in My Storage, press the search button on the remote control or navigate to the top of the page and select the search icon , then press OK.
-
Page 47
WD TV Play Media Player User Manual Press Options for multi-lingual/multi-character input (applicable to certain letters on the keyboard). If you want to erase the last character entered, navigate to then press Navigate to and press OK to clear the search field. -
Page 48
WD TV Play Media Player User Manual Use the navigation buttons to select the media file you are looking for, and then press OK or to initiate playback. Manual Search You can manually search for a media file by navigating to the My Storage app, selecting a source (see “Accessing Media Content”… -
Page 49: Watching Video
WD TV Play Media Player User Manual Watching Video You can watch videos on your TV using the media player. For a detailed list of supported video formats, refer to “Supported Formats” on page 146. Video Playback To play back video: To access media content from a network share, media server, or USB storage: 1.
-
Page 50: Video Playback Controls
WD TV Play Media Player User Manual playback from the last playback position. Select Resume to resume playback or Restart to start playback from the beginning. Video Playback Controls Use these buttons on the remote control to control video playback:…
-
Page 51: Video Playback Options
WD TV Play Media Player User Manual Video Playback Options To display the video playback options while playing a video, press Options. To return to the video, press Back. Subtitle Use this option to view subtitles during video playback. Make sure the subtitle files are located in the same folder as the current video, and that it has the same filename as the video file.
-
Page 52
WD TV Play Media Player User Manual Note: This option is only available for ASS/SRT/SSA subtitles, and is not available for PGS, SUB/IDX, or VOBSUB subtitles. 1. During video playback, press Options. 2. Highlight Adjust Subtitles, then press Adjust Subtitles submenu options include: Position &… -
Page 53
WD TV Play Media Player User Manual Audio Lip Sync Use this option to adjust the timing of the audio to better match up to the video. This is useful for adjusting videos where the audio and video are out of sync due to improper encoding, etc. -
Page 54
WD TV Play Media Player User Manual Device Auto Sleep Timer Select this option to set a period of time before the device turns off automatically. Displaying the Video Playback Panel Use this option to display the Video Playback Panel on the bottom of the screen. -
Page 55
WD TV Play Media Player User Manual 2. Some videos allow you to advance to a specific time. Select Skip to Desired Time, then click OK. A keyboard displays: 3. Use the navigation buttons to position the cursor under each number in the Hour, Minute, and Second fields, then select a number from the keyboard. -
Page 56: Playing Music
WD TV Play Media Player User Manual Playing Music You can listen to audio files on your TV/audio system using the media player. For a detailed list of supported music formats, refer to “Supported Formats” on page 146. Music Playback…
-
Page 57: Music Playback Controls
WD TV Play Media Player User Manual Music Playback Controls Use these buttons on the remote control to control music playback when in the music playback screen: Button Function STOP Stop audio playback PAUSE/PLAY Pause or resume audio playback 1. Press FF (fast forward) or REV (reverse) to…
-
Page 58: Music Playback Options
WD TV Play Media Player User Manual Music Playback Options To display the music playback options, press Options. To hide the options, press Back or Options again. Play Mode Use the music play mode to set repeat and shuffle options.
-
Page 59: Playing Music From Your Ipod
WD TV Play Media Player User Manual Shuffle Use this option to set the audio tracks in the current music folder/playlist to play in random order. To enable music shuffle mode: 1. During music playback, press Options. 2. Select Play Mode, then press OK repeatedly until the repeat icon you want is displayed.
-
Page 60: Viewing Photos
WD TV Play Media Player User Manual Viewing Photos You can view your digital photos both individually and in slideshow mode on your TV using the media player. For a detailed list of supported image formats, refer to “Supported Formats” on page 146.
-
Page 61: Photo Display Options
WD TV Play Media Player User Manual Photo Display Options To display the photo options while viewing a photo, press Options. To return to the photo you were viewing, press Back or Options again. View Info Select this option to view info about the photo including source, file size, dimensions, image number, date and time photo was taken, exposure mode, and flash info.
-
Page 62
WD TV Play Media Player User Manual Upload to Picasa You can upload a photo to Picasa by selecting this option. 1. Press and select Upload to Picasa from the list of options. 2. If prompted to sign in, select Yes, then press OK, and enter your Picasa username and password using the on-screen keyboard. -
Page 63: Displaying Photo Thumbnails
WD TV Play Media Player User Manual Delete See “Delete” on page 48. Device Auto Sleep Timer See “Device Auto Sleep Timer” on page 49. Displaying Photo Thumbnails While viewing a photo or slideshow, press to display thumbnails of all your photos Use the navigation buttons to select another photo to view, then press OK.
-
Page 64: Displaying Photo Information
WD TV Play Media Player User Manual Displaying Photo Information Use this option to display the Picture Information Panel on the bottom of the screen. This panel shows the following information about the current picture: Image filename Source Image file size and resolution Image’s sequence number and the total number of image files in the current…
-
Page 65
WD TV Play Media Player User Manual Slideshow Playback Controls Use these buttons on the remote control to control slideshow playback: Button Function STOP Discontinue the slideshow PAUSE/PLAY Pause or resume the slideshow NEXT Display the next picture file in the slideshow… -
Page 66: Apps
Availability varies by country. These services may be changed, terminated, or interrupted at any time. With WD TV Play, you can stream the best Internet entertainment to your HDTV. Watch hit movies, catch up on TV shows, stay connected to your social network, and enjoy on-demand access to your favorite music from your TV.
-
Page 67: Accessing Apps
TuneIn – The world’s largest Internet radio guide with access to over 30,000 free radio stations searchable by location, genre, or format. Tweet by WD TV – Update your status and follow what’s happening around the world with the people and organizations you care about.
-
Page 68: Accuweather.com
WD TV Play Media Player User Manual AccuWeather.com The Weather service provided by AccuWeather.com provides local forecasts for everywhere in the United States and over two million locations worldwide. To access Weather: 1. Find and select AccuWeather.com , and press OK.
-
Page 69
WD TV Play Media Player User Manual 6. The AccuWeather.com home screen displays current temperature, conditions, and other weather details at your location. Options include: Settings Maps (press Options, then OK to zoom & pan the weather map in your area… -
Page 70
WD TV Play Media Player User Manual Set/Add Favorite City To add one or more cities so that you can view weather information for more than one location, do the following: 1. Press to select Settings in the AccuWeather.com home screen. -
Page 71: Facebook
WD TV Play Media Player User Manual Facebook Share your status, photos, videos, and your favorite links on Facebook. Find out the latest news from your social network or the world and so much more. Access it all on your big screen TV.
-
Page 72
WD TV Play Media Player User Manual Photos You can view the photos or photo albums you and others users have posted to Facebook either individually or as a slideshow. 1. In the Facebook main menu, select Photos then press OK. -
Page 73
WD TV Play Media Player User Manual Newsfeed The Facebook news feed displays all of your friends’ comments and allows you to “Like” or comment. The number of people who like or have commented on each entry displays inside the corresponding icons to the right of the news feed entry. -
Page 74
WD TV Play Media Player User Manual Videos Player With a video playing, press OK to bring up the videos player info panel. You can choose to Like or Comment on a video in the info panel, then press OK. -
Page 75
WD TV Play Media Player User Manual Event Event displays all events you’ve been invited to, and allows you to view more information about or comment on events, and view your friends’ comments and “Like” or comment on them. The number of people who like or have commented on each entry displays inside the corresponding icons to the right of the Event entry. -
Page 76: Flickr
WD TV Play Media Player User Manual Flickr Flickr is an online image and video management and sharing website. Flickr content is organized based on tags—a keyword or category label that describes content. Tags help users to search for contents that have something in common. Each content file can have as many as 75 tags associated with it.
-
Page 77
WD TV Play Media Player User Manual To explore based on the upload date: Press to select Recent Upload in the Flickr home screen, then press OK. A photostream showing the most recently uploaded content displays. Go to “Flickr Photostream” on page 76 for instructions on how to navigate a photostream. -
Page 78
WD TV Play Media Player User Manual 1. Press to select Search in the Flickr home screen, then press OK. 2. Press to select Keywords, then press OK. 3. Use the navigation buttons to type a search word using the on-screen keyboard. -
Page 79
WD TV Play Media Player User Manual Searching for a Flickr Member To search for a Flickr member: 1. Press to select Search in the Explore screen, then press OK. 2. Press to select Flickr member, then press OK. 3. Use the navigation buttons to type a member’s user name, email… -
Page 80
WD TV Play Media Player User Manual 3. To remove a contact from the list, select the contact name and press Options. Select Delete or Delete All Items, then press OK. My Tags My Tags shows a list of Flickr tags you have searched for. -
Page 81
WD TV Play Media Player User Manual Flickr Photostream The Flickr photostream layout is the same as that of a Photos directory in thumbnail mode. You can use the navigation buttons to select content. To view content in fullscreen mode, select the file and press OK. -
Page 82
WD TV Play Media Player User Manual Player Options As with a regular photo slideshow, you can customize the way content is displayed in the Flickr Player. To do this, press Options. Note: To view photos enlarged in fit to screen or full screen mode, access the Setup menu and follow the instructions under “Photo Scaling”… -
Page 83: Flixster
WD TV Play Media Player User Manual Flixster Watch the latest theatrical movie trailers and get critic reviews from Rotten Tomatoes. Preview movies that are opening this week and see what’s hot at the box office. See what’s new on DVD and Blu-ray and the top rentals. Search a catalog of over 40,000 films.
-
Page 84: Live365
WD TV Play Media Player User Manual Live365 Use Live365 to create your own online radio station or listen to other Live365 broadcasters’ online stations. Music selections are compiled based on user ratings. Some small AM and FM stations also utilize Live365 to stream audio over the Internet.
-
Page 85
WD TV Play Media Player User Manual 4. Press to select Sign In or Don’t have an account?, then press OK. If you don’t have an account, follow the on-screen instructions to create your Live365 account online. 5. Use the navigation buttons to key in your Live365 user name on the on- screen keyboard. -
Page 86
WD TV Play Media Player User Manual Listening to a Live365 Station New Live365 users can browse for a radio station. You can access the last station you’ve listened to if you’ve already accessed Live365 from the media player. Registered Live365 users can access My Preset List and listen to favorite stations. -
Page 87
WD TV Play Media Player User Manual The Live365 Station screen: The Live365 station screen provides view and sorting and audio quality filtering options. 1. Press , select the view icon , and press OK to switch between Grid and List views. -
Page 88
WD TV Play Media Player User Manual To listen to a favorite station: 1. On the Live365 main screen, press to select My Presets, then press OK. Press to select a station from your preset list. 2. Press or OK to start listening to the selected radio station. -
Page 89
WD TV Play Media Player User Manual 2. Press to select Search, then press OK. 3. On the on-screen keyboard, use the navigation buttons to key in a search keyword, then press OK. 4. Press to select a station from the search result. -
Page 90
WD TV Play Media Player User Manual Providing Song Feedback Music selections in Live365 are compiled based on their user ratings. You can participate in the selection process by giving a song the “thumbs up” or “thumbs down” vote. To provide song feedback: 1. -
Page 91: Netflix
User Manual Netflix Enjoy new releases, classics, and TV episodes instantly on your WD TV Play media player. Don’t wait for the mailman to deliver your movies and don’t settle for streaming to your small computer screen. Access your Netflix unlimited membership and instantly watch TV episodes and movies on your big screen.*…
-
Page 92: Pandora (Us Only)
Conditions for Using Pandora The following conditions must be satisfied before you can use the Pandora service. You must have a Pandora account. Go to www.pandora.com/wd to create your account. Once you have registered, note your activation code. You will need this code to sign in to Pandora from your media player.
-
Page 93
4. If you do not have a Pandora account, select I am new to Pandora, then press 5. Write down the activation code and follow the onscreen instructions (go to www.pandora.com/wd to create your new account). When finished, choose Continue, then press OK. -
Page 94
WD TV Play Media Player User Manual Once you have successfully signed in to Pandora, the Stations screen appears. From this screen you can create new stations, start listening to previously created stations and Quickmix playlist, and define profile preferences for your account. -
Page 95
WD TV Play Media Player User Manual To create a Pandora station: 1. Navigate to Create Station or press Options to select Create station. Press 2. Use the navigation buttons to type the name of an artist or song title using the on-screen keyboard. -
Page 96
WD TV Play Media Player User Manual QuickMix QuickMix is a feature that allows you to listen to more than one of your stations at once. QuickMix will play only one song based on particular musical characteristics at a time (unlike regular Pandora stations, which play four related songs in a row), so the mood changes more often. -
Page 97: Bookmarking A Song Or Artist
WD TV Play Media Player User Manual Bookmarking a Song or Artist You have the option to bookmark a song or an artist for later reference. You can later refer to this bookmark if you want buy the track when you’ve sign in to Pandora from your computer or mobile computing device, or if you want to share your musical preferences with other Pandora users.
-
Page 98: Picasa
WD TV Play Media Player User Manual Picasa View, share and enjoy your photographs right from your television. To learn more about Picasa services, and the options and limitations related to them, go to http://www.picasa.google.com. To access Picasa: 1. Find and select , then press OK to display the Picasa home screen.
-
Page 99
WD TV Play Media Player User Manual 3. Use the navigation buttons to type your Picasa user name in the on-screen keyboard. Select Submit, then press OK. 4. Use the navigation buttons to type your Picasa account password in the on-screen keyboard. -
Page 100: Searching For Content
WD TV Play Media Player User Manual You can sort and filter content on this page by showing all content (All) or your Unlisted Gallery or Public Gallery. Navigate to , and press OK, then press and OK twice to switch that selection.
-
Page 101: My Photos
WD TV Play Media Player User Manual The content search begins (this may take a few seconds). Content matching your search word appears in a Search result screen. 3. Use the navigation buttons to select a photo or video from the display.
-
Page 102
WD TV Play Media Player User Manual Photo Menu Options With a photo thumbnail in a web album selected, press Options. The My Photos menu options display. Press Back when complete to return to the web album menu. Information Use this option to display the following information about the current picture:… -
Page 103
WD TV Play Media Player User Manual Photo Display Options To display the photo options while viewing a photo, press Options. To return to the photo you were viewing, press Back or Options again. Information See “Information” on page 97. -
Page 104: Video Player
WD TV Play Media Player User Manual Video Player The Picasa video layer layout is similar to the regular video playback screen. It displays the playback status bar and the elapsed and total playback times. Press to pause and resume playback.
-
Page 105: Shoutcast Radio
WD TV Play Media Player User Manual SHOUTcast Radio SHOUTcast Radio is the ultimate directory of online radio stations featuring over 45,000 music, talk, sports, and community radio stations from around the world. To access SHOUTcast: 1. Find and select SHOUTcast Radio , then press OK.
-
Page 106
WD TV Play Media Player User Manual 4. Press to select a radio station. 5. Press Options, then press to select Add to Favorite if you want to add the station to Favorites. Press OK. 6. Press or OK to start listening to the selected radio station. You can view information about the currently playing station and song such as title, artist, genre, number of listeners, etc. -
Page 107
WD TV Play Media Player User Manual To add to a station, program, or podcast to your favorites: 1. Go to the station list showing the station you want to add. 2. Press to select the station you want to add or begin playing a station. -
Page 108
WD TV Play Media Player User Manual Removing a Station from Your Preset List You can remove stations you no longer want from your preset list. To remove a station from your preset list: 1. On the SHOUTcast Radio main screen, press to select Favorites, then press OK. -
Page 109: Spotify
WD TV Play Media Player User Manual Spotify Enjoy on-demand access to over 15 million tracks and albums. Any artist, any album, any genre — available instantly on your media player.* To use the service, create a Spotify account at www.spotify.com/wdtv.
-
Page 110
WD TV Play Media Player User Manual Searching for a Spotify Artist, Album, or Track To search for a Spotify artist, album, or track: 1. On the Spotify main screen, press to select Search, then press OK. 2. On the on-screen keyboard, use the navigation buttons to key in a search keyword, then press OK. -
Page 111
WD TV Play Media Player User Manual Adding a Track to a Playlist If you like a particular track, you can add it to a playlist for easier access in the future. To add a track to a playlist: 1. Go to the track list showing the track you want to add. -
Page 112
WD TV Play Media Player User Manual 3. Select Collaborate, then press OK. 4. The playlist is now set to Collaborate, and the playlist appears with a dot next to it. You can reverse this setting by pressing Options with the playlist selected, then select Uncollaborate. -
Page 113
WD TV Play Media Player User Manual 2. In the Spotify home screen, press to select Starred, then press OK. Your starred tracks display. People On the Spotify main screen, press to select People, then press OK to see a list of the friends you’ve added to your Spotify account. -
Page 114
WD TV Play Media Player User Manual Delete Spotify Account To delete a Spotify account: 1. On the Spotify main screen, press to select Account, and press OK. 2. Select the Spotify account you wish to delete, then press to select the x and press OK. -
Page 115: Tunein
WD TV Play Media Player User Manual TuneIn The world’s largest Internet radio guide with access to over 30,000 free radio stations searchable by location, genre, or format. To access TuneIn: 1. Find and select TuneIn , then press OK.
-
Page 116
WD TV Play Media Player User Manual 4. Select Enter RadioTime.com account, then press OK. 5. Use the navigation buttons to type in your TuneIn user name using the on-screen keyboard, then press OK. 6. Use the navigation buttons to type in your TuneIn account password using the on-screen keyboard, then press OK. -
Page 117
WD TV Play Media Player User Manual Note: You can also press on the remote control to toggle to the results list after entering several characters in the search field. 3. Press to select a station from the search result. -
Page 118
WD TV Play Media Player User Manual 3. Press Options, then press to select Remove Preset, then press OK. 4. A confirmation prompt appears. Select OK, then press OK. Getting Station Information You can view information about the currently playing station and song. -
Page 119: Tweet By Wd Tv
Select Submit, then press OK. 4. Press , then OK with the green check mark selected. 5. The Tweet by WD TV home screen displays. Press then to choose a menu option, then press OK.
-
Page 120
WD TV Play Media Player User Manual Tweet Options Select a tweet in Timeline and press Option to access the following tweet options: Favorite – use this option to favorite or unfavorite a tweet. The star symbol appears underneath the tweet when favorited. -
Page 121
WD TV Play Media Player User Manual Using the Filter Option Use the filter option to control what displays in the Timeline and Followers screens. Timeline 1. In the Timeline screen, press repeatedly to select the filter icon , and press 2. -
Page 122: News Feed (Rss)
WD TV Play Media Player User Manual News Feed (RSS) The news feed app uses RSS (Really Simple Syndication) to provide you with a list of current news items in a brief format so you can scan headlines and choose the items that interest you most without visiting websites.
-
Page 123: News Feed Search
WD TV Play Media Player User Manual News Feed Search From the News Feed or Category pages, navigate to the Search News Feed icon and press OK to search for a news feed using the on-screen keyboard. News Feed Options With a news feed selected, press Option.
-
Page 124: Setup And Advanced Features
WD TV Play Media Player User Manual Setup and Advanced Features The Setup menu lets you customize the way you use the media player and set preferences for media playback. To select a Setup category: 1. Navigate to the top of the My Favorites home screen and select the Setup icon .
-
Page 125: Audio/Video Output
WD TV Play Media Player User Manual Audio/Video Output Use the menus in this category to configure playback for audio and video files. Video Output Use this menu to select a video signal. After you finish making your selections, select OK at the “Are you sure you want to change the video resolution?”…
-
Page 126
By turning HDMI CEC ON, you can: Press the power button on the WD TV or other HDMI CEC device remote controller to power on or off both the media player and your HDTV or other devices. -
Page 127
WD TV Play Media Player User Manual Note: The HDMI CEC function only works with HDMI CEC-compatible devices. Not all operations of each HDMI device can be controlled with a single remote control. Depending on the specifications of your HDMI-CEC compatible device, some or all functions listed above may not work even if the device is HDMI-CEC compatible. -
Page 128: Network Settings
WD TV Play Media Player User Manual Network Settings Use the menus in this category to configure and view the media player’s network settings after initial setup using the setup wizard. See “Network Setup” on page 19 for information and instructions regarding the initial setup wizard.
-
Page 129
WD TV Play Media Player User Manual 6. Manual: Once the network is detected, the following screen appears. Press to select IP address, then press OK. 7. Manual: Use the navigation buttons to key in your IP address using the on- screen keyboard. -
Page 130
WD TV Play Media Player User Manual 4. Select Wireless, then press OK. 5. Select a wireless connection method, then press OK. Auto search, Manually enter the wireless network name, and Wi-Fi Protected Setup (WPS) — see “Wireless Network Setup” on page 20 for further instructions. -
Page 131
WD TV Play Media Player User Manual 2. Open a Windows Explorer window, then click Network. 3. Click Add a wireless device. 4. Click on the media player device icon, then click Next. 5. Enter the pairing code (see step 1), then click Next. -
Page 132
WD TV Play Media Player User Manual 6. Select the network you want to add the media player to from the list, then click Next. 7. Press OK on the remote to connect the media player to your network (see step 8. -
Page 133: System
WD TV Play Media Player User Manual Proxy Proxy is used by corporations to view and filter online transactions. All requests in the corporate environment go through a proxy server to perform such actions as recording the IP address of a web site, checking the IP address that is being opened to make sure it’s not on a blocked list, and checking outgoing attachments for spam…
-
Page 134
WD TV Play Media Player User Manual To change functions, press to select a function button, then press OK. Press to select a different function for the button such as My Storage, Help, etc., then press OK. To reset the function buttons to default settings, select Reset, then press OK. -
Page 135
Select OK then press OK to restart the media player. Device Registration To register your WD product using the Setup menu: 1. Make sure your media player has an active network connection. See “Finding Your Content — My Storage” on page 24 for instructions on how to set up a network connection. -
Page 136
WD TV Play Media Player User Manual 4. Press to select Device Registration, then press OK. The Device Registration screen appears. 5. In the Device Registration screen, navigate to the First Name field, then press 6. Use the navigation buttons to type in your first name using the on-screen keyboard. -
Page 137: Appearance
User Interface Backgrounds You can use this menu to set a different photo as the system background to replace the default grass field and sunny sky photo. You can choose from the WD Creative Masters backgrounds or Your Backgrounds. WD Creative Masters WD Creative Masters includes themed albums of photos from leading photographers that you can use for your media player user interface background.
-
Page 138
WD TV Play Media Player User Manual Select a WD Creative Masters album, then navigate to a photo and press OK. Press OK again to preview the background. You can choose to Set as Background or View Bio of the photographer, then press OK. -
Page 139: Playback Settings
Screensaver Style Use this menu to choose your screensaver display style. WD Logo – this is the default screensaver with a moving WD logo. Folder Photo Slideshow – photos from a single folder in attached storage are shown in a slideshow as your screensaver.
-
Page 140
WD TV Play Media Player User Manual Video Playback Settings Use the menus in the Video Settings screen to configure the display and sequence option for video files. Video Playback Sequence Use this menu to select the video playback mode. The default setting is Normal . Go to “Play Mode”… -
Page 141
WD TV Play Media Player User Manual Music Playback Settings Use the menus in the Music settings screen to configure the display and sequence option for audio files. Music Playback Sequence Use this menu to select the audio playback mode. The default setting is Normal . Go to “To set the music repeat mode:”… -
Page 142
WD TV Play Media Player User Manual Photo Settings Use the menus on this category to configure the display size and slideshow settings when viewing your image files. Slideshow Sequence Use this menu to set the slideshow sequence mode. The default setting is Normal . -
Page 143: About
WD TV Play Media Player User Manual Slideshow Interval Time Use this menu to set the time interval between pictures in the slideshow. You can select from 3 seconds (default) to 5 minutes. Photo Scaling Use this menu to define how pictures are scaled when you view them. This also applies when pictures are viewed in a slideshow.
-
Page 144: System Maintenance
Messages” on page 143 for possible corrective action. Solutions to more serious problems may require contacting your dealer or an authorized service center for assistance. For more information, refer to “WD Service and Support” on page 2. System Firmware Upgrade Firmware is an important set of instructions that tells your media player how to operate, what the interactive screens look like, and how to do what you tell it to do.
-
Page 145
2. Click “Downloads,” then the product name (or photo). Download the WD TV media player firmware zip file to your computer. 3. Using an unzip utility, extract the zip file contents to the root directory of a USB device connected to your computer. -
Page 146: Troubleshooting
• Power cycle (turn off/on) your TV. • Power cycle (turn off/on) your media player. • If the same thing happens, a system diagnostic failure may have occurred. Contact WD Technical Support for assistance (see “WD Service and Support” on page 2).
-
Page 147
WD TV Play Media Player User Manual Problem Solution The slideshow pictures are distorted. Navigate to the Setup | Playback Settings | Photo screen and select Keep as original or Fit to screen in the Photo Scaling field. FILES File does not play. -
Page 148: Common Error Messages
WD TV Play Media Player User Manual Problem Solution The media player remote control does • Press only one button at a time. not work. • Make sure the batteries are properly inserted. • The batteries may already be drained out. Replace batteries with new ones.
-
Page 149: Faqs
WD TV Play Media Player User Manual FAQs How do I find media files and create playlists? Several media player applications are currently available, such as Winamp and iTunes, that let you play, arrange, and edit media files. These media players also let you create playlists and edit the metadata information for media files.
-
Page 150: Appendix
WD TV Play Media Player User Manual Appendix Multiformat Content Playback Multiformat is a file type that groups other files of the same digital content but may be encoded in different digital formats. For example, a single video file may actually include a few components such as video, audio, and photo grouped together.
-
Page 151: Supported Formats
WD TV Play Media Player User Manual Supported Formats Filename extension Codec Format/container VIDEO .3g2/.3gp/.mov/.mp4 Video: QuickTime AVC/H264 MPEG4 M-JPEG Audio: MPEG Audio .asf/.wmv Video: WMV3/VC-1 Audio: WMA2 WMA3 WMA PRO MPEG Audio .avi/.divx Video: AVC/H264 M-JPEG WMV3 WVC1 (VC1)
-
Page 152
WD TV Play Media Player User Manual Filename extension Codec Format/container .ogg Video MPEG4 AVC/H264 XviD Audio Vorbis MPEG Audio .mkv Video: MATROSKA AVC/H264 MPEG4 Xvid WMV3 VC-1 Audio: AC3/DD Plus/TrueHD MPEG Audio An audio receiver is required for multi-channel surround sound digital output. -
Page 153
WD TV Play Media Player User Manual File Codec Format/container AUDIO AIF/AIFF AIFF 1. AC3 MATROSKA 2. FLAC 3. MPEG 2/4 AAC LC/HE 4. MPEG Audio 5. OGG Vorbis 6. PCM AC3/EC3 1. Dolby Digital AC3/EC3 2. Dolby Digital Plus 3. -
Page 154
WD TV Play Media Player User Manual Thumbnail Support Limitation MUSIC Filename Only supports ID3 and EXIF format have thumbnail extension Thumbnail in the id3 tag (“APIC” or “PIC” tag) Thumbnail in the asf format (“WM/Picture” in the extended info) Thumbnail in the quicktime format (“moov/udta/meta/ilst/covr”) -
Page 155: Regulatory Compliance
Connect the equipment into an outlet on a circuit different from that to which the receiver is connected. Consult the retailer or an experienced radio/television technician for help. Any changes or modifications not expressly approved by WD could void the user’s authority to operate the equipment. Regulatory Information/Disclaimers Installation and use of this Wireless LAN device must be in strict accordance with the instructions included in the user documentation provided with the product.
-
Page 156
WD TV Play Media Player User Manual Industry Canada (IC) This device complies with RSS-210 of the Industry Canada Rules. Operation is subject to the following two conditions: 1. this device may not cause interference and 2. this device must accept any interference, including interference that may cause… -
Page 157
WD TV Play Media Player User Manual Cet appareil n’est destiné qu’a` des adaptateur compatibles marqués «UL Listed.” CE Compliance for Europe Operation of this device is subjected to the following National regulations and may be prohibited to use if certain restriction should be applied. -
Page 158
WD TV Play Media Player User Manual (2005/32/EC). «Noudattamisjulistus» on jätetty asiaankuuluvien direktiivien mukaisesti, ja se on tallessa Western Digital Europessa. Mærkning med CE-symbolet angiver at systemet overholder Europaparlamentets og Rådets direktiver, herunder EMC-direktiverne (elektromagnetisk kompatibilitet) (2004/ 108/EC), (1999/5/EC) og lavspændingsdirektivet (2006/95/EC) og EuP-direktivet 2005/32/EC. -
Page 159: Limited Warranty
Limited Warranty WD warrants that the Product, in the course of its normal use, will for the term defined below, be free from defects in material and workmanship and will conform to WD’s specification therefor. The term of your limited warranty depends on the country in which your Product was purchased.
-
Page 160: Warranty Information (Australia/New Zealand Only)
Warranty WD warrants that the Product, in the course of its normal use, will for the term defined below, be free from defects in material and workmanship and will conform to WD’s specifications. The term of your warranty is 1 year in Australia and New Zealand, unless otherwise required by law.
-
Page 161: Gnu General Public License («Gpl»)
WD or the dealer from whom you originally purchased the Product determines that your claim is valid, WD or such dealer shall, at its discretion, either repair or replace the Product with an equivalent or better Product or refund the cost of the Product to you. You are responsible for any expenses associated with a claim under this warranty.
-
Page 162: Spotify Third-Party Licenses
WD TV Play Media Player User Manual Spotify Third-Party Licenses Several fantastic pieces of free and open-source software have really helped get Spotify to where it is today. A few require that we include their license agreements within our product. Consider it done. As we enjoy giving credit where it’s due, we included the entire list below.
-
Page 163
WD TV Play Media Player User Manual d. Executable Files» refer to the executables, binary files, configuration and any required data files included in the Work. e. Publisher» means the provider of the website, magazine, CD-ROM, DVD or other medium from or by which the Work is obtained by You. -
Page 164
WD TV Play Media Player User Manual LICENSE OR THE USE OF THE WORK OR OTHERWISE, EVEN IF THE AUTHOR OR THE PUBLISHER HAS BEEN ADVISED OF THE POSSIBILITY OF SUCH DAMAGES. 9. Termination. a. This License and the rights granted hereunder will terminate automatically upon any breach by You of any term of this License. -
Page 165
WD TV Play Media Player User Manual THIS SOFTWARE IS PROVIDED BY THE COPYRIGHT HOLDERS AND CONTRIBUTORS «AS IS» AND ANY EXPRESS OR IMPLIED WARRANTIES, INCLUDING, BUT NOT LIMITED TO, THE IMPLIED WARRANTIES OF MERCHANTABILITY AND FITNESS FOR A PARTICULAR PURPOSE ARE DISCLAIMED. IN NO EVENT SHALL… -
Page 166
Western Digital, WD, the WD logo, WD TV, My Book, and My Passport are registered trademarks of Western Digital Technologies, Inc. in the U.S. and other countries: and WD TV Play, WD TV Remote, and WD Livewire are trademarks of Western Digital Technologies, Inc. Other marks may be mentioned herein that belong to other companies. -
Page 167
WD TV Play Media Player User Manual Index accessories 3 Eject function AccuWeather.com 63 button 27, 28 advanced features 119 procedure 17 encoding support 132 space 35 environmental compliance (China) 154 storage limit 35 error messages 143 usage 35 apps… -
Page 168
WD TV Play Media Player User Manual searching for contents 72 LED light control 129 Flixster 78 Live365 79 adding a station to your preset list 84 exit 85 GNU general public license 156 getting track information 85 GPL software 156… -
Page 169
WD TV Play Media Player User Manual wireless 20 playback settings 134 news feed 117 playlist adding custom news feeds 118 supported formats 145 options 118 videos, playback 44 search 118 power NTSC 120 AC connector 7 cable connection 11… -
Page 170
WD TV Play Media Player User Manual USB storage 25 view 59 settings Spotify 104 Audio/Video menu 120 adding a track to a playlist 106 network 123 browse album artist 105 System menu 123 collaborate on a playlist 106 Setup 119… -
Page 171
WD TV Play Media Player User Manual Tweet by WD TV 114 wireless network setup 20 Twitter 114 get Windows pairing code 125 usage statistics 131 YouTube USB device my account 94 connection 16 search history 42, 96 disconnection 16…