My Cloud EX2 Ultra
Личный облачный накопитель
Руководство по эксплуатации
™

-
Contents
-
Table of Contents
-
Bookmarks
Quick Links
WD My Cloud EX2
™
Personal Cloud Storage
User Manual
Related Manuals for Western Digital My Cloud EX2
Summary of Contents for Western Digital My Cloud EX2
-
Page 1
WD My Cloud EX2 ™ Personal Cloud Storage User Manual… -
Page 2: Wd Service And Support
Your product includes 30 days of free telephone support during the warranty period. This 30-day period starts on the date of your first telephone contact with WD Technical Support. Email support is free for the entire warranty period and our extensive knowledge base is available 24/7. To help us keep you informed of new features and services, remember to register your product online at http://register.wd.com.
-
Page 3: Table Of Contents
Recording Your WD Product Information……..
-
Page 4
Volume Virtualization ……….. . . 92 Managing Apps on WD My Cloud EX2 ……97 About Apps . -
Page 5
Appendices ……….. 141 Appendix A: WD My Cloud EX2 Quick User Guide ……141 Appendix B: Joomla!®… -
Page 6: Important User Information
If the product has been dropped or the chassis has been damaged. If the product exhibits a distinct change in performance, contact WD Customer Support at http://support.wd.com…
-
Page 7: Recording Your Wd Product Information
IMPORTANT USER INFORMATION Recording Your WD Product Information Remember to write down the following WD product information, which is used for setup and technical support. Your WD product information is found on the label on the back of the device. Serial Number…
-
Page 8: Product Overview
RAID 1, cloud or LAN/WAN backup options. Stream large files to any screen and expand your NAS features with a full suite of apps.The WD My Cloud EX2 personal cloud storage system is a high-performance system providing secure wireless access to your media and files from any computer, tablet, or smartphone when connected to a wireless router.
-
Page 9: About The Online Learning Center
Back up, your way – Protect your data via remote backup to another My Cloud EX2 or My Cloud EX4, integrated cloud backup or local LAN/WAN backup. PC users, WD SmartWare™ Pro offers options for how, when and where you back up your files for up to ®…
-
Page 10: Package Contents
Canada www.shopwd.ca www.wdstore.ca Europe www.shopwd.eu www.wdstore.eu All others Contact WD Technical Support in your region. For a list of Technical Support contacts, visit http://support.wd.com and see Knowledge Base Answer ID 1048. Operating System ® ® Windows Mac OS X …
-
Page 11: Pre-Installation Instructions
Handling Precautions WD products are precision instruments and must be handled with care during unpacking and installation. Rough handling, shock, or vibration can damage the device drives. Observe the following precautions when unpacking and installing your external storage product: …
-
Page 12: Product Components
PRODUCT OVERVIEW Product Components Front View Power LED Drive LEDs WD MY CLOUD EX2 PERSONAL CLOUD STORAGE USER MANUAL…
-
Page 13: Back View
Connects the device to an AC adapter and the power outlet. Kensington For device security, the device is equipped with a security slot that security slot supports a standard Kensington security cable. Visit http://www.kensington.com/ for more information. WD MY CLOUD EX2 PERSONAL CLOUD STORAGE USER MANUAL…
-
Page 14: Getting Started
Accessing Content It’s easy to set up the WD My Cloud EX2 Personal Cloud Storage device — all you have to do is unpack your device, connect it, and wait for the Power LED on the front of your device to turn a solid blue.
-
Page 15
6. When looking down on the top of the unit with the front panel towards you, and with the connectors at the bottom of the drive facing in, gently slip the drive into a slot. 7. Make sure the tab is sticking up at the back of the unit. WD MY CLOUD EX2 PERSONAL CLOUD STORAGE USER MANUAL… -
Page 16: Physically Connecting The Device
11. Continue to “Physically Connecting the Device” on page 11. Physically Connecting the Device Follow the steps below to connect the WD My Cloud EX2 Personal Cloud Storage device to a home or small office network. Important: To avoid overheating, make sure the device is upright as shown in the illustration above and nothing is blocking or covering the slots and openings on the top and bottom of the device.
-
Page 17: Leds
4. Plug the other end of the power adapter into a power outlet. The unit powers up automatically. Important: Wait for the WD My Cloud EX2 device to finish powering up (approximately three minutes) before configuring it. You will know it is ready when the power LED stops flashing and turns blue.
-
Page 18: Getting Started Using Online Setup Software
Use the following steps to download and run the online setup software, discover the device, and get started using your device. The online setup software is available from WD’s Online Learning Center at http://wd.com/setup/wdmycloudex2.
-
Page 19
4. Click the Download Setup Software button. The setup software downloads to your computer. 5. Access your downloaded files, and then double-click Setup.exe (Windows) or WD My Cloud EX2 Personal Cloud Storage Setup.dmg (Mac) to open the setup software. The Getting Started window displays. WD MY CLOUD EX2 PERSONAL CLOUD STORAGE… -
Page 20
2. Read the Western Digital End User License Agreement that displays, and then select the “I accept the terms of the License Agreement” check box and click Next. 3. Review the information on the screen, WD MY CLOUD EX2 PERSONAL CLOUD STORAGE USER MANUAL… -
Page 21
GETTING STARTED 4. When the power LED on your WD My Cloud EX2 device is solid blue, click Next. The software discovers your device. Note: If your device is not detected, follow the on-screen directions. 5. Select your WD My Cloud EX2 device and click Next. The Set up your personal cloud screen displays. -
Page 22
Note: You may need to check your email spam folder if your spam filter does not allow email from WD. The Congratulations! screen displays. You’ve successfully set up your WD My Cloud EX2 device. WD MY CLOUD EX2 PERSONAL CLOUD STORAGE… -
Page 23
• If the option is enabled, the firmware turns on automatic updates at 3:00 AM daily. To change settings for automatic updates, see “Firmware” on page 2. Click Finish to close the setup wizard. WD MY CLOUD EX2 PERSONAL CLOUD STORAGE USER MANUAL… -
Page 24: Getting Started Without Online Setup Software
If you do not use the online setup software to get started, you can still: Use your WD My Cloud EX2 personal cloud storage device as an external hard drive, dragging and dropping files to and from it. …
-
Page 25
File > Make Alias. Mapping the Public Folder (Windows) To map the WD My Cloud EX2 Public folder for quick access in the future: 1. In Windows Explorer, under Network, click WDMYCLOUDEX2. 2. Right-click the Public folder and select Map Network Drive from the menu. -
Page 26: Accessing Your Cloud Remotely
Enabling Cloud Access for the WD My Cloud EX2 Device Before you can use your WD My Cloud EX2 device remotely, you have to enable it for cloud access. To enable the WD My Cloud device for remote access and to check the status of its remote connection(s), see “Cloud Access”…
-
Page 27
Make sure to write down the access codes you generate. Click OK. Once you use the code(s), the Configure Access page displays the cloud devices to which the user now has access, along with the activation code used. WD MY CLOUD EX2 PERSONAL CLOUD STORAGE USER MANUAL… -
Page 28: Mobilizing Your Files With Ios And Android Mobile Apps
Or, take a photo or video clip and instantly upload it from your gallery directly to your WD My Cloud EX2 device with ease.WD Photos is compatible with leading Apple mobile devices and many popular Android devices. Photos are automatically optimized for viewing on your mobile device.
-
Page 29
ACCESSING YOUR CLOUD REMOTELY To install WD Photos on your mobile device: Download WD Photos from the Apple App or Google Play store and install it on your mobile device. Launch WD Photos on your mobile device to display the WD Photos page. -
Page 30
“To generate an activation code for a user’s mobile device(s):” on page 22. Enter your user name and password. Tap your WD My Cloud EX2 device to view your album(s), and then tap an album to display the photos contained within it. Note: If you have problems installing WD Photos, visit http://wd.com/setup/wdphotos. -
Page 31
. Note: WD My Cloud app brings your data from the WD My Cloud EX2 device to your tablet, handset, or other portable devices using Google Android or Apple iOS. WD My Cloud provides a convenient file list of the WD My Cloud EX2 device contents and then launches your favorite player or viewer for any files you wish to open. -
Page 32
In the Add Manually section, tap to the left of WD Device. Enter the activation code generated on the WD My Cloud’s dashboard and tap Activate. You must generate one code for each app you want to activate. Codes are valid for 48 hours from the time of request and can be used one time only. -
Page 33
Add and remove device content by dragging and dropping files and folders from your computer. Requirements WD My Cloud EX2 personal cloud storage or with the most recent firmware, connected to the Internet. A PC or a Mac computer. -
Page 34
ACCESSING YOUR CLOUD REMOTELY In the Software Downloads area, click Go to Downloads. In the WD My Cloud for desktop area, click Download. The setup software downloads to your computer. Access your downloaded files, and then double-click wdmycloud.exe (Windows) or wdmycloud.dmg (MAC). -
Page 35
ACCESSING YOUR CLOUD REMOTELY Select a language from the drop-down menu, and then click OK. Read the WD License Agreement, and then click I accept the terms of the License Agreement. Click Next. 10. Read the Apple License Agreement, and then click I accept the terms of the License Agreement. -
Page 36
ACCESSING YOUR CLOUD REMOTELY 12. Once the installation is complete, click Done to close the WD My Cloud installer. Mac: Complete Steps 1 — 5 above. Click Downloads and select WD My Cloud Installer. If asked to install a Java runtime, click Install. -
Page 37
ACCESSING YOUR CLOUD REMOTELY Read the WD Software License Agreement, and then click I accept the terms of the License Agreement. Click Install. The installation begins. Once the installation is complete, click Done to close the WD My Cloud installer. -
Page 38
User” on page 21. Click Activation Code to log in using the activation code generated by WD My Cloud EX2. (To generate an activation code, see “To generate an acti- vation code for a user’s mobile device(s):” on page 22.) The WD My Cloud Desktop app opens. -
Page 39: Managing Users, Groups, And Shares
The Administrator, normally the device owner, is the person in charge of setting up the device. As the WD My Cloud EX2 device owner, you have a special user account (admin) that provides you with administrator privileges. With these privileges, you can set up and configure the device to your specific needs and add other users to your personal cloud.
-
Page 40
2. Enter the User Name, First Name, Last Name and Email address (optional) of the user you’d like to add in the applicable fields, and then click Next. WD MY CLOUD EX2 PERSONAL CLOUD STORAGE USER MANUAL… -
Page 41
5. Enter the Quota Amount, or leave the values blank for unlimited space, and then click Save. (See “Quota Rules” on page 40 for information on quotas.) Your new user account displays on the left pane of the Set Up Users screen. WD MY CLOUD EX2 PERSONAL CLOUD STORAGE USER MANUAL… -
Page 42
Number of Users: Enter the number of User accounts you’d like to create. The maximum number you can add displays to the right. Password: Enter a password for the user accounts. Confirm Password: Confirm the password for the user accounts. WD MY CLOUD EX2 PERSONAL CLOUD STORAGE USER MANUAL… -
Page 43
3. Enter the Quota Amount, or leave the values blank for unlimited space, and then click Next. (See “Quota Rules” on page 40 for information about quotas.) 4. Your new user accounts display on screen. Click Save to save them to your device. WD MY CLOUD EX2 PERSONAL CLOUD STORAGE USER MANUAL… -
Page 44: Editing User Settings
(no password is the default setting). Use the following steps to update a user password. 1. On the Set Up Users screen, select a user from the list on the left. WD MY CLOUD EX2 PERSONAL CLOUD STORAGE USER MANUAL…
-
Page 45
Use the following steps to assign a quota to a user account. A quota determines the amount of disk space allocated to the user on the WD My Cloud EX2 device. 1. On the Set Up Users screen, select the user from the left pane. -
Page 46: About Groups
MANAGING USERS, GROUPS, AND SHARES 2. In the Quotas field, click Configure. 3. Enter the amount of space to assign to the user on the WD My Cloud EX2 device. To assign unlimited space, leave the Quota Amount field(s) blank.
-
Page 47: Adding A Group
4. Enter the Quota Amount, or leave the values blank for unlimited space, and then click Save. Your new group account displays on the left pane of the Set Up Groups screen. WD MY CLOUD EX2 PERSONAL CLOUD STORAGE USER MANUAL…
-
Page 48: Editing Group Settings
Once a group account is created, you can assign access to the various shares on your WD My Cloud EX2 device using the following steps. 1. On the Set Up Groups screen, select the group for which you’d like to assign a share.
-
Page 49: About Shares
Group account list. About Shares A share is an area on the WD My Cloud EX2 device for storing files (similar to a folder or directory). Note: In this manual, we use the terms share and folder interchangeably.
-
Page 50
1. On the navigation bar, click Shares to display the About Shares page. 2. Click a share to display its profile and share access information. Note: Only private shares can be edited. Public shares always have read/write access and are therefore grayed out. WD MY CLOUD EX2 PERSONAL CLOUD STORAGE USER MANUAL… -
Page 51: Creating A New Share
Note that share descriptions must begin with an alphanumeric value and can contain up to 256 characters. Enable Recycle Bin (optional) The Recycle Bin contains any files deleted from the WD My Cloud EX2 device. If you’d like to use the Recycle Bin, click the toggle button .
-
Page 52
2. Modify the required and optional settings as desired. Making a Share Private If you decide there is a reason to limit access to a public share, convert it to a private share. WD MY CLOUD EX2 PERSONAL CLOUD STORAGE USER MANUAL… -
Page 53: Deleting A Share
Note: For information on accessing the contents of a share remotely, see “Accessing Your Cloud Remotely” on page 21. Several options are available for opening a WD My Cloud EX2 share. For a private share, the user must have: …
-
Page 54
Click the WD Quick View icon in the menu bar and (Mac OS X) move the cursor over the name of your WD My Cloud device to display the submenu. Select Open on the WD Quick View submenu. The shares display in a second submenu. -
Page 55: The Dashboard At A Glance
Obtaining Customer Support Common Tasks Use the WD My Cloud EX2 dashboard to configure settings and to manage the device as you prefer. For example, you can set up user accounts and restrict access to the files on your WD My Cloud EX2 device, set up folders for storing files, enable remote access, and customize the device to suit your needs.
-
Page 56
Learning Center Downloads page at wd.com/setup/mycloudex2apps. Accessing the Dashboard for the First Time Use the following steps when you initially access the WD My Cloud EX2 dashboard. Password When you initially log into WD My Cloud EX2, leave the field blank 2. -
Page 57
Click the Automatically update device firmware when available check box. Click the Register the WD My Cloud EX2 device to receive continuous product support check box. 9. Click Finish. The WD My Cloud EX2 dashboard displays. WD MY CLOUD EX2 PERSONAL CLOUD STORAGE… -
Page 58: The Dashboard Home Page
THE DASHBOARD AT A GLANCE The Dashboard Home Page The WD My Cloud EX2 Home page has an information bar at the top right, an navigation icon bar across the page, and an instant overview of the status of the device’s main functions with links for updating settings.
-
Page 59
Monitor remote access status. Backups Create backups to: • A USB drive • Another WD My Cloud EX2 on your local network or on a remote network • Another location on your WD My Cloud EX2 device • A Cloud backup site… -
Page 60
The main body of the Home page shows the status of the device and its functions and provides shortcuts to the most necessary tasks. Capacity The Capacity panel displays the amount of free storage left on your WD My Cloud EX2 device. WD MY CLOUD EX2 PERSONAL CLOUD STORAGE… -
Page 61
Diagnostics The Diagnostics section displays a snapshot of the system’s components and identifies the overall health of the WD My Cloud EX2 device. WD MY CLOUD EX2 PERSONAL CLOUD STORAGE USER MANUAL… -
Page 62
Close Firmware The Firmware section displays the current version of firmware loaded on your WD My Cloud EX2 device. A green check mark indicates that your firmware is up-to-date. 1. To view whether an updated version of the firmware is available, click the arrow to the right of Firmware to display firmware availability: … -
Page 63
WD My Cloud EX2 device. At a glance, you can see the network, CPU, and RAM activity. 1. To view a list of all the system activities and processes that are running on your WD My Cloud EX2 device, click the arrow on the right of the panel to display: … -
Page 64
The Cloud Devices panel displays the number of cloud devices currently accessing the WD My Cloud EX2 device remotely. In this example, one cloud device is accessing it remotely. 1. To add cloud access for a user, click the plus sign (+) in the lower right of the panel to display: 2. -
Page 65
WD My Cloud EX2 device. Users The Users panel displays the number of users currently set up to use the WD My Cloud EX2 device. 1. To add a user, click the plus (+) sign in the lower right of the panel:… -
Page 66
Save. You’ve added a new user. Apps The Apps panel displays the apps currently installed on your WD My Cloud EX2 device. 1. To view the installed apps, click the arrow in the lower right of the panel to display:… -
Page 67
THE DASHBOARD AT A GLANCE Note: To install an app, see “Managing Apps on WD My Cloud EX2” on page 97. 2. To return to the Home page, click Close Managing Alerts Alerts display system messages containing pertinent information about the status of your WD My Cloud EX2 device. -
Page 68: Obtaining Customer Support
To dismiss all alerts, click View All, and then Dismiss All. Obtaining Customer Support To open the Support page: 1. Click the Help icon on any page to display the Help menu. 2. Click Support to display the following page: WD MY CLOUD EX2 PERSONAL CLOUD STORAGE USER MANUAL…
-
Page 69
THE DASHBOARD AT A GLANCE If a problem occurs with the WD My Cloud EX2 device, WD Technical Support will need information about your device to troubleshoot and determine the best solution. There are two ways to get your device info and request support: … -
Page 70: Common Tasks
THE DASHBOARD AT A GLANCE Common Tasks The next few chapters step you through the procedures for configuring and using the WD My Cloud EX2 device. The following table provides shortcuts to instructions for some common tasks. How do I …
-
Page 71: Backing Up And Retrieving Files
Connecting A USB Drive Connect a USB hard drive to the USB port on the rear of your WD My Cloud EX2 device for additional storage and backup capabilities. The USB drive appears as a share on the WD My Cloud EX2 dashboard.
-
Page 72: User Manual
BACKING UP AND RETRIEVING FILES Creating a USB Backup Use the following steps to back up your data on your WD My Cloud EX2 to or from a USB device. On the navigation bar, click Backups to display the Backups screen.
-
Page 73
On the USB Backups screen, under USB Backup Jobs, select the job you’d like to modify, and then click the Edit Job button Review the USB Details screen, and then click Close to close the screen. WD MY CLOUD EX2 PERSONAL CLOUD STORAGE USER MANUAL… -
Page 74: Remote Backups
USB Backup Jobs list. Remote Backups Back up your WD My Cloud EX2 device to another WD My Cloud EX2 or a WD My Cloud EX4 device. Before you proceed with a remote backup, ensure the following: …
-
Page 75
In the Remote IP field, enter the IP address of the remote backup server. (Example 192.168.1.16) In the Password field, enter the password for the remote backup server, and then click Next. WD MY CLOUD EX2 PERSONAL CLOUD STORAGE USER MANUAL… -
Page 76
Click Yes to begin your remote backup now. Click No to create a remote backup job for future backup. 9. Review the details of your Remote Backup job, and then click Finish WD MY CLOUD EX2 PERSONAL CLOUD STORAGE USER MANUAL… -
Page 77
On the Remote Backup screen, under Remote Backup Jobs, click the Recover button next to the job you’d like to view. On the Recover screen, click OK. Your data recovery begins. WD MY CLOUD EX2 PERSONAL CLOUD STORAGE USER MANUAL… -
Page 78: Internal Backups
WD My Cloud EX2 device. Creating an Internal Backup Use the following steps to back up your WD My Cloud EX2 internally. On the navigation bar, click Backups to display the Backups screen. Click Internal Backups, if not already selected.
-
Page 79
On the Internal Backups screen, under Internal Backup Queue, select the job you’d like to modify, and then click the Details button. Review the details of your Internal Backup job, and then click Close. WD MY CLOUD EX2 PERSONAL CLOUD STORAGE USER MANUAL… -
Page 80: Cloud Backups
Internal Backup Jobs list. Cloud Backups A cloud backup allows you to create remote backups that are accessible over the Internet and through various mobile devices. WD My Cloud EX2 device uses the following cloud services to create remote backups: …
-
Page 81
Email address: Enter the email address you’ll use to receive information from ElephantDrive. Password: Enter a password for your new account Verify Password: Reenter your password. You’ve now enabled your ElephantDrive cloud backup. WD MY CLOUD EX2 PERSONAL CLOUD STORAGE USER MANUAL… -
Page 82
Once your Amazon S3 account is set up, use the following steps to create a cloud backup. On the navigation bar, click Backups to display the Backups screen. Click Cloud Backups, if not already selected. Click the Amazon S3 button at the top of the screen. WD MY CLOUD EX2 PERSONAL CLOUD STORAGE USER MANUAL… -
Page 83
Enter the following information, and then click Next: Type Select one of the following options: • Upload: Backs up your WD My Cloud EX2 data to your Amazon S3 bucket. • Download: Backs up your Amazon S3 bucket to your WD My Cloud EX2 device. -
Page 84
• Incremental Backup: Overwrites files with source files that are newer then the target files. In the Local Path field, enter a path for your backup on your WD My Cloud EX2 server. Click Browse to browse to a location for your backup on the device. -
Page 85
13. Review your settings, and then click Finish. Your Amazon S3 Cloud backup is created. The new job displays in the Amazon S3 Queue section of the Amazon S3 Backup page. 14. Access your Amazon S3 Cloud backup bucket to view your device backups. WD MY CLOUD EX2 PERSONAL CLOUD STORAGE USER MANUAL… -
Page 86: Managing Storage On Wd My Cloud Ex2
The Storage page allows you to configure the storage within your device and view the status and capacity of the disks within your device. This chapter provides details on managing the storage on your WD My Cloud EX2 device. WD MY CLOUD EX4 PERSONAL CLOUD STORAGE…
-
Page 87: Raid Storage
There are several different levels of RAID, each one providing a different method of sharing or distributing data among the drives. Your WD My Cloud EX2 device allows you to select from the following storage modes:…
-
Page 88: Changing The Raid Mode
MANAGING STORAGE ON WD MY CLOUD EX2 Changing the RAID Mode Use the following steps to change the current RAID mode on your WD My Cloud EX2 device. WARNING! Changes made to your RAID Mode will delete all of your data and your user settings.
-
Page 89
MANAGING STORAGE ON WD MY CLOUD EX2 Select the RAID mode you’d like to use for your WD My Cloud EX2 device. Options include: JBOD The use of one or more drives not in a RAID configuration but managed as separate logical volumes. -
Page 90
MANAGING STORAGE ON WD MY CLOUD EX2 Using the Volume slider, select the amount of space you’d like to dedicate to the selected RAID mode. If you choose not to use the entire volume for your RAID selection, you can configure the remaining disk space as Spanning by selecting the Configure the remaining disk space as Spanning check box. -
Page 91: Disk Status
Auto-Rebuilding your RAID The Auto-Rebuilding option allows you to automatically rebuild the RAID for your WD My Cloud EX2 device in case of drive corruption. Use the following steps to enable the auto-rebuild option. On the navigation bar, click Storage to display the Storage screen.
-
Page 92
Viewing Hard Drive Information Use the following steps to view status of the disks on your WD My Cloud EX2 device. On the Storage page, click Disk Status, if not already selected. Select Drive <drive #> next to the disk for which you’d like to view information. -
Page 93: Iscsi Storage
WD My Cloud EX2 allows you to create and manage iSCSI targets. The iSCSI target provides storage, similar to a local hard disk drive, but is accessed over a network rather then locally.
-
Page 94
MANAGING STORAGE ON WD MY CLOUD EX2 Click iSCSI, if not already selected. Click the toggle button to enable iSCSI. Click Create iSCSI Target at the bottom of the screen. On the Create iSCSI Target screen, enter the following information: … -
Page 95
MANAGING STORAGE ON WD MY CLOUD EX2 Enabling / Disabling an iSCSI Target Use the following steps to enable or disable an iSCSI target. Enabling an iSCSI Target On the Storage page, click iSCSI. Under iSCSI Target list, click Details next to the target you’d like to enable. -
Page 96
MANAGING STORAGE ON WD MY CLOUD EX2 Click the toggle button to ON to enable iSCSI. In the iSCSI iSNS Client field, click the toggle button Click Configure. Enter the iSNS client server address, and then click Save. WD MY CLOUD EX4 PERSONAL CLOUD STORAGE… -
Page 97: Volume Virtualization
Volume Virtualization Volume Virtualization simplifies scalability by allowing you to map iSCSI targets on other network storage devices and present them as volumes on your WD My Cloud EX2 device. Creating a Virtualized Volume Use the following steps to create a virtualized volume on your device.
-
Page 98
MANAGING STORAGE ON WD MY CLOUD EX2 Select an iSCSI target from the retrieved list, and then click Next. To add authentication to the target, click the toggle button to ON, enter a User Name and Password, and then click Next. -
Page 99
MANAGING STORAGE ON WD MY CLOUD EX2 Review the Volume Virtualization summary to ensure that your settings are correct, and then click Save. A virtual volume is created. Connecting a Virtualized Volume to a Target Use the following steps to connect a virtualized volume to a target on your device. -
Page 100
Once your virtual volume is formatted, click Close. The state of the volume is changed to Connect. Your new virtual volume is now available on your WD My Cloud EX2 device. WD MY CLOUD EX4 PERSONAL CLOUD STORAGE USER MANUAL… -
Page 101
MANAGING STORAGE ON WD MY CLOUD EX2 Modifying a Virtualized Volume Use the following steps to modify a virtualized volume on your device. On the Storage page, click Volume Virtualization, if not already selected. Select the virtual volume you’d like to modify, and then click Modify. -
Page 102: Managing Apps On Wd My Cloud Ex2
Note: Support for each app should be obtained through the individual vendor. WD My Cloud EX2 comes with various apps installed. There is also a list of available apps for you to choose from on the Add an App screen.
-
Page 103
MANAGING APPS ON WD MY CLOUD EX2 Adding an App Use the following steps to add an app to your WD My Cloud EX2 device. 1. On the navigation bar, click Apps to display the Apps screen. 2. Click the Add an App icon in the lower left side of the screen. -
Page 104
Manually Adding an App If you have an app you’d like to add that is not listed on the Add an App screen, use the following steps to manually add that app to your WD My Cloud EX2 device. Note: WD recommends that you fully understand the nature of any app before you install it on your device. -
Page 105
Updating an App Use the following steps to update an app that you’ve added to your WD My Cloud EX2 device. 1. On the navigation bar, click Apps to display the Apps screen. -
Page 106: Playing/Streaming Videos, Photos, & Music
, you can just transfer your multimedia content to “Enabling DLNA and iTunes” on page 103) the Public share on your WD My Cloud EX2 device, and you are ready to stream and view ® content on your home entertainment center, game consoles (for example, Xbox 360 ®…
-
Page 107: Media Types Supported
M2TS MPEG1 MPEG2 MPEG4 QTIF SPTS Xvid Note: Some devices may not support playback of all these files. Please refer to your device’s user manual to see which formats are supported. WD MY CLOUD EX2 PERSONAL CLOUD STORAGE USER MANUAL…
-
Page 108: Media Storage
Media Storage You can access and store media content on the WD My Cloud EX2 device by means of network shares. Shares, similar to folders or directories, are areas set up to organize media and access them from your network.
-
Page 109
The DLNA area displays the current version, the number of music, video, and pictures available on your device, and when the last update occurred. To view DLNA media server information, on the Settings screen, click Media in the left panel. WD MY CLOUD EX2 PERSONAL CLOUD STORAGE USER MANUAL… -
Page 110
Click Browse, and then navigate to the folder where iTunes can access your media. Click Save at the bottom of the iTunes area. 3. In the Password field, enter a password to be used when accessing your WD My Cloud EX2 device on iTunes. WD MY CLOUD EX2 PERSONAL CLOUD STORAGE… -
Page 111
3. Follow the same process to place your videos and pictures into their respective Pictures and Video folders. Note: You can also access your media files using WD My Cloud Desktop app (see “WD My Cloud for Desktop App” on page 27). WD MY CLOUD EX2 PERSONAL CLOUD STORAGE… -
Page 112: Accessing Your Personal Cloud Using Media Players
You can connect the various WD TV and WD Media Players to your home network for access to media content stored in a network drive such as the WD My Cloud EX2 device. For details on using a WD Media Player to access files on your device, see Knowledge Base Answer ID 2676 or refer to your WD Media Player User Guide.
-
Page 113: Accessing Your Personal Cloud Using Itunes
PLAYING/STREAMING VIDEOS, PHOTOS, & MUSIC DLNA Devices See specific DLNA media device user manuals for instructions on connecting a DLNA device to your local area network so you can access content on the WD My Cloud EX2 device. Go to http://www.dlna.org for a list of DLNA-certified devices and for further information.
-
Page 114: Configuring Settings
Firmware Update The Settings option on the navigation bar allows the Administrator to view and customize the WD My Cloud EX2 device’s system, network, media, utilities, notifications, and firmware settings. This chapter explains how to configure the various settings for your WD My Cloud EX2 device.
-
Page 115
32 characters long and can not include special characters (e.g., @, #, $ etc.). Serial Number Displays the WD-assigned number that identifies the specific unit. This field can not be updated. WD MY CLOUD EX2 PERSONAL CLOUD STORAGE USER MANUAL… -
Page 116
In this section of the General screen, you can change the language that displays in the WD My Cloud EX2 device’s interface and set the date and time. The date and time are synchronized to the NTP (Network Time Protocol) server by default. You have the option of setting the date and time manually or allowing the NTP to access the Internet and automatically set the time. -
Page 117
Use the following steps to turn cloud access on or off for all users (i.e., control whether computers and mobile devices can access the content on the WD My Cloud EX2 device) Note: This turns on cloud access for the entire device. To turn on access for an individual user, see “Configuring Cloud Access for a User”… -
Page 118
Example: If you set up your manual HTTP port as 5040, you’d use the following address to access your device: http://<Device IP Address>:5040. WD MY CLOUD EX2 PERSONAL CLOUD STORAGE USER MANUAL… -
Page 119: Energy Saver
Energy Saver The Energy Saver fields allow you to reduce the energy required to run your WD My Cloud EX2 device. Use the following information to configure the energy saving options on your WD My Cloud EX2 device. View or change the following settings:…
-
Page 120
Services This section of the General screen enables or disables various services available on your WD My Cloud EX2 device. WD MY CLOUD EX2 PERSONAL CLOUD STORAGE USER MANUAL… -
Page 121
Folder information, or select the folder from the Select a Folder drop-down list at the right of the field. 5. Click Get Remote Share Folder to connect to your remote folder. WD MY CLOUD EX2 PERSONAL CLOUD STORAGE USER MANUAL… -
Page 122
CONFIGURING SETTINGS 6. Click Save. Active Directory Enabling this function allows you WD My Cloud EX2 device to join an existing Windows domain. Active Directory is disabled by default. 1. To enable Active Directory, click the toggle button to ON. -
Page 123: Network
Enter the Active Directory server host name. 5. Click Save. Recycle Bin The Recycle Bin contains any files deleted from the WD My Cloud EX2 device. To clear the recycle bin for your device, click Clear. Note: Recycle Bin is only available for SMB protocols.
-
Page 124: Network Services
IPv4 Network Mode By default, the network mode is set to DHCP, which means the WD My Cloud EX2 device automatically gets the IP address and other settings from your network. Select the method of assigning the device’s unique IPv4 address: •…
-
Page 125
Server Message Block, version 2. Select this option to support Windows File History in Windows 8. • To enable/disable SMB2, click the toggle button Note: If you enable SMB2, read/write performance will be impacted. WD MY CLOUD EX2 PERSONAL CLOUD STORAGE USER MANUAL… -
Page 126
Link Layer Topology Discovery protocol. Select this option to enable LLTD on your network for enhanced network discovery and diagnostics on Microsoft Windows machines. • To enable/disable LLTD, click the toggle button WD MY CLOUD EX2 PERSONAL CLOUD STORAGE USER MANUAL… -
Page 127
Simple Network Management Protocol. Select this option to manage devices over IP networks. • To enable/disable SNMP, click the toggle button Note: See the WD Tech Support Downloads page at http://support.wd.com to download the MiB configuration file. Secured Shell protocol. Select this option to securely access your personal cloud and perform command-line operations via the Secured Shell (SSH) protocol. -
Page 128
The Remote Server section of the Network screen allows you to enable your WD My Cloud EX2 device to act as a remote server, allowing you to back up shares from another WD My Cloud EX2 on the local LAN or WAN. -
Page 129: Port Forwarding
For additional information on Port Forwarding, see Knowledge Base Answer ID 10649. Adding Port Forwarding Services 1. Click Add to add port forwarding service(s) to your WD My Cloud EX2 device. 2. On the Port Forwarding Settings screen, click either Select the default service scan or the Customize a port forwarding service, and then click Next.
-
Page 130: Media
“Playing/Streaming Videos, Photos, & Music” on page 101. Utilities On the Utilities page, you can test the WD My Cloud EX2 device and get diagnostic information, restore the device to factory defaults, reboot or shut down the device, and import or export a configuration file.
-
Page 131: System Restore
System Restore The system restore allows the Administrator to perform a full factory restore on the WD My Cloud EX2 device. This option restores your device to factory default settings with no data loss. Important: Before doing a factory restore or a system update, you may choose to save your device’s current configuration.
-
Page 132: System Configuration
Once the reboot is complete, launch the dashboard. Device Maintenance The Device Maintenance area allows you to shut down and reboot your WD My Cloud EX2 device. This area also displays the amount of time the device has been up and running.
-
Page 133: Notifications
The Scan Disk area allows you to scan your device’s hard disks for any errors. Scanning Your Disk Use the following steps to run a disk scan on your WD My Cloud EX2 device. 1. In the Scan Disk area, select the volume you’d like to scan from the drop-down menu.
-
Page 134
7. Repeat steps 5 — 6 to enter up to 5 email addresses. 8. Click Send Test Email to validate the email addresses you entered. 9. Click OK, and then check your email for a validation email. WD MY CLOUD EX2 PERSONAL CLOUD STORAGE USER MANUAL… -
Page 135
Critical Only: Send only critical alerts. Critical and Warning: Send both critical and warning alerts. All: Send all alerts (Informational, Critical, Warning). The system automatically updates with your selection. WD MY CLOUD EX2 PERSONAL CLOUD STORAGE USER MANUAL… -
Page 136: Firmware Update
CONFIGURING SETTINGS Firmware Update The Firmware Update page allows you to set up the device to update the My Cloud EX2 firmware automatically or to manually check for an update file. The current version number and the date of last update of the firmware also display on this screen.
-
Page 137
Follow this procedure to perform a manual update. Note: Ensure that you’ve downloaded the firmware file you need to install on your device from the WD Tech Support Downloads page at http://support.wd.com/product/download.asp. Manually Installing an Update 1. In the Manual Update section, click Update from File. -
Page 138: Replacing A Drive
Knowledge Base Answer ID 8 to get detailed instructions on obtaining a replacement drive for this product. Following are instructions for replacing a faulty drive or, if your WD My Cloud EX2 model did not come with drives, for inserting drives.
-
Page 139: Replacing A Drive
Replacing a Drive If you bought a WD My Cloud EX2 device without hard drives, or if you are replacing an existing drive, you may use a drive made by another company. For a list of compatible drives, go to wd.com/mycloudex2.
-
Page 140
Preparing a Drive The My Cloud EX2 comes with a bag holding the screws, tabs, and labels needed for inserting the new drive. For WD replacement drives, you can reuse the parts attached to the faulty drive. -
Page 141: Returning A Wd Drive
Do not disassemble the internal drive and attached assembly components. Return the entire internal drive assembly intact to WD. Return the faulty drive following the instructions provided in the WD Knowledge Base Answer ID 8. WD MY CLOUD EX2 PERSONAL CLOUD STORAGE…
-
Page 142: Regulatory And Warranty Information
Connect the equipment into an outlet on a circuit different from that to which the receiver is connected. Consult the retailer or an experienced radio/television technician for help. Any changes or modifications not expressly approved by WD could void the user’s authority to operate the equipment. ICES/NMB-003 Compliance Cet appareil DE la classe B est conform à…
-
Page 143: Warranty Information (All Regions Except Australia/New Zealand)
Limited Warranty WD warrants that the Product, in the course of its normal use, will for the term defined below, be free from defects in material and workmanship and will conform to WD’s specification therefor. The term of your limited warranty depends on the country in which your Product was purchased.
-
Page 144: Warranty Information (Australia/New Zealand Only)
Australian Consumer Law. Warranty WD warrants that the Product, in the course of its normal use, will for the term defined below, be free from defects in material and workmanship and will conform to WD’s specifications. The term of your warranty is 2 years in Australia and New Zealand, unless otherwise required by law.
-
Page 145
WD or the dealer from whom you originally purchased the Product determines that your claim is valid, WD or such dealer shall, at its discretion, either repair or replace the Product with an equivalent or better Product or refund the cost of the Product to you. You are responsible for any expenses associated with a claim under this warranty. -
Page 146: Appendices
This guide is primarily for WD My Cloud EX2 users, rather than the administrator. Logging into WD My Cloud EX2 1. Enter the name of your WD My Cloud EX2 device (default name: wdmycloudEX2) in the browser’s address field: …
-
Page 147
APPENDICES The Dashboard Home Page The WD My Cloud EX2 Home page has an information bar at the top right, a navigation icon bar across the page, an instant overview of the status of the device’s main functions and links for updating settings. -
Page 148
• Another WD My Cloud EX2 on your local network or on a remote network • A Cloud backup site Viewing the Home Page The Home is your gateway to the WD My Cloud EX2 device. From this page you can find: The capacity of the device … -
Page 149
Cloud Access Links The Cloud Access Links allow you to access the software necessary to gain access to the WD My Cloude EX2 device from your desktop and mobile apps. Downloads and Apps Information The Downloads and Applications area displays information on the number of downloads and apps available on your device. -
Page 150
Apps The Apps page provides access to the various apps available for your use on the WD My Cloud EX2 device. Available apps vary depending on what your administrator has implemented. WD MY CLOUD EX2 PERSONAL CLOUD STORAGE USER MANUAL… -
Page 151: Appendix B: Joomla! Setup Guide
Web sites and powerful online apps. For additional information on Joomla!, visit http://www.joomla.org// Joomla! is one of the many apps available for use from your WD My Cloud EX2 device. Provided in this section are the steps you’ll need to set up Joomla!.
-
Page 152
You can also use the randomly generated table prefix pre-loaded into this field. Old Database Process: Select one of the following options: Backup: Backs up the old database. Remove: Removes the old database WD MY CLOUD EX2 PERSONAL CLOUD STORAGE USER MANUAL… -
Page 153
Admin Password: Enter the password you’ll use to log into your Joomla! site. Confirm Admin Password: Reenter the password you entered in the Admin Password field. 11. Click Install Sample Data. 12. Click Next. WD MY CLOUD EX2 PERSONAL CLOUD STORAGE USER MANUAL… -
Page 154: Appendix C: Phpbb Setup Guide
Internet connection. phpBB is one of the many apps available for use from your WD My Cloud EX2 device. Provided in this section are the steps you’ll need to set up phpBB.
-
Page 155
Database username: Enter your MySQL account user name. If you’re using the phpMyAdmin app, enter admin. Database password: Enter your MySQL password. If you’re using the phpMyAdmin app, enter admin. WD MY CLOUD EX2 PERSONAL CLOUD STORAGE USER MANUAL… -
Page 156
Administrator password: Enter the password you’ll use to log into your bulletin board. Confirm administrator password: Reenter the password you entered in the Administrator password field. Contact e-mail address: Enter the email address of the individual administering the board. WD MY CLOUD EX2 PERSONAL CLOUD STORAGE USER MANUAL… -
Page 157
10. Review the Administrator details screen to ensure that the administrator configuration was successfull, and then click Proceed to next step. 11. Review the screen, and then click Proceed to next step. WD MY CLOUD EX2 PERSONAL CLOUD STORAGE USER MANUAL… -
Page 158
Administration Control Panel after phpBB is installed. 13. Review the information on the screen, and then click Proceed to next step. 14. Review the information on the screen. phpBB is now installed. WD MY CLOUD EX2 PERSONAL CLOUD STORAGE USER MANUAL… -
Page 159: Appendix D: Supported Raid Modes
Spanning RAID 0 RAID 1 JBOD Appendix E: RAID Migrations The chart below identifies the RAID migration path allowed on your WD My Cloud EX2 device. From JBOD (1 disk) RAID 1 (2 disks) Appendix F: Safe Mode Firmware Update Procedures If you see the following screen, use the steps outlined below to recover your server from safe mode.
-
Page 160
7. Once your device has completed the reboot, we recommend that you do a system restore (“System Restore” on page 126). WD MY CLOUD EX2 PERSONAL CLOUD STORAGE USER MANUAL… -
Page 161: Appendix G: Technical Specifications
DC output Output voltage: 12 VDC, 3A Power supply: 36W Temperature Operating temperature: 5°C to 35°C (41°F to 95 °F) Non-operating temperature: -20°C to 65°C (-4°F to 149 °F) RoHs compliant WD MY CLOUD EX2 PERSONAL CLOUD STORAGE USER MANUAL…
-
Page 162
APPENDICES WD MY CLOUD EX2 PERSONAL CLOUD STORAGE USER MANUAL… -
Page 163: Index
44 navigation icons 54 quotas to users 40 deep sleep 114 share access to groups 43 deleting automatic support an app 100 requesting 64 an iSCSI target 90 auto-rebuilding 86 WD MY CLOUD EX2 PERSONAL CLOUD STORAGE USER MANUAL…
-
Page 164
43 an iSCSI target 90 quota rules 40 cloud access for a user 21 removing 44 DLNA 103 viewing 41 ElephantDrive backup 75 GS Mark 137 iSCSI iSNS Client 90 WD MY CLOUD EX2 PERSONAL CLOUD STORAGE USER MANUAL… -
Page 165
105 media types 102 enabling 105 other 107 overview 101 WD 107 refreshing 106 media servers streaming media 108 about 101 overview 101 settings 103 Joomla Media settings setup guide 146 WD MY CLOUD EX2 PERSONAL CLOUD STORAGE USER MANUAL… -
Page 166
123 phpBB Setup Guide 149 removing a group 44 Port Forwarding 124 removing users 41 adding 124 replacing a drive 133 deleting 124 rescanning/rebuilding the DLNA Database modifying 124 WD MY CLOUD EX2 PERSONAL CLOUD STORAGE USER MANUAL… -
Page 167
56 internal backups 74 system report 64 remote backups 72 sending to Customer Support 64 the RAID mode 82 System Restore USB backup details 68 about 126 Virtualized Volume WD MY CLOUD EX2 PERSONAL CLOUD STORAGE USER MANUAL… -
Page 168
WD Technical Support contacting ii WD’s Online Learning Center 13 Web Access Timeout 114 Web browser compatibility 6 WebDAV Service 121 Windows mapping a public folder 20 Windows Vista/Windows 7/Windows 8 WD MY CLOUD EX2 PERSONAL CLOUD STORAGE USER MANUAL… -
Page 169
Western Digital, WD, the WD logo, My Book, My Passport, and WD TV are registered trademarks in the U.S. and other countries; and WD My Cloud, WD Red, WD SmartWare, WD GreenPower, WD Photos, and WD TV Live are trademarks of Western Digital Technologies, Inc.
![]()
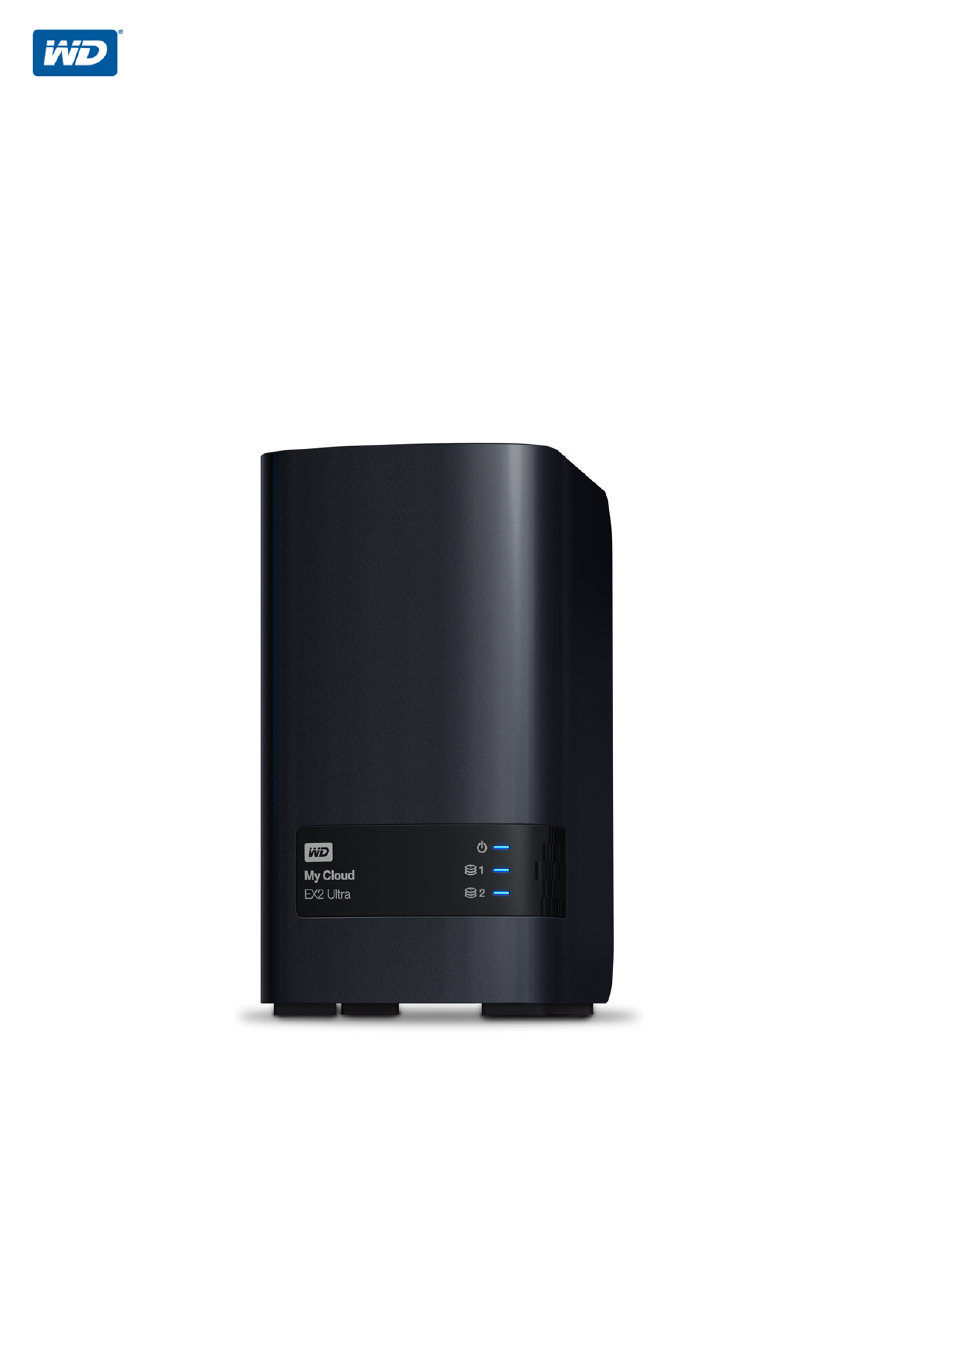
My Cloud™ EX2 Ultra
Личный облачный накопитель
Руководство по эксплуатации
При возникновении неполадок в работе изделия, пожалуйста, не торопитесь его возвращать. Мы всегдаготовыпомочьвамустранитьнеполадкисамостоятельно. Ответынабольшинство технических вопросов можно получить, обратившись к нашей базе знаний или к службе поддержки по электронной почте на сайте http://support.wd.com. Если вы не нашли ответа на свой вопрос или предпочитаете общаться со службой поддержки по телефону, позвоните по наиболее удобному для вас номеру из числа приведенных ниже.
На приобретенное вами изделие распространяется 30-дневная бесплатная техническая поддержка по телефону в течение гарантийного срока. Этот 30-дневный период начинается в момент вашего первого обращения в службу технической поддержки WD по телефону. Техническая поддержка по электронной почте предоставляется бесплатно в течение всего гарантийного срока, а наша обширная база знаний доступна ежедневно и круглосуточно. Если вы хотите получать от нас известия о новых возможностях и услугах, зарегистрируйте свое изделие на сайте
http://register.wd.com.
Ресурсы поддержки в Интернете
Посетите сайт поддержки нашей продукции по адресу http://support.wd.com, где вам предоставляются следующие возможности:
Файлы. Загрузить драйверы, программы и обновления для изделий WD.
Регистрация. Зарегистрировать изделие WD, чтобы получать последние обновления и специальные предложения.
Гарантийное обслуживание и RMA. Получить сведения о гарантии, возврате изделий (RMA), состоянии RMA и восстановлении данных.
База знаний — Поиск по ключевым словам или номеру ответа.
Установка. Получить справку в Интернете об установке изделия или программы WD.
Сообщество WD. Общайтесь и обменивайтесь мнениями с другими пользователями WD.
Центр обучения. Здесь можно найти сведения о том, как максимально полно использовать возможности личного облачного накопителя (http://www.wd.com/setup).
Порядок обращения в службу технической поддержки WD
При обращении в компанию WD за технической поддержкой потребуется сообщить серийный номер изделия WD, конфигурацию компьютера и версию операционной системы.
|
Северная |
Азиатско- |
|||
|
Америка |
тихоокеан- |
|||
|
США и Канада, |
800 275-4932 |
ский регион |
1 800 42 9861 |
|
|
Австралия |
||||
|
английский язык |
||||
|
США, испанский |
949 672-7199 |
Китай |
800 820 6682 / 400 627 6682 |
|
|
язык |
||||
|
Мексика |
800.832.4778 |
Гонконг |
+852-3057 9031 |
|
|
Европа |
00800 ASK4 WDEU |
Индия |
1 800-200 5789 / 1 800-419 5591 |
|
|
Индонезия |
001-803-852 3993 |
|||
|
(бесплатно)* |
(00800 27549338) |
Япония |
0800-805 7293, 0120-934 453 |
|
|
Европа |
||||
|
+31 880062100 |
Малайзия |
1 800-817 477 |
||
|
Ближний Восток |
+31 880062100 |
Филиппины |
1 800-1855 0277 / +63-2-395 2319 |
|
|
Африка |
+31 880062100 |
Сингапур |
1 800 608 6008 |
|
|
Россия |
8-10-8002-3355011 |
Тайвань |
0800-225 593 / +886-2-8723 1298 |
Таиланд 00 1800 852 5913
* Бесплатные телефоны работают в следующих странах: Австрия, Бельгия, Великобритания, Германия, Дания, Ирландия, Испания, Италия, Нидерланды, Норвегия, Франция, Швейцария, Швеция.
Регистрация изделия WD
Зарегистрируйте приобретенное вами изделие WD, чтобы получать последние обновления и специальные предложения. Вы можете без труда зарегистрировать свой накопитель на
сайте http://register.wd.com или с помощью программы личного облачного накопителя
My Cloud EX2 Ultra.

Содержание
Ремонт и поддержка продукции WD . . . . . . . . . . . . . . . . . . . . . . . . . . . . . . . . . . . . . . . . . ii Регистрация изделия WD . . . . . . . . . . . . . . . . . . . . . . . . . . . . . . . . . . . . . . . . . . . . . . . . . . ii
|
1 Важные сведения для пользователя . . . . . . . . . . . . . . . . . . . . . . . . . . |
1 |
|
Важные правила техники безопасности . . . . . . . . . . . . . . . . . . . . . . . . . . . . . . . . . . . . . . |
1 |
|
Запись сведений об изделии WD . . . . . . . . . . . . . . . . . . . . . . . . . . . . . . . . . . . . . . . . . . . |
2 |
|
2 Общие сведения об изделии . . . . . . . . . . . . . . . . . . . . . . . . . . . . . . . . . |
3 |
|
О системе . . . . . . . . . . . . . . . . . . . . . . . . . . . . . . . . . . . . . . . . . . . . . . . . . . . . . . . . . . . . . . |
3 |
|
О виртуальном центре обучения. . . . . . . . . . . . . . . . . . . . . . . . . . . . . . . . . . . . . . . . . . . . |
4 |
|
Комплект поставки . . . . . . . . . . . . . . . . . . . . . . . . . . . . . . . . . . . . . . . . . . . . . . . . . . . . . . . |
5 |
|
Прежде чем приступить к установке . . . . . . . . . . . . . . . . . . . . . . . . . . . . . . . . . . . . . . . . . |
6 |
|
Бережное обращение. . . . . . . . . . . . . . . . . . . . . . . . . . . . . . . . . . . . . . . . . . . . . . . . . . . . . |
6 |
|
Компоненты изделия. . . . . . . . . . . . . . . . . . . . . . . . . . . . . . . . . . . . . . . . . . . . . . . . . . . . . . |
7 |
3 С чего начать . . . . . . . . . . . . . . . . . . . . . . . . . . . . . . . . . . . . . . . . . . . . . . 11
Установка дисков в модель без дисков. . . . . . . . . . . . . . . . . . . . . . . . . . . . . . . . . . . . . . 11 Подсоединение устройства . . . . . . . . . . . . . . . . . . . . . . . . . . . . . . . . . . . . . . . . . . . . . . . 13
С чего начать с программой установки из Интернета . . . . . . . . . . . . . . . . . . . . . . . . . . 14 С чего начать без программы установки из Интернета. . . . . . . . . . . . . . . . . . . . . . . . . 15
Загрузить контент . . . . . . . . . . . . . . . . . . . . . . . . . . . . . . . . . . . . . . . . . . . . . . . . . . . . . . . 15
4 Дистанционный доступ к вашему облачному накопителю . . . . . . 17
Как включить облачный доступ к устройству My Cloud EX2 Ultra . . . . . . . . . . . . . . . . . 17 Как настроить доступ к облаку для пользователя . . . . . . . . . . . . . . . . . . . . . . . . . . . . . 17
Как предоставить доступ к файлам с мобильных устройств с помощью
программ для мобильных устройств с iOS и Android. . . . . . . . . . . . . . . . . . . . . . . . . . . 19
5 Управление пользователями, группами и общими папками . . . . . 21
Сведения о пользователях . . . . . . . . . . . . . . . . . . . . . . . . . . . . . . . . . . . . . . . . . . . . . . . 21 Сведения о группах . . . . . . . . . . . . . . . . . . . . . . . . . . . . . . . . . . . . . . . . . . . . . . . . . . . . . 26 Сведения об общих папках . . . . . . . . . . . . . . . . . . . . . . . . . . . . . . . . . . . . . . . . . . . . . . . 28
6 Главное о приборной панели . . . . . . . . . . . . . . . . . . . . . . . . . . . . . . . . 33
Вызов приборной панели . . . . . . . . . . . . . . . . . . . . . . . . . . . . . . . . . . . . . . . . . . . . . . . . . 33 Начальная страница приборной панели. . . . . . . . . . . . . . . . . . . . . . . . . . . . . . . . . . . . . 35 Как обратиться за поддержкой . . . . . . . . . . . . . . . . . . . . . . . . . . . . . . . . . . . . . . . . . . . . 44 Стандартные задачи. . . . . . . . . . . . . . . . . . . . . . . . . . . . . . . . . . . . . . . . . . . . . . . . . . . . . 46
|
ЛИЧНОЕ ОБЛАЧНОЕ ХРАНИЛИЩЕ MY CLOUD EX2 ULTRA |
i |
РУКОВОДСТВО ПО ЭКСПЛУАТАЦИИ

7 Резервное копирование и восстановление файлов . . . . . . . . . . . . 47
О резервном копировании . . . . . . . . . . . . . . . . . . . . . . . . . . . . . . . . . . . . . . . . . . . . . . . . 47
Работа с USB-устройствами и резервное копирование через USB . . . . . . . . . . . . . . . 47
Дистанционное резервное копирование. . . . . . . . . . . . . . . . . . . . . . . . . . . . . . . . . . . . . 50 Внутреннее резервное копирование. . . . . . . . . . . . . . . . . . . . . . . . . . . . . . . . . . . . . . . . 52 Облачное резервное копирование . . . . . . . . . . . . . . . . . . . . . . . . . . . . . . . . . . . . . . . . . 53
|
8 |
Работа с хранилищем в устройстве My Cloud EX2 Ultra . . . . . . . . |
59 |
Типы дисковых систем . . . . . . . . . . . . . . . . . . . . . . . . . . . . . . . . . . . . . . . . . . . . . . . . . . . 59 RAID-массив . . . . . . . . . . . . . . . . . . . . . . . . . . . . . . . . . . . . . . . . . . . . . . . . . . . . . . . . . . . 60 Состояние диска . . . . . . . . . . . . . . . . . . . . . . . . . . . . . . . . . . . . . . . . . . . . . . . . . . . . . . . . 63 Работа по протоколу iSCSI. . . . . . . . . . . . . . . . . . . . . . . . . . . . . . . . . . . . . . . . . . . . . . . . 64 Виртуализация томов . . . . . . . . . . . . . . . . . . . . . . . . . . . . . . . . . . . . . . . . . . . . . . . . . . . . 67
9 Работа с программами в устройстве My Cloud EX2 Ultra . . . . . . . . 69
Сведения о приложениях. . . . . . . . . . . . . . . . . . . . . . . . . . . . . . . . . . . . . . . . . . . . . . . . . 69 Работа с программами . . . . . . . . . . . . . . . . . . . . . . . . . . . . . . . . . . . . . . . . . . . . . . . . . . . 69
10 Воспроизведение и трансляция фильмов, фотоснимков и музыки . . . . . . . . . . . . . . . . . . . . . . . . . . . . . . . . . . . . . . . . . . . . . . . . . 72
Медиасерверы. . . . . . . . . . . . . . . . . . . . . . . . . . . . . . . . . . . . . . . . . . . . . . . . . . . . . . . . . . 72 Хранение медиафайлов. . . . . . . . . . . . . . . . . . . . . . . . . . . . . . . . . . . . . . . . . . . . . . . . . . 74 Как включить серверы DLNA и iTunes. . . . . . . . . . . . . . . . . . . . . . . . . . . . . . . . . . . . . . . 74
Доступ к личному облаку с помощью медиаплееров. . . . . . . . . . . . . . . . . . . . . . . . . . . 79
Доступ к личному облаку с помощью iTunes . . . . . . . . . . . . . . . . . . . . . . . . . . . . . . . . . 80
11 Настройка параметров . . . . . . . . . . . . . . . . . . . . . . . . . . . . . . . . . . . . . 81
Основные. . . . . . . . . . . . . . . . . . . . . . . . . . . . . . . . . . . . . . . . . . . . . . . . . . . . . . . . . . . . . . 81 Сеть . . . . . . . . . . . . . . . . . . . . . . . . . . . . . . . . . . . . . . . . . . . . . . . . . . . . . . . . . . . . . . . . . . 88 Медиа. . . . . . . . . . . . . . . . . . . . . . . . . . . . . . . . . . . . . . . . . . . . . . . . . . . . . . . . . . . . . . . . . 96 Служебные программы. . . . . . . . . . . . . . . . . . . . . . . . . . . . . . . . . . . . . . . . . . . . . . . . . . . 96 Уведомления. . . . . . . . . . . . . . . . . . . . . . . . . . . . . . . . . . . . . . . . . . . . . . . . . . . . . . . . . . 100 Обновление встроенной программы. . . . . . . . . . . . . . . . . . . . . . . . . . . . . . . . . . . . . . . 102
12 Порядок замены диска . . . . . . . . . . . . . . . . . . . . . . . . . . . . . . . . . . . . 105
Как выявить неисправный диск . . . . . . . . . . . . . . . . . . . . . . . . . . . . . . . . . . . . . . . . . . . 105 Замена диска. . . . . . . . . . . . . . . . . . . . . . . . . . . . . . . . . . . . . . . . . . . . . . . . . . . . . . . . . . 106 Возврат жесткого диска WD . . . . . . . . . . . . . . . . . . . . . . . . . . . . . . . . . . . . . . . . . . . . . . 107
13 Сведения о гарантии и нормативно-правовом соответствии . . . 108
Нормативно-правовое соответствие. . . . . . . . . . . . . . . . . . . . . . . . . . . . . . . . . . . . . . . 108
Сведения о гарантии (Для всех регионов, кроме Австралии и Новой Зеландии) . . . 109 Сведения о гарантии (только для Австралии и Новой Зеландии) . . . . . . . . . . . . . . . 110
|
ЛИЧНОЕ ОБЛАЧНОЕ ХРАНИЛИЩЕ MY CLOUD EX2 ULTRA |
ii |
РУКОВОДСТВО ПО ЭКСПЛУАТАЦИИ

14 Приложения . . . . . . . . . . . . . . . . . . . . . . . . . . . . . . . . . . . . . . . . . . . . . . 113
Приложение A. Краткое руководство по эксплуатации My Cloud EX2 Ultra . . . . . . . . 113 Приложение B. Руководство по установке системы Joomla!® . . . . . . . . . . . . . . . . . . 118 Приложение C. Руководство по установке системы phpBB . . . . . . . . . . . . . . . . . . . . 119
Приложение D. Поддерживаемые режимы RAID . . . . . . . . . . . . . . . . . . . . . . . . . . . . . 122 Приложение E. Перенос RAID-массивов . . . . . . . . . . . . . . . . . . . . . . . . . . . . . . . . . . . 122
Приложение F: Порядок обновления встроенной программы
в безопасном режиме. . . . . . . . . . . . . . . . . . . . . . . . . . . . . . . . . . . . . . . . . . . . . . . . . . . 123 Приложение G: Технические характеристики. . . . . . . . . . . . . . . . . . . . . . . . . . . . . . . . 124
15 Алфавитный указатель . . . . . . . . . . . . . . . . . . . . . . . . . . . . . . . . . . . . 125
|
ЛИЧНОЕ ОБЛАЧНОЕ ХРАНИЛИЩЕ MY CLOUD EX2 ULTRA |
iii |
РУКОВОДСТВО ПО ЭКСПЛУАТАЦИИ

ВАЖНЫЕ СВЕДЕНИЯ ДЛЯ ПОЛЬЗОВАТЕЛЯ
|
Важные сведения для пользователя |
||
|
1 |
||
Важные правила техники безопасности |
||
|
Запись сведений об изделии WD |
||
|
Важные правила техники безопасности |
||
|
Это устройство спроектировано и изготовлено так, чтобы обеспечить личную |
||
|
безопасность. Неправильное его использование может привести к поражению |
||
|
электрическим током или возникновению пожара. Средства защиты, |
||
|
реализованные в этом изделии, обеспечат вашу безопасность при условии |
||
|
соблюдения нижеописанных процедур установки, эксплуатации и технического |
||
|
обслуживания. |
Следуйте всем указаниям и предупреждениям, обозначенным на изделии.
Перед чисткой отсоедините изделие от электророзетки. Не пользуйтесь жидкими или аэрозольными чистящими средствами. Для чистки используйте влажную ткань.
Не пользуйтесь изделием вблизи каких бы то ни было жидкостей.
Не ставьте изделие на неустойчивые предметы. Изделие может упасть и серьезно повредиться.
Не роняйте изделие.
Не заслоняйте прорези и отверстия на верхнем и нижнем торцах корпуса. Для обеспечения надлежащей вентиляции и надежной работы изделия, а также для его защиты от перегрева эти отверстия не следует перекрывать или заслонять. Кроме того, чтобы избежать перегрева накопителя,
необходимо следить за тем, чтобы он находился в вертикальном положении.
Подключайте изделие только к источникам питания, параметры которых соответствуют его маркировке. Если вам точно не известны параметры электросети, проконсультируйтесь с продавцом изделия или сотрудником вашей местной энергокомпании.
Не ставьте никаких предметов на шнур питания. Не располагайте изделие в местах, где на шнур питания будут наступать.
В случае использования удлинителя убедитесь в том, что совокупный номинальный ток всех приборов, подключенных к удлинителю, не превышает номинального тока самого удлинителя. Также убедитесь в том, что совокупный номинальный ток всех приборов, подключенных к электророзетке, не превышает номинала предохранителя.
Не засовывайте какие бы то ни было предметы вовнутрь изделия через прорези на его корпусе, так как эти предметы могут соприкоснуться с точками, в которых присутствует опасное напряжение, или вызвать
короткое замыкание, что может привести к поражению электрическим током или возникновению пожара.
Отключите изделие от сети и обратитесь за техническим обслуживанием к квалифицированному мастеру, если:
—Шнур питания или вилка повреждены или изношены.
—На изделие пролилась жидкость.
—Изделие попало под дождь или в сырость.
|
ЛИЧНОЕ ОБЛАЧНОЕ ХРАНИЛИЩЕ MY CLOUD EX2 ULTRA |
1 |
|
РУКОВОДСТВО ПО ЭКСПЛУАТАЦИИ |

ВАЖНЫЕ СВЕДЕНИЯ ДЛЯ ПОЛЬЗОВАТЕЛЯ
—При соблюдении инструкций по эксплуатации изделие не работает должным образом. Осуществляйте настройку только элементами управления, упомянутыми в руководстве по эксплуатации. Настройка изделия ненадлежащим образом может привести к его повреждению
ипотребовать значительных затрат труда квалифицированного технического специалиста для восстановления нормального функционирования.
—Изделие уронили или его корпус поврежден.
—Если эксплуатационные характеристики изделия существенно изменились, обратитесь в службу поддержки клиентов компании WD на сайте http://support.wd.com.
ВНИМАНИЕ! В устройстве используется литиевая батарея типа CR2032. В случае неправильной замены этой батареи возникает опасность взрыва. Заменяйте её только на такую же или аналогичную батарею рекомендуемого производителем типа.
Выбрасывать использованные батареи следует в соответствии с указаниями производителя.
Запись сведений об изделии WD
Для настройки устройства и получения технической поддержки запишите следующие сведения об изделии WD. Сведения об изделии WD указаны на этикетке, размещенной на задней панели устройства.
—Серийный номер
—Артикул модели
—Дата покупки
—Операционная система и программы
|
ЛИЧНОЕ ОБЛАЧНОЕ ХРАНИЛИЩЕ MY CLOUD EX2 ULTRA |
2 |
|
РУКОВОДСТВО ПО ЭКСПЛУАТАЦИИ |

ОБЩИЕ СВЕДЕНИЯ ОБ ИЗДЕЛИИ
|
Общие сведения об изделии |
||
|
2 |
||
О системе |
||
|
Особенности |
||
|
О виртуальном центре обучения |
||
|
Комплект поставки |
||
|
Прежде чем приступить к установке |
||
|
Бережное обращение |
||
|
Компоненты изделия |
||
|
О системе |
Накопитель My Cloud EX2 Ultra — это скоростное устройство NAS с двумя отсеками, предназначенное для дома или небольшого офиса. Как и другая продукция WD®, оно имеет высокое качество и надежность. Централизованно храните все свои файлы и защитите их с помощью массива RAID 1, а также резервного копирования в локальной сети или в облачной системе. Транслируйте большие файлы на любой экран и расширьте функциональные возможности своего NAS с помощью полного комплекта программ. Личный облачный накопитель
My Cloud EX2 Ultra — это скоростная система, которая при подключении
кбеспроводному маршрутизатору обеспечивает защищенный беспроводной доступ
квашим медиаданным и другим файлам с любого компьютера, планшета или смартфона.
В этом руководстве приводятся поэтапные указания по установке и другие важные сведения о приобретенном вами изделии WD. Обновленные редакции этого руководства и его версии на других языках можно загрузить с сайта по адресу http://products.wd.com/updates. Дополнительные сведения и новости об этом продукте см. на нашем сайте http://www.wd.com/.
Особенности
Широкий выбор вариантов — Можно выбрать NAS без дисков, а затем установить в него накопители, которые вы выбрали сами. Также можно выбрать уже укомплектованную модель, оснащенную дисками WD Red™, которые обеспечивают максимальную надежность при работе в уникальных условиях круглосуточно функционирующих систем NAS.
Конфигурация дисков — Вы можете выбрать один из нескольких вариантов конфигурации дисков: RAID 0, RAID 1, JBOD или объединение.
Защита файлов на высшем уровне — У вас есть несколько способов защитить свои файлы от утраты. Выберите вариант защиты файлов, который вам лучше подойдет: RAID 1, резервное копирование на USB-накопители, в LAN, WAN или облачную систему.
Легко управлять — Многофункциональная приборная панель позволяет вам постоянно держать свою систему под контролем. Вы можете следить за состоянием дисков, управлять учетными записями пользователей и настраивать функции энергосбережения. Уведомления по электронной почте и на телефон дают возможность быть в курсе состояния устройства My Cloud EX2 Ultra.
Различные программы для индивидуализации вашего NAS — aMule, Icecast, Joomla!,® phpBB,® phpMyAdmin, Transmission, SqueezeCenter и т.д. Актуальные версии программ можно загрузить с сайта www.mycloud.com/learn.
|
ЛИЧНОЕ ОБЛАЧНОЕ ХРАНИЛИЩЕ MY CLOUD EX2 ULTRA |
3 |
|
РУКОВОДСТВО ПО ЭКСПЛУАТАЦИИ |

ОБЩИЕ СВЕДЕНИЯ ОБ ИЗДЕЛИИ
Несколько встроенных серверов — Файловый сервер, сервер FTP, сервер резервного копирования и сервер загрузки для файлообменной сети BitTorrent.
Трансляция медиа на сетевые устройства — Фильмы и фотоснимки можно транслировать на сетевые телевизоры, медиаплееры, игровые приставки и другие устройства с поддержкой DLNA®/UPnP®. Встроенный медиасервер Twonky, сертифицированный DLNA. А с помощью встроенного сервера iTunes® вы сможете легко транслировать музыку из своей коллекции.
Резервное копирование удобным для вас способом — защитите свои файлы путем дистанционного резервного копирования на другое устройство My Cloud, облачного резервного копирования, либо резервного копирования через локальную или глобальную сеть. С программой WD SmartWare™ Pro пользователи ПК могут сами выбирать, когда, куда и как сохранять резервные копии файлов с 10 разных компьютеров. Пользователи компьютеров Mac® могут использовать все возможности программы резервного копирования Apple® Time Machine® для того, чтобы защитить свои данные.
Увеличение емкости — просто подсоедините совместимый USB-накопитель
к устройству My Cloud EX2 Ultra и моментально увеличьте емкость своей системы. Имеется два порта расширения USB 3.0.
Встроенные функции энергосбережения — Остановка дисков и включение-
отключение накопителя по графику позволяют экономить электричество.
Ваше личное облако — в отличие от облачных систем общего пользования, на устройстве My Cloud EX2 Ultra можно централизованно и надежно хранить все свои материалы в домашней или офисной сети, а не на чужом сервере. Никакой отправки своих файлов неизвестно куда. Никакой абонентской платы. Никаких ограничений.
Дополнительные возможности — Целевые объекты iSCSI, все функции FTP,
поддержка Jumbo-кадров, готовность к работе с IPv6, поддержка UPS
(с подключением по USB и локальной сети), монитор ресурсов в реальном времени, шифрование тома с проверкой пароля при загрузке, SNMP и виртуальные тома.
О виртуальном центре обучения
В виртуальном центре обучения WD содержатся самые актуальные сведения, указания и программы, помогающие максимально полно использовать возможности личных облачных накопителей. В этом Интернет-руководстве имеются поэтапные инструкции по настройке дистанционного доступа, резервному копированию файлов, проверке состояния устройства и т.д. Это интерактивный ресурс, наглядно описывающий все этапы установки и использования устройств My Cloud EX2 Ultra.
Спомощью виртуального Центра обучения вы сможете:
Узнать об особенностях приобретенного личного облачного накопителя.
Загрузить последние версии программ для вашего изделия.
Найти исчерпывающие сведения обо всех функциях вашего изделия, представленные в интерактивной форме.
Обновить свое изделие при появлении новых функциональных возможностей.
Пользоваться постоянно функционирующим Интернет-ресурсом без руководства пользователя или компакт-диска.
|
ЛИЧНОЕ ОБЛАЧНОЕ ХРАНИЛИЩЕ MY CLOUD EX2 ULTRA |
4 |
|
РУКОВОДСТВО ПО ЭКСПЛУАТАЦИИ |

ОБЩИЕ СВЕДЕНИЯ ОБ ИЗДЕЛИИ
Комплект поставки
Личный облачный накопитель My Cloud EX2 Ultra
Кабель Ethernet
Сетевой источник питания Памятка по установке и настройке
Монтажный комплект (только для модели без дисков)
Личный облачный накопитель
My Cloud EX2 Ultra
|
Сетевой источник |
Кабель Ethernet |
Памятка по установке |
|
питания* |
и настройке |
Сведения о дополнительных аксессуарах для этого продукта см. на сайте
|
США |
www.shopwd.com или www.wdstore.com |
|
Канада |
www.shopwd.ca или www.wdstore.ca |
|
Европа |
www.shopwd.eu или www.wdstore.eu |
|
Все |
Обращайтесь в службу технической поддержки WD |
|
остальные |
в вашем регионе. Контактную информацию службы |
|
технической поддержки можно найти в Базе знаний на |
|
|
сайте http://support.wd.com, Answer ID 1048. |
|
Операционная система
Windows® Mac OS X®
|
|
Windows 10 |
|
|
|
Windows 8 или 8.1 |
|
|
|
Windows 7 |
|
|
Windows Vista® |
|
|
|
|
El Capitan (Mac OS X 10.11) Yosemite (Mac OS X 10.10) Maverick (Mac OS 10.9)
Mountain Lion* (Mac OS X 10.8) Lion* (Mac OS X 10.7)
Примечание. На совместимость влияет аппаратная конфигурация вашего компьютера и версия операционной системы.
|
ЛИЧНОЕ ОБЛАЧНОЕ ХРАНИЛИЩЕ MY CLOUD EX2 ULTRA |
5 |
|
РУКОВОДСТВО ПО ЭКСПЛУАТАЦИИ |
![]()
ОБЩИЕ СВЕДЕНИЯ ОБ ИЗДЕЛИИ
Браузеры
Internet Explorer с версии 10
Safari с версии 6.0 на поддерживаемых компьютерах под управлением Mac OS
Firefox с версии 30 на поддерживаемых компьютерах под Windows и Mac OS
Google Chrome с версии 31 на поддерживаемых компьютерах под Windows
и Mac OS
Локальная сеть
Маршрутизатор или коммутатор (для максимального быстродействия рекомендуется модель с поддержкой Gigabit Ethernet).
Интернет
Для первоначальной настройки и загрузки программ, а также для дистанционного доступа и работы с мобильными устройствами требуется скоростное соединение с Интернетом.
Прежде чем приступить к установке
Прежде чем приступить к установке устройства, выберите оптимальное место его расположения. Разместите его в месте, удовлетворяющем следующим требованиям:
Находится рядом с заземленной электророзеткой
Чистое и не пыльное
На устойчивом предмете, не подверженном вибрации
Хорошо проветривается, вдали от источников тепла, прорези и отверстия на верхнем и нижнем торцах устройства не заслоняются
Удалено от электромагнитных полей, создаваемых такими электроприборами, как кондиционеры, радио- и телеприемники.
Бережное обращение
Изделия WD — это высокоточные устройства, требующие бережного обращения при распаковке и установке. Неосторожное обращение, удары и вибрация могут привести к повреждению дисков в устройстве. В процессе распаковки и установки внешнего накопителя соблюдайте следующие меры предосторожности:
Не толкайте и не роняйте устройство.
Не передвигайте устройство, когда его питание включено.
Не используйте это изделие в качестве портативного устройства.
Не извлекайте оба диска с данными одновременно. В этом случае устройство перестанет реагировать на ваши действия.
|
ЛИЧНОЕ ОБЛАЧНОЕ ХРАНИЛИЩЕ MY CLOUD EX2 ULTRA |
6 |
|
РУКОВОДСТВО ПО ЭКСПЛУАТАЦИИ |

ОБЩИЕ СВЕДЕНИЯ ОБ ИЗДЕЛИИ
Компоненты изделия
Вид спереди
|
7 |
||
|
ЛИЧНОЕ ОБЛАЧНОЕ ХРАНИЛИЩЕ MY CLOUD EX2 ULTRA |
||
|
РУКОВОДСТВО ПО ЭКСПЛУАТАЦИИ |

ОБЩИЕ СВЕДЕНИЯ ОБ ИЗДЕЛИИ
Вид сзади
Кнопка сброса
Порты USB
Порт Ethernet
Отверстие для замка
Kensington®
Отверстие для замка Гнездо внешнего источника питания (постоянный ток)
|
Компонент |
Значок Описание |
|
Порт Ethernet |
Для подключения устройства к локальной сети. |
|
Порт USB 3.0 |
Для подключения дополнительного USB-накопителя. |
|
Кнопка |
( ) |
Для восстановления заводских настроек: например, имени |
||
|
сброса |
и пароля администратора устройства. |
|||
|
Гнездо |
Для подключения устройства к источнику питания, |
|||
|
питания |
включающемуся в розетку электросети. |
|||
|
Отверстие |
Для защиты от кражи устройство имеет отверстие, в которое |
|||
|
для замка |
входит стандартный замок Kensington на стальном тросике. |
|||
|
Kensington |
Подробности на сайте http://www.kensington.com/. |
|
ЛИЧНОЕ ОБЛАЧНОЕ ХРАНИЛИЩЕ MY CLOUD EX2 ULTRA |
8 |
|
РУКОВОДСТВО ПО ЭКСПЛУАТАЦИИ |

ОБЩИЕ СВЕДЕНИЯ ОБ ИЗДЕЛИИ
Индикаторы
Индикатор питания на передней панели
В таблице ниже описаны возможные состояния индикатора на передней панели.
|
Состояние |
Цвет |
Вид |
Описание состояния |
|
Питание отключено |
Черный |
——- |
Устройство в режиме ожидания или сна |
|
(не горит) |
|||
|
Включение |
Синий |
Мигает |
Устройство включается или |
|
выполняется обновление |
|||
|
микропрограммы. |
|||
|
Питание включено |
Синий |
Непрерывно |
Устройство находится во включенном |
|
состоянии. |
|||
|
Питание включено |
Красный |
Мигает |
Устройство включено, но |
|
(ухудшены |
характеристики тома ухудшены. |
||
|
характеристики) |
|||
|
Требуется |
Желтый |
Мигает |
Событие (например, отключение |
|
действие |
сетевого кабеля), требующее действий |
||
|
с вашей стороны. |
|||
Примечание. При установке несовместимых дисков индикатор питания мигает желтым во время включения устройства.
Индикаторы дисков на передней панели
В следующей таблице описываются возможные состояния индикаторов дисков на передней панели.
|
Функция |
Цвет |
Вид |
Описание функции |
|
Нет диска |
Черный |
—— |
Диск отсутствует. |
|
(не горит) |
|||
|
Диск присутствует, |
Синий |
Непрерывно |
Диск есть, но нет активности. |
|
обращений нет |
|||
|
Диск работает |
Синий |
Мигает |
Диск есть, он активен. |
|
Неисправность |
для |
Мигает |
Диск присутствует, но временно |
|
диска |
сетевых |
неисправен или вышел из строя. |
|
|
хранилищ |
|||
|
Примечание. |
При установке несовместимых дисков индикаторы дисков |
||
|
быстро мигают красным во время включения устройства. |
|
ЛИЧНОЕ ОБЛАЧНОЕ ХРАНИЛИЩЕ MY CLOUD EX2 ULTRA |
9 |
|
РУКОВОДСТВО ПО ЭКСПЛУАТАЦИИ |

ОБЩИЕ СВЕДЕНИЯ ОБ ИЗДЕЛИИ
Индикаторы сети (Ethernet) на задней панели
В таблице ниже описываются возможные состояния индикаторов работы сети.
Примечание. Если смотреть на порт, то верхний слева — это индикатор работы, а верхний справа — индикатор соединения.
|
Состояние |
Индикатор |
Вид |
Описание состояния |
|
Соединение |
Соединение |
Выкл. |
Один из концов кабеля не подключен |
|
разорвано |
либо соединение неисправно. |
||
|
Соединение |
Ссылка |
Желтый |
Кабель подключен, и между двумя |
|
установлено — |
сторонами канала выполняется обмен |
||
|
10/100 Мб/с |
данными. Сетевое подключение 10/100. |
||
|
Соединение |
Ссылка |
Зеленый |
Кабель подключен, и между двумя |
|
установлено — |
сторонами канала выполняется обмен |
||
|
10/100/1000 Мб/с |
данными. Сетевое подключение |
||
|
10/100/1000. |
|||
|
Бездействие |
Действие |
Непрерывно |
Активный обмен данными не |
|
соединения |
выполняется. |
||
|
Канал занят |
Действие |
Зеленый, |
Выполняется активный обмен |
|
мигает |
данными. |
||
|
ЛИЧНОЕ ОБЛАЧНОЕ ХРАНИЛИЩЕ MY CLOUD EX2 ULTRA |
10 |
|
РУКОВОДСТВО ПО ЭКСПЛУАТАЦИИ |

С ЧЕГО НАЧАТЬ
3 С чего начать
Установка дисков в модель без дисков Подсоединение устройства
Счего начать с программой установки из Интернета
Счего начать без программы установки из Интернета Загрузить контент
Установить личный облачный накопитель My Cloud EX2 Ultra несложно. Достаточно распаковать и подключить его, а затем дождаться, когда индикатор питания на передней панели начнет непрерывно светиться синим цветом. Затем с сайта http://www.wd.com/setup загрузите программу быстрой установки и запустите её.
Примечание. О том, как безопасно завершать работу устройства и отсоединять его, читайте в разделе «Служебные программы» на странице 96.
Предупреждение! Для защиты от электростатического разряда перед началом работы с устройством заземлитесь, прикоснувшись к металлическому предмету.
Установка дисков в модель без дисков
Предупреждение! Далее приводятся указания по установке дисков в модель устройства My Cloud EX2 Ultra, не укомплектованную дисками. Допускается использовать диски как WD, так и другого производителя. Перечень совместимых дисков см. на сайте http://products.wdc.com/.
Предупреждение! Убедитесь, что на устройство не подано питание и что оно не подключено к локальной сети. Во избежание проблем, связанных с электростатическими разрядами, перед работой с устройством коснитесь массивного металлического предмета (т. е. используйте этот предмет в качестве заземления).
Примечание. Дальнейшие указания о том, как извлечь и заменить неисправный диск или подготовить и установить диск другого производителя, читайте в разделе
«Порядок замены диска» на странице 105.
|
ЛИЧНОЕ ОБЛАЧНОЕ ХРАНИЛИЩЕ MY CLOUD EX2 ULTRA |
11 |
|
РУКОВОДСТВО ПО ЭКСПЛУАТАЦИИ |

С ЧЕГО НАЧАТЬ
Примечание. Для выполнения этих действий вам понадобится крестовая отвертка. Прежде чем выполнять эти действия, отключите кабели питания
илокальной сети.
1.Нажмите на утопленную кнопку дверцы в верхней части устройства, чтобы открыть её.
2.Извлеките скобу, удерживающую диски.
3.С помощью винта из пакета прикрепите пластиковый язычок к верхнему отверстию на боку диска (справа, если смотреть со стороны зеленой платы).
4.Вставьте винт в соответствующее отверстие на другой стороне диска.
5.Разместите этикетку 1 или 2 на верхней части диска. Этикетка 1 находится слева, а этикетка 2 — справа, если смотреть на устройство сверху вниз. Соответствующие цифры нанесены на этикетку поперечного крепления.
6.Повернув устройство передней панелью к себе, а диск — разъемом вниз
ивовнутрь устройства, осторожно задвиньте диск в отсек.
7.Убедитесь в том, что язычок выступает над диском в задней части устройства.
|
ЛИЧНОЕ ОБЛАЧНОЕ ХРАНИЛИЩЕ MY CLOUD EX2 ULTRA |
12 |
|
РУКОВОДСТВО ПО ЭКСПЛУАТАЦИИ |

С ЧЕГО НАЧАТЬ
8.Повторите действия 3—7 с другим диском.
9.Закрепите винтом скобу над дисками.
10.Закройте дверцу и с усилием нажмите на неё, чтобы она надежно закрепилась на своем месте.
11.Перейдите к разделу “Подсоединение устройства” на странице 13.
Подсоединение устройства
Чтобы подключить личный облачный накопитель My Cloud EX2 Ultra к локальной сети у себя дома или в небольшом офисе, выполните указанные ниже действия.
Предупреждение! С целью избежать перегрева устройства, установите его вертикально, как показано на рисунке выше, чтобы прорези и отверстия на верхнем и нижнем торцах устройства не заслонялись. В случае перегрева устройство безопасно завершит свою работу. Выполнение всех текущих операций будет прервано. Это может привести к утрате данных.
Предупреждение! Чтобы обеспечить максимальное быстродействие, рекомендуем вам пользоваться комплектным кабелем Ethernet.
1.Подключите один конец комплектного кабеля Ethernet к порту Ethernet на задней панели устройства.
2.Подключите другой конец кабеля Ethernet к порту маршрутизатора или коммутатора.
3.Подключите шнур источника питания к соответствующему разъему на задней панели устройства.
|
ЛИЧНОЕ ОБЛАЧНОЕ ХРАНИЛИЩЕ MY CLOUD EX2 ULTRA |
13 |
|
РУКОВОДСТВО ПО ЭКСПЛУАТАЦИИ |

С ЧЕГО НАЧАТЬ
4.Включите источник питания в розетку электросети. Питание устройства включится автоматически.
Предупреждение! Прежде чем настраивать устройство
My Cloud EX2 Ultra, дождитесь, пока оно полностью включится (этот процесс занимает примерно три минуты). Устройство будет готово к работе, когда индикатор питания перестанет мигать и начнет светиться синим.
5.Когда индикатор питания устройства начнет непрерывно светиться синим, перейдите к разделу «С чего начать с программой установки из Интернета» на странице 14.
С чего начать с программой установки из Интернета
Программа установки из Интернета поможет вам без труда подключить это устройство к сети дома или в небольшом офисе. Выполните следующие действия, чтобы загрузить и выполнить программу установки из Интернета, обнаружить свое устройство и приступить пользованию им. Вы можете загрузить программу установки из виртуального центра обучения WD по адресу http://products.wdc.com/.
Загрузка и установка программы установки из Интернета
После подключения устройства:
1.В веб-браузере перейдите на страницу приветствия по адресу http://mycloud.com/setup.
2.На странице приветствия нажмите кнопку Приступить.
Программа установки начнет поиск вашего устройства My Cloud. После обнаружения устройства отобразится экран со сведениями о нем, включая IP- и MAC-адреса устройства.
3.Следуйте инструкциям на экране, чтобы настроить устройство и установить программу WD Sync.
|
ЛИЧНОЕ ОБЛАЧНОЕ ХРАНИЛИЩЕ MY CLOUD EX2 ULTRA |
14 |
|
РУКОВОДСТВО ПО ЭКСПЛУАТАЦИИ |

С ЧЕГО НАЧАТЬ
4.По завершении настройки и установки программы WD Sync отобразится окно со списком чаще всего используемых папок на вашем компьютере. Выберите на своем компьютере папки, которые хотите синхронизировать с устройством
My Cloud, и нажмите кнопку Далее.
5.Настройка WD Sync завершена. Нажмите кнопку Закрыть, чтобы закрыть экран настройки WD Sync.
Примечание. Ярлык WD Sync может находиться в разделе «Отображать скрытые значки» на панели задач.
С чего начать без программы установки из Интернета
Приступая к работе без программы установки из Интернета, вы можете:
Использовать личный облачный накопитель My Cloud EX2 Ultra в качестве внешнего накопителя, удобно обмениваясь с ним файлами.
Настраивать устройство при помощи приборной панели My Cloud EX2 Ultra. (См. раздел «Начальная страница приборной панели» на странице 35.)
Выполнять внутреннее, дистанционное и облачное резервное копирование, а также резервное копирование через USB (см. «Резервное копирование и восстановление файлов» на странице 47).
Загрузить контент
В папке Public на устройстве My Cloud EX2 Ultra находятся вложенные папки Shared Music, Shared Pictures и Shared Videos. В этих папках содержатся файлы,
скопированные вами на устройство, и резервные копии файлов, сохраненные с компьютера или подключенного USB-накопителя.
Примечание. В этом Руководстве термины папки и общие папки означают одно и то же.
Чтобы после подсоединения устройства My Cloud EX2 Ultra (см. раздел “Подсоединение устройства” на странице 13) получить доступ к его содержимому, выполните указанные ниже действия.
|
ЕСЛИ у вас операционная |
То… |
|
|
система… |
||
|
Windows 10, Windows 8 или |
1. |
На начальной странице Windows 8 наберите Компьютер |
|
Windows 8.1 |
2. |
Выберите Компьютер. |
|
3. |
На левой панели выберите Сеть. |
|
|
4. |
Дважды щелкните значок MyCloudEX2Ultra и перейдите |
|
|
в папку Public на этом устройстве. |
||
|
5. |
Дважды нажмите на значок папки Public. Отобразятся значки |
|
|
вложенных папок Shared Music, Shared Pictures и Shared |
||
|
Videos. Теперь вы можете работать с медиафайлами |
||
|
в соответствующих папках при помощи Проводника Windows. |
||
|
ЛИЧНОЕ ОБЛАЧНОЕ ХРАНИЛИЩЕ MY CLOUD EX2 ULTRA |
15 |
|
РУКОВОДСТВО ПО ЭКСПЛУАТАЦИИ |
![]()
|
С ЧЕГО НАЧАТЬ |
|||||
|
ЕСЛИ у вас операционная |
То… |
||||
|
система… |
|||||
|
Windows XP, Windows Vista, |
1. Выберите |
или |
|||
|
Windows 7 |
Пуск > Компьютер > Сеть > MyCloudEX2Ultra и при |
||||
|
необходимости введите учетные данные сети |
|||||
|
(маршрутизатора). Отобразятся общие и личные папки |
|||||
|
устройства. |
|||||
|
2. Дважды нажмите на значок папки Public. Отобразятся значки |
|||||
|
вложенных папок Shared Music, Shared Pictures и Shared |
|||||
|
Videos. Теперь вы можете работать с медиафайлами |
|||||
|
в соответствующих папках при помощи Проводника Windows. |
|||||
|
Mac OS X |
1. В разделе «Общий доступ» на боковой панели Finder |
||||
|
(Snow Leopard, Lion, Mountain Lion, |
выберите MyCloudEX2Ultra. |
||||
|
Mavericks) |
2. Если появится окно авторизации, выберите Как гость |
||||
|
и нажмите Подключиться. Откроется общая папка Public: |
|||||
|
3. Дважды нажмите на значок папки Public. Отобразятся |
|||||
|
вложенные в неё папки: Shared Music, Shared Pictures, Shared |
|||||
|
Videos и Software. Теперь вы можете перетаскивать файлы |
|||||
|
в общие папки при помощи Finder: |
|||||
|
4. Если необходимо, чтобы значок общего накопителя |
|||||
|
постоянно отображался на рабочем столе, создайте его |
|||||
|
псевдоним. Это можно сделать одним из двух способов: |
|||||
|
Примечание. Прежде чем создавать псевдоним, последовательно |
|||||
|
выберите пункты Finder > Настройки > Основные |
|||||
|
настройки и установите флажок Подключенные |
|||||
|
— |
серверы. |
||||
|
Нажмите на объект, псевдоним которого требуется |
|||||
|
создать (например, Shared Music), и удерживайте кнопку |
|||||
|
мыши нажатой. Теперь, удерживая нажатыми клавиши |
|||||
|
Cmd и Option, перетащите выбранный объект туда, где |
|||||
|
требуется разместить его псевдоним. В результате вместо |
|||||
|
перемещения объекта на новом месте будет создан его |
|||||
|
псевдоним. |
—ИЛИ—
—Правой кнопкой мыши щелкните объект, для которого
необходимо создать псевдоним (например, Shared Music),
а затем выберите Файл > Создать псевдоним.
Как назначить букву диска папке Public (в Windows)
Чтобы назначить общей папке Public на устройстве My Cloud EX2 Ultra букву диска для быстрого доступа к ней, выполните указанные ниже действия.
1.В разделе «Сеть» Проводника Windows выберите MyCloudEX2Ultra.
2.Щелкните правой кнопкой мыши папку Public и в появившемся меню выберите пункт Подключить сетевой диск.
3.Выберите требуемую букву из раскрывающегося списка Диск.
4.Установите флажок Восстанавливать при входе в систему.
5.Нажмите Готово. Общая папка Public теперь подключена как сетевой диск.
|
ЛИЧНОЕ ОБЛАЧНОЕ ХРАНИЛИЩЕ MY CLOUD EX2 ULTRA |
16 |
|
РУКОВОДСТВО ПО ЭКСПЛУАТАЦИИ |

ДИСТАНЦИОННЫЙ ДОСТУП К ВАШЕМУ ОБЛАЧНОМУ НАКОПИТЕЛЮ
48 Дистанционныйнакопителю доступ к вашему облачному
Как включить облачный доступ к устройству My Cloud EX2 Ultra Как настроить доступ к облаку для пользователя
Как предоставить доступ к файлам с мобильных устройств с помощью программ для мобильных устройств с iOS и Android
Личная облачная система — это когда ваши файлы надежно хранятся под вашим контролем у вас дома. В отличие от облачных систем общего пользования личная облачная система дает вам возможность централизованно и надежно хранить все ваши данные в домашней сети. Обменивайтесь файлами, транслируйте медиа
иобращайтесь к своим материалам с компьютеров типа PC или Mac и с мобильных устройств, где бы вы ни были. Никакой абонентской платы. Без отправки своих файлов неизвестно куда. Надежно храните свои фильмы, музыку, фотоснимки
идругие файлы дома, всегда держите их под рукой.
В данной главе рассказывается, как настроить дистанционный доступ к устройству My Cloud EX2 Ultra. Кроме того, в ней приведены примеры использования некоторых из множества возможностей устройства.
Как включить облачный доступ к устройству
My Cloud EX2 Ultra
Чтобы можно было пользоваться облачным доступом к устройству
My Cloud EX2 Ultra, необходимо включить эту функцию. О том, как разрешить удаленный доступ к устройству My Cloud и проверить состояние соединения для удаленного доступа, читайте в разделе “Облачный доступ”на странице 84.
Как настроить доступ к облаку для пользователя
После того как вы включите облачный доступ к устройству My Cloud EX2 Ultra, выполните указанные ниже действия, чтобы настроить дистанционный доступ для пользователей этого устройства.
1.На панели навигации щелкните значок Облачный доступ  .
.
2.На левой панели выберите пользователя, для которого необходимо настроить доступ к облаку.
|
ЛИЧНОЕ ОБЛАЧНОЕ ХРАНИЛИЩЕ MY CLOUD EX2 ULTRA |
17 |
|
РУКОВОДСТВО ПО ЭКСПЛУАТАЦИИ |

ДИСТАНЦИОННЫЙ ДОСТУП К ВАШЕМУ ОБЛАЧНОМУ НАКОПИТЕЛЮ
3.В поле «Учетная запись MyCloud.com пользователя <имя_пользователя>»
щелкните значок Указать или изменить адрес email  . Щелкните этот значок, если вы еще не указали адрес электронной почты для этой учетной записи или если необходимо изменить этот адрес.
4.Введите адрес электронной почты этого пользователя. На этот адрес будут отправляться запросы подтверждения и указания по установке и активации пароля для облачного доступа.
5.Нажмите Сохранить.
6.Если вы еще не указали адрес электронной почты, то этот значок будет неактивен. Укажите адрес электронной почты, а затем нажмите на этот значок, чтобы отправить сведения, требуемые для облачного доступа.
Чтобы создать код активации для мобильного устройства пользователя:
Предупреждение! Коды действительны в течение 48 часов с момента создания
имогут быть использованы только однократно.
1.Нажмите Получить код в нижней части экрана. Вам понадобится создать по одному коду для каждого из устройств, которые требуется активировать.
Вдиалоговом окне отобразится код активации, а также дата и время окончания срока его действия.
Примечание. Обязательно запишите созданные коды активации.
2.Нажмите OK. После того, как вы используете эти коды, на странице «Настройка доступа» отобразятся облачные устройства, к которым этому пользователю теперь разрешен доступ, наряду с соответствующими кодами активации.
|
ЛИЧНОЕ ОБЛАЧНОЕ ХРАНИЛИЩЕ MY CLOUD EX2 ULTRA |
18 |
|
РУКОВОДСТВО ПО ЭКСПЛУАТАЦИИ |

ДИСТАНЦИОННЫЙ ДОСТУП К ВАШЕМУ ОБЛАЧНОМУ НАКОПИТЕЛЮ
Как предоставить доступ к файлам с мобильных устройств с помощью программ для мобильных устройств с iOS и Android
С помощью программы My Cloud для мобильных устройств и программы My Cloud для компьютеров вы можете получать доступ ко всему содержимому личной облачной системы с любого устройства.
Программа My Cloud для мобильных устройств
С помощью этой программы у вас всегда будет доступ к вашей личной облачной системе. Освободите драгоценное пространство на своем мобильном устройстве: напрямую отправляйте фотоснимки и видеозаписи на личный облачный накопитель, а затем получайте доступ к ним и обменивайтесь ими в защищенном режиме.
Программа My Cloud для мобильных устройств дает возможность легко обмениваться файлами между личным облаком, Dropbox™ и другими общедоступными облачными службами.
С помощью программы My Cloud для мобильных устройств вы можете выполнять указанные ниже действия.
В любом месте открывать и просматривать важные файлы, хранящиеся на вашем устройстве My Cloud EX2 Ultra, не копируя их на мобильное устройство.
Демонстрировать фотоснимки, хранящиеся на вашем устройстве My Cloud EX2 Ultra.
Подключаться с планшета или смартфона к другим облачным службам:
например, Dropbox.
Транслировать и воспроизводить музыку и фильмы, хранящиеся на вашем устройстве My Cloud EX2 Ultra.
Примечание. Качество трансляции видеоматериалов выше при подключении через локальную сеть или через Wi-Fi. На трансляцию через WAN влияет ограничение скорости передачи данных от абонента, установленное вашим провайдером домашнего Интернета.
Показывать презентации с планшетов под управлением iOS и Android. Программа My Cloud поддерживает большинство популярных форматов файлов, например документы Microsoft Word, таблицы Microsoft Excel и презентации PowerPoint.
Дополнительные сведения о возможностях программы и о том, как ею пользоваться, читайте в Справке на странице «Помогите мне» и в разделе «Полезные советы» в программе WD Photos, а также на сайте http://mycloud.wd.com.
Примечание. Программа My Cloud позволяет перенести файлы с устройства My Cloud EX2 Ultra на планшет, смартфон или другое портативное
устройство под управлением Google Android или Apple iOS. My Cloud
отображает удобный список файлов, хранящихся на устройстве My Cloud EX2 Ultra, и позволяет воспроизводить и просматривать их
с помощью выбранных вами программ. О том, файлы каких форматов поддерживает ваше мобильное устройство, читайте в его руководстве по эксплуатации.
|
ЛИЧНОЕ ОБЛАЧНОЕ ХРАНИЛИЩЕ MY CLOUD EX2 ULTRA |
19 |
|
РУКОВОДСТВО ПО ЭКСПЛУАТАЦИИ |

ДИСТАНЦИОННЫЙ ДОСТУП К ВАШЕМУ ОБЛАЧНОМУ НАКОПИТЕЛЮ
Требования
Личный облачный накопитель My Cloud EX2 Ultra с последней версией встроенной программы, подключенный к Интернету.
Для доступа к облачным службам необходима программа My Cloud для мобильных устройств и действующая учетная запись Dropbox, Google Drive
или OneDrive™.
Устройство iPhone или iPad с ОС iOS 7.0 или более поздней версии.
Смартфон или планшет с ОС Android 4.0 или более поздней версии.
Установка приложения My Cloud для мобильных устройств
Загрузите программу My Cloud из магазина Apple App Store или Google Play и установите её на мобильное устройство.
|
ЛИЧНОЕ ОБЛАЧНОЕ ХРАНИЛИЩЕ MY CLOUD EX2 ULTRA |
20 |
|
РУКОВОДСТВО ПО ЭКСПЛУАТАЦИИ |

УПРАВЛЕНИЕ ПОЛЬЗОВАТЕЛЯМИ, ГРУППАМИ И ОБЩИМИ ПАПКАМИ |
||
|
Управление пользователями, группами |
||
|
5 |
||
|
и общими папками |
||
Сведения о пользователях |
||
|
Сведения о группах |
||
|
Сведения об общих папках |
||
|
Сведения о пользователях |
||
|
Администратор — как правило, владелец устройства, отвечает за его настройку. |
||
|
Так как вы — владелец устройства My Cloud EX2 Ultra, то у вас есть специальная |
||
|
учетная запись пользователя с правами администратора. Используя эти права, |
||
|
можно настраивать устройство согласно своим потребностям и добавлять других |
||
|
пользователей в свое личное облако. Вы также можете определять, какие именно |
||
|
пользователи получат доступ к устройству. |
||
|
По умолчанию для администратора (admin) пароль не требуется. Вы можете |
||
|
создать его в любой момент (см. раздел “Как изменить пароль пользователя” |
||
|
на странице 25). |
||
|
Примечание. Одновременный вход в веб-интерфейс устройства нескольких |
||
|
пользователей с реквизитами администратора не допускается. Поэтому |
||
|
обязательно выходите из веб-интерфейса |
||
|
устройства My Cloud EX2 Ultra по окончании работы с ним. Это даст |
||
|
возможность войти в веб-интерфейс другим пользователям, у которых |
||
|
имеются реквизиты администратора. |
||
|
Сведения о том, как настроить автоматический выход из программы по |
||
|
истечении заданного времени, см. в разделе «Энергосбережение — период |
||
|
ожидания веб-доступа» в главе “Энергосбережение” на странице 86. |
||
|
На экране «Пользователи» отображается список пользователей. Здесь |
||
|
администратор может просматривать сведения о каждом из пользователей, |
||
|
создавать новых пользователей, создавать группы, а также выдавать |
||
|
пользователям и группам права доступа к общим папкам. |
Просмотр списка пользователей
1.На панели навигации выберите значок Пользователи. Откроется экран «Настройки пользователей».
2.Чтобы просмотреть сведения о пользователе, выберите его имя в панели слева. Отобразятся сведения о пользователе и его правах доступа к папкам. Пользователь может иметь следующие права доступа к папке: только чтение, чтение и запись, доступ запрещен.
Примечание. Права доступа к папкам в разделе «Доступ к общим папкам» не подлежат изменению, поскольку эти папки являются общими. После того как папка будет сделана личной, она отобразится в этом списке и права доступа к ней можно будет изменить. (См. раздел “Как сделать общую папку личной” на странице 31.)
|
ЛИЧНОЕ ОБЛАЧНОЕ ХРАНИЛИЩЕ MY CLOUD EX2 ULTRA |
21 |
|
РУКОВОДСТВО ПО ЭКСПЛУАТАЦИИ |

УПРАВЛЕНИЕ ПОЛЬЗОВАТЕЛЯМИ, ГРУППАМИ И ОБЩИМИ ПАПКАМИ
Как добавить одного пользователя
Администратор создает учетные записи пользователей и настраивает параметры общих папок, к которым тот или иной пользователь может обращаться. Чтобы создать одну учетную запись пользователя, выполните следующие действия.
1.Чтобы добавить пользователя, нажмите на значок  в левом нижнем углу экрана.
2.В соответствующие поля создаваемой учетной записи введите имя пользователя, а также его имя, фамилию и адрес электронной почты (необязательно), а затем нажмите Далее.
3.Чтобы установить пароль, включите переключатель  , укажите пароль этого пользователя, а затем введите его повторно. Нажмите кнопку Далее.
4.Чтобы поместить нового пользователя в одну из групп, установите флажок напротив требуемой группы и нажмите Далее.
5.Укажите размер квоты или не заполняйте это поле, чтобы не ограничивать доступный пользователю объем дискового пространства, а затем нажмите Применить. (Сведения о квотах см. в разделе See “Правила выделения квот” на странице 25.) Новая учетная запись отобразится на левой панели экрана «Настройки пользователей».
|
ЛИЧНОЕ ОБЛАЧНОЕ ХРАНИЛИЩЕ MY CLOUD EX2 ULTRA |
22 |
|
РУКОВОДСТВО ПО ЭКСПЛУАТАЦИИ |

УПРАВЛЕНИЕ ПОЛЬЗОВАТЕЛЯМИ, ГРУППАМИ И ОБЩИМИ ПАПКАМИ
Как добавить нескольких пользователей
Чтобы создать несколько учетных записей пользователей, выполните следующие действия.
1.Чтобы добавить нескольких пользователей, нажмите Добавить нескольких пользователей в левом нижнем углу экрана.
2.Выберите, как будут вводиться сведения о пользователях, а затем нажмите Далее.
Создание нескольких пользователей: Ввести сведения о пользователях вручную. See “Создание нескольких пользователей” на странице 23
Импорт пользователей: Импортировать в устройство список пользователей. Перейдите в раздел “Как импортировать нескольких пользователей” на странице 24.
Создание нескольких пользователей
1.На экране «Создание нескольких пользователей» укажите следующие сведения, а затем нажмите Далее:
Префикс имени пользователя: Укажите префикс имени пользователя. Он будет добавлен к префиксу учетной записи при создании имени пользователя. (Пример: HR)
Префикс учетной записи: Укажите цифровой префикс учетной записи. Он будет добавлен к префиксу имени пользователя при создании имени пользователя. (Пример: 143)
Количество пользователей: Укажите число учетных записей пользователей, которые требуется создать. Максимально допустимое число новых пользователей отображается справа.
|
ЛИЧНОЕ ОБЛАЧНОЕ ХРАНИЛИЩЕ MY CLOUD EX2 ULTRA |
23 |
|
РУКОВОДСТВО ПО ЭКСПЛУАТАЦИИ |

УПРАВЛЕНИЕ ПОЛЬЗОВАТЕЛЯМИ, ГРУППАМИ И ОБЩИМИ ПАПКАМИ
Пароль: Укажите пароль для этих учетных записей.
Подтверждение пароля: Повторно введите пароль для этих учетных записей.
Перезаписать дублирующие записи (необязательно): Установите этот флажок, если необходимо заменить повторяющиеся учетные записи, уже имеющиеся на устройстве.
2.Чтобы поместить новых пользователей в одну из групп, установите флажок напротив требуемой группы и нажмите Далее.
3.Укажите размер квоты или не заполняйте это поле, чтобы не ограничивать доступный пользователю объем дискового пространства, а затем нажмите Далее. (Сведения о квотах см. в разделе See “Правила выделения квот” на странице 25.)
4.Отобразятся новые учетные записи пользователей. Чтобы сохранить их
вустройстве, нажмите кнопку Применить.
Как импортировать нескольких пользователей
1.Нажмите Загрузить, чтобы загрузить текстовый файл с указанием формата, который необходимо использовать для создания файла с данными пользователей для импорта.
2.Создайте и сохраните файл с данными пользователей. Файл для импорта должен иметь следующий формат:
Формат файла с данными пользователей для импорта: #имя пользователя/пароль пользователя/группы пользователя/ общая папка(ч+з)/ общая папка(ч)/ общая папка(нд)/квота пользователя
Пример: #user/pw/g1:g2/folder1:folder2/folder3:folder4/folder5:folder6/0:0:0:0
3.Нажмите Импортировать список пользователей и выберите созданный вами файл для импорта.
4.Нажмите Далее.
|
ЛИЧНОЕ ОБЛАЧНОЕ ХРАНИЛИЩЕ MY CLOUD EX2 ULTRA |
24 |
|
РУКОВОДСТВО ПО ЭКСПЛУАТАЦИИ |

УПРАВЛЕНИЕ ПОЛЬЗОВАТЕЛЯМИ, ГРУППАМИ И ОБЩИМИ ПАПКАМИ
5.Выберите программы, права доступа к которым необходимо предоставить новым учетным записям, и нажмите Далее.
6.Нажмите Применить. Новые учетные записи пользователей будут сохранены
вустройство.
Редактирование настроек пользователя
1.На экране «Настройки пользователей» выберите пользователя, сведения
окотором требуется изменить. Отобразятся панели «Сведения о пользователе» и «Доступ к общим папкам».
2.Измените обязательные и необязательные настройки по своему желанию.
3.Если на экране «Общая папка» создана личная папка, то она отобразится на панели «Доступ к общим папкам» на экране «Настройки пользователей». Вы можете назначить права доступа к ней для каждого из пользователей.
(О том, как создать личную папку, читайте в разделе “Как сделать общую папку личной” на странице 31.)
Как изменить пароль пользователя
При просмотре сведений о пользователе администратор может установить или сменить пароль пользователя (заводская настройка — без пароля). Чтобы сменить пароль пользователя, выполните следующие действия.
1.На экране «Настройки пользователей» выберите пользователя в списке слева.
2.Нажмите на переключатель  , если пароль ранее не был задан.
3.Нажмите Настроить справа от переключателя  . Отобразится экран
«Изменить пароль»:
4.Введите новый пароль в поля «Новый пароль» и «Подтверждение пароля».
5.Нажмите Применить.
Как поместить пользователя в группу
Чтобы поместить пользователя в группу, выполните следующие действия.
1.На экране «Настройки пользователей» выберите требуемого пользователя на левой панели.
2.В поле Участие в группах нажмите Настроить.
3.Установите флажок напротив группы, в которую требуется поместить этого пользователя, и нажмите Применить.
Правила выделения квот
Система квот позволяет вам точно контролировать объем дискового пространства, выделяемый тому или иному пользователю или группе. Существует ряд правил, определяющих приоритет выделения квот.
Квота пользователя должна быть не больше квоты группы. Например, если квота группы — 20 ГБ, и вы попытаетесь установить квоту пользователя 30 ГБ, то отобразится сообщение о том, что квота пользователя должна быть не больше квоты группы.
Если пользовательская квота не задана, пользователю будет выдана групповая квота.
|
ЛИЧНОЕ ОБЛАЧНОЕ ХРАНИЛИЩЕ MY CLOUD EX2 ULTRA |
25 |
|
РУКОВОДСТВО ПО ЭКСПЛУАТАЦИИ |
![]()
УПРАВЛЕНИЕ ПОЛЬЗОВАТЕЛЯМИ, ГРУППАМИ И ОБЩИМИ ПАПКАМИ
Если квота пользователя установлена до его перемещения в группу, для которой установлена квота:
—Если квота пользователя больше квоты группы, то квота пользователя будет автоматически уменьшена до размера квоты группы.
—Если квота пользователя не превышает квоту группы, то размер квоты пользователя не будет изменен.
Как выделять квоты пользователю
Чтобы выделить квоту пользователю, выполните следующие действия. Квота — это выделяемый пользователю объем дискового пространства на устройстве
My Cloud EX2 Ultra.
1.На экране «Настройкa пользователей» выберите требуемого пользователя на левой панели.
2.В поле «Квоты» нажмите Настроить.
3.Укажите выделяемый пользователю объем дискового пространства на устройстве My Cloud EX2 Ultra.
Чтобы выделить неограниченный объем, не заполняйте поле «Квота».
4.Нажмите Применить.
Удаление пользователя
Чтобы удалить каких-либо пользователей с устройства My Cloud EX2 Ultra, выполните указанные ниже действия.
Примечание. Учетная запись администратора удалению не подлежит.
1.На экране «Настройка пользователей» выберите пользователя, которого требуется удалить, на левой панели.
2.Нажмите на значок Удалить пользователя  .
.
3.В ответ на запрос подтверждения нажмите OK. Учетная запись выбранного пользователя будет удалена из устройства и перестанет отображаться в списке учетных записей.
Сведения о группах
Группы упрощают работу с большим числом пользователей. Права, выданные группе, определяют, какие действия могут выполнять её участники.
|
ЛИЧНОЕ ОБЛАЧНОЕ ХРАНИЛИЩЕ MY CLOUD EX2 ULTRA |
26 |
|
РУКОВОДСТВО ПО ЭКСПЛУАТАЦИИ |

УПРАВЛЕНИЕ ПОЛЬЗОВАТЕЛЯМИ, ГРУППАМИ И ОБЩИМИ ПАПКАМИ
Просмотр групп
1.На панели навигации выберите значок Пользователи. Откроется экран «Настройки пользователей».
2.Выберите вкладку Группы на странице «Настройкa пользователей».
3.Чтобы просмотреть сведения о группе, выберите её имя в панели слева. Отобразятся сведения о группе.
Добавление групп
1.Чтобы добавить группу, нажмите на значок  в левом нижнем углу экрана «Настройки групп».
2.Введите Название группы.
3.Установите флажки напротив имен пользователей, которых требуется поместить в эту группу, и нажмите Далее.
4.Укажите размер квоты или не заполняйте это поле, чтобы не ограничивать доступный пользователю объем дискового пространства, а затем нажмите Применить. Новая учетная запись группы отобразится на левой панели экрана «Настройкa групп».
Изменение настроек группы
1.На экране «Настройки групп» выберите группу, сведения о которой требуется изменить. Отобразятся панели «Сведения о группе» и «Доступ к общим папкам».
2.Измените обязательные и необязательные настройки по своему желанию.
Отом, как изменять права доступа группы к папкам, читайте в разделе “Как выдавать группам права доступа к общим папкам” на странице 27.
Как выдавать группам права доступа к общим папкам
После создания учетной записи можно выдать группе права доступа к папкам на устройстве My Cloud EX2 Ultra, выполнив указанные ниже действия.
1.На экране «Настройка групп» выберите группу, которой требуется выдать права доступа к папке.
2.В разделе «Доступ к общим папкам» выберите тип доступа, который требуется выдать выбранному пользователю:
Чтение и запись: Выберите этот вариант, чтобы выдать группе права на чтение и запись в выбранную папку. Участники группы смогут как просматривать, так и изменять содержимое этой папки.
Только чтение: Выберите этот вариант, чтобы выдать группе права на чтение в выбранной папке. Участники этой группы смогут только просматривать, но не изменять содержимое этой папки.
Запретить доступ: У данной группы нет доступа к этой общей папке.
В учетной записи группы будут сохранены выданные вами права доступа к папкам.
|
ЛИЧНОЕ ОБЛАЧНОЕ ХРАНИЛИЩЕ MY CLOUD EX2 ULTRA |
27 |
|
РУКОВОДСТВО ПО ЭКСПЛУАТАЦИИ |

УПРАВЛЕНИЕ ПОЛЬЗОВАТЕЛЯМИ, ГРУППАМИ И ОБЩИМИ ПАПКАМИ
Как выделять квоты группам
Чтобы выделить квоту группе, выполните следующие действия. Квота — это назначенный пользователю объем дискового пространства в устройстве
My Cloud EX2 Ultra. (Сведения о квотах см. в разделе See “Правила выделения квот” на странице 25.)
1.На экране «Настройка групп» выберите требуемую группу на левой панели.
2.В поле «Квоты» нажмите Настроить.
3.Укажите назначаемый группе объем дискового пространства в устройстве My Cloud EX2 Ultra. Чтобы выделить неограниченный объем, не заполняйте поле «Квота».
4.Нажмите Применить.
Удаление группы
Чтобы удалить каких-либо пользователей с устройства My Cloud EX2 Ultra, выполните указанные ниже действия.
1.На экране «Настройки групп» выберите пользователя, которого требуется удалить, на левой панели.
2.Нажмите на значок Удалить группу  .
.
3.В ответ на запрос подтверждения нажмите OK. Учетная запись выбранной группы будет удалена из устройства и перестанет отображаться в списке учетных записей.
Сведения об общих папках 

Общая папка — это место, в котором хранятся файлы на устройстве
My Cloud EX2 Ultra (как в обычной папке).
Примечание. В этом Руководстве термины «папка» и «общая папка» означают одно и то же.
Папка может быть общей, доступ к которой имеют все пользователи, или личной, доступ к которой имеет ограниченное число пользователей. Выбрав значок Общие папки на панели навигации, можно отобразить список общих папок на устройстве My Cloud EX2 Ultra. Администратор также может управлять общими папками
и правами доступа пользователей.
Примечание. USB-флэш-диски можно подключать как общие папки, но изменение их содержимого не предусмотрено.
Просмотр списка общих папок
Щелкните значок Общие папки на панели навигации. Отобразится список общих папок на устройстве My Cloud EX2 Ultra. Напротив каждой папки отображается её описание и состояние атрибутов «Трансляция мультимедиа» и «Общий доступ».
Чтобы просмотреть список общих папок, выполните следующие действия.
1.На панели навигации выберите Общие папки. Отобразится страница «Сведения об общих папках».
|
ЛИЧНОЕ ОБЛАЧНОЕ ХРАНИЛИЩЕ MY CLOUD EX2 ULTRA |
28 |
|
РУКОВОДСТВО ПО ЭКСПЛУАТАЦИИ |

УПРАВЛЕНИЕ ПОЛЬЗОВАТЕЛЯМИ, ГРУППАМИ И ОБЩИМИ ПАПКАМИ
2.Чтобы отобразить подробные сведения о папке и правах доступа к ней, щелкните имя папки.
Примечание. Допускается изменять атрибуты только личных папок. Общие папки всегда имеют права на чтение и запись, и поэтому они неактивны.
|
ЛИЧНОЕ ОБЛАЧНОЕ ХРАНИЛИЩЕ MY CLOUD EX2 ULTRA |
29 |
|
РУКОВОДСТВО ПО ЭКСПЛУАТАЦИИ |

УПРАВЛЕНИЕ ПОЛЬЗОВАТЕЛЯМИ, ГРУППАМИ И ОБЩИМИ ПАПКАМИ
Создание общей папки
Вы можете создать общую или личную папку. Например, если в ресурс содержится финансовая информация, то имеет смысл сделать его личным. Или, например, если вы хотите показать свои фотоснимки знакомому, то можно выдать ему права доступа к соответствующему ресурсу.
1.Выберите значок Общие папки на панели навигации. Отобразится экран «Сведения об общих папках».
2.Щелкните значок Добавить общую папку .
.
3.Укажите следующие параметры:
|
Том |
Выберите том из раскрывающегося списка. |
|
|
Названиересурса |
Укажите имя общего ресурса. (Имя должно содержать от 1 до |
|
|
32 буквенно-цифровых символов. Пробелы не допускаются. |
||
|
Прописные и строчные буквы различаются.) |
||
|
Описание общего ресурса |
Введите краткое описание содержимого этого общего ресурса. |
|
|
(необязательно) |
Имейте в ви0ду, что описание папки должно начинаться |
|
|
с буквенно-цифрового символа, а его длина не должна |
||
|
превышать 256 знаков. |
||
|
Включить Корзину |
В Корзину попадают все файлы, удаленные с устройства |
|
|
(необязательно) |
My Cloud EX2 Ultra. Если требуется пользоваться Корзиной, то |
|
|
включите переключатель |
. (Заводская настройка — «ВЫКЛ».) |
Примечание. Функция Корзины распространяется только на файлы, доступ к которым осуществляется по протоколу SMB (в Windows).
4.Нажмите кнопку Далее.
5.Укажите следующие параметры:
|
Разрешить доставку м-медиа |
Если этот параметр включен, то разрешено транслировать |
|
|
(необязательно) |
медиафайлы, хранящиеся в этой папке, на другие устройства. |
|
|
Если требуется разрешить трансляцию медиа, нажмите на |
||
|
переключатель |
. Заводская настройка — «ВЫКЛ». |
Примечание. Чтобы транслировать медиафайлы, хранящиеся в папке, необходимо, чтобы медиасервер на устройстве был включен.
Сведения о том, как включить медиасервер на устройстве, см. в разделе “Как включить DLNA” на странице 75.
Доступ по FTP (необязательно) Разрешить доступ к этой папке по протоколу FTP. Если требуется разрешить доступ по FTP, нажмите на
переключатель  .
.
|
Примечание. Чтобы предоставлять доступ к папкам по |
||
|
FTP, необходимо включить поддержку |
||
|
протокола FTP. Сведения о том, как включить |
||
|
доступ по протоколу FTP, см. в разделе |
||
|
“Сетевые службы” на странице 89. |
||
|
Доступ по WebDAV |
Разрешить доступ к этой папке по протоколу WebDAV. Если |
|
|
(необязательно) |
требуется разрешить доступ по WebDAV, нажмите на |
|
|
переключатель |
. |
Примечание. Чтобы предоставлять доступ к папкам по WebDAV, необходимо включить поддержку протокола WebDAV. Сведения том, как включить доступ по протоколу WebDAV, см. в разделе “Сетевые службы” на странице 89.
|
ЛИЧНОЕ ОБЛАЧНОЕ ХРАНИЛИЩЕ MY CLOUD EX2 ULTRA |
30 |
|
РУКОВОДСТВО ПО ЭКСПЛУАТАЦИИ |

УПРАВЛЕНИЕ ПОЛЬЗОВАТЕЛЯМИ, ГРУППАМИ И ОБЩИМИ ПАПКАМИ
Изменение настроек общих папок
1.На экране «Настройки общих папок» выберите общую папку, настройки которой требуется изменить. Отобразится панель «Параметры общей папки».
2.Измените обязательные и необязательные настройки по своему желанию.
Как сделать общую папку личной
Если вам потребуется ограничить доступ к какой-либо общей папке, сделайте её личной.
1.На экране «Настройки общих папок» выберите необходимую общую папку.
2.Переведите переключатель Общий доступ в положение ВЫКЛ.
3.Для каждого пользователя в списке Права доступа установите необходимые
права, щелкнув соответствующий значок (чтение и запись  , только чтение
 или нет доступа
  ).
).
Удаление ресурса
ВНИМАНИЕ! При удалении ресурса уничтожаются все хранящиеся
внем файлы и папки.
1.Выберите требуемую папку в списке общих папок на странице «Сведения об общих папках».
|
2. |
Щелкните значок Удалить папку |
. |
|
3. |
В ответ на запрос подтверждения нажмите OK. |
Локальный доступ к содержимому ресурса
Примечание. О дистанционном доступе к содержимому ресурса читайте в разделе “Дистанционный доступ к вашему облачному накопителю” на странице 17.
Открыть общую папку на устройстве My Cloud EX2 Ultra можно несколькими способами. Если ресурс общий, то у пользователя должны быть:
Имя пользователя и пароль для этой общей папки
Права доступа к этому ресурсу: полные или только на чтение
|
ЛИЧНОЕ ОБЛАЧНОЕ ХРАНИЛИЩЕ MY CLOUD EX2 ULTRA |
31 |
|
РУКОВОДСТВО ПО ЭКСПЛУАТАЦИИ |

УПРАВЛЕНИЕ ПОЛЬЗОВАТЕЛЯМИ, ГРУППАМИ И ОБЩИМИ ПАПКАМИ
|
Если требуется открыть |
ТО . . . |
|||||
|
папку при помощи . . . |
||||||
|
Windows 10 и Windows 8 |
1. |
Нажмите на значок Проводника |
на панели задач. |
|||
|
или 8.1 |
2. |
На левой панели выберите Сеть, а затем дважды |
||||
|
щелкните MyCloudEX2Ultra. |
||||||
|
3. |
Дважды нажмите значок общей или личной папки на |
|||||
|
своем устройстве. |
||||||
|
Windows 7, Windows Vista |
1. |
Выберите |
или Пуск > Компьютер. |
|||
|
или Windows XP |
||||||
|
2. |
На левой панели выберите Сеть |
|||||
|
3. |
Щелкните MyCloudEX2Ultra. |
|||||
|
4. |
Дважды нажмите на значок общей или личной папки на |
|||||
|
своем устройстве. |
||||||
|
Mac OS X |
1. |
Откройте окно Finder и найдите устройство My Cloud |
||||
|
в разделе «Общий доступ» на боковой панели. |
||||||
|
Если отобразится окно авторизации, выберите Как |
||||||
|
гость и нажмите Подключиться. |
||||||
|
2. |
Нажмите на значок этого устройства. Отобразится |
|||||
|
папка Public и все личные ресурсы, к которым у вас |
||||||
|
имеется доступ. |
||||||
|
ЛИЧНОЕ ОБЛАЧНОЕ ХРАНИЛИЩЕ MY CLOUD EX2 ULTRA |
32 |
|
РУКОВОДСТВО ПО ЭКСПЛУАТАЦИИ |

ГЛАВНОЕ О ПРИБОРНОЙ ПАНЕЛИ
|
Главное о приборной панели |
||||
|
6 |
||||
Вызов приборной панели |
||||
|
Начальная страница приборной панели |
||||
|
Как обратиться за поддержкой |
||||
|
Стандартные задачи |
||||
|
С помощью приборной панели устройства My Cloud EX2 Ultra можно выполнять |
||||
|
необходимые настройки и управлять устройством. Например, можно создавать |
||||
|
учетные записи пользователей, ограничивать доступ к файлам, хранящимся на |
||||
|
устройстве My Cloud EX2 Ultra, создавать папки для хранения файлов, включать |
||||
|
дистанционный доступ и необходимым образом изменять параметры работы |
||||
|
устройства. |
||||
|
Вызов приборной панели |
||||
|
Вызвать приборную панель можно одним из следующих способов: |
||||
|
ЕСЛИ запуск производится |
ТО . . . |
|||
|
через . . . |
||||
|
Значок на рабочем столе |
Чтобы вызвать приборную панель |
|||
|
My Cloud EX2 Ultra, дважды щелкните значок |
||||
|
приборной панели . |
Браузер или Проводник Windows С использованием имени устройства
1.В адресной строке браузера введите имя устройства My Cloud EX2 Ultra (по умолчанию используется имя
MycloudEX2Ultra):
—http://<имя_устройства> (Windows,
пример: http://MyCloudEX2Ultra).
—https://<имя_устройства>.local (Mac,
пример: https://MyCloudEX2Ultra.local)
2.Нажмите Перейти.
С помощью IP-адреса:
1.В адресной строке браузера введите IP-адрес устройства My Cloud EX2 Ultra: http://<IP-адрес>
IP-адрес можно посмотреть в интерфейсе маршрутизатора.
(Пример: http://192.168.1.22)
2.Нажмите Перейти.
Windows 10 и Windows 8 или 8.1 1. На начальной странице наберите Компьютер.
2.Выберите Компьютер.
3.На левой панели выберите Сеть.
4.Найдите устройство My Cloud EX2 Ultra на правой панели в разделе «Запоминающие устройства».
5.Дважды нажмите на значок устройства или нажмите правую кнопку мыши и выберите Просмотр вебстраницы устройства из раскрывающегося меню.
|
Windows 7 или Vista |
1. Щелкните |
> Компьютер. |
2.На левой панели выберите Сеть
3.Найдите устройство My Cloud EX2 Ultra на правой панели в разделе «Запоминающие устройства».
4.Дважды нажмите на значок устройства или нажмите правую кнопку мыши и выберите Просмотр вебстраницы устройства из раскрывающегося меню.
|
ЛИЧНОЕ ОБЛАЧНОЕ ХРАНИЛИЩЕ MY CLOUD EX2 ULTRA |
33 |
|
РУКОВОДСТВО ПО ЭКСПЛУАТАЦИИ |

|
ГЛАВНОЕ О ПРИБОРНОЙ ПАНЕЛИ |
||
|
ЕСЛИ запуск производится |
ТО . . . |
|
|
через . . . |
||
|
Windows XP |
1. |
Выберите Пуск > Сетевое окружение. |
|
2. |
Найдите устройство My Cloud. |
|
|
3. |
Дважды нажмите на значок устройства или нажмите |
|
|
правую кнопку мыши и выберите Вызвать. |
|
Mac OS X |
1. Щелкните значок Safari |
> значок закладки |
> |
|||
|
Bonjour. |
||||||
2.Дважды щелкните значок устройства My Cloud EX2 Ultra в сети.
|
Мобильные устройства |
Устройства с iOS: |
|
|
1. |
Откройте браузер. |
|
|
2. |
В адресной строке введите адрес |
|
|
https://<имя_устройства>.local. |
Устройства с Android:
1.Откройте браузер.
2.В адресной строке введите адрес http://<имя_устройства>.
Первый вызов приборной панели
Чтобы вызвать приборную панель My Cloud EX2 Ultra в первый раз, выполните указанные ниже действия.
1.При первом входе в систему My Cloud EX2 Ultra не заполняйте поле Пароль.
2.Нажмите Вход. В раскрывающемся меню выберите необходимый язык.
3.Щелкните ссылку Лицензионное соглашение WD с конечным пользователем, прочитайте соглашение и установите флажок
|
ЛИЧНОЕ ОБЛАЧНОЕ ХРАНИЛИЩЕ MY CLOUD EX2 ULTRA |
34 |
|
РУКОВОДСТВО ПО ЭКСПЛУАТАЦИИ |

ГЛАВНОЕ О ПРИБОРНОЙ ПАНЕЛИ
Принимаю условия лицензионного соглашения WD с конечным пользователем.
4.Щелкните Продолжить.
5.Чтобы создать учетную запись администратора устройства WD My Cloud EX2, укажите свои имя, фамилию и электронный адрес (необязательно), а затем нажмите Сохранить.
6.Если требуется добавить других пользователей, то для каждого пользователя укажите имя пользователя, а также имя, фамилию и адрес электронной почты (необязательно), а затем нажмите Сохранить. Чтобы создать учетную запись
справами дистанционного доступа, необходимо указать адрес электронной почты пользователя.
7.Нажмите кнопку Далее.
8.Прочтите, что написано на экране.
При необходимости выполните указанные ниже действия.
Установите флажок Автоматически обновлять встроенную программу устройства при её наличии.
Установите флажок Зарегистрировать устройство My Cloud EX2 Ultra, чтобы постоянно получать поддержку.
9.Нажмите Готово. Отобразится приборная панель My Cloud EX2 Ultra.
Начальная страница приборной панели
На начальной странице приборной панели My Cloud EX2 Ultra расположены следующие элементы: информационная строка в правом верхнем углу, навигационная панель значков вдоль страницы и панель основных сведений о состоянии устройства со ссылками для изменения настроек.
|
ЛИЧНОЕ ОБЛАЧНОЕ ХРАНИЛИЩЕ MY CLOUD EX2 ULTRA |
35 |
|
РУКОВОДСТВО ПО ЭКСПЛУАТАЦИИ |
![]()
|
ГЛАВНОЕ О ПРИБОРНОЙ ПАНЕЛИ |
|||||||||||
Информационные значки |
|||||||||||
|
Значок |
Наименование |
Действия |
|||||||||
|
USB-устройства, |
Нажмите, чтобы отобразить число |
||||||||||
|
подключенные к My Cloud |
подключенных USB-устройств. (К порту USB |
||||||||||
|
можноподключитьнесколькоустройствчерез |
|||||||||||
|
концентратор.) Еслинеподключенониодного |
|||||||||||
|
USB-устройства, то этот значок неактивен. |
|||||||||||
|
Уведомления |
Нажмите, чтобы отобразить последние |
||||||||||
|
уведомления о наличии новой версии |
|||||||||||
|
встроенной программы и неполадках |
|||||||||||
|
в сети. |
|||||||||||
|
Особо важные |
Щелкните, чтобы отобразить серьезные |
||||||||||
|
уведомления |
предупреждения (например, перегрев, |
||||||||||
|
переохлаждение, ошибка SMART диска, не |
|||||||||||
|
удалось подключить том данных и т. д.). |
|||||||||||
Навигационные значки |
|||||||||||
|
Значок |
Наименование |
Действия |
|||||||||
|
Главная |
На приборной панели отображаются основные сведения |
||||||||||
|
о состоянии устройства со ссылками на изменение |
|||||||||||
|
настроек. |
|||||||||||
|
Пользователи |
Создание, изменение и удаление учетных записей |
||||||||||
|
пользователей и предоставление им полных или |
|||||||||||
|
ограниченных прав доступа к тем или иным общим |
|||||||||||
|
Ресурсы |
Создание, изменение и удаление общих папок |
||||||||||
|
и предоставление отдельным пользователям прав |
|||||||||||
|
доступа к ним (полный доступ, ограниченный доступ, |
|||||||||||
|
Доступ к облаку |
Установка, изменение и удаление прав облачного |
||||||||||
|
доступа к тем или иным общим папкам. Слежение за |
|||||||||||
|
состоянием дистанционного доступа. |
|||||||||||
|
Резервные копии |
Сохранение резервных копий: |
||||||||||
|
• |
На USB-накопитель |
||||||||||
|
• На другое устройство My Cloud EX2 Ultra |
|||||||||||
|
в локальной или дистанционной сети |
|||||||||||
|
• В другую папку на этом устройстве |
|||||||||||
|
My Cloud EX2 Ultra |
|||||||||||
|
• В службу облачного резервного копирования |
|||||||||||
|
Хранилище |
Выбор способа хранения данных на устройстве |
||||||||||
|
My Cloud EX2 Ultra. |
|||||||||||
|
Приложения |
Установка и удаление приложений, расширяющих |
|
спектр областей применения устройства. |
|
ЛИЧНОЕ ОБЛАЧНОЕ ХРАНИЛИЩЕ MY CLOUD EX2 ULTRA |
36 |
|
РУКОВОДСТВО ПО ЭКСПЛУАТАЦИИ |
 Loading…
-
Page 1
WD My Cloud EX2 ™ Personal Cloud Storage User Manual… -
Page 2: Wd Service And Support
Your product includes 30 days of free telephone support during the warranty period. This 30-day period starts on the date of your first telephone contact with WD Technical Support. Email support is free for the entire warranty period and our extensive knowledge base is available 24/7. To help us keep you informed of new features and services, remember to register your product online at http://register.wd.com.
-
Page 3: Table Of Contents
Recording Your WD Product Information……..
-
Page 4
Volume Virtualization ……….. . . 92 Managing Apps on WD My Cloud EX2 ……97 About Apps . -
Page 5
Appendices ……….. 141 Appendix A: WD My Cloud EX2 Quick User Guide ……141 Appendix B: Joomla!®… -
Page 6: Important User Information
If the product has been dropped or the chassis has been damaged. If the product exhibits a distinct change in performance, contact WD Customer Support at http://support.wd.com…
-
Page 7: Recording Your Wd Product Information
IMPORTANT USER INFORMATION Recording Your WD Product Information Remember to write down the following WD product information, which is used for setup and technical support. Your WD product information is found on the label on the back of the device. Serial Number…
-
Page 8: Product Overview
RAID 1, cloud or LAN/WAN backup options. Stream large files to any screen and expand your NAS features with a full suite of apps.The WD My Cloud EX2 personal cloud storage system is a high-performance system providing secure wireless access to your media and files from any computer, tablet, or smartphone when connected to a wireless router.
-
Page 9: About The Online Learning Center
Back up, your way – Protect your data via remote backup to another My Cloud EX2 or My Cloud EX4, integrated cloud backup or local LAN/WAN backup. PC users, WD SmartWare™ Pro offers options for how, when and where you back up your files for up to ®…
-
Page 10: Package Contents
Canada www.shopwd.ca www.wdstore.ca Europe www.shopwd.eu www.wdstore.eu All others Contact WD Technical Support in your region. For a list of Technical Support contacts, visit http://support.wd.com and see Knowledge Base Answer ID 1048. Operating System ® ® Windows Mac OS X …
-
Page 11: Pre-Installation Instructions
Handling Precautions WD products are precision instruments and must be handled with care during unpacking and installation. Rough handling, shock, or vibration can damage the device drives. Observe the following precautions when unpacking and installing your external storage product: …
-
Page 12: Product Components
PRODUCT OVERVIEW Product Components Front View Power LED Drive LEDs WD MY CLOUD EX2 PERSONAL CLOUD STORAGE USER MANUAL…
-
Page 13: Back View
Connects the device to an AC adapter and the power outlet. Kensington For device security, the device is equipped with a security slot that security slot supports a standard Kensington security cable. Visit http://www.kensington.com/ for more information. WD MY CLOUD EX2 PERSONAL CLOUD STORAGE USER MANUAL…
-
Page 14: Getting Started
Accessing Content It’s easy to set up the WD My Cloud EX2 Personal Cloud Storage device — all you have to do is unpack your device, connect it, and wait for the Power LED on the front of your device to turn a solid blue.
-
Page 15
6. When looking down on the top of the unit with the front panel towards you, and with the connectors at the bottom of the drive facing in, gently slip the drive into a slot. 7. Make sure the tab is sticking up at the back of the unit. WD MY CLOUD EX2 PERSONAL CLOUD STORAGE USER MANUAL… -
Page 16: Physically Connecting The Device
11. Continue to “Physically Connecting the Device” on page 11. Physically Connecting the Device Follow the steps below to connect the WD My Cloud EX2 Personal Cloud Storage device to a home or small office network. Important: To avoid overheating, make sure the device is upright as shown in the illustration above and nothing is blocking or covering the slots and openings on the top and bottom of the device.
-
Page 17: Leds
4. Plug the other end of the power adapter into a power outlet. The unit powers up automatically. Important: Wait for the WD My Cloud EX2 device to finish powering up (approximately three minutes) before configuring it. You will know it is ready when the power LED stops flashing and turns blue.
-
Page 18: Getting Started Using Online Setup Software
Use the following steps to download and run the online setup software, discover the device, and get started using your device. The online setup software is available from WD’s Online Learning Center at http://wd.com/setup/wdmycloudex2.
-
Page 19
4. Click the Download Setup Software button. The setup software downloads to your computer. 5. Access your downloaded files, and then double-click Setup.exe (Windows) or WD My Cloud EX2 Personal Cloud Storage Setup.dmg (Mac) to open the setup software. The Getting Started window displays. WD MY CLOUD EX2 PERSONAL CLOUD STORAGE… -
Page 20
2. Read the Western Digital End User License Agreement that displays, and then select the “I accept the terms of the License Agreement” check box and click Next. 3. Review the information on the screen, WD MY CLOUD EX2 PERSONAL CLOUD STORAGE USER MANUAL… -
Page 21
GETTING STARTED 4. When the power LED on your WD My Cloud EX2 device is solid blue, click Next. The software discovers your device. Note: If your device is not detected, follow the on-screen directions. 5. Select your WD My Cloud EX2 device and click Next. The Set up your personal cloud screen displays. -
Page 22
Note: You may need to check your email spam folder if your spam filter does not allow email from WD. The Congratulations! screen displays. You’ve successfully set up your WD My Cloud EX2 device. WD MY CLOUD EX2 PERSONAL CLOUD STORAGE… -
Page 23
• If the option is enabled, the firmware turns on automatic updates at 3:00 AM daily. To change settings for automatic updates, see “Firmware” on page 2. Click Finish to close the setup wizard. WD MY CLOUD EX2 PERSONAL CLOUD STORAGE USER MANUAL… -
Page 24: Getting Started Without Online Setup Software
If you do not use the online setup software to get started, you can still: Use your WD My Cloud EX2 personal cloud storage device as an external hard drive, dragging and dropping files to and from it. …
-
Page 25
File > Make Alias. Mapping the Public Folder (Windows) To map the WD My Cloud EX2 Public folder for quick access in the future: 1. In Windows Explorer, under Network, click WDMYCLOUDEX2. 2. Right-click the Public folder and select Map Network Drive from the menu. -
Page 26: Accessing Your Cloud Remotely
Enabling Cloud Access for the WD My Cloud EX2 Device Before you can use your WD My Cloud EX2 device remotely, you have to enable it for cloud access. To enable the WD My Cloud device for remote access and to check the status of its remote connection(s), see “Cloud Access”…
-
Page 27
Make sure to write down the access codes you generate. Click OK. Once you use the code(s), the Configure Access page displays the cloud devices to which the user now has access, along with the activation code used. WD MY CLOUD EX2 PERSONAL CLOUD STORAGE USER MANUAL… -
Page 28: Mobilizing Your Files With Ios And Android Mobile Apps
Or, take a photo or video clip and instantly upload it from your gallery directly to your WD My Cloud EX2 device with ease.WD Photos is compatible with leading Apple mobile devices and many popular Android devices. Photos are automatically optimized for viewing on your mobile device.
-
Page 29
ACCESSING YOUR CLOUD REMOTELY To install WD Photos on your mobile device: Download WD Photos from the Apple App or Google Play store and install it on your mobile device. Launch WD Photos on your mobile device to display the WD Photos page. -
Page 30
“To generate an activation code for a user’s mobile device(s):” on page 22. Enter your user name and password. Tap your WD My Cloud EX2 device to view your album(s), and then tap an album to display the photos contained within it. Note: If you have problems installing WD Photos, visit http://wd.com/setup/wdphotos. -
Page 31
. Note: WD My Cloud app brings your data from the WD My Cloud EX2 device to your tablet, handset, or other portable devices using Google Android or Apple iOS. WD My Cloud provides a convenient file list of the WD My Cloud EX2 device contents and then launches your favorite player or viewer for any files you wish to open. -
Page 32
In the Add Manually section, tap to the left of WD Device. Enter the activation code generated on the WD My Cloud’s dashboard and tap Activate. You must generate one code for each app you want to activate. Codes are valid for 48 hours from the time of request and can be used one time only. -
Page 33
Add and remove device content by dragging and dropping files and folders from your computer. Requirements WD My Cloud EX2 personal cloud storage or with the most recent firmware, connected to the Internet. A PC or a Mac computer. -
Page 34
ACCESSING YOUR CLOUD REMOTELY In the Software Downloads area, click Go to Downloads. In the WD My Cloud for desktop area, click Download. The setup software downloads to your computer. Access your downloaded files, and then double-click wdmycloud.exe (Windows) or wdmycloud.dmg (MAC). -
Page 35
ACCESSING YOUR CLOUD REMOTELY Select a language from the drop-down menu, and then click OK. Read the WD License Agreement, and then click I accept the terms of the License Agreement. Click Next. 10. Read the Apple License Agreement, and then click I accept the terms of the License Agreement. -
Page 36
ACCESSING YOUR CLOUD REMOTELY 12. Once the installation is complete, click Done to close the WD My Cloud installer. Mac: Complete Steps 1 — 5 above. Click Downloads and select WD My Cloud Installer. If asked to install a Java runtime, click Install. -
Page 37
ACCESSING YOUR CLOUD REMOTELY Read the WD Software License Agreement, and then click I accept the terms of the License Agreement. Click Install. The installation begins. Once the installation is complete, click Done to close the WD My Cloud installer. -
Page 38
User” on page 21. Click Activation Code to log in using the activation code generated by WD My Cloud EX2. (To generate an activation code, see “To generate an acti- vation code for a user’s mobile device(s):” on page 22.) The WD My Cloud Desktop app opens. -
Page 39: Managing Users, Groups, And Shares
The Administrator, normally the device owner, is the person in charge of setting up the device. As the WD My Cloud EX2 device owner, you have a special user account (admin) that provides you with administrator privileges. With these privileges, you can set up and configure the device to your specific needs and add other users to your personal cloud.
-
Page 40
2. Enter the User Name, First Name, Last Name and Email address (optional) of the user you’d like to add in the applicable fields, and then click Next. WD MY CLOUD EX2 PERSONAL CLOUD STORAGE USER MANUAL… -
Page 41
5. Enter the Quota Amount, or leave the values blank for unlimited space, and then click Save. (See “Quota Rules” on page 40 for information on quotas.) Your new user account displays on the left pane of the Set Up Users screen. WD MY CLOUD EX2 PERSONAL CLOUD STORAGE USER MANUAL… -
Page 42
Number of Users: Enter the number of User accounts you’d like to create. The maximum number you can add displays to the right. Password: Enter a password for the user accounts. Confirm Password: Confirm the password for the user accounts. WD MY CLOUD EX2 PERSONAL CLOUD STORAGE USER MANUAL… -
Page 43
3. Enter the Quota Amount, or leave the values blank for unlimited space, and then click Next. (See “Quota Rules” on page 40 for information about quotas.) 4. Your new user accounts display on screen. Click Save to save them to your device. WD MY CLOUD EX2 PERSONAL CLOUD STORAGE USER MANUAL… -
Page 44: Editing User Settings
(no password is the default setting). Use the following steps to update a user password. 1. On the Set Up Users screen, select a user from the list on the left. WD MY CLOUD EX2 PERSONAL CLOUD STORAGE USER MANUAL…
-
Page 45
Use the following steps to assign a quota to a user account. A quota determines the amount of disk space allocated to the user on the WD My Cloud EX2 device. 1. On the Set Up Users screen, select the user from the left pane. -
Page 46: About Groups
MANAGING USERS, GROUPS, AND SHARES 2. In the Quotas field, click Configure. 3. Enter the amount of space to assign to the user on the WD My Cloud EX2 device. To assign unlimited space, leave the Quota Amount field(s) blank.
-
Page 47: Adding A Group
4. Enter the Quota Amount, or leave the values blank for unlimited space, and then click Save. Your new group account displays on the left pane of the Set Up Groups screen. WD MY CLOUD EX2 PERSONAL CLOUD STORAGE USER MANUAL…
-
Page 48: Editing Group Settings
Once a group account is created, you can assign access to the various shares on your WD My Cloud EX2 device using the following steps. 1. On the Set Up Groups screen, select the group for which you’d like to assign a share.
-
Page 49: About Shares
Group account list. About Shares A share is an area on the WD My Cloud EX2 device for storing files (similar to a folder or directory). Note: In this manual, we use the terms share and folder interchangeably.
-
Page 50
1. On the navigation bar, click Shares to display the About Shares page. 2. Click a share to display its profile and share access information. Note: Only private shares can be edited. Public shares always have read/write access and are therefore grayed out. WD MY CLOUD EX2 PERSONAL CLOUD STORAGE USER MANUAL… -
Page 51: Creating A New Share
Note that share descriptions must begin with an alphanumeric value and can contain up to 256 characters. Enable Recycle Bin (optional) The Recycle Bin contains any files deleted from the WD My Cloud EX2 device. If you’d like to use the Recycle Bin, click the toggle button .
-
Page 52
2. Modify the required and optional settings as desired. Making a Share Private If you decide there is a reason to limit access to a public share, convert it to a private share. WD MY CLOUD EX2 PERSONAL CLOUD STORAGE USER MANUAL… -
Page 53: Deleting A Share
Note: For information on accessing the contents of a share remotely, see “Accessing Your Cloud Remotely” on page 21. Several options are available for opening a WD My Cloud EX2 share. For a private share, the user must have: …
-
Page 54
Click the WD Quick View icon in the menu bar and (Mac OS X) move the cursor over the name of your WD My Cloud device to display the submenu. Select Open on the WD Quick View submenu. The shares display in a second submenu. -
Page 55: The Dashboard At A Glance
Obtaining Customer Support Common Tasks Use the WD My Cloud EX2 dashboard to configure settings and to manage the device as you prefer. For example, you can set up user accounts and restrict access to the files on your WD My Cloud EX2 device, set up folders for storing files, enable remote access, and customize the device to suit your needs.
-
Page 56
Learning Center Downloads page at wd.com/setup/mycloudex2apps. Accessing the Dashboard for the First Time Use the following steps when you initially access the WD My Cloud EX2 dashboard. Password When you initially log into WD My Cloud EX2, leave the field blank 2. -
Page 57
Click the Automatically update device firmware when available check box. Click the Register the WD My Cloud EX2 device to receive continuous product support check box. 9. Click Finish. The WD My Cloud EX2 dashboard displays. WD MY CLOUD EX2 PERSONAL CLOUD STORAGE… -
Page 58: The Dashboard Home Page
THE DASHBOARD AT A GLANCE The Dashboard Home Page The WD My Cloud EX2 Home page has an information bar at the top right, an navigation icon bar across the page, and an instant overview of the status of the device’s main functions with links for updating settings.
-
Page 59
Monitor remote access status. Backups Create backups to: • A USB drive • Another WD My Cloud EX2 on your local network or on a remote network • Another location on your WD My Cloud EX2 device • A Cloud backup site… -
Page 60
The main body of the Home page shows the status of the device and its functions and provides shortcuts to the most necessary tasks. Capacity The Capacity panel displays the amount of free storage left on your WD My Cloud EX2 device. WD MY CLOUD EX2 PERSONAL CLOUD STORAGE… -
Page 61
Diagnostics The Diagnostics section displays a snapshot of the system’s components and identifies the overall health of the WD My Cloud EX2 device. WD MY CLOUD EX2 PERSONAL CLOUD STORAGE USER MANUAL… -
Page 62
Close Firmware The Firmware section displays the current version of firmware loaded on your WD My Cloud EX2 device. A green check mark indicates that your firmware is up-to-date. 1. To view whether an updated version of the firmware is available, click the arrow to the right of Firmware to display firmware availability: … -
Page 63
WD My Cloud EX2 device. At a glance, you can see the network, CPU, and RAM activity. 1. To view a list of all the system activities and processes that are running on your WD My Cloud EX2 device, click the arrow on the right of the panel to display: … -
Page 64
The Cloud Devices panel displays the number of cloud devices currently accessing the WD My Cloud EX2 device remotely. In this example, one cloud device is accessing it remotely. 1. To add cloud access for a user, click the plus sign (+) in the lower right of the panel to display: 2. -
Page 65
WD My Cloud EX2 device. Users The Users panel displays the number of users currently set up to use the WD My Cloud EX2 device. 1. To add a user, click the plus (+) sign in the lower right of the panel:… -
Page 66
Save. You’ve added a new user. Apps The Apps panel displays the apps currently installed on your WD My Cloud EX2 device. 1. To view the installed apps, click the arrow in the lower right of the panel to display:… -
Page 67
THE DASHBOARD AT A GLANCE Note: To install an app, see “Managing Apps on WD My Cloud EX2” on page 97. 2. To return to the Home page, click Close Managing Alerts Alerts display system messages containing pertinent information about the status of your WD My Cloud EX2 device. -
Page 68: Obtaining Customer Support
To dismiss all alerts, click View All, and then Dismiss All. Obtaining Customer Support To open the Support page: 1. Click the Help icon on any page to display the Help menu. 2. Click Support to display the following page: WD MY CLOUD EX2 PERSONAL CLOUD STORAGE USER MANUAL…
-
Page 69
THE DASHBOARD AT A GLANCE If a problem occurs with the WD My Cloud EX2 device, WD Technical Support will need information about your device to troubleshoot and determine the best solution. There are two ways to get your device info and request support: … -
Page 70: Common Tasks
THE DASHBOARD AT A GLANCE Common Tasks The next few chapters step you through the procedures for configuring and using the WD My Cloud EX2 device. The following table provides shortcuts to instructions for some common tasks. How do I …
-
Page 71: Backing Up And Retrieving Files
Connecting A USB Drive Connect a USB hard drive to the USB port on the rear of your WD My Cloud EX2 device for additional storage and backup capabilities. The USB drive appears as a share on the WD My Cloud EX2 dashboard.
-
Page 72: User Manual
BACKING UP AND RETRIEVING FILES Creating a USB Backup Use the following steps to back up your data on your WD My Cloud EX2 to or from a USB device. On the navigation bar, click Backups to display the Backups screen.
-
Page 73
On the USB Backups screen, under USB Backup Jobs, select the job you’d like to modify, and then click the Edit Job button Review the USB Details screen, and then click Close to close the screen. WD MY CLOUD EX2 PERSONAL CLOUD STORAGE USER MANUAL… -
Page 74: Remote Backups
USB Backup Jobs list. Remote Backups Back up your WD My Cloud EX2 device to another WD My Cloud EX2 or a WD My Cloud EX4 device. Before you proceed with a remote backup, ensure the following: …
-
Page 75
In the Remote IP field, enter the IP address of the remote backup server. (Example 192.168.1.16) In the Password field, enter the password for the remote backup server, and then click Next. WD MY CLOUD EX2 PERSONAL CLOUD STORAGE USER MANUAL… -
Page 76
Click Yes to begin your remote backup now. Click No to create a remote backup job for future backup. 9. Review the details of your Remote Backup job, and then click Finish WD MY CLOUD EX2 PERSONAL CLOUD STORAGE USER MANUAL… -
Page 77
On the Remote Backup screen, under Remote Backup Jobs, click the Recover button next to the job you’d like to view. On the Recover screen, click OK. Your data recovery begins. WD MY CLOUD EX2 PERSONAL CLOUD STORAGE USER MANUAL… -
Page 78: Internal Backups
WD My Cloud EX2 device. Creating an Internal Backup Use the following steps to back up your WD My Cloud EX2 internally. On the navigation bar, click Backups to display the Backups screen. Click Internal Backups, if not already selected.
-
Page 79
On the Internal Backups screen, under Internal Backup Queue, select the job you’d like to modify, and then click the Details button. Review the details of your Internal Backup job, and then click Close. WD MY CLOUD EX2 PERSONAL CLOUD STORAGE USER MANUAL… -
Page 80: Cloud Backups
Internal Backup Jobs list. Cloud Backups A cloud backup allows you to create remote backups that are accessible over the Internet and through various mobile devices. WD My Cloud EX2 device uses the following cloud services to create remote backups: …
-
Page 81
Email address: Enter the email address you’ll use to receive information from ElephantDrive. Password: Enter a password for your new account Verify Password: Reenter your password. You’ve now enabled your ElephantDrive cloud backup. WD MY CLOUD EX2 PERSONAL CLOUD STORAGE USER MANUAL… -
Page 82
Once your Amazon S3 account is set up, use the following steps to create a cloud backup. On the navigation bar, click Backups to display the Backups screen. Click Cloud Backups, if not already selected. Click the Amazon S3 button at the top of the screen. WD MY CLOUD EX2 PERSONAL CLOUD STORAGE USER MANUAL… -
Page 83
Enter the following information, and then click Next: Type Select one of the following options: • Upload: Backs up your WD My Cloud EX2 data to your Amazon S3 bucket. • Download: Backs up your Amazon S3 bucket to your WD My Cloud EX2 device. -
Page 84
• Incremental Backup: Overwrites files with source files that are newer then the target files. In the Local Path field, enter a path for your backup on your WD My Cloud EX2 server. Click Browse to browse to a location for your backup on the device. -
Page 85
13. Review your settings, and then click Finish. Your Amazon S3 Cloud backup is created. The new job displays in the Amazon S3 Queue section of the Amazon S3 Backup page. 14. Access your Amazon S3 Cloud backup bucket to view your device backups. WD MY CLOUD EX2 PERSONAL CLOUD STORAGE USER MANUAL… -
Page 86: Managing Storage On Wd My Cloud Ex2
The Storage page allows you to configure the storage within your device and view the status and capacity of the disks within your device. This chapter provides details on managing the storage on your WD My Cloud EX2 device. WD MY CLOUD EX4 PERSONAL CLOUD STORAGE…
-
Page 87: Raid Storage
There are several different levels of RAID, each one providing a different method of sharing or distributing data among the drives. Your WD My Cloud EX2 device allows you to select from the following storage modes:…
-
Page 88: Changing The Raid Mode
MANAGING STORAGE ON WD MY CLOUD EX2 Changing the RAID Mode Use the following steps to change the current RAID mode on your WD My Cloud EX2 device. WARNING! Changes made to your RAID Mode will delete all of your data and your user settings.
-
Page 89
MANAGING STORAGE ON WD MY CLOUD EX2 Select the RAID mode you’d like to use for your WD My Cloud EX2 device. Options include: JBOD The use of one or more drives not in a RAID configuration but managed as separate logical volumes. -
Page 90
MANAGING STORAGE ON WD MY CLOUD EX2 Using the Volume slider, select the amount of space you’d like to dedicate to the selected RAID mode. If you choose not to use the entire volume for your RAID selection, you can configure the remaining disk space as Spanning by selecting the Configure the remaining disk space as Spanning check box. -
Page 91: Disk Status
Auto-Rebuilding your RAID The Auto-Rebuilding option allows you to automatically rebuild the RAID for your WD My Cloud EX2 device in case of drive corruption. Use the following steps to enable the auto-rebuild option. On the navigation bar, click Storage to display the Storage screen.
-
Page 92
Viewing Hard Drive Information Use the following steps to view status of the disks on your WD My Cloud EX2 device. On the Storage page, click Disk Status, if not already selected. Select Drive <drive #> next to the disk for which you’d like to view information. -
Page 93: Iscsi Storage
WD My Cloud EX2 allows you to create and manage iSCSI targets. The iSCSI target provides storage, similar to a local hard disk drive, but is accessed over a network rather then locally.
-
Page 94
MANAGING STORAGE ON WD MY CLOUD EX2 Click iSCSI, if not already selected. Click the toggle button to enable iSCSI. Click Create iSCSI Target at the bottom of the screen. On the Create iSCSI Target screen, enter the following information: … -
Page 95
MANAGING STORAGE ON WD MY CLOUD EX2 Enabling / Disabling an iSCSI Target Use the following steps to enable or disable an iSCSI target. Enabling an iSCSI Target On the Storage page, click iSCSI. Under iSCSI Target list, click Details next to the target you’d like to enable. -
Page 96
MANAGING STORAGE ON WD MY CLOUD EX2 Click the toggle button to ON to enable iSCSI. In the iSCSI iSNS Client field, click the toggle button Click Configure. Enter the iSNS client server address, and then click Save. WD MY CLOUD EX4 PERSONAL CLOUD STORAGE… -
Page 97: Volume Virtualization
Volume Virtualization Volume Virtualization simplifies scalability by allowing you to map iSCSI targets on other network storage devices and present them as volumes on your WD My Cloud EX2 device. Creating a Virtualized Volume Use the following steps to create a virtualized volume on your device.
-
Page 98
MANAGING STORAGE ON WD MY CLOUD EX2 Select an iSCSI target from the retrieved list, and then click Next. To add authentication to the target, click the toggle button to ON, enter a User Name and Password, and then click Next. -
Page 99
MANAGING STORAGE ON WD MY CLOUD EX2 Review the Volume Virtualization summary to ensure that your settings are correct, and then click Save. A virtual volume is created. Connecting a Virtualized Volume to a Target Use the following steps to connect a virtualized volume to a target on your device. -
Page 100
Once your virtual volume is formatted, click Close. The state of the volume is changed to Connect. Your new virtual volume is now available on your WD My Cloud EX2 device. WD MY CLOUD EX4 PERSONAL CLOUD STORAGE USER MANUAL… -
Page 101
MANAGING STORAGE ON WD MY CLOUD EX2 Modifying a Virtualized Volume Use the following steps to modify a virtualized volume on your device. On the Storage page, click Volume Virtualization, if not already selected. Select the virtual volume you’d like to modify, and then click Modify. -
Page 102: Managing Apps On Wd My Cloud Ex2
Note: Support for each app should be obtained through the individual vendor. WD My Cloud EX2 comes with various apps installed. There is also a list of available apps for you to choose from on the Add an App screen.
-
Page 103
MANAGING APPS ON WD MY CLOUD EX2 Adding an App Use the following steps to add an app to your WD My Cloud EX2 device. 1. On the navigation bar, click Apps to display the Apps screen. 2. Click the Add an App icon in the lower left side of the screen. -
Page 104
Manually Adding an App If you have an app you’d like to add that is not listed on the Add an App screen, use the following steps to manually add that app to your WD My Cloud EX2 device. Note: WD recommends that you fully understand the nature of any app before you install it on your device. -
Page 105
Updating an App Use the following steps to update an app that you’ve added to your WD My Cloud EX2 device. 1. On the navigation bar, click Apps to display the Apps screen. -
Page 106: Playing/Streaming Videos, Photos, & Music
, you can just transfer your multimedia content to “Enabling DLNA and iTunes” on page 103) the Public share on your WD My Cloud EX2 device, and you are ready to stream and view ® content on your home entertainment center, game consoles (for example, Xbox 360 ®…
-
Page 107: Media Types Supported
M2TS MPEG1 MPEG2 MPEG4 QTIF SPTS Xvid Note: Some devices may not support playback of all these files. Please refer to your device’s user manual to see which formats are supported. WD MY CLOUD EX2 PERSONAL CLOUD STORAGE USER MANUAL…
-
Page 108: Media Storage
Media Storage You can access and store media content on the WD My Cloud EX2 device by means of network shares. Shares, similar to folders or directories, are areas set up to organize media and access them from your network.
-
Page 109
The DLNA area displays the current version, the number of music, video, and pictures available on your device, and when the last update occurred. To view DLNA media server information, on the Settings screen, click Media in the left panel. WD MY CLOUD EX2 PERSONAL CLOUD STORAGE USER MANUAL… -
Page 110
Click Browse, and then navigate to the folder where iTunes can access your media. Click Save at the bottom of the iTunes area. 3. In the Password field, enter a password to be used when accessing your WD My Cloud EX2 device on iTunes. WD MY CLOUD EX2 PERSONAL CLOUD STORAGE… -
Page 111
3. Follow the same process to place your videos and pictures into their respective Pictures and Video folders. Note: You can also access your media files using WD My Cloud Desktop app (see “WD My Cloud for Desktop App” on page 27). WD MY CLOUD EX2 PERSONAL CLOUD STORAGE… -
Page 112: Accessing Your Personal Cloud Using Media Players
You can connect the various WD TV and WD Media Players to your home network for access to media content stored in a network drive such as the WD My Cloud EX2 device. For details on using a WD Media Player to access files on your device, see Knowledge Base Answer ID 2676 or refer to your WD Media Player User Guide.
-
Page 113: Accessing Your Personal Cloud Using Itunes
PLAYING/STREAMING VIDEOS, PHOTOS, & MUSIC DLNA Devices See specific DLNA media device user manuals for instructions on connecting a DLNA device to your local area network so you can access content on the WD My Cloud EX2 device. Go to http://www.dlna.org for a list of DLNA-certified devices and for further information.
-
Page 114: Configuring Settings
Firmware Update The Settings option on the navigation bar allows the Administrator to view and customize the WD My Cloud EX2 device’s system, network, media, utilities, notifications, and firmware settings. This chapter explains how to configure the various settings for your WD My Cloud EX2 device.
-
Page 115
32 characters long and can not include special characters (e.g., @, #, $ etc.). Serial Number Displays the WD-assigned number that identifies the specific unit. This field can not be updated. WD MY CLOUD EX2 PERSONAL CLOUD STORAGE USER MANUAL… -
Page 116
In this section of the General screen, you can change the language that displays in the WD My Cloud EX2 device’s interface and set the date and time. The date and time are synchronized to the NTP (Network Time Protocol) server by default. You have the option of setting the date and time manually or allowing the NTP to access the Internet and automatically set the time. -
Page 117
Use the following steps to turn cloud access on or off for all users (i.e., control whether computers and mobile devices can access the content on the WD My Cloud EX2 device) Note: This turns on cloud access for the entire device. To turn on access for an individual user, see “Configuring Cloud Access for a User”… -
Page 118
Example: If you set up your manual HTTP port as 5040, you’d use the following address to access your device: http://<Device IP Address>:5040. WD MY CLOUD EX2 PERSONAL CLOUD STORAGE USER MANUAL… -
Page 119: Energy Saver
Energy Saver The Energy Saver fields allow you to reduce the energy required to run your WD My Cloud EX2 device. Use the following information to configure the energy saving options on your WD My Cloud EX2 device. View or change the following settings:…
-
Page 120
Services This section of the General screen enables or disables various services available on your WD My Cloud EX2 device. WD MY CLOUD EX2 PERSONAL CLOUD STORAGE USER MANUAL… -
Page 121
Folder information, or select the folder from the Select a Folder drop-down list at the right of the field. 5. Click Get Remote Share Folder to connect to your remote folder. WD MY CLOUD EX2 PERSONAL CLOUD STORAGE USER MANUAL… -
Page 122
CONFIGURING SETTINGS 6. Click Save. Active Directory Enabling this function allows you WD My Cloud EX2 device to join an existing Windows domain. Active Directory is disabled by default. 1. To enable Active Directory, click the toggle button to ON. -
Page 123: Network
Enter the Active Directory server host name. 5. Click Save. Recycle Bin The Recycle Bin contains any files deleted from the WD My Cloud EX2 device. To clear the recycle bin for your device, click Clear. Note: Recycle Bin is only available for SMB protocols.
-
Page 124: Network Services
IPv4 Network Mode By default, the network mode is set to DHCP, which means the WD My Cloud EX2 device automatically gets the IP address and other settings from your network. Select the method of assigning the device’s unique IPv4 address: •…
-
Page 125
Server Message Block, version 2. Select this option to support Windows File History in Windows 8. • To enable/disable SMB2, click the toggle button Note: If you enable SMB2, read/write performance will be impacted. WD MY CLOUD EX2 PERSONAL CLOUD STORAGE USER MANUAL… -
Page 126
Link Layer Topology Discovery protocol. Select this option to enable LLTD on your network for enhanced network discovery and diagnostics on Microsoft Windows machines. • To enable/disable LLTD, click the toggle button WD MY CLOUD EX2 PERSONAL CLOUD STORAGE USER MANUAL… -
Page 127
Simple Network Management Protocol. Select this option to manage devices over IP networks. • To enable/disable SNMP, click the toggle button Note: See the WD Tech Support Downloads page at http://support.wd.com to download the MiB configuration file. Secured Shell protocol. Select this option to securely access your personal cloud and perform command-line operations via the Secured Shell (SSH) protocol. -
Page 128
The Remote Server section of the Network screen allows you to enable your WD My Cloud EX2 device to act as a remote server, allowing you to back up shares from another WD My Cloud EX2 on the local LAN or WAN. -
Page 129: Port Forwarding
For additional information on Port Forwarding, see Knowledge Base Answer ID 10649. Adding Port Forwarding Services 1. Click Add to add port forwarding service(s) to your WD My Cloud EX2 device. 2. On the Port Forwarding Settings screen, click either Select the default service scan or the Customize a port forwarding service, and then click Next.
-
Page 130: Media
“Playing/Streaming Videos, Photos, & Music” on page 101. Utilities On the Utilities page, you can test the WD My Cloud EX2 device and get diagnostic information, restore the device to factory defaults, reboot or shut down the device, and import or export a configuration file.
-
Page 131: System Restore
System Restore The system restore allows the Administrator to perform a full factory restore on the WD My Cloud EX2 device. This option restores your device to factory default settings with no data loss. Important: Before doing a factory restore or a system update, you may choose to save your device’s current configuration.
-
Page 132: System Configuration
Once the reboot is complete, launch the dashboard. Device Maintenance The Device Maintenance area allows you to shut down and reboot your WD My Cloud EX2 device. This area also displays the amount of time the device has been up and running.
-
Page 133: Notifications
The Scan Disk area allows you to scan your device’s hard disks for any errors. Scanning Your Disk Use the following steps to run a disk scan on your WD My Cloud EX2 device. 1. In the Scan Disk area, select the volume you’d like to scan from the drop-down menu.
-
Page 134
7. Repeat steps 5 — 6 to enter up to 5 email addresses. 8. Click Send Test Email to validate the email addresses you entered. 9. Click OK, and then check your email for a validation email. WD MY CLOUD EX2 PERSONAL CLOUD STORAGE USER MANUAL… -
Page 135
Critical Only: Send only critical alerts. Critical and Warning: Send both critical and warning alerts. All: Send all alerts (Informational, Critical, Warning). The system automatically updates with your selection. WD MY CLOUD EX2 PERSONAL CLOUD STORAGE USER MANUAL… -
Page 136: Firmware Update
CONFIGURING SETTINGS Firmware Update The Firmware Update page allows you to set up the device to update the My Cloud EX2 firmware automatically or to manually check for an update file. The current version number and the date of last update of the firmware also display on this screen.
-
Page 137
Follow this procedure to perform a manual update. Note: Ensure that you’ve downloaded the firmware file you need to install on your device from the WD Tech Support Downloads page at http://support.wd.com/product/download.asp. Manually Installing an Update 1. In the Manual Update section, click Update from File. -
Page 138: Replacing A Drive
Knowledge Base Answer ID 8 to get detailed instructions on obtaining a replacement drive for this product. Following are instructions for replacing a faulty drive or, if your WD My Cloud EX2 model did not come with drives, for inserting drives.
-
Page 139: Replacing A Drive
Replacing a Drive If you bought a WD My Cloud EX2 device without hard drives, or if you are replacing an existing drive, you may use a drive made by another company. For a list of compatible drives, go to wd.com/mycloudex2.
-
Page 140
Preparing a Drive The My Cloud EX2 comes with a bag holding the screws, tabs, and labels needed for inserting the new drive. For WD replacement drives, you can reuse the parts attached to the faulty drive. -
Page 141: Returning A Wd Drive
Do not disassemble the internal drive and attached assembly components. Return the entire internal drive assembly intact to WD. Return the faulty drive following the instructions provided in the WD Knowledge Base Answer ID 8. WD MY CLOUD EX2 PERSONAL CLOUD STORAGE…
-
Page 142: Regulatory And Warranty Information
Connect the equipment into an outlet on a circuit different from that to which the receiver is connected. Consult the retailer or an experienced radio/television technician for help. Any changes or modifications not expressly approved by WD could void the user’s authority to operate the equipment. ICES/NMB-003 Compliance Cet appareil DE la classe B est conform à…
-
Page 143: Warranty Information (All Regions Except Australia/New Zealand)
Limited Warranty WD warrants that the Product, in the course of its normal use, will for the term defined below, be free from defects in material and workmanship and will conform to WD’s specification therefor. The term of your limited warranty depends on the country in which your Product was purchased.
-
Page 144: Warranty Information (Australia/New Zealand Only)
Australian Consumer Law. Warranty WD warrants that the Product, in the course of its normal use, will for the term defined below, be free from defects in material and workmanship and will conform to WD’s specifications. The term of your warranty is 2 years in Australia and New Zealand, unless otherwise required by law.
-
Page 145
WD or the dealer from whom you originally purchased the Product determines that your claim is valid, WD or such dealer shall, at its discretion, either repair or replace the Product with an equivalent or better Product or refund the cost of the Product to you. You are responsible for any expenses associated with a claim under this warranty. -
Page 146: Appendices
This guide is primarily for WD My Cloud EX2 users, rather than the administrator. Logging into WD My Cloud EX2 1. Enter the name of your WD My Cloud EX2 device (default name: wdmycloudEX2) in the browser’s address field: …
-
Page 147
APPENDICES The Dashboard Home Page The WD My Cloud EX2 Home page has an information bar at the top right, a navigation icon bar across the page, an instant overview of the status of the device’s main functions and links for updating settings. -
Page 148
• Another WD My Cloud EX2 on your local network or on a remote network • A Cloud backup site Viewing the Home Page The Home is your gateway to the WD My Cloud EX2 device. From this page you can find: The capacity of the device … -
Page 149
Cloud Access Links The Cloud Access Links allow you to access the software necessary to gain access to the WD My Cloude EX2 device from your desktop and mobile apps. Downloads and Apps Information The Downloads and Applications area displays information on the number of downloads and apps available on your device. -
Page 150
Apps The Apps page provides access to the various apps available for your use on the WD My Cloud EX2 device. Available apps vary depending on what your administrator has implemented. WD MY CLOUD EX2 PERSONAL CLOUD STORAGE USER MANUAL… -
Page 151: Appendix B: Joomla! Setup Guide
Web sites and powerful online apps. For additional information on Joomla!, visit http://www.joomla.org// Joomla! is one of the many apps available for use from your WD My Cloud EX2 device. Provided in this section are the steps you’ll need to set up Joomla!.
-
Page 152
You can also use the randomly generated table prefix pre-loaded into this field. Old Database Process: Select one of the following options: Backup: Backs up the old database. Remove: Removes the old database WD MY CLOUD EX2 PERSONAL CLOUD STORAGE USER MANUAL… -
Page 153
Admin Password: Enter the password you’ll use to log into your Joomla! site. Confirm Admin Password: Reenter the password you entered in the Admin Password field. 11. Click Install Sample Data. 12. Click Next. WD MY CLOUD EX2 PERSONAL CLOUD STORAGE USER MANUAL… -
Page 154: Appendix C: Phpbb Setup Guide
Internet connection. phpBB is one of the many apps available for use from your WD My Cloud EX2 device. Provided in this section are the steps you’ll need to set up phpBB.
-
Page 155
Database username: Enter your MySQL account user name. If you’re using the phpMyAdmin app, enter admin. Database password: Enter your MySQL password. If you’re using the phpMyAdmin app, enter admin. WD MY CLOUD EX2 PERSONAL CLOUD STORAGE USER MANUAL… -
Page 156
Administrator password: Enter the password you’ll use to log into your bulletin board. Confirm administrator password: Reenter the password you entered in the Administrator password field. Contact e-mail address: Enter the email address of the individual administering the board. WD MY CLOUD EX2 PERSONAL CLOUD STORAGE USER MANUAL… -
Page 157
10. Review the Administrator details screen to ensure that the administrator configuration was successfull, and then click Proceed to next step. 11. Review the screen, and then click Proceed to next step. WD MY CLOUD EX2 PERSONAL CLOUD STORAGE USER MANUAL… -
Page 158
Administration Control Panel after phpBB is installed. 13. Review the information on the screen, and then click Proceed to next step. 14. Review the information on the screen. phpBB is now installed. WD MY CLOUD EX2 PERSONAL CLOUD STORAGE USER MANUAL… -
Page 159: Appendix D: Supported Raid Modes
Spanning RAID 0 RAID 1 JBOD Appendix E: RAID Migrations The chart below identifies the RAID migration path allowed on your WD My Cloud EX2 device. From JBOD (1 disk) RAID 1 (2 disks) Appendix F: Safe Mode Firmware Update Procedures If you see the following screen, use the steps outlined below to recover your server from safe mode.
-
Page 160
7. Once your device has completed the reboot, we recommend that you do a system restore (“System Restore” on page 126). WD MY CLOUD EX2 PERSONAL CLOUD STORAGE USER MANUAL… -
Page 161: Appendix G: Technical Specifications
DC output Output voltage: 12 VDC, 3A Power supply: 36W Temperature Operating temperature: 5°C to 35°C (41°F to 95 °F) Non-operating temperature: -20°C to 65°C (-4°F to 149 °F) RoHs compliant WD MY CLOUD EX2 PERSONAL CLOUD STORAGE USER MANUAL…
-
Page 162
APPENDICES WD MY CLOUD EX2 PERSONAL CLOUD STORAGE USER MANUAL… -
Page 163: Index
44 navigation icons 54 quotas to users 40 deep sleep 114 share access to groups 43 deleting automatic support an app 100 requesting 64 an iSCSI target 90 auto-rebuilding 86 WD MY CLOUD EX2 PERSONAL CLOUD STORAGE USER MANUAL…
-
Page 164
43 an iSCSI target 90 quota rules 40 cloud access for a user 21 removing 44 DLNA 103 viewing 41 ElephantDrive backup 75 GS Mark 137 iSCSI iSNS Client 90 WD MY CLOUD EX2 PERSONAL CLOUD STORAGE USER MANUAL… -
Page 165
105 media types 102 enabling 105 other 107 overview 101 WD 107 refreshing 106 media servers streaming media 108 about 101 overview 101 settings 103 Joomla Media settings setup guide 146 WD MY CLOUD EX2 PERSONAL CLOUD STORAGE USER MANUAL… -
Page 166
123 phpBB Setup Guide 149 removing a group 44 Port Forwarding 124 removing users 41 adding 124 replacing a drive 133 deleting 124 rescanning/rebuilding the DLNA Database modifying 124 WD MY CLOUD EX2 PERSONAL CLOUD STORAGE USER MANUAL… -
Page 167
56 internal backups 74 system report 64 remote backups 72 sending to Customer Support 64 the RAID mode 82 System Restore USB backup details 68 about 126 Virtualized Volume WD MY CLOUD EX2 PERSONAL CLOUD STORAGE USER MANUAL… -
Page 168
WD Technical Support contacting ii WD’s Online Learning Center 13 Web Access Timeout 114 Web browser compatibility 6 WebDAV Service 121 Windows mapping a public folder 20 Windows Vista/Windows 7/Windows 8 WD MY CLOUD EX2 PERSONAL CLOUD STORAGE USER MANUAL… -
Page 169
Western Digital, WD, the WD logo, My Book, My Passport, and WD TV are registered trademarks in the U.S. and other countries; and WD My Cloud, WD Red, WD SmartWare, WD GreenPower, WD Photos, and WD TV Live are trademarks of Western Digital Technologies, Inc.
Перед вами файл pdf, где представлена инструкция (руководство) на русском для WESTERN DIGITAL My Cloud EX2 Ultra 2x4Tb (WDBSHB0080JCH-EEUE). Вы можете скачать ее либо изучить в онлайн режиме.
Подробные сведения об инструкции:
Устройство из раздела: жесткий диск USB
Бренд-производитель: WESTERN DIGITAL
Наименование модели: WESTERN DIGITAL My Cloud EX2 Ultra 2x4Tb (WDBSHB0080JCH-EEUE)
Язык: Руководство на русском языке
Файл: pdf
Размер файла: 6,90 MB
")
Скачать инструкцию к HARPER HDT2-1110
ЗАГРУЗИТЬ
Просмотр инструкции онлайн