- Manuals
- Brands
- Electrolux Manuals
- Washer/Dryer
- EW7W3R68SI
- Instruction manual
-
Contents
-
Table of Contents
-
Troubleshooting
-
Bookmarks
Quick Links
EW7W3R68SI
EN
Washer Dryer
User Manual
Related Manuals for Electrolux EW7W3R68SI
Summary of Contents for Electrolux EW7W3R68SI
-
Page 1
EW7W3R68SI Washer Dryer User Manual… -
Page 2: Table Of Contents
18. TECHNICAL DATA………………50 WE’RE THINKING OF YOU Thank you for purchasing an Electrolux appliance. You’ve chosen a product that brings with it decades of professional experience and innovation. Ingenious and stylish, it has been designed with you in mind. So whenever you use it, you can be safe in the knowledge that you’ll get great results every time.
-
Page 3: Safety Information
ENGLISH SAFETY INFORMATION Before the installation and use of the appliance, carefully read the supplied instructions. The manufacturer is not responsible for any injuries or damages that are the result of incorrect installation or usage. Always keep the instructions in a safe and accessible location for future reference.
-
Page 4
This appliance is intended to be used in household • and similar applications such as: staff kitchen areas in shops, offices and other – working environments; by clients in hotels, motels, bed & breakfast and – other residential type environments;… -
Page 5
ENGLISH The appliance must be connected to the water mains • using the new supplied hose sets, or other new hose sets supplied by the Authorised Service Centre. Old hose sets must not be reused. • If the mains power supply cable is damaged, it must •… -
Page 6: Safety Instructions
Clean the appliance with a moist cloth. Use only • neutral detergents. Do not use abrasive products, abrasive cleaning pads, solvents or metal objects. Before any maintenance operation, deactivate the • appliance and disconnect the mains plug from the socket.
-
Page 7: Installation
ENGLISH • Do not touch the glass door while a • Do not sit or stand on the open door. programme is in operation. The glass • Do not dry dripping wet clothes in the can get hot. appliance. • Do not dry damaged (torn, frayed) 2.5 Service items that contain padding or fillings.
-
Page 8
3.3 Unpacking WARNING! Use the gloves. WARNING! Remove all the packaging and the transit bolts before installing the appliance. 1. Put two polystyrene packaging elements on the floor under the appliance. WARNING! It is strongly recommended that this action is carries out by two persons. -
Page 9
ENGLISH 5. Remove the power supply cable and the drain hose from the hose holders. It is possible to see water flowing from the drain hose. This is due to the testing with water of the appliance in factory. 6. Remove the three bolts, the hose holders and plastic spacers by using the spanner supplied with the appliance. -
Page 10
3.4 Positioning and levelling 1. Install the appliance on a flat hard floor. WARNING! Make sure that carpets do not stop the air circulation below the appliance. Bring the appliance near the furniture recess before levelling it. For more details, refer to paragraph «Building… -
Page 11
ENGLISH The inlet hose 1. Remove the inlet hose from inside the drum. 2. To connect the water inlet hose towards the proper direction and with the proper inclination, check the position of the water tap before connecting it to the back of the appliance. -
Page 12
To a stand pipe with vent-hole Directly into a drain pipe at a height of not Ø 40 mm less than 60 cm (23.6”) and not more than 100 cm (39.3”). The end of the drain hose must always be ventilated , i.e. -
Page 13
ENGLISH If hoses run behind the 596 mm appliance, make sure that 553 mm nothing closes the small recess indicated with the measures 50 x 50 mm. 819 mm 50 mm 50 mm 140 mm 76 mm The appliance is also equipped with an adhesive sponge pad H that you can find inside the drum. -
Page 14
Factory pre setting The appliance is originally pre set for the assembly of a cupboard door opening from right to left. The best solution would be to screw the upper hinge to the upper hole of the top plate and the lower hinge to the lower hole of the bottom plate. -
Page 15
ENGLISH Cupboard door preparation For countersinking the door, it is recommended to call a professional. Align the cupboard door to the furniture correctly. Measure the distance X to fix the height of the hole to countersink the upper hinge. The centre of the hole Y should be at the same height of the stroke on the hinge support. -
Page 16: Product Description
Mounting the door Fix the hinges to the hinge supports on the appliance by means of the two supplied screws B. The hinges can be adjusted to compensate for possible uneven thickness of the door. Counter-magnet The appliance is pre set for a magnetic closure.
-
Page 17: Control Panel
ENGLISH Front feet for levelling the appliance Inlet hose connection Drain hose Back feet for levelling the appliance Mains cable 5. CONTROL PANEL 5.1 Control panel description Нон-стоп 1ч 1кг Хлопок Д н е и м Х л о п к…
-
Page 18
5.2 Display The Temperature area: Temperature indicator . Cold water indicator. Door locked indicator. Child safety lock indicator. The digital indicator can show: • Programme duration (e. g. , washing and/or drying phase). • Delay time (e. g. • Cycle end ( •… -
Page 19: Dial And Buttons
ENGLISH Drum clean indicator. This is a recommendation to perform the drum cleaning. Refer to paragraph «Cleaning the drum» in «Care and cleaning» chapter. Anti-crease phase indicator. Drying phase indicator. The spin area: Spin speed indicator No Spin indicator. Spin phase is off. Rinse Hold indicator.
-
Page 20
To activate/deactivate this option, hold washing programme. Set this option the Предв. стирка button pressed for 3 for very delicate fabrics. The rinses seconds until the indicator comes on/ phase uses more water for some goes off on the display. -
Page 21
ENGLISH When you set a washing programme, the • : minimum. display shows the default duration and 6.11 Child Lock dashes. Touch Менеджер времени button to With this option you can prevent children reduce the programme duration from playing with the control panel. according to your needs. -
Page 22: Programmes
6.16 Отсрочка старта • Cupboard dry: laundry to be put in store. With this option you can delay the start of • Extra dry: laundry to be fully dried. a programme to a more convenient time. You can not set all Touch the button repeatedly to set the required delay.
-
Page 23
• Items that are not suitable for tumble drying. • All items with plastic, metal, wooden parts or alike. ELECTROLUX fragrance. If you use this special gentle fragrance, your laundry will scent as just washed: pour a single dose bottle in the compartment and simply start a steam programme. -
Page 24
Programme Reference Maxi‐ Programme description Default tem‐ spin (Type of load and soil level) perature speed load Temperature Spin range speed range 1600 rpm 8 kg All fabrics, except woollens and very deli‐ (1600- 400 cate fabrics. Programme for rinsing and spin‐… -
Page 25
ENGLISH Programme Reference Maxi‐ Programme description Default tem‐ spin (Type of load and soil level) perature speed load Temperature Spin range speed range 1200 rpm 2 kg Do not use fabric softener and (1200- 400 Куртки make sure that there is no soften‐ rpm) 30 °C er residue in the detergent dis‐… -
Page 26
Programme options compatibility Programme ■ ■ ■ ■ ■ ■ ■ ■ ■ ■ Хлопок ■ ■ ■ ■ ■ ■ ■ ■ ■ ■ Хлопок Эко ■ ■ ■ ■ ■ ■ ■ ■ ■ ■ Синтетика ■… -
Page 27
ENGLISH Programme ■ ■ Нон-стоп 1ч 1кг 1) This option excludes the option. 2) Предв. стирка and Пятна cannot be selected together. 3) If you set the No Spin option, the appliance performs draining only. 7.2 Woolmark Apparel Care — washed according to the instructions on the garment label and those issued Blue… -
Page 28
Dryness Level Type of fabric Load Cottons and Linen up to 4 kg (bathrobes, bath towels, Cupboard Dry etc) For items to be stored Synthetics and mixed up to 3 kg fabrics (jumpers, blouses, under‐ wear, household and bed… -
Page 29: Settings
ENGLISH Dryness Level Type of fabric Load Spin Suggested (kg) speed duration (rpm) (mins) Cupboard Dry Cottons and Linen 1600 160 — 180 For items to be (bathrobes, bath towels, etc) 1600 100 — 110 stored 1600 55 — 65 Synthetics and mixed fabrics 1200 135 — 150…
-
Page 30: Before First Use
9. BEFORE FIRST USE 1. Make sure that the electrical power is 4. Set and start a programme for cotton available and the water tap is open. at the highest temperature without 2. Pour 2 litres of water into the any laundry in the drum.
-
Page 31
ENGLISH — Maximum level for quantity of liquid additives. — Flap for powder or liquid deter‐ gent. Always follow the instructions that you find on the packaging of the detergent products, but we recommend that you do not With the flap in the position DOWN: exceed the maximum •… -
Page 32
Changing the delay start after display and the given information the countdown has started changes accordingly. If a selection is not possible To change the delay start: an acoustic signal sounds 1. Touch the Старт/Пауза… -
Page 33
ENGLISH There is also an alternative way of About 20 minutes after the cancelling: programme start, the 1. Rotate the selector knob to the «Reset» programme duration could position be adjusted again depending 2. Wait for 1 second. The display shows on the capacity of water absorption of the fabrics. -
Page 34: Daily Use — Washing & Drying
When you activate the If you have selected No Spin appliance again, the display , the appliance will shows the end of the only drain the water. previous programme. Turn 3. When the programme is completed the programme dial to set a and the door locked indicator new cycle.
-
Page 35
ENGLISH 11.1 Complete wash&dry indicators of the Режим — Стирка and Режим — Сушка buttons are on. The programme indicators appear on the display. The display also shows the Automatic Non-Stop maximum recommended load for a programme or programmes washing and drying programme (e.g. 4 kg for cottons). -
Page 36: Daily Use — Drying Only
You can remove the laundry before 2. Touch the Старт/Пауза button to the anti-crease phase is completed. start the programme. The SensiCare We recommend, for better results, estimation starts. that you remove the laundry when the In the display the door locked phase is almost completed or indicator comes on.
-
Page 37: Fluff In The Fabrics
ENGLISH The appliance continues to operate In the display the door locked with the anti-crease phase for indicator comes on. approximately 30 minutes or more if The display also shows the remaining Anti-crease option was set. programme time. The anti-crease phase reduces creasing.
-
Page 38: Hints And Tips
If the appliance is frequently used, carry out the cleaning programme regularly. 14. HINTS AND TIPS 14.2 Stubborn stains WARNING! Refer to Safety chapters. For some stains, water and detergent is not sufficient. 14.1 The laundry load We recommend that you pre-treat these stains before you put the items in the •…
-
Page 39
ENGLISH 14.8 Garment labels • Always start a washing programme with the maximum load of laundry When you dry the laundry, obey the allowed. indications on the labels of the • If you pre-treat the stains or use a manufacturers: stain remover, set a programme with a low temperature. -
Page 40: Care And Cleaning
15. CARE AND CLEANING 15.4 Door seal with double lip WARNING! trap Refer to Safety chapters. This appliance is designed with a self 15.1 External cleaning cleaning draining system, allowing light fluff fibers that fall off the clothes to be…
-
Page 41
ENGLISH 2. Run the Очистка programme. For more details, refer to washing programme table. 3. Add a small quantity of powder detergent into the empty drum, in order to rinse out any left residues. Occasionally, at the end of a cycle the display may show the icon : this is a… -
Page 42
• The display shows the alarm code Regularly check the drain pump filter and make sure that it is clean. WARNING! • Do not remove the filter Clean the drain pump if: while the appliance • The appliance does not drain the operates. -
Page 43
ENGLISH 180˚ 3. Turn the filter 180 degrees in anti-clockwise direction to open it, without removing. Let the water flow out. 4. When the bowl is full of water, turn the filter back and empty the container. 5. Repeat the steps 4 and 5 until the water stops to flow out. -
Page 44
9. Put the filter back into the special guides by turning it clockwise. Make sure that you tighten the filter correctly to prevent leakages. 10. Close the pump cover. When you drain the water with the emergency drain procedure, you must activate the drain system again: 1. -
Page 45: Troubleshooting
ENGLISH 45° 20° 15.9 Emergency drain remaining water from the inlet hose and the drain pump. If the appliance cannot drain the water, 1. Disconnect the mains plug from the carry out the same procedure, described mains socket. in ‘Cleaning the drain pump’ paragraph. If 2.
-
Page 46
• — No communication between electronic elements of the appliance. Switch it off and switch on again. The programme was not finished properly or the appliance stopped too early. If the alarm code appears again, contact the Authorised Service Centre. -
Page 47
ENGLISH Problem Possible solution • Make sure that the water tap is open. • Make sure that the pressure of the water supply is not too low. For this information, contact your local water authority. • Make sure that the water tap is not clogged. The appliance does not •… -
Page 48
Problem Possible solution • Make sure the levelling of the appliance is correct. Refer to «Installation instruction». The appliance makes • Make sure that the packaging and/or the transit bolts an unusual noise and are removed. Refer to «Installation instruction». -
Page 49: Consumption Values
ENGLISH 1. Press the Вкл/Выкл button to switch CAUTION! the appliance off. Risk of burns! Make sure 2. Disconnect the mains plug from the that the water temperature mains socket. is not too high and the 3. Pull twice the emergency unlock laundry is not hot.
-
Page 50: Technical Data
Programmes Load Energy Water con‐ Approximate pro‐ (kg) con‐ sumption gramme duration sumption (litre) (minutes) (kWh) Delicates 40°C 0.30 Wool/Handwash 30°C 0.15 1) This programme at 60 °C is the reference programme for energy label data, in compli‐ ance with GOST R IEC 62512:2012.
-
Page 51
ENGLISH… -
Page 52
www.electrolux.com/shop…
![]()
![]()
+7 (495) 646-61-04
Время работы
+7 (800) 333-10-52
Заказать обратный звонок
Время работы
Москва
- Санкт-Петербург
- Казань
- Краснодар
- Екатеринбург
- Тюмень
- Новосибирск
- Челябинск
- Другие регионы
Мичуринский проспект, 58к1
0
0
Корзина пуста
Поиск
- Акции и скидки
- Адрес бутика
- Доставка
- Подключение
- Сервис-центры
Каталог товаров
Все бренды
- Asko
- Miele
- V-ZUG
- Kuppersbusch
- De Dietrich
- Liebherr
- Другие бренды
- AEG
- Asko
- Bang & Olufsen
- Barazza
- Bertazzoni
- Big Green Egg
- Blanco
- Bone Crusher
- BORA
- BORK
- Bosch
- Brandt
- Bugatti
- Climadiff
- Cold Vine
- De Dietrich
- Dometic
- Dunavox
- Electrolux
- Elica
- EuroCave
- Faber
- Falmec
- Festivo
- Fhiaba
- Franke
- Frigidaire
- Fulgor Milano
- Gaggenau
- GENCOOL
- Gorenje
- Graude
- Gutmann
- Haier
- Hitachi
- Hyundai
- Ilve
- Indel B
- InSinkErator
- IO MABE
- IP
- Irinox
- iRobot
- Jacky`s
- Kaiser
- KitchenAid
- Korting
- KRONA
- Kuppersberg
- Kuppersbusch
- La Cornue
- La Pavoni
- La Sommeliere
- Laurastar
- Libhof
- Liebherr
- Lofra
- Maunfeld
- Maytag
- MC Wine
- Meyvel
- Miele
- Mitsubishi Electric
- Neff
- Nivona
- NOVIS
- Panasonic
- Pando
- Restart
- Samsung
- Schaub Lorenz
- Schulthess
- Sharp
- Siemens
- Smeg
- Sony
- SUB-ZERO
- Teka
- Toshiba
- Tyent
- V-ZUG
- Vestfrost
- Viking
- WMF
- Wolf
- Zigmund Shtain
-
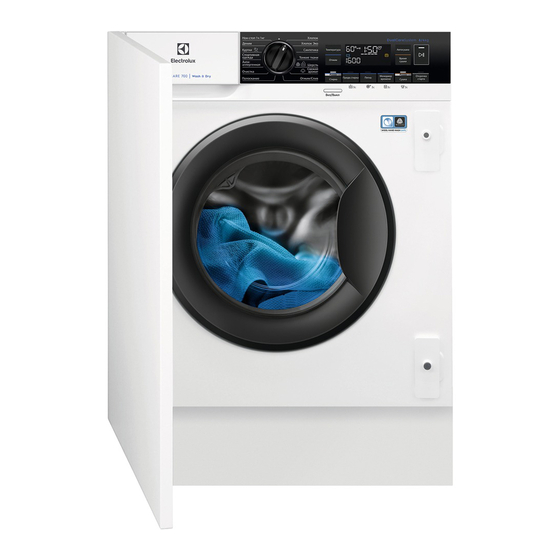
Встраиваемая стирально-сушильная машина Electrolux EW7W3R68SI
- Инструкция
Electrolux EW7W3R68SI — инструкция к стиральной машине на русском языке на Hausdorf
Сохранить файл: Инструкция к Electrolux EW7W3R68SI.PDF, 1.35 Мб

В наличии
204 000 руб.
Цена на 23.09.2023
Бесплатная доставка
Бесплатная доставка техники по Москве (выезд за МКАД — 30 руб./км.).
Подробнее
Бесплатное подключение
Установка и подключение техники на готовые коммуникации — бесплатно!
Подробнее
Вернуться на страницу товара
Бесплатная доставка
По Москве и большинству городов России
Подробнее
Бесплатное подключение
Профессионально установим технику на готовые коммуникации
Подробнее
Бесплатное хранение
До 365 дней — купите сегодня, а получите когда удобно
Подробнее
Простой возврат и обмен
Что-то не так? Обменяем товар или вернем деньги
Подробнее
Требуется руководство для вашей Electrolux EW7W3R68SI Стиральная машина с сушилкой? Ниже вы можете просмотреть и загрузить бесплатно руководство в формате PDF. Кроме того, приведены часто задаваемые вопросы, рейтинг изделия и отзывы пользователей, что позволит оптимально использовать ваше изделие. Если это не то руководство, которое вы искали, – свяжитесь с нами.
Ваше устройство неисправно, и в руководстве отсутствует решение? Перейдите в Repair Café для получения бесплатных ремонтных услуг.
Руководство

Рейтинг
Сообщите нам, что вы думаете о Electrolux EW7W3R68SI Стиральная машина с сушилкой, оставив оценку продукта. Хотите поделиться вашими впечатлениями от данного изделия или задать вопрос? Вы можете оставить комментарий в нижней части страницы.
Довольны ли вы данным изделием Electrolux?
Да Нет
Будьте первым, кто оценит это изделие
0 голоса
Часто задаваемые вопросы
Наша служба поддержки выполняет поиск полезной информации по изделиям и отвечает на часто задаваемые вопросы. Если вы заметили неточность в наших часто задаваемых вопросах, сообщите нам об этом с помощью нашей контактной формы.
Моя стирально-сушильная машина издает много шума и / или громко вибрирует, что я могу с этим поделать? Проверенный
Возможно, стирально-сушильная машина не выровнена. Вы можете сделать это, отрегулировав ножки до идеального уровня. Проблема также может быть вызвана тем, что в машину загружено слишком много одежды. Если это не причина вашей проблемы, вам следует связаться с производителем.
Это было полезно (1269)
Я хочу знать возраст моего прибора Electrolux. Как мне это сделать? Проверенный
Вы можете определить возраст вашего продукта по серийному номеру. Это можно найти на вашем устройстве. Первый символ серийного номера указывает год (например: 1 = 2001), а два символа после этого указывают неделю производства (например: 35 = 35 неделя этого года). Таким образом, серийный номер 13500016 указывает на то, что машина начиная с 35 недели 2001 года.
Это было полезно (802)
Моя стирально-сушильная машина пахнет, что мне делать? Проверенный
Есть стирально-сушильные машины с функцией самоочистки. Если эти функции недоступны, можно добавить 100 мл белого уксуса или 100 г кристаллов соды и запустить стирально-сушильную машину по программе 90 ℃.
Это было полезно (549)
В чем разница в использовании стиральной машины с сушилкой и отдельной стиральной машины и сушилки? Проверенный
Самым большим преимуществом стирально-сушильной машины является то, что она занимает меньше места. Однако отдельная сушилка сможет сушить больше, чем стирально-сушильная машина. Стирально-сушильная машина также потребляет относительно больше энергии и требует больше времени.
Это было полезно (298)
Могу ли я подключить стиральную машину с сушкой к удлинителю? Проверенный
Приборы, требующие большого количества энергии, такие как стиральная машина с сушкой, не могут быть подключены ко всем удлинителям. Посмотрите, какова потребляемая мощность стирально-сушильной машины, которая указана в ваттах, и проверьте, может ли удлинитель справиться с этим. Существуют удлинители с более толстыми кабелями, предназначенные для работы с более крупными приборами.
Это было полезно (259)

Встраиваемая стиральная машина Electrolux EW7W3R68SI – работает тихо и эффективно!
Класс энергопотребления
Класс энергопотребления А+++ позволяет расходовать меньше электроэнергии, что экономит ваш бюджет.
Особенности
Пользоваться этой стиральной машиной очень просто благодаря удобному электронному управлению. На дисплее отображается вся необходимая информация. За одну загрузку вы легко отстираете до 8 кг вещей. Благодаря стильному дизайну эта стиральная машина прекрасно впишется в любой интерьер.
Таймер отсрочки
Функция таймера отсрочки поможет вам отстирать вещи к определенному времени, что очень удобно. Для этого вам нужно лишь загрузить одежду в стиральную машину, добавить моющее средство и выбрать нужную программу.
Безопасность
Для безопасной работы стиральная машина оснащена защитой от протечек воды. Функция контроля за уровнем пены обеспечивает более эффективное полоскание. Контроль дисбаланса позволяет сократить уровень шума и вибраций во время работы стиральной машины. Также имеется блокировка панели управления для защиты от случайного нажатия.
Качественная стирка
Наличие 14 автоматических программ позволит вам без труда подобрать наиболее оптимальный вариант для стирки любого типа ткани. Также имеются специальные программы для стирки шерсти и деликатных тканей.
Отжим
Благодаря высокой скорости отжима белье будет быстро сохнуть после стирки. Также вы можете стирать без него.