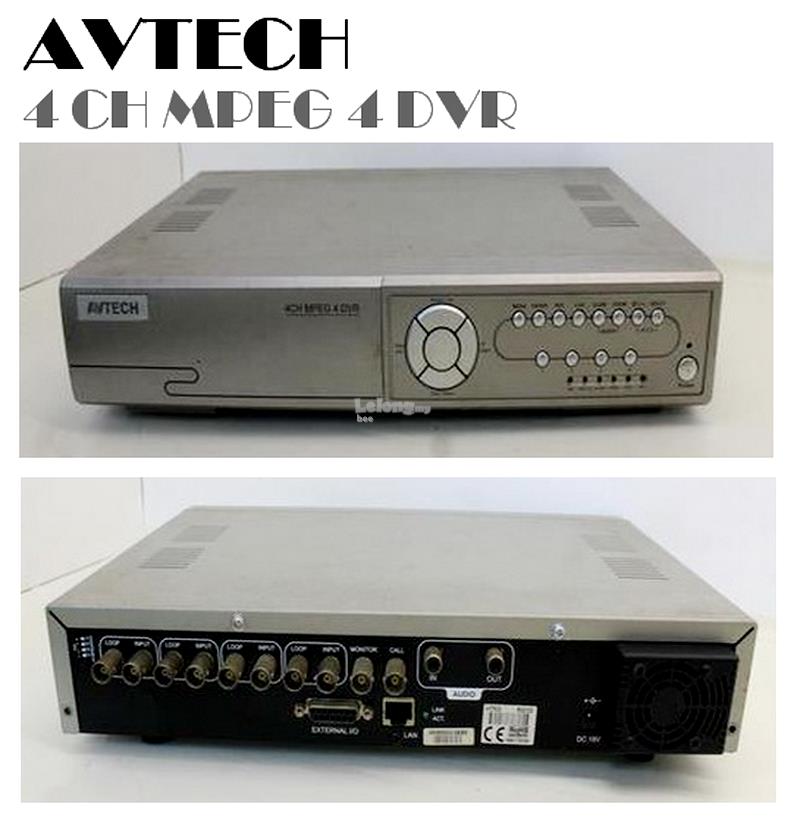
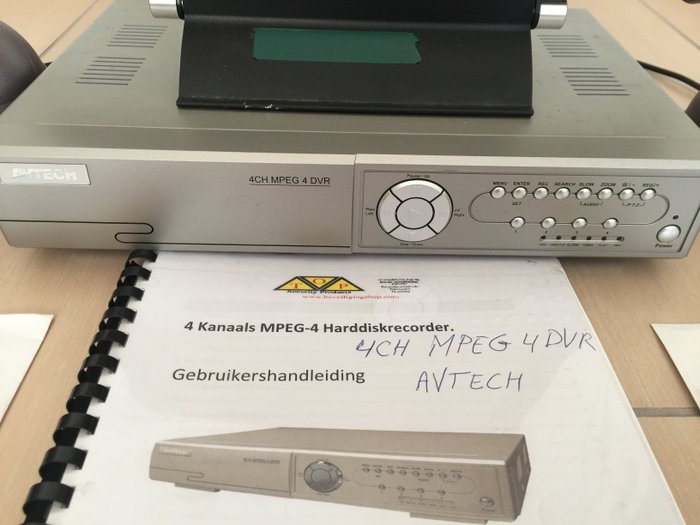
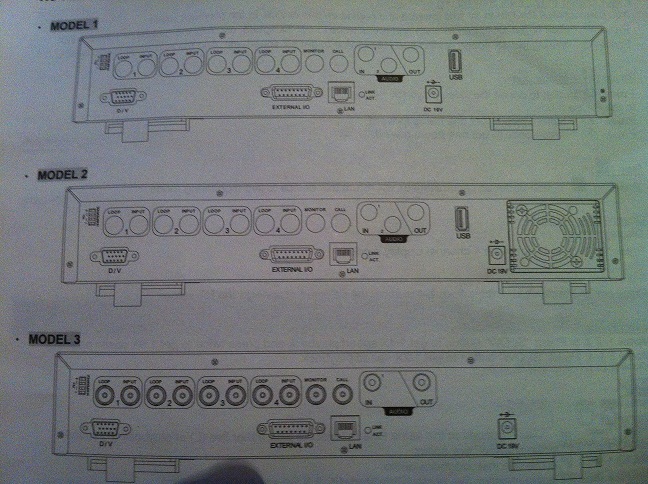
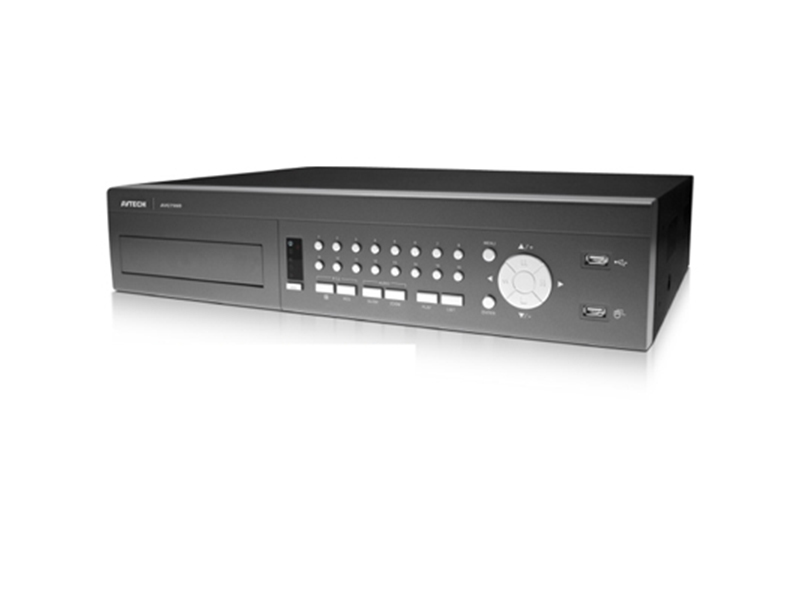
-
Contents
-
Table of Contents
-
Troubleshooting
-
Bookmarks
Quick Links
INSTRUCTION MANUAL
1080p AHD 4/8/16CH
Digital Video Recorders
Please read this manual thoroughly before use, and keep it handy for future reference.
Related Manuals for AtVideo 4CH AHD DVR
Summary of Contents for AtVideo 4CH AHD DVR
-
Page 1: Digital Video Recorders
INSTRUCTION MANUAL 1080p AHD 4/8/16CH Digital Video Recorders Please read this manual thoroughly before use, and keep it handy for future reference.
-
Page 2: Explanation Of Graphical Symbols
WARNING TO REDUCE THE RISK OF FIRE OR ELECTRIC SHOCK, DO NOT EXPOSE THIS PROCUCT TO RAIN OR MOISTURE. DO NOT INSERT ANY METALLIC OBJECT THROUGH THE VENTILATION GRILLS OR OTHER OPENNINGS ON THE EQUIPMENT. CAUTION EXPLANATION OF GRAPHICAL SYMBOLS The lightning flash with arrowhead symbol, within an equilateral triangle, is intended to alert the user to the presence of uninsulated «dangerous voltage»…
-
Page 3
FCC COMPLIANCE STATEMENT INFORMATION TO THE USER THIS EQUIPMENT HAS BEEN TESTED AND FOUND TO COMPLY WITH THE LIMITS FOR A CLASS A DIGITAL DEVICE, PURSUANT TO PART 15 OF THE FCC RULES. THESE LIMITS ARE DESIGNED TO PROVIDE REASONABLE PROTECTION AGAINST HARMFUL INTERFERENCE WHEN THE EQUIPMENT IS OPERATED IN A COMMERCIAL ENVIRONMENT. -
Page 4: Important Safety Instructions
IMPORTANT SAFETY INSTRUCTIONS 1. Read these instructions. 2. Keep these instructions. 3. Heed all warnings. 4. Follow all instructions. 5. Do not use this apparatus near water. 6. Clean only with dry cloth. 7. Do not block any ventilation openings. Install in accordance with the manufacturer’s instructions.
-
Page 5: Table Of Contents
Contents Chapter 1. Introduction ………………11 1.1. Description………………..11 1.2. Components………………..11 1.3. Key Features ………………..11 1.4. Basic Security System Configuration…………12 1.5. Front Panel View………………12 1.6. Rear Panel View ………………13 1.7. IR Remote Control ………………15 Chapter 2.
-
Page 6
3.2.6. Holiday………………..37 3.2.7. Motion ………………..38 3.2.8. Event Record Duration……………. 39 3.3. Device Setup ………………..40 3.3.1. Storage ………………..40 3.3.2. Sensor / Video Loss Detection Setup ……….41 3.3.3. Alarm Schedule Setup…………….. 42 3.3.4. PTZ Control Setup …………….42 3.3.5. -
Page 7
3.5.4.5. Remote Login………………57 3.5.5. DDNS………………… 58 3.5.6. Live Transfer ………………59 3.5.7. FTP File Transfer …………….. 59 3.5.8. Email / SNS………………. 60 3.5.8.1. Email / SNS: SMTP…………….60 3.5.8.2. Email / SNS: Event…………….61 3.5.8.3.Email / SNS: Recipient …………..62 3.5.8.4.Email / SNS: Schedule…………… -
Page 8
5.1.8. General Menu: Search…………….. 77 5.1.9. General Menu: Backup……………. 78 5.1.10. General Menu: Main Menu …………..78 5.1.11. General Menu: Information …………… 79 5.1.12. General Menu: Easy Setup …………… 79 5.1.13. General Menu: Shut Down …………..80 5.1.14. General Menu: Hide Launcher …………80 5.1.15. -
Page 9
8.2.2. General Web Viewer Operation …………94 8.2.3. Calendar and Time Search Button:………… 95 8.2.4. PTZ Control ………………96 Chapter 9. Web Viewer – Setup/Web Configuration ……..97 9.1. Web Configuration………………97 9.1.1. Video/Audio………………97 9.1.1.1. Camera………………..97 9.1.1.2. Monitor………………..98 9.1.1.3. -
Page 10
9.1.4.1. Date/Time………………107 9.1.4.2. Time Synchronization Setup …………107 9.1.4.3. Signal/Language/Device name …………108 9.1.4.4. Config ………………..108 9.1.4.5. System Information ……………. 109 9.1.4.6. Authorization Management…………109 9.1.4.6.1. Authorization Management: Admin ……….. 109 9.1.4.6.2. Authorization Management: Group……….110 9.1.4.6.3. Authorization Management: User ……….110 9.1.4.6.4. -
Page 11: Chapter 1. Introduction
Chapter 1. Introduction 1.1. Description This manual applies to AHD Digital video recorder. The AHD digital video recorder supports up to 4/8ch AHD analogue cameras. It can record high quality images onto its maximum capacity of hard disk drives. The Series is extremely straightforward to install and setup through a dedicated configuration wizard.
-
Page 12: Basic Security System Configuration
Dynamic / Static IP support with own / public name server • All channel sensor inputs, Alarm outputs, PTZ control • Advanced event search function • System / Event log file management • Self-diagnosis and hardware watch-dog • 48 Languages •…
-
Page 13: Front Panel View
1.5. Front Panel View Title Description ① DVR power indicator DVR power indicator ② REC LED Recording indicator ③ Playback LED Playback indicator ④ Network LED Network connection indicator IR REMOTE CONTROL ⑤ Receives all incoming signals from the remote control SENSOR Connect USB mouse or USB memory device for firmware ⑥…
-
Page 14
1.6. Rear Panel View 4CH AHD DVR 8CH AHD DVR 16CH AHD DVR ① ② ③ Audio input Audio out Camera input ④ ⑤ ⑥ HDMI VGA out USB 2.0 ⑦ ⑧ ⑨ Sensor/Alarm: I/O RS-485 Power input ⑩ ⑪… -
Page 15: Ir Remote Control
1.7. IR Remote Control Installing batteries 1. Remove the battery cover by sliding in the direction of the arrow. 2. Insert two AAA batteries according to directions provided. 3. Replace the battery cover by sliding in the direction of the arrow.
-
Page 16: Chapter 2. Installation
Chapter 2. Installation 2.1. HDD Installation Before Installation We recommend setting the current time on your DVR before HDD Installation. Please make sure that the power of DVR is switched off before starting installation. Step 1. Make sure the DVR power is switched OFF Step 2.
-
Page 17
2.2.2 Using a Dynamic IP Address You can use a router with your Dynamic IP broadband modem. In this case, you should set the configuration of a router properly for network connection between DVR and Net/Web Viewer. Please follow the instructions in next section to configure your router correctly. Home/Office Network Internet If your Broadband Modem does not support internal loop back (port forwarding) function and you… -
Page 18
2.2.3.2. DHCP & IP Address Setting To assign an unique private IP address to your intranet environment automatically, you can enable DHCP option in the Network Setup menu of your DVR and your Router. In this case, you can skip the procedures described on this page. -
Page 19: Starting The System
Starting the System When power is turned on, you will see the initializing screen and it may take up to one minute to complete. After initializing is complete, an Easy Setup screen will appear.
-
Page 20: Easy Setup
Easy Setup An Easy Setup screen of 9 steps will appear. If you don’t like to setup all at this point and like to skip the steps, please click the Exit button. Then the system will exit to main live screen. However, you can setup the system at anytime you want by click the Easy Setup Menu in the right-click mouse menu.
-
Page 21
[3/9] Port/Connection Test: You can set the Port and Connection testing. If you want to test if DVR IP address is connected to the network environment, please enter the desired DVR IP address to click the test button. [4/9] DVRNS / Dashboard At this step, the user can setup Network ID and Password for the Administrator and User. -
Page 22
[5/9] Date / Time In this step, the user can set the date and time of the system and Time Sync with the time server, and Daylight Saving Time (DST). [6/9] Camera Setup The user can set the video (on/off, cover 1 and 2), audio (on/off) and camera title. -
Page 23
[7/9] Record Quality The user can set the recording resolution, recording rate and recording quality [8/9] Event Detection The user can set the Motion (on/off) and Video Loss (on/off) -
Page 24
[9/9] Monitor Resolution Setup The user can select the display resolution with more suitable for the display monitor type. After Easy Setup is completed or exited from Easy Setup menu, a live screen will appear. When the user does not log-in the system and click to any menu, it will prompt you to the login dialog. Enter ID and Password by using the virtual keyboard and click OK. -
Page 25: Live Menu Description
Live Menu Description Mouse Menu To navigate by using your mouse, right click your mouse anywhere on the screen and you will be given options to choose from. When a channel is selected, the Mouse Menu options/selections are different than the Mouse Menu when a channel is not selected.
-
Page 26: System Information
Menu Description Screen Mode Can select how you would like to view screen Zoom In Can zoom in for the desired area. Audio On/Off Option to have the audio on or off Freeze Can freeze Playback or Live scene Stop Alarm Stops the alarm output and the event monitoring.
-
Page 27: Chapter 3. Main Menu Setup
Chapter 3. Main Menu Setup Go to Main Menu Window using: • Remote control – Press MENU, Mouse – Right click and click MENU icon. To go to desired sub menu: • Use direction keys and press ENTER (remote control) or click on the mouse To go to the higher level menu: •…
-
Page 28: Video/Audio Setup
3.1. Video/Audio Setup There are 5 sub menus under Video/Audio. To exit to main menu, press MENU (or right click on the mouse) key again. 3.1.1. Camera (Channel) Name and Display 1) VIDEO: You may select the video ON, OFF, COVERT 1 or COVERT 2. ON: Pictures/Images and icons will appear on screen as normal.
-
Page 29
Screen Input: You can configure your screen to your preference by adjusting the channel. 1) Brightness 2) Contrast 3) Color 4) Click the <Init> to initialize settings back to the default 50. 5) When the desired setting is entered, click <OK>. Privacy Region: You can set privacy region for each channel up to four privacy region settings. -
Page 30: Monitor
3.1.2. Monitor In this menu, you’ll be able to set the desired HDMI/VGA resolution by simply clicking on the resolution scroll down bar and select the setting. To adjust the brightness/contrast/hue/color for monitor, click the Monitor button on the bottom left corner.
-
Page 31: Sequence / Events Display
3.1.3. Sequence / Events Display The DVR can display each live video channel in full screen (or a group of channels) in sequence mode similar to slide show in PC. Select the interval, channel setup and Duration. 1) SEQUENCE: — Interval: You may select OFF position or 30 sec maximum. — Single Mode: By clicking the channel setup, you can select individual channel or all.
-
Page 32: Screen Mode
1) CAMERA ID MODE [NUMBER / NAME / OFF] You can display a number or name of your camera on the screen. Select OFF not to display any. BORDER COLOR [WHITE / BLACK / OFF] Select the color of border line on multiple channel display mode. Choose from WHITE and BLACK ICON [ON/OFF] Select ON or OFF to display Icon…
-
Page 33: Record Setup
3.2. Record Setup With this menu, you can set all parameters (see the picture as below) related to recording for each camera independently. Use direction keys and ENTER button to select the camera (channel) and change the setup value. 3.2.1. Policy DVR can record a live video by manual, schedule, event (motion detection and/or external sensor) and by network user’s command.
-
Page 34: Record Quality
3.2.2. Record Quality Setup the record quality parameters for each camera. Resolution [1080p, 720p, 960H, 1/2 960H and 1/4 960H] There are several recording resolution modes you can choose from. 1080p is the highest resolution. Record Rate (F/S) [NTSC: 30-1] [PAL 25-1] Select recording speed in frame (image) per second.
-
Page 35: Recording Option
3.2.4. Recording Option You can enable/disable HDD overwriting feature and set warning method when HDD is full and overwriting is disabled. 1) HDD Overwrite Mode [ON / OFF] If you select “ON”, DVR will delete the old recorded files (from the oldest file) and will record the new video file when the HDD is full.
-
Page 36: Recording Schedule Setup
3.2.5. Recording Schedule Setup This menu allows you to create your own recording schedule and trigger type. To enable this feature, schedule recording feature at RECORD->POLICY->SCHEDULE menu must be turned “ON”. Using direction keys and ENTER button, choose preferred record types (such as Continuous, Event, Both (Cont&Evnt) on the selected time and date.
-
Page 37: Holiday
3.2.6. Holiday You can set specific dates to Holidays & Weekends according to your preferences. Holidays are applied to <Record Schedule> and < Alarm Schedule> as well. Select Record in Main Menu and click Holiday & Weekend. A calendar for Holiday & Weekend setup will appear. By using your mouse or buttons, select year or month and click [OK] or [ENTER].
-
Page 38: Motion
3.2.7. Motion This menu allows you to set motion detection area for motion recording. To start a motion trigger recording, RECORD-> POLICY->MOTION must be enabled Sensitivity [LEVEL 1 – LEVEL 10] The higher level is more sensitive to detect motions. Area [FULL / SETUP] Full: Motion will be detected from full viewing area.
-
Page 39: Event Record Duration
Setting the Motion Detection Area: 1. Select <Motion Region> 2. When “Motion Region” window appears, select a channel for detection and set the area of motion detection. 3. To set the area in “Motion Region” window select desired region. To set the area cells individually, click <Individual>…
-
Page 40: Device Setup
2) Post Event: The recording will continue for a pre-determined time after the actual end of an event. If it is set to 5 seconds, the recording ends in 5 seconds after an event. You can set up the Post Event to maximum of 6 hours.
-
Page 41: Sensor / Video Loss Detection Setup
the HDD may be compromised therefore you may need to change the HDD. 3.3.2. Sensor / Video Loss Detection Setup Select the right type of your external sensors connected to DVR. There are 2 different types of sensors. (N.O.- Normal Open and N.C.- Normal Close). Press ENTER button to change and select the sensor type.
-
Page 42: Alarm Schedule Setup
3.3.3. Alarm Schedule Setup You can set the conditions and operating hours for scheduled alarms. 1) ON: Marked in Blue, it will always generated alarm On scheduled time. 2) OFF: Marked in Black, no alarm is generated even if an event occurs. 3) Event Sync: Marked in Green, it generates alarm Only when an event occurs.
-
Page 43: System Controller / Printer Device
1) ID: You can create own ID number (0-255) for each PTZ camera (up to 16 cameras. Ex. is for 4 ch). 2) PROTOCOL: Select the correct protocol for each PTZ camera connected to DVR. 3) SPEED: Select the speed of camera movement (1-5). The higher number indicates faster speed. 4) When the PTZ setup is complete, click <OK>…
-
Page 44: Video Analysis
3.3.6. Video Analysis Mode ON: Video Analysis will be activated. Mode OFF: Video Analysis will be deactivated. Protocol: Select device/Protocol (Currently only have Hitron). Once the Video Analysis is set and complete, you will be able to view events if an action has taken place.
-
Page 45: System Setup
3.4. System Setup This menu helps you to configure DVR for basic operation. You can set the current time for your area, network parameters, and password for security purposes. 3.4.1. Date / Time Setup You can setup the current date and time manually. 1) Date: Sets the date that will appear on the screen.
-
Page 46: Signal / Language / Device Name
3.4.2. Signal / Language / Device Name DVR supports several languages. Select your preferred language using ENTER button and press MENU to save and exit. Select your video signal format type: NTSC or PAL. Use ENTER key to select the type and press OK button. Note: Changing the video signal setup of the DVR will cause it to reboot 3.4.3.
-
Page 47: Log Information
How to upgrade firmware with USB memory stick: — Check you current firmware version before starting upgrade. — Have a newer version of firmware software in a USB memory stick. — Insert a USB memory stick to the USB port on the DVR. — Press Menu button — Go to CONFIG.
-
Page 48: Authorization Management
3.4.5. Authorization Management You can set permissions of each user over the DVR’s specific function and settings. 3.4.5.1. Admin. Under Authorization Management Admin, you can change Admin’s ID and Password. By clicking on the ID, a virtual keyboard will appear to type in ID. This also applies to Password and Confirm PW. Once you have entered your ID and PW, click OK.
-
Page 49: User
1) Select Group and window for Add, Delete, Rename and Group Authority setup appears. 2) Click to a desired item and set the value. — Add, Delete, Rename: You can add, delete, rename a group or modify permissions given to the group.
-
Page 50: Setup
When selecting Add from the window, a window for “Add User” will appear. You can configure the Network Viewer setting including Name, ID, Select Group and Password. Result of the user setup appears in the User window. To change the user property, use “Edit User”. The “Edit User”…
-
Page 51: Network Setup
3.5. Network Setup With this menu, you can setup the network for DVR. Before starting this setup, the DVR must be connected to the router by LAN cable. Also, please make sure that internet is working properly. Important: If you are not familiar with network configuration and find any difficulties during this setup, please consult with your IT specialist or contact your distributor.
-
Page 52
When A Router Is Used: 1) Setting the DVR with a Static IP: — Internet Connection: You can connect the DVR to a router which is connected to a cable modem or a router in a LAN environment. 2) Setting the DVR Network: — Set the <Connection Mode>… -
Page 53: Port / Connection Test
3.5.2. Port / Connection Test 1) Port (TCP): Initially, 9350-9351 is set. It increases/decreased by TCP: It has better stability and lower speed when compared to UDP and recommended for internet environments. 2) WebViewer Port: Enter the port number for the Web Viewer. Initially, it is set to 80.
-
Page 54: Dashboard Setup
This Exclamation icon indicates that the DVR has not been registered to our DVRNS server. If the ID is already in use, you will see a registration window stating that it’s an invalid ID. You will need to click ok and re-enter ID. Registration: For a complete setup of your DVR, you must register your DVR to our DVRNS server.
-
Page 55: Dashboard Starting
Dashboard Setup by Existing Account: The user can manag and control the mutiful DVRs with single ID and Password by web browser. If the user wants to control more than 2 DVRs with single ID and PW by web browser, the Dashboard ID and PW for the DVRs should be same.
-
Page 56: Dvr Search
to the DVR. 3.5.4.4. DVR Search In your Dashboard, type in the Network ID of your desired DVR and it directly connect to your DVR’s webpage. Network ID: Once you have entered the Network ID for desired DVR, click the GO button. After clicking the GO button, it will route you to the web page login.
-
Page 57: Remote Login
3.5.4.5. Remote Login Using your Web Viewer, you will be able to Live Monitor and perform playback from your DVR. To access your Web Viewer for Live monitoring and Playback, you will need to enter your ID and Password…
-
Page 58: Ddns
3.5.5. DDNS You can set the DDNS site for a remote user’s network connection. 1) A virtual keyboard will appear for user input. Once the DDNS setup is complete, click OK. DDNS Setting: DDNS is a short form of Dynamic Domain Naming Systems. DNS (Domain Name System) is a service that routes a Domain name consisting of user friendly characters to an IP consisting of numbers (64.233.189.104).
-
Page 59: Live Transfer
3.5.6. Live Transfer You can set the quality of the image that is transferred from the DVR to the network. 1) Record Rate: Choose from OFF to 30fps (Highest) 2) Record Quality: Level 1 (Lowest) to Level 8 (Highest) 3.5.7. FTP File Transfer This menu allows the user to transfer the FTP file to a specific server when event is triggered.
-
Page 60: Email / Sns
The Help description is as follows; FTP Server IP Address/URL – Enter the FTP server IP address or host name. Port – Enter the port number used by the FTP server. The Default number is 21. User Name/Password – Provide your log-in information to the desired FTP Server. Upload Path –…
-
Page 61: Email / Sns: Event
4) User Authentication: Click the check box next to User Authentication if the SMTP server requires user authentication. The account input box will be activated. 5) User: Enter a user to use authentication when connecting to the SMTP server. 6) Password: Enter the password of the SMTP server user. 7) Sender: Use the virtual keyboard to enter the sender’s email address.
-
Page 62: 3.Email / Sns: Recipient
3.5.8.3.Email / SNS: Recipient You can add a user to the mailing service. Click the User Add button and Add recipient window will appear in the middle of the screen. To input recipient’s name and email address, click the space next to the name and virtual keyboard will appear.
-
Page 63: Iscsi
3.5.9. iSCSI The DVR supports the iSCSI function. 1) Use iSCSI: If you want to use iSCSI, check Use iSCSI box. If you check the iSCSI box, iSCSI setting menu will be enabled. 2) Device: You can enter Initiator Node Name. 3) iSCSI Target Address: You can enter iSCSI device IP address.
-
Page 64
Target Nodes: If you click Target Node Setup button, it will display target node name and you can select only one target node name. If it does not display any target node name, you must check DVR network or iSCSI device network. If error popup window appears, you must check iSCSI setting information if entered correctly. -
Page 65
iSCSI device block size. In iSCSI device setting block size, you must set to 512byte. In iSCSI device IP address, it should be set to static IP address, not in DHCP. -
Page 66: Back Up
3.6. Back Up You can check the backup device and set the backup schedule by channel or by time. You can only backup your data with either a UBS Drive or external CD/DVD Writer. 1) Backup Range: Sets the Start and End time for the backup. 2) Overlap: Shows a list of overlapping data on a same time according to the number data.
-
Page 67: Chapter 4: Search Menu
CHAPTER 4: Search Menu 4.1. Time Search You can search for recorded data of a desired time. 1) Select a date to search. 2) Recorded data on that date and time will be listed. The display bar is different according to the data type so check the data type for the color in the left pane.
-
Page 68: Event Search
There are 6 options to choose from to retrieve recorded data. You can choose to search one at a time, multiple at a time or by all. You can click the “All” tab to view all options or you can click individually. 1) Normal: You can search for data that has been manually recorded.
-
Page 69: Motion
4.3. Motion Under motion search, you are able to search for all areas that have been recorded when motion is detected. It is a very specific search instruction to eliminate time loss and unwanted search areas. If a motion is detected in each channel, you can set a desired area to perform the search. If you set the manual area to Motion Region, the Setup button will be activated.
-
Page 70: Capture
available by regular CALENDAR/TIME search. You can search, playback, backup, remove files using this menu. Click SEARCH -> PROTECT. You will see the file list with recording start Time. Select a file and click PLAY button. Protect icon will be displayed on playback screen to notify you that this is a protected video file.
-
Page 71: Video Analysis
4.5. Video Analysis You can search for data as a preferred function in a specified preset position. 1) Motion: An object in motion will be detected. 2) Tracking: The camera will track a moving object. 3) Cross: You can detect a moving object crossing a specified virtual line in a preset position. 4) Enter: You can detect a moving object that newly enters in a specified area, (enter box) 5) Abandon: You can detect an object abandoned in a specified area.
-
Page 72: Chapter 5. General Operation
CHAPTER 5. General Operation 5.1. General Menu To navigate by using your mouse, right click your mouse anywhere on the screen and you will be given options to choose from. 1) Screen Mode 2) Audio On/Off 3) Freeze 4) Stop Alarm 5) Record Start/Stop 6) Play 7) Search…
-
Page 73: General Menu: Screen Mode
5.1 .1 .General Menu: Screen Mode When selecting Scene Mode, you will be given three (3) options: 4-Slpit, PIP and Auto sequence. Auto Sequence If you activate Auto Display Mode (Sequence Display Mode), live channels (cameras) will be displayed on the monitor screen in accordance with your sequence setup. When Auto Sequence is activated, an auto mode icon will be shown on the upper right corner of the screen until you stop this mode.
-
Page 74: Pip (Picture In Picture)
PIP (Picture in Picture) To activate PIP Display Mode, select PIP mode. Main channel is displayed on the full monitor screen at the same time as one two or three other channels are displayed in inset window. To exit from this mode, select the desired screen mode. To exchange the two images of PIP screen each other with a mouse, simply drag full screen to the inset screen, then the two screens will be exchanged.
-
Page 75: General Menu: Zoom In
5.1.3. General Menu: Zoom In Select Zoom-in and click the selected portion (as yellow colored) to enlarge. You can use the direction keys or the mouse to enlarge desired area. Click enter or double click once the desired area is confirmed.
-
Page 76: General Menu: Stop Alarm
5.1.5. General Menu: Stop Alarm Stops the alarm output and the event monitoring. 5.1.6. General Menu: Record Start/Stop Will start and stop Manual recording. However, if the schedule or event recording is set, even the user clicks the Record Stop menu, it will not be applied to the Schedule recording or Event recording.
-
Page 77: General Menu: Play
5.1.7. General Menu: Play You can playback data stored in the HDD. Also you can playback with quick play for 30sec ~ 10min, which is very critical time search. 5.1.8. General Menu: Search You can perform search for recorded data by Time, Event, Protect, Capture and Video Analysis. Once you click Search from the General Menu, it will direct you to the Search Menu.
-
Page 78: General Menu: Backup
5.1.9. General Menu: Backup You can back up the desired data to a connected device. By clicking the Backup tab from the General Menu, it will direct you to the Main Backup Menu. 5.1.10. General Menu: Main Menu By clicking the Main Menu on the General Menu, it will direct you to the Main Menu.
-
Page 79: General Menu: Information
5.1.11. General Menu: Information This menu will display overall system information. 5.1.12. General Menu: Easy Setup This menu will allow you to set your DVR with 10 easy steps.
-
Page 80: General Menu: Shut Down
5.1.13. General Menu: Shut Down This menu will allow you to completely shut down your DVR unit. When the user clicks this menu, a warning message window will appear to confirm the user to proceed. 5.1.14. General Menu: Hide Launcher Shows or hides the Launcher…
-
Page 81: General Menu: Logout
5.1.15. General Menu: Logout This menu allows you to logout by clicking the Logout button. A logout window will appear to confirm you to logout. 5.2. Live Launcher The Live Launcher menu appears at the bottom of the live screen. Some of the menu buttons will appear in the Live Launcher, General Menu and Playback Launcher for the convenience of not having to go back and forth to navigate to the desired action.
-
Page 82: Live Launcher Control Button Description
5.2.1. Live Launcher Control Button Description Scene Mode Zoom In Printer Resume Play Capture Freeze Record Audio Alarm Off Search Backup Menu expansion button 5.3. Playback Launcher 1) Click <Play> Menu in Mouse Menu or on Live launcher. You can select 30sec. 1 min, 5 min, 10 min and critical time playback.
-
Page 83: Play Launcher Control Button Description
5.3.1. Play Launcher Control Button Description Playbar: Displays the time of recorded data Playback control button: Allows user to in the selected channel for the past 24 control playback of desired function. hours Playback display mode: Allows user to Capture: You can capture video image playback of desired mode.
-
Page 84: Ptz Control
5.4. PTZ Control The DVR enables you to adjust the settings of a PTZ camera as well as an ordinary one according to your preference. The PTZ device can be activated only if a channel in connection with the PTZ camera is selected.
-
Page 85
3) IRIS : Adjusts the intensity of radiation incoming to the iris. (this function is only available for the cameras supporting iris control function. 4) FOCUS : Enables you to adjust the focus manually. 5) Preset: the camera can set the position of the preference area. 6) Tour: The camera automatically runs between/among the preset points that you selected. -
Page 86
TOUR SETTING Firstly select the Tour menu and click Setup-Preset button , the Tour setting window will appear. Tour Number: you can set 1 ~ 8. Dwell Time: Dwell time of one Preset. (0 ~ 99 sec). Tour program setting: max. 50 tour set per tour number can be set. -
Page 87: Recording
5.5. Recording Manual Recording Icon: If DVR starts recording by manual trigger, recording indication icon will be displayed on the left top of the screen. To stop recording, press RECORD button again. Recording Icon: When DVR starts recording by events, the recording icon will be activated: Schedule Recording Regular/manual Recording External Sensor driven Recording…
-
Page 88: Chapter 6. Protect Video/Audio File
Chapter 6. Protect Video/Audio File 6.1. Protect Registration You can protect important recorded files from HDD overwriting. Register important files to protect list. During the playback of recorded file, just click the Protect icon on the launcher to save as protected file. How to protect important files from HDD overwriting? During the playback of recorded file, you can transfer current retrieving file to PROTECT LIST.
-
Page 89: Protected File Backup
How to delete protected files? To remove old files from PROTECT LIST, go to PROTECT LIST menu. Select file(s) you want to remove. Click DELETE and YES to remove it permanently. IMPORTANT: If you click YES, the file will be erased from HDD permanently and will not be recovered.
-
Page 90: Chapter 7. Capture Video Still Image
Chapter 7. Capture Video Still Image 7.1. Still Image Capture You can capture and save up to 100 still images and retrieve, delete, or back them up easily. You can capture videos instantly using a mouse or remote control. How to capture video images? During playback mode (including FF, REW and Pause) or live display, you can capture current video image using a mouse or remote control.
-
Page 91: View Captured Image
7.2. View Captured Image The DVR keeps and manages captured files separately from other video files stored in HDD. You can view them at any time unless you remove them from CAPTURE LIST. You can store up to 100 captured images in master HDD. How to view captured images? Click SEARCH Menu ->…
-
Page 92: Backup Captured Image
How to remove captured image files? IMPORTANT: If there are 100 captured images in your HDD and you try to capture new video images, “Capture list is full” message will be appeared. To protect your captured images, please maintain your captured images not to exceed 100 images.
-
Page 93: Chapter 8. Web Viewer — Connection Via Internet Explorer
Chapter 8. Web Viewer – Connection via Internet Explorer 8.1. System Requirement — Pentium 4 or above recommended — O/S: Microsoft Windows XP, Vista, Windows 7 — 2GB RAM or above recommended — Super VGA 512M or above (1GB recommended) — 10/100 Base T network card for LAN operation 8.1.1.
-
Page 94: General Web Viewer Operation
2. Security Warning will ask you if you accept to run the application. Click on the box indicating that you accept the risk and want to run this application and click the RUN button. 8.2.2. General Web Viewer Operation When you connect to your DVR, you will see a screen as below. Connect/Disconnect Button: Connect to DVR which is designated in Login pop-up window.
-
Page 95: Calendar And Time Search Button
8.2.3. Calendar and Time Search Button: You can search data from Calendar Search or by Time Search. Click on the Search button at the menu bar. Once you have clicked the Search button, a Calendar Search will appear. The dates that are marked in red color indicates that there are data on that date.
-
Page 96: Ptz Control
8.2.4. PTZ Control You will be able to control your PTZ camera that’s connected to your DVR. Keep in mind that PTZ control function can only be performed in LIVE mode. First select a specific channel to control the PTZ camera, then simply click on the PTZ icon/button on the menu bar.
-
Page 97: Chapter 9. Web Viewer — Setup/Web Configuration
Chapter 9. Web Viewer – Setup/Web Configuration 9.1. Web Configuration You can remotely control and manage the DVR from your Internet. We strongly recommend not using this function in normal operation. If you change the configuration of the DVR to a wrong value, the DVR may not work properly and can cause unexpected problems.
-
Page 98: Monitor
1) VIDEO: You may select the video ON, OFF, COVERT 1 or COVERT 2. 2) AUDIO: You may select the audio ON or OFF position. 3) TITLE/CH NAME: Create your own name/title for each camera. If you skip this setup, camera # will be displayed on the screen.
-
Page 99: Osd/Display Position
9.1.1.4. OSD/Display Position You can configure each parameter for on-screen-display. 9.1.2. Record You can set all parameters related to recording for each camera independently. 9.1.2.1. Policy DVR can record a live video by manual, schedule, event (motion detection and/or external sensor) and by network user’s command.
-
Page 100: Recording Quality
9.1.2.2. Recording Quality DVR can set the recording quality for normal and event condition. Therefore, the user can set the recording quality with low resolution for normal condition and high resolution for event condition. ** For detailed information, please refer to the Main Menu under Record 9.1.2.3.
-
Page 101: Schedule
9.1.2.4. Schedule 1) CAMERA CH: Select channel for schedule recording. 2) SELECT DAY [SUN – SAT/Holiday] : Select the desired day for schedule recording. 3) TIME: Move the cursor to desired time and click to set it highlighted. Press click again to change schedule recording option by color.
-
Page 102: Motion Detection
9.1.2.6. Motion Detection You can set the motion detection mode, areas and sensitivity levels for recording. ** For detailed information, please refer to the Main Menu under Record. 9.1.2.7. Motion Region You can set the motion detection regions for recording. ** For detailed information, please refer to the Main Menu under Record.
-
Page 103: Event Record Duration
9.1.2.8. Event Record Duration You can set the beginning and ending point of a recording on an event. Pre Event Post Event ** For detailed information, please refer to the Main Menu under Record 9.1.2.6. Record Option You can enable/disable HDD overwriting feature. ** For detailed information, please refer to the Main Menu under Record…
-
Page 104: Device
9.1.3. Device You can configure the peripherals in your DVR such as PTZ control and printer 9.1.3.1. Sensor Detection Select the right type of your external sensors connected to the DVR. There are two different types of sensors, (N.O. — Normal Open and N.C. — Normal Close). Press APPLY button to change and select the sensor type.
-
Page 105: Alarm Schedule
9.1.3.3. Alarm Schedule You can set the conditions and operating hours for scheduled alarms. ** For detailed information, please refer to the Main Menu under Device 9.1.3.4. PTZ DVR supports PAN, TILT, ZOOM and FOCUS control for PTZ cameras. ** For detailed information, please refer to the Main Menu under Device…
-
Page 106: System Controller / Printer Device
9.1.3.5. System Controller / Printer Device You can set the communicator for use of PTZ with the DVR. You can set the values of each communication setup of the remote device. ** For detailed information, please refer to the Main Menu under Device 9.1.3.6.
-
Page 107: System
9.1.4. System The menu will help you to configure DVR for basic operation. 9.1.4.1. Date/Time You can set up the current date and time manually. ** For detailed information, please refer to the Main Menu under System 9.1.4.2. Time Synchronization Setup Auto Time Set (Time Sync.): By clicking the Time Sync.
-
Page 108: Signal/Language/Device Name
9.1.4.3. Signal/Language/Device name DVR supports up to 48 different languages. Select your preferred languages. Video Signal: Select your video signal format type, NTSC or PAL. ** For detailed information, please refer to the Main Menu under System 9.1.4.4. Config This menu allows the user to reboot the DVR system remotely. For DVR rebooting, it will take about 2 minutes.
-
Page 109: System Information
9.1.4.5. System Information This menu will display overall system information 9.1.4.6. Authorization Management You can set permissions of each user over the DVR’s specific function and settings. 9.1.4.6.1. Authorization Management: Admin 1) Under Permission Management Admin, you can change Admin ID and Password. By clicking on the ID, a virtual keyboard will appear to type in ID.
-
Page 110: Authorization Management: Group
9.1.4.6.2. Authorization Management: Group 1) Select Group and window for Add, Delete, Rename and Group Authority setup appears. 2) Click to a desired item and set the value. ** For detailed information, please refer to the Main Menu under System 9.1.4.6.3.
-
Page 111: Authorization Management: Setup
9.1.4.6.4. Authorization Management: Setup You can set restricted access for all general users. Items with restrictions will require logging in for ** For detailed information, please refer to the Main Menu under System 9.1.5. Network With this menu, you can setup the network for DVR. Before starting this setup, the DVR must be connected to the router by LAN cable.
-
Page 112: Port
9.1.5.2. Port 1) Port (TCP): Initially, 9350-9351 is set. TCP: It has better stability and lower speed when compared to UDP and recommended for internet environments. 2) Web Viewer Port: Enter the port number for the Web Viewer. Initially, it is set to 80. 3) When the protocol setup is complete, click OK.
-
Page 113: Ddns
9.1.5.4. DDNS You can set the DDNS site for a remote user’s network connection. ** For detailed information, please refer to the Main Menu under Network 9.1.5.5. Live File Transfer You can set and transfer the Live File with a specific record rate and quality to a specific server. ** For detailed information, please refer to the Main Menu under Network…
-
Page 114: Email/Sns
9.1.5.6. Email/SNS Receive event notifications by either Email or SNS (Social Networking Service) 9.1.5.6.1 Email / SNS: SMTP You can send e-mail to a registered DVR user at a specific time interval or if an event occurs. ** For detailed information, please refer to the Main Menu under Network 9.1.5.6.2.
-
Page 115: Email / Sns: Schedule
9.1.5.6.3. Email / SNS: Schedule Schedule menu will allow one to set schedule to receive notification. You may choose email, SNS or both (Email & SNS). Each notification will have different color association. You may select specific channel for notification or simply click Apply to All CH tab. ** For detailed information, please refer to the Main Menu under Network 9.1.5.6.4.
-
Page 116: Product Specifications
Product Specifications Channel 16CH Input 4 BNC 8 BNC 16 BNC Video Display Output VGA, HDMI Input 4 Channel 8 Channel 16 Channel Audio Output 1 RCA Display 120fps 240fps 480fps FPS(NTSC/PAL) VGA Display Up to 1920×1080 Display Resolution Screen Split Mode 1/4/6/8/9 1/4/6/8/9/13/16 PIP and Zoom…
-
Page 117
RS485 PTZ Control Languages 48 Languages Support Power Supply 12VDC, 2A Dimension 300x47x209mm 378x47x317mm Notice: The information in this manual was current when published. The manufacturer reserves the right to revise and improve its products. All specifications are subject to change without notice. -
Page 118: Network Troubleshooting
Network Troubleshooting You must set your network environment properly to use remote control software (Net Viewer or Web Viewer). 1.Ping Test through your Router Ping is a command-line tool used to check whether another computer is reachable from your own. You can use the command either from the Windows Command Prompt or from a Linux terminal.
-
Page 119
Set IP address, Subnet mask, and Gateway address of your PC. • Open Network Connections Select Properties of Local Area Connection Select Internet Protocol (TCP/IP) Select Properties… -
Page 120
Click on Use the following IP address Type in Subnet mask and Gateway address of DVR into these fields. Type in IP address like example. Do ping test again. • With the test result, you can figure out whether or not the setup has been successful. -
Page 121: Terms / Icons Glossary
Terms / Icons Glossary Composite Video — A format of an analog television (picture only) signal before it is combined with a sound signal. DHCP — Dynamic Host Configuration Protocol. A network application protocol used by devices to obtain configuration into for operation in an internet protocol network. Also a source of IP addresses. DSL — Internet connection that can be used at the same time and on the same telephone line with a regular telephone.
-
Page 122: Dvr Icon Reference
DVR Icon Reference REGULAR RECORDING Icon PTZ SET — Icon indicates PTZ function indicates manual recording is set is available SCHEDULE RECORDING Icon PTZ- Icon indicates that PTZ function indicates recording is set to record has been activated according to schedule EVENT RECORDING Icon indicates SENSOR EVENT (ALARM IN)-Icon that…
-
Page 123
1080p AHD 4/8/16CH Digital Video Recorders REV.A…
Предложите, как улучшить StudyLib
(Для жалоб на нарушения авторских прав, используйте
другую форму
)
Ваш е-мэйл
Заполните, если хотите получить ответ
Оцените наш проект
1
2
3
4
5
-
Page 1
260Z PLA Y P A US E S T OP RE W HD D HD D Fu ll ALAR M TIME R PL AY RE C MENU ENTER LIS T SLOW ZOOM Please read instructions thoroughly before operation and retain it for future reference. The image shown above may differ from the actual product appearance. -
Page 2
ENCODED BY A CONSUMER ENGAGED IN A PERSONAL AND NON-COMMERCIAL ACTIVITY AND/OR WAS OBTAINED FROM A VIDEO PROVIDER LICENSED BY MPEG LA TO PROVIDE MPEG-4 VIDEO. NO LICENSE IS GRANTED OR SHALL BE IMPLIED FOR ANY OTHER USE. ADDITIONAL INFORMATION INCLUDING THAT RELATING TO PROMOTIONAL INTERNAL AND COMMERCIAL USES AND LICENSING MAY BE OBTAINED FROM MPEG LA, LLC. -
Page 3: Table Of Contents
TABLE OF CONTENTS 1. OVERVIEW……………………..1 1.1 Product Description ……………………….1 1.2 Features…………………………..1 1.3 Package Contents ……………………….1 1.4 Specifications…………………………2 2. FRONT AND REAR PANELS ………………..3 2.1 Front Panel …………………………3 2.2 Rear Panel………………………….5 3. CONNECTIONS AND SETUP………………..6 3.1 HDD Installation ………………………….6 3.2 Camera Connection……………………….6 3.3 Power Setup …………………………6 3.4 Date and Time Setting ………………………..6…
-
Page 4
8.1.2 General AP Operation……………………..26 Record…………………………26 Playback…………………………27 Network Backup ……………………….28 8.1.3 AP Control Panel ……………………..28 8.1.4 AP Functions……………………….30 Image Display……………………….30 Address Book ……………………….30 Miscellaneous Control ………………………32 Information ……………………….49 DVR Control ……………………….49 8.2 IE Web Browser ………………………..51 8.3 QuickTime Player……………………….52 APPENDIX 1 COMPATIBLE USB FLASH DRIVE BRAND…………53 APPENDIX 2 COMPATIBLE HDD BRAND……………. -
Page 5: Overview
OVERVIEW 1. OVERVIEW 1.1 Product Description This MPEG4 multiplex network DVR series combines remote surveillance, burglar prevention, and evidentiary recording features and is designed to become a simple entry-level system with all necessary functions. 1.2 Features MPEG4 Network Transmission ‧ MPEG4 web transmitting for faster transmission and clearer images via network Simplex / Duplex Operation ‧…
-
Page 6: Specifications
MODEL DR040 Video System NTSC / PAL (auto detection) Video Compression Format MPEG4 Video Input (Composite video signal 1 Vp-p 75Ω BNC) 4 Channels Video Output Composite video signal 1 Vp-p 75Ω BNC Simplex Mode: 360×240 pixels with 120 IPS <NTSC> / 360×288 pixels with 100 IPS <PAL>…
-
Page 7: Front And Rear Panels
FRONT AND REAR PANELS 2. FRONT AND REAR PANELS PLA Y S T OP RE W P A US E HD D HD D Fu ll ALAR M TIME R PL AY RE C MENU ENTER LIS T SLOW ZOOM 2.1 Front Panel LED Indication The following LEDs will be on when:…
-
Page 8
FRONT AND REAR PANELS LIST (Event List Search) To quick search the recorded files by event list, press this button to show all types of the event lists. Select one of the event list and press “ENTER” button to playback the selected file. MANUAL: List the information of the manual-recorded files. -
Page 9: Rear Panel
CONNECTIONS AND SETUP 2.2 Rear Panel RISKOF ELECTRIC SHOC K DO NOT OPEN WARNI N G : T O RED U CE T HE RI S K O F EL EC TR IC SH O CK, DO N OT R E M O V E CO V ER (O R BA CK ). NO USER -SE R VIC E ABL E PA RT S INSI D E.
-
Page 10: Connections And Setup
CONNECTIONS AND SETUP 3. CONNECTIONS AND SETUP 3.1 HDD Installation The HDD must be installed before the DVR is turned on. Step 1: Loose the screws on the upper cover and open the upper cover of the DVR. Step 2: Remove the HDD bracket. Step 3: Get a suitable brand HDD and set the HDD mode to “Master”…
-
Page 11
CONNECTIONS AND SETUP ADVANCE SYSTEM CAMERA PASSWORD XXXX DETECTION RESET DEFAULT RESET DISPLAY CLEAR HDD HDD-MASTER-1 ALERT UPGRADE START SYSTEM AUTO KEYLOCK NEVER NETWORK LANGUAGE ENGLISH BACKUP VIDEO FORMAT NTSC HDD INFO VERSION 1167-1012-1022-1017… -
Page 12: Basic Operation
BASIC OPERATION 4. BASIC OPERATION 4.1 Live Page In this live page of the DVR, you can see the following icons: Icon Function Icon Function Icon Function Icon Function live audio Key lock Key unlock Digital zoom mode channel Digital zoom Timer recording Motion Recording…
-
Page 13: Key Lock And Unlock
BASIC OPERATION Slow Playback Press “SLOW” button to get 1/4X speed playback and press twice to get 1/8X speed playback. Audio Playback Use these two buttons to select the live or playback sound of the audio channels. Icon “ ” means: Live audio of the 1 audio channel / Icon “…
-
Page 14: Search
BASIC OPERATION 4.6 Search Search by List Press “LIST” button on the DVR control panel to show the list for all types of the recorded files. Choose the list you want to view and press “ENTER” button to start playback. MANUAL List the information of the manual-recorded files.
-
Page 15: Menu Configuration
MAIN MENU 5. MENU CONFIGURATION DATE QUICK SEARCH SEARCH HDD IMAGE SIZE QUALITY MANUAL RECORD ENABLE EVENT REOCRD ENABLE RECORD TIMER RECORD ENABLE MULTIPLEX MODE MAIN MENU MANUAL RECORD IPS EVENT RECORD IPS TIMER RECORD IPS RECORD TIMER TIMER DETECTION TIMER DATE DATE FORMAT…
-
Page 16: Quick Start Menu
QUICK START MENU 6. QUICK START MENU Press the “MENU” button and enter the password to go to the quick-start menu list. The default admin password is 0000. Users can change the password later. Please refer to “SYSTEM” at page 19. ITEM FUNCTION Enter / exit the quick start menu…
-
Page 17
QUICK START MENU RECORD IMAGE SIZE MENU QUALITY BEST QUICK SEARCH MANUAL RECORD ENABLE RECORD EVENT RECORD ENABLE TIMER TIMER RECORD ENABLE DATE MULTIPLEX MODE ADVANCE REMOTE VIEW MANUAL RECORD IPS EVENT RECORD IPS TIMER RECORD IPS PLEASE CONSULT YOUR INSTALLER FOR ADVANCE SETTING SELECT BACK NEXT… -
Page 18: Timer
ADVANCED MENU 6.2 TIMER Press “MENU” button on the front panel to enter the main menu list. Move the cursor to “TIMER”, and press ”ENTER”. Select to enable (ON) or disable (OFF) the recorder timer and / or detection timer functions. TIMER RECORD TIMER DETECTION TIMER…
-
Page 19: Advanced Menu
ADVANCED MENU 7. ADVANCED MENU Press “MENU” button on the front panel to enter the main menu list. Move the cursor to “ADVANCE”, and press ”ENTER”. The screen will show the following options. ADVANCE CAMERA DETECTION MENU DISPLAY QUICK SEARCH ALERT RECORD SYSTEM…
-
Page 20: Detection
ADVANCED MENU 7.2 DETECTION In this submenu, you can set up detection-related functions: DETECTION SETUP and DETECTION TIMER. Move the cursor to “DETECTION”, and press ”ENTER”. The screen will show the following options. ADVANCE DETECTION CAMERA DETECTION SETUP DETECTION TIMER DETECTION DISPLAY ALERT…
-
Page 21: Detection Timer
ADVANCED MENU Press “ENTER” to Press “UP” or “DOWN” to choose Press “LEFT” or “RIGHT” to confirm the start area. the height of the area, and press choose the width of the area “ENTER” again to confirm. Press “+” to set the whole You can also up set up Press “-”…
-
Page 22: Display
ADVANCED MENU 7.3 DISPLAY In this menu list, you can check and change some display settings. Move the cursor to “DISPLAY”, and press ”ENTER”. You will see a similar screen as the following: ADVANCE DISPLAY FULL SCREEN DWELL DURATION (SEC) CAMERA DETECTION CHANNEL TITLE…
-
Page 23: System
ADVANCED MENU MOTION BUZZER Select to enable or disable the sound when any motion alarm is triggered (ON / OFF). ALARM DURATION (SEC) Press “ENTER” or “+” / “-” button to set the duration time of alarm recording in second (5 / 10 / 20 / 40). 7.5 SYSTEM In this menu list, you can check or change some system settings.
-
Page 24: Network
ADVANCED MENU VERSION Here shows the firmware version information. 7.6 NETWORK In this menu list, you can set up the network. Move the cursor to “NETWORK”, and press ”ENTER”. You will see a similar screen as the following: ADVANCE NETWORK CAMERA NETWORK TYPE STATIC…
-
Page 25
ADVANCED MENU ‧ PPPOE NETWORK TYPE Select the network type as PPPOE. USER NAME / PASSWORD Set the “username” and “password” subscribed from your ISP supplier DNS (PRIMARY DNS / SECONDARY DNS) Key in the IP address of the domain name server obtained from your ISP (Internet Service Provider). PORT The valid number ranges from 1 to 9999. -
Page 26: Backup
ADVANCED MENU DHCP NETWORK TYPE DHCP 000 . 000 . 000 . 000 GATEWAY 000 . 000 . 000 . 000 NETMASK 000 . 000 . 000 . 000 PRIMARY DNS 168 . 095 . 001 . 001 SECONDARY DNS 139 .
-
Page 27: Hdd Info
ADVANCED MENU Move the cursor to “BACKUP”, and press ”ENTER”. You will see a similar screen as the following: BACKUP USB BACKUP USB BACKUP START TIME 2006 – 12 – 01 21 : 35 : 00 END TIME 2006 – 12 – 01 21 : 45 : 00 AVAILABLE SIZE 1.460 GB HDD NUM…
-
Page 28: Event Log
ADVANCED MENU 7.9 EVENT LOG In this menu list, you can view all the event information (event type, time and channel) or clear all log records. Move the cursor to “EVENT LOG”, and press ”ENTER”. You will see the following options: ADVANCE EVENT LOG CAMERA…
-
Page 29: Remote Operation
REMOTE OPERATION 8. REMOTE OPERATION You can also control the DVR remotely via the supplied licensed software AP (hereafter called the “AP”), IE web browser, and Apple’s QuickTime player. 8.1 Supplied Licensed Software AP 8.1.1 Installation & Network Connection Install the software Place the supplied CD-ROM into your DVD- / CD-ROM drive.
-
Page 30: General Ap Operation
REMOTE OPERATION The default DVR values are as follows: Item Default Value IP address 192.168.1.10 User name admin Password admin Port Click (Search) (Refresh) to search the available IP address(es) of other ” ” ” ” DVR(s) under the same domain as your PC’s IP address. The found address(es) will be listed, and can be added into the address book by clicking (Add into address book).
-
Page 31: Playback
REMOTE OPERATION If “Manual” is checked, click “ ” (Record) on the main control panel to start the manual recording immediately, and the recordings will be saved in the specified location. The red text indication “REC” will be shown at the top left corner of the image display view.
-
Page 32: Network Backup
REMOTE OPERATION For the playback control panel details, please see “Playback Screen” at page 48. Network Backup Click “ ” (Miscellaneous Control) → “ ” (Backup) to go into the “Download” page as follows, and you can select a specific time range or event to make a video backup remotely. For details, please see “Backup” at page 33. 8.1.3 AP Control Panel After setting up the network information, login user name and password, double-click “…
-
Page 33
REMOTE OPERATION Button Function Description The place where the images are displayed. Image Display For details, please see “8.1.4 AP Functions” at page 30. Click to show the predefined IP address(es). You can add, remove or search the IP address to log in the DVR remotely. Address Book Two sub-functions are available for this button: Address Book and Search. -
Page 34: Ap Functions
REMOTE OPERATION 8.1.4 AP Functions Image Display Button Function Description Image View Tab Click the tab to select the view you want.. To see all views in the image display area if you have many views and do not want to switch each view by clicking the blue tab described above, click to choose a proper split view (1-cut / 4-cut / 9-cut / 16-cut) which Expand All Views best suits your needs.
-
Page 35
REMOTE OPERATION Click to view the pre-defined DVR access details. To log in, choose one IP address from the address list, and click the address twice; to log out, click the connected IP address twice. Tip: You can also click “ ”… -
Page 36: Miscellaneous Control
REMOTE OPERATION address to add into the address book, edit the details, or update the address list. Button Function Description Select from the available IP address list, and click this button to add the Add into address selected address to the address book. book Setting Select from the available IP address list, and click this button to edit the setting.
-
Page 37
REMOTE OPERATION Choose the desired channel from the drop-down list, and click and drag the slider to make adjustment. Click “ ” to apply the change to the selected channel, or “ ” to apply to all channels. To return to the default values, click “ ”… -
Page 38
REMOTE OPERATION Function Description click “Prev. Page” or “Next Page”. ‧To refresh the event list, click “Reload”. File Path Assign the location where the backup files are saved. Simultaneously Playback To view the backup images simultaneously when the download process is in progress, select the checkbox “Simultaneously Playback”. -
Page 39
REMOTE OPERATION Weekly Click “Weekly” tab, and you will see a weekly time table indicating the week days (Mon ~ Sun) and hours (0 ~ 24), similar to the figure below: X axis: 0 ~ 24 hours. Each time interval within a square is 15 minutes. Y axis: Monday ~ Sunday. -
Page 40
REMOTE OPERATION How to modify / delete a current time setting: 1. Select the schedule setting you want to modify from the schedule table. The setting will be displayed in the left setting panel. 2. Modify the setting in the left setting panel, and click “Update”. 3. -
Page 41
REMOTE OPERATION In “General”, you will see the following items: Item Description Firmware Version Display the current firmware version of your DVR. MAC Address Display the MAC address. Title Provide a title for this DVR. Only 15 characters are allowed. Logs Click “… -
Page 42
REMOTE OPERATION Supervisor Power User Normal User Guest Address Book ● ● ● ● Miscellaneous Control Color Setting ● Backup ● Record Setting ● ● ● ● Server Setting ● Tools ● Status List ● ● ● ● Record ● ●… -
Page 43: Function Description
REMOTE OPERATION Select the network type you will be using for DVR connection. There are 3 network connection types: Static IP, PPPOE and DHCP. Note: PPPOE and DHCP network connection types are required to apply the DDNS service to get a “Hostname”…
-
Page 44
REMOTE OPERATION DDNS Apply: a). Go to a website which provide the free DDNS service, for example, http://www.dyndns.org. b). Create an account in DynDNS. c). After creating one account, users will receive a confirmation E-mail within a few minutes. To complete the registration, please follow the instructions received. -
Page 45
REMOTE OPERATION MAIL Click “ ” (Miscellaneous Control) → “ ” (Server Setting) → “Network” → “MAIL” to go into the “MAIL” page. Enter the detailed E-mail information and press “Apply” to confirm. The information you set here will be applied when the function of E-mail notification is enabled in the «Alert» menu. Function Description Server… -
Page 46
REMOTE OPERATION Function Description MPEG Choose the image size (4CIF / CIF) and picture quality (BEST / HIGH / NORMAL / BASIC) when the web transmission format is MPEG. FrameRate Choose the frame rate for transmitting (FULL / HALF / ONE THIRD / QUARTER / FIFTH). In “Dvr”… -
Page 47
REMOTE OPERATION Camera In “Dvr” → “Camera”, you can specify a channel to enable the recording function by selecting the check box “Record”, choose to activate the “Covert Recording” function by selecting the check box “Cover”, and rename the channel title which will be displayed in the live view screen by double-clicking the channel title. -
Page 48
REMOTE OPERATION Function Description detection. The highest sensitivity setting is 0, and the lowest sensitivity setting is 15. The default setting is 2. “Reference”, is to set a reference for detection. The default value is 10, which means the DVR will compare 10 continuous images at one time according to the sensitivity of LS, SS, TS simultaneously. -
Page 49
REMOTE OPERATION Function Description Title Select to display the channel title in the live view. Event Select to display the event symbol in the live view. Full Sequence Duration Set the time-out in seconds (3 / 5 / 10 / 15) after which the channel display will be switched by one channel (Full Sequence Duration). -
Page 50
REMOTE OPERATION ‧Firmware To upgrade your DVR firmware remotely, click “Firmware” tab, and follow the steps below: a). In the “Firmware” section, you will see the current firmware version. To upgrade the firmware version of your DVR, click “Add” to locate and select the firmware file. The file will be shown in the firmware list. -
Page 51
REMOTE OPERATION a). Prepare a graphic file in the “BMP” format for replacement. Note: Use the image software to set the image size to 320 * 240, and save the image as an 8-bit (64-color) image in the «BMP» format. b) Click “Add”… -
Page 52: Button Description
REMOTE OPERATION Button Description Time Range To find the specific logs, set the time range (From / To), and the range unit here. Record Type Select the record type you want to search (User / Alarm / Motion / RETR). Query Click to start sorting the logs specified.
-
Page 53: Information
REMOTE OPERATION Function Description Playback / Download This area shows the detailed playback / download information, such as the file name, Info Display record date and time, and the speed, etc. Playback Progress Bar This area shows the playback progress and the progress percentage. Playback Operation This area is enabled only when the playback is started.
-
Page 54
REMOTE OPERATION Function Description Channel Click the channel No. (CH1 ~ CH4) to see the live view of the selected channel. Selection 4-Cut Image This 4-cut view button is disabled because this DVR doesn’t support this button. Display Key Lock Click to enable the DVR key lock function. -
Page 55: Ie Web Browser
Web Transmission Format Main Menu Select the web transmission format: MPEG4 or Quick Time. QuickTime is Apple Inc.’s multimedia software. You need to have QuickTime installed in you operation system first. When “QuickTime” is selected, you will be promoted to enter the user name and password to access the server of the DVR.
-
Page 56: Quicktime Player
Step 2: Open your QuickTime player. Select “File” → “Open URL”, and key in the URL address. The URL format is “rtsp://ipaddress/live/mpeg4” (For example, “rtsp://59.124.231.75/live/mpeg4”). Click “OK” to continue. Step 3: A pop-up window will appear and prompt you to enter the authentication information. Key in the user name and password for accessing your DVR.
-
Page 57: Appendix 1 Compatible Usb Flash Drive Brand
APPENDIX 1 COMPATIBLE USB FLASH DRIVE BRAND APPENDIX 1 COMPATIBLE USB FLASH DRIVE BRAND Please upgrade the firmware of the DVR to the latest version to ensure the accuracy of the following table. If the USB flash drive is not supported by the DVR, the «USB ERROR» message will be shown on the screen. Note: Please use your PC to format the USB flash drive as «FAT32».
-
Page 58: Appendix 2 Compatible Hdd Brand
APPENDIX 2 COMPATIBLE HDD BRAND APPENDIX 2 COMPATIBLE HDD BRAND Please upgrade the firmware of the DVR to the latest version to ensure the accuracy of the following table. MANUFACTURER MODEL CAPACITY ROTATION Deskstar 7K250, HDS722516VLAT20 160GB 7200 rpm HDS722516VLAT80 160GB 7200 rpm HITACHI…
-
Page 59: Appendix 3 Troubleshooting
APPENDIX 2 COMPATIBLE HDD BRAND APPENDIX 3 TROUBLESHOOTING Please refer to the table below for easy troubleshooting. The table describes some typical problems and also their solutions. Please check them before calling your DVR dealer. ‧ FAQ (Frequently ask question) Questions Solutions No power…
-
Page 60: Appendix 4 Default Value
APPENDIX 4 DEFAULT VALUE APPENDIX 4 DEFAULT VALUE ‧ Default Value Items Default Value ‧ DVR Side: ADMIN Password 0000 Channel Title Display Event Status Display Image Size Record Timer Detection Timer Date Format Y/M/D Daylight Saving Camera – BRIG (Brightness) Camera –…

Автосервис «Ралли»
МЕНЮ
Обновлено: 24.09.2023
Читайте также:
- Инструкция видеорегистратор erisson vr sf111 — 89 фото
- Как настроить универсальный пульт на кондиционер митсубиси — 91 фото
- Лачетти термостат на 92 плюсы и минусы — 95 фото
Обновлено: 24.09.2023
В этом анекдоте высказывается мнение производителя, что прежде чем включать прибор, необходимо обязательно прочесть инструкцию. Я не думаю, что это нужно делать обязательно. Человеку с навыками, часто имеющему дело с электроникой, как правило, инструкция не нужна. Но бывают случаи, когда руководство по эксплуатации может значительно облегчить жизнь и сэкономить потраченное время. Именно для таких случаев я и размещаю на своем сайте инструкции, скачать бесплатно их можно в любой момент. За время существования сайта их накопилось уже достаточно много и что бы как-то облегчить поиск и скачку, инструкции теперь будут размещаться по производителям. Ниже списка производителей остальные инструкции (которые не вошли в отдельные каталоги) даны общим списком. Выбирайте как Вам удобнее.
На этой странице размещены инструкции автомобильных видеорегистраторов, скачать их можно абсолютно бесплатно, без отправки СМС, в общем без всяких попыток вымогательства.
Форум по системам видеонаблюдения, безопасности, пожарным и охранным сигнализациям, контролю доступа.
Avtech 8ch dvr программное обеспечение очень нужен совет
Avtech 8ch dvr программное обеспечение очень нужен совет
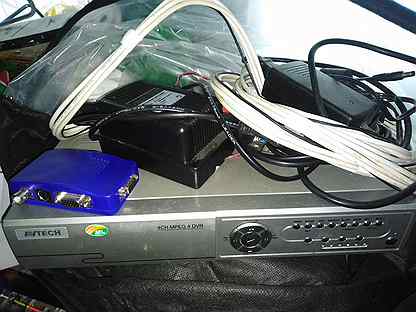
Добрый день может кто-нибудь подскажет как мне определить марку Avtech. Кручу его по всякому не могу увидеть марку и документов нет, на корпусе только 8CH H.264 DVR + не могу к нему подобрать программное обеспечение — тот кто подсунул родственникам ни дал ни руководство, ни диск с ПО, он пол года назад им продал его — сказал что навороченный, а я смотрю там даже меню коряво на русский переведено когда забиваешь пароль там вместо пользователя сверху на русском Админю, я набираю 0000 и захожу. а мне нужно по сети и через интернет.
А главное тот мужик увидел что я «капаюсь» в регистраторе — подлетел и девчонкам продавцом начал кричать что отказывается от всего обслуживание и т.д. Странно и подозрительно — не подсунул ли он чего такое — что по сети не работает — хотя он же как бы новой модели. Странно он знал что компьютер есть — мог же сразу настроить ПО для просмотра по сети?
DVR Client — программа, предназначенная для работы с удаленными записывающими устройствами систем видеонаблюдения. В частности, она умеет транслировать и записывать видео с IP камер и рекордеров, сохраняя его при этом в собственный архив. Из самых важных преимуществ клиента стоит выделить относительно простой интерфейс, а также поддержку кодека H.264, который обеспечивает высокой качество изображения при неплохом сжатии.
Интерфейс и возможности
Главное окно DVR Client состоит из отдельных блоков, каждый из которых отвечает за трансляцию картинки с одной камеры/рекордера. При необходимости таких блоков может быть до двенадцати. С большим количеством устройств, программа, к сожалению, работать не умеет. При необходимости пользователь может переключаться между пресетами расположения блоков, а также изменять позиционирование камер и включать/выключать трансляцию звука. Сделать это можно из удобного всплывающего меню.
Дополнительные функции
Из дополнительных возможностей DVR Client H 264 стоит отметить создание визуальной карты подключенных устройств и наличие удобного менеджера для управления ними. Также в программе реализована возможность работы с несколькими учетными записями.
Ключевые особенности
- трансляция видео и звука с подключенных камер и рекордеров;
- удобный интерфейс, позволяющий настроить расположение блоков с картинкой из разных источников;
- ведение подробного журнала событий;
- режим детектора движений;
- удобный пошаговый мастер для подключения новых устройств;
- поддержка кодека H.264.
Этот софт позволяет с легкостью управлять довольно большим количеством камер с одного компьютера.
Для начала нужно, конечно же, авторизоваться.
Далее программа предложит выбрать название для рабочей зоны. Можно обойтись просто номером. Однако когда используется огромное количество видеофиксаторов, то есть смысл их зонировать.
На экране отобразится изображение, посылаемое со всех подключенных устройств.
Так, в период с 00.00 и до 9.00 камера активируется по движению. Это сделано потому, что в ночное время видеонаблюдение выполняет в основном функции охранной системы, и если кто-то захочет пройти, то обязательно будет заснят. А лишняя информация – нет.
С 9.00 и по 18.00 выставлена постоянная фиксация. Это позволит в любой спорной ситуации обратиться к отснятым материалам и пролить свет на темные стороны дела. С 18.00 и по 23.59 – вновь видео записывается по детекции.
Более подробную инструкцию по работе с программой можно посмотреть ниже в листающемся PDF файле. Если он не отображается, перезагрузите страницу сайта или кликните по ссылке в конце статьи.
Читайте также:
- Gfl 120 lada vesta и gfl 130 lada vesta отличия
- Какие шины выбрать на микроавтобус
- Педаль газа поднимается вверх
- Автомагнитола prology mch 365u инструкция
- Starline 2 приложение инструкция

