TM-xA Series
Barcode Label Printing Scale User
Manual
Modal:TM-30A /TM-15A / TM-6A
2008.06 Version1.51
Preface
Thank you for use the product. Before you start to use this product, please be sure you have read the
content in the 《Preface》 and follow these notices.
1.1 Notices:
Make sure the electric plugs and wires are all properly connected, and use the 3-cell electric wire only. If an extension-board is used, the outlet of the extension-board is also 3-cell. Make sure the earth wire is properly connected to the earth in order to prevent the leakage of electricity.
Don’t touch the electric plug with wet hand, in case of electric shock.
Don’t lean your body on the scale to avoid damaging the load cell.
Don’t impact the scale or shock the scale with heavy goods, in case of damaging the load cell. When weighing, don’t exceed the maximum weighing range
Don’t get the product rained or washed by water; If there is some water on the product by inadvertence, please wipe it clean with a dry cloth; If the scale doesn’t work normally, please send the scale to our distributor as soon as possible. We shall do our best to service you.
Don’t put the scale in the places which are ultimately cold, hot or wet. These working conditions may make the product not work normally or damage the product.
Don’t use organic chemistry solutions to wipe the surface or the panel of the product.
Don’t try to take the scale apart and repair the scale by non-professonal staff.
Don’t put your hands into the product through the place where the printer spins out. It may cause electric shock with 110V/220V electricity.
Cut the connection between the scale and AC electricity when taking the scale apart under the guidance of professional staff from our company.
Don’t try to disassembly the switch power inside of the scale. Because it takes a long time to discharge the high voltage capacitance, and it’s very dangerous to disassembly the switch power when the high voltage capacitance is not fully discharged.
Strongly recommend users to use thermal paper sold by our company. The scale can have a longer
life if working with thermal paper sold by our company because we have done a lot of experiments and optimizations on the our thermal paper. On contrary, the life span of the printer may get shortened if the printer works with the thermal paper which is likely to deposit or leave carbon deposits.
Thermal header is a precise instrument. Don’t touch it with fingers or sharp tools. Always use the
accessary cleaning tools to keep the header clean.
i
1.2 Guide to read
Please go to page 6 《Thermal printer》 and learn the method to install paper and notices for users.
Please read page 2《General functions, configuration and using index》carefully first in order to know
about the performance of the scale.
Please read page 15 《Fast Prog》carefully first , and learn frequently used programme operations of the
scale.
For ordinary users, please first read page 19, the two chapters 《Transfer and Lock of PLU》(page 19) and
《
Manual Goods Sale》 (page 21) in the 《Sale Operations》, and learn general sale operations of the scale.
For ordinary users, read page 98《Account Operations》, get to know how to print the report forms and
delete the records. And read page 36《Inquiry of Sale Records and Markers of Returns of Goods》to learn
how to look over the recent sale records.
For advanced users, read the rest of 《Sale Operations》, and learn auto mode and other functions.
For professional users, such as managers in big supermarket, should continue reading the rest of the instruction.
When error warning shows up, check 《Error: No se encuentra la fuente de referencia》 in page
Error: No se encuentra la fuente de referencia .
ii
Menu
Preface …………………………………………………………………………………………………………..
i
1.1 Notices: …………………………………………………………………………………………………….
i
Make sure the electric plugs and wires are all properly connected, and use the 3-cell electric wire only. If an extension-board is used, the outlet of the extension-board is also 3-cell. Make sure the earth wire is properly connected to the earth in order to prevent the leakage of electricity.
……………………………………………………………………….
i
Don’t touch the electric plug with wet hand, in case of electric shock.
………………….
i
Don’t lean your body on the scale to avoid damaging the load cell.
………………………
i
Don’t impact the scale or shock the scale with heavy goods, in case of damaging the load cell. When weighing, don’t exceed the maximum weighing range …………….
i
Don’t get the product rained or washed by water; If there is some water on the product by inadvertence, please wipe it clean with a dry cloth; If the scale doesn’t work normally, please send the scale to our distributor as soon as possible. We shall do our best to service you.
…………………………………………………………………………………
i
Don’t put the scale in the places which are ultimately cold, hot or wet. These working conditions may make the product not work normally or damage the product.
…………………………………………………………………………………………………………..
i
Don’t use organic chemistry solutions to wipe the surface or the panel of the product.
…………………………………………………………………………………………………………..
i
Don’t try to take the scale apart and repair the scale by non-professonal staff.
……….
i
Don’t put your hands into the product through the place where the printer spins out.
It may cause electric shock with 110V/220V electricity.
……………………………………….
i
Cut the connection between the scale and AC electricity when taking the scale apart under the guidance of professional staff from our company.
…………………………………
i
Don’t try to disassembly the switch power inside of the scale. Because it takes a long time to discharge the high voltage capacitance, and it’s very dangerous to disassembly the switch power when the high voltage capacitance is not fully discharged.
………………………………………………………………………………………………………
i
Strongly recommend users to use thermal paper sold by our company. The scale can have a longer life if working with thermal paper sold by our company because we have done a lot of experiments and optimizations on the our thermal paper. On contrary, the life span of the printer may get shortened if the printer works with the thermal paper which is likely to deposit or leave carbon deposits.
…………………………
i
Thermal header is a precise instrument. Don’t touch it with fingers or sharp tools.
Always use the accessary cleaning tools to keep the header clean. ………………………..
i
1.2 Guide to read …………………………………………………………………………………………….
ii
Please go to page 6
Thermal printer 》 notices for users.
……………………………………………………………………………………………..
ii
Please read page 2
《 carefully first in order to know about the performance of the scale. ………………………………………….
ii
Please read page 15 Fast Prog 》
iii
programme operations of the scale. ………………………………………………………………….
ii
For ordinary users, please first read page 19, the two chapters
《 of PLU 《 》 《 and learn general sale operations of the scale.
…………………………………………………….
ii
For ordinary users, read page 98 《 》 the report forms and delete the records. And read page 36 Inquiry of Sale Records and Markers of Returns of Goods
……………………………………………………………………………………………………………………..
ii
For advanced users, read the rest of
Sale Operations 》 other functions. ………………………………………………………………………………………………
ii
For professional users, such as managers in big supermarket, should continue reading the rest of the instruction. …………………………………………………………………….
ii
When error warning shows up, check Error: No se encuentra la fuente de referencia
》
………………….
ii
Menu ……………………………………………………………………………………………………………
iii
Examples Menu ……………………………………………………………………………………………
xx
1 Components of Barcode Lbel Printing Scale …………………………………………………
1
1.1 Check Accessories ……………………………………………………………………………………..
1
One Barcode label Printing Scale; …………………………………………………………………..
1
One display pole; …………………………………………………………………………………………..
1
One tray; ………………………………………………………………………………………………………
1
One pack of screws used to fix the pole; …………………………………………………………..
1
One copy
《 TM-xA Series Barcode Label Printing Scale User Manual (this book); 1
One CD for PC software 《 》 ……………………..
1
One set of clean appliance for thermal printer head; …………………………………………..
1
One overlay for shortcut PLU; ………………………………………………………………………..
1
One power plug …………………………………………………………………………………………….
1
1.2 Keyboard ………………………………………………………………………………………………….
1
1.2.1 The original overlay of the keyboard ……………………………………………………………………………………………
1
Picture 1.1 Sketch map of keyboard function ………………………………………………………………………….
1
1.2.2 Instructions for Keys ………………………………………………………………………………………………………………….
1
1.2.3 Instruments for Keys in Function Area …………………………………………………………………………………………
2
【 】: Enter sale mode and execute the operation of goods sale.
…………………..
2
Prog 】: Enter programme mode and can programme scale parameters, PLU, print formats, time and so on. …………………………………………………………………………..
2
【
】 . 2
【 】 again. …………………………………………………………………………………………………………….
2
【
】 number in input window, number tare is the priority.). Pressing Tare 】 time without releasing, system would enter
【 . And do it again to exit this state.
……………………………………………………………………………………………………………………..
2
iv
Zero 】 allowed range, set zero would fail. ……………………………………………………………………
2
Shift 】 : Shife key used for extending PLU shortcut key, and switching case sensitivity in text input interface. When current input number is decimal (tare, weight, U.Price, T.Price) , long press Shift 】 point.
……………………………………………………………………………………………………………..
2
【 mode if current sale buffer is empty. …………………………………………………………………
2
【
: The key owns no meaning in this edition. The print type is decided by selected Print format. ………………………………………………………………………………………
2
【 Paper type 】 plain thermal paper. ………………………………………………………………………………………..
2
Re-print 】 stored in deal records as sale record.). This function can be forbidden in Spec.
………
2
【 】: Roll the gap thermal paper or plain thermal paper. Unprinted buffer data will be cleared in the process of feed.
………………………………………………………………..
2
【
】: Discount in percentage, . Please notice that input is decimal and pay extra attention to the position of decimal point. Discount is 5% off while input is 500, if there are two zeroes after decimal point. And input should be 5000, If there are three zeroes.
……………………………………………………………………………………………………………
2
【 】: Discount in subtraction. . Input is also decimal. ……………………………
3
【
】
………………………………….
3
【 】 price unit of temporary weight PLU. For example, when users set the price unit of temporary weight PLU is 500g while the unit of the scale is kg, system would automatically convert input number (double input number). ……………………………….
3
【
】: Open drawer besides normal operations.
…………………………………..
3
【 】 to process instructions to understand the use of combination keys. ………………………
3
【 】: Input count amount in sale. Or do temporary count goods sale according to inputted U.Price.
……………………………………………………………………………………………..
3
Amend 】 : Amend deal data in sale interface and store amended data in programme interface. ………………………………………………………………………………………
3
【←】【↑】【↓】【→】:
Switch among neighbouring steps and numbers in programme and account interfaces.
……………………………………………………………………
3
【 】~【 】: Activate corresponding sale buffers. ………………………………..
3
0 】~【 9 】、【 00 Input corresponding numbers.
……………………………….
3
【 】 ……………………………………..
3
【
】
……………
3
Cash/Print 】 according to setting. ……………………………………………………………………………………….
3
【
】: Clear data, cancel operations or go back to previous step.
…………….
3
【 】 confirmation operations.
…………………………………………………………………………………..
3
1.2.4 Character Input Instructions ………………………………………………………………………………………………………..
3
v
【
【
】
】
………………………………………………..
…………………………………..
3
3
【 : Confirm the input in special IME (not used in pure English version). . 3
【 End
】 3
【 】 ………………………………..
3
Insert 】 when cursor is constant on, insert mode is activated when cursor is glittering.
……….
3
【 】
2 (in big letters), Code(machine code). There are special IMEs for not pure English version (e.g., Chs for Chinese ISN.) ………………………………………………………………….
3
【 】 ……………………………………………..
3
【←】【→】
: Move current editing position backwards or forwards.
……………….
3
9 】 【 】 】 ……………………
4
The first window: Display current input mode: one of En-1, En-2 and Code.
………..
4
The second window: Display the position of current editing letters in the text.
……..
4
The third window: Display current editing position and content of neighbouring letters. In En-1 or En-2 ASCII mode is displayed, in Code Hex mode is displayed.
Cover mode is activated when cursor which shows the position is constant on; insert mode is activated when cursor is glitter.
…………………………………………………………….
4
The fourth window: Display current input content. In En-1 or En-2 the window displays nothing, and in Code displays the inputted machine code. ……………………..
4
En-1: Input numbers or ASCII characters. For the keys with ‘/’, input character is the one on the left of ‘/’. Pressing 【 , next input character and only this one is under the rule of En-2 . ……………………………………………………………………………………
4
En-2: Input numbers or ASCII characters. For the keys with ‘/’, input character is the one on the right of ‘/’. Pressing 【 , next input character and only this one is under the rule of En-1 .
…………………………………………………………………………………
4
Code: Input machine code mode. Users can input ASCII, symbols in special IMEs.
The system could automatically distinguish the input content as ASCII, symbols in special IMEs. Machine codes of each field can be found in following table. …………
4
1.3 Display Panel ……………………………………………………………………………………………
4
1.3.1 Sketch Map of Display Panel ………………………………………………………………………………………………………
4
Picture 1.1 Display overlay …………………………………………………………………………………………………..
4
1.3.2 Indication Signs ………………………………………………………………………………………………………………………..
4
【 】 ………………………………………………
4
【
】
…………………………………………………………
4
【 】 【 】
Under this condition, tare would not be cleared after the sale. Long press Tare 】 again would exit lock tare.
……………………………………………………………………………….
4
【 】 press
【 would lock PLU. Under this condition, after the sale, the former PLU sale state would remain till new PLU is transferred. Long press 【 again would exit lock PLU.
…………………………………………………………………………………………………
5
Auto mode 】 automatically. In auto mode: If a weight PLU is transferred, print would operate
vi
automatically in condition that weight is new (Weight was set to zero in last sale.). If a count PLU is transferred, system would print the amount bill when the print amount has been set.
………………………………………………………………………………………..
5
【
】
………………………………….
5
【 paper.
……………………………………………………………………………………………………………..
5
【
】 【 】
……………………………………………………………
5
【 】 …………………………………………………………………………
5
【
】
……………………………………………………………..
5
【
【
【
】
】
……………………………………………………………..
………
5
5
】
【 】 : It’s on when there are buffers in V1~V4 records. And it’s glittering in edit mode.
………………………………………………………………………………………………………
5
【 】
U.Price; when display total means that current accumulative total has been discounted in T.Price ………………………………………………………………………………………
5
【 : It’s on when current goods’ single price is displayed in fourth window. . 5
【
】 fourth window. ……………………………………………………………………………………………….
5
1.3.3 Expression of Characters …………………………………………………………………………………………………………….
5
Picture 3.1 Number characters 0 ………………………………………………………………………………………
5
Picture 3.2 Characters A
~
………………………………………………………………………………………………..
5
Picture 3.3 Characters N ~ …………………………………………………………………………………………………
5
Picture 3.4 Dash 、 ………………………………
5
Dash of special symbols: the same as ‘-’ in ASCII. ……………………………………………
6
Underline of special symbols: Used to represent the characters which cannot be displayed in ASCII(the symbols except 0
~ ~
………………………………..
6
Aboveline of special symbols: Used to represent extended characters. In Chinese edition, two aboveline represent a Chinese character. In Russian edition, one aboveline represent a Russian character.
…………………………………………………………….
6
Three lineations of special symbols: In calibrating processes, it’s used as a prompt to decide to enter demarcated interface or standard interface. ……………………………..
6
1.4 Specifications ……………………………………………………………………………………………
6
Power supply: AC 90V~264V, 47~63Hz …………………………………………………………..
6
Operation temperature: 0℃ ~ …………………………………………………………………..
6
Conservation temperature: -20℃
~
…………………………………………………………..
6
Operation humidity: 15% ~ …………………………………………………………………
6
1.5 Thermal printer …………………………………………………………………………………………
6
1.5.1 Install gap paper ………………………………………………………………………………………………………………………..
6
Picture 1.1 Open side door of scale printer ……………………………………………………………………………..
6
Picture 1.2 Open press mouth ………………………………………………………………………………………………..
7
Picture 1.3 Place paper roller ………………………………………………………………………………………………..
7
Picture 1.4 Install paper loop …………………………………………………………………………………………………
7
vii
Picture 1.5 Finish installing paper ………………………………………………………………………………………….
8
Picture 1.6 Close side door of scale printer ……………………………………………………………………………..
8
1.5.2 Gap paper mounts recycle …………………………………………………………………………………………………………..
9
Picture 2.1 Gap paper mounts recycle …………………………………………………………………………………….
9
1.5.3 Install plain paper ………………………………………………………………………………………………………………………
9
1.5.4 Operations concerning paper ……………………………………………………………………………………………………….
9
【
】
【
Gap Paper is light in the display, you should set to use gap paper. Otherwise you should set to use plain paper. If the type of paper you set to use is different from the type currently used, please long press 【 】 ………………
9
【 Feed 】 【 Feed 】 【 Feed to clear abnormities of the printer and make paper roll for a certain length.
………………………
9
1.5.5 Abnormity of gap paper print ………………………………………………………………………………………………………
9
Install gap label paper, and make the edges of label paper and print head parallel. .. 9
Switch off the scale. There are two keys near the component which draws back the paper in the printer. Press and hold these two keys, and switch on the scale. …………
9
After the printer is started, printer would roll out the paper at the length of 75mm. . 9
After the paper is rolled out, malfunctions have been eliminated if two test lights don’t glitter and one light is on and the other is off. ……………………………………………
9
Then, press the key near to the component which draws back the paper. There would be one test paper been printed.
………………………………………………………………..
9
Go to normal operation processes. …………………………………………………………………
10
Picture 5.2 Test keys of printer …………………………………………………………………………………………….
10
2 General functions, configuration and using index ………………………………………..
11
2.1 General functions …………………………………………………………………………………….
11
The printer can store 5990 PLUs, and the user can edit numbers of PLU from 10 to
5999. …………………………………………………………………………………………………………..
11
Users can use gap thermal paper and plain thermal paper. ………………………………..
11
The printer provides many kinds of price input and discount. ……………………………
11
The printer provides reports printing for different time periods and classifications
……………………………………………………………………………………………………………………
11
Precision of measurement: business mode 1/6000, industrial mode 1/30000.
………
11
You can use USB flash disk to transfer and save the data. All the parameters can be set on the compter and downloaded with USB flash disk. ………………………………….
11
2.2 Setting of Print Format ……………………………………………………………………………..
11
Press
【 】 for 4 seconds to switch between gap paper and plain paper.
This key would amend Spec021.
……………………………………………………………………..
11
There are 9 kinds of print formats. Please reference to page 48 table 5-5 Factory default print formats 》 …………………………………………………………………………………..
11
58mm*40mm and 40mm*30mm gap paper, 58mm and 40mm width plain paper are available in default print formats. When using different type of paper, please adjust the corresponding Spec shown in the table below. ……………………………………………
11
Print formats include label print and receipt print. If user need to custom print
viii
format, please use PC ssoftware to change or contact with appointed after-service cencer. …………………………………………………………………………………………………………
12
Don’t print bills while saling: amend Spec003 and Spec008 to 0. If some specific deals need to print bills, please press
【
………………………………………….
12
To print a few copies of one bill, put the amount into Spec003 and Spec008. ……..
12
To print two different kinds of bills: set the type of one kind of bill in
Spec000~Spec009, and set the another in Spec010~Spec019. Strongly suggest users contact with appointed after-service cencer. …………………………………………………….
12
Set grey level of gap thermal paper in Spec022. ………………………………………………
12
Set grey level of plain thermal paper in Spec023. ……………………………………………
12
The distance for paper cut should be long enough. Usually the value you set in
Spec025 is bigger than 30 when plain paper is used.
…………………………………………
12
You can set different kinds of print formats and barcode types for each PLU. You can check the details in PLU parameters for print formats and barcode types. Set the value of these parameters to 0 if you choose the system type.
…………………………….
12
The procedures to confirm print format: take bill 1 as an example. If two or more goods are sold, print sum bill and use Spec005 as print format. If only one good is sold, print the item bill. If sale PLU has been set for a specific print format (not 0), system would use this special print format. If no specific print format has been set to sale PLU (The setting number is 0.), the print format would be Spec000..
…………..
12
2.3 Barcode Settings ……………………………………………………………………………………..
12
9 kinds of barcode settings, details in page 78 1.4
《 …
Barcodes can be divided by purpose into item barcodes and total barcodes, which are printed in item labels and total labels respectively. If users need to custom print format, please use PC software to change or contact with appointed after-service center. ………………………………………………………………………………………………………….
12
2.4 Measure Functions ………………………………………………………………………………….
13
The scale offers 6 measure units as kg, gram, ton, lb, 500g, 100g. …………………….
13
Based on the difference national regulations, some of the measure unit may Not
Open. The combinations and recommended Spec settings are all shown below:
Weight precision: The precisions are divided into four levels. Level 0 owns original
1/3000 . Level 0 and level 1 are available for commercial users while level 2 and level 3 are only available for industrial users (“Ind” would be attached in the print of weight). Please refer to Spec213. ……………………………………………………………………
13
We guarantee the stability and reliability for precision level 0 (1/3000 ) when the scale leaves factory. But the higher precisions are just to satisfy the need of high definition print for some users, so factory would not guarantee the stability and reliability for higher precision levels for every scale. Please choose the precision prudentially.
………………………………………………………………………………………………….
13
The request Zero-Return for scale print: it’s requested in commercial sales that the display have to return to zero when the scale is going to print the weights of two goods. But for industrial users, this rule could be ignored. Set the value of Spec069 to 2. (“Ind” would be attached in the print of weight). ………………………………………
13
2.5 Sale Functions ………………………………………………………………………………………..
13
ix
Users could operate accumulative sales with 4 customers at the same time. Please refer to the 1.1 in page 32 for operations. ………………………………………………………..
13
Rounding methods could be divided into rounding method for single and rounding method for total. The settings of rounding methods are shown in Spec100 and
Spec101.
………………………………………………………………………………………………………
13
Suggest that set the value of Spec100 to 1 if users don’t want the unit “cent” to be displayed in sales.
………………………………………………………………………………………….
13
Suggest that set the values of Spec100 to 0 and Spec101 to 1 if users want the unit
“cent” to be in sale while unit “cent” is not displayed in grandtotal and print.
………
13
The units’ conversion for preset PLU U.Price: for example: set PLU10 U.Price to
10.00, the unit is 500gram and unit displayed is kg. When transfer PLU10, unit price is displayed as 20.00.
……………………………………………………………………………………..
13
Units’ conversion for temporary unit price: the scale offers the function of units’ conversion for temporary unit goods and price from 500gram to kg. When U.Price’ display unit is /kg, set the value of Spec210 to 7 and the value of Spec073 to 1 to activate this function. Please refer to the 1.2 in page 20, 1.1in page 27.
……………….
13
No Weigh Sale for Weight PLU: set the value of Spec071 to 1. When the weight returns to zero in weigh sale, input the price and sell the goods at the price you input. Please refer to 1.1 in page 22.
………………………………………………………………..
13
Users can discount on U.Price and T.Price conveniently. The discount methods include discount at a fixed number, discount in subtraction and discount in percentage. Please refer to
《 》
……………………..
14
2.6 Report Functions …………………………………………………………………………………….
14
Users could print the total reports with time periods of last 32 stat. day, stat. month, stat. quarter or manual time period.
…………………………………………………………………
14
Users can print the reports for all departments, all classes and part of PLU (below
1000), with a time period of present stat. day, stat. month, stat. quarter or manual time period.
…………………………………………………………………………………………………..
14
Please refer to 《 》 …………………….
14
3 Fast Prog ……………………………………………………………………………………………………
15
3.1 Fast-Prog of PLU …………………………………………………………………………………….
15
Example 1.1 Fast-Prog of PLU ……………………………………………………………………………………..
15
Note 1 Except the parts which have been instructed, meaning of the other words are listed in 《 》 ………………….
16
Note 2 PLU fast-prog is forbidden when SPEC080=0. ………………………………
16
Note 3 Before you move to next step, if it display “ E1.01 Data Invalid”, it means that the programme data you input is invalid. …………………………………
16
Note 4 The xx in PLU.xx means the content in the data which is marked with the number of xx in PLU fast prog. …………………………………………………………
16
Note 5 Xx is not continuous when users press to select the programme content. There are two reasons. First reason is that the content in that part is meaningless. For example, tare will not present in count PLU programme. The second reason is that the content in that part is seldom used and has been set as non-programme content (Skip) in P3.01 and P3.02. Users
x
could change that setting for personel usage. Please refer to corresponding chapters for details.
…………………………………………………………………………………
16
Note 6 PLU that users can edit are from 10 to 5999, total 5990 PLU.
…………..
16
3.2 Fast-Prog of Shortcut Key for PLU ……………………………………………………………
16
Example 1.1 Fast-Prog of Shortcut Key for PLU. Amend a shortcut key. ………………………….
17
Note 1 When SPEC081=0, PLU shortcut-key fast-prog is forbidden. ………….
17
Example 1.2 Fast-Prog of Shortcut Key for PLU. Amend two or more shortcut keys.
…………
17
Note 1 When SPEC081=0, PLU shortcut key fast prog is forbidden.
……………
17
3.3 Fast-Prog of Spec Parameters ……………………………………………………………………
17
Example 1.1 Fast-Prog of Spec Parameters …………………………………………………………………….
18
Note 1 Spec fast-prog programme is forbidden when SPEC082 = 0. …………..
18
Note 2 Refer to 《 》 the definitions of data parameters . ………………………………………………………….
18
Note 3 Read the definition of the parameter before you change it. And don’ t change any unknown parameters in Spec programme. ……………………………….
18
Note 4 xxx in SP.xxx means the number of the data content in Spec programme. …………………………………………………………………………………………..
18
Note 5 xxx is not continuous when users press 【 】 programme content. That’s because users can only select Spec in level 0 by pressing 【 】 pressing
【 to change Spec in level 1. And users cannot change Spec in level 2 and level 3 because their data are involved with some specifications in measurement and other hardware fields.
……………………………………………………
18
4 Sale Operations ………………………………………………………………………………………….
19
4.1 Transfer and Lock of PLU …………………………………………………………………………
19
4.1.1 Transfer by using PLU number ………………………………………………………………………………………………….
19
Example 1.1 Use PLU number to transfer weight PLU …………………………………………………….
19
Example 1.2 Use PLU number to transfer count PLU ………………………………………………………
19
4.1.2 Tranfer by Using PLU Shortcut Keys …………………………………………………………………………………………
19
Example 1.1 Use PLU shortcut keys to transfer weight PLU …………………………………………….
19
Example 1.2 Use PLU shortcut keys to transfer count PLU ………………………………………………
20
4.1.3 Transfer Temporary Weight PLU (The number of PLU is 1) …………………………………………………………
20
Example 1.1 Transfer temporary weight PLU …………………………………………………………………
20
Note 1 Temporary weitht PLU could be converted into count PLU if users press
【 or the weight is zero.
…………………………………………………………..
20
Example 1.2 Transfer temporary weight PLU with a unit conversion of the U.Price.
…………..
20
Note 1 Assume temporary weight unit is 500g(Spec210) and the unit of scale is kg. After input the U.Price of 1.70 and press
【 , the U.Price is converted into 3.40. That means the conversion of the unit between 500g and kg is done.
…………………………………………………………………………………………………………….
20
4.1.4 Transfer temporary count PLU (The number of PLU is 2.) …………………………………………………………..
21
Example 1.1 Transfer temporary count PLU …………………………………………………………………..
21
4.1.5 Lock and unlock of PLU ………………………………………………………………………………………………………….
21
xi
Example 1.1 Lock and unlock PLU ………………………………………………………………………………
21
Note 1 For weight PLU, the tare is locked while you lock PLU without exiting
PLU.
……………………………………………………………………………………………………..
21
Note 2 When you long press
PLU 】 correctness or error) . Hold pressing for 4 seconds you will hear the beep for correctness. …………………………………………………………………………………………..
21
Note 3 Once PLU is locked, it wouldn’t be unlocked unless users unlock PLU manually. ……………………………………………………………………………………………..
21
Note 4 There’s no difference in weight or count for lock temporary goods. The scale could distinguish weight or count according to operation process. ………
21
Note 5 When users try ro enter auto mode and then exit the mode, the scale would unlock the lock of PLU because auto mode could influence on lock of
PLU.
……………………………………………………………………………………………………..
21
4.2 Manual Goods Sale …………………………………………………………………………………
21
4.2.1 Sale and Print of Single Weight Goods ……………………………………………………………………………………….
21
Example 1.1 Sale for single weight goods …………………………………………………………………….
21
Note 1 Two qualifications are indispensable when directly print without accumulating: 1. Current accumulative buffer is empty, 2. The value of
SPEC060 is not set to be 3 (cashing mode without zero change default).
……..
22
Note 2 The system would have to wait for several seconds if users sell the weigh goods when the display of weight is not stable. If the display of weight is stable in the waiting time, system would sell the goods according to the operations. Please refer to SPEC151 about the waiting time. ……………………..
22
4.2.2 Sale and Print of Single Count Goods …………………………………………………………………………………………
22
Example 1.1 Sale and print for single count goods …………………………………………………………..
22
Note 1 Two qualifications are indispensable when directly print without accumulating: 1. Current accumulative buffer is empty, 2. The value of
SPEC060 is not set to be 3 (cashing mode without zero change default).
……..
22
4.2.3 No Weigh Sale for Weight Goods ………………………………………………………………………………………………
22
Example 1.1 No Weigh Sale for Weight PLU ………………………………………………………………….
22
Note 1 To execute no weigh sale, the value of Spec071 needs to be set to 1 while the default value is 0. …………………………………………………………………….
23
Note 2 No weigh sale for temporary goods is not restricted by Spec071. And it will automatically convert to count sale for temporary count goods.
……………
23
4.2.4 Sale and Print for different kinds of goods (No Cashing Mode) …………………………………………………….
23
Example 1.1 Sale and print for different kinds of goods (No Cashing Mode) ……………………..
23
Note 1 Users can execute no cashing mode when the value of SPEC60 is 0 or
1. …………………………………………………………………………………………………………
23
4.2.5 Sale and Print for Different Kinds of Goods (cashing mode, input payment) …………………………………..
23
Example 1.1 sale and print for different kinds of goods (cashing mode, input payment) ………
23
Note 1 Cashing mode is available and change interface is displayed when the value of SPEC60 is 1, 2, or 3. …………………………………………………………………
24
4.2.6 Sale and Print for Different Kinds of Goods (cashing mode, payment equal to price) ………………………
24
Example 1.1 Sale and print for different kinds of goods (cashing mode, payment equal to
xii
price) ………………………………………………………………………………………………………………………….
24
Note 1 Cashing mode without input the amount of payment is available and change interface is displayed when the value of SPEC060 is set to 2. ………….
24
4.3 Discount Operations …………………………………………………………………………………
25
4.3.1 U.Price Discount ……………………………………………………………………………………………………………………..
25
Example 1.1 Execute discount in percentage ………………………………………………………………….
25
Note 1 In the discount in percentage, the data object to discount on is floatingpoint decimal. For the discount at 5% off, if input number is 2-digit decimals, users need to input 500. If input number is 3-digit decimals, users need to input
5000. Users can change the decimal point position by long press 【 . . 25
Example 1.2 Execute discount in subtraction ………………………………………………………………….
25
Example 1.3 Execute discount at a fixed number ……………………………………………………………
25
4.3.2 T.Price Discount ……………………………………………………………………………………………………………………..
26
4.3.3 Auto Discount ………………………………………………………………………………………………………………………….
26
Example 1.1 Auto discount ……………………………………………………………………………………………
26
Note 1 All details about the auto discount setting of PLU, please read definitions of auto discount settings in 《 》
43 and Spec115 carefully. Suggest users edit the content on PC.
…………………
26
4.3.4 Unit Conversion of Temporary U.Price
………………………………………………………………………………………
27
Example 1.1 Unit Conversion of Temporary U.Price
……………………………………………………….
27
Note 1 Spec210 is 7 (500g), and kg is the measure unit of the scale.
……………
27
Note 2 Spec073 is 1: Put
【 】 【 . 27
4.4 Setting and Lock of Tare …………………………………………………………………………..
27
4.4.1 Weight Tare ……………………………………………………………………………………………………………………………..
27
Example 1.1 Weight tare ……………………………………………………………………………………………….
27
Note 1 If users need to cancel tare, current total weight should be 0 and users do not input any number.
…………………………………………………………………………
27
4.4.2 Number Tare …………………………………………………………………………………………………………………………..
27
Example 1.1 Number tare ……………………………………………………………………………………………..
27
Note 1 Spec067 is 0: Number tare is forbidden ………………………………………..
28
Note 2 Spec067 is 1: Use absolute value to tare. For example, when the tare definition is 0.001 and input is 0.32, tare is 0.032. …………………………………….
28
Note 3 Spec067 is 2. Use floating-point values to tare . For example if input
0.32 it will show 0.320 after tare.
……………………………………………………………..
28
Note 4 When there are numbers in input window and total weight is not 0, weight tare is the priority.
………………………………………………………………………..
28
4.4.3 Lock and Unlock of Tare …………………………………………………………………………………………………………..
28
Example 1.1 Tare lock and unlock …………………………………………………………………………………
28
Note 1 When you long press Tare 】 correctness or error) . Hold pressing for 4 seconds you will hear the beep for correctness.
……………………………………………………………………………………………
28
Note 2 Once tare locked, it cannot be changed or cleared automatically. Only manual tare can change tare. …………………………………………………………………..
28
xiii
Note 3 Once tare locked, it cannot be unlocked unless users unlock tare manually. ……………………………………………………………………………………………..
28
4.5 Auto Mode ………………………………………………………………………………………………
28
4.5.1 Enter and Exit of Auto Mode …………………………………………………………………………………………………….
28
Example 1.1 Enter and Exit of Auto Mode ……………………………………………………………………..
28
Note 1 Current accumulative buffer must be empty if you enter auto mode.
Users cannot switch buffer in auto mode if target accumulative buffer is not empty. ………………………………………………………………………………………………….
29
Note 2 Activate lock PLU while enter auto mode and unlock PLU while exit auto mode.
…………………………………………………………………………………………….
29
Note 3 Enter or exit auto mode could only be done in 『 』 ……………
29
4.5.2 Sales in Auto Mode ………………………………………………………………………………………………………………….
29
Example 1.1 Sale in auto mode: weight goods ……………………………………………………………….
29
Example 1.2 Sale in auto mode: count goods …………………………………………………………………
31
4.6 Operations of Sale Buffers ………………………………………………………………………..
32
4.6.1 Switch Sale Buffers ………………………………………………………………………………………………………………….
32
Example 1.1 Switch sale buffers ……………………………………………………………………………………
32
4.6.2 Amend the data in sale buffers …………………………………………………………………………………………………..
33
Example 1.1 Clear all data in current sale buffers ……………………………………………………………
33
Example 1.2 Clear one certain goods in current sale buffer ………………………………………………
35
Note 1 In amend window: the window of tare is in the form of xx xx. The first part shows accumulative times; the latter part is the object to be amended. 00 is total and 01~31 are accumulative number. ……………………………………………….
36
Note 2 If users amend the total, the whole deal l is cleared …………………………
36
Note 3 If users amend xx goods, information of xx goods is cleared. And if there was a T.Price discount, T.Price discount information is ignored. T.Price will be calculated based on U.Price (or discounted U.Price) and weight/count amount of sold goods.
…………………………………………………………………………….
36
Note 4 If T.Price is selected, the window of 『 』 number of sold goods. The definition of the piece number is: 5 count goods add
5 , each weight goods add 1. …………………………………………………………………..
36
4.7 Inquiry of Sale Records and Markers of Returns of Goods ……………………………
36
Example 1.1 Inquiry of sale records and markers of returns of goods ………………………………..
37
Note 1 The light of 【 on means the corresponding record is marked as return of goods. If users want to mark return of goods, Spec074 must be opened which is Not Open in default.
……………………………………………………….
39
Note 2 The display form of this window is xx.xx. The first part shows accumulative times; The latter part shows sequence numbers of the corresponding deal. 02.02 means that accumulative times is 2 and this goods is the second accumulative goods. If show 02.00, it means itself is not a goods but just a independent statistic price due to discount or rounding. See detail of
Spec102. ………………………………………………………………………………………………
39
Note 3 The number shown in the window of change / U.Price is the amount of
xiv
sale record stored in the scale. When the number is close to 8000, the scale would delete the earlist records automaticlly. And single / total shows the sequence number of this record in all the records. ……………………………………..
39
5 Programme Operations ……………………………………………………………………………..
40
5.1 Please read this part first …………………………………………………………………………..
40
5.2 Basic Operations in Programme Interface …………………………………………………..
40
5.2.1 Tree-shaped Design of Edit Steps ………………………………………………………………………………………………
40
Picture 1.1 Sketch map of tree-shaped design of edit interface ………………………………………………..
42
5.2.2 Frequently-used Keys in Prog Interfaces …………………………………………………………………………………….
42
Amend 】 operation is in DTSet, go back to step 0 after save and wait for new number to be input to amend. …………………………………………………………………………………………….
42
【
【
】 when operation is in P3. Or press
【 】
【 operation is in text edit or in edit interface of print format. Then press 【 save and exit, or press 【 】
…….
42
】
……………………………….
】
42
【→】 【←】 and to select steps P21~ P27.
…………………………………………………………………………………………….
43
: Press 【↑】 to select previous or next valid data when amending data in programme. And its function is the same as 【←】【→】 in some interfaces when no data is to be amended. ………………………………………………………………………
43
0 】~【 9 】、 00: Input corresponding numbers.
………………………………………..
43
【 】 ………………………………………………………….
43
【
】 in TMSet, users can use 【 】 【 , there would be a hint for you to input the step number you want to select. Input the number and press
【
Confirm . ………………………………………………………………………………………………..
43
5.2.3 List of Programme Interface ………………………………………………………………………………………………………
43
5.3 The Edit of All Parts in TMSet …………………………………………………………………..
69
5.3.1 Time Programme ……………………………………………………………………………………………………………………..
69
Example 1.1 Time Programme ………………………………………………………………………………………
69
5.3.2 Programme of Spec Data Parameters ………………………………………………………………………………………….
69
Example 1.1 Programme of Spec parameters ………………………………………………………………….
69
Note 1 This programme way is the same as the way Fast-Prog of Spec
Parameters in example 3-4 in page Error: No se encuentra la fuente de referencia, except the way it enters programme page. ………………………………..
70
Note 2 Please refer to 《 in page 116 for definitions of all items of Spec data parameters . ……………………………………..
70
5.3.3 Programme of String Parameters ……………………………………………………………………………………………….
70
Example 1.1 Programme of string parameters …………………………………………………………………
70
Note 1 Please refer to 7.3 Definitions of String data paremeters for definitions
xv
of each string parameter. ………………………………………………………………………..
70
5.3.4 Prog of PLU Shortcut Keys ……………………………………………………………………………………………………….
71
Example 1.1 Prog of PLU Shortcut keys ………………………………………………………………………..
71
Note 1 The way it programmes is the same as the way of 1.1 and 1.2 in page
17, except the way it enters programme interface. …………………………………….
71
5.4 The Edit of All Parts in DTSet ………………………………………………………………….
71
5.4.1 Department Programme ……………………………………………………………………………………………………………
71
Example 1.1 Department Programme …………………………………………………………………………….
72
5.4.2 Class Programme ……………………………………………………………………………………………………………………..
72
Example 1.1 Class programme ……………………………………………………………………………………..
72
5.4.3 PLU Programme ………………………………………………………………………………………………………………………
73
Example 1.1 PLU programme ……………………………………………………………………………………….
73
Note 1 Except the parts which have been instructed, meaning of the other words are listed
《 》
……………………..
74
Note 2 The way it programmes is the same as the way Fast-Prog of 1.1 in page
15, except the way it enters programme page. …………………………………………..
74
Note 3 xx is not continuous when users press
to select the programme content. There are two reasons. One reason is that the content in this part is meaningless. For example, tare will not present in count PLU programme. The other reason is that the content in that part is seldom used and has been set as non-programme content (Skip) in P31 and P32. Users could change that setting for personal usage and please refer to corresponding chapters for details. ………………………………………………………………………………..
74
5.4.4 Unit Programme (Not Open) ……………………………………………………………………………………………………..
75
Note 1 Default weight unit is the measure unit of the scale. ……………………….
75
5.4.5 Barcode Programme …………………………………………………………………………………………………………………
75
Example 1.1 Barcode Programme ………………………………………………………………………………….
75
Table 1.1 List of barcode types …………………………………………………………………………….
76
Note 1 Only EAN13 are opened currently. No matter which kind of code you choose, print will be in format of EAN13. ………………………………………………..
77
Table 1.2 Table 5-2 Check digit of barcode …………………………………………………………….
77
Note 1 Check digit of barcode for barcode formats is just an advice for the scale. The scale would process the check based on the selected barcode format.
For example, EAN13 is verified by End Check no matter which kind of check is selected. …………………………………………………………………………………………….
77
Table 1.3 Descriptions of barcode data items ………………………………………………………….
77
Table 1.4 Factory Default barcode ………………………………………………………………………..
78
5.4.6 Print Formats Programme ………………………………………………………………………………………………………….
79
Table 1.1 Factory default print formats …………………………………………………………………..
79
Note 1 If users use gap paper in size of 58mm*30mm, set the value of Spec000 to 1, Spec001 to 4. …………………………………………………………………………………
83
Note 2 If users use gap paper in size of 40mm*30mm, set the value of Spec000 to 2, Spec005 to 5. …………………………………………………………………………………
83
Note 3 If users use gap paper in size of 58mm*30mm, set the value of Spec000
xvi
to 3, Spec005 to 6. …………………………………………………………………………………
83
Note 4 If users use plain paper in width of 58mm, set the value of Spec000 and
Spec005 to 7 ………………………………………………………………………………………….
83
Note 5 If users use plain paper in width of 40mm, set the value of Spec000 and
Spec005 to 8. ………………………………………………………………………………………..
83
5.4.7 Salesman Programme (Not Open) ………………………………………………………………………………………………
83
Example 1.1 Salesman programme ………………………………………………………………………………..
83
Note 1 Number 1~99 is the content for users to edit.
………………………………….
84
5.5 Assistant Data Programme ………………………………………………………………………..
85
5.5.1 Steps Select of PLU Prog ………………………………………………………………………………………………………….
85
Example 1.1 Steps select of PLU prog ……………………………………………………………………………
85
Note 1 The steps above activate steps index and shield steps cost. So, there is a step to input index in the programme of P23, but without a step to input cost.
Select Prog or Skip by pressing 【↑】 . If Prog is selected, the step is in the programme. If Skip is selected, the step is skiped and not in programme. 86
Note 2 Amended content would be in effect only in PLU programme and not effective in fast-prog. …………………………………………………………………………….
86
5.5.2 Steps Select of PLU Fast Prog …………………………………………………………………………………………………..
87
Example 1.1 Steps select of PLU fast prog ……………………………………………………………………..
87
Note 1 The processes are the same as 1.1 , only if amended contents only work in PLU fast-prog instead of PL U programme. …………………………………………
88
5.5.3 Delete Sale Data ………………………………………………………………………………………………………………………
88
Example 1.1 Delete PLU20 ~ ……………………………………………………………………………………
89
Note 1 Once confirming to delete object, users shall be requested to input 2 numbers. And system would delete data objects in the range between the two numbers. If the 2nd number is 0, the object appointed by 1st number is deleted.
If 2nd number is less than 1st number, no object is deleted. ……………………….
90
5.6 Communication and Data Update ……………………………………………………………..
90
5.6.1 Operations of files in USB flash disk.
…………………………………………………………………………………………
90
Example 2.13 Load files in USB flash disk …………………………………………………………………….
90
Note 1 If the loading files ends normally, system would change the state into
Finish. Normally, the amount of error commands should be 0. …………………..
91
Note 2 If system encounters with invalid files or other serious mistakes, change the state into Error. ………………………………………………………………………………..
91
Note 3 In the state of Finish or Error, press any key to exit. If users want to exit midway, press 【 ……………………………………………………………………..
91
Example 1.2 Save to files in USB flash disk …………………………………………………………………..
92
Note 1 Exporting data to files in USB flash disk may take a lot of time. Please wait.
……………………………………………………………………………………………………..
92
Note 2 Press any key to exit when saving is ended. If users want to exit midway, press 【 ……………………………………………………………………..
92
5.6.2 Ethernet Monitor Interface ………………………………………………………………………………………………………..
92
Example 1.1 Enter Ethernet monitor interface …………………………………………………………………
92
i xvi
Note 1 This monitor interface is usually used when the scale is set to not update in real-time on Internet. ………………………………………………………………………….
93
5.6.3 RS232 Communications ……………………………………………………………………………………………………………
93
5.6.4 USB Slave Communications ……………………………………………………………………………………………………..
93
5.7 Hardware Assistant …………………………………………………………………………………..
93
5.7.1 Validate Code ………………………………………………………………………………………………………………………….
93
5.7.2 Password …………………………………………………………………………………………………………………………………
93
Note 1 That Password is 0 means no passwords needed. Users could set the password to be 0 when canceling the password.
…………………………………………
94
Note 2 Admin password is in a higher level than the other 3 passwords. Users do not need to input any password to enter all interface if admin password is 0 , no matter whether the other passwords are 0 or not. If users want to protect
Prog interface or Account interface, first change the admin password other than factory default, then set passwords of corresponding interfaces.
………………….
94
Example 1.2 Process of amending passwords ………………………………………………………………….
94
Note 1 Only the input passwords match for the two times, password setting can be done. ………………………………………………………………………………………………..
95
5.7.3 Recover Factory Default Setting ………………………………………………………………………………………………..
96
Example 1.1 Process of amending passwords ………………………………………………………………….
96
Note 1 Please pay attention to this. Execute recovery 1 or 4, and then passwords would change to factory default.
………………………………………………
97
6 Account Operations ……………………………………………………………………………………
98
6.1 List of Account Interfaces …………………………………………………………………………
98
Table 1.1 List of Account interfaces ……………………………………………………………………….
98
6.2 Operations of Printing Report ……………………………………………………………………
99
6.2.1 Print Total Report ……………………………………………………………………………………………………………………
99
Example 1.1 Print daily reports of today and yesterday ………………………………………………….
100
Note 1 If some buffers store no data, these buffers would be skiped off without printing.
………………………………………………………………………………………………
100
Note 2 If 2nd number input is 0, system would only print the buffer appointed by 1st number. …………………………………………………………………………………….
100
Note 3 If 2nd number input is not 0 and less than 1st number, no buffer would be printed.
……………………………………………………………………………………………
100
Note 4 The hints about currently print object may appear on the screen for just a few seconds when system is printing. ………………………………………………….
100
6.2.2 Print Department Report ………………………………………………………………………………………………………….
100
6.2.3 Print Class Report …………………………………………………………………………………………………………………..
100
6.2.4 Print PLU Report ……………………………………………………………………………………………………………………
101
Example 1.1 Print PLU daily reports with the numbers from 10 to 20 ……………………………..
101
Note 1 If some buffers store no data, these buffers would be skiped off without printing.
………………………………………………………………………………………………
101
Note 2 If 2nd number input is 0, system would only print the buffer appointed
xvi ii
by 1st number.
……………………………………………………………………………………..
101
Note 3 If 2nd number input is not 0 and less than 1st number, no buffer would be printed.
……………………………………………………………………………………………
101
6.3 Clear Report Information ……………………………………………………………………….
101
6.3.1 Clear Report Information Manually ………………………………………………………………………………………….
101
Example 1.1 Clear information in manual report ……………………………………………………………
102
6.3.2 Clear All Reports and Records Information ……………………………………………………………………………….
102
Example 1.1 Clear All Reports and Records Information ……………………………………………….
102
Note 1 This operation would clear the records of all deals. And it’s irreversible.
Please operate it carefully. …………………………………………………………………….
102
7 Appendix ………………………………………………………………………………………………….
103
7.1 Error messages and solution …………………………………………………………………….
103
7.2 Definitions of Spec data parameters …………………………………………………………
116
7.3 Definitions of String data paremeters ……………………………………………………….
130
xix
Examples Menu
Example 1.1Fast-Prog of PLU ……………………………………………………………………….
15
Example 1.1Fast-Prog of Shortcut Key for PLU. Amend a shortcut key. ………..
17
Example 1.2Fast-Prog of Shortcut Key for PLU. Amend two or more shortcut keys.
……………………………………………………………………………………………………………..
17
Example 1.1Fast-Prog of Spec Parameters …………………………………………………….
18
Example 1.1Use PLU number to transfer weight PLU ……………………………………
19
Example 1.2Use PLU number to transfer count PLU ……………………………………..
19
Example 1.1Use PLU shortcut keys to transfer weight PLU ……………………………
19
Example 1.2Use PLU shortcut keys to transfer count PLU …………………………….
20
Example 1.1Transfer temporary weight PLU …………………………………………………
20
Example 1.2Transfer temporary weight PLU with a unit conversion of the
U.Price.
………………………………………………………………………………………………………..
20
Example 1.1Transfer temporary count PLU …………………………………………………..
21
Example 1.1Lock and unlock PLU ……………………………………………………………….
21
Example 1.1 Sale for single weight goods ………………………………………………………
21
Example 1.1Sale and print for single count goods …………………………………………..
22
Example 1.1No Weigh Sale for Weight PLU …………………………………………………..
22
Example 1.1Sale and print for different kinds of goods (No Cashing Mode) ……
23
Example 1.1sale and print for different kinds of goods (cashing mode, input payment) ………………………………………………………………………………………………………
23
Example 1.1Sale and print for different kinds of goods (cashing mode, payment equal to price) ……………………………………………………………………………………………….
24
Example 1.1Execute discount in percentage ………………………………………………….
25
Example 1.2Execute discount in subtraction ………………………………………………….
25
Example 1.3Execute discount at a fixed number ……………………………………………
25
Example 1.1Auto discount …………………………………………………………………………….
26
Example 1.1Unit Conversion of Temporary U.Price
……………………………………….
27
Example 1.1Weight tare ………………………………………………………………………………..
27
Example 1.1Number tare ………………………………………………………………………………
27
Example 1.1Tare lock and unlock ………………………………………………………………….
28
Example 1.1Enter and Exit of Auto Mode ……………………………………………………..
28
Example 1.1Sale in auto mode: weight goods ………………………………………………..
29
Example 1.2Sale in auto mode: count goods ………………………………………………….
31
Example 1.1Switch sale buffers ……………………………………………………………………..
32
Example 1.1Clear all data in current sale buffers …………………………………………..
33
Example 1.2Clear one certain goods in current sale buffer ……………………………..
35
Example 1.1Inquiry of sale records and markers of returns of goods ……………..
37
Example 1.1Time Programme ……………………………………………………………………….
69
Example 1.1Programme of Spec parameters ………………………………………………….
69
Example 1.1Programme of string parameters ………………………………………………..
70
Example 1.1Prog of PLU Shortcut keys …………………………………………………………
71
Example 1.1Department Programme …………………………………………………………….
72
Example 1.1Class programme ………………………………………………………………………
72
Example 1.1PLU programme ………………………………………………………………………..
73
Example 1.1Barcode Programme …………………………………………………………………..
75
Example 1.1Salesman programme …………………………………………………………………
83
Example 1.1Steps select of PLU prog …………………………………………………………….
85
Example 1.1Steps select of PLU fast prog ………………………………………………………
87
Example 1.1Delete PLU20
~
……………………………………………………………………..
89
Example 2.13Load files in USB flash disk ………………………………………………………
90
Example 1.2Save to files in USB flash disk …………………………………………………….
92
Example 1.1Enter Ethernet monitor interface ……………………………………………….
92
Example 1.2Process of amending passwords ………………………………………………….
94
Example 1.1Process of amending passwords ………………………………………………….
96
Example 1.1Print daily reports of today and yesterday …………………………………
100
Example 1.1Print PLU daily reports with the numbers from 10 to 20 ……………
101
Example 1.1Clear information in manual report ………………………………………….
102
Example 1.1Clear All Reports and Records Information ………………………………
102
1
Components of Barcode Lbel Printing Scale
1.1 Check Accessories
One Barcode label Printing Scale;
One display pole;
One tray;
One pack of screws used to fix the pole;
One copy《TM-xA Series Barcode Label Printing Scale User Manual 》(this book);
One CD for PC software 《TM-xA data management software》
One set of clean appliance for thermal printer head;
One overlay for shortcut PLU;
One power plug
1.2 Keyboard
1.2.1 The original overlay of the keyboard
6
1 a/A
a/A
f/F
f/F
11 k/K
k/K
2
12 b/B
b/B
7 g/G
g/G
l/L
l/L
3
8 c/C
c/C
h/H
h/H
4 d/D
d/D
9
i/I
i/I
5 e/E
e/E
10
j/J
j/J
13 m/M
m/M
14 n/N
n/N
15 o/O
o/O
16 p/P
p/P
17 q/Q
q/Q
18 r/R
r/R
19 s/S
s/S
20 t/T
t/T
21 u/U
u/U
22 v/V
v/V
23 w/W
w/W
24 x/X
x/X
25 y/Y
y/Y
26
31 z/Z
z/Z
!
!
27
32
SP
SP
?
?
28
33
<
<
.
.
29
=
=
34
,
,
30
>
>
35
;
;
36
+
+
40
(
(
37
—
—
41
)
)
38
*
*
42
{
{
39
/
/
43
}
}
44
52
[
[
48
@
@
%
%
56
|
|
45
]
]
49
#
#
53
^
^
57
46
50
54
58
‘
‘
&
&
`
`
_
_
47
“
“
51
$
$
55
:
:
59
~
~
60
End
End
61
Del
Del
62
Insert
Insert
63
IME
IME
Sale Prog Account Time Feed F-Prog
64
Shift
69
-%
65
Auto
Mode
66
Type
70
-Num
71
[email protected]
67
Paper
Type
68
Re-
Zero
72 73
T-Sale
Drawer Tare
7
4
1
8
5
2
9
6
3
×
←
V2
↑
V1
↓
V3
Amend
→
V4
PLU
Cash/Print
0 00
Back Cancel Accu/Confirm
Picture 1.1 Sketch map of keyboard function
The graph above shows the original definitions. Some buttons on the left top area are marked with numbers, which are serial number for the shortcut keys. In this text, 【 SCxx 】 is used to represent shortcut keys. For example, 【SC1】 represents the first key on the left top marked with number 1. 【SC1】~【SC63】are PLU default shortcut keys and can be set to represent one certain key if user requests. When editing the text, 【SC1】~【SC63】
are function keys and character keys for the input of letters. Please refer to chapter 1.2.4. 【SC64】~【SC73】 are
default shortcut keys for additional functions . The default setting is shown in the graph. And it’s not available to change the setting of function keys now.
1.2.2 Instructions for Keys
When you press right keys, the scale would beep shortly to show the operation is right.
1
When you press wrong keys, the scale will beep in 1 long sound and 2 short sounds. This composite beeps mean the failure in operation process or errors in pressing keys. If operaton process fails, there will be Ex.xx displayed on the screen (e.g., E1.01 means programme data is invalid.).
It need to press one key for 4 seconds in some operation which needs to Long Press the key without releasing it. During the period you will hear 2 beeps. The first beep sounds when you press the key and the second beep sounds after pressing the key for 4 seconds.
In some【F-Prog】+ 【Other keys】 operations, users should first press 【Fast-Prog】 without releasing and press the other key in order to complete the operation.
In the following instruction: 【Key1】 【Key2】 means the operation that press 【Key 1】 first and release it, then perss【Key 2】 and release it. 【Key1】+【Key2】means the operation that press 【Key1】 and 【Key2】 at the same time. When users do it , press 【Key1】 first, and press 【Key2】 without releasing 【Key1】 .
1.2.3 Instruments for Keys in Function Area
1.1 shows the default setting of keys in the function area. According to customer’s requests, default setting
may be different. And the specific setting will be on the overlay:
【Sale】:Enter sale mode and execute the operation of goods sale.
【Prog】: Enter programme mode and can programme scale parameters, PLU, print formats, time and so on.
【Account】: Enter Account mode to check deals data or print reports and so on.
【Time】: Display current time and return to the previous interface when you press it again.
【 Tare 】 : Set current weight as tare or appoint certain data as tare (When there is a number in input window, number tare is the priority.). Pressing 【Tare】 for a long time without releasing, system would enter 【Tare】. And do it again to exit this state.
【Zero】: Clear current weight and reset zero within allowed range. If not within allowed range, set zero would fail.
【Shift】:Shife key used for extending PLU shortcut key, and switching case sensitivity in text input interface. When current input number is decimal (tare, weight, U.Price, T.Price) , long press 【Shift】 can change the position of decimal point.
【Auto Mode】: Switch between ordinary mode and auto mode. Users can enter auto mode if current sale buffer is empty.
【Print type】: The key owns no meaning in this edition. The print type is decided by selected Print format.
【Paper type】: Long Press it to switch the paper type between gap thermal paper and plain thermal paper.
【Re-print】: Repeat last print in current buffer (Repeated print data would not be stored in deal records as sale record.). This function can be forbidden in Spec.
【Feed】: Roll the gap thermal paper or plain thermal paper. Unprinted buffer data will be cleared in the process of feed.
【-%】: Discount in percentage,
P
Dis
=
P
( 1
−
Input
)
100
. Please notice that input is decimal and pay extra attention to the position of decimal point. Discount is 5% off while input is 500, if there are two zeroes
2
after decimal point. And input should be 5000, If there are three zeroes.
【-Num】: Discount in subtraction.
P
Dis
=
P
−
Input
. Input is also decimal.
【[email protected]】: Discount to a fixed price.
P
Dis
=
Input
. Input is also decimal.
【 T-Sale 】 : Set input number as U.Price and set a temporary PLU. Users can amend price unit of temporary weight PLU. For example, when users set the price unit of temporary weight PLU is 500g while the unit of the scale is kg, system would automatically convert input number (double input number).
【Drawer】: Open drawer besides normal operations.
【F-Prog】: Change some setting or values of PLU fastly in sale mode. Please refer to process instructions to understand the use of combination keys.
【×】: Input count amount in sale. Or do temporary count goods sale according to inputted U.Price.
【Amend】: Amend deal data in sale interface and store amended data in programme interface.
【←】【↑】【↓】【→】: Switch among neighbouring steps and numbers in programme and account interfaces.
【V1】~【V4】: Activate corresponding sale buffers.
【0】~【9】、【00】: Input corresponding numbers.
【Back】: Delete the last digit of the inputted number.
【PLU】: Transfer PLU datas by using input numbers as serial numbers.
【Cash/Print】: Check out in cash; calculate changes and print labels or receipts according to setting.
【Cancel】: Clear data, cancel operations or go back to previous step.
【 Accu/Confirm 】 : Save accumulative deal data into activated sale buffer and other confirmation operations.
1.2.4 Character Input Instructions
The key of function section remains the same when system enters letters input interface, while
【
SC1】~【SC63】 are used to input letters. In input process, definitions of keyboard are shown below:
【Amend】: Confirm text input. Save and exit.
【Cancel】: Cancel edited data and quit without saving.
【Confirm】: Confirm the input in special IME (not used in pure English version).
【End】: Input end character, and all characters after appointed position are deleted.
【Delete】: Delete the character at the position of cursor .
【Insert】: Switch between cover mode and insert mode. Cover mode is activated when cursor is constant on, insert mode is activated when cursor is glittering.
【IME】: Input method editor. Switch the input languages: En-1(in small letters), En-2 (in big letters),
Code(machine code). There are special IMEs for not pure English version (e.g., Chs for Chinese ISN.)
【Shift】: Switch En-1, En-2 in temporary state.
【←】【→】: Move current editing position backwards or forwards.
3
【0】~【9】 and【SC1】~【SC59】: Input characters or codes.
In the process of input text, meanings of four windows are shown below:
The first window: Display current input mode: one of En-1, En-2 and Code.
The second window: Display the position of current editing letters in the text.
The third window: Display current editing position and content of neighbouring letters. In En-1 or En-2
ASCII mode is displayed, in Code Hex mode is displayed. Cover mode is activated when cursor which shows the position is constant on; insert mode is activated when cursor is glitter.
The fourth window: Display current input content. In En-1 or En-2 the window displays nothing, and in
Code displays the inputted machine code.
Switch 4 kinds of input languages by pressing switch keys. Input mode of each kind of input language is shown below:
En-1: Input numbers or ASCII characters. For the keys with ‘/’, input character is the one on the left of ‘/’.
Pressing 【Shift】 , next input character and only this one is under the rule of En-2 .
En-2: Input numbers or ASCII characters. For the keys with ‘/’, input character is the one on the right of
‘/’. Pressing 【Shift】 , next input character and only this one is under the rule of En-1 .
Code: Input machine code mode. Users can input ASCII, symbols in special IMEs. The system could automatically distinguish the input content as ASCII, symbols in special IMEs. Machine codes of each field can be found in following table.
1.3 Display Panel
1.3.1 Sketch Map of Display Panel
t/C u h n /U rice /T l
Zero Stable
Lock
Tare
Lock
PLU
Auto
Mode
Label
Gap
Paper
Shift
Sale
Prog Account Change U.Price
V1 V2 V3 V4 Discount Single Total
Picture 1.1 Display overlay
1.3.2 Indication Signs
【Zero】: It’s on when weight is zero and stable.
【Stable】: It’s on when weight is stable.
【Lock Tare】: It’s on when tare is locked. Long press 【Tare】 would lock tare. Under this condition, tare
4
would not be cleared after the sale. Long press 【Tare】 again would exit lock tare.
【Lock PLU】: It’s on when PLU is locked (lock U.Price at the same time.). Long press 【PLU】 would lock
PLU. Under this condition, after the sale, the former PLU sale state would remain till new PLU is transferred. Long press 【PLU】 again would exit lock PLU.
【Auto mode】: It’s on in auto mode. In auto mode, lock PLU would be activated automatically. In auto mode: If a weight PLU is transferred, print would operate automatically in condition that weight is new
(Weight was set to zero in last sale.). If a count PLU is transferred, system would print the amount bill when the print amount has been set.
【Label mode】: This sign is meaningless in this edition.
【Gap paper】: It’s on when paper type is gap paper. It’s off when paper type is plain paper.
【Shift】: Press 【Shift】 and it is on.
【Sale】: It’s on in sale mode.
【Prog】: It’s on in programme mode.
【Account】: It’s on in account mode.
【Change】: It’s on when the data in third window displayed is cash change.
【U.Price】: It’s on when the data in third window displayed is goods U.Price.
【V1】~【V4】: It’s on when there are buffers in V1~V4 records. And it’s glittering in edit mode.
【Discount】: When display single means that current goods has been discounted in U.Price; when display total means that current accumulative total has been discounted in T.Price
【Single】: It’s on when current goods’ single price is displayed in fourth window.
【Total】: It’s on when the subtotal of current sale buffers (V1~V4) is displayed in fourth window.
1.3.3 Expression of Characters
Picture 3.1 Number characters 0~9
Picture 3.2 Characters A~M
Picture 3.3 Characters N~Z
Picture 3.4 Dash、underline, aboveline, three lineations of special symbols
5
Dash of special symbols: the same as ‘-’ in ASCII.
Underline of special symbols: Used to represent the characters which cannot be displayed in ASCII(the symbols except 0~9, A~Z and ‘-’)
Aboveline of special symbols: Used to represent extended characters. In Chinese edition, two aboveline represent a Chinese character. In Russian edition, one aboveline represent a Russian character.
Three lineations of special symbols: In calibrating processes, it’s used as a prompt to decide to enter demarcated interface or standard interface.
1.4 Specifications
Power supply: AC 90V~264V, 47~63Hz
Operation temperature: 0℃~40℃
Conservation temperature: -20℃~70℃
Operation humidity: 15%~85%RH
1.5 Thermal printer
1.5.1 Install gap paper
1. Press and open side door.
Picture 1.1 Open side door of scale printer
6
Open
2. Move the Switch
Picture 1.2 Open press mouth
4. Pull the steel plate which is used to restrain paper out at the direction 1
,
Then rotate the steel plate by
90 degrees at the direction 2 in order to let print paper pass by.
2
1
3. Place paper roller
Picture 1.3 Place paper roller
6. Pull up U-shaped paper retaining spring.
7. Wrap the paper roller by print paper.
5. Put print paper through paper inlet sensor.
Inlet sensor
Picture 1.4 Install paper loop
7
8. Put U-shaped paper retaining spring outside of roll-up paper circle.
10. Put the steel plate back to original position and adjust its height which is just close to paper.
9. Push the print mouth to let the ring fasten print mouth .
Picture 1.5 Finish installing paper
12. Press 【Feed】
11. Close side door of scale printer.
Picture 1.6 Close side door of scale printer
8
1.5.2 Gap paper mounts recycle
When gap paper is used up, users need to move away paper mounts. Pull roll paper out at the direction of the arrowhead until end of the paper. Then pull retaining spring out and tear down the used paper.
Picture 2.1 Gap paper mounts recycle
1.5.3 Install plain paper
Different from the way in installing gap paper shown in1.5.1, U-shaped paper retaining spring is not needed
anymore. All you need to do is to put the paper into the paper sensor and let the tear part be outside.
1.5.4 Operations concerning paper
【Paper type】: Make sure the type of paper set is the same as the type used. When 【Gap Paper】is light in the display, you should set to use gap paper. Otherwise you should set to use plain paper. If the type of paper you set to use is different from the type currently used, please long press 【Paper Type】to change the set.
【Feed】: After installing the paper, press【Feed】. You can also press 【Feed】 to clear abnormities of the printer and make paper roll for a certain length.
1.5.5 Abnormity of gap paper print
Users of plain paper don’t need to do any adjustment for this.
Abnormity of printer parameters may happen when gap paper prints are unnormal, paper goes out continuously, or printer can’ work after one paper is printed.
Users need to check whether the paper type is right first. Then follow below operations to eliminate malfunctions:
Install gap label paper, and make the edges of label paper and print head parallel.
Switch off the scale. There are two keys near the component which draws back the paper in the printer.
Press and hold these two keys, and switch on the scale.
After the printer is started, printer would roll out the paper at the length of 75mm.
After the paper is rolled out, malfunctions have been eliminated if two test lights don’t glitter and one light is on and the other is off.
Then, press the key near to the component which draws back the paper. There would be one test paper
9
been printed.
Go to normal operation processes.
Gap Peper Test Key
Plain paper test key
Picture 5.2 Test keys of printer
10
2 General functions, configuration and using index
2.1 General functions
The printer can store 5990 PLUs, and the user can edit numbers of PLU from 10 to 5999.
Users can use gap thermal paper and plain thermal paper.
The printer provides many kinds of price input and discount.
The printer provides reports printing for different time periods and classifications
Precision of measurement: business mode 1/6000, industrial mode 1/30000.
You can use USB flash disk to transfer and save the data. All the parameters can be set on the compter and downloaded with USB flash disk.
2.2 Setting of Print Format
Press 【Paper type】 for 4 seconds to switch between gap paper and plain paper. This key would amend
Spec021.
There are 9 kinds of print formats. Please reference to page 48 table 5-5《Factory default print formats》
58mm*40mm and 40mm*30mm gap paper, 58mm and 40mm width plain paper are available in default print formats. When using different type of paper, please adjust the corresponding Spec shown in the table below.
11
Print formats include label print and receipt print. If user need to custom print format, please use PC ssoftware to change or contact with appointed after-service cencer.
Don’t print bills while saling: amend Spec003 and Spec008 to 0. If some specific deals need to print bills, please press 【Re-print】.
To print a few copies of one bill, put the amount into Spec003 and Spec008.
To print two different kinds of bills: set the type of one kind of bill in Spec000~Spec009, and set the another in Spec010~Spec019. Strongly suggest users contact with appointed after-service cencer.
Set grey level of gap thermal paper in Spec022.
Set grey level of plain thermal paper in Spec023.
The distance for paper cut should be long enough. Usually the value you set in Spec025 is bigger than 30 when plain paper is used.
You can set different kinds of print formats and barcode types for each PLU. You can check the details in
PLU parameters for print formats and barcode types. Set the value of these parameters to 0 if you choose the system type.
The procedures to confirm print format: take bill 1 as an example. If two or more goods are sold, print sum bill and use Spec005 as print format. If only one good is sold, print the item bill. If sale PLU has been set for a specific print format (not 0), system would use this special print format. If no specific print format has been set to sale PLU (The setting number is 0.), the print format would be Spec000..
2.3 Barcode Settings
9 kinds of barcode settings, details in page 78 1.4《Factory Default barcode》.
Barcodes can be divided by purpose into item barcodes and total barcodes, which are printed in item labels and total labels respectively. If users need to custom print format, please use PC software to change or contact with appointed after-service center.
12
2.4 Measure Functions
The scale offers 6 measure units as kg, gram, ton, lb, 500g, 100g.
Based on the difference national regulations, some of the measure unit may Not Open. The combinations and recommended Spec settings are all shown below:
Weight precision: The precisions are divided into four levels. Level 0 owns original 1/3000 . Level 0 and level 1 are available for commercial users while level 2 and level 3 are only available for industrial users
(“Ind” would be attached in the print of weight). Please refer to Spec213.
We guarantee the stability and reliability for precision level 0 (1/3000 ) when the scale leaves factory. But the higher precisions are just to satisfy the need of high definition print for some users, so factory would not guarantee the stability and reliability for higher precision levels for every scale. Please choose the precision prudentially.
The request Zero-Return for scale print: it’s requested in commercial sales that the display have to return to zero when the scale is going to print the weights of two goods. But for industrial users, this rule could be ignored. Set the value of Spec069 to 2. (“Ind” would be attached in the print of weight).
2.5 Sale Functions
Users could operate accumulative sales with 4 customers at the same time. Please refer to the 1.1 in page
32 for operations.
Rounding methods could be divided into rounding method for single and rounding method for total. The settings of rounding methods are shown in Spec100 and Spec101.
Suggest that set the value of Spec100 to 1 if users don’t want the unit “cent” to be displayed in sales.
Suggest that set the values of Spec100 to 0 and Spec101 to 1 if users want the unit “cent” to be in sale while unit “cent” is not displayed in grandtotal and print.
The units’ conversion for preset PLU U.Price: for example: set PLU10 U.Price to 10.00, the unit is
500gram and unit displayed is kg. When transfer PLU10, unit price is displayed as 20.00.
Units’ conversion for temporary unit price: the scale offers the function of units’ conversion for temporary unit goods and price from 500gram to kg. When U.Price’ display unit is /kg, set the value of
Spec210 to 7 and the value of Spec073 to 1 to activate this function. Please refer to the 1.2 in page 20,
1.1in page 27.
No Weigh Sale for Weight PLU: set the value of Spec071 to 1. When the weight returns to zero in weigh
sale, input the price and sell the goods at the price you input. Please refer to 1.1 in page 22.
13
Users can discount on U.Price and T.Price conveniently. The discount methods include discount at a fixed
number, discount in subtraction and discount in percentage. Please refer to 《Discount Operations》 in page 25.
2.6 Report Functions
Users could print the total reports with time periods of last 32 stat. day, stat. month, stat. quarter or manual time period.
Users can print the reports for all departments, all classes and part of PLU (below 1000), with a time period of present stat. day, stat. month, stat. quarter or manual time period.
Please refer to《Account Operations》 in page 98 for the details.
14
3 Fast Prog
Fast prog is the programme operation that draws out some frequently-used programme functions and enables users enter certain frequently-used programme interfaces without selecting in programme interface.
Please make sure system is in the interface of idle sale before transferring fast prog. If system is not in sale operation, pressing 【Sale】 could enter the interface of idle sale. If system is in sale operation, pressing 【Cancel】 for several times could quit sale process and enter the interface of 『Sale Idle』. The sign of the interface of idle sale is that two lights 【Sale】 and 【Total】 are on. On contrary, if two light of 【Sale】 and 【Single】 are on , system is in sale PLU interface.
3.1 Fast-Prog of PLU
Press 【F-Prog】+【PLU】 to enter PLU Fast Prog.
The process of programme is similar with PLU programme in standard programme interface. But users can finish PLU Fast Prog in sale interface.
Example 1.1 Fast-Prog of PLU
Edit PLU10 as a weight PLU with the name Pork-2, U.Price $30.00/kg, cost $24.00/kg and tare 0.005g.
15
N o t e 1 Except the parts which have been instructed, meaning of the other words are listed in 《 List of
Programme Interface》in page 43.
N o t e 2 PLU fast-prog is forbidden when SPEC080=0.
N o t e 3 Before you move to next step, if it display “ E1.01 Data Invalid”, it means that the programme data you input is invalid.
N o t e 4 The xx in PLU.xx means the content in the data which is marked with the number of xx in PLU fast prog.
N o t e 5 Xx is not continuous when users press【】and【】to select the programme content. There are two reasons. First reason is that the content in that part is meaningless. For example, tare will not present in count PLU programme. The second reason is that the content in that part is seldom used and has been set as non-programme content (Skip) in P3.01 and P3.02. Users could change that setting for personel usage. Please refer to corresponding chapters for details.
N o t e 6 PLU that users can edit are from 10 to 5999, total 5990 PLU.
3.2 Fast-Prog of Shortcut Key for PLU
Press 【F-Prog】+【SCxx】to enter PLU shortcut key programme. 【SCxx】could be one of 【SC1】~【SC63】.
After pressing one key, Users can input the PLU which the pressed key appoints to .Then press【Amend】to save and exit.
Users can save without exit if they would like to go on to amend other shortcut keys. Press 【Confirm】 to save the change and press another 【SCxx】 to amend. The number of input PLU must exist. User can select existing PLU by pressing 【↑】【↓】. The process of programme is similar with scPLU programme in standard programme interface. Please refer to the process shown below.
16
Example 1.1 Fast-Prog of Shortcut Key for PLU. Amend a shortcut key.
N o t e 1 When SPEC081=0, PLU shortcut-key fast-prog is forbidden.
Example 1.2 Fast-Prog of Shortcut Key for PLU. Amend two or more shortcut keys.
N o t e 1 When SPEC081=0, PLU shortcut key fast prog is forbidden.
3.3 Fast-Prog of Spec Parameters
Press 【F-Prog】+【Prog】 to enter Spec parameters fast prog.
Please select the number you want to edit by pressing 【←】【】. The second window shows the number of
17
Spec which is being edited. The third window shows current parameters configuration. The fourth window shows the data which has been edited by users.
Spec data parameters are made up of 250 data. Refer to 《Definitions of Spec data parameters 》in page
116 in order to understand functions of these parameters.
Press 【Amend】 to save and quit, or press【Cancel】to quit without saving. The process of programme is similar with Spec programme in standard programme interface. For details, please refer to the process shown below.
Here, we are going to amend Spec000 to 2, Spec002 to 77 and Spec040 to 99. We would present the processes without discussing on the parameters we actually amend and their meanings.
Example 1.1 Fast-Prog of Spec Parameters
N o t e 1 Spec fast-prog programme is forbidden when SPEC082 = 0.
N o t e 2 Refer to 《 Definitions of Spec data parameters 》 in page 116 to know the definitions of data
parameters .
N o t e 3 Read the definition of the parameter before you change it. And don’ t change any unknown parameters in Spec programme.
N o t e 4 xxx in SP.xxx means the number of the data content in Spec programme.
N o t e 5 xxx is not continuous when users press 【】and【】 to select the programme content. That’s because users can only select Spec in level 0 by pressing 【 】 and 【 】 . You have to input corresponding numbers afterting pressing 【×】to change Spec in level 1. And users cannot change Spec in level 2 and level 3 because their data are involved with some specifications in measurement and other hardware fields.
18
4 Sale Operations
4.1 Transfer and Lock of PLU
Attention: PLU1 is a temporary weight goods, PLU2 is a temporary count goods. And both of them can’t be edited and tranfered. PLU that can be edited start from the number 10.
4.1.1 Transfer by using PLU number
Example 1.1 Use PLU number to transfer weight PLU
Transfer PLU10, assuming PLU10 is a weight PLU with U.Price $2.00/kg and tare 0.100kg.
Example 1.2 Use PLU number to transfer count PLU
Transfer PLU11, assuming PLU11 is count PLU with U.Price $5.00/pc
4.1.2 Tranfer by Using PLU Shortcut Keys
Example 1.1 Use PLU shortcut keys to transfer weight PLU
19
Example 1.2 Use PLU shortcut keys to transfer count PLU
Transfer SC2, assuming SC2=PLU11 and SC2 is count PLU with U.Price $5.00/pc
4.1.3 Transfer Temporary Weight PLU (The number of PLU is 1)
Example 1.1 Transfer temporary weight PLU
N o t e 1 Temporary weitht PLU could be converted into count PLU if users press 【
×
】 or the weight is zero.
Example 1.2 Transfer temporary weight PLU with a unit conversion of the U.Price.
N o t e 1 Assume temporary weight unit is 500g(Spec210) and the unit of scale is kg. After input the U.Price of 1.70 and press 【T-Sale】, the U.Price is converted into 3.40. That means the conversion of the unit between 500g and kg is done.
20
4.1.4 Transfer temporary count PLU (The number of PLU is 2.)
Example 1.1 Transfer temporary count PLU
4.1.5 Lock and unlock of PLU
Example 1.1 Lock and unlock PLU
N o t e 1 For weight PLU, the tare is locked while you lock PLU without exiting PLU.
N o t e 2 When you long press 【PLU】, you can hear one beep first (beep for correctness or error) . Hold pressing for 4 seconds you will hear the beep for correctness.
N o t e 3 Once PLU is locked, it wouldn’t be unlocked unless users unlock PLU manually.
N o t e 4 There’s no difference in weight or count for lock temporary goods. The scale could distinguish weight or count according to operation process.
N o t e 5 When users try ro enter auto mode and then exit the mode, the scale would unlock the lock of PLU because auto mode could influence on lock of PLU.
4.2 Manual Goods Sale
4.2.1 Sale and Print of Single Weight Goods
Example 1.1 Sale for single weight goods
Sell 1 kg PLU10 goods. Assume PLU10 is a weight PLU with U.Price is $2.00/kg and tare is 0.100kg.
21
N o t e 1 Two qualifications are indispensable when directly print without accumulating: 1. Current accumulative buffer is empty, 2. The value of SPEC060 is not set to be 3 (cashing mode without zero change default).
N o t e 2 The system would have to wait for several seconds if users sell the weigh goods when the display of weight is not stable. If the display of weight is stable in the waiting time, system would sell the goods according to the operations. Please refer to SPEC151 about the waiting time.
4.2.2 Sale and Print of Single Count Goods
Example 1.1 Sale and print for single count goods
Sell 5 PLU11. Assume PLU11 is count PLU with U.Price is $5.00/pc
N o t e 1 Two qualifications are indispensable when directly print without accumulating: 1. Current accumulative buffer is empty, 2. The value of SPEC060 is not set to be 3 (cashing mode without zero change default).
4.2.3 No Weigh Sale for Weight Goods
Example 1.1 No Weigh Sale for Weight PLU
22
N o t e 1 To execute no weigh sale, the value of Spec071 needs to be set to 1 while the default value is 0.
N o t e 2 No weigh sale for temporary goods is not restricted by Spec071. And it will automatically convert to count sale for temporary count goods.
4.2.4 Sale and Print for different kinds of goods (No Cashing Mode)
Example 1.1 Sale and print for different kinds of goods (No Cashing Mode)
Sell 1kg PLU10 goods. Assume PLU10 is weight PLU with U.Price $2.00 /kg and tare 0.100kg. 5pcs PLU11 goods, PLU11 is count PLU with U.Price $5.00/pc
N o t e 1 Users can execute no cashing mode when the value of SPEC60 is 0 or 1.
4.2.5 Sale and Print for Different Kinds of Goods (cashing mode, input payment)
Example 1.1 sale and print for different kinds of goods (cashing mode, input payment)
Sell 1kg PLU10 goods. Assume PLU10 is weight PLU with U.Price $2.00/kg and tare 0.100kg. 5pcs PLU11 goods, PLU11 is count PLU with U.Price $5.00/pc and payment $30
23
N o t e 1 Cashing mode is available and change interface is displayed when the value of SPEC60 is 1, 2, or 3.
4.2.6 Sale and Print for Different Kinds of Goods (cashing mode, payment equal to price)
Example 1.1 Sale and print for different kinds of goods (cashing mode, payment equal to price)
Sell 1kg PLU10 goods. Assume PLU10 is weight PLU with U.Price $2.00/kg and tare 0.100kg. 5pcs PLU11,
PLU11 is count PLU with U.Price $5.00/pc and payment $30 .
N o t e 1 Cashing mode without input the amount of payment is available and change interface is displayed when the value of SPEC060 is set to 2.
24
4.3 Discount Operations
4.3.1 U.Price Discount
The data after discount should be within the discountable area. If the data exceeds the area, discount operation would fail.
Example 1.1 Execute discount in percentage
Discount in U.Price: at the percentage of 95%, as
×
100 .
00
−
5 .
00
. Assume that PLU10 is weight PLU with
100 .
00
U.Price $2.00 /kg and tare 0.100kg.
N o t e 1 In the discount in percentage, the data object to discount on is floating-point decimal. For the discount at 5% off, if input number is 2-digit decimals, users need to input 500. If input number is 3digit decimals, users need to input 5000. Users can change the decimal point position by long press
【
Shift】.
Example 1.2 Execute discount in subtraction
Discount in U.Price: discount at the subtraction of $0.10 . Assume that PLU10 is weight PLU with U.Price
$2.00 /kg and tare 0.100kg.
Example 1.3 Execute discount at a fixed number
Discount in U.Price: discount the U.Price to $1.80. Assume that PLU10 is weight PLU with U.Price $2.00
/kg and tare 0.100kg.
25
4.3.2 T.Price Discount
The operations of T.Price discount and U.Price discount are the same. Under the condition that PLU is not transferred and accumulative buffers are present, execute discount operation is to discount on T.Price. The processes are not repeated here. The limit of discount on T.Price is a accumulative value of U.Price discount limits of all goods.
4.3.3 Auto Discount
When goods are setting on a uto discount, the price of activated PLU would change in real-time according to the settings and system would shield any actions of manual change on the price.
Assume PLU20 is at the U.Price $ 10.00. U.Price goes to $ 9.00 when sale weight is more than 1kg and
U.Price goes to $ 8.00 when sale weight is more than 2kg. The change of U.Price of this goods is shown below:
Example 1.1 Auto discount
N o t e 1 All details about the auto discount setting of PLU, please read definitions of auto discount settings
in《List of Programme Interface》 on page 43 and Spec115 carefully. Suggest users edit the content on
PC.
26
4.3.4 Unit Conversion of Temporary U.Price
Example 1.1 Unit Conversion of Temporary U.Price
N o t e 1 Spec210 is 7 (500g), and kg is the measure unit of the scale.
N o t e 2 Spec073 is 1: Put 【T-Sale】 into use of 【Unit Conversion】.
4.4 Setting and Lock of Tare
4.4.1 Weight Tare
Example 1.1 Weight tare
N o t e 1 If users need to cancel tare, current total weight should be 0 and users do not input any number.
4.4.2 Number Tare
Example 1.1 Number tare
27
N o t e 1
Spec067 is 0: Number tare is forbidden
N o t e 2
Spec067 is 1: Use absolute value to tare. For example, when the tare definition is 0.001 and input is
0.32, tare is 0.032.
N o t e 3
Spec067 is 2. Use floating-point values to tare . For example if input 0.32 it will show 0.320 after tare.
N o t e 4
When there are numbers in input window and total weight is not 0, weight tare is the priority.
4.4.3 Lock and Unlock of Tare
Example 1.1 Tare lock and unlock
N o t e 1 When you long press 【Tare】, you can hear one beep first (beep for correctness or error) . Hold pressing for 4 seconds you will hear the beep for correctness.
N o t e 2 Once tare locked, it cannot be changed or cleared automatically. Only manual tare can change tare.
N o t e 3 Once tare locked, it cannot be unlocked unless users unlock tare manually.
4.5 Auto Mode
4.5.1 Enter and Exit of Auto Mode
Example 1.1 Enter and Exit of Auto Mode
28
N o t e 1 Current accumulative buffer must be empty if you enter auto mode. Users cannot switch buffer in auto mode if target accumulative buffer is not empty.
N o t e 2 Activate lock PLU while enter auto mode and unlock PLU while exit auto mode.
N o t e 3 Enter or exit auto mode could only be done in 『Sale Idle』
4.5.2 Sales in Auto Mode
Example 1.1 Sale in auto mode: weight goods
Weight PLU can do auto sale. Assume PLU10 is weight PLU with U.Price 2.00yuan/kg and tare 0.100kg.
29
30
Example 1.2 Sale in auto mode: count goods
Count PLU sale in auto sale mode . Assume PLU11 is count PLU with U.Price $2.00/pc. Sell 10 deals and each deal sells 5 items.
31
4.6 Operations of Sale Buffers
4.6.1 Switch Sale Buffers
Example 1.1 Switch sale buffers
32
4.6.2 Amend the data in sale buffers
Example 1.1 Clear all data in current sale buffers
33
34
Example 1.2 Clear one certain goods in current sale buffer
35
N o t e 1 In amend window: the window of tare is in the form of xx xx. The first part shows accumulative times; the latter part is the object to be amended. 00 is total and 01~31 are accumulative number.
N o t e 2 If users amend the total, the whole deal l is cleared
N o t e 3 If users amend xx goods, information of xx goods is cleared. And if there was a T.Price discount,
T.Price discount information is ignored . T.Price will be calculated based on U.Price (or discounted
U.Price) and weight/count a mount of sold goods.
N o t e 4 If T.Price is selected, the window of 『Weight/Count』 will display piece number of sold goods. The definition of the piece number is: 5 count goods add 5 , each weight goods add 1.
4.7 Inquiry of Sale Records and Markers of Returns of Goods
Mark the tenth item in the sale record as return of goods.
36
Example 1.1 Inquiry of sale records and markers of returns of goods
37
38
N o t e 1 The light of 【Shift】 on means the corresponding record is marked as return of goods. If users want to mark return of goods, Spec074 must be opened which is Not Open in default.
N o t e 2 The display form of this window is xx.xx. The first part shows accumulative times; The latter part shows sequence numbers of the corresponding deal. 02.02 means that accumulative times is 2 and this goods is the second accumulative goods. If show 02.00, it means itself is not a goods but just a independent statistic price due to discount or rounding. See detail of Spec102.
N o t e 3 The number shown in the window of change / U.Price is the amount of sale record stored in the scale. When the number is close to 8000, the scale would delete the earlist records automaticlly . And single / total shows the sequence number of this record in all the records.
39
5 Programme Operations
5.1 Please read this part first
For ordinary users, they can use 3 kinds of Fast Progs in 《Fast Prog》 in chaper 3 to handle most
applications.
There are detailed programme operations of the scale in this chapter, as well as examples for users. But some parts of programme content are very complicated such as print format edit and barcode format edit. Devisers suggest users use company offered software when users are in need of these functions. The company software offers users a convenient interface to edit all the working parameters and sale data of the scale. The setting data can be downloaded from Ethernet (real-time download), or transferred in the form of files by USB flash disk
(Users edit the data on PC and store the data in USB flash disk , then download the data to scale from USB flash disk.).
Devisers are convinced that it’s easy to learn to use the company offered software. As long as users own basic computer operation knowledge and learn with user manual of this software (User manual would be installed with the software), users can operate the software in a very short time. If users cannot use computer and are still in need of complicated programme operations, users can write down the demands and send to us.
If computers cannot be used in users’ circumstances, and users are indeed in need of functions of this part, please read content in this chapter carefully. In consideration of too much content, detailed example instructions of all operations will not be provided in some chapters. But all the functions are instructed in words and processes
are arranged in sequence of steps. Users should read 《Tree-shaped Design of Edit Steps》 and 《Frequently-used
Keys in 》 first carefully. Then do programme operations according to instructions in 《 List of Programme
Interface》 and corresponding chapters on the basis of fully understanding of these two parts.
5.2 Basic Operations in Programme Interface
5.2.1 Tree-shaped Design of Edit Steps
40
41
P1.—
TM-Set
Time Spec String
ScPLU
Fast Prog
P2.—
DT-Set
Dept.
Class PLU
Unit Bcode Label Sales
Prog-
Menu
P3.—
DT-Ass
SK-PLU
SKFPLU Delete
P4.—
Commu
U-Disk Ethnet RS232 USlave
P5.—
HW-Ass
Set-PW TMS-DF
Note: Hardware information must be operated in this machine.
Picture 1.1 Sketch map of tree-shaped design of edit interface
5.2.2
Frequently-used
Keys in Prog Interfaces
【Amend】: Save the amended content and go back to previous interface. If operation is in DTSet, go back to step 0 after save and wait for new number to be input to amend.
【Cancel】: Don’t save the amended data and go back to previous interface.
【Confirm】: Get into the next interface. Such as enter P31 by pressing 【Confirm】 when operation is in
P3. Or press 【Confirm】 to enter certain edit interface when operation is in text edit or in edit interface of print format. Then press 【Amend】 to save and exit, or press 【Cancel】 to exit without saving.
42
【←】、【→】: Steps selection. Such as in step P21, press 【←】 and【→】 to select steps P21~ P27.
【↑】、
【↓】 to select previous or next valid data when amending data in programme.
And its function is the same as 【←】【→】 in some interfaces when no data is to be amended.
【0】~【9】、00: Input corresponding numbers.
【back】: Delete the last digit number.
【×】: There are many steps to select in processes of Spec and DTSet edit operations in TMSet, users can use 【×】 to select step to edit. After press【×】, there would be a hint for you to input the step number you want to select. Input the number and press 【Confirm】.
5.2.3 List of Programme Interface
43
44
45
46
47
48
49
50
51
52
53
54
55
56
57
58
59
60
61
62
63
64
65
66
67
68
5.3 The Edit of All Parts in TMSet
5.3.1 Time Programme
Example 1.1 Time Programme
5.3.2 Programme of Spec Data Parameters
Example 1.1 Programme of Spec parameters
69
N o t e 1 This programme way is the same as the way Fast-Prog of Spec Parameters in example 3-4 in page
Error: No se encuentra la fuente de referencia, except the way it enters programme page.
N o t e 2 Please refer to 《Definitions of Spec data parameters 》 in page 116 for definitions of all items of
Spec data parameters .
5.3.3 Programme of String Parameters
Example 1.1 Programme of string parameters
N o t e 1 Please refer to 7.3 Definitions of String data paremeters for definitions of each string parameter.
70
5.3.4 Prog of PLU Shortcut Keys
Example 1.1 Prog of PLU Shortcut keys
N o t e 1 The way it programmes is the same as the way of 1.1 and 1.2 in page 17, except the way it enters
programme interface.
5.4 The Edit of All Parts in DTSet
5.4.1 Department Programme
The department (Dept. for short) is the largest category in sales statistics. And it’s marked with number from 1 to
99 and the corresponding meanings are shown below:
71
Example 1.1 Department Programme
5.4.2 Class Programme
Class is the second largest category in sales statistics. And it is marked with number from 1 to 99 and the corresponding meanings are shown below:
Example 1.1 Class programme
72
5.4.3 PLU Programme
Price-LookUp is information cell for goods sale. Serial number of PLU, as the only sign of scale store PLU, is defined by user to correspond to actual goods. Remark number, as the number defined by users or the serial number of actual goods, is often printed as barcode. All the serial numbers which can be edited by users are from
10 to 5999. And special serial numbers are corresponding to the meanings shown below :
Example 1.1 PLU programme
73
N o t e 1 Except the parts which have been instructed, meaning of the other words are listed 《 List of
Programme Interface》in page 43.
N o t e 2 The way it programmes is the same as the way Fast-Prog of 1.1 in page 15, except the way it enters
programme page.
N o t e 3 xx is not continuous when users press【】and【】to select the programme content. There are two reasons. One reason is that the content in this part is meaningless. For example, tare will not present in count PLU programme. The other reason is that the content in that part is seldom used and has been set as non-programme content (Skip) in P31 and P32. Users could change that setting for personal usage and please refer to corresponding chapters for details.
74
5.4.4 Unit Programme (Not Open)
Unit is the basis of sale price. The scale has shielded parts of functions in consideration that edit of units may cause unnecessary trouble. The 8 units edited when the scale is released from factory are shown as below:
N o t e 1 Default weight unit is the measure unit of the scale.
5.4.5 Barcode Programme
Barcodes have different meanings in various applications and coding systems. Some barcodes are already edited when the scale is released from factory. Users could choose some barcodes from them to use or edit the barcode by themselves.
Example 1.1 Barcode Programme
75
Table 1.1 List of barcode types
76
N o t e 1 Only EAN13 are opened currently. No matter which kind of code you choose, print will be in format of EAN13.
Table 1.2 Table 5-2 Check digit of barcode
N o t e 1 Check digit of barcode for barcode formats is just an advice for the scale. The scale would process the check based on the selected barcode format. For example, EAN13 is verified by End Check no matter which kind of check is selected.
Table 1.3 Descriptions of barcode data items
77
Table 1.4 Factory Default barcode
78
5.4.6 Print Formats Programme
Different print formats are needed in various applications. Some print types are already edited when the scale is released from factory. Users could choose some formats from them or edit the format by themselves. It’s very
hard to edit print format on the scale. Suggest users do not edit print format on the scale.
This chapter would not offer any examples about print formats edit. Users should use the software on PC to edit print formats or write down demands and send them to us. We will edit the print format you need.
Table 1.1 Factory default print formats
79
80
81
82
N o t e 1 If users use gap paper in size of 58mm*30mm, set the value of Spec000 to 1, Spec001 to 4.
N o t e 2 If users use gap paper in size of 40mm*30mm, set the value of Spec000 to 2, Spec005 to 5.
N o t e 3 If users use gap paper in size of 58mm*30mm, set the value of Spec000 to 3, Spec005 to 6.
N o t e 4 If users use plain paper in width of 58mm, set the value of Spec000 and Spec005 to 7
N o t e 5 If users use plain paper in width of 40mm, set the value of Spec000 and Spec005 to 8.
5.4.7 Salesman Programme (Not Open)
Example 1.1 Salesman programme
83
N o t e 1 Number 1~99 is the content for users to edit.
84
5.5 Assistant Data Programme
5.5.1 Steps Select of PLU Prog
Example 1.1 Steps select of PLU prog
85
N o t e 1 The steps above activate steps index and shield steps cost. So, there is a step to input index in the programme of P23, but without a step to input cost. Select Prog or Skip by pressing【↑】or【↓】. If
Prog is selected, the step is in the programme. If Skip is selected, the step is skiped and not in programme.
N o t e 2 Amended content would be in effect only in PLU programme and not effective in fast-prog.
86
5.5.2 Steps Select of PLU Fast Prog
Example 1.1 Steps select of PLU fast prog
87
N o t e 1 The processes are the same as 1.1 , only if amended contents only work in PLU fast-prog instead of
PL U programme.
5.5.3 Delete Sale Data
When entering the interfaces of delete, users would be requested to receive validate code. Validate code is
9958. Confirm and enter delete process.
88
Example 1.1 Delete PLU20~30
89
N o t e 1 Once confirming to delete object, users shall be requested to input 2 numbers. And system would delete data objects in the range between the two numbers. If the 2 nd number is 0, the object appointed by 1 st number is deleted. If 2 nd number is less than 1 st number, no object is deleted.
5.6 Communication and Data Update
5.6.1 Operations of files in USB flash disk.
Data edited on PC could be transferred by USB flash disk.
The software would create a file in the directory of JHSCALE when exporting a file to USB flash disk.
If users export auto-update file, the form of file is A_xxx.TMS. If the scale has set USB flash disk autoupdate (factory default setting), after switch on, the scale would update the data when system detects the file in
USB flash disk
In P51, press【×】 to select auto-update file A_xxx.TMS, or input number to select numbered files from
A_000.TMS to A_999.TMS (The number is file serial number ). Press 【Confirm】 to load file data and update the information in the scale. Or press 【Amend】 to save scale information to appointed file.
Example 2.13 Load files in USB flash disk
90
N o t e 1 If the loading files ends normally, system would change the state into Finish. Normally, the amount of error commands should be 0.
N o t e 2 If system encounters with invalid files or other serious mistakes, change the state into Error.
N o t e 3 In the state of Finish or Error, press any key to exit. If users want to exit midway, press 【Cancel】.
91
Example 1.2 Save to files in USB flash disk
N o t e 1 Exporting data to files in USB flash disk may take a lot of time. Please wait.
N o t e 2 Press any key to exit when saving is ended. If users want to exit midway, press 【Cancel】.
5.6.2 Ethernet Monitor Interface
Example 1.1 Enter Ethernet monitor interface
92
N o t e 1 This monitor interface is usually used when the scale is set to not update in real-time on Internet.
5.6.3 RS232 Communications
The interface is similar to ethernet monitor interface.
5.6.4 USB Slave Communications
The interface is similar to ethernet monitor interface.
5.7 Hardware Assistant
5.7.1 Validate Code
On the purpose of preventing any misoperation in important operation interfaces, users are requested to input validate code when entering these operation interfaces. The interface is shown below:
Input Code 0
Validate code of this scale is 9958. When the scale requests to input validate code, users should first make sure whether this operation interface is the one you intend to enter and understand the meaning of this operation.
Then input validate code and do operations.
5.7.2 Password
Password is the code to obtain the right to operate the scale. And there are 4 passwords in all.
93
N o t e 1 That Password is 0 means no passwords needed. Users could set the password to be 0 when canceling the password.
N o t e 2 Admin password is in a higher level than the other 3 passwords. Users do not need to input any password to enter all interface if admin password is 0 , no matter whether the other passwords are 0 or not. If users want to protect Prog interface or Account interface, first change the admin password other than factory default, then set passwords of corresponding interfaces.
Example 1.2 Process of amending passwords
94
N o t e 1 Only the input passwords match for the two times, password setting can be done.
95
5.7.3 Recover Factory Default Setting
Example 1.1 Process of amending passwords
96
N o t e 1 Please pay attention to this. Execute recovery 1 or 4, and then passwords would change to factory default.
97
6 Account Operations
6.1 List of Account Interfaces
Entering to Account interface, the scale would enter a calculate process, which first calculate sale records that haven’t Stat.. Then enter A1 select interface.
Table 1.1 List of Account interfaces
98
6.2 Operations of Printing Report
6.2.1 Print Total Report
Total reports are divided into total daily report, total monthly report, total quarterly report and total manual report. Each report owns 32 buffer zones (0~31).
Take total daily report as an example: The buffer zone 0 stores total daily report of current day; buffer zone 1 stores total daily report of the last day. The rest may be deduced by analogy. So buffer zone 31 stores total daily report of the day dating back to 31 days ago.
Total monthly report and total quarterly report works in the same way, storing total report of the last x
99
months or quarters (x=0~31).
Total manual report would take operation A51 as time point to divide the storage. The buffer zone delays a position automatically when a report is cleared (That means: Buffer 31 records the information which was stored in buffer 30. By analogy, buffer 1 record the information which was stored in buffer 0 and information stored in buffer 0 is cleared. Then start accumulating in buffer 0. ).
When printing total report, system would request to input 2 numbers. And the scale would print total buffer which is added up with the buffers whose numbers are between the 2 input numbers.
Example 1.1 Print daily reports of today and yesterday
N o t e 1 If some buffers store no data, these buffers would be skiped off without printing.
N o t e 2 If 2 nd number input is 0, system would only print the buffer appointed by 1 st number.
N o t e 3 If 2 nd number input is not 0 and less than 1 st number, no buffer would be printed.
N o t e 4 The hints about currently print object may appear on the screen for just a few seconds when system is printing.
6.2.2 Print Department Report
The scale could print report of all departments. Operation steps are similar as《Print PLU Report Print》.
Only the step to enter is different and 2 input numbers is the department numbers.
6.2.3 Print Class Report
The scale could print reports of all Classes. Operation steps are similar as《Print PLU Report Print》.
Only the step to enter is different and 2 input numbers is the class numbers.
1
00
6.2.4 Print PLU Report
The scale could print PLU reports whose number is less than 1000.
When printing PLU reports, system would orderly print those PLU reports whose serial numbers is between the 2 input numbers as well as the 2 input numbers.
Example 1.1 Print PLU daily reports with the numbers from 10 to 20
N o t e 1 If some buffers store no data, these buffers would be skiped off without printing.
N o t e 2 If 2 nd number input is 0, system would only print the buffer appointed by 1 st number.
N o t e 3 If 2 nd number input is not 0 and less than 1 st number, no buffer would be printed.
6.3 Clear Report Information
6.3.1 Clear Report Information Manually
The information in manual reports would not be cleared automatically unless users enter A51 (clear current manual report) interface to clear it. After this operation, manual reports of all departments, classes and PLU would be cleared, and total manual report would delay its serial number.
1
01
Example 1.1 Clear information in manual report
6.3.2 Clear All Reports and Records Information
Example 1.1 Clear All Reports and Records Information
N o t e 1 This operation would clear the records of all deals. And it’s irreversible. Please operate it carefully.
1
02
7Appendix
7.1 Error messages and solution
1
03
1
04
1
05
1
06
1
07
1
08
1
09
11
0
11
1
11
2
11
3
11
4
11
5
7.2 Definitions of Spec data parameters
11
6
11
7
11
8
11
9
1
20
1
21
1
22
1
23
1
24
1
25
1
26
1
27
1
28
1
29
7.3 Definitions of String data paremeters
1
30
1
31
ВЕСЫ ТОРГОВЫЕ С ЧЕКОПЕЧАТЬЮ МОДЕЛИ CL5000 РУКОВОДСТВО ПО ЭКСПЛУАТАЦИИ Версия от 01.02.2012 г.
СОДЕРЖАНИЕ: 1 ОБЩИЕ СВЕДЕНИЯ……………………………………………………… 5 1.1МЕРЫ БЕЗОПАСНОСТИ ………………………………………………………………… 5 1.2ТЕХНИЧЕСКИЕ ДАННЫЕ………………………………………………………………… 8
2.7.4УСТАНОВКА ДАТЫ, ВРЕМЕНИ И ФОРМАТА ИХ ПРЕДСТАВЛЕНИЯ …………….. 69 2.7.5ПАРОЛИ И ДОСТУП, ПРОДАВЦЫ…………………………………………………………… 70 2.7.6ДИАГНОСТИКА УСТРОЙСТВ…………………………………………………………………… 74
3.10.1 3.10.2 3.10.3 РЕЖИМ «БЕЗ АВТОРИЗАЦИИ» ……………………………………………………… 103 РЕЖИМ «ПРИКРЕПЛЕННЫЙ» ………………………………………………………… 103 РЕЖИМ «ПЕРЕХОДЯЩИЙ» …………………………………………………………… 103
1 ОБЩИЕ СВЕДЕНИЯ 1.1 МЕРЫ БЕЗОПАСНОСТИ Внимание! Будте осторожны при установке и эксплуатации весов. Безукоснительно соблюдайте приведенные ниже требования мер безопасности! Не разбирайте весы. При появлении любых повреждений или неисправностей немедленно свяжитесь с официальным дилером CAS для
Убедитесь в подключении весов к розетке с нужным напряжением. Не менее чем за 30 минут до начала работы весы необходимо включить для прогрева. Для получения наилучших характиристик при Избегайте случайных ударов по весам. Это эксплуатации выполняйте техническое обслу- может повредить внутренний
Благодарим Вас за покупку весов CL5000 производства фирмы CAS Corporation (Южная Корея) — весов с возможностью печати самоклеющихся этикеток. Эти весы обладают самыми современными возможностями, имеют конструкцию высокого качества и удобный пользовательский интерфейс. Перед началом эксплуатации
1.2 ТЕХНИЧЕСКИЕ ДАННЫЕ Основные технические данные приведены в таблице 1.1. Таблица 1.1 – Технические данные Наибольший предел взвешивания, кг 6 15 30 Цена поверочного деления и дискретность отсчета, г 1/2 2/5 5/10 Максимальная масса тары, кг 5.998 9.998 9.998 Частота 8 АЦ-преобразования, Гц Размер
1.3 КОМПЛЕКТ ПОСТАВКИ Перечень поставляемых компонентов приведен в таблице 1.2. Таблица 1.2 – Комплект поставки Наименование Количество (шт.) Весы CL5000X* 1 Платформа 1 Сетевой шнур 1 Винт крепления стойки (только 4 для модификаций CL5000P и CL5000R) Руководство по эскплуатации 1 * X – один из 4-х
1.4 ОБЩИЙ ВИД Весы CL5000 выпускаются в 4-х модификациях по форме корпуса и расположению отсчетного устройства (дисплеев): базовая модификация — без стойки, с расположением дисплея непосредственно на весах, модификация с горизонтальным расположением дисплеев на стойке, модификация с вертикальным
На рисунках 1.5-1.8 приведены виды дисплея и клавиатуры для некоторых модификаций. Рисунок 1.5 – Вид дисплеев при их горизонтальном расположении на стойке весов (CL5000P) Рисунок 1.6 – Вид клавиатуры весов модификации CL5000B Рисунок 1.7 – Вид клавиатуры весов со стойкой (модификации CL5000P и
Рисунок 1.8 – Вид клавиатуры весов модификации CL5000H 1.5 УКАЗАТЕЛИ Указатели предназначены для индикации определенного состояния или режима работы весов. Условия, при которых каждый указатель включен, приведены в таблице 1.3. Таблица 1.3 – Условия включения указателей Указатель Когда включен
1.6 КЛАВИАТУРА Клавиатура предназначена для управления работой весов. Основное назначение каждой клавиши приведено в таблице 1.4. Таблица 1.4 – Основное назначение клавиш Клавиша Основное назначение Числовые клавиши. Используются для ввода цены, количества, итога, тары, числовых данных в режиме
В режиме взвешивания: добавление текущего товара в список суммируемых товаров. В режиме программирования: переход на одну страницу вниз. + СТР. В режиме взвешивания: печать нескольких этикеток для одного товара. В режиме программирования: переход на предыдущий уровень меню, а при нахождении в
1.7 ПРОГРАММНОЕ ОБЕСПЕЧЕНИЕ ВЕСОВ Программное обеспечение (далее – ПО) весов является встроенным. Идентификационным признаком ПО служит номер версии, который отображается на дисплее весов при их включении (см. п. 1.8). Уровень защиты ПО от непреднамеренных и преднамеренных воздействии в
Установите переключатель, расположенный в нижней части весов, в положение «ON» (вклю- чено). Если самодиагностика весов пройдет успешно, они перейдут в режим взвешивания. При этом на всех дисплеях (кроме графического) должны высветитьтся нули. Если возникли сложности на этом этапе, рекомендуется
Для того чтобы установить рулон этикеток выполните следующие действия: 1. Отключите питание весов тумблером ON/OFF, расположенным на днище весов. Откройте крышку отсека принтера (см. рисунок 1.13). Рисунок 1.13 – Открытие крышки 2. Поднимите рычаг (см. рисунок 1.14). Рисунок 1.14 – Подъем рычага 3.
4. Снимите с картриджа фиксатор и приемную катушку (см. рисунок 1.16). Рисунок 1.16 – Снятие фиксатора и приемной катушки 5. Установите новый рулон (см. рисунок 1.17). Рисунок 1.17 – Установка нового рулона 6. Рулон должен быть установлен, как показано на рисунке 1.18. Наклейка Зазор Термоголовка
2 ПРОГРАММИРОВАНИЕ 2.1 ОБЩИЙ ПОРЯДОК РАБОТЫ В РЕЖИМЕ ПРОГРАММИРОВАНИЯ Вход в режим программирования осуществляется нажатием клавиши МЕНЮ (при условии нахождения весов в режиме взвешивания). После входа в режим программирования на графическом дисплее появится главное меню программирования, на
Таблица 2.1 – Перечень возможных кодов и соответствующих им меню (подменю) Код Меню Код Подменю Код Подменю 1100 Товары 1110 Переоценка 1120 Добавить/изменить 1130 Скидки 1131 Добавить/изменить скидку 1132 Просмотр скидок 1133 Удалить 11331 Удалить по товару № скидку 11332 Удалить по отделу № 11333
1600 Итоги 1610 X1 отчет 1620 Z1 отчет 1630 X2 отчет 1532 1533 1534 1611 1612 1613 1614 1615 1616 1617 Скидка по массе Скидка по штукам Скидка по количеству Итог по весам Итог по запрограммированным товарам по незапрограммирован. товарам Итог Итог по группам Итог по отделам Почасовой итог Итог по
1870 Параметры весов 1900 Интерфейсы 1880 1910 1920 1930 1940 1950 1871 1872 1873 1874 Настройка функций клавиш Сетевые настройки 1911 1912 1913 1914 1915 1916 1917 Приложение ВКЛ/ВЫКЛ. блокировку Проверка весов Копировать все Параметры дисплея Параметры печати Общие параметры Отмена авторизации
10 Кол-во товаров в наборе: ** Количество единиц товара в наборе. 11 Наименование единицы № *** Номер наименования единицы измерения штучных и счетных товаров. 12 Фиксиров. Стоимость Фиксированная стоимость. Вводится значение фиксированной стоимости, которое будет использоваться при вызове товара
* Доступно при вводе весового товара, ** Доступно при вводе счетного товара, *** Доступно при вводе штучного и счетного товара, **** Если введены оба состава продукта (по номеру и прямой), приоритетным будет прямой состав. Примечание. В случае установки в меню с кодом 1510 в строке «Использ. общ.
2.2.1 СОЗДАНИЕ ЗАПИСИ ТОВАРА (МЕНЮ -> 1. Товары -> 2. Добавить/Изменить) В этом разделе описывается последовательность действий, которые необходимо выполнить для ввода в память весов нового товара или для изменения параметров ранее введенного. Ниже по действиям описана процедура ввода нового товара
Введите время, определяющее срок годности. Срок годности вводится как количество часов с момента упаковки, в течение которых товар должен быть продан. Если время срока годности использовать не требуется, введите «0». Нажмите клавишу ПЕЧ. Введите номер состава продукта. Если состав
2.2.3.2 УДАЛЕНИЕ ТОВАРА (МЕНЮ -> 1. Товары -> 4. Управление -> 2. Удалить) Предусмотрено 3 варианта удаления товара: удаление товара определенного номера, удаление всех товаров определенного отдела и удаление всех товаров, хранящихся в памяти весов. Для примера ограничимся рассмотрением удаления
Допустим, номер отдела – 1, а номер товара – 2. Тогда последовательно нажмите клавиши 1, ПЕЧ., 2, ПЕЧ. На дисплее высветится количество продаж этого товара. Для обнуления количества продаж данного товара нажмите клавишу ТЕСТ, для обнуления количества продаж всех товаров – клавишу НУЛЬ. 28
2.3 ДОПОЛНИТЕЛЬНЫЙ СПИСОК I (Меню -> 2. Доп. список I -> 1.Отделы) В весах предусмотрены списки отделов, групп, дополнительных текстов, штрих-кодов, нумерации тары и единиц счета. Список представляет из себя совокупность записей. Каждая запись содержит порядковый номер и значение. Например, запись
2.3.1.2 ПРОСМОТР СПИСКА ОТДЕЛОВ (Меню->2.Доп. список I->1.Отделы ->2.Просмотр отделов) 1. Ввод диапазона Для просмотра списка установленных отделов необходимо ввести диапазон номеров (начальный и конечный номера) отделов, например, с 1-го по 10-ый. 1 ПЕЧ. 1 ПРОСМОТР ОТДЕЛОВ (1/1) — Начальный номер:
2.3.2.1 СОЗДАНИЕ НОВОЙ ГРУППЫ (МЕНЮ -> 2. Доп. список I -> 2.Группы -> 1. Добавить/Изменить группу) 1. Создание новой группы Каждой группе должен быть присвоен номер, который может быть в диапазоне от 1 до 99. Например, нужно ввести группу № 1. 1 Каждая группа должна, кроме номера, содержать
2.3.3 ДОПОЛНИТЕЛЬНЫЕ ТЕКСТЫ (МЕНЮ -> 2. Доп. список I -> 4. Дополнительные тексты) Дополнительные тексты могут вводиться для последующей ссылки на них в записи товаров и, соответственно, для печати на этикетке. Всего может быть введено в память до 99-ти дополнительных текстов. На каждый из
2.3.3.3 УДАЛЕНИЕ ДОПОЛНИТЕЛЬНОГО ТЕКСТА (МЕНЮ ->2. Доп. список I -> 4. Дополнительные тексты -> 3. Удалить дополнительный текст) УДАЛИТЬ ДОП. ТЕКСТ Доп. текст №:[ :[ 1] 1. Ввод номера (1/1) Для удаления дополнительного текста необходимо ввести его номер, например, 1. 1 ПЕЧ. 2.3.4 ШТРИХ-КОД (МЕНЮ ->
Таблица 2.3 – Соответствие цифры типу кодировки штрих-кода № Тип кодировки Максимальное количество разрядов, описание 1 EAN-13 13, печать только цифр 2 3 4 5 6 7 8 9 10 13+5, печать только цифр 8, печать только цифр 24, печать только цифр 12, печать только цифр 13, печать только цифр CODE39: 13,
Таблица 2.4 — Соответствие числового значения формату штрих-кода и описание назначение составляющих разрядов штрих-кода Значение Формат Описание составляющих штрих-кода 0 Пользовательский I: Код товара N: Номер ячейки штрих-код P: Стоимость 1 DDIIIIIPPPPPC V: Проверочный разряд стоимости
2.3.4.2 ПРОСМОТР ШТРИХ-КОДОВ (МЕНЮ -> 2. Доп. список I -> 6. Форматы штрих-кодов -> 2. Просмотр штрих-кодов) 1. Установка диапазона номеров штрих-кодов Для просмотра списка установленных штрих-кодов нужно задать диапазон номеров штрих-кодов, которые необходимо просмотреть, например, с 1-го по
2.3.5 СПИСОК МАСС ТАРЫ (МЕНЮ -> 2. Доп. список I -> 7. Список масс тары) Список масс тары используется для последующего вызова определенной массы тары при вызове товара. При этом, после ввода записи массы тары в список, устанавливается ссылка на номер тары при редактировании товара (см п. 2.2).
X 5. Выход в меню Для выхода в меню нажмите клавишу ВЫХ. ВЫХ * Если Вы ввели тару с номером «1», равную 10 кг (как описано в примере), то при вводе нового товара в память весов при указании номера тары «1» для вводимого товара в дальнейшем (при взвешивании) будет учитываться масса тары, равная 10
2.3.5.4 КЛАВИШИ БЫСТРОГО ВЫЗОВА МАССЫ ТАРЫ (МЕНЮ -> 2. Доп. список I -> 7. Список масс тар -> 4. Клавиши вызова тары ) Для быстрого вызова из памяти весов массы тары можно назначить до 9-ти клавиш из числа клавиш быстрого вызова товара. Для этого предварительно необходимо определить клавиши
5. Выход из меню Для перехода на предыдущий уровень меню нажмите клавишу ВЫХ. Для выхода в режим взвешивания нажимайте клавишу ВЫХ. до тех пор, пока весы не перейдут в режим взвешивания. X ВЫХ. 2.3.6.2 ПРОСМОТР ЕДИНИЦ СЧЕТА (МЕНЮ -> 2. Доп. список I -> 8. Список единиц счета -> 2. Просмотр единиц
2.4 ДОПОЛНИТЕЛЬНЫЙ СПИСОК II 2.4.1 СОСТАВЫ ПРОДУКТОВ (МЕНЮ -> 3. Дополнительный список II -> 1. Составы продуктов) Составы продуктов, как правило, используются для последующей печати на этикетке у соответствующих товаров. В зависимости от управляющей программы весов предусмотрено 1000 прямых
2.4.1.2 ПРОСМОТР СОСТАВОВ ПРОДУКТОВ (МЕНЮ -> 3. Дополнительный список II -> 1. Составы продуктов -> 2. Просмотр составов прод.) 1. Ввод диапазона номеров Для просмотра определенных составов продуктов необходимо ввести диапазон соответствующих им номеров, которые требуется просмотреть, например, с
2.4.2 СКИДКИ НА ОПРЕДЕЛЕННЫЕ ТОВАРЫ (МЕНЮ -> 1. Товары -> 3. Скидки) Скидка может устанавливаться отдельно для каждого товара. Всего существует 11 видов скидок. Кроме этого допускается определить дни недели, в которые будет предоставляться скидка, период дат и период времени. Далее описаны
стоимости 11 Скидка на дополнительное количество по стоимости уменьшается цена за килограмм (за штуку) после достижения заданного порога стоимости. Устанавливается абсолютное значение скидки, на которое уменьшается масса (количество) после достижения заданного порога стоимости. 3. Ввод порогов и
4. Определение дней недели, в которые будет предоставляться скидка СКИДКА ПО МАССЕ Введите 1 или 0: [ВПВСЧПС] Дни недели : [0000111] (5/7) 1-> Скидка есть 0-> Скидки нет Дни считаются слева направо с воскресенья по субботу. Например, требуется установить скидку для четверга, пятницы и субботы. 0 0
Для вывода списка скидок на печать нажмите клавишу ТЕСТ. 2.4.2.3 УДАЛЕНИЕ СКИДОК (МЕНЮ -> 1. Товары -> 3.Скидки -> 3.Удалить скидку) Существует 3 варианта удаления скидок: по номеру товара определенного отдела, по определенному отделу и удаление всех скидок. 2.4.2.3.1 УДАЛЕНИЕ СКИДКИ ПО НОМЕРУ
2.4.3 ОБЩИЕ СКИДКИ (МЕНЮ -> 5. Общие параметры -> 3. Скидка) Кроме установки скидки для каждого товара, есть возможность установить общую скидку, которая может применяться ко всем товарам. 2.4.3.1 ОПРЕДЕЛЕНИЕ ПРИОРИТЕТА СКИДОК (МЕНЮ -> 5. Общие параметры -> 3. Скидка -> 1. Приоритет скидок)
2.4.4 НАСТРОЙКА КЛАВИШ БЫСТРОГО ДОСТУПА (МЕНЮ -> 1.Товары -> 6. «Горячие» клавиши) Всего предусмотрено 5 наборов клавиш быстрого доступа – каждый набор соответствует определенному отделу, номер набора вводится при образовании нового отдела (см. раздел 2.2.2). Любая из клавиш быстрого доступа может
2.4.5 МАГАЗИНЫ (МЕНЮ -> 4. Параметры магазина -> 1. Магазины) Магазины вводятся в память весов с целью печати их названия, номера телефона и текста на этикетках. Для случая использования весов в нескольких магазинах предусмотрен ввод информации о 10 магазинах. Далее описан порядок ввода указанных
2.4.5.2 ПРОСМОТР МАГАЗИНОВ (МЕНЮ -> 4. Параметры магазина -> 1. Магазины -> 2. Просмотр назв. магазинов) Предусмотрена возможность просмотра списка введенных магазинов. 1. Ввод диапазона порядковых номеров Допустим, необходимо просмотреть магазины, которым соответствуют номера в диапазоне от 1 до
2.4.6 БЕГУЩАЯ СТРОКА (МЕНЮ -> 4. Магазин -> 3. Реклама на дисплее) В весах предусмотрено отображение бегущей строки во время пауз при продажах. Бегущая строка может содержать любые символы кодировки ASCII. Максимальная длина бегущей строки – 80 символов. Данный пункт меню описывает порядок работы с
4. Определение активности бегущей строки ВВОД РЕКЛАМНЫХ СТРОК (3/7) Показ строки реклымы (Д/Н) : [Д] Для установки активности бегущей строки (бегущая строка будет высвечиваться) в поле ввода значения необходимо установить «Д», для этого используется клавиша 1. Для отмены активности бегущей строки в
7. Установка диапазона дат, в которые будет высвечиваться сообщение ВВОД РЕКЛАМНЫХ СТРОК (6/7) Дата начала :[11-01-06]ДД-ММ-ГГ Дата окончания:[13-01-06]ДД-ММ-ГГ Сообщение будет высвечиваться только в том диапазоне дат, который установлен в данном пункте меню. Даты вводятся в формате день-месяц-год.
2.4.7 БЫСТРАЯ СМЕНА ФОРМАТА ЭТИКЕТКИ (МЕНЮ -> 4. Магазин -> 7. Клавиши форматов этикеток) В весах предусмотрена функция быстрой смены формата этикетки (по нажатию одной клавиши). Для использования этой функции в память весов предварительно необходимо ввести номер клавиши формата этикетки (в
2.5 ОСНОВНЫЕ НАСТРОЙКИ 2.5.1 ФОРМАТ ЭТИКЕТКИ (МЕНЮ -> 5. Общие параметры -> 1. Формат этикетки) В данном разделе описывается изменение номера используемого формата этикетки. Более подробное описание форматов этикеток смотрите в пункте 4.1 настоящего руководства. 1. Определение формата На данном
5. Определение направления итоговой этикетки при печати При выводе на печать итоговой этикетки ее допускается перевернуть. Для установки переворота необходимо установить значение «Д» (устанавливается нажатием клавиши 1), для отказа от переворота – значение «Н» (устанавливается нажатием клавиши 0).
2. Установка номера формата штрих-кода для запрограммированного весового товара ФОРМАТ ШТРИХ-КОДА Вкл. общ. штрих-код (1=Д/0=Н): [ Д ] № ш.-кода весов. тов. :[2] № щ.-кода штучн. тов. :[0] (1/4) ФОРМАТ ШТРИХ-КОДА Вкл. общ. штрих-код (1=Д/0=Н): [ Д ] № ш.-кода весов. тов. :[2] № щ.-кода штучн. тов.
2.6 ПАРАМЕТРЫ ПЕЧАТИ Данный раздел описывает процедуры настройки наличия или отсутствия вывода на печать (этикетку) определенных данных при продажах, а также настройку некоторых параметров печати. ПАРАМЕТРЫ ПЕЧАТИ 1. Список печати этикетки 2. Показывать скидку 3. Настройки принтера (1/2) ПАРАМЕТРЫ
Таблица 2.10 — Информация, допустимая для вывода на печать (этикетку) № страОписание ницы меню 1 Название отдела Номер отдела Номер группы 2 Номер товара Наименование № 1 Наименование № 2 3 Наименование № 3 Код товара Единица массы 4 Масса тары Количество Единица счета 5 Продать до (дата) Продать
2.6.2 ПОКАЗ СКИДКИ (МЕНЮ -> 7. Параметры печати -> 2. Показывать скидку) В данном пункте описывается процедура установки наличия (отсутствия), а также настройки вывода на печать стоимости с учетом скидки и без учета скидки. Для краткости ввод каждого параметра описываться не будет, а будет лишь
Таблица 2.12 – Параметры печати № Название разОписание раздела дела 1 Режим печати Выбор режима печати: режим печати чеков, этикеток или сплошная лента. Установка размера этикетки (чека) в миллиметрах: “Ширина 2 Размеры чека/этикетки (60)”, “Длина (40)” и “Зазор(2)”; стандартный размер чека:
2.6.3.3 НАСТРОЙКА ДАТЧИКОВ (МЕНЮ -> 7. Параметры печати -> 3. Настройка принтера 3. Настройка датчиков) В этом пункте допускается определить значения протяжки и отрыва ленты. Как правило, калибровка датчиков проводится после замена ленты этикеток. В любом случае рекомендуется автоматическая
2.6.3.6 СДВИГ ПЕЧАТИ (МЕНЮ -> 7. Параметры печати -> 3. Настройка принтера 6. Сдвиг печати) Настройка сдвига печати позволяет корректировать положение области печати по вертикали. Точная настройка сдвига печати упростит снятие напечатанной этикетки. Сдвиг печати определяется установленным значением
Таблица 2.13 – Назначение символов, составляющих номер этикетки Обозначение Назначение Пример простого номера этикетки I Код товара N Номер продукта P Стоимость U Цена за килограмм #0001 W Масса Q Количество Пример простого номера чека D Отдел G Группа A Счетчик этикеток B Счетчик транзакций
2.6.6.1 ВАРИАНТЫ ПЕЧАТИ ЧЕКА (МЕНЮ -> 7. Параметры печати -> 6. Печать чеков ->1. Варианты печати чека) В данном пункте меню допускается определить использование списка печати, наличие печати штрих-кода, итога покупки, копии чека и списка печати копии чека. Для примера предположим, что требуется
2.7 КОНФИГУРАЦИЯ (МЕНЮ -> 8. Конфигурация) В этом разделе описаны процедуры настроек всевозможных параметров работы весов. Ниже показаны все страницы основного раздела режима «Конфигурация». КОНФИГУРАЦИЯ 1.РЕЖИМ ПРОДАЖ 2.РЕЖИМ РАБОТЫ 3.НОМЕР ВЕСОВ (1/3) КОНФИГУРАЦИЯ 7. ПАРАМЕТРЫ ВЕСОВ 8. ФУНКЦИИ
Таблица 2.15 — Дополнительное описание режимов продаж Выполняемые Режим Продавец операции 1.Переходящий прода- Переходящий вец, «чеки» продавец Продажа 2. «Этикетки» (без проПродажа давца) Без продавца 3. Фасовка (без продавца) Без продавца Продажа 4. Переходящий прода- Переходящий Продажа вец,
2.7.2 РЕЖИМЫ РАБОТЫ (МЕНЮ -> 8. Конфигурация -> 2. Режимы работы) Данный раздел описывает изменение режима работы продавца и режима работы весов. Допустимые режимы работы весов: «регистрация», «без отчета» и «администратор». Допустимые режимы работы продавца: «без авторизации», «прикрепленный
2.7.3 УСТАНОВКА ТЕКУЩЕГО ОТДЕЛА И МАГАЗИНА (МЕНЮ -> 8. Конфигурация -> 3. Номер весов) На весах можно менять номер текущего отдела и номер магазина (например, если одни весы используются для работы в разных отделах или разных магазинах). При работе весов в основном режиме можно делать вызов из
2. Установка формата представления года, времени и разделителя даты Формат года определяет формат представления года: четырехзначное (значение 0) или двузначное (значение 1). Формат времени определяет формат представления времени: 24-х часовой (значение 0) или 12-ти часовой (значение 1). В качестве
5 Уровень доступа Уровень доступа продавца может принимать значения в диапазоне от 0 до 3. Уровень доступа определяет полномочия продавца (какими функциями и настройками продавец может пользоваться). 1. Ввод номера, ФИО и псевдонима продавца Например, номер продавца – 2, ФИО – Иванов, псевдоним –
1. Ввод номера продавца УДАЛИТЬ ПРОДАВЦА Продавец №:[ 2] Петров (1/1) Для удаления продавца введите его уникальный номер, например, 2. 2 ПЕЧ. 2.7.5.5 УРОВНИ ДОСТУПА ПРОДАВЦОВ (МЕНЮ -> 8. Конфигурация -> 5. Пароли и доступ -> 5. Уровни доступа ) Раздел «Уровни доступа» описывает установку разрешения
14 Изменение стоимости 15 Открыть денежный ящик 16 Доступ к меню 17 Изменение данных о товаре 18 Изменение цены товара 19 Доступ к общим параметрам 20 Доступ к X-отчету 21 Доступ к Z-отчету 22 Изменение параметров магазина 23 Изменение скидки 25 Изменение массы тары 26 Конфигурация весов 29 30
2.7.5.6 КЛАВИШИ ПРОДАВЦОВ (МЕНЮ -> 8. Конфигурация -> 5. Пароли и доступ 6. Клавиши продавцов) В этом разделе описывается присвоение определенному продавцу определенной клавиши продавца. Каждому продавцу может быть назначена своя клавиша. Всего продавцам может быть назначено до 31-й клавиши (см.
2.7.6.1 ТЕСТИРОВАНИЕ ДИСПЛЕЯ (МЕНЮ -> 8. Конфигурация -> 6. Тест -> 1. Дисплей ) Для тестирования дисплея нажмите клавишу 1 в меню «ТЕСТ». Выход из режима тестирования – клавиша ВЫХ. 2.7.6.2 ТЕСТИРОВАНИЕ АЦП (МЕНЮ -> 8. Конфигурация -> 6. Тест -> 2. АЦП ) Для тестирования АЦП нажмите клавишу 2 в
2.7.6.5 ТЕСТИРОВАНИЕ ДАТЧИКОВ ПРИНТЕРА (МЕНЮ -> 8. Конфигурация -> 6. Тест -> 5. Датчики принтера) Для тестирования датчиков принтера нажмите клавишу 5 в меню «ТЕСТ». Для тестовой печати нажмите клавишу ТЕСТ. Выход из режима тестирования – клавиша ВЫХ. ДАТЧИКИ ПРИНТЕРА Отрыв бумаги:[ЗАНЯТО ] Печ.
2.7.7 ПАРАМЕТРЫ ВЕСОВ (МЕНЮ -> 8. Конфигурация -> 7. Параметры весов) Этот раздел описывает некоторые параметры работы весов, доступные для изменения: параметры работы дисплея, печати и др. (см. таблицу 2.21). Для краткости перечень конкретных действий описываться не будет, а в таблице 2.21 сведены
Штучн. тов. без клавиши Д/Н Д/Н Весовой тов. без клавиши Налог вкл. в стоимость «Регистр» вместо «Возвр.» Д/Н Д/Н Д/Н Двойное кол-во клав. Тов. Д/Н 4. Отмена авторизации (Код меню:1874) Сброс авториз. после опер. Сброс авториз. через(0.1с) 1~99 Определяет наличие работы клавиш быстрого доступа для
2. Установка назначения клавиши Введите номер функции, которую будет исполнять назначаемая клавиша (см. таблицу 2.22). Например, требуется установить значение «12». 1 2 ФУНКЦИИ КЛАВИШ Код клавиши: [ 4] Клавиша функции: [12] (1/1) ПЕЧ. Таблица 2.22 – Соответствие числового значения номеру функции №
25~28 [ВАЛЮТА 1~4] Вызов таблицы валют* 31~39 [ТАРА 1~9] Вызов тары из списка масс тар 51~83 ПРОДАВЕЦ(V1~V32) Регистрация продавца 83~90 [УСТАНОВКА ФОРМАТА ЭТИКЕТКИ] Изменение формата этикетки * В версии весов для стран СНГ данная функция заблокирована. ** На части весов данная функция доступна
2.8.2 ОТЧЕТЫ ВИДА X1/X2 (МЕНЮ -> 6. Итоги -> 1. X1 Отчет / 3. X2 Отчет) Далее, для получения отчета необходимо нажать клавишу, соответствующую его варианту (см. таблицу 2.24). X1 ОТЧЕТ 1. ИТОГ ПО ВЕСАМ 2. ИТОГ ПО ЗАПР. ТОВАРАМ 3. ИТОГ ПО НЕЗАПР. ТОВАРАМ (1/3) Таблица 2.24 – Соответствие клавиши
2.8.2.2 ОТЧЕТЫ ВИДА X1/X2 ПО ЗАПРОГРАММИРОВАННЫМ ТОВАРАМ (МЕНЮ -> 6. Итоги -> 1.X1 Отчет / 3. X2 Отчет -> 2. Итог по запр. Това рам) Данный пункт меню отчетов описывает порядок получения отчетов вида X1 (X2) для всех операций продаж, совершенных с определенными запрограммированными товарами
2.8.2.3 ОТЧЕТЫ ВИДА X1/X2 ПО НЕЗАПРОГРАММИРОВАННЫМ ТОВАРАМ (МЕНЮ -> 6. Итоги -> 1.X1 Отчет / 3. X2 Отчет -> 3. Итог по незапр. товарам) На первой странице данного пункта меню необходимо определить тип незапрограммированных товаров, по операциям с которыми требуется получить отчет: 0 — весовой
2.8.2.4 ОТЧЕТЫ ВИДА X1/X2 ПО ГРУППАМ (МЕНЮ -> 6. Итоги -> 1. X1/X2 Отчет -> 4. Итог по группам) Введите диапазон номеров групп, по которым требуется получить отчет, например, с 1-ой по 5-ю. 1 84 ПЕЧ. 5 X1 ИТОГ ПО ГРУППАМ С №[ 0]по №[ 5] (1/1) ПЕЧ. На дисплее высветится отчет по заданной группе
2.8.2.5 ОТЧЕТЫ ВИДА X1/X2 ПО ОТДЕЛАМ (МЕНЮ -> 6. Итоги -> 1/4. X1/X2 Отчет -> 5. Итог по отделам) Введите диапазон номеров отделов, по которым требуется получить отчет, например, с 1-го по 3-ий. 1 ПЕЧ. 3 X1 ИТОГ ПО ОТДЕЛАМ С №[ 0]по №[ 3] (1/1) ПЕЧ. На дисплее высветится отчет по заданным отделам.
2.8.2.7 ОТЧЕТЫ ПО ПРОДАВЦАМ ВИДА X1/X2 (МЕНЮ -> 6. Итоги -> 1/4. X1/X2 Отчет -> 7. Итог по продавцам) На данном этапе требуется ввести диапазон номеров продавцов, по операциям которых требуется получить отчет. Например, с 1-го по 2-ого. 1 86 ПЕЧ. 2 X1 ИТОГ ПО ПРОДАВЦАМ С №[ 1]по №[2] (1/1) ПЕЧ. На
2.8.3 ОТЧЕТЫ ПО ВЕСАМ ВИДА Z1/Z2 (МЕНЮ -> 6. Итоги -> 2/4. Z1/Z2 Итог по весам) Для вывода подробного отчета на печать и удаления отчетных данных нажмите клавишу ТЕСТ. На дисплее весов высветится запрос подтверждения. Для подтверждения вывода на печать и удаления данных нажмите клавишу 1. Z1 ИТОГ
2.9 ИНТЕРФЕЙСЫ ОБМЕНА ДАННЫМИ В весах реализована возможность обмена данными по интерфейсу «RS-232», а также и по «TCP/IP» (технология Ethernet), если весы не поставлялись без данной возможности. При подключении весов к компьютеру реализуются следующие функции: • Загрузка списка товаров в память
Для входа в режим настроек параметров связи выполните следующие действия: При нахождении весов в режиме взвешивания, нажмите последовательно клавиши МЕНЮ, 9. В случае запроса пароля введите пароль и нажмите клавишу ПЕЧ. ИНТЕРФЕЙСЫ 1. СЕТЕВЫЕ НАСТРОЙКИ 2. ПРИЛОЖЕНИЕ 3. ВКЛ./ВЫКЛ. БЛОКИРОВКУ (1/1)
3 РАБОТА В ОСНОВНОМ РЕЖИМЕ В этом разделе рассматриваются основные операции по работе с весами в режиме продаж. При включении питания весов, если самодиагностика прошла успешно, весы переходят в режим продаж. При этом на всех дисплеях должны высвечиваться нули. Следует отметить, что в данном
3.2 РАБОТА С ТАРОЙ Режим работы с тарой удобен для получения массы груза нетто при взвешивании груза в таре. В режиме взвешивания массу тары допускается ввести двумя способами: с клавиатуры весов или путем измерения массы тары на платформе. 3.2.1 ВВОД МАССЫ ТАРЫ С КЛАВИАТУРЫ Для ввода массы тары с
3.3 ВЫЗОВ ИЗ ПАМЯТИ ЗАПРОГРАММИРОВАННОГО ТОВАРА И ПЕЧАТЬ ЭТИКЕТКИ Данные по предварительно запрограммированному товару можно вызвать из памяти двумя способами: с помощью клавиши быстрого доступа или посредством ввода номера ячейки памяти, которая содержит данные о товаре (с помощью числовых
Если требуется напечатать больше одной этикетки, нажмите клавишу X и введите соответст- вующее число.* Нажмите клавишу ПЕЧ. * В некоторых версиях прошивок весов данная функция заблокирована. В этом случае, для ее использования, обратитесь к поставщику для проведения соответствующих настроек.
* В некоторых версиях весов данная функция заблокирована. В этом случае, для ее использования, обратитесь в техническую службу для проведения соответствующих настроек. 3.4 ВЗВЕШИВАНИЕ И ПЕЧАТЬ ЭТИКЕТКИ ДЛЯ НЕЗАПРОГРАММИРОВАННЫХ ТОВАРОВ 3.4.1 ВЕСОВОЙ ТОВАР Далее рассмотрены действия, которые
3.4.2 ШТУЧНЫЙ ТОВАР Далее рассмотрены действия, которые продавец должен выполнить при продаже незапрограммированного штучного товара. Нажмите клавишу ШТУЧН. ТОВАР. Используя числовые клавиши, введите количество единиц товара. 0.000 СТАБ. 2 ►0◄ НЕТТО 5.00 АВТО СОХР. ФАСОВКА 10.00 СКИДКА
3.5 ИЗМЕНЕНИЕ ЦЕНЫ ЗА ЕДИНИЦУ ЗАПРОГРАММИРОВАННОГО ТОВАРА После вызова запрограммированного товара из памяти можно изменить цену за единицу. В случае с весовым товаром для изменения цены используется клавиша КОРР. ЦЕНЫ. Рассмотрим примеры. 3.5.1 ВЕСОВОЙ ТОВАР Сделайте вызов товара из памяти в
3.6 ВВОД МАССЫ ТОВАРА С КЛАВИАТУРЫ ВЕСОВ После вызова запрограммированного товара из памяти можно ввести его массу с клавиатуры весов. При этом товар на платформу весов класть не нужно. Внимание! Для возможности использования данной функции необходимо назначить ей одну из клавиш быстрого доступа
3.7 РЕЖИМ СУММИРОВАНИЯ Режим суммирования удобно использовать, когда покупка состоит из нескольких товаров или когда происходит упаковка товаров в общую тару, на которую впоследствии нужно наклеить этикетку с суммарной массой (количеством) или стоимостью. При суммировании для каждого товара
0.000 1.500 25.01 СТАБ. ►0◄ НЕТТО АВТО СОХР. ФАСОВКА 37.52 СКИДКА строчн. ДАННЫЕ Нажмите клавишу +. 0.000 SUb СТАБ. ►0◄ НЕТТО tot АВТО 2 СОХР. ФАСОВКА 57.52 СКИДКА строчн. ДАННЫЕ Снимите товар с платформы. Для продолжения суммирования продолжайте выполнять описанные действия для каждого
ется взвесить товар, который не нужно включать в число суммируемых, а потом продолжить работу в режиме суммирования. Для завершения суммирования и получения итоговой этикетки нажмите клавишу ЧАСТ. ИТОГ/ИТОГ. При этом не имеет значения, включен ли режим суммирования. После этого нажмите клавишу
3.9 ФАСОВКА Режим фасовки удобно использовать при фасовке, т.е. взвешивании товаров с последующим наклеиванием этикетки и размещением в торговом зале. В режиме фасовки (в случае с весовым товаром) этикетки печатаются автоматически, т.е. после взвешивания не нужно нажимать клавишу ПЕЧ. Кроме этого,
3.9.4 ПРИМЕНЕНИЕ СКИДКИ В ПРОЦЕНТАХ При взвешивании товара можно ввести скидку в процентах от стоимости, которая будет учтена в стоимости при операции и на этикетке. Для ввода скидки в процентах используется клавиша СКИД (%). Пример ввода скидки описан ниже. Сделайте вызов товара из памяти в
3.10 РЕЖИМЫ РАБОТЫ ПРОДАВЦА В весах предусмотрено 3 режима работы продавца (оператора): без авторизации, прикрепленный и переходящий. Перед использованием режимов «прикрепленный» и «переходящий» необходимо провести соответствующие настройки в меню с кодами 1820, 1850 и 1880 (соответственно пункты
3.11 АВТОМАТИЧЕСКАЯ ПЕЧАТЬ ЭТИКЕТОК В весах предусмотрен режим автоматической печати этикеток для запрограммированных весовых товаров, при нахождении весов в котором после взвешивания товара (если он уже вызван из памяти) и после вызова товара из памяти (если товар уже на платформе) этикетка
3.13 ИСПОЛЬЗОВАНИЕ ДОПОЛНИТЕЛЬНЫХ НАСТРАИВАЕМЫХ ФУНКЦИЙ Кроме вышеописанных функций в весах предусмотрены дополнительные функции, которые можно использовать только после проведения специальных настроек. Все дополнительные фукнции выполняются по нажатию одной клавиши, поэтому основная настройка —
3.13.6 СБРОС ПОКАЗАНИЙ ВСЕХ ДИСПЛЕЕВ В весах предусмотрена функция сброса показаний всех дисплеев. Для использования этой функции необходимо предварительно назначить для выполнения этой функции одну из клавиш быстрого доступа (см. п. 2.7.8). После проведения соответствующих настроек для сброса
4 ПРИЛОЖЕНИЯ 4.1 ФОРМАТЫ ЭТИКЕТОК Каждому формату этикетки присвоен свой уникальный номер. Существуют стандартные (встроенные заводом-изготовителем) форматы этикеток и форматы пользовательских этикеток, которые возможно загрузить с персонального компьютера, используя программное обеспечение
Наименование 1 Наименование 2 Время упаковки Штрих-код Дата упаковки Цена за килограмм Цена килограмм Срок за годности Масса Масса Стоимость Стоимость 4040мм мм Название магазина Дополнительный текст 60 мм Рисунок 4.3 – Формат этикетки № 12 Наименование 1 Цена за килограмм Стоимость Масса Время
Таблица 4.2 – Вид форматов этикеток Номер 1 Вид этикетки Номер 13 2 14 3 15 4 16 11 17 12 18 Вид этикетки 109
Номер 19 Вид этикетки Номер 31 20 32 21 33 22 34 25 35 26 36 110 Вид этикетки
Номер 37 Вид этикетки Номер 40 38 41 39 42 Вид этикетки Примечание. Форматы этикеток в таблице 4.2 представлены без учета фактического масштаба и без соблюдения пропорций размеров. 111
4.2 КОДЫ СИМВОЛОВ Часто при вводе данных требуется ввести символы, отсутствующие на клавиатуре в явном виде. В этом случае следует ввести код символа, выполнив следующие действия: — Нажать клавишу КОД СИМВ. — Ввести код нужного символа в соответствии с таблицей 4.2. — Нажать клавишу ПЕЧ. Таблица
5 ЛИСТ ПОВЕРКИ ВЕСОВ Поверку весов необходимо проводить в том случае, если весы используются в сфере, на которую распространяется Государственный метрологический контроль. Периодичность поверки – 1 раз в год. Заводской (серийный) № весов: ________ . Таблица 5.1 – Учет поверок N п/п Дата Фамилия
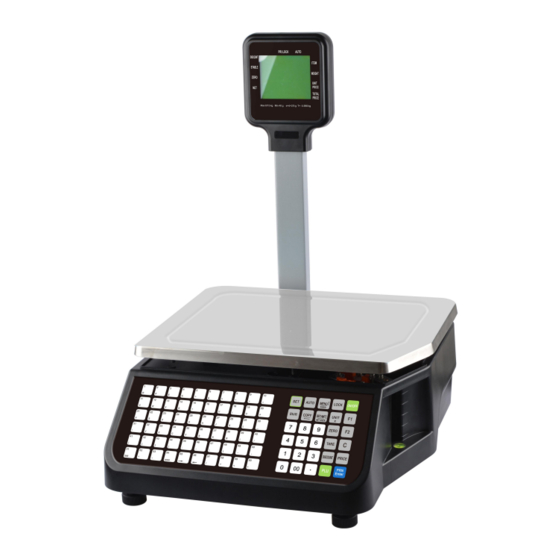
-
Contents
-
Table of Contents
-
Troubleshooting
-
Bookmarks
Quick Links
User Manual
LS015 Barcode label scale
Rongta Technology (Xiamen) Group Co., Ltd.
www.rongtatech.com
V1.1
Related Manuals for Rongta Technology LS015
Summary of Contents for Rongta Technology LS015
-
Page 1
User Manual LS015 Barcode label scale Rongta Technology (Xiamen) Group Co., Ltd. www.rongtatech.com V1.1… -
Page 2: Table Of Contents
Contents Introduction……………………1 1. The Label scale’s specification…………….2 2. Features Summary………………..3 2.1 Unique and powerful network…………..3 2.2 Usage is easy to learn…………….. 3 2.3 Advanced functions and durable quality…………3 3. Label scale installation steps…………….4 3.1 Installation………………….4 3.2 The installation of the thermal label paper……….5 3.3 Keyboard………………….6 3.4 Description of label paper…………….6 4.
-
Page 3: Introduction
Introduction Thank you for choosing our Label scale LS015. In order to operate LS015 correctly, User manual is detailed in function and operation method of LS015 , which help user with doubt quickly when come up against mechanical fault .
-
Page 4: The Label Scale’s Specification
1. The Label scale’s specification The Weighing range and accuracy. LS015 Max weight: 15kg Min weight: 40g 0kg to 6kg * 0.002kg (e=2g) 6kg to 15kg * 0.005kg (e=5g) The accuracy grade: Resolution: Input sensitivity: greater than or equal to 50u V/D zero-point adjustment range: ±60MV…
-
Page 5: Features Summary
2. Features Summary 2.1 Unique and powerful network Use the Ethernet interface technology and the data transfer rate has been improved drastically Advice: When you use the Ethernet interface, suggest using the shielded cable. 2.2 Usage is easy to learn Operate the PLU by single bond to make fast sales, and the front desk staff could use it without training.
-
Page 6: Label Scale Installation Steps
3. Label scale installation steps 3.1 Installation c.Install the display b.put the air fittings a.Connect air fittings bar and put the tray inside the display bar d. Adjust the feet to make the level tool inside the little circle…
-
Page 7: The Installation Of The Thermal Label Paper
3.2 The installation of the thermal label paper a. Open the dust cover. b. Open the print head e.Thread the front of new label roll d.Remove first few labels, and then through the filter plate and wrap in pick-up loading the roll clamp ,and close the printing head (As shown in the figure) Press [] button to roll the label paper…
-
Page 8: Keyboard
3.3 Keyboard Press [] button to adjust label position and long press [] button to align paper. 3.4 Description of label paper The label which is used at RONGTA Label Scale is: Thermal Seam Marking Label. As shown below: Height:60mm,width:(30~60)mm,Max outside diameter: 100mm,Minimum inner diameter:40mm or 26.8mm.
-
Page 9: Common Easy-To -Use Operations
5. Common easy-to -use operations 5.1 Switch on and off Hard disk switch on/turn on: After connecting power supply, switch on the power button at the bottom of the scale. After the screen shows one by one the information of edition No., IP address, self-test countdown “0 、1、2、……8”,the scale enter into sale pattern.
-
Page 10: Tare Operation
button [PLU] + the corresponding hotkey. For easy operation, all the PLU can print the latest illustration. The printing function is set by PC. Method 2: general operation Example: sale green onion 2kg. The Fresh Commodity Code is 10 and the unit price is €1.50/kg Operation procedure: press the button [ZERO] (if the screen already shows zero, the action can be slipped), put 2kg goods on the scale press the button [PLU]…
-
Page 11: Temporary Changing
Method 2: Example: before changing, apple’s unit price is €4.00/kg, after changing, its unit price is €3.00/kg. fresh commodity code is 15. Steps: press button[PRICE] input the apple’s fresh commodity code 15 press button[PRN/ENTER] input new price €3.00/kg press button[PRN/ENTER] weighing and pricing.
-
Page 12: Operation Button In Common Use
automatically. If when to operate fast, recommend to proceed as following procedure. Procedure: Put item 1 on the scale tray, it will print label automatically put item 2 on and take off item 1 take the label and stick it on item 1, next label will be printed automatically put item 3 on and take off item 2 take the label and stick it on item 2, next label will be printed automatically…
-
Page 13: Label Scale Setting
6.3 Label Scale Setting 1. Long press the set button, enter the settings menu 2. Select IP settings, set the IP address of the label scale (And need to be same network of routers which is the same IP address) 3.
-
Page 14: System Set Up
S Save for changes. H Hotkey setting: Up to three numbers, while preserving the changes of PLU. 7.2 System set up That operation can be lock by password. The password is set in PC and can be change at anytime. …
-
Page 15: Lock
label(clicking twice (set)to set). []/[] sum all quantity of single goods’ label: print all information of all sales goods((clicking twice (set)to set)). []/[] clear all the summation data: clean up all the summation data((clicking twice (set)to set)). []/[]fine tuning of paper-out position: adjust paper’s offset value: 0~16. …
-
Page 16: Troubleshooting
Click [TARE] key for 2 seconds to come into the tare setting status, system remind that enter pass code, it means that entering the pass code which is set via pc software. Restored lock Click [ON/OFF] key for 2 seconds to turn off the scale click [ON/OFF] to turn on the scale.
-
Page 17
b. Printer rear photwas damage.oelectric has slanting direction or is dust. c. Photoelectric pair of printer rear photoelectric is bad. Solutions: a. adjust the settings in following key order on the scale [SETTING] Enter the system setting Press hotkey[S ] Enter the select label type(0:label;1:receipt 2: label, without recycle paper roll)… -
Page 18
Fuzzy print and it is not black enough Reasons: a. printer head has not been fasten well. b. Thermal head is dirty. c. Print density is too low. Solutions: a. Re-fasten the printer head well. b. Wipe the thermal head with a soft cloth glued alcohol gently. c. -
Page 19: The Key Issues
8.3 The key issues Keys have been ringing, display is normal Reasons: a. Line piece of key cause short circuit. b. Sharp object resist the key. Solutions: a. Change line piece of the key. b. Move the sharp object. Some keys do not ring …
-
Page 20: Communication Problem
d. The leveling mat is not leveling. Solutions: a. Exclude the interference factors. b. Replace the mainboard. c. Open the wind resistance function(set it in function set). d. Adjust the leveling mat to be leveling. e. If still not, return back the scale to our company. Unable to weigh Reasons: Bad mainboard, bad AD board or bad load cell.
-
Page 21: Other Problems
Er-06: The PLU NO Sale Date Er-07: Price Can Not Be Zero Er-08: Please Exit Tare Mode Er-09: Salesman Err Er-10: Please Close Orange Handle Er-11: Wrong LF code or PLU Not Exist Er-12: Weight Not Change …
-
Page 22: The Acceleration Of Gravity Revised Table
RS-232 type is optional. 9. The acceleration of gravity revised table COUNTRY CITY G(m/sec COUNTRY CITY G(m/sec Greece Athens 9.800 Scotland Glasgow 9.816 South Africa Cape town 9.796 Spain Madrid 9.800 Netherlands Amsterdam 9.813 Singapore Singapore 9.781 Norway Oslo 9.815 Argentina Buenos Aires 9.797…