- Manuals
- Brands
- Vermeer Manuals
- Lawn and Garden Equipment
- 504 PRO
- Operator and maintenance manual
-
Contents
-
Table of Contents
-
Bookmarks
Quick Links
504/604 PRO Baler
Operator’s and
Maintenance Manual
504PRO_604PRO_o-m2_00 —
Serial No. 504PR Serial No. 8001 —
604PR Serial No. 101 —
Order No. 105400EC2
Cabled Assembly Order No. 510520026
https://tractormanualz.com
Related Manuals for Vermeer 504 PRO
Summary of Contents for Vermeer 504 PRO
-
Page 1
504/604 PRO Baler Operator’s and Maintenance Manual 504PRO_604PRO_o-m2_00 — Serial No. 504PR Serial No. 8001 — 604PR Serial No. 101 — Order No. 105400EC2 Cabled Assembly Order No. 510520026 https://tractormanualz.com… -
Page 2
This manual explains the proper operation of your machine. Study and understand these instructions thoroughly before operating or maintaining the machine. Failure to do so could result in personal injury or equipment damage. Consult your Vermeer dealer if you do not understand the instructions in this manual, or need additional information. -
Page 3
• Any defect which was caused (in Vermeer’s sole judgment) by other than normal use and service of the Agricultural Equipment, or by any of the following: (i) accident; (ii) misuse or negligence; (iii) overloading; (iv) lack of reasonable and proper maintenance; (v)improper repair or installation;… -
Page 4
Transportation costs, if any, of transporting to the Vermeer dealer. • The travel time and expenses of the Vermeer dealer’s service personnel to make a repair on the retail purchaser’s site or other location. • In no event shall Vermeer’s liability exceed the purchase price of the product. -
Page 5
EXCLUSIONS OF WARRANTIES: UNLESS OTHERWISE REQUIRED BY LAW, AND EXCEPT FOR THE WARRANTIES EXPRESSLY AND SPECIFICALLY MADE HEREIN, VERMEER MAKES NO OTHER WARRANTIES, AND ANY POSSIBLE LIABILITY OF VERMEER HEREIN UNDER IS IN LIEU OF ALL OTHER WARRANTIES, EXPRESS, IMPLIED, OR STATUTORY, INCLUDING, BUT NOT LIMITED TO, ANY WARRANTIES OF MERCHANTABILITY OR FITNESS FOR A PARTICULAR PURPOSE. -
Page 6
RECEIVING AND DELIVERY REPORT Refer to applicable sections of this manual as needed and check or perform the following items: Receiving Check that all loose items (controller, driveline, controller mount, tractor harness, manuals, gauge wheels, any optional kits, and all hardware) •… -
Page 7
Dealer/Owner Information Receiving and Delivery Report ii 504/604 PRO Baler https://tractormanualz.com… -
Page 8
Identification Numbers – Record The serial number is shown on data plate on the right side of machine, as shown right. Warranty claims and queries cannot be dealt with unless the serial number is stated. Please enter this number here immediately after delivery: Machine Model # ………… -
Page 9
• Inspect tires and rims for damage. • Check that highway lights operate correctly. • Check all chains for proper adjustment. • Check the controllers for proper function and for visual damage. • Check drivelines for proper installation. • Ensure slow-moving vehicle sign is installed. •… -
Page 10: Table Of Contents
Table of Contents TYPE OVERVIEW …………1-1 Field Statistics Page ……… . . 5-14 Tasks Page .
-
Page 11
Cutting Device ……….7-27 10.4 Stopping the Machine in the Field . -
Page 12
12.3 Coupling the Cam-Type Cut-Out Clutch ….12-3 INDEX TECHNICAL DATA ………… 13-1 REVISION HISTORY ……….. 14-1 13.1 Overview …………13-1 13.2 Dimensions . -
Page 13: Type Overview
1 TYPE OVERVIEW Drawbar D11 – US-Version Pick-up width 6.6 / 7.4 / 7.9 ft (2.00 / 2.25 / 2.40 m) Roller lubrication manual roller lubrication Chain lubrication automatic chain lubrication Cutting device Xtra Cut 17 (with 17 knives) Rotor ring type rotor (for 17 knives) net wrap Wrapping…
-
Page 14: Safety Messages
2 SAFETY MESSAGES General Safety Messages General safety messages appear in this Safety Messages section. Specific safety messages are located in appropriate sections of the manual where a potential hazard may occur if the instructions or procedures are not followed. A signal word «DANGER», «WARNING», or «CAUTION»…
-
Page 15
Wear personal protective equipment. Dress properly. Keep spectators away. Follow Shutdown Procedure before servicing, cleaning, repairing or transporting machine. Pressurized fluid can penetrate body tissue and result in death or serious injury. Leaks can be invisible. Keep away from any suspected leak. -
Page 16: Safety Instructions
Safety Instructions WARNING: Even when all instructions have been read and understood there are potential hazards with the machine. Always handle the machine with care to avoid injury to yourself and others! WARNING: Do not do work on the magnets of the blade holders if you have a cardiac pacemaker or other implant that can be impaired by magnetic fields.
-
Page 17: Machine Decals
• Do not step onto the drawbar or other parts of the machine, when the machine is in operation. Keep sufficient distance to baler (pick-up, running gear, bale unloading area). • Before threading the net wrapping material: Follow Shutdown Procedure on page 6-1 All protection devices must be mounted to the baler and must be in correct state.
-
Page 18
Decal Explanation The two lift eyes at the upper cross bar are indicated by this symbol. Other fastening points are not permitted for crane suspension. Tie down points. Three points at the machine are indicated by this symbol: Two points on the axle and one on the drawbar. -
Page 19
Tailgate locking device If the lever is positioned perpendicular to the flow direction, the tailgate is secured against lowering. Lubrication Once a day: check lubrication and relubricate if necessary. Lubrication Check lubrication and relubricate if necessary. Necessary driveline speed: 540 rpm Thread scheme for net wrapping 2-6 Safety Messages 504/604 PRO Baler… -
Page 20: Safety Signs
• When replacing a machine component with a sign attached, replace sign also. • Replacement signs can be purchased from your Vermeer equipment dealer. Decal Explanation DANGER: Baler intake can pull you in, resulting in death or serious injury.
-
Page 21
• NEVER feed crop in by hand. • NEVER remove material from the baler intake while it is running. • NEVER try to unplug baler by hand while it is running. • ALWAYS disengage power takeoff, shut off tractor engine, set park brake, and remove key before working on baler for any reason including servicing, inspecting, or unplugging machine. -
Page 22
WARNING: Connect and use equipment highway lights. CAUTION: Oversized bales place excessive load on belts, rollers and bearings which could result in product or property damage and is a fire hazard. Do not overfill baler. WARNING: Read this Operator’s Manual and safety signs before operating machine. -
Page 23
WARNING: Riders are not allowed on the baler WARNING: Opening tailgate can crush, resulting in serious injury or injury. WARNING: Stay away from rear of baler. Warn others to stay away before raising tailgate. WARNING: A falling or closing tailgate can crush, resulting in serious or death. -
Page 24: Personal Protective Equipment
The accumulator is under gas and oil pressure. Depressurize hydraulic system prior to disassembling or repair. Stepping or standing on some areas of machine may result in slipping or falling. Do not step on prohibited areas. DANGER: Entanglement in rotating driveline can result in death or serious injury.
-
Page 25: Fire Prevention Baler
Fire Prevention Baler Figure 1. Do not smoke in the vicinity of the machine. The harvested crop can easily ignite! To prevent fire: • Remove crop remains and oil leaks. • If any machine parts run hot: find and remove cause. •…
-
Page 26
NOTICE Order fire extinguisher kit (part number AK01415) from your authorized Vermeer dealer. NOTICE Fire extinguisher is shipped empty and must be filled/charged prior to initial use. Fire extinguisher must also be refilled/ recharged after every subsequent use. To refill/recharge, use the following procedure: Figure 3. -
Page 27: Hydraulic System Baler
Hydraulic System Baler WARNING: Pressurized fluid can penetrate body tissue and result in death or serious injury. Leaks can be invisible. Keep away from any suspected leak. Relieve pressure in the hydraulic system before searching for leaks, disconnecting hoses, or performing any other work on the system.
-
Page 28: Safety Devices
• Depressurize hydraulic system as described in Shutdown procedure (see page 6-1). • Secure hydraulic operated parts (pick-up, cutting device) mechanically against unexpected movements. • If any short-time maintenance or assembly work is carried out with the tailgate open, the tailgate must be hydraulically secured against lowering: use the shut off valve (on the left side of machine).
-
Page 29: Net Knife Safeguard
2. Turn the hydraulic tailgate valve (1) (see Figure 4 on page 2-16) to the shut-off position (parallel to lines). Remove the tailgate safeguard 1. Turn the hydraulic tailgate valve to the operating position. 2. Close the tailgate. Figure 4. Tailgate hydraulic valve 2.7.2 Net knife safeguard WARNING: Risk of cutting! During work in the vicinity of the net knife: fit net knife safeguard.
-
Page 30: Pick-Up Safeguard
Figure 5. Secure the net knife KEY: 1. Handle net knife carrier — 2. Safety chain — 3. Spring clip 2.7.3 Pick-up Safeguard The pick-up safeguard is a safety chain (2) (see Figure 6 on page 2-18) that sets the height of the pick-up and protects it from falling if the hydraulic pressure should drop during driving.
-
Page 31: Side Covers
Figure 6. Pick-up safeguard KEY: 1. Hook — 2. Chain Side Covers WARNING: Risk of cutting injury from moving parts. Never operate the machine with open shields! WARNING: Risk of injury from swiveling shields. After unlocking, the shields swivel automatically up operated by pneumatic pressure.
-
Page 32
Figure 7. Shields When the on the left and right side are open some parts are easier to reach. Open the cover 1. Turn the lever (1) (see Figure 8 on page 2-20) 504/604 PRO Baler Safety Messages 2-19 https://tractormanualz.com… -
Page 33
2. Use the lock (2) to open the cover. The cover will turn up. Close the cover 1. Push the cover down until first the lock and then the lever engage. Figure 8. Open the side cover KEY: 1. Lever — 2. Lock 2-20 Safety Messages 504/604 PRO Baler https://tractormanualz.com… -
Page 34: Intended Use
3 INTENDED USE Vermeer round balers are designed solely for use in baling agricultural crop material. Always use the machine in accordance with the instructions contained in this Operator’s Manual, safety signs on the machine, and other material provided by Vermeer Corporation.
-
Page 35: Overview Of The Machine
The baler has a wide pick-up max. 7.9 ft (2.40 m) and can produce round bales with a width of 4.0 ft (1.23 m) and a diameter from: • 504 PRO 3.3 – 5.2 ft (1.00 –1.60 m). • 604 PRO 3.3 – 5.9 ft (1.00 –1.80 m).
-
Page 36
Figure 9. General overview KEY: 1. Controller — 2. Tying unit — 3. Bale chamber — 4. Tailgate — 5. Bale ejector — 6. Feed channel floor — 7. Cutting unit — 8. Feed rotor — 9. Pick-up unit — 10. Draw bar 4-2 Overview of the Machine 504/604 PRO Baler https://tractormanualz.com… -
Page 37: Controls And Adjustments
5 CONTROLS AND ADJUSTMENTS Control The baler is operated from the tractor by the PTO shaft, the hydraulic single and double acting valves and by the user interfaces E-Link Pro For more information about how to operate the user interface, see the software description (see page 5-7). The has a touch screen, but can also be operated using the buttons on the side.
-
Page 38
Figure 10. E-link Pro buttons A. ON/OFF 1. Start 6. Home Push ON/OFF to switch the monitor On or Off Push Start to start or restart a net wrap cycle Push Home to activate the home page B. Escape 2. Manual/Automatic 7. -
Page 39: Setup The E-Link Pro Display
D. OK (Enter) 4. Hydroflex floor 9. Task Push OK to accept the active selection Push Hydroflex floor to switch the function of Push Task to activate the page for entering (selected with the Up or Down button) the double acting valve in the tractor to lift/ tasks lower the Hydroflex floor.
-
Page 40
Setup Display and Sound 1. Push [ ] (F6) (see page 5-2) on a configuration page. The page «Display/Sound Configuration» appears. 2. Push the line «Brightness». 3. Push the button [ ] or [ ] to increase or decrease the brightness of the display. 4. -
Page 41
11.Push [OK] to confirm the setting and toggle between Hour and Minute. 12.Push the button [ ] to confirm the time. 13.Push the line «Daylight Saving» to switch between daylight saving or “standard time”. Virtual Terminal 1. Push the button [ ] on a configuration page. -
Page 42: Software Description
Software Description Figure 11. E-Link Pro Software KEY: 1. Home page (see page 5-7) — 2. Bale setup (see page 5-12) — 3. Field statistics (see page 5-14) — 4. Tasks (see page 5-15) — 5. Advanced 5-6 Controls and Adjustments 504/604 PRO Baler https://tractormanualz.com…
-
Page 43: Home Page E-Link Pro
Home Page E-Link Pro Figure 12. Home page The home page of the E-Link Pro display is divided into 6 sections: • Sections [A and E] have control buttons. • Sections [B, D and F] give information. • Section [C] has a button to view the field name and other information. 504/604 PRO Baler Controls and Adjustments 5-7 https://tractormanualz.com…
-
Page 44: Bale Settings Page
[A] Buttons on the left to go to another page Home page Bale settings page Statistics/field data page Tasks page Advanced settings page [B] Information about the current bale 1. Bale size indicator (Inch) 2. Target bale size (Inch) 3. Bale size indicator (graphic) 4.
-
Page 45
Figure 13. Colour of the bale size indicator 1. Green, bale in progress 2. Yellow, bale nearly at target, only appears when «Near full alert” feature is activated (see page 5-23) At this point an audio signal is generated. 3. Red, bale is at the target size 4. -
Page 46
[E] Buttons on the right to start or change the operation of the baler The buttons start the following: Start to wrap the bale (Manual wrapping) Switch from manual to automatic wrap or from automatic to manual wrap. In automatic mode, the wrapping starts automatically, in manual mode you must push the start button to start the wrap process The selected mode is also visible on the display see [F]. -
Page 47
[F] Baler equipment and operation status 1. The bale is wrapped manually 2. Number of Knives are inserted (green icon); if knives are not inserted this icon is black 3. Hydroflex floor is not lowered (black icon); if the Hydroflex floor is lowered this icon is red 4. -
Page 48
The settings are automatically saved when you go to another page, for example to the home page. Setting Machine type Unit Min — Max Default/Advised 504 PRO 35 – 63 Full bale size inch 604 PRO inch 35 – 71 The set diameter of the bale. -
Page 49
Net wraps number 1.5 – 10.0 The number of wraps around the bale. 0 – 10 Bale density Level The level that indicates if the bale must be more dense or less dense. — Soft core On/Off Selection for making bales with a soft core or not. –… -
Page 50: Field Statistics Page
Field Statistics Page Figure 15. Field statistics page This page shows information about the number of bales and hours worked on the field. The name of the selected field is shown in the title bar. Information of up to 20 fields can be stored. The name of the field can be entered on this page. Push the buttons up or down to select a field.
-
Page 51: Tasks Page
3. Push OK to save the name. 4. Push to return to the field statistics page or to go to the home page. • Push to delete the data of the field. Push to confirm. Tasks Page Figure 16. Tasks Depending on the available options on your baler like the tying system and knife groups, this page shows entries for wizards to make changes.
-
Page 52
1. Push to start the wizard. 2. Select the new number of knives. The selected number is shown grey and the icon «Disengage” starts blinking. 3. Use the double acting valve in the tractor to disengage the knives. The icon «Engage” starts blinking after the knives are lowered. 4. -
Page 53: Advanced Menu
Advanced Menu Figure 17. Advanced menu structure KEY: 1. Advanced user interface — 2. Calibration (see page 5-19) — 3. Diagnostics (see page 5-22) — 4. Advanced Baler setup — 5. Administrator Menu — 6. Advanced baler setup — 7. Tuning 504/604 PRO Baler Controls and Adjustments 5-17 https://tractormanualz.com…
-
Page 54: Advanced User Interface
Figure 18. Advanced menu Push the button on the line you want to use. 5.8.1 Advanced User Interface Figure 19. Advanced user interface On this page you can change the shown information on the home page as follows: 5-18 Controls and Adjustments 504/604 PRO Baler https://tractormanualz.com…
-
Page 55: Calibration
1. Push the button right on the line «Info boxes set-up”. 2. The display shows: Figure 20. Info box setup 3. Use the arrow buttons arrow up or down to select the information box you want to change. 4. Use the arrow buttons left or right to select the information you want to display on the home page.
-
Page 56
On this page you can start the calibration of the bale diameter. Do this if the size of the bale deviates from the set bale size. Before you start the calibration you must know how much the deviation is (See example below). Calibrate as follows: 1. -
Page 57
Example Measure the distances A, B, C and D (= horizontal and vertical distance on both sides of the bale) and calculate the average bale size: (A+B+C+D)/ 4. For example: The set bale diameter = 49.5 Inch but it is a bit too small: (48.5 + 48 + 49.5 + 48)/4 = (194)/4 = 48.5 In this example the average bale size is 1 inch too small so the {bale offset} must be increased. -
Page 58: Diagnostics
«System information»: Displays the software version, the model, serial number and the total number of bales and hours. • «Administration»: This is only available for Vermeer technicians and requires a password. • 5-22 Controls and Adjustments 504/604 PRO Baler https://tractormanualz.com…
-
Page 59: Advanced Baler Setup (504/604 Pro Baler)
5.8.4 Advanced Baler Setup (504/604 PRO Baler) Figure 23. Advanced Baler Setup Model Setup 504/604 PRO Baler Controls and Adjustments 5-23 https://tractormanualz.com…
-
Page 60
Figure 24. Advanced Baler Setup 1. Settings for the number of available knives or the wrapping method can be changed by pushing the arrow up or down 2. Push to return to the «Adv. menu» or to go to the home page. The selection is automatically saved when you leave the page. -
Page 61
– Soft core bale size [%] 0 – 100 Size of the soft core, this is a percentage of the of the normal bale. Switch the soft core on or off on the page: «Bale set-up” (see page 5-12) – Net delay 0.0 –… -
Page 62: Shutdown Procedures
6 SHUTDOWN PROCEDURES Shutdown Procedure Service and Maintenance When stopping the machine, use the following shutdown procedure: • Ensure bale chamber is empty. Do not leave bale or partial bale in bale chamber. • Reduce engine speed to idle and switch off driveline. •…
-
Page 63
• Secure hydraulic operated parts (pick-up, cutting device) mechanically against unexpected movements. 6-2 Shutdown Procedures 504/604 PRO Baler https://tractormanualz.com… -
Page 64: Preparing The Equipment Baler
7 PREPARING THE EQUIPMENT BALER WARNING: Crushing can occur! During handling in the area of the drawbar ensure that the machine is secured against moving. Do not raise the tongue jack before the baler has been safely coupled to the tractor. Do not uncouple the baler, unless: •…
-
Page 65
• To move the tongue jack slowly, you must push the crank handle into the tongue jack up to the stop. • Up: Turn the crank handle counter clockwise. • Down: Turn the crank handle clockwise. Figure 25. Tongue jack KEY: 1. -
Page 66: Adjust The Height Of The Drawbar
4. Insert the safety bolt. 5. Position the tongue jack under the draw bar of the baler. 6. Turn the crank until the tongue jack is extended. Remove the support foot: 1. Turn the crank (1) until the support foot (4) has retracted and there is sufficient free space. 2.
-
Page 67
11.Adjust the bolt (8) until the draw bar head is in a horizontal position. 12.Tighten the bolts (9). 13.Connect the drawbar of the baler to the tractor. CAUTION: Observe the torques on the decal! . Whenever the safety nuts and bolts (9) have been loosened they must be replaced by new ones 7-4 Preparing the Equipment Baler 504/604 PRO Baler… -
Page 68
Figure 26. Adjust the drawbar KEY: 1. Bolts — 2. Bolts — 3. Locking plate — 4. Hole — 5. Toothed flange — 6. Pin — 7. Pin — 8. Bolt — 9. Bolts 10. Strap A, B, C, types of drawbar heads 504/604 PRO Baler Preparing the Equipment Baler 7-5 https://tractormanualz.com… -
Page 69: Tow Hitch Version
Figure 27. Torques Tow Hitch Version • Adjust drawbar per ASABE standards as shown. Failure to adjust the drawbar properly may result in driveline damage. 7-6 Preparing the Equipment Baler 504/604 PRO Baler https://tractormanualz.com…
-
Page 70: Driveline Baler
Figure 28. Type I Driveline (power take-off) Speed 540 rpm Diameter 1-3/8 in. (35 mm) # of Splines Dimension A 7.9–11.8 in. (20–30 cm) Dimension B 13.0–19.7 in. (33–56 cm) Dimension C 13.8 in. (35 cm) Driveline Baler Danger: Entanglement in rotating driveline [4] can result in death or serious injury.
-
Page 71
Keep driveline shields in place at all times. Ensure shields turn and telescope freely. Wear close-fitting clothing and confine long hair. Figure 29. Rotating driveline WARNING: During operation there is potential of the driveline slipping off the tractor power take-off and causing injuries and/or damages. -
Page 72: Driveline — Couple To Tractor
Figure 30. Angle of driveline Only the driveline prescribed by the manufacturer may be used! A key-type overrunning clutch as integrated part of the driveline protects the machine drive. Figure 31. Driveline WARNING: Injury may occur. (see page 7-9) Protective tube and guard cone of the driveline and power take-off protection must be fitted and be in proper condition.
-
Page 73: Driveline — Uncouple From Tractor
• Lift driveline [4] from holder [3](see Figure 32 on page 7-10). • Align splines and push driveline onto tractor PTO shaft. • Pull back on collar [6], push driveline onto tractor shaft, and release collar (see Figure 33 on page 7-10). Push onto tractor shaft until collar snaps into locked position.
-
Page 74: Attach Baler
• Install and lower tractor PTO shield [5] (see Figure 33 on page 7-10). Figure 34. Anti-rotation chain Attach Baler WARNING: Use Shutdown Procedure before attaching implement to the tractor.(see page 6-1) For trouble-free operation of the baler correct coupling of the machine and adjustment of the driveline is important. •…
-
Page 75: Electrical System
Figure 35. Attach baler NOTICE Order safety chain (part number AK01332) from your authorized Vermeer dealer. Electrical System 7.6.1 Lighting Set To connect the lighting system, insert the 7-pin plug into the corresponding socket on the tractor. Before traveling on the roads, check that the lighting system functions correctly (also at daylight).
-
Page 76
Figure 36. Controller Figure 37. E-Link PRO display Figure 38. Monitor mounting system 504/604 PRO Baler Preparing the Equipment Baler 7-13 https://tractormanualz.com… -
Page 77
• Install the Monitor mounting system (see Figure 38 on page 7-13) on tractor at a location convenient for the operator. • To connect the controller, insert the 9-pin plug into the corresponding socket on the E-LINK PRO tractor harness. After connecting the plug supply voltage is available. -
Page 78: Net Wrapping
Net Wrapping Figure 39. Open the top cover and secure the net knife KEY: 1. Handle net knife carrier — 2. Safety chain — 3. Spring clip — 4. Top cover 504/604 PRO Baler Preparing the Equipment Baler 7-15 https://tractormanualz.com…
-
Page 79
Figure 40. Covers KEY: 1. Side cover — 2. Top cover — 3. Bar 7-16 Preparing the Equipment Baler 504/604 PRO Baler https://tractormanualz.com… -
Page 80
Figure 41. Prepare for a Net Roll KEY: 1. Crank handle — 2. Safety chain on the net roll holder 504/604 PRO Baler Preparing the Equipment Baler 7-17 https://tractormanualz.com… -
Page 81: Insert The Net
7.7.1 Insert the Net 1. Push the new net roll (1) (see Figure 42 on page 7-19) into the holder. 2. Connect the safety chain (2). 3. Tilt the holder (3) and net into the net roll holder. 4. Turn the crank handle into the sleeve of the net roll up to the stop, and than 1/8 of a turn backward. This ensures that the roll can rotate freely.
-
Page 82
Figure 42. Insert the net roll KEY: 1. Net roll — 2. Safety chain — 3. Net roll holder 504/604 PRO Baler Preparing the Equipment Baler 7-19 https://tractormanualz.com… -
Page 83
Figure 43. Check distance core position KEY: 1. Extruder bearing — 2. Inner washer — A. Distance between 3/8 and 1/2” 7-20 Preparing the Equipment Baler 504/604 PRO Baler https://tractormanualz.com… -
Page 84
Figure 44. Check the position of the Spindles KEY: 1. Spindle — 2. Spindle 504/604 PRO Baler Preparing the Equipment Baler 7-21 https://tractormanualz.com… -
Page 85: Adjust The Net Roll Holder
Figure 45. Feed the Net KEY: 1. Net roll — 2. Upper guide tube — 3. Net tightener — 4. Expanding device — 5. Rubber roll — 6. Steel roll 7.7.2 Adjust the Net Roll Holder Net rolls are available in several widths and net lengths. Depending on the length of the net you want to use and the width of the net some adjustments must be made.
-
Page 86: Netwrap Roller Position
2. Pull the handle (1) of the net knife carrier to the front and hold it. 3. Attach the safety chain (2) and secure it with the clip (3). 4. If you use a net length of 2000 m do the following on both sides: 1.
-
Page 87
When netwrap roller valve (6)(see page 7-23) is turned to the operating position, netwrap roller (3) performs the following functions: • During wrap cycle Roller (3) is in rearward position(see page 7-25). • Roller (3) is belt-driven from roller (1) and rotates •… -
Page 88
Figure 49. D Figure 48. C • At start of wrap cycle • Tractor hydraulic valve operating tailgate circuit must be in float position to allow cylinder (4) to retract. • A solenoid valve opens when wrap cycle begins. This allows cylinder (4) to retract by means of spring pressure, moving roller (3) rearward. (see page 7-25) Roller (3) begins rotating when netwrap feed clutch engages. -
Page 89: Reset Net Knife
To disable roller (3) movement: 1. Make a bale and start wrap cycle. 2. Disengage PTO immediately after wrap cycle starts. 3. Follow Shutdown Procedure,(see page 6-1) 4. Ensure roller (3) is in rear position and move valve (6) to shut-off position. This will lock roller (3) in rear position at all times. 5.
-
Page 90: Cutting Device
Cutting Device 7.8.1 Insert a Net Roll WARNING: Before you do work near the net knife, insert the net knife safeguard and secure the net knife. CAUTION: Always wear safety gloves when doing work near the net knife and with the net. CAUTION: Be aware that a net roll of 3000 m with a width of more than 1.23 m can be heavy (>…
-
Page 91
1. Press softkey (E) to enable the Hydroflex control bottom door circuit. 2. Using tractor hydraulic control for remote valve connected to the electric control valve on the baler, fully lower (open) bottom door. As bottom door lowers, knives automatically disengage. 3. -
Page 92
4. Press softkey (D) to enable the cutting device circuit. 5. Press softkeys (A), (G), and (H) to select desired knife group. 6. Move tractor hydraulic control in the opposite direction that lowered the bottom door in Step 2. • The selected knife group raises into cutting position through bottom door. -
Page 93: Brittle Crop Material
High-Pressure Override Procedure 11.Repeat Steps 1–5. 12.Press and hold softkey (K). Holding softkey (K) allows knives to be raised at full tractor pressure — up to 2610 psi (180 bar) or higher — rather than the 580 psi (40 bar) limit of normal operation. 13.After icons (I) indicate knives fully raised, immediately repeat Steps 1–8 to ensure correct accumulator pressure.
-
Page 94: Assembly And Disassembly Of The Cutting Device Knives
Figure 51. Cutting knive 7.8.5 Assembly and Disassembly of the Cutting Device Knives NOTICE By removing individual knives the cut length of the baling material can be changed. If no cutting function is desired for a longer period of time, all knives can be removed and replaced by blank knives. WARNING: Injury may occur.
-
Page 95
• Using pliers withdraw the knives rearward, then diagonally upwards from the knife axle and remove them from the knife slots. Figure 52. Knive axle lever NOTICE Removed knives should be replaced by blank knives (part no. 1724551237W) to prevent plugging of the knife slots. Both blank and removed knives can be stored and secured with a cotter pin on the maintenance platform (see Figure 53 on page 7-33). -
Page 96: Regrinding The Cutting Device Knives
Figure 53. Mowing cutting device Figure 54. Replacing blank knives 7.8.6 Regrinding the Cutting Device Knives To provide the best crop throughput it is recommended to regrind the cutting device knives at least after cutting of 500 bales. Dependent on the working conditions sharpening may be necessary earlier.
-
Page 97: Close Up And Shutdown Procedure On The Field
WARNING: Injury may occur when working near the magnets [1] of the knife holders! The function of cardiac pacemakers can be interrupted by magnetic fields. Potential of injury by sharp edges: Never strike against the installed knives from the bottom with a striking tool — this may damage the magnets! (see page 7-34) •…
-
Page 98
8. Remove the spring clips (3) from the pick-up guide wheels. 9. Lift the guide wheels and hook them on the left and right side of the baler in the drive position (2) . 10.Secure the guide wheels with the spring clip (3). 11.Push in the bale ejector tubes (1) and secure with the cotter pin. -
Page 99: Transporting The Machine
8 TRANSPORTING THE MACHINE Tractor (towing vehicle) Requirements for Baler Minimum weight/transport speed (per ASABE standard, “Safety for Agricultural Equipment”): WARNING: Loss of steering or braking control can result in death or serious injury. Use a tractor that is large enough for sufficient steering and braking control.
-
Page 100
Hydraulic system • Minimum number of remote valves with FLOAT function one single acting and one double acting • Minimum flow rate 13 gpm (50 L/min) • Minimum pressure recommended 2600 psi (180 bar) • Maximum pressure 3045 psi (210 bar) NOTICE Some tractors have detents which will not allow the tractor hydraulic control to return to NEUTRAL on its… -
Page 101: Minimum Weight/Transport Speed (Per Asabe Standard, «Safety For Agricultural Equipment»)
Figure 56. Tractor wheels Minimum weight/transport speed (per ASABE standard, “Safety for Agricultural Equipment”) WARNING: Maximum towing speed: 20 mph (32 km/h). Loss of steering or braking control can result in death or serious injury. Use a tractor that is large enough for sufficient steering and braking control. Do not tow equipment that does not have brakes at speeds over 20 mph (32 km/h).
-
Page 102
Ensure slow-moving vehicle (SMV) sign [1] is installed with orange and red reflective surfaces facing rearward as shown. (see Figure 59 on page 8-5) Install optional highway safety towing chain (minimum 10,000 lb / 4540 kg capacity), Vermeer part number AK01332. •… -
Page 103
Figure 59. Slow-moving vehicle 504/604 PRO Baler Transporting the Machine 8-5 https://tractormanualz.com… -
Page 104: Operating The Machine Baler
9 OPERATING THE MACHINE BALER WARNING: Death or serious injury may occur The machine may only be operated by persons who are familiar with the operating instructions and the safety instructions. Never remove any harvested crop material from the machine while the drive is running. Prior to work: Switch off driveline, switch off tractor engine, remove ignition key and disconnect driveline from power take-off.
-
Page 105: Laying Swaths (Windrows)
WARNING: Injury may occur. Never leave tractor controls unattended while the implement is operating. When carrying out work on the opened tailgate: Follow Shutdown Procedure (see page 6-1), and use appropriate safeguards when working on or around machine. WARNING: Injury may occur. Contact with baler or bales can result in death or serious injury. Keep all spectators and other workers away from baler and work area while in operation.
-
Page 106: Pick-Up Gauge Wheels
• Lift and lower the pick-up by means of the tractor’s hydraulic control. Figure 61. Shutoff valve Figure 62. Screen NOTICE The valves of the hydraulic switch will not be activated when the [1] pick-up is selected. This setting has to be preferred to minimize the power consumption and to avoid unnecessary heating of the valve coils.
-
Page 107: Wind Guard
• Set the safeguard safety chain to the desired position. • Always select the same adjustment on both sides of the pick-up. Figure 63. Pick-up gauge wheel 9.3.2 Wind guard The wind guard (see figure on page 9-5) is mounted movable – hanging above the pick-up. •…
-
Page 108: Driveline Speed
Figure 64. The wind guard WARNING: Injury may occur at the pick-up. Both pick-up gauge wheels cover the circular path of the tines laterally and are therefore part of the safety equipment. When using the baler both gauge wheels must always be attached. Driveline Speed Operate baler at power take-off standard speed of 540 rpm.
-
Page 109: Driving Style
CAUTION: Damage may occur. Only the driveline prescribed by the manufacturer may be used! WARNING: Injury may occur. Protective tube and guard cone of the driveline and the power take-off protection, must be fitted and be in proper condition. Always ensure that the driveline is installed and secured correctly: Secure the driveline safeguard against revolving by fitting the chain.
-
Page 110: Adjust Baler Settings On The Control
Adjust Baler Settings on the Control On the controller in the tractor set the following: 1. Push the button to go to the Bale settings page. (Or on the home page of the E-link Control push 2. Make all the settings (see page 5-12). 3.
-
Page 111
9.7.1 Open and close tailgate The tailgate is opened and closed by means of the tractor’s hydraulic control (distribution valve for the tailgate): Tailgate must be properly closed: • Before beginning to pick up the crop material. After each bale ejection. •… -
Page 112
Figure 66. Locking hook 504/604 PRO Baler Operating the Machine Baler 9-9 https://tractormanualz.com… -
Page 113: Operation Instructions
10 OPERATION INSTRUCTIONS 10.1 Start Baling You can start baling when the baler is prepared according to the previous paragraphs: • Net or twine is inserted • Baler is adjusted to the field • Knives are set You know how to drive •…
-
Page 114: Eject A Bale
Make 2 or 3 smaller bales at the end of the field Do this for the last 2 or 3 bales on the field: 1. Stop the tractor when the bale is at the size you want to make it. 2.
-
Page 115: Disconnect The Baler From The Tractor
2. Use the single acting valve in the tractor to open the tailgate. The bale leaves the chamber and an arrow appears in the display. 3. Move the single acting valve in the tractor to ‘float’ to lower the tailgate completely. This ensures that •…
-
Page 116: Stopping The Machine In The Field
8. Switch off the tractor engine and remove the key. Disconnect the Baler 1. Install the tongue jack(see page 7-1). 2. Disconnect the cables of electrical power supply, lighting and control panel and store in storage slots. 3. Disconnect the hydraulic hoses and connect them to the dummies and store in storage slots. 4.
-
Page 117: Maintenance/Setting
11 MAINTENANCE/SETTING WARNING: Use Shutdown Procedure before servicing, cleaning, repairing or transporting machine (see page 6-1). 11.1 Tires on Baler WARNING: Tire explosion can result if the following procedures are not followed: Maintain correct tire pressure. Do not inflate tire above recommended pressure (see page 11-3). •…
-
Page 118
Figure 67. Baler wheels Figure 68. Gauge wheel 11-2 Maintenance/Setting 504/604 PRO Baler https://tractormanualz.com… -
Page 119: Tires And Tire Pressure
11.1.1 Tires and tire pressure Tire Pressure Lug nut torque Retorque 2 tires types: – 14L, 30 psi 244 ft-lb after first 10 hours – 14L 16.1 (330 Nm) of operation, – 21.5L 16.1 – 21.5L, 16 psi then at 50-hour intervals 29 psi 2 pick-up gauge wheels: 16 ×…
-
Page 120: Safety Signs And Labels
Replace any damaged or missing signs. When attaching signs, the temperature of the mounting surface must be at least 40°F (5°C). The mounting surface must also be clean and dry. • When replacing a machine component with a sign attached, replace sign also. • Replacement signs can be purchased from your Vermeer equipment dealer. 11.4 Environment/Disposal 11.4.1 Lubricants •…
-
Page 121: Tying Unit Maintenance
11.5 Tying Unit Maintenance 11.5.1 Adjust the Disk Brake of the Net Tying Unit To prevent free-wheeling of the net roll the disc brake must be adjusted in such a way that the brake disc can no longer be turned by hand when the lever (1) (see Figure 70 on page 11-6) points upwards.
-
Page 122: Adjust The Shock Absorbers
Figure 70. Adjust the disk brake of the net tying unit KEY: 1. Lever — 2. Bolt — 3. Milled nut 11.5.2 Adjust the Shock Absorbers On the left side of the baler the movements of the net tensioner (1) are damped by a shock absorber. Two wing nuts push the friction linings against the net tensioner from both sides.
-
Page 123
2. Move the net tensioner (3) (see Figure 71 on page 11-7) to the top end position and hold it. 3. Tighten both wing nuts (1) and (2) finger tight. 4. Move the net tensioner to the bottom end position, if it is just possible to move it by hand the wing nuts are correctly tightened. Otherwise tighten the wing nuts further. -
Page 124: Components For E-Link Pro
11.6 Components for E-LINK PRO 11.6.1 Controller and Display 11-8 Maintenance/Setting 504/604 PRO Baler https://tractormanualz.com…
-
Page 125
(Explanation for Figure on previous page) Item Item controller «E-LINK PRO» net knife tripping device USB port hydraulic switch B1 sensor cutting device (knife group 1) hydraulic switch B2 hydraulic switch B3 sensor cutting device (knife group 2) sensor bale ramp hydraulic switch B4 and B5 sensor tailgate locking pressure control valve… -
Page 126
3× Sensor M30 • Locking device, right • Locking device, left ∅ 1.18 in. (30 mm) • Net knife 11-10 Maintenance/Setting 504/604 PRO Baler https://tractormanualz.com… -
Page 127: Chain Lubrication System Maintenance
If adjustment is required, only a trained service technician is allowed to make the change on the basis of the service information provided by Vermeer. Procedure 1.
-
Page 128
Test during the first few hours after filling 1. Check the oil level every 2 hours after filling the oil container. If necessary fill the oil container again. Figure 73. Lubrication oil container and pump KEY: 1. Cap — 2. Oil container — 3. Cap of the pump — 4. Oil pump — 5. Tubes NOTICE Change oil annually after the end of the season. -
Page 129: Maintenance Procedures
• Replace drain plug [12] and refill gearbox [10] through check/fill hole [11]. Figure 74. Gearbox NOTICE Gearbox capacity is 57.5 oz (1.7 L). Use SAE-90 gear oil meeting API-GL5 specifications. Check filling level with dip stick weekly: Oil level must be between min. and max. mark. •…
-
Page 130: Lubrication Chart
• Lubricate the knife lever only on balers with cutting device XtraCut 17(see page 11-14). Maintenance after Every 500 Bales or more often, in sandy conditions twice per day Sharpen or replace the knives • Lubricate several parts of the baler (see page 11-14) •…
-
Page 131
Lubricant Specifications Multipurpose grease NLGI 2 extreme pressure grease, e.g. VERMEER LC Ultra or SHELL Alvania EP2 Always apply 2 strokes with a manual grease gun Chain Lubrication SAE 30 motor oil (do not use waste oil)) 504/604 PRO Baler Maintenance/Setting 11-15 https://tractormanualz.com… -
Page 132
Lubricant Specifications Transmission oil SAE 90 transmission oil Machine oil Multifunctional oil After 500 bales after the first use Note Position in Baler part Lubricant figure Only balers with cutting device XtraCut 17: 500 bales after first use, then once per season grease knife lever After every 500 bales (or daily) Position in… -
Page 133
After every 500 bales (or daily) Lubricant metering device (roller lubrication) on both sides Tailgate roller (at the lower edge of the on both sides, open and fix the tailgate 1/4 (see page 11-23) tailgate) Tailgate roller (at the lower edge of the on both sides, open and fix the tailgate 1/4 (see page 11-23) tailgate) Roller on locking device… -
Page 134: Clean The Baler
At the end of the season annually (in case of special operating conditions also weekly) Star ratchet in pick-up drive left baler side Bearing on pick-up on both sides Applies to camless pickup: left and right grease nipple can only be seen after removal of the side covers Main gear unit Oil change…
-
Page 135: Grind The Cutting Unit Knives
11.8.4 Grind the Cutting Unit Knives WARNING: Chopper knives can cut fingers and hands. WARNING: Wear gloves and use suitable tool when handling chopper knives. WARNING: Do not do work on the magnets of the blade holders if you have a cardiac pacemaker or other implant that can be impaired by magnetic fields.
-
Page 136
6. Find the lever of the knife axle (see Figure 75 on page 11-20) on the feed channel housing in front of the tire on the right side. Swivel the lever down through 90° as far as the stop. 7. Go inside the bale chamber and use pliers to remove the knives •… -
Page 137: Replace Knives With Blind Knives
11.8.5 Replace Knives with Blind Knives WARNING: Do not do work on the magnets of the blade holders if you have a cardiac pacemaker or other implant that can be impaired by magnetic fields. CAUTION: Do not hit the knives with any kind of tool from the bottom. This may damage the magnets and splinters may brake loose and cause injury.
-
Page 138
Figure 76. Knife storage KEY: 1. Knives or blind knives — 2. Cotter pin Install the blind knives 1. Go inside the baler and push the blind knives diagonally down onto the knife axle. 2. Swivel the lever of the knife axle up. 3. -
Page 139: Lubricate The Tailgate And Tensioning Arm Rollers
11.9 Lubricate the Tailgate and Tensioning Arm Rollers Loosen the belts 1. Shut off the tractor and remove the key. 2. Pull the wire (1) (see Figure 77 on page 11-24) behind the hook (2) to lock the rocker arm. 3.
-
Page 140: Adjusting The Scraper Plate
Figure 77. Rocker arm KEY: 1. Wire — 2. Hook 11.10 Adjusting the Scraper Plate Correct adjustment of the two scraper plates [1] reduces the effect of jamming the two pick-up augers and optimizes the crop-flow (see Figure 78 on page 11-25). Adjust the scraper to auger clearance using the screws [2]: •…
-
Page 141: Tensioning The Hydroflexcontrol
Figure 78. Auger scraper 11.11 Tensioning the Hydroflexcontrol • Adjust the distance between top and bottom disc of the HYDROFLEX rubber spring: 2 in. (50 mm)(see Figure 79 on page 11-26). 504/604 PRO Baler Maintenance/Setting 11-25 https://tractormanualz.com…
-
Page 142
Figure 79. Hydroflex rubber spring 11-26 Maintenance/Setting 504/604 PRO Baler https://tractormanualz.com… -
Page 143: Assembly Procedures
12 ASSEMBLY PROCEDURES 12.1 Driveline – Uncouple from Machine Before road transport: • Disconnect anti-rotation chain [1] from baler(see Figure 80 on page 12-1). • Open access cover of the guard cone [2](see Figure 81 on page 12-2). • Rotate gearbox shaft manually as needed to loosen and remove tapered pin [3] from clutch(see Figure 82 on page 12-3). Replace access cover of the guard cone [2](see Figure 81 on page 12-2).
-
Page 144: Driveline — Couple To Machine
Figure 81. Guard cone 12.2 Driveline – couple to machine Slide driveline onto gearbox shaft(see Figure 80 on page 12-1). • Open access cover [2] of the guard cone(see Figure 81 on page 12-2). • Rotate gearbox shaft manually as needed to install tapered pin [3] to clutch(see Figure 82 on page 12-3). •…
-
Page 145: Coupling The Cam-Type Cut-Out Clutch
Figure 82. Gearbox 12.3 Coupling the Cam-Type Cut-Out Clutch A driveline with automatic overload clutch (cam-type cut-out clutch) is installed. Clean and grease the profile of the machine sided connecting shaft prior to assembling. • • Loosen and turn out tapered pin [1]. •…
-
Page 146
Figure 83. Grease Figure 84. Cut-out clutch installation 12-4 Assembly Procedures 504/604 PRO Baler https://tractormanualz.com… -
Page 147: Technical Data
13 TECHNICAL DATA 13.1 Overview 504/604 PRO Capprox. 60 in. × 48.4 in. (152 cm × 123 cm) Net wrapping unit with quality round bale net Length: 6,560 ft or 9,840 ft / width: max: 4.27 ft (Length: 2,000 or 3,000 m / width: max: 130 cm) center net roll tube inside diameter min.
-
Page 148: Dimensions
Speed of driveline 540 rpm Electrical connections Connection for lighting system 12 V (7-pole) Connection for control Connect to battery Length with closed tailgate [m] 16 ft 5” (5.0 m) Length with open tailgate 17 ft 7” (5.4 m) Width without gauge wheels 96”…
-
Page 149
Figure 85. Baler dimensions 504/604 PRO Baler Technical Data 13-3 https://tractormanualz.com… -
Page 150
INTENTIONALLY BLANK Technical Data 504/604 PRO Baler https://tractormanualz.com… -
Page 151
Index Advanced User Interface …………..5-18 Revision number …………….14-1 Calibration………………5-20 Safety signs………………2-7 Chain Lubrication …………….11-11 Serial number ………………iii side covers ………………2-19 Depressurize ………………10-3 Disposal ……………….11-4 Drawbar ………………..7-3 E-link pro……………….5-1 Eject a Bale ………………10-2 Field statistics page …………….5-14 Lubrication chart …………….11-14 Net tying ………………7-27 Pick-up Safeguard…………….2-17 PTO shaft……………….7-9… -
Page 152
14 REVISION HISTORY Date Revision Page(s) Description o-m2_00 08/16 Second edition Operator’s and maintenance Manual released. 504/604 PRO Baler Revision History 14-1 https://tractormanualz.com… -
Page 153
https://tractormanualz.com…
This manual is also suitable for:
604 pro
-D36x50 SII parts manual sn552- с поиском v4.08.pdf
Владелец скрыт
16 мар. 2015 г.
6,9 МБ
D35x50 — Инструкция по эксплуатации.doc
Владелец скрыт
16 мар. 2015 г.
6,4 МБ
D36x50 — Инструкция по эксплуатации.doc
Владелец скрыт
16 мар. 2015 г.
6,2 МБ
D36x50 — Инструкция по эксплуатации2.doc
Владелец скрыт
16 мар. 2015 г.
6,4 МБ
D36x50 10ft Гидравлика.dwf
Владелец скрыт
16 мар. 2015 г.
139 КБ
D36x50 10ft Гидравлика.pdf
Владелец скрыт
16 мар. 2015 г.
376 КБ
D36x50 15ft Электрика (1).pdf
Владелец скрыт
16 мар. 2015 г.
937 КБ
D36x50 15Ft Электрика.pdf
Владелец скрыт
16 мар. 2015 г.
937 КБ
Владелец скрыт
16 мар. 2015 г.
241 КБ
D36x50 parts manual sn101- с поиском.pdf
Владелец скрыт
16 мар. 2015 г.
23,7 МБ
D36x50 s2 15ft Гидравлика (1).pdf
Владелец скрыт
16 мар. 2015 г.
240 КБ
D36x50 s2 15ft Гидравлика.pdf
Владелец скрыт
16 мар. 2015 г.
240 КБ
D36x50 Series II — Инструкция по эксплуатацииRUS.doc
Владелец скрыт
16 мар. 2015 г.
8,5 МБ
D36x50 Series II инстр. по обслуживанию RUS.pdf
Владелец скрыт
16 мар. 2015 г.
5 МБ
D36x50 SII parts manual sn101- с поиском.pdf
Владелец скрыт
16 мар. 2015 г.
10,1 МБ
D36x50 SII parts manual sn176- с поиском.pdf
Владелец скрыт
16 мар. 2015 г.
15,9 МБ
d36x50_p1_03_history_sn101-.pdf
Владелец скрыт
16 мар. 2015 г.
15,7 МБ
В этой папке нет файлов.Чтобы добавить файлы, войдите в аккаунт
Vermeer maintenance, service and operator’s manuals in PDF for: heavy equipment, skid steer loaders, drill machines, excavators
| Title | File Size | Download Links |
| Vermeer D16x20A Navigator Horizontal Directional Drill Service Manual [PDF] | 38.3kb | Download |
| Vermeer D20x22 Service Manual [PDF] | 34.1kb | Download |
| Vermeer D33x44 Horizontal Directional Drill Service Manual [PDF] | 9.6Mb | Download |
| Vermeer D33x44 Parts Manual [PDF] | 8.4Mb | Download |
| Vermeer D36x50 Horizontal Directional Drill Maintenance Manual [PDF] | 2.4Mb | Download |
| Vermeer D60x90 Navigator Service Manual [PDF] | 2.9Mb | Download |
| Vermeer RT450 Tractor Parts Manual [PDF] | 3.3Mb | Download |
| Vermeer RTX250 Manual [PDF] | 690.8kb | Download |
| Vermeer S450TX Mini Skid Steer Manual [PDF] | 2.3Mb | Download |
| Vermeer S600TX Skid Steer Technical Specifications [PDF] | 993.2kb | Download |
| Vermeer S650TX Operator’s Manual [PDF] | 2.3Mb | Download |
| Vermeer S725TX Mini Skid Steer Operator’s Manual [PDF] | 5.2Mb | Download |
| Vermeer S925TX Mini Skid Steer Service & Operator’s Manual [PDF] | 2.8Mb | Download |
| Vermeer SC252 / SC292 Manual [PDF] | 519.9kb | Download |
| Vermeer SC362 Operator’s Manual [PDF] | 4Mb | Download |
| Vermeer T655III Service Manual [PDF] | 25.5Mb | Download |
| Vermeer V25 / VX30G / VSK25 / VSK30G Vacuum Excavators Operator’s and Maintenance Manual [PDF] | 5.4Mb | Download |
The list provided contains a variety of service manuals, operator’s manuals, maintenance manuals, and parts manuals for several models of industrial and agricultural equipment manufactured by Vermeer Corporation. These manuals are available in PDF format and provide detailed instructions and technical specifications for the proper use, maintenance, and repair of the equipment.
The equipment covered in these manuals includes horizontal directional drills such as the Vermeer D16x20A Navigator, D20x22, D33x44, and D36x50, as well as the D60x90 Navigator. The manuals also cover the RT450 Tractor and RTX250, mini skid steers such as the S450TX, S600TX, S650TX, S725TX, and S925TX, and vacuum excavators, including the V25, VX30G, VSK25, and VSK30G models.
In addition, the list includes the operator’s manuals for the Vermeer SC252/SC292 and SC362 stump cutters and the T655III trencher. Each manual provides detailed information about the equipment, including technical specifications, operation instructions, maintenance procedures, and troubleshooting tips. These manuals are essential resources for equipment owners, operators, and maintenance personnel who need to ensure the safe and efficient operation of Vermeer equipment.
Vermeer Corporation
Vermeer Corporation is a global industrial and agricultural equipment manufacturer based in Pella, Iowa, United States. The company was founded in 1948 by Gary Vermeer and has since grown to become a leading manufacturer of innovative equipment for various industries, including construction, mining, landscaping, and agriculture.
Some of the products manufactured by Vermeer Corporation include horizontal directional drilling machines, tree care equipment, mini skid steers, brush chippers, stump cutters, compost turners, trenchers, and vacuum excavators. The company is known for its focus on customer needs and dedication to innovation, often introducing new technologies and features to its products.
Vermeer Corporation has a global presence, with operations and dealerships in North and South America, Europe, Asia, Africa, and Australia. The company has a solid commitment to sustainability and responsible business practices, with initiatives focused on reducing waste, conserving resources, and supporting the communities where it operates.
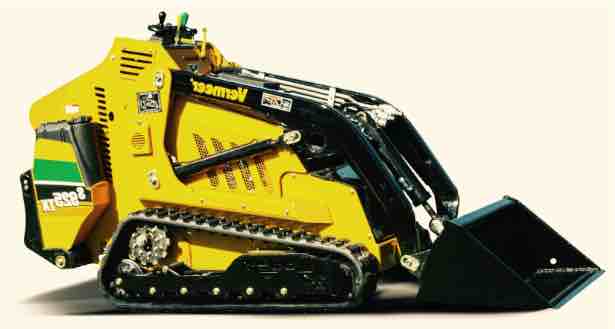
Vermeer S925TX
Vermeer-504-604-PRO-Baler-Operator-and-Mantenance-Manual
Vermeer-BC600XL-Chipper-Operators-Manual
Vermeer-d40-40-Navtec-Navigator-Maintenance-Manual
Vermeer-T450-Operators-Manual
Review of VERMEER RTX1250 Tractors
Some VERMEER Tractor Manuals PDF above the page.
Vermeer has upgraded the RTX1250 tractor with smart controls for interchangeable attachments.
Based on the previous generation model, the new RTX1250i2 tractor is equipped with the latest technological solutions that make it more efficient on the job site and reduce the time required to replace i2 attachments.
Productivity Zone determines the ideal operating range and speed for rear attachments and optimized machine performance.
The Auto Plunge system, turned on with one click of the toggle switch, controls engine speed and, if necessary, automatically reduces the immersion speed of attachments or rotors.
This prevents a strong reduction in speed or shutdown of the power plant.
Vermeer made it easy to set up and reconfigure the RTX1250i2 with the i2 Intelligent Attachment, which can now be replaced in just 1 hour.
Tires, tracks, trenchers, plows and dumps fell into the i2 equipment category.
Self-identifying i2 devices communicate with the tractor, and the machine controls are then adjusted to suit the performance of the attachment.
Also equipped the new RTX1250i2 with the Vermeer Fleet-ready system, which allows the owner of the machine to control the tractor engine hours, downtime, fuel consumption, location and fault codes.
Uses Deutz TCD Tier 4 (Stage IV) Engine.
Volume: 3.6 L
Power: 127 h.p. (94.7 kW)
Maximum torque: 500.3 Nm
Maximum speed: 16.3 km / h
Minimum travel speed (working): 1.3 m / min
Base weight (tracks): 7330.1 kg
Length: 3.8 m
Width: 222.3 cm
Height: 292.1 cm
Ground clearance: 34.3 cm
The history of Vermeer began when Gary Vermeer modified a farm cart in 1948 by attaching a lifting device to it. The high demand for this invention
eventually led to the creation of the Vermeer Manufacturing Company in Pella, Iowa, USA.
For 60 years, this company has had more than one invention, for example, the world’s first round hay press, wood waste shredder and stump shredder.
Since its inception, the small, one-man, Iowa-based Vermeer business has grown to become a global agricultural, construction, industrial and forestry equipment
corporation.
In 1991, Vermeer introduced the NAVIGATOR line of horizontal directional drilling rigs to the world market, which later served as the fiber optic cable for the
worldwide data superhighway. With a strong leadership position in the trenching equipment industry, Vermeer products are highly sought after by rental companies and other clients in road
construction and mining operations.
At present, Vermeer Manufacturing for the family of HDD rigs has a whole brand portfolio: Navigator — a trademark of the family of HDD rigs, Firestick — drill rods;
Navtec — computer control system for the drilling process; RockFire — rock drilling head; Splinelok is a drill rod coupling mechanism.
Vermeer Corporation is making an impact on the progressive development of the world through the production of high quality equipment for tree maintenance,
agriculture, underground construction, open pit mining, and environmental protection equipment. Highly durable and reliable, this equipment is backed by on-site customer service and technical
support from independent dealers around the world.
SELF-PROPELLED TRACTOR WITH RTX450 TRACTOR STATION
With the addition of the RTX450 to the RTX line of equipment, contractors can choose from Vermeer’s full line of four-track machines to maximize their productivity
in challenging conditions. The RTX450 is offered in three configurations: Normal Duty Axle with 66cm tires or Heavy Duty Axle with 74cm tires and four tracks. The tractor also features the same
controls for all RTX machines.
FEATURES & BENEFITS
The RTX450 with a Tier 4 Final engine has 14% more power (compared to the RT450).
The RTX450 has a class-leading compact turning circle, which allows it to work in confined areas — especially in residential areas.
Vermeer exclusive TrenchSense ™ electronic control system helps maintain control even in the toughest terrains.
The Sauer H1 electronically controlled hydraulic pump provides precise control and power reserve to the travel drive.
SELF-PROPELLED TRACTOR XTS1250
With four innovative steel tracks, you can keep working even when your productivity is threatened by adverse weather conditions and rough terrain. Not only are you
guaranteed stability and flotation — the XTS1250’s energetic traction will overcome the resistance of most difficult terrains.
FEATURES & BENEFITS
Handles virtually any soil thanks to a patent-pending four steel track system and satellite axles with differential locks that distribute weight evenly.
Improved control thanks to remote control attachment controls that pivot with the swivel (for improved visibility) driver’s seat.
Maximum — up to 27,000 lb / 12,247 kg increase in pulling power thanks to the added weight and traction.
Your local Vermeer dealer will provide full service and genuine Vermeer parts.