-
Contents
-
Table of Contents
-
Bookmarks
Quick Links
PAYMENT APPLICATION INSTRUCTION
MANUAL
for Verifone Vx520 terminal and Verifone PP1000SE V3 PIN pad
with 2.2.1 application version
1
ITCARD
•
Planet Cash
•
Planet Pay
•
Planet Plus
Related Manuals for VeriFone Vx 520
Summary of Contents for VeriFone Vx 520
-
Page 1
PAYMENT APPLICATION INSTRUCTION MANUAL for Verifone Vx520 terminal and Verifone PP1000SE V3 PIN pad with 2.2.1 application version ITCARD • Planet Cash • Planet Pay • Planet Plus… -
Page 2: Table Of Contents
ABLE OF ONTENTS Verifone Vx520 terminal …………………. 4 Description of terminal ………………..4 1.1.1 Technical data ………………….. 4 1.1.2 Description and functions of terminal buttons …………4 Operation of terminal and PIN pad …………….4 1.2.1 Preparing a set of devices for work ……………. 5 Replacing the paper roll …………………..
-
Page 3
4.2.1 Summary ………………….37 4.2.2 Detailed ………………….. 37 4.2.3 GSM top-up report ………………..37 4.2.4 Generation of report ……………….. 37 Update of application ………………..38 Display of version ………………….. 40 Change of password………………..40 Diagnostics ……………………. 41 4.6.1 Call of Diagnostics and Diagnostics procedure ………… 41 4.6.2 Diagnostics printouts ………………. -
Page 4: Verifone Vx520 Terminal
1. Verifone Vx520 terminal 1.1 Description of terminal 1.1.1 Technical data Display 128×64 pixel | backlit LCD screen magnetic strip reader Card readers electronic card reader Printer thermal, standard paper rolls 58 mm x 25 m Dimensions (L×W×H) 203 mm x 78 mm x 84 mm usage 0°C — 50°C…
-
Page 5: Preparing A Set Of Devices For Work
1. Terminal Verifone Vx520 2. Pinpad VerifonePP1000 SE v3 1.2.1 Preparing a set of devices for work In order to ensure the proper function the set of devices should be appropriately prepared for work and controlled by the authorised person.
-
Page 6
• the PP1000SE V3 PIN pad has no its own power source – it draws current after the connection to the RS-232 socket in the terminal. This means that after the disconnection of the power source from the terminal the power of the PIN pad is also disconnected. CONNECTING THE PIN PAD CABLE TO THE RS-232 SOCKET IN THE TERMINAL FIGURE CONNECTING THE PIN PAD TO THE TERMINAL… -
Page 7: Replacing The Paper Roll
Replacing the paper roll Use standard paper for thermal printers in rolls with a width of 58 mm and length of 25 m. In order to replace the paper roll: 1. Pull gently the printer cover upwards, then backwards 2. Remove the remains of the previous roll and paper from the printer chamber 3.
-
Page 8: Description Of Application Indicators (Icons)
2.2 Description of application indicators (icons) During normal application operation two icons informing about the connection condition and PIN pad status/contactless transaction availability is always visible on the main screen. The meaning of the individual icons is described below. Connection icons – dependent on the type of a medium which is used by the terminal to communicate with the hosts •…
-
Page 9: Starting — Selecting The Transaction Type
3.1.1 Starting — selecting the transaction type 3.1.1.1 Starting the transaction on the main screen (default transaction) The application allows setting a so-called default transaction, i.e. the most common transaction, on the main screen. This enables the amount to be entered immediately without selecting the transaction from the list.
-
Page 10: Entering The Amount
3.1.2 Entering the amount The amount is entered on the terminal by means of 0-9 alphanumerical keys. The entered characters appear on the screen one by one from the right hand side which means that in order to enter the amount of PLN 12.34, the 1-2-3-4 keys should pressed in turn.
-
Page 11: Entering The Card And The Payment Methods
The entered sales amount is too high The entered cash withdrawal amount is too low – FIGURE TRANSACTION LIMITS ERROR MESSAGES 3.1.3 Entering the card and the payment methods The payment application installed on the terminal allows making payments with all the types of cards currently available on the market –…
-
Page 12
read the list of the options displayed on the terminal for the Client and make the selection according to his/her decision. The majority of the cards are related to the single Client’s account which means that most of the cards are provided with one application for making the payment on the terminal. -
Page 13
The correct read of the data of the contactless card is signalled by the activation of all four diodes located above the PIN pad display and by the emission of the long continuous acoustic signal. The incorrect read is signalled by the activation of all the diodes and the short double acoustic signal. -
Page 14
Reading the data of the magnetic card FIGURE INSERTING THE MAGNETIC STRIP CARD When the magnetic card is read correctly, depending on the settings and the type of the card, the application: — displays questions about additional services — connects with the Authorisation Centre in order to obtain the authorisation or — displays the PIN entry request After the confirmations of the transaction with the use of the magnetic strip there are no application identifier field or contactless transaction field. -
Page 15
The 6-digit code does not require the additional PIN confirmation. When the BLIK code is entered by the Client and confirmed, the application connects with the Authorisation Centre, displays the result of the transaction and prints out the confirmation. The procedure of the BLIK payment transaction is described below. 4. -
Page 16: Questions About Additional Services — Dcc And Cash Withdrawal
The confirmation printouts of the mobile phone payment transactions have the same fields as the confirmation printouts of the standard contactless transactions (see: Proximity (contactless) cards) 3.1.4 Questions about additional services – DCC and cash withdrawal Depending on the Provider’s settings, when the card is inserted and read, the questions about the additional services — dynamic currency conversion (DCC) and/or cash withdrawal — can appear on the terminal display.
-
Page 17
1. When the data are read properly, the application displays the „Zatwierdź PIN” (eng. “Waiting for PIN”) 2. The application connects with the Authorisation Centre. message. Ask the Client to enter and confirm the PIN. The entered characters are masked. 3. -
Page 18: Types Of Transactions
If the signature is COMPLIANT, the application prints out If the signature is NONCOMPLIANT, the application the confirmation for the Client and returns to the main CANCELS the transaction and prints out the confirmation. screen The printout of the copy for the Client is obligatory FIGURE TRANSACTION CONFIRMED WITH THE SIGNATURE PRINTOUTS…
-
Page 19
In order to make the Sales transaction (the exemplary PIN card transaction procedure): 1. Enter the amount and 3. The application 4. The Client should confirm by the ENTER 2. Insert the card informs about the read of enter the PIN code and the card data press ENTER 6. -
Page 20: Cash Back (Sales And Cash Withdrawal)
THE SALES – the Client’s copy THE SALES – the Seller’s copy FIGURE THE SALES THE EXEMPLARY PRINTOUT 3.2.2 Cash Back (Sales and cash withdrawal) The Cash Back (or Sales and cash withdrawal) transaction is the transaction consisting in making the Sales transaction and paying the Client a sum of money specified by him/her at the same time.
-
Page 21
The Cash Back transaction may be unavailable for certain cards – in such cases the transaction can be rejected OR the application proposes continuing the Sales transaction itself. The maximum (and minimum) cash withdrawal amount can be different depending on the type of the card used during the transaction and the transaction limits resulting from the application settings (see: Transaction limits) -
Page 22: Cancellation
transaction or Cash Back — Sales and cash withdrawal transaction, if he/she confirms his/her willingness to withdraw cash). The availability of the cash withdrawal during the Sales transaction depends on the application settings: if the cash withdrawal promotion is not activated — the Client does not receive the cash withdrawal proposition. However, the Cash Back (Sales and cash withdrawal) transaction as the separate transaction can be visible in the transaction menu (also depending on the application settings).
-
Page 23: Copy Of The Client’s Printout
CANCELLATION PRINTOUT CANCELLATION PRINTOUT the Seller’s copy the Client’s copy – FIGURE CANCELLATION EXEMPLARY CONFIRMATION PRINTOUTS In case of the inappropriate data given by the User the application displays one of the following messages: 1. The account number 3. The entered amount 2.
-
Page 24
2. Select the KOPIA WYDRUKU 1. Press the WIĘCEJ 4. The application prints 3. Enter the account KLIENTA (eng. CLIENT out the copy of the (eng. MORE) key on the number and confirm by PRINTOUT COPY) position main screen the ENTER key Client’s printout from the list of transactions ’… -
Page 25: Preauthorisation
PREPAID GSM – ORIGINAL TRANSACTION PRINTOUTS (Seller’s and CLIENT’S COPY PRINTOUT from Client’s) the menu ’ – FIGURE COPY OF CLIENT S PRINTOUT PREPAID GSM 3.2.5 Preauthorisation The preauthorisation consists in blocking temporarily the funds on the Client’s for the later payment. This means that the funds are not transferred to the Seller’s account but only reserved until the payment for the service is made [see: Completion of…
-
Page 26
In order to make the Preauthorisation: 2. Select 1. Press the WIĘCEJ 3. Enter the amount and 4. Insert the contact PREAUTORYZACJA (eng. (eng. MORE) key on the confirm by the ENTER (strip or chip) card PREAUTHORISATION) from main screen the list of transactions 8. -
Page 27: Completion Of Preauthorisation
The necessity of giving the expiry date and/or CVV2/CVC2 code is optional and depends on the Provider’s settings. In order to make the Preauthorisation without the physical presence of the payment card: 2. Select 1. Press the WIĘCEJ 3. Enter the amount and 4.
-
Page 28
The Completion can be performed for the same or lower amount but not higher than the amount of the Preauthorisation. If the final amount to be paid is higher, apart from the Completion the additional Sales transaction for the remaining amount should be made The Completion may be performed on the different device than the Preauthorisation (e.g. -
Page 29: Prepaid Gsm
COMPLETION PRINTOUT COMPLETION PRINTOUT The Client’s copy The Seller’s copy – FIGURE COMPLETION OF PREAUTHORISATION EXEMPLARY CONFIRMATION PRINTOUTS 3.2.7 Prepaid GSM The Prepaid GSM transaction allows selling the GSM top-ups by using the card- or cash-based payment. The transaction procedure is presented below. 3.2.7.1 Prepaid GSM –…
-
Page 30: Return
1. Select the GOTÓWKA 2. The application connects with the Authorisation Centre and displays the result of the (eng. CASH) option transaction. 3. The application displays the „Gotówka otrzymana?” (eng. “Cash received?”) question. The confirmations are printed out when the proper value is selected. If the „NIE”…
-
Page 31
The Return transaction is performed when the Client returns the goods for which he/she paid by card, and the original Sales transaction cannot be longer cancelled (the original transaction is already sent for the settlement). The return should be made with the same card which was used earlier during the Sales transaction. The Return transaction is always confirmed by the Client’s signature, regardless of the type of the card used. -
Page 32
RETURN – the sygnature is RETURN – the sygnature is compliant compliant – FIGURE RETURN THE SIGNATURE COMPLIANT PRINTOUTS If the Client’s signature on the confirmation of the transactions is noncompliant with the signature put on the card: 9a. The printout of the Client’s copy is obligatory and 7a. -
Page 33: Dynamic Currency Conversion — Dcc
RETURN – Seller’s printout with RETURN – Seller’s printout with the place for the signature the place for the signature FIGURE RETURN THE SIGNATURE NONCOMPLIANT PRINTOUTS 3.3 Dynamic currency conversion – DCC Depending on the configuration the application makes available the DCC (dynamic currency conversion). service.
-
Page 34: Administration Functions
If the foreign currency is selected, the Client’s copy is printed out in English. Transaction with DCC (in Transaction without EUR) – exemplary DCC (in PLN) – printouts exemplary printouts FIGURE EXEMPLARY PRINTOUTS The DCC option is always unavailable for the contactless transactions. The DCC proposition never appears for the cards whose currency is PLN.
-
Page 35: Call Of Settlement
If the “Niezgodność z hostem” (eng. “Noncompliance with host”) message recurs on the subsequent printouts of Settlements, contact the Service Centre. If the Settlement error message recurs on the printouts, absolutely contact the Service Centre. The copy of the Settlement printout cannot be done. 4.1.1 Call of Settlement Depending on the configuration the Settlement can be carried out by the application automatically once a day…
-
Page 36: Reports
If there are no transactions to be settled on the terminal, the printout includes the zero values of amounts and numbers of transactions, and “Brak transakcji” (eng. “No transaction”) information appears in the DETAILED section. In addition, depending on the configuration: •…
-
Page 37: Summary
The printouts of the Reports are not numbered. 4.2.1 Summary The Summary Report printouts, in addition to the data of the point of sale (address, TID, MID), date and time, include: • The title of the Report • The IN TOTAL section — the summary of the payments with breakdown into the type and number of the transactions: SALES, RETURN, CASH •…
-
Page 38: Update Of Application
DAILY report DAILY report DAILY report – FIGURE REPORTS EXEMPLARY PRINTOUTS 4.3 Update of application The update consists in connecting the application with TMS to download the latest parameters (settings) and/or the new version of the application as well as in sending information about the terminal status. Depending on the configuration the application may perform the update once a day on the specific weekdays at the determined time.
-
Page 39
In order to make the Update of the application: 2. Select „AKTUALIZACJA 3. If there are the unsettled transactions on the terminal, 1. Select the ADMIN APLIKACJI” (eng. „UPDATE the application informs about this fact and displays the menu in the main OF APPLICATION”) from the request for the confirmation. -
Page 40: Display Of Version
4.4 Display of version The function allows displaying the version number of the payment application and making the printout including information about the versions of the individual components of the software installed currently on the terminal. In order to display the application version: 2.
-
Page 41: Diagnostics
2. Select the „ZMIANA 3. Enter the 4. The entered 1. Select the ADMIN HASŁA” (eng. „CHANGE menu on the main Administrator’s characters are masked OF PASSWORD”) function screen password and confirm with asterisks from the list and confirm 7. The application 5.
-
Page 42
4.6.1.1 Keyboard test The objective of the keyboard test is to check the proper function of every key of the device. The application displays the list of symbol corresponding to the individual buttons except the CANCEL key. When the User presses the key, its symbol is “marked off”… -
Page 43
4.6.1.3 Connection test 7. The application 8. The application displays the authorisation HOST IP 10. The application displays the question ADDRESS obtained from the currently set parameter. If makes a connection and about the test need be, edit it, then confirm displays the test result. -
Page 44: Diagnostics Printouts
4.6.2 Diagnostics printouts The exemplary printout of the Ethernet terminal The exemplary printout of the GPRS terminal diagnostics result diagnostics result ’ – FIGURE DIAGNOSTICS RESULTS EXEMPLARY PRINTOUTS 4.7 Demo mode For the training purposes the application provides the special DEMO mode to follow the procedure of some most common used functions and to make the exemplary printouts.
-
Page 45
In order to enter the DEMO mode: 3. Enter the password 4. The application 2. Select DEMO MODE 1. Press ADMIN on the from the list of and confirm by the confirms the activation of main screen transactions ENTER key the DEMO mode FIGURE DEMO MODE… -
Page 46: Additional Functions
5. Additional functions 5.1 Printout of the data of terminal and point of sale In order to facilitate the communication with the Customer Service Office the printout including the identification data of the terminal and point of sale can be made: •…
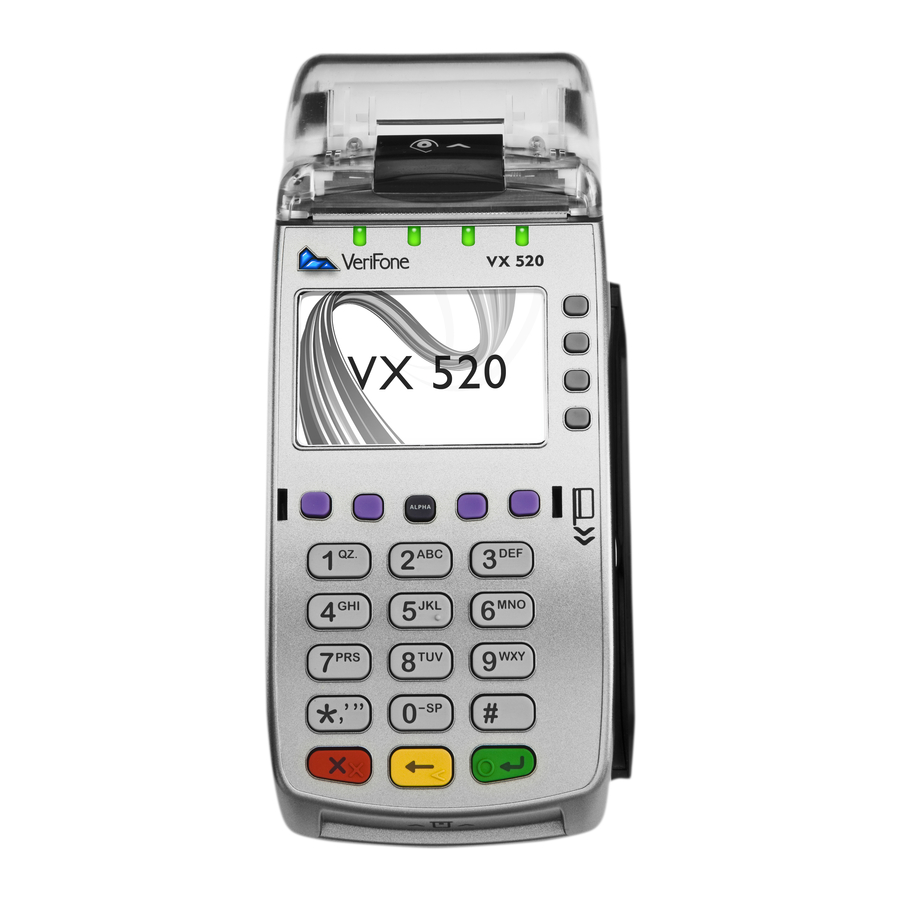
Среди оборудования от компании VeriFone для приема платежных карт выгодно выделяется POS-терминал VeriFone VX520. Он отличается удобством применения, простотой настроек, возможностью приема всех видов пластиковых карт. В основе аппарата — мощный процессор, который способствует быстрой обработке информации. За счет высокоскоростного шифрования обеспечивается защита данных от мошенников.
Подберем VeriFone под любой бизнес и бюджет.
Оставьте заявку и получите консультацию в течение 5 минут.
VeriFone VX520: инструкция по подготовке терминала к работе
Согласно инструкции, подключение VeriFone VX520 к сети Интернет возможно через следующие виды связи:
- GPRS. Связь с интернетом возможна через SIM-карту с подключенной услугой доступа, предоставляемой мобильным оператором.
- Ethernet. К аппарату подключают провод от модема или роутера. Преимущества проводного интернета заключаются в стабильности и высокой скорости.
Подключение к интернету через Wi-Fi не поддерживается.
Клавиатура аппарата состоит их нескольких клавиш, на каждую их них возложены определенные функции.
Функциональное назначение кнопок POS-терминала:
- F1-F4 — кнопки навигации (F1 открывает меню административных операций в режиме ожидания);
- кнопки с цифрами — ввод суммы;
- красная, желтая и зеленая кнопки — отмена, удаление и подтверждение действий соответственно.
Прежде чем приступить к работе, нужно удостовериться в том, что принтер заправлен кассовой лентой. Для установки рулона бумаги осторожно откройте крышку, аккуратно нажав на черную кнопку, согласно направлению стрелки. Вставьте чековую ленту так, чтобы она при печати чеков разматывалась снизу. Потяните за край, он должен выйти из лотка. Захлопните крышку и оторвите часть бумаги, которая видна снаружи.
Чтобы включить терминал, удерживайте зеленую кнопку примерно 5 секунд, пока он не перейдет в режим ожидания (на дисплее появится надпись «Введите карту»). Для отключения удерживайте кнопку красного цвета.
Терминал VeriFone VX520: инструкция по эксплуатации
Согласно инструкции по эксплуатации, терминал VeriFone VX520 поддерживает финансовые и административные операции. Основная его функция в точках продаж — проведение оплаты за товары. Для получения доступа к денежным операциям нужно вставить пластиковую карту в чип-ридер либо провести магнитной полосой через считыватель (зависит от вида используемой карты). Любую операцию, проведенную в течение рабочей смены, можно отменить. После этого деньги возвращаются на счет владельца карты.
Также терминал позволяет проводить административные операции, такие как печать копий чеков, формирование отчетов за смену и прочие. Чтобы открыть доступ к этим операциям, нужно нажать F1, когда терминал находится в режиме ожидания.
После совершения любой из операций устройство автоматически, в течение нескольких секунд, переходит в режим ожидания. Выбирать требуемый пункт можно как при помощи кнопок навигации, так и путем нажатия соответствующих цифр.
В зависимости от версии программного обеспечения, пункты меню могут немного различаться.
Мы готовы помочь!
Задайте свой вопрос специалисту в конце статьи. Отвечаем быстро и по существу. К комментариям
Финансовые операции
Чтобы провести оплату за товар, выберите в предложенном меню требуемый раздел. Далее сделайте следующее:
- Укажите сумму с помощью цифровых кнопок. Чтобы ввести копейки, нажмите после рублей кнопку «*». Недопустимо выполнять операции с суммами ниже 1 рубля.
- Подтвердите действия зеленой клавишей. При необходимости коррекции суммы нажимайте желтую кнопку.
- Если понадобится введение PIN-кода, система его запросит. Подтвердите действие зеленой кнопкой.
- Сверьте информацию на карте с той, которая появится на экране. Если она не совпадает, попробуйте совершить операцию снова. Если совпадает, подтвердите.
- Устанавливается соединение с банком и происходит обмен данными, это займет 3—40 секунд. По завершении процесса появится надпись об одобрении операции и начале печати чеков.
- Выйдет первый чек, на котором клиент должен поставить подпись. Подтвердить. Начнется печать следующего чека.
В случае сбоя выйдет только один чек с сообщением об отклонении операции и кодом ошибки.
Отмена операции возможна только до момента закрытия смены. Выполните действия в следующей очередности:
- Выберите требуемый раздел.
- Введите номер документа, сформированного при осуществлении операции, которую нужно отменить. Подтвердите нажатием на зеленую кнопку.
- Данные чека выводятся на экран. Снова подтвердите.
- Происходит проверка карты. Сравните данные на дисплее с информацией на карте. Подтвердите.
- Устанавливается соединение с банком и происходит обмен данными.
- После успешно проведенной операции начинается печать чеков.
Деньги практически моментально поступят на счет покупателя.
Подберем POS-терминал VeriFone, установим и настроим за 1 час.
Оставьте заявку и получите консультацию в течение 5 минут.
Административные операции
Сформировать копию чека можно, отыскав его по номеру, или повторив печать последнего фискального документа. Чтобы узнать чековый номер, зайдите в меню «Отчеты» и выберите полный отчет. В нем представлены сведения всех операций за текущий период. Имейте в виду, что после закрытия смены база терминала очистится и печать копии чека будет невозможной. Номер, найденный в полном отчете, введите после выбора раздела «Печать копии чека по номеру».
В разделе меню «Отчеты» можно распечатать краткий или полный отчет за текущий период. Разница между ними заключается в содержании. В кратком отчете указаны итоговые суммы по каждой операции, а в полном — детальная информация, включая номер чека, карты, дату и прочее.
В разделе «Служебные операции» доступны:
- «Сверка итогов». Происходит закрытие смены и очистка сведений по всем операциям, выполненным за текущий период. Система сверяет информацию в базе с той, которая хранится в банке. В зависимости от результата, осуществляется печать чека с сообщением о совпадении либо несовпадении итогов.
- «Загрузка ключей». Осуществляется загрузка рабочих ключей из банковской системы в аппарат. Чаще всего операция выполняется при появлении ошибки с кодом 898.
- «Проверка связи». Выполняется связь устройства с банком.
Если произошла случайная блокировка аппарата, нажмите F1 и подтвердите зеленой кнопкой.
Возможные неисправности и способы их устранения
Основные виды неисправностей POS-терминала VeriFone VX520 и варианты их решения представлены в таблице.
| Возможные неисправности | Решения |
| Не выходит чек | Проверьте наличие кассовой ленты в принтере. Перезагрузите аппарат |
| Не удается завершить операцию, сообщение на экране указывает на ошибку при установке соединения (работа по GPRS) | Отключите аппарат, а затем включите через 1 минуту.
Проверьте доступный баланс на SIM-карте: извлеките ее из аппарата и вставьте в мобильный телефон. |
| Не получается завершить операцию, ошибка при установке соединения (работа по Ethernet) | Отключите аппарат и включите через 1 минуту.
Перезагрузите устройство доступа к интернету (роутер, модем). Проверьте наличие связи путем совершения операции «Загрузка ключей» |
Кроме того, на ошибки указывает появление следующих кодов на экране аппарата:
- 051 — срок действия карты завершен;
- 050 — операция невозможна по причине блокировки карты;
- 055 — операция запрещена банком-эмитентом;
- 058 — карта не активна;
- 076 — не хватает денег для совершения операции;
- 205 — ввод неверной суммы;
- 201 — неправильно указан PIN-код.
В случае серьезных неисправностей, не поддающихся самостоятельному устранению, стоит обратиться за помощью к специалистам.
Подключение VeriFone VX520 к 1С
Для работы VeriFone VX520 с 1С предварительно нужно скачать и установить соответствующий драйвер.
Работа POS-терминала с 1С осуществляется следующим образом.
- Сначала программа 1С отправляет драйверу запрос, который тот впоследствии перенаправляет в систему терминала.
- Происходит обмен данными между терминалом и сервером банка.
- В 1С приходит ответ. Если операция прошла успешно, начинается печать чека. Если нет — аппарат выдает ошибку. Ее решение зависит от причины появления.
Подключение VeriFone VX520 к 1С осуществляется через USB или RS-232.
Для настройки POS-терминала сделайте следующее:
- Подключите аппарат к ПК.
- Установите требуемый драйвер.
- Удостоверьтесь в адекватной работе устройства («Пуск» — «Устройства и принтеры», выбрать оборудование и посмотреть его свойства).
- Зайдите в раздел «Администрирование» программы 1С. Выберете «РМК и оборудование», потом — «Подключаемое оборудование».
- Нажмите «Создать».
- Укажите тип (эквайринговый терминал) и наименование устройства.
Далее можно ввести некоторые параметры, такие как код валюты, устройства и прочие. В конце выполните тест, по результатам которого можно судить о правильности подключения и настройки.
Драйвер для VeriFone VX520
Без драйвера для VeriFone VX520 становится невозможным подключение аппарата к компьютеру. В частности, он необходим для успешной интеграции терминала и 1С.
Скачать драйвер для VeriFone VX520 можно с официального сайта компании. Чтобы его установить, потребуется запуск файла setup.exe. В случае успешной установки можно заметить, как появится еще один СОМ-порт (по умолчанию 9-й). Но при желании номер можно изменить в файле silent.bat.
Как перезагрузить терминал VeriFone VX520?
Если аппарат завис или отказывается выполнять команды, иногда помогает решить проблему обычная перезагрузка. Как перезагрузить терминал VeriFone VX520?
Воспользуйтесь одним из двух способов:
- Отключите аппарат от источника питания. Извлеките аккумулятор, а затем установите через пару минут и включите устройство.
- Зажмите зеленую кнопку и клавишу с цифрой 7 одновременно и удерживайте до тех пор, пока система не запросит пароль. Введите «1», нажмите кнопку «alpha», которая расположена между фиолетовыми клавишами в верхнем ряду. Откроется окно, где выбирайте «Restart».
Начнется перезагрузка устройства. Если с ее помощью устранить сбой не удалось, придется обращаться за помощью к специалистам.
Подберем POS-терминал VeriFone для вашего бизнеса. Доставим в любую точку РФ!
Оставьте заявку и получите консультацию в течение 5 минут.

Марк Трегубов
Стратегический консультант в области оптимизации бизнес-процессов с 2005 года, специализируется на складской логистике и розничной торговле.
Оцените, насколько полезна была информация в статье?
Наш каталог продукции
У нас Вы найдете широкий ассортимент товаров в сегментах
кассового, торгового, весового, банковского и офисного оборудования.
Посмотреть весь каталог
Преимущества сервиса Port
Авторизованный сервисный центр для 22 производителей
Услуги по монтажу, настройке, ремонту всего спектра оборудования
Аккредитованные специалисты
Доставка оборудования в сервисный центр
БОЛЬШЕ О СЕРВИСНОМ ЦЕНТРЕ
Обязательная гарантия на услуги
Наша компания является авторизованным сервисным центром, поэтому мы всегда следим за качеством своего обслуживания.Воспользовавшись нашими услугами вы получаете:
Штат специалистов, готовый ответить на вопросы
Бесплатный выезд специалиста
Актуальную документацию по обслуживанию оборудования
БОЛЬШЕ О СЕРВИСНОМ ЦЕНТРЕ
Вам могут быть интересны: