- Manuals
- Brands
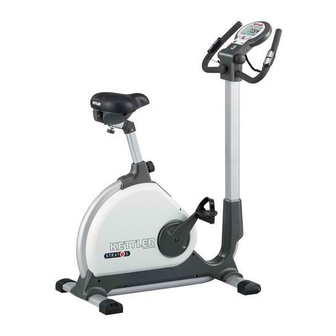
- Kettler Manuals
- Exercise Bike
- Stratos S
- Assembly instruction manual
-
Contents
-
Table of Contents
-
Bookmarks
Quick Links
Montageanleitung „ STRATOS «
Art.-Nr. 07969-600
D
GB
F
NL
E
I
PL
Abb. ähnlich
Related Manuals for Kettler Stratos
Summary of Contents for Kettler Stratos
-
Page 1
Montageanleitung „ STRATOS ” Art.-Nr. 07969-600 Abb. ähnlich… -
Page 2: Wichtige Hinweise
Weitergehende Eingriffe gen (Demontage von Originalteilen, Anbau von nicht zulässi- gen Teilen, usw.) können Gefahren für den Benutzer entstehen. sind nur vom KETTLER-Service oder von KETTLER geschultem Fachpersonal zulässig. ? Beschädigte Bauteile können Ihre Sicherheit und die Lebens- dauer des Gerätes beeinträchtigen. Tauschen Sie deshalb be- ? Im Zweifelsfall und bei Fragen wenden Sie sich bitte an Ihren schädigte oder verschlissene Bauteile sofort aus und entziehen…
-
Page 3: For Your Safety
? In case of enquiry, please contact your KETTLER dealer. out of use until this has been done. Use only original KETTLER ? In choosing the location of the apparatus, ensure a sufficient sa- spare parts.
-
Page 4: Handling The Equipment
List of spare parts Waste Disposal KETTLER products are recyclable. At the end of its useful life plea- When ordering spare parts, always state the full article number, spa- re partnumber, the quantity required and the S/N of the product.
-
Page 5: Instructions De Montage
été rem- ? Choisir l’emplacement de l’appareil de manière à assurer un placés. N’utiliser que des pièces de rechange KETTLER d’origi- écart de sécurité suffisant par rapport aux obstacles. Ne pas installer l’appareil à proximité immédiate de points de circula- ? En cas d’entraînement régulier et intensif, il y a lieu de con-…
-
Page 6: Voor Uw Veiligheid
Remarque relative à la gestion des déchets de mentionner la référence article, le numéro de pièce de re- Les produits KETTLER sont recyclables. A la fin de sa durée d’u- change, la quantité demandée a quantitè nècessaire ainsi que le nu- tilisation, remettez l’appareil à…
-
Page 7
Onderdelenlijst Verwijderingsaanwijzing Vermeld bij de onderdelenbestellingen a.u.b. het volledige artikel- KETTLER producten zijn recyclebaar. Breng het apparaat aan het nummer, het onderdeelnummer, het benodigde aantal en het serie- einde van de gebruiksduur naar en vaekkundig verzamelpunt nummer, aan. -
Page 8: Advertencias Importantes
Las manipulaciones del aparato sólo útil del aparato. Por lo tanto, cambie inmediatamente las pie- se permiten al servicio técnico de KETTLER y a personas instrui- zas dañadas o desgastadas y ponga el aparato fuera de ser- das por Kettler.
-
Page 9: Pedido De Recambios
Indicar con los pedidos de piezas de repuesto el número completo Los productos de KETTLER son riciclables. Cuando se termina la del artículo, el número de la pieza de repuesto, las unidades solici- vida útil de un aparato o una máquina, entréguelos a una em- tadas y así…
-
Page 10
Per l’ordinazione di parti di ricambio indicate il completo nume- I prodotti KETTLER sono reciclabill. Quando l’apparecchio non ro di articolo, della parte di ricambio, il numero di unit necessa- servirà più, portatelo in un apposito punto di raccolta della Vo- rio nonchè… -
Page 11: Ważne Informacje
Bardziej złożone prace na przyrządzie mogą przepro- spowodować mogą zagrożenia dla użytkownika. wadzać tylko pracownicy serwisu firmy KETTLER lub przeszko- ? Uszkodzone części mogą zagrozić Twojemu bezpieczeństwu i lony przez firmę KETTLER personel.
-
Page 12: Zamawianie Części Zamiennych
Wskazówka dotycząca usuwania odpadów Zamawianie części zamiennych, strona 22-23 Produkty firmy KETTLER podlegajà recyklingowi. Pod koniec Przy zamawianiu części zamiennych proszę podawać kompletny numer artykułu, numer części zamiennej, numer serii urządzenia. okresu u˝ywalnoÊcl prosz´ oddaç urzàdzenie do wlaÊciwego Przykład zamówienia: nr artykułu 07969-600 / nr części za-…
-
Page 13: Checkliste (Packungsinhalt)
Checkliste (Packungsinhalt) Checklist (contents of packaging) Lista de control (contenido del paquete) Liste de vérification (contenu de l’emballage) Lista di controllo (contenuto del pacco) Checklijst (verpakkingsinhoud) Lista kontrolna (zawartość opakowania) Stck. M 16 M 12 Pulsmesser M 8 x 45 Pulsmesser M 8 x 16 3,9 x 25…
-
Page 14
Messhilfe für Verschraubungsmaterial Measuring help for screw connections Ayuda para la medición del material de atornilladura Gabarit pour système de serrae Misura per materiale di avvitamento Meethlp voor schroefmateraal Wzornik do połączeń śrubowych M8 x 45 M8 x 45… -
Page 15
ACHTUNG ! Die beiden Schrauben mit gewölbter Unterlegschei- be (D) müssen aus technischen Gründen zuerst an- gezogen werden. Erst dann die Schrauben mit fla- cher Unterlegscheibe (E) anziehen Important ! Due to technical reasons the screws with the cur- ved washer (D) have to be tightend first. Tighten the screws with the flat washer (E) last. -
Page 16
3,9 x 25 M 12… -
Page 17
M 16… -
Page 18
Handhabung Handleiding Handling Utilisation Aplicación Zastosowanie Utilizzo… -
Page 19
Handhabung Typenschild — Seriennummer Type label — Serial number Plaque signalétiqu — Numèro de serie Typeplaatje — Seriennummer Placa identificativa — Número de serie Targhetta tecnica — Numero di serie Tabliczka identifikacyna — Numer serii Demontage der Pedalarme sez une vis M12 (ne fait pas partie de la gamme de livraison) dans l’ouverture de filetage (B). -
Page 20: Battery Change
Batteriewechsel Changement de piles Un affichage de l’ordinateur faible ou éteint impose un change- ment des piles. L’ordinateur est équipé de deux piles. Effectuez le changement comme suit: ? Enlevez le couvercle du logement des piles et rempla- cez-les par deux piles neuves du type AA 1,5V. ? Veillez au marquage au fond du logement lors de la mise en place des piles.
-
Page 21: Wymiana Baterii
Batteriewechsel Cambio delle batteria Una visualizzazione debole o spenta del computer richiede il cambio della batteria. Il computer è munito di due batterie. Pro- cedete al cambio delle batterie nel modo seguente: ? Togliete il coperchio della batteria e sostituite le batte- rie con 2 nuove del tipo AA, 1,5V ? Fate attenzione nel montaggio al contrassegno nel suolo del vano batteria.
-
Page 22
Ersatzteilzeichnung 66 65… -
Page 23
Ersatzteilliste Heimtrainer „STRATOS “ Teil Bezeichnung Stück Ersatzteil-Nr. für 07969-600 Rahmen 91111764 Bodenrohr (80x33mm) 91111287 Rollenschoner rechts, (f. 80x33mm) 91170387 Rollenschoner links, (f. 80x33mm) 91170388 Verstellschoner (f. 80x33mm) 91170500 Antriebsrad (D=240mm) m. Tretlagerachse und Lagersatz 91130125 Kugellager 6203 ZZ (paarweise je Achse wechseln!) -
Page 24
HEINZ KETTLER GmbH & Co. KG· Postfach 1020 · D- 59463 Ense-Parsit docu 528n-10/ 08.05…
| Language | Type | Pages | |
|---|---|---|---|
| English | Installation Guide | 22 | > Go to the manual |
| English | User Manual | 30 | > Go to the manual |
| German | User Manual | 22 | Go to the manual |
| German | User Manual | 30 | Go to the manual |
| Dutch | User Manual | 22 | Go to the manual |
| Dutch | User Manual | 30 | Go to the manual |
| French | User Manual | 22 | Go to the manual |
| French | User Manual | 30 | Go to the manual |
| Italian | User Manual | 22 | Go to the manual |
| Italian | User Manual | 30 | Go to the manual |
| Swedish | User Manual | 22 | Go to the manual |
| Swedish | User Manual | 30 | Go to the manual |
| Spanish | User Manual | 22 | Go to the manual |
| Spanish | User Manual | 30 | Go to the manual |
458579
1
-
What is the maximum weight for a person using the cycle? 100 kg or 150 kg?
Submitted on 17-6-2020 at 12:47Reply Report abuse
Report abuse
Libble takes abuse of its services very seriously. We’re committed to dealing with such abuse according to the laws in your country of residence. When you submit a report, we’ll investigate it and take the appropriate action. We’ll get back to you only if we require additional details or have more information to share.
Product: Kettler STRATOS 7996-500
Forumrules
To achieve meaningful questions, we apply the following rules:
- First, read the manual;
- Check if your question has been asked previously;
- Try to ask your question as clearly as possible;
- Did you already try to solve the problem? Please mention this;
- Is your problem solved by a visitor then let him/her know in this forum;
- To give a response to a question or answer, do not use this form but click on the button ‘reply to this question’;
- Your question will be posted here and emailed to our subscribers. Therefore, avoid filling in personal details.
Your question has been posted on this page
Would you like to receive an email when new answers and questions are posted? Please enter your email address.
(Ocr-Read Summary of Contents of some pages of the Kettler Stratos GT 7969 000 Document (Main Content), UPD: 13 February 2023)
-
17, 8 Remplacement des piles Un affichage faible ou inexistant nécessite un remplacement des piles. L’ordinateur est équipé de deux piles. Changer les piles comme suit: ■ Retirer le couvercle du casier à piles et les remplacer par deux nouvel- les du type AA 1,5 V. ■ Lors de la mise en place des piles, respecter l’indication au fond du casier à piles. ■ En cas de dysfonctionnements après …
-
37, Per annotare i valori raggiunti durante l’allenamento è possibile inserirli nella tabella relativa alle prestazioni personali sotto sforzo. Prima e dopo ogni unità di allenamento sono necessari circa 5 minuti di ginnastica per il riscaldamento o il raffreddamento dei muscoli. Fra due sessioni di al- lenamento dovrebbe trascorrere un giorno in cui non si effettua alcun esercizio fisico se successivamente si intende passa…
-
5, 4.4.2.6 Trainingszeit Grenzwerte: 0 — 99 min, Schrittweite: 1min oder 5 min Vorgabe der Trainingszeit (deaktiviert) Vorgabe der Trainingszeit Als letzter Parameter kann die Trainingszeit eingestellt werden. Die rech- te obere Anzeige beginnt zu blinken (Zahlensegmente und Schriftzug «TIME»). In der mittleren Anzeige wird die aktuell gespeicherte Trainings- zeit angezeigt. Die Taste «SET» speichert den aktuellen Wert und die Al- terseingabe beginnt erneut (Du…
-
31, Se da la nota 1,0 de la buena forma fÌsica. 3. P1 es mayor que P2 y el valor del parentesis est· entre 0 y 5,0. La visualizaciun de la nota se realiza dentro de la imagen principal con una “F“ antepuesta (por ejemplo: F3,0 con una cifra decimal). En la ima- gen de abajo a la derecha, se indica la diferencia calculada entre el pul- so inicial y final. Ediciun de la nota de la buena forma fÌsica Se puede conseguir la salida de la visualizaciun de la nota de la b…
-
4, Kettler Stratos GT 7969 000 nicht überschritten werden. Der Mindestwert für die obere Pulsgrenze liegt bei 80 Schlägen pro Minute. Der hier eingegebene Maximalpuls wird für die akustische und optische Warnmeldung bei Überschreitung genutzt. Desweiteren wird der hier ein- gegebene Wert als Basis zur Berechnung des prozentualen Vergleichs Ak- tueller Puls / Maxpuls verwendet. 4.4.2.4 Trainingsstrecke (deaktiviert) Grenzwerte: 0 — 99 km, Schrittweite: 1 km oder 5 km Vorgabe der Trainingsstrecke (deaktiviert) …
-
30, respondiente se ilumina intermitentemente durante 5 segundos. Despues la cuenta de la visualizaciun, incluidos los datos predeterminados ya mostrados, se realiza de forma ascendente. El centelleo de la visualiza- ciun no es visible dentro de la imagen principal, si en este momento se est· indicando el valor correspondiente; en este caso, ˙nicamente centel- lea la imagen m·s pequeoa. 5. Visualizaciones y c·lculos 5.1 Visualizaciun de las escalas de carga de resiste…
-
32, Kettler Stratos GT 7969 000 8. Cambio de pilas Cuando la visualizaciun es debil o se apaga, se requiere el cambio de las pilas. El ordenador est· provisto de dos pilas. Haga el cambio como sigue: ■ Quite la tapa del compartimento de las pilas y reempl·celas por dos nuevas del tipo AA 1,5 Voltios. ■ Observe durante la colocaciÛn de las pilas, la marcaciÛn de los polos en la base del compartimento de las mismas. ■ Si despues de haber vuelto a poner en marcha el ordenador, se pro- ducen…
-
10, 5.5 Speed The speed is calculated in such a way that at pedal revolutions of 60 rpm a speed of approximately 21.3 km/h is indicated. 5.6 Distance Kilometres travelled in counting-up and pre-set mode are indicated in 10km intervals from 0.00 km to 99.99 km. 5.7 Time The training time is shown between 0.00 and 99.59 minutes. The time read-out only appears when pedal revolutions are above 20 rpm. The read-out can be in counting-up mode or prre-set mode. 5.8 Pulse-rate measureme…
-
15, Kettler Stratos GT 7969 000 5 Affichages et calculs 5.1 Affichage du niveau d’effort Réglage en continu de 1 à 10 L’affichage se situe en haut à gauche à côté de l’affichage principal du milieu. Il est possible de régler en continu de 1 à 10 l’effet de freinage au moyen de la roue à main. 5.2 Affichage du kilométrage total Pendant sa sélection d’une personne, son kilométrage total (en km entiers) est affiché dans le champ «Distance/Tota…
-
11, This read-out will remain until the + or – button is used to call up another read-out or the SET button is pressed to reactivate the scan mode. The data that appears in the central main display can be identified by the identification code above the read-out.At the beginning of training the scan mode is always activated. This is also the case if training is inter- rupted and started again, regardless of the previous setting. 6.2 Interruption of training/end of tra…
-
33, 1 Istruzioni per l’uso del computer 2 Funzioni 1Misurazione del tempo [ TIME ] 2Velocità [ KM/H ] 3 Ritmo della pedalata [ RPM ] 4 Percorso allenamento [ DISTANCE ] 5 Consumo energetico in calorie [ KILOJOULE ] 6Visualizzazione del livello di affaticamento 1 — 10 7Misurazione delle pulsazioni [ PULSE ] 8 Confronto percentuale fra le pulsazioni effettive e le pulsazioni massime [ % ] 9Misurazione delle pulsazioni a ripos…
-
18, Kettler Stratos GT 7969 000 1 Computerhandleiding 2 Uitrusting 1Tijdmeting [ TIME ] 2 Snelheid [ KM/H ] 3Trapfrequentie [ RPM ] 4Trainingsafstand [ DISTANCE ] 5Calorieënverbruik [ KILOJOULE ] 6Weergave van het belastingsniveau 1 – 10 7 Polsslagmeting [ PULSE ] 8Procentuele vergelijking van de begin polsslag met de maxi- male polsslag [ % ] 9 Herstelpolsmeting [ REC ] [ 0:60 — 0:00 ] 10 Conditiewaarderingscijfer 1 — 6 [ REC ] [ F1. 0 — F6. 0…
-
9, Once a person has been selected the display jumps to “Data view”. Now the stored training *data is displayed for the relevant person. The data view disappears when training is started or the “set” button is pressed. 4.4.2.2 Age Limiting values 10 –99 years, interval 1 or 5. Age entry (de-activated) Age entry The upper right display begins to flash ( the two figures on the upper right hand an…
-
6, DISTANCE > KILOJOULE > TIME > KM/H > RPM > PULSE > DISTANCE > u.s.w. (Durchlauf). Bei einem Druck auf die Taste «SET» erlischt die Anzeige «SCAN» und der Benutzer kann über die Tasten + und — die Anzeige im mittleren Display auswählen. Diese Anzeige bleibt bis über die Tasten + oder — eine ande- re Anzeigeart auswählt, oder über die Taste «SET» der Scan — Modus re- aktivi…
-
7, 8 Batteriewechsel Eine schwache oder erloschene Computeranzeige macht einen Batterie- wechsel erforderlich. Der Computer ist mit zwei Batterien ausgestattet. Nehmen Sie den Batteriewechsel wie folgt vor: ■ Nehmen Sie den Batteriefachdeckel ab und ersetzen Sie die Batterien durch zwei neue vom Typ AA 1,5V. ■ Achten Sie beim Einsatz der Batterien auf die Kennzeichnung im Batteriefachboden. ■ Sollte es nach dem Wiedereinschalten zu Fehlfunktionen ko…
-
3, 1 Bedienungsanleitung Computer 2 Ausstattung 1 Zeitmessung [ TIME ] 2 Geschwindigkeit [ KM/H ] 3Trittfrequenz [ RPM ] 4Trainingsstrecke [ DISTANCE ] 5 Energieverbrauch [ KILOJOULE ] ( bremsstufenabhängig ) 6 Belastungsstufenanzeige 1 — 10 7 Pulsmessung [ PULSE ] 8Prozentualer Vergleich des Istpuls mit dem max. Puls [ % ] 9Erholungspulsmessung [ REC ] [ 0:60 — 0:00 ] 10 Fitnessnote 1 — 6 [ REC ] [ F1. 0 — F6. 0 ] 11 Automatische Speicherung der Trainingskilometer für 4 Perso — n…
-
8, 1 Operating instructions for the training computer 2 Features 1. Measuring time [ TIME ] 2. Speed [ KM/H ] 3. Alarm frequency [ RPM ] 4. Training distance [ DISTANCE ] 5. Energy consumption [ KILOJOULE ] 6. Read-out of exertion level 1 – 10 7. Pulse measurement [ PULSE ] 8. Comparison of actual pulse with maximum pulse [ % ] 9. Measurement of recovery pulse [ REC ] [ 0:60 — 0:00 ] 10. Fitness mark 1-6 [ REC…
-
22, 8 Vervanging van de batterijen Een zwakke of ontbrekende computerweergave noodzaakt de vervan- ging van de batterijen. De computer bevat 2 batterijen. Verwissel de batterijen als volgt: ■ Neem het dekseltje weg en vervang de batterijen door 2 nieuwe van het type AA 1,5 V ■ Let op de tekentjes in het batterijvakje deze geven aan hoe de batteri- jen geplaatst moeten worden. ■ Worden bij het inschakelen van de computer nog fouten getoond, druk dan de batterijen nog een keer goed aan. Belan…
-
29, El kilometraje total (en kms enteros) de la persona correspondiente se vi- sualiza en el campo “Total“. La selecciun de personas (mediante + y -) se hace en un recorrido (P1, P2, P3, P4, P1…) hasta que se pulse la tecla “Set“. (Confirmaciun de la persona seleccionada). Los par·metros que siguen ahora, se memorizan con el cudigo personal. Visualizaciun de los datos Despues de haber seleccionado una persona, la imagen salta hasta ìvi- sualizaciÛn de datosî. Ahora se indican los datos…
Лучшие велотренажеры
- Топ самых популярных для дома
- Топ бескомпромиссно лучших
- Топ недорогих
- Топ вертикальных
- Топ горизонтальных
- Топ для спортзалов
- Топ самых популярных спинбайков
- Топ самых прочных
- Весь каталог
Марки велотренажёров
- Популярные
- Все
-
Bronze Gym
-
CARBON FITNESS
-
CardioPower
-
Everyfit
-
Hasttings
-
Horizon
-
Matrix
-
Nautilus
-
Octane Fitness
-
Oxygen
-
Proxima
-
Royal Fitness
-
Schwinn
-
Sole Fitness
-
SPIRIT
-
Sportop
-
Svensson Body Labs
-
SVENSSON INDUSTRIAL
-
Titanium
-
UNIXFIT
-
Vision
-
Adidas
-
AeroFit
-
Alex
-
Altezani
-
AMF
-
Applegate
-
Atemi
-
Basic Fitness
-
BH Fitness
-
Body Craft
-
Body Solid
-
Bronze Gym
-
CARBON FITNESS
-
CardioPower
-
Care Fitness
-
DFC
-
Diadora
-
Diamond Fitness
-
Energetics
-
Eurofit
-
Everyfit
-
EVO FITNESS
-
Freemotion
-
Halley
-
Hasttings
-
Horizon
-
HouseFit
-
Infiniti
-
Inspire
-
Intensor
-
Iron Body
-
ITOSIMA
-
Kettler
-
Lemond
-
Life Fitness
-
Life Gear
-
LiveStrong
-
Matrix
-
Motus
-
Nautilus
-
NordicTrack
-
Octane Fitness
-
Oxygen
-
ProForm
-
Proteus
-
Proxima
-
Reebok
-
Royal Fitness
-
Schwinn
-
Smith
-
Sole Fitness
-
SPIRIT
-
Sport Elite
-
Sportop
-
SportsArt
-
Starfit
-
Star Trac
-
Stingray
-
Svensson Body Labs
-
SVENSSON INDUSTRIAL
-
Titanium
-
True Fitness
-
UltraGym
-
UNIXFIT
-
VictoryFit
-
Vision
-
Xebex
-
XTERRA
-
Zipro Fitness

У нас 99% положительных отзывов
- Статьи
![]()
Русский
- Bedienungsanleitung Kettler Stratos
- Kettler Stratos User Manual
- Manual Usuario Kettler Stratos
- Mode d’emploi Kettler Stratos
- Istruzioni Kettler Stratos
- инструкция Kettler Stratos
- Kettler Stratosの取扱説明書
- Handleiding Kettler Stratos
- Manual de uso Kettler Stratos
Вам нужна инструкция? Мы поможем Вам ее найти и сэкономить Ваше время.
- 16 stron
- 3.19 mb
Изделие Kettler Stratos, а также другие, которыми Вы пользуетесь ежедневно, наверняка вы получили в комплекте с инструкцией обслуживания. Из опыта наших пользователей мы знаем, что большинство из Вас не уделили этому особого внимания. Большая часть инструкций, сразу же после покупки попадает в корзину для мусора вместе с коробкой — это ошибка. Ознакомьтесь с информацией, касающейся инструкции Kettler Stratos, которая поможет Вам в будущем сэкономить нервы и избежать головной боли.
Важная подсказка — не забывайте хотя бы раз прочитать инструкцию Kettler Stratos
Если вы не хотите каждый раз читать информационные брошюры, касающиеся, тех или Kettler Stratos иных изделий, достаточно, прочитать их раз — сразу же после покупки устройства. Вы получите основное знания, касающиеся поддержания изделия Kettler Stratos в хорошем эксплуатационном состоянии, так, чтобы без проблем достигнуть его планируемого цикла работы. Затем инструкцию можно отложить на полку и вернуться к ней только в случае, если вы не уверены, правильно ли проводится техобслуживание изделия. Правильный уход является необходимым элементом Вашего удовольствия Kettler Stratos.
Раз в году пересмотрите шкафчик, в котором держите инструкции для всех устройств, — выбросите те, которыми вы уже не пользуетесься. Это поможет Вам сохранять порядок в своей домашней базе инструкций обслуживания.
Summary of Contents for Kettler Stratos
Что находится в инструкции Kettler Stratos? Почему стоит ее прочитать?
- Гарантия и подробности, касающиеся техобслуживания изделия
Хорошей идеей будет прикрепить чек к странице инструкции. Если что-то плохое случится во время использования Kettler Stratos, у вас будет комплект документов, необходимый для гарантийного ремонта. В этой части инструкции вы найдете информацию об авторизованных сервисных центрахKettler Stratos а также, как самостоятельно правильно ухаживать за оборудованием — так, чтобы не потерять гарантийных прав. - Указания по монтажу и Setup
Не терять нервов и времени на самостоятельную попытку установки и первого запуска изделия. Воспользуйтесь рекомендациями производителя Kettler Stratos чтобы правильно запустить изделие, без лишнего риска повреждения оборудования. - Информация, касающаяся дополнительных запчастей (входящих в комплект а также являющихся опцией)
Пересматривая эту часть документа вы сможете проверить, доставлен ли ваш Kettler Stratos с полним комплектом аксессуаров. Вы также сможете узнать, какие дополнительные запчасти или аксессуары для Kettler Stratos Вы сможете найти и докупить к своему устройству. - Troubleshooting
Самые частые проблемы, касающиеся Kettler Stratos и методы их решения. Это очень полезная часть руководства по обслуживанию — она позволит Вам сэкономить много времени на поиск решений. 90% проблем с Kettler Stratos повторяется у многих пользователей. - Требования, касающиеся питания и энергетический класс
Информация, касающаяся количества потребляемой энергии, а также рекомендации, касающиеся установки и питания Kettler Stratos. Прочитайте, чтобы оптимально пользоваться Kettler Stratos и не использовать большего количества ресурсов, нежели это необходимо для правильной работы изделия. - Специальные функции Kettler Stratos
Здесь вы можешь узнать, как персонализировать изделие Kettler Stratos. Вы узнаете, какие дополнительные функции могут помочь Вам удобно использовать продукт Kettler Stratos а также, какие функции Вашего устройства оптимальны для выполнения конкретной деятельности.
Как видите в инструкции вы найдете информацию, которая реально поможет Вам в использовании Вашего изделия. Стоит с ней ознакомиться, чтобы избежать разочарований, возникающих из более короткого, нежели предусматривалось, периода исправности изделия Kettler Stratos. Если все же вы не хотите копить инструкции в своем доме, наш сайт поможет Вам в этом — вы должны найти у нас руководство по обслуживанию большинства из своих устройств, а также Kettler Stratos.