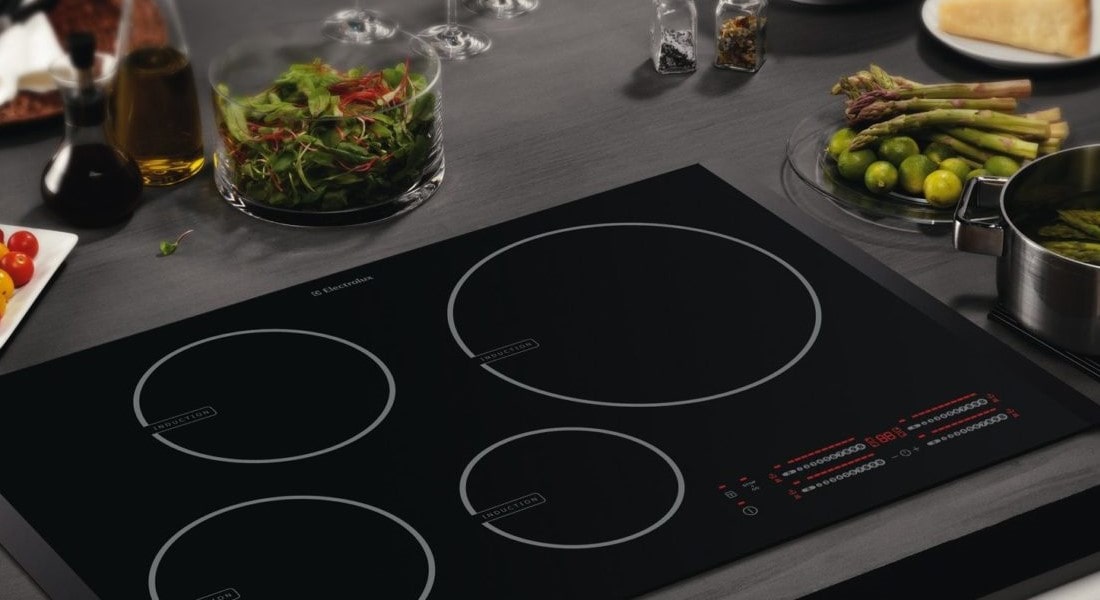
Современные варочные поверхности Электролюкс оснащены информационным дисплеем, с помощью которого управлять техникой стало значительно проще.
Но, эти дисплеи так же позволяют получать информацию о неисправностях с помощью кодов ошибок.
Мы собрали для Вас всех известные нам коды ошибок, которые подходят для всех типов варочных панелей Electrolux: индукционных, электрических, и газовых.
- Бесплатно предоставим в пользование варочную панель →
- Акция действует только с 01.05.2023 по 31.05.2023
Ошибка L (может мигать) – означает, что включена защита от детей. L – Lock, блокировка. Читайте инструкцию о том, как снять ошибку в сервисной книжке..
Ошибка F (постоянно мигает) – индукционная панель н видит посуду, либо используется посуда без ферромагнитных свойств.
Ошибка E1 – означает перегрев электроники. Если спустя час после отключения варочной панели ошибка не исчезает, обратитесь в сервисный центр. Потребуется ремонт модуля управления.
Ошибка E2 – ошибка в блоке памяти модуля управления. Требуется ремонт платы управления.
Ошибка E3 – неисправен инверторный двигатель конвекционной печи. Произошло короткое замыкание и требуется восстановление цепи питания.
Ошибка E4 – конфорка работает слишком долго и перегрелась. Отключите панель на 30 минут, ошибка исчезнет.
Ошибка E5 – неисправен фильтр сетевых помех. Напряжение в сети нестабильно, требуется диагностика и скорее всего, замена фильтра сетевых помех.
Ошибка E6 – неисправен силовой блок. Так же ошибка может указывать на неисправность правого блока силового инвертора, а если быть точнее – на отсутствие сигнала.
Ошибка E7 – вентилятор индукционной панели неисправен. Охлаждающие вентиляторы не могут раскрутиться до нужных оборотов. Требуется ремонт.
Ошибка E8 – обрыв цепи питания между блоком питания и модулем индикации. Критическая ошибка, требующая вмешательство специалиста из сервисного центра.
Ошибка E9 – неисправен модуль управления. Возможно, до этого сработало УЗО и варочная панель обесточилась, из-за чего и произошёл сброс настроек конфигурации модуля управления. Ремонт возможен на дому.
Ошибка E10 – неисправен датчик температуры. Термостат мог выйти из строя из-за замыкания цепи питания на ТЭНе.
Ошибка E22 – зажаты одновременно 2 и более кнопок. Ошибка сенсорной панели.
Наши мастера готовы в любой день недели приехать и убрать ошибку, поскольку мы понимаем, без плиты в наше время жить тяжело, особенно, если в доме есть маленькие дети.
Поэтому, для семей с маленькими детьми на ремонт варочных панелей у нас есть скидка – 10%.
Не оставим Вас без варочной панели
В настоящий момент действует специальная акция, которая включает в себя предоставление рабочей варочной поверхности на время ремонта. Если потребуется сложное восстановление электронного модуля, то мы:
- бесплатно установим рабочую поверхность, взамен неисправной;
Благодаря этой опции, Вы сможете готовить еду как и прежде, пока наши специалисты будут заниматься восстановлением неисправной техники.
Ошибки варочных панелей Electrolux можно разделить на две группы. Некоторые кодировки обозначают проблемы, которые вполне можно решить самостоятельно, или которые не являются неполадками вовсе. Другие требуют обращения в сервис, так как связаны с неисправностью каких-либо деталей. Встроенная система диагностики позволяет быстро и оперативно понять, какие действия нужно предпринять, чтобы плита снова заработала. Для того чтобы узнать, с чем именно вы столкнулись, рекомендуем ознакомиться со списком самых распространенных кодировок и их расшифровок.
Все коды ошибок варочных панелей Electrolux
Принятая система обозначения ошибок варочных поверхностей Electrolux будет одинакова для разных моделей бренда. Важно отметить, что не все буквенно-цифровые обозначения сообщают о возникших во время эксплуатации прибора проблемах. Так, некоторые коды просто сообщают о работе того или иного режима:
- A — включена функция автоматического нагрева.
- L — работает блокировка от детей. Чтобы снова пользоваться сенсорной панелью, необходимо ее отключить. Подробный алгоритм для конкретной модели указан в инструкции, обычно для этого необходимо какое-то время нажимать на кнопку замка.
- P — панель работает в режиме повышенной мощности.
- U — обозначает активированную функцию подогрева.
- Непосредственно к ошибкам варочных панелей Electrolux относятся следующие кодировки:
- F — на панели нет посуды, либо, в случае с индукционными панелями, она не обладает необходимыми магнитными свойствами и устройство ее не видит.
- E1 — произошел перегрев электроники, пользоваться плитой в данный момент нельзя. Нужно отключить ее от электропитания минимум на полчаса и дать остыть. Если после этого ошибка сохраняется, обратитесь в авторизованный сервис.
- E2 — неисправность блока памяти. Самостоятельный ремонт не рекомендуется, нужно вызывать специалиста.
- E3 — нет связи с инвертором. Ошибка часто возникает после скачков напряжения в электросети или из-за перенапряжения силового блока. Требуется тщательная диагностика и ремонт от квалифицированного мастера.
- E4 — перегрелись конфорки. Ничего делать не надо, только дать им остыть (не менее тридцати минут).
- E5 — неполадки с электросетью. Напряжение по какой-то причине нестабильно, возможно, потребуется замена сетевого фильтра. Только профессиональный ремонт.
- E6 — обычно появление этой ошибки варочных панелей Электролюкс сопровождается выбитой пробкой и громким хлопком плиты. Это сигнализирует о том, что перегорел силовой блок инвертора. Ремонт сложен, но возможен, тем не менее, будьте готовы к необходимости полностью заменить деталь.
- E7 — неисправность кулера. Из-за этого не происходит охлаждение силового блока, что может привести к куда более серьезной поломке. Сразу же обращайтесь в сервис.
- E8 — потеряна связь между блоками. Можно попробовать перезагрузить устройство. Если ошибка не пропала, то нужна диагностика от специалистов.
- E9 — проблемы с сенсорной панелью. Дело может быть в механических повреждениях, обрыве проводки, неисправности блока управления. Точно определить проблему помогут в сервисе.
- E10 — неисправность термостата. Нужна квалифицированная помощь специалиста.
- E22 — одновременно нажато несколько кнопок, не является признаком каких-либо неполадок.
Здесь мы привели далеко не все коды ошибок варочных панелей Electrolux, с которыми вы можете столкнуться. Если вашей ошибки нет в списке, то это значит, что необходимо обратиться в сервис. Специалисты обладают всей необходимой информацией, чтобы быстро и точно определить проблему и вернуть вашу плиту в строй.
Другие возможные неисправности
Существуют и другие распространенные проблемы, не имеющие кодового обозначения:
- Панель не включается. Для начала проверьте, подается ли питание на розетку, не вышла ли она из строя, в порядке ли кабель подключения. Мог сработать предохранитель, тогда повторное подключение к сети может исправить ситуацию. Не задавайте уровень нагрева сразу, подождите не менее минуты. Удостоверьтесь, что нажимаете только на одну сенсорную клавишу, а не на несколько одновременно, варочная поверхность может работать только с одним нажатием. Проверьте, не включен ли режим «Пауза».
- Панель не реагирует на касания. Такое возможно, если сенсорный дисплей чем-то блокируется, например, на нем частично расположена посуда. Отодвиньте сковородку или кастрюлю. Уберите другие возможные посторонние элементы с поверхности сенсора, очистите его от воды и загрязнений. Отключите устройство от питания и дайте ему охладиться перед повторным включением.
- После звукового сигнала варочная панель сама отключается. Таким образом, прибор сообщает вам о том, что на поверхности обнаружены посторонние предметы. Их нужно убрать.
- Не работает индикатор остаточного тепла. Если вы знаете, что конфорка точно была нагрета, а индикации нет, то, скорее всего, вышел из строя термодатчик. Нужно обратиться в сервис.
- Не получается включить максимальную мощность конфорки. Скорее всего, это из-за того, что уже работает другая на высшем уровне нагрева. Его надо уменьшить, чтобы задействовать эту мощность на другом участке панели.
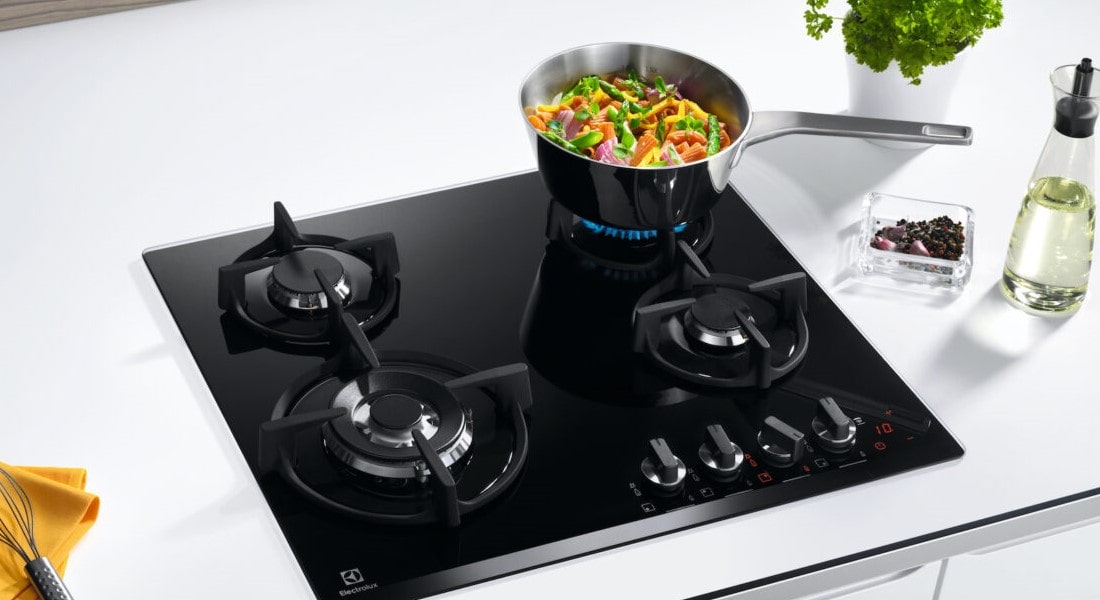
Еще больше информации вы можете найти в инструкции к вашей модели. В разделе «Неисправности» перечислены все основные ошибки варочных панелей Электролюкс, с которыми можно попробовать разобраться без помощи специалистов. Помните, что для корректной работы устройства нужно соблюдать все рекомендации по эксплуатации, указанные производителем.
Когда обращаться в сервис
Если вы столкнулись с ошибками варочных панелей Электролюкс и не смогли разобраться с ними, следуя представленным выше инструкциям, то это значит, что нужна помощь квалифицированных профессионалов. Попытки починить варочную панель самостоятельно без нужных инструментов и навыков могут привести к более серьезным поломкам и нарушить условия гарантии.
Electrolux EIV644 — Hob Manual
SAFETY INFORMATION
Before the installation and use of the appliance, carefully read the supplied instructions. The manufacturer is not responsible for any injuries or damages that are the result of incorrect installation or usage. Always keep the instructions in a safe and accessible location for future reference.
Children and vulnerable people safety
- This appliance can be used by children aged from 8 years and above and persons with reduced physical, sensory or mental capabilities or lack of experience and knowledge if they have been given supervision or instruction concerning the use of the appliance in a safe way and understand the hazards involved.
- Children between 3 and 8 years of age and persons with very extensive and complex disabilities shall be kept away unless continuously supervised.
- Children of less than 3 years of age should be kept away unless continuously supervised.
- Do not let children play with the appliance.
- Keep all packaging away from children and dispose of it appropriately.
- Keep children and pets away from the appliance when it operates or when it cools down. Accessible parts are hot.
- If the appliance has a child safety device, it should be activated.
- Children shall not carry out cleaning and user maintenance of the appliance without supervision.
General Safety
SAFETY INSTRUCTIONS
Installation
Only a qualified person must install this appliance.
Risk of injury or damage to the appliance.
- Remove all the packaging.
- Do not install or use a damaged appliance.
- Follow the installation instructions supplied with the appliance.
- Keep the minimum distance from other appliances and units.
- Always take care when moving the appliance as it is heavy. Always use safety gloves and enclosed footwear.
- Seal the cut surfaces with a sealant to prevent moisture to cause swelling.
- Protect the bottom of the appliance from steam and moisture.
- Do not install the appliance adjacent to a door or under a window. This prevents hot cookware falling from the appliance when the door or the window is opened.
- Each appliance has cooling fans on the bottom.
- If the appliance is installed above a drawer:
- Do not store any small pieces or sheets of paper that could be pulled in, as they can damage the cooling fans or impair the cooling system.
- Keep a distance of minimum 2 cm between the bottom of the appliance and parts stored in the drawer.
Electrical Connection
Risk of fire and electric shock.
- All electrical connections should be made by a qualified electrician.
- The appliance must be earthed.
- Before carrying out any operation make sure that the appliance is disconnected from the power supply.
- Make sure that the parameters on the rating plate are compatible with the electrical ratings of the mains power supply.
- Make sure the appliance is installed correctly. Loose and incorrect electricity mains cable or plug (if applicable) can make the terminal become too hot.
- Use the correct electricity mains cable.
- Do not let the electricity mains cable tangle.
- Make sure that a shock protection is installed.
- Use the strain relief clamp on the cable.
- Make sure the mains cable or plug (if applicable) does not touch the hot appliance or hot cookware, when you connect the appliance to the near sockets.
- Do not use multi-plug adapters and extension cables.
- Make sure not to cause damage to the mains plug (if applicable) or to the mains cable. Contact our Authorised Service Centre or an electrician to change a damaged mains cable.
- The shock protection of live and insulated parts must be fastened in such a way that it cannot be removed without tools.
- Connect the mains plug to the mains socket only at the end of the installation. Make sure that there is access to the mains plug after the installation.
- If the mains socket is loose, do not connect the mains plug.
- Do not pull the mains cable to disconnect the appliance. Always pull the mains plug.
- Use only correct isolation devices: line protecting cut-outs, fuses (screw type fuses removed from the holder), earth leakage trips and contactors.
- The electrical installation must have an isolation device which lets you disconnect the appliance from the mains at all poles. The isolation device must have a contact opening width of minimum 3 mm.
Use
Risk of injury, burns and electric shock.
- Remove all the packaging, labelling and protective film (if applicable) before first use.
- Use this appliance in a household environment.
- Do not change the specification of this appliance.
- Make sure that the ventilation openings are not blocked.
- Do not let the appliance stay unattended during operation.
- Set the cooking zone to «off» after each use.
OptiHeat Control (3 step Residual heat indicator)

The induction cooking zones make the heat necessary for cooking process directly in the bottom of the cookware. The glass ceramic is heated by the heat of the cookware.
DAILY USE
Refer to Safety chapters.
Activating and deactivating
Touch for 1 second to activate or deactivate the hob.
Automatic Switch Off
The function deactivates the hob automatically if:
The relation between the heat setting and the time after which the hob deactivates:
| Heat setting | The hob deactivates after |
 , 1 — 3 , 1 — 3 |
6 hours |
| 4 — 7 | 5 hours |
| 8 — 9 | 4 hours |
| 10 — 14 | 1.5 hour |
The heat setting
To set or change the heat setting:
Touch the control bar at the correct heat setting or move your finger along the control bar until you reach the correct heat setting.
Using the cooking zones
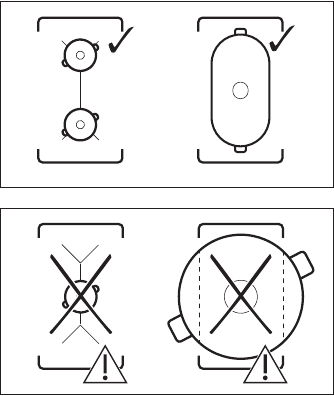
Place the cookware in the centre of the selected zone. Induction cooking zones adapt to the dimension of the bottom of the cookware automatically.
You can cook with large cookware placed on two cooking zones at the same time. The cookware must cover the centres of both zones but not go beyond the area marking.
If the cookware is located between the two centres, the bridge function will not be activated.
Bridge
The function operates when the pot covers the centres of the two zones.
This function connects two cooking zones and they operate as one.
First set the heat setting for one of the cooking zones.
To activate the function for left / right cooking zones: touch 
To deactivate the function: touch 
Automatic Heat Up
Activate this function to get a desired heat setting in a shorter time. When it is on, the zone operates on the highest setting in the beginning and then continues to cook at the desired heating setting.
To activate the function the cooking zone must be cold.
To activate the function for a cooking zone: touch 


To deactivate the function: change the heat setting.
PowerBoost
This function makes more power available to the induction cooking zones. The function can be activated for the induction cooking zone only for a limited period of time. After this time the induction cooking zone automatically sets back to the highest heat setting.
Refer to «Technical data» chapter.
To activate the function for a cooking zone: touch 

To deactivate the function: change the heat setting.
Timer
Count Down Timer
You can use this function to set how long the cooking zone should operate for a single cooking session.
First set the heat setting for the cooking zone then set the function.
To set the cooking zone: touch again and again until the indicator of a necessary cooking zone comes on.
To activate the function: touch of the timer to set the time (00 — 99 minutes). When the indicator of the cooking zone starts to flash slowly the time counts down.
To see the remaining time: set the cooking zone with . The indicator of the cooking zone starts to flash quickly. The display shows the remaining time.
To change the time: set the cooking zone with . Touch
or
.
To deactivate the function: set the cooking zone with and touch
. The remaining time counts back to 00. The indicator of the cooking zone goes out.
When the time comes to an end, the sound operates and 00 flashes. The cooking zone deactivates.
To stop the sound: touch .
CountUp Timer (The count up timer)
You can use this function to monitor how long the cooking zone operates.
To set the cooking zone: touch again and again until the indicator of a necessary cooking zone comes on.
To activate the function: touch of the timer.
comes on. When the indicator of the cooking zone starts to flash slowly the time counts up. The display switches between
and counted time (minutes).
To see how long the cooking zone operates: set the cooking zone with . The indicator of the cooking zone starts to flash quickly. The display shows how long the zone operates.
To deactivate the function: set the cooking zone with and touch
or
. The indicator of the cooking zone goes out.
Minute Minder
You can use this function as a Minute Minder when the hob is activated and the cooking zones do not operate. The heat setting display shows 
To activate the function: touch .
Touch or
of the timer to set the time. When the time comes to an end, the sound operates and 00 flashes.
To stop the sound: touch .
The function has no effect on the operation of the cooking zones.
Pause
This function sets all cooking zones that operate to the lowest heat setting.
When the function operates, all other symbols on the control panels are locked.
The function does not stop the timer functions.
Touch to activate the function.
comes on. The heat setting is lowered to 1.
To deactivate the function, touch . The previous heat setting comes on.
Lock
You can lock the control panel while cooking zones operate. It prevents an accidental change of the heat setting.
Set the heat setting first.
To activate the function: touch .

To deactivate the function: touch . The previous heat setting comes on.
When you deactivate the hob, you also deactivate this function.
Child Safety Device
This function prevents an accidental operation of the hob.
To activate the function: activate the hob with . Do not set the heat setting. Touch
for 4 seconds.

.
To deactivate the function: activate the hob with . Do not set the heat setting. Touch
for 4 seconds.

.
To override the function for only one cooking time: activate the hob with .

for 4 seconds. Set the heat setting in 10 seconds. You can operate the hob. When you deactivate the hob with
the function operates again.
OffSound Control (Deactivating and activating the sounds)
Deactivate the hob. Touch for 3 seconds. The display comes on and goes out. Touch
for 3 seconds.


To confirm your selection wait until the hob deactivates automatically.
When the function is set to 
- you touch
- Minute Minder comes down
- Count Down Timer comes down
- you put something on the control panel.
Power management
- Cooking zones are grouped according to the location and number of the phases in the hob. See the illustration.
- Each phase has a maximum electricity loading of 3700 W.
- The function divides the power between cooking zones connected to the same phase.
- The function activates when the total electricity loading of the cooking zones connected to a single phase exceeds 3700 W.
- The function decreases the power to the other cooking zones connected to the same phase.
- The heat setting display of the reduced zones changes between two levels.
HINTS AND TIPS
Refer to Safety chapters.
Cookware
For induction cooking zones a strong electro-magnetic field creates the heat in the cookware very quickly.
Use the induction cooking zones with suitable cookware.
Cookware material
- correct: cast iron, steel, enamelled steel, stainless steel, multi-layer bottom (with a correct marking from a manufacturer).
- not correct: aluminium, copper, brass, glass, ceramic, porcelain.
Cookware is suitable for an induction hob if:
- water boils very quickly on a zone set to the highest heat setting.
- a magnet pulls on to the bottom of the cookware.
The bottom of the cookware must be as thick and flat as possible.
Ensure pan bases are clean and dry before placing on the hob surface.
Cookware dimensions
Induction cooking zones adapt to the dimension of the bottom of the cookware automatically.
The cooking zone efficiency is related to the diameter of the cookware. The cookware with a diameter smaller than the minimum receives only a part of the power generated by the cooking zone.
Refer to «Technical data».
The noises during operation
If you can hear:
- crack noise: cookware is made of different materials (sandwich construction).
- whistle sound: you use the cooking zone with high power level and the cookware is made of different materials (sandwich construction).
- humming: you use high power level.
- clicking: electric switching occurs.
- hissing, buzzing: the fan operates.
The noises are normal and do not refer to hob malfunction.
Öko Timer (Eco Timer)
To save energy, the heater of the cooking zone deactivates before the count down timer sounds. The difference in the operation time depends on the heat setting level and the length of the cooking operation.
Examples of cooking applications
The correlation between the heat setting of a zone and its consumption of power is not linear. When you increase the heat setting, it is not proportional to the increase of the consumption of power. It means that a cooking zone with the medium heat setting uses less than a half of its power.
The data in the table is for guidance only.
| Heat setting | Use to: | Time (min) | Hints |
 — 1 — 1 |
Keep cooked food warm. | as necessary | Put a lid on the cookware. |
| 1 — 3 | Hollandaise sauce, melt: butter, chocolate, gelatine. | 5 — 25 | Mix from time to time. |
| 1 — 3 | Solidify: fluffy omelettes, baked eggs. | 10 — 40 | Cook with a lid on. |
| 3 — 5 | Simmer rice and milkbased dishes, heat up ready-cooked meals. | 25 — 50 | Add at least twice as much liquid as rice, mix milk dishes halfway through the procedure. |
| 5 — 7 | Steam vegetables, fish, meat. | 20 — 45 | Add a couple of tablespoons of liquid. |
| 7 — 9 | Steam potatoes. | 20 — 60 | Use max. ¼ l of water for 750 g of potatoes. |
| 7 — 9 | Cook larger quantities of food, stews and soups. | 60 — 150 | Up to 3 l of liquid plus ingredients. |
| 9 — 12 | Gentle fry: escalope, veal cordon bleu, cutlets, rissoles, sausages, liver, roux, eggs, pancakes, doughnuts. | as necessary | Turn halfway through. |
| 12 — 13 | Heavy fry, hash browns, loin steaks, steaks. | 5 — 15 | Turn halfway through. |
| 14 | Boil water, cook pasta, sear meat (goulash, pot roast), deep-fry chips. | ||
 |
Boil large quantities of water. PowerBoost is activated. |
CARE AND CLEANING
Refer to Safety chapters.
General information
- Clean the hob after each use.
- Always use cookware with a clean base.
- Scratches or dark stains on the surface have no effect on how the hob operates.
- Use a special cleaner suitable for the surface of the hob.
- Use a special scraper for the glass.
Cleaning the hob
- Remove immediately: melted plastic, plastic foil, sugar and food with sugar, otherwise, the dirt can cause damage to the hob. Take care to avoid burns. Use a special hob scraper on the glass surface at an acute angle and move the blade on the surface.
- Remove when the hob is sufficiently cool: limescale rings, water rings, fat stains, shiny metallic discoloration. Clean the hob with a moist cloth and a non-abrasive detergent. After cleaning, wipe the hob dry with a soft cloth.
- Remove shiny metallic discoloration: use a solution of water with vinegar and clean the glass surface with a cloth.
TROUBLESHOOTING
Refer to Safety chapters.
What to do if…
| Problem | Possible cause | Remedy |
| You cannot activate or operate the hob. | The hob is not connected to an electrical supply or it is connected incorrectly. | Check if the hob is correctly connected to the electrical supply. Refer to the connection diagram. |
| The fuse is blown. | Make sure that the fuse is the cause of the malfunction. If the fuse is blown again and again, contact a qualified electrician. | |
| You do not set the heat setting for 10 seconds. | Activate the hob again and set the heat setting in less than 10 seconds. | |
| You touched 2 or more sensor fields at the same time. | Touch only one sensor field. | |
| Pause operates. | Refer to «Daily use». | |
| There is water or fat stains on the control panel. | Clean the control panel. | |
| An acoustic signal sounds and the hob deactivates. An acoustic signal sounds when the hob is deactivated. | You put something on one or more sensor fields. | Remove the object from the sensor fields. |
| The hob deactivates. | You put something on the sensor field  . . |
Remove the object from the sensor field. |
| Residual heat indicator does not come on. | The zone is not hot because it operated only for a short time or the sensor is damaged. | If the zone operated sufficiently long to be hot, speak to an Authorised Service Centre. |
| Automatic Heat Up does not operate. | The zone is hot. | Let the zone become sufficiently cool. |
| The highest heat setting is set. | The highest heat setting has the same power as the function. | |
| The heat setting changes between two levels. | Power management operates. | Refer to «Daily use». |
| The sensor fields become hot. | The cookware is too large or you put it too near to the controls. | Put large cookware on the rear zones if possible. |
| There is no sound when you touch the panel sensor fields. | The sounds are deactivated. | Activate the sounds. Refer to «Daily use». |
 comes on. comes on. |
Child Safety Device or Lock operates. | Refer to «Daily use». |
 comes on. comes on. |
There is no cookware on the zone. | Put cookware on the zone. |
| The cookware is unsuitable. | Use suitable cookware. Refer to «Hints and tips». | |
| The diameter of the bottom of the cookware is too small for the zone. | Use cookware with correct dimensions. Refer to «Technical data». | |
 and a number come on. and a number come on. |
There is an error in the hob. | Deactivate the hob and activate it again after 30 seconds. If  comes on again, disconnect the hob from the electrical supply. After 30 seconds, connect the hob again. If the problem continues, speak to an Authorised Service Centre. comes on again, disconnect the hob from the electrical supply. After 30 seconds, connect the hob again. If the problem continues, speak to an Authorised Service Centre. |
| You can hear a constant beep noise. | The electrical connection is incorrect. | Disconnect the hob from the electrical supply. Ask a qualified electrician to check the installation. |
If you cannot find a solution…
If you cannot find a solution to the problem yourself, contact your dealer or an Authorised Service Centre. Give the data from the rating plate. Give also three digit letter code for the glass ceramic (it is in the corner of the glass surface) and an error message that comes on. Make sure, you operated the hob correctly. If not the servicing by a service technician or dealer will not be free of charge, also during the warranty period. The instructions about the Service Centre and conditions of guarantee are in the guarantee booklet.
TECHNICAL DATA
Rating plate
Model EIV644
Typ 61 B4A 04 AA
Induction 7.35 kW
Ser. Nr. ……
ELECTROLUX
PNC 949 596 713 00
220 — 240 V / 400 V 2N 50 — 60 Hz
Made in Germany
7.35 kW
Cooking zones specification
| Cooking zone | Nominal power (maximum heat setting) [W] | PowerBoost [W] | PowerBoost maximum duration [min] | Cookware diameter [mm] |
| Left front | 2300 | 3200 | 10 | 125 — 210 |
| Left rear | 2300 | 3200 | 10 | 125 — 210 |
| Right front | 2300 | 3200 | 10 | 125 — 210 |
| Right rear | 2300 | 3200 | 10 | 125 — 210 |
The power of the cooking zones can be different in some small range from the data in the table. It changes with the material and dimensions of the cookware.
For optimal cooking results use cookware no larger than the diameter in the table.
ENERGY EFFICIENCY
Product information according to EU 66/2014
| Model identification | EIV644 | |
| Type of hob | Built-In Hob | |
| Number of cooking areas | 2 | |
| Heating technology | Induction | |
| Lenght (L) and width (W) of the cooking area | Left | L 39.2 cm W 22.0 cm |
| Lenght (L) and width (W) of the cooking area | Right | L 39.2 cm W 22.0 cm |
| Energy consumption of the cooking area (EC electric cooking) | Left | 183.9 Wh / kg |
| Energy consumption of the cooking area (EC electric cooking) | Right | 183.9 Wh / kg |
| Energy consumption of the hob (EC electric hob) | 183.9 Wh / kg |
EN 60350-2 — Household electric cooking appliances — Part 2: Hobs — Methods for measuring performance
Energy saving
You can save energy during everyday cooking if you follow below hints.
- When you heat up water, use only the amount you need.
- If it is possible, always put the lids on the cookware.
- Before you activate the cooking zone put the cookware on it.
- Put the smaller cookware on the smaller cooking zones.
- Put the cookware directly in the centre of the cooking zone.
- Use the residual heat to keep the food warm or to melt it.
SAUDI ARABIA — CUSTOMER SERVICE
Further after-sales service agencies overseas
In these countries our respective agents’ own guarantee conditions are applicable. Please obtain further details directly.
First Distribution Company (FDC) Al Faisaliah Group
Main service center address:
Al Khalidiya area – Port Street – Building name: Mussa 4
AL Dammam, Kingdom of Saudi Arabia.
Postal address:
P.O Box 2728 Riyadh 11461
Kingdom of Saudi Arabia
tel. + 966 11 243-9732
fax +966 11 243-9674
ENVIRONMENTAL CONCERNS
Recycle materials with the symbol . Put the packaging in relevant containers to recycle it. Help protect the environment and human health by recycling waste of electrical and electronic appliances. Do not dispose of appliances marked with the symbol

Being ensured permissible content limitation of some toxic chemicals (RoHS compliant).
www.electrolux.com
Visit our website for:


CUSTOMER CARE AND SERVICE
Always use original spare parts.
When contacting our Authorised Service Centre, ensure that you have the following data available: Model, PNC, Serial Number.
The information can be found on the rating plate.
Warning / Caution-Safety information
General information and tips

Subject to change without notice.
Documents / Resources
References
Download manual
Here you can download full pdf version of manual, it may contain additional safety instructions, warranty information, FCC rules, etc.
Download Electrolux EIV644 — Hob Manual
Данный раздел представляет большой выбор инструкций по эксплуатации встраиваемых электрических варочных панелей марки Electrolux. Если Вы утратили инструкцию из комплекта, то, надеемся, без труда сможете найти ее на нашем сайте и бесплатно скачать.
Если, по каким-то причинам, Вы не смогли найти нужное руководство, не стесняясь пишите запрос нам.
Современные варочные поверхности Электролюкс оснащены информационным дисплеем, с помощью которого управлять техникой стало значительно проще.
Но, эти дисплеи так же позволяют получать информацию о неисправностях с помощью кодов ошибок.
Мы собрали для Вас всех известные нам коды ошибок, которые подходят для всех типов варочных панелей Electrolux: индукционных, электрических, и газовых.
- Бесплатно предоставим в пользование варочную панель →
- Акция действует только с 01.05.2023 по 31.05.2023
Ошибка L (может мигать) – означает, что включена защита от детей. L – Lock, блокировка. Читайте инструкцию о том, как снять ошибку в сервисной книжке..
Ошибка F (постоянно мигает) – индукционная панель н видит посуду, либо используется посуда без ферромагнитных свойств.
Ошибка E1 – означает перегрев электроники. Если спустя час после отключения варочной панели ошибка не исчезает, обратитесь в сервисный центр. Потребуется ремонт модуля управления.
Ошибка E2 – ошибка в блоке памяти модуля управления. Требуется ремонт платы управления.
Ошибка E3 – неисправен инверторный двигатель конвекционной печи. Произошло короткое замыкание и требуется восстановление цепи питания.
Ошибка E4 – конфорка работает слишком долго и перегрелась. Отключите панель на 30 минут, ошибка исчезнет.
Ошибка E5 – неисправен фильтр сетевых помех. Напряжение в сети нестабильно, требуется диагностика и скорее всего, замена фильтра сетевых помех.
Ошибка E6 – неисправен силовой блок. Так же ошибка может указывать на неисправность правого блока силового инвертора, а если быть точнее – на отсутствие сигнала.
Ошибка E7 – вентилятор индукционной панели неисправен. Охлаждающие вентиляторы не могут раскрутиться до нужных оборотов. Требуется ремонт.
Ошибка E8 – обрыв цепи питания между блоком питания и модулем индикации. Критическая ошибка, требующая вмешательство специалиста из сервисного центра.
Ошибка E9 – неисправен модуль управления. Возможно, до этого сработало УЗО и варочная панель обесточилась, из-за чего и произошёл сброс настроек конфигурации модуля управления. Ремонт возможен на дому.
Ошибка E10 – неисправен датчик температуры. Термостат мог выйти из строя из-за замыкания цепи питания на ТЭНе.
Ошибка E22 – зажаты одновременно 2 и более кнопок. Ошибка сенсорной панели.
Наши мастера готовы в любой день недели приехать и убрать ошибку, поскольку мы понимаем, без плиты в наше время жить тяжело, особенно, если в доме есть маленькие дети.
Поэтому, для семей с маленькими детьми на ремонт варочных панелей у нас есть скидка – 10%.
Не оставим Вас без варочной панели
В настоящий момент действует специальная акция, которая включает в себя предоставление рабочей варочной поверхности на время ремонта. Если потребуется сложное восстановление электронного модуля, то мы:
- бесплатно установим рабочую поверхность, взамен неисправной;
Благодаря этой опции, Вы сможете готовить еду как и прежде, пока наши специалисты будут заниматься восстановлением неисправной техники.
Ошибки варочных панелей Electrolux можно разделить на две группы. Некоторые кодировки обозначают проблемы, которые вполне можно решить самостоятельно, или которые не являются неполадками вовсе. Другие требуют обращения в сервис, так как связаны с неисправностью каких-либо деталей. Встроенная система диагностики позволяет быстро и оперативно понять, какие действия нужно предпринять, чтобы плита снова заработала. Для того чтобы узнать, с чем именно вы столкнулись, рекомендуем ознакомиться со списком самых распространенных кодировок и их расшифровок.

Все коды ошибок варочных панелей Electrolux
Принятая система обозначения ошибок варочных поверхностей Electrolux будет одинакова для разных моделей бренда. Важно отметить, что не все буквенно-цифровые обозначения сообщают о возникших во время эксплуатации прибора проблемах. Так, некоторые коды просто сообщают о работе того или иного режима:
- A — включена функция автоматического нагрева.
- L — работает блокировка от детей. Чтобы снова пользоваться сенсорной панелью, необходимо ее отключить. Подробный алгоритм для конкретной модели указан в инструкции, обычно для этого необходимо какое-то время нажимать на кнопку замка.
- P — панель работает в режиме повышенной мощности.
- U — обозначает активированную функцию подогрева.
- Непосредственно к ошибкам варочных панелей Electrolux относятся следующие кодировки:
- F — на панели нет посуды, либо, в случае с индукционными панелями, она не обладает необходимыми магнитными свойствами и устройство ее не видит.
- E1 — произошел перегрев электроники, пользоваться плитой в данный момент нельзя. Нужно отключить ее от электропитания минимум на полчаса и дать остыть. Если после этого ошибка сохраняется, обратитесь в авторизованный сервис.
- E2 — неисправность блока памяти. Самостоятельный ремонт не рекомендуется, нужно вызывать специалиста.
- E3 — нет связи с инвертором. Ошибка часто возникает после скачков напряжения в электросети или из-за перенапряжения силового блока. Требуется тщательная диагностика и ремонт от квалифицированного мастера.
- E4 — перегрелись конфорки. Ничего делать не надо, только дать им остыть (не менее тридцати минут).
- E5 — неполадки с электросетью. Напряжение по какой-то причине нестабильно, возможно, потребуется замена сетевого фильтра. Только профессиональный ремонт.
- E6 — обычно появление этой ошибки варочных панелей Электролюкс сопровождается выбитой пробкой и громким хлопком плиты. Это сигнализирует о том, что перегорел силовой блок инвертора. Ремонт сложен, но возможен, тем не менее, будьте готовы к необходимости полностью заменить деталь.
- E7 — неисправность кулера. Из-за этого не происходит охлаждение силового блока, что может привести к куда более серьезной поломке. Сразу же обращайтесь в сервис.
- E8 — потеряна связь между блоками. Можно попробовать перезагрузить устройство. Если ошибка не пропала, то нужна диагностика от специалистов.
- E9 — проблемы с сенсорной панелью. Дело может быть в механических повреждениях, обрыве проводки, неисправности блока управления. Точно определить проблему помогут в сервисе.
- E10 — неисправность термостата. Нужна квалифицированная помощь специалиста.
- E22 — одновременно нажато несколько кнопок, не является признаком каких-либо неполадок.

Здесь мы привели далеко не все коды ошибок варочных панелей Electrolux, с которыми вы можете столкнуться. Если вашей ошибки нет в списке, то это значит, что необходимо обратиться в сервис. Специалисты обладают всей необходимой информацией, чтобы быстро и точно определить проблему и вернуть вашу плиту в строй.
Другие возможные неисправности
Существуют и другие распространенные проблемы, не имеющие кодового обозначения:
- Панель не включается. Для начала проверьте, подается ли питание на розетку, не вышла ли она из строя, в порядке ли кабель подключения. Мог сработать предохранитель, тогда повторное подключение к сети может исправить ситуацию. Не задавайте уровень нагрева сразу, подождите не менее минуты. Удостоверьтесь, что нажимаете только на одну сенсорную клавишу, а не на несколько одновременно, варочная поверхность может работать только с одним нажатием. Проверьте, не включен ли режим «Пауза».
- Панель не реагирует на касания. Такое возможно, если сенсорный дисплей чем-то блокируется, например, на нем частично расположена посуда. Отодвиньте сковородку или кастрюлю. Уберите другие возможные посторонние элементы с поверхности сенсора, очистите его от воды и загрязнений. Отключите устройство от питания и дайте ему охладиться перед повторным включением.
- После звукового сигнала варочная панель сама отключается. Таким образом, прибор сообщает вам о том, что на поверхности обнаружены посторонние предметы. Их нужно убрать.
- Не работает индикатор остаточного тепла. Если вы знаете, что конфорка точно была нагрета, а индикации нет, то, скорее всего, вышел из строя термодатчик. Нужно обратиться в сервис.
- Не получается включить максимальную мощность конфорки. Скорее всего, это из-за того, что уже работает другая на высшем уровне нагрева. Его надо уменьшить, чтобы задействовать эту мощность на другом участке панели.

Еще больше информации вы можете найти в инструкции к вашей модели. В разделе «Неисправности» перечислены все основные ошибки варочных панелей Электролюкс, с которыми можно попробовать разобраться без помощи специалистов. Помните, что для корректной работы устройства нужно соблюдать все рекомендации по эксплуатации, указанные производителем.
Когда обращаться в сервис
Если вы столкнулись с ошибками варочных панелей Электролюкс и не смогли разобраться с ними, следуя представленным выше инструкциям, то это значит, что нужна помощь квалифицированных профессионалов. Попытки починить варочную панель самостоятельно без нужных инструментов и навыков могут привести к более серьезным поломкам и нарушить условия гарантии.
- Manuals
- Brands
- Electrolux Manuals
- Cooktop
- GAS COOKTOP
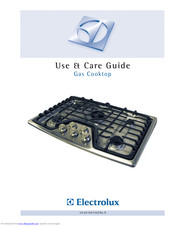
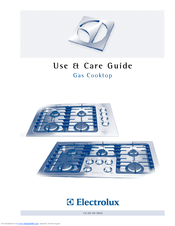
Manuals and User Guides for Electrolux GAS COOKTOP. We have 9 Electrolux GAS COOKTOP manuals available for free PDF download: Use & Care Manual, Use And Care Manual
Electrolux GAS COOKTOP Use & Care Manual (60 pages)
Gas Cooktop
Brand: Electrolux
|
Category: Cooktop
|
Size: 62.38 MB
Table of Contents
-
-
Make a Record for Future Use
2
-
-
Important Safety Instructions
4
-
-
-
Liquefied Petroleum (Propane) Gas Conversion
7
-
-
Proper Burner Adjustments
8
-
Locations of the Burners
8
-
Placement of Burner Heads and Caps
9
-
Placement of Burner Grates
9
-
Surface Cooking Utensils
10
-
Using the Simmer Plate
12
-
Setting Surface Controls
13
-
General Care & Cleaning
14
-
Cleaning the Burner Grates, Burner Caps, Burner Heads, Simmer Plate and Griddle
15
-
Cooktop Cleaning and Maintenance
16
-
Cleaning Recommendations for the Ceramic Glass Cooktop
16
-
Care and Cleaning of Stainless Steel
17
-
Solutions to Common Problems
18
-
Surface Burner Do Not Light
18
-
Burner Flame Only Lights Half Way Around Burner
18
-
Burner Flame Is Orange
18
-
Scratches or Abrasions on Ceramic Glass Cooktop Surface
19
-
Metal Marks on Ceramic Glass Cooktop Surface
19
-
Brown Streaks and Specks on Ceramic Glass Cooktop Surface
19
-
Areas of Discoloration on Ceramic Glass Cooktop Surface
19
-
-
-
-
Importantes Instrucciones de Seguridad
24
-
-
-
Instrucciones para la Puesta a Tierra
27
-
Conversión al Cas Propano/Licuado
27
-
-
-
Ajuste Correcto del Quemador
28
-
Ubicación de las Hornillas
28
-
Colocación de las Basa y las Tapas del Quemador
29
-
Como Colocar las Rejillas de Hornillas
29
-
Seleccióne del Los Utensilios de Cocina
30
-
Uso del Plato para Cocción a Fuego Lento
32
-
Programación de Los Controles de Superficie
33
-
Cuidado y Limpieza General
34
-
Cuidado y Limpieza de la Mesa
34
-
Limpieza y Mantenimiento de la Cubierta
36
-
Recomendaciones de Limpieza para Cubiertas de Vidrio Cerámico
36
-
Cuidado y Limpieza del Acero Inoxidable
37
-
-
Soluciones a Problemas Comunes
38
-
Los Quemadores no Encienden
38
-
El Quemador Tiene la Mitad de la Llama
38
-
La Llama del Quemador es Anarajada
38
-
Raspaduras sobre el Vidrio Cerámico de la Superficie de la Parrilla de Cocina
39
-
Marcas de Metal sobre el Vidrio Cerámico de la Superficie de la Parrilla de Cocina
39
-
Rayas Marrones y Manchas sobre el Vidrio Cerámico de la Superficie de la Parrilla de Cocina
39
-
Areas de Descoloración sobre el Vidrio Cerámico de la Superficie de la Parrilla de Cocina
39
-
-
Información de la Garantía
40
-
Conservez Ces Renseignements Pour Plus Tard
42
-
Cuisson Sur Les Foyers
48
-
Dimension de la Flamme
48
-
Information Sur la Garantie
60
-
Electrolux GAS COOKTOP Use & Care Manual (38 pages)
30”/36″ Gas Cooktop
Brand: Electrolux
|
Category: Cooktop
|
Size: 5.15 MB
Table of Contents
-
-
Finding Information
2
-
Make a Record for Future Use
2
-
-
-
Important Safety Instructions
4
-
-
-
Liquefied Petroleum (Propane) Gas Conversion
7
-
-
Proper Burner Adjustments
8
-
Locations of the Burners
9
-
Placement of Burner Heads and Caps
9
-
Surface Cooking Utensils
10
-
Setting Surface Controls
11
-
Using the Simmer Plate
12
-
General Care & Cleaning
14
-
Cleaning the Burner Grates, Burner Caps and Burner Heads
15
-
Porcelain Enamel Cooktop Cleaning Instructions
16
-
Care & Cleaning of Stainless Steel
16
-
Solutions to Common Problems
17
-
Surface Burner Do Not Light
17
-
Burner Flame Only Lights Half Way Around Burner
17
-
Burner Flame Is Orange
17
-
-
-
Conservez Ces Renseignements Pour Plus Tard
20
-
-
-
-
Informations Générales
22
-
-
Importantes Mesures de Sécurité
22
-
-
-
Instructions de Mise À la Terre
25
-
-
Cuisson Sur Les Foyers
26
-
Dimension de la Flamme
26
-
Bon Réglage des Brûleurs
26
-
Emplacement des Brûleurs
27
-
Mise en Place des Têtes Et des Couvercles de Brûleurs
27
-
Ustensiles Pour la Cuisson Sur Les Brûleurs
28
-
Réglage des Brûleurs de Surface
29
-
Utilisation de la Plaque À Griller
30
-
Utilisation du Support de Wok
31
-
-
Nettoyage Et Entretien Général
32
-
Tableau de Nettoyage Et D’entretien
32
-
Nettoyage des Grilles, des Couvercles
33
-
Et des Têtes de Brûleurs
33
-
Entretien Et Nettoyage de L’acier Inoxydable
34
-
-
Solutions Aux Problèmes Communs
35
-
Les Brûleurs de Surface Ne S’allument Pas
35
-
La Flamme N’est Pas Complète Autour des Brûleurs
35
-
-
Information Sur la Garantie
37
-
Electrolux GAS COOKTOP Use & Care Manual (20 pages)
Brand: Electrolux
|
Category: Cooktop
|
Size: 19.21 MB
Table of Contents
-
-
Makea Recordfor Futureuse
2
-
-
Importantsafetyinstructions
4
-
-
Locationsof the Burners
9
-
Placementof Burnerheadsand Caps
10
-
Placementof Burnergrates
10
-
Properburneradjustments
11
-
Settingsurfacecontrols
12
-
-
Cooktopcleaningand Maintenance
16
-
Cleaningrecommendations F Orthe Ceramic Glasscooktop
16
-
Care & Cleaningof Stainlesssteel
17
-
Solutions to Common Problems
18
-
Surfaceburnerdo Not Light
18
-
Burnerflameonlylightshalf Wayaroundburner
18
-
Scratches Orabrasionson Ceramicglass Cooktopsurface
19
-
Metalmarkson Ceramicglass
19
-
Brownstreaksand Speckson Ceramicglass Cooktopsurface
19
-
Areasof Discoloration on Ceramic Glass Cooktopsurface
19
-
Electrolux GAS COOKTOP Use & Care Manual (20 pages)
Gas Cooktop
Brand: Electrolux
|
Category: Cooktop
|
Size: 1.69 MB
Table of Contents
-
-
Make a Record for Future Use
2
-
-
-
Important Safety Instructions
4
-
-
-
Liquefied Petroleum (Propane) Gas Conversion
7
-
-
Proper Burner Adjustments
8
-
Locations of the Burners
9
-
Placement of Burner Heads and Caps
9
-
Surface Cooking Utensils
10
-
Setting Surface Controls
11
-
Using the Simmer Plate
12
-
General Care & Cleaning
14
-
Cleaning the Burner Grates, Burner Caps and Burner Heads
15
-
Porcelain Enamel Cooktop Cleaning Instructions
16
-
General Care & Cleaning
16
-
Care & Cleaning of Stainless Steel
16
-
Solutions to Common Problems
17
-
Surface Burner Do Not Light
17
-
Burner Flame Only Lights Half Way Around Burner
17
-
Burner Flame Is Orange
17
-
Electrolux GAS COOKTOP Use And Care Manual (18 pages)
Electrolux Gas cooktop Use and care guide
Brand: Electrolux
|
Category: Cooktop
|
Size: 1.52 MB
Table of Contents
-
Finding Information
2
-
Important Safety Instructions
3
-
-
Liquefi Ed Petroleum (Propane) Gas Conversion
6
-
-
Surface Cooking Utensils
7
-
Using the Wok Stand (Accessory Not Included)
8
-
Using the Simmer Plate (Accessory Not Included)
9
-
Locations of the Burners
9
-
Placement of Burner Caps
9
-
Placement of Burner Grates
10
-
Proper Burner Adjustments
10
-
Setting Surface Controls
11
-
-
General Care and Cleaning
12
-
Care and Cleaning Table
12
-
Care and Cleaning of Stainless Steel
12
-
Cleaning Burner Grates, Caps, Heads and Glass Cooktop
12
-
Cleaning the Burner Caps
13
-
Cleaning the Burner Heads
13
-
-
-
Solutions to Common Problems
15
-
Surface Burners Do Not Light
15
-
Burner Flame Only Lights Half Way Around Burner
15
-
Burner Flame Is Orange
15
-
Scratches or Abrasion on Ceramic Glass Cooktop Surface
15
-
Metal Mark on Ceramic Glass
15
-
Brown Streaks and Specks on Ceramic Glass
15
-
Areas of Discoloration on Ceramic Glass
15
-
Electrolux GAS COOKTOP Use And Care Manual (16 pages)
Brand: Electrolux
|
Category: Cooktop
|
Size: 2.42 MB
Table of Contents
-
Finding Information
2
-
-
Important Safety Instructions
4
-
-
-
Liquefied Petroleum (Propane) Gas Conversion
6
-
-
Proper Burner Adjustments
6
-
Locations of the Burners
7
-
Placement of Burner Caps
7
-
Surface Cooking Utensils
8
-
Setting Surface Controls
8
-
Using the Simmer Plate (Accessory Not Included)
9
-
Using the Wok Stand (Accessory Not Included)
10
-
General Care and Cleaning
10
-
Care and Cleaning Table
11
-
Care and Cleaning of Stainless Steel
11
-
-
Solutions to Common Problems
13
-
Surface Burner Do Not Light
13
-
Burner Flame Only Lights Half Way Around Burner
13
-
Burner Flame Is Orange
13
-
Electrolux GAS COOKTOP Use And Care Manual (16 pages)
Use & Care Guide Gas Cooktop 318 200 676 (0602)
Brand: Electrolux
|
Category: Cooktop
|
Size: 1.73 MB
Table of Contents
-
Finding Information
2
-
Make a Record for Future Use
2
-
-
-
Important Safety Instructions
4
-
-
-
Liquefied Petroleum (Propane) Gas Conversion
7
-
-
Proper Burner Adjustments
8
-
Locations of the Burners
9
-
Placement of Burner Heads and Caps
9
-
Placement of Burner Grates
10
-
Surface Cooking Utensils
10
-
Setting Surface Controls
11
-
General Care & Cleaning
13
-
Cleaning the Burner Grates, Burner Caps and Burner Heads
13
-
Porcelain Enamel Cooktop Cleaning Instructions
14
-
Care & Cleaning of Stainless Steel
14
-
-
Solutions to Common Problems
15
-
Surface Burner Do Not Light
15
-
Burner Flame Only Lights Half Way Around Burner
15
-
Burner Flame Is Orange
15
-
Electrolux GAS COOKTOP Use And Care Manual (16 pages)
30″ cooktop/36″ cooktop
Brand: Electrolux
|
Category: Cooktop
|
Size: 0.76 MB
Table of Contents
-
Finding Information
2
-
-
Important Safety Instructions
4
-
-
-
Liquefi Ed Petroleum (Propane) Gas Conversion
6
-
-
Proper Burner Adjustments
6
-
Location of the Burners
7
-
Placement of Burner Caps
8
-
Surface Cooking Utensils
9
-
Setting Surface Controls
10
-
Care and Cleaning Table
11
-
Care and Cleaning of Stainless Steel
11
-
-
General Care and Cleaning
11
-
Solutions to Common Problems
13
-
Surface Burner Do Not Light
13
-
Burner Flame Only Lights Half Way Around Burner
13
-
Burner Flame Is Orange
13
-
Electrolux GAS COOKTOP Use And Care Manual (16 pages)
GAS COOKTOP
Brand: Electrolux
|
Category: Cooktop
|
Size: 9.57 MB
Table of Contents
-
-
Liquefied Petroleum (Propane) Gas Conversion
6
-
-
Locations of the Burners
7
-
Placement of Burner Caps
7
-
Surface Cooking Utensils
8
-
Setting Surface Controls
8
-
Using the Simmer Plate (Accessory Not Included).9
9
-
Using the Wok Stand (Accessory Not Included)
10
-
Care and Cleaning Table
11
-
Related Products
-
Electrolux 30″ Gas Range
-
Electrolux GHC605W
-
Electrolux GHR92S
-
Electrolux GHS607W
-
Electrolux GHC607S
-
Electrolux GHS917W
-
Electrolux GHC937W
-
Electrolux GHC937S
-
Electrolux GHR12W
-
Electrolux GC70V
Electrolux Categories
Refrigerator
Oven
Washer
Freezer
Dishwasher
More Electrolux Manuals
Электролюкс Варочная панель
Прежде чем вы начнете
- Удалите весь упаковочный материал и ленту.
- Убедитесь, что колпачки горелок отцентрированы на горелках и установлены правильно.
- Сначала установите центральную решетку для конфорок, затем установите на место левую и правую решетки.
Подробные инструкции см. В Руководстве по эксплуатации и уходу.
Установка крышки горелки
Все крышки горелок должны быть правильно установлены перед первым использованием, чтобы обеспечить надлежащий розжиг и размер пламени газа.
- Убедитесь, что размер каждой крышки горелки соответствует размеру головки горелки.
- Убедитесь, что крышки горелок правильно установлены на головках горелок.
Крышка горелки должна плотно прилегать к центру головки горелки и быть ровной. - Оказавшись на месте, проверьте посадку, осторожно сдвинув крышку горелки из стороны в сторону.
ПРИМЕЧАНИЕ: Мы рекомендуем обратиться к профессиональному установщику или технику, если вам нужно переоборудовать вашу варочную панель на сжиженный нефтяной (LP) природный газ.
Начать готовить
ПОЛОЖЕНИЕ РУЧКИ ГОРЕЛКИ
ЭКСПЛУАТАЦИЯ ГОРЕЛКИ
- Поставьте посуду на конфорку.
- Нажмите и поверните ручку варочной панели в положение, чтобы зажечь конфорку.
- Проверьте горелку, чтобы убедиться, что у нее устойчивое пламя.
- Когда горелка зажгется, поверните ручку, чтобы отрегулировать размер пламени.
ПРИМЕЧАНИЕ: При нажатии ручки управления на всех горелках будет слышен щелчок.
УСТАНОВКА РАЗМЕРА ПЛАМЕНИ
Цвет пламени — ключ к правильной настройке горелки.
Хорошее пламя — чистое, голубое и почти незаметное. Отрегулируйте или очистите горелку, если пламя желто-оранжевое.
Если пламя выходит за пределы внешнего края посуды, уменьшите уровень пламени.
Начните с максимальной настройки и уменьшите ее по мере необходимости для общих нужд приготовления.
| FLAME РАЗМЕРE | CПОДГОТОВКА ТИП |
| Высокое пламя | Варка, Жарка, Обжигание |
| Среднее пламя | Медленное кипячение, Загустение соуса и подливки, Приготовление на пару, Тушение |
| Низкое пламя | Тушение, Браконьерство, Тушение |
| Эти настройки основаны на металлических или алюминиевых кастрюлях среднего веса с крышками. При использовании посуды других типов настройки могут отличаться. |
Использование грида
На левой стороне вашей варочной панели есть две конфорки стандартного размера, которые можно использовать для нагрева посуды большего размера, например, сковороды.
- Разместите сковороду по центру над левыми газовыми горелками.
- Разогрейте сковороду в течение 5 минут на среднем или средне-низком уровне.
Сковорода двусторонняя из чугуна с керамическим покрытием. При необходимости используйте антипригарный кулинарный спрей или масло. Медленный предварительный нагрев сковороды обеспечивает равномерное распределение тепла для достижения наилучших результатов приготовления.
Мы рекомендуем вручную мыть сковороду жесткой щеткой в очень горячей воде. При необходимости используйте немного мыла и хорошо промойте. Высушите безворсовой тканью и храните в сухом месте. Сковородку можно мыть в посудомоечной машине.
Уход и Чистка
Защитите свою варочную панель, быстро смыв пролитую жидкость.
Перед очисткой варочной панели убедитесь, что элементы управления находятся в положении ВЫКЛЮЧЕНО, а конфорки варочной панели остыли.
Для генеральной уборки протрите чистой, damp тканью и вытрите насухо, чтобы не поцарапать. Инструкции по очистке решеток и конфорок на варочной панели см. В Руководстве по эксплуатации и уходу.
Часто задаваемые вопросы
Почему моя газовая плита не работает?
Убедитесь, что ручка варочной панели повернута в положение LITE при включении конфорки. Убедитесь, что отверстия для конфорок варочной панели не забиты. В вашем Руководстве по эксплуатации и уходу есть инструкции, как правильно чистить конфорки варочной панели.
Почему пламя горелки неравномерное?
Забитые отверстия или прорези горелки могут стать причиной неравномерного пламени. Убедитесь, что конфорки варочной панели установлены и размещены правильно. Крышки горелок должны быть ровными и правильно сидеть на головках горелок.
Почему пламя моей горелки слишком велико?
Настройки приготовления могут быть слишком высокими. С помощью ручки варочной панели уменьшите настройку.
Неправильная установка колпачков горелок может привести к слишком сильному пламени. Проверьте плотность посадки крышек конфорок, сдвинув их в сторону, чтобы сдвинуть, когда варочная панель остыла.
Неправильное преобразование LP вашей варочной панели также может привести к слишком сильному пламени. См. Инструкции по набору для переоборудования, входящие в комплект документации.
Всегда обращайтесь к руководству по эксплуатации и уходу за дополнительными советами и инструкциями.
Устойчивое развитие вместе
Мы стремимся к более рациональному питанию, начиная от способа хранения продуктов и заканчивая тем, как мы их готовим.
Душевное спокойствие и защита
Откройте для себя больше преимуществ, зарегистрировав свое устройство. Отправьте текст со значком фотографии на своем приборе или регистрационной карточке или посетите нас в Интернете, чтобы зарегистрироваться.
ElectroluxAppliances.ru
(877) 435-3287
10200 Дэвид Тейлор Драйв
Шарлотта, Северная Каролина 28262
ElectroluxAppliances.ru
(800) 265-8352
5855 Уэй Терри Фокса
Миссиссауга, ON L5V 3E4
Документы / Ресурсы
Рекомендации


