-
Page 1
MIMAKI ENGINEERING CO., LTD. https://mimaki.com/ D203043-42 Original instructions… -
Page 2: Table Of Contents
Table of contents CAUTION ………………v DISCLAIMER OF WARRANTY …………v Requests ………………..v FCC Statement (USA) …………….v Interference to televisions and radios ……….. v CDRH REGULATION …………….v Restriction in use …………….. vi Foreword ………………vi On this operation manual …………..vi For safe operation …………….vii Symbols ………………..vii Safety interlock ………………xii…
-
Page 3
Turning the Power ON…………… 2-3 Turning the Power OFF …………..2-3 Setting the media ……………..2-4 Set the media in another method …………2-6 Test printing ……………..2-7 Perform test printing with the test pattern for checking white ink ..2-8 Head Cleaning …………….2-8 About head cleaning……………. -
Page 4
Setting a AUTO Power-off…………… 3-18 Setting Time ………………3-18 Setting Unit (Length) …………… 3-18 Setting a KEY BUZZER…………..3-18 Setting the network…………….3-19 Setting event mail function ………….. 3-19 Setting of Remote control…………..3-24 Setting a LANGUAGE …………..3-24 Setting a Ionizer (Option) …………..3-24 Recognize connection options ………… -
Page 5
Setting the Cleaning Intervals and Type ……… 4-18 Replacing consumables ………….4-19 (When using rubber wiper) Replace the wiper/wiper absorber..4-19 (When using suction wiper)Replace the nozzle cap……4-19 Replacing the mist filter …………..4-20 Replacing the mist filter box …………4-21 LED Glass Replacement ………….. -
Page 6: Caution
The product can interfere with radios and televisions if set up or commissioned THIS LIMITED WARRANTY OF MIMAKI SHALL BE THE under improper conditions. The product is not guaranteed SOLE AND EXCLUSIVE WARRANTY AND IS IN LIEU…
-
Page 7: Restriction In Use
Foreword Foreword Restriction in use Congratulations on your purchase of a MIMAKI “UJF- Kebab HS system which is option for UJF-3042 MkII e, 3042MkII/3042MkII EX/3042MkII e/3042MkII EX UJF-3042 MkII EX e, and the UJF-6042 MkII e is 6042MkII/6042MkII e ” model of UV ink jet printer.
-
Page 8: For Safe Operation
For safe operation For safe operation WARNING • Be sure to setup the appropriate air-moving Symbols system in case of using this machine in a closed room or a room with bad ventilation. Symbols are used in this Operation Manual for safe Cautions for constructing exhaust outlet.
-
Page 9
MIMAKI for repair. Never repair your machine by yourself since it is very dangerous for you Power supply and voltage to do so. -
Page 10
For safe operation WARNING WARNING Abnormal event occurs Circulating water • If the machine is used under an abnormal • If you find any water leaks on the maintenance condition where the machine produces smoke parts, turn the power switch off immediately, or unpleasant smell, fire or electric shocks can and remove the power plug from the power result. -
Page 11
UV devices other than those recommended by on the printer, dust can put on it. Mimaki. We would take no responsibility for • Store media not to put dust on it. Wiping dust any troubles caused through the use of a UV off the media, dust will be put on the media devices not recommended by Mimaki. -
Page 12
For safe operation CAUTION • After this machine is used long time, foreign materials or dust gathered may cause electrical leakage, or insulation deterioration may cause firing and/or smoking. Periodically clean this machine replace deteriorated parts after insulation resistance. • After this machine is used long time, screws or others on the conductive parts may be loosened, causing firing and/or smoking. -
Page 13: Safety Interlock
For safe operation Safety interlock This machine is equipped with interlocks to terminate the operation for your safety when the cover opens during printing etc. (red circle parts in the figure below). Front cover *1: Although the carriage stops when you open the front cover, the interlock is not activated.
-
Page 14: Position Of The Warning Label
Position of the warning label Position of the warning label Warning labels are adhered on this machine. Be sure to fully understand the warnings given on the labels. In the case where any of the warning label has become so soiled that the warning message is illegible or has come off, purchase a new one from your local distributor or our office.
-
Page 15
Position of the warning label Order No. Label Order No. Label (1)M903330 (6)M913425 (2)M913563 (7)M913706 (UJF-6042MkII/ UJF-6042MkIe) (3)M913565 (8)M903239 (UJF-3042MkII/ UJF-3042MkII EX/ UJF-3042MkII e/ UJF-3042MkII EX e) (4)M907935 (9)M913610 (5)M913423 (10)M913419 (11)M915076… -
Page 16
Position of the warning label… -
Page 17: Before Use
Chapter 1 Before Use This chapter describes the items required to understand before use, such as the name of each part of the machine or the installation procedures. Installing the machine ……..1-2 Connecting the LAN cable ……1-12 Connecting the power cable ….. 1-12 Where to install the machine……
-
Page 18: Installing The Machine
Chapter 1 Before Use Installing the machine • When moving this machine, take care not to give a significant impact on it. • When moving this machine, keep it as flatly as possible. Do not move it on its side. It may cause Where to install the machine machine failure.
-
Page 19: Configuration And Function
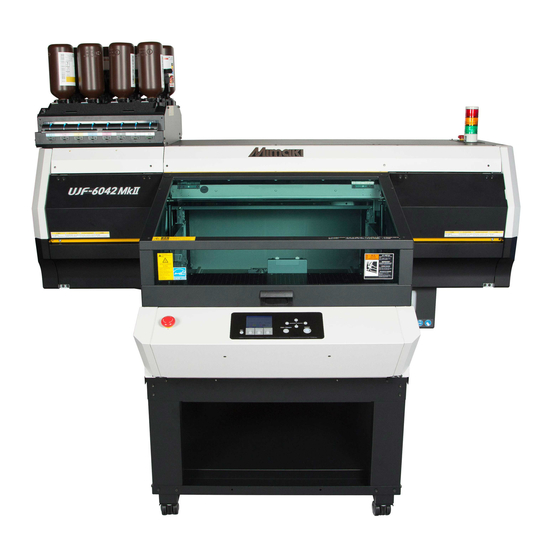
Chapter 1 Before Use Configuration and Function Front Below is an illustration of UJF-3042MkII. Ink supply unit Front cover Insert ink bottles here. Open and close this cover when P.1-13) replacing or setting the media. Carriage ( P.1-4) The carriage is provided with the print head.
-
Page 20: Rear
Chapter 1 Before Use Rear EMERGENCY SWITCH USB socket One EMERGENCY switch is placed on the front face of Connect USB the unit and one is placed on the right side in the rear part interface cable. of the cover. When stopping the machine for safety reason, press the LAN connector switch.
-
Page 21: Indicator Light Unit
Chapter 1 Before Use Indicator light unit The indicator light unit shows the status of the machine in the three colors light. • Indicator light unit on 3042MkII is optional. • To your use this option, you will need a mounting work by our service engineers. Please note that the optional accessories can not be attached by the customer.
-
Page 22: Operation Panel
• Do not turn the main power switch( P.1-4) off. • When Mimaki Remote Access is in use, «During remote control. [ent]» will appear on the display, and key operations using the control panel of the unit will be disabled.
-
Page 23
Chapter 1 Before Use *1 : Ink Status Status of the ink tank (remaining ink/error, etc.) is displayed using icons. Each icon is described below. Icon Contents Displays the remaining ink amount in nine levels, in the order of the ink cartridge set in the slot. The remaining amount decreases moving to the right. -
Page 24
Chapter 1 Before Use *2 : Functions assigned to [FUNC1] to [FUNC3] Contents of functions assigned to [FUNC1] to [FUNC3] are described below. Icon Contents Displays “MENU” for setting functions. Displays maintenance functions such as test print, cleaning, etc. Shifts to Remote from LOCAL and starts printing. Executes data clear. -
Page 25: About Table
Chapter 1 Before Use About table It is necessary to adjust the table height depending on the media thickness because various media can be set for printing. The specification of each table is as less: Table UJF-3042MkII/UJF-3042MkII e UJF-3042MkII EX/UJF-3042MkII EX e UJF-6042MkII/UJF-6042MkII e Acceptable media 5kg and less…
-
Page 26
Chapter 1 Before Use • UJF-6042MkII/UJF-6042MkII e Vacuum Table • Tap hole ( ○ ) can be used with jig. • The position of other holes might be changed without notice. • Do not protrude the jig from the edge of the table. 1-10… -
Page 27: Instructions For Using The Table
Chapter 1 Before Use Connecting the cables Instructions for using the table When using jigs, set the width to A3 for UJF-3042MkII/ UJF-3042MkII EX/UJF-3042MkII e/UJF-3042MkII EX e, Connecting the USB2.0 interface A2 (or 674mm) for UJF-6042MkII/UJF-6042MkII e and the cable depth to 464mm or less.
-
Page 28: Connecting The Lan Cable
Chapter 1 Before Use Removing USB memory If connecting via a switching hub If a USB memory module is inserted in the personal computer to which a this machine machine is connected, click «Stop» in the «Safely Remove Hardware»…
-
Page 29: Caution In Handling Of Ink Bottles
Each color is displayed on the LCD as follows: • Never refill the ink bottles with ink. This may result in troubles. MIMAKI will not bear any responsibility for any Display Color Display…
-
Page 30: Setting Ink Bottles
Chapter 1 Before Use Setting ink bottles • If the mouth of the ink bottle is fitted with a seal (1) Use a cutter or similar tool to cut out a circle from the seal at the mouth of the bottle. If Take out the ink bottle, and slowly shake it there is any leftover cut, it may cause ink to twenty times and more.
-
Page 31
Chapter 1 Before Use • Wipe off any ink or maintenance liquid remaining on the ink bottle or special cap. Failure to do so may result in ink leaks due to the spinning of the special cap. • Check to confirm that there is no foreign matter, such as paper towel scraps or dust,adhering to the special cap. -
Page 32
Chapter 1 Before Use • Do not touch the metal part of the IC chip. It may Replace the ink bottle break the IC chip by static, or may cause read error by stain or flaw. • Be sure to use safety glasses. •… -
Page 33
Chapter 1 Before Use If the light-blocking cover comes off Use the wiping filter to wipe off any ink. If the light-blocking cover comes off, light striking the inside of the tank can result in the ink curing. Perform the following procedures if the light-blocking cover comes off. -
Page 34: About Media
Chapter 1 Before Use About Media About ink expiration date The ink expiration date is indicated on the Ink bottle. The sizes of media that can be used and the method of Expired ink may cause printing defects or alter the color handling are described here.
-
Page 35: Menu Mode
Chapter 1 Before Use Menu mode This machine has three modes. Each mode is described below. Local Local is a mode in printing preparation state. All keys are available. Receiving of data from the computer is allowed, however, printing is not executed. The following operations are allowed in the local.
-
Page 36
Chapter 1 Before Use 1-20… -
Page 37: Basic Operations
Chapter 2 Basic Operations This chapter describes procedures and setting methods for ink and media preparation, and printing. Operation flow……….2-2 Perform head cleaning depending on the test printing result ……….2-8 Turning the Power ON/OFF ……2-3 Printing an image from source data …..2-9 Turning the Power ON …….
-
Page 38: Operation Flow
Chapter 2 Basic Operation Operation flow See “Turning the Power ON” ( P.2-3) Turning the Power ON See “Setting the media” ( P.2-4) Setting the media See “Test printing” ( P.2-7) Test printing See “Head Cleaning” ( P.2-8) Head Cleaning See “Printing an image from source data”…
-
Page 39: Turning The Power On/Off
Chapter 2 Basic Operation Turning the Power ON/OFF Turning the Power OFF When having ended the operation of the machine, turn the power OFF by pressing the [END/POWER] key. Turning the Power ON Check the following items when turning the power OFF. This machine is provided with the following two power •…
-
Page 40: Setting The Media
Chapter 2 Basic Operation Setting the media [END/POWER] key a long time on the front of the machine, check the display is turned off on the operation panel, and then turn the main power switch off. • The peripheral parts of the media could roll up due to heat.
-
Page 41
Chapter 2 Basic Operation Change the Table Height Attach the table spacer. Depending on the media thickness, change the height of the table. 53 mm or less 53 to 103 mm 103 to 153 mm Work height 2 pieces 1 piece none (0mm) Table spacer Attach the assembled table on the main… -
Page 42: Set The Media In Another Method
Chapter 2 Basic Operation Changing origin Set the media in another method The default origin position can be changed by pressing You can lower the table to set media more easily. JOG keys [][][][]. • The origin can also be changed from «ORIGIN Press the key in (MENU)
-
Page 43: Test Printing
Chapter 2 Basic Operation Test printing Check result of printing. • When the result is normal, finish the operation. P.2-9) Make test printing in the specified direction to check • When the result is abnormal, execute head whether there is nozzle clogging or other printing failures cleaning.
-
Page 44: Perform Test Printing With The Test Pattern For Checking White Ink
Chapter 2 Basic Operation Head Cleaning Perform test printing with the test pattern for checking white ink About head cleaning It makes easier to check if print the background to the white ink locations in the pattern. Check the printed test pattern result and perform cleaning depending on the status.
-
Page 45: Printing An Image From Source Data
Chapter 2 Basic Operation Printing an image from Taking out the media after completion of printing. source data (1) When you made vacuum «ON», Press the [FUNC1] (VACUUM) to turn the adsorption «OFF». Starting the printing operation (Only for UJF-3042MkII EX/UJF-3042MkII EX e, UJF-6042MkII/UJF-6042MkII e or •…
-
Page 46: Checking Printing Data That Is Being Received Or Has Been Received
Chapter 2 Basic Operation Checking printing data that is being received or has been received When printing is interrupted or print data is received on the local mode, the warning message «DATA REMAIN» appears on the display. At this time, if you press the [FUNC3] (REMOTE) migrate to the remote, printing is started or restarted.
-
Page 47: Setup
Chapter 3 Setup This chapter describes the various setting of this machine. About Head Height MENU ……3-2 Setting of SUCTION WIPER….. 3-15 About MACHINE SETUP MENU….3-16 Head Height MENU table……3-2 Setting the Media Thickness …… 3-3 MACHINE SETUP MENU table….3-17 Setting the HEAD GAP ……
-
Page 48: About Head Height Menu
Chapter 3 Setup About Head Height MENU On SETUP MENU, you can set the print conditions to match the media you usually use. 10 : 22 LOCAL 0.0mm 0.0mm 53.0mm TEST PRINT / MENU REMOTE CLEANING : Press this to select Head Height MENU, or to switch to the previous screen. : Press this to switch to the next screen.
-
Page 49: Setting The Media Thickness
Chapter 3 Setup Press to select the mode, and Setting the Media Thickness press the key. If the media thickness is changed, Table Height is also • Set value: ON, OFF changed. • When «ON» is selected: You can select the behavior. Select one from the three types below: Press the (MENU)
-
Page 50
Chapter 3 Setup Table spacer Set the length of the table spacer you are using. Press the (MENU) key in LOCAL mode. • HEAD HEIGHT MENU will be displayed. Press to select “Table spacer” , and press the key. Press to select the table spacer, and press the key. -
Page 51: About Origin Setup Menu
Chapter 3 Setup About ORIGIN SETUP MENU Common settings are functions for using this machine easily. The following items can be set in Origin settings. LOCAL 10 : 22 0.0mm 0.0mm 53.0mm TEST PRINT / MENU REMOTE CLEANING : Press this to select ORIGIN SETUP MENU, or to switch to the previous screen. : Press this to switch to the next screen.
-
Page 52: Setting The X Offset (Rem)
Chapter 3 Setup Setting the X offset (REM) Setting the X offset (LOC) Use the following steps to accurately set the X origin of Use the following steps to accurately set the X origin of the online print. the built-in pattern such as test print. Press the (MENU) in LOCAL mode.
-
Page 53: Setting The Z Origin
Chapter 3 Setup Setting the Z origin Changing the origin using the JOG keys You can also change the origin using the JOG keys. Press the (MENU) in LOCAL mode. Changing with the JOG keys Press to select “SET ORIGIN” , and press the key.
-
Page 54: About Setup Menu
Chapter 3 Setup About SETUP MENU On SETUP MENU, you can set the print conditions to match the media you usually use. 10 : 22 LOCAL 0.0mm 0.0mm 53.0mm TEST PRINT / MENU REMOTE CLEANING : Press this to select SETUP MENU, or to switch to the previous screen. : Press this to switch to the next screen.
-
Page 55: Setup Menu Table
Chapter 3 Setup SETUP MENU table • For each setting item below, you can set it so that the machine may operate according to the value specified when you printed from your RIP software in the connected host PC. • Set Item : FEED COMP./INK LAYER/Logical Seek/REFRESH •…
-
Page 56: Setting Of Media Correction
Chapter 3 Setup Setting of Media Correction Setting of LOGICAL SEEK A pattern for media correction is printed and a feeding The head’s operation varies depending on the LOGICAL rate is corrected. SEEK settings, as shown in the figure below. •…
-
Page 57: Setting Of Ink Layers
Chapter 3 Setup The drawing is not performed and only the LED UV Setting of INK LAYERS is lit. Use when drawing is performed without the PRINT LED UV is lit etc., and when you wish to make it Set the number of times for over painting. cure afterward.
-
Page 58: Setting Of Fan Mode
Chapter 3 Setup Press the (MENU) key in the local Setting of FAN MODE mode. You can set whether the vacuum function to fix the media set on the table is performed automatically or you perform Press to select «Setting», then it manually.
-
Page 59: Setting Of Print Flushing Level
If performing media correction does not resolve feeding splash on the print result as the ink on the nozzles stripes, use the MAPS (Mimaki Advanced PassSystem) thickens due to stray light. function to disperse the pass boundary to make the If this happens, increase the flushing amount before feeding stripes less visible.
-
Page 60: Setting Of The Misregistration Adjust
Chapter 3 Setup * Use transparent media with the A4 landscape Setting of the Misregistration adjust size or more in Y direction. Set Adjust:back to Step6. It is used when the mis-registration occurs at printing the color/spot color version. Press to select the resolution to adjust , and press the key.
-
Page 61: Setting Of Lt Mode
Chapter 3 Setup Press to select “EXEC Setting of LT mode INTERVAL” , and press the key. Press the (MENU) key in the local Press the key. mode. • EXEC INTERVAL setting menu is displayed. Press to select «Setting», then Press to select the set value, and press the…
-
Page 62: About Machine Setup Menu
Chapter 3 Setup About MACHINE SETUP MENU • Since UV light intensity adjustment is performed, check the print performance (stickiness, odor etc.) before using the LT mode. • Effective condition Ink type Resolution Pass Media LUS120 600 x 600 8 pass UV PET Common settings are functions for using this machine easily.
-
Page 63: Machine Setup Menu Table
Set the authentication number for Mimaki PIN code 0000-9999 0000 Remote Control Remote Access. Set the time for Mimaki Remote Access to KeyLife 5min-120min 30min automatically exit remote control when there is no operation during remote control. English / 日本語 / Deutsch / LANGUAGE ( P.3-24)
-
Page 64: Setting A Auto Power-Off
Chapter 3 Setup Function name Set value Default Meaning Set the time until head temperature goes to HEAD TEMP.STANDBY TIME 5min 5min ~ 15min standby. *1. Settable only when Auth. is not OFF. *2. Settable only when Auth. is POP before SMTP. *3.
-
Page 65: Setting The Network
• The notification by the event mail function may not be delivered due to Internet environment, failure of the device/ Press to select “CHECK MAC the power supply, etc. Mimaki has absolutely no responsibility for any damages or loss resulting from non- ADDRESS” , and press the key.
-
Page 66
Chapter 3 Setup Set the event to send an event mail Set the e-mail address Press the (MENU) (>>) Press the (MENU) (>>) key local mode. key local mode. • MACHINE SETUP MENU will be displayed. • MACHINE SETUP MENU will be displayed. Press to select “EVENT MAIL”… -
Page 67
Chapter 3 Setup Set the server Press to select “USER NAME” , and press the key. Press the (MENU) (>>) Press to set User Name, key in LOCAL mode. and press the key. • MACHINE SETUP MENU will be displayed. •… -
Page 68
Chapter 3 Setup Send a test e-mail Press the (MENU) (>>) key local mode. • MACHINE SETUP MENU will be displayed. Press to select “EVENT MAIL” , and press the key. Press the (>>) key. • “TRANSMIT TEST EXECUTE” will be displayed. Press the key. -
Page 69
Chapter 3 Setup • The sent result of the test e-mail is the result of e-mail sending process performed by this machine to the e-mail server. It does not indicate that the e-mail was received at the address. • If the spam e-mail filter etc. has been set in the terminal in which e-mails are received, even if “Sending has been completed”… -
Page 70: Setting Of Remote Control
See the online manual for Mimaki Remote Access. Press the key several times to When Mimaki Remote Access is in use, «During remote end the setting. control. [ent]» will appear on the display, and key operations using the control panel of the unit will be Setting a LANGUAGE disabled.
-
Page 71: Recognize Connection Options
Chapter 3 Setup Press Recognize connection options Recognize the option when installing the Kebab option. Press key, select the setting value, Press the (MENU) (>>) key and press in LOCAL mode. • Setting value:5min ~ 15min Press to select “MACHINE Press key several times to end SETUP”, and press the…
-
Page 72: About Nozzle Check Menu
Chapter 3 Setup About NOZZLE CHECK MENU Set operations concerning the nozzle missing detection function. UJF-3042MkII is displayed only when the NCU option is installed. 10 : 22 LOCAL 0.0mm 0.0mm 53.0mm TEST PRINT / MENU REMOTE CLEANING : Press this to select NOZZLE CHECK MENU, or to switch to the previous screen. : Press this to switch to the next screen.
-
Page 73: Printing Check Flow
Chapter 3 Setup Printing Check Flow Nozzle check is conducted according to the following flow at the start of printing. • Turn the “Printing Check” setting ON to be enabled. • Only perform RETRY COUNT and Printing Check settings when the settings are enabled. nozzle check …
-
Page 74: Setting The Printing Check
Chapter 3 Setup Setting the Printing Check Setting the NOZZLE RECOVERY Select «ON» when you want to conduct nozzle check at set this if you want to conduct automatic nozzle recovery the start of online printing. when nozzle missing is detected. Press the (MENU) key in the local Press the…
-
Page 75: About Information Menu
Chapter 3 Setup About INFORMATION MENU The information of this machine can be confirmed. The following items can be confirmed as machine information. 10 : 22 LOCAL 0.0mm 0.0mm 53.0mm TEST PRINT / MENU REMOTE CLEANING : Press this to select INFORMATION MENU, or to switch to the previous screen. : Press this to switch to the next screen.
-
Page 76: Displaying The Information
Chapter 3 Setup Displaying the Information In LOCAL mode, press (MENU) and press the key. Press to select «INFORMATION», then press the key. • The information menu is displayed. Press to select the information you want to see. • Refer to «Information menu list» and select the information to display.
-
Page 77: Maintenance
Chapter 4 Maintenance This chapter describes the items required to use this machine more comfortably, which are the methods for the daily care, the maintenance of the ink bottles etc. Routine maintenance ……..4-2 Checking the UV Lamp Usage ….4-16 Solving the Ink Overflow Problem…..
-
Page 78: Routine Maintenance
To order replacement consumable items, contact your local dealer or our service office.For more information on other consumable items, refer to our website. https://mimaki.com/supply/inkjet.html When this machine is left unused for a long time When the machine is not going to be used for a week or…
-
Page 79
Chapter 4 Maintenance… -
Page 80: About Maintenance Menu
Chapter 4 Maintenance About MAINTENANCE MENU This provides various settings for doing maintenance on the machine. The following items can be set in Maintenance settings. LOCAL 10 : 22 0.0mm 0.0mm 53.0mm TEST PRINT / MENU REMOTE CLEANING : Press this to select MAINTENANCE MENU, or to switch to the previous screen. : Press this to switch to the next screen.
-
Page 81: Maintenance Menus At-A-Glance
Chapter 4 Maintenance MAINTENANCE MENUs at-a-glance Item Set value Meaning For carrying out maintenance on the carriage and station periphery. CARRIAGE OUT Moves the carriage out, for carrying out cleaning of the cap periphery, P.4-6) head, wipers, etc. REPLACE Waste Ink Tank Resets or corrects the used count for the waste ink tank.
-
Page 82: Maintaining The Capping Station
Chapter 4 Maintenance Maintaining the Capping Open the right maintenance cover. Station Maintain the ink cap, wiper, etc. located in the capping station. (SATION MAINT.) • To keep the nozzle status normal, perform wiper cleaning frequently. The ink cap and wiper function as follows. •…
-
Page 83
Chapter 4 Maintenance (When using suction wiper) Clean the • Wipe off so that no ink or cleaning solution remains on the rim of the cap rubber.If ink suction wiper. remains, nozzle missing or mixed color may occur. • Wipe off any ink on or around the wiper with a cleaning swab dipped… -
Page 84: Cleaning The Mist Filter
Chapter 4 Maintenance • If the stain strongly attached to the filter, such as Cleaning the mist filter the liquefaction of the ink attached to the filter, please replace the filter. ( P.4-21) Press the (MENU) in LOCAL mode. Press to select “MAINTENANCE”, and press the key.
-
Page 85: Nozzle Wash
Chapter 4 Maintenance Nozzle Wash Suction wipe Suction wipe Press the (MENU) in LOCAL mode. Press to select “MAINTENANCE”, and press the key. Area around wiper Area around wiper • MAINTENANCE MENU will be displayed. UJF-3042MkII/3042MkII EX UJF-3042MkII e/3042MkII EX e /6042MkII /6042MkII e Press the…
-
Page 86: Nozzle Wash (When Pr-200 Ink Using)
Chapter 4 Maintenance Press the (MENU) in LOCAL mode. Nozzle Wash (When PR-200 ink using) Press to select “MAINTENANCE”, • On models equipped with the PR-200, ink may clog the nozzle. Please check the Ver. on the label and press the key.
-
Page 87
Chapter 4 Maintenance Close the maintenance cover, and press Clean the tube once a week to prevent wiper key. tube clogging. (1) Fill the dropper with 3 cc cleaning solution. • Use the dropper scale for the liquid measure. (2) Fill the suction wiper with the cleaning solution from its mouth. -
Page 88: Washing The Ink Discharge Passage
Chapter 4 Maintenance Close the maintenance cover and press Washing the Ink Discharge Passage key. Wash the ink discharge passage regularly(about once a week) to prevent the head nozzles from clogging due to ink coagulation inside the passage. When the Machine Is Not Used for a Press the (MENU) in LOCAL mode.
-
Page 89: Sub Tank Maintenance
Chapter 4 Maintenance (3) Insert it in the original position by holding the protrusions at both ends of the wiper. Protrusion Press the key. (When using suction wiper) Clean the • Until wiper cleaning is competed, [COMPLETED suction wiper and around the wiper. (NEXT): ENT] is displayed on the screen.
-
Page 90: White Maintenance
Chapter 4 Maintenance Cleaning the Ink Head Perform it if a large amount of missing nozzle is not recovered or a nozzle missing occurs immediately after and the Area around It cleaning. Press the (MENU) in LOCAL mode. Because ink head employs very precise…
-
Page 91: Clean The Bottom Of The Led Lamp And The Bot- Tom Of The Mist Filter
Chapter 4 Maintenance Wipe ink sticking to the side of the head off Cleaning the bottom of the LED lamp and with a cleaning swab. the bottom of the mist filter. • Wipe off the ink sticking to the side of the head with a cleaning swab dipped in maintenance …
-
Page 92: Nozzle Recovery Function
Chapter 4 Maintenance Nozzle Recovery Func- Register the Nozzle number that needs tion NOZZLE RECOVERY and press key. (1) Select the registration number from 1 to 10 NOZZLE RECOVERY: When nozzles missing can not be by pressing [][] key and press the improved at specific points, other good nozzles can be [ENTER] key.
-
Page 93: Reset The Set Value
Chapter 4 Maintenance Reset the set value Solving the Ink Overflow Problem Press the (MENU) in LOCAL mode. Press the (MENU) in LOCAL mode. Press to select “MAINTENANCE”, Press to select “MAINTENANCE”, and press the key. and press the key. •…
-
Page 94: Automatic Maintenance Function
Chapter 4 Maintenance Automatic Mainte- Setting the Refreshing Intervals nance Function The refresh interval is set. Refresh is the operation to discharge some ink from the nozzle to prevent nozzle To use this machine comfortably, you can set various clogging. maintenances to be performed automatically.
-
Page 95: Replacing Consumables
To order replacement consumable items, contact your Protrusion local dealer or our service office. For more information on other consumable items, refer to our website. https://mimaki.com/supply/inkjet.html (When using rubber wiper) Replace the wiper/wiper absorber. The wiper and the wiper absorber are consumable. When the display indicates the warning message “!REPLACE…
-
Page 96
Chapter 4 Maintenance Press to select “MAINTENANCE”, • If the nozzle opening sinks down and is difficult to insert, support the tube from below by hand. and press the key. • MAINTENANCE MENU will be displayed. Press , and press the key. -
Page 97: Replacing The Mist Filter
Chapter 4 Maintenance Close the maintenance cover, and press Replacing the mist filter key. • After its initial operation, the machine returns to Press the (MENU) in LOCAL mode. LOCAL. Press to select “MAINTENANCE”, Replacing the mist filter box and press the key.
-
Page 98: Led Glass Replacement
Chapter 4 Maintenance Set the mist filter in the new mist filter box. Set the new mist filter box in its original position. Set the mist filter in the new mist filter box. Claw • Insert until it clicks into place, and confirm that the tabs are engaged.
-
Page 99: Replacing The Waste Ink Tank Before The Waste Ink Tank Confirmation Message Is Displayed
Chapter 4 Maintenance Discard waste ink • Put a cap on the waste ink tank removed. When the warning message «Check waste ink» is displayed on the display, please discard waste ink according to the following procedure. Press (MENU) in the local mode Replace the waste ink tank.
-
Page 100: If Check Wiper Waste Inktank Warning Appears
Chapter 4 Maintenance Discard wiper waste ink. If Check Wiper Waste Inktank Warning If the “Check wiper waste inktank” warning appears on the Appears(UJF-3042MkII/6042MkII only) local display, discard the waste ink as follows: Ink sucked up by wiping during head cleaning and other processes is collected in the wiper waste ink tank at the Press (MENU) in the local mode…
-
Page 101: Replacing The Waste Ink Tank Before The «Check Wiper Waste Inktank» Warning Is Displayed
Chapter 4 Maintenance Supplying antifreeze Return the wiper waste ink tank to its liquid location in the waste ink tank box. • If the rubber seal was removed along with the Refill the hot-water circulation tank in the head with wiper waste ink tank, be sure to refit the rubber antifreeze mixed liquid.
-
Page 102
• Use the recommended antifreeze liquid by and press the key. Mimaki. If not, the cooling device may be broken. (Supplied antifreeze liquid :1000cc x 2 bottles) • MAINTENANCE MENU will be displayed. • Do not touch the antifreeze liquid directly. If the… -
Page 103
Chapter 4 Maintenance Refill antifreeze mixed liquid. Connect the tube to the feed-water inlet. Press the key. • Inject the antifreeze mixed liquid, which is prepared in Step5, from the feed-water inlet. • Injection water slowly until the buzzer sounds. •… -
Page 104
Chapter 4 Maintenance 4-28… -
Page 105: Troubleshooting
Chapter 5 Troubleshooting This chapter describes the corrective measures to be taken for a phenomenon suspected to be trou- ble and the procedures to clear the error number displayed on the LCD. Troubleshooting ……….. 5-2 Warning / Error Messages ……5-4 Power does not turn on ……
-
Page 106: Power Does Not Turn On
Chapter 5 Troubleshooting Troubleshooting Take appropriate actions as described below before taking the trouble as a failure. If still the problem is not solved after troubleshooting, contact your local distributor, our sales office, or service center. Power does not turn on In most cases, this is due to improper connection of the power cable for the machine or computer.
-
Page 107: Nozzle Is Clogged
If nozzles are clogged, the machine must be repaired by MIMAKI’s service engineer. When the ink leakage occurs In case of ink leakage, please turn off the main power, unplug the power cable and contact your local distributor,…
-
Page 108: Warning / Error Messages
Chapter 5 Troubleshooting Warning / Error Messages If some trouble occurs, the buzzer sounds and the display shows a corresponding error message. Take an appropriate remedy for the displayed error. Warning messages Errors when performing operations Message Cause Solution • Return to LOCAL and make sure that the The motor is «OFF».
-
Page 109
Chapter 5 Troubleshooting Message displayed in LOCAL Message Cause Solution Multiple ink errors (unusable ink) occur and Can’t print/BTL ink can not be supplied (printed, cleaned, • Replace with a new ink bottle and IC chip. etc.). • Check the waste ink amount in the waste ink tank. -
Page 110
Chapter 5 Troubleshooting Message Cause Solution Due to an NCU-related error during nozzle NCU ERROR check, printing was stopped and the nozzle Nozzle check OFF check function was turned «OFF». • Contact your local distributor, our sales !Can’t PRINT/HEAD ERROR Print head is defective. -
Page 111: Error Messages
Chapter 5 Troubleshooting Error messages When an error message is displayed, eliminate the error according to the chart below. When displaying again, contact your local distributor, our sales office, or service center. Message Cause Solution ERROR 108 Abnormal connection of the print head. HD CONNECT [12345678] ERROR 108…
-
Page 112
Chapter 5 Troubleshooting Message Cause Solution ERROR 1de SLIDER PCB V1R2 • Turn off the power on the machine and ERROR 1e0 An error occurred in the power supply of the turn it on after a while. SLIDER PCB V3R3 slider T PCB. -
Page 113
Chapter 5 Troubleshooting Message Cause Solution ERROR 533 • Turn off the power on the machine and X Origin was not detected correctly. X ORIGIN turn it on after a while. • When displaying again, contact your ERROR 541 local distributor, our sales office, or Pump sensor detection error PUMP MOTOR SENSOR service center. -
Page 114
Chapter 5 Troubleshooting Message Cause Solution ERROR 658 The NCU sensor sensitivity is falling. NCU SENSOR LV LOW • Replacement of the NCU is recom- ERROR 65b mended. NCU Sens Adj Err H • Contact your local distributor, our sales Cannot adjust the sensor sensitivity. -
Page 115
Chapter 5 Troubleshooting SYSTEM HALT Message Solution Turn off the power on the machine and turn it on after a while. SYSTEM HALT (*) Check the number and contact your local distributor to call for service. 000 :MESSAGE (“000” is the error No.) 5-11… -
Page 116
Chapter 5 Troubleshooting 5-12… -
Page 117: Appendix
Chapter 6 Appendix This chapter contains the lists of the specifications and functions of this machine. Specifications……….6-2 Sheet for inquiry ………..6-6 Machine specifications ……. 6-2 LICENSE Library……….6-7 Ink specifications……..6-4 Setting orders of ink bottles ……6-5…
-
Page 118: Specifications
Chapter6 Appendix Specifications Machine specifications Item UJF-3042MkII/3042MkII e UJF-3042MkII EX/3042MkII EX e UJF-6042MkII/UJF-6042MkII e Method Drop-on-demand piezoelectric print heads Print head Specification 3 head, 6 nozzles 4 head, 8 nozzles x-dpi: 600, 900, 1200 Resolution y-dpi: 600, 1200 600 x 600 8, 10 pass Drawing 600 x 900…
-
Page 119: Ink Specifications
Chapter6 Appendix Ink specifications Specifications Item Supply Ink bottle Ink type LH100,LUS120,LUS150, LUS200, LUS210(CL only), PR200 Black ink Cyan ink Magenta ink Yellow ink Color White ink Clear ink Primer ink (PR-200) Light Cyan ink (UJF-3042 MkII EX/UJF-6042MkII Only) Light Magenta ink (UJF-3042 MkII EX/UJF-6042MkII Only) Ink capacity 1 L / 250 ml The period is printed on the ink bottle.
-
Page 120: Setting Orders Of Ink Bottles
Chapter6 Appendix Setting orders of ink bottles • The order of the ink bottles that are set differs depending on the ink set that is used. UJF-3042MkII/6042MkII UJF-3042MkII e/6042MkII e • UJF-3042MkII EX/UJF-6042MkII Ink arrangement Ink set 6 -color + White + White 6 -color + White + Primer 6 -color + Whiter + Clear 6 -color + Clear + Primer…
-
Page 121: Sheet For Inquiry
Chapter6 Appendix Sheet for inquiry Use this sheet for troubles and abnormal functions of the machine. Fill in the following necessary items, and then fax the sheet to our sales office. Company name Person in charge Telephone number machine model Operating OS Machine information Error message…
-
Page 122
Chapter6 Appendix… -
Page 123: License Library
Chapter6 Appendix LICENSE Library Mimaki printer Firmware Copyright @2020 MIMAKI ENGINEERING CO.,LTD. All rights reserved. This product contain open source software listed in the tables below. Component License StarterWare for ARM® based TI Sitara Processors BSD-TI The following license terms and conditions shall apply to the open source software listed in the table above: BSD-TI Copyright (C) 2010 Texas Instruments Incorporated — http://www.ti.com/…
-
Page 124
Chapter6 Appendix… -
Page 125
UJF-3042MkIISeries/UJF-6042MkIISeries Operation Manual May, 2022 MIMAKI ENGINEERING CO.,LTD. 2182-3 Shigeno-otsu, Tomi-shi, Nagano 389-0512 JAPAN D203043-42-1005022… -
Page 126
© MIMAKI ENGINEERING CO., LTD.2016…
- Manuals
- Brands
- MIMAKI Manuals
- Printer
- UJF-3042 MkII
- Original instructions manual
-
Contents
-
Table of Contents
-
Troubleshooting
-
Bookmarks
Quick Links
MIMAKI ENGINEERING CO., LTD.
URL: http://mimaki.com/
D203043-12
Original instructions
Related Manuals for MIMAKI UJF-3042 MkII
Summary of Contents for MIMAKI UJF-3042 MkII
-
Page 1
MIMAKI ENGINEERING CO., LTD. URL: http://mimaki.com/ D203043-12 Original instructions… -
Page 2: Table Of Contents
Table of contents CAUTION ………………v DISCLAIMER OF WARRANTY …………v Requests ………………..v FCC Statement (USA) …………….v Interference to televisions and radios ……….. v CDRH REGULATION …………….v Foreword ………………vi On this operation manual …………..vi For safe operation …………….vi Symbols ………………..
-
Page 3
Setting the media ……………..2-4 Set the media in another method …………2-6 Test printing ……………..2-7 Perform test printing with the test pattern for checking white ink ..2-8 Head Cleaning …………….2-8 About head cleaning…………….2-8 Perform head cleaning depending on the test printing result …. 2-8 Printing an image from source data ……….2-9 Starting the printing operation ………… -
Page 4
Setting a LANGUAGE …………..3-25 Setting a Ionizer (Option) …………..3-25 Recognize connection options …………3-25 Initializing the Settings…………..3-25 About NOZZLE CHECK MENU ……….3-26 INFORMATION MENU table…………3-26 Printing Check Flow ……………. 3-27 Printing Operations at “Nozzle Missing” Judgment and Error Occurrence……………… -
Page 5
Chapter 5 Troubleshooting Troubleshooting …………….5-2 Power does not turn on …………..5-2 The machine does not start printing ……….5-2 Image quality is poor …………….. 5-2 Nozzle is clogged …………….5-3 Ink bottle warning appears …………..5-3 When the ink leakage occurs …………5-3 Warning / Error Messages …………5-4 Warning messages……………. -
Page 6: Caution
The product can interfere with radios and televisions if set up or commissioned THIS LIMITED WARRANTY OF MIMAKI SHALL BE THE under improper conditions. The product is not guaranteed SOLE AND EXCLUSIVE WARRANTY AND IS IN LIEU…
-
Page 7: Foreword
Foreword Foreword For safe operation Congratulations on your purchase of a MIMAKI “UJF- Symbols 3042MkII/6042MkII ” model of UV ink jet printer. UV Inkjet Printer UJF-3042MkII/6042MkII uses ultraviolet Symbols are used in this Operation Manual for safe ray curing ink (UV ink).
-
Page 8
MIMAKI for (2) If mounting a valve on the exhaust outlet, repair. be sure to open the valve when using the •… -
Page 9
For safe operation Never do the following WARNING Abnormal event occurs WARNING • If the machine is used under an abnormal condition where the machine produces smoke Do not disassemble or remodel the machine or unpleasant smell, fire or electric shocks can •… -
Page 10: Precautions For Use
For safe operation WARNING CAUTION • Be sure to wear goggles and gloves for Ink bottles handling the antifreeze liquid. • If the ink bottle is moved from a cold place to a warm place, leave it in a place of use for three hours or more and use it.
-
Page 11
UV irradiation and UV power supply units used. Never use those UV devices other than those recommended by Mimaki. We would take no responsibility for any troubles caused through the use of a UV devices not recommended by Mimaki. -
Page 12
For safe operation Cautions on Installation CAUTION A place exposed to direct On an inclined surface sunlight A place exposed to direct air A place that vibrates flow from an air conditioner or the like. A place where temperature or Around a place where fire humidity varies significantly is used… -
Page 13: Safety Interlock
For safe operation Safety interlock This machine is equipped with interlocks to terminate the operation for your safety when the cover opens during printing etc. (red circle parts in the figure below). Front cover *1: Although the carriage stops when you open the front cover, the interlock is not activated.
-
Page 14: Position Of The Warning Label
Position of the warning label Position of the warning label Warning labels are adhered on this machine. Be sure to fully understand the warnings given on the labels. In the case where any of the warning label has become so soiled that the warning message is illegible or has come off, purchase a new one from your local distributor or our office.
-
Page 15
Position of the warning label Order No. Label Order No. Label (1)M903330 (7)M913694 (2)M913419 (8)M913425 (3)M913563 (9)M913706 (UJF-6042MkII) (4)M913565 (10)M903239 (UJF-3042MkII) (5)M907935 (11)M913610 (6)M913423… -
Page 16: Ec Declaration Of Conformity
Serial No. covered AABCDEEE AA: S4, B: 0 to 9, C: any alpha-numeric, D: any alphabet, EEE: 001 to 999 Manufacturer MIMAKI ENGINEERING CO.,LTD. 2182-3, Shigeno-otsu, Tomi, Nagano, 389-0512, JAPAN Authorised Compiler in the Community MIMAKI EUROPE B.V. Stammerdijk 7E 1112 AA Diemen, The Netherlands…
-
Page 17: Before Use
Chapter 1 Before Use This chapter describes the items required to understand before use, such as the name of each part of the machine or the installation procedures. Installing the machine ……..1-2 Connecting the cables……… 1-10 Where to install the machine ……. 1-2 Connecting the USB2.0 interface cable ..1-10 Moving this machine ……..
-
Page 18: Chapter 1 Before Use
Chapter 1 Before Use Before moving this machine, install the Installing the machine handles for transporting. (two places) Insert the handles into this machine, and fix them tightening screws. Where to install the machine Secure sufficient space for installation before assembling this machine.
-
Page 19: Configuration And Function
Chapter 1 Before Use Configuration and Function Front Ink supply unit Front cover Insert ink bottles here. Open and close this cover when P.1-12) replacing or setting the media. Carriage ( P.1-4) The carriage is provided with the print head. Maintenance Cover Open the cover during maintenance.
-
Page 20: Rear
Chapter 1 Before Use Rear EMERGENCY SWITCH One EMERGENCY switch is placed on the front face of USB socket the unit and one is placed on the right side in the rear part Connect USB of the cover. interface cable. When stopping the machine for safety reason, press the switch.
-
Page 21: Indicator Light Unit
Chapter 1 Before Use Indicator light unit The indicator light unit shows the status of the machine in the three colors light. • Indicator light unit on 3042MkII is optional. • To your use this option, you will need a mounting work by our service engineers. Please note that the optional accessories can not be attached by the customer.
-
Page 22: Operation Panel
Chapter 1 Before Use Operation Panel The operation panel is used for setting of printing method and each operation. Changes over the functions of the function keys ([FUNC1]–[FUNC3]). Display Displays the following items: Press this to set various functions or •…
-
Page 23
Chapter 1 Before Use *2 : Functions assigned to [FUNC1] to [FUNC3] Contents of functions assigned to [FUNC1] to [FUNC3] are described below. Icon Contents Displays “MENU” for setting functions. Displays maintenance functions such as test print, cleaning, etc. Shifts to Remote from LOCAL and starts printing. Executes data clear. -
Page 24: About Table
Chapter 1 Before Use About table It is necessary to adjust the table height depending on the media thickness because various media can be set for printingprinting. The specification of each table is as less: Table UJF-3042MkII UJF-6042MkII Acceptable media 5kg and less 8kg and less weight…
-
Page 25
Chapter 1 Before Use • UJF-6042MkII Vacuum Table • A tap hole ( ○ ) can be used by the jig. • B tap hole may be deleted without notice. • Do not protrude the jig from the edge of the table. -
Page 26: Instructions For Using The Table
Chapter 1 Before Use Connecting the cables Instructions for using the table When using jigs, set the width to A and the depth to Connecting the USB2.0 interface 464mm or less. If you exceed the dimensions above, the table cannot be cable moved.
-
Page 27: Connecting The Lan Cable
Chapter 1 Before Use Notes on peripheral devices in USB high speed mode If connecting directly to the printer When a peripheral device (USB memory or USB HDD) to be operated in USB high speed mode is connected to the same personal computer that a UJF-3042MkII/6042MkII machine is connected to, the USB device may not be recognized.
-
Page 28: About Ink Bottle
• Never refill the ink bottles with ink. This may result in troubles. Light cyan(only for 6042MkII) MIMAKI will not bear any responsibility for any Light magenta(only for 6042MkII) damage caused by the use of the ink bottles refilled with ink.
-
Page 29: Setting Ink Bottles
Chapter 1 Before Use Setting ink bottles • After the cap is removed, if a seal is attached to the mouse of the bottle, open the seal using a cutter knife. When opening the seal, make four slices (eight sections) as shown in the figure below Take out the ink bottle, and slowly shake it and fold the flaps into the bottle.
-
Page 30
Chapter 1 Before Use (2) Tighten the specialized cap using the Set the ink bottle on the tank. tightening jig. • Set the ink bottle while moving the lever on the tank completely to the right. Tightening jig • Do not ever rotate the ink bottle at all after setting it into the tank. -
Page 31
Chapter 1 Before Use Replace the ink bottle About IC chip • The IC chip has information of IC chip • Be sure to use protective goggles. ink color, remaining amount of Perform as follows when [INK END] or [INK NEAR END] ink, expiration data, etc. -
Page 32
Chapter 1 Before Use If the light-blocking cover comes off Use the wiping filter to wipe off any ink. If the light-blocking cover comes off, light striking the inside of the tank can result in the ink curing. Perform the following procedures if the light-blocking cover comes off. -
Page 33: About Media
Chapter 1 Before Use About Media About ink expiration date The ink bottle has its expiration date. The sizes of media that can be used and the method of You can use the bottle in two months after the expiration handling are described here.
-
Page 34: Menu Mode
Chapter 1 Before Use Menu mode This machine has three modes. Each mode is described below. Local Local is a mode in printing preparation state. All keys are available. Receiving of data from the computer is allowed, however, printing is not executed. The following operations are allowed in the local.
-
Page 35: Basic Operations
Chapter 2 Basic Operations This chapter describes procedures and setting methods for ink and media preparation, and printing. Operation flow ……….2-2 Perform head cleaning depending on the test printing result ……….2-8 Turning the Power ON/OFF ……2-3 Printing an image from source data ….2-9 Turning the Power ON ……..
-
Page 36: Chapter 2 Basic Operations
Chapter 2 Basic Operation Operation flow Turning the Power ON See “Turning the Power ON” ( P.2-3) Setting the media See “Setting the media” ( P.2-4) Test printing See “Test printing” ( P.2-7) Head Cleaning See “Head Cleaning” ( P.2-8) Printing an image from source See “Printing an image from source data”…
-
Page 37: Turning The Power On/Off
Chapter 2 Basic Operation Turning the Power ON/OFF Turning the Power OFF When having ended the operation of the machine, turn the Turning the Power ON power OFF by pressing the [END/POWER] key. Check the following items when turning the power OFF. •…
-
Page 38: Setting The Media
Chapter 2 Basic Operation Setting the media Cautions about Turning the Power OFF Do not turn the main power switch OFF. • The peripheral parts of the media could roll up due When the main power switch is ON, the power to heat.
-
Page 39
Chapter 2 Basic Operation Change the Table Height Attach the table spacer. Depending on the media thickness, change the height of the table. Work height 53 mm or less 53 to 103 mm 103 to 153 mm 2 pieces 1 piece Table spacer none Attach the assembled table on the main… -
Page 40: Set The Media In Another Method
Chapter 2 Basic Operation Changing origin Set the media in another method The default origin position can be changed by pressing You can lower the table to set media more easily. JOG keys [][][][]. • The origin can also be changed from «ORIGIN Press the key in (MENU)
-
Page 41: Test Printing
Chapter 2 Basic Operation Test printing Check result of printing. • When the result is normal, finish the operation. P.2-9) Make test printing in the specified direction to check • When the result is abnormal, execute head whether there is nozzle clogging or other printing failures cleaning.
-
Page 42: Perform Test Printing With The Test Pattern For Checking White Ink
Chapter 2 Basic Operation Head Cleaning Perform test printing with the test pattern for checking white ink About head cleaning It makes easier to check if print the background to the white ink locations in the pattern. Check the printed test pattern result and perform cleaning depending on the status.
-
Page 43: Printing An Image From Source Data
Chapter 2 Basic Operation Printing an image from Taking out the media after completion of printing. source data (1) When you made vacuum ON, Press the [FUNC1] (VACUUM) to turn the adsorption OFF. Starting the printing operation (Only for UJF-6042MkII) •…
-
Page 44: Checking Printing Data That Is Being Received Or Has Been Received
Chapter 2 Basic Operation Checking printing data that is being received or has been received When printing is interrupted or print data is received on the local mode, the warning message «DATA REMAIN» appears on the display. At this time, if you press the [FUNC3] (REMOTE) migrate to the remote, printing is started or restarted.
-
Page 45
Chapter 3 Setup This chapter describes the various setting of this machine. About Head Height MENU ……3-2 About MACHINE SETUP MENU ….3-14 Head Height MENU table……3-2 MACHINE SETUP MENU table….3-15 Setting the Media Thickness ……. 3-3 Setting a AUTO Power-off ……3-16 Setting the HEAD GAP ……. -
Page 46: Chapter 3 Setup
Chapter 3 Setup About Head Height MENU On SETUP MENU, you can set the print conditions to match the media you usually use. LOCAL 10 : 22 0.0mm 0.0mm 53.0mm TEST PRINT / MENU REMOTE CLEANING : Press this to select Head Height MENU, or to switch to the previous screen. : Press this to switch to the next screen.
-
Page 47: Setting The Media Thickness
Chapter 3 Setup Press to select the mode, and Setting the Media Thickness press the key. If the media thickness is changed, Table Height is also • Set value: ON, OFF changed. • When ON is selected: You can select the behavior. Press the (MENU) Select one from the three types below:…
-
Page 48: About Origin Setup Menu
Chapter 3 Setup About ORIGIN SETUP MENU Common settings are functions for using this machine easily. The following items can be set in Origin settings. LOCAL 10 : 22 0.0mm 0.0mm 53.0mm TEST PRINT / MENU REMOTE CLEANING : Press this to select ORIGIN SETUP MENU, or to switch to the previous screen. : Press this to switch to the next screen.
-
Page 49: Setting The X Offset (Rem)
Chapter 3 Setup Setting the X offset (REM) Setting the X offset (LOC) Use the following steps to accurately set the X origin of Use the following steps to accurately set the X origin of the online print. the built-in pattern such as test print. Press the (MENU) in LOCAL.
-
Page 50: Setting The Z Origin
Changing the origin using the JOG Setting the Z origin keys You can also change the origin using the JOG keys. Press the (MENU) in LOCAL. Changing with the JOG keys Press to select “SET ORIGIN” , and press the key.
-
Page 51
Chapter 3 Setup… -
Page 52: About Setup Menu
Chapter 3 Setup About SETUP MENU On SETUP MENU, you can set the print conditions to match the media you usually use. LOCAL 10 : 22 0.0mm 0.0mm 53.0mm TEST PRINT / MENU REMOTE CLEANING : Press this to select SETUP MENU, or to switch to the previous screen. : Press this to switch to the next screen.
-
Page 53: Setup Menu Table
Chapter 3 Setup SETUP MENU table • For each setting item below, you can set it so that the machine may operate according to the value specified when you printed from your RIP software in the connected host PC. • Set Item : FEED COMP./INK LAYER/Logical Seek/REFRESH •…
-
Page 54: Setting Of Media Correction
Chapter 3 Setup Setting of Media Correction Setting of LOGICAL SEEK A pattern for media correction is printed and a feeding The head’s operation varies depending on the LOGICAL rate is corrected. SEEK settings, as shown in the figure below. •…
-
Page 55: Setting Of Ink Layers
Chapter 3 Setup Press the (>>) . Setting of INK LAYERS Set the number of times for over painting. Press to select “UV MODE” , and Press the (3 times) (MENU) press the key. key in LOCAL. Press to select a set value, and •…
-
Page 56: Setting Of Fan Mode
Chapter 3 Setup Setting of FAN MODE Setting of PRINT FLUSHING LEVEL You can set whether the vacuum function to fix the media When using a clear acrylic jig and so on, the ink may set on the table is performed automatically or you perform splash on the print result as the ink on the nozzles it manually.
-
Page 57: Setting Of Maps4
Setting of MAPS4 end the setting. If performing media correction does not resolve feeding stripes, use the MAPS (Mimaki Advanced PassSystem) function to disperse the pass boundary to make the feeding stripes less visible. Press the…
-
Page 58: Setting Of The Misregistration Adjust
Chapter 3 Setup Press to select the resolution to Setting of the Misregistration adjust adjust , and press the key. It is used when the mis-registration occurs at printing the Feed direction: 600dpi/900dpi/1200dpi color/spot color version. Scan direction : 600dpi/1200dpi Press to select “Print”…
-
Page 59
Chapter 3 Setup 3-15… -
Page 60: About Machine Setup Menu
Chapter 3 Machine setting About MACHINE SETUP MENU Common settings are functions for using this machine easily. The following items can be set in Machine settings. LOCAL 10 : 22 0.0mm 0.0mm 53.0mm TEST PRINT / MENU REMOTE CLEANING : Press this to select MACHINE SETUP MENU, or to switch to the previous screen. : Press this to switch to the next screen.
-
Page 61: Machine Setup Menu Table
Chapter 3 Machine setting MACHINE SETUP MENU table Function name Set value Default Meaning If no operation is input for the specified period of AUTO Power-off OFF / 10min to 600min 30min time, the power is automatically turned off. TIME ( P.3-18) +4h ~ -20h Japan time…
-
Page 62: Setting A Auto Power-Off
Chapter 3 Machine setting Setting a AUTO Power-off Setting Time When no operation has been performed for the set time, You can set time of your country (time difference). the power supply is automatically turned “OFF”. Press the (MENU) (>>) Press the (MENU) in LOCAL.
-
Page 63: Setting A Key Buzzer
Configurator”, the tool to perform network setting of Mimaki’s product. To download the Network Configurator, Press the (MENU) (>>) check » Driver / Utility» on the download page at Mimaki key in LOCAL. Engineering (http://mimaki.commimaki.com/download/). • MACHINE SETUP MENU will be displayed. Press the (MENU) (>>)
-
Page 64: Setting Event Mail Function
Configurator”, the tool to perform network setting of Mimaki’s product. To download the Network Configurator, check » Driver / Utility» on the download page at Mimaki • To reflect network setting, once turn off the power Engineering (http://mimaki.com/download/).
-
Page 65
Chapter 3 Machine setting Set the event to send an event mail Set the e-mail address Press the Press the (MENU) (>>) (MENU) (>>) key in LOCAL. key in LOCAL. • MACHINE SETUP MENU will be displayed. • MACHINE SETUP MENU will be displayed. Press to select “EVENT MAIL”… -
Page 66
Chapter 3 Machine setting Set the server Press to select “USER NAME” , and press the key. Press the (MENU) (>>) key in LOCAL. Press to set User Name, • MACHINE SETUP MENU will be displayed. and press the key. •… -
Page 67
Chapter 3 Machine setting Send a test e-mail Press the (MENU) (>>) key in LOCAL. • MACHINE SETUP MENU will be displayed. Press to select “EVENT MAIL” , and press the key. Press the key. (>>) • “TRANSMIT TEST EXECUTE” will be displayed. Press the key. -
Page 68
Chapter 3 Machine setting • The sent result of the test e-mail is the result of e-mail sending process performed by this machine to the e-mail server. It does not indicate that the e-mail was received at the address. • If the spam e-mail filter etc. has been set in the terminal in which e-mails are received, even if “Sending has been completed”… -
Page 69: Setting A Language
Chapter 3 Machine setting Setting a LANGUAGE Recognize connection options You can change the displayed language. Recognize the option when installing the Kebab option. Press the (MENU) (>>) key Press the (MENU) (>>) key in LOCAL. in LOCAL. Press to select “MACHINE Press to select “MACHINE SETUP”, and press the…
-
Page 70: About Nozzle Check Menu
Chapter 3 Confirming Machine Informationa About NOZZLE CHECK MENU Set operations concerning the nozzle missing detection function. UJF-3042MkII is displayed only when the NCU option is installed. LOCAL 10 : 22 0.0mm 0.0mm 53.0mm TEST PRINT / MENU REMOTE CLEANING : Press this to select NOZZLE CHECK MENU, or to switch to the previous screen.
-
Page 71: Printing Check Flow
Chapter 3 Confirming Machine Information Printing Check Flow Nozzle check is conducted according to the following flow at the start of printing. • Turn the “Printing Check” setting ON to be enabled. • Only perform RETRY COUNT and Printing Check settings when the settings are enabled. nozzle check …
-
Page 72: Setting The Printing Check
Chapter 3 Confirming Machine Informationa Setting the Printing Check Setting the NOZZLE RECOVERY Select ON when you want to conduct nozzle check at the set this if you want to conduct automatic nozzle recovery start of online printing. when nozzle missing is detected. Press the (MENU) (3 times)
-
Page 73
Chapter 3 Confirming Machine Information 3-29… -
Page 74: About Information Menu
Chapter 3 Information Menu About INFORMATION MENU The information of this machine can be confirmed. The following items can be confirmed as machine information. LOCAL 10 : 22 0.0mm 0.0mm 53.0mm TEST PRINT / MENU REMOTE CLEANING : Press this to select INFORMATION MENU, or to switch to the previous screen. : Press this to switch to the next screen.
-
Page 75: Displaying The Information
Displaying the Information Press the (MENU) key in LOCAL. times) • INFORMATION MENU will be displayed. Press to select a information. • Refer to the “INFORMATION MENU”, and select the information to be displayed. Press the key. • If you selected [LIST] in step 2, the machine’s settings will be printed.
-
Page 76
3-32… -
Page 77
Chapter 4 Maintenance This chapter describes the items required to use this machine more comfortably, which are the methods for the daily care, the maintenance of the ink bottles etc. Routine maintenance ……..4-2 Nozzle Recovery Function …….4-13 When this machine is left unused for a long Reset the set value ……..4-14 time …………. -
Page 78: Chapter 4 Maintenance
Chapter 4 Maintenance Routine maintenance Cleaning exterior surfaces Be sure to conduct maintenance works for the machine If exterior surfaces of the machine is dirty, dampen a soft depending on operation frequency or periodically so as to cloth with water or a neutral detergent diluted with water, use the machine for a long time while keeping its drawing squeeze it and wipe the surfaces.
-
Page 79: Cleaning The Table
Chapter 4 Maintenance Cleaning the table The table is easy to become dirt with lint, paper dust or the like after cutting media. For a conspicuous stain, wipe it off with a soft-hair brush, a dry cloth, a paper towel or the like. •…
-
Page 80: About Maintenance Menu
Chapter 4 Maintenance About MAINTENANCE MENU This provides various settings for doing maintenance on the machine. The following items can be set in Maintenance settings. LOCAL 10 : 22 0.0mm 0.0mm 53.0mm TEST PRINT / MENU REMOTE CLEANING : Press this to select MAINTENANCE MENU, or to switch to the previous screen. : Press this to switch to the next screen.
-
Page 81: Maintenance Menus At-A-Glance
Chapter 4 Maintenance MAINTENANCE MENUs at-a-glance Item Set value Meaning For carrying out maintenance on the carriage and station periphery. CARRIAGE OUT Moves the carriage out, for carrying out cleaning of the cap periphery, P.4-6) head, wipers, etc. REPLACE WasteInkTank Resets or corrects the used count for the waste ink tank.
-
Page 82: Maintaining The Capping Station
Chapter 4 Maintenance Maintaining the Capping Open the right maintenance cover. Station Maintain the ink cap, wiper, etc. located in the capping station. (SATION MAINT.) • To keep the nozzle status normal, perform wiper cleaning frequently. The ink cap and wiper function as follows. •…
-
Page 83: Cleaning The Mist Filter
Chapter 4 Maintenance Clean the cap rubber. Open the left maintenance cover. • Wipe off the ink sticking to the cap rubber with a cleaning swab dipped in maintenance solution for maintenance. • Wipe off so that maintenance solution for maintenance will not remain.
-
Page 84: Nozzle Wash
Chapter 4 Maintenance Fill up the cap with cleaning solution for Nozzle Wash maintenance. • Suck maintenance solution into a dropper and fill Press the (MENU) in LOCAL. up the cap with it. Fill up the cap with maintenance solution on the verge of overflow from the cap.
-
Page 85: Washing The Ink Discharge Passage
Chapter 4 Maintenance Close the maintenance cover and press Washing the Ink Discharge Passage key. Wash the ink discharge passage regularly(about once a week) to prevent the head nozzles from clogging due to ink coagulation inside the passage. Press the (MENU) in LOCAL.
-
Page 86: When The Machine Is Not Used For A Long Time
Chapter 4 Maintenance Clean the wiper and the bracket. When the Machine Is Not Used for a Long Time (1) Open the maintenance cover then pull out it by holding projections at both ends of the When the machine is not going to be used for a week or wiper.
-
Page 87: Sub Tank Maintenance
Chapter 4 Maintenance Fill up the cap with cleaning solution for Sub tank maintenance maintenance. Perform it if a large amount of missing nozzle is not • Suck maintenance solution into a dropper and fill recovered or a nozzle missing occurs immediately after up the cap with it.
-
Page 88: Cleaning The Ink Head And The Area Around It
Chapter 4 Maintenance Cleaning the Ink Head Wipe ink sticking to the side of the head off with a cleaning swab. and the Area around It • Wipe off the ink sticking to the side of the head with a cleaning swab dipped in maintenance Because head employs…
-
Page 89: Nozzle Recovery Function
Chapter 4 Maintenance Nozzle Recovery Function Register the Nozzle number that needs NOZZLE RECOVERY and press NOZZLE RECOVERY: When nozzles missing can not be key. improved at specific points, other good nozzles can be (1) Select the registration number from 1 to 10 used as alternatives for printing.
-
Page 90: Reset The Set Value
Chapter 4 Maintenance Reset the set value Solving the Ink Overflow Problem Press the (MENU) in LOCAL. Press the (MENU) in LOCAL. Press to select “MAINTENANCE”, Press to select “MAINTENANCE”, and press the key. and press the key. • MAINTENANCE MENU will be displayed. •…
-
Page 91: Automatic Maintenance Function
Chapter 4 Maintenance Automatic Maintenance Setting the Refreshing Intervals Function The refresh interval is set. Refresh is the operation to discharge some ink from the nozzle to prevent nozzle To use this machine comfortably, you can set various clogging. maintenances to be performed automatically. Press the (MENU) in LOCAL.
-
Page 92: Replacing Consumables
Chapter 4 Maintenance Replacing consumables Remove the wiper. • Pull out the wiper by holding the protrusions at its Replacing the wiper / wiper absorber both ends. Projection The wiper (SPA-0271) and the wiper absorber (SPC- 0830) are consumable. When the display indicates the warning message “!REPLACE WIPER/ABSORBER”, it is necessary to check and replace the wiper and wiper absorber immediately with a new one.
-
Page 93: Replacing The Mist Filter
Chapter 4 Maintenance Close the maintenance cover, and press Replacing the mist filter key. Press the (MENU) in LOCAL. • After its initial operation, the machine returns to LOCAL. Press to select “MAINTENANCE”, If a Waste Ink Tank Confirmation and press the key.
-
Page 94: Replacing The Waste Ink Tank Before The Waste Ink Tank Confirmation Message Is Displayed
Chapter 4 Maintenance Replace the waste ink tank with Replace the waste ink tank. another (1) Prepare a new waste ink tank (SPA-0173). (2) Insert the waste ink tank by holding a handle of the tank. The warning message “Check waste ink” is displayed.
-
Page 95: Supplying Antifreeze Liquid
• Use the recommended antifreeze liquid(SPC- Water heating 0394) by Mimaki. If not, the cooling device may be device broken. (Supplied antifreeze liquid :1000cc x 2 bottles) • Do not touch the antifreeze liquid directly. If the antifreeze liquid settles on your skin or clothes, immediately wash it off with soap and water.
-
Page 96: Supplying Antifreeze Liquid
Chapter 4 Maintenance Refill antifreeze mixed liquid. Supplying antifreeze liquid If an error of lack of water occurs, supply antifreeze liquid. Press the (MENU) in LOCAL. Press to select “Maintenance”, and press the key. • MAINTENANCE MENU will be displayed. Press to select “Water FillUp”, •…
-
Page 97: Troubleshooting
Chapter 5 Troubleshooting This chapter describes the corrective measures to be taken for a phenomenon suspected to be trou- ble and the procedures to clear the error number displayed on the LCD. Troubleshooting …………….5-2 Power does not turn on …………..5-2 The machine does not start printing ……….
-
Page 98: Chapter 5 Troubleshooting
Troubleshooting Take appropriate actions as described below before taking the trouble as a failure. If still the problem is not solved after troubleshooting, contact your dealer or an office of MIMAKI. Power does not turn on In most cases, this is due to improper connection of the power cable for the machine or computer. Check that the power cable is connected properly.
-
Page 99: Nozzle Is Clogged
If nozzles are clogged, the machine must be repaired by MIMAKI’s service engineer. When the ink leakage occurs If the ink leakage occurs, unplug the power plug to turn off the main power switch, and contact our service office or distributor.
-
Page 100: Warning / Error Messages
Chapter 5 Troubleshooting Warning / Error Messages If some trouble occurs, the buzzer sounds and the display shows a corresponding error message. Take an appropriate remedy for the displayed error. Warning messages Errors when performing operations Message Cause Solution • Return to LOCAL and make sure that the The motor is off.
-
Page 101
Chapter 5 Troubleshooting Message displayed in LOCAL Message Cause Solution • Check the waste ink amount in the waste ink tank. The waste ink tank count has exceeded the Check waste ink • Execute maintenance and waste ink tank specified value. replacement, and reset the waste ink amount. -
Page 102: Error Messages
Chapter 5 Troubleshooting Error messages When an error message is displayed, eliminate the error according to the chart below. If the same error message appears again, contact your dealer or an office of MIMAKI to call for service. Message Cause…
-
Page 103
Chapter 5 Troubleshooting Message Cause Solution ERROR 1de SLIDER PCB V1R2 • Turn off the power button to the machine ERROR 1e0 An error occurred in the power supply of the and turn it on after a while. SLIDER PCB V3R3 slider T PCB. -
Page 104
Chapter 5 Troubleshooting Message Cause Solution • Replace to the new ink bottle. ERROR 602 • In this case, please replace the ink IC «INK END» (Usage prohibited、Available INK BOTTLE END only during cleaning with a 4-color ink set.) with a new one which comes with a bottle. -
Page 105
Chapter 5 Troubleshooting Message Cause Solution ERROR 658 The NCU sensor sensitivity is falling. NCU SENSOR LV LOW • Replacement of the NCU is recom- ERROR 65b mended. NCU Sens Adj Err H • Contact our service desk or your local Cannot adjust the sensor sensitivity. -
Page 106
Chapter 5 Troubleshooting 5-10… -
Page 107
Chapter 6 Appendix This chapter contains the lists of the specifications and functions of this machine. Specifications ………………6-2 Machine specifications …………..6-2 Ink specifications …………….6-3 Setting orders of ink bottles ………….6-4 Sheet for inquiry …………….6-5… -
Page 108: Chapter 6 Appendix
Chapter6 Appendix Specifications Machine specifications Item UJF-3042MkII UJF-6042MkII Method Drop-on-demand piezoelectric print heads Print head Specification 3 head, 2 staggered 4 head, 2 staggered x-dpi: 600, 900, 1200 Resolution y-dpi: 600, 1200 600 x 600 8, 10 pass Drawing 600 x 900 12, 16 pass mode 1200×1200…
-
Page 109: Ink Specifications
Chapter6 Appendix Ink specifications Specifications Item Supply 1L Ink bottle / 250 ml Ink Black ink Cyan ink Magenta ink Color Yellow ink White ink Clear ink Primer ink (PR-200) Ink capacity 1 L / 250 ml The period is printed on the ink bottle. Shelf life Within three months after opening the package even in the available period.
-
Page 110: Setting Orders Of Ink Bottles
Chapter6 Appendix Setting orders of ink bottles • The order of the ink bottles that are set differs depending on the ink set that is used. • UJF-6042MkII Ink arrangement Ink set 6 -color + White + White 6 -color + White + Primer 6 -color + Whiter + Clear 6 -color + Clear + Primer 4-color + Primer + Clear + White + White…
-
Page 111: Sheet For Inquiry
Chapter6 Appendix Sheet for inquiry Use this sheet for troubles and abnormal functions of the machine. Fill in the following necessary items, and then fax the sheet to our sales office. Company name Person in charge Telephone number machine model Operating OS Machine information Error message…
-
Page 112
Chapter6 Appendix… -
Page 113
UJF-3042MkII/6042MkII Operation Manual January, 2017 MIMAKI ENGINEERING CO.,LTD. 2182-3 Shigeno-otsu, Tomi-shi, Nagano 389-0512 JAPAN D203043-12-16012017… -
Page 114
FW : 2.00 © MIMAKI ENGINEERING CO., LTD.2016…
Mimaki UJF-3042MKII Настольный планшетный УФ-принтер со светодиодной подсветкой

Инструкция по эксплуатации
Перед использованием
Для примечания и безопасности см. руководство по эксплуатации принтера UJF-3042MkIIseries/6042MkIIseries. Перед использованием обязательно прочтите «Предупреждения и примечания» данного руководства и полностью усвойте его содержание. Несанкционированное воспроизведение любой части этого документа строго запрещено.
© 2016 MIMAKI ENGINEERING Co., Ltd. Рекомендуется заранее проверить эффект отключения электричества.
Настройка ионизатора
При установке ионизатора «ВКЛ» в НАСТРОЙКАХ МАШИНЫ он будет выполнять операцию по устранению статического электричества перед печатью.
- Нажмите
 (МЕНЮ)
 (>>) в местном.
 - Нажмите
 выберите «НАСТРОЙКИ МАШИНЫ» и нажмите кнопку
 .
.
- Отобразится МЕНЮ НАСТРОЙКИ МАШИНЫ.
- Нажмите для выбора «ИОНИЗАТОР» и нажмите кнопку .
- Будет выбрана установка «IONISER».
- Нажмите выберите «ВКЛ.» и нажмите кнопку .
- Если установлено значение «ВКЛ», стол перемещает всю поверхность в соответствии с данными печати, чтобы устранить статическое электричество перед печатью.
- Нажмите
 клавишу несколько раз, чтобы завершить настройку.
О ежедневном уходе
 Перед тем, как позаботиться об этом, обязательно выключите главный выключатель питания на основном корпусе.
- Вы можете получить удар током. Кроме того, вы можете получить травму побочно.
- Не прикасайтесь непосредственно к зонду электрода. Вы можете получить травму. Будьте осторожны в работе.
- После очистки полностью высушите его, а затем подключите к ионизатору для использования.
- Если моющая жидкость остается на зонде-электроде, это может привести к аварии или отказу машины. Чистящий спирт может коснуться кожи или попасть в глаза.
- Не прикасайтесь к зонду электрода твердыми предметами, например инструментом. Это может привести к аварии или поломке машины.
 Перед тем, как позаботиться об этом, обязательно выключите главный выключатель питания на основном корпусе.
Инструменты, необходимые для обслуживания
- Набор для чистки зонда электрода (SPA-0237/SPA-0239)
- Темные очки
- Алкоголь
- Перчатки
Очистка электрода-зонда
Проверьте электрод-зонд перед работой и очистите его, если он загрязнен.
- Не прикасайтесь непосредственно к зонду электрода. Вы можете получить травму. Будьте осторожны в работе.
- Не прикасайтесь к зонду электрода твердыми предметами, например инструментом. Это может привести к аварии или поломке машины.
Снимите электродный зонд с ионизатора.
- С помощью прилагаемого набора для замены зонда-электрода его можно легко снять.
- Поместите сменный комплект в электрод-зонд.

- Снимите зонд-электрод.


Протрите зонд электрода и вокруг него ватным тампоном, смоченным в спирте.
- Рекомендуется: этиловый спирт.


Когда очень грязно
 Используйте ультразвуковую ванну. Также в качестве моющего средства можно использовать спирт.
Очистите с помощью комплекта для чистки зонда электрода (SPA-0237)
Объясните, как выполнять очистку с помощью комплекта для чистки зонда электрода (SPA-0237).
- Не прикасайтесь непосредственно к зонду электрода. Вы можете получить травму. Будьте осторожны в работе.
- Не прикасайтесь к зонду электрода твердыми предметами, например инструментом. Это может привести к аварии или поломке машины.
- Замочите фильтр комплекта для очистки зонда электрода для блока очистки в спирте.

- Накройте комплект для чистки зонда электрода и осторожно поверните его два или три раза.

- Фильтр комплекта для очистки электродного зонда удаляет пятна с электродного зонда.
- Если он очень грязный, замените фильтр и снова очистите его.


Замочите комплект для чистки зонда электрода
- Крышки входят в комплект для чистки, чтобы предотвратить попадание пыли в комплект для чистки во время хранения. Всегда закрывайте крышкой при хранении.
- Также через отверстие для ремешка можно продеть шнур, чтобы комплект можно было повесить на стену. Обязательно надевайте крышки во время этого способа хранения. (Пожалуйста, подготовьте ремешок самостоятельно.)
Установка фильтра
Объясните метод замены фильтра комплекта для очистки зонда электрода (SPA-0237).
 Сменный фильтр комплекта для очистки
- После того, как фильтр используется для очистки нескольких зондов-электродов, к фильтру прилипает пыль, и возможности очистки снижаются.
- Если фильтр загрязнен, замените его комплектом для очистки зонда электрода вместо фильтра или замените его на дополнительный комплект для очистки фильтров (SPC-0238).
- Удалите использованный фильтр и вставьте новый фильтр в отверстие в центре комплекта для чистки электродного зонда.
- Обратите внимание на то, как обращен фильтр. Установите фильтр отверстием вверх.


- Полностью вставьте фильтр в набор для очистки.
- Монтажное положение фильтра выставить с шагом ±1 мм к торцам.
- Полностью вставьте фильтр внутрь, чтобы он не погнулся.


Очистите внутреннюю стенку электрода
Набор для очистки зонда электрода 2 (SPA-0239) используется для очистки внутренней стенки колпачка зонда электрода. При очистке наконечника зонда электрода используйте комплект для чистки электродов (SPA-0237).
Инструменты, необходимые для обслуживания
- Набор для чистки зонда электрода 2 (SPA-0239)
- Темные очки
- Алкоголь
- Перчатки
- Не прикасайтесь непосредственно к зонду электрода. Вы можете получить травму. Будьте осторожны в работе.
- Не прикасайтесь к зонду электрода твердыми предметами, например инструментом. Это может привести к аварии или поломке машины.
- Замочите фильтр комплекта для очистки электродных зондов 2 для блока очистки в спирте.

- Накройте набор для чистки зонда электрода 2 и осторожно поверните его два или три раза.

- Фильтр комплекта для очистки зонда-электрода 2 удаляет пятна с зонда-электрода.
- Если он очень грязный, замените фильтр и снова очистите его.


Установка фильтра
Объясните, как заменить фильтр комплекта для чистки зонда электрода 2 (SPA-0239).
Комплект для чистки 2 Сменный фильтр
- После того, как фильтр используется для очистки нескольких зондов-электродов, к фильтру прилипает пыль, и возможности очистки снижаются.
- Если фильтр загрязнен, замените его комплектом для очистки зонда электрода 2 вместо фильтра или замените на дополнительный комплект для очистки фильтров (SPC-0240).
- Удалите использованный фильтр и вставьте новый фильтр в отверстие в центре комплекта для чистки электродного зонда 2.
- Обратите внимание на то, как обращен фильтр. Установите фильтр диагональным наконечником вверх.


- Вставьте фильтр с помощью пинцета до упора в набор для очистки электродного зонда 2.
- Монтажное положение фильтра должно быть установлено на расстоянии от 0 до 2 мм от торцов.
- Полностью вставьте фильтр внутрь, чтобы он не погнулся.


Функция тревожного выхода
Этот ионизатор имеет функцию вывода сигналов тревоги.
Часть выхода тревоги
функция сигнала тревоги
| Товары | Тревога (ALM) | Уровень ионов (ION) | Состояние (СОСТОЯНИЕ) |
| индикация | Индикатор мигает три раза примерно каждую секунду. | Индикатор мигает два раза примерно каждую секунду. | Индикатор мигает. раз в секунду |
|
Статус и т.д. |
Внутренняя цепь разорвана. Происходят аномальные выделения. |
Из-за пятен на электроде-зонде и его износа производство ионов уменьшилось.
Используйте это как руководство по уходу за зондом-электродом. |
Установленная среда (температура, влажность, периферийные металлы и т. д.) повлияла на производительность по отводу электричества. |
| Удаление электричества | Удаление электричества прекращается. | Отключение электричества продолжается. | Отключение электричества продолжается. |
|
контрмера |
Свяжитесь с дистрибьютором в вашем районе или с нашим офисом. |
Позаботьтесь об электродном зонде.*1
Если состояние не может быть улучшено, замените соответствующий зонд-электрод. |
Проверьте окружающую среду и периферийные металлы. |
| Замена часть | SPA-0208
Зонды с вольфрамовыми электродами для ионизатора (включая 4 шт.) |
Прежде чем позаботиться об электродном зонде, выключите основное питание основного корпуса и будьте осторожны при выполнении работы.
Регулировка угла ионизатора
Ионизатор можно регулировать по углу. Если трудно получить доступ к работе с задней стороны стола, переместите ионизатор на верхнюю сторону.
D203082-20 15042022-
© 2016 MIMAKI ENGINEERING CO., LTD. Все права защищены
Документы / Ресурсы
Рекомендации
Тема: Детальный обзор Mimaki UJF-3042 MKII
Итак, братцы, в честь того, что на форуме зарегистрировался какой-то новый пользователь под ником RAD_Enot и тиснул сразу три поста, я решил, вдохновившись этим незаурядным событием, выпустить новый детальный обзор принтера. Как обычно маюсь страшным бездельем. Сегодня речь пойдёт о Mimaki UJF3042 MKII. Если вы следите за экстренными выпусками моих новостей, то должны были помнить, что я печатал в прошлом году на машине предыдущего поколения — Mimaki UJF3042 FX. Но мне критически не хватало высоты стола и вот, в силу удачного стечения обстоятельств мне посчастливилось сбыть старушку и прикупить совершенно новый агрегат. Всё это время я честно собирался накидать очередной отзыв, но работы навалилось (а я этого не хочу никогда), зимой в общем и целом холодно, мрачно и хочется спать, а летом я чрезвычайно и в охотку люблю прибухнуть, так что руки дотянулись до клавиатуры только сейчас. Я маюсь от нечего делать. Традиционно идёт неспешная печать на JV150 1440dpi в 12 pass на Orajet 3640 какой-то микроскопической шелупени, резак CG-SRII тоже старается нарезает какую-то лапшу, а Mimaki UJF3042 MKII печатает шрифт Брайля — что и вовсе пытка. Делать нечего, порно как-то поднадоело (постарел я, что ли) – и вот я уже пишу эти волшебные строки.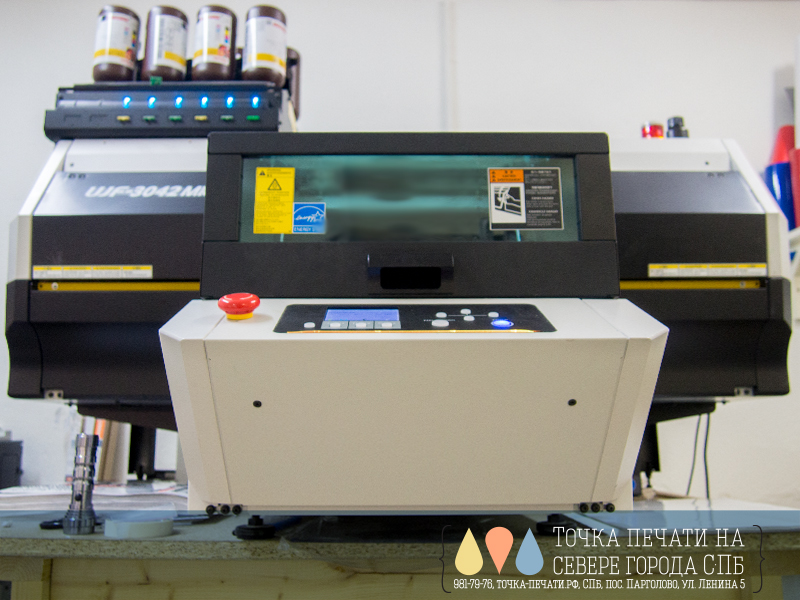
Мой восхитительный обзор будет построен точно таким же образом по структуре аналогичной прошлым очеркам (он будет прост, изящен и логичен). Если кто-то не знаком с моим творчеством (я допускаю, что в мире печати ещё есть такие чёрные невежды), то вкратце о моих трудах – будучи печатником я делаю суперобъективные обзоры на станки которыми пользуюсь на радость продавцам (потому что они не способны адекватно ничего рассказать) и на зависть другим продавцам, других принтеров (Roland, Epson, Mutoh, HP и прочего хлама) не преследуя никакой коммерческой выгоды. Часто моими обзорами пользуются те, кто готовится окунуться в яркий мир полиграфии, печати, печали, страданий и ужаса. И в этот раз надо учесть, что пишу я свой автобиографичный труд уже спустя год использования, когда гарантия закончилась и моя первоначальная эйфория прошла, настроение индифферентное, а может быть даже оно скоро сменится и на гнев. Я довольно сух. Суров. Строг. Но, по-прежнему, красив и обаятелен – жаль, что вы не можете насладиться кроме этого славного письма ещё и моим видом. Но что делать, что делать – остаётся только принять это знание на веру.
Вперёд самого обзора немного сравним с машиной предыдущего поколения. Есть четыре очень важных, отличия:
1.Габариты машины. Когда вы смотрите на фотки машин самих по себе – кажется, что они примерно одинаковые. Но это не так. Новое поколение почти в два раза больше дедка. Она значительно больше и если бы я был поприжимистее и сэкономил бы на материалах для изготовления стола в прошлый раз, то мне пришлось под новую машину делать новый стол. Но обошлось. Однако, мы с величайшим трудом затащили её в печатню. Потребовалось полностью разобрать дверной косяк и втаскивать её боком. Буквально – 1см в минус и йух там. Так, что – не во всякий кабинет можно поставить такую. Как её теперь от сюда вытащить при необходимости – я не представляю.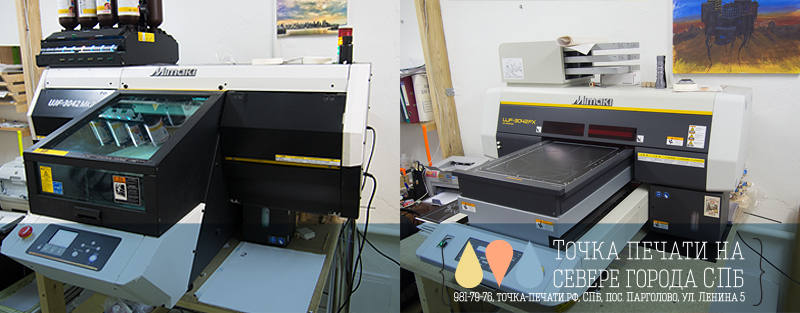
2.Объём чернил. В этой модели идут литровый банки. Парадоксально, но стоят они столько же, сколько 600гр. картриджи у дедка. Здесь новая система подачи чернил, отличная от дедка — ничего не надо взвешивать и пр. И чернила расходуются до последней капли. Что не может не радовать рачительного хозяина.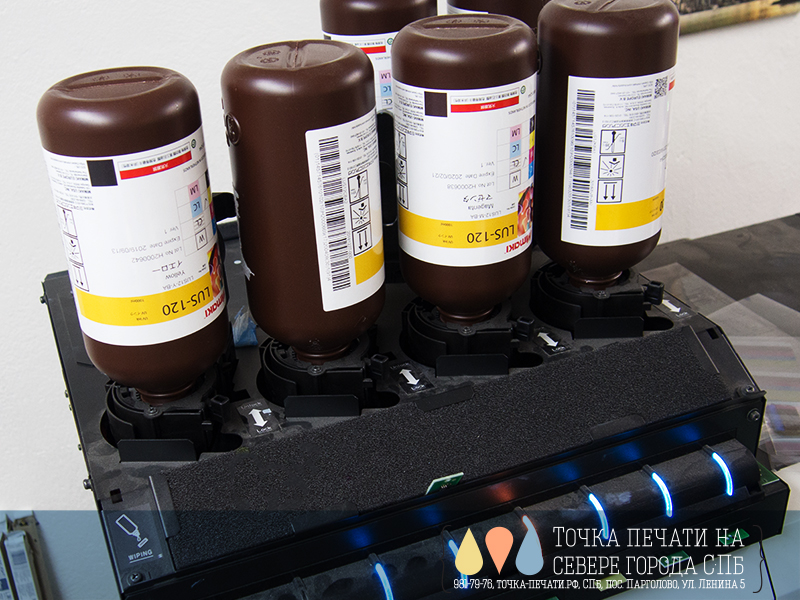
3.Машина имеет иной принцип конструкции. Дедок делал так – стол оставался неподвижным, а верхняя часть перемещалась над столом снося всё, что стояло по пути. Здесь ездит стол, а корпус внушителен и молчалив.
4.Эта машина на новых, других головах. В предыдущем поколении использовалась башка Richo GEN4 (которую на всех профильных форумах деловито обзывают промышленной, хотя, конечно, никаких критериев для такой классификации не существует). Здесь стоят Toshiba CE2 (и что-то там ещё). С точки зрения оператора и печати, скорее всего разницы никакой нет. Но с точки зрения самой системы – небольшие отличия есть. О них будет ниже.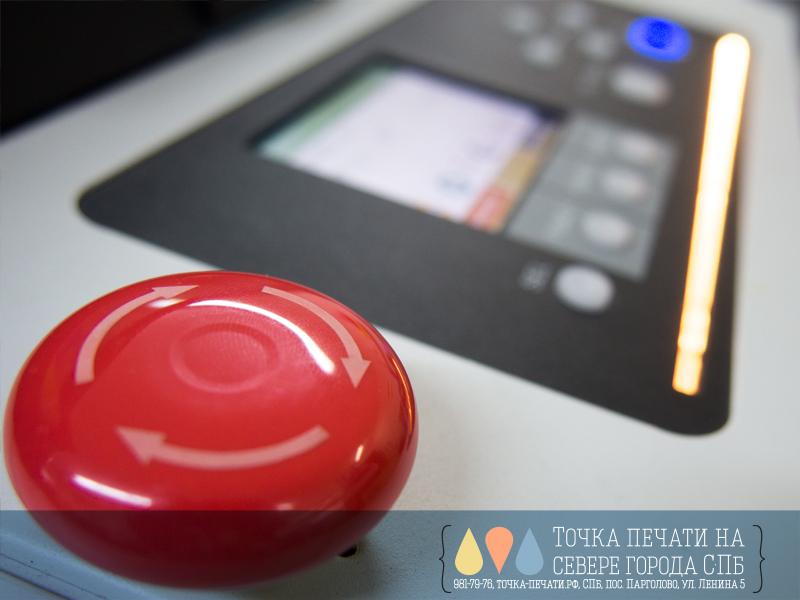
Итак, начнём с цветовой модели. Как и во всех своих последних машинах Mimaki продолжает свою линию по свободной конфигурации. У меня модель с 6-ю головами. И вы можете делать всё что вам угодно СМИК+. После плюса может быть белый, лак, праймер, лайты, в любой конфигурации. Замечательно. Просто замечательно. Конечно, конфигурацию выбирают в самом начале и как правило один раз. Но если очень припрёт – то всегда можно её сменить. Моя – СМИК+Белый+Лак. Я нацелен на сувенирку, випвизитки и прочую мелкоту, где полезен лак. Выглядит богато. Кроме того, я печатаю шрифт Брайля лаком, чтобы придать пупырочкам максимально сферическую гладкую форму. Лак с этим справляется лучше всего. Как говорил А.С. Пушкин – ИМХО.
Но если вы не знаете как применить лак, то лучше ставить два белых.
Есть конфигурация машины с 8-ю цветами. Mimaki UJF3042 MKII FX То есть, это может быть СМИК+Лайты+белый+лак. Но я такую сложную девушку не держу у себя.
Или, вообще, огненная конфигурация – СМИК+2Белый+Лак+Праймер. О дааа.. О да-а… О… извините, я на минуточку отвлёкся – сами понимаете, но я уже продолжаю:
В общем, тут всё.
Чернила.
Для данной модели есть три вида чернил, которые отличаются по степени гибкости: LUS150, LUS120, LH100. По-прежнему самые жёсткие — LH100. У меня такие стояли на прошлой, на моей новой стоят LUS120. И я могу их полноценно сравнить. LUS120 мне нравятся больше. Это эластичные чернила, которые имеют превосходную адгезию к огромному количеству материалов и сохраняют отличную гибкость. Единственный недостаток, который заставляет меня скучать по LH100 – это то что ими сложно нарастить фактуру. Видимо, из-за их мягкости, что ли. То, что мы наращивали, печатая в 8 слоёв, на lh100 теперь приходится печатать в 20 слоёв. Это расстраивает. Ах, не надо, оставьте – не успокаивайте меня, это не слёзы, это сольвент.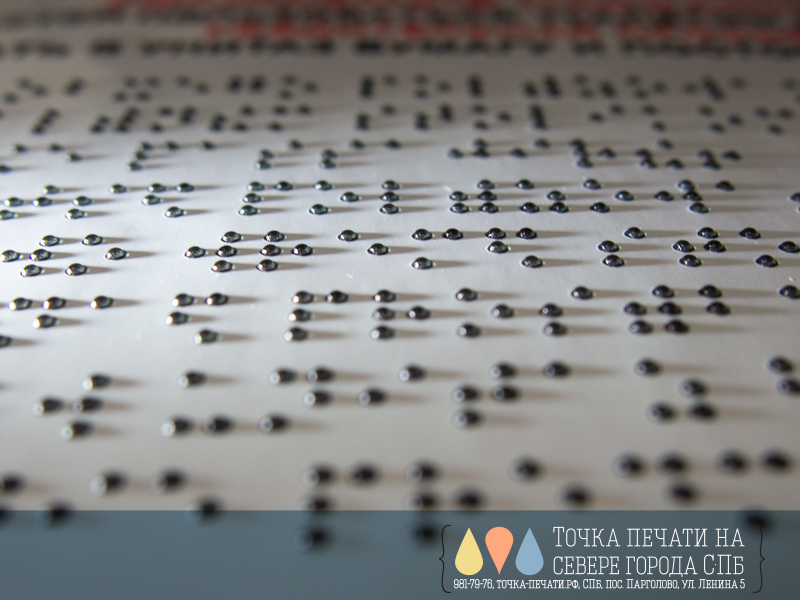
В конце можно сказать, что чернила считаются экологически чистыми, бла, бля, бла и всё такое. В отличии от lh100 запах имеют очень слабый и не вызывающий отвращения (предыдущие я с трудом выносил).
Новинкой является то, что в систему встроена новая более совершенная система рециркуляции чернил – в отличии от прошлой, где рециркуляция происходила в магистрали от картриджа до головы и в самом картридже пигмент превосходно оседал, тут сделана система субтанков и, в общем-то, проблем с оседанием пигмента нет. Иногда машина, всё-таки, просит потрясти баночку, но мне кажется, что это атавизм. По крайней мере, теперь нет как прежде обязательных танцев с маракасами перед печатью.
Ну и как я уже писал выше – нет ущербной системы взвешивания чернил. Ты ставишь банку (кстати, механизм довольно удобный) и тратишь чернила до последней капельки.
А это на фотке сливной бак: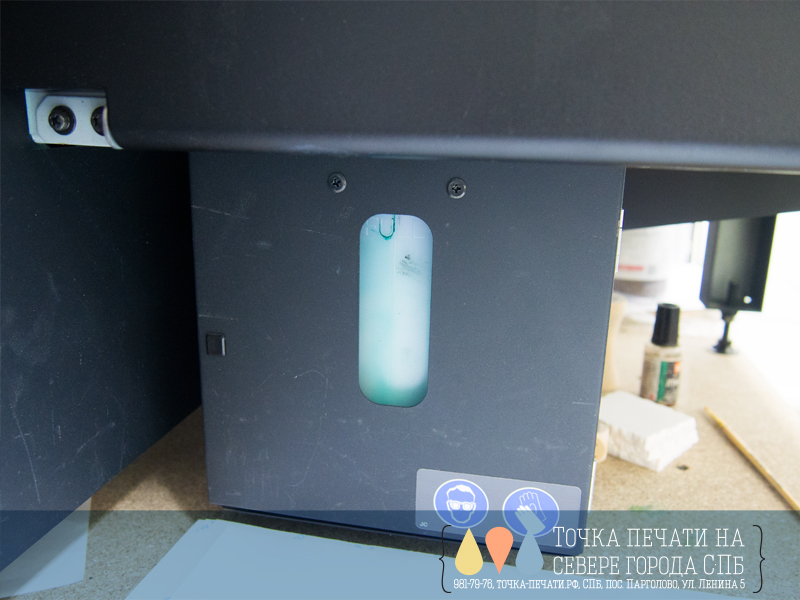
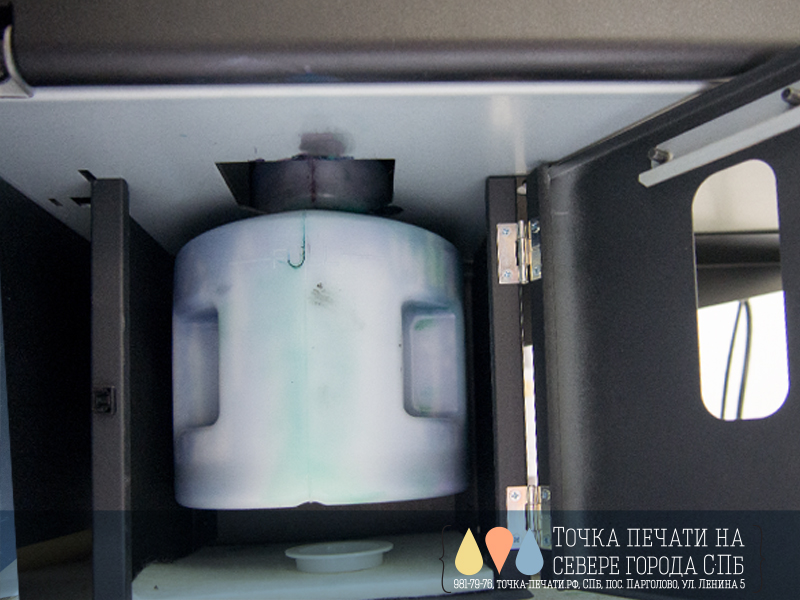
Меню.
Это новое цветное меню, которым теперь снабжают все машины Mimaki. Зачем оно цветное, я не знаю. Никакой. Никакой мало-мальски практической пользы это не несёт, а удорожание, наверное, есть. Радует только то, что у всех машин оно идентичное. Из печального – как и на всех машинах с новым меню, нет горячей клавиши Data Clear. Но работать можно. Минимум кнопок. Убраны кнопки управления столом. Есть просто кнопки перемещения, которые в зависимости от того, в каком ты разделе меню двигают стол или ориджин (каретку).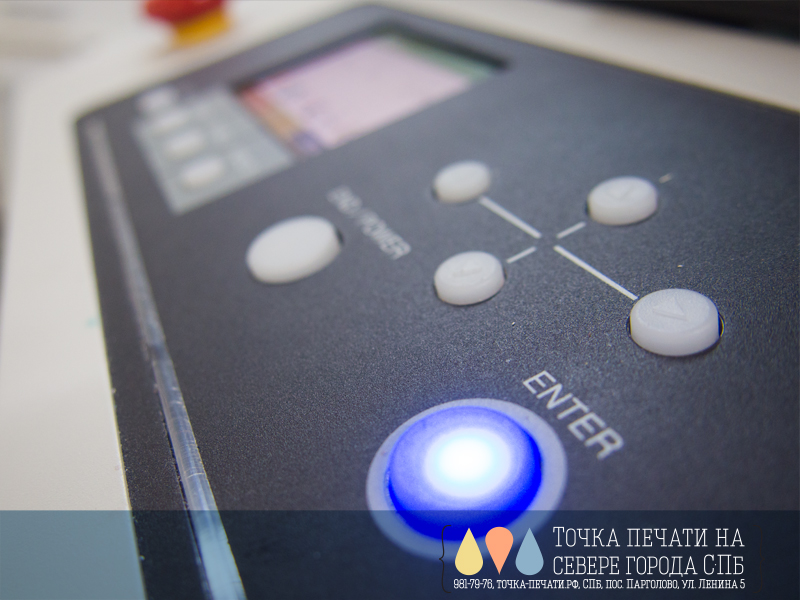
В общем, ничего плохого про меню сказать нельзя. Впрочем, как и хорошего. Привыкаешь и перестаёшь замечать его.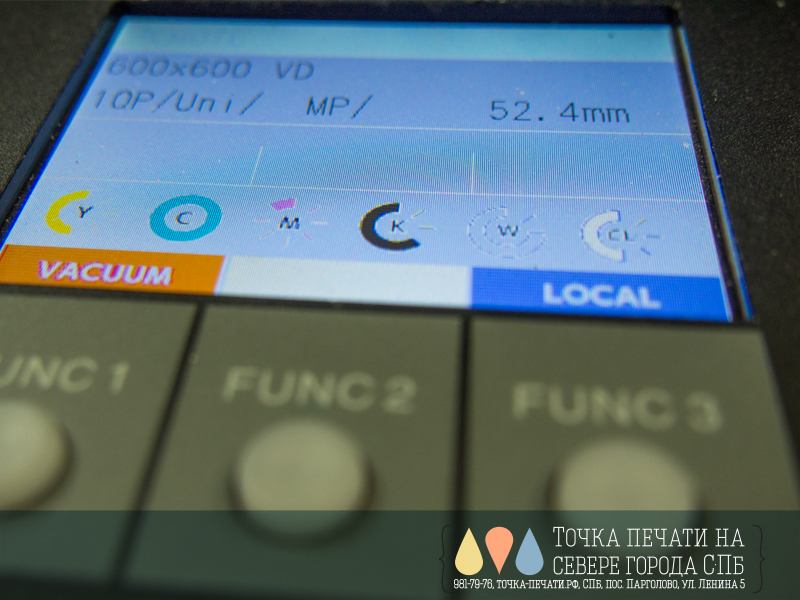
Конструкция.
Как я уже писал, принтер построен по-новому. Стол перемещается, корпус неподвижен. Изменило ли это что-то? Нет. Прошлая машина не была устойчивее. За счёт того, что масса верхней части была большой, то при её движении нижний стол вибрировал. Тут та же самая вибрация за счёт движения самого стола. Надо отдать должное, что вакуумный прижим работает получше. Но если вам не хватит его, то вы можете заколхозить кулер помощнее или даже подключить пылесос.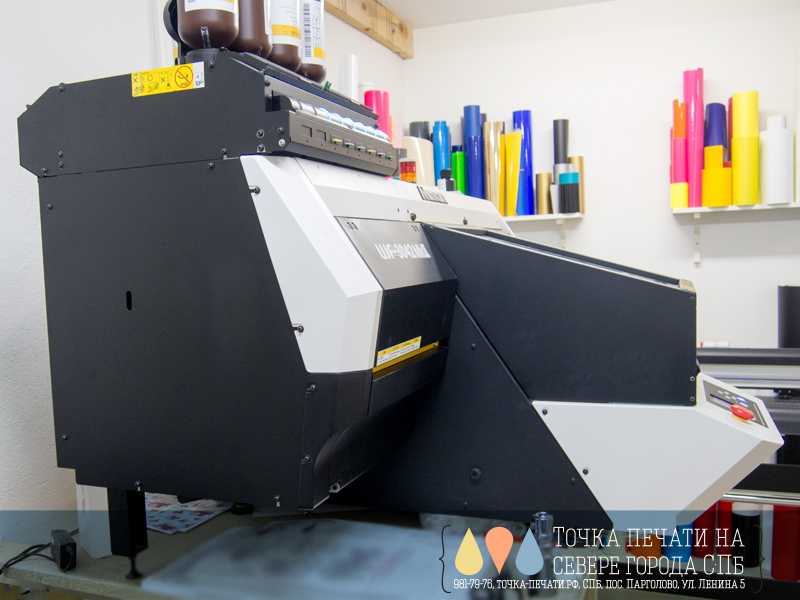
Есть стол и без вакуума. Вроде как – сейчас вакуумный стол идёт как доп. опция. Вначале эти принтаки шли со всеми обвесами и в подарок даже давали Кебаб (да, делать шаурму). Может это и не так, но менеджер клялся, что я забираю последнюю машину с такими плюшками. А именно – вакуумный стол, промышленный сигнализатор (нахрена он мне нужен? Это когда такой светофор стоит на крышке и показывает – всё ли хорошо с машиной, актуально когда у вас парк из 20 машин и чтобы сразу из одной точки охватывать взглядом все и понимать – порядок ли), антистатический ионизатор или что-то такое (по факту просто вентилятор в задней стенке), лазер на битые дюзы (вообще бесполезная ерундовина), а лучше бы кебаб подарили.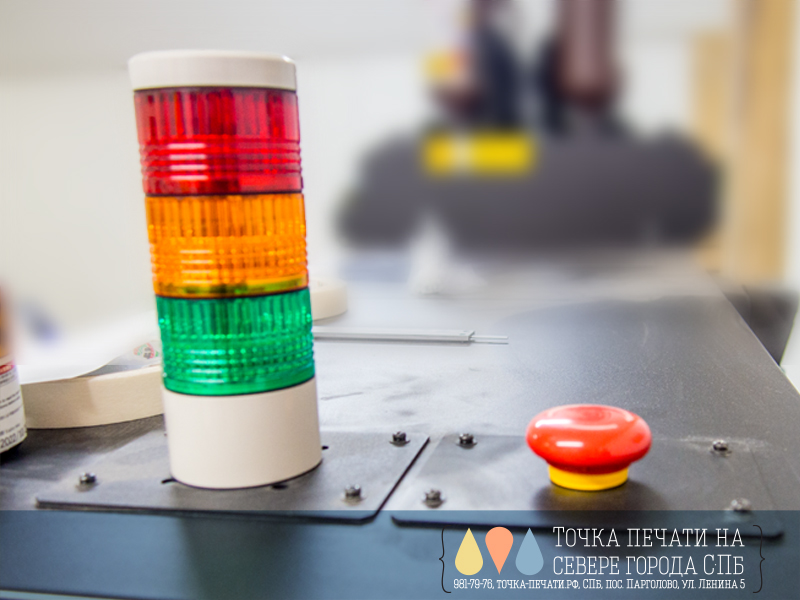
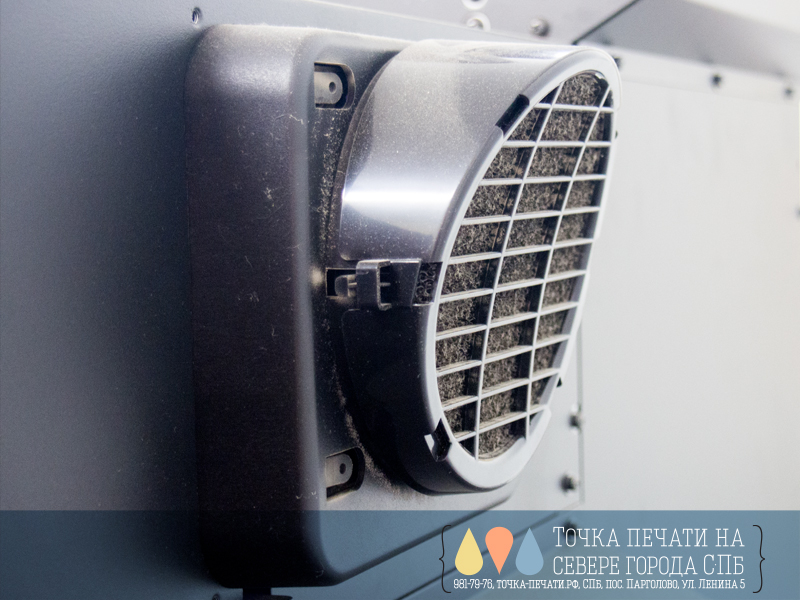
Самая важная особенность этого поколения, что высота стола 15см. У прошлой была специальная серия HG с такой высотой. Дороже. А тут, типа, вот вам, реальный абдейт. Нужна ли такая высота простым печатниками и уездным печатным дворам? Безусловно. Высота в 5 см как на прошлой, это та самая высота, которой всегда чуть-чуть не хватало. По закону божественного проведения в 100% случаев не хватает как раз пары миллиметров, чтобы подпихнуть желаемый сувенир. Кубик Рубика, например. Какую-нибудь шкатулку. Мой опыт показывает, что подавляющее большинство не плоских предметов, на которых хотят печатать чуть больше 5см в высоту. Шарики для антистресса. Всякие флаконы для косметики. Игрушки для взрослых. Пачка сигарет. Это можно продолжать бесконечно, конечно. Но, есть претензия к инженерам – реализован лифт неудобно. Подъём осуществляется на 5см. Остальное добирается специальными ножками по 5 см (2шт).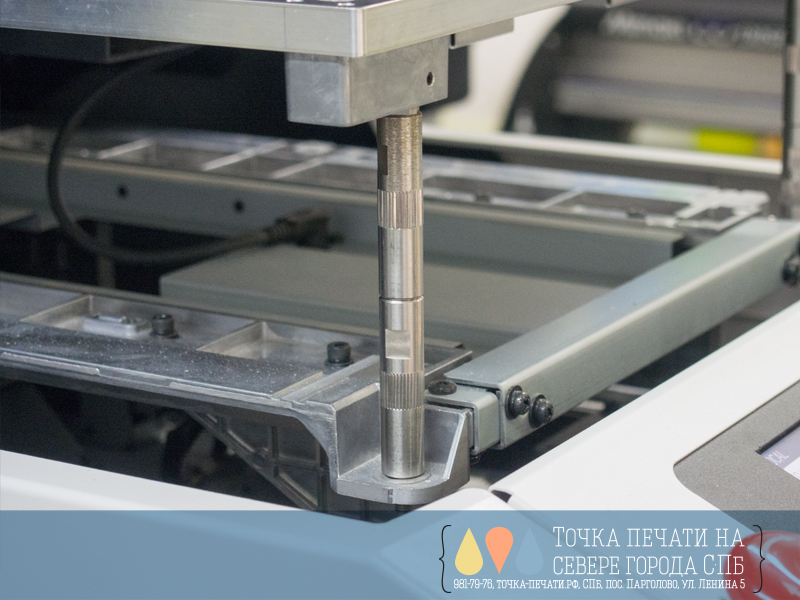
Это неудобно когда меняется высота изделия в пределах 5см и приходится постоянно перевинчивать эти ножки. Я даже подумываю о покупке отдельного комплекта (если бы ножки можно было бы скачать на торрентах – я скачал бы). В укор Mimaki какие-то принтера Apex сделанные из Epson на скорую ногу имеют полноценный лифт на 140см. Очень удобно. Правда на этом преимущество Apex заканчивается.
Отдельно в этой машине стоит полюбоваться местом для обслуживания головы. Оно прекрасно. Если посмотреть на машину невооружённым взглядом, то без труда можно обнаружить общие черты с любой другой машиной Mimaki нового поколения (которые с цветным экраном). Машины модульны. Частично они собираются из одинаковых элементов. Я приветствую такой подход. Это разумно. Это удешевляет производство. Это обеспечивает наличие запчастей. Короче, место для обслуги теперь такое же кайфовое как и на стописятке (JV150). У предыдущей его просто не было. Чтобы почистить голову приходилось лезть в какую-то щель. А здесь есть прекрасные крышки, за которыми открывается изумительная просторная полость и великолепный обзор на подошву каретки со всеми её, так сказать, головками. Когда видишь это – получаешь наивысшее эстетическое наслаждение, которое только может получить праведный печатник. Очень удобно.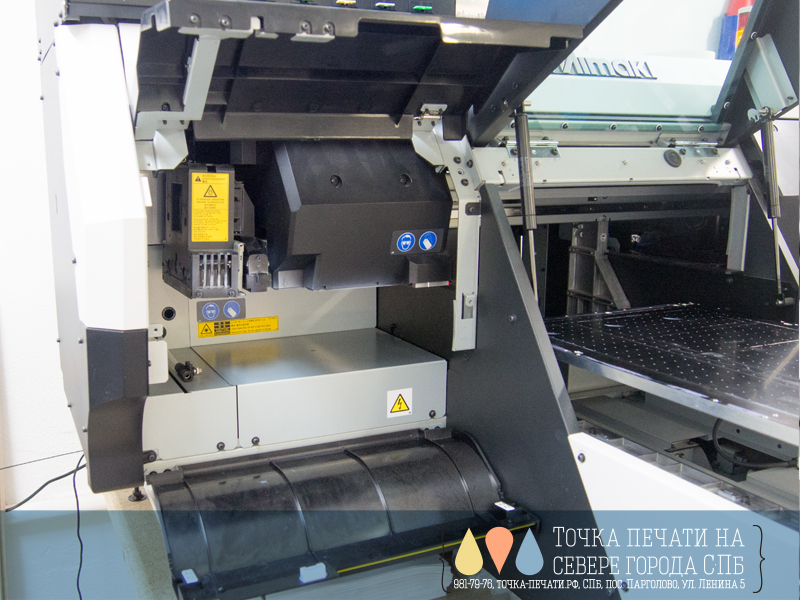
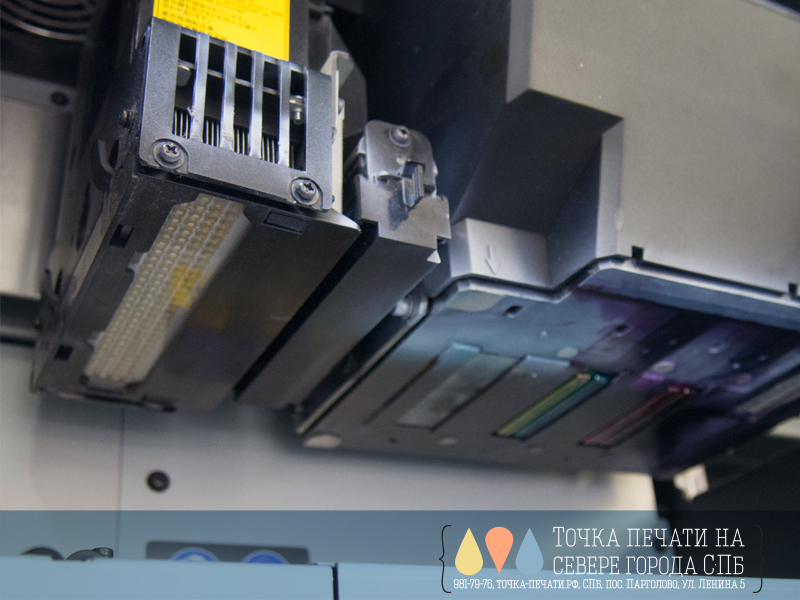
Парковка в данном случае традиционно грязна и неприятна. Чернила не сохнут сами по себе, поэтому всё что выплёскивается – так и шлякает вокруг. Как видите, моя поролоночка уже вся сиреневая.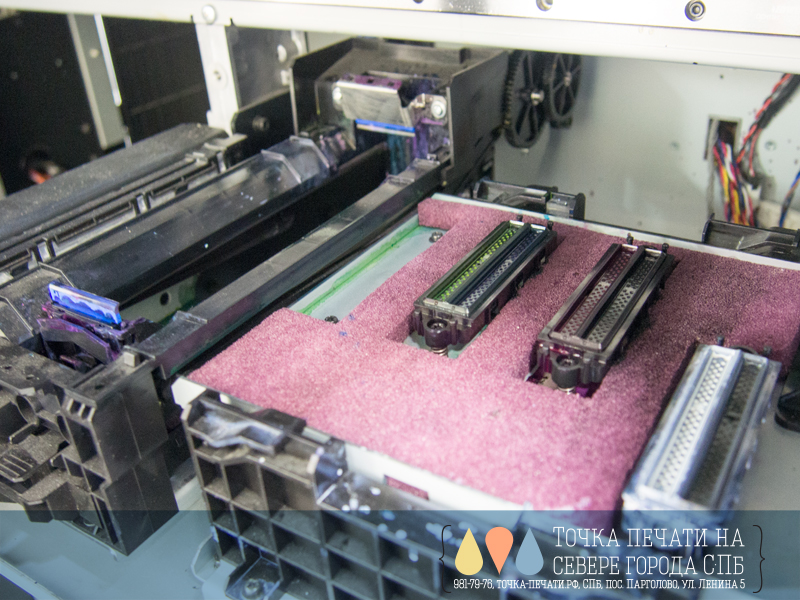
Я её пытался отмыть от тех чернил, которые на неё налегли. Вообще, у меня какие-то проблемы с парковкой – поэтому, возможно, моя оценка не объективна. Пока эти проблемы решить не могут.
Тут два вайпера. Один вайпер подтирает голову, второй вайпер очищает первый вайпер. Чётко всё.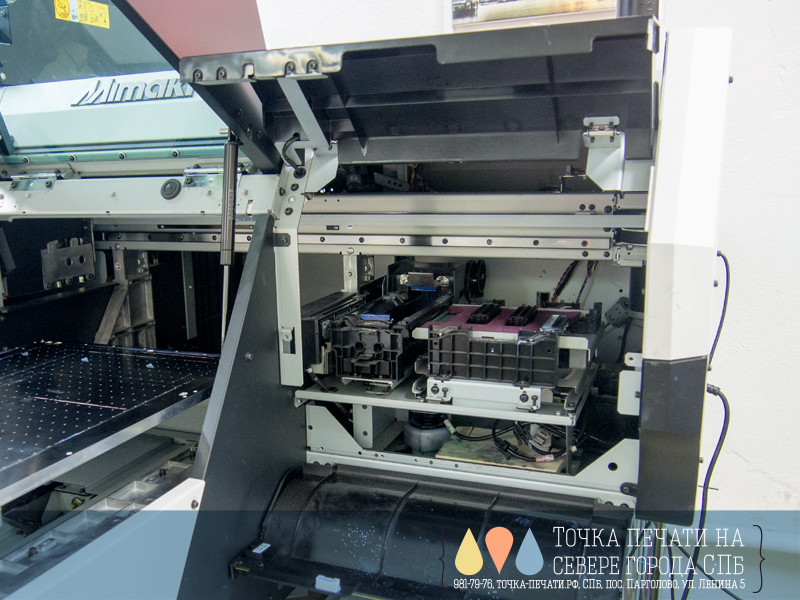
Что касается голов – здесь стоят Tochiba CE2. Они не имеют привычных сменных демпферов, как на головах Epson. Головы сдвоенные, но по факту, они не имеют между собой тонких стенок или сообщений и внутри не рвутся никакие мембраны, как на головках серии DX5 и выше. Нет перетекания цветов внутри головы. Также, ввиду отсутствия демпферов система снабжена субтанками, которые находятся прямо под бутылками с чернилами. Самое грустное в этих головах – стоимость. Мне меняли белую голову по гарантии. Там был специфический деффект, который не смогли устранить (тест хороший, все дюзы на месте, а при печати как будто выбита половина). И оказалось, что стоимость одной головушки – 200 рублей. Только что это написал и упал сразу же. Сердце прихватило. Ну и тут их три (парных). В случаи какой-то неудачи – 600 рублей. Честно сказать – для меня это много. Возможно кому-то покажется пустяком. По последним сведениям возможно поставить альтернативную голову, которую делает Toshiba же под номером CE4, но стоимость которой всего каких-то 60 рублей. Эти головы активно пропагандирует Сайн-Сервис — поставщик принтеров из Поднебесной. Хвалит их изо всех сил и называет превосходными. В противоречие есть мнение об отвратительном качестве этих голов. Что они кривые. Быстро дохнут. Я не пробовал. Не знаю. Но обсуждения уже развернулись жаркие на форуме Зенона. В любом случае, 60 рублей, это будет шанс для кого-то (может быть и для меня). Хотя, почему, если они взаимозаменяемые такая колоссальная разница в цене – не ясно.
В системе используется тосол такого же ядерного розового цвета как и в прошлой, но здесь он, наоборот, служит для нагрева головы до нужно температуры. Не знаю почему, но подливать его иногда приходится – куда-то он девается в процессе эксплуатации, хотя в прошлой модели, его никто никогда не доливал. Но, надо отдать должное, ускоглазые не поскупились на тосол и дали целых две бутылки – этого хватит на долго.
Лазерный датчик в этой машине действительно полезный. Он выполняет свою функцию и поднастраивает высоту стола в нужный момент. Тем самым обеспечивая безопасность голове. Также, на каретке есть механическая защитная планка, которая защищает голову от непредвиденного удара. Я за больше чем полтора года использования ни разу не зацепил ничего. Но может быть дело в том, какой я молодец, а не какая система защиты. Как знать.
Последнее, что можно упомянуть о конструкции – это крышка. Всё, упомянул.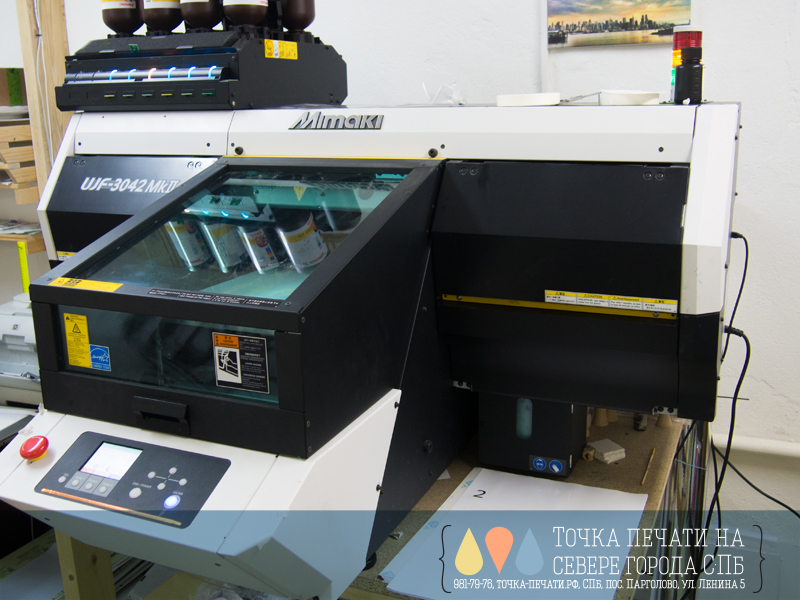
Ну и рекомендую устанавливать машину повыше. У нас печатный стол находится на уровне груди. Очень удобно и раскладывать и обслуживать мащину. Только чернила чтоб поменять приходится вставать на стул. Можно ли ставить машину на офисные столы? Нет. Эту точно нельзя. Она реально большая и требует под себя хороший надёжный стол. Лучше его колотить из бруска 10х5 минимум и монтировать к стене.
Вроде по этой части всё.
Печать.
Собственно, то, ради чего мы все и собрались. Печатает машина отлично. Детализация высочайшая. Заявлена максимально 1200х1200dpi. Но она ничуть не уступает предыдущей с заявленной 2400х1440dpi. Скорость печати – не знаю. Но в среднем на крейсерских 8 проходах пара минут.
Дольше выкладывать предметы, чем печатать на них. В общем, минимально машина печатает в 8 проходов. Максимально в 20.
Конечно присутствует MAPS4 – проходов при печати не видно. Глаз радуется. Есть уже традиционная функция замены битых дюз. Уже обычное дело. То есть, новых функций не добавили, а могли бы. Например, я бы советовал в следующей машине припендюрить пивной кран – иной раз очень нужно.
Лак, как обычно, умеет быть глянцевым, а умеет быть матовым, смотря в каком настроении печатник.
Зона печати 30х42. Есть версия 42х60, но цена у неё неприличная, хотя я бы от такой не отказался.
Печать готова к эксплуатации сразу же. Из новшеств – уф лампа стоит под углом относительно каретки. За счёт этого можно безопасно печатать по отражающим изделиям (хром, зеркала, стекло). Пожалуй, что это важное нововведение.
По расходу чернил – с учётом того, что машина работает ежедневно, мы за весь год купили два или три комплекта чернил. На прошлой, с учётом того, что печатали мы меньше и иногда машина просто стояла и ждала своего выхода мы раз в два месяца меняли картриджи.
Прошивка, драйвера RIP.
С машиной, разумеется, поставляется RIP. Как обычно это Raster Link версии 6. Сейчас его апдейтили до Raster Link 6Plus. Рип полностью отвечает потребностям печатника. Автоматически создаёт специальные цвета для печати лаком и белым по нажатию одной кнопки. Не требует специальной подготовки файлов. Имеет восхитительную функцию, которой нет, похоже, нигде – умеет переворачивать в белый цвет объекты с градиентным затуханием. И вы можете печатать по цветным, черным и прозрачным изделиям изображения, края которых постепенно исчезают. Жарко? Хо-хо! То ли ещё будет, детки. Слушайте дальше.
Прошивки постоянно выходят новые, но радости никакой не приносят.
Драйвер как обычно – один единственный, универсальный для всех их принтеров/плоттеров. В комплекте идёт куча профилей. Так как печать поверхностная, и мало зависит от носителя, то поставляемых профилей в комплекте хватает более чем с избытком.
Чипы на чернила – машина не расчипована. Альтернативных чипов пока никто не поставляет. На алике пока не было. С недавних пор сами чипы обновились у япошек и теперь используются чипы с более глубоким шифрованием (мы тут пытались их перезаписать и обнаружилась вот такая вот фигня, что новые чипы более развитые и сложные). Но честно говоря, смысла в этом особенного нет. С учётом расхода чернил – покупать альтернативные незачем. Даже при стоимости литра в восемь с половиной рублей. Кроме того, чернила LUS120 очень хороши. А что вы там себе купите? Говно какое-нибудь в подвале разлитое. Разлитое, а потом тряпками собранное обратно с полу в банки. Оно вам надо? Эти еврейские клёцки.
Кроме того, машина нормально считает расход чернил и выпивает всё до последней капельки. Такой фигни как было раньше на прошлой машине, что чернила ещё есть, а чип посчитал по количеству плевков, что больше нет – не происходит.
Дизайн и корпус.
Мне дизайн нравится. С точки зрения оператора – всё, кроме ножек печатного стола, достаточно удобно. Выглядит солидно. Цельно. Везде удобные крышки. Сквозь основную крышку виден процесс печати. Всё подогнано. На вид и на ощупь сделано прочно. Похоже, что их главный конструктор учился в Советском союзе – потому что лишних никаких украшательств нет. Всё чётко. Всё по делу. Корпус сверху плоский и ровный – можно положить чего.
Вот вам фотка зада — тут питание, lan и USB2
Траблы.
За полтора года эксплуатации мне поменяли по гарантии белую голову. И вот недавно я обратился в сервис со странной проблемой перетекания синего цвета в жёлтый во время печати (и именно во время печати). На данный момент сервис помочь пока не знает как (и не особенно вспоминает про меня – один раз приехали, дали заключение, что проблема не решена и затихорились). По моим наблюдениям – малиновый также перетекает в чёрный. Но этого не видно, потому что он чёрный. В общем, что-то работает неправильно и пока проблема не продиагностирована. Также в течении года малиновая голова расстроилась и разошлось сведение. Инженер сказал, что голова изначально, похоже, была плохо затянута, что довольно нелепо. Недавно ещё корректировали лазер. Если не считать всех этих мелочей, то в общем и целом это та машина на которой можно хорошо заработать – она может печатать но-нстоп, с отличным качеством уникальные вещи (например, всех очень всегда впечатляют визитки на цветном тачкавере, то что раньше делали с помощью шелкухи, теперь можно печатать (СМИК+БЕЛЫЙ+ЛАК). На данный момент она работает в три смены. В этом году она честно разделяет объём заказов примерно пополам с основной JV150 (возможно, что по деньгам и количеству отпечатанного нет, но по загрузке – однозначно и по маржинальности — безусловно).
Из новинок – недавно Мимаки выпустила металлизированные чернила. При том, на сколько я понял, это чернила типа хром, которые можно потом покрыть любым цветом и превратить в золото или цветные металлы. Так что актуальнее брать машину о восьми головах, конечно. Но я эти чернилочки вживую не видал.
Будущее.
Конечно я пишу про своё будущее. Я очень планирую взять UCJV300. Это УФ рулонник. То что мы сейчас делаем на сувенирнике – лютая порнография, с которой без труда справится рулонник. Так что, если удача мне улыбнётся и свалится на голову хотя бы лишний миллиончик, то ждите новый экстренный выпуск (уж с ним-то я затягивать не стану, сразу опишу всё как есть и сфотографируюсь вместе, для вашего удовольствия, чтобы вы оценили какие мы с ним красавцы и неразлучные друзья). Ну и все те добросовестные люди, которые желают освоить бюджетные деньги в срочном порядке с откатом до 40% тоже берите на заметку ;-).
Если просто хотите мне поспособствовать — можете закинуть пару сотен тысяч мне на карту, чтобы я смог себе позволить новую игрушку.
Ну и в завершении – если вы поставщик оборудования и заинтересованы в том, чтобы толкнуть на рынок новую тачку, то лучшего тестера вам не найти. Я люблю своё дело. И не обязательно это будет положительный отзыв, конечно. Приглашайте к себе, привозите мне – поиграемся и дадим оценку. Это не рекламные проспекты какие-то дурацкие в которых от начала и до конца всё ложь. А ложь, конечно, хуже всего тогда, когда это глагол.
И помните, как обычно мой текст не является рекламой, антирекламой, пропагандой разжигающей расистскую ненависть, не нарушает Конституцию РФ и никаким образом не затрагивает честь и достоинство кого либо, а также никак не оскорбляет, а, наоборот, бережёт самые тонкие чувства верующих. Написан тест исключительно по доброй воле и не преследует никакой другой цели кроме как поделиться с любым желающим своим опытом. Бесценным, кстати. Надо заметить, что любая перепечатка или цитирование мне до лампочки, но ссылка приветствуется. В случае если вы имеете что возразить, дополнить или как-то оскорбить меня – то не забывайте, что в запале вы можете нарушить правила грамматики русского языка, а я этого не люблю. Так что – пишите правильно, как петербуржец.
Спасибо за внимание.