-
Contents
-
Table of Contents
-
Troubleshooting
-
Bookmarks
Quick Links
TE200/TE300 Series
THERMAL TRANSFER/DIRECT THERMAL BAR
CODE PRINTER
USER’S
MANUAL
i
Related Manuals for TSC TE200 series
Summary of Contents for TSC TE200 series
-
Page 1
TE200/TE300 Series THERMAL TRANSFER/DIRECT THERMAL BAR CODE PRINTER USER’S MANUAL… -
Page 2
Information in this document is subject to change without notice and does not represent a commitment on the part of TSC Auto ID Technology Co. No part of this manual may be reproduced or transmitted in any form or by any means, for any purpose other than the purchaser’s personal use, without the expressed… -
Page 3
Agency Compliance and Approvals EN 55032, Class A EN 55024 EN 60950-1 This is a class A product. In a domestic environment this product may cause radio interference in which case the user may be required to take adequate measures. FCC part 15B, Class A ICES-003, Class A This equipment has been tested and found to comply with the limits for a… -
Page 4
TP TC 004/2011 TP TC 020/2011 IS 13252(Part 1)/ IEC 60950-1 R-41055980 KN 32 KN 35 Important safety instructions: 1. Read all of these instructions and keep them for later use. 2. Follow all warnings and instructions on the product. 3. -
Page 5: Table Of Contents
Contents 1. Introduction ………………….1 1.1 Product Introduction ………………1 1.2 Product Features ………………. 2 1.2.1 Printer Standard Features …………..2 1.2.2 Printer Optional Features …………..3 1.3 General Specifications ……………… 4 1.4 Print Specifications ………………4 1.5 Ribbon Specifications ………………4 1.6 Media Specifications ………………5 2.
-
Page 6
5.3 Calibrating Media Sensor by Diagnostic Tool ……….29 5.3.1 Auto Calibration …………….29 6. Troubleshooting ………………..30 6.1 Common Problems ………………30 7. Maintenance ………………….. 31 Revise History ………………….32… -
Page 7: Introduction
1. Introduction 1.1 Product Introduction Thank you very much for purchasing TSC bar code printer. The TE200/TE300 series printer features the single motor that is capable of handling a large capacity of 300 meters ribbon and large rolls of media inside its sleek design. If the 5” interior label capacity is not enough, simply add an external media roll mount and the TE200/TE300 series can easily handle 8”…
-
Page 8: Product Features
1.2 Product Features 1.2.1 Printer Standard Features The printer offers the following standard features. TE200 TE300 (203 dpi (300 dpi Product standard feature model) model) ○ ○ Thermal transfer printing ○ ○ Direct thermal printing ○ ○ Plastic ○ ○ Gap sensor ○…
-
Page 9: Printer Optional Features
Text, bar code, graphics/image printing (Please refer to the ○ ○ TSPL/TSPL2 programming manual for supporting code page) Supported bar code Supported image 1D bar code 2D bar code Code128UCC, GS1 DataBar, BITMAP, Code128 subsets BMP, A、B、C, EAN128, DataMatrix, (Max. 256 colors graphics) Interleaved 2 of 5, Maxicode,…
-
Page 10: General Specifications
1.3 General Specifications General Specifications 204 mm (W) x 164 mm (H) x 280 mm (L) Physical dimensions Weight 2.4 kg Electrical External universal switching power supply Input: AC 100-240V, 2A, 50-60 Hz Output: DC 24V, 2.5A, 60W, LPS Environmental condition Operation: 5 ~ 40˚C (41 ~ 104˚F), 25~85% non-condensing Storage: -40 ~ 60 ˚C (-40 ~ 140˚F), 10~90% non-condensing 1.4 Print Specifications Print Specifications…
-
Page 11: Media Specifications
1.6 Media Specifications TE200 TE300 Media Specifications (203 dpi model) (300 dpi model) Label roll capacity 5” OD, 75m Continuous, die-cut, black mark, fan-fold, notch Media type Media wound type Outside wound Media width 20mm ~ Max. 112 mm Media thickness 0.06 mm (2.36 mil) ~ 0.19 mm (7.48 mil) Media core diameter 1”…
-
Page 12: Operations Overview
2. Operations Overview 2.1 Unpacking and Inspection This printer has been specially packaged to withstand damage during shipping. Please carefully inspect the packaging and printer upon receiving the bar code printer. Please retain the packaging materials in case you need to reship the printer. Unpacking the printer, the following items are included in the carton.
-
Page 13: Printer Overview
2.2 Printer Overview 2.2.1 Front View LED indicator Feed/Pause button Top cover open tab Paper exit chute…
-
Page 14: Interior View
2.2.2 Interior View OPEN Printer top cover Media supply spindle Ribbon supply spindle Platen roller Ribbon supply hub Black mark sensor/Gap sensor (receiver) Ribbon rewind hub Gap sensor (transmitter) Ribbon rewind spindle Media guide Print head release button Media guide hub Fixing tab Print head WARNING…
-
Page 15: Rear View
2.2.3 Rear View Power switch Power jack socket USB interface (USB 2.0/Full speed mode) Note: The interface picture here is for reference only. Please refer to the product specification for the interfaces availability.
-
Page 16: Setup
3. Setup 3.1 Setting up the Printer Place the printer on a flat, secure surface, then follow the steps below: Plug the power cord into the AC power cord socket at the rear of the printer. Then, plug the other side into a properly grounded power outlet.
-
Page 17: Loading The Ribbon
3.2 Loading the Ribbon 1. Open the printer top cover by pressing the top cover open tabs located on each side of the printer. 2. Insert the paper core to the ribbon rewind spindle. Note: Please follow the direction when installing the ribbon rewind spindle.
-
Page 18
4. Push the print head release button to open the print head mechanism. OPEN 5. Insert the ribbon to the ribbon spindle. Note: The ribbon spindle can be substituted by insert the ribbon with notches on both sides to the ribbon mechanism directly. -
Page 19
7. Pull the leader of the ribbon through the print head and stick the leader of the ribbon onto the ribbon rewind paper core. 8. Turn the ribbon rewind hub until the ribbon plastic leader is thoroughly wound and the black section of the ribbon covers the print head. -
Page 20: Loading The Media
3.3 Loading the Media 3.3.1 Loading the Roll Labels Open the printer top cover by pressing the top cover open tabs located on each side of the printer. Insert the paper roll into the media supply spindle and use two fixing tabs to fix the paper roll onto the center of the spindle.
-
Page 21
Place the paper roll onto the paper roll mount. Media spindle with two 1.5” adapters Push the print head release button to open the print head mechanism. Gap sensor (transmitter) Black mark sensor/ Gap sensor Platen roller (emitter) Note: The black mark sensor position is moveable and the gap sensor is fixed. Please make sure the gap or black mark is at the location where media gap/black mark will pass through for sensing. -
Page 22
Close the print head mechanism with both hands and make sure the latches are engaged securely. Use “Diagnostic Tool” to set the media sensor type and calibrate the selected sensor. (Start the “Diagnostic tool” Select the “Printer Configuration” tab Click the “Calibrate Sensor”… -
Page 23: External Label Roll Mount Installation (Option)
3.3.2 External Label Roll Mount Installation (Option) 1. Attach the extended plate on the bottom of the printer. 2. Insert a 3” (or 1”) label spindle into a paper roll. Then, install it on the external paper roll mount. 1” label spindle 3”…
-
Page 24: Led And Button Functions
4. Refer to chapter 3.3.1 to install the label. Use “Diagnostic Tool” to set the media sensor type and calibrate the selected sensor. Note: Please calibrate the gap/black mark sensor when changing media. 4. LED and Button Functions This printer has one button and one three-color LED indicator. By indicating the LED with different color and pressing the button, printer can feed labels, pause the printing job, select and calibrate the media sensor, print printer self-test report, reset printer to defaults (initialization).
-
Page 25: Led Indicator
4.1 LED Indicator LED Color Description Green/Solid This illuminates that the power is on and the device is ready to use. Green/Flash This illuminates that the system is downloading data from PC to memory or the printer is paused. Amber This illuminates that the system is clearing data from printer.
-
Page 26: Gap/Black Mark Sensor Calibration
Power on utilities The LED color will be changed as following pattern: Amber Amber Green Green/Amber Red/Amber Solid green LED color (5 blinks) (5 blinks) (5 blinks) (5 blinks) (5 blinks) Functions 1. Gap / black mark sensor calibration Release 2.
-
Page 27: Gap/Black Mark Calibration, Self-Test And Dump Mode
4.3.2 Gap/Black Mark Calibration, Self-test and Dump Mode While calibrate the gap/black mark sensor, printer will measure the label length, print the internal configuration (self-test) on label and then enter the dump mode. To calibrate gap or black mark sensor, depends on the sensor setting in the last print job. Please follow the steps below to calibrate the sensor.
-
Page 28
Self-test printout Model name F/W version Firmware checksum Printer S/N TSC configuration file System date System time Printed mileage (meter) Cutting counter Print speed (inch/sec) Print darkness… -
Page 29
Numbers of download files Total & available memory space Print head check pattern… -
Page 30: Printer Initialization
Dump mode Printer will enter dump mode after printing printer configuration. In the dump mode, all characters will be printed in 2 columns as following. The left side characters are received from your system and right side data are the corresponding hexadecimal value of the characters. It allows users or engineers to verify and debug the program.
-
Page 31: Set Black Mark Sensor As Media Sensor And Calibrate The Black Mark Sensor
Printer configuration will be restored to defaults as below after initialization. Parameter Default setting Speed 127 mm/sec (5 ips) (203DPI) 76 mm/sec (3 ips) (300DPI) Density 4″ (101.5 mm) Label Width 4″ (101.5 mm) Label Height Sensor Type Gap sensor 0.12″…
-
Page 32: Skip Auto.bas
Amber red (5 blinks) amber (5 blinks) green (5 blinks) green/amber (5 blinks) red/amber (5 blinks) solid green 4.3.6 Skip AUTO.BAS TSPL2 programming language allows user to download an auto execution file to flash memory. Printer will run the AUTO.BAS program immediately when turning on printer power.
-
Page 33: Diagnostic Tool
5. Diagnostic Tool TSC’s Diagnostic Utility is an integrated tool incorporating features that enable you to explore a printer’s settings/status; change a printer’s settings; download graphics, fonts and firmware; create a printer bitmap font; and send additional commands to a printer. With the aid of this powerful tool, you can review printer status and settings in an instant, which makes it much easier to troubleshoot problems and other issues.
-
Page 34: Printer Function
5.2 Printer Function 1. Select the PC interface connected with bar code printer. The default interface setting is USB interface. If USB interface is connected with printer, no other settings need to be changed in the interface field. 2. Click the “Printer Function” button to setup. 3.
-
Page 35: Calibrating Media Sensor By Diagnostic Tool
5.3 Calibrating Media Sensor by Diagnostic Tool 5.3.1 Auto Calibration 1. Make sure the media is already installed and print head mechanism is closed. (Please refer to section 3.3.) Gap sensor Black mark sensor 2. Turn on the printer power switch. 3.
-
Page 36: Troubleshooting
6. Troubleshooting 6.1 Common Problems The following guide lists the most common problems that may be encountered when operating this bar code printer. If the printer still does not function after all suggested solutions have been invoked, please contact the Customer Service Department of your purchased reseller or distributor for assistance.
-
Page 37: Maintenance
line. Memory full * The space of FLASH/DRAM * Delete unused files in the FLASH/DRAM. is full. ( FLASH / DRAM ) * Ribbon and media is loaded * Reload the supply. incorrectly * Clean the print head. * Dust or adhesive * Clean the platen roller.
-
Page 38: Revise History
This session presents the clean tools and methods to maintain your printer. 1. Please use one of following material to clean the printer. Cotton swab Lint-free cloth Vacuum / Blower brush 100% ethanol 2. The cleaning process is described as following, Printer Part Method Interval…
-
Page 39
Date Content Editor… -
Page 40
9F., No.95, Minquan Rd., Xindian Dist., No.35, Sec. 2, Ligong 1st Rd., Wujie Township, New Taipei City 23141, Taiwan (R.O.C.) Yilan County 26841, Taiwan (R.O.C.) TEL: +886-2-2218-6789 TEL: +886-3-990-6677 FAX: +886-2-2218-5678 FAX: +886-3-990-5577 Web site: www.tscprinters.com E-mail: printer_sales@tscprinters.com TSC Auto ID Technology Co., Ltd. tech_support@tscprinters.com…
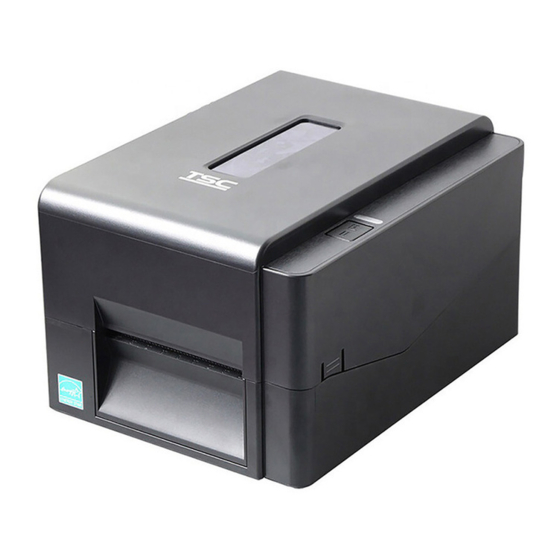
TSC TE200 — популярная модель принтера этикеток. Он поддерживает термотрансферную печать, 8 встроенных шрифтов, командные языки Eltron® и Zebra®. Разрешение печати — 203 dpi, скорость работы — 152,4 мм/с. Подключается к компьютеру при помощи USB 2.0.
Модель можно использовать в розничных магазинах, на складах, в транспортной сфере, а также для работы с маркетплейсами Ozon и Wildberries. Есть 16 МБ оперативной памяти и 8 МБ флэш-памяти. Как настроить принтер этикеток TSC TE200 после покупки, расскажем в этой статье.
Установка и включение принтера
В комплект поставки устройства входят:
- принтер;
- кабель и блок питания;
- шнур USB 2.0;
- вал для риббонов (2 шт.);
- вал дня носителя;
- бумажная втулка для красящей ленты;
- печатная инструкция;
- диск с инструкциями, ПО и драйверами.
Размещать принтер рекомендуется на ровной поверхности — рабочем столе, прилавке и пр. Сперва необходимо убедиться, что тумблер устройства установлен в положение «выкл.», он расположен на задней панели. Затем можно подключить TSC TE200 с помощью сетевого кабеля и блока питания, а также соединить с компьютером при помощи шнура USB. Только после этого оборудование включается путём нажатия тумблера.
Загрузка расходных материалов
Чтобы поместить риббоны в принтер, необходимо:
- поднять крышку устройства, нажав на защёлки по бокам;
- поместить бумажную втулку на вал перемотки ленты;
- установить его сначала правой, а затем левой стороной (стороны подписаны литерами L и R);
- приподнять механизм печатающей головки путём нажатия квадратной зелёной кнопки;
- надеть риббон на другой вал;
- установить внутри устройства шпиндель;
- протянуть конец красящей ленты через термоголовку и закрепить на бумажном сердечнике, расположенном на первом шпинделе;
- повернуть втулку, пока риббон не будет плотно намотан на неё;
- закрыть печатающий механизм и крышку.
Для установки носителя требуется:
- открыть крышку принтера с помощью боковых защёлок;
- надеть рулон этикет-ленты на вал подачи носителя, при необходимости используя переходник;
- разместить вал с рулоном носителя внутри принтера;
- нажатием зелёной кнопки поднять печатающую головку;
- протянуть этикет-ленту через датчик носителя и поместить ее конец на бумагоопорный валик;
- настроить положение направляющих по ширине этикеток;
- опустить печатающий механизм и закрыть крышку оборудования.
Драйверы и ПО
Принтер работает с операционными системами Windows и Oracle Linux. Всё нужное для работы программное обеспечение есть на диске, который входит в комплект поставки. На нём присутствует руководство пользователя и программа BarTender, с помощью которой можно создавать шаблоны этикеток.
Драйверы для устройства можно загрузить с официального сайта производителя. Они находятся в разделе «Поддержка и загрузка» — нужно выбрать тип ПО и указать модель принтера. На сайте также есть различные программы для других моделей производителя TSC.

Настройка принтера TSC TE200
Долгое удерживание кнопки Feed с последующим включением принтера активирует встроенные утилиты для тестирования и настройки печати. Их всего шесть. Узнать, какая именно была запущена, можно по цвету индикатора:
- красный — калибровка датчика зазора/чёрной метки;
- жёлтый (мигающий) — регулировка датчика зазора/чёрной метки;
- зелёный (мигающий) — режим инициализации;
- зелёный/жёлтый — настройте датчик носителя чёрной метки и откалибруйте его;
- красный/жёлтый — настройте датчик зазора в качестве датчика носителя и откалибруйте его;
- зелёный (горящий) — пропуск AUTO.BAS.
Калибровка датчиков
Калибровку датчика зазора/чёрной метки необходимо проводить, если:
- принтер подключен в первый раз;
- произведена замена этикет-ленты;
- выполняется инициализация.
Чтобы провести калибровку, кнопку Feed нужно отпустить в тот момент, когда индикатор начнёт мигать красным.
Регулировка зазора/чёрной метки, самодиагностика и режим дампа
Утилита запускается, когда индикатор мигает жёлтым. В процессе регулировки принтер автоматически определяет длину этикетки, выводит результаты самодиагностики на печать, а затем переходит в режим дампа. Это помогает диагностировать повреждение нагревательных элементов, определить объём свободной памяти, конфигурацию. Чтобы печатать данные в режиме дампа, необходима бумага шириной 100 мм. Для возвращения в стандартный режим принтер нужно перезапустить путём выключения/включения.
Инициализация
Инициализация работает, когда индикатор мигает зелёным. Она необходима для очистки оперативной памяти и сброса оборудования до заводских настроек. При инициализации удаляются все загруженные файлы, а также установленное программное обеспечение.
Настройка датчиков
Датчики можно настроить двумя способами, в зависимости от типа используемого носителя (с чёрными метками или зазорами). Для чёрной метки это поочерёдное мигание индикатора жёлтым/зелёным, для зазора — красным/жёлтым.
Пропуск AUTO.BAS
С помощью командного языка TSPL2 можно автоматически загружать выполняемый файл во flash-память устройства. Это возможно за счёт программы AUTO.BAS — она активируется при включении. Если во время настройки отпустить кнопку Feed в момент, когда индикатор будет непрерывно гореть зеленым, программное обеспечение не будет функционировать.
Инструкция по настройке TSC TE200 с помощью диагностической программы
Чтобы следить за состоянием принтера этикеток и настраивать его, в нём предусмотрена встроенная диагностическая программа Diagnostic tool. С её помощью можно также загружать шрифты и графику. Работа с ней осуществляется через компьютер.
Чтобы настроить печатное оборудование с помощью программы, необходимо:
- найти вкладку «Printer Configuration», выбрать интерфейс подключения устройства к ПК (USB);
- зайти в раздел «Printer Function», выбрать нужные функции;
- для регулировки датчика нужно нажать на первую кнопку в разделе Printer Function и выбрать тип носителя, а затем кликнуть по кнопке «Calibrate» (калибровка).
Распространённые проблемы в работе и их решение
Среди наиболее распространённых неисправностей в работе TSC TE200:
- Не горит индикатор. Проблема может быть в отсутствии питания или неправильном подключении кабеля. Необходимо проверить правильность подключения устройства к электросети.
- Флэш-память переполнена. Необходимо её очистить путём удаления лишних данных.
- Принтер не печатает этикетки. Причин может быть несколько — закончились расходники, риббон и носитель несовместимы между собой или термоголовка загрязнилась/вышла из строя. Необходимо поочерёдно проверить все три варианта.
- Принтер пропускает этикетки в процессе печати. Причиной может быть неправильно установленный размер этикеток, ошибки при калибровке датчика или присутствие на нём загрязнений.
- Этикетки выходят из устройства помятыми. Причина может скрываться в неправильной загрузке риббона — убедитесь, что направляющая носителя задевает края риббона.
- На этикетках присутствует серая полоса. Возможно, печатающая головка или опорный валик загрязнены — в этом случае их нужно будет очистить.
- Данные на этикетках некорректны. Скорее всего, оборудование находится в режиме дампа — чтобы выйти из этого режима, его нужно перезагрузить.
Как видите, установка и настройка принтера этикеток TSC TE200 — задача, требующая времени. При необходимости вы можете обратиться к специалистам, которые помогут быстро настроить устройство, а также оперативно решат любые проблемы с его работой.
Преимущества сервиса Port
Авторизованный сервисный центр для 22 производителей
Услуги по монтажу, настройке, ремонту всего спектра оборудования
Аккредитованные специалисты
Доставка оборудования в сервисный центр
БОЛЬШЕ О СЕРВИСНОМ ЦЕНТРЕ
Обязательная гарантия на услуги
Наша компания является авторизованным сервисным центром, поэтому мы всегда следим за качеством своего обслуживания.Воспользовавшись нашими услугами вы получаете:
Штат специалистов, готовый ответить на вопросы
Бесплатный выезд специалиста
Актуальную документацию по обслуживанию оборудования
БОЛЬШЕ О СЕРВИСНОМ ЦЕНТРЕ
Вам могут быть интересны: