Руководства, описания, инструкции
Руководство пользователя Thermo King SL
SL-100e, SL-200e, SL-400e с SR-2 и SPECTRUM SL с SR-2
TK60057-2-OP (изд. 1, 08/06)
Авторефрижераторные установки с собственным двигателем TS-200, TS-300, TS-600, TS-500, SPECTRUM TS XDS SR, RD-II, KD-II, MD-200, MD-300, MD-II, SDZ, CD-II MAX UMD-II, URD-III, UTS, RD TLE, MD TLE, RD-MT, MD-MT, MD-200 MT Руководство пользователя
Авторефрижераторные установки с собственным
двигателем TS-200, TS-300, TS-600, TS-500, SPECTRUM TS XDS SR, RD-II, KD-II, MD-200, MD-300, MD-II, SDZ, CD-II MAX UMD-II, URD-III, UTS, RD TLE, MD TLE, RD-MT, MD-MT,
MD-200 MT
TK 60019-RU-1-OP (изд. 0)
Введение…………………………………………………………… 7
Руководство Пользователя Thermo King Старых Моделей Серии С
Руководство Пользователя Thermo King Старых Моделей Серии С
КНОПКИ И ИНДИКАТОРЫ УПРАВЛЕНИЯ
00 Световой индикатор включения; [2] Кнопка включения/выключения; [3) Световой индикатор заданной температуры; [4] Световой индикатор перегрузки по переменному току; [5] Световой индикатор работы установки; [б] Дисплей показаний температуры;0Световой индикатор показания температуры по Цельсию; [8]Световой индикатор показания температуры по Фаренгейту.
Руководство пользователя Thermo King Старых моделей серии V
Руководство пользователя Thermo King Старых моделей серии V
РАБОТА В РЕЖИМЕ ОТТАИВАНИЯ
РУЧНОЕ ВКЛЮЧЕНИЕ РЕЖИМА ОТГАИВАНИЯ*)
При нажатии кнопка ручного включения запускает режим оттаивания, если температура испарителя ниже 2°С или 35°F, при этом светодиод оттаивания должен включиться.
Установка будет работать в режиме охлаждения автоматически, когда цикл оттаивания закончится.
Руководство пользователя Direct Smart Reefer Thermo King Серии V
Руководство пользователя Direct Smart Reefer Thermo King Серии V
Установки с приводом от двигателя автомобиля и контроллером Direct Smart Reefer Руководство по эксплуатации B-100, V-100, V-200, V-300, V-400, V-500, V-700
РУССКИЙ содержание
Руководство оператора пульта управления ThermoGuard uP-T Smart Reefer
Руководство оператораThermoGuard TG-VI
Руководство оператораThermoGuard TG-VI
РАЗДЕЛ I
ПРАВИЛА БЕЗОПАСНОЙ ЭКСПЛУАТАЦИИ
Правила безопасности I-I
Общие правила I-I
Автоматический запуск/остановка I-I
Руководство пользователя Smart Reefer2
Руководство пользователя Smart Reefer2
ФУНКЦИИ ПУЛЬТА УПРАВЛЕНИЯ HMI
Пульт управления HMI (Human/Machine Interface) подключен к контроллеру и служит для управления агрегатом и отображения информации . Пульт HMI и контроллер соединены шиной CAN (Controller Area Network) . HMI также включает в себя регистратор данных о температуре груза Cargo Watch . Он расположен на дверце блока управления
Руководство оператора ThermoGuard Spectrum Multi-Temp
Раздел 1 — Информация по техникебезопасности SPECTRUM
Общие правила………………………………………………………………………………………………………………….. 1-1
Автоматический пуск и останов………………………………………………………………………………………… 1-1
Руководство пользователя SLX
SLX-100, 200 и 400 с контроллером SR-2
Введение
Общие сведения………………………………………………………………………………………………………………………………………………………………………….. 4
СЛУЖБА Thermo Assistance…………………………………………………………………………………………………………………………………………………………. 4
Коды ошибок Thermo King
Расшифровка кодов ошибок Thermo King (Термо Кинг)
Инструкции по эксплуатации органов управления Thermo King
Полезная информация о Thermo King
- Manuals
- Brands
- Thermo King Manuals
ManualsLib has more than 546 Thermo King manuals
Popular Categories:
![]()
Air Conditioner
![]()
Power Supply
![]()
Refrigerator
Featured manuals

SR-3 — Microprocessor Simple Operation Manual
Accessories
Models
Document Type
Precedent S-600
Operator’s Manual
• Operator’s Manual
Precedent S-700
Operator’s Manual
• Operator’s Manual
Air Compressor
Models
Document Type
X214
Overhaul Manual
X418
Overhaul Manual
X426
Overhaul Manual
X430
Overhaul Manual
Air Conditioner
Models
Document Type
098916
Maintenance Manual
098922
Maintenance Manual
098924
Maintenance Manual
098934
Maintenance Manual
098935
Maintenance Manual
MAGNUM
Maintenance Manual
MAGNUM 20
Maintenance Manual
MAGNUM SL
Maintenance Manual
Precedent S-600
Operator’s Manual
• Operator’s Manual
Precedent S-700
Operator’s Manual
• Operator’s Manual
Show all Thermo King Air Conditioner manuals
Automobile Accessories
Models
Document Type
42-2499
Installation Procedures
B-100
Diagnostic Manual
E-200
Operato’s Manual
• Installation Manual
Precedent C-600M
Installation Manual
• Operator’s Manual
Precedent S-750i
Installation Manual
SB-III 30 SR+
Manual
SLXi Spectrum
Operator’s Manual
• Operator’s Manual
• Maintenance Manual
• Manual
SLXi Spectrum Whisper Pro
Operator’s Manual
• Operator’s Manual
• Maintenance Manual
• Manual
SLXi-100
Operator’s Manual
• Operator’s Manual
• Maintenance Manual
• Maintenance Manual
• Manual
SLXi-200
Operator’s Manual
• Operator’s Manual
• Maintenance Manual
• Maintenance Manual
• Manual
Show all Thermo King Automobile Accessories manuals
Chiller
Models
Document Type
UT-1280
Installation Manual
• Operator’s Manual
Commercial Food Equipment
Models
Document Type
VM-405 PBBD2
User Manual
• Operating Manual
Computer Hardware
Models
Document Type
Smart Reefer 2
Driver Manual
Smart Reefer 3
Driver Manual
• User Manual
Smart Reefer 4
Manual
Sr-2
Manual
SR-3
Manual To Simple Operation
• Driver Manual
• Diagnostic Manual
• User Manual
SR-4
Manual
Control Systems
Models
Document Type
919180
Manual
919181
Manual
919182
Manual
919190
Manual
919191
Manual
919192
Manual
SL-400e
Diagnostic Manual
• Maintenance Manual
SLX Series
Diagnostic Manual
SLXe Series
Diagnostic Manual
SLXi Series
Diagnostic Manual
Show all Thermo King Control Systems manuals
Control Unit
Models
Document Type
920271
Manual
920272
Manual
920273
Manual
920274
Manual
920275
Manual
920276
Manual
V-500
Operator’s Manual
• Manual
• Diagnostic Manual
V-500 MAX-10
Manual
V-500 MAX-20 1PH
Manual
V-500 MAX-20 3PH
Manual
Show all Thermo King Control Unit manuals
Controller
Models
Document Type
ClimaAIRE BEA114
Operator’s Manual
ClimaAIRE I D TK 60065
Operator’s Manual
IntelligAIRE II
Operator’s Manual
Engine
Models
Document Type
SB-400
Manual
Heat Pump
Models
Document Type
Ce-Series
Operator’s Manual
CRR-20
Maintenance Manual
CRR-40
Maintenance Manual
CRR-40 119
Manual
CRR-40 119A
Manual
CRR-40 172
Manual
CRR-40 800
Manual
CRR-40 800E
Manual
CRR-40-139
Maintenance Manual
CRR-40-141
Maintenance Manual
Show all Thermo King Heat Pump manuals
Heater
Models
Document Type
HK450
Installation Manual
• Installation Manual
HK450 HO
Installation Manual
• Installation Manual
HK450 MAX
Installation Manual
• Installation Manual
SB-200TG
Operation Manual
Trailer Edition Heat King 450 Series
Installation Manual
• Installation Manual
Heating System
Models
Document Type
HK-430 HO
Installation Manual
HK450
Installation Manual
• Installation Manual
HK450 HO
Installation Manual
• Installation Manual
HK450 MAX
Installation Manual
• Installation Manual
Trailer Edition Heat King 450 Series
Installation Manual
• Installation Manual
Industrial Equipment
Models
Document Type
MAGNUM PLUS 098212
Maintenance Manual
• Maintenance Manual
MAGNUM PLUS 098216
Maintenance Manual
• Maintenance Manual
MAGNUM PLUS 098218
Maintenance Manual
• Maintenance Manual
MAGNUM PLUS 098219
Maintenance Manual
• Maintenance Manual
MAGNUM PLUS 098223
Maintenance Manual
• Maintenance Manual
MAGNUM PLUS 098580
Maintenance Manual
• Maintenance Manual
MAGNUM PLUS 098581
Maintenance Manual
• Maintenance Manual
MAGNUM PLUS 098582
Maintenance Manual
• Maintenance Manual
MAGNUM PLUS 098583
Maintenance Manual
• Maintenance Manual
MAGNUM PLUS 098585
Maintenance Manual
• Maintenance Manual
Show all Thermo King Industrial Equipment manuals
Inverter
Models
Document Type
1100
User Manual
1500
User Manual
2000
User Manual
Laboratory Equipment
Models
Document Type
SG 3500 Series
Maintenance Manual
SGCO-3500
Maintenance Manual
SGUM-3500
Maintenance Manual
Other
Models
Document Type
TouchPrint
User Manual
• User Manual
• Manual
Portable Generator
Models
Document Type
SGCO 3000
Manual
TriPac E
Driver Operating Instructions
TriPac Envidia
Operator’s Manual
• Installation Manual
Power Supply
Models
Document Type
MAGNUM PLUS 098203
Maintenance Manual
MAGNUM PLUS 098212
Maintenance Manual
• Maintenance Manual
MAGNUM PLUS 098216
Maintenance Manual
• Maintenance Manual
MAGNUM PLUS 098218
Maintenance Manual
• Maintenance Manual
MAGNUM PLUS 098219
Maintenance Manual
• Maintenance Manual
MAGNUM PLUS 098223
Maintenance Manual
• Maintenance Manual
MAGNUM PLUS 098580
Maintenance Manual
• Maintenance Manual
MAGNUM PLUS 098581
Maintenance Manual
• Maintenance Manual
MAGNUM PLUS 098582
Maintenance Manual
• Maintenance Manual
MAGNUM PLUS 098583
Maintenance Manual
• Maintenance Manual
Show all Thermo King Power Supply manuals
Printer
Models
Document Type
TouchPrint
User Manual
• User Manual
• Manual
Refrigerator
Models
Document Type
002008
Manual
002009
Manual
002010
Manual
002011
Manual
088669
Manual
088670
Manual
088671
Manual
088672
Manual
088673
Manual
088674
Manual
Show all Thermo King Refrigerator manuals
Remote Control
Models
Document Type
µP-T
Operating Manual
Solar panel
Models
Document Type
Ingersoll Rand NAD 100W
Installation Manual
Ingersoll Rand ThermoLite EMEA 100W
Installation Manual
Ingersoll Rand ThermoLite EMEA 36W
Installation Manual
Ingersoll Rand ThermoLite NAD 36W
Installation Manual
ThermoLite
Installation Manual
ThermoLite 401414
Installation Instructions Manual
ThermoLite T-Series
Installation Manual
Temperature Controller
Models
Document Type
SB-210+
Operator’s Manual
SB-310+
Operator’s Manual
Spectrum DE 30-2
Manual
Spectrum DE 30-3
Manual
Thermostat
Models
Document Type
914 724
Manual
914725
Manual
914728
Manual
914729
Manual
915091
Manual
915094
Manual
915097
Manual
CB MAX 10 12V
Manual
CB MAX 10 24V
Manual
CB MAX 20 12V
Manual
Show all Thermo King Thermostat manuals
Trucks
Models
Document Type
Precedent C-600
Operator’s Manual
T-1000R
Installation Manual
• Manual
• Maintenance Manual
• Operator’s Manual
• Maintenance Manual
T-1200R
Installation Manual
• Manual
• Operator’s Manual
• Maintenance Manual
T-500R
Operator’s Manual
• Maintenance Manual
T-600R
Installation Manual
• Manual
• Maintenance Manual
• Operator’s Manual
• Maintenance Manual
T-800R
Installation Manual
• Manual
• Maintenance Manual
• Operator’s Manual
• Maintenance Manual
Show all Thermo King Trucks manuals
Ventilation Hood
Models
Document Type
CF-II M19.10
Reference Sheet
CF-II M19.7
Reference Sheet
CF-II M19.8
Reference Sheet
CF-II M19.9
Reference Sheet
Water Filtration Systems
Models
Document Type
TriPac DPF
Operator’s Manual
- Manuals
- Brands
- Thermo King Manuals
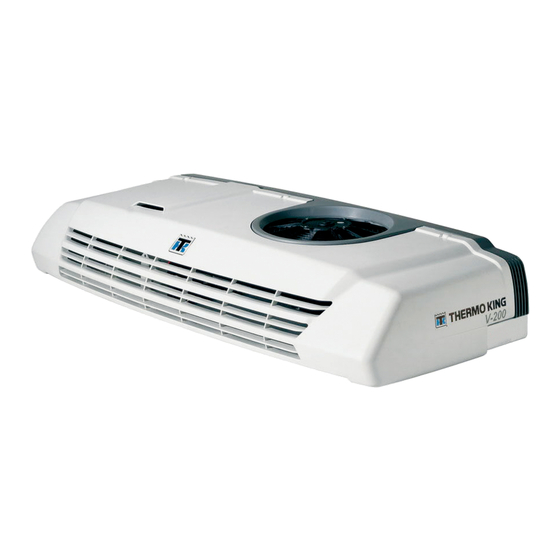
- Refrigerator
- V-200
- Manual
-
Contents
-
Table of Contents
-
Troubleshooting
-
Bookmarks
Quick Links
V-200/V-300 Series
TK 50982-1-MM (Rev. 3, 02/03)
Copyright© 2003 Thermo King Corp., Minneapolis, MN, USA.
Printed in USA.
Related Manuals for Thermo King V-200 Series
Summary of Contents for Thermo King V-200 Series
-
Page 1
V-200/V-300 Series TK 50982-1-MM (Rev. 3, 02/03) Copyright© 2003 Thermo King Corp., Minneapolis, MN, USA. Printed in USA. -
Page 2
If further information is required, Thermo King Corporation should be consulted. Sale of product shown in this manual is subject to Thermo King’s terms and conditions including, but not limited to, the Thermo King Limited Express Warranty. Such terms and conditions are available upon request. -
Page 3
Keep Polyol Ester compressor oil in tightly sealed containers. If Polyol Ester oil becomes contaminated with moisture or standard oils, dispose of properly—DO NOT USE! WARNING: When servicing Thermo King R-404A and R-134a units, use only those service tools certified for and dedicated to R-404A or R-134a refrigerant and Polyol Ester compressor oils. -
Page 5: Table Of Contents
Table of Contents List of Figures …………….9 Safety Precautions .
-
Page 6
Table of Contents Electrical Maintenance …………..35 Trouble Shooting In-Cab Control Box M-13 and M-16 . -
Page 7
Table of Contents Clutch Maintenance …………..61 Clutch Test . -
Page 8
Table of Contents… -
Page 9: List Of Figures
List of Figures Figure 1: Typical P.C. Board …………..22 Figure 2: P.C.
-
Page 10
List of Figures Figure 50: Remove Shaft Seal Cover …………64 Figure 51: Remove Shaft Seal . -
Page 11: Safety Precautions
Safety Precautions General Practices Refrigerant 1. ALWAYS WEAR GOGGLES OR SAFETY Although fluorocarbon refrigerants are classified GLASSES. Refrigerant liquid, refrigeration as safe refrigerants, certain precautions must be oil, and battery acid can permanently damage observed when handling them or servicing a unit the eyes (see First Aid under Refrigeration in which they are used.
-
Page 12: Low Voltage
Safety Precautions when working with an operating refrigeration First Aid unit. Lethal voltage potentials can exist on IMMEDIATE action must be initiated after a connections in the high voltage tray of the control person has received an electrical shock. Obtain box.
-
Page 13: Specifications
Specifications GENERAL Compressor TK208R, or SELTEC TM-13XD or SELTEC TM-15XD Compressor Oil Charge 1 Compressor systems 12 oz. (354.8 ml) 2 Compressor systems 24 oz. (709.7 ml) Compressor Oil Type Polyol Ester P/N 203-413 Defrost Method: Hot gas Defrost Timer: Initiation Interval Adjustable, 1 hour to 10 hours Termination Interval…
-
Page 14: R-404A Refrigeration System
Specifications R-404A REFRIGERATION SYSTEM (V-200/V-300 Max-10, V-200/V-300 Max-20, V-200/V-300 Max TC-10, V200/300-Max TC-20) V-200 2.75 lbs. (1.25 Kg) Refrigerant Charge V-200TC 4.00 lbs. (1.81 Kg) V-300 4.00 lbs. (1.81 Kg) Defrost Termination Switch: Opens 48.0 ± 5.4 F (8.9 ± 3.0 C) Closes 36.0 ±…
-
Page 15: Electrical System
Specifications ELECTRICAL SYSTEM Fuses Fuse 1: Evaporator Fan Motor (EF1) 12V Units 15 amps, 24V Units 10 amps Fuse 2: Evaporator Fan Motor (EF2) 12V Units 15 amps, 24V Units 10 amps Fuse 3: 2A Circuits 12V Units 25 amps, 24V Units 20 amps Fuse 4: 2R1 Circuit 12V &…
-
Page 16
Specifications… -
Page 17: Maintenance Inspection Schedule
Maintenance Inspection Schedule Weekly Monthly Semi- Annual Inspect/Service These Items Annual ELECTRICAL • • Check defrost initiation and termination. • • Check thermostat cycle sequence. • • Check operation of protection shutdown circuits. • Check thermostat and thermometer calibration in 0 C (32 F) ice-water bath.
-
Page 18
Maintenance Inspection Schedule… -
Page 19: Unit Description
Unit Description Introduction Compressor The Thermo King V-200/V-300 and V-200/V-300 The compressor is mounted on and driven by the MAX truck refrigeration systems are designed for truck engine. Refrigeration hoses or lines are used low and medium temperature applications on vans to connect the condenser, the evaporator, the and small-sized trucks with one compartment.
-
Page 20: Control Circuits
Unit Description Control Circuits compressor. As the refrigerant passes through the metering orifice it expands and evaporates, The control circuits operate on 12V or 24V DC cooling the suction gas entering the compressor. supplied by the truck batteries for engine This cooling effect is transferred to the discharge operation.
-
Page 21: Unit Features
Unit Description Unit Features Protection Features • Condenser • High Pressure Cutout Switch — The High Pressure Cutout Switch is a pressure sensitive • ES200 Max Evaporator (V-200) switch. It is located in the discharge line near • ES300 Max Evaporator (V-300) the oil separator on Model 10 units.
-
Page 22: Control Box
Control Box Fuses P.C. Board All Printed Circuit Boards manufactured by Thermo King can be easily identified by the Part Number stamped on them. Even though that all P.C. Boards have a similar layout, there are some differences from one to another depending on the unit model and which functions they carry out.
-
Page 23: Common Relays
Unit Description The Defrost Relay will remain energized until the defrost cycle is terminated by the Defrost Termination Switch or the In-Cab Control Box ON/OFF Switch is pressed. Standby Relays The standby relays CR1, CR2 and ER are located on the P.C. Board in Model 20. AGA1234 Commutation Relays (CR1 and CR2) When the Commutation Relays are energized the…
-
Page 24: Defrost Timer
Unit Description Pilot Solenoid Relay 3 (PS3) The condenser fan is also controlled by the condenser fan pressure switch (CFPS) on R-134a When the Remote Fan Relay 3 is energized, units. This normally open switch monitors the battery voltage energizes the liquid line solenoid compressor discharge pressure.
-
Page 25: Serial Number Locations
Unit Description Defrost Serial Number Locations The defrost cycle can be initiated any time the Nameplate located on the front CONDENSER: evaporator coil temperature is below 36 F (2.2 C). inside edge of condenser frame. Defrost is initiated automatically by the defrost Nameplate located on the outside EVAPORATOR: timer, or manually by pressing the manual defrost…
-
Page 26: Figure 5: Condenser
Unit Description ARA047 Figure 5: Condenser ARA050 Figure 6: Evaporator…
-
Page 27: Figure 7: Control Box Side Of Model 20 Condenser
Unit Description AJA1800 Transformer Motor Contactor Overload Relay P.C. Board Figure 7: Control Box Side Of Model 20 Condenser…
-
Page 28: Figure 8: Refrigeration Component Side Of Model 20 Condenser
Unit Description AJA1801 Compressor Liquid Line Sight Glass Electric Motor Defrost Solenoid Valve Condenser Coil Discharge Check Valve Liquid Injection Valve Oil Separator Drier 10. Suction Pressure Regulator Valve Figure 8: Refrigeration Component Side of Model 20 Condenser…
-
Page 29: Operating Instructions
Operating Instructions Description 1. ON-OFF KEY (M-13, and M-16 only) It is used to start/stop the unit. The internal return air temperature will be automatically displayed. 2. ON LED Indicator (M-13, and M-16 only) AJA1772 When on, it indicates that the unit has been Figure 9: M13 &…
-
Page 30: Figure 13: Setpoint Key & Dial
Operating Instructions 6. Setpoint Adjust Dial (M-13, M-16, M-17) It is used to adjust the setpoint temperature. 7. Setpoint Key (M-13, M-16, M-17) It is used to display the setpoint temperature. AJA1806 Figure 15: Defrost Key & LED AJA1804 8. Power Cord LED (M-13, and M-16 only) When on, it indicates the unit is plugged to the A.C.
-
Page 31: In-Cab Control Box Operating Instructions (M-13, M-16, M-17)
Operating Instructions In-Cab Control Box Operating Instructions (M-13, M-16, M-17) Display Return Air (Box) Temperature During normal operation (unit is ON and cooling), the ON LED Indicator, the Unit Operation LED and Celsius/Fahrenheit LED Indicator should be AJA1808 ON; the return air (box) temperature should be displayed on the screen.
-
Page 32: Unit Operation
In-Cab 4. Products should be pre-cooled before loading. Control Box on TC units. Thermo King units are designed to maintain loads at the temperature at which they were Electric Standby Operation loaded. Transport refrigeration units are not 1.
-
Page 33: Post Load Procedure
Operating Instructions Post Load Procedure 1. Be sure all the doors are closed and locked. 2. Adjust the thermostat(s) to the desired temperature setpoint(s). 3. Start the unit. 4. Half an hour after loading, defrost the unit by momentarily pressing the Manual Defrost switch.
-
Page 34
Operating Instructions… -
Page 35: Electrical Maintenance
Electrical Maintenance Trouble Shooting In-Cab Control Box M-13 and M-16 Before starting this trouble shooting, verify that the In-Cab Control Box 12/24V selector is placed in the correct position and check the ground circuit through Pin 9 Connector C-9. AJA1775 Figure 19: BLOCK DIAGRAM M-13, M-16 IMPORTANT: This trouble shooting only covers In-Cab Control Box functions and should not be…
-
Page 36
Electrical Maintenance SYMPTOMS REMEDY Defrost cycle is not initiated when the Manual 1st. Box temperature must be higher than Setpoint Defrost Switch is pressed. temperature: unit must be in cool mode. 2nd. Evaporator coil temperature must be lower than 36.0 ± 5.4 F (2.2 ± 3.0 C) (defrost termination switch closed). -
Page 37: Trouble Shooting M-17 In-Cab Control Box (Tc Units Only)
Electrical Maintenance Trouble Shooting M-17 In-Cab Control Box (TC Units Only) Before starting this trouble shooting, verify that the In-Cab Control Box 12/24V selector is placed in the correct position and check the ground circuit through Pin 9 Connector C-11. AJA1810 Figure 20: BLOCK DIAGRAM M-17 IMPORTANT: This trouble shooting only covers…
-
Page 38: Defrost System
Electrical Maintenance Defrost System The factory setting for the defrost timer is four hours. Use the following information to change A defrost cycle can be started by pressing the the setting of the defrost timer. manual defrost switch or automatically by the defrost timer, when the defrost termination switch is closed and the unit is in cool mode.
-
Page 39: Manual Defrost Switch
Electrical Maintenance Manual Defrost Switch If the unit doesn’t shift to defrost cycle go to step A manual defrost switch is located in the In-Cab control box. Pressing the manual defrost switch 1. Check the evaporator temperature. initiates the defrost cycle if the defrost termination Be sure the evaporator temperature is actually switch is closed and the unit is in cool mode.
-
Page 40: Condenser Fan Pressure Switch (Cfps) R-134A Units Only
Electrical Maintenance Liquid Injection System 3. After approximately one minute, defrost should be initiated. The Defrost LED, defrost (R-404A Units Only) relay, and defrost solenoid valve must be This liquid injection switch is a temperature activated. sensitive switch located on the discharge fitting of the truck engine compressor.
-
Page 41: Electric Standby Circuits
Electrical Maintenance Electric Standby Circuits 2. Measure the transformer output voltage (AC) at the terminal board. Measure the voltage If the unit does not run in the electric standby between wires X1 and X4. The voltage mode use the following procedure. reading should be approximately 12/24V (depending on the unit voltage).
-
Page 42
Electrical Maintenance… -
Page 43: Refrigeration Maintenance
2000 microns to the manifold of an evacuation station. The within 5 minutes, look for a leak in the use of Thermo King Evacuation Station P/N system or in the evacuation and charging 204-725 is recommended.
-
Page 44: Checking The Refrigerant Charge
Refrigeration Maintenance 11. Start the unit on engine operation and run the 22. The above conditions MUST be established truck engine at approximately 1000 rpm. each time the refrigerant level is checked or if refrigerant needs to be added for any reason. 12.
-
Page 45: Checking Compressor Oil Charge
Refrigeration Maintenance Testing the Refrigerant Charge with a 1. Install a compressor on the system having a Loaded Box residual oil supply and self-lubricating system such as a TK 214 model. Connect an oil 1. Install a gauge manifold. separator on the discharge or suction line to 2.
-
Page 46: High Pressure Cutout Switch (Hpco)
Refrigeration Maintenance High Pressure Cutout Switch 9. Raise the discharge pressure of the compressor by blocking the condenser coil air (HPCO) flow. When the discharge pressure reaches The high pressure cutout switch is located on a 300 psi (2068 kPa) on R-134a units, or 450 psi discharge line inside the condenser unit.
-
Page 47: Cleanup Procedure For Small Truck Units
Refrigeration Maintenance Cleanup Procedure for Small Clean-up Procedure Truck Units 1. Make sure all hose routing is correct. 2. Make sure that the oil trap is correctly installed. 3. Recover contaminated refrigerant from system. 4. Remove lines from compressors (engine driven and standby).
-
Page 48
Refrigeration Maintenance Putting the Unit Back Into Operation 1. Replace check valve (or check valve seats). 2. Install new oil separator. 3. Install new liquid injection orifice. 4. Install new drier. 5. Install new expansion valve. 6. Install compressors and lines. 7. -
Page 49: Refrigeration Service Operations
Refrigeration Service Operations NOTE: It is generally good practice to replace 3. Disconnect the clutch wire and the discharge the filter drier whenever the high side is opened and suction lines (and liquid injection hose if or when the low side is opened for an extended necessary).
-
Page 50: Condenser Coil
Refrigeration Service Operations Condenser Coil 3. Install and tighten the ORS nuts. Hold the drier with a back-up wrench on the hex behind the ORS fitting. Removal 4. Pressurize the system and test for leaks. 1. Recover the refrigerant charge. 5.
-
Page 51: Oil Separator
Refrigeration Service Operations 5. Reinstall the condenser cover. CAUTION: Use a heat sink to prevent 6. Recharge the unit. damaging the valve when soldering. Liquid Injection Metering Installation Orifice 1. Clean the tubes for soldering if necessary. Removal 2. Remove the coil and disassemble the valve if soldering.
-
Page 52: Testing The Liquid Injection Solenoid Valve And Metering Orifice
Refrigeration Service Operations Testing the Liquid Injection Discharge Check Valve (Model Solenoid Valve and Metering Orifice 20 Only) 1. Disconnect the CLU and LIS wires from the Testing the Discharge Check Valve liquid injection switch. The discharge check valve is a very important part 2.
-
Page 53: Figure 28: Check Valve Assembly
Refrigeration Service Operations ARA054 Cover Nut Piston Spring Sealing Washer Sealing Washer Piston Screw/Piston Seat Cap Nut Piston Valve Body Figure 28: Check Valve Assembly 8. Observe the gauge manifold reading of the 11. Observe the gauge manifold readings of the engine driven compressor.
-
Page 54: Check Valve Repair
Refrigeration Service Operations Check Valve Repair 4. If no leaks are found, evacuate the system. 5. Recharge the unit with refrigerant and check Disassembly compressor oil. 1. Recover the refrigerant charge. Evaporator Coil 2. Loosen the cap nut and remove the cap nut, sealing washer, spring, and piston assembly.
-
Page 55: Expansion Valve Assembly
Refrigeration Service Operations Expansion Valve Assembly Removal 1. Recover the refrigerant charge. 2. Remove the evaporator cover. Disconnect the evaporator fan motor wires. 3. Remove the feeler bulb from the suction line clamps. Note the position of the feeler bulb on the suction line.
-
Page 56: Suction Receiver Tank (Heat Option Only)
Refrigeration Service Operations Suction Receiver Tank (Heat In-line Check Valves (TC Units Option Only) Only) TC units use in-line check valve in the hot gas Removal and/or liquid lines. These check valves are located 1. Recover the refrigerant charge. in the TC/heat kit. An in-line check valve is not repairable and must be replaced if it fails.
-
Page 57: Replacing Refrigerant Hoses (Speedy Clip System)
Use only one clip for hose #4. ASA127 Figure 32: Fitting The Clips 3. Lubricate the cylinder of the fitting to be inserted in the hose using Thermo King refrigerant oil. Figure 37: Tightening Both Clips ASA128 Figure 33: Lubricating The Cylinder Of The Fitting…
-
Page 58
Refrigeration Service Operations… -
Page 59: Structural Maintenance
Structural Maintenance Unit Inspection Inspect the unit during the pre-trip inspection and during scheduled maintenance inspections for loose or broken wires or hardware, compressor oil leaks, or other physical damage which might affect unit performance and require repair or replacement of parts. Evaporator Coil Clean the coils during scheduled maintenance inspections.
-
Page 60
Structural Maintenance… -
Page 61: Clutch Maintenance
Clutch Maintenance Clutch Test 1. If the field coil lead wire is broken, replace the field coil. 2. Check the amperage and voltage. The amperage range should be 3.6 to 4.2 amps at 12 volts or 1.8 to 2.1 amps at 24 volts. Note the following symptoms and conditions.
-
Page 62: Figure 42: Remove Snap Ring And Cover
Clutch Maintenance NOTE: DO NOT hold the coil by the lead wire. Figure 44: Remove Coil Snap Ring Cover Inspection Figure 42: Remove Snap Ring and Cover 1. Drive Plate 5. Remove the pulley assembly using the clutch If the contact surface is scorched, the drive remover (P/N 204-806) and the spacer plate and pulley should be replaced.
-
Page 63: Clutch Installation
Clutch Maintenance Clutch Installation 5. Install the cover and the snap ring using external ring pliers (P/N 204-808). NOTE: Before installation refer to “Inspection” NOTE: When installing the snap ring, the above. chamferred inner edge of the snap ring 1. Confirm that the felt is installed on the front of should face upward.
-
Page 64: Shaft Seal Cover And Shaft Seal: Removal And Installation
Clutch Maintenance NOTE: The shaft seal cover SHOULD NOT be reused. Always use a new shaft seal cover when reassembling a compressor. 8. Ensure that the clutch clearance is as specified. If necessary, adjust the clearance using shims. Adjusting shims are available in the following Shaft Seal Cover thicknesses: Shim P/N…
-
Page 65: Figure 52: Inspect Shaft Seal
Clutch Maintenance damaged in any way. Make sure the shaft seal is 4. Place the shaft seal on the seal guide and slide free from lint and dirt that could damage the shaft the seal into the cylinder head. seal surface. Figure 52: Inspect Shaft Seal Shaft Seal Installation Before installing a shaft seal inspect it carefully…
-
Page 66: Special Tools
Clutch Maintenance Special Tools 8. Place the shaft seal cover on the seal guide and slide the shaft seal cover into the cylinder head. 8932a Figure 56: Install Shaft Seal Cover Figure 58: Clutch Remover P/N 204-806 9. Use the seal installer (from the shaft seal kit P/N 204-805) to press the shaft seal cover into the cylinder.
-
Page 67: Figure 60: Clutch Installation Kit P/N 204-890
Clutch Maintenance 8932e 8932c Figure 62: Shaft Seal Kit P/N 204-805 Figure 60: Clutch Installation Kit P/N 204-890 8932d Figure 61: Snap Ring Pliers P/N 204-808…
-
Page 68: System Compressor And Oil
Clutch Maintenance During normal operation there is always a quantity of oil that travels around inside the system. This oil lubricates all the components, returns to the compressor for a while, and again travels around the system. Adding Extra Oil to the System The initial oil charge into a new system is based on the size of the system and the amount of oil, which remains in the compressor during…
-
Page 69: Belt Tensions
Clutch Maintenance Remove the compressor from the unit and drain CAUTION: Any extra or replacement oil the oil from the compressor drain plug and all should be placed into the system at the other ports. Turn the clutch (rotating the internal compressor parts) by hand and drain oil again.
-
Page 70
Clutch Maintenance… -
Page 71: Over-The-Road Mechanical Diagnosis
Over-the-Road Mechanical Diagnosis If desired box temperature cannot be obtained refrigerant, evacuate the system to 500 microns during engine driven compressor operation, any and recharge with the proper amount of of the following may be indicated: refrigerant. An excessive heat load During EXCESSIVE HEAT LOAD: TEMPERATURE OF THE LIQUID LINE:…
-
Page 72
Over-the-Road Mechanical Diagnosis… -
Page 73: Electric Standby Mechanical Diagnosis
Electric Standby Mechanical Diagnosis Condition Possible Cause Remedy Compressor does not run Improperly wired Check wiring against diagram Low line voltage Check line voltage, determine location of voltage drop Relay contacts not closing Check by operating manually. Replace relay if defective Fuses blown Replace fuses Open circuit in motor winding…
-
Page 74
Electric Standby Mechanical Diagnosis Condition Possible Cause Remedy Unit operates long or Shortage of refrigerant Repair leak and recharge continuously Discharge valve leaking Replace leak Thermostat faulty Repair or replace Dirty condenser Clean condenser Air in system Evacuate and recharge system Compressor inefficient Replace compressor Plugged expansion valve… -
Page 75
Electric Standby Mechanical Diagnosis Condition Possible Cause Remedy Head pressure too low Refrigerant shortage Repair leak and recharge Compressor suction or discharge Replace valve valve inefficient Noisy unit Insufficient compressor oil Add oil to proper level Mounting bolts loose Tighten Refrigerant flooding back Adjust oil level or refrigerant charge. -
Page 76: Electric Standby Service Checks
Electric Standby Mechanical Diagnosis Electric Standby Service Checks 1.Compressor does not run. a.Check for power at source. b.Check for power at plug. c.Check for power at compressor contactor. d.Check for power at overload terminals (contactor closed). e.Check for power at motor terminals. 2.Power at compressor terminals but motor does not a.Replace compressor.
-
Page 77: Refrigeration Diagnosis Chart
Refrigeration Diagnosis Chart POSSIBLE CAUSES • • Overcharge of refrigerant • • • • • • • Shortage of refrigerant • • • • • • • • No refrigerant • Air through condenser too hot (ambient) • Air flow through condenser restricted (dirty) •…
-
Page 78
Refrigeration Diagnosis Chart… -
Page 79: Index
Index Expansion Valve Assembly 55 After Start Inspection 32 Fuses 22 BELT 15 Belt Tensions 69 GENERAL 13 General 11 Check Valve Repair 54 Check Valve Replacement 54 Checking Compressor Oil Charge 45 High 11 Checking the Oil Level 68 High Pressure Cutout And Condenser Fan Pressure Checking the Refrigerant Charge 44 Switches 50…
-
Page 80
Index R 14 Refrigerant 11, 20 Refrigerant Charge 43 Refrigeration 11 Refrigeration Diagnosis Chart 77 Refrigeration Maintenance 43 Refrigeration Service Operations 49 Replacing Refrigerant Hoses (Speedy Clip System) 57 Safety 11 Safety Precautions 11 Serial Number Locations 25 Shaft Seal Cover and Shaft Seal Removal And Installation 64 Solenoid Valves 50 Special Tools 66… -
Page 81: Diagram Index
Diagram Index Dwg No. Drawing Title 1B20489 “V200-10/R134a Refrigeration Diagram” — Page 1 of 1 1B19462 “V-200/V-300 Condenser Outline Drawing” — Page 1 and 2 of 2 1B19463 “ES200 & ES200 MAX Evaporators Outline Drawing” — Page 1 and 2 of 2 1B21121 “V200-20/R134a Refrigeration Diagram”…
-
Page 82
Diagram Index… -
Page 83
V200-10/R134a Refrigeration Diagram… -
Page 84
V-200/V-300 Condenser Outline Drawing… -
Page 85
V-200/V-300 Condenser Outline Drawing… -
Page 86
ES200 & ES200 MAX Evaporators Outline Drawing… -
Page 87
ES200 & ES200 MAX Evaporators Outline Drawing… -
Page 88
V200-20/R134a Refrigeration Diagram… -
Page 89
V200 MAX-10/R404A Refrigeration Diagram… -
Page 90
V200-20MAX Jet Cool Installation… -
Page 91
V200 MAX-20/R404A Refrigeration Diagram… -
Page 92
Draining Tubes & Heaters Installation Drawing… -
Page 93
Draining Tubes & Heaters Installation Drawing… -
Page 94
V200 MAXTC-20 Refrigeration Diagram… -
Page 95
MTCH Kit Outline Drawing… -
Page 96
MTCH Kit Outline Drawing… -
Page 97
V-300-10/R134a Refrigeration Diagram… -
Page 98
V300-20/R134a Refrigeration Diagram… -
Page 99
V300 MAX-10/R404A Refrigeration Diagram… -
Page 100
V300 MAX-20/R404A Refrigeration Diagram… -
Page 101
ES300 Evaporator Outline Drawing… -
Page 102
ES300 Evaporator Outline Drawing… -
Page 103
ES150 Evaporator Outline Drawing… -
Page 104
ES150 Evaporator Outline Drawing… -
Page 105
V-200-10/AC V-300-10AC 12V; 24V 134a Wiring Diagram… -
Page 106
V-200-10/AC V-300-10/AC 12V; 24V Schematic Diagram… -
Page 107
V-200/V-300-20/AC V200/300 MAX-20/50/AC 1 PH 60Hz 12V; 24V Wiring Diagram… -
Page 108
V-200/V-300-20/AC 1PH 60 Hz 12V; 24V Schematic Diagram… -
Page 109
V-200 MAXTC-10/30 V-200 MAXTCI-10 12V/24V Wiring Diagram… -
Page 110
V-200 MAXTC-10/30 12V/24V Schematic Diagram… -
Page 111
V-200-20/AC V-300-20/AC 1 PH 60Hz 12V; 24V Wiring Diagram… -
Page 112
V-200-20/AC V-300-20/AC 1 PH 60Hz 12V; 24V Schematic Diagram… -
Page 113
V-200-20/AC V-300-20/AC 3PH 60Hz 12V; 24V Schematic Diagram… -
Page 114
V-200-20/AC V-300-20/AC 3PH 60Hz 12V; 24V Wiring Diagram… -
Page 115
V-200/V-300 MAXTC-20, 3PH 60Hz; 12V; 24V Wiring Diagram… -
Page 116
V-200/V-300 MAXTC-20, 3PH 60Hz; 12V/24V Schematic Diagram… -
Page 117
V-200 MAXTC-20 3PH 60Hz; 12V/24V (Safeway) Wiring Diagram… -
Page 118
V-200 MAXTC-20 3PH 60Hz 12V/24V (Safeway) Schematic Diagram…
Инструкции по ремонту авторефрижераторов (рефрижераторов) Thermo King (Термо Кинг) на нашем сайте нет.
Инструкции на пульты управления
![]() SR2 — пульт управления авторефрижераторов SLe и SLX
SR2 — пульт управления авторефрижераторов SLe и SLX
![]() ThermoGuard TG-VI
ThermoGuard TG-VI
![]() ThermoGuard uP-T
ThermoGuard uP-T
![]() Spectrum Multi-Temp
Spectrum Multi-Temp
Инструкции на авторефрижераторы
![]() SL-100e, SL-200e, SL-400e и SPECTRUM SL
SL-100e, SL-200e, SL-400e и SPECTRUM SL
![]() SLX-100, 200 и 400 с контроллером SR-2
SLX-100, 200 и 400 с контроллером SR-2
![]() TS-200, TS-300, TS-600, TS-500, SPECTRUM TS, XDS SR, RD-II, KD-II, MD-200, MD-300, MD-II, SDZ, CD-II MAX, UMD-II, URD-III, UTS, RD TLE, MD TLE, RD-MT, MD-MT, MD-200 MT
TS-200, TS-300, TS-600, TS-500, SPECTRUM TS, XDS SR, RD-II, KD-II, MD-200, MD-300, MD-II, SDZ, CD-II MAX, UMD-II, URD-III, UTS, RD TLE, MD TLE, RD-MT, MD-MT, MD-200 MT
![]() T-500R, T-600R, T-800R, T-1000R, T-1200R (1 часть), (2 часть).
T-500R, T-600R, T-800R, T-1000R, T-1200R (1 часть), (2 часть).
![]() UT-800, UT-1200
UT-800, UT-1200
![]() Нового поколения B-100, V-100, V-200, V-300, V-400, V-500, V-700
Нового поколения B-100, V-100, V-200, V-300, V-400, V-500, V-700
![]() Серия — С
Серия — С
![]() Серия — V
Серия — V