- Manuals
- Brands
- VeriFone Manuals
- Payment Terminal
- V200t
- Installation manual
-
Contents
-
Table of Contents
-
Troubleshooting
-
Bookmarks
Quick Links
V200t
Installation Guide
Verifone Part Number DOC470-003-EN-A, Revision A
Related Manuals for VeriFone V200t
Summary of Contents for VeriFone V200t
-
Page 1
V200t Installation Guide Verifone Part Number DOC470-003-EN-A, Revision A… -
Page 2
Verifone, Inc. The information contained in this document is subject to change without notice. Although Verifone has attempted to ensure the accuracy of the contents of this document, this document may include errors or omissions. The examples and sample programs are for illustration only and may not be suited for your purpose. -
Page 3: Table Of Contents
Connecting ECRs to the V200t ……..
-
Page 4
V200t Terminal …….. -
Page 5: Preface
This guide is organized as follows: Chapter 1, Overview. Provides an overview of a V200t device. Chapter 2, Setup. Explains how to set up and install the V200t and establish connections with other devices. Chapter 3, Specifications. Discusses the power requirements and dimensions of V200t.
-
Page 6: Acronym Definitions
REFACE Guide Conventions Table 1 Document Conventions Convention Meaning Example The pencil icon is used to RS-232-type devices do not work NOTE highlight important information. on the communication port. The caution symbol indicates The unit is not waterproof or CAUTION hardware or software failure, or dustproof, and is intended for loss of data.
-
Page 7
REFACE Guide Conventions Table 2 Acronym Definitions (continued) Acronym Definitions Universal Serial Bus Verifone Part Number V200 NSTALLATION UIDE… -
Page 8
REFACE Guide Conventions V200 NSTALLATION UIDE… -
Page 9: Hapter
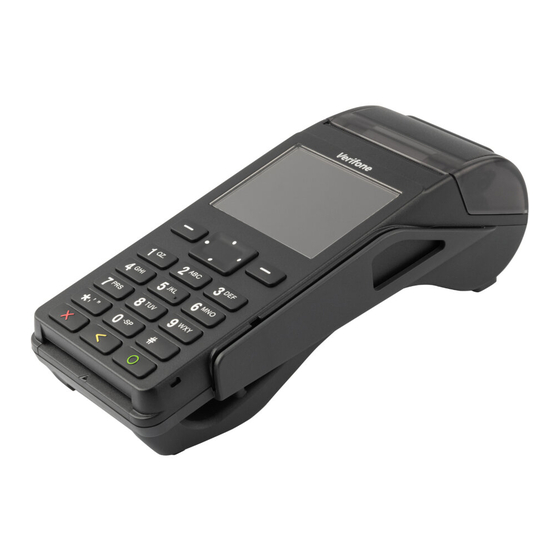
The V200t offers several communication options, enhanced display, increased processing power and two USB peripheral ports. The V200t terminal uses a robust, sleek, and highly functional design. With modular communication options, enhanced color display, increased processing power, expanded memory, and two USB peripheral ports.
-
Page 10: Rear Compartments
VERVIEW V200t Terminal • Integrated thermal printer Rear Compartments After removing the rear covers, the underside of the V200t shows the following: Figure 2 V200t Cards Compartment • Dual MSAM slots • Dual SIM slots • Micro SD Card slot •…
-
Page 11: Features And Benefits
Meets ISO and ANSI standards for PIN encryption, key management, and MAC. • The VeriShield security architecture meets published specifications for PCI PTS POI and provides sophisticated file authentication to prevent execution of unauthorized software. • Key injection simplified and secured with Verifone’s SecureKit key loading software. V200 NSTALLATION UIDE…
-
Page 12: Countertop Performance In A Hand-Over Design
VERVIEW Features and Benefits Countertop • The 32-bit processing and multi-tasking capabilities ensures fast processing of Performance in a payment, payment-related, and value-added applications. Hand-Over Design • Exceptional display and printer graphics-handling capabilities that quickly render logos, graphical fonts, and character-based languages. V200 NSTALLATION UIDE…
-
Page 13: Setup Selecting Location
• A flat support surface such as a countertop or a table, • Near a power outlet and the terminal or computer that connects to the V200t. WARNING For safety, do not string cables or cords across a walkway. V200…
-
Page 14: Environmental Factors
• Do not use the V200t outdoors. CAUTION The V200t is not waterproof or dustproof and is intended for indoor use only. Any damage to the unit from exposure to rain or dust can void any warranty. Electrical •…
-
Page 15: Unpacking Shipping Carton
• Offer PIN security literature at the point of sale • Use signage to limit the view of the V200t to just that of the cardholder. Unpacking Carefully inspect the shipping carton and its contents for possible tampering or Shipping Carton damage.
-
Page 16: Installing Or Replacing Msam, Micro Sd And Sim Cards
Remove the clear protective film from the display. Replace all the packing materials, close the lid, and save the carton for repacking or moving the V200t unit in the future. Do not use a unit that has been tampered with or otherwise damaged. This unit WARNING comes equipped with tamper-evident label.
-
Page 17: Changing Or Installing Msams
ETUP Installing or Replacing MSAM, Micro SD and SIM Cards Changing or To change or install MSAM cards: Installing MSAMs Use steps 1 to 3 of Opening Card Compartment to get to the MSAM cardholder. Remove the old card, if any, and insert the MSAM card carefully into the slot (with the gold contacts facing downward) until fully inserted.
-
Page 18: Changing Or Installing Sim Cards (For V200T Plus Only)
If you are finished replacing or inserting cards, replace the battery and lock the rear cover back in place. Changing or To change or install SIM cards in V200t Plus units: Installing SIM Cards Use steps 1 to 3 of Opening Card Compartment to get to the SIM cardholder.
-
Page 19: Establishing Communication
ETUP Establishing Communication Establishing You can connect the V200t to your network by using the following options: Communication • Connecting by Telephone Line • Connecting by Ethernet Cable. Connecting by Connect the telephone cord to the communication port on the terminal, then route…
-
Page 20: Loading Printer Paper
Paper install paper in the printer. The V200t uses a roll of 57 mm wide x 40 mm, single-ply, thermal sensitive paper. A pink out-of-paper indicator line appears on the edge of the paper before the end of the roll. After this line appears, there is enough paper remaining on the roll to conclude at least one more transaction.
-
Page 21: Connecting Optional Devices
Different terminals support different devices, so for more information about optional devices, please contact your Verifone distributor. Optional Device You can connect several devices to your V200t. You can use the following cables Connections for different types of device connections: •…
-
Page 22: Connecting The V200T To A Pc
ETUP Connecting Optional Devices Connecting the The following illustration shows how to connect the V200t to a computer via the V200t to a PC Multi-Communication port using the RJ9 to DB9 cable (VPN CBL000-051-02-A) Figure 13 Sample PC Connection Connecting ECRs to The V200t supports electronic cash registers (ECRs).
-
Page 23: Connecting Power Supply
Power Supply Verifone ships the power supply unit with the terminal as required. Contact your Verifone representative If you have changed the context in which the terminal is used or have questions about which power supply should be used. Using an incorrectly rated power supply can damage the unit or cause it not to CAUTION work properly.
-
Page 24: Smart Card Reader
Premature removal can void the transaction. Magnetic Stripe The V200t has a magnetic card reader that uses a triple track stripe reader. This Card Reader Use gives the unit greater reliability over a wide range of swipe speeds and operating environments.
-
Page 25: Contactless Transactions
If any device is found in tamper state, please remove it immediately from service. NOTE Keep it available for potential forensic investigation, and notify your company security officer and your local Verifone representative or service provider. For more information on contacting Verifone, refer to Service and Support.
-
Page 26
ETUP Periodic Inspection V200 NSTALLATION UIDE… -
Page 27: Specifications
HAPTER Specifications This chapter discusses power requirements, dimensions, and other specifications of the V200t terminal. V200t Terminal Refer to the following technical information for the V200t terminal: Unit Power • 8 V DC, 2.25 A Operating Power: Requirements Temperature •…
-
Page 28: Primary Smart Card
Two Security Access Module (SIM) slots Connectivity • • GPRS/GSM Class 10 • GPRS DL 85.6 kbps, UL 42.8 kbps • GPRS (V200t Plus Only) • GPRS/GSM Class 10 • UMTS/HSPA DL 7.2Mbps, UL 5.7Mbps • Bluetooth • BT class 1.5 with up to 100m range as a goal (line of sight) •…
-
Page 29: Troubleshooting Guidelines
HAPTER Troubleshooting Guidelines This chapter lists typical malfunctions that may occur while operating a V200t device and the appropriate corrective action. If the problem persists – even after performing the outlined guidelines, or if the problem is not described, contact your local Verifone representative for assistance.
-
Page 30
ROUBLESHOOTING UIDELINES Transactions Fail To Process • If the problem persists, contact your local Verifone representative. Check Smart Card Reader • Perform a test transaction using several different smart cards to ensure the problem is not a defective card. •… -
Page 31: Hapter
Never use thinner, trichloroethylene, or ketone-based solvents – they can CAUTION deteriorate plastic or rubber parts. Because the V200t can be damaged by liquid, do not spray cleaners or other solutions directly onto the keypad or display. Always apply the cleaner to a cloth before cleaning the device.
-
Page 32
You will be issued MRA number(s) and the fax will be returned to you. NOTE One MRA number must be issued for each V200t unit you return to Verifone, even if you are returning several of the same model. Describe the problem(s). -
Page 33: Accessories And Documentation
Monday — Friday, 7 A.M. — 5 P.M., MST • International – Contact your Verifone representative Cables Contact your local Verifone distributor to determine which cable fits your needs. CBL159-312-01-A LAN cable for Ethernet connections (CAT5, 2.0 m). CBL000-051-02-A RJ9 to DB9 cable…
-
Page 34
ERVICE AND UPPORT Accessories and Documentation V200 NSTALLATION UIDE… -
Page 35: A P P En Di X A Caution And Warning Messages
être endommagé, en label. If a label or component aviser immédiatement la compagnie maritime appears damaged, immediately et votre représentant Verifone ou prestataire notify the shipping company and de services. your Verifone representative or service provider.
-
Page 36
Electrostatic discharges décharges électrostatiques. Les décharges can damage the equipment. électrostatiques peuvent endommager le Verifone recommends using a matériel. Verifone recommande d’utiliser un grounded anti-static wrist strap. bracelet anti-statique à la terre. Caution Setup page… -
Page 37
Caution and Warning Messages V200 NSTALLATION UIDE… -
Page 38
Verifone, Inc. 1-800-Verifone www.verifone.com V200t Installation Guide Verifone Part Number DOC470-003-EN-A, Revision A…
- Manuals
- Brands
- VeriFone Manuals
- Payment Terminal
- V200t
- Installation manual
-
Contents
-
Table of Contents
-
Troubleshooting
-
Bookmarks
Quick Links
V200t
Installation Guide
Verifone Part Number DOC470-003-EN-A, Revision A
Related Manuals for VeriFone V200t
Summary of Contents for VeriFone V200t
-
Page 1
V200t Installation Guide Verifone Part Number DOC470-003-EN-A, Revision A… -
Page 2
Verifone, Inc. The information contained in this document is subject to change without notice. Although Verifone has attempted to ensure the accuracy of the contents of this document, this document may include errors or omissions. The examples and sample programs are for illustration only and may not be suited for your purpose. -
Page 3: Table Of Contents
Connecting ECRs to the V200t ……..
-
Page 4
V200t Terminal …….. -
Page 5: Preface
This guide is organized as follows: Chapter 1, Overview. Provides an overview of a V200t device. Chapter 2, Setup. Explains how to set up and install the V200t and establish connections with other devices. Chapter 3, Specifications. Discusses the power requirements and dimensions of V200t.
-
Page 6: Acronym Definitions
REFACE Guide Conventions Table 1 Document Conventions Convention Meaning Example The pencil icon is used to RS-232-type devices do not work NOTE highlight important information. on the communication port. The caution symbol indicates The unit is not waterproof or CAUTION hardware or software failure, or dustproof, and is intended for loss of data.
-
Page 7
REFACE Guide Conventions Table 2 Acronym Definitions (continued) Acronym Definitions Universal Serial Bus Verifone Part Number V200 NSTALLATION UIDE… -
Page 8
REFACE Guide Conventions V200 NSTALLATION UIDE… -
Page 9: Hapter
The V200t offers several communication options, enhanced display, increased processing power and two USB peripheral ports. The V200t terminal uses a robust, sleek, and highly functional design. With modular communication options, enhanced color display, increased processing power, expanded memory, and two USB peripheral ports.
-
Page 10: Rear Compartments
VERVIEW V200t Terminal • Integrated thermal printer Rear Compartments After removing the rear covers, the underside of the V200t shows the following: Figure 2 V200t Cards Compartment • Dual MSAM slots • Dual SIM slots • Micro SD Card slot •…
-
Page 11: Features And Benefits
Meets ISO and ANSI standards for PIN encryption, key management, and MAC. • The VeriShield security architecture meets published specifications for PCI PTS POI and provides sophisticated file authentication to prevent execution of unauthorized software. • Key injection simplified and secured with Verifone’s SecureKit key loading software. V200 NSTALLATION UIDE…
-
Page 12: Countertop Performance In A Hand-Over Design
VERVIEW Features and Benefits Countertop • The 32-bit processing and multi-tasking capabilities ensures fast processing of Performance in a payment, payment-related, and value-added applications. Hand-Over Design • Exceptional display and printer graphics-handling capabilities that quickly render logos, graphical fonts, and character-based languages. V200 NSTALLATION UIDE…
-
Page 13: Setup Selecting Location
• A flat support surface such as a countertop or a table, • Near a power outlet and the terminal or computer that connects to the V200t. WARNING For safety, do not string cables or cords across a walkway. V200…
-
Page 14: Environmental Factors
• Do not use the V200t outdoors. CAUTION The V200t is not waterproof or dustproof and is intended for indoor use only. Any damage to the unit from exposure to rain or dust can void any warranty. Electrical •…
-
Page 15: Unpacking Shipping Carton
• Offer PIN security literature at the point of sale • Use signage to limit the view of the V200t to just that of the cardholder. Unpacking Carefully inspect the shipping carton and its contents for possible tampering or Shipping Carton damage.
-
Page 16: Installing Or Replacing Msam, Micro Sd And Sim Cards
Remove the clear protective film from the display. Replace all the packing materials, close the lid, and save the carton for repacking or moving the V200t unit in the future. Do not use a unit that has been tampered with or otherwise damaged. This unit WARNING comes equipped with tamper-evident label.
-
Page 17: Changing Or Installing Msams
ETUP Installing or Replacing MSAM, Micro SD and SIM Cards Changing or To change or install MSAM cards: Installing MSAMs Use steps 1 to 3 of Opening Card Compartment to get to the MSAM cardholder. Remove the old card, if any, and insert the MSAM card carefully into the slot (with the gold contacts facing downward) until fully inserted.
-
Page 18: Changing Or Installing Sim Cards (For V200T Plus Only)
If you are finished replacing or inserting cards, replace the battery and lock the rear cover back in place. Changing or To change or install SIM cards in V200t Plus units: Installing SIM Cards Use steps 1 to 3 of Opening Card Compartment to get to the SIM cardholder.
-
Page 19: Establishing Communication
ETUP Establishing Communication Establishing You can connect the V200t to your network by using the following options: Communication • Connecting by Telephone Line • Connecting by Ethernet Cable. Connecting by Connect the telephone cord to the communication port on the terminal, then route…
-
Page 20: Loading Printer Paper
Paper install paper in the printer. The V200t uses a roll of 57 mm wide x 40 mm, single-ply, thermal sensitive paper. A pink out-of-paper indicator line appears on the edge of the paper before the end of the roll. After this line appears, there is enough paper remaining on the roll to conclude at least one more transaction.
-
Page 21: Connecting Optional Devices
Different terminals support different devices, so for more information about optional devices, please contact your Verifone distributor. Optional Device You can connect several devices to your V200t. You can use the following cables Connections for different types of device connections: •…
-
Page 22: Connecting The V200T To A Pc
ETUP Connecting Optional Devices Connecting the The following illustration shows how to connect the V200t to a computer via the V200t to a PC Multi-Communication port using the RJ9 to DB9 cable (VPN CBL000-051-02-A) Figure 13 Sample PC Connection Connecting ECRs to The V200t supports electronic cash registers (ECRs).
-
Page 23: Connecting Power Supply
Power Supply Verifone ships the power supply unit with the terminal as required. Contact your Verifone representative If you have changed the context in which the terminal is used or have questions about which power supply should be used. Using an incorrectly rated power supply can damage the unit or cause it not to CAUTION work properly.
-
Page 24: Smart Card Reader
Premature removal can void the transaction. Magnetic Stripe The V200t has a magnetic card reader that uses a triple track stripe reader. This Card Reader Use gives the unit greater reliability over a wide range of swipe speeds and operating environments.
-
Page 25: Contactless Transactions
If any device is found in tamper state, please remove it immediately from service. NOTE Keep it available for potential forensic investigation, and notify your company security officer and your local Verifone representative or service provider. For more information on contacting Verifone, refer to Service and Support.
-
Page 26
ETUP Periodic Inspection V200 NSTALLATION UIDE… -
Page 27: Specifications
HAPTER Specifications This chapter discusses power requirements, dimensions, and other specifications of the V200t terminal. V200t Terminal Refer to the following technical information for the V200t terminal: Unit Power • 8 V DC, 2.25 A Operating Power: Requirements Temperature •…
-
Page 28: Primary Smart Card
Two Security Access Module (SIM) slots Connectivity • • GPRS/GSM Class 10 • GPRS DL 85.6 kbps, UL 42.8 kbps • GPRS (V200t Plus Only) • GPRS/GSM Class 10 • UMTS/HSPA DL 7.2Mbps, UL 5.7Mbps • Bluetooth • BT class 1.5 with up to 100m range as a goal (line of sight) •…
-
Page 29: Troubleshooting Guidelines
HAPTER Troubleshooting Guidelines This chapter lists typical malfunctions that may occur while operating a V200t device and the appropriate corrective action. If the problem persists – even after performing the outlined guidelines, or if the problem is not described, contact your local Verifone representative for assistance.
-
Page 30
ROUBLESHOOTING UIDELINES Transactions Fail To Process • If the problem persists, contact your local Verifone representative. Check Smart Card Reader • Perform a test transaction using several different smart cards to ensure the problem is not a defective card. •… -
Page 31: Hapter
Never use thinner, trichloroethylene, or ketone-based solvents – they can CAUTION deteriorate plastic or rubber parts. Because the V200t can be damaged by liquid, do not spray cleaners or other solutions directly onto the keypad or display. Always apply the cleaner to a cloth before cleaning the device.
-
Page 32
You will be issued MRA number(s) and the fax will be returned to you. NOTE One MRA number must be issued for each V200t unit you return to Verifone, even if you are returning several of the same model. Describe the problem(s). -
Page 33: Accessories And Documentation
Monday — Friday, 7 A.M. — 5 P.M., MST • International – Contact your Verifone representative Cables Contact your local Verifone distributor to determine which cable fits your needs. CBL159-312-01-A LAN cable for Ethernet connections (CAT5, 2.0 m). CBL000-051-02-A RJ9 to DB9 cable…
-
Page 34
ERVICE AND UPPORT Accessories and Documentation V200 NSTALLATION UIDE… -
Page 35: A P P En Di X A Caution And Warning Messages
être endommagé, en label. If a label or component aviser immédiatement la compagnie maritime appears damaged, immediately et votre représentant Verifone ou prestataire notify the shipping company and de services. your Verifone representative or service provider.
-
Page 36
Electrostatic discharges décharges électrostatiques. Les décharges can damage the equipment. électrostatiques peuvent endommager le Verifone recommends using a matériel. Verifone recommande d’utiliser un grounded anti-static wrist strap. bracelet anti-statique à la terre. Caution Setup page… -
Page 37
Caution and Warning Messages V200 NSTALLATION UIDE… -
Page 38
Verifone, Inc. 1-800-Verifone www.verifone.com V200t Installation Guide Verifone Part Number DOC470-003-EN-A, Revision A…
- Инструкции и руководства
- Бренды
- Viewera
- V200T
- Руководство Пользователя
Page 1
TFT-LCD TV MONITOR
V200T
USER’
S MANUAL
www.viewera.com
Rev 1.1
Note for Owners:
Guidesimo.com webproject is not a service center of VeriFone trademark and does not carries out works for diagnosis and repair of faulty VeriFone V200t equipment. For quality services, please contact an official service center of VeriFone company. On our website you can read and download documentation for your VeriFone V200t device for free and familiarize yourself with the technical specifications of device.
-
First Data FD130
NBefore plugging in your terminal, please connect all cables so that you don’t accidentally damage the unit or connected devices.Step 1: Getting ConnectedThe operation of the terminal requires access to either an IP connection (DSL or cable), WiFi, or dialup. If you chose dial-up a dedicated phone line should be used.Phone ConnectorRouter ModemCable or DSL OutletStep 2: Add an (o …
FD130 Payment Terminal, 2
-
Ingenico iCT220
QUICKREFERENCEGUIDETelium SeriesRESTAURANTiCT220iCT250CREDIT CARD SALE(KEY ENTERED)GUIDE TO KEYSUse to SetLanguageENTER KeyCLEAR KeyCANCEL KeyADMIN KeyAUTHORIZE ONLYPressSelect 2 — AUTH ONLYSelect from the Menu:1 — Amt Auth2 — Card Validation3 — Eligibility> Server ID +Enter the amount if anAmt. Auth and pressSlide Card or manuallyenter the card numberand press> Enter the expiration dateand …
iCT220 Payment Terminal, 2
-
Ingenico Move/5000
Keyboard details and functionality The functions key accesses the different application menus The red key cancels the procedure in progress The yellow key cancels the last character The green key validates input selections and information. It is also used to switch on the terminal. The feed key will eject the thermal paper a few centimeters over the tear line if pressed for more than two seconds T …
Move/5000 Payment Terminal, 8
-
Sharp UP-X200
MOBILE TERMINALMOBILES TERMINALTERMINAL MOBILETERMINAL PORTATILHARDWARE OPERATION MANUALTECHNISCHE BEDIENUNGSANLEITUNGMANUEL D’UTILISATIONMANUAL TECNICOUP-X200MODELMODELLMODELEMODELO UPX200_Cover1_4 04.7.15, 3:03 PM1Downloaded from: http://www.usersmanualguide.com/ …
UP-X200 Payment Terminal, 49
-
Nurit 2085
Cards are swiped with magnetic stripe down and to the right. They can be swiped either top to bottom or bottom to top. CREDIT CARD PURCHASE STEP TERMINAL PROMPT ACTION 1. Idle Prompt Swipe card or manually enter credit card number. 2. Expiration date (manual) Enter card expiration date (MMYY). 3. Amount Enter the amount of the sale. 4. Server ID (optional) Enter Server ID. 5. Tip …
2085 Payment Terminal, 4
-
Ingenico iCMP
Ingenico iCMP wireless EMV Reader: Tech Guide Document Revision: v1.1.2Service Manualingenico iCMP Wireless EMV Reader to Voyager Connection ResetTech Guide18805 Adams Ct., #110 ~ Morgan Hill, CA 95037, USA ~ +1-408.924.0808 ~ www.washlinksystems.com ~ [email protected] …
iCMP Payment Terminal, 8
-
EHRLE CarWash-Key
Reinigungstechnik CarWash-Systeme Projektmanagement EHRLE-GmbH Industriestraße 3 89165 Dietenheim USt-IdNr.DE 130839188 Page 1 von 4 State 07.02.2020 Tel.: +49 (0)7303/1600-0 eMail: [email protected] Web: www.ehrle.de Subject to changes Quick Start Guide – Charging Terminal for EHRLE-CarWash-Key Unpack everything (dispose of holding carton and plastic packaging) Combine the power su …
CarWash-Key Payment Terminal, 4
-
VeriFone Omni 3740
VeriFone Quick Reference Guide Retail 3740/3750 Vx570 Standard Functions: Default Password: 998877 Paper Feed: Press the three (3) key Important Information: Note: To process a Debit or EBT transaction, follow the credit sale procedures, but choose Debit or EBT accordingly. If you are processing a manual transaction, you can type the card number …
Omni 3740 Payment Terminal, 2
-
VeriFone VX 675 Series
Processing a sale using a chip cardRefunding transactions• Insert the chip card into the terminal.• Key in the transaction amount and select the OK buon.• If cashback is prompted, select ‘YES’ to enter the cashback amount or ‘NO’ to continue the transaction.• If prompted, ask the customer to enter their PIN into the terminal and select the OK buon to continue.• Follow …
VX 675 Series Credit Card Machine, 2
Popular Payment Terminal User Guides:
C
H AP T ER
C
H AP T ER
C
4
V200
I
T
NSTALLATION
3
V200t Terminal . . . . . . . . . . . . . . . . . . . . . . . . . . . . . . . . . . . . . . . . . . . . . . . . . . 27
Unit Power Requirements . . . . . . . . . . . . . . . . . . . . . . . . . . . . . . . . . . . . . . . 27
Temperature . . . . . . . . . . . . . . . . . . . . . . . . . . . . . . . . . . . . . . . . . . . . . . . . . 27
Humidity . . . . . . . . . . . . . . . . . . . . . . . . . . . . . . . . . . . . . . . . . . . . . . . . . . . . 27
External Dimensions . . . . . . . . . . . . . . . . . . . . . . . . . . . . . . . . . . . . . . . . . . . 27
Weight. . . . . . . . . . . . . . . . . . . . . . . . . . . . . . . . . . . . . . . . . . . . . . . . . . . . . . 27
Memory . . . . . . . . . . . . . . . . . . . . . . . . . . . . . . . . . . . . . . . . . . . . . . . . . . . . . 27
Display . . . . . . . . . . . . . . . . . . . . . . . . . . . . . . . . . . . . . . . . . . . . . . . . . . . . . 27
Battery Pack . . . . . . . . . . . . . . . . . . . . . . . . . . . . . . . . . . . . . . . . . . . . . . . . . 27
Magnetic Card Reader . . . . . . . . . . . . . . . . . . . . . . . . . . . . . . . . . . . . . . . . . 27
Primary Smart Card . . . . . . . . . . . . . . . . . . . . . . . . . . . . . . . . . . . . . . . . . . . 28
SAM Card Reader. . . . . . . . . . . . . . . . . . . . . . . . . . . . . . . . . . . . . . . . . . . . . 28
SIM Card Reader . . . . . . . . . . . . . . . . . . . . . . . . . . . . . . . . . . . . . . . . . . . . . 28
Connectivity . . . . . . . . . . . . . . . . . . . . . . . . . . . . . . . . . . . . . . . . . . . . . . . . . 28
Security . . . . . . . . . . . . . . . . . . . . . . . . . . . . . . . . . . . . . . . . . . . . . . . . . . . . . 28
4
Keypad Does Not Respond . . . . . . . . . . . . . . . . . . . . . . . . . . . . . . . . . . . . . . . . 29
5
Maintenance and Cleaning. . . . . . . . . . . . . . . . . . . . . . . . . . . . . . . . . . . . . . . . . 31
Service Returns . . . . . . . . . . . . . . . . . . . . . . . . . . . . . . . . . . . . . . . . . . . . . . . . . 31
Cables. . . . . . . . . . . . . . . . . . . . . . . . . . . . . . . . . . . . . . . . . . . . . . . . . . . . . . 33
Power Supply . . . . . . . . . . . . . . . . . . . . . . . . . . . . . . . . . . . . . . . . . . . . . . . . 33
Battery Pack . . . . . . . . . . . . . . . . . . . . . . . . . . . . . . . . . . . . . . . . . . . . . . . . . 33
Accessories. . . . . . . . . . . . . . . . . . . . . . . . . . . . . . . . . . . . . . . . . . . . . . . . . . 33
Documentation . . . . . . . . . . . . . . . . . . . . . . . . . . . . . . . . . . . . . . . . . . . . . . . 33
G
UIDE
Инструкция по эксплуатации и проведению оплаты посредством различных типов банковских карт через пин-пад модели Verifone P200 и работающий с ним в тандеме терминал V200c
Важнейшие клавиши

Алгоритм поведения сделки через бесконтактную карту

- Необходимо осуществить введение посредством клавиатуры терминала V200c от Verifone, работающего в тандеме с пин-падом P200, суммы транзакции.
Чтобы изменить величину суммы, осуществите нажатие на кнопку желтого цвета. После окончания ввода, следует воспользоваться зеленой кнопкой. Прерывание транзакции происходит посредством красной клавиши.

- Далее клиент подносит карту к дисплею пин-пада и держит ее там до возникновения звукового сигнала.
Если происходит свечение всех четырех индикаторов, расположенных вверху дисплея, срабатывает звуковая индикация, то прочтение карты завершается успешно. Прибор устанавливает соединение с банком.
При успешно совершенной транзакции, терминал, работающий в тандеме с пин-падом (в данном случае модель V200c от Verifone) произведет печать чека с указанием суммы и пометкой «Contactless». После печати первого чека, следует его оторвать.
- Чтобы произвести печать следующего чека, нажмите на дисплее «Jah» либо «Enter» (зеленую кнопку).

Первый чек остается продавцу. Второй – вручается клиенту. Если сделку не удалось совершить, терминал напечатает чек с указанием этой ситуации и наличием кода ошибки. В таком случае всегда есть возможность совершить повторную транзакцию.
Алгоритм проведения сделки через чип-карту

- Необходимо осуществить введение посредством терминальной клавиатуры суммы транзакции.
Чтобы изменить величину суммы, осуществите нажатие на кнопку желтого цвета. После окончания ввода, следует воспользоваться зеленой кнопкой. Прерывание транзакции происходит посредством красной клавиши.

- Далее клиент производит вставку карты в чип-ридер пин-пада.

- Далее происходит введение клиентом на ПИН-клавиатуре ПИН-кода от его карты.
Ввод подтверждается посредством нажатия зеленой кнопки. Желтая кнопка помогает исправить неправильно введенный ПИН-код, а красная – прервать транзакцию.
При корректном введении ПИН-кода происходит коннект устройства с банком.
Об удачно совершенной транзакции оповещает чек с указанием суммы и пометкой «PIN KONTROLLITUD». Первую квитанцию нужно оторвать.

- Чтобы произвести печать следующего чека, нажмите на дисплее «Jah» либо «Enter» (зеленую кнопку).

Первый чек – для продавца, второй – для клиента.
- Необходимо, чтобы клиент произвел извлечение карты из чип-ридера.
Если сделку не удалось совершить, терминал напечатает чек с указанием этой ситуации и наличием кода ошибки. В таком случае всегда есть возможность совершить повторную транзакцию.
Если манипуляции с чип-картой не завершились успехом и на дисплее появилось «Используйте магнитную карточку», необходимо произвести операции, характерные для транзакций с использованием магнитной карты.
Алгоритм проведения сделки через магнитную карту

- Необходимо осуществить введение посредством клавиатуры терминала суммы транзакции.
Чтобы изменить величину суммы, осуществите нажатие на кнопку желтого цвета. После окончания ввода, следует воспользоваться зеленой кнопкой. Прерывание транзакции происходит посредством красной клавиши.

- Необходимо плавное проведение магнитной карты сквозь слот соответствующего считывателя.


- Далее следует введение четырех последних цифр номера клиентской карты. По окончании ввода, подтвердите зеленой кнопкой.
Устройство осуществит коннект с банком. Успешная транзакция завершается распечаткой чека. Первый чек следует оторвать.

Согласно требованиям по приему банковских карт, их владелец должен быть идентифицирован. Квитанция должна обладать клиентской подписью (сверить ее с подписью на карте), отметкой о типе предоставленной документации, ее номером, если величина суммы больше той, что предусмотрена в договоре карты (заполнение от руки).
- Чтобы произвести печать повторного чека, нажмите на дисплее «Jah» либо «Enter» (зеленую кнопку).

Первый чек достается продавцу, второй – отдается покупателю.
Как произвести отмену транзакции (сделки)?
Аннулирование возможно до момента отправки информации о сделках в банк.

- Необходимо нажать на дисплее кнопку «Valikud».
- Далее следует нажатие посредством клавиатуры цифры «3».

Посредством терминальной клавиатуры осуществите ввод номера чека транзакции, которую нужно отменить, затем подтвердите действие зеленой кнопкой. В автоматическом режиме устройство отображает номер чека последней транзакции.
Дисплей прибора отображает вопрос «Аннулировать сделку?», потом указаны четыре последние цифры карточного номера и величина суммы транзакции.

- Аннулирование транзакции начинается при нажатии кнопки «Jah» либо «Enter» (кнопки зеленого цвета). Чтобы отменить эту операцию, следует нажать кнопку «Ei» либо красную клавишу.
При выполнении сделки через чип-карту:
Следует вставить карту в чип-ридер пин-пада.
При выполнении сделки через магнитную карту:
Проведите картой сквозь магнитный ридер терминала V200c.
Распечатка квитанции сигнализирует об успешном прохождении сделки отмены. Сумма на такой квитанции указана со знаком минус. Первый распечатанный чек следует оторвать.

- Чтобы произвести печать повторного чека, нажмите на дисплее «Jah» либо «Enter» (зеленую кнопку).

Первая квитанция – продавцу, вторая – клиенту.
Когда устройство сообщает «СДЕЛКА НЕ НАЙДЕНА», это означает, что транзакция по указанному номеру в данный день не производилась, либо он была осуществлена раньше или уже отменена, или отправлена в банк.

Распечатка чековой копии возможна до момента отправки сведений о сделках в банк.
- Следует произвести нажатие кнопки «Valikud».
- Нажатие посредством клавиатуры цифры «4».

- При нажатии цифры «1» происходит распечатка копии последнего чека.
- При нажатии «2» устройство в автоматическом режиме отобразит номер последнего распечатанного чека. Применяя клавиатуру терминала, осуществите ввод того номера чека, копия которого требуется, подтвердите зеленой кнопкой.
Отправка информации о сделках в банк
Информацию о совершаемых в течение рабочего дня транзакциях можно отправлять в банк в автоматическом режиме либо вручную. Автоматически данные отправляются единожды в сутки в специальное отведенное время, для этого необходимо, чтобы устройство было включено. Вся операция осуществляется через терминал V200c, в связке с которым функционирует пин-пад.
Чтобы отправлять данные о сделках вручную:
- Осуществите нажатие кнопки «Valikud».

- Произведите нажатие цифры «2».
- Чтобы отправить сделки, следует нажать «1» («Saada»).

При удачном завершении отправки данных о сделках происходит распечатка отчета, где указывается число всех прошедших сделок и общая величина их суммы.

Нажав на цифру «3», устройство осуществит отображение либо печать данных обо всех сделках в памяти прибора, но в банк информация отправлена не будет.
Обращаем Ваше внимание, что купить понравившуюся модель терминала по привлекательной цене можно на нашем сайте, кликнув на ссылки:
купить Verifone (Верифон) P200
- Инструкции и руководства
- Бренды
- Viewera
- V200T
- Руководство Пользователя
Page 1
TFT-LCD TV MONITOR
V200T
USER’
S MANUAL
www.viewera.com
Rev 1.1
(Ocr-Read Summary of Contents of some pages of the VeriFone V200t Document (Main Content), UPD: 24 February 2023)
-
11, OVERVIEW Features and Benefits V200 T INSTALLATION GUIDE 11 Features and Benefits The V200t terminal provides the following functionality: Exceptional Ease of Use and Ergonomics • Four-way navigation button with two function keys for UI access. • The contactless functionality offers a convenient payment option for consumers. • The bold design is sleek, stylish, and lightweight for conveniently handing the terminal to the consumer for PIN entry or other inp…
-
31, V200T INSTALLATION GUIDE 31 CHAPTER 5 Service and Support Maintenance and Cleaning The V200t device has no user-serviceable parts. Unless otherwise instructed, do not, under any circumstances, attempt any service, adjustments, or repairs on the unit. Disconnect the device before cleaning. To clean the unit, periodically use a clean cloth, slightly dampened with water and a drop or two of mild s…
-
30, TROUBLESHOOTING GUIDELINES Transactions Fail To Process 30 V200T INSTALLATION GUIDE • If the problem persists, contact your local Verifone representative. Check Smart Card Reader • Perform a test transaction using several different smart cards to ensure the problem is not a defective card. • Ensure that the card is inserted correctly (see Magnetic Stripe Card Reader Use). • Ensure the MSAM card…
-
36, Caution and Warning Messages 36 V200T INSTALLATION GUIDE Caution Setup page 16 Observe standard precautions in handling electrostatically sensitive devices. Electrostatic discharges can damage the equipment. Verifone recommends using a grounded anti-static wrist strap. Respecter les précautions standard dans la manipulation d’appareils sensibles aux décharges électrostatiques. Les décharges électrostatiques peuvent endommager le matériel. Verifone recommande d’utilise…
-
10, OVERVIEW V200t Terminal 10 V200T INSTALLATION GUIDE • Integrated thermal printer Rear Compartments After removing the rear covers, the underside of the V200t shows the following: Figure 2 V200t Cards Compartment • Dual MSAM slots • Dual SIM slots • Micro SD Card slot • Battery compartment Figure 3 V200t Ports Compartment • Ethernet port • RS-232 port • RJ11 port • USB Host/Client port • Power port 3$ 3)- 3)- 3$ 3!- 3!-
… -
29, V200T INSTALLATION GUIDE 29 CHAPTER 4 Troubleshooting Guidelines This chapter lists typical malfunctions that may occur while operating a V200t device and the appropriate corrective action. If the problem persists – even after performing the outlined guidelines, or if the problem is not described, contact your local Verifone representative for assistance. Display Panel Does Not Work Use the following steps to…
-
13, V200T INSTALLATION GUIDE 13 CHAPTER 2 Setup This chapter describes the setup procedure for the V200t, in the following sections: • Selecting Location • PIN Protection Measures • Unpacking Shipping Carton • Installing or Replacing MSAM, Micro SD and SIM Cards • Establishing Communication • Loading Printer Paper • Connecting Optional Devices • Connecting Power Supply • Smart Card Reader • Magnetic Stripe Card Reader Use • Contactless Transactions • …
-
6, PREFACE Guide Conventions 6 V200T INSTALLATION GUIDE Acronym Definitions Please refer to Table 2 for the acronyms used in this manual. The pencil icon is used to highlight important information. RS-232-type devices do not work on the communication port. The caution symbol indicates hardware or software failure, or loss of data. The unit is not waterproof or dustproof, and is intended for indoor use only.…
-
24, VeriFone V200t SETUP Smart Card Reader 24 V200T INSTALLATION GUIDE Smart Card Reader The smart card transaction procedure can vary depending on the application. Verify the proper procedure with your application provider before performing a smart card transaction. Figure 16 Using the Smart Card Reader Conducting a Smart Card Transaction To conduct a smart card transaction: 1 Position the smart card with the gold contacts facing upwar…
-
2, All rights reserved. No part of the contents of this document may be reproduced or transmitted in any form without the written permission of Verifone, Inc. The information contained in this document is subject to change without notice. Although Verifone has attempted to ensure the accuracy of the contents of this document, this document may include errors or omissions. The examples and sample …
-
7, PREFACE Guide Conventions V200 T INSTALLATION GUIDE 7 USB Universal Serial Bus VPN Verifone Part Number Table 2 Acronym Definitions (continued) Acronym Definitions
… -
4, 4 V200T INSTALLATION GUIDE CHAPTER 3 Specifications V200t Terminal . . . . . . . . . . . . . . . . . . . . . . . . . . . . . . . . . . . . . . . . . . . . . . . . . . 27 Unit Power Requirements . . . . . . . . . . . . . . . . . . . . . . . . . . . . . . . . . . . . . . . 27 Temperature . . . . . . . . . . . . . . . . . . . . . . . . . . . . . . . . . . . . . . . . . . . . . . . . . 27 Humidity . . . . . . . . . . . . . . . . . . . . . . . . . . . . . . . . .…
-
5, V200T INSTALLATION GUIDE 5 PREFACE This guide is the primary source of information for setting up and installing the V200t device. Audience This guide provides simple descriptions of the V200t features and the basic information for installing and configuring the V200t. Organization This guide is organized as follows: Chapter 1, Overview. Provides an overview of a V200t device. Chapter 2, Setup. Explains how…
-
15, SETUP Unpacking Shipping Carton V200 T INSTALLATION GUIDE 15 The following table describes the two preferred mounting methods and the recommended measures to protect from PIN capture in four observation corridors: Additionally, you may wish to implement the following to further increase security during PIN entry. • Offer PIN security literature at the point of sale • Use signage to limit the view of the V200t to just that of the cardholder. Unpackin…
-
22, SETUP Connecting Optional Devices 22 V200T INSTALLATION GUIDE Connecting the V200t to a PC The following illustration shows how to connect the V200t to a computer via the Multi-Communication port using the RJ9 to DB9 cable (VPN CBL000-051-02-A). Figure 13 Sample PC Connection Connecting ECRs to the V200t The V200t supports electronic cash registers (ECRs). The following illustration shows how to make a peripheral connection to …
Инструкция по эксплуатации и проведению оплаты посредством различных типов банковских карт через пин-пад модели Verifone P200 и работающий с ним в тандеме терминал V200c
Важнейшие клавиши
Алгоритм поведения сделки через бесконтактную карту
- Необходимо осуществить введение посредством клавиатуры терминала V200c от Verifone, работающего в тандеме с пин-падом P200, суммы транзакции.
Чтобы изменить величину суммы, осуществите нажатие на кнопку желтого цвета. После окончания ввода, следует воспользоваться зеленой кнопкой. Прерывание транзакции происходит посредством красной клавиши.
- Далее клиент подносит карту к дисплею пин-пада и держит ее там до возникновения звукового сигнала.
Если происходит свечение всех четырех индикаторов, расположенных вверху дисплея, срабатывает звуковая индикация, то прочтение карты завершается успешно. Прибор устанавливает соединение с банком.
При успешно совершенной транзакции, терминал, работающий в тандеме с пин-падом (в данном случае модель V200c от Verifone) произведет печать чека с указанием суммы и пометкой «Contactless». После печати первого чека, следует его оторвать.
- Чтобы произвести печать следующего чека, нажмите на дисплее «Jah» либо «Enter» (зеленую кнопку).
Первый чек остается продавцу. Второй – вручается клиенту. Если сделку не удалось совершить, терминал напечатает чек с указанием этой ситуации и наличием кода ошибки. В таком случае всегда есть возможность совершить повторную транзакцию.
Алгоритм проведения сделки через чип-карту
- Необходимо осуществить введение посредством терминальной клавиатуры суммы транзакции.
Чтобы изменить величину суммы, осуществите нажатие на кнопку желтого цвета. После окончания ввода, следует воспользоваться зеленой кнопкой. Прерывание транзакции происходит посредством красной клавиши.
- Далее клиент производит вставку карты в чип-ридер пин-пада.
- Далее происходит введение клиентом на ПИН-клавиатуре ПИН-кода от его карты.
Ввод подтверждается посредством нажатия зеленой кнопки. Желтая кнопка помогает исправить неправильно введенный ПИН-код, а красная – прервать транзакцию.
При корректном введении ПИН-кода происходит коннект устройства с банком.
Об удачно совершенной транзакции оповещает чек с указанием суммы и пометкой «PIN KONTROLLITUD». Первую квитанцию нужно оторвать.
- Чтобы произвести печать следующего чека, нажмите на дисплее «Jah» либо «Enter» (зеленую кнопку).
Первый чек – для продавца, второй – для клиента.
- Необходимо, чтобы клиент произвел извлечение карты из чип-ридера.
Если сделку не удалось совершить, терминал напечатает чек с указанием этой ситуации и наличием кода ошибки. В таком случае всегда есть возможность совершить повторную транзакцию.
Если манипуляции с чип-картой не завершились успехом и на дисплее появилось «Используйте магнитную карточку», необходимо произвести операции, характерные для транзакций с использованием магнитной карты.
Алгоритм проведения сделки через магнитную карту
- Необходимо осуществить введение посредством клавиатуры терминала суммы транзакции.
Чтобы изменить величину суммы, осуществите нажатие на кнопку желтого цвета. После окончания ввода, следует воспользоваться зеленой кнопкой. Прерывание транзакции происходит посредством красной клавиши.
- Необходимо плавное проведение магнитной карты сквозь слот соответствующего считывателя.
- Далее следует введение четырех последних цифр номера клиентской карты. По окончании ввода, подтвердите зеленой кнопкой.
Устройство осуществит коннект с банком. Успешная транзакция завершается распечаткой чека. Первый чек следует оторвать.
Согласно требованиям по приему банковских карт, их владелец должен быть идентифицирован. Квитанция должна обладать клиентской подписью (сверить ее с подписью на карте), отметкой о типе предоставленной документации, ее номером, если величина суммы больше той, что предусмотрена в договоре карты (заполнение от руки).
- Чтобы произвести печать повторного чека, нажмите на дисплее «Jah» либо «Enter» (зеленую кнопку).
Первый чек достается продавцу, второй – отдается покупателю.
Как произвести отмену транзакции (сделки)?
Аннулирование возможно до момента отправки информации о сделках в банк.
- Необходимо нажать на дисплее кнопку «Valikud».
- Далее следует нажатие посредством клавиатуры цифры «3».
Посредством терминальной клавиатуры осуществите ввод номера чека транзакции, которую нужно отменить, затем подтвердите действие зеленой кнопкой. В автоматическом режиме устройство отображает номер чека последней транзакции.
Дисплей прибора отображает вопрос «Аннулировать сделку?», потом указаны четыре последние цифры карточного номера и величина суммы транзакции.
- Аннулирование транзакции начинается при нажатии кнопки «Jah» либо «Enter» (кнопки зеленого цвета). Чтобы отменить эту операцию, следует нажать кнопку «Ei» либо красную клавишу.
При выполнении сделки через чип-карту:
Следует вставить карту в чип-ридер пин-пада.
При выполнении сделки через магнитную карту:
Проведите картой сквозь магнитный ридер терминала V200c.
Распечатка квитанции сигнализирует об успешном прохождении сделки отмены. Сумма на такой квитанции указана со знаком минус. Первый распечатанный чек следует оторвать.
- Чтобы произвести печать повторного чека, нажмите на дисплее «Jah» либо «Enter» (зеленую кнопку).
Первая квитанция – продавцу, вторая – клиенту.
Когда устройство сообщает «СДЕЛКА НЕ НАЙДЕНА», это означает, что транзакция по указанному номеру в данный день не производилась, либо он была осуществлена раньше или уже отменена, или отправлена в банк.
Распечатка чековой копии возможна до момента отправки сведений о сделках в банк.
- Следует произвести нажатие кнопки «Valikud».
- Нажатие посредством клавиатуры цифры «4».
- При нажатии цифры «1» происходит распечатка копии последнего чека.
- При нажатии «2» устройство в автоматическом режиме отобразит номер последнего распечатанного чека. Применяя клавиатуру терминала, осуществите ввод того номера чека, копия которого требуется, подтвердите зеленой кнопкой.
Отправка информации о сделках в банк
Информацию о совершаемых в течение рабочего дня транзакциях можно отправлять в банк в автоматическом режиме либо вручную. Автоматически данные отправляются единожды в сутки в специальное отведенное время, для этого необходимо, чтобы устройство было включено. Вся операция осуществляется через терминал V200c, в связке с которым функционирует пин-пад.
Чтобы отправлять данные о сделках вручную:
- Осуществите нажатие кнопки «Valikud».
- Произведите нажатие цифры «2».
- Чтобы отправить сделки, следует нажать «1» («Saada»).
При удачном завершении отправки данных о сделках происходит распечатка отчета, где указывается число всех прошедших сделок и общая величина их суммы.
Нажав на цифру «3», устройство осуществит отображение либо печать данных обо всех сделках в памяти прибора, но в банк информация отправлена не будет.
Обращаем Ваше внимание, что купить понравившуюся модель терминала по привлекательной цене можно на нашем сайте, кликнув на ссылки:
купить Verifone (Верифон) P200