Вы можете бесплатно скачать инструкции в PDF для Nortel Networks Телефоны.
У нас есть 98 бесплатных инструкций в PDF для 98 Nortel Networks Телефоны.
-
1
-
3
-
4
-
6
-
7
-
a
-
b
-
c
-
d
-
e
-
f
-
i
-
j
-
l
-
m
-
n
-
p
-
r
-
s
-
t
-
Page 1: Nortel Networks M3904
Nor tel Knowledge Netw ork Enterpr ise V oice Solutions Customer Documentation Meridian Digital T elephones M3901 M3902 M3903 M3904 User Guide[…]
-
Page 2: Nortel Networks M3904
38 While you are aw ay from your desk: Call Forward[…]
-
Page 3: Nortel Networks M3904
i Contents M3900 Series M eridian Digital Telephone 1 M3901 …………………………………… ………………………. ……………………… 1 M3902 …………………………………… ………………………. ……………………… 2 M3903 …………………………………… ………………………. ..[…]
-
Page 4: Nortel Networks M3904
ii Draft 0.01 Contents While o n an ac tive call 25 Place a call on H old .. ………………………. ……………………………………. …. 25 Transfer a call (M3902) ……………………. ………………………. ………………. 25 Transfer a call (M3903 an d M3904) …… ………………………. ……………….[…]
-
Page 5: Nortel Networks M3904
iii Contents Addi tional Ca ll Featur es 52 Auto Dial Tran sfer Feature ……………………….. ………………………………… 52 Use the buzz signal ……………………. ……………………………………. ………. 52 Call Page to make an announcement ………………………. ……………………. 53 Centrex/E[…]
-
Page 6: Nortel Networks M3904
iv Draft 0.01 Contents Options List 79 Select a language ………………. …………………………………… ………………. 80 Change a Featu re Key label (M3902) …………………………… ………………. 80 Change a Featu re Key label (M3903 an d M3904) ………….. ………………. 82 Adjust Screen contrast ……[…]
-
Page 7: Nortel Networks M3904
v Contents Access and use the Personal Directory 102 Access the Personal Director y ………. ………………………. ………………….. 102 Add a Personal Directory entry ……………………………… ………………….. 102 Add an incomin g call ………………………………………….. ………………….. 104 A[…]
-
Page 8: Nortel Networks M3904
vi Draft 0.01 Contents Accessories for the M3900 S eries telephones 127 Accessory Connection Module (ACM) ………………………………………… .. 1 27 Analog Termina l Adapter (ATA) ………………………………….. …………….. 1 27 Computer Telephony Inte gration Adap ter (CTIA) …………………………… .. 127 Di[…]
-
Page 9: Nortel Networks M3904
1 M3900 Series Meridian Digital Teleph one M3900 Series Meridian Dig ital T elephone There are five models in th e M3900 Ser ies Meridian Digital T elephone Por tfolio. Thi s docu men t de scri bes the M3901 , M3902 , M3903 , and M3904 featu res and how to use them. The M3902 , M3903 , and M3904 a re descri bed in the main portion of this document.[…]
-
Page 10: Nortel Networks M3904
2 M3900 Series Meridian Digital Telephone M3902 The M3902 has one L ine (DN) Ke y , an d three Programma ble Soft Key s (self- labele d). M3902 telephone 553-8624 Message W aiting Light/ Incoming Call Indicator LCD Indicator Programmab le Soft K eys (self-labeled) Navigation K eys Handsfree K ey V olume Control Bar LED LED One Line (DN) Options Mes[…]
-
Page 11: Nortel Networks M3904
3 M3900 Series Meridian Digital Teleph one M3903 The M3903 has two Progr ammable L ine (DN )/Feature Ke ys (sel f-labe led) with t w o f e at u r e s o r l i n e s c o n fi gu re d o n e a c h k ey. I t a l s o h a s f o u r C o n t e x t S e n si t iv e So ft Keys (s elf-la beled). M3903 telephone 553-8625B Mute Message Waiting Light/ Incoming Cal[…]
-
Page 12: Nortel Networks M3904
4 M3900 Series Meridian Digital Telephone M3904 The M3904 , has six P rogrammabl e Line (DN) /Featur e Keys (sel f-labeled ), with t w o f e at u r e s o r l i n es c o n f i gu re d o n e a c h k ey. I t a l s o h a s f o u r C o n t e x t S e n s it iv e So ft Keys (self- labeled). M3904 telephone Message W aiting Light/ Incoming Call Indicator L[…]
-
Page 13: Nortel Networks M3904
5 Your Telephone’s Controls Y our T elephone’ s Controls Use t he V olume Contro l Bar to control the volume of the h andset, headset, speaker , ringer , and handsfre e. Increa se the volume by pressin g the right si de of the bar . Lower it by pressing the left side. / Y ou can ter minate an active call by pressing the Goodbye Key . The Goodby[…]
-
Page 14: Nortel Networks M3904
6 Your Telephone’ s Controls The Navigation Keys allo w you to scroll through Menus and lists on the display . / The Copy Key copies incoming or outgoing call numbers into the Personal Director y on the M3904 . The Quit Key ends a n active applic ation. Pressing the Quit Key does not affect the status of calls currently on your telephone . Note: […]
-
Page 15: Nortel Networks M3904
7 Your Telephone’s Contro ls Line/Director y Number (DN) Key(s) are assigned to your M 3902 , M3903 , or M3904 . They c an be a Pr im ar y Di rect ory Numb er (PD N) or seco ndary DN(s) on th e M3903 an d M3904 . On the M3903 and M 3904 , the lower right hand Line/Feature Key on the first layer is you r Primar y Director y Number (PDN) Key . W he[…]
-
Page 16: Nortel Networks M3904
8 Terms you should know T erms you should know Attendant — The attendant is a telephone operator in your organization. Call Log — The Call L og can be co nfigured to store either unanswered or all incoming ca lls. These en tries can b e accessed thro ugh your di rector y menu. Call par ty informa tion —When your telephone rings, the display s[…]
-
Page 17: Nortel Networks M3904
9 Terms you should know Meridian 1, Meridian SL-100 — Th e Meridian 1 or the Merid ian SL-100 is your office communications syste m. More… — The More Key allows access to the multiple layer s of Programmable Soft Keys. These k eys are th e keys located b elow the disp lay on your telephon e. Off-hook — Off-hook is a term used to in dicate t[…]
-
Page 18: Nortel Networks M3904
10 Your telephone call featur es Y our telephone call features Y our network admi nistrator assigns featu res to your program mable featur e keys. Whenever this guide describe s a procedure that require s special co des ask your network admin istrator to provide these to you. T o access a feature , you press a Fe ature Key , or enter a Flexible Fea[…]
-
Page 19: Nortel Networks M3904
11 Your telephone call featu res T o swi tch from hand set t o hand sfree : 1. Press the Handsfree Key . 2. Re place t he ha n dset . T o use a he adset: Connect a headset to the headset jack or the ha ndset ja ck depend ing on the headset ty pe and the te lephone you are using . / Press the Headset Key ( M3903 and M3904 ). F or the M390 2 read the[…]
-
Page 20: Nortel Networks M3904
12 Your telephone call featur es Activate/deactiva te Group listening The Group listening feature allows others to listen to a call through the speaker while you are speak ing thr ough the ha ndset. This feat ure must be enabled by your network admin istrator . T o acti vate th e Grou p listen ing option: / 1. Press the Options Key . 2. U se the Na[…]
-
Page 21: Nortel Networks M3904
13 Your telephone call featu res T o deact ivate the Group lis tening option: / 1. Press the Options Key . 2. U se the Navigation Keys to scroll through the Options List an d highlight Group listening . 3. Press the Select Key . 4. Press the Off Key to turn Group listen ing of f. 5. Press the Done Ke y to sa ve ch an ges. 6. Press the Quit Key to e[…]
-
Page 22: Nortel Networks M3904
14 Your telephone call featur es Use the Predial feat ure The Predial feature a llows yo u to enter an d previ ew a numb er con tain ing up to 31 digits and m ake correction s before you dia l the numb er . T o us e Predi al: 1. Re place t he ha n dset , if it is of f the cradle. 2. Dial the numb er . Note 1: Press the Pause Key to insert a 1.5 sec[…]
-
Page 23: Nortel Networks M3904
15 Make a c all Make a call This secti on describ es featur es that you ca n use when y ou make a call. There a re several ways to make a call from your M3900 Series Meridia n Digital T elephone. T o make a cal l from your telephone, use the featu res describe d in this chap ter . To m a k e a c a l l : 1. Lift the handset . or or or Press the Line[…]
-
Page 24: Nortel Networks M3904
16 Make a c all Make a call while on-hook T o mak e a call while on- hook, leav e the handse t in the cr adle whil e you di al a numbe r . T o dial on-hook: 1. Press a Line (DN) Key . 2. Dial the nu mber wh en yo u recei ve d ial tone. 3. Lift the handset when the call ed party answers. Auto Di al Auto Dial lets you dedi cat e a fe atu re key t o a[…]
-
Page 25: Nortel Networks M3904
17 Make a c all 2. Dial the numb er to be stored on the Auto Di al Key . Note 1: The nu mber m ay co ntain u p to 31 digits. Note 2: If y ou are sto ring an ext ern al or long distance number, b e sure that the appropriate access codes are in cluded. 3. Press the Auto Dia l Key again. The number is stored on the key . Note: T o cha nge the k ey la […]
-
Page 26: Nortel Networks M3904
18 Make a c all T o ca ncel Rin g Aga in befo re notif icati on: Press the Ring A gain Key a second time before hearing the no tification tone. Ring Again (M39 03 and M390 4) Use t he Ring Agai n feature when you d ial a number a nd receive a busy tone or no answer . The Ring Again fe ature lets you know when th e person you dialed is availab le or[…]
-
Page 27: Nortel Networks M3904
19 Make a c all Redial last number ca lled Last Number Redial allows you to automatically red ial the last number you dialed. This fea ture mu st be enabled b y your network administrator . T o use Last Number Redial when using the ha ndset: 1. Lift the handset . 2. Press a Line (DN) Key . T o use Last Number Redial when using handsfree: Press the […]
-
Page 28: Nortel Networks M3904
20 Make a c all Use Speed Call (M3902) The Speed Call feat ure al lows you t o automa ticall y dial frequen tly call ed num bers by entering a one, two, or three digit access code. Contact your network administrator to determine the capaci ty of your Speed Call list. This will establish the numb er of digits you will en ter for eac h access code. A[…]
-
Page 29: Nortel Networks M3904
21 Make a c all Use Speed Call (M3903 and M 3904) The Speed Call feat ure al lows you t o automa ticall y dial frequen tly call ed num bers by entering a one, two, or three digit access code. Contact your network administrator to determine the capacity of you r Speed Call list. This will establish the numb er of digits you will en ter for eac h acc[…]
-
Page 30: Nortel Networks M3904
22 Make a c all 3. Dial the Spee d Call code assi gned to the telephon e number . The numb er is automatica lly diale d. Make a Sys tem Speed Ca ll System Speed Call allows you to make a call by dial ing Speed Call codes which may override your telephone’ s cl ass of ser vice restrictions. The System Speed Call feature is se t up on the system by[…]
-
Page 31: Nortel Networks M3904
23 Make a c all Make an Intercom ca ll The Intercom feature connects a group of people together through an Intercom Key . Y ou ca n use th e Interc om featur e to ca ll a memb er of your i nterc om group by pressing a code assigned to each member of the group. Th e intercom group must be set up by your network a dministrator . T o make an Int ercom[…]
-
Page 32: Nortel Networks M3904
24 Answer a call Answer a call When you re ceive an in coming ca ll, your tele phone rings an d the LCD indic ator flashes. T o answ er a call: or Lift the handset . or or Press the Handsfree Key ( M3902 , M3903 , an d M3904 ). or or Press the Line (DN) Key be side the LCD indicator as it flashes. or / Press the Headset Key if you have a headset co[…]
-
Page 33: Nortel Networks M3904
25 While on an active call While on an active call This section de scribes feature s that you can use while on a n active call. Place a call on Hold Use t he Hold feature whe n you are talking with on e par ty and a sec ond call comes in on a second line. Y ou can answer the second call and retain the origin al call by putting it on H old. T o plac[…]
-
Page 34: Nortel Networks M3904
26 While on an active call / 3. W hen yo u hear the ring or a pe rso n answers, press the Tr a n s f e r Key to complete the call transfer . The LED indic ator goes from steady on to off. T o go back to the original call if the transfer is in complete: If the person you called is not avai la ble, p ress the Line (DN) Key to reconnect to the origina[…]
-
Page 35: Nortel Networks M3904
27 While on an active call T o go back to the original c all if the transfer is in complete: / 1. Press the Goodbye Key . 2. Press the Line (DN) Key with the flashing icon to return to your original call . Use Timed Reminder Recall Timed Remi nder Recall gives you a remin der tone when a c all you tr ansferred is not answer ed. T o use Timed Remind[…]
-
Page 36: Nortel Networks M3904
28 While on an active call If th e tran sfer red call is not answer ed, y our tel ephone r ings : 1. Lift the handset . 2. Press the Tr a n s f e r Key and re pea t the transfer (to a d if ferent DN). Note: If you transfer a call to a person an d they pick up the line while you are still on the line, p ress the Goodbye Key to complete the transfer […]
-
Page 37: Nortel Networks M3904
29 While on an active call T o Par k a call on the Syst em Par k DN or your own DN: Press the Park Key . If there is a System Park DN, the call automatically parks on the System Park DN. Other wise, it parks on your DN. Note: For System Park on the Meridian SL-100, press the Directed Call Park Key followed by ££ ££ ££ ££ . Y ou receive a co[…]
-
Page 38: Nortel Networks M3904
30 While on an active call T o retr ieve a pa rked cal l: 1. Lift the handset . or 2. Press the Park Key . On the Meridian SL-100, yo u can retrieve the call by dialing the D irected Call Park Retrieval F AC or System Call Park Retrieval F A C. 3. Dial the DN wher e you park ed the call. Note: If a parked call is not retrieved within a specifie d p[…]
-
Page 39: Nortel Networks M3904
31 While on an active call T o park a call on a DN othe r than t he System Park DN on the M eridian 1 : 1. Press the Park Key . The screen displays Press OK to park call on 2190 (Whe re 219 0 rep resen ts the default System Park DN). 2. Dial the DN wher e you wan t to park the call. When yo u beg in dial ing, the scre en displays En ter digits, t h[…]
-
Page 40: Nortel Networks M3904
32 While on an active call T o retr ieve a pa rked call on the Merid ian 1: 1. Lift the handset . 2. Dial the DN wher e you park ed the call. Note: If a parked call is not retrieved within a specifie d period of time, it rin gs back to your telephone or to the attendant. Check with your network administrator to determine your specified period of ti[…]
-
Page 41: Nortel Networks M3904
33 While on an active call Calling Par ty Number (M3902) The Calling Par ty Number feature allows you to record a caller’ s number , for accounting purposes, while on a n established call. Note: This feature is not available on the Meridian SL-100. T o re cord a ca ller ’ s num ber: 1. Press the Calling Par ty Key . En ter number appe ars on th[…]
-
Page 42: Nortel Networks M3904
34 While on an active call T o reco rd a char ge accou nt numb er (Meridian S L-100): 1. Lift the handset and as k the ca lling party to hold 2. Flas h the swit ch hook 3. Dial the Account Code F AC. Y ou receive di al tone. 4. Dial the account code digits. 5. Flas h the swit ch hook. Y ou a re returned to your ca ll. Display incoming calls The Dis[…]
-
Page 43: Nortel Networks M3904
35 While on an active call T race a Malicious call Malicious Call T race provi des a wa y for you to t rac e nuisa nce cal ls. T he fea ture i s available for both intern al and exter nal calls. Wh en the key is pre ssed, your Direct or y N umb er a nd the tele phone n umber of the caller are recorde d fo r acces s by your network administrator . T[…]
-
Page 44: Nortel Networks M3904
36 Incoming calls Incoming calls This section d escribes featu res that you ca n use with in coming call s. Acti vate A utoma tic An swerb ack When Automatic Answerback is active, your set automatically answers in handsfr ee mode after o ne ring. Note: When Automatic Answerback is active, calls do not for wa rd to your voice message ser vice. T o u[…]
-
Page 45: Nortel Networks M3904
37 Incoming calls Use Call Pickup Call Pickup allows you to pick up a call from any telephone in the same Pickup Group or another Pickup Group. This feature must b e enabled by y our netw ork administrator . T o answer a call in your own Call Pickup Grou p: 1. Lift the handset . 2. Press the Pickup Key or enter the Pickup R inging Number FF C (Meri[…]
-
Page 46: Nortel Networks M3904
38 Incoming calls Use Call W aiting Call W aiting puts your current call on hold, while you answer an in coming call. Example: Th e attendant rou tes an outside ca ll to you wh ile you are on an existi ng call. Call W aiting allows you to recognize th e call and respond to it. This featur e must be enabl ed by yo ur network a dministrator . T o an […]
-
Page 47: Nortel Networks M3904
39 While you are away from your desk While you are away from your desk This section describes fea tures that y ou may wish to use when you are away from your desk. For ward calls (M3902) The Call Forward feature all ows you to direct your calls to ring a t another Line (DN). Y ou can not for ward calls while your telephone is ringing. T o for ward […]
-
Page 48: Nortel Networks M3904
40 While you are away from your desk For ward calls (M390 3 and M 3904) The Call Forward feature all ows you to direct your calls to ring a t another Line (DN). Y ou can not for ward calls while your telephone is ringing. T o for ward your ca lls: 1. Press the For ward Key . The prev iously stor ed for ward n umber appears, if on e exists, and th e[…]
-
Page 49: Nortel Networks M3904
41 While you are away from your desk For ward internal calls only Internal Call For ward al lows only calls origin ating at inter nal DNs to ring at another DN . Calls originating outsid e your Meridian 1 system will still ring at your telephone . Y ou cannot for w ard calls wh ile your tele phone is r inging. T o for w ard your inter nal calls : 1[…]
-
Page 50: Nortel Networks M3904
42 While you are away from your desk Use Remote Call For ward The Remote Call F or ward feature allows you (from any tel ephone other than your own) to for ward your calls to an y telephone . T o use this fe ature you must have a Call For war d Key configu red on your tele phone. Note: On the Meridian SL-100, dial the Remote Access Director y Numbe[…]
-
Page 51: Nortel Networks M3904
43 While you are away from your desk T o ca ncel Re mot e Call Fo r wa rd: 1. Lift the handset . 2. If you call from a telephone outsid e the system, first dial your Direct Inward System Access number and wait for dial tone. 3. Dial the Remote Call For ward Deactivate FFC. 4. Dial your Station Contr ol Password. 5. Dial your DN. Y ou get a dial ton[…]
-
Page 52: Nortel Networks M3904
44 Secure your telephone Secure your telephone Y ou can lock your telephone with a password to prevent unauthorized u se of your telephone. Note: This featu re is not avail able on th e Meridian SL-100 . T o lock your telephone: 1. Lift the handset . 2. Dial the Electronic Lock Activate FFC and your Station Control Password. Note: If you per form t[…]
-
Page 53: Nortel Networks M3904
45 Talk with more than one per son T alk with more than one person This chapter describes fe atures which allow you to talk w ith more than one person at the same time. Set up a Conference ca ll (M3902) Yo u c a n s e t u p a Conference call for up to six peop le (inc luding yoursel f). Cont act your network administrator to determi ne the maximum […]
-
Page 54: Nortel Networks M3904
46 Talk with more than one person Set up a Conference ca ll (M3903 and M3904) Yo u c a n s e t u p a Conference call for up to six peop le (inc luding yoursel f). Cont act your network administrator to determi ne the maximum number of people your system allows on a conference call. T o set u p a conf erence call: 1. Press the Conference Key while y[…]
-
Page 55: Nortel Networks M3904
47 Talk with more than one per son Join a call (M39 02) The Call Join feature allow s you to connec t an incomin g call to a call already in progress ther eby crea ting a confe rence ca ll. In ord er to use Cal l Join, yo ur telephone must be configured with either a second line (DN) or a Ca ll W aiting Key . T o conn ect a call on ho ld (on a dif […]
-
Page 56: Nortel Networks M3904
48 Talk with more than one person Selectable Conferee Display an d Disconnect Y ou ca n v iew t he li st o f activ e co nfer ees b y usi ng the C on fer ee Sel ec tabl e Dis pla y Key and disc onnect an y par ty that ha s been ad ded to the confe rence call . This feature is not available on the Me ridian SL-100 system. T o vi ew act ive con fere e[…]
-
Page 57: Nortel Networks M3904
49 Talk with more than one per son Use Group Call Group Call automaticall y calls memb ers of a prede fined grou p, one at a time , until they have all answered. Ask your network administrator for details on how to create a confer ence call group . T o call group members: 1. Lift the handset . 2. Press the Group C all Key or en ter the Group Call F[…]
-
Page 58: Nortel Networks M3904
50 Talk with more than one person T o answer a Group Call: Lift the handset . Note 1: If you are on a call and you receive three 10-second tones, this is the notification of a group call on your cu rrent exte nsio n. Note 2: If you are on a call on another line on your telephone ( M3903 and M3904 ) when a group c all is made, you receive a long ton[…]
-
Page 59: Nortel Networks M3904
51 Work without interru ption W ork withou t interruption This chapter d escribes feature s that provide you with u ninterrupted wo rk time. Activat e Make Se t Busy Make Set Busy allows you to m ake your tel ephone appear busy to all c allers. To a c t i vate Make Set Busy: Press the Make S et Bus y Key . T o deact ivate Make Set Bu sy: Press the […]
-
Page 60: Nortel Networks M3904
52 Additional Call Features Additional Call Feat ures Auto Di al T rans fer Featu re Auto Dial T ransfer allo ws you to use your Auto Dial Key to transmit dig its to the central of fice after a T runk Switc h Hook Flash. Y ou must be on a central office/exchange (CO) trunk call from or to a CO which offers Centrex or excha nge li ne-type featu res.[…]
-
Page 61: Nortel Networks M3904
53 Additional Call Features Call Page to make a n announcement Call Page al l o ws y o u t o m a k e a n an n o u nc e m e n t ov e r t he p a g i n g s y s te m . T o ma k e a pag e c all, dial the pagi ng t runk ac cess c ode . Note: When the Page Key is used on a n attendant consol e it overrides th e telephone s; the tele phones are di sconnect[…]
-
Page 62: Nortel Networks M3904
54 Additional Call Features Charge or Force Charge a call (M3 902) Call Charge allows you to charge a call to a spec ific account. Fo rced Ch arg e Account allows you to charge long-distance calls from a tel ephone restricted to local cal ls. Note: On the Meridian SL-100, the account code allows a user to ente r a billing number . I f the ac count […]
-
Page 63: Nortel Networks M3904
55 Additional Call Features T o ch arge a ca ll to an ac coun t when you tr ansfe r a call: / 1. Press the Tr a n s f e r Key . The call is pla ced on ho ld. 2. Press Charge Key , or enter the Call Detail Recor ding Charge Account FFC. 3. Dial the charge accou nt number . Y ou receive di al tone. 4. Dial the number to where the call is to be transf[…]
-
Page 64: Nortel Networks M3904
56 Additional Call Features Charge or Fo rce Charge a call (M3 903 and M3904) Call Charge allows you to charge a call to a spec ific account. Fo rced Ch arg e Account allows you to charge long-distance calls from a tel ephone restricted to local cal ls. Note: On the Meridian SL-100, the account code allows a user to ente r a billing number . I f th[…]
-
Page 65: Nortel Networks M3904
57 Additional Call Features 3. Dial the charge accou nt numb er . U se the Clear Key or Delete Key to edit the number . P ress the Exit Key to leave the screen without charging the call. 4. Press the OK Key . Y ou retur n to your call. T o ch arge a ca ll to an ac coun t when you tr ansfe r a call: 1. Press the Tr a n s f e r Key . The call is pla […]
-
Page 66: Nortel Networks M3904
58 Additional Call Features 3. Dial the charge accou nt number . Y ou receive di al tone. 4. Dial the numb er of the person you want to add to the conference. or 5. Press the Swap Key to switch betwee n talking with the original caller and the new caller . Press the Connect Key to complete th e conf erence. Over ride Fe atur e Yo u c a n Override a[…]
-
Page 67: Nortel Networks M3904
59 Additional Call Features Forced Camp-on For ced C amp- on allows your telephone to automatical ly ring another telephone as soon as that tele phone discon nects from its curr ent call. Forc ed Camp-on allows you to c amp-on b oth inter nal and exter nal call s. To u s e F o r c e d C a m p — o n : 1. Dial a telephone numb er and r ecei ve a busy[…]
-
Page 68: Nortel Networks M3904
60 Additional Call Features Enhanced Override Feat ure Enhanced Override allows you to override an active call after you have attempted a Forced Camp-on. Use Enhanced Overrid e when you make either a simple call or a consultation call (i. e., place a call on hold and call another par ty). T o use Enh anced Over ride : 1. Dial a telep hone numb er a[…]
-
Page 69: Nortel Networks M3904
61 Additional Call Features Station Camp-on Station Camp-on allows you to transfer an external call to a busy extension . When the busy extension disconnects from its current call, the transferred cal l will ring at the now idle extension. T o activ ate Stati on Camp-on af ter answer ing an incomin g exter nal telep hone call : 1. Press the Tr a n […]
-
Page 70: Nortel Networks M3904
62 Additional Call Features Privacy R elease Privacy Release allows one or more people who sha re your DN to join you r call. T o use Pri vac y Rel eas e while on an establ ished cal l: Press the Privacy Release Key while you are on a c all. One ot her per son c an now join the call if they press the shared Line (MADN) Key on their telephone. Note:[…]
-
Page 71: Nortel Networks M3904
63 Additional Call Features Radio Paging Some telephone systems can have an on-site Radio P aging system. This system feat ure al lo ws you to pa ge a pe rs on and stay o n the l ine u nti l they answer . The paged person a nswe rs the c all wh en th ey en ter a spe cial Paging “Meet — me ” code from a ny teleph one. This con nects the pe rson […]
-
Page 72: Nortel Networks M3904
64 Additional Call Features 2. Dial the Radio Pa ging Access FFC. Y ou receive ringb ack/ring tone. Note 1: The person you have p aged can proceed to any telephone, enter their Radio Paging Answer code plus their own DN . This action connects you and the person paged . Note 2: You rece ive a fifteen second, high pitched tone, then silence if the pa[…]
-
Page 73: Nortel Networks M3904
65 Additional Call Features V oice Call The Vo i c e C a l l featu re allows you to page anoth er person or m ake an announcement th rough someone else’ s telephone speaker . T o mak e a voice ca ll: 1. Lift the handset . 2. Press the V oice Call Key . 3. Mak e your an nounce ment. / 4. Press the Goodbye Key . T o res pond to a vo ice cal l: Y ou[…]
-
Page 74: Nortel Networks M3904
66 Additional Call Features 4. Press the Play Key to pla y your first new message. Note: Use the More. . . Key to view additional message options. or or or or or 5. Press the Stop Key to pause pla yback of the message. Press Play to resume playbac k or Press the Last Key to go to the previou s message. Press Play to playback th e message or Press L[…]
-
Page 75: Nortel Networks M3904
67 Hospitality features Hospitality feat ures These hosp itality feat ures are i ntended for hotel opera tions use. Note: With the exception of Automatic W ake-U p, hospitality featu res are not available on the Meridian SL-100. Automatic W ak e-Up Alth ough no rmal ly used as a hotel fea ture, Au toma ti c W ake- Up may be use ful to business user[…]
-
Page 76: Nortel Networks M3904
68 Hospitality features / 3. Press the Goodbye Key . Note: On th e Meridian SL-100, after you enter the F AC, you receive a confirmation tone. T o ver ify the t ime for the wake-u p call: 1. Lift the handset . 2. Dial the Automatic W ake-Up V erify FFC. 3. Dial the wake-up time in a 24 hour time format (hhmm). I f it is correct, you receive a con f[…]
-
Page 77: Nortel Networks M3904
69 Hospitality features Message Registration Message Registration allows yo u to read, change, or reset meters that log y our hotel telephone calls. T o read me ters: 1. Press the Message Registration Key . 2. Dial the room Direc tor y Number (DN). 3. Press the Message Registration Key . T o chang e a meter: 1. Press the Message Registration Key . […]
-
Page 78: Nortel Networks M3904
70 Hospitality features Maid I dentification Maid Identif ication makes it easi er to keep tra ck of which ma ids clean which rooms. The maid enters the information from the telephon e in each room. T o ente r clea ning st atus : 1. Press the Room Stat us Key . 2. Dial the Directory Number (DN) for the room for which the cle aning status is being c[…]
-
Page 79: Nortel Networks M3904
71 Hospitality features Room Stat us Room Statu s lets you re ad the status of a room u sing the di splay . T o read t he status of a ro om: 1. Press the Room Stat us Key . 2. Dial the Dire ctor y Number (DN) for the room. The DN i s displayed followed by a two digit code. The first digit indicates the occupancy status: The next digit indicates the[…]
-
Page 80: Nortel Networks M3904
72 Meridian SL-100 CLASS Features Meridian SL-100 CLASS Featu res Anonymous Caller Rejection The Anonymous Caller Rejection featu re allows you to re ject incom ing calls on your li ne (DN) f or wh ich ca lling nam e and n umber have bee n inte ntional ly blocked. Onl y calls in whi ch the infor mation has be en blocked are rejected . Check with yo[…]
-
Page 81: Nortel Networks M3904
73 Meridian SL-100 CLASS Features Automatic Ca llback The Auto matic Callback feature al lows you to enter a Feature A ccess Code (F AC) that will automatically set up a ca ll to the last Director y Number (DN) y ou dialed on your individual line (DN) regardl ess of whether the call was answered, unanswered, or busy . Check with your network admini[…]
-
Page 82: Nortel Networks M3904
74 Meridian SL-100 CLASS Features Automatic Recall The Automatic Recal l featu re allows you to e nter a Feature Access Code (F AC) that will automatically set up a call to the last incoming call on your Director y Number (DN). C heck with your network administra tor regarding the availabil ity of this feature. T o acti vate Au tomat ic Rec all: 1.[…]
-
Page 83: Nortel Networks M3904
75 Meridian SL-100 CLASS Features Customer Originat ed T race The Customer Orig inated T race fe ature allows you to activate a n immedia te trace of the last incoming call to your Director y Number (DN) without requiring prior approval and m anual inter ve ntion by your network administrator . Customer Originated T race m ay be activate d on a per[…]
-
Page 84: Nortel Networks M3904
76 Meridian SL-100 CLASS Features Calling Name and Number Deliver y Blocking The Calling Name and Number Deliver y Blocking feature allows you to co ntrol the displa y of your Dire ctor y Nu mber (DN), or your name and DN, on the display of the par ty you are c alling. This feature i s availa ble on a per-cal l basis. In stead of your name a nd/or […]
-
Page 85: Nortel Networks M3904
77 Telephone display T elephone display This section sum marizes the disp lay featur es of the M3902 , M3 903 , and the M3904 . Id le disp lay is sh own in the follow ing figu res. M3902 disp lay The M3902 disp lay give s call stat us and fe atu re inf ormat ion. M3903 disp lay The up per portion of t he di spla y on t he M3903 gives call status in[…]
-
Page 86: Nortel Networks M3904
78 Telephone display M3904 disp lay The up per portion of the dis play on the M3904 g ives call status infor mation, th e lower displa y area is a three line feature infor mation di splay . Note: Refer to “Y our T elep hone’ s Controls” on page 5 and for m ore informati on on di spla y an d spec ial ize d key info rmati on. Display Con[…]
-
Page 87: Nortel Networks M3904
79 Options List Options List The Opti ons List (avail able on t he M3902 , M3903 , an d M3904 ) allows you t o customize ce rt ain character istics of your phone . Screen prom pts take you step-by-step through pr ocedures a nd keep you informed on the sta tus of the following settings: L anguage, Change feature key label, Sc reen contr ast, V olume[…]
-
Page 88: Nortel Networks M3904
80 Options List Select a language The displa y is availa ble in multipl e language s. After you se lect Language. . . from the Options List me nu, 1. Use the Navigation Keys to highlight the desired lan guage (e.g., Ger man). 2. Press the Select Key . Press the Done Key to save changes. Press the Quit Key or Options Key to exit. Change a Feature Ke[…]
-
Page 89: Nortel Networks M3904
81 Options List 5. Press the Select Key . 6. Press the Dial Pad Key that is prin ted with the first letter in your new label. Press the key until the correct character appea rs. 7. Repeat step 6 u ntil you have c hanged the enti re labe l. Press the Done Key to save changes. Press the Options Key to exit. Note 1: For a detailed ex ample of using th[…]
-
Page 90: Nortel Networks M3904
82 Options List Change a Feature Key la bel (M3903 and M3904) Y ou can change the n ame on the P rogrammabl e Line (D N)/Featur e Keys (self-labeled). These keys are located on both sides of the top por tion of the display are a on the M3903 and M3904 . T o chang e a Feature Key label: 1. Press the down Navigation Key once to highligh t Chan ge fe […]
-
Page 91: Nortel Networks M3904
83 Options List Note 3: Use the Case Key to change the case of the letter, as nee ded. You can use the Delet e Key to delete one character, or the Clear Key ( M3903 ) if you want to delete the entire label. On the M3 903 you m ay use the Sp ace Key to enter a space or the Restore Key to restore the label to the default value. Note 4: Press the Up N[…]
-
Page 92: Nortel Networks M3904
84 Options List Adjust Screen contrast The Screen contrast option allows y ou to adjust the contrast of the d isplay on your telephone. After you select Screen contrast from the Options L ist menu; or Fr om the Contrast screen, press the Lower Key to decr ease the display contrast level, or press the Higher Key to increase the display contrast leve[…]
-
Page 93: Nortel Networks M3904
85 Options List Choose Ring type The Ring type option allows you to choose from among the various ringing sounds avail able for you r telephone model. Af ter you select Ring t ype. . . from the Options List me nu; 1. U se the Navigation Keys to scroll through the list of ring types. 2. Press the Play Key to sample a ring tone. 3. Press the Select K[…]
-
Page 94: Nortel Networks M3904
86 Options List Use Live dial pad The Live dial pad option ( available on the M3904 ) allo ws you to press an y dial pad key to automatica lly access a dial tone. After you select Live dial pad from the Options List me nu; or Fr om the Live dialpad screen, press the On Ke y to t u rn o n L iv e d ia l p ad , o r press the Off Key to turn off Li ve […]
-
Page 95: Nortel Networks M3904
87 Options List Enable Call timer The Call timer enable option measures how long you are on each call. A fter you select Call tim er ena ble from the Options List menu; or Fr om the Call timer screen, press the On Key to turn on the Call timer , or press the Of f Key to turn off the Cal l timer . Press the Done Key to save changes. Press the Quit K[…]
-
Page 96: Nortel Networks M3904
88 Options List Use Headset por t on call The Headset port on call option (available on the M3904 ) requ ires that a lamp-t ype ac cessor y be con nected to th e headset p ort. When the H eadset port on call option is activated an d the user is on a call, the lamp is lit to provide a n indication tha t a call is in pr ogress. After y ou select Head[…]
-
Page 97: Nortel Networks M3904
89 Options List Set On-hook default path The On-hook default path option (available on the M3903 an d M3904 ) automatically opens th e voice path on either a Headset (connected to the headset jack) or on Handsfree wh en you press a Line (DN) Key or ( M3904 only) dial p ad key with Live dial pad ena bled. After you select On h ook default path from […]
-
Page 98: Nortel Networks M3904
90 Options List Activa te Grou p Lis tening The Group List ening feature en ables you to talk on th e handset to one party while other people listen to the con versation on your telephone ’ s speaker . The network administrat or must enable this feature. After yo u select Group l istening from the Options List menu; or Fr om the Gr oup listening […]
-
Page 99: Nortel Networks M3904
91 Call Log and Personal Directory display and navigation Call Log and P ersonal Direct or y display and navigation M3903 Call Log display a nd navigation The M3903 information disp lay shows one item at a time. Use the Navigation Keys to scroll through the list. When the item you want appears, press the Sele ct Key . The figure bel ow shows the st[…]
-
Page 100: Nortel Networks M3904
92 Call Log and Personal Director y display and navigation T o ac cess th e M3903 Calle rs Lis t or Redial List using a Context Sen sitive Soft Ke y or a Pr ogrammable F eature Key: or Press the Callers Key to access the Callers List, or press the Redial Key to access the Redial List. T o exit the M3 903 Call Log: or / Press the Quit Key or the Cal[…]
-
Page 101: Nortel Networks M3904
93 Call Log and Personal Directory display and navigation Access your Perso nal Director y , Callers List, or Redial List (M3904) T o acce ss th e M3904 D irect or y/Log: / 1. Press the Director y/Log Key . Note: When you pr ess the Dire ctor y/ Log Key , your Per sonal Director y is automatically selected. At this point, you may beg in searchin g […]
-
Page 102: Nortel Networks M3904
94 Call Log and Personal Director y display and navigation Call Log and Pers onal Director y password p rotection (M3903 and M3904) Y ou can password protect your Callers List and Redial List. Y our password also protects your Personal Director y ( M3904 o nly) . If passwor d protection is activated, you will be a sked to enter your password each t[…]
-
Page 103: Nortel Networks M3904
95 Call Log and Personal Directory display and navigation 9. Press the Enter Key . 10. Press th e Done Key to save changes. or / or / 11. Press the Quit Key or the Call Lo g Key ( M3903 ) or the Direct or y/L og Key ( M3904 ) to exi t. T o disable Personal Direc tor y passwo rd: / or / 1. Press the Call Log Key ( M390 3 ) or the Director y/Log Key […]
-
Page 104: Nortel Networks M3904
96 Call Log and Personal Director y display and navigation 6. Press the Select Key again to select P assword enabled : ON . 7. Press the Off Key to disable pa ssword protection. 8. Press the Done Key to save changes. or / or / 9. Press the Quit Key or the Call Log Key ( M3903 ) or the Direct or y/L og Key ( M3904 ) to exi t. Select Off Done Quit Ca[…]
-
Page 105: Nortel Networks M3904
97 Call Log Call Log The Call Log (availa ble on the M3903 and M 3904 ) records the name an d numbe r of incoming and outgoi ng call s and can be password protected. Y ou can activa te Call Log to recor d all calls, record only the unanswer ed calls, or recor d no incoming ca lls. The Callers List stores incoming calls, and the Redial List stores o[…]
-
Page 106: Nortel Networks M3904
98 Call Log If th ere a re no n ew cal ls, y ou a re presented with the first call in the old call s list . T o make a cal l fro m the C allers Li st: 1. U se the Navigation Keys to highligh t the numb er you wan t to call. Note 1: If you are c alling an e xternal or long d istance n umber, yo u will need to edit the number to add the access codes […]
-
Page 107: Nortel Networks M3904
99 Call Log 3. Press the Select Key . or 4. Press the New Key to go to the top of the new calls l ist, or press the Old Key to go to the top of the old calls list. T o acce ss th e Calle rs List using a Context Sensi tive Soft K ey or a Prog ramm abl e Featu re Key: Press the Callers Key . If ther e ar e new calls , you are presented with the first[…]
-
Page 108: Nortel Networks M3904
100 Redial List Redial List The Redial List (avail able on t he M 3903 and M3904 ) r ecords your last 20 ( M3904 ) or 5 ( M3903 ) outgoing calls and can be password prote cted. On the M3904 , you can copy these numbers to your Personal Dire ctor y . Access and use the Redi al List (M3903) T o acce ss th e Redia l List us ing the Call Log Key: / 1. […]
-
Page 109: Nortel Networks M3904
10 1 Redial List Access and use the Redi al List (M3904) T o acce ss th e Redia l List us ing the Director y/Log Key: / 1. Press the Director y/Log Key . 2. U se the Navigation Keys to highligh t Call Log (Redi al Li st) . 3. Press Select . T o acce ss the Redi al List using a Context Sensi tive Soft K ey or a Prog ramm abl e Featu re Key: Press th[…]
-
Page 110: Nortel Networks M3904
102 Access and use the Personal Directory Access and use the Personal Director y The Personal Director y (available on the M3904 ) provid es a pe rsonalized director y of names and tel ephone nu mbers. The Person al Director y allows you to add, dele te, search, a nd edit entrie s and can be password pr otected. The Personal Director y holds up to […]
-
Page 111: Nortel Networks M3904
10 3 Access and use the Personal Dire ctory Exampl e: T o ente r the na me and te lephone number f or Chris : 1. Dial the name using the key pad. Note: Press the Up Navigation Key to access special characters you may want to incl ude i n th e name . Us e the Navigation Keys to locate the character you want to include. Press the Select Key to choose[…]
-
Page 112: Nortel Networks M3904
104 Access and use the Personal Directory or / 7. Press the Quit Key or the Director y/Log Key to exit. Add an incoming ca ll / 1. Press the Copy Key . The displays shows the message Copy to . 2. Press the Director y Key . or 3. Press Next to copy the incoming call without editing the name. Edit the number , if required ( see notes for ste p 4) an […]
-
Page 113: Nortel Networks M3904
10 5 Access and use the Personal Dire ctory or / 6. Press the Quit Key or the Director y/Log Key to exit. Note: Y ou can ed it the na me or numbe r before or after you save to the director y . Add an out going call / 1. After the person you called answers, press the Copy Key . The displays shows Copy to . 2. Press the Director y Key . 3. Add the na[…]
-
Page 114: Nortel Networks M3904
106 Access and use the Personal Directory Delete or edit a Personal Director y entr y T o delet e a Personal Director y entr y: 1. U se the Navigation Keys to highligh t the entr y you want to edit or delete. 2. Press the Delete Key to delete the currently highlighted entr y in your Personal Dire ctor y . 3. Press the Ye s Key to confirm the deleti[…]
-
Page 115: Nortel Networks M3904
10 7 Access and use the Personal Dire ctory Delete your Personal Director y T o delet e your Personal Di rector y: 1. Press the Delete List Key . The display shows De lete all entries? . or 2. Press the Ye s Key if you want to del ete all the en tries in your Personal Director y , or press the No Key if you want to return to the top of the Personal[…]
-
Page 116: Nortel Networks M3904
108 Access and use the Personal Directory Use Card View The Card View feature provid es additional information a bout the Person al Director y entr y . T o look at the C ard View: 1. U se the Navigation Keys to highligh t the desired n ame. 2. Press the right Navig ati on Key . T o dial f rom the Card Vi ew: 1. U se the Navigation Keys to show the […]
-
Page 117: Nortel Networks M3904
10 9 Access and use the Personal Dire ctory Searc h for an en tr y Y ou can sear ch for a par ticular entr y in your Personal D irector y . T o se arch for an entr y: 1. U se the Navigation Keys to highligh t Personal Directory . 2. Y ou may press the Sel ect Key or proceed dire ctly to step 3. 3. Use the dial pad to enter the first letter of the n[…]
-
Page 118: Nortel Networks M3904
110 Access and use the Personal Directory or 4. Press Next to copy the incoming call without editing the name. Edit the number , if required ( see notes for ste p 5), and g o to s tep 6. or Press Clear to make changes to the name b efore sav ing. Add the n ame usin g the dial pad , Delete , and Case Keys as ne eded. 5. Press the Next Key . Make cha[…]
-
Page 119: Nortel Networks M3904
11 1 Set-to-Set Messaging Set-to-Set Mes saging With the Set-to-Set Messaging applicat ion activated (a vailable on the M3903 and M3904 ) , an internal cal ler using an M3 903 or an M 3904 receives a q uick visual message, which you have selected, whene ver they dial your telephone number . The length of your message is limited to 24 cha racters. T[…]
-
Page 120: Nortel Networks M3904
112 Set-to-Set Messaging 2. From the Edi t Mo de screen, use the dial pad to enter a text message. Press the Delete Key to delete a cha racter . Press the Case Key to toggle between upper an d lower ca se characte rs. Press the Cancel Key to exit the screen without saving changes. Note 1: Please refer to “ A dd a Personal Directory en try ” on […]
-
Page 121: Nortel Networks M3904
11 3 Set-to-Set Messaging 3. From the Edi t Mo de screen, use the dial pad to customize the message. Press the Delete Key to delete a character . P ress the Case Key to togg le between u pper an d lower case character s. Press the Cancel Key to exit th e scre en wit hout sa ving c hanges . Note 1: Please refer to “ Add a Personal Directory en try[…]
-
Page 122: Nortel Networks M3904
114 Corporate Dir ectory Note 2: If messages have been provided by your ne twork admin istrator, up and down arrows ap pear on the ri ght side of the display. The On and Off Keys appear for the most recently selected message. or / 2. Press the Quit Ke y or the Applications Key to exit the Set-t o-Set Messag ing applicati on. Note: If you press the […]
-
Page 123: Nortel Networks M3904
11 5 Corporat e Directory Note 2: You do not need to enter the entire name . When the Done Key is pressed, the a pplication will highl ight the first directory entry that matche s the text that you entered. 5. Press the Done Key . The application highlights the first entr y that matches the text you entered in st ep 4. If ther e is no matc h, t he […]
-
Page 124: Nortel Networks M3904
116 Corporate Dir ectory T o exit the Corpo rate Di rector y applicat ion: or / Press the Quit Ke y or the Applications Key . T o cop y an entr y fr om the C orporat e Director y to your telephone ’ s Perso nal D irect or y: / 1. With the entr y selected in the Corporate Direc tor y , pr ess the Copy Key . 2. In the Copy to screen, press the Dire[…]
-
Page 125: Nortel Networks M3904
11 7 Virtual Office Vir tual Of fice The Vir tual Of fice f e a t u r e ( a v a i l a b l e o n t h e M3903 and M390 4) allows you to lo g into a special ly designated M3903 or M 3904 telephone. When you log into the telephone your individ ual configur ation is download ed to the te lephone for li ne (DN) and fea ture acc ess. Virtual O ffice is id[…]
-
Page 126: Nortel Networks M3904
118 Virtual Office Note: I f your Vir tua l Of fice t eleph one is configur ed as an M3903 , you m ay only logi n to an M 3903 . If y our V irtu al O ffice telephone is configured as an M3904 , you may on ly logi n to an M 3904 . T o log off the Virtual Of fice telep hone: 1. Lift the handset . or 2. Dial the V irtu al office T ermin al L og of F ([…]
-
Page 127: Nortel Networks M3904
119 M3901 Feature Operation M3901 Feature Operation M3901 is a one line te lephone. Th e M3901 op erates i n a dif fere nt way t han the other M3900 series Digital T eleph ones. This section explains in some d etail the M3901 opera tion. The M3901 supports fi ve programm able features. Y ou ac tivate the feature s when you press the M3901 Featu re […]
-
Page 128: Nortel Networks M3904
120 M3901 Feature Operation Line (DN) K ey T o us e the Line (DN) Key to make a call: / or 1. Press the Line (DN) Key . or Lift the handset . The Line (DN) Ke y is automatically selected. 2. Dial the telephon e number . V olume Control Bar Use the V olume Cont rol Bar to raise or lower the vol ume on the ringer or handset. T o adju st the rin ger v[…]
-
Page 129: Nortel Networks M3904
121 M3901 Feature Operation Program a featu re or an Auto D ial Y our network administrator may configure up to five features for your telephone. The Features Card on the rig ht side of the M3901 lists each fe ature and the Di al Pad Number Key used to activate the feature. After you press the Feature Key , you have 30 seconds to pr ess a Dial Pad […]
-
Page 130: Nortel Networks M3904
122 M3901 Feature Operation Use Au to Dial Auto Dial lets yo u de dic ate a f eatu r e po sit ion to a sp ecif ic tele phone numbe r . When the Featu res Key an d assig ned Dial Pad Nu mber Key are presse d, th e number is d ialed au tomatically . This featu re must be en abled by your network administrator . 1. Lift the handset . / 2. Press the Fe[…]
-
Page 131: Nortel Networks M3904
123 M3901 Feature Operation T o make a S peed Call: 1. Lift the handset . / 2. Press the Feature s Key . 3. Press the Dial Pad Number Key for the Speed Call Contr oller featu re or the Speed Call User feature. 4. Dial the Spee d Call code of th e number you want to call. The Spee d Call feat ure automatica lly dials t he nu mber . Use Call T ransfe[…]
-
Page 132: Nortel Networks M3904
124 M3901 Feature Operation Set up a Conference call Yo u c a n s e t u p a Conference call for up to six peop le (inc luding yoursel f). Cont act your network administrator to determi ne the maximum number of people your system allows on a conference call. T o use the Co nferen ce Ca ll featur e: / 1. Press the Hold Key to put the active call on h[…]
-
Page 133: Nortel Networks M3904
125 M3901 Feature Operation Acti vate R ing Ag ain Use t he Ring Agai n feature when you d ial a number a nd receive a busy tone or no answer . The Ring Again fe ature lets you know when th e person you dialed is availab le or has used th eir tele phon e. The fea ture no tifies you when to redi al your party . The R ing Aga in feature au tomaticall[…]
-
Page 134: Nortel Networks M3904
126 M3901 Feature Operation Make a cal l T o dial a numb er while on-hook : / 1. Press the Line (DN) Ke y . 2. Dial the numb er . 3. Lift the handset and spea k when the party answers. T o use ha ndset a nd dial numb er: 1. Lift the handset , the telephone automatically selects the Line (D N). 2. Dial the telephon e number . Receive a call T o rece[…]
-
Page 135: Nortel Networks M3904
127 Accessories for the M3900 Series telephones Accessories for the M3900 Series telephones Optional items are available for use with your M3900 Series Digital telephone. Please conta ct your System Administrator for additional de tails. Note: W all a ttachment is av ailable for all fou r models. Accessor y Connection Module (ACM) The Accessor y Co[…]
-
Page 136: Nortel Networks M3904
128 Accessories for the M 3900 Series telephones Full Duplex Hands Free Module The Full Du plex Hands Free Mo dule provides simul taneous audio pa ths for transmitting an d receiv ing durin g hands free calls. The Full Dupl ex Handsfr ee Module is ava ilable for th e M39 04 . Headsets Amplified headsets are compatible with your M3900 Se ries Meridi[…]
-
Page 137: Nortel Networks M3904
129 Flexible Feature Codes/Feature Access Codes Meridian 1 Flexible Feature Codes (FFCs) Call Detail R ecording Charge Account Radio Paging Access Remote Call For ward Activate Radio Pag ing Answer Remote Call For ward Deactivate Stati on Cont rol P ass wor d Chan ge Pickup Ringing Number V irt ual Of fice T erminal Log On Electronic Lock Activate […]
-
Page 138: Nortel Networks M3904
130 Flexible Feature Co des/Feature Acce ss Codes Meridian SL-100 Feature Access Codes (F ACs) Account Code D irected Call Park Retr ieval Anonymous Caller Rejection (ACRJ) Activate Directe d Call Pick -up (DCP U) Anonymous Caller Rejection (ACRJ) Deactivate Executi ve Busy Over ride (E BO) Automatic Callback (ACB) Activate Mali cious C all Ho ld ([…]
-
Page 139: Nortel Networks M3904
131 Index A access the Persona l Directory 102 Accessory Connection Module (ACM ) 127 account code 54 , 56 Analog Term inal Adap ter (ATA) 127 announce ment 53 , 65 Anonymous Caller Rejection 72 answer calls 24 applicati ons Corporate Direc tory 114 Set-to-Set Messaging 111 Appli cations Ke y 6 area code se tup 86 attendant 8 Attendant Recall 28 Au[…]
-
Page 140: Nortel Networks M3904
132 Index M3902 54 M3903, M3904 56 Computer Tel ephony Integ ration Adapte r (CTIA) 127 , 128 Conferen ce 35 , 48 , 124 M3902 45 M3903, M3904 46 Context Sensitive S oft Keys 3 , 4 , 8 copy from Redi al List 109 Copy Key 6 , 8 Corporate Direct ory 114 Customer Ori ginated Trace 75 D date format 87 Date/time displ ay 8 Dial Key 7 Dial Tone interrupte[…]
-
Page 141: Nortel Networks M3904
133 Index I indicator 8 Information displ ay 8 Informat ion li ne 8 Intercom 23 Internal Call Forward 41 Interrupted dial tone 8 J join a call M3902 47 M3903, M3904 47 K key cli ck 87 key layou t M3901 1 M3902 2 M3903 3 M3904 4 Key-base d Expansion M odule 128 keys Appli cations K ey 6 Call Log 6 Call Log Key 94 , 95 Copy Key 6 , 8 Dial Key 7 Direc[…]
-
Page 142: Nortel Networks M3904
134 Index Redial List 100 M3904 Callers List 98 Directories 92 display 78 key layou t 4 Options List 79 Personal Dire ctory 102 Personal Dire ctory, access 93 Redial List 101 , 109 Maid Identification 70 make a call M3901 126 Make Set Busy 51 Malicio us Ca ll Hold (MCH) 35 Mali cious Ca ll Trac e 35 Meridian 1 9 Meridian SL-100 8 , 9 , 10 , 16 , 17[…]
-
Page 143: Nortel Networks M3904
135 Index Remote Ac cess Directory Number 42 Remote Call Forw ard 42 Ring Again M3901 125 M3902 17 M3903,M3904 18 ring t one 9 , 59 , 61 ring type 85 ringback 9 , 59 , 61 Room Status 71 S screen contrast 84 secure your telephone 44 Sel ect K ey 79 Selectab le Conferee Di splay and Dis- conne ct 48 Select ive Ca ll Forwar d 76 Set-to-Set Messaging 1[…]
-
Page 144: Nortel Networks M3904
136 Index[…]
-
Page 145: Nortel Networks M3904
38 While you are aw ay from your desk: Call Forward[…]
-
Page 146: Nortel Networks M3904
Title to and ownership of Meridian SL-1 softw are shall at all times remain with Nortel Networks. Meridian SL-1 softw are shall not be sold outright and the use thereof by the customer shal l be subject to the parties entering into softwar e agreements as specified by Nortel Networks. Information contained in this document is subject to change. Nor[…]
-
Contents
-
Table of Contents
-
Troubleshooting
-
Bookmarks
Quick Links
Title page
Nortel Communication Server 1000
IP Phone 1150E
User Guide
Related Manuals for Nortel NN43114-100
Summary of Contents for Nortel NN43114-100
-
Page 1
Title page Nortel Communication Server 1000 IP Phone 1150E User Guide… -
Page 3: Table Of Contents
Revision history ……..9 About the Nortel IP Phone 1150E ….11 Basic features .
-
Page 4
Contents Selecting a headset type ……44 Configuring call log options ….. . . 45 Choosing a ring type . -
Page 5
Night Service ……..77 IP Phone 1150E non-ACD call features ….79 Make a call . -
Page 6
Contents Using Enhanced Override ……100 Using Forced Camp-on ……101 Override Feature . -
Page 7
Using Media Gateway 1000B ……136 Using Test Local Mode ……137 Using Resume Normal Mode . -
Page 8
Contents… -
Page 9: Revision History
Revision history April 2009 Standard 01.09. This document is up-issued to support Nortel Communication Server 1000 Release 5.0 software with the change in CAT5e cable which is currently shipped with the IP phones. January 2009 Standard 01.08. This document is up-issued to reflect changes in the technical content found in the section Connecting the components of the phone.
-
Page 10
Revision history October 2006 Standard 01.02. This document is up-issued to support Nortel Communication Server 1000 Release 4.5 software. This document was up-issued to 01.02 to reflect a change in technical content found in the regulatory section. October 2006 Standard 01.01. This document is up-issued to support Nortel Communication Server 1000 Release 4.5 software. -
Page 11: About The Nortel Ip Phone 1150E
About the Nortel IP Phone 1150E About the Nortel IP Phone 1150E The Nortel IP Phone 1150E provides easy access to a wide range of business features. Your network administrator assigns features to your feature keys and provides you with passwords and other codes as required.
-
Page 12: Basic Features
• Some IP Phone 1150E phones are not configured to support soft key functionality. Contact your system administrator. For information about context-sensitive soft keys, see New in This Release Communication Server Release 5.0 (NN43001-115).
-
Page 13
Supervisor headset port • USB port to support standard USB keyboard, mouse, or powered hub Note: Powered downstream 1.1-compliant USB hubs are supported, including USB 2.0 hubs, if they offer USB 1.1 backwards compliancy. About the Nortel IP Phone 1150E… -
Page 14
About the Nortel IP Phone 1150E • automatic network configuration • Hearing Aid Compatibility (HAC) as per FCC Part 68 • wireless device support (Agent port, only) through Bluetooth® 1.2 compliant Audio Gateway Headset Profile) • language support: English, French, Swedish, Danish, Norwegian,… -
Page 15: Telephone Controls
Telephone controls This section describes the controls on your IP Phone 1150E. In some geographic regions, the IP Phone 1150E is offered with key caps that have English text labels. Text in parentheses indicates labels appearing on the key caps, for example (Services).
-
Page 16
About the Nortel IP Phone 1150E (Volume +) (Volume -) Use the Volume control the volume of the ringer, headset, and speaker. Press the top button to increase the volume, and press the bottom button to decrease the volume. Use the… -
Page 17
About the Nortel IP Phone 1150E Feature key (reserved for future use) Activity key (reserved for future use) Use the Goodbye key to terminate an active call. Press the Emergency key to join the supervisor into a call that you judge to be an emergency situation. -
Page 18
About the Nortel IP Phone 1150E When a message is waiting, the red Alerter/Message Waiting indicator Also, this indicator flashes when the set ringer is on. When a data-related message, such as an instant message, is received, the blue Feature Status Lamp flashes. -
Page 19
About the Nortel IP Phone 1150E Press the Services key and use the navigation keys to access the following items: • Telephone Options: — Volume adjustment — Contrast adjustment — Language — Date/Time — Display diagnostics — Local Dialpad Tone —… -
Page 20
(continued) • Password Admin: — Station Control Password Note: The Password Admin not available on all IP Phone 1150E phones. Consult your system administrator. • Display Network Diagnostics Utilities Note: Only your system administrator or service provider can use Display Network Diagnostics Utilities to perform Internet diagnostics. -
Page 21
The following telephone controls are IP Phone 1150E Supervisor phones only. About the Nortel IP Phone 1150E Press the Message/Inbox your voice mailbox. Note: This function is not available on all phones; consult your system administrator. Press the Ans Emerg key to join the agent in an emergency situation call. -
Page 22: Telephone Display
About the Nortel IP Phone 1150E Telephone display Your IP Phone 1150E has three display areas: • The upper display area provides line and feature key status. • The middle display area contains single-line information for items such as caller number, caller name, Call Timer, feature prompt strings, user-entered digits, date and time information, and telephone information.
-
Page 23: Security Features
Security features The following security features are available on your IP Phone 1150E: • Using encrypted calling • Managing your Station Control Password (SCPW) Using encrypted calling Your IP Phone 1150E supports secure communication using SRTP media encryption. If the feature is enabled, a security icon appears on the screen when your call is secured using SRTP media encryption.
-
Page 24
8. Press the Select soft key to accept the new password. If you are locked out of your IP Phone 1150E, or if you forget your SCPW, contact your system administrator. 1. Press the Directory key. keys to scroll and key. -
Page 25
3. Use the dialpad to enter your password Enter 4. Press the 5. Press the 6. Choose one of the following context- Done 7. Press the About the Nortel IP Phone 1150E Up/Down navigation keys to scroll and highlight Change Protection Mode. (if Password Protection is enabled). -
Page 26: Entering And Editing Text
Entering and editing text Entering and editing text You can enter and edit text on your IP Phone 1150E using the following methods: • “Entering text using the telephone dialpad” on page 27 • “Editing text using the context-sensitive soft keys” on page 27 The use of any of these methods for text entry or editing depends on the application.
-
Page 27: Entering Text Using The Telephone Dialpad
When on a call, you can use the function keys (f1, f2, f3, f4, f5, f6, f7, and f8) to control the telephone. Table 2 shows the function keys and their associated action during telephone calls. Table 2: USB keyboard function keys during telephone calls Function key Action Go to speaker mode…
-
Page 28
Entering and editing text To edit an entry in your Personal Directory, press the select the desired entry from your Personal Directory. To edit text with the context-sensitive soft keys: 1. Press the Edit soft key. 2. Press the Left/Right 3. -
Page 29
Table 3: Editing context-sensitive soft key description (Part 2 of 2) Soft key Done/Select/Enter More.. Entering and editing text Description Varies, depending on the state of your phone. Access additional context-sensitive soft keys. -
Page 30: Connecting The Components
Connecting the components Connecting the components Figure 4 shows connections on the IP Phone 1150E. Figure 4: IP Phone 1150E connections Accessory Expansion module port* PC Ethernet port Agent headset port WARNING *Ensure that the protective rubber cap on the IP Phone 1150E: Accessory Expansion Module port is in place when the port is not in use.
-
Page 31: Before You Begin
Before you begin CAUTION Damage to Equipment Do not plug your IP Phone 1150E into a regular telephone jack. This results in severe damage to the IP Phone. Consult your system administrator to ensure that you plug your telephone into a 10/100BaseT Ethernet jack.
-
Page 32
Adapter (model #N0089601) for this model of phone only. Note 1: Your IP Phone 1150E supports both AC power and Power over Ethernet options, including IEEE 802.3af Power Classification 3. To use local AC power, the optional AC adapter can be ordered… -
Page 33
separately. To use Power over Ethernet, where power is delivered over the CAT5e cable, the LAN must support Power over Ethernet, an AC adapter is not required. Note 2: You must use CAT5e (or later) cables if you want to use gigabit Ethernet. -
Page 34
Connecting the components Figure 6: Cable routing tracks 2 Rivet slots (Method B) 7. Wall-mount your phone (optional). Your IP Phone 1150E can be mounted either: — using the mounting holes on the bottom of the phone stand (Method A), or —… -
Page 35
Complete steps 1-7, as needed, before you wall-mount your phone: Method A: Press the wall-mount lever, and pull the phone away from the stand. Using the stand cover (the part you removed in step 1), mark the wall-mount holes by pressing the bottom of the stand cover firmly against the wall in the location where you want to install the phone. -
Page 36: Configuring Telephone Options
Station Control Password (SCPW). • Virtual Office Login menus are listed when an IP Phone 1150E Class of Service is configured for Virtual Office and branch office. For more information, see “Using Virtual Office” on page 129.
-
Page 37: Using The Telephone Options Menu
Using the Telephone Options menu Use the Telephone Options • “Adjusting the volume” on page 38 • “Adjusting the display screen contrast” on page 39 • “Selecting a language” on page 40 • “Selecting date and time format” on page 41 •…
-
Page 38: Adjusting The Volume
Configuring Telephone Options Select Cancel Adjusting the volume To adjust the volume, press the Options, and select Volume adjustment… To adjust the volume: 3. Press the Send/Enter 4. Press the Up/Down to scroll and highlight an option (for example, Language…). 5.
-
Page 39: Adjusting The Display Screen Contrast
To adjust the LCD screen contrast, press the Telephone Options, and select Note 1: If you have an Expansion Module for the IP Phone 1150E attached to your phone, adjusting the phone LCD screen contrast also adjusts the display screen contrast configuration for the Expansion Module.
-
Page 40: Selecting A Language
Configuring Telephone Options To adjust the display screen contrast: Down Select Cancel Selecting a language The display is available in multiple languages. To choose a language, press the Services key, select Language… Note: This language setting controls the language used by features on your phone only.
-
Page 41: Selecting Date And Time Format
Select Cancel Selecting date and time format Several date and time formats are available. Formats are based on the 12-hour and 24-hour clocks. To select the date and time format, press the Services key, select Telephone To select a date and time format: Select Cancel Accessing display diagnostics…
-
Page 42: Choosing A Local Dialpad Tone
Configuring Telephone Options To use Display diagnostics: Cancel Choosing a local dialpad tone The Local DialPad Tone option produces Dual-Tone Multi-Frequency (DTMF) sounds, a single tone, or no sound when you press a key on the dialpad. To choose a local dialpad tone, press the Telephone Options, and select To choose a local dialpad tone:…
-
Page 43: Viewing Phone Information
Viewing phone information The Set Info option displays the following phone-specific information: • IP address • Hardware ID of the IP Phone • Current firmware version To view phone information, press the Options, and select To view phone information: Cancel…
-
Page 44: Selecting A Headset Type
Configuring Telephone Options To view diagnostic information: Cancel Selecting a headset type You can configure your IP Phone 1150E to select a headset type: • Plantronics • GN Netcom • Nortel Networks handset To select a headset type, press the…
-
Page 45: Configuring Call Log Options
Select Cancel Configuring call log options Use the call log option to configure the following preferences: • “Configuring the Callers List log” on page 45 • “Configuring New Call Indication” on page 46 • “Configuring Preferred Name Match” on page 47 •…
-
Page 46
Select Cancel Configuring New Call Indication You can configure your IP Phone 1150E to display a message to indicate that a new incoming call was received. The default configuration is On. To configure new call indication, press the Options, and select… -
Page 47
Select Cancel Configuring Preferred Name Match You can configure your IP Phone 1150E to display the name of the caller as defined in your Personal Directory. The default configuration is Off. To configure Preferred Name Match, press the Telephone Options, and select… -
Page 48
Configuring Telephone Options Configuring Area Code Setup Use the Area Code Setup an incoming call arrives with an area code that matches one of the three stored area codes, the incoming call number is reordered to display the phone number followed by the area code (as opposed to the area code followed by the phone number). -
Page 49
Select Cancel To edit area code display: Configuring Telephone Options 6. Choose one of the following: — Press the Select configuration. — Press the Cancel the existing configurations. 1. Press the Up/Down scroll and highlight Area Code 2. Press the Send/Enter 3. -
Page 50: Choosing A Ring Type
Configuring Telephone Options Select Cancel Choosing a ring type The Ring type… option configures the phone ring tone. To choose a ring type, press the Services Ring type… To select a ring type: Play Select Stop Cancel 6. Choose one of the following: —…
-
Page 51: Enabling Or Disabling Call Timer
Enabling or disabling Call Timer The call timer measures how long you are on each call. To enable Call Timer, press the Services Call Timer. When Call Timer is enabled, it is shown in the Date/Time area of the display. To enable or disable Call Timer: Select Cancel…
-
Page 52: Changing Feature Key Labels
Configuring Telephone Options Select Cancel Changing feature key labels The Change feature key label option renames the label displayed next to each feature key or restores the default labels to the keys (collectively or individually). To rename feature key labels, press the select Telephone Options, and select…
-
Page 53
Select Cancel To restore the default labels: To restore feature key labels, press the Options, and select Change feature key Configuring Telephone Options 4. Choose one of the following: — Press the Select changes and return to the Telephone Options —… -
Page 54: Configuring The Name Display Format
Configuring Telephone Options Configuring the name display format You can configure your IP Phone 1150E to display the name of the incoming calling party in the following formats: • first name, last name • last name, first name To configure name display format, press the…
-
Page 55
To configure Live Dialpad, press the Options, and select Live To configure Live Dialpad: Select Cancel Configuring Telephone Options Services key, select Dialpad. 1. Press the Up/Down scroll and highlight 2. Press the Send/Enter 3. Press the Up/Down scroll and highlight one of the following: —… -
Page 56: Using The Password Admin Menu
Configuring Telephone Options Using the Password Admin menu The Password Admin menu allows you to set or change your SCPW and to enable or disable Password Protection. To change your SCPW: 1. Press the Services 2. Press the Up/Down highlight Password 3.
-
Page 57
Configuring Telephone Options 8. Press the Select soft key to accept the new password. Note: If you are locked out of your IP Phone 1150E, or if you forget your SCPW, contact your system administrator. 1. Press the Directory 2. Press the… -
Page 58
Configuring Telephone Options Done 6. Choose one of the following context- sensitive soft keys: — to accept the selection — to return to the Directory menu 7. Press the Done soft key. -
Page 59: Call Center Agent/Supervisor Features
Headset interface Note: Refer to your distributor for recommended headset types for use with the IP Phone 1150E. Test your headset before using the phone to receive calls. In a noisy environment, an amplified headset is an option. Select Headset type in the Options list and choose Type 1, Type 2, or Amplified.
-
Page 60: Login With Agent Id And Multiple Queue Assignment (Mqa)
Call Center Agent/Supervisor Features Login with Agent ID and Multiple Queue Assignment (MQA) The process of logging in using MQA consists of entering your four digit Agent ID followed by a Supervisor ID (if your queue requires one) followed by up to five ACD DNs and priority values (if priority values are being used) terminated by ##.
-
Page 61
Dial your Agent ID # ACD DN 1 # ACD DN 2 # ACD DN 3 # ACD DN 4 # ACD DN 5 # # Dial your Agent ID, Supervisor ID ACD DN 1 # ACD DN 2 # ACD DN 3 # ACD DN 4 # ACD DN 5 # # Dial… -
Page 62: Default Login
Call Center Agent/Supervisor Features To correct errors during the login procedure: Default login If you usually use the same phone, you do not need to repeat the entire login process at the beginning of each shift. The default login places you in the same ACD queues and the same supervisor that the set had in the previous login.
-
Page 63: Agent Logout
Agent logout To logout: Call Center Agent/Supervisor Features 1. Press the Make Busy disconnect the headset. The LED indicator lights steadily. Note 1: If you press the again, the LED indicator will turn off. At this point your phone can accept non- ACD calls, but you are logged out of the queue.
-
Page 64: Call Center Agent Features
Answer Call Center calls In-Calls Key is the lower right key on your IP Phone 1150E and is the main ACD extension (Primary DN). It allows you to answer the next queued call on the primary DN. This key presents only ACD calls. To…
-
Page 65: Call Forcing
Note: If you have the handset option and you pick up the handset, you must also press a DN key, otherwise the handset is not operable. You can terminate a call by replacing the handset in the cradle. The phone rings and the In-Calls indicator flashes: To end an ACD call: Call Forcing The Call Forcing option automatically connects incoming ACD calls.
-
Page 66: The Emergency Key
Call Center Agent features The Emergency Key When you have an emergency situation: Use Not Ready Use the Not Ready Key, when performing post-call work. To be taken out of the queue: To be placed back in the queue: 1. Press the Emergency indicator flashes while your supervisor is called.
-
Page 67: Activate Make Set Busy
Activate Make Set Busy Make Set Busy allows you to make your phone appear busy to all callers. To activate Make Set Busy: To deactivate Make Set Busy: Making non-ACD calls An Individual DN allows you to make outgoing calls and to receive non- ACD incoming calls.
-
Page 68: Contact Your Supervisor
Call Center Agent features To answer a non-ACD call: 2637 Contact your supervisor To answer your supervisor when your phone rings and the Supervisor indicator flashes: If you are on a call and hear a buzz and the Supervisor indicator flashes: To call your supervisor: To return to the ACD call:…
-
Page 69: Use Walkaway And Return From Walkaway
To Conference your Supervisor during a call in progress: To Transfer to a supervisor, during a call in progress: Use Walkaway and Return from Walkaway Use this feature when you need to leave your desk during an ACD call, during a non-ACD call, or while in the Not Ready state. To use the Walkaway feature: Call Center Agent features 1.
-
Page 70
Call Center Agent features To Walkaway while in Not Ready mode (Not Ready LED or LCD indicator is on, and Not Ready is shown on the display): To return from Walkaway: 2. Disconnect the headset before you leave. Note: Some headsets have a quick disconnect feature. -
Page 71
Call Center Agent features 1. Press the key next to the flashing indicator. Note 1: If a caller disconnects before you return from Walkaway, the Not Ready indicator flashes. When you return from Walkaway, you are in Not Ready mode. Note 2: Even if you are using the optional handset, you must disconnect the headset to activate walkaway mode. -
Page 72: Call Center Supervisor Features
Call Center Supervisor Features Call Center Supervisor Features In addition to the features described in this section, your network administrator can assign any feature listed in the “Agent features” section to a supervisor’s phone (except Supervisor). Agent Keys Agent Keys allow you to connect, observe, or monitor the status of each Agent position.
-
Page 73: Answer Agent
Answer Agent When your phone rings and the Answer Agent indicator flashes: To disconnect an agent call: Answer Emergency When your phone buzzes and the Answer Emergency indicator flashes: To disconnect from the emergency call: Call Center Supervisor Features 1. Press the Answer Agent position goes into Not Ready state and you are connected to the agent.
-
Page 74: Call Agent
The Supervisor Talk/Listen Key is located in the upper left corner of the IP Phone 1150E and has an associated LED. A supervisor can listen in on an active call at an IP Phone 1150E by connecting the headset into the port near the Supervisor Talk/Listen Key on an agent’s phone.
-
Page 75: Observe Agent
To use the Supervisor Talk/Listen feature: To use the Supervisor Observe feature for a two way conversation: To mute the Supervisor headset: Observe Agent To observe an agent: 2637 Call Center Supervisor Features 1. Plug your headset into the agent phone. 1.
-
Page 76
Call Center Supervisor Features Note: You cannot observe an agent if the agent’s call is on hold or if no calls are in progress. To talk to an agent you are observing: To leave the Observe state: 1. Press the Observe Agent You now have a conference with the agent and the caller. -
Page 77: Interflow
Interflow When the call backlog or the waiting time in the queue exceeds a set threshold, Interflow forwards calls to a predefined target queue. The supervisor activates Interflow when the waiting time for the queue exceeds its threshold. To activate Interflow: To stop Interflow: Night Service To enter Night Service:…
-
Page 78
Call Center Supervisor Features To transition to Night Service: Night To exit Night Service: Night 1. Press the Night Key and (8=T for Transition). The indicator flashes. Calls in the queue remain in the queue and new calls receive Night Service. 1. -
Page 79: Ip Phone 1150E Non-Acd Call Features
This section describes features that you can use when you make a call. There are several ways to make a call from your Nortel IP Phone 1150E. To make a call from your phone, use the features described in this chapter.
-
Page 80: Using Predial
IP Phone 1150E non-ACD call features Using Predial The Predial feature allows you to enter and preview a number of up to 31 digits and make corrections before you dial the number. To use Predial: 2637 Dial the number. Note: If you are on a call on your…
-
Page 81: Using Auto Dial
AutoDial To display the Auto Dial number: Display AutoDial To store an Auto Dial number: AutoDial IP Phone 1150E non-ACD call features 1. Press an Individual Line 2. Press the associated Note: The number is dialed automatically. 1. Press the Display Key.
-
Page 82: Using Ring Again
IP Phone 1150E non-ACD call features AutoDial Using Ring Again Use the Ring Again feature when you dial a number and receive a busy tone or no answer. The Ring Again feature lets you know when the person you dialed is available or has used their phone. The feature notifies you when to redial your party.
-
Page 83: Using Last Number Redial
Speed Call list. A phone designated as a Speed Call Controller can program or edit the Speed Call list. This feature must be enabled by your network administrator. IP Phone 1150E non-ACD call features 2. Press the Ring Call 1. Press the…
-
Page 84
IP Phone 1150E non-ACD call features To store or change a Speed Call number: SpcCtrl Done To make a Speed Call: 2637 1. Press the Speed Call Controller The screen displays Enter Code, then number. Dial a one, two, or three digit code. Use Delete Key if you make a mistake. -
Page 85: Using System Speed Call
To make a System Speed Call: 2637 SpcCtrl SpcUsr IP Phone 1150E non-ACD call features 2. Press the Speed Call Controller Speed Call User displays Enter code.
-
Page 86: Using Hot Line
IP Phone 1150E non-ACD call features Using Hot Line The network administrator can program a Hot Line Key that allows you to dial a specific number automatically. The network administrator can apply other features to the Hot Line such as Call Redirection, so that the Hot Line call is answered by a person and not by a voice mail box.
-
Page 87: Answering A Call
When you receive an incoming call on an Individual Line (DN), your phone rings and the LCD indicator flashes. To answer a call: 2637 IP Phone 1150E non-ACD call features Dial the one or two digit code for the intercom group member you want to call.
-
Page 88: While On An Active Call
IP Phone 1150E non-ACD call features While on an active call This section describes features that you can use while on an active call on an Individual Line (DN). To place a call on Hold: Use the Hold feature when you are talking with one party and a second call comes in on a second Individual Line (DN).
-
Page 89: Transferring A Call
Trans Trans To go back to the original call if the transfer is incomplete: 2493 IP Phone 1150E non-ACD call features 1. Press the Transfer is on hold and you receive a dial tone. The screen displays Call on hold, dial number.
-
Page 90: Using Timed Reminder Recall
IP Phone 1150E non-ACD call features Using Timed Reminder Recall Timed Reminder Recall gives you a reminder tone when a call you transferred is not answered. To use Timed Reminder Recall: Trans Trans If the transferred call is not answered, your phone rings:…
-
Page 91: Using Attendant Recall
If configured network-wide, Call Park can be used across networks. To park a call on a System Park DN: Park IP Phone 1150E non-ACD call features 1. Press the Attendant Recall on a call. Stay on the line until the attendant answers.
-
Page 92
IP Phone 1150E non-ACD call features To park a call on a DN other than the System Park DN: Park To retrieve a parked call: 2493 1. Press the Park Key. The screen displays Press OK to park call on 2190 (Where 2190 represents the default System Park DN). -
Page 93: Calling Party Number/Charge Account
The Display Key allows you to be on an active call and display an incoming caller’s name and/or number, if not automatically displayed, without interfering with the call in progress. IP Phone 1150E non-ACD call features 1. Press the Charge Key.
-
Page 94: Tracing A Malicious Call
IP Phone 1150E non-ACD call features To view the name of a second caller while on a call in progress: Display 2493 Tracing a Malicious call Malicious Call Trace provides a way for you to trace nuisance calls. The feature is available for both internal and external calls. When the key is pressed, your Directory Number and the phone number of the caller are recorded for access by your network administrator.
-
Page 95
To use Call Trace if you do not have a Call Trace Key: Trans Conf 2493 IP Phone 1150E non-ACD call features 1. Press the Transfer Conference Key. Dial the Malicious Call Trace FFC. 3. Press the Individual Line (DN) beside the flashing LCD indicator to return to the call. -
Page 96: Additional Call Features
Additional Call Features Additional Call Features Using the buzz signal Buzz allows one person, whose phone is linked to another phone, to signal the other phone. The person signaled hears a buzz. Use this feature to notify the other person of a call, a visitor, or a request. To buzz the phone linked to yours: Buzz Using Call Page Connect to make an…
-
Page 97: Charging A Call Or Charging A Forced Call
To disconnect from the paging system: Charging a call or charging a forced call Call Charge allows you to charge a call to a specific account. Charge Account allows you to charge long-distance calls from a phone restricted to local calls. To charge or force charge a local or a long-distance call to an account before you dial: 2637…
-
Page 98
Additional Call Features To charge a call in progress: Charge Account To charge a call to an account when you transfer a call: Trans Account Dial the number. 1. Press the Charge Key. The screen displays Select Charge type. 2. Press the Account displays Enter account number. -
Page 99
Connect To charge a call to an account when you add someone to a conference call: Conf Account Swap Connect Additional Call Features Dial the number of the phone where the call is to be transferred. 5. Press the Connect the phone ring. -
Page 100: Using Enhanced Override
Additional Call Features Using Enhanced Override Enhanced Override allows you to override an active call after you have attempted a Forced Camp-on. Use Enhanced Override when you make either a simple call or a consultation call (i.e., place a call on hold and call another party).
-
Page 101: Using Forced Camp-On
Using Forced Camp-on Forced Camp-on allows your phone to automatically ring another phone as soon as that phone disconnects from its current call. Forced Camp-on allows you to camp-on both internal and external calls. To use Forced Camp-on: Override Additional Call Features Dial a phone number and receive a busy signal.
-
Page 102: Override Feature
Additional Call Features To answer a camped-on call: 2637 Override Feature You can Override a busy signal and interrupt another call. To override a busy/engaged signal: Override To end the connection: 1. Press the Individual Line beside the flashing LCD indicator. You are connected to the camped-on caller.
-
Page 103: Using Privacy Release
Using Privacy Release Privacy Release allows one or more people who share your DN to join your call. To use Privacy Release while on an established call: PrivRls Using Radio Page Some phone systems can have an on-site Radio Paging system. This system feature allows you to page a person and stay on the line until they answer.
-
Page 104
Additional Call Features To use Automatic Post selection: Note: Use this feature when the called party is either busy on the phone or away from the desk. To page the called party there is no need to redial the number of the called party. RadioPage Dial the number of the party you want to… -
Page 105: Using Voice Call
To use the Special Radio Paging features: If you carry a Radio Pager, you will receive a paging indication when another Meridian 1 phone user access the Radio Paging system and dials your DN. If the Radio Paging system is set up to function in “Meet — me” mode, you can use the following steps to answer the paging call from any Meridian 1 extension.
-
Page 106: Using The Voice Messaging Control Screens
Additional Call Features To respond to a voice call: Using the Voice Messaging control screens The Voice Messaging control screens allow you to send commands while connected to your voice messaging system using the context-sensitive soft keys instead of the dial pad. To use Voice Messaging controls: 2637 Vmsg…
-
Page 107
Play 5. Press the message. Note: Use the additional message options. Stop 6. Press the the message. Press Last 7. Press the message. Press message or press previous messages. Next Press the message. Press message or Press later messages. Delete Press the current message. -
Page 108: Activate Automatic Answerback
Additional Call Features Activate Automatic Answerback When Automatic Answerback is active, your set automatically answers in handsfree mode after one ring. Note: When Automatic Answerback is active, calls do not forward to your voice message service. To use Automatic Answerback: AutoAns To deactivate Automatic Answerback: AutoAns…
-
Page 109: Use Call Waiting
To answer an incoming call in another Call Pickup Group: 2637 GrpPickup To answer a call at a specific extension in any Pickup Group: 2637 DNPickup Use Call Waiting Call Waiting puts your current non-ACD call on hold, while you answer an incoming call.
-
Page 110
Additional Call Features To answer an incoming call while on another call: CallWait To return to your first phone call: 2637 If you do not have a Call Waiting Key: 2637 1. Press the Hold Key when you hear the tone. -
Page 111: Forward Calls
Forward calls The Call Forward feature allows you to direct your calls to ring at another Line (DN). You cannot forward calls while your phone is ringing. To forward your calls: Forward Done To view the number that your calls are being forwarded to: CheckFw Exit Additional Call Features…
-
Page 112: Forward Internal Calls Only
Additional Call Features To cancel Call Forward: CheckFw Exit Forward internal calls only Internal Call Forward allows only calls originating at internal DNs to ring at another DN. Calls originating outside your Meridian 1 system will still ring at your phone. You cannot forward calls while your phone is ringing. To forward your internal calls: IntForward IntForward…
-
Page 113: Use Remote Call Forward
To reinstate Internal Call Forward to the same number: IntForward IntForward Use Remote Call Forward The Remote Call Forward feature allows you (from any phone other than your own) to forward calls directed to your Individual Line (DN) to another phone.
-
Page 114
Additional Call Features To cancel Remote Call Forward: Dial the number where you want to forward your calls. If you forward calls to an invalid number, you receive a fast busy tone. 7. Press the # Key. 8. To forward calls to a previous call forward phone number, skip step six above 1. -
Page 115: Secure Your Phone
Secure your phone You can lock your phone with a password so that no one can make calls on your Individual Line (DN). To lock your phone: 2637 To unlock your phone: 2637 Additional Call Features 1. Press an Individual Line Dial the Electronic Lock Activate FFC and your Station Control Password.
-
Page 116: Set Up A Conference Call
Additional Call Features To change your password (must be done from your phone): 2637 Set up a Conference call You can set up a Conference call for up to six people (including yourself). Contact your network administrator to determine the maximum number of people your system allows on a conference call.
-
Page 117: Join A Call
Swap Connect If the person you attempt to add to the conference is unavailable: 2637 Join a call The Call Join feature allows you to connect an incoming call to a call already in progress thereby creating a conference call. In order to use Call Join, your phone must be configured with either a second line (DN) or a Call Waiting Key.
-
Page 118: Selectable Conferee Display And Disconnect
Additional Call Features Connect Selectable Conferee Display and Disconnect You can view the list of active conferees by using the Conferee Selectable Display Key and disconnect any party that has been added to the conference call. To view active conferees: ConfSelDsp To disconnect a conferee: ConfSelDsp…
-
Page 119: Use Group Call
2637 Use Group Call Group Call automatically calls members of a predefined group, one at a time, until they have all answered. Ask your network administrator for details on how to create a conference call group. To call group members: 2637 Additional Call Features 2.
-
Page 120
Additional Call Features Group To answer a Group Call: 2637 1. Press the Group Call Group Call FFC. The feature automatically calls all group members. The icon flashes until all members answer. Their phone numbers appear on the display as they answer. When the last person answers, the indicator lights steadily. -
Page 121
Additional Call Features To end a Group Call: 1. Press the Goodbye key. Note: When the person who made the group call disconnects, the call terminates for all members of the group. However, the members of the Group Call can disconnect from the call and not affect other members on the call. -
Page 122: Additional Phone Features
Additional phone features Additional phone features The following features are described in this section: • “Using the Personal Directory” on page 122 • “Using the Callers List” on page 125 • “Using the Redial List” on page 127 • “Using Virtual Office” on page 129 •…
-
Page 123
Next Done Cancel To edit an entry: Edit Done Cancel Additional phone features 3. Press the Next soft key. 4. Use the dialpad to enter the phone number. 5. Do one of the following: — Press the Done new entry. —… -
Page 124
Additional phone features To delete an entry: Delete Confirm Cancel To search for an entry: Dial Cancel 1. Press the Up/Down scroll and highlight the desired entry. 2. Press the Delete soft key. 3. Choose one of the following: — Press the Confirm the entry. -
Page 125: Using The Callers List
Using the Callers List The Callers List feature logs all incoming calls. The Callers List can store up to 100 entries. When the list is full, the system overwrites the oldest entry. Use the Callers List feature to review missed calls and to dial calls. The Callers List contains: •…
-
Page 126
Additional phone features To dial an entry: Dial To delete an entry: Delete Confirm Cancel 1. Press the Up/Down scroll and highlight the desired entry. 2. Press the Dial soft key. 1. Press the Up/Down scroll and highlight the desired entry. 2. -
Page 127: Using The Redial List
To delete the entire Callers List: Delete Using the Redial List The Redial List feature logs all outgoing calls. Redial List can stored up to 20 entries. When the list is full, the system overwrites the oldest entry. Use the Redial List feature to review calls made, and to redial previously dialed calls.
-
Page 128
Additional phone features To dial an entry: Dial To delete an entry: Delete To delete the entire Redial List: Delete 1. Press the Up/Down scroll and highlight the desired entry. 2. Press the Dial soft key. 1. Press the Up/Down scroll and highlight the desired entry. -
Page 129: Using Virtual Office
IP Phone 1150E (the Remote phone) to log in to your own home or office IP Phone (the Office phone). After you log in, you can access the DNs, autodial numbers, key layout, feature keys, and voicemail features that are configured on your own home or office IP Phone.
-
Page 130
Additional phone features A successful login transfers all the features, time, date, and tones to your Remote phone from your Office phone. 2. Press the Up/Down scroll and highlight Virtual Office 3. Press the Send/Enter 4. At the prompt, enter your user ID. 5. -
Page 131: Using Virtual Office On Your Remote Phone
Phone model to the next, your Office IP Phone 1150E display is different on each Remote phone. Figure 8 shows an IP Phone 1150E logged in as a Remote phone to an IP Phone 1150E Office phone. All the features appear as they do on your Office IP Phone 1150E.
-
Page 132
Additional phone features Figure 9: Office phone displays the message Logged Out Logged Out. Virtual Home When activated for Virtual Office by a Remote phone, your Office phone is logged out and no longer operational. If this is the case when you return to your office, you can disconnect the remote login and regain control of your Office phone. -
Page 133: Logging Out Of Virtual Office
Enter your User ID and password (this logs the Office phone back on to your office network). — Press the Virtual another IP Phone, and your phone becomes a Remote phone. 1. Press the Services 2. Press the Up/Down…
-
Page 134: Troubleshooting Virtual Office
Table 5: Troubleshooting Virtual Office (Part 1 of 3) Displayed Probable Cause Message Busy, try again Remote IP Phone is active (not idle). ACD is logged in. Make Set Busy is inactive on ACD IP Phone.
-
Page 135
Remote phone has no Station Control Password. Permission Incorrect User ID Denied (4) entered. Attempt to log in to a remote IP Phone 1120E or IP Softphone 2050 from an IP Phone 1150E (some restrictions apply). Permission Incorrect User ID Denied (5) entered. -
Page 136: Using Media Gateway 1000B
10 minutes. Local Mode If the WAN connection goes down, the IP Phone loses communication with the Main Office TPS. It then registers with the MG 1000B and receives phone services from the MG 1000B. Features such as Personal…
-
Page 137: Using Test Local Mode
Use Test Local Mode to check Local Mode functionality (make and receive phone calls). Test Local Mode is useful when provisioning has changed for an IP Phone on an MG 1000B Controller. Using Resume Normal Mode Use the Resume Normal Mode command to return to Normal Mode after testing survival functionality.
-
Page 138: Troubleshooting Mg 1000B
Additional phone features Troubleshooting MG 1000B The MG 1000B can cause error messages to display on-screen. Table 6 lists error messages and describes actions to correct the causes. Table 6: Troubleshooting MG 1000B Display Message Local Mode Local Mode Invalid ID (1) Local Mode Invalid ID (2) 3.
-
Page 139: Regulatory And Safety Information
Consult the dealer or an experienced radio/ TV technician for help. Note: The user should not make changes or modifications not expressly approved by Nortel Networks. Any such changes could void the user’s authority to operate the equipment. IMPORTANT NOTE — FCC Radiation Exposure Statement: This equipment complies with FCC radiation exposure limits set forth for an uncontrolled environment.
-
Page 140
Regulatory and safety information • This is a Class B product. In a domestic environment this product can cause radio interference in which case the user must take adequate measures. • Operation is subject to the following two conditions: (1) this device may not cause interference, and (2) this device must accept any interference, including interference that may cause undesired operation of the device.»… -
Page 141
Table 8: EMC compliance Jurisdiction Standard Canada ICES-003 Australia/ AS/NZS 3548 CISPR 22 Zealand European EN 55022 Community EN 55024 EN 61000-3-2 Limits for harmonic current emissions EN 61000-3-3 Limitation of voltage fluctuations and Japan VCCI Regulatory and safety information Description Class B Emissions: Interference-Causing Equipment Standard: Digital Apparatus… -
Page 142: Denan Regulatory Notice For Japan
This equipment complies with the CE Marking requirements. EU Countries: This device complies with the essential requirements and other relevant provisions of Directive 1999/5/EC. A copy of the Declaration may be obtained from Nortel Networks GmbH address: Ingolstaedter Strasse 14-18, 80807 Munich Germany…
-
Page 143
The user should not make changes or modifications not expressly approved by Nortel Networks. Any such changes could void the user’s authority to operate the equipment •… -
Page 144
Consult the dealer or an experienced radio/ TV technician for help. Note: The user should not make changes or modifications not expressly approved by Nortel Networks. Any such changes could void the user’s authority to operate the equipment This Class A digital apparatus complies with Canadian ICES-003. Cet appareil numérique de la classe A est conforme à… -
Page 145: Other
EU Countries: This device complies with the essential requirements and other relevant provisions of Directive 1999/5/EC. A copy of the Declaration may be obtained from Nortel Networks GmbH address: Ingolstaedter Strasse 14-18, 80807 Munich GermanyBluetooth Wireless Technology: This portable device with its antenna complies with FCC’s RF radiation exposure limits set forth for an uncontrolled environment.
-
Page 146
Regulatory and safety information… -
Page 147: Terms You Should Know
Terms you should know Calling Party Name Display Information appearing on the LCD display screen, such as the caller’s name and phone number. The system must have CPND enabled. Category 5 (Cat5) Cable and associated connecting hardware capable of transmitting at speeds up to 100 MHz, used by 10BaseT, 100BaseT4, 100BaseTX.
-
Page 148
Interrupted dial tone A broken or pulsed dial tone that sounds when you access some features on your phone. Message/Inbox A fixed key on your IP Phone 1150E that connects to your voice messaging system when the key is pressed. -
Page 149
Navigation keys Keys used to scroll through menus and lists appearing on the LCD display screen. Off-hook Any line selected to make a call or receive an incoming call. The term off-hook is applied whether (a) the end user lifts up the handset, (b) the end user presses a line key, (c) the call is automatically answered at the phone, or (d) a line is automatically selected for an outgoing call. -
Page 150
Terms you should know programmable layers. These keys are also used to configure parameters in the Special dial tone The three consecutive tones followed by dial tone that you hear when accessing phone features. Station Control Password (SCPW) Enables security features on your phone to prevent others from making calls from your phone and to prevent access to protected features (for example, Remote Call Forward). -
Page 151: Index
Index About the IP Phone 2004 147 ACD calls 64 Activity code 64 agent ID 60 agent keys 72 Agent Return 69 Agent Walkaway 69 announcement 96, 105 Answer Agent 73 answer calls 87 Answer Emergency 73 Answer Supervisor 68…
-
Page 152
IndexIndex Directory Number 147 Display Key 93, 94 Display Network Diagnostics Utili- ties 20 DN 147 Electronic Lock 115 Emergency supervisor End ACD call 65 Enhanced Override 100 Expand key 16 Feature Access Code (FAC) 79, 95, 102, 109 Feature display 148 Fixed key 148 Flexible Feature Code (FFC) 79, 85, 95, 100, 102, 103, 108, 109,… -
Page 153
Message key 148 Message waiting indicator 18, 150 More key 15 Multiple Appearance Number (MADN) 103 Multiple Queue Assignment (MQA) Mute key 17 Navigation keys 16, 149 Night Service 77 Non-ACD calls 67 Normal Mode 136 Not Ready 66, 71, 73 Observe Agent 75 Off-hook 149 on-hook dialing 80… -
Page 154
IndexIndex Speed Call, System 85 Volume control bar 16 Station Control Password 113, 114, 116 Station Control Password (SCPW) Status Messages 150 Supervisor 60, 68 Supervisor ID 60 Switchhook 150 System or Switch 150 System Speed Call 85 Telephone Options 37 Test Local Mode 137 Timed Reminder Recall 90 trace 94… -
Page 156: User Guide
Nortel Networks. The Bluetooth word mark and logos are owned by the Bluetooth SIG, Inc. and any use of such marks by Nortel Networks is under license. Other trademarks and trade names are those of their respective owners.
This manual is also suitable for:
1150e
Усиленный Телефон
- Название модели
- Подробности документа
-
64 pages
1.76 mb -
7 pages
0.1 mb
Автомобильные аксессуары
- Название модели
- Подробности документа
-
78 pages
0.91 mb
Калькулятор
- Название модели
- Подробности документа
-
42 pages
0.83 mb
Камера
- Название модели
- Подробности документа
-
74 pages
1.14 mb
Car Audio
- Название модели
- Подробности документа
-
4 pages
0.21 mb
Клавиатура
- Название модели
- Подробности документа
-
19 pages
2.59 mb
Факс
- Название модели
- Подробности документа
-
24 pages
0.16 mb -
81 pages
0.66 mb -
26 pages
0.5 mb
Домофон
- Название модели
- Подробности документа
-
18 pages
0.17 mb
Морское радио
- Название модели
- Подробности документа
-
18 pages
0.11 mb
Медицинская тревога
- Название модели
- Подробности документа
-
26 pages
0.34 mb -
111 pages
1.39 mb
Модем
- Название модели
- Подробности документа
-
20 pages
1.71 mb -
86 pages
0.65 mb -
112 pages
5.22 mb
Сетевые кабели
- Название модели
- Подробности документа
-
74 pages
0.57 mb -
74 pages
0.57 mb
Принтер
- Название модели
- Подробности документа
-
96 pages
1.1 mb
Recording Equipment
- Название модели
- Подробности документа
-
62 pages
1.84 mb -
90 pages
0.21 mb
Маршрутизатор
- Название модели
- Подробности документа
-
1 pages
3.55 mb -
50 pages
5.69 mb
Сканер
- Название модели
- Подробности документа
-
24 pages
0.16 mb
Аппарат безопасности
- Название модели
- Подробности документа
-
54 pages
1.3 mb -
912 pages
7.08 mb -
58 pages
4.5 mb
Гидролокатор
- Название модели
- Подробности документа
-
144 pages
1.68 mb -
2 pages
0.34 mb
Стереосистема
- Название модели
- Подробности документа
-
311 pages
6.86 mb
Фильтр от перенапряжения
- Название модели
- Подробности документа
-
94 pages
0.7 mb
Пылесосы
- Название модели
- Подробности документа
-
116 pages
8.07 mb
Вытяжка
- Название модели
- Подробности документа
-
27 pages
0.99 mb
Видеоигр
- Название модели
- Подробности документа
-
145 pages
2.68 mb
Наушники для видеоигр
- Название модели
- Подробности документа
-
896 pages
11.53 mb
Water System
- Название модели
- Подробности документа
-
164 pages
1.66 mb -
86 pages
0.55 mb -
222 pages
2.87 mb
Интернет камера
- Название модели
- Подробности документа
-
352 pages
3.59 mb -
306 pages
6.16 mb
Сварочная система
- Название модели
- Подробности документа
-
98 pages
0.35 mb -
95 pages
1.18 mb
Котелок
- Название модели
- Подробности документа
-
52 pages
1.17 mb
Садовый пылесос
- Название модели
- Подробности документа
-
30 pages
0.3 mb
Перейти к контенту
Ad
1
Руководство по эксплуатации Nortel Networks 3904
Nortel Networks 3904
2
Руководство по эксплуатации Nortel Networks 1000E
Nortel Networks 1000E
3
Руководство по эксплуатации Nortel Networks 1120
Nortel Networks 1120
4
Руководство по эксплуатации Nortel Networks 4146Ex
Nortel Networks 4146Ex
5
Руководство по эксплуатации Nortel Networks 413X
Nortel Networks 413X
6
Руководство по эксплуатации Nortel Networks 4065R
Nortel Networks 4065R
7
Руководство по эксплуатации Nortel Networks 414X
Nortel Networks 414X
8
Руководство по эксплуатации Nortel Networks 6300
Nortel Networks 6300
9
Руководство по эксплуатации Nortel Networks 6.1
Nortel Networks 6.1
10
Руководство по эксплуатации Nortel Networks 7210
Nortel Networks 7210
11
Руководство по эксплуатации Nortel Networks 7100
Nortel Networks 7100
12
Руководство по эксплуатации Nortel Networks ATA 2
Nortel Networks ATA 2
13
Руководство по эксплуатации Nortel Networks 7220
Nortel Networks 7220
14
Руководство по эксплуатации Nortel Networks BCM200/400
Nortel Networks BCM200/400
15
Руководство по эксплуатации Nortel Networks BSG12
Nortel Networks BSG12
16
Руководство по эксплуатации Nortel Networks BST Doorphone
Nortel Networks BST Doorphone
17
Руководство по эксплуатации Nortel Networks BM450
Nortel Networks BM450
18
Руководство по эксплуатации Nortel Networks BCM50
Nortel Networks BCM50
19
Руководство по эксплуатации Nortel Networks C3050 REV2
Nortel Networks C3050 REV2
20
Руководство по эксплуатации Nortel Networks C3060
Nortel Networks C3060
21
Руководство по эксплуатации Nortel Networks Business Communications Manager (BCM) & Norstar Installation
Nortel Networks Business Communications Manager (BCM) & Norstar Installation
22
Руководство по эксплуатации Nortel Networks C4050
Nortel Networks C4050
23
Руководство по эксплуатации Nortel Networks C4012
Nortel Networks C4012
24
Руководство по эксплуатации Nortel Networks Call Center Supervisor Guide P0919438 02
Nortel Networks Call Center Supervisor Guide P0919438 02
25
Руководство по эксплуатации Nortel Networks Call Center Telephone
Nortel Networks Call Center Telephone
26
Руководство по эксплуатации Nortel Networks C3020
Nortel Networks C3020
27
Руководство по эксплуатации Nortel Networks Call Pilot A0789401
Nortel Networks Call Pilot A0789401
28
Руководство по эксплуатации Nortel Networks CallPilot 100
Nortel Networks CallPilot 100
29
Руководство по эксплуатации Nortel Networks CallPilot 150
Nortel Networks CallPilot 150
30
Руководство по эксплуатации Nortel Networks CallPilot 2.0
Nortel Networks CallPilot 2.0
31
Руководство по эксплуатации Nortel Networks Companion MICS-XC
Nortel Networks Companion MICS-XC
32
Руководство по эксплуатации Nortel Networks CallPilot Desktop Messaging
Nortel Networks CallPilot Desktop Messaging
33
Руководство по эксплуатации Nortel Networks Enterprise Edge Feature Programming Telephone
Nortel Networks Enterprise Edge Feature Programming Telephone
34
Руководство по эксплуатации Nortel Networks Enterprise Edge M7324N
Nortel Networks Enterprise Edge M7324N
35
Руководство по эксплуатации Nortel Networks DCT1900
Nortel Networks DCT1900
36
Руководство по эксплуатации Nortel Networks FastRad
Nortel Networks FastRad
37
Руководство по эксплуатации Nortel Networks Enterprise Edge M7208N
Nortel Networks Enterprise Edge M7208N
38
Руководство по эксплуатации Nortel Networks i2022 Series
Nortel Networks i2022 Series
39
Руководство по эксплуатации Nortel Networks i2021 Series
Nortel Networks i2021 Series
40
Руководство по эксплуатации Nortel Networks ICS 4.1
Nortel Networks ICS 4.1
41
Руководство по эксплуатации Nortel Networks i2050
Nortel Networks i2050
42
Руководство по эксплуатации Nortel Networks Industrial Handset
Nortel Networks Industrial Handset
43
Руководство по эксплуатации Nortel Networks jAZZ X-6000
Nortel Networks jAZZ X-6000
44
Руководство по эксплуатации Nortel Networks M3110
Nortel Networks M3110
45
Руководство по эксплуатации Nortel Networks IP Phone 2001
Nortel Networks IP Phone 2001
46
Руководство по эксплуатации Nortel Networks LDP7004
Nortel Networks LDP7004
47
Руководство по эксплуатации Nortel Networks LIP-6830
Nortel Networks LIP-6830
48
Руководство по эксплуатации Nortel Networks LDP7008
Nortel Networks LDP7008
49
Руководство по эксплуатации Nortel Networks M7100N
Nortel Networks M7100N
50
Руководство по эксплуатации Nortel Networks M760
Nortel Networks M760
51
Руководство по эксплуатации Nortel Networks MERIDIAN BCM 4.0
Nortel Networks MERIDIAN BCM 4.0
52
Руководство по эксплуатации Nortel Networks M2016S
Nortel Networks M2016S
53
Руководство по эксплуатации Nortel Networks LIP-6812
Nortel Networks LIP-6812
54
Руководство по эксплуатации Nortel Networks M7410
Nortel Networks M7410
55
Руководство по эксплуатации Nortel Networks Meridian M2008HF
Nortel Networks Meridian M2008HF
56
Руководство по эксплуатации Nortel Networks Meridian M3901
Nortel Networks Meridian M3901
57
Руководство по эксплуатации Nortel Networks Meridian M3902
Nortel Networks Meridian M3902
58
Руководство по эксплуатации Nortel Networks NN10042-116
Nortel Networks NN10042-116
59
Руководство по эксплуатации Nortel Networks Meridian M3903
Nortel Networks Meridian M3903
60
Руководство по эксплуатации Nortel Networks Meridian M3905
Nortel Networks Meridian M3905
61
Руководство по эксплуатации Nortel Networks NN10300-009
Nortel Networks NN10300-009
62
Руководство по эксплуатации Nortel Networks Meridian M3904
Nortel Networks Meridian M3904
63
Руководство по эксплуатации Nortel Networks NN43001-504
Nortel Networks NN43001-504
64
Руководство по эксплуатации Nortel Networks Norstar ICS
Nortel Networks Norstar ICS
65
Руководство по эксплуатации Nortel Networks Modular ICS 4.0
Nortel Networks Modular ICS 4.0
66
Руководство по эксплуатации Nortel Networks Norstar M7208
Nortel Networks Norstar M7208
67
Руководство по эксплуатации Nortel Networks Norstar M7310
Nortel Networks Norstar M7310
68
Руководство по эксплуатации Nortel Networks NN10300-020
Nortel Networks NN10300-020
69
Руководство по эксплуатации Nortel Networks NN43116-104
Nortel Networks NN43116-104
70
Руководство по эксплуатации Nortel Networks Nortel DECT 4025
Nortel Networks Nortel DECT 4025
71
Руководство по эксплуатации Nortel Networks Nortel 4145Ex
Nortel Networks Nortel 4145Ex
72
Руководство по эксплуатации Nortel Networks Nortel Meridian M2008
Nortel Networks Nortel Meridian M2008
73
Руководство по эксплуатации Nortel Networks Nortel Meridian M2006
Nortel Networks Nortel Meridian M2006
74
Руководство по эксплуатации Nortel Networks Telephone Business Communications Manager 2.5
Nortel Networks Nortel Networks Telephone Business Communications Manager 2.5
75
Руководство по эксплуатации Nortel Networks Nortel 4070
Nortel Networks Nortel 4070
76
Руководство по эксплуатации Nortel Networks Nortel Meridian M2216ACD
Nortel Networks Nortel Meridian M2216ACD
77
Руководство по эксплуатации Nortel Networks Telephone CallPilot 100
Nortel Networks Nortel Networks Telephone CallPilot 100
78
Руководство по эксплуатации Nortel Networks Telephone 150
Nortel Networks Nortel Networks Telephone 150
79
Руководство по эксплуатации Nortel Networks Nortel M 7000
Nortel Networks Nortel M 7000
80
Руководство по эксплуатации Nortel Networks Telephone M7208
Nortel Networks Nortel Networks Telephone M7208
81
Руководство по эксплуатации Nortel Networks Telephone CallPilot
Nortel Networks Nortel Networks Telephone CallPilot
82
Руководство по эксплуатации Nortel Networks Telephone M7324
Nortel Networks Nortel Networks Telephone M7324
83
Руководство по эксплуатации Nortel Networks Telephone M7310
Nortel Networks Nortel Networks Telephone M7310
84
Руководство по эксплуатации Nortel Networks Telephone P0609347 02
Nortel Networks Nortel Networks Telephone P0609347 02
85
Руководство по эксплуатации Nortel Networks Telephone MCP1.1 FP1 (2.02)
Nortel Networks Nortel Networks Telephone MCP1.1 FP1 (2.02)
86
Руководство по эксплуатации Nortel Networks Telephone NN10033-111
Nortel Networks Nortel Networks Telephone NN10033-111
87
Руководство по эксплуатации Nortel Networks Telephone PO84262701
Nortel Networks Nortel Networks Telephone PO84262701
88
Руководство по эксплуатации Nortel Networks Telephone P0908533
Nortel Networks Nortel Networks Telephone P0908533
89
Руководство по эксплуатации Nortel Networks Telephone t7100
Nortel Networks Nortel Networks Telephone t7100
90
Руководство по эксплуатации Nortel Networks Telephone T7208
Nortel Networks Nortel Networks Telephone T7208
91
Руководство по эксплуатации Nortel Networks Telephone P0908542 Issue 01
Nortel Networks Nortel Networks Telephone P0908542 Issue 01
92
Руководство по эксплуатации Nortel Networks Telephone T7316
Nortel Networks Nortel Networks Telephone T7316
93
Руководство по эксплуатации Nortel Networks Telephone T7316 M7100
Nortel Networks Nortel Networks Telephone T7316 M7100
94
Руководство по эксплуатации Nortel Networks Telephone T7316E
Nortel Networks Nortel Networks Telephone T7316E
95
Руководство по эксплуатации Nortel Networks Nortel WLAN Handset 2210
Nortel Networks Nortel WLAN Handset 2210
96
Руководство по эксплуатации Nortel Networks Nortel WLAN Handset 2211
Nortel Networks Nortel WLAN Handset 2211
97
Руководство по эксплуатации Nortel Networks Nortel WLAN Handset 2212
Nortel Networks Nortel WLAN Handset 2212
98
Руководство по эксплуатации Nortel Networks P0609347 02
Nortel Networks P0609347 02
99
Руководство по эксплуатации Nortel Networks NT8B45AAAB
Nortel Networks NT8B45AAAB
100
Руководство по эксплуатации Nortel Networks NP-4046-100
Nortel Networks NP-4046-100
101
Руководство по эксплуатации Nortel Networks SL-100
Nortel Networks SL-100
102
Руководство по эксплуатации Nortel Networks Regular Telephone
Nortel Networks Regular Telephone
103
Руководство по эксплуатации Nortel Networks RTU-292
Nortel Networks RTU-292
104
Руководство по эксплуатации Nortel Networks P0936571 02
Nortel Networks P0936571 02
105
Руководство по эксплуатации Nortel Networks SOFTPHONE 2050
Nortel Networks SOFTPHONE 2050
106
Руководство по эксплуатации Nortel Networks 03050
Nortel Networks 03050
107
Руководство по эксплуатации Nortel Networks BCM1000
Nortel Networks BCM1000
108
Руководство по эксплуатации Nortel Networks Call Pilot NTRG22AC
Nortel Networks Call Pilot NTRG22AC
109
Руководство по эксплуатации Nortel Networks ICS 6.1
Nortel Networks ICS 6.1
110
Руководство по эксплуатации Nortel Networks Meridian M2616
Nortel Networks Meridian M2616
111
Руководство по эксплуатации Nortel Networks Telephone M7324N
Nortel Networks Nortel Networks Telephone M7324N
112
Руководство по эксплуатации Nortel Networks Nortel 4027
Nortel Networks Nortel 4027
- Manuals
- Brands
- Nortel Manuals
- IP Phone
ManualsLib has more than 104 Nortel IP Phone manuals
Click on an alphabet below to see the full list of models starting with that letter:
1
2
4
5
6
7
B
D
E
I
K
L
M
N
P
S

74 pages
Meridian M2008 User Manual
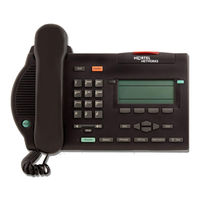
218 pages
Meridian M3903 Quick Reference Manual
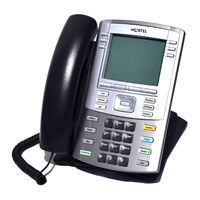
106 pages
1140E User Manual
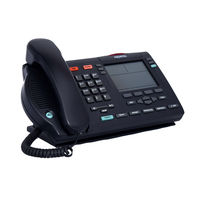
60 pages
M3902 Quick Reference Manual
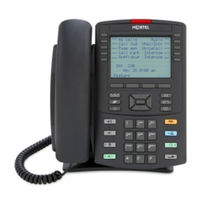
168 pages
1230 User Manual

178 pages
1140E User Manual
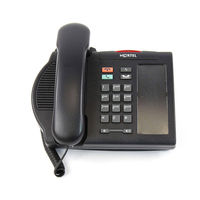
146 pages
Meridian M3901 User Manual
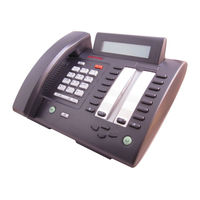
6 pages
Meridian M3820 Quick Reference Card

15 pages
Networks IP Phone 2002 User Manual

154 pages
m3900 series User Manual
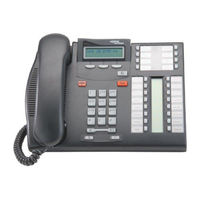
8 pages
BCM 50/400 Administration Manual
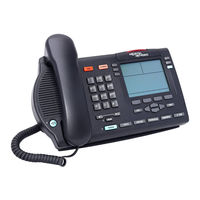
138 pages
Meridian M3901 User Manual

124 pages
Meridian M3901 User Manual

61 pages
2210 User Manual
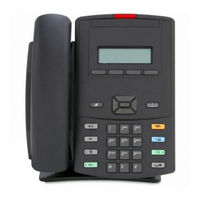
63 pages
1210 User Manual
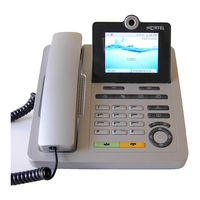
112 pages
1535 User Manual
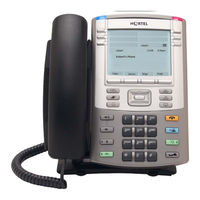
216 pages
1140E User Manual

166 pages
1220 User Manual
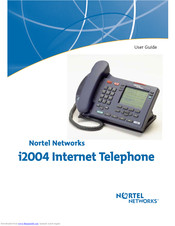
29 pages
i2004 User Manual
224 pages
1165E User Manual
1

Brochure • Reference • User Manual • Overview • User Manual • User Manual • Integration Manual • Release Note • User Manual • Supplementary Manual • Installation Manual • Implementation Manual • Overview Manual • Scripting Manual • Configuration Manual • Installation And Configuration Manual • Command Reference Manual • Hardware Installation Manual • Administration Manual • Pre-Installation Instructions • Configuration Manual • Quick Start Manual • Quick Start Manual • Release Note • Release Note • Configuration Manual • Integration Manual • Features And Services Fundamentals • Fundamentals • Fundamentals • Installation And Commissioning Manual • Installation And Commissioning Manual • Applications Installation And Commissioning • Library Reference Manual • Manual • Fundamentals • Installation And Commissioning Manual • User Manual • User Manual • Reference Manual • Manual • Installation And Commissioning Manual • Description, Installation And Operation Manual • Installation And Configuration Manual • Manual • Configuration Manual • Fundamentals
11 Series
Features Manual
1100 Series
User Manual • User Manual • Installation Manual • Configuration • User Manual • Connecting Manual • User Manual • Installation And Operation Manual • Getting Started • Installing
1120
User Manual • User Manual • User Manual
1120E/1140E
Quick Reference Manual
1120SA
Get Started Manual
1140
User Manual • Quick Reference Manual
Quick Reference Manual • User Manual • User Manual • User Manual • User Manual • Get Started • User Manual • User Manual • User Manual • Getting Started • Quick Reference Card • Quick Reference • Installation And Operation Manual • Fundamentals • Fundamentals • User Manual • User Manual • User Manual • User Manual • User Manual • User Manual • Technical Specifications • User Manual • Quick Reference Manual • User Manual • User Manual • User Manual • User Manual • Quick Reference Card • Quick Start Manual • Installation And Operation Manual • User Manual • User Manual • User Manual • Quick Reference Manual • User Manual
1150E
User Manual • Quick Reference Card • User Manual • User Manual • Getting Started • Quick Reference Card • Installation And Operation Manual • Fundamentals • Fundamentals • User Manual • User Manual • Installation And Operation Manual • User Manual
1165E
User Manual • User Manual • Getting Started
12 Series
1200 Series
User Manual • Installation Manual
1210
User Manual • Quick Installation Manual • User Manual • User Manual • Reference Manual • User Manual • User Manual
1220
Quick Reference Manual • Quick Installation Manual • Quick Reference Card • User Manual • User Manual • User Manual
Installation And Commissioning Manual • Installation And Configuration Manual • User Manual • Get Started • Quick Reference Card • Release Note • User Manual • Getting Started
2
2001
User Manual • User Manual • Getting Started • Get Started • User Manual • User Manual • Quick Reference Card • Installation And Operation Manual • Installation And Operation Manual • Additional Applications • Quick Reference Card • Quick Reference Card • Fundamentals • Fundamentals • Installation And Operation Manual • User Manual • User Manual • User Manual • User Manual • Installation And Operation Manual • Quick Reference Card • Quick Reference Card
2033
Quick Reference Card • User Manual • Quick Reference Card • User Manual • Installation And Operation Manual • Get Started • Quick Reference Card • Fundamentals • Fundamentals • Installation And Operation Manual • User Manual • User Manual • Installation And Operation Manual • User Manual • User Manual
2210
User Manual • User Manual • User Manual • Installation And Operation Manual • Installation And Operation Manual • Quick Reference Manual • User Manual • Fundamentals • Fundamentals • Fundamentals • Installation And Operation Manual • User Manual • Installation And Configuration Manual
2211
User Manual • User Manual • Installation And Operation Manual • Installation And Operation Manual • Quick Reference Manual • User Manual • Fundamentals • Fundamentals • Fundamentals • Installation And Operation Manual • User Manual • Installation And Configuration Manual
2212
User Manual • User Manual • Installation And Operation Manual • Quick Reference Manual • Installation And Configuration Manual • User Manual • Fundamentals • Fundamentals • Fundamentals
4
4060
User Manual • User Manual • User Manual
5
5100 Series Release 2.3.3
User Manual • User Manual • Integration Manual • Installation And Commissioning Manual • User Manual • Release Note • Supplementary Manual • Programming Reference Manual • Hardware Installation Manual • Release Note • User’s Manual And Command Reference
6
6120
User Manual • User Manual • Quick Reference Card • Getting Started • Fundamentals • Fundamentals • User Manual Addendum • User’s Manual & Instructions
6140
User Manual • User Manual • Quick Reference Card • Getting Started • Fundamentals • Fundamentals • Fundamentals • User Manual Addendum
7
7449
B
BayStack 600 Series
Installation Hardware • Install Manual • Installation Manual • Reference Manual • Release Note • User Manual • Manual • Installing
BCM 50/400
Administration Manual
Configuration Manual • Installation And Maintenance Manual • Keycode Installation Manual • Integration Manual • Installation And Configuration Manual • Documentation Update • Configuration • Administration Manual • Configuration Manual • Configuration Manual • Installation And Configuration Manual • System Overview • Troubleshooting Manual • Installation And Maintenance Manual • Feature User Manual • Configuration Manual • Overview • Configuration Manual • Installation And Maintenance Manual • Installation Manual
BCM50 2.0
User Manual • System Overview Manual • User Manual • Installation Manual • Configuration Manual
BCM502002
User Manual
D
DMS-100 Series
User Manual • General Description Manual • Product Manual • Manual • Maintenance Manual • Maintenance Manual • Quick Reference Manual • Quick Reference Manual • Manual • Manual • Installation, Operation And Maintenance Manual • Replacement Procedures • Replacement Procedures • Installation, Operation And Maintenance Manual • Reference Manual • Maintenance Manual • Maintenance Manual • Installation, Operation And Maintenance Manual • Maintenance Manual • Application Manual • Reference Manual • Maintenance Manual • Maintenance Manual • Maintenance Manual
E
Enterprise Edge M7310N
User Manual • User’s Card Manual • Quick Programming Manual • Manual
I
i20 Series
Features Manual
i2002
User Manual • Documentation Update • User Manual • User Manual • Quick Reference Card • Quick Reference • User’s Card Manual
i2004
User Manual • Documentation Update • User Manual • User Manual • User Manual • User Manual • Getting Started • User Manual • User Manual • Description • User Manual • Installation Manual • User Manual • Description, Installation And Operation Manual • User Manual

(French) Manual Utilisateur
i2050
Installation Manual • User Manual
IP Phone 1110
Quick Reference Card • User Manual • Getting Started • Installation And Operation Manual • Fundamentals • Fundamentals • User Manual • User Manual • User Manual • User Manual • Reference Manual
IP Phone 1535
Installation And Commissioning Manual
IP Phone 2001
User Manual • User Manual • User Manual • User Manual • User Manual
IP Phone 2004
User Manual • User Manual • User Manual • User Manual • Installation And Operation Manual • Installation And Operation Manual • Additional Applications • Get Started • Quick Reference Card • User Manual • Fundamentals • Fundamentals • Installation And Operation Manual • User Manual • User Manual • User Manual • User Manual • User Manual • User Manual • User Manual • User Manual • Installation And Operation Manual • Quick Reference Card
IP Phone 2007
User Manual • User Manual • User Manual • User Manual • User Manual • User Manual • Installation And Operation Manual • Installation And Operation Manual • Additional Applications • Get Started • Quick Reference Card • Firmware Release Notes • Fundamentals • Fundamentals • Installation And Operation Manual • User Manual • User Manual • User Manual • Installation And Operation Manual • User Manual • Quick Reference Card • User Manual
IP Phone 2210
User Manual
IP Phone 2211
User Manual
IP Phone 2212
User Manual
IP Phone 8540
Getting Started
K
KEM
Installation And Operation Manual • User Manual
L
LIP-6830
User Manual
M
M2018
Reference Manual
M2112
Reference Manual
M2317
Manual • Reference Manual
M3110
Installation Manual • Manual
M3310
Installation And Administration Manual • Manual
M3820
Installation And Administration Manual • Quick Reference Card • Manual
m3900 series
Reference Manual • Reference Manual • Installation Manual • Installation And Administration Manual • User Manual • Description, Installation And Operation
M3905
User Manual • User Manual • Reference Manual • Installation Manual • Installation Manual • Install Manual • Installation Manual • Installation Manual • Installation And Administration Manual • User Manual • User Manual • Description • Quick Reference Manual • Quick Reference Card • Reference Manual • Reference Manual
M5208 Meridian
User Manual • Manual
M5216
User Manual • User Manual • Installation, Operation And Maintenance Manual
M5316
User Manual • User Manual • User Manual • Installation, Operation And Maintenance Manual
Meridian 9316
Quick Reference Sheet
Meridian M2000 Series
Quick Start Manual • Reference Manual
Meridian M2006
User Manual • Quick Reference Manual • Quick Reference Manual • Product Support Bulletin • User Manual • Description
Meridian M2008
User Manual • Quick Reference Manual • Quick Reference Manual • Product Support Bulletin • User Manual • Description
Meridian M2008HF
User Manual • Quick Reference Manual • Quick Reference Manual • Product Support Bulletin • User Manual • Description
Meridian M2616
User Manual • Quick Reference Manual • Quick Reference Manual • Product Support Bulletin • User Manual • Description
Meridian M3901
User Manual • Installation Manual • Installation And Administration Manual • User Manual • User Manual • Quick Reference Card • Description • User Manual • Reference Manual
Meridian M3902
User Manual • User Manual • Installation Manual • Installation Manual • Installation Manual • Install Manual • Installation And Administration Manual • User Manual • Quick Reference Card • User Manual • Quick Reference Manual • Quick Reference Manual • Quick Reference Manual • Description • Quick Reference Manual • User Manual • Quick Reference Manual • Quick Reference Card • Quick Reference Manual • Quick Reference Manual • Reference Manual • Reference Manual
Meridian M3903
User Manual • User Manual • Installation Manual • Installation Manual • Installation Manual • Install Manual • Installation And Administration Manual • Quick Reference Card • User Manual • User Manual • Quick Reference Manual • Quick Reference Manual • Quick Reference Manual • Description • Quick Reference Manual • User Manual • Quick Reference Manual • Manual • Quick Reference Manual • Quick Reference Manual • Reference Manual • Reference Manual
Meridian M3904
User Manual • User Manual • Reference Manual • Installation Manual • Installation Manual • Installation Manual • Install Manual • Installation Manual • Installation Manual • Installation Manual • Installation And Administration Manual • Quick Reference Card • User Manual • User Manual • Quick Reference Manual • Quick Reference Manual • Quick Reference Manual • Description • Quick Reference Manual • User Manual • Quick Reference Manual • Quick Reference Manual • Quick Reference Manual • Reference Manual • Reference Manual
Meridian M5008
User Manual • Manual
Meridian Meridian 1
Installation And Commissioning Manual • User Manual • Operation Manual • Installation Manual • Release Note • Implementation Manual • Maintenance Manual • Upgrade Manual • Scripting Manual • User Manual • Feature Description And Administration • Description • Hardware Replacement Manual • Manual • Replacement Manual • Manual • Installation Manual • Description, Installation, And Maintenance • Description, Installation And Operation • Manual • General Maintenance Information • Manual • Manual • Manual • Manual • Planning, Installation And Operating Instructions • Manual • Planning And Installation Manual • Administration And Maintenance • Manual • Manual • Configuration Manual
MOG6xx
Installation And Configuration Manual
MOG7xx
Installation And Configuration Manual
N
NA
Quick Reference Card
Networks 2004
User Manual
Networks IP Phone 2002
User Manual • Quick Reference • Installation And Operation Manual • Installation And Operation Manual • Additional Applications • Get Started • Quick Reference Card • Fundamentals • Fundamentals • Installation And Operation Manual • User Manual • User Manual • User Manual • User Manual • User Manual • User Manual • User Manual • Quick Reference Card • Quick Reference Card • Installation And Operation Manual • User Manual
NN10042-116
User Manual
NN10300-009
User Manual
NN10300-020
User Manual
NN40050-109
User Manual
NN43001-115
User Manual
NN43112-102
User Manual
NN43112-103
User Manual
NN43112-107
User Manual
NN43113-103
Get Started
NN43113-105
User Manual
NN43113-106
User Manual
NN43114-100
User Manual
NN43114-102
Quick Reference Card
NN43115-100
Quick Reference Card
NN43115-102
Quick Reference Card
NN43115-110
Get Started
NN43117-110 01.01
User Manual
NN43118-100
User Manual
NN43118-102
User Manual
NN43120-105
User Manual
Norstar M7208
User’s Card • User Manual • Installation And Maintenance Manual • Manual • Manual • Manual • Manual
Nortel IP Phone 1120E
Quick Reference Manual • User Manual • User Manual • User Manual • User Manual • User Manual • Quick Reference Card • User Manual • Firmware Release Notes • Installation And Operation Manual • Fundamentals • Fundamentals • User Manual • User Manual • User Manual • User Manual • User Manual • User Manual • User Manual • User Manual • User Manual • User Manual • Quick Start Manual • Quick Reference Card • User Manual • Installation And Operation Manual • User Manual • Quick Reference Manual • User Manual • Administration Manual • Quick Reference
(French) Guide Utilisateur
Nortel IP Phone 1210
User Manual
Nortel IP Phone 1230
Quick Reference Manual • Quick Installation Manual • Technical Specifications • User Manual • User Manual • Function Manual • User Manual
P
Phase 0
User Manual
Phase 1
User Manual
Phase 2
User Manual
S
Softphone 2050
User Manual • User Manual • User Manual • User Manual • User Manual • User Manual • Installation And Operation Manual • Installation And Operation Manual • Quick Reference Card • Installation Manual • User Manual • Installation Manual • Fundamentals • Fundamentals • Installation And Operation Manual • User Manual • Installation Manual • User Manual • Installation And Operation Manual • User Manual
Вы можете бесплатно скачать инструкции в PDF для Nortel Networks Телефоны.
У нас есть 98 бесплатных инструкций в PDF для 98 Nortel Networks Телефоны.
-
1
-
3
-
4
-
6
-
7
-
a
-
b
-
c
-
d
-
e
-
f
-
i
-
j
-
l
-
m
-
n
-
p
-
r
-
s
-
t
Усиленный Телефон
- Название модели
- Подробности документа
-
64 pages
1.76 mb -
7 pages
0.1 mb
Автомобильные аксессуары
- Название модели
- Подробности документа
-
78 pages
0.91 mb
Калькулятор
- Название модели
- Подробности документа
-
42 pages
0.83 mb
Камера
- Название модели
- Подробности документа
-
74 pages
1.14 mb
Car Audio
- Название модели
- Подробности документа
-
4 pages
0.21 mb
Клавиатура
- Название модели
- Подробности документа
-
19 pages
2.59 mb
Факс
- Название модели
- Подробности документа
-
24 pages
0.16 mb -
81 pages
0.66 mb -
26 pages
0.5 mb
Домофон
- Название модели
- Подробности документа
-
18 pages
0.17 mb
Морское радио
- Название модели
- Подробности документа
-
18 pages
0.11 mb
Медицинская тревога
- Название модели
- Подробности документа
-
26 pages
0.34 mb -
111 pages
1.39 mb
Модем
- Название модели
- Подробности документа
-
20 pages
1.71 mb -
86 pages
0.65 mb -
112 pages
5.22 mb
Сетевые кабели
- Название модели
- Подробности документа
-
74 pages
0.57 mb -
74 pages
0.57 mb
Принтер
- Название модели
- Подробности документа
-
96 pages
1.1 mb
Recording Equipment
- Название модели
- Подробности документа
-
62 pages
1.84 mb -
90 pages
0.21 mb
Маршрутизатор
- Название модели
- Подробности документа
-
1 pages
3.55 mb -
50 pages
5.69 mb
Сканер
- Название модели
- Подробности документа
-
24 pages
0.16 mb
Аппарат безопасности
- Название модели
- Подробности документа
-
54 pages
1.3 mb -
912 pages
7.08 mb -
58 pages
4.5 mb
Гидролокатор
- Название модели
- Подробности документа
-
144 pages
1.68 mb -
2 pages
0.34 mb
Стереосистема
- Название модели
- Подробности документа
-
311 pages
6.86 mb
Фильтр от перенапряжения
- Название модели
- Подробности документа
-
94 pages
0.7 mb
Пылесосы
- Название модели
- Подробности документа
-
116 pages
8.07 mb
Вытяжка
- Название модели
- Подробности документа
-
27 pages
0.99 mb
Видеоигр
- Название модели
- Подробности документа
-
145 pages
2.68 mb
Наушники для видеоигр
- Название модели
- Подробности документа
-
896 pages
11.53 mb
Water System
- Название модели
- Подробности документа
-
164 pages
1.66 mb -
86 pages
0.55 mb -
222 pages
2.87 mb
Интернет камера
- Название модели
- Подробности документа
-
352 pages
3.59 mb -
306 pages
6.16 mb
Сварочная система
- Название модели
- Подробности документа
-
98 pages
0.35 mb -
95 pages
1.18 mb
Котелок
- Название модели
- Подробности документа
-
52 pages
1.17 mb
Садовый пылесос
- Название модели
- Подробности документа
-
30 pages
0.3 mb
Nor
tel Knowledg
e Netw
ork
Enterprise Voice Solutions Customer Documentation
Meridian Digital
Telephones
M3901
M3902
M3903
M3904
User Guide