-
Contents
-
Table of Contents
-
Troubleshooting
-
Bookmarks
Quick Links
D01098520B
DR-680
Portable Multitrack Recorder
OWNER’S MANUAL
Related Manuals for Tascam DR-680
Summary of Contents for Tascam DR-680
-
Page 1
D01098520B DR-680 Portable Multitrack Recorder OWNER’S MANUAL… -
Page 2: Important Safety Instructions
Consult the dealer or an experienced radio/ TV technician for help. CAUTION: Changes or modifications to this equipment not expressly approved by TEAC CORPORATION for compliance could void the user’s authority to operate this equipment. TASCAM DR-680…
-
Page 3
TASCAM DR-680… -
Page 4
The batteries could short, causing leak, rupture or other trouble. Do not heat or disassemble batteries. Do not put • them in fire or water. Batteries could rupture or leak, causing fire, injury or stains around them. TASCAM DR-680… -
Page 5: Table Of Contents
Selecting a folder for the playback area on the Stereo track recording settings ………25 BROWSE screen Arming and disarming tracks for recording…….25 …………41 Creation of new takes when restarting recording …..26 Setting the search speed ……….41 Setting the name given to recording takes …….26 TASCAM DR-680…
-
Page 6
……..54 Input and output …………54 Analog audio input and output ……..54 Digital audio input and output ………54 Control input and output ……….54 Audio performance …………55 Requirements for connected computers …..55 Other specifications …………55 Dimensions …………..56 Block diagrams ……………57 TASCAM DR-680… -
Page 7: Introduction
• Cascade function allows the transport of multiple • “SD memory card” is sometimes abbreviated as DR-680 units to be controlled by a single master “SD card.” unit • When we refer to a key or connector or control on •…
-
Page 8: Intellectual Property Rights
We give hints and tips on using the DR-680 when you TEAC Corporation disclaims any warranty that see this icon. any use of such data and/or information shall be free from infringement of any third party’s intel-…
-
Page 9: About Sd Cards
If this should happen, use that device A list of SD cards that have been tested with this unit farther from the unit or turn its power off. can be found on the TASCAM web site (www.tascam. com). Beware of condensation…
-
Page 10: Names And Functions Of Parts
Press this to switch the unit power between level in a menu and respond “YES” to confirmation STANDBY pop-up messages on various settings screens. 6 PHANTOM switches Use these to turn phantom power input pairs 1/2, 3/4 and 5/6. TASCAM DR-680…
-
Page 11: Front Panel
Press when the Home Screen is open to open the Functions Screen. Press the key on the top panel while pressing STOP this key to erase the current mark. When the Home Screen is open, press and hold this button to open the screen. MENU TASCAM DR-680…
-
Page 12
LEVEL close it and return to the Home Screen. j 1–6 keys Use these to select tracks on the TR I M LEVEL settings screens. Press when in recording standby to arm/disarm that track for recording. TASCAM DR-680… -
Page 13: Left Side Panel
Do not connect an unbalanced dynamic mic to an XLR • connector when phantom power is being supplied. Doing so could damage that mic and this unit. TASCAM DR-680…
-
Page 14: Right Side Panel
DIGITAL/SYNC OUT Insert SD cards here. the other DR-680 to this jack. . USB port c DIGITAL/SYNC OUT jack Connect this unit with a computer using a USB2.0 The stereo signal mixed by the internal mixer is cable.
-
Page 15: Bottom Panel
Use this stand to raise the front of the unit when operating it on a flat surface. @ Battery compartment cover # Battery compartment Install batteries (8 AA) for powering the unit in this compartment. (See “Using AA batteries” on page 20.) TASCAM DR-680…
-
Page 16: Home Screen
DISPLAY When using the included AC adaptor (PS-1225L), show the remaining time of the take as a negative icon appears. number. When recording, the elapsed recording time of the take is shown. TASCAM DR-680…
-
Page 17: Menu Structure
1 and 2 function as the L and R Set the date and time DATE/ T I ME meters. e SOLO indicator When a track has been soloed, the indicator appears. An icon appears beneath the meter of the currently soloed track. TASCAM DR-680…
-
Page 18: Using Menus
On the Functions Screen, you can view and activate Press the key to return to the Home HOME/FUNC the following items. Screen. Repeat Pre-record Operation basics Auto-record Use the following controls to operate the various DIN/MIX monitor settings screens. Limiter TASCAM DR-680…
-
Page 19: Repeat Activation
LOW CUT menu. (See “Using the low-cut filter” on page 33.) NOTE When the ST REC item on the REC screen is set to MIX, this setting is fixed to MIX MON, and it cannot be changed to DIN MON. TASCAM DR-680…
-
Page 20: Preparations
This unit cannot recharge AA nickel-metal hydride • If power is available from both batteries and the AC (NiMH) batteries. Use a commercially-available battery adaptor, the power is supplied by the AC adaptor. recharger to recharge NiMH batteries. TASCAM DR-680…
-
Page 21: Turning The Power On And Putting The Unit Into Standby
3 – Preparations Turning the power on and putting A list of SD/SDHC cards that have been verified for use with this unit can be found on the TASCAM the unit into standby website (http://www.tascam.com/). Inserting an SD card Turning the power on 1 Open the SD card slot cover on the right side When the power is in standby, press and hold the panel of the unit.
-
Page 22: Preparing An Sd Card For Use
PHONES CAUTION Before using the built-in speaker, turn the PHONES knob to the minimum volume. Failure to do so could cause sudden loud noises to occur, which might damage your hearing or equipment. TASCAM DR-680…
-
Page 23: Connecting Monitoring Equipment
LINE OUTPUTS Powered monitor speakers or amplifier and speakers CAUTION Before using an external monitoring system, turn the volume to minimum. Failure to do so could cause sudden loud noises to occur, which might damage your hearing or equipment. TASCAM DR-680…
-
Page 24: Recording
, or when expecting to do so. MP3- 1 92k bps MP3-320k bps The maximum number of takes in a folder is about • 5 Press the key to return to the selection of 100. items on the screen. TASCAM DR-680…
-
Page 25: Setting The Sampling Frequency
Tracks can be armed and disarmed for recording from screen. MENU 4 Use the wheel to select one of the following DATA 1. Press the key on the top panel to open the MENU options: (default value), or MONO STEREO screen. MENU TASCAM DR-680…
-
Page 26: Creation Of New Takes When Restarting Recording
Record to a new take. NEW TAKE 5 Press the key to return to the selection of items on the screen. 6 Press the key to return to the screen. MENU MENU Press the key to return to the Home HOME/FUNC Screen. TASCAM DR-680…
-
Page 27: Available Recording Time Display
Set the recording source for the stereo track on the and the remaining available recording time. When screen. (See “Stereo track recording settings” on the remaining available recording time is shown, it page 25.) appears as a negative number. TASCAM DR-680…
-
Page 28: Setting The Input Sources
Do not connect an unbalanced dynamic mic to a mic • input when phantom power is being supplied. Doing so could damage that mic and this unit. TASCAM DR-680…
-
Page 29: Adjusting The Input Levels
If an INPUT switch is set to LINE, the corresponding MIC (See “Using the limiter” on page 33.) GAIN switch is disabled. 7 Press the key to REC TRIM HOME/FUNC return to the Home Screen. TASCAM DR-680…
-
Page 30: Recording A Take
7 When you have finished making the settings, take or a new take is created when you start recording press the key to return to the Home HOME/FUNC again after pausing. (See “Creation of new takes when Screen. restarting recording” on page 26.) TASCAM DR-680…
-
Page 31: Using The Solo Function
If auto-recording has been turned ON, the A . REC 1 Set as explained in the AUTO REC LEVEL indicator appears with a dark background. previous section. 2 Open the screen of selecting items. AUTO REC TASCAM DR-680…
-
Page 32: Automatically Adding Marks At The Position Where Recording Restarts
TAKE You should use a folder that contains as few takes as • possible when creating new takes while recording or when expecting to do so. The maximum number of takes in a folder is about • 100. TASCAM DR-680…
-
Page 33: Automatically Starting A New Take During Recording
2 Use the wheel to select the menu DATA LOW CUT Press the 1–6 keys to turn the limiter ON or OFF item, and press the key to open the ENTER for each input independently. screen. TASCAM DR-680…
-
Page 34: Using Marks
If you change the take using the  or ¯ key without stopping, the erasure of marks is not completed. Moving to a mark When stopped or during playback, press the ¯ key or key while pressing and holding the  TASCAM DR-680…
-
Page 35: Pre-Recording
Used in combination with the auto-record function, you can capture recordings without losing the initial sound. NOTE If the unit has been in recording standby for less than two seconds, only the amount of time that the unit has been in standby can be recorded. TASCAM DR-680…
-
Page 36: Recording Times
The above recording times are estimates, and might differ according to the SD/SDHC card. • The above recording times are not continuous recording times. They are total recording times for SD/SDHC card • capacities. TASCAM DR-680…
-
Page 37: Take And Folder Operations (Browse Screen)
This icon appears before the name of a recorded take. CANCEL Folder ( Press this to not conduct any operation on the selected This icon shows a folder. take. Open folder ( The contents of this folder are currently shown on the screen. TASCAM DR-680…
-
Page 38: Folder Operations
Press the key to erase the takes and return to ENTER screen. Press the key to cancel deletion BROWSE and reopen the pop-up menu. NOTE This unit cannot delete write-protected files and files that the unit does not recognize. TASCAM DR-680…
-
Page 39: Playback
On the Home Screen, press the PLAY/PAUSE during playback to pause playback at the current NOTE position in the take. No sound is output while you are turning the DATA • Press the key again to restart playback PLAY/PAUSE wheel. from that position. TASCAM DR-680…
-
Page 40: Mixing And Outputting A Multitrack Recording
5 Use the pan controls on this screen to adjust the stereo position of each channel. Use the – keys to select the channels that you want to adjust. 6 Use the knob to adjust each to a suitable VALUE stereo position using values ranging from TASCAM DR-680…
-
Page 41: Setting The Playback Area
Regardless of the current playback area, if you play a 5 When you have finished making the settings, take on the screen, the playback area changes press the key to return to the Home HOME/FUNC BROWSE to the folder that contains that take. Screen. TASCAM DR-680…
-
Page 42: Repeat Playback
Home HOME/FUNC Screen. NOTE icon appears on the Home Screen when the • repeat function is ON. The takes in the currently set playback area are • repeated. (See “Setting the playback area” on page 41.) TASCAM DR-680…
-
Page 43: Connection With A Computer
Avoid changing names on a computer if you want to use them again on this unit. Files with formats that are not supported by this • unit will not be recognized even after rebuilding and cannot be played back. TASCAM DR-680…
-
Page 44: Ending The Connection With A Computer
Follow the correct computer procedures to disconnect the unit from the computer before disconnecting the USB cable. Please refer to your computer manual for information about the correct procedures for discon- necting an external drive. After being disconnected, the power is set to standby. TASCAM DR-680…
-
Page 45: Cascade Connections
SYSTEM menu ª • CASCADE Set the master unit to and the slave unit to MASTER SLAVE Function menu ª • REPEAT For cascade playback, both the master and slave units must be set the same. TASCAM DR-680…
-
Page 46: Precautions For Use Of The Cascade Function
If a menu screen is open on either or both units, the cascade function will not work properly. • Use of the cascade function for playback is intended for checking recorded takes. We cannot guarantee synchronized playback. TASCAM DR-680…
-
Page 47: Other Settings And Information Display
You can set the digital output format to SPDIF or Screen. AES/EBU. 1 Press the key to open the screen. MENU MENU 2 Use the wheel to select the menu item, DATA I /O and press the key to open the menu ENTER I /O screen. TASCAM DR-680…
-
Page 48: Power Auto Off Settings
Options: (alkaline batteries (default value)), ALKAL I (nickel metal hydride batteries) N i -MH Cascade settings Use the item to set the cascade function. CASCADE Options: (default setting—cascade disabled), MASTER SLAVE TASCAM DR-680…
-
Page 49: Initializing The Unit
ENTER 6 When formatting completes, the screen This page shows information about the system CARD reopens. firmware version. When the screen is open, press the I NFORMAT I ON key to return to the screen. ENTER SYSTEM TASCAM DR-680…
-
Page 50: Viewing Card Information
ENTER screen. TOTAL Shows the total memory capacity of the SD card. REMA I N Shows the remaining capacity of the SD card. F I LE/FLDR Shows the total number of files and folders inside the MUSIC folder. TASCAM DR-680…
-
Page 51: 10 — Messages
10 – Messages The following is a list of the pop-up messages that might appear on the DR-680 under certain conditions. Refer to this list if one of these pop-up messages appears and you want to check the meaning or determine a suitable response.
-
Page 52
If any of these errors occur, turn the unit power OFF and restart it. If the power cannot be turned OFF, remove the batteries and disconnect the AC adaptor (if Sys tem Error 1 connected). If the error message continues to appear, please contact a TASCAM Service Center. Sys tem Error 2… -
Page 53: 11 — Troubleshooting
MIC GAIN contact the store where you bought the unit or a • Is the output level of a connected external device TASCAM Service Center. too low? Power will not turn ON. ª The sound I am trying to record is distorted.
-
Page 54: 12 — Specifications
Sleeve: GND) Format: USB2.0 HIGH SPEED (480 Mbps) INPUT switch set to MIC Input impedance: 2.4 kΩ Nominal input level: GAIN LOW: –20 dBu (0.11 V) GAIN HIGH: –44 dBu (6.91 mV) Maximum input level: GAIN LOW: +3 dBu (1.55 V) TASCAM DR-680…
-
Page 55: Audio Performance
Requirements for connected About 4 hours playback (JEITA) computers NiMH batteries About 4.5 hours recording (JEITA) See the TASCAM web site (http://www.tascam.com/) for the latest information about OS compatibility. About 4.5 hours playback (JEITA) Windows computer Dimensions (width x height x depth) Pentium 300 MHz or faster 216.4 x 56 x 188.4 mm…
-
Page 56: Dimensions
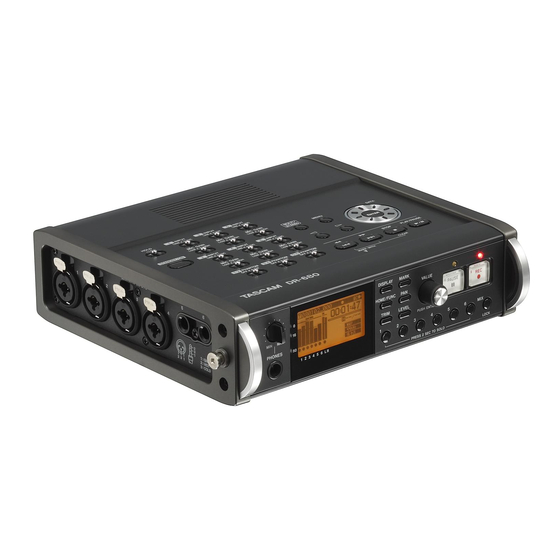
12 – Specifications Dimensions 202 mm 54 mm 216.4 mm 56 mm • Illustrations in this manual might differ from the actual product. • In order to improve the product, specifications and appearance could be changed without prior notice. TASCAM DR-680…
-
Page 57: Block Diagrams
12 – Specifications Block diagrams Recording ª Play ª TASCAM DR-680…
-
Page 58
12 – Specifications ª Input Type A Input Type B Typical Output TASCAM DR-680… -
Page 59
Notes TASCAM DR-680… -
Page 60
DR-680 TEAC CORPORATION Phone: +81-42-356-9143 www.tascam.jp 1-47 Ochiai, Tama-shi, Tokyo 206-8530, Japan TEAC AMERICA, INC. Phone: +1-323-726-0303 www.tascam.com 7733 Telegraph Road, Montebello, California 90640 USA TEAC CANADA LTD. Phone: +1905-890-8008 Facsimile: +1905-890-9888 www.tascam.com 5939 Wallace Street, Mississauga, Ontario L4Z 1Z8, Canada TEAC MEXICO, S.A.
-
Page 1
D01098520B DR-680 Portable Multitrack Recorder OWNER’S MANUAL… -
Page 2: Important Safety Instructions
Consult the dealer or an experienced radio/ TV technician for help. CAUTION: Changes or modifications to this equipment not expressly approved by TEAC CORPORATION for compliance could void the user’s authority to operate this equipment. TASCAM DR-680…
-
Page 3
TASCAM DR-680… -
Page 4
The batteries could short, causing leak, rupture or other trouble. Do not heat or disassemble batteries. Do not put • them in fire or water. Batteries could rupture or leak, causing fire, injury or stains around them. TASCAM DR-680… -
Page 5: Table Of Contents
Selecting a folder for the playback area on the Stereo track recording settings ………25 BROWSE screen Arming and disarming tracks for recording…….25 …………41 Creation of new takes when restarting recording …..26 Setting the search speed ……….41 Setting the name given to recording takes …….26 TASCAM DR-680…
-
Page 6
……..54 Input and output …………54 Analog audio input and output ……..54 Digital audio input and output ………54 Control input and output ……….54 Audio performance …………55 Requirements for connected computers …..55 Other specifications …………55 Dimensions …………..56 Block diagrams ……………57 TASCAM DR-680… -
Page 7: Introduction
• Cascade function allows the transport of multiple • “SD memory card” is sometimes abbreviated as DR-680 units to be controlled by a single master “SD card.” unit • When we refer to a key or connector or control on •…
-
Page 8: Intellectual Property Rights
We give hints and tips on using the DR-680 when you TEAC Corporation disclaims any warranty that see this icon. any use of such data and/or information shall be free from infringement of any third party’s intel-…
-
Page 9: About Sd Cards
If this should happen, use that device A list of SD cards that have been tested with this unit farther from the unit or turn its power off. can be found on the TASCAM web site (www.tascam. com). Beware of condensation…
-
Page 10: Names And Functions Of Parts
Press this to switch the unit power between level in a menu and respond “YES” to confirmation STANDBY pop-up messages on various settings screens. 6 PHANTOM switches Use these to turn phantom power input pairs 1/2, 3/4 and 5/6. TASCAM DR-680…
-
Page 11: Front Panel
Press when the Home Screen is open to open the Functions Screen. Press the key on the top panel while pressing STOP this key to erase the current mark. When the Home Screen is open, press and hold this button to open the screen. MENU TASCAM DR-680…
-
Page 12
LEVEL close it and return to the Home Screen. j 1–6 keys Use these to select tracks on the TR I M LEVEL settings screens. Press when in recording standby to arm/disarm that track for recording. TASCAM DR-680… -
Page 13: Left Side Panel
Do not connect an unbalanced dynamic mic to an XLR • connector when phantom power is being supplied. Doing so could damage that mic and this unit. TASCAM DR-680…
-
Page 14: Right Side Panel
DIGITAL/SYNC OUT Insert SD cards here. the other DR-680 to this jack. . USB port c DIGITAL/SYNC OUT jack Connect this unit with a computer using a USB2.0 The stereo signal mixed by the internal mixer is cable.
-
Page 15: Bottom Panel
Use this stand to raise the front of the unit when operating it on a flat surface. @ Battery compartment cover # Battery compartment Install batteries (8 AA) for powering the unit in this compartment. (See “Using AA batteries” on page 20.) TASCAM DR-680…
-
Page 16: Home Screen
DISPLAY When using the included AC adaptor (PS-1225L), show the remaining time of the take as a negative icon appears. number. When recording, the elapsed recording time of the take is shown. TASCAM DR-680…
-
Page 17: Menu Structure
1 and 2 function as the L and R Set the date and time DATE/ T I ME meters. e SOLO indicator When a track has been soloed, the indicator appears. An icon appears beneath the meter of the currently soloed track. TASCAM DR-680…
-
Page 18: Using Menus
On the Functions Screen, you can view and activate Press the key to return to the Home HOME/FUNC the following items. Screen. Repeat Pre-record Operation basics Auto-record Use the following controls to operate the various DIN/MIX monitor settings screens. Limiter TASCAM DR-680…
-
Page 19: Repeat Activation
LOW CUT menu. (See “Using the low-cut filter” on page 33.) NOTE When the ST REC item on the REC screen is set to MIX, this setting is fixed to MIX MON, and it cannot be changed to DIN MON. TASCAM DR-680…
-
Page 20: Preparations
This unit cannot recharge AA nickel-metal hydride • If power is available from both batteries and the AC (NiMH) batteries. Use a commercially-available battery adaptor, the power is supplied by the AC adaptor. recharger to recharge NiMH batteries. TASCAM DR-680…
-
Page 21: Turning The Power On And Putting The Unit Into Standby
3 – Preparations Turning the power on and putting A list of SD/SDHC cards that have been verified for use with this unit can be found on the TASCAM the unit into standby website (http://www.tascam.com/). Inserting an SD card Turning the power on 1 Open the SD card slot cover on the right side When the power is in standby, press and hold the panel of the unit.
-
Page 22: Preparing An Sd Card For Use
PHONES CAUTION Before using the built-in speaker, turn the PHONES knob to the minimum volume. Failure to do so could cause sudden loud noises to occur, which might damage your hearing or equipment. TASCAM DR-680…
-
Page 23: Connecting Monitoring Equipment
LINE OUTPUTS Powered monitor speakers or amplifier and speakers CAUTION Before using an external monitoring system, turn the volume to minimum. Failure to do so could cause sudden loud noises to occur, which might damage your hearing or equipment. TASCAM DR-680…
-
Page 24: Recording
, or when expecting to do so. MP3- 1 92k bps MP3-320k bps The maximum number of takes in a folder is about • 5 Press the key to return to the selection of 100. items on the screen. TASCAM DR-680…
-
Page 25: Setting The Sampling Frequency
Tracks can be armed and disarmed for recording from screen. MENU 4 Use the wheel to select one of the following DATA 1. Press the key on the top panel to open the MENU options: (default value), or MONO STEREO screen. MENU TASCAM DR-680…
-
Page 26: Creation Of New Takes When Restarting Recording
Record to a new take. NEW TAKE 5 Press the key to return to the selection of items on the screen. 6 Press the key to return to the screen. MENU MENU Press the key to return to the Home HOME/FUNC Screen. TASCAM DR-680…
-
Page 27: Available Recording Time Display
Set the recording source for the stereo track on the and the remaining available recording time. When screen. (See “Stereo track recording settings” on the remaining available recording time is shown, it page 25.) appears as a negative number. TASCAM DR-680…
-
Page 28: Setting The Input Sources
Do not connect an unbalanced dynamic mic to a mic • input when phantom power is being supplied. Doing so could damage that mic and this unit. TASCAM DR-680…
-
Page 29: Adjusting The Input Levels
If an INPUT switch is set to LINE, the corresponding MIC (See “Using the limiter” on page 33.) GAIN switch is disabled. 7 Press the key to REC TRIM HOME/FUNC return to the Home Screen. TASCAM DR-680…
-
Page 30: Recording A Take
7 When you have finished making the settings, take or a new take is created when you start recording press the key to return to the Home HOME/FUNC again after pausing. (See “Creation of new takes when Screen. restarting recording” on page 26.) TASCAM DR-680…
-
Page 31: Using The Solo Function
If auto-recording has been turned ON, the A . REC 1 Set as explained in the AUTO REC LEVEL indicator appears with a dark background. previous section. 2 Open the screen of selecting items. AUTO REC TASCAM DR-680…
-
Page 32: Automatically Adding Marks At The Position Where Recording Restarts
TAKE You should use a folder that contains as few takes as • possible when creating new takes while recording or when expecting to do so. The maximum number of takes in a folder is about • 100. TASCAM DR-680…
-
Page 33: Automatically Starting A New Take During Recording
2 Use the wheel to select the menu DATA LOW CUT Press the 1–6 keys to turn the limiter ON or OFF item, and press the key to open the ENTER for each input independently. screen. TASCAM DR-680…
-
Page 34: Using Marks
If you change the take using the  or ¯ key without stopping, the erasure of marks is not completed. Moving to a mark When stopped or during playback, press the ¯ key or key while pressing and holding the  TASCAM DR-680…
-
Page 35: Pre-Recording
Used in combination with the auto-record function, you can capture recordings without losing the initial sound. NOTE If the unit has been in recording standby for less than two seconds, only the amount of time that the unit has been in standby can be recorded. TASCAM DR-680…
-
Page 36: Recording Times
The above recording times are estimates, and might differ according to the SD/SDHC card. • The above recording times are not continuous recording times. They are total recording times for SD/SDHC card • capacities. TASCAM DR-680…
-
Page 37: Take And Folder Operations (Browse Screen)
This icon appears before the name of a recorded take. CANCEL Folder ( Press this to not conduct any operation on the selected This icon shows a folder. take. Open folder ( The contents of this folder are currently shown on the screen. TASCAM DR-680…
-
Page 38: Folder Operations
Press the key to erase the takes and return to ENTER screen. Press the key to cancel deletion BROWSE and reopen the pop-up menu. NOTE This unit cannot delete write-protected files and files that the unit does not recognize. TASCAM DR-680…
-
Page 39: Playback
On the Home Screen, press the PLAY/PAUSE during playback to pause playback at the current NOTE position in the take. No sound is output while you are turning the DATA • Press the key again to restart playback PLAY/PAUSE wheel. from that position. TASCAM DR-680…
-
Page 40: Mixing And Outputting A Multitrack Recording
5 Use the pan controls on this screen to adjust the stereo position of each channel. Use the – keys to select the channels that you want to adjust. 6 Use the knob to adjust each to a suitable VALUE stereo position using values ranging from TASCAM DR-680…
-
Page 41: Setting The Playback Area
Regardless of the current playback area, if you play a 5 When you have finished making the settings, take on the screen, the playback area changes press the key to return to the Home HOME/FUNC BROWSE to the folder that contains that take. Screen. TASCAM DR-680…
-
Page 42: Repeat Playback
Home HOME/FUNC Screen. NOTE icon appears on the Home Screen when the • repeat function is ON. The takes in the currently set playback area are • repeated. (See “Setting the playback area” on page 41.) TASCAM DR-680…
-
Page 43: Connection With A Computer
Avoid changing names on a computer if you want to use them again on this unit. Files with formats that are not supported by this • unit will not be recognized even after rebuilding and cannot be played back. TASCAM DR-680…
-
Page 44: Ending The Connection With A Computer
Follow the correct computer procedures to disconnect the unit from the computer before disconnecting the USB cable. Please refer to your computer manual for information about the correct procedures for discon- necting an external drive. After being disconnected, the power is set to standby. TASCAM DR-680…
-
Page 45: Cascade Connections
SYSTEM menu ª • CASCADE Set the master unit to and the slave unit to MASTER SLAVE Function menu ª • REPEAT For cascade playback, both the master and slave units must be set the same. TASCAM DR-680…
-
Page 46: Precautions For Use Of The Cascade Function
If a menu screen is open on either or both units, the cascade function will not work properly. • Use of the cascade function for playback is intended for checking recorded takes. We cannot guarantee synchronized playback. TASCAM DR-680…
-
Page 47: Other Settings And Information Display
You can set the digital output format to SPDIF or Screen. AES/EBU. 1 Press the key to open the screen. MENU MENU 2 Use the wheel to select the menu item, DATA I /O and press the key to open the menu ENTER I /O screen. TASCAM DR-680…
-
Page 48: Power Auto Off Settings
Options: (alkaline batteries (default value)), ALKAL I (nickel metal hydride batteries) N i -MH Cascade settings Use the item to set the cascade function. CASCADE Options: (default setting—cascade disabled), MASTER SLAVE TASCAM DR-680…
-
Page 49: Initializing The Unit
ENTER 6 When formatting completes, the screen This page shows information about the system CARD reopens. firmware version. When the screen is open, press the I NFORMAT I ON key to return to the screen. ENTER SYSTEM TASCAM DR-680…
-
Page 50: Viewing Card Information
ENTER screen. TOTAL Shows the total memory capacity of the SD card. REMA I N Shows the remaining capacity of the SD card. F I LE/FLDR Shows the total number of files and folders inside the MUSIC folder. TASCAM DR-680…
-
Page 51: 10 — Messages
10 – Messages The following is a list of the pop-up messages that might appear on the DR-680 under certain conditions. Refer to this list if one of these pop-up messages appears and you want to check the meaning or determine a suitable response.
-
Page 52
If any of these errors occur, turn the unit power OFF and restart it. If the power cannot be turned OFF, remove the batteries and disconnect the AC adaptor (if Sys tem Error 1 connected). If the error message continues to appear, please contact a TASCAM Service Center. Sys tem Error 2… -
Page 53: 11 — Troubleshooting
MIC GAIN contact the store where you bought the unit or a • Is the output level of a connected external device TASCAM Service Center. too low? Power will not turn ON. ª The sound I am trying to record is distorted.
-
Page 54: 12 — Specifications
Sleeve: GND) Format: USB2.0 HIGH SPEED (480 Mbps) INPUT switch set to MIC Input impedance: 2.4 kΩ Nominal input level: GAIN LOW: –20 dBu (0.11 V) GAIN HIGH: –44 dBu (6.91 mV) Maximum input level: GAIN LOW: +3 dBu (1.55 V) TASCAM DR-680…
-
Page 55: Audio Performance
Requirements for connected About 4 hours playback (JEITA) computers NiMH batteries About 4.5 hours recording (JEITA) See the TASCAM web site (http://www.tascam.com/) for the latest information about OS compatibility. About 4.5 hours playback (JEITA) Windows computer Dimensions (width x height x depth) Pentium 300 MHz or faster 216.4 x 56 x 188.4 mm…
-
Page 56: Dimensions
12 – Specifications Dimensions 202 mm 54 mm 216.4 mm 56 mm • Illustrations in this manual might differ from the actual product. • In order to improve the product, specifications and appearance could be changed without prior notice. TASCAM DR-680…
-
Page 57: Block Diagrams
12 – Specifications Block diagrams Recording ª Play ª TASCAM DR-680…
-
Page 58
12 – Specifications ª Input Type A Input Type B Typical Output TASCAM DR-680… -
Page 59
Notes TASCAM DR-680… -
Page 60
DR-680 TEAC CORPORATION Phone: +81-42-356-9143 www.tascam.jp 1-47 Ochiai, Tama-shi, Tokyo 206-8530, Japan TEAC AMERICA, INC. Phone: +1-323-726-0303 www.tascam.com 7733 Telegraph Road, Montebello, California 90640 USA TEAC CANADA LTD. Phone: +1905-890-8008 Facsimile: +1905-890-9888 www.tascam.com 5939 Wallace Street, Mississauga, Ontario L4Z 1Z8, Canada TEAC MEXICO, S.A.
Усилители шумят мало. Звук четкий и детальный. После PMD-661 создается впечатление, что вату из ушей вынули. Всякие там Зумы и Роландо-Эдиролы посасывают с причмокиванием.
Перегруз держат нормально. Есть индикация перегрузки по входу (отсутствие оной в 661 очень сильно анноит).
Удобное переключение режимов (линейный/микрофонный ,чувствительность, фантом). Фантомное питание включается на каждую пару каналов, все остальное — поканально.
Входы 5 и 6 — низкоомные. Очень удобно для контактных миков (пъезо) и прочих высокоомных звукоснимателей.
Дисплей маловат, но пользоваться можно (я привык относительно быстро). В любом случае, я всегда держу большой хэдрум и никогда не пользуюсь малым разрешением.
Очень удобно сделана регулировка контрастности (кнопка «Display» + валкодер).
В прошивке 1.20 появились «GANG» и Mid-Side. Кульно и рульно!
В принципе, управление сделано удобно и интуитивно понятно. Мануал был прочтен один раз (еще перед покупкой, для общего ознакомления) и больше не трогался.
Питается аппарат от восьми элементов АА, или от внешнего БП. Напряжение внешнего питания 8-13 В. Для питания от камерных 14 В аккумуляторов девайс не предназначен (некоторые питают, но на свой страх и риск — стаб греется), зато прекрасно питается от трехбаночных Li-Ion аккумулятров.
К стати, кассета для АА элементов крепится всего одним шурупом и подсоединяется разъемом (разборка девайса не требуется). Вместо нее можно установить Li-Ion аккумулятор (места много, можно даже стабилизатор запихнуть, если страшно, или контроллер зарядки). Подозреваю, что создатели предусматривали возможность установки альтернативной батареи в отсек питания, но потом забыли об этом.
Держатель для кабеля питания (крючек на корпусе) — очень полезная фича!
Вынимать батарею можно надолго. Часы и настройки не слетят! Создатели не поскупились на резервную батарейку.
Важное дополнение: Если у вас сели аккумы, согнать материал вы сможете без проблем — в режиме ридера аппарат питается от USB.
Явные недостатки:
Проблема всех ЖК дисплеев — замерзают, падлы.
В корпусе нет резьбового крепления (установить на штатив, или куда-то загриповать не выйдет).
Ручка валкодера «Value» очень сильно торчит. Боюсь сломать валкодер в процессе транспортировки. Надо подобрать покороче.
Цифровой вход дружит не со всеми устройствами. С некоторыми девайсами можно писать только в 44.1. С чем связано — ХЗ (какой-то бит не нравится). Sound Devices, в своем MixPre-D, траблему совместимости пофиксили (выпустили новую прошивку).
С девайсами, где стоит CS8406 в «hardware mode», аппарат работает только в режиме 44.1! Как я ни колдовал с этой 8406, — или аппарат вааще не лочит вход, или 44.1. Вот хоть ты тресни!
На гневные письма производитель не реагирует. 
В общем, с моим железом 8 каналов доступны только в «бытовом» режиме записи.
Мониторится цифровой вход только отдельно от микса (или аналоговые входы, или цифровой). Суровый косяк!
Чехла в комплекте нет, а покупать дорого. На e-bay нет, а B&H и Thomann бесплатно не высылают ($60 жаба душит отдавать за совкопочту). В совке тоже мало где есть, да и цены запредельные (ну, это проблемы совковых барыг).
Чехол буду заказывать на Thomann, когда буду покупать микрофоны, чтоб на почте сэкономить.
Без чехла в сумке постоянно щелкаются переключатели на верхней крышке (тоже сильно выступают). Приходится использовать вкладыш от фотосумки NG (не очень удобно, но жить можно).
Резюме:
В общем, девайс хороший, но PMD-661 я продавать, скорее всего, не буду.
DR-680
Owner’s Manual Addendum
TASCAM DR-680
1
Added functions
The following functions have been added with
firmware version 1.20.
1 Mid-side (MS) microphone decoding mode
2 GANG function
MS microphone decoding
mode
Setting the MS decoding mode
Select the
MS MODE
item on the
SYSTEM
menu to
open the
MS MODE
screen.
Set the decoding mode to use when connecting mid-
side microphones. Channel pairs 1-2, 3-4 and 5-6 can
each be set separately.
OFF (default value)
Recording and playback use the ordinary mode
(no mid-side decoding).
INPUT
Use this mode to decode while recording.
Playback uses the ordinary mode.
MONITOR
Use to monitor the output of mid-side
microphones
with decoding while recording
without decoding.
Also use this with a take that was recorded
without decoding to decode it during playback.
In that case,
A.OUT SEL
should be set to
MIX
in
the
I/O
menu.
NOTE
The
MS MODE
screen settings cannot be changed
during recording or playback. Always stop the unit
(the transport icon should be ) before changing the
settings.
Connecting a mid-side microphone
When using this unit’s mid-side decoding function,
connect the mid signal to the odd channel and the
side signal to the even channel in the pair. If you
connect them in reverse, correct decoding is not
possible.
For example, connect the mid signal to channel 3
and the side signal to channel 4.
Recording with mid-side decoding
1 On the
MS MODE
screen, set the decoding
mode to
INPUT
.
2 Press the MIX PAN key on the front panel to
open the
PAN
screen (pan pot adjustment
screen). Use the MS width control to adjust the
width of the mid-side signal pair.
Press one of the number (1-6) keys on the front
panel that corresponds to one of the mid-
side channels that was set to
INPUT
on the
MS MODE
screen. (For example, press 3 or 4 to
adjust paired channels 3 and 4.)
Use the VALUE dial to adjust the width of the
signal suitably in a 0–100 range. At 0, only the
mid channel is included in the stereo decoding.
As the value is increased, more of the side
channel is included in the stereo decoding. At
100, only the side channel is included. (The
default value is
0
.)
3 Press the MIX LEVEL key on the front panel
to open the
LEVEL
screen, and adjust the
decoder output.
Press one of the number (1-6) keys on the front
panel that corresponds to one of the mid-
side channels that was set to
INPUT
on the
MS MODE
screen. (For example, press 3 or 4 to
adjust paired channels 3 and 4.)
D01141120A
-
Инструкции по эксплуатации
1

Tascam DR-680 инструкция по эксплуатации
(56 страниц)
- Языки:Английский
-
Тип:
PDF -
Размер:
7.35 MB
Просмотр
На NoDevice можно скачать инструкцию по эксплуатации для Tascam DR-680. Руководство пользователя необходимо для ознакомления с правилами установки и эксплуатации Tascam DR-680. Инструкции по использованию помогут правильно настроить Tascam DR-680, исправить ошибки и выявить неполадки.