 Стиральная машина с резервуаром Gorenje – настоящая «палочка-выручалочка» для домов, не подключенных к централизованному водоснабжению. Однако подобная бытовая техника требует повышенной заботы: пользоваться стиральной машиной с баком для воды следует более внимательно и аккуратно. Важно не только заполнить ее водой, но и подготовить жидкость специальным образом. Существуют и другие нюансы пользования агрегатом, которые следует знать ее владельцам.
Готовим воду для стирки
Стиральная машина Gorenje с баком для воды работает практически в полном автономном режиме. Перед ее запуском в резервуар наливают необходимое количество воды – приблизительно 30-40 литров, все зависит от объема бака. К качеству воды предъявляются определенные требования: она не должна содержать мусора и насекомых, которые в последствии могут попасть во внутренние составляющие бытовой техники и спровоцировать ее поломку. Поэтому наливать в емкость следует очищенную или отстоянную воду, а при использовании речной или озерной воды ее необходимо предварительно отфильтровать.
Сам резервуар оснащен фильтром, но он способен улавливать лишь крупные частицы мусора, поэтому о чистоте воды придется заботиться владельцу бытовой техники. Для заливки воды следует открыть крышку резервуара и наполнить его жидкостью до указанной отметки. После закрытия крышки стиральная машина готова к стирке.
Загрузка средства для стирки
Каждая модель бытовой техники имеет руководство по эксплуатации, где находится пошаговая инструкция рассказывающая как пользоваться прибором. Однако до сих пор находятся хозяйки, которые загружают стиральный порошок не в специальный лоток, а непосредственно в барабан стиральной машины. Производитель техники Gorenje предостерегает от такого шага, ведь современные моющие средства содержат агрессивные составляющие, способные повредить ткань или оставить на ней не выводимые следы и пятна. Поэтому загружать моющие средства следует строго в специальный отсек.
Лоток – порошкоприемник бытовой техники Gorenje разделен на отсеки для:
- основной стирки – загрузка сухого или жидкого стирального порошка, отмечен он символами «В» или «II»;
- предварительной стирки – предназначен для сухого порошка или геля, он маркирован «А» или «I»;
- ополаскивателя – самое маленькое отделение, куда заливается кондиционер для белья, маркируется символом в виде цветка или звездочки.
Чаще всего используется отсек для основной стирки, остальные отделения востребованы время от времени.
Также в отделение для основной стирки загружаются все дополнительные средства:
- пятновыводитель;
- отбеливатель;
- средства против накипи.
Очень важно не перепутать отсеки, ведь неправильная загрузка средств для стирки может стать причиной нежелательных последствий для вещей и работы самого бытового прибора.
Программные установки и закладка белья
Программатор на стиральной машинке Gorenje достаточно прост и понятен, поэтому с подбором нужного режима стирки проблем у хозяйки не возникнет. Ручка переключения программ вращается по часовой стрелке до нужной отметки, после чего нажимается кнопка «Старт/Стоп». До запуска программы можно внести изменения в температурный режим и параметры отжима.
Загрузка белья в барабан – один из важных и ответственных этапов стирки. Правильное расположение вещей позволяет не только получить качественный результат их очищения, но и значительно продлить срок эксплуатации бытового прибора.
Для этого следует соблюдать ряд правил. Первое, сортировка вещей по типу ткани, цветам и степени загрязнения. Все виды деликатных тканей: шелк, лен, синтетику – необходимо стирать отдельно друг от друга. Если на вещах есть старые, сильные или глубокие пятна, для нее стоит выбирать режимы: интенсивный, предварительной стирки или замачивания. Повседневные вещи, которые нужно просто освежить, вполне можно стирать на ежедневной или быстрой программе.
Перед помещением одежды в барабан следует проверить все карманы и вытащить из них находящиеся там предметы, чтобы они не испортились сами и/или не повредили бытовой прибор. Все съемные части тоже лучше отстегнуть и очистить их вручную. Все застежки рекомендуется привести в закрытый вид, а верхнюю одежду, трикотажные и махровые вещи вывернуть наизнанку. Это позволит им не испортиться при стирке и не потерять свой первоначальный вид.
Начинаем стирку
После помещения вещей в стиральную машину Gorenje следует плотно закрыть люк барабана и порошкоприемник. Удостоверится, что резервуар заполнен водой до соответствующей отметки. Ручку программатора следует установить в нужное положение и запустить бытовой прибор кнопкой «Старт/Стоп».
Техника начнет работу. Стиральная машина будет функционировать в автономном режиме, контролировать ее не требуется. Когда цикл закончится, техника сообщит об этом звуковым сигналом.
Переживать, что вода закончится, не следует – объем резервуара рассчитан минимум на один цикл работы, независимо от выбранного режима.
По окончании работы в течение 1-2 минут будет действовать блокировка люка. После, барабан можно будет открыть и достать чистые вещи. Люк и порошкоприемник рекомендуется оставить открытыми для просушки внутренних комплектующих техники и предотвращения развития в них грибка.
- Поделитесь своим мнением — оставьте комментарий

Данный раздел представляет большой выбор инструкций по эксплуатации стиральных машин Gorenje. Вы можете бесплатно скачать любое руководство.
Для Gorenje инновации и дизайн были важны с самого начала. Свой первый патент компания получила в 1956 году, и далее на протяжении 60лет запатентовала 151 изобретение и получила 26 престижных международных наград в области дизайна.
В 2000 году компания Gorenje реализовала планы, вынашиваемые с начала девяностых, и выпустила первую линейку бытовой техники за подписью иконы итальянского дизайна — Паоло Пининфарина. Воодушевленная превзошедшим все ожидания успехом первой коллекции Gorenje приступило к разработке второго поколения линии Gorenje Pininfarina, со временем ставшей синонимом узнаваемого и классического дизайна. В 2007 году была запущена черная коллекция Gorenje Pininfarina Black, в 2010-м — стальная Gorenje Pininfarina Steel, которые в совершенстве синтезируют технологические новинки и непревзойденный дизайн.
Если Вы утратили инструкцию из комплекта, то, надеемся, без труда сможете найти ее на нашем сайте.
Если, по каким-то причинам, Вы не смогли найти нужное руководство, не стесняясь пишите запрос нам.
- Manuals
- Brands
- Gorenje Manuals
- Washer
- WS168LNST
- Detailed instructions for use
-
Contents
-
Table of Contents
-
Troubleshooting
-
Bookmarks
Quick Links
EN
DETAILED
INSTRUCTIONS
FOR USE OF WASHING
MACHINE
www.gorenje.com
Related Manuals for Gorenje WS168LNST
Summary of Contents for Gorenje WS168LNST
-
Page 1
DETAILED INSTRUCTIONS FOR USE OF WASHING MACHINE www.gorenje.com… -
Page 2
Life is complicated today. Let’s make laundry care simple! Your new WaveActive washing machine uses innovative technology and latest achievements in laundry care to help you simplify your daily household chores. WaveActive technology offers the gentlest care for any garment, with minimum creasing. At the same time, your washing machine will be easy on the environment, owing to its highly efficient use of power, water and detergent. -
Page 3: Table Of Contents
CONTENTS SAFETY PRECAUTIONS INTRODUCTION 10 WASHING MACHINE DESCRIPTION 11 Technical specifications 12 Control unit PREPARING 14 INSTALLATION AND CONNECTION THE WASHING 14 Removing the blocking rods MACHINE 15 Moving and transport after installation BEFORE FIRST 16 Selecting the room 16 Adjusting the washing machine feet 17 Washing machine placement 19 Connecting to water supply 21 Aqua — stop…
-
Page 4: Safety Precautions
Keep the instruction manual handy, near the washing machine. Instructions for use are available on our website at www.gorenje.com. Your washing machine is intended solely for household use. If the washing machine is used for professional,…
-
Page 5
Follow the instructions for correct installation of the Gorenje washing machine and connection to the water and power mains (see chapter »INSTALLATION AND CONNECTION«). Connection to water and power supply has to be executed by an adequately trained technician or expert. -
Page 6
Do not connect the washing machine to an electrical outlet intended for an electric shaver or hair dryer. Do not install the washing machine in a room where the temperature can drop to below 5°C, as washing machine parts may be damaged in case of water freezing. Place the washing machine on a level and stable solid (concrete) base. -
Page 7
indicated spot until it locks into place. The door cannot be opened during washing machine operation. We recommend removing any impurities from the washing machine drum before the first wash using the Cotton 90°C programme (see PROGRAMME TABLE). After the washing cycle, close the water tap and pull out the washing machine plug from the power socket. -
Page 8
No silver ions are released during the washing programme. The washing machine is not intended for use by persons (including children) with physical or mental impairments, or persons with lacking experience and knowledge. These persons should be instructed about the use of the washing machine by a person responsible for their safety. -
Page 9
sensory or mental capabilities or lack of experience and knowledge, but only if they are supervised during the use of the washing machine, if they have been provided relevant instructions regarding safe use of the washing machine, and if they understand the hazards of inappropriate use. Make sure children do not play with the appliance. -
Page 10: Washing Machine Description
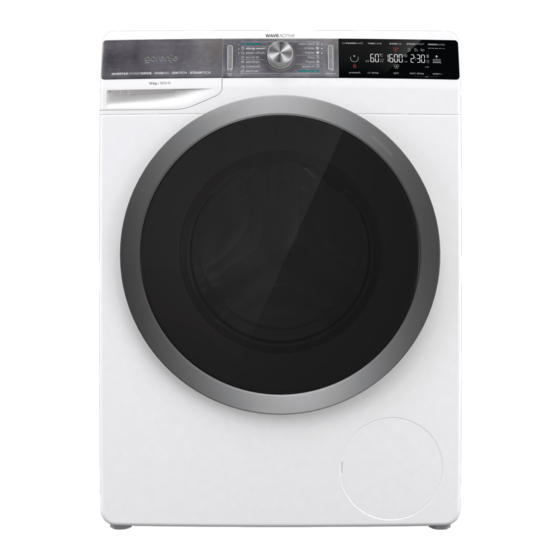
WASHING MACHINE DESCRIPTION FRONT Control unit Start/pause button Programme selector knob On/off/reset button Dispenser tray Door Rating plate Pump filter BACK Water supply hose Power cord Water discharge hose Adjustable feet…
-
Page 11: Technical Specifications
TECHNICAL SPECIFICATIONS (DEPENDING ON THE MODEL) Rating plate with basic information about the washing machine is fitted on the front wall of the washing machine door opening (see chapter »WASHING MACHINE DESCRIPTION«). Maximum load See rating plate Width 600 mm Height 850 mm Washing machine depth (a)
-
Page 12: Control Unit
CONTROL UNIT ON/OFF/RESET PROGRAMME START/PAUSE BUTTON BUTTON SELECTOR KNOB Use this button to start or Use this button to turn the 2a Light next to the selected pause a programme. washing machine on and washing programme is lit. off, and to reset the washing Upon start-up or during pause, programme.
-
Page 13
WASHING MODE GREENGUIDE SPIN (SPINNING RATE Information on water and /DRAIN /PUMP POWERCARE power consumption, according STOP 4b TIMECARE to the selected washing Option to set the spinning rate settings. DOSEAID Information on PREWASH START DELAY recommended amount of Option to set a start powder and liquid detergent, delay according to the selected… -
Page 14: Installation And Connection
INSTALLATION AND CONNECTION Remove all packaging. When removing the packaging, make sure not to damage the appliance with a sharp object. REMOVING THE BLOCKING RODS Before the first use of the appliance, transport rods must be removed. A blocked washing machine may be damaged when it is switched on for the first time.
-
Page 15: Moving And Transport After Installation
MOVING AND TRANSPORT AFTER INSTALLATION If you wish to move the washing machine after it has been installed, the angular pieces and at least one blocking rods have to be re-installed to prevent vibration damage to the washing machine during transport (see chapter »INSTALLATION AND CONNECTION/Removing the blocking rods«). If you lost the angular pieces and the blocking rods, they can be ordered from the manufacturer.
-
Page 16: Selecting The Room
SELECTING THE ROOM Floor on which the washing machine is placed must have a concrete base. It should be clean and dry; otherwise, the washing machine may slide. Also, clean the bottom surface of adjustable feet. The washing machine must stand level and stable on a solid base. ADJUSTING THE WASHING MACHINE FEET Use a water scale and spanner No.
-
Page 17: Washing Machine Placement
WASHING MACHINE PLACEMENT If you also have a Gorenje dryer of corresponding (same) dimensions, it can be placed on top of the Gorenje washing machine (in this case, vacuum feet must be used) or next to it (figures 1 and 3).
-
Page 18
Washing machine installation clearances 25 mm The washing machine may not be in contact with a wall or adjacent furniture. For optimum washing machine operation, we recommend observing the clearances from the walls as indicated in the figure. In case of failure to observe the minimum required clearances, safe and correct washing machine operation cannot be ensured. -
Page 19: Connecting To Water Supply
CONNECTING TO WATER SUPPLY Attach the hose to the water tap by screwing it onto the thread. AQUA — STOP TOTAL AQUA — STOP REGULAR CONNECTION If your washing machine features a hot and cold water connection, but you only wish to connect it to cold water supply, do not install the hot water hose and close the hot water connection on the back of the washing machine with the supplied cap.
-
Page 20
If your model has connections for both hot and cold water, then connect one hose to the cold water supply (blue wing nut or blue mark on the hose) and the other one to the hot water supply (red wing nut or red mark on the hose), as indicated on the back of the washing machine. Connections are labelled with letters C and H (C = cold, H = hot). -
Page 21: Aqua — Stop
AQUA — STOP (ONLY WITH SOME MODELS) If an internal tube or hose is damaged, a shut-off system is activated that cuts the water supply to the washing machine. In such case, the control glass (a) will turn red. Replace the water supply hose.
-
Page 22: Connecting And Securing The Water Discharge Hose
CONNECTING AND SECURING THE WATER DISCHARGE HOSE Feed the water discharge hose into a washbasin or a bathtub, or connect it directly to a drain (discharge hose minimum diameter 4 cm). The vertical distance from the floor to the end of the discharge hose may be no more than 100 cm and no less than 60 cm.
-
Page 23
The discharge hose has to be attached and affixed to the pin on the back of the washing machine, as shown in the figure. If the discharge hose is not correctly attached, safe and correct washing machine operation cannot be ensured. -
Page 24: Connecting The Appliance To The Power Mains
CONNECTING THE APPLIANCE TO THE POWER MAINS Before connecting the washing machine to the power mains, wait for at least 2 hours until it reaches room temperature. Connect the washing machine to a grounded power outlet. After installation, the wall outlet should be freely accessible.
-
Page 25: Washing With Ionized Air
WASHING WITH IONIZED AIR Adding ionized air during the wash improves the washing effect in a way that is friendly to the nature and gentle to your clothes. Ionized air improves the effectiveness of the powder or liquid detergent. This leads to better washing effect without extending the washing program.
-
Page 26: Before Using The Appliance For The First Time
BEFORE USING THE APPLIANCE FOR THE FIRST TIME Make sure the washing machine is disconnected from the power mains; then, open the door towards you (figures 1 and 2). Before first use, clean the washing machine drum with a soft moist cotton cloth and water, or use the Cotton 90°C programme.
-
Page 27: Washing Process, Step By Step
WASHING PROCESS, STEP BY STEP (1–7) STEP 1: HEED THE LABELS ON THE LAUNDRY Normal wash; Max. Max. Max. Max. Hand wash Do not Sensitive laundry washing washing washing washing only wash temp. temp. temp. temp. 95°C 60°C 40°C 30°C Bleaching Bleaching in cool water Bleaching not allowed…
-
Page 28: Step 2: Preparing The Washing Process
STEP 2: PREPARING THE WASHING PROCESS Sort the laundry by type of fabric, colour, soiling, and allowed washing temperature (see PROGRAMME TABLE). Wash the laundry that sheds a lot of fibre or lint separately from other laundry. Close the buttons and zippers, tie any ribbons, and turn the pockets inside out; remove any metal clips that could damage the laundry and washing machine interior, or clog the drain.
-
Page 29
SWITCHING ON THE WASHING MACHINE Use the power cord to connect the washing machine to power mains, and connect the washing machine to water supply. Press the (1) ON/OFF/RESET button to switch on the washing machine (figure 1). With some models, the washing machine drum is also lit for 5 minutes when the washing machine is switched on (figure 2). -
Page 30
LOADING THE WASHING MACHINE Open the washing machine door by pulling the handle towards you (figure 1). Insert the laundry into the drum (after making sure the drum is empty) (figure 2). Make sure that no garment is stuck between the door and the rubber gasket. Close the washing machine door (figure 3). -
Page 31: Step 3: Choosing The Washing Programme
STEP 3: CHOOSING THE WASHING PROGRAMME Choose the programme by rotating the programme selector knob (2) to the left or to the right (depending on the type of laundry and how heavily soiled it is). See PROGRAMME TABLE. When you select the washing programme, the light (2a) on the display unit next to the selected washing programme lights up.
-
Page 32
PROGRAMME TABLE Programme Max. load Programme description Cotton black * MAX This programme is used for washing dark laundry using 30°C — 40°C special-purpose detergents for black laundry. The programme washes at low temperatures, with gentle tumbling and lower spinning rate. Cotton color * MAX Programme for lightly to moderately dirty laundry. -
Page 33
Programme Max. load Programme description Steril tub 0 kg Washing programme is used to clean the drum and to (Self-cleaning remove detergent residues and bacteria. To select the programme) programme, rotate the programme selector knob to the left or to the right to the Steril tub (Self-cleaning programme) position . -
Page 34
Programme Max. load Programme description Stain Organic * MAX Use this program to remove the following types of stains: (Blood Stains) blood, eggs, semolina or wheatlet, curry, make-up, ice 30°C — 90°C cream, milk shake, mashed potatoes and pudding. Stain Fruits * MAX Use this program to remove the following types of stains: (Fruit Stains) -
Page 35: Step 4: Choosing The Settings
STEP 4: CHOOSING THE SETTINGS Most programmes feature basic settings, but these settings can be changed. Adjust the settings by pressing the relevant function button (before pressing the (3) START/PAUSE button). Functions that cannot be changed with the selected washing programme are partly lit (dimmed). Certain settings cannot be selected with some programmes.
-
Page 36
DOSEAID With the (5) DOSEAID function, the washing machine will recommend the optimum amount of powder or liquid detergent according to the selected settings. Recommended amount of powder or liquid detergent depends • Water hardness (the following settings are available: soft, medium, hard. -
Page 37
Activate the function by pressing on position (5) DOSEAID. When the DOSEAID function (5) is activated, the sign (5) DOSEAID lights up. When the DOSEAID function (5) is activated, the symbol and the second level (medium soiled laundry) will light up. Press the symbol to set the desired level of laundry dirtiness (e.g. -
Page 38
Based on the measured amount of laundry in the drum and other settings, the recommended amount of powder or liquid detergent will be displayed on the display unit [in ml]. The left-hand side display unit will indicate the recommended amount of concentrated detergent, and the right-hand side display will indicate the recommended amount of non-concentrated detergent. -
Page 39
STAINEXPERT (TYPES OF STAINS) Use this function to remove various types of stains using special-purpose stain removers (only on programs Cotton Black, Cotton Colour, and Cotton White). The user can choose between stain removal programmes at temperatures of 30°C, 40°C, 60°C and 90°C: FRUITS COFFEE ORGANIC… -
Page 40
TEMP. (WASHING TEMPERATURE) Changing the temperature for the selected program. Each program has a preset temperature that can be changed by pressing the (10) position TEMP. (WASHING TEMPERATURE). (— indicates cold wash) The temperature is displayed on the display unit above the button. SPIN (SPINNING RATE/DRAIN/PUMP STOP) To adjust the spinning rate. -
Page 41
CHILD LOCK A safety feature. To activate the child lock, simultaneously press the (12) START DELAY and (14) WATER+ (HIGH WATER LEVEL) positions and hold them for at least three seconds. The selection will be confirmed by an acoustic signal and by an indicator light (the symbol (13) will be lit). -
Page 42
START DELAY Use this function to start the washing cycle after a certain amount of time has elapsed. Press the (12) START DELAY position. -:— will appear on the display unit (11a). If, for example, you choose a programme with a duration of 2:39, the time will be indicated on the display unit, and the symbol (12b) will be lit next to the time indication. -
Page 43: Step 5: Selecting Additional Functions
STEP 5: SELECTING ADDITIONAL FUNCTIONS Activate/deactivate the functions by pressing the desired function (before pressing the (3) START/PAUSE button). Some settings cannot be selected with certain programmes. In case of such settings, an acoustic signal will be emitted, and the light on the button will not be lit or it will flash when the button is pressed (see FUNCTION TABLE).
-
Page 44
PREWASH Washing heavily soiled laundry, particularly with stubborn superficial stains. If you select PREWASH, add the detergent into the prewash compartment WATER+ (HIGH WATER LEVEL) The laundry is washed with a higher water level (2 levels) and with an additional rinse. Basic/default setting Level 1 –… -
Page 45
FUNCTION TABLE Programmes Cotton black • • • • • • • • • • • • • • • • Cotton color • • • • • • • • • • • • • • • • • •… -
Page 46
Programmes Rinse/Softening • • • • • (Partial programme) Spin/Drain (Spinning rate/Drain) • • • (Partial programme) Eco 40-60 • • • • • Steam refresh (Refreshment with • • steam) • • • • • Allergy steam (Anti-allergy • •… -
Page 47: Step 6: Starting The Washing Programme
STEP 6: STARTING THE WASHING PROGRAMME Press the (3) START/PAUSE button. Selected WASHING MODE, TEMP. (WASHING TEMPERATURE), SPIN (SPINNING RATE/ DRAIN/PUMP STOP) and TIME REMAINING TO THE END OF PROGRAMME or START DELAY (if selected) are indicated on the display unit. Symbols will be lit on the selected functions.
-
Page 48: Step 7: Change Of Washing Programme Or Manual (Physical) Cancellation
STEP 7: CHANGE OF WASHING PROGRAMME OR MANUAL (PHYSICAL) CANCELLATION To stop and cancel a washing programme, press the (1) ON/OFF/RESET button and hold it for more than 3 seconds. The washing programme is temporarily paused when the time remaining until programme completion is flashing on the display unit .
-
Page 49: Step 8: End Of The Washing Programme
STEP 8: END OF THE WASHING PROGRAMME The washing machine will indicate the end of the washing programme with an acoustic signal and »End« will appear on the display until the washing machine switches into low standby mode or switches off. After 5 minutes, the »End« sign will no longer be displayed. Open the washing machine door.
-
Page 50: Interruptions And Changing The Programme
INTERRUPTIONS AND CHANGING THE PROGRAMME MANUAL INTERRUPTION To stop and cancel a washing programme, press the (1) ON/OFF/RESET button and hold it for more than 3 seconds. Signal lights will flash on the display. At the same time, the washing machine pumps the water out of the washing machine drum.
-
Page 51
PAUSE BUTTON The washing programme can always be stopped by pressing the (3) START/PAUSE button. The washing programme is temporarily paused when the time remaining until programme completion is flashing on the display unit . If there is no water in the drum and water temperature is not too high, then the door will unlock after a certain period of time, and they can be opened. -
Page 52
ERRORS In case of an error or fault, the programme will be interrupted. Flashing signal lights and an acoustic signal will warn about such occurrence (see TROUBLESHOOTING TABLE), and the error will be indicated on the display (E:XX). POWER SUPPLY FAILURE In case of a power supply failure, the washing programme is interrupted. -
Page 53
OPENING THE DOOR MANUALLY IN CASE OF A POWER OUTAGE — IN CASE OF A PROGRAM PAUSE When the program is paused or interrupted, open the filter cap using a suitable tool (flat screwdriver or a similar tool). Washing machine door can only be opened by simultaneously pulling… -
Page 54: Maintenance & Cleaning
MAINTENANCE & CLEANING Before cleaning, unplug the washing machine from the power mains. Children should not clean the washing machine or perform maintenance tasks without proper supervision! CLEANING THE DISPENSER TRAY The dispenser tray should be cleaned at least twice per month. To remove the dispenser tray from the housing,…
-
Page 55: Cleaning The Water Supply Hose, Detergent Dispenser Housing, And Rubber Door Gasket
CLEANING THE WATER SUPPLY HOSE, DETERGENT DISPENSER HOUSING, AND RUBBER DOOR GASKET Clean the net filter often under running water. Use a brush to clean the entire washing machine rinsing section, especially the nozzles on the upper side of the rinsing chamber. After every wash, wipe the rubber door seal to extend its…
-
Page 56: Cleaning The Pump Filter
CLEANING THE PUMP FILTER During cleaning, some water may be spilled. It is therefore recommended to place an absorbent cloth on the floor. Open the pump filter cap using a suitable tool (flat screwdriver or a similar tool). Pull out the water outlet funnel before cleaning the pump filter.
-
Page 57: Cleaning The Washing Machine Exterior
CLEANING THE WASHING MACHINE EXTERIOR Always disconnect the washing machine from the power mains before cleaning. Clean the washing machine exterior and display unit using a soft damp cotton cloth and water. Do not use any solvents or cleaning agents that could damage the washing machine (please observe the recommendations and warnings provided by the cleaning agent manufacturers).
-
Page 58: Troubleshooting
TROUBLESHOOTING WHAT TO DO …? The washing machine shall automatically control the operation of particular functions during the washing cycle. If any irregularity is identified, this will be indicated by reporting (E:XX) on the display. The washing machine will report the error until it is switched off. Disturbances from the environment (e.g.
-
Page 59: Troubleshooting And Error Table
TROUBLESHOOTING AND ERROR TABLE Problem/ Indication on the display unit and What to do? error problem description Incorrect settings Restart the programme. If the error reoccurs, call a service technician. Temperature sensor error. Inlet water too cold. Repeat the washing programme.
-
Page 60
Problem/ Indication on the display unit and What to do? error problem description Water level sensor error. Unplug the power cord from the outlet; then, plug the power cord back into the outlet and switch on the washing machine. If the error reoccurs, call a service technician. Water overflow If there is water in the drum that exceeds a certain level, and an error is reported on the… -
Page 61
Problem/ Indication on the display unit and What to do? error problem description Electronics communication Unplug the power cord from the outlet; then, plug failure in the washing machine the power cord back into the outlet and switch on the washing machine. If the error reoccurs, call a service technician. -
Page 62
Problem/ Indication on the display unit and What to do? error problem description Preparation for unlocking the Wait until the process is completed. If no error door is indicated after the process, then a new Signal lights will flash on the programme can be started. -
Page 63: Servicing
TYPE: PS15/XXXXX MODEL: XXXXXX.X IPX4 Art.No.: XXXXXX Ser.No.: XXXXXXXX 220-240 V ~ XX Hz XX A Pmax.: XXXX W XXXX W XXXX/min X kg 0,05-0,8 MPa Additional equipment and accessories for maintenance can be viewed on our website at: www.gorenje.com…
-
Page 64: Recommendations For Washing And Economic Use Your Washing Machine
RECOMMENDATIONS FOR WASHING AND ECONOMIC USE YOUR WASHING MACHINE Wash new coloured garments separately the first time. Wash heavily soiled laundry in smaller amounts, with more powder detergent or with a pre-wash cycle. Apply a special stain remover on stubborn stains before the wash. We recommend referring to STAIN REMOVAL TIPS.
-
Page 65
When using thick liquid laundry care products, we recommend diluting them with water to prevent clogging the dispenser tray drain. Liquid detergents are intended for washing programmes without a prewash cycle. At higher spinning rates, there will be less residual moisture in the laundry. As a result, drying in a tumble dryer will be more economical and faster. -
Page 66
Hardness levels Water hardness °dH (°N) m mol/l °fH(°F) p.p.m. 1 – soft < 8,4 < 1,5 < 15 < 150 2 – normal 8,4 — 14 1,5 — 2,5 15 — 25 150 — 250 3 – hard > 14 >… -
Page 67
We recommend adding powder detergent immediately before the washing cycle. If you add it sooner, make sure the detergent compartment in the dispenser tray is completely dry before adding the powder detergent: otherwise, the powder detergent may cake before the start of the washing process. -
Page 68: Stain Removal Tips
STAIN REMOVAL TIPS Before using special-purpose stain removers, try using the natural methods that do not harm the environment on less stubborn stains. However, prompt action is required! Soak the stain with an absorbent sponge or a paper towel; then, rinse with cold (lukewarm) water – but never with hot water! Stains Stain removal When the stain is dry, first scrape it off the garment before washing…
-
Page 69
Stains Stain removal Glue, chewing gum Place the garment in a bag and put it in the freezer until the stain hardens. Then, remove it with a blunt knife. Then, dilute the stain with a prewash stain remover and rinse thoroughly. Then, wash the laundry as usual. -
Page 70: Disposal
DISPOSAL Packaging is made of environmentally friendly materials that can be recycled, disposed of, or destroyed without any hazard to the environment. To this end, packaging materials are labelled appropriately. The symbol on the product or its packaging indicates that the product should not be treated as normal household waste.
-
Page 71: Program Duration And Spinning Rate Table
PROGRAM DURATION AND SPINNING RATE TABLE NORMALCARE SPIN (basic/default setting) (SPINNING RATE) Temp. [°C] Washing time [rpm] Programmes [minutes] Cotton black ** 1000 Cotton color * 1200 Cotton white * 1200 (Mixed laundry/Synthetics) ** 1000 Wool/Handwash ** 800 Speed 20´ ** 1000 IonWash 59´…
-
Page 72
NORMALCARE SPIN (basic/default setting) (SPINNING RATE) Temp. [°C] Washing time [rpm] Programmes [minutes] Eco 40-60 * 1200 Steam refresh (Refreshment with steam) Allergy steam (Anti-allergy * 800 program with steam) Auto wash * 1200 Stain Organic (Blood Stains) * 1200 Stain Fruits (Fruit Stains) * 1200… -
Page 73
LOW STANDBY MODE If you do not run any program or choose any settings after switching on the washing machine (ON/ OFF/RESET button (1)), the display unit will be switched off after 5 minutes and switched to stand- by mode in order to save energy. The display unit will be reactivated if you rotate the programme selector knob (2) or press the ON/ OFF/RESET button (1). -
Page 74
PRODUCT INFORMATION SHEET According to EU-Regulation No. 2019/2014 (depending on the model) Supplier’s name or trade mark: Supplier’s adress ( Model identifier: General product parameters: Parameter Value Parameter Value Height Rated capacity ( ) (kg) Dimensions in cm Width Depth Energy efficiency class ( [A/B/C/D/E/F/G] ( Washing efficiency index (… -
Page 75
Additional information: Weblink to the supplier’s website, where the information from point 9 Anex II to Commition Regulation (EU) 2019/2023 ( ) is found: ) for the »eco 40-60« programme. ) changes to these items shall not be considered relevant for the purposes of paragraph 4 of Article 4 of Regulation (EU) 2017/1369. -
Page 76
Gorenje Asia (Shanghai) Limited Company Address: Unit B/2F Building A, Synnex International Park, No. 1068 West Tianshan Road Service number: 400 808 8899 Service mailbox: service.cn@gorenje.com Website: www.gorenjechina.com PS15 L2 SUPERIOR-P en (02-21)