 PHILIPS SCF281 AVENT Паровой стерилизатор для микроволновой печи

Введение
Поздравляем с покупкой и добро пожаловать в Philips! Чтобы в полной мере воспользоваться поддержкой Philips, зарегистрируйте свой продукт на www.philips.com/welcome
Общее описание
- Крышка
- Клипсы
- Корзина
- Система исчисления
- Полости для бутылок
- Полости сосков
- Держатели купольных крышек
- Прорези для больших бутылок

ВАЖНЫЕ МЕРЫ БЕЗОПАСНОСТИ
- При использовании этого микроволнового стерилизатора необходимо всегда соблюдать основные меры предосторожности, включая следующие:
- Прочтите все инструкции.
- При перемещении или открытии стерилизатора необходимо соблюдать крайнюю осторожность. Вода внутри может быть еще горячей. Всегда давайте стерилизатору остыть перед его перемещением, очисткой или хранением.
- Будьте осторожны, открывая стерилизатор после стерилизации, так как пар может обжечь.
- Не касайтесь горячих поверхностей. Используйте ручки или ручки.
- Не используйте стерилизатор не по назначению.
- Всегда держите стерилизатор в недоступном для детей месте.
- Не ставьте на горячую газовую или электрическую горелку или рядом с ними, а также в нагретую духовку.
- Не используйте химические стерилизующие растворы/таблетки или отбеливатели в стерилизаторе или на продуктах, подлежащих стерилизации.
- Использование гомеопатических добавок в воде может оказать негативное влияние на пар, здоровье и повредить пластмассовые детали.
- Не используйте для чистки стерилизатора губки, абразивные чистящие средства или агрессивные жидкости, такие как отбеливатель, бензин или ацетон.
- Не используйте смягченную воду в стерилизаторе.
- ТОЛЬКО ДЛЯ ДОМАШНЕГО ИСПОЛЬЗОВАНИЯ.
- Никогда не используйте стерилизатор в микроволновой печи, не налив воды в основание.
СОХРАНИТЕ ЭТИ ИНСТРУКЦИИ
Предупреждение
- Никогда не используйте аксессуары или детали других производителей, а также детали, не рекомендованные Philips. Если вы используете такие аксессуары или детали, ваша гарантия становится недействительной.
- Не помещайте металлические предметы в стерилизатор, так как это может повредить микроволновую печь.
- Используйте дистиллированную воду, воду в бутылках или свежую проточную воду без каких-либо добавок.
- Стерилизуйте только продукты для детского питания, разрешенные для стерилизации.
- Не перегружайте стерилизатор, иначе предметы не стерилизуются должным образом.
- Не подвергайте стерилизатор воздействию высоких температур или прямых солнечных лучей.
- Вылейте всю оставшуюся воду после того, как она остынет.
- Всегда мойте руки, прежде чем прикасаться к стерилизованным предметам.
Перед первым использованием
Перед первым использованием стерилизатора тщательно очистите его, как описано ниже.
- Снимите корзину с основания.
- Наполните детскую бутылочку или мерный стакан ровно 7 унциями (200 мл) водопроводной воды и налейте в основание (рис. 2).
Количество воды должно быть ровно 7 унций (200 мл). Если основа содержит слишком много воды, предметы не будут стерилизованы должным образом. Если в основании недостаточно воды, это может привести к повреждению стерилизатора или микроволновой печи. - Поместите корзину в основание (рис. 3).
- Наденьте крышку на стерилизатор (1) и нажмите на зажимы, чтобы зафиксировать крышку на месте (2). (Рис. 4)
- Поместите стерилизатор в микроволновую печь. (Рис. 5)
Примечание. Прежде чем приступать к стерилизации, убедитесь, что микроволновая печь чистая и сухая.
Примечание. Если у вас комбинированная духовка, убедитесь, что духовка или гриль выключены и остыли, прежде чем ставить в нее стерилизатор. - Выберите подходящую микроволновую печьtage и время (см. таблицу в главе
«Использование стерилизатора для микроволновой печи») и включите микроволновую печь. - После окончания работы в микроволновой печи откройте ее и дайте стерилизатору остыть, прежде чем вынимать его из микроволновой печи.
- Потяните защелки (1) и снимите крышку (2) (рис. 6).
- Вылейте оставшуюся воду и тщательно промойте основание и корзину.

Подготовка к использованию
Наполнение корзины
Прежде чем положить предметы для стерилизации в корзину, тщательно вымойте их в посудомоечной машине или вручную с помощью горячей воды с небольшим количеством жидкого мыла. Убедитесь, что вы удалили все остатки молока.
Примечание. Убедитесь, что все предметы, подлежащие стерилизации, полностью разобраны, и поместите их в корзину отверстиями вниз, чтобы они не наполнились водой.
Примечание: не ставьте предметы слишком близко друг к другу. Пар должен иметь возможность циркулировать вокруг предметов, чтобы обеспечить эффективную стерилизацию.
Наполнить корзину можно несколькими способами:
Четыре бутылочки для кормления Philips AVENT
- Поместите бутылки вверх дном в углубления для бутылок. (Рис. 7)
- Поместите соски в полости для сосков (рис. 8).
- Поместите винтовые кольца свободно поверх ниппелей (рис. 9).
Примечание. Резьбовые кольца большего размера подходят только в том случае, если они расположены под наклоном над ниппелями. - Поместите купольные крышки в держатели купольных крышек (рис. 10).
Две большие бутылочки для кормления Philips AVENT на 11 унций (330 мл)
- Вставьте ободок бутылок в прорези для больших бутылок (рис. 11).
- Поместите соски в полости для сосков (рис. 12).
- Поместите винтовые кольца свободно поверх ниппелей (рис. 13).
Примечание. Резьбовые кольца большего размера подходят только в том случае, если они расположены под наклоном над ниппелями. - Поместите купольные крышки в держатели купольных крышек (рис. 14).
Четыре чашки для хранения Philips AVENT с крышками
- Поместите чашки для хранения вверх дном в корзину (рис. 15).
- Поместите крышки вертикально вокруг чашек. (Рис. 16)
Использование микроволнового стерилизатора
Помещайте в стерилизатор только предметы, пригодные для стерилизации. Не стерилизуйте щетку для бутылочек или предметы, наполненные жидкостью, например, прорезыватели для зубов, наполненные охлаждающей жидкостью.
Примечание. Прежде чем стерилизовать бутылочки и другие предметы, сначала очистите их.
- Снимите корзину с основания.
- Наполните детскую бутылочку или мерный стакан ровно 7 унциями (200 мл) водопроводной воды и налейте в основание (рис. 2).
Количество воды должно быть ровно 7 унций (200 мл). Если основа содержит слишком много воды, предметы не будут стерилизованы должным образом. Если в основании недостаточно воды, это может привести к повреждению стерилизатора или микроволновой печи. - Поместите корзину в основание (рис. 3).
- Поместите предметы для стерилизации в корзину (см. главу «Подготовка к использованию»).
- Наденьте крышку на стерилизатор (1) и нажмите на зажимы, чтобы зафиксировать крышку на месте (2) (рис. 4).
- Поместите стерилизатор в микроволновую печь. (Рис. 5)
Примечание. Прежде чем приступать к стерилизации, убедитесь, что микроволновая печь чистая и сухая. - Выберите подходящую микроволновую печьtage и время (см. таблицу) и включите микроволновую печь.
микроволновая печьtagе и время
- После окончания работы в микроволновой печи откройте ее и дайте стерилизатору остыть, прежде чем вынимать его из микроволновой печи.
Будьте осторожны, из микроволновой печи может идти горячий пар. - Достаньте стерилизатор из микроволновой печи.
Примечание. Убедитесь, что вы держите стерилизатор горизонтально, чтобы избежать утечки или проливания горячей воды.
Примечание: стерилизованные предметы остаются стерильными до 24 часов в микроволновом стерилизаторе, если вы не снимаете крышку. - Потяните защелки (1) и снимите крышку (2) (рис. 6).
- Уберите бутылки и другие предметы из корзины. Используйте щипцы, чтобы удалить мелкие предметы.
Будьте осторожны, из стерилизатора может выходить горячий пар, а стерилизованные предметы могут оставаться горячими. - После извлечения стерилизованных предметов вылейте оставшуюся воду, тщательно промойте основание и корзину и вытрите все детали насухо.

Примечание. Если у вас комбинированная духовка, убедитесь, что духовка или гриль выключены и остыли, прежде чем ставить в нее стерилизатор.
Примечание. Не превышайте время стерилизации, указанное в таблице.
Уборка
Очищайте крышку, корзину и основание после каждого использования.
Никогда не используйте для чистки стерилизатора губки, абразивные чистящие средства или агрессивные жидкости, такие как отбеливатель, бензин или ацетон.
Примечание. Дайте стерилизатору остыть перед его очисткой.
- Очистите детали стерилизатора в горячей воде с небольшим количеством жидкого мыла.
Примечание. Вы также можете мыть части стерилизатора в посудомоечной машине. - После очистки тщательно высушите все детали.
Примечание. После очистки храните стерилизатор в чистом и сухом месте.
Этот продукт не имеет других деталей, обслуживаемых пользователем. Для получения помощи позвоните по телефону 1-800-54-Avent (1-800-542-8368).
Гарантия
ГАРАНТИЯ ОДИН ГОД
Philips North America LLC (США) и Philips Electronics Ltd (КАНАДА) гарантируют отсутствие дефектов на каждое новое изделие Philips Avent моделей SCF283, SCF282 или SCF281.
в отношении материалов или изготовления в течение одного года с даты покупки, и обязуется бесплатно отремонтировать или заменить любое дефектное изделие.
ВАЖНО: Настоящая гарантия не распространяется на повреждения, возникшие в результате несчастного случая, неправильного или неправильного использования, отсутствия разумной осторожности или установки какого-либо приспособления, не поставляемого с продуктом.
НЕ НЕСЕТ ОТВЕТСТВЕННОСТИ ЗА КАКИЕ-ЛИБО ОСОБЫЕ, СЛУЧАЙНЫЕ ИЛИ КОСВЕННЫЕ УБЫТКИ.
Для получения гарантийного обслуживания просто позвоните по телефону 1-800-54 Avent.
Изготовлено для:
Личное здоровье Philips
Подразделение Philips North America LLC
Почтовый ящик 10313, Стэмфорд, Коннектикут 06904, США
В Канаде: Philips Electronics Ltd.
281 Hillmount Road, Маркхэм, ON L6C 2S3
© 2021 Koninklijke Philips NV Все права защищены.
12/22/2021
Документы / Ресурсы
 |
PHILIPS SCF281 AVENT Паровой стерилизатор для микроволновой печи [pdf] Руководство пользователя SCF283, SCF282, SCF281, AVENT Паровой стерилизатор для микроволновой печи, SCF281 AVENT Паровой стерилизатор для микроволновой печи, AVENT, Паровой стерилизатор для микроволновой печи, AVENT Паровой стерилизатор для микроволновой печи, Паровой стерилизатор, Стерилизатор |
Рекомендации

Регистрация продукта | Филипс
Дополнительная информация
-
Инструкция по эксплуатации PDF
файл,
2.2 MB
2 июля 2021 г. -
Инструкция по эксплуатации PDF
файл,
1.1 MB
2 июля 2021 г. -
Инструкция по эксплуатации PDF
файл,
1.1 MB
2 июля 2021 г. -
Инструкция по эксплуатации PDF
файл,
1.1 MB
2 июля 2021 г. -
Инструкция по эксплуатации PDF
файл,
1.3 MB
2 июля 2021 г. -
Инструкция по эксплуатации PDF
файл,
1.3 MB
2 июля 2021 г. -
Инструкция по эксплуатации PDF
файл,
1.3 MB
2 июля 2021 г. -
Инструкция по эксплуатации PDF
файл,
1.3 MB
2 июля 2021 г. -
Инструкция по эксплуатации PDF
файл,
1.3 MB
2 июля 2021 г. -
Инструкция по эксплуатации PDF
файл,
1.3 MB
2 июля 2021 г. -
Инструкция по эксплуатации PDF
файл,
1.3 MB
2 июля 2021 г. -
Инструкция по эксплуатации PDF
файл,
1.3 MB
2 июля 2021 г. -
Инструкция по эксплуатации PDF
файл,
1.3 MB
2 июля 2021 г. -
Инструкция по эксплуатации PDF
файл,
1.3 MB
2 июля 2021 г. -
Инструкция по эксплуатации PDF
файл,
1.3 MB
2 июля 2021 г. -
Инструкция по эксплуатации PDF
файл,
1.3 MB
2 июля 2021 г. -
Инструкция по эксплуатации PDF
файл,
1.3 MB
2 июля 2021 г. -
Инструкция по эксплуатации PDF
файл,
1.3 MB
2 июля 2021 г. -
Инструкция по эксплуатации PDF
файл,
1.3 MB
2 июля 2021 г. -
Инструкция по эксплуатации PDF
файл,
2.5 MB
2 июля 2021 г. -
Инструкция по эксплуатации PDF
файл,
2.5 MB
2 июля 2021 г. -
Инструкция по эксплуатации PDF
файл,
2.5 MB
2 июля 2021 г. -
Инструкция по эксплуатации PDF
файл,
2.5 MB
2 июля 2021 г. -
Инструкция по эксплуатации PDF
файл,
2.5 MB
2 июля 2021 г. -
Инструкция по эксплуатации PDF
файл,
2.4 MB
2 июля 2021 г. -
Инструкция по эксплуатации PDF
файл,
2.4 MB
2 июля 2021 г. -
Инструкция по эксплуатации PDF
файл,
2.4 MB
2 июля 2021 г. -
Инструкция по эксплуатации PDF
файл,
2.4 MB
2 июля 2021 г. -
Инструкция по эксплуатации PDF
файл,
2.4 MB
2 июля 2021 г. -
Инструкция по эксплуатации PDF
файл,
2.4 MB
2 июля 2021 г. -
Инструкция по эксплуатации PDF
файл,
2.4 MB
2 июля 2021 г. -
Инструкция по эксплуатации PDF
файл,
2.4 MB
2 июля 2021 г. -
Инструкция по эксплуатации PDF
файл,
2.4 MB
2 июля 2021 г. -
Инструкция по эксплуатации PDF
файл,
2.4 MB
2 июля 2021 г. -
Инструкция по эксплуатации PDF
файл,
2.4 MB
2 июля 2021 г. -
Инструкция по эксплуатации PDF
файл,
2.4 MB
2 июля 2021 г. -
Инструкция по эксплуатации PDF
файл,
2.4 MB
2 июля 2021 г. -
Инструкция по эксплуатации PDF
файл,
2.4 MB
2 июля 2021 г. -
Инструкция по эксплуатации PDF
файл,
2.4 MB
2 июля 2021 г. -
Инструкция по эксплуатации PDF
файл,
1.3 MB
11 июня 2021 г. -
Инструкция по эксплуатации PDF
файл,
990.0 kB
2 июля 2021 г. -
Инструкция по эксплуатации PDF
файл,
2.5 MB
11 июня 2021 г. -
Important Information Manual PDF
файл,
1.6 MB
21 октября 2020 г. -
Important Information Manual PDF
файл,
1.6 MB
21 октября 2020 г. -
Important Information Manual PDF
файл,
1.6 MB
21 октября 2020 г. -
Important Information Manual PDF
файл,
1.6 MB
21 октября 2020 г. -
Important Information Manual PDF
файл,
1.6 MB
21 октября 2020 г. -
Important Information Manual PDF
файл,
1.6 MB
21 октября 2020 г. -
Important Information Manual PDF
файл,
1.6 MB
21 октября 2020 г. -
Important Information Manual PDF
файл,
1.6 MB
21 октября 2020 г. -
Important Information Manual PDF
файл,
1.6 MB
21 октября 2020 г. -
Important Information Manual PDF
файл,
1.6 MB
21 октября 2020 г. -
Important Information Manual PDF
файл,
1.6 MB
21 октября 2020 г. -
Important Information Manual PDF
файл,
1.6 MB
21 октября 2020 г. -
Important Information Manual PDF
файл,
1.6 MB
21 октября 2020 г. -
Important Information Manual PDF
файл,
1.6 MB
21 октября 2020 г. -
Important Information Manual PDF
файл,
1.6 MB
21 октября 2020 г. -
Important Information Manual PDF
файл,
2.3 MB
21 октября 2020 г. -
Important Information Manual PDF
файл,
2.3 MB
21 октября 2020 г. -
Important Information Manual PDF
файл,
2.3 MB
21 октября 2020 г. -
Important Information Manual PDF
файл,
2.3 MB
21 октября 2020 г. -
Important Information Manual PDF
файл,
2.3 MB
21 октября 2020 г. -
Important Information Manual PDF
файл,
2.3 MB
21 октября 2020 г. -
Important Information Manual PDF
файл,
2.3 MB
21 октября 2020 г. -
Important Information Manual PDF
файл,
1.9 MB
21 октября 2020 г. -
Important Information Manual PDF
файл,
1.9 MB
21 октября 2020 г. -
Important Information Manual PDF
файл,
1.9 MB
21 октября 2020 г. -
Important Information Manual PDF
файл,
1.9 MB
21 октября 2020 г. -
Important Information Manual PDF
файл,
1.9 MB
21 октября 2020 г. -
Important Information Manual PDF
файл,
1.9 MB
21 октября 2020 г. -
Important Information Manual PDF
файл,
1.9 MB
21 октября 2020 г. -
Important Information Manual PDF
файл,
1.9 MB
21 октября 2020 г. -
Important Information Manual PDF
файл,
1.9 MB
21 октября 2020 г. -
Important Information Manual PDF
файл,
1.9 MB
21 октября 2020 г. -
Important Information Manual PDF
файл,
1.9 MB
21 октября 2020 г. -
Important Information Manual PDF
файл,
1.9 MB
21 октября 2020 г. -
Important Information Manual PDF
файл,
1.9 MB
21 октября 2020 г. -
Eco passport PDF
файл,
175.2 kB
5 января 2021 г. -
Брошюра PDF
файл,
962.6 kB
8 января 2021 г.
Зарегистрируйте продукт и получите
- Электронную гарантию
- Информацию о скидках и акциях
- Простой доступ к поддержке продуктов
Обращение в компанию Philips
Мы всегда рады помочь вам
Предлагаемые продукты
Как пользоваться стерилизатором Philips Avent
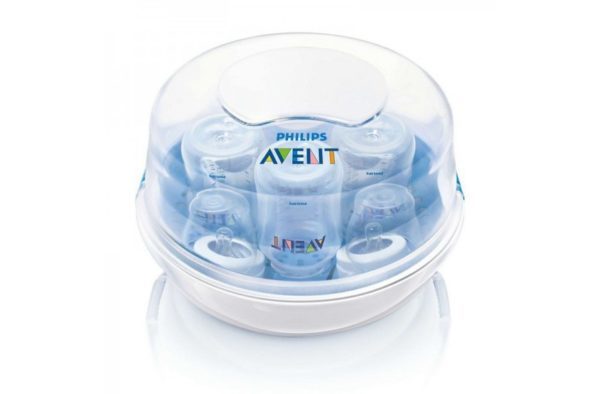
Любая мама знает, насколько важно в первые месяцы жизни ребёнка уделять особое внимание гигиене и чистоте. Ведь в этот период детский организм не способен в полной мере отражать негативное воздействие большинства патогенных микробов. Поэтому особого ухода к себе требует детская посуда: бутылочки, пустышки, ложки. Лучший способ, с помощью которого можно добиться совершенной стерильности – использование специальных устройств. Одним из таких приборов является стерилизатор для СВЧ Philips Avent SCF281/02.
Что собой представляет стерилизатор для микроволновой печи
Philips Avent – широко известная марка, зарекомендовавшая себя только с положительной стороны. Впервые свет увидел продукцию этой фирмы в 1984 году, когда была выпущена первая бутылочка для кормления.
Сегодня бренд Филипс готов предложить родителям широкий ассортимент стерилизаторов. Первое место в этом списке занимает стерилизатор для СВЧ Philips Avent SCF281/02. Прибор пользуется популярностью за счёт удобства и лёгкости в эксплуатации.
Конструкция устройства:
- поддон;
- подставка для бутылочек, соски и молокоотсоса, имеющая специальные углубления под посуду;
- крышка с ручками и замком-защёлкой.
Несмотря на свой простой вид и форму, данный стерилизатор может обрабатывать абсолютно любой предмет, используемый ребёнком, будь то бутылочка для кормления, поильник, молокоотсос, пустышка или ложка. В общем, всё то, что не боится паровой обработки.
Принцип работы
Первое, что следует отметить, стерилизатор сам по себе не имеет ничего общего с электричеством. В его конструкции нет провода, вилки, мотора, блока управления. Однако в отсутствие электричества обработать детскую утварь не удастся, потому что главное условие использования прибора – это наличие рабочей СВЧ-печи.
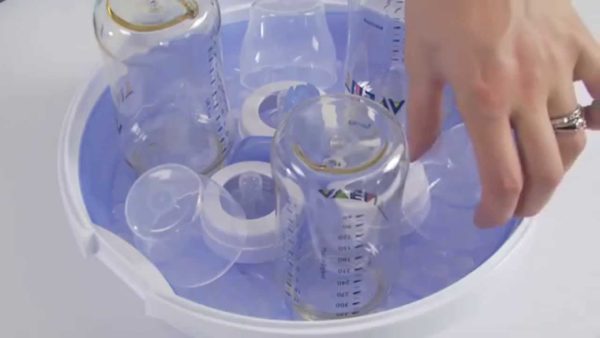
Пользоваться стерилизатором просто и удобно, всё, что вам потребуется, это:
- Залить необходимое количество воды в поддон.
- Распределить по подставке детские бутылочки, соски и прочую посуду.
- Накрыть крышкой и защёлкнуть замочки с двух сторон.
- Поставить в микроволновую печь на время от 2 до 6 минут (в зависимости от мощности техники).
При закипании воды образовывается пар, под действием которого происходит стерилизация детской посуды.
После завершения процедуры, важно соблюдать меры безопасности. Не торопитесь доставать стерилизатор из микроволновой печи в первые минуты – он очень горячий, и уж тем более открывать и поднимать крышку. Вода, находящаяся внутри устройства, и скопившийся пар могут вас обжечь.
Технические характеристики
Стерилизатор Авент обладает следующими парметрами:
- Можно использовать бутылочки как с узким горлом, так и с широким.
- Наличие боковых ручек с фиксатором исключают вероятность случайного открытия устройства, если потребуется переставить его на другое место.
- Ручки не нагреваются, что позволяет вполне спокойно достать прибор из микроволновой печи.
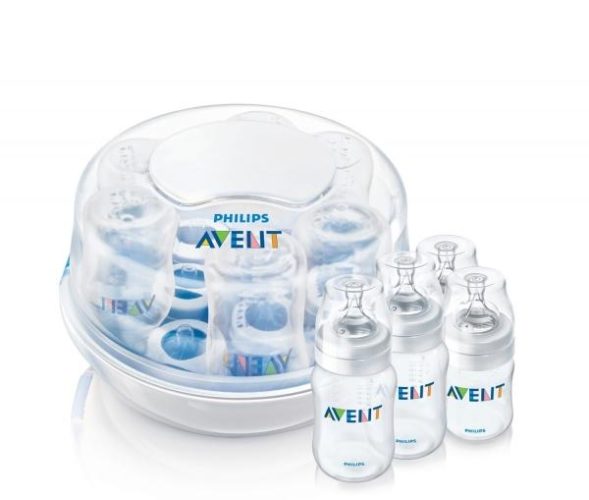
- Одновременно можно обработать до 4 бутылочек.
- В комплект входит пинцет, с помощью которого можно брать обработанную посуду.
- Подходит для большинства микроволновок.
Преимущества
Безусловно, стерилизовать посуду с помощью подобных устройств значительно удобнее. Теперь нет необходимости кипятить кастрюлю с водой, как это делали наши мамы, и вылавливать горячие бутылочки. Имея такой прибор у себя дома, достаточно сложить всю детскую посуду в него, поставить в микроволновую печь, установить нужное время и немного подождать.
Стерилизатор фирмы Авент обладает весомыми преимуществами, о которых нам сообщает инструкция к нему:
- Удобство. Устройство обладает лёгким весом, его всегда можно взять с собой на дачу, в путешествие, использовав в дороге в качестве хранилища для бутылочек.
- Быстрота. Потребуется всего 6 минут, чтобы получить стерильную посуду.
- Антибактериальный эффект. Уничтожает до 99,9% всех патогенных бактерий.
- Долговременный эффект. Посуда сохраняет стерильность в течение суток при закрытой крышке.
- Безопасность. Главное, не пренебрегать мерами предосторожности.
- Вместительность. Прибор вмещает до 4 бутылок или 2 молокоотсосов.
- Экологичность. Материалы, из которых изготовлен стерилизатор, не содержат бисфенол-А.
Заключение
Стерилизатор – специальное оборудование, разработанное для обработки детской посуды, применение которого позволит уничтожить до 99,9% всех вредоносных микробов с поверхности бутылочек, сосок и других детских предметов.
Специалисты рекомендуют обязательно стерилизовать бутылочки, соски, ложечки и прочую посуду в течение первых месяцев жизни ребёнка, чтобы обезопасить его от кишечных инфекций.
Стерилизатор бутылочек для микроволновой печи способен справиться с возложенными на него задачами не хуже, а может даже и лучше электрического аналога. Однако не стоит забывать, что сам по себе Филипс Авент SCF281 безрезультативен, его действие возможно только совместно с СВЧ-печью.
Philips Avent Sterilizer Manual
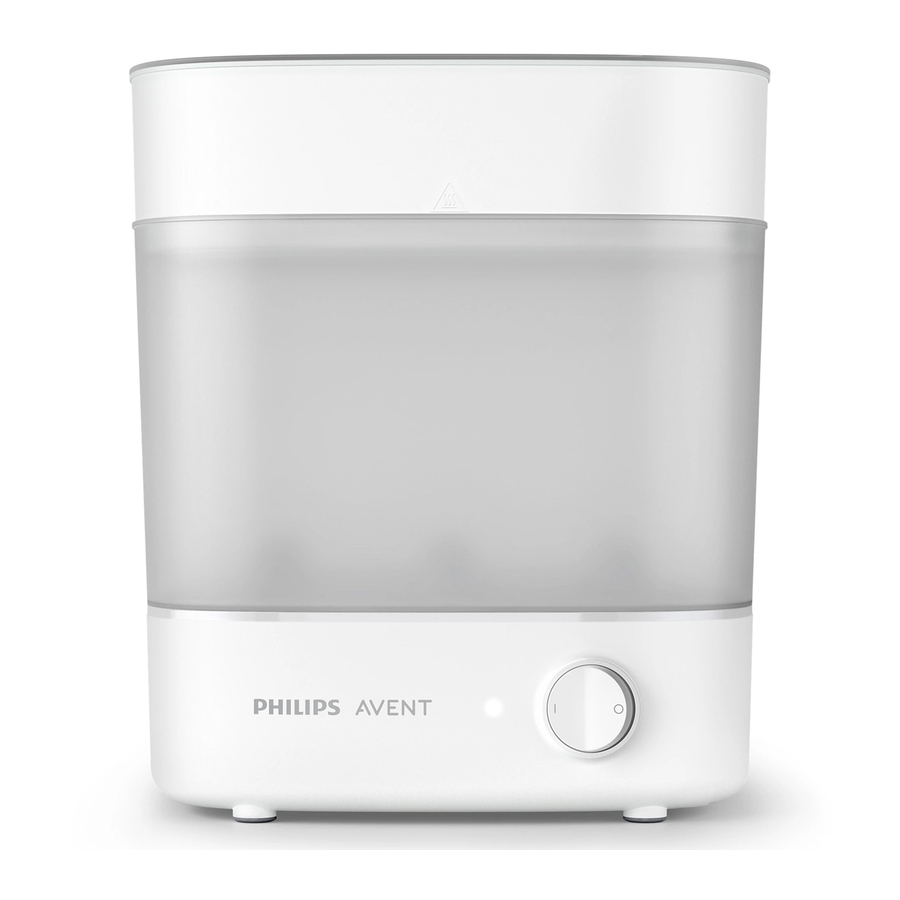
General description


- Lid with grip
- Small basket
- Bottom plate for large basket
- Large basket with drip tray
- Maximum water level indicator
- Heating element with water reservoir
- Base unit
- Power cord
- Tongs
- Cord storage
SCF293
- Filter cover
- Filter
- Air outlet
- Sterilize mode
- Auto mode
- Dry mode
- On/off button
- Control knob with progress indicator lights
SCF291
- On/off indicator light
- Power on button
- Power off button
Note: You can find the type number of your sterilizer on the bottom of the appliance.
Important
Read this user manual carefully before you use the appliance and save it for future reference.
- Never immerse the base, the power cord or the mains plug in water or any other liquid.
- Failure to follow the descaling instructions may cause irreparable damage.
- Never disassemble the base to avoid the risk of electric shock.
- This appliance can be used by persons with reduced physical, sensory or mental capabilities or lack of experience and knowledge if they have been given supervision or instruction concerning use of the appliance in a safe way and if they understand the hazards involved.
- This appliance shall not be used by children. Keep the appliance and its cord out of the reach of children.
- Children shall not play with the appliance.
- Check if the voltage indicated on the appliance corresponds to the local mains voltage before you connect the appliance.
- Do not use the appliance if the plug, the power cord or the appliance itself is damaged.
- If the power cord is damaged, it must be replaced by Philips, a service center authorized by Philips or similarly qualified persons in order to avoid a hazard.
- There are no serviceable parts inside the electric steam sterilizer. Do not attempt to open, service or repair the electric steam sterilizer yourself.
- The appliance becomes extremely hot during operation and may cause burns if it is touched.
- Beware of hot steam that comes out of the vent in the lid or when you remove the lid. Steam can cause burns.
- Do not touch the base, the baskets and the lid during or shortly after operation because they are very hot. Only lift the lid by its grip.
- Never move or open the appliance when it is in use or when the water in it is still hot.
- Never place items on top of the appliance when it is in use.
- Only use water without any additives.
- Do not put bleach or other chemicals in the appliance.
- Do not pour water over the indication on reservoir or 130 ml/4.5 oz water.
- Only sterilize baby bottles and other items that are suitable for sterilizers. Check the user manual of the items you want to sterilize, to make sure they are suitable for sterilizers.
- If you want to stop the operation, press power off button (for SCF291) or press the on/off button (for SCF293) to turn off the appliance.
- This appliance is intended for household use only.
- Do not misuse the sterilizer for other than its intended use to avoid potential injury.
- Never use any accessories or parts from other manufacturers or that Philips does not specifically recommend. If you use such accessories or parts, your guarantee becomes invalid.
- Do not expose the appliance to extreme heat or direct sunlight.
- Always let the appliance cool down before you move or store it.
- The accessible surfaces may become hot during use.
- Do not sterilize very small items which can fall through the holes in the bottom of the basket.
- Never place items directly on the heating element when the appliance is switched on.
- Do not use the appliance if it has fallen or is damaged in any way. Take it to an authorized Philips service center for repair.
- Always place and use the appliance on a dry, stable, level and horizontal surface.
- Do not place the appliance on a hot surface.
- Do not let the power cord hang over the edge of the table or worktop on which the appliance stands.
- Always pour any remaining water out of the appliance after use and when the appliance has cooled down.
- Switch off the appliance and disconnect from supply before changing accessories or approaching parts that move in use.
- Environmental conditions, such as temperature and altitude, may affect the functioning of this appliance.
- Cleaning and user maintenance shall not be made by children.
- Always disconnect the device from supply if it’s left unattended.
Electromagnetic fields (EMF)
This Philips appliance complies with all applicable standards and regulations regarding exposure to electromagnetic fields.
Getting to know the settings
Note: Before you sterilize bottles and other items, clean them first.
Only place items in the sterilizer which are suitable for sterilizing. Do not sterilize items that are filled with liquid, e.g. a teether with cooling fluid.
Things to Note
- Don’t pour water into the air outlet.


- Don’t immerse the base unit in water.

- Use 130 ml/4.5 oz distilled water.

- Clean the items beforehand.

- Disassemble all parts completely and place them with openings pointing down.

- Pour out the remaining water from large basket after each use.

- Clean the filter every 4 weeks.

- Descale the sterilizer every 4 weeks.

Before first use
When you use the appliance for the first time, we advise you to let it complete one sterilization process with empty baskets.
- Use a clean baby bottle and pour exactly 130ml/4.5 oz distilled water directly into the water reservoir of the base.
Tip: Using distilled water can minimize the formation of limescale on heating element. For more information on limescale, see section «Descaling». - Place the large basket on the base.
- Place the bottom plate in the large basket.
- Place the small basket on the large basket.
- Place the lid on top of the small basket.
- Put the plug in the wall socket.
- SCF291: Press the power on button to switch on the appliance.
SCF293: Turn the on/off button to «Sterilize» mode. Then press it to switch on the appliance.
Note: If you plug in the appliance after you have pressed the power on button, the sterilizer starts working immediately. You can switch it off by pressing power off button.
The base, the baskets and the lid become hot during or shortly after operation.


SCF291
- The on/off indicator light lights up to indicate that the appliance starts sterilizing.
- When the sterilization process is finished, the light goes off and the appliance switches off automatically.
SCF293
- The entire progress indicator lights flash to show the appliance is sterilizing.
- When the sterilization process is finished, the lights go off and the appliance switches off automatically.
- You can turn the on/off button to «Dry» mode to dry the appliance. It takes approximately 30 minutes to complete the drying cycle.
- After the appliance has cooled down completely, remove the lid, the small basket, the bottom plate, the large basket and wipe them dry.
Note: When you remove the large basket from the base, be aware of the remaining water on the base drip tray. - Let the appliance cool down completely for approximately 10 minutes before you use it again.
Note: The appliance does not work for 10 minutes after a sterilizing cycle. It needs to cool down first.
Preparing for use
Preparing for sterilizing
Before you put the items to be sterilized in the sterilizer, clean them thoroughly in the dishwasher or clean them by hand with hot water and some liquid dishwashing detergent.
Assembling the sterilizer
There are several ways to assemble the sterilizer.
- With only the small basket on the base to sterilize small items such as soothers.
- With only the large basket on the base to sterilize medium-sized items such as breast pumps, toddler plates or toddler cutlery.
- With the large basket and the small basket on the base to sterilize up to six 330ml/ 11oz bottles. Place the bottles upside down in the large basket and place the bottle dome caps, screw rings and teats in the small basket.
Note: When you fill the small basket, put screw rings on the bottom, place the teats and the bottle caps loosely on top of the screw rings.
Note: Make sure all parts that need to be sterilized are completely disassembled and place them in the basket with their openings pointing down to prevent them from filling up with water.


Using the appliance
Sterilizing (SCF291 and SCF293)
- Pour water directly into the water reservoir of the base (see section «Before first use»).
- Assemble the sterilizer (see section «Assembling the sterilizer») and place the items to be sterilized in it.
- Place the lid on top of the small or large basket.
- Put the plug in the wall socket.
- SCF291: Press the power on button to switch on the appliance.
SCF293: Turn the on/off button to «Sterilize» mode. Then press it to switch on the appliance.
The base, the baskets and the lid become hot during or shortly after operation.
Note: You can switch the appliance off by pressing the power off button.
 Step 1")
 Step 2")
 Step 3")
SCF291
- The on/off indicator light lights up to indicate that the appliance starts sterilizing.
- When the sterilization process is finished, the light goes off and the appliance switches off automatically.
SCF293
- The entire progress indicator lights flash to show the appliance is sterilizing.
- When the sterilization process is finished, the lights go off and the appliance switches off automatically.
- Remove the lid.
Wait until the appliance has cooled down before you remove the lid.
Be careful. Hot steam may come out of the sterilizer. - Remove the bottles and other items from the basket. Use the tongs to remove the smaller items.
Be careful. The sterilized items may still be hot.
Note: Make sure you wash your hands thoroughly before you touch the sterilized items. - Unplug the appliance and wait until the appliance has cooled down completely.
- Remove the small basket and large basket.
Note: When you remove the large basket, be aware of the remaining water on the base drip tray.
Note: The drip tray is designed for catching milk or food residue from the items to avoid going into the water reservoir of the base. This is to optimize the sterilizing performance and make the heating element easy to clean. - Detach the bottom plate from the large basket. Pour out any remaining water from the large basket drip tray and clean it (see section «Cleaning»).
- Pour out any remaining water from the water reservoir and wipe it dry.
Note: The appliance does not work for 10 minutes after a sterilizing cycle. It needs to cool down first.
Auto – Sterilizing + Drying (SCF293)
- Pour water directly into the water reservoir of the base (see section «Before first use»).
- Assemble the sterilizer (see section «Assembling the sterilizer») and place the items to be sterilized in it.
Note: Make sure all the items are completely disassembled and placed in the basket with their openings pointing down for effective drying.
Be careful. Hot steam will come out of the sterilizer when drying starts. - Place the lid on top of the small or large basket.
- Put the plug in the wall socket.
- Turn the on/off button to «Auto» mode. Then press it to switch on the appliance.
- The appliance starts sterilizing first. The entire progress indicator lights flash to show the appliance is sterilizing.
- After that, drying will start automatically. The progress indicator lights flash and off gradually to show the appliance is drying.
- When the whole process is finished, the lights go off and the appliance switches off automatically.
The base, the baskets and the lid become hot during or shortly after operation.
- Remove the lid.
- Remove the bottles and other items from the basket. Use the tongs to remove the smaller items.
Be careful. The sterilized items may still be hot.
Note: Make sure you wash your hands thoroughly before you touch the sterilized items.
Note: The drying result may vary depends on the ambient temperature, ambient humidity and loading of sterilizer. You can run one more drying cycle if necessary. - Unplug the appliance and wait until the appliance has cooled down completely.
- Remove the small basket and large basket.
Note: When you remove the large basket, be aware of the remaining water on the base drip tray. - Detach the bottom plate from the large basket. Pour out any remaining water from the large basket drip tray and clean it (see section «Cleaning»).
 Step 1")
 Step 2")
 Step 3")
Drying (SCF293)
- Assemble the sterilizer (see section «Assembling the sterilizer») and place the items to be dried in it.
Note: Make sure all the items are completely disassembled and placed in the basket with their openings pointing down for effective drying.
Be careful. Hot steam will come out of the sterilizer when drying starts. - Place the lid on top of the small or large basket.
- Put the plug in the wall socket.
- Turn the on/off button to «Dry» mode. Then press it to switch on the appliance.
- Drying will start after about 30 seconds. The appliance warms up to produce warm air to dry items.
- The progress indicator lights flash and off gradually to show the appliance is drying.
- When the drying process is finished, the lights go off and the appliance switches off automatically.
The base, the baskets and the lid become hot during or shortly after operation.
- Remove the lid.
- Remove the bottles and other items from the basket. Use the tongs to remove the smaller items.
Be careful. The dried items may still be hot.
Note: Make sure you wash your hands thoroughly before you touch the dried items.
Note: The drying result may vary depends on the ambient temperature, ambient humidity and loading of sterilizer. You can run one more drying cycle if necessary. - Unplug the appliance and wait until the appliance has cooled down completely.
 Step 1")
 Step 2")
 Step 3")
Cleaning
Do not use abrasive or aggressive cleaning agents (e.g. bleach) or a scouring pad to clean this appliance.
Never immerse the base and the power cord in water or any other liquid.
Note: The sterilizer is not dishwasher-proof. The baskets, the bottom plate and the lid can be cleaned with hot water and liquid dishwashing detergent.
- Always unplug the appliance and let it cool down before you clean it.
- Clean the base with a moist cloth.
- Detach the bottom plate from the large basket. Pour out any remaining water from the large basket drip tray.
Note: Water accumulates on the large basket drip tray after each sterilizing cycle. Pour out the remaining water from the large basket after each use. - Clean the lid, the small basket, the bottom plate and the large basket in hot water with some liquid dishwashing detergent.
Note: After cleaning, store the sterilizer in a clean and dry place.

Cleaning the filter (SCF293)
- Detach the filter cover from the base.
- Take out the filter and clean it under tap water.
- Let the filter air dry thoroughly. Put it back to the base and close the filter cover.
Note: Clean the filter at least every 4 weeks to ensure that it continues to filter effectively.
 Step 1")
 Step 2")
 Step 3")
Descaling
The sterilization process is extremely important to ensure the most hygienic standards for your baby. Limescale deposits can slow down the sterilization cycle and even impair its effectiveness.
Limescale is the hard and chalky deposit. Depending on the water type in your area, limescale can have different appearances ranging from snow white looking powder to brownish stains. The harder the water, the faster scale builds up. It builds up in appliances as the residue of minerals naturally contained in water, which fail to evaporate when water is heated. Although it is not harmful as such, it is unsightly, hard to clean and can impair the operation of appliances or damage their components if allowed to build up.
Descale the sterilizer at least every 4 weeks to ensure it works efficiently.
- Pour 90ml/ 3oz of white vinegar (5% acetic acid) and 30ml/ 1oz of water into the water reservoir.
- Place the small basket on the base. Place the lid on top of the small basket.
- SCF291: Press the power on button to switch on the appliance.
SCF293: Turn the on/off button to «Sterilize» mode. Then press it to switch on the appliance.
Note: Place the small basket on the base to prevent hot liquid from splashing out. - Let the appliance operate for 5 minutes, and then switch it off.
SCF291: Press the power off button to switch off the appliance.
SCF293: Press the on/off button to switch off the appliance. - Empty the water reservoir and rinse it thoroughly. If you still see traces of scale, remove it by sponge. Rinse again and wipe the base with a damp cloth.
- Rinse the small basket and lid as well to remove vinegar solution.
Note: You can also use citric acid based descalers.
Note: Do not use other types of descalers.


Ordering accessories
To buy accessories or spare parts, visit www.philips.com or go to your Philips dealer. You can also contact the Philips Consumer Care Centre in your country (see the worldwide guarantee leaflet for contact details).
Recycling

- This symbol means that this product shall not be disposed of with normal household waste (2012/19/EU).
- Follow your country’s rules for the separate collection of electrical and electronic products. Correct disposal helps prevent negative consequences for the environment and human health.
Guarantee and support
If you need information or support, please visit www.philips.com/support or read the separate worldwide guarantee leaflet.
Note: This appliance needs to be descaled regularly for optimal performance. If you do not do this, the appliance may eventually stop working. In this case, repair is NOT covered by your warranty.
Troubleshooting
This chapter summarizes the most common problems you could encounter with the appliance. If you are unable to resolve the problem with the information below, contact the Consumer Care Center in your country.
| Problem | Solution |
When should I descale my sterilizer? |
When you use the sterilizer, you may notice that there are small spots ranging from snow white to brownish appearing on the heating plate. This is a sign that your sterilizer should be descaled. In any case, the sterilizer should be descaled at least every 4 weeks to ensure that it continues to work effectively. |
Why is the sterilizing time so short? |
You did not add enough water for sterilizing. Pour exactly 130 ml/4.5 oz water directly into the water reservoir of the base. |
Why is there still much water remaining on heating plate after sterilizing? |
The heating plate may be blocked by the limescale. The sterilizer should be descaled at least every 4 weeks. See section «Descaling». |
Why is there a burning smell and burnt mark on the base? |
You may not have poured out the remaining water from the large basket drip tray regularly. Water accumulates on the large basket drip tray after each sterilizing cycle. Pour out any remaining water from large basket after each use. 1. Detach the bottom plate from the large basket. Pour out any remaining water from the large basket drip tray. 2. Clean the bottom plate and the large basket in hot water with liquid dishwashing detergent. The items may be not cleaned thoroughly before sterilizing. Before you put the items to be sterilized in the sterilizer, clean them thoroughly in the dishwasher or by hand with hot water and liquid dishwashing detergent. |
Why does the sterilizer stop working? |
The heating plate may be blocked by the limescale. The sterilizer should be descaled at least every 4 weeks. See section «Descaling». |
The items are still wet after drying. |
The items may still be wet due to different reasons: • Ambient temperature or humidity • Loading of sterilizer • The items stack too closely together Make sure hot air is able to circulate around the items to ensure effective drying. You can run one more complete drying cycle if necessary. |

Videos
Philips Avent Steriliser Review Video
Documents / Resources
References
Download manual
Here you can download full pdf version of manual, it may contain additional safety instructions, warranty information, FCC rules, etc.
Download Philips Avent Sterilizer Manual
Посмотреть инструкция для Philips Avent SCF291 бесплатно. Руководство относится к категории стерилизаторы бутылочек, 1 человек(а) дали ему среднюю оценку 9.3. Руководство доступно на следующих языках: русский, английский. У вас есть вопрос о Philips Avent SCF291 или вам нужна помощь? Задайте свой вопрос здесь
Philips Avent SCF291 — стерилизатор бутылочек, предназначенный для использования в бытовых условиях. Он разработан компанией Philips, признанным лидером в области производства бытовой техники. Стерилизатор соответствует всем современным стандартам качества и безопасности.
Philips Avent SCF291 обеспечивает высокую степень стерилизации, уничтожая 99,9% бактерий. Благодаря использованию пара, он очищает бутылочки и другие предметы для кормления вашего малыша от вредных микроорганизмов. Технология осуществляет процесс стерилизации за 6 минут, что экономит ваше время и энергию.
Стерилизатор Philips Avent SCF291 обладает простым и интуитивно понятным использованием. Он оснащен удобной панелью управления и светодиодными индикаторами, которые позволяют контролировать процесс стерилизации.
Этот стерилизатор имеет компактный и привлекательный дизайн, что делает его идеальным решением для использования дома или в поездках. Он легко вмещает до 6 бутылочек одновременно, а также другие предметы для кормления. Крышка стерилизатора помогает сохранить бутылочки чистыми до 24 часов.
Важно отметить, что Philips Avent SCF291 максимально безопасен и не содержит вредных веществ. Этот стерилизатор предлагает надежное и долговечное использование, что делает его отличным выбором для заботливых родителей.
Главная
Не можете найти ответ на свой вопрос в руководстве? Вы можете найти ответ на свой вопрос ниже, в разделе часто задаваемых вопросов о Philips Avent SCF291.
Инструкция Philips Avent SCF291 доступно в русский?
Да, руководствоPhilips Avent SCF291 доступно врусский .
Не нашли свой вопрос? Задайте свой вопрос здесь