Introduction
Steam Workshop is a system of back-end storage and front-end web pages that make it easy to store, organize, sort, rate, and download content for your game or application.
This page contains technical details on implementing Steam Workshop with your title. For information and definitions of the various types of Workshop integration you can utilize and how to make the best out of the tools provided by Steam please see the Steam Workshop Overview before getting started integrating the steam workshop with your game.
In a typical set-up, customers of your game would use tools provided by you with purchase of your game to create modifications or entirely new content. Those customers would then submit that content through a form built into your tool to the Steam Workshop. Other customers would then be able to browse, sort, rate, and subscribe to items they wish to add to their game by going to the Steam Workshop in the Steam Community. Those items would then download through Steam. If you’ve registered for the ISteamUGC::ItemInstalled_t callback within your game, you can then call ISteamUGC::GetItemInstallInfo to get the installed location and read the data directly from that folder. That new content would then be recognized by the game in whatever capacity makes sense for your game and the content created.
Steam Workshop Types, Monetization, & Best Practices
For more information and definitions of the various types of Workshop integration you can utilize and how to make the best out of the tools provided by Steam, please see the Steam Workshop documentation.
Managing Steam Workshop Visibility
The Steam Workshop is the website hosted through Steam that enumerates shared content and allows users to vote and comment on the content visible through the community. By default, applications are not enabled to be publicly visible in the Workshop. This prevents content not intended to be shared through the Steam Workshop portal from being visible unless the workshop is set to public.
Set the visibility state of the workshop through the following steps:
- Browse to the application landing page on the Steamworks website
- Click Edit Steamworks Settings
- From the Workshop Tab, select General
- On the right-hand side of the page, find the Visibility State section.
- Use the radio buttons to select the desired level of visibility which can include Developers Only, Developers & Testers, Customers & Developers and Everyone.
- From the Publish tab, click Prepare for Publishing
- Click Publish to Steam and complete the process to publish the change.
Note: To change the visibility state to Everyone, the Workshop checklist must be complete which includes branding, title, description and at least one item of content publicly visible.
Tech Overview
The process to share and consume User Generated Content is by using the ISteamUGC API which can be found in the Steamworks SDK. The methods exposed provide a way to share workshop item content which can then be discovered through the Steam Workshop or an in-app experience.
The Workshop API must be accessed through the pointer that is returned from SteamUGC().
For example:
SteamAPICall_t hSteamAPICall = SteamUGC()->CreateItem( SteamUtils()->GetAppID(), k_EWorkshopFileTypeMicrotransaction );
Enabling ISteamUGC for a Game or Application
Before workshop items can be uploaded to the Steamworks backend there are two configuration settings that must be made, Configuring Steam Cloud Quotas and Enabling the ISteamUGC API.
The Steam Cloud feature is used to store the preview images associated to workshop items. The Steam Cloud Quota can be configured with the following steps:
- Navigate to the Steam Cloud Settings page in the App Admin panel.
- Set the Byte quota per user and Number of files allowed per user to appropriate values for preview image storage
- Click Save
- From the Publish tab, click Prepare for Publishing
- Click Publish to Steam and complete the process to publish the change.
Enabling the ISteamUGC API can be accomplished with the following steps:
- Navigate to the Steam Workshop Configuration page in the App Admin panel.
- Find the Additional Configuration Options section.
- Check Enable ISteamUGC for file transfer.
- Click Save.
- From the Publish tab, click Prepare for Publishing.
- Click Publish to Steam and complete the process to publish the change.
Once these settings are in place workshop content can be uploaded via the API.
Creating and Uploading Content
The process of creating and uploading workshop content is a simple and repeatable process as shown in the flow chart below.

Creating a Workshop Item
- All workshop items begin their existence with a call to ISteamUGC::CreateItem
- The
nConsumerAppIdvariable should contain the App ID for the game or application. Do not pass the App ID of the workshop item creation tool if that is a separate App ID. - EWorkshopFileType is an enumeration type that defines how the shared file will be shared with the community. The valid values are:
- k_EWorkshopFileTypeCommunity — This file type is used to describe files that will be uploaded by users and made available to download by anyone in the community. Common usage of this would be to share user created mods.
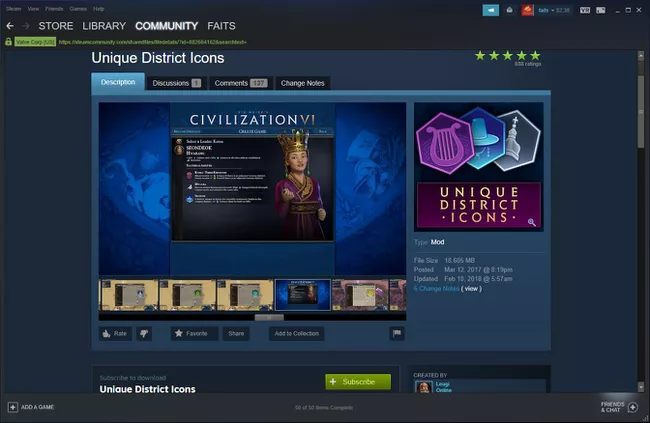
- k_EWorkshopFileTypeMicrotransaction — This file type is used to describe files that are uploaded by users, but intended only for the game to consider adding as official content. These files will not be downloaded by users through the Workshop, but will be viewable by the community to rate.
This is the implementation that Team Fortress 2 uses.
- The
- Register a call result handler for CreateItemResult_t
- First check the
m_eResultto ensure that the item was created successfully. - When the call result handler is executed, read the
m_nPublishedFileIdvalue and store for future updates to the workshop item (e.g. in a project file associated with the creation tool). - The
m_bUserNeedsToAcceptWorkshopLegalAgreementvariable should also be checked and if it’s true, the user should be redirected to accept the legal agreement. See the Workshop Legal Agreement section for more details.
Uploading a Workshop Item
- Once a workshop item has been created and a PublishedFileId_t value has been returned, the content of the workshop item can be populated and uploaded to the Steam Workshop.
- An item update begins with a call to ISteamUGC::StartItemUpdate
- Using the UGCUpdateHandle_t that is returned from ISteamUGC::StartItemUpdate, calls can be made to update the Title, Description, Visibility, Tags, Item Content and Item Preview Image through the various ISteamUGC::SetItem[…] methods.
- ISteamUGC::SetItemTitle — Sets a new title for an item.
- ISteamUGC::SetItemDescription — Sets a new description for an item.
- ISteamUGC::SetItemUpdateLanguage — Sets the language of the title and description that will be set in this item update.
- ISteamUGC::SetItemMetadata — Sets arbitrary metadata for an item. This metadata can be returned from queries without having to download and install the actual content.
- ISteamUGC::SetItemVisibility — Sets the visibility of an item.
- ISteamUGC::SetItemTags — Sets arbitrary developer specified tags on an item.
- ISteamUGC::AddItemKeyValueTag — Adds a key-value tag pair to an item. Keys can map to multiple different values (1-to-many relationship).
- ISteamUGC::RemoveItemKeyValueTags — Removes an existing key value tag from an item.
- ISteamUGC::SetItemContent — Sets the folder that will be stored as the content for an item.
- ISteamUGC::SetItemPreview -Sets the primary preview image for the item.
- Once the update calls have been completed, calling ISteamUGC::SubmitItemUpdate will initiate the upload process to the Steam Workshop.
- Register a call result handler for SubmitItemUpdateResult_t
- When the call result handler is executed, check the
m_eResultto confirm the upload completed successfully. - Note: There is no method to cancel the item update and upload once it’s been called.
- If desired, the progress of the upload can be tracked using ISteamUGC::GetItemUpdateProgress
- EItemUpdateStatus defines the upload and update progress.
-
punBytesProcessedandpunBytesTotalcan be used to provide input for a user interface control such as a progress bar to indicate progress of the upload. -
punBytesTotalmay update during the upload process based upon the stage of the item update.
- In the same way as Creating a Workshop Item, confirm the user has accepted the legal agreement. This is necessary in case where the user didn’t initially create the item but is editing an existing item.
Additional Notes
- Workshop items were previously designated as single files. With ISteamUGC, a workshop item is a representation of a folder of files.
- If a workshop item requires additional metadata for use by the consuming application, you can attach metadata to your item using the ISteamUGC::SetItemMetadata call. This metadata can be returned in queries without having to download and install the item content.
Previously we suggested that you save this metadata to a file inside the workshop item folder, which of course you can still do.
Consuming Content
Consuming workshop content falls into two categories, Item Subscription and Item Installation.
Item Subscription
The majority of subscriptions to a workshop item will happen through the Steam Workshop portal. It is a known location, common to all games and applications, and as such, users are likely to find and subscribe to items regularly on the workshop site.
However, ISteamUGC provides two methods for programmatically subscribing and unsubscribing to workshop items to support in-game item subscription management.
- ISteamUGC::SubscribeItem — Subscribe to a workshop item. It will be downloaded and installed as soon as possible.
- ISteamUGC::UnsubscribeItem — Unsubscribe from a workshop item. This will result in the item being removed after the game quits.
Two additional methods exist for enumerating through a user’s subscribed items.
- ISteamUGC::GetNumSubscribedItems — Gets the total number of items the current user is subscribed to for the game or application.
- ISteamUGC::GetSubscribedItems — Gets a list of all of the items the current user is subscribed to for the current game.
Receiving Notifications for External Subscription Actions
In-game notifications can be received when a user has subscribed or unsubscribed from a file through any mechanism (e.g. ISteamUGC, Steam Workshop Website):
- Register a callback handler for RemoteStoragePublishedFileSubscribed_t and RemoteStoragePublishedFileUnsubscribed_t
- The structs will be populated with the ISteamRemoteStorage::PublishedFileId_t which can then be used to access the information about the workshop item.
- The structs also contain the application ID (
m_unAppID) associated with the workshop item. It should be compared against the running application ID as the handler will be called for all item subscriptions regardless of the running application.
Item Installation
Once Item Subscription information is known, the remaining consumption methods can be utilized. These methods provide information back to the game about the state of the item download and installation. Workshop item downloads are executed via the Steam Client and happen automatically, based on the following rules:
- When the Steam Client indicates a game or application is to launch, all app depots that have been updated will be downloaded and installed.
- Any existing installed workshop items are updated if needed
- Game or application then launches
- Newly subscribed workshop items that are not downloaded will then download and be installed in the background.
- Subscribed files will be downloaded to the client in the order they were subscribed in.
- The Steam download page will show workshop item downloads with a specific banner to indicate a workshop item download is occurring.
Note: Using the «Verify Integrity of Game Files» feature in the Steam Client will also cause workshop items to be downloaded.
As the game will start before newly subscribed content is downloaded and installed, the remaining consumption methods exist to aid in monitoring and managing the install progress. They can also be used when items are subscribed in-game to provide status of installation in real time.
Status of a Workshop Item
- ISteamUGC::GetItemState — Gets the current state of a workshop item on this client.
Download Progress of a Workshop Item
- ISteamUGC::GetItemDownloadInfo — Get info about a pending download of a workshop item that has k_EItemStateNeedsUpdate set.
Initiate or Increase the Priority of Downloading a Workshop Item
- ISteamUGC::DownloadItem
- Set
bHighPrioritytotrueto pause any existing in-progress downloads and immediately begin downloading this workshop item. - If the return value is
truethen register and wait for the callback ISteamUGC::DownloadItemResult_t before calling ISteamUGC::GetItemInstallInfo or accessing the workshop item on disk. - If the user is not subscribed to the item (e.g. a Game Server using anonymous login), the workshop item will be downloaded and cached temporarily.
- If the workshop item has an ISteamUGC::EItemState of
k_EItemStateNeedsUpdate, ISteamUGC::DownloadItem can be called to initiate the update. Do not access the workshop item on disk until the callback ISteamUGC::DownloadItemResult_t is called. - This method only works with ISteamUGC created workshop items. It will not work with legacy ISteamRemoteStorage workshop items.
- The ISteamUGC::DownloadItemResult_t callback struct contains the application ID (
m_unAppID) associated with the workshop item. It should be compared against the running application ID as the handler will be called for all item downloads regardless of the running application.
- Set
Retrieving information about the local copy of the Workshop Item
- ISteamUGC::GetItemInstallInfo — Gets info about currently installed content on the disc for workshop items that have k_EItemStateInstalled set.
Notification when a Workshop Item is Installed or Updated
- Register a callback handler for ISteamUGC::ItemInstalled_t.
Querying Content
The ISteamUGC interface provides a flexible way to enumerate the various kinds of UGC in Steam (e.g. Workshop items, screenshots, videos, etc.).

- Register a call result handler for SteamUGCQueryCompleted_t.
- There are a few methods available for creating the query depending upon the required scenario, Querying by Content Associated to a User or Querying All Content or getting the details of content you have ids for.
- ISteamUGC::CreateQueryUserUGCRequest — Query UGC associated with a user. You can use this to list the UGC the user is subscribed to amongst other things.
- ISteamUGC::CreateQueryAllUGCRequest — Query for all matching UGC. You can use this to list all of the available UGC for your app.
- ISteamUGC::CreateQueryUGCDetailsRequest — Query for the details of specific workshop items.
- Customize the query as appropriate by calling the option setting methods:
- When querying for User UGC
- ISteamUGC::SetCloudFileNameFilter — Sets to only return items that have a specific filename on a pending UGC Query.
- When querying for All UGC
- ISteamUGC::SetMatchAnyTag — Sets whether workshop items will be returned if they have one or more matching tag, or if all tags need to match on a pending UGC Query.
- ISteamUGC::SetSearchText — Sets a string to that items need to match in either the title or the description on a pending UGC Query.
- ISteamUGC::SetRankedByTrendDays — Sets whether the order of the results will be updated based on the rank of items over a number of days on a pending UGC Query.
- When querying for either type of UGC
- ISteamUGC::AddRequiredTag — Adds a required tag to a pending UGC Query. This will only return UGC with the specified tag.
- ISteamUGC::AddExcludedTag — Adds a excluded tag to a pending UGC Query. This will only return UGC without the specified tag.
- ISteamUGC::AddRequiredKeyValueTag — Adds a required key-value tag to a pending UGC Query. This will only return workshop items that have a key = [param]pKey[/param] and a value = [param]pValue[/param].
- ISteamUGC::SetReturnOnlyIDs — Sets whether to only return IDs instead of all the details on a pending UGC Query. This is useful for when you don’t need all the information (e.g. you just want to get the IDs of the items a user has in their favorites list.)
- ISteamUGC::SetReturnKeyValueTags — Sets whether to return any key-value tags for the items on a pending UGC Query.
- ISteamUGC::SetReturnLongDescription — Sets whether to return the full description for the items on a pending UGC Query.
- ISteamUGC::SetReturnMetadata — Sets whether to return the developer specified metadata for the items on a pending UGC Query.
- ISteamUGC::SetReturnChildren — Sets whether to return the IDs of the child items of the items on a pending UGC Query.
- ISteamUGC::SetReturnAdditionalPreviews — Sets whether to return any additional images/videos attached to the items on a pending UGC Query.
- ISteamUGC::SetReturnTotalOnly — Sets whether to only return the total number of matching items on a pending UGC Query. — The actual items will not be returned when ISteamUGC::SteamUGCQueryCompleted_t is called.
- ISteamUGC::SetLanguage — Sets the language to return the title and description in for the items on a pending UGC Query.
- ISteamUGC::SetAllowCachedResponse — Sets whether results to be will be returned from the cache for the specific period of time on a pending UGC Query.
- When querying for User UGC
- Send the query to Steam using ISteamUGC::SendQueryUGCRequest which will invoke the ISteamUGC::SteamUGCQueryCompleted_t call result handler registered in step 1.
- In the call result handler for ISteamUGC::SteamUGCQueryCompleted_t, call ISteamUGC::GetQueryUGCResult to retrieve the details for each item returned.
- You can also call these functions to retrieve additional information for each item (some of this data is not returned by default, so you need to configure your query appropriately):
- ISteamUGC::GetQueryUGCPreviewURL — Retrieve the URL to the preview image of an individual workshop item after receiving a querying UGC call result.
- ISteamUGC::GetQueryUGCMetadata — Retrieve the developer set metadata of an individual workshop item after receiving a querying UGC call result.
- ISteamUGC::GetQueryUGCChildren — Retrieve the ids of any child items of an individual workshop item after receiving a querying UGC call result.
- ISteamUGC::GetQueryUGCStatistic — Retrieve various statistics of an individual workshop item after receiving a querying UGC call result.
- ISteamUGC::GetQueryUGCNumAdditionalPreviews and ISteamUGC::GetQueryUGCAdditionalPreview — Retrieve the details of an additional preview associated with an individual workshop item after receiving a querying UGC call result.
- ISteamUGC::GetQueryUGCNumKeyValueTags and ISteamUGC::GetQueryUGCKeyValueTag — Retrieve the details of a key-value tag associated with an individual workshop item after receiving a querying UGC call result.
- Call ISteamUGC::ReleaseQueryUGCRequest to free up any memory allocated while querying or retrieving the results.
Paging Results
Up to 50 results will be returned from each query. Paging through more results can be achieved by creating a query that increments the unPage parameter (which should start at 1).
Playtime Tracking
To track the playtime of Workshop items simply call ISteamUGC::StartPlaytimeTracking with the ids of the items you want to track. Then when the items are removed from play call ISteamUGC::StopPlaytimeTracking with the ids you want to stop tracking or call ISteamUGC::StopPlaytimeTrackingForAllItems to stop tracking playtime for all items at once.
When your app shuts down, playtime tracking will automatically stop.
You will also be able to sort items by various playtime metrics in ISteamUGC::CreateQueryAllUGCRequest queries. Here are the playtime based query types you can use:
- k_EUGCQuery_RankedByPlaytimeTrend — Sort by total playtime in the «trend» period descending (set with ISteamUGC::SetRankedByTrendDays)
- k_EUGCQuery_RankedByTotalPlaytime — Sort by total lifetime playtime descending.
- k_EUGCQuery_RankedByAveragePlaytimeTrend — Sort by average playtime in the «trend» period descending (set with ISteamUGC::SetRankedByTrendDays)
- k_EUGCQuery_RankedByLifetimeAveragePlaytime — Sort by lifetime average playtime descending
- k_EUGCQuery_RankedByPlaytimeSessionsTrend — Sort by number of play sessions in the «trend» period descending (set in ISteamUGC::SetRankedByTrendDays)
- k_EUGCQuery_RankedByLifetimePlaytimeSessions — Sort by number of lifetime play sessions descending
Deleting Workshop Item Content
To delete a Workshop item, you can call ISteamUGC::DeleteItem. Please note that this does not prompt the user and cannot be undone.
Steamworks Example – SpaceWar Integration
The Steamworks API Example Application (SpaceWar) that comes with the Steamworks SDK demonstrates a subset of the ISteamUGC API.
-
CSpaceWarClient::LoadWorkshopItemdemonstrates checking if a workshop item is downloaded and installed on disk as well as requesting information about a workshop item by ISteamRemoteStorage::PublishedFileId_t -
CSpaceWarClient::LoadWorkshopItemsdemonstrates retrieving the list of subscribed workshop items for the current user for the SpaceWar application -
CSpaceWarClient::OnWorkshopItemInstalleddemonstrates a callback handler for ISteamUGC::ItemInstalled_t
Workshop Legal Agreement
Workshop items will be hidden by default until the contributor agrees to the Steam Workshop Legal Agreement. In order to make it easy for the contributor to make the item publicly visible, please do the following.
- Include text next to the button that submits an item to the workshop, something to the effect of: «By submitting this item, you agree to the workshop terms of service» (including the link)
- After a user submits an item, open a browser window to the Steam Workshop page for that item by calling ISteamFriends::ActivateGameOverlayToWebPage with
pchURLset tosteam://url/CommunityFilePage/<PublishedFileId_t>replacing <PublishedFileId_t> with the workshop item id.
This has the benefit of directing the author to the workshop page so that they can see the item and configure it further if necessary and will make it easy for the user to read and accept the Steam Workshop Legal Agreement.
Web API
In addition to these methods, there are a set of Web API interface that provides similar functionality along with community-based filtering APIs to list all shared content. Please consult the documentation for the ISteamRemoteStorage interface in the Web API list.
Dedicated Game Servers
Game servers can also download and install items.
- The Game Server will need to know the PublishedFileId_t to request a workshop item, this could be supplied by the game clients or set by the server operator. Then call ISteamUGC::DownloadItem to retrieve a temporary copy of the workshop item.
- A call can then be made to ISteamUGC::GetItemInstallInfo to retrieve information to locate and use the workshop item.
- See the Item Installation section above for more information on these API methods.
SteamCmd Integration
Along with the ISteamUGC API, the steamcmd.exe command line tool can be used to create and update workshop items for testing purposes. This should only be used for testing purposes, as the tool requires the user to enter their Steam credentials (something we don’t want customers to have to do).
To create a new Steam Workshop item using steamcmd.exe a VDF file must first be created. The VDF is a plain text file that should contain the following keys.
«workshopitem»
{
«appid» «480»
«publishedfileid» «5674»
«contentfolder» «D:\\Content\\workshopitem»
«previewfile» «D:\\Content\\preview.jpg»
«visibility» «0»
«title» «Team Fortress Green Hat»
«description» «A green hat for Team Fortress»
«changenote» «Version 1.2»
}
Notes:
- The keys map to the various ISteamUGC::SetItem[…] methods. See the documentation above for more details.
- The values shown are examples only and should be updated appropriately.
- To create a new item,
appidmust be set andpublishedfileidmust be unset or set to0. - To update an existing item,
appidandpublishedfileidmust both be set. - The remaining key/value pairs should be included in the VDF if the key should be updated.
Once the VDF has been created, steamcmd.exe can be run with the workshop_build_item <build config filename> file parameter. For example:
steamcmd.exe +login myLoginName myPassword +workshop_build_item workshop_green_hat.vdf +quit
If the command is successful, the publishedfileid value in the VDF will be automatically updated to contain the ID of the workshop item. In this way, subsequent calls with steamcmd.exe for the same VDF will result in an update rather than creation of a new item.
Errors and Logging
The majority of ISteamUGC methods return boolean values. For additional information on specific errors, there are a number of places to review:
-
Steam\logs\Workshop_log.txtis a log for all transfers that occur during workshop item downloading
and installation. -
Steam\workshopbuilds\depot_build_<appid>.logis a log for all actions during the upload and update of a workshop item. - ISteamUGC::SteamUGCQueryCompleted_t, ISteamUGC::CreateItemResult_t and ISteamUGC::SubmitItemUpdateResult_t contain EResult variables that can be checked.
Frequently Asked Questions
Q: Can a separate application publish content to my game’s Workshop?
Yes. A separate application for editing or publishing tools can be configured with base application’s workshop to accept content from that editing application.
To configure this, go to the Workshop Configuration section for the base application and scroll to the bottom of the page. Enter the separate application’s App ID in the field under «App Publish Permissions» and hit «Add».
Once the Steamworks settings are published, the editing application will be able to publish content to the base application’s workshop.
Как скачивать и голосовать за моды и предметы в Steam Workshop
В этой статье вы узнаете:
- Как это работает
- Сколько стоит?
- Как скачивать моды.
- Как голосовать за моды
- Кто может загружать моды
Мастерская Steam, которая является неотъемлемой частью сообщества Steam, предназначена для облегчения создания модификаций игр. Большинство игр Steam, поддерживающих мастерскую, позволяют загружать и устанавливать моды одним нажатием кнопки; разработчики используют мастерскую для краудсорсинга контента, который в конечном итоге может оказаться в игре.
Как работает мастерская Steam?
Мастерская Steam – это хранилище модов для игр Steam. Когда разработчик выпускает игру в Steam и в этой игре есть поддержка модов, у него есть возможность привязать ее к мастерской Steam. Ссылка на мастерскую Steam позволяет создателям игр загружать свои моды для широкой аудитории, а также предоставляет обычным игрокам простой и оптимизированный процесс получения модов.
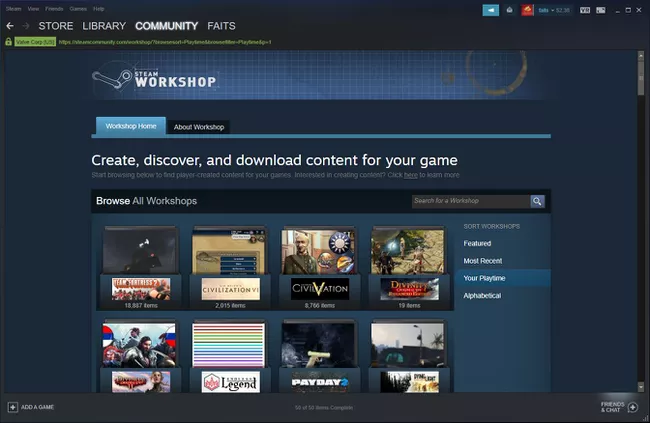
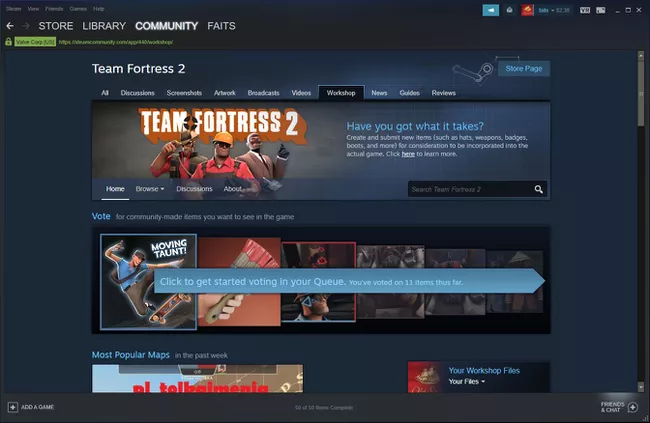
Когда вы открываете мастерскую Steam, доступ к которой можно получить через сообщество Steam, она представит вам список популярных игр, в которых есть доступные для загрузки моды. Вы можете проверить избранные игры, недавно обновленные игры и игры, в которые играли недавно. Вы также можете просмотреть список всех игр, поддерживающих эту функцию.
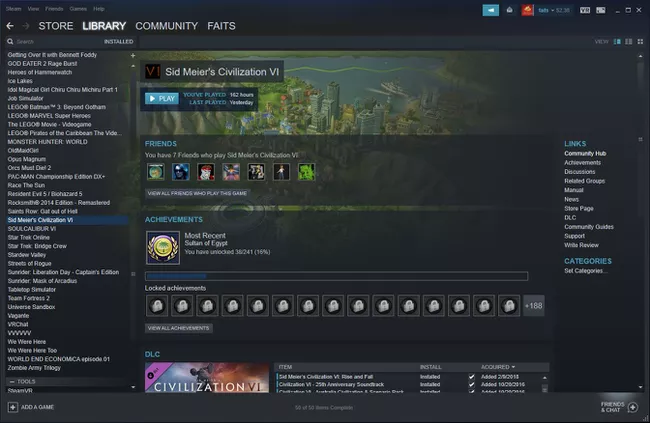
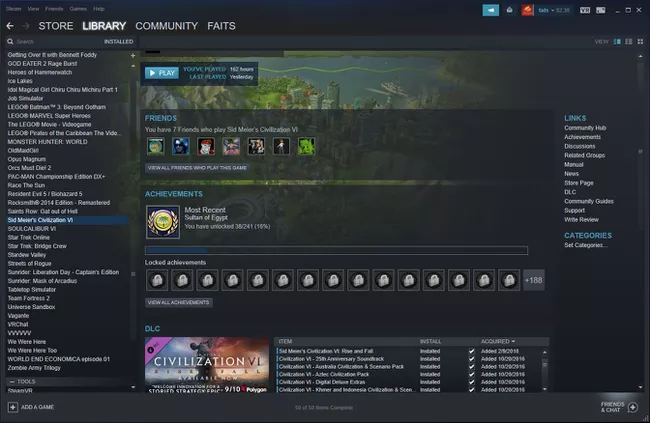
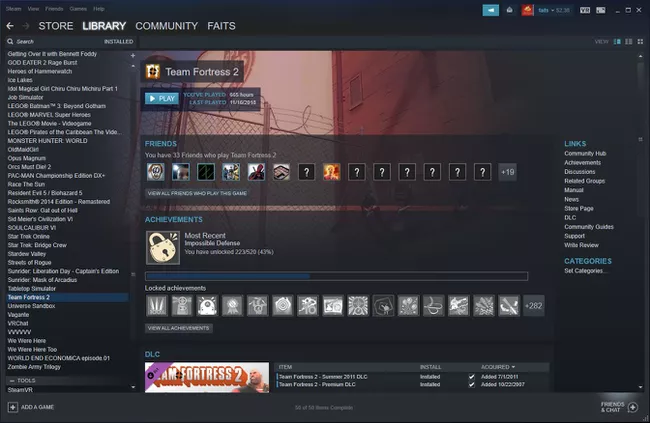
Вы можете получить доступ к мастерской Steam прямо из вашей библиотеки Steam. Если вы выберите игру в своей библиотеке, и эта игра включает поддержку Steam Workshop, вы увидите кнопку, которая ведет прямо на страницу мастерской Steam этой игры.
Сколько стоит мастерская?
Мастерская Steam бесплатна, как и большинство модов и других предметов в ней. Некоторые игры, такие как Skyrim, также включают в себя платные премиум-моды. Когда вы покупаете такой мод, часть вашего платежа идет создателю мода.
Совет: если вы платите за мод в мастерской Steam, и он не работает так, как должен, или вы не удовлетворены своей покупкой, вы можете вернуть его, используя политику возврата, аналогичную той, которая применяется при возврате игр Steam.
Как скачать моды из мастерской Steam
Если игра поддерживает мастерскую Steam, просто подпишитесь на нее, чтобы получить доступ к ее потоку контента модов. Этот процесс заменяет загрузку или установку отдельных предметов из мастерской Steam. Если какие-то предметы или моды в вашей игре вам больше не нужны, вы можете отказаться от подписки, и Steam удалит их.
Предупреждение: перед загрузкой и установкой предметов из мастерской Steam обязательно сделайте резервную копию файлов игры и сохраните данные.
Как получить моды и другие предметы в мастерской Steam:
1 Запустите Steam, откройте свою библиотеку и выберите игру, поддерживающую мастерскую Steam.
2 Прокрутите вниз до раздела мастерская и выберите «Обзор мастерской».
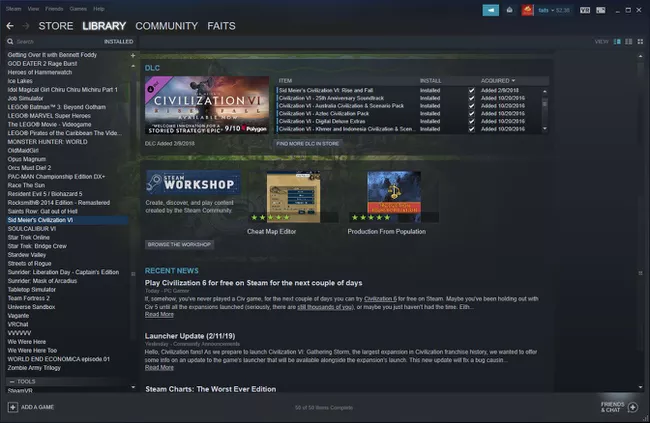
Совет: если вы не видите кнопку «Обзор мастерской», это означает, что игра не поддерживает мастерскую Steam, и вам придется попробовать другую игру.
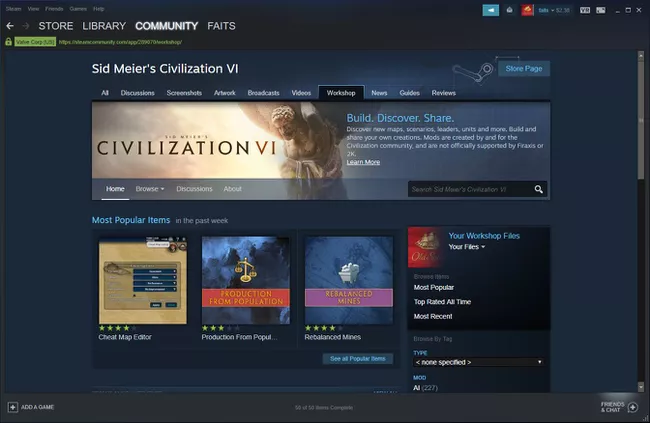
3 У каждой игры, поддерживающей мастерскую Steam, есть страница мастерской Steam. На этой странице вы найдете множество способов открыть для себя новые модели, плагины, моды и многое другое.
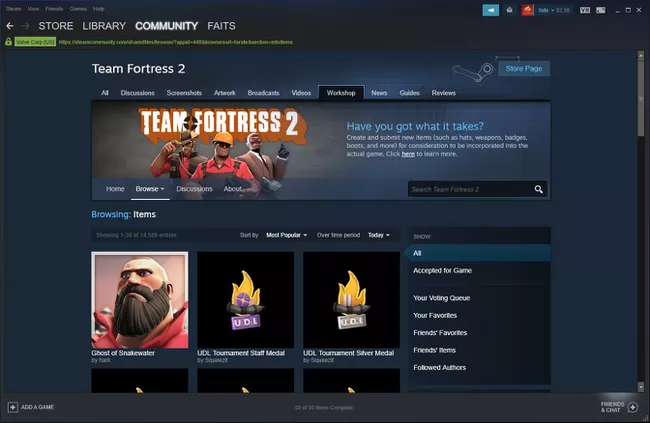
4 Щелкните любой интересующий вас элемент на главной странице, воспользуйтесь функцией поиска или просмотрите с помощью одного из вариантов сортировки.
5 Когда вы найдете интересующий вас предмет, выберите его.
6 Когда вы выбираете предмет в мастерской Steam, появляется дополнительная информация об этом предмете. Если вы хотите попробовать, нажмите «+ Подписаться».
Совет: если вы хотите удалить элемент, плагин или мод из своей игры, вернитесь на ту же страницу и еще раз выберите «Подписка».
7 Запустите игру и опробуйте свой новый предмет или мод.
8 Вы можете загружать несколько предметов, плагинов и модов одновременно, но некоторые предметы из мастерской Steam могут конфликтовать с другими. Если после установки нескольких предметов из мастерской Steam ваша игра не работает должным образом, попробуйте удалять их по одному, пока игра не заработает корректно.
Как проголосовать за предметы в мастерской Steam
В некоторых играх используется другой подход, позволяющий голосовать за отправленные пользователем предметы в мастерской Steam. При таком условии в игру включаются только самые популярные моды.
Как голосовать за предметы в мастерской Steam:
1 Откройте свою библиотеку Steam и выберите игру, которая поддерживает этот вариант мастерской Steam.
2 Прокрутите вниз и выберите «Обзор мастерской».
Совет: если вы не видите опции для просмотра мастерской, значит игра не поддерживает мастерскую Steam.
3 Если вы хотите найти новые элементы для голосования, выберите большую кнопку «Нажмите, чтобы начать голосование в своей очереди».
Совет: если вы хотите проголосовать за определенный элемент, вы можете найти его в поле поиска.
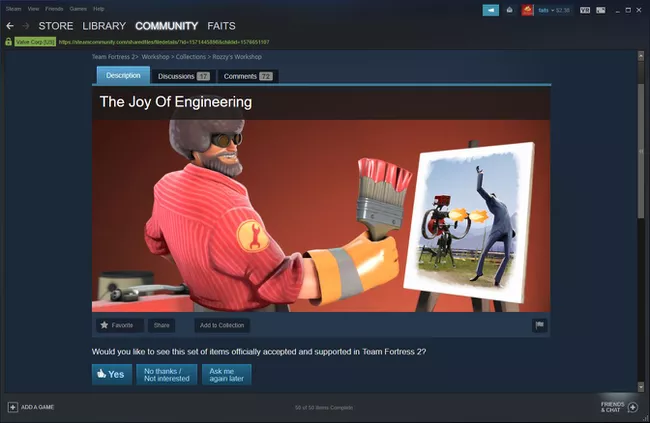
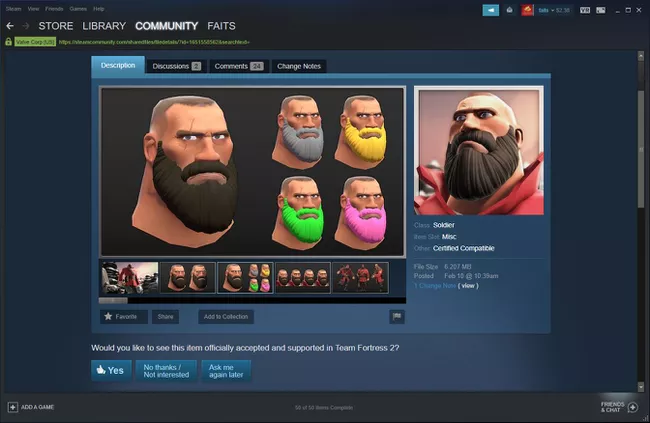
4 Если вы хотите, чтобы в игре появился определенный элемент, выберите «Да».
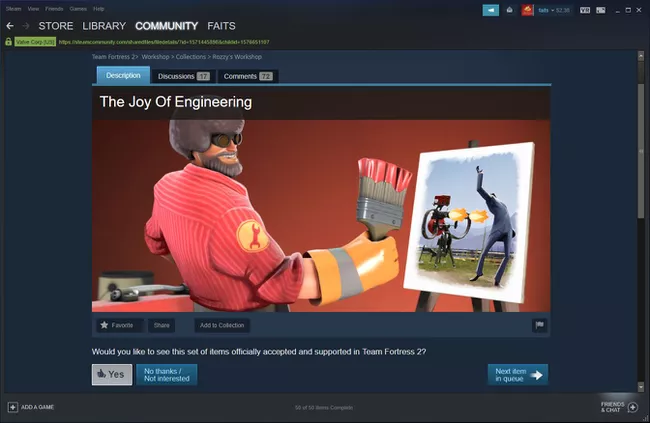
5 Выберите «Следующий элемент в очереди» и повторите процесс голосования для оставшихся элементов.
6 Вы можете выбрать любой предмет на странице мастерской Steam, чтобы проголосовать за него напрямую.
7 Выберите «Да», если хотите, чтобы этот предмет появился в игре.
8 Вы можете голосовать за любое количество предметов.
Когда заявленный предмет в мастерской Steam получает достаточное количество голосов, разработчик может решить включить ее в игру.
Кто может загружать моды
Мастерская Steam доступна любому. Для входа в нее нет никаких ограничений, кроме ваших умений и воображения, но для подачи предметов на рассмотрение, необходимо подписать соглашение с Valve.
Загрузка в мастерскую Steam сложнее, чем загрузка модов, и выполняется она не через клиент Steam. Каждая игра, поддерживающая мастерскую Steam, имеет отдельный способ загрузки.
В некоторых играх есть опция «меню» внутри самой игры. Опция позволяет загружать свои моды в мастерскую Steam, тогда как другие игры требуют ввода кода командной строки. Некоторые издатели также предоставляют утилиту, предназначенную для загрузки модов для своих игр в мастерскую Steam.
Если вы хотите загрузить моды в мастерскую Steam, проверьте, есть ли в вашей игре возможность сделать это. В противном случае обратитесь к разработчику или издателю игры за соответствующими инструкциями.
Мастерская Steam – это элемент Steam-клиента. Он позволяет создавать пользовательский контент для тех игр из библиотеки Steam, которые поддерживают авторские модификации. Другими словами, Steam Мастерская являются своего рода хранилищем для модов и внутриигровых предметов из видеоигр корпорации Valve, создаваемых игроками. Чтобы скачать интересующий вас мод, достаточно перейти в Мастерскую и нажать на зеленую кнопку “Подписаться”. При этом вы должны быть владельцем лицензионной версии игры и личного аккаунта в сервисе Steam.
В Мастерской Steam каждый найдет достойный контент для Team Fortress 2 или Counter-Strike: Global Offensive. Заметим, что только последняя часть франшизы “Counter-Strike” поддерживает функцию Воркшопа. Все предыдущие такой плюшки не имели. На сегодняшний день в Мастерской CS GO вы можете создавать скины оружия, наклейки на пушки, а также авторские карты. Если ваш дизайн КС ГО зайдет публике, игроки начнут страшно нахваливать его и ставить палец вверх. А вы приготовьтесь к тому, что в конечном итоге ваш скин просто станет частью шутера. Перед тем как ввести предмет из Мастерской в игру коллектив Valve тщательно изучает вкусы и предпочтения сообщества. Если ваш вариант дизайна оружия или карта наберет достаточное количество позитивных откликов, то добавление вашего предмета КС ГО произойдет в рамках очередного обновления или специальной операции.
Когда это случиться, вы начнете получать денежные отчисления от продаж ваших скинов. Чем больше контента вашего авторства попадет и игру, тем более крупные суммы будут приходить на ваш счет. Например, Coridium, автор скинов Азимов и Редлайн, стал миллионером благодаря своему таланту и щедрых дивидендам от Valve. Компания не скупиться по заслугам благодарить тех пользователей, которые делают важный вклад в развитие игровой экосистемы. А что может быть лучшим поощрением чем денежные знаки?
С другой стороны, не стоит спешить с загрузкой контента в Мастерскую. К этому процессу стоит подойти, как говорится, с умом. Для начала внимательно ознакомьтесь с условиями соглашения подписчика Steam. Таким образом, в будущем вы избежите ненужных споров и правовых коллизий. Дело в том, что контент, условия его включения и размер вознаграждение варьируется в зависимости от игры. Дочитав эту статью до конца, вы получите тот минимальный “бэкграунд”, который должен иметь каждый опытный творец внутриигрового контента для Valve.
Как открыть Мастерскую Steam?
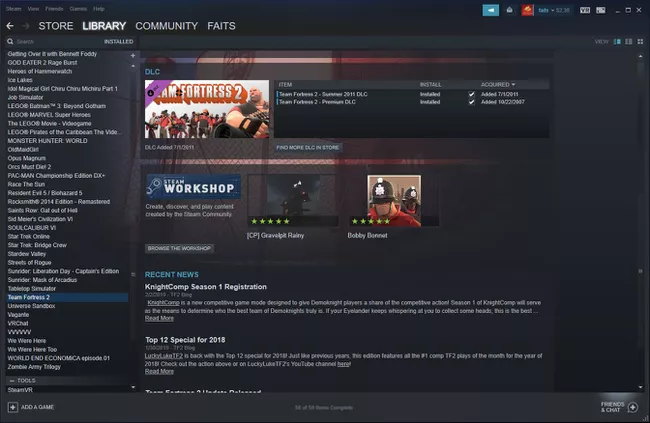
Для того чтобы попасть на главную страницу Мастерской Steam достаточно запустить свой браузер. Затем вставить в адресную строку: https://steamcommunity.com/workshop/. В разделе “О мастерской” вы увидеть полный перечень игр, которые поддерживают моды. Другой вариант – навести курсор мыши на ярлык “Steam” и дважды кликнуть по нему левой кнопкой. Когда Steam-клиент будет запущен, находим в верхнем меню закладку “Сообщество” и переходим в подменю “Мастерская”. Также можете получить доступ к Steam Workshop прямо в библиотеке Steam. Пользование Steam Мастерской полностью бесплатно. Более того, не нужно платить за использование карт и скинов КС ГО.
Как устроена Steam Мастерская?
Оказавшись внутри Мастерской, вы получаете доступ к колоссальной коллекции пользовательского контента. Чтобы не потеряться в разнообразии модификаций, настоятельно рекомендуем использовать панель поиска и доступный набор фильтров. Помимо этого, можно выбрать способы упорядочивание списка. Например, от самых популярных к менее популярным, по дате добавления, с наивысшим рейтингом за все время итд. Когда вы наконец-то определились с дополнительным контентом, все что нужно сделать, чтобы он добавился к вам игру, это подписаться на него. Вы можете загружать несколько элементов, плагинов и модов одновременно. Однако некоторые элементы Steam Workshop могут создавать конфликты с другими. Если ваша игра не работает правильно после установки нескольких вещей из мастерской Steam, попробуйте удалять их по одному, пока игра не запуститься. Для того, чтобы удалить мод – достаточно просто отписаться.
Как самому сделать скин в КС ГО?
Чтобы сделать скин КС ГО не достаточно просто прочитать от корки до корки это руководство. Вы также должны неплохо управляется с Photoshop CS5 Extended. Понимать что такое дизайн и красиво рисовать. Создать КС ГО скин за 5 минут, конечно, не удасться. Но и утверждать что это крайне сложный и времязатратный процесс, который лучше и вовсе не браться мы не будем. На Youtube вы найдете множество бесплатного русскоязычного контента, который годно объясняют как шаг за шагом создать свой первый скин для Мастерской. После просмотра видео гайдов, вы будете четко понимать как нарисовать скин для КС ГО.
А пока рекомендуем начать вот с этого обзора:
Как добавить свой скин в Мастерскую?
Итак, вам удалось в конце концов создать стильный скин на пушку или нож. Более того, вы готовы выставить его на всеобщее обозрение. Прекрасно! Теперь давайте рассмотрим как выглядит процесс загрузки КС ГО скина в Workshop. Традиционно запускаем КС ГО. В “Настройках” включаем консоль разработчика. Открываем консоль и пишем “workshop_workbench”. Нажимаем на кнопку “Отправить”. В новом окне вы увидите с левой стороны “Верстак Мастерской”. Выбираем опцию “Custom Paint Job”, после чего загружаем ваш скин. Выбираем модель оружия. Далее регулируем ползунками положение вашего оружия и смотрим как “сидит” на нем ваш авторский скин. Если у вас остались вопросы, то вторая часть этого видео развеет все ваши сомнения:
Когда твой скин КС ГО станет частью шутера?
Если вы создадите поистине гениальный дизайн КС ГО скина, то другие члены сообщества Стим обязательно обратят на него внимание. Не верите? Ну и не надо. Но факт остается фактом. В 2019 году пользователи просто умоляли разработчиков из Valve добавить в шутер AK | Diesel Power. Этот чудный скин удачно имитирует внешний вид бомбы C4. Два красных проводка и соответствующие зеленые и желтые цвета могут намекать на взрывчатое вещество.
Однако, точно также как в случае с этим скином, нет никаких гарантий, что очень крутой дизайн пополнит новую коллекцию раскрасок КС ГО. Голоса и мнения пользователей имеют значение, однако последнее слово всегда остается за самим разработчиком. Мы рекомендуем загрузить в воркшоп сразу несколько дизайнов. Однако, не стоит выкладывать недоработанные варианты. Количество не всегда означает качество. Таким образом, вы только испортите себе репутацию и другие юзеры будут меньше заходить на вашу страницу в Мастерской.
Комментарии
kомментарии
1 звезда
2 звезды
3 звезды
4 звезды
5 звезд

В коллекцию Steam можно собрать контент из Мастерской, чтобы делиться им с игровым сообществом. Мы расскажем, как создать такую сборку и добавить в нее нужные предметы.


Чтобы создать коллекцию в Steam Workshop, следуйте данной инструкции:
-

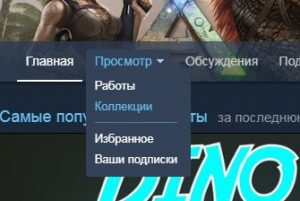
Создаем коллекцию в Steam Откройте приложение Steam или сайт steamcommunity.com, зайдите в свой аккаунт и отройте меню «Сообщество». В выпадающем списке кликните на пункт «Мастерская».
- Среди представленных игр выберите ту, для которой хотите создать коллекцию, нажав на «Просмотр» под логотипом игры.
- В меню «Просмотр» откройте раздел «Коллекции». В правом столбце появится кнопка «Создать коллекцию».
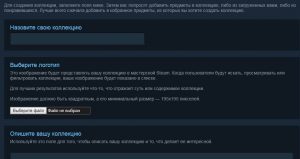
- В появившемся окне введите название сборки, выберите логотип и придумайте описание коллекции. Вам также понадобится выбрать тип и категорию, к которой ее следует отнести. После всего этого нажмите на кнопку «Сохранить и продолжить».
-

Придумайте название коллекции Теперь вы можете добавить или изменить связанные с коллекцией предметы, выбрав их среди опубликованных, избранных или предметов из подписки. Подтвердите свой выбор, снова нажав «Сохранить и продолжить».
- На этом этапе вы можете добавить к вашей коллекции фоновое изображение. В конце останется только нажать на кнопку «Опубликовать».
- Получить доступ к своим коллекциям можно в меню «Контент» — «Коллекции». Здесь можно просматривать, редактировать или удалять сборки Steam.
Читайте также:
- Jailbreak PS4: возможно, но незаконно
- Что можно сделать из старой игровой консоли
- Как подключить к Steam Link геймпад от PS3 или PS4
Фото: Steam

Редактор направлений «Мобильные устройства» и «Техника для дома»
Была ли статья интересна?
When the Steam Deck was first announced, many people wondered if it would support modding.
The current version of Steam Deck that’s available contains Steam Workshop which is a place for users to post their content and mods.
In this post, we’ll provide instructions on how to install mods on the Steam Deck through Steam Workshop.
Quick Summary
This post sheds light upon
- What is Steam Workshop?
- How to access Steam Workshop on the Steam Deck
- How to install mods through Steam Workshop
- Some frequently asked questions (FAQs)
So without further ado, let’s get started.
What is Steam Workshop?
The Steam Workshop is a powerful tool that allows players to enhance their gaming experience by downloading and using mods created by other players. When a game developer releases a game on Steam and it includes mod support, it can be integrated with the Steam Workshop.
This allows gamers to upload and share their mods with others, making it easy for players to discover and download mods for their favorite games.
The Steam Workshop is accessible through the Steam Community and presents users with a wide range of options to browse through.
The main page displays a list of popular games that have mods available for download, as well as:
- Featured games
- Recently updated games
- Recently played games
Users can also view a list of every game that supports Steam Workshop, making it easy to discover new games with mod support.
In addition to browsing through the Steam Workshop, players can also access it directly from their Steam library.
When you click on a game in your library, and that game includes Steam Workshop support, you’ll find a button that links directly to that game’s Steam Workshop page. This makes it easy for players to find and download mods for the games they are currently playing.
Overall, the Steam Workshop is an invaluable resource for players looking to enhance their gaming experience.
It provides an easy-to-use platform for creators to share their mods with a massive built-in audience, while also providing regular players with a straightforward and streamlined process for obtaining mods.
It’s no wonder why Steam Workshop is such a popular feature among the gaming community.
How to Access Steam Workshop on the Steam Deck?
Let’s talk a little about how to access the Steam Workshop with the Steam Deck.
Important note: Modifying games on the Steam Deck can be risky and it’s important to back up the game before installing any mods.
This is to prevent the risk of game files getting corrupted and not being able to play the game anymore. It’s also important to note that if you’re low on storage, you can back up only the necessary files.
To check if a game supports the Steam Workshop, you can navigate to the game’s information and look for a section labeled “Workshop.” If it’s present, you can use the Steam Workshop to mod the game.
If a game doesn’t support the Steam Workshop, the other option you have is to use Nexus Mods. However, it’s important to be cautious when using this website as some mods may contain corrupted files.
Therefore, whenever you download and install a mod from Nexus Mods for your Steam Deck, check it for malware first.
Modding games on the Steam Deck can be a bit tricky but with enough effort, you can find a mod for almost any game. Remember to back up your game before installing any mods and be careful when downloading from websites like Nexus Mods.
If you’re on the hunt for the most exciting games to play on the Steam Deck, our curated list of titles is a must-see.
How to Install Mods through Steam Workshop?
In this section, we’ll provide a step-by-step guide on how to install mods through the Steam Workshop.
Step 1: Browsing the Steam Workshop
The Steam Workshop is a platform that allows users to access and subscribe to various modifications, or “mods,” created by the community for a particular game.
These mods can include new ships, alternate models of headquarters, or even translations of the game. This allows players to customize their gaming experience and add new content to the game.
Step 2: Subscribing to Mods
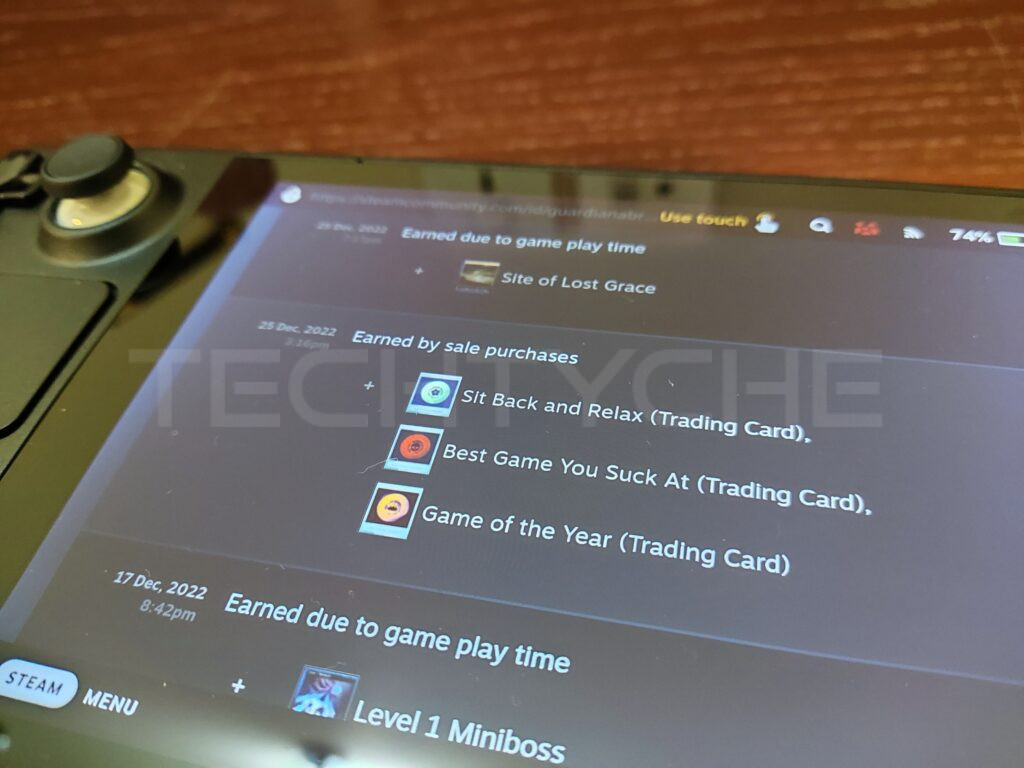
To subscribe to a mod, players simply need to browse through the Workshop, find a mod that interests them, and click the green “Subscribe” button.
Once you’re subscribed, the mod will automatically download when the player starts the game launcher. The game launcher will check to see if the mod needs to be downloaded or updated, and if so, will instruct the Steam Client to begin the download.
After the download is complete, the game launcher will automatically copy the mod into the local game folder, usually located in the InstallationFolder\Mods directory. Players can then access the mod in the game launcher’s “Mods” window.
Step 3: Activating the Mod
When activating a mod, you’ll need to open the game launcher’s “Mods” window and check the box next to the mod’s name.
This will make the mod available for use by the game. The load order of the mods is also displayed in this window, which is important if multiple mods are changing the same game item.
For example, if two mods are changing the model of the same ship (same key name in the database), the mod with the higher order number (2 is higher than 1) will be the one actually used by the game.
If something is not showing up in the game in the way the player expected, it’s always a good idea to see if the active mods are truly compatible with each other.
If you’re struggling with a specific game or feature on the Steam Deck, our troubleshooting guide can help you find a solution.
Frequently Asked Questions (FAQs)
Does Steam workshop work on Steam Deck?
Yes. Steam Workshop does indeed work on the Steam Deck.
All you have to do is access Steam Store on your Steam Deck and navigate to the Steam Workshop tab.
How long can I play on the Steam Deck?
It depends on several factors such as:
- How demanding the game is
- How many programs you have running in the background
- Your Steam Deck’s specifications
And a whole lot more.
In any case, the Steam Deck can provide between 2 to 8 hours on a full charge depending on what you’re using it for.
Is my Steam Deck upgradeable?
Yes. Certain components of the Steam Deck are indeed upgradeable.
For example, you can add or remove an internal SSD which will provide you with a whole lot more space.
Wrapping Things Up…
In conclusion, the Steam Workshop is a great tool for gamers who want to add new content to their game and customize their gaming experience.
It allows players to easily browse, subscribe and download mods created by the community.
If you have any questions regarding how to run Steam Workshop on the Steam Deck, please feel free to reach out in the comments section below.
Don’t forget to check out our latest insights and reviews on the latest products with FAQs, Tips, and more.
Author
-

Victor is the Editor in Chief at Techtyche. He tests the performance and quality of new VR boxes, headsets, pedals, etc. He got promoted to the Senior Game Tester position in 2021. His past experience makes him very qualified to review gadgets, speakers, VR, games, Xbox, laptops, and more.
Feel free to check out his posts.
View all posts