Szép jó napot mindenkinek segitséget szeretnék kérni egy erösitő javitásában
Van nállam egy Sony F110 erösitő,egyik fele gyengébben,szól a upc1298 ra gyanakszom,a feszültségek a lábain rajz szerint mind rendben vannak,ellenálások értékei is jók.egyik naprol a másikra jött elö ez a hiba.Az összes bemenetelen probáltam
Találkozott már valaki ezzel a fajta hibával?
Üdv András
Sziasztok Mesterek!
3db 5x 2,9 mm ledes 6 lábú smd mikrokapcsolót keresek, ez egy Sony cdx-s2200 autós cd-ben van./előlap/
Vagy előlap is érdekel.
Azt szeretném kérdezni, hogy van-e valakinek bontásból működőképes? Mert akkor vevő lennék rá.
A boltban rendelés alatt/HQ/.Hogy mikor lesz?
Üdv: Proci
:help:
Kedves szervizes kollégák!
Elakadtam egy Sony STR-DE475 5.1-es erősítő javításában.
Leírom ,hogy mi is történt ,mert tudom ,hogy én rontottam el de ,viszont szeretném megjavítani mert nagyon a szívemhez nőtt mert nagyon szépen szól.
Először is olyat produkált ,hogy 5.1 hallgatása esetén a hang össze vissza szólt ,hol halkan ,hol hangosan , szét bontottam és a nagy panel ahol a végfokok vannak ott található rajta 2 db UPC2581-es IC ezeknek a lábai illetve a nagy környéke ki volt melegedve és mindent átforrasztottam és úgy gondoltam ,hogy teszek bele hűtést ,hogy megoldjam ezt a problémát. Ezt meg is csináltam és tettem bele egy 8cm -es 12V os ventilátort. Rákötöttem a 12V-os kimenetre nem is volt vele gond ,hazavittem 1 filmet meg is néztem vele és tökéletes volt ,csak az zavart ,hogy nagyon hallani lehetett a venti hangját . Na itt rontottam el mert úgy gondoltam ,hogy átkötöm a 12v helyett elég lesz neki 5V- is . Rákötöttem az 5V-os kimenetre és innentől a mostani hiba lépett fel. Most be indul és kb 5 másodperc múlva el kezd kattogni a relé illetve a kijelzőn megjelent a «PROTECT» felirat és kifagy vagy letilt. Méregettem és hibásnak találtam a 7812 a lapon kicseréltem és utána a hiba még mindig adott csak annyi előrelépés van ,hogy a csatolt képen bekarikáztam a R736-os 1kohm-os ellenállás el kezdett füstölni és nem tudom ,hogy mi okozhatja ezt. Ebben szeretnék tanácsot illetve segítséget kérni tőletek. Minden hozzászólást szívesen fogadok.Előre is köszönöm mindenkinek aki tud nekem segíteni.
Sziasztok!
Vettem egy Sony TC-FX210 magnót, ami szépen működik azt leszámítva, hogy a felvétel indításakor (szünet feloldásakor pontosabban) a bal oldalon -4, jobb oldalon -2 dB-ig folyamatosan világítani kezd a kivezérlésjelző. Mármint nem a zene hatására, hanem akkor is, ha még nem indult el a felvételi forrás, vagy letekerem a potmétert. Szalagtípustól függően ráadásul: a jobb oldal krómon már 0-ig, metálon +3-ig kitér! Így már egyáltalán nem is lehetne beállítani a helyes szintet..
Először azt hittem, valami gerjedés: javítottam már pár decket, amiben mechanikus átkapcsoló volt a felvételhez, és annak a kontakthibája produkált ilyen jelenséget (kimeneten hallható pattogással vagy sípolással egybekötve). De ebben nincs felvételi tolókapcsoló, elektronikusan vált üzemmódot. Sem a vonal kimeneten monitorozva, sem a fejhallgatóban nem jelenik meg semmi zaj a felvétel indításakor, sőt ha leszünetelve beállítom a kivezérlést (ekkor még normálisan jelez!), majd elindítom, egy kevés — gyanúsan fejkopásból eredő — magasveszteséget leszámítva tökéletes felvételt készít, semmi torzítás vagy gerjedés nincs!
Következő ötletem (a szalagtípus-függő szintből kiindulva): mi van, ha kijut az előmágnesező jel a kimenetre? Az nyilván nem hallható, mert nagyfrekvenciás, attól függetlenül az erősítőt még terheli, tehát nem túl egészséges jelenség. Viszont: kipróbáltam, hogy más deckek bemenetére rákötöttem ezt a Sony-t, és figyeltem a kijelzők együttfutását. Lejátszás közben szépen egymáshoz állítottam őket, de felvételkor már csak a Sony kijelzőjén ugrott meg a szint, a másikon nem történt semmi rendellenes. Aztán ütközésig feltekerve sem jeleztek semmit. És ez 3-4 készüléken ugyanúgy! Ezek után kicsit érthetetlen számomra, hogy a fejhallgató kimenetről meghajtott kivezérlésjelző hogyan tud hibázni…
A készüléket a napokban vásároltam, előélete ismeretlen. Hibásan vettem, hiányoztak róla a szíjak, amit persze már pótoltam. Megbontva látszólag nem volt még, nem hiányzik belőle semmi, és a fenti hibán kívül más rendellenességet nem vettem észre a működésében. A szervizkönyvet külföldi oldalról beszereztem, és feltöltöttem ide is.
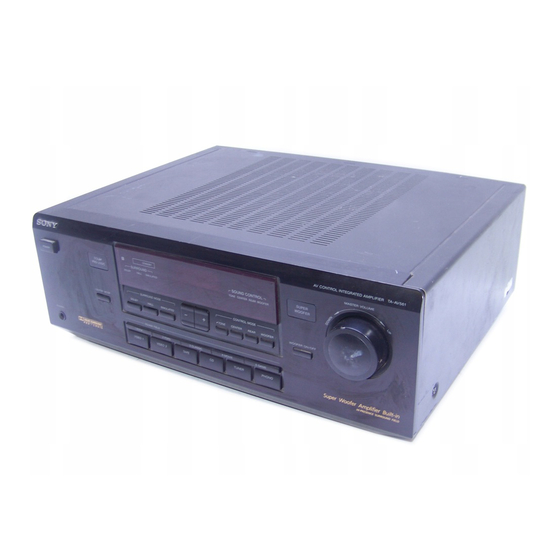
Руководства Sony TA-AV590 Размер файлов: 6044 KB, Язык: English, Формат: pdf, Платформа: Windows/Linux, Дата: 2014-11-11
На данной странице вы можете скачать руководства Sony TA-AV590. Мы предлагаем вам ознакомиться с руководством пользователя, инструкцией по сервисному обслуживанию и ремонту.
Также здесь вы найдете список заказных номеров на комплектующие Sony TA-AV590.
Все файлы предоставляются исключительно в ознакомительных целях. И не являютя руководством по ремонту, а направлены лишь на то чтобы помочь вам более детально ознакомиться с принципом построения устройства.
Содержимое представленных здесь руководств требуют от вас знания технического английского языка.
Если вы собираетесь скачать руководство по сервисному обслуживанию Sony TA-AV590, иными словами сервис мануал, вы дожны обладать хотя бы минимальными познаниями в области электроники и пониманием базовых принципов работы электромеханических устройств.
Для просмотра руководств вам понадобится Adobe Acrobat Reader версии 9 и выше либо другая программа для просмотра pdf файлов.
В связи с популярностью информации представленной на сайте и ее бесплатного предоставления конечному пользователю, убедительная просьба использовать специальные программные продукты для многопотокового скачивания файлов.
Руководства для Sony TA-AV590
- Руководство пользователя (User manual)
- Руководство по сервисному обслуживанию (Service manual)
- Руководство по ремонту (Repair manual)
- Перечень комплектующих (PartList)
![]()
SONY TA-AV590 SM

Type:  (PDF)
(PDF)
Size
6.5 MB
Page
27
Category
AUDIO
SERVICE MANUAL
If you get stuck in repairing a defective appliance
download
this repair information for help. See below.
Good luck to the repair!
Please do not offer the downloaded file for sell only
use it for personal usage!
Looking for similar sony manual?
Document preview [1st page]

Click on the link for free download!
Document preview [2nd page]

Click on the link for free download!
Please tick the box below to get download link:
- Also known:
SONY TAAV-590 TAAV590 TAAV 590 TA AV590 TA-AV590
- If you have any question about repairing write your question to the Message board. For this no need registration.
- If the site has helped you and you also want to help others, please Upload a manual, circuit diagram or eeprom that is not yet available on the site.
Have a nice Day! - Please take a look at the below related repair forum topics. May be help you to repair.
Warning!
If you are not familiar with electronics, do not attempt to repair!
You could suffer a fatal electrical shock! Instead, contact your nearest service center!
Note! To open downloaded files you need acrobat reader or similar pdf reader program. In addition,
some files are archived,
so you need WinZip or WinRar to open that files. Also some files are djvu so you need djvu viewer to open them.
These free programs can be found on this page: needed progs
If you use opera you have to disable opera turbo function to download file!
If you cannot download this file, try it with CHROME or FIREFOX browser.
Relevant AUDIO forum topics:
Üdvözlet Mindenkinek.
A CD lejátszó hibás KSM-213 D lézer fejét lecseréltem bontott KSM-213 B fejre.A lejátszás elindul, de akadozik, másodpercekre kihagy.
A készüléket bármelyik irányban elbillentve megszűnik a hiba.Átmozgattam az összes kábelt, vezetéket, NYÁK lemezt, semmire nem érzékeny, de vízszintes helyzetben nem hajlandó rendesen működni. Leemeltem a dobozról a CD egységet, és óvatosan forgattam a levegőben, vízszintesen jött a hiba, előre,hátra, oldalra billenve hibátlanul működik. A lézer fejre gyanakszom. Tapasztalt valaki hasonló hibát?
Sziasztok!
Van egy sony F770ES erositom ami az utobbi idoben nem szol rendessen. A jobb oldala az esetek 80%ban nagyon picit hangosabban szol mint a bal oldala. Szinte bekapcsolas fuggo, minden sokadik alkalommal egyforman szolal meg. Madj x ido utan elkezd a jobb oldal nem normalissan szolni. Van amikor csak akkor nem szol rendessen (vagy elhalkul a jobb oldala teljessen egy idore) ha pl a szam elejen vagy vegen fel,-lekeveresnel mar halkan szol a zene. Amint felhangosodik a zene mar szol megint rendessen. Neha viszont x ido utan elkezd barmely hangeron «krepegni». Probaltam masik kabelt masik bemenetet masik forrast. A hangfalakat is felcsereltem az allando picit hangosabban szolas miatt. Minden alkalommal ugyanaz a helyzet. Nagyon nem ertek az elektronikahoz de muszaki ember leven szetszedtem es a csatorna valasztora gyanakodva befujtam kontakt tisztitoval de azon kivul, hogy most gyorsabban valt csatornat nem valtozott semmi. (A motor neha tevelygett a tisztitas elott, tulment majd vissza mire megtalalta a helyes poziciot). A hangero potmeterre nem gyanakszom mert nem valtozik semmi hiaba tekergetem. Ami toretent nem regen es befolyassal lehet a hibara az, hogy a kisfiam kikapcsolt allapotban felhangositotta az erositot teljessen es ugy hagyta. Persze en nem ellenoriztem hisz nem gondoltam (mert en mindig nullara tekerem) igy a szoba masik vegeben voltam mikor uvoltve megszolalt a rockzene ami persze egybol belecsapott es igy elegge nagyot kaphatott az erosito mire le tudtam tekerni. A hibat ezek utan kezdte produkalni. Itt van ketto hangfile a hibarol. Van valakinek otlete mi lehet a baj?
Koszonom elore is a segitseget.
Balazs
Hello,
Sony TA-F317R erősítőben a végfok tranzisztorok és a meghajtó IC megadták magukat. IC szállítás alatt, viszont tranzisztorokat elfogadható áron nem tudtam beszerezni, így a helyettesítés maradt.
Eredetileg 2SC3853 (NPN) és 2SA1489 (PNP) komplementer párok vannak benne. Itthon a 2SC2581 és 2SA1106 párost találtam, ami nagyobb áramot bír és elég hasonlóak a paramétereik és szintén komplementer párok.
A neten BD245 és 246 helyettesítést ajánlanak, de ezek paraméterei eléggé eltérnek az eredetitől.
Kérdésem, a fenti 2SC2581 és 2SA1106 páros megfelelne-e v. simán használjak BD 245-246-ot, nem okozna gondot és nem kell a munkaponton állítani? Szükséges-e a másik (jó) végfokban is cserélni a tranzisztorokat (hogy szimmetrikus maradjon)?
Köszönöm.
Üdv
DR
Üdvözlet Mindenkinek!
SONY gépbe keresek KSM-215DCP/C2NP típusú
lézeregységet.A SINI-nél van, de nagyon drága./23 e./Nagyon megköszönném, ha tudna valaki más, elfogadhatóbb áron kereskedő beszerzési forrást ajánlani.
irokéz
Similar manuals:
If you want to join us and get
repairing help
please sign in or sign up by completing a simple electrical test
or write your question to the Message board without registration.
You can write in English language into the forum (not only in Hungarian)!
E-Waste Reduce

249 ₽
Инструкция (руководство пользователя) на Интегрированный усилитель AV SONY TA-AV590
Артикул: sony-ta-av590
Категория: SONY
-
Описание
-
Детали
Описание
Инструкцию по эксплуатации SONY TA-AV590 на русском языке можно будет скачать в личном кабинете после оформления и оплаты заказа.
Детали
| Формат файла |
|
|---|---|
| Размер инструкции в кб |
1446 |
-
Contents
-
Table of Contents
-
Troubleshooting
-
Bookmarks
Quick Links
Integrated AV
Amplifier
Operating instructions
Mode d’emploi
Manual de Instrucciones
•Read this book first
•Lire d’abord ce manuel
•Lea en primer lugar este libro
TA-AV561A
© 1997 by Sony Corporation
3-860-643-11(1)
Getting Started
EN
F
E
1
EN
Related Manuals for Sony TA-AV561A
Summary of Contents for Sony TA-AV561A
-
Page 1
Integrated AV Amplifier Operating instructions Mode d’emploi Manual de Instrucciones •Read this book first •Lire d’abord ce manuel •Lea en primer lugar este libro TA-AV561A © 1997 by Sony Corporation 3-860-643-11(1) Getting Started… -
Page 2
Do not use any type of abrasive pad, scouring powder or solvent such as alcohol or benzine. If you have any question or problem concerning your amplifier, please consult your nearest Sony dealer. -
Page 3: Table Of Contents
About This Manual Conventions • The instructions in this manual describe the controls on the amplifier. You can also use the controls on the remote if they have the same or similar names as those on the amplifier. • A “Quick Reference Guide” is supplied on page 20.
-
Page 4: Getting Started
Getting Started Unpacking Check that you received the following items with the amplifier: • Remote controller (remote) (1) • Size AA (R6) batteries (2) Inserting batteries into the remote Insert two size AA (R6) batteries in accordance with the + and – marking on the battery compartment. When using the remote, point it at the remote sensor g on the amplifier.
-
Page 5: Audio/Video Component Hookups
Audio/Video Component Hookups Overview This section describes how to connect your audio and video (audio signal only) components to the amplifier, so you can listen to stereo sources in surround sound. For specific locations of the jacks, see the illustration below.
-
Page 6: Speaker System Hookups
Getting Started Amplifier VIDEO 1 AUDIO OUT AUDIO IN LD Player/TV game Amplifier VIDEO 2 AUDIO IN Where do I go next? Go on to the next section to connect the speakers. Speaker System Hookups OUTPUT INPUT AUDIO AUDIO Overview This section describes how to connect your speakers to the amplifier.
-
Page 7: Ac Hookups
Hookups Front speakers Front speaker Amplifier CENTER SPEAKER FRONT WOOFER SPEAKERS SPEAKER Rear and centre speakers Amplifier REAR Rear Centre SPEAKERS speaker speaker CENTER SPEAKER FRONT WOOFER SPEAKERS SPEAKER Superwoofer Amplifier Superwoofer WOOFER SPEAKER Where do I go next? Go on to the next section to connect the mains lead and complete your home theatre system.
-
Page 8: Amplifier Operations
When you listen with headphones Connect the headphones to the PHONES jack. No sound is heard from your speakers. MASTER VOLUME Using the remote The remote lets you operate the amplifier and the Sony components that are connected to it. FUNCTION (VIDEO1, VIDEO2,…
-
Page 9: Recording
Recording This amplifier makes it easy to record to and from the components connected to the amplifier. You don’t have to connect playback and recording components directly: once you select a programme source on the amplifier, you can record and edit as you normally would using the controls on each component.
-
Page 10: Using Sound Fields
Using Sound Fields Choosing a Surround Mode You can take advantage of surround sound simply by selecting one of the three pre-programmed surround modes according to the type of programme you wish to play. DOLBY PRO LOGIC SURROUND indicator indicator (DOLBY/HALL/SIMULATED) SURROUND MODE (DOLBY/HALL/SIMULATED)
-
Page 11: Getting The Most Out Of Dolby Pro Logic Surround Sound
Getting the Most Out of Dolby Pro Logic Surround Sound To obtain the best possible Dolby Pro Logic Surround sound, first select the centre mode. Then, adjust the volume of each speaker. Note that you must connect the rear speakers and/or a centre speaker to do the following adjustments.
-
Page 12
Using Sound Fields Adjusting the speaker volume The test tone feature lets you set the volume of your speakers to the same level. (If all of your speakers have equal performance, you don’t have to adjust the speaker volume.) Using the controls on the remote lets you adjust the volume level from your listening position. -
Page 13: Using Preset Sound Fields
Using Preset Sound Fields You can take advantage of sound fields simply by selecting one of the five pre-programmed ones according to the programme you want to play. SOUND FIELD Press one of the SOUND FIELD buttons so that the sound field you wish to use is displayed. Select the appropriate sound field as follows: To reproduce Press…
-
Page 14: Additional Information
Should any problem persist, consult your nearest Sony dealer. There’s no sound or only a very low-level sound is heard. / Check that the speakers and components are connected securely.
-
Page 15: Specifications
Specifications Amplifier section Power output Australian model: (FRONT) DIN power output 80 W + 80 W (at rear/ centre/woofer off at 1 kHz, 8 ohms) Continuous RMS power output 110 W + 110 W (at rear/ centre/woofer off at 1 kHz, 10% T.H.D., 8 ohms) Music power output 160 W + 160 W (at rear/…
-
Page 16: Glossary
Additional Information Glossary Centre mode Setting of speakers to enhance Dolby Pro Logic Surround mode. To obtain the best possible surround sound, select one of the following four centre modes according to your speaker system. • NORMAL mode Select NORMAL mode if you have front and rear speakers and a small centre speaker.
-
Page 17: Index
Quick reference guide 20 Rear panel 5, 6, 7, 18 Recording on a tape or video tape 9 Remote 8, 10, 11, 13, 19 controlling Sony components 8 Selecting a programme source using the remote 8 Sound field preset 13…
-
Page 18: Rear Panel Descriptions
Rear Panel Descriptions !¢ !£ 1 y ground terminal 2 REAR SPEAKERS 3 SWITCHED AC OUTLET 4 Mains lead 5 VOLTAGE SELECTOR (except for Europe and UK) !™ !¡ 6 WOOFER SPEAKER 7 CENTER SPEAKER 8 FRONT SPEAKERS 9 VIDEO 1 0 VIDEO 2 !¡…
-
Page 19: Remote Button Descriptions
Remote Button Descriptions Remote Button Descriptions For buttons not described on previous pages and buttons with names different from the buttons on the main unit. Remote Operates Function Button CD player 1-10 Selects track or disc numbers. >10 CD player Selects track numbers over 10.* CD player…
-
Page 20: Quick Reference Guide
Quick Reference Guide Selecting a Component Example: Playing a CD Turn on the CD player. Start playing. Choosing a Surround Mode Example: Listening to classic music on a CD HALL Turn on the CD player. Start playing. Using Preset Sound Fields Example: Listening to classic music on a CD…
-
Page 22
N’utilisez pas de tampon abrasif, poudre à récurer ou solvant, comme de l’alcool ou de la benzine. En cas de question ou de problème concernant l’amplificateur, consultez le revendeur Sony le plus proche. -
Page 23
Au sujet de ce manuel Conventions • Ce mode d’emploi décrit le fonctionnement avec les commandes de l’amplificateur. Vous pouvez également utiliser les commandes de la télécommande qui ont un nom identique ou similaire à celles de l’amplificateur. • Vous trouverez un “Guide de référence rapide”… -
Page 24: Préparatifs
Préparatifs Déballage Vérifiez que tous les articles suivants sont fournis avec l’amplificateur. • Télécommande (1) • Piles de format AA (R6) (2) Mise en place des piles dans la télécommande Insérez deux piles de format AA (R6) en faisant correspondre les bornes + et – avec le schéma dans le logement.
-
Page 25: Raccordement De Composants Audio/Vidéo
Raccordement de composants audio/vidéo Aperçu Ce paragraphe vous explique comment raccorder des composants audio et vidéo (son seulement) à l’amplificateur pour pouvoir écouter des sources stéréo en surround. L’illustration ci-dessous indique l’emplacement des prises. PHONO CD VIDEO 2 TUNER TAPE VIDEO 1 De quels cordons avez-vous besoin? Cordons audio (1 pour un lecteur CD, tuner, tourne-disque,…
-
Page 26: Raccordement D’enceintes
Préparatifs Magnétoscope Amplificateur VIDEO 1 AUDIO OUT AUDIO IN Lecteur LD/Console de jeu vidéo Amplificateur VIDEO 2 AUDIO IN Que faire ensuite? Passez au paragraphe suivant pour le raccordement des enceintes. Raccordement d’enceintes Magnétoscope OUTPUT INPUT AUDIO AUDIO Aperçu Ce paragraphe explique comment raccorder des enceintes à…
-
Page 27: Raccordement Au Courant Secteur
Raccordements Enceintes avant Enceinte avant (droite) Amplificateur CENTER SPEAKER FRONT WOOFER SPEAKERS SPEAKER Enceintes centrale et arrière Amplificateur REAR SPEAKERS Enceinte arrière Enceinte (droite) centrale CENTER SPEAKER FRONT WOOFER SPEAKERS SPEAKER Caisson de grave Amplificateur Caisson de grave WOOFER SPEAKER Que faire ensuite? Passez au paragraphe suivant pour raccorder l’amplificateur au courant secteur et ainsi terminer l’installation de votre…
-
Page 28: Fonctionnement De L’amplificateur
Branchez le casque sur la prise PHONES. Aucun son n’est fourni par les enceintes. MASTER VOLUME Utilisation de la télécommande La télécommande vous permet de contrôler l’amplificateur et les composants Sony raccordés. FUNCTION (VIDEO 1, VIDEO 2, TAPE, CD, TUNER) Appuyez sur SYSTEM POWER pour mettre l’amplificateur sous tension quand le témoin…
-
Page 29: Enregistrement
Enregistrement Vous pouvez réaliser facilement des enregistrements entre les différents composants raccordés à l’amplificateur. Il n’est pas nécessaire de raccorder directement les composants de lecture et d’enregistrement, car une fois que vous avez sélectionné la source de programme sur l’amplificateur, vous pouvez procéder à l’enregistrement ou au montage comme si vous utilisiez les commandes de chaque composant.
-
Page 30: Utilisation De Champs Sonores
Utilisation de champs sonores Utilisation de champs sonores Sélection d’un mode surround Vous pouvez bénéficier du son surround simplement en sélectionnant un des trois modes présélectionnés en fonction du type de programme que vous souhaitez écouter. Indicateur DOLBY PRO Indicateur SURROUND LOGIC (DOLBY/HALL/SIMULATED) SURROUND MODE…
-
Page 31: Pour Mieux Profiter Du Son Dolby Pro Logic Surround
Pour mieux profiter du son Dolby Pro Logic Surround Afin d’obtenir le meilleur son Dolby Pro Logic Surround possible, sélectionnez d’abord le mode de canal central. Ensuite, réglez le volume de chaque enceinte. Vous devez raccorder des enceintes arrière et/ou une enceinte centrale pour pouvoir faire les réglages suivants.
-
Page 32
Utilisation de champs sonores Réglage du volume des enceintes La tonalité d’essai permet de régler le volume de toutes les enceintes sur le même niveau. (Si toutes les enceintes ont la même puissance, il n’est pas nécessaire de régler le volume.) Utilisez la télécommande pour régler le volume depuis votre position d’écoute. -
Page 33: Utilisation Des Champs Sonores Préréglés
Utilisation des champs sonores préréglés Vous pouvez sélectionner un des cinq champs sonores préréglés en fonction du programme que vous voulez écouter. SOUND FIELD Appuyez sur une des touches SOUND FIELD jusqu’à ce que le champ sonore souhaité soit affiché. Sélectionnez le champ sonore approprié…
-
Page 34: Informations Supplémentaires
Si vous rencontrez des difficultés lors de l’utilisation de l’amplificateur, consultez ce guide de dépannage pour essayer de résoudre le problème. Toutefois, si le problème persiste, consultez un revendeur Sony. Pas de son ou son extrêmement faible. / Vérifiez si les enceintes et les composants sont correctement raccordés.
-
Page 35: Spécifications
Spécifications Section amplificateur Puissance de sortie Modèles pour l’Australie: (FRONT) Puissance de sortie DIN 80 W + 80 W (avec arrière/ centre/grave hors service à 1 kHz, 8 ohms) Puissance de sortie continue RMS 110 W + 110 W (avec arrière/centre/grave hors service à…
-
Page 36: Glossaire
Informations supplémentaires Glossaire Mode de canal central Ce réglage des enceintes améliore le mode Dolby Pro Logic Surround. Pour obtenir le meilleur effet surround possible, choisissez un des quatres modes suivants selon la configuration des enceintes. • Mode NORMAL Choisissez le mode NORMAL si vous utilisez des enceintes avant et arrière avec une petite enceinte centrale.
-
Page 37: Index
Son surround Dolby 10,16 mode de canal central 11,16 Stations préréglées 17 Télécommande 8, 10, 11, 13, 19 commande d’appareils Sony 8 Temps de retard 12, 16 Tonalité d’essai 12, 16 U, V, W, X, Y, Z Utilisation de l’extrême…
-
Page 38: Description Du Panneau Arrière
Description du panneau arrière !¢ !£ 1 Borne de masse y 2 REAR SPEAKERS (enceintes arrière) 3 SWITCHED AC OUTLET (prise secteur commutée) 4 Cordon d’alimentation secteur !™ !¡ 5 Sélecteur de tension (sauf modèles pour l’Europe et le Royaume-Uni) 6 WOOFER SPEAKER (grave) 7 CENTER SPEAKER (centre) 8 FRONT SPEAKERS (avant)
-
Page 39: Description Des Touches De La Télécommande
Description des touches de la télécommande Description des touches de la télécommande Commandes qui ne sont pas expliquées auparavant et dont les noms ne correspondent pas à ceux des commandes de l’amplificateur. Commande Contrôle Fonction 1-10 Le lecteur CD Sélection des numéros de plage ou disques.
-
Page 40: Guide De Référence Rapide
Guide de référence rapide Sélection d’un composant Exemple: Lecture d’un CD Allumez le lecteur CD. Commencez la lecture. Sélection d’un mode surround Exemple: Ecoute d’un disque de musique classique HALL Allumez le lecteur CD. Commencez la lecture. Utilisation des champs sonores préréglés Exemple: Ecoute d’un disque de musique…
-
Page 42
— Para el CDP-CX571/ST-JX661/ TC-WR661 — El enchufe del cable de alimentación del CDP-CX571/ST-JX661/TC-WR661 es de tipo con dos contactos, diseñado para conectarse solamente al TA-AV561A. No conecte este enchufe en ningún otro sistema ni tomacorriente de la red. Precauciones Seguridad •… -
Page 43
Descripción de este manual Convencionalismos • En este manual de instrucciones se describen los controles del amplificador. Usted también podrá utilizar los controles del telemando si poseen nombres iguales o similares a los del amplificador. • En la contraportada se ofrece la “Guía de referencia rápida”. -
Page 44: Preparativos
Preparativos Desembalaje Compruebe si ha recibido los accesorios siguientes con el amplificador: • Telemando (1) • Pilas de tamaño AA (R6) (2) Colocación de las pilas en el telemando Inserte dos pilas de tamaño AA (R6) de acuerdo con las marcas + y –…
-
Page 45: Conexión De Componentes De Audio/Vídeo
Conexión de componentes de audio/vídeo Descripción general En esta sección se describe cómo conectar sus componentes de audio y de vídeo (señales de audio solamente) al amplificador, a fin de poder escuchar fuentes estéreo con sonido perimétrico. Con respecto a la ubicación específica de los terminales, consulte la ilustración siguiente.
-
Page 46: Conexión De Sistemas De Altavoces
Preparativos Videograbadora Amplificador VIDEO 1 AUDIO OUT AUDIO IN Reproductor de discos láser/ Juegos de televisión Reproductor de discos láser Amplificador VIDEO 2 AUDIO IN ¿Qué hacer a continuación? Vaya a la sección siguiente para conectar los altavoces. Conexión de sistemas de Videograbadora altavoces OUTPUT…
-
Page 47: Conexión De Ca
Conexiones Altavoces delanteros Altavoz delantero Amplificador (derecho) CENTER SPEAKER FRONT WOOFER SPEAKERS SPEAKER Altavoces traseros y central Amplificador Altavoz REAR SPEAKERS trasero Altavoz (derecho) central CENTER SPEAKER FRONT WOOFER SPEAKERS SPEAKER Altavoz de supergraves Amplificador Altavoz de supergraves WOOFER SPEAKER ¿Qué…
-
Page 48: Operaciones Del Amplificador
Conecte los auriculares a la toma PHONES. No se oirá sonido a través de los altavoces. MASTER VOLUME Utilización del telemando El telemando le permitirá controlar el amplificador los componentes Sony a él conectados. FUNCTION (VIDEO 1, VIDEO 2, TAPE, CD,…
-
Page 49: Grabación
Grabación Este amplificador facilita la grabación en y desde los componentes conectados al mismo. Usted no tendrá que conectar directamente componentes de reproducción y grabación: una vez seleccionada una fuente de programas en el amplificador, podrá grabar y editar como lo haría normalmente utilizando los controles de cada componente.
-
Page 50: Utilización De Campos Acústicos
Utilización de campos acústicos Elección de un modo perimétrico Usted podrá aprovechar las ventajas del sonido perimétrico seleccionando simplemente uno de los tres modos perimétricos programados de acuerdo con el tipo de programa que desee reproducir. Indicador SURROUND Indicador DOLBY (DOLBY/HALL/SIMULATED) PRO LOGIC SURROUND MODE…
-
Page 51: Disfrute Al Máximo De Sonido Dolby Pro Logic Surround
Disfrute al máximo de sonido Dolby Pro Logic Surround Para obtener el mejor sonido Dolby Pro Logic Surround posible, seleccione en primer lugar el modo central. Después ajuste el volumen de cada altavoz. Tenga en cuenta que, para realizar los ajustes siguientes, deberá…
-
Page 52
Utilización de campos acústicos Ajuste del volumen de los altavoces La función de tono de prueba le permitirá ajustar el volumen de sus altavoces al mismo nivel. (Si todos los altavoces poseen las mismas características, no necesitará ajustar su volumen.) La utilización de los controles del telemando le permitirá… -
Page 53: Utilización De Los Campos Acústicos Programados
Utilización de los campos acústicos programados Usted podrá aprovechar las ventajas de los campos acústicos seleccionando simplemente uno de los programados de acuerdo con el programa que desee reproducir. SOUND FIELD Presione una de las teclas SOUND FIELD de forma que se visualice el campo acústico que desee utilizar.
-
Page 54: Información Adicional
Si el problema persiste, consulte a su proveedor Sony más cercano. No hay sonido, o solamente se oye sonido de nivel muy bajo.
-
Page 55: Especificaciones
Especificaciones Sección del amplificador Salida de potencia Modelo para Australia: (FRONT) Salida de potencia DIN 80 W + 80 W (altavoces traseros/central/de graves desconectados, 1 kHz, 8 ohmios) Salida de potencia eficaz continua 110 W + 110 W (altavoces traseros/central/de graves desconectados, 1 kHz, distorsión armónica total del 10%,…
-
Page 56
Información adicional • Modo PHANTOM Seleccione el modo PHANTOM si posee altavoces delanteros y traseros, pero carece de altavoz central. El sonido del canal central saldrá a través de los altavoces delanteros. Altavoz Altavoz delantero delantero derecho izquierdo Altavoz trasero Altavoz trasero izquierdo derecho… -
Page 57: Índice Alfabético
Sonido Dolby Surround 10, 16 modo central 11, 16 Sonido perimétrico 10, 16 T, U, V, W, X, Y, Z Telemando 8, 10, 11, 13, 19 control de componentes Sony Tiempo de retardo 12, 16 Tono de prueba 12, 16 Nombres de los controles…
-
Page 58: Descripción Del Panel Posterior
Descripción del panel posterior !¢ !£ 1 Terminal de puesta a tierra (y) 2 Tomas para altavoces traseros (REAR SPEAKERS) 3 Tomacorrientes de CA conmutables (SWITCHED AC OUTLET) 4 Cable de alimentación de CA 5 Selector de tensión (VOLTAGE SELECTOR) (excepto para Europa y el Reino Unido) !™…
-
Page 59: Descripción De Las Teclas Del Telemando
Descripción de las teclas del telemando Descripción de las teclas del telemando Para las teclas no descritas en las páginas anteriores, y para las que tienen nombres diferentes a los de las teclas de la unidad principal. Tecla del Función Controla telemando Reproductor de…
-
Page 60: Guía De Referencia Rápida (Contraportada)
Selección de un componente Ejemplo: Reproducción de un disco compacto Conecte la alimentación del reproductor de discos compactos. Inicie la reproducción. Sony Corporation Printed in Malaysia Elección de un modo perimétrico Ejemplo: Escucha de música clásica de un disco compacto HALL Conecte la alimentación del…