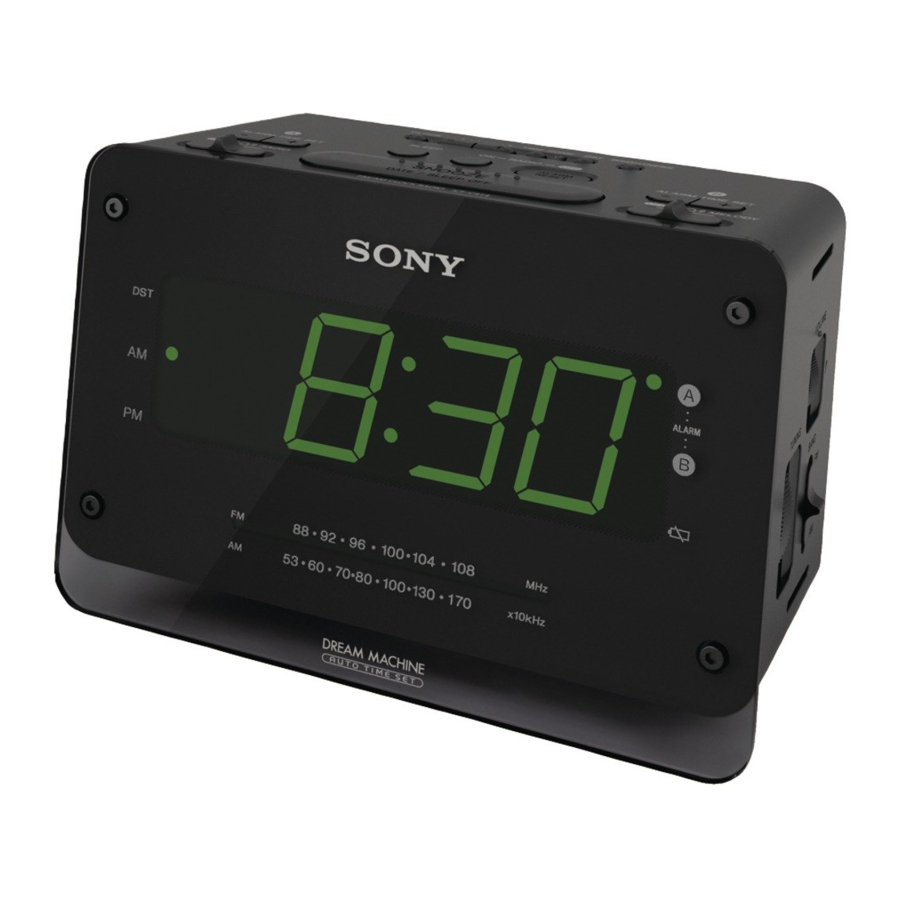
Радиочасы Sony ICFC414

ВАЖНАЯ ИНСТРУКЦИЯ
ПРЕДУПРЕЖДЕНИЕ
- Чтобы снизить риск возгорания или поражения электрическим током, не подвергайте устройство воздействию дождя или влаги.
- Во избежание возгорания не закрывайте вентиляционные отверстия аппарата газетами, скатертями, шторами и т. Д. И не ставьте на аппарат зажженные свечи.
- Чтобы снизить риск возгорания или поражения электрическим током, не подвергайте это устройство воздействию капель или брызг, а также не ставьте на него предметы, наполненные жидкостью, например вазы.
- Не устанавливайте прибор в ограниченном пространстве, например в книжном шкафу или встроенном шкафу.
- Не подвергайте батареи (батарейный блок или установленные батареи) чрезмерному нагреванию, например, солнечному свету, огню и т.п., в течение длительного времени.
- Поскольку сетевой штекер используется для отключения устройства от сети, подключайте его к легкодоступной розетке переменного тока. Если вы заметили неисправность в устройстве, немедленно отключите сетевую вилку от розетки переменного тока.
ВНИМАНИЕ!
При неправильной замене батареи существует опасность взрыва. Заменяйте только на такой же или аналогичный.
ОБЪЯВЛЕНИЕ

Особенности
- Большой, хорошо заметный зеленый светодиод размером 1.4 дюйма.
- Двойной будильник FM/AM Часы-радио.
- Различные типы будильников — зуммер, радио и мелодия.
- Автоматическая установка времени — при первом включении часов на дисплей будет отображаться текущее время.
- Автоматический переход на летнее/летнее время.
- Кнопка даты для отображения месяца, дня и года.
- Регулятор яркости (высокий/средний/низкий).
- Система будильника No Power No Problem™ для поддержания работы часов и будильника при отключении питания с установленной батареей CR2032.
- Расширяемый повтор — время повтора можно увеличить с 10 до 60 минут.
- Скорость прогрессивного сигнала тревоги (только зуммер).
О резервной батарее
Чтобы сохранить хорошее время, в качестве резервного источника питания, это устройство имеет одну батарею CR2032 внутри устройства в дополнение к домашнему току. Батарея обеспечивает работу часов и будильника в случае отключения электроэнергии.
Примечание для клиентов в Канаде
Часы настроены на заводе, а их память питается от предустановленной батарейки Sony CR2032. Если на дисплее появляется «AM 12:00», когда устройство подключается к розетке переменного тока в первый раз, возможно, батарея разряжена. В этом случае обратитесь к дилеру Sony. Предустановленная батарея CR2032 считается частью продукта и на нее распространяется гарантия. Вам необходимо предъявить «Примечание для покупателей в Канаде» (в этой инструкции) дилеру Sony, чтобы подтвердить гарантию на этот продукт.
Когда нужно заменить аккумулятор
Когда батарея разряжается, на дисплее появляется индикатор. В случае отключения питания при слабом заряде батареи текущее время и будильник будут инициализированы. Замените батарею литиевой батареей Sony CR2032. Использование другой батареи может привести к пожару или взрыву.
Установка и замена резервной батареи
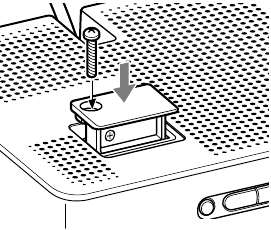
- Держите вилку переменного тока подключенной к розетке переменного тока, выкрутите винт, который крепит батарейный отсек на задней панели устройства с помощью отвертки, и снимите батарейный отсек.
- Вставьте новую батарею в батарейный отсек стороной вверх.
- Чтобы извлечь батарею из батарейного отсека, выдвиньте ее со стороны с надписью PUSH.
- Вставьте батарейный отсек обратно в устройство и закрепите его винтом
- При замене батареи нажмите RADIO ON, чтобы выключить индикатор на дисплее.


Заметки
- При замене батареи не отсоединяйте вилку переменного тока от сетевой розетки.
- В противном случае текущее время и будильник будут инициализированы.
- При установке батареи обязательно соблюдайте полярность.
Установка часов в первый раз
- Это устройство настроено на текущую дату и время на заводе и питается от резервной батареи. Все, что вам нужно сделать, это просто подключить его и выбрать свой часовой пояс.
- Подключите устройство.
- Сначала отображаются месяц и число, затем год, а затем на дисплее появляется текущее восточное стандартное/летнее время. Нажмите ЧАСОВОЙ ПОЯС. На дисплее появится номер зоны «2». Если вы живете в Восточном часовом поясе, вам не нужно настраивать настройку области.

- Несколько раз нажмите кнопку TIME ZONE, пока не появится нужная цифра. Дисплей возвращается к часам примерно через 4 секунды после завершения операции.

Внимание
Во время транспортировки и первого использования может произойти ошибка часов. В этом случае обратитесь к разделу «Установка часов и даты», чтобы установить правильное время.
Когда начинается переход на летнее время (летнее время)
- В данном устройстве используется автоматическая регулировка летнего/летнего времени. Индикатор DST появляется на дисплее в начале перехода на летнее время (летнее время) и исчезает в его конце.
- Переход на летнее время начинается в 2:00 утра второго воскресенья марта.
- Стандартное время начинается в 2:00 утра в первое воскресенье ноября.
Чтобы отменить автоматическую настройку перехода на летнее/летнее время и установить отображение летнего времени вручную
- Автоматическую настройку летнего/летнего времени можно отменить.
- Нажмите и удерживайте DST не менее 3 секунд, пока отображаются часы.
- Раздастся звуковой сигнал, и на дисплее появится сообщение «Aut OFF», показывая, что автоматическая настройка летнего/летнего времени отменена. Дисплей возвращается к часам.
Заметки
- Переход на летнее время зависит от законодательства каждой страны/региона, и в вашем регионе он может не использоваться. В таком случае отмените автоматическую настройку летнего/летнего времени перед использованием устройства и при необходимости установите время вручную.
- Чтобы снова активировать автоматическую настройку перехода на летнее/летнее время, нажмите и удерживайте кнопку DST не менее 3 секунд. Прозвучит звуковой сигнал, и “Aut
- On” появляется на дисплее, показывая, что активирована автоматическая настройка летнего/летнего времени. Дисплей возвращается к часам.
- Чтобы вручную переключить дисплей на летнее время (летнее время), см. раздел «Чтобы перевести дисплей на летнее время (летнее время)».
Установка часов и даты
- Чтобы изменить настройку вручную, выполните процедуру, начиная с шага 1.
- Нажмите ЧАСЫ не менее чем на 2 секунды.
- Вы услышите звуковой сигнал, и на дисплее начнет мигать год.
- Нажимайте + или – до тех пор, пока на дисплее не появится правильный год.
- Нажмите ЧАСЫ.
- Повторите шаги 2 и 3, чтобы установить месяц, день и время.
- После установки времени раздаются два коротких звуковых сигнала, и часы начинают отсчет с 0 секунд.
- Нажатие и удержание + или – быстро изменяет год, месяц или день.
- При установке текущего времени время быстро меняется с шагом в 1 минуту до 10 минут, а затем с шагом в 10 минут.
- При установке часов вы должны выполнить каждый шаг в течение 65 секунд, иначе режим установки часов будет отменен.
Для отображения года и даты
- Нажмите SNOOZE/DATE/SLEEP OFF один раз, чтобы установить дату, и в течение примерно 3 секунд снова нажмите ее, чтобы указать год.
- Дисплей показывает дату или год в течение примерно 3 секунд, а затем возвращается к текущему времени.
- Если подключить вилку переменного тока к розетке переменного тока, когда данное устройство питается от резервного источника питания, текущая дата и время отображаются в следующем порядке (так же, как при включении устройства после сбоя питания). «месяц и число» (около 1 секунды) «год» (около 1 секунды) «текущее время»
Для переключения дисплея на индикацию перехода на летнее время (летнее время)
Измените настройку перехода на летнее время (летнее время) в соответствии со следующими процедурами, если вы отменили автоматическую настройку летнего/летнего времени.
Нажмите летнее время.
На дисплее появится индикатор DST, и индикация времени изменится на летнее время (летнее время). Чтобы деактивировать настройку летнего времени (летнего времени), снова нажмите DST.
Настройка яркости дисплея
При нажатии кнопки BRIGHTNESS доступны три уровня яркости. Воспроизведение радио
- Нажмите RADIO ON, чтобы включить радио.
- Отрегулируйте громкость с помощью VOLUME.
- Выберите ДИАПАЗОН.
- Настройтесь на станцию с помощью TUNING.
- Выключить радио
- Нажмите RADIO OFF/ALARM RESET.
Улучшение приема
FM:
Шнур питания переменного тока работает как FM-антенна. Полностью вытяните шнур питания переменного тока, чтобы повысить чувствительность приема.
AM:
-
- Поверните устройство горизонтально для оптимального приема. В устройство встроена ферритовая AM-антенна.
- Не устанавливайте устройство над стальным столом или металлической поверхностью, так как это может привести к помехам при приеме.


Установка будильника
Функция двойного будильника позволяет установить две программы будильника (ALARM A и ALARM B). Время будильника можно установить для каждой программы, а звук будильника можно выбрать из зуммера, радио или мелодии.
Заметки
- Перед установкой будильника обязательно установите часы (см. «Установка часов и даты»).
- Заводская установка времени будильника: «PM 12:00».
- Чтобы установить будильник радио, сначала настройтесь на станцию и отрегулируйте громкость (см. «Воспроизведение радио»).
Чтобы установить время будильника
- Установите БУДИЛЬНИК A (или B) на желаемый звук будильника ( (зуммер), РАДИО или МЕЛОДИЯ).
- Время будильника отображается на несколько секунд, а затем на дисплее загорается индикатор ALARM A (или B). (Он не появляется, когда переключатель установлен в положение OFF.) Когда вы устанавливаете будильник на МЕЛОДИЯ, будильник звучит мелодия «Весна» из «Времен года» Антонио Лучио Вивальди.
- Нажмите ALARM TIME SET A (или B) + или –, чтобы установить желаемое время.
- Каждое нажатие ALARM TIME SET A (или B) + или – изменяет индикацию на 1 минуту. Если вы нажмете и будете удерживать ALARM TIME SET A (или B) + или –, время будильника переместится вперед (или назад) на 1 минуту до 10 минут, а затем с шагом в 10 минут. Во время установки времени будильника на дисплее мигает индикатор ALARM A (или B). Следующий бывшийample при установке БУДИЛЬНИКА A.

- Когда установка времени будильника завершена, через несколько секунд дисплей возвращается к часам, а индикатор ALARM A (или B) перестает мигать и горит полностью.
- Когда БУДИЛЬНИК A (или B) установлен на , RADIO или MELODY, настройку времени будильника можно изменить с помощью ALARM TIME SET A (или B) + или –. Одно нажатие ALARM TIME SET A (или B) + или – отображает время будильника примерно на 4 секунды. Нажимая ALARM TIME SET A (или B) + или –, когда время будильника отображается на дисплее, время будильника будет изменено.
- Для зуммера звуковой сигнал становится более частым через каждые несколько секунд в трех прогрессивных с.tagх годов.
- Индикатор ALARM A (или B) мигает на дисплее, когда:
- На дисплее появится время будильника.
- Звучит сигнал будильника.
- Функция повтора включена.
- Настройка времени будильника не может быть изменена, если
- БУДИЛЬНИК A (или B) отключен. Если вы нажмете
- УСТАНОВКА ВРЕМЕНИ БУДИЛЬНИКА A (или B) + или –, на дисплее примерно на 0.5 секунды появляется надпись «OFF».
- Если второй будильник звучит во время первого (или активна функция повтора), второй будильник имеет приоритет.
- ЧАСЫ, DST и ЧАСОВОЙ ПОЯС недоступны, пока звучит будильник или когда включена функция повтора.
- Функция будильника работает как обычно в первый и последний день перехода на летнее время (летнее время). В результате, если установлена автоматическая настройка летнего/летнего времени и будильник установлен на время, пропущенное при переходе на летнее время, будильник пропускается; если будильник установлен на время, совпадающее с окончанием летнего времени, будильник прозвучит дважды.
- Если для БУДИЛЬНИКА А и Б установлено одинаковое время будильника, БУДИЛЬНИК А имеет приоритет.
- Чтобы вздремнуть еще несколько минут Нажмите SNOOZE/DATE/SLEEP OFF. Звук будильника останавливается, но автоматически включается снова примерно через 10 минут. Каждый раз, когда вы нажимаете SNOOZE/DATE/SLEEP OFF, время повтора изменяется следующим образом:

- Максимальное время повтора составляет 60 минут. Дисплей показывает время повтора в течение примерно 4 секунд и возвращается к отображению текущего времени. При нажатии кнопки SNOOZE/DATE/SLEEP OFF после появления текущего времени время повтора снова начинается с 10 минут.

Чтобы остановить будильник
- Нажмите RADIO OFF/ALARM RESET, чтобы выключить будильник.
- Будильник сработает снова в то же время на следующий день.
- Если не нажать кнопку RADIO OFF/ALARM RESET, будильник будет звучать непрерывно в течение примерно 60 минут, а затем автоматически выключится.
- Чтобы отключить будильник
- Установите БУДИЛЬНИК A (или B) на ВЫКЛ.
- Индикатор ALARM A (или B) исчезнет с дисплея.
Примечание о тревоге в случае перебоя в подаче электроэнергии
- В случае сбоя питания функции будильника работают до тех пор, пока батарея не разрядится. Однако различаются следующие функции:
- На дисплее ничего не появится.
- Когда звук будильника установлен на радио, он автоматически изменится на зуммер.
- Если питание восстанавливается во время звучания будильника, будильник звучит непрерывно в течение примерно 60 минут (или до отключения)
- Будильник гудит около одной минуты, временно останавливается и снова гудит примерно через пять минут, если ни SNOOZE/DATE/SLEEP OFF, ни RADIO OFF/ALARM RESET не нажаты во время жужжания будильника.
- Если будильник звенит и останавливается (либо автоматически через 1 минуту, либо нажатием
- SNOOZE/DATE/SLEEP OFF) пять раз, будильник автоматически сбрасывается в случае отключения питания. Будильник будет гудеть в течение 30 минут (или до отключения) после возобновления подачи питания, если питание будет возобновлено в течение 60 минут после срабатывания будильника.
- Если вы нажмете SNOOZE/DATE/SLEEP OFF во время звучания будильника, время повтора будет установлено на 10 минут. Во время сбоя питания время повтора не может быть установлено более чем на 10 минут.
- Если на дисплее появится индикатор, сигнализация не сработает в случае отключения питания. Замените батарею, если появится индикатор.
Установка таймера сна
- Вы можете засыпать под радио, используя встроенный таймер сна, который автоматически выключает радио по истечении заданного времени.
- Нажмите СОН.
- Радио включается. Вы можете установить таймер сна на 90, 60, 30 или 15 минут. Каждое нажатие изменяет дисплей следующим образом:

- Когда дисплей возвращается к «90», раздаются два коротких звуковых сигнала.
- Радио будет играть в течение установленного вами времени, а затем выключится.
- Чтобы выключить радио раньше установленного времени
- Нажмите RADIO OFF/ALARM RESET или SNOOZE/DATE/SLEEP OFF.

Использование таймера сна и будильника
- Вы можете засыпать под радио, а также просыпаться от зуммера, радио или мелодии будильника в заданное время.
- Поставить будильник. (См. «Установка будильника».)
- Установите таймер сна. (См. «Настройка таймера сна».)
Меры предосторожности
- Воспроизведение устройства от источника питания, указанного в «Технических характеристиках».
- Чтобы отсоединить шнур питания переменного тока (сетевой шнур), тяните его за вилку, а не за шнур.
- Устройство не отключается от источника питания переменного тока (сети), пока оно подключено к розетке, даже если само устройство было выключено.
- Паспортная табличка и важная информация по безопасности расположены снизу снаружи.
- Не оставляйте устройство рядом с источником тепла, например радиатором или воздуховодом, а также в местах, подверженных воздействию прямых солнечных лучей, сильной запыленности, механической вибрации или ударам.
- Обеспечьте достаточную циркуляцию воздуха, чтобы предотвратить накопление внутреннего тепла. Не размещайте устройство на поверхности (ковре, одеяле и т. д.) или рядом с материалами (занавесками), которые могут заблокировать вентиляционные отверстия.
- Если внутрь устройства попал какой-либо твердый предмет или жидкость, отключите устройство от сети и проверьте его с помощью квалифицированного персонала перед дальнейшей эксплуатацией.
- Для очистки корпуса используйте мягкую ткань d.ampс мягким раствором моющего средства.
ПРИМЕЧАНИЯ ПО ЛИТИЕВОЙ БАТАРЕИ
- Протрите аккумулятор сухой тканью, чтобы обеспечить хороший контакт.
- При установке батареи обязательно соблюдайте полярность.
- Не держите аккумулятор металлическим пинцетом, иначе может произойти короткое замыкание.
- Если у вас есть какие-либо вопросы или проблемы относительно вашего устройства, обратитесь к ближайшему дилеру Sony.
УСТРАНЕНИЕ НЕПОЛАДОК
- В случае возникновения какой-либо проблемы с устройством выполните следующие простые проверки, чтобы определить, требуется ли техническое обслуживание.
- Если проблема не устранена, обратитесь к ближайшему дилеру Sony.
- Часы мигают «AM 12:00».
- Произошел сбой питания, и резервная батарея разряжена. Замените батарею. Удалите старую батарею и установите новую.
- Зуммер, радио или мелодия будильника не звучат в установленное время будильника.
- Убедитесь, что звуковой сигнал, радио или мелодия активированы (загорается индикатор ALARM A (или B)).
- Радиобудильник активируется, но не звучит в установленное время.
- Убедитесь, что громкость не установлена на минимум.
- Когда начинается переход на летнее время, часы не используют летнее время автоматически.
- Убедитесь, что часы установлены правильно.
- Нажмите и удерживайте DST не менее 3 секунд, чтобы активировать автоматическую настройку летнего/летнего времени.
Характеристики

- Отображение времени
- 12-часовая система
- Диапазон частот
- Динамик
- прибл. Диаметр 6.6 см (2 5/8 дюйма), 8 Ом
- Выходная мощность
- 180 мВт (при 10% гармонических искажений)
- Требования к питанию
- 120 В переменного тока, 60 Гц Для резервного питания: 3 В постоянного тока, одна батарея CR2032
- Габаритные размеры:
- прибл. 178.9 × 121.8 × 88.5 мм (ш/в/г) (7 1/8 × 4 7/8 × 3 1/2 дюйма), вкл. выступающие части и элементы управления
- Масса
- прибл. 638 г (1 фунт 6.5 унции), вкл. Батарея CR2032 Конструкция и технические характеристики могут быть изменены без предварительного уведомления.
FAQS
Sony делает радиочасы?
Amazon’s Choice выделяет высоко оцененные продукты по хорошей цене, доступные для немедленной отправки.
Как запрограммировать радиочасы Sony?
Вставьте шнур питания радиочасов в исправную электрическую розетку. На радиочасах нажмите и удерживайте кнопку CLOCK в течение 2 секунд. Отпустите кнопку ЧАСЫ. Нажмите кнопку TIME SET+ или TIME SET-, чтобы выбрать час. Нажмите кнопку ЧАСЫ
Как пользоваться будильником Sony ICF c1?
Нажмите RADIO, чтобы включить радио. Установите BAND на нужный диапазон (AM или FM). Настройтесь на нужную станцию с помощью TUNING. Отрегулируйте громкость с помощью VOLUME +/–. Чтобы выключить радио, нажмите ALARM RESET/OFF
Почему мой будильник Sony постоянно меняет время?
Это может быть связано с перебои в подаче электроэнергии и состояние резервной батареи, установленной в блоке. Для бывшегоampт. е. если происходит перебой в электроснабжении, а радиочасы работают от резервной батареи, время может быть увеличено или упущено в зависимости от емкости батареи.
Делает ли Timex будильники?
amazon.com: Будильник Timex T121B с 0.7-дюймовым красным дисплеем (черный) : Дом и кухня.
Что такое DST на радиочасах?
На дисплее появляется «DST», и дисплей часов переключается на летнее время (летнее время).
Что означает летнее время на моем будильнике Sony?
В верхней части радиочасов нажмите кнопку DST, чтобы включить летнее время функция включена или выключена. ПРИМЕЧАНИЯ. Когда функция перехода на летнее время включена, индикатор летнего времени на передней панели радиочасов будет гореть.
Как выключить радио на будильнике Sony?
Чтобы отключить функцию радио на этой модели радиочасов (см. раздел «Продукты» ниже), нажмите кнопку СБРОС/ВЫКЛ ТРЕВОГИ [РИС. 1], расположенный в верхней части устройства. Чтобы снова включить функцию радио, нажмите кнопку FM, которую можно найти слева от кнопки СБРОСА/ВЫКЛЮЧЕНИЯ БУДИЛЬНИКА.
Почему мой будильник постоянно сбивает время?
Наиболее распространенная причина потери времени аналоговыми часами заключается в том, что отложения в батарейном отсеке, препятствующие полному соединению батареи с часовым механизмом. Извлеките аккумулятор и проверьте провода на наличие отложений из-за протекающего аккумулятора, пыли и т. д.
Почему мои атомные часы отстают на 5 минут?
Если атомные радиоуправляемые часы в настоящее время не принимают сигнал синхронизации атомных часов WWVB, их отображение времени будет постепенно «отклоняться» от правильного времени.. Часы больше не управляются по радио; это обычные кварцевые часы.
Как сбросить настройки будильника Sony?
Нажмите и удерживайте кнопку TIME или кнопку CLOCK более 2 секунд, пока на дисплее не начнет мигать час. Нажмите кнопку + или кнопку –, чтобы выбрать требуемую дату и/или время, затем нажмите кнопку TIME или кнопку CLOCK. Повторите шаг номер два, чтобы установить оставшиеся атрибуты даты и/или времени.
Как узнать, какой у меня будильник: AM или PM?
Для 12-часового формата цифровые часы будут показывать время с точкой в верхнем левом углу дисплея, чтобы указать, что время сейчас в PM, в то время как точка в углу не будет, когда время в AM. Второй вариант — отображать время в 24-часовом формате.
Где мой будильник?
Если его еще нет на рабочем столе, вы можете найти его, проведя вверх от нижней части экрана и пройдя через меню приложений. Нажмите на вкладку «БУДИЛЬНИК» в верхнем левом углу приложения «Часы»..
Где в настройках часы?
Обновите дату и время на вашем устройстве Android Нажмите «Настройки», чтобы открыть меню «Настройки». Коснитесь Дата и время. Коснитесь Автоматически.
Что означают две вертикальные точки?
Двоеточие: знак препинания, состоящий из двух точек одинакового размера, выровненных вертикально. Двоеточие часто предшествует объяснению, списку или цитируемому предложению..
Sony DREAM MACHINE ICF-C414 — FM/AM Clock Radio Manual
Overview

There is a tactile dot above the VOLUME dial to indicate which way turns the volume up.
Features
- Large, easy to-see, 1.4 inch green LED.
- Dual alarm FM/AM Clock radio.
- Various types of alarms — buzzer, radio and melody.
- Automatic time set — When you plug the clock in for the first time, the current time will be shown in the display (except East European model).
- Automatic Daylight Saving Time/Summer time adjustment (except East European model).
- DST button to adjust Daylight Saving Time/ Summer time.
- Date button to display month, day and year.
- Brightness control (High/Middle/Low).
- No Power No Problem™ alarm system to keep the clock and the alarm operating during a power interruption with a CR2032 battery installed (except East European model).
- Supplied CR2032 battery for backup power source to keep the clock and alarm operating during a power interruption (East European model only).
- Extendable snooze — Snooze time can be extended from 10 up to 60 minutes.
- Progressive Alarm Speed (buzzer only).
About the backup battery
To keep good time, as backup power source, this unit has one CR2032 battery inside of the unit in addition to the house current. (The battery is supplied with the unit for East European model.) The battery keeps the clock and the alarm operating in the event of a power interruption.
Note for customers in Europe (except East Europe)
The clock is preset at the factory, and its memory is powered by the preinstalled Sony CR2032 battery. If the «0:00» appears in the display when the unit is connected to AC outlet for the first time, the battery may be weak. In this case, consult a Sony dealer. The preinstalled CR2032 battery is considered part of the product, and is covered by the warranty.
You are required to show «Note for customers in Europe (except East Europe)» (in this instruction) to a Sony dealer in order to validate the warranty for this product.
Knowing when to replace the battery
When the battery becomes weak, the »  » indicator appears in the display.
In the event of a power interruption when the battery is weak, the current time and alarm will be initialized.
Replace the battery with a Sony CR2032 lithium battery. Use of another battery may present a risk of fire or explosion.
Installing and replacing the backup battery
- Keep the AC plug connected to the AC outlet, remove the screw that secures the battery compartment at the rear of the unit using a screwdriver, and remove the battery compartment

- Insert a new battery in the battery compartment with the side facing up. To remove the battery from the battery compartment, push it out from the side marked PUSH.
- Insert the battery compartment back into the unit and secure it with the screw.
- When you are replacing the battery, press RADIO ON to turn the » » indicator off in the display.

 side facing up. To remove the battery from the battery compartment, push it out from the side marked PUSH.
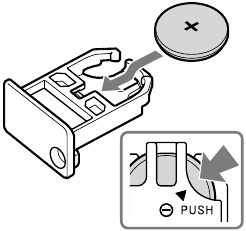
 » indicator off in the display.
Notes
- If you replace the battery, do not disconnect the AC plug from the AC outlet.
Otherwise, the current time and alarm will be initialized. - Be sure to observe the correct polarity when installing the battery.
Setting the clock for the first time (except for East European model)
This unit is preset to the current date and time at the factory, and is powered by the back up battery. All you need to do is just plug it in and select your time zone.
- Plug in the unit.
First, the month and date appear, then the year, and then the current Central European Time appears in the display. - Press TIME ZONE.
«1» (area number) appears in the display.
If you live in the Central European Time zone, you do not need to adjust the area setting.
| Area number | Time zone |
| 1 (default) | Central European Time/ Central European Summer Time |
| 2 | Eastern European Time/ Eastern European Summer Time |
| 0 | Western European Time/ Western European Summer Time |
- Press TIME ZONE repeatedly until the desired number appears.
The display returns to the clock about 4 seconds after the operation is complete.
Note
During the shipment and your first use, a clock error may occur. In this case, refer to «Setting the clock and date» to set the correct time.
When daylight saving time (summer time) begins
This unit employs Automatic Daylight Saving Time/Summer Time adjustment. The DST indicator appears in the display at the beginning of the daylight saving time (summer time), and disappears at the end of it.
Automatic DST/summer time adjustment is based on GMT (Greenwich Mean Time).
Area number 0:
- Daylight saving time (summer time) begins at:
1:00 AM on the final Sunday of March. - Standard time begins at: 2:00 AM on the final Sunday of October.
Area number 1:
- Daylight saving time (summer time) begins at:
2:00 AM on the final Sunday of March. - Standard time begins at: 3:00 AM on the final Sunday of October.
Area number 2:
- Daylight saving time (summer time) begins at:
3:00 AM on the final Sunday of March. - Standard time begins at: 4:00 AM on the final Sunday of October.
To cancel the automatic DST/summer time adjustment and to set DST display manually
The automatic DST/summer time adjustment can be cancelled.
Press and hold DST for at least 3 seconds while the clock is displayed.
A beep sounds, and «Aut  OFF» appears in the display to show that the automatic DST/summer time adjustment is cancelled. The display returns to the clock.
Notes
- Daylight Saving Time depends on the law in each country/region, and your area may not use it. In such a case, cancel the automatic DST/ summer time adjustment before using the set and set the time manually as necessary.
- To activate the automatic DST/summer time adjustment again, press and hold DST for at least 3 seconds. A beep sounds, and «Aut On» appears in the display to show that the automatic DST/summer time adjustment is activated. The display returns to the clock.
- To change the display to the daylight saving time (summer time) manually, see «To change the display to the daylight saving time (summer time) indication.»
Setting the clock and date
Follow the procedure from step 1 for East European model. To change the setting for other models, follow the procedure from step 2.
- Plug in the unit.
The display will flash «0:00». - Press CLOCK for at least 2 seconds. You will hear a beep and the year will start to flash in the display.
- Press + or – until the correct year appears in the display.
- Press CLOCK.
- Repeat steps 3 and 4 to set the month, day and time.
After setting the time, two short beeps sound and the clock starts from 0 seconds.
- Pressing and holding + or – changes the year, month or day rapidly.
When setting the current time, time changes rapidly by 1 minute-increments up to 10 minutes, and then by 10 minute-increments. - While setting the clock, you must perform each step within 65 seconds, or the clock setting mode will be cancelled.
To display the year and date
Press SNOOZE/DATE/SLEEP OFF once for the date, and within about 3 seconds press it again for the year.
The display shows the date or year for about 3 seconds and then changes back to the current time.
If you connect the AC plug to an AC outlet while this unit is powered from the backup power source, the current date and time appears in the following order (the same as when the unit is powered on after a power interruption). «month and date» (about 1 second) «year» (about 1 second) «current time»
To change the display to the daylight saving time (summer time) indication
Change the daylight saving time (summer time) adjustment setting according to the following procedures if;
- you have East European model.
- you have cancelled the Automatic DST/Summer Time adjustment.
Press DST.
The DST indicator appears in the display and the time indication changes to the daylight saving time (summer time).
To deactivate the daylight saving time (summer time) adjustment, press DST again.
Setting the brightness of the display
Three levels of brightness are available by pressing BRIGHTNESS.
Operating the radio
- Press RADIO ON to turn on the radio.
- Adjust the volume using VOLUME.
- Select BAND.
- Tune in to a station using TUNING.
To turn off the radio
Press RADIO OFF/ALARM RESET.
Improving the reception
FM:
Extend the FM wire aerial fully to increase reception sensitivity.
AM:
Rotate the unit horizontally for optimum reception. A ferrite bar AM aerial is built-in to the unit.
Do not operate the unit over a steel desk or metal surface, as this may lead to interference of reception.
Setting the alarm
The dual alarm function allows you to set two alarm programmes (ALARM A and ALARM B). The alarm time can be set for each programme and the alarm sound is selectable from buzzer, radio or melody.
Notes
- Before setting the alarm, make sure to set the clock (see «Setting the clock and date»).
- The factory set alarm time is «12:00».
- To set the radio alarm, first tune in to a station and adjust the volume (see «Operating the radio»).
To set the alarm time
- Set ALARM A (or B) to the desired alarm sound ( (buzzer), RADIO or MELODY).
The alarm time appears for a few seconds, and then the ALARM A (or B) indicator lights up in the display. (It does not appear when the switch is set to OFF.)
When you set the alarm to MELODY, the alarm sounds the melody- «Spring» from «The Four Seasons» by Antonio Lucio Vivaldi. - Press ALARM TIME SET A (or B) + or – to set the desired time.
Each press of ALARM TIME SET A (or B) + or – changes the indication by 1 minute. If you press and hold ALARM TIME SET A (or B) + or –, the alarm time goes forward (or backward) by 1 minute up to 10 minutes, and then by 10 minutes increments. While setting the alarm time, the ALARM A (or B) indicator flashes in the display. The following example is when setting the ALARM A.
When the alarm time setting is complete, the display returns to the clock after a few seconds and the ALARM A (or B) indicator changes from flashing to fully lit.
 (buzzer), RADIO or MELODY).
- While ALARM A (or B) is set to , RADIO or MELODY, the alarm time setting can be changed by ALARM TIME SET A (or B) + or –. One press of ALARM TIME SET A (or B) + or – displays the alarm time for about 4 seconds. By pressing ALARM TIME SET A (or B) + or – while the alarm time appears in the display, the alarm time will be changed.
- For the buzzer alarm, the beeping of the alarm becomes more rapid after every few seconds in three progressive stages.
- The ALARM A (or B) indicator flashes in the display while:
- The alarm time appears in the display.
- The alarm sounds.
- The snooze function is turned on.
- The alarm time setting cannot be changed if ALARM A (or B) is set to OFF. If you press ALARM TIME SET A (or B) + or –, «OFF» appears in the display for about 0.5 seconds.
- If a second alarm sounds during a first (or the snooze function is active), the second alarm takes priority.
- CLOCK, DST, and TIME ZONE are unavailable while the alarm sounds or when the snooze function is turned on.
- The alarm function works as usual at the first and last day of daylight saving time (summer time). As a result, if the automatic DST/ summer time adjustment is set and the alarm is set at a time skipped when the daylight saving time begins, the alarm is skipped; if the alarm is set at a time overlapping when daylight saving time ends, the alarm will sound twice.
- If the same alarm time is set for both ALARM A and B, the ALARM A takes priority.
 , RADIO or MELODY, the alarm time setting can be changed by ALARM TIME SET A (or B) + or –. One press of ALARM TIME SET A (or B) + or – displays the alarm time for about 4 seconds. By pressing ALARM TIME SET A (or B) + or – while the alarm time appears in the display, the alarm time will be changed.
To doze for a few more minutes
Press SNOOZE/DATE/SLEEP OFF.
The alarm sound stops but will automatically come on again after about 10 minutes. Each time you press SNOOZE/DATE/SLEEP OFF, the snooze time changes as follows:
The maximum snooze time is 60 minutes.
The display shows the snooze time for about 4 seconds and returns to show the current time.
When you press SNOOZE/DATE/SLEEP OFF after the current time appears, the snooze time starts from 10 minutes again.
To stop the Alarm
Press RADIO OFF/ALARM RESET to turn off the alarm.
The alarm will come on again at the same time the next day.
If RADIO OFF/ALARM RESET is not pressed, the alarm sounds continuously for about 60 minutes, and then it will stop automatically.
To deactivate the Alarm
Set ALARM A (or B) to OFF.
The ALARM A (or B) indicator disappears from the display.
Note on alarm in the event of a power interruption
In the event of a power interruption, the alarm functions work until the battery is empty.
However, the following functions differ:
Setting the sleep timer
You can fall asleep to the radio using the built-in sleep timer that turns off the radio automatically after a preset duration.
Press SLEEP.
The radio turns on. You can set the sleep timer to 90, 60, 30, or 15 minutes. Each press changes the display as follows:
Two short beeps sound when the display returns to «90».
The radio will play for the duration you set, then shut off.
To turn off the radio before the preset time
Press RADIO OFF/ALARM RESET or SNOOZE/ DATE/SLEEP OFF.
To use both sleep timer and alarm
You can fall asleep to the radio and also be awakened by the buzzer, radio or melody alarm at the preset time.
- Set the alarm. (See «Setting the alarm».)
- Set the sleep timer. (See «Setting the sleep timer».)
Troubleshooting
Should any problem occur with the unit, make the following simple checks to determine whether or not servicing is required.
If the problem persists, consult your nearest Sony dealer.
The clock flashes «0:00».
- A power interruption occurred and the backup battery is low. Replace the battery. Remove the old battery and install a new one.
The buzzer, radio or melody alarm does not sound at the preset alarm time.
- Check that the buzzer, radio or melody alarm is activated (the ALARM A (or B) indicator lights up).
The radio alarm is activated but does not sound at the preset alarm time.
- Check that the volume is not set to minimum.
Specifications
Time display
24-hour System
Frequency range
| Model for East Europe | |
| Band | Frequency |
| FM | 87.5 – 108 MHz |
| AM | 530 – 1 710 kHz |
| Model for others | |
| Band | Frequency |
| FM | 87.5 – 108 MHz |
| AM | 526.5 – 1 606.5 kHz |
Speaker
Approx. 6.6 cm (2 5/8 inches) dia., 8 Ω
Power output
180 mW (at 10% harmonic distortion)
Power requirements
230 V AC, 50 Hz
For power backup: 3 V DC, one CR2032 battery
Dimensions
Approx. 178.9 × 121.8 × 88.5 mm (w/h/d)
(7 1/8 × 4 7/8 × 3 1/2 inches) incl. projecting parts and controls
Mass
Approx. 621 g (1 lb 5.9 oz) incl. CR2032 battery
Design and specifications are subject to change without notice.

Documents / Resources
Download manual
Here you can download full pdf version of manual, it may contain additional safety instructions, warranty information, FCC rules, etc.
Download Sony DREAM MACHINE ICF-C414 — FM/AM Clock Radio Manual
English
WARNING
To reduce the risk of fire or electric shock, do
not expose this apparatus to rain or moisture.
To reduce the risk of fire, do not cover the
ventilation of the apparatus with newspapers,
tablecloths, curtains, etc. And do not place lighted
candles on the apparatus.
To reduce the risk of fire or electric shock, do not
expose this apparatus to dripping or splashing,
and do not place objects filled with liquids, such
as vases, on the apparatus.
Do not install the appliance in a confined space,
such as a bookcase or built-in cabinet.
Do not expose the batteries (battery pack or
batteries installed) to excessive heat such as
sunshine, fire or the like for a long time.
As the main plug is used to disconnect the unit
from the mains, connect the unit to an easily
accessible AC outlet. Should you notice an
abnormality in the unit, disconnect the main plug
from the AC outlet immediately.
CAUTION
Danger of explosion if battery is incorrectly
replaced. Replace only with the same or
equivalent type.
Features
Large, easy to-see, 1.4 inch green LED.
Dual alarm FM/AM Clock radio.
Various types of alarms — buzzer, radio and
melody.
Automatic time set — When you plug the clock
in for the first time, the current time will be
shown in the display.
Automatic Daylight Saving Time/Summer time
adjustment.
Date button to display month, day and year.
Brightness control (High/Middle/Low).
No Power No Problem™ alarm system to keep
the clock and the alarm operating during a
power interruption with a CR2032 battery
installed.
Extendable snooze — Snooze time can be
extended from 10 up to 60 minutes.
Progressive Alarm Speed (buzzer only).
About the backup
battery
To keep good time, as backup power source, this
unit has one CR2032 battery inside of the unit in
addition to the house current.
The battery keeps the clock and the alarm
operating in the event of a power interruption.
Note for customers in Canada
The clock is preset at the factory, and its memory
is powered by the preinstalled Sony CR2032
battery. If the “AM 12:00” appears on the display
when the unit is connected to AC outlet for the
first time, the battery may be weak. In this case,
consult a Sony dealer. The preinstalled CR2032
battery is considered part of the product, and is
covered by the warranty. You are required to show
“Note for customers in Canada” (in this
instruction) to a Sony dealer in order to validate
the warranty for this product.
Knowing when to replace the battery
When the battery becomes weak, the “
”
indicator appears in the display.
In the event of a power interruption when the
battery is weak, the current time and alarm will
be initialized.
Replace the battery with a Sony CR2032 lithium
battery. Use of another battery may present a risk
of fire or explosion.
Installing and replacing the backup battery1 Keep the AC plug connected to the AC outlet, remove the screw that secures the battery compartment at the rear of the unit using a screwdriver, and remove the battery compartment (See Fig. —).2 Insert a new battery in the battery compartment with the side facing up. To remove the battery from the battery compartment, push it out from the side marked PUSH (See Fig. —).3 Insert the battery compartment back into the unit and secure it with the screw (See Fig. —).4 When you are replacing the battery, press RADIO ON to turn the “
” indicator off in the display.
Notes
If you replace the battery, do not disconnect the
AC plug from the AC outlet.
Otherwise, the current time and alarm will be
initialized.
Be sure to observe the correct polarity when
installing the battery.
Setting the clock for
the first time
This unit is preset to the current date and time at
the factory, and is powered by the back up battery.
All you need to do is just plug it in and select your
time zone.
1 Plug in the unit.
First, the month and date appear, then the
year, and then the current Eastern Standard/
Daylight Time appears in the display.
2 Press TIME ZONE.
Area number “2” appears in the display.
If you live in the Eastern Time zone, you do
not need to adjust the area setting.
Area number Time zone
1 Atlantic Standard/
Daylight Time
2
(default)
Eastern Standard/
Daylight Time
3 Central Standard/
Daylight Time
4 Mountain Standard/
Daylight Time
5 Pacific Standard/Daylight
Time
6 Yukon Standard/Daylight
Time
7 Hawaiian Standard/
Daylight Time
3 Press TIME ZONE repeatedly until the desired number appears.
The display returns to the clock about 4
seconds after the operation is complete.
Note
During the shipment and your first use, a clock
error may occur. In this case, refer to “Setting the
clock and date” to set the correct time.
When daylight saving time (summer time) begins
This unit employs Automatic Daylight Saving
Time/Summer Time adjustment. The DST
indicator appears in the display at the beginning
of the daylight saving time (summer time), and
disappears at the end of it.
Daylight saving time begins at: 2:00 AM on the
second Sunday of March.
Standard time begins at: 2:00 AM on the first
Sunday of November.
To cancel the automatic DST/summer time adjustment and to set DST display manually
The automatic DST/summer time adjustment can
be cancelled.
Press and hold DST for at least 3 seconds while
the clock is displayed.
A beep sounds, and “Aut
OFF” appears in the
display to show that the automatic DST/summer
time adjustment is cancelled. The display returns
to the clock.
Notes
Daylight Saving Time depends on the law in
each country/region, and your area may not use
it. In such a case, cancel the automatic DST/
summer time adjustment before using the set
and set the time manually as necessary.
To activate the automatic DST/summer time
adjustment again, press and hold DST for at
least 3 seconds. A beep sounds, and “Aut
On” appears in the display to show that the
automatic DST/summer time adjustment is
activated. The display returns to the clock.
To change the display to the daylight saving
time (summer time) manually, see “To change
the display to the daylight saving time (summer
time) indication.”
Setting the clock and
date
To change the setting manually, follow the
procedure from step 1.
1 Press CLOCK for at least 2 seconds.
You will hear a beep and the year will start to
flash in the display.
2 Press + or – until the correct year appears in the display.3 Press CLOCK.
4 Repeat steps 2 and 3 to set the month,
day and time.
After setting the time, two short beeps sound
and the clock starts from 0 seconds.
Pressing and holding + or – changes the year,
month or day rapidly.
When setting the current time, time changes
rapidly by 1 minute-increments up to 10
minutes, and then by 10 minute-increments.
While setting the clock, you must perform each
step within 65 seconds, or the clock setting
mode will be cancelled.
To display the year and date
Press SNOOZE/DATE/SLEEP OFF once for the
date, and within about 3 seconds press it again for
the year.
The display shows the date or year for about 3
seconds and then changes back to the current
time.
If you connect the AC plug to an AC outlet while
this unit is powered from the backup power
source, the current date and time appears in the
following order (the same as when the unit is
powered on after a power interruption).
“month and date” (about 1 second)
“year”
(about 1 second)
“current time”
To change the display to the daylight saving time (summer time) indication
Change the daylight saving time (summer time)
adjustment setting according to the following
procedures if you have cancelled the automatic
DST/summer time adjustment.
Press DST.
The DST indicator appears in the display and the
time indication changes to the daylight saving
time (summer time).
To deactivate the daylight saving time (summer
time) adjustment, press DST again.
Setting the brightness
of the display
Three levels of brightness are available by pressing
BRIGHTNESS.
Playing the radio
1 Press RADIO ON to turn on the radio.2 Adjust the volume using VOLUME.3 Select BAND.4 Tune in to a station using TUNING.To turn off the radio
Press RADIO OFF/ALARM RESET.
Improving the reception
FM:
The AC power cord functions as an FM
antenna. Extend the AC power cord fully to
increase reception sensitivity.
AM:
Rotate the unit horizontally for optimum
reception. A ferrite bar AM antenna is built-in
to the unit.
Do not operate the unit over a steel desk or metal
surface, as this may lead to interference of
reception.
Setting the alarm
The dual alarm function allows you to set two
alarm programs (ALARM A and ALARM B).
The alarm time can be set for each program and
the alarm sound is selectable from buzzer, radio
or melody.
Notes
Before setting the alarm, make sure to set the
clock (see “Setting the clock and date”).
The factory set alarm time is “PM 12:00”.
To set the radio alarm, first tune in to a station
and adjust the volume (see “Playing the radio”).
To set the alarm time1 Set ALARM A (or B) to the desired alarm sound ( (buzzer), RADIO or MELODY).
The alarm time appears for a few seconds, and
then the ALARM A (or B) indicator lights up
in the display. (It does not appear when the
switch is set to OFF.)
When you set the alarm to MELODY, the
alarm sounds the melody- “Spring” from “The
Four Seasons” by Antonio Lucio Vivaldi.
2 Press ALARM TIME SET A (or B) + or –
to set the desired time.
Each press of ALARM TIME SET A (or B) + or
– changes the indication by 1 minute. If you
press and hold ALARM TIME SET A (or B) +
or –, the alarm time goes forward (or
backward) by 1 minute up to 10 minutes, and
then by 10 minutes increments. While setting
the alarm time, the ALARM A (or B) indicator
flashes in the display. The following example is
when setting the ALARM A.
When the alarm time setting is complete, the
display returns to the clock after a few seconds
and the ALARM A (or B) indicator changes
from flashing to fully lit.
While ALARM A (or B) is set to , RADIO
or MELODY, the alarm time setting can be
changed by ALARM TIME SET A (or B) + or –.
One press of ALARM TIME SET A (or B) + or –
displays the alarm time for about 4 seconds. By
pressing ALARM TIME SET A (or B) + or –
while the alarm time appears in the display, the
alarm time will be changed.
For the buzzer alarm, the beeping of the alarm
becomes more rapid after every few seconds in
three progressive stages.
The ALARM A (or B) indicator flashes in the
display while:
– The alarm time appears in the display.
– The alarm sounds.
– The snooze function is turned on.
The alarm time setting cannot be changed if
ALARM A (or B) is set to OFF. If you press
ALARM TIME SET A (or B) + or –, “OFF”
appears in the display for about 0.5 seconds.
If a second alarm sounds during a first (or the
snooze function is active), the second alarm
takes priority.
CLOCK, DST, and TIME ZONE are unavailable
while the alarm sounds or when the snooze
function is turned on.
The alarm function works as usual at the first
and last day of daylight saving time (summer
time). As a result, if the automatic DST/
summer time adjustment is set and the alarm is
set at a time skipped when the daylight saving
time begins, the alarm is skipped; if the alarm is
set at a time overlapping when daylight saving
time ends, the alarm will sound twice.
If the same alarm time is set for both ALARM
A and B, the ALARM A takes priority.
To doze for a few more minutes
Press SNOOZE/DATE/SLEEP OFF.
The alarm sound stops but will automatically
come on again after about 10 minutes. Each time
you press SNOOZE/DATE/SLEEP OFF, the
snooze time changes as follows:
The maximum snooze time is 60 minutes.
The display shows the snooze time for about
4 seconds and returns to show the current time.
When you press SNOOZE/DATE/SLEEP OFF
after the current time appears, the snooze time
starts from 10 minutes again.
To stop the Alarm
Press RADIO OFF/ALARM RESET to turn off the
alarm.
The alarm will come on again at the same time
the next day.
If RADIO OFF/ALARM RESET is not pressed, the
alarm sounds continuously for about 60 minutes,
and then it will stop automatically.
To deactivate the Alarm
Set ALARM A (or B) to OFF.
The ALARM A (or B) indicator disappears from
the display.
Note on alarm in the event of a power
interruption
In the event of a power interruption, the alarm
functions work until the battery is empty.
However, the following functions differ:
Nothing will appear on the display.
When the alarm sound is set to radio, it will
change to buzzer automatically.
If the power returns while the alarm sounds,
the alarm sounds continuously for about 60
minutes (or until turned off).
4-135-644-21(1)
©2009 Sony Corporation Printed in China
FM/AM
CLOCK RADIO
ICF-C414
Operating Instructions
Mode d’emploi (au dos)
The alarm buzzes for about one minute, stops
temporarily, and will buzz again after about five
minutes if neither SNOOZE/DATE/SLEEP OFF
or RADIO OFF/ALARM RESET are pressed
while the alarm is buzzing.
If the alarm buzzes and stops (either
automatically after 1 minute or by pressing
SNOOZE/DATE/SLEEP OFF) five times, the
alarm is automatically reset in the case of a
power interruption. The alarm will buzz for 30
minutes (or until turned off) after power is
resumed if the power is resumed within 60
minutes from the alarm time.
If you press SNOOZE/DATE/SLEEP OFF while
the alarm sounds, the snooze time is set to 10
minutes. During a power interruption, snooze
time cannot be set to more than 10 minutes.
If the “
” indicator appears in the display, the
alarm will not work in the event of a power
interruption. Replace the battery if the “
”
indicator appears.
Setting the sleep timer
You can fall asleep to the radio using the built-in
sleep timer that turns off the radio automatically
after a preset duration.
Press SLEEP.
The radio turns on. You can set the sleep timer to
90, 60, 30, or 15 minutes. Each press changes the
display as follows:
Two short beeps sound when the display returns
to “90”.
The radio will play for the duration you set, then
shut off.
To turn off the radio before the preset
time
Press RADIO OFF/ALARM RESET or SNOOZE/
DATE/SLEEP OFF.
To use both sleep timer and alarm
You can fall asleep to the radio and also be
awakened by the buzzer, radio or melody alarm at
the preset time.
1 Set the alarm. (See “Setting the alarm”.) 2 Set the sleep timer. (See “Setting the sleep timer”.)
Precautions
Play the unit on the power source specified in
“Specifications”.
To disconnect the AC power cord (mains lead),
pull it out by the plug, not the cord.
The unit is not disconnected from the AC
power source (mains) as long as it is connected
to the wall outlet, even if the unit itself has been
turned off.
The nameplate and important information
concerning safety are located on the bottom
exterior.
Do not leave the unit in a location near a heat
source such as a radiator or airduct, or in a
place subject to direct sunlight, excessive dust,
mechanical vibration, or shock.
Allow adequate air circulation to prevent
internal heat build-up. Do not place the unit on
a surface (a rug, a blanket, etc.) or near
materials (a curtain) which might block the
ventilation holes.
Should any solid object or liquid fall into the
unit, unplug the unit and have it checked by
qualified personnel before operating it any
further.
To clean the casing, use a soft cloth dampened
with a mild detergent solution.
NOTES ON LITHIUM BATTERY
Wipe the battery with a dry cloth to assure a
good contact.
Be sure to observe the correct polarity when
installing the battery.
Do not hold the battery with metallic tweezers,
otherwise a short-circuit may occur.
If you have any questions or problems concerning
your unit, please consult your nearest Sony dealer.
Troubleshooting
Should any problem occur with the unit, make
the following simple checks to determine whether
or not servicing is required.
If the problem persists, consult your nearest Sony
dealer.
The clock flashes “AM 12:00”.
A power interruption occurred and the backup
battery is low. Replace the battery. Remove the
old battery and install a new one.
The buzzer, radio or melody alarm does not
sound at the preset alarm time.
Check that the buzzer, radio or melody alarm is
activated (the ALARM A (or B) indicator lights
up).
The radio alarm is activated but does not
sound at the preset alarm time.
Check that the volume is not set to minimum.
When daylight saving time begins, the clock
does not employ the daylight saving time
automatically.
Make sure the clock is set correctly.
Press and hold DST for at least 3 seconds to
activate the automatic DST/summer time
adjustment.
Specifications
Time display
12-hour System
Frequency range
Band Frequency
FM 87.5 – 108 MHz
AM 530 – 1 710 kHz
Speaker
Approx. 6.6 cm (2
5
/8 inches) dia., 8 Ω
Power output
180 mW (at 10% harmonic distortion)
Power requirements
120 V AC, 60 Hz
For power backup: 3 V DC, one CR2032 battery
Dimensions
Approx. 178.9 × 121.8 × 88.5 mm (w/h/d)
(7
1
/8 × 4
7
/8 × 3
1
/2 inches) incl. projecting parts
and controls
Mass
Approx. 638 g (1 lb 6.5 oz) incl. CR2032 battery
Design and specifications are subject to change
without notice.
Dream Machine is a trademark of Sony Corporation.
Dream Machine est une marque de fabrique de Sony Corporation.
No Power No Problem is a trademark of Sony Corporation.
No Power No Problem est une marque de fabrique de Sony
Corporation.
Battery compartment
AC power cord
There is a tactile dot
above the VOLUME dial to
indicate which way turns
the volume up.
For customers who purchased this product in the
USA
Please register this product on line at
http://www.sony.com/productregistration.
Proper registration will enable us to send you
periodic mailings about new products, services,
and other important announcements. Registering
your product will also allow us to contact you in
the unlikely event that the product needs
adjustment or modification. Thank you.
WARNING
To reduce the risk of fire or electric shock, do
not expose this apparatus to rain or
moisture.
To reduce the risk of fire, do not cover the
ventilation of the apparatus with newspapers,
tablecloths, curtains, etc. And do not place lighted
candles on the apparatus.
To reduce the risk of fire or electric shock, do not
expose this apparatus to dripping or splashing,
and do not place objects filled with liquids, such
as vases, on the apparatus.
Do not install the appliance in a confined space,
such as a bookcase or built-in cabinet.
Do not expose the batteries (battery pack or
batteries installed) to excessive heat such as
sunshine, fire or the like for a long time.
As the main plug is used to disconnect the unit
from the mains, connect the unit to an easily
accessible AC outlet. Should you notice an
abnormality in the unit, disconnect the main plug
from the AC outlet immediately.
You are cautioned that any changes or
modifications not expressly approved in this
manual could void your authority to operate this
equipment.
CAUTION
Danger of explosion if battery is incorrectly
replaced. Replace only with the same or
equivalent type.
This symbol is intended to alert the user to
the presence of uninsulated “dangerous
voltage” within the product’s enclosure that
may be of sufficient magnitude to constitute
a risk of electric shock to persons.
This symbol is intended to alert the user to
the presence of important operating and
maintenance (servicing) instructions in the
literature accompanying the appliance.
INFORMATION
This equipment has been tested and found to
comply with the limits for a Class B digital device,
pursuant to Part 15 of the FCC Rules. These limits
are designed to provide reasonable protection
against harmful interference in a residential
installation. This equipment generates, uses and
can radiate radio frequency energy and, if not
installed and used in accordance with the
instructions, may cause harmful interference to
radio communications. However, there is no
guarantee that interference will not occur in a
particular installation. If this equipment does
cause harmful interference to radio or television
reception, which can be determined by turning
the equipment off and on, the user is encouraged
to try to correct the interference by one or more
of the following measures:
— Reorient or relocate the receiving antenna.
— Increase the separation between the equipment
and receiver.
— Connect the equipment into an outlet on a circuit
different from that to which the receiver is
connected.
— Consult the dealer or an experienced radio/TV
technician for help.
WARNING
Replace the battery for the clock backup with a
Sony CR2032 lithium battery. Use of another
battery may present a risk of fire or explosion.
Battery may explode if mistreated. Do not
recharge, disassemble or dispose of in fire.
Dispose of used battery promptly. Keep away
from children.
Important Safety
Instructions
1) Read these instructions.
2) Keep these instructions.
3) Heed all warnings.
4) Follow all instructions.
5) Do not use this apparatus near water.
6) Clean only with dry cloth.
7) Do not block any ventilation openings.
Install in accordance with the manufacturer’s
instructions.
 Do not install near any heat sources such as
radiators, heat registers, stoves, or other
apparatus (including amplifiers) that produce
heat.
9) Do not defeat the safety purpose of the
polarized or grounding-type plug. A polarized
plug has two blades with one wider than the
other. A grounding type plug has two blades
and a third grounding prong. The wide blade
or the third prong are provided for your safety.
If the provided plug does not fit into your
outlet, consult an electrician for replacement
of the obsolete outlet.
10) Protect the power cord from being walked on
or pinched particularly at plugs, convenience
receptacles, and the point where they exit
from the apparatus.
11) Only use attachments/accessories specified by
the manufacturer.
12) Use only with the cart, stand, tripod, bracket,
or table specified by the manufacturer, or sold
with the apparatus. When a cart is used, use
caution when moving the cart/apparatus
combination to avoid injury from tip-over.
13) Unplug this apparatus during lightning storms
or when unused for long periods of time.
14) Refer all servicing to qualified service
personnel. Servicing is required when the
apparatus has been damaged in any way, such
as power-supply cord or plug is damaged,
liquid has been spilled or objects have fallen
into the apparatus, the apparatus has been
exposed to rain or moisture, does not operate
normally, or has been dropped.
For the state of california, USA only
Perchlorate Material –special handling may apply, See
www.dtsc.ca.gov/hazardouswaste/perchlorate
Perchlorate Material: Lithium battery contains
perchlorate
Features
Large, easy to-see, 1.4 inch green LED.
Dual alarm FM/AM Clock radio.
Various types of alarms — buzzer, radio and
melody.
Automatic time set — When you plug the clock
in for the first time, the current time will be
shown in the display.
Automatic Daylight Saving Time/Summer time
adjustment.
Date button to display month, day and year.
Brightness control (High/Middle/Low).
No Power No Problem™ alarm system to keep
the clock and the alarm operating during a
power interruption with a CR2032 battery
installed.
Extendable snooze — Snooze time can be
extended from 10 up to 60 minutes.
Progressive Alarm Speed (buzzer only).
Precautions
Play the unit on the power source specified in
“Specifications”.
To disconnect the AC power cord (mains lead),
pull it out by the plug, not the cord.
The unit is not disconnected from the AC
power source (mains) as long as it is connected
to the wall outlet, even if the unit itself has been
turned off.
The nameplate and important information
concerning safety are located on the bottom
exterior.
Do not leave the unit in a location near a heat
source such as a radiator or airduct, or in a
place subject to direct sunlight, excessive dust,
mechanical vibration, or shock.
Allow adequate air circulation to prevent
internal heat build-up. Do not place the unit on
a surface (a rug, a blanket, etc.) or near
materials (a curtain) which might block the
ventilation holes.
Should any solid object or liquid fall into the
unit, unplug the unit and have it checked by
qualified personnel before operating it any
further.
To clean the casing, use a soft cloth dampened
with a mild detergent solution.
NOTES ON LITHIUM BATTERY
Wipe the battery with a dry cloth to assure a
good contact.
Be sure to observe the correct polarity when
installing the battery.
Do not hold the battery with metallic tweezers,
otherwise a short-circuit may occur.
If you have any questions or problems concerning
your unit, please consult your nearest Sony dealer.
Troubleshooting
Should any problem occur with the unit, make
the following simple checks to determine whether
or not servicing is required.
If the problem persists, consult your nearest Sony
dealer.
The clock flashes “AM 12:00”.
A power interruption occurred and the backup
battery is low. Replace the battery. Remove the
old battery and install a new one.
The buzzer, radio or melody alarm does not
sound at the preset alarm time.
Check that the buzzer, radio or melody alarm is
activated (the ALARM A (or B) indicator lights
up).
The radio alarm is activated but does not
sound at the preset alarm time.
Check that the volume is not set to minimum.
When daylight saving time begins, the clock
does not employ the daylight saving time
automatically.
Make sure the clock is set correctly.
Press and hold DST for at least 3 seconds to
activate the automatic DST/summer time
adjustment.
This unit includes a preinstalled Sony Lithium battery (CR2032) as back-up power source for the clock, which is preset
to EST (Eastern Standard Time) at the factory. And this battery is considered part of the product.
Specifications
Time display
12-hour System
Frequency range
Band
Frequency
FM
87.5 – 108 MHz
AM
530 – 1 710 kHz
Speaker
Approx. 6.6 cm (2
5
/
8
inches) dia., 8 Ω
Power output
180 mW (at 10% harmonic distortion)
Power requirements
120 V AC, 60 Hz
For power backup: 3 V DC, one CR2032 battery
Dimensions
Approx. 178.9 × 121.8 × 88.5 mm (w/h/d)
(7
1
/
8
× 4
7
/
8
× 3
1
/
2
inches) incl. projecting parts and
controls
Mass
Approx. 638 g (1 lb 6.5 oz) incl. CR2032 battery
Design and specifications are subject to change
without notice.