Welcome to the official Craft documentation hub! Here, you’ll find developer-centric information on implementing and extending Craft CMS and Craft Commerce, as well as tools and tutorials to help you get started.
Our companion Knowledge Base (opens new window) is home to resources for all audiences, including common recipes, troubleshooting tips, and support articles.
# Products
Learn about the foundation of the Craft platform.
# Plugins + Tools
Discover solutions and extensions from the Craft team and beyond.
# Tutorials
Self-contained, step-by-step training materials.
# Starter Projects
Complete projects you can use to learn or jump start your own.
# Popular Resources
The best places to look for help, inspiration, and news.

Начиная с версии Майнкрафт 1.7.3 мод теперь именуется как IndustrialCraft2 или IC2. Поддержка первого Индастриал Крафта больше осуществляться не будет, но если очень хочется установить, то всегда можете скачать его у нас на сайте.
IndustrialCraft — Это самый крупный промышленный мод для Майнкрафта. Перечисление его возможностей займет несколько дней. Помимо промышленного уклона в металлургию, электротехнику и агропромышленность в нем добавлено более сотни новых блоков, растений, ресурсов, оружия. Только лишь с одним этим модом можно создавать целые города с заводами, фабриками и полями как в современном мире.
Файлы без вирусов. Проверено VirusTotal

- 4,4
- 1
- 2
- 3
- 4
- 5
0
Оценка: 4,4/5
(Голосов: 16)
Вместе с IndustrialCraft скачивают
-
Contents
-
Table of Contents
-
Bookmarks
Quick Links
Related Manuals for GCC Technologies i-Craft
Summary of Contents for GCC Technologies i-Craft
-
Page 1
V6 Jan. 2016… -
Page 2: Table Of Contents
4.2 Driver Un-installation ………………51 4.3 Driver Operation ………………..54 4.4 Contouring Printed Image via Application Software ……..57 5. Use SD Card with i-Craft (SD card is an optional item) ……… 57 Read an SD Card in i-Craft …………….. 57…
-
Page 3
Menu function ………………… 60 5.3.1 Media Menu ………………60 5.3.2 SD Card Menu ………………60 6. Appendix ……………………61 i-Craft Specification ……………… 61 Material Parameter Setting List …………..62 CorelDRAW AAS Plug-In Instruction …………. 63 Illustrator AAS Plug-In Instruction …………..74… -
Page 4: Get Started
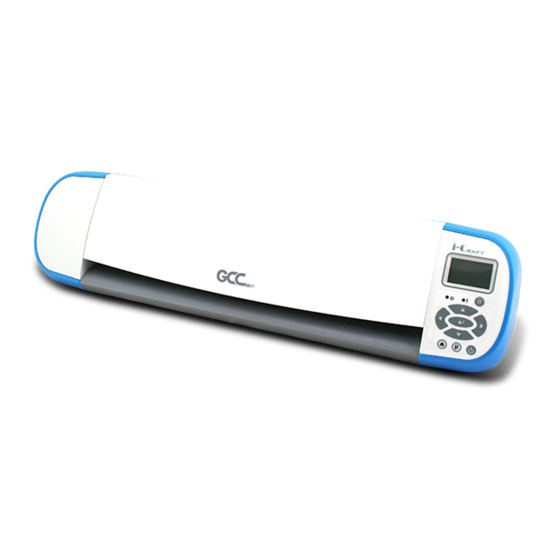
1. Get Started 1.1 Package Item Remove your i-Craft from the package and place it onto an even and stable worktable. Check if the following items are included in the accessory package, if there are missing parts, please contact your dealer for further assistance.
-
Page 5: Installation
2. Installation 2.1 Connect i-Craft Make sure i-Craft is placed on a stable worktable. Connect i-Craft to the power adapter and put the plug into the socket on the wall. Connect i-Craft to your computer, and then press the power button to turn…
-
Page 6: Blade Installation
2.2 Blade Installation The blade will lose its sharpness after a period of usage; the cutting quality might be affected. By increasing the cutting force, it might do the trick. However, once the blade is worn out and no longer provides a reliable cutting, you should replace a new one.
-
Page 7
Blade Holder Installation Insert the blade holder into tool carriage. The outward ring of the holder must put into the grooves of carriage firmly, and then fasten the case. Use the reversing steps to remove the blade holder. -
Page 8: Sure Cuts A Lot Software Installation
2.3 Sure Cuts A Lot Software Installation 2.3.1 Auto Installation Step 1 Put your installation DVD into your CD-ROM to start the installation. The software is compatible with Windows XP/Vista/7/8/10 and Macintosh OSX (10.6 — 10.10). Click on Software and select “Sure Cuts A Lot” to start the installation. Step 2 Step 3 Press Next to continue.
-
Page 9
Select “I accept the agreement” and press “Next.” Step 4 Step 5 Use the default folder (suggested) or select a folder you want to install the Sure Cuts A Lot and press “Next.” Tick “Create a desktop icon” if you want to create a shortcut on your Step 6 desktop, and tick “Associated scut4 extension”… -
Page 10
Don’t tick “Install USB Driver” and tick “Launch Sure Cuts A Lot,” and Step 7 then press “Finish” to compete installation. Step 8 Run Sure Cuts A Lot. -
Page 11
Press “Activate…”to activate Sure Cuts A Lot. Please make sure it is Step 9 connected to the internet. Step 10 Put your name in the Name column and enter the 25-letter software key shown on the DVD front cover to the Serial column and press “OK”… -
Page 12: Manually Activate Software
Cuts A Lot software is activated before implementing cutting jobs. 2.3.2 Manually Activate Software If the computer connected to i-Craft cutter doesn’t have internet connection to accomplish above software activation process, you can use “Activate manually” function alternatively to enter the “Activation Code” to start the usage of Sure Cuts A Lot.
-
Page 13
Step 1 Check the «Activate manually» checkbox and you should see the Site Code and Activation Code fields appear. The Site Code field will be pre-filled in and cannot be changed. Step 2 Visit http://www.craftedge.com/activation/surecutsalot via an internet connected computer. Enter your name, serial (software key, shows on the DVD cover) and site code. -
Page 14: Re-Install Sure Cuts A Lot Software
2.3.3 Re-install Sure Cuts A Lot Software If you change a new computer, you may need to deactivate your Sure Cuts A Lot software and re-install it on your new device. Go to “Deactivate…” under Help and press Yes to confirm, then follow the installation procedure and use the same code to activate it on another computer.
-
Page 15
Step 1 Click on the web site link at the bottom left of Activate window. On the web site, click “De-Activation Page” at the middle of the page. Step 2 Step 3 Enter the original register info and serial number, and the reason you need the license to be reset. -
Page 16: Greatcut Installation
After the “Deactivate” on the web site, you can enter the serial number Step 4 on PC to start use the same license again. 2.4 GreatCut Installation Step 1 Click GreatCut Registration in installation DVD to go http://gccvoucher.eurosystems.lu/, and then enter your voucher code provided when purchasing GreatCut and click “Go on!”…
-
Page 17
Click “Request” to go to registration page. Step 2 Fill in the required information and click “Request license code.” Step 3 Step 4 The registration is completed; you should receive two emails, one is registration confirmation with activation link and another is your license data with .ecf file. -
Page 18
Or click “Install GreatCut” in installation DVD. Step 6 Step 7 Select a destination folder. Step 8 Select Typical and click Next. Note: You may select custom setup to install additional drivers. -
Page 19
Step 9 Select the folder and click Next. Default program folder in the start menu is GCC\GreatCut 3. Step 10 GreatCut is installing. Step 11 Click Finish to complete installation. -
Page 20
Step 12 Before you launch GreatCut, open the .ecf attached to the license data email to install your license data to GreatCut so that you don’t need to fill in your information again. Step 13 If the license do not install successfully, you will need to fill in your license data manually. -
Page 21: Tablet App Installation
(AP) like Apple AirPort Express connect the tablet to i-Craft The following takes AirPort Express for example to illustrate how to setup a wireless access point (AP) and cut with i-Craft through tablet. 2.5.1 Setup a Wireless Access Point (AP)
-
Page 22
Step 2 Connect your DSL or cable modem to your AirPort Express using the WAN Ethernet port. (The source of picture: Apple website) Step 3 Use AirPort Utility to create a new network. Please refer to the manual of AirPort Express Step 4 After finishing network setting, the light of AirPort Exress and AirPort… -
Page 23: Operation
3. Operation 3.1 Control Panel Function Power off Power down Power key Power on Performance states 4 Arrow key To move position, select function, or change setting. Enter To set item or register the immediately preceding input value. Pause To temporarily halt cutting process or to continue To perform cutting…
-
Page 24: Media Loading
Step 2 Turn the lever counterclockwise to release the roller and move the pinch roller to the position you want to cut. i-Craft is able to cut different sizes of media including Letter, 9 inch, A4, A3 and 12 inch.
-
Page 25
Step 3 Turn the lever clockwise to fix the roller. Then press Feed/Eject button to load the media to i-Craft Step 4 The edge of the media on the left side should be aligned to the first line from the left on the front platen. -
Page 26: Cut With I-Craft Tm Through Sure Cuts A Lot Software
Put the front cover down to prevent fingers from being pinched by the moving parts; i-Craft is ready to work now. Note Always remove the materials from i-Craft before powering it off. 3.3 Cut with i-Craft through Sure Cuts A Lot software There are basic instructions of Sure Cut A Lot below.
-
Page 27: Insert Graphics From Library
2. If you want to change the mat size and orientation, you can fill a proper value in the Document window. 3.3.1 Insert Graphics from Library Select graphics from library to insert a selected design. Tips Remain the aspect ratio …
-
Page 28: Draw Text
3.3.2 Draw Text Click on the T icon at left side to create the text and select the font you like at text window. 3.3.3 Import Design If you have created your design in other design software, go to import under file to import it, SCA supports svg, scut, scal, pdf, ai.
-
Page 29: Shadow Layer (Contour Cut)
Tips Thousands of SVG files designed specifically for Sure Cuts A Lot! http://SVGCuts.com is the top of source for designer SVG files for Sure Cuts A Lot. Thousands of high quality elements including: shapes for card-making, scrapbooking, as well as gift bags, boxes and 3D flowers. …
-
Page 30: Convert Image To Cutting File (Trace Image)
3.3.5 Convert Image to Cutting File (Trace Image) «Sure Cuts A Lot» allows you to import image files and will trace the image for cutting. Step 1 Go to Trace Image under File, or select Trace Image button on the toolbar to open the setting window.
-
Page 31
‧ Monochrome — will trace as if the image is a black and white image. Contrast: this value will determine the cutoff to whether parts of the image should be traced. When you adjust the contrast value, the preview will change to a black and white image showing what parts of the image will be traced. -
Page 32
‧ Single Color — choose a specific color from the image to trace. To choose a color, click the color button, and then click on the preview image to choose a color. Contrast: this value will determine the cutoff to whether parts of the image should be traced. -
Page 33: Cut The Design
3.3.6 Cut the Design Click on the “Cutter” button on the toolbar and Cut Settings window will Step 1 appear. Click on “Settings…” to open GCC Cutter Settings window Step 2 Step 3 Adjust Registration Marks setting under GCC Cutter Settings window if needed.
-
Page 34
Step 4 Adjust Blade Offset, Overcut Value, Multi-Cut and Quality under Cut Settings window if needed. *Blade Offset: set the offset value according to different blade, for a standard blade, set the offset value at 0.25mm, 0.5mm for an optional advanced blade and 0mm for an optional plotting pen. -
Page 35
Under “Cut Settings” section, there are some useful functions. After Step 5 setting the parameters, click on “Cut” to send the data to i-Craft i-Craft will start the cutting job. *Cut Mode: there are “WSIWYG” and “Origin Point” options, WSIWYG… -
Page 36: Print And Cut Your Design
3.3.7 Print and Cut Your Design The Print and Cut function allows you to print the graphics from Sure Cuts A Lot to printer, and then put the printed materials on i-Craft cutter to cut out the contour of printed jobs from Sure Cuts A Lot.
-
Page 37
Click on “Print…” to open printer setting window and click OK. Step 3 Step 4 Print your design with registration marks out. Step 5 Load the printed media with adhesive sheet to i-Craft (refer to Section 3.2 “Media Loading”). -
Page 38
Press “Next” and then press “Scan+Cut”, and then i-Craft Step 6 will detect the registration marks and cut the contour lines automatically. Tips Test Cut function can save your materials. Click on “Test Cut” to exam if the setting works properly on selected material. -
Page 39: Scan2Cut
3.3.8 Scan2Cut You can scan or photograph of the existing images you like and then cut around the shapes with this function. Step 1 Use a pen to make 4 small marks around the image you want to cut which will be used as the registration marks to align the laser to when we are going to cut it out.
-
Page 40
Click “Load Image…” button to load the image you captured. Step 4 After checking “Use custom marks” checkbox, click and drag the 4 Step 5 marks to 4 red squares to the material, and then click “OK.” Please make sure 4 marks right on the 4 corners. -
Page 41: Rhinestones
Step 6 Trace image and cut. (section 3.3.5) 3.3.9 Rhinestones «Sure Cuts A Lot» can create rhinestone templates. You will need to select an object on the mat, and then choose «Rhinestones» from under the «Effect» menu to bring up the Rhinestone window shown below. 3.3.10 Engraving Tip Applications (Optional Items) If you buy Engraving Tip Set, please refer the instruction below.
-
Page 42
Step 2 Replace the original blade holder with the tool holder. Step 3 Import the image. Select “Line Fill” under Effects. (The function is available for SCA4.) Step 4 Step 5 Set the value of Line Spacing. -
Page 43
Step 6 Select Cutter icon on the toolbar, and select Holder to set offset. When using the engraving tip, select Advanced Blade; when using the color pen, select Pen. Step 7 When using the engraving tip, setting Multi-Cut as 3 times and Pressure as 50 is recommended. -
Page 44: Online Video Tutorials
Sample of engraving tip 3.3.11 Online Video Tutorials There are online video tutorials show you how to use Sure Cuts A Lot software http://www.craftedge.com/tutorials/ or check the Help function. More project video tutorials shows you how to design and output a real job also can be found at http://www.gccworld.com/en/Vinyl_Cutter.php under…
-
Page 45: Cut With I-Craft Tm Through Tablet
3.4 Cut with i-Craft through Tablet There are basic instructions of Sure Cut A Lot below. If you need detailed instruction, please refer to Sure Cuts A Lot iPad Help. You could refer instructions of SCA PC version, but maybe not all the functions could be executed on the tablet.
-
Page 46
Click on the “Connection” option in Cut Settings, and then select “Air Step 5 Print.” Click on the “Port” option, and then select “GCC i-Craft.” Step 6… -
Page 47
Adjust Speed and Pressure, and then click on “Cut.” Step 7 Step 8 Please wait for the cutting data sent to i-Craft about 30 seconds, press OK, and then i-Craft start to cut. -
Page 48: Driver Installation And Operation
4. Driver Installation and Operation The scrapbook cutter communicates with a computer through a USB (Universal Serial Bus). This chapter shows you how to connect the scrapbook cutter to a host computer with your familiar graphic design software such as CorelDRAW, and Adobe Illustrator via GCC driver, and illustrate how to set up the computer and scrapbook cutter interconnection.
-
Page 49
Click on “Install Win 8/7/Vista/XP Driver” in DVD, and then the USB Step 3 driver will be installed automatically. It takes few minutes to find the device. Please DO NOT disconnect the USB cable until the installation has completed. Step 4 The installation will take few minutes to complete, and then you will see a message below. -
Page 50
Confirm to close all running application programs before you start installing the driver, and then click OK. Step 7 Add i-Craft driver successfully, click OK to next step. Step 8 If users want to install AASII VBA on CorelDRAW and Adobe Illustrator, exit CorelDRAW and Adobe Illustrator program, and then click on “Install.”… -
Page 51
Step 9 Check Install Message to confirm CorelDRAW and AI version and then click OK. Step 10 The driver installation is complete. Note AASII VBA is a CorelDRAW and Adobe Illustrator plug-in for contouring printed images to get better cutting result if you choose to output graphic file through GCC driver. -
Page 52: Driver Un-Installation
4.2 Driver Un-installation You have to remove previous version driver installed on your PC system completely before you can install the latest version successfully. Please refer to below steps. Step 1 Go to Control Panel\Hardware and Sound\Devices and Printers window. Right click the printer and select “Remove device.”…
-
Page 53
Select “Driver” page Step 3 Select the model and click on “Remove”. Step 4 Select “Remove driver and driver package” and click OK. Step 5… -
Page 54
Click Yes and then click “Delete” and “OK,” and the driver installed on Step 6 PC is completely removed. -
Page 55: Driver Operation
4.3 Driver Operation Cutting in Application Programs (CorelDRAW as an illustration) Select “Print…” under File in application program to cut image. Step 1 Select Printer as i-Craft and click on “Preferences…” to set cutting Step 2 parameters.
-
Page 56
Step3 Select media and advanced setting to set cutting parameters. You can save, import, and delete the parameters if you want. Select Media: Click on the material that is used. Media Size: Select a proper size or you may click on the pencil to edit the media size you need. -
Page 57
On Advanced Settings page, users may adjust values of speed, pressure, quality, overcut and diecut if needed. Click “Save as” to save the changes as parameter copy for later use, or click save to overwrite current parameter settings. Reset to Default: to reset the parameter settings of the selected media to default value. -
Page 58: Contouring Printed Image Via Application Software
SD card with adapter. Please store files in .plt format to SD card so that i-Craft can recognize the files. 5.1 Read an SD Card in i-Craft Insert your SD card into the slot while i-Craft is powered on, and load the media into i-Craft 5.2 SD Card Settings The “Origin settings”, “Media”, “Smooth”…
-
Page 59: Origin Settings
5.2.1 Origin Settings If you want to cut different shapes on the same media, you may use the function of Origin Settings to reset the origin in order to avoid unnecessary waste of materials. To set origin, move the bullet point to Origin settings and press “Enter” key, the settings will show as below.
-
Page 60
If you want to abort the changes, press Pause key to go back to upper page. sample When the settings is done, press Cut key on the control panel and i-Craft will start to cut, then press Feed/Eject key to unroll the media. Step 6 The cutting job is done. -
Page 61: Menu Function
5.3 Menu function 5.3.1 Media Menu Media menu Function Settings To set or modify tool speed at horizontal Speed 1-10 moving. To set or modify the value of pressure that Pressure is being cut; make sure the material can be 1-50 cut through.
-
Page 62: Appendix
6. Appendix i-Craft Specification Model i-Craft™ Operational Method Roller-Type Max. Cutting Width 30.5 cm (12″) Max. Cutting Length up to 1000mm Max. Media Loading Width 330mm (13″) Max. Media Cutting Width 32 cm (12.48”) Number of Pinch Rollers Acceptable Material Thickness 0.8 mm (0.03″)
-
Page 63: Material Parameter Setting List
6.2 Material Parameter Setting List Reference Parameter setting for different materials Soft MEDIA Card stock Card stock Card stock Copy magnet (thickness) (120lb.) (250lb.) (350lb.)* paper (0.2mm) PRESSURE SPEED Optional Regular Regular Regular Regular blade advanced OFFSET blade blade blade (0.25) green blade (0.25)
-
Page 64: Coreldraw Aas Plug-In Instruction
6.3 CorelDRAW AAS Plug-In Instruction AASII Plug-in is a contour cutting of printed image function to work with graphic software such as CorelDRAW and Adobe Illustrator which is a substitute solution to Sure Cuts A Lot application software. Note AASII VBA Installer is applicable for CorelDRAW Version 13, 14, 15, 16, 17 Installation Please refer to Step 8 in Section 4.1 Driver Installation to install AAS plug-in for…
-
Page 65
Click on “Apply” and select whether you would like to add the Step 3 registration marks by page size or by object. Step 4 Now you can print out the image file with registration marks. Note: “Add Registration Mark by Object” will be the default selection if you click on the image whereas “Add Registration Mark by page size”… -
Page 66
Add Registration Mark by page size If you tick “Add Registration Mark by page size” as shown in the figure below and click “Apply”, your registration marks will be created automatically (please see Figure A3-1). Note: The length setting will be in the range of 5-25mm according to your page size. -
Page 67
Workable area It allows users to edit and cut graphics in the area outside the registration marks when adding registration marks by page. For A4 size media sheet, the workable area is 2.5mm extended from the registration mark on left and right sides and 4.5mm extended from the registration mark on top side. -
Page 68
Add Registration Mark by Object If you tick “Add Registration Mark by Object”, you will be offered three options of registration marks as shown below. 4-Point Positioning Length: The length of marks Range: 5mm~50mm Optimized Setting: 25mm … -
Page 69
4-Point Positioning 4-Point Positioning Length: The length of marks Range: 5mm~50mm Optimized Setting: 25mm Thickness: The line thickness of marks Range: 1mm~2mm Optimized Setting: 1mm Margin: The distance between marks and images Range: 0mm~50mm … -
Page 70
Note: 1. To save your materials, in addition to amending object margins, you can also adjust the length of the registration marks (5mm minimum) when you apply 4-Point Positioning (see table 1 for suggestions based on different material sizes). The smaller the size is, the smaller the distance between the object and the registration marks is (see the figures below). -
Page 71
Segmental Positioning For precise cutting quality, it is suggested to select “Segmental Positioning” when you are working on an extra long or large-sized image to increase cutting accuracy. Segmental Positioning X Step: The distance of intermediate position on the X axis … -
Page 72
Multiple Copies It is suggested to select “Multiple Copies” when you would like to make several copies of one image on your material to increase cutting accuracy. Multiple Copies No. of X Copies: The numbers of copies on X axis … -
Page 73
Contour cutting through CorelDraw Step 1 Position the paper with registration marks printed by your printer on the GCC cutter. Select “FilesPrint”. Step 2 Figure A3-13 Note: if you use CorelDraw X5 and later, you must follow the steps below. 1. -
Page 74
2. Go to the “Layout” page and select Bottom left corner at “Reposition images to”. Figure A3-15 3. Click “Print”. -
Page 75: Illustrator Aas Plug-In Instruction
6.4 Illustrator AAS Plug-In Instruction AASII VBA Installer is applicable for Adobe Illustrator Version CS4, CS5, CS6, Installation Please refer to Step 8 in Section 4.1 Driver Installation to install AAS plug-in for Adobe Illustrator. Printer Setting Step 1 Go to Control Panel, right click on the printer and select Printer Properties to open the Printer Properties page…
-
Page 76
Go to the Advanced page and make sure the “Enable advanced Step 2 printing features” box is unchecked. -
Page 77
User Instructions Step 1 Open Illustrator. Step 2 Edit your image and create a contour line (Note: you must have the line width set as 0.001mm). Contour line Step 3 Click on the image and apply the AAS function (FileScripts_AASII_Plug_In). -
Page 78
Step 4 Select the registration marks needed Step 5 Three types of registration marks are introduced here: 4-Point Positioning, Segmental Positioning and Multiple Copies. Note: The values entered in the “4-Point Positioning” section (length, thickness and margin) will still be applied when you tick “Segmental Positioning” or “Multiple Copies.”… -
Page 79
Step 6 Confirm the registration marks (the 4-Point Position mark is used as an illustration in the following steps). Click on the blank area on the page and then click “Document Setup”. Step 7… -
Page 80
Hit “Edit Artboards”. Step 8 Click on “Presets → Fit Artboard to Artwork bounds”. Step 9… -
Page 81
Step 10 Please move your mouse to the tool bar on the left when step 9 is finished and then click “Selection Tool”. Step 11 This will take you back to the edit mode. -
Page 82
Step 12 Print out the file with the contour line and the registration marks. Step 13 Place the printed file on the cutter, lower the pinch rollers and then position the carriage at the origin of the registration marks. Step 14 Send the file to the cutter. -
Page 83
Step 15 Select the cutter model, position the object in the bottom left corner. Step 16 Your job is now completed. -
Page 84
Add Registration Mark by page size If you want to create registration mark by page size, select the object, go to “Scripts” under “File” and select “_AASII_Plug_In” Tick “Make by page size” and click “Apply” and the registration mark will be created on the 4 corners of the page automatically, sown as below. -
Page 85
Workable area It allows users to edit and cut graphics in the area outside the registration marks when adding registration marks by page. For A4 size media sheet, the workable area is 2.5mm extended from the registration mark on left and right sides and 4.5mm extended from the registration mark on top side. -
Page 86
Add Registration Mark by Object If you add registration mark by Object, you will be offered three options of registration marks. Firstly, select the graphic which you want to add registration mark on and go to “Scripts” under “File” and select “_AASII_Plug_In”. Make sure to untick “Make by page size”… -
Page 87
Three types of registration marks 4-Point Positioning 4-Point Positioning Length: The length of marks Range: 5mm~50mm Optimized Setting: 25mm Thickness: The line thickness of marks Range: 1mm~2mm Optimized Setting: 1mm Margin: The distance between marks and images … -
Page 88
Note: 1. To save your materials, in addition to amending object margins, you can also adjust the length of the registration marks (5mm minimum) when you apply 4-Point Positioning (see table 1 for suggestions based on different material sizes). The smaller the size is, the smaller the distance between the object and the registration marks is (see the figures below). -
Page 89
Segmental Positioning For precise cutting quality, it is suggested to select “Segmental Positioning” when you are working on an extra long or large-sized image to increase cutting accuracy. Segmental Positioning X Step: The distance of intermediate position on the X axis … -
Page 90
Multiple Copies It is suggested to select “Multiple Copies” when you would like to make several copies of one image on your material to increase cutting accuracy. Multiple Copies No. of X Copies: The numbers of copies on X axis …

Craft CMS is intuitive. Marketing plans and organizational workflows—not so much. Guide lets you create a user manual throughout Craft CMS so clients don‘t need to go far to get the answers they need.
Guide was built to be a CMS manual, but Guide 3 is also a quick way to create widgets and unique Craft CP pages, without the use of a custom module or knowledge of PHP.
Guide 3 for Craft CMS 4

Requirements
- This plugin requires Craft CMS 4.0 or later.
Installation
To install the plugin, you can find it in the Craft Plugin Store, or follow these instructions.
-
Open your terminal and go to your Craft project:
-
Then tell Composer to load the plugin:
composer require wbrowar/guide -
In the Control Panel, go to Settings → Plugins and click the “Install” button for Guide.
Setup
- Visit the Guide settings page to configure a couple of setup options. The
Template Pathsetting is required for guides to be displayed. TheAsset Volumesetting is recommended when screenshots and other images are used in your guide content. - Create your guides using the built-in editor or by selecting templates added to your Guide Template Path.
- Use the Organizer to place your guides around the Craft CMS Control Panel.
Documentation
Documenation for Guide and Craft Guide Templates can be found here.
Brought to you by Will Browar
Here are some great open source projects that were used to help create this plugin:
- Nuxt.js
- Tailwind CSS
- Vite.js
- Vue.js
Thanks to the maintainers for doing what you do to make things like this possible. 💚

Описание
Мод добавит книгу рецептов, в которой будут все рецепты, которые есть в игре, даже рецепты модов.
Скриншоты
Видео
Рецепты:

Как установить CraftGuide
- Скачай и установи Minecraft Forge
- Скачай мод
- Не распаковывая, скопируй в .minecraft\mods
- Готово
Скачать CraftGuide
| # | Ссылка | Размер | Дата |
|---|---|---|---|
| Для 1.10.2 https://minecraft-inside.ru/download/67221/ |
446,98 КБ | 5 августа 2017 | |
| Для 1.8.9 https://minecraft-inside.ru/download/67222/ |
449,03 КБ | 5 августа 2017 | |
| Для 1.7.10 https://minecraft-inside.ru/download/67223/ |
448,60 КБ | 5 августа 2017 | |
| Для 1.7.2 https://minecraft-inside.ru/download/17777/ |
349,60 КБ | 11 июня 2015 | |
| Для 1.6.4 https://minecraft-inside.ru/download/9706/ |
333,14 КБ | 13 марта 2014 | |
| Для 1.6.2 https://minecraft-inside.ru/download/9708/ |
296,12 КБ | 13 марта 2014 | |
| Для 1.5.2 https://minecraft-inside.ru/download/9705/ |
291,86 КБ | 13 марта 2014 | |