Please note that this guide is written for players who do not intend to purchase mushrooms with real money.
FAQ[]
Q: How should I spend my mushrooms?[]
A: If you want to increase the amount of quests you can do, you should save it for the gryphon mount (25 mushrooms over 14 days). Gryphon doubles the amount of quests you can do over 14 days. A combination of the raptor/tiger and beer still should not beat the gryphon. Should you have under 25 mushrooms and no mount, then you should buy a raptor or tiger (30% mount).
Q: How should I allocate my stats?[]
A: 1 luck is worth approximately 40% of your primary attribute. 1 Cons is worth approximately 80% of your primary attribute. The other two attributes are worth about 10% of your primary attribute. Allocate points accordingly. Try to keep cons about 60-80% of your primary attribute.
Eg:
If you’re a mage, the importance of stats goes in this order:
Intelligence
Constitution (60 — 80% of your intelligence)
Luck (40% of your intelligence)
Q: What should I buy from the weapon or magic shop?[]
A: Do not purchase any items that cost mushroom(s). Otherwise, always upgrade your current equipment whenever possible selling your old item. It is optimal to buy cons, primary attribute, and eternal life potions whenever they become available.
Q: When should I use potions?[]
A: It’s a good idea to stack them and use them all at the same time to make some progress with dungeons. Otherwise, feel free to use them whenever. Another option is to use them when you get a new one to replace the old one.
Q: Is arena good?[]
A: Arena is fun but it is not a good source of income. Honor does not help your character other than the achievement stats. Just remember to do arena with as little gold as possible.
Q: Should I take quests which give exp or gold?[]
A: It’s recomended to take gold. It makes it easier to buy stats, which are then needed to complete better quests. Taking exp gives will eventually mean less successful quest completions, so it’s not recommended. Take the quests in the following priority: Superior equipment, best gold ratio, dungeon key, low time.
Edit: Some people believe what is written above, but it’s not completely true. EXP always outclasses gold, but if you take quests with high EXP reward only, you will fall behind eventually, leading to losses from low levels. You should keep it balanced.
If you’re going for a «cookie cutter» build, meaning you don’t want to think too much about the missions you do, then you should probably go for the method cited above the edit, since if you keep going for gold your equipment will always keep getting better, meaning that you won’t fail missions or lose to low levels. The only downside to this is that you’re not going the optimal route, but going for the optimal route is a tiring process, you should decide which route you want to go depending on the time you want to allocate to the game.
A2: Going for Exp has always been my #1, with more Exp you achieve a higher level therefore you can unlock higher level items for which you will have the gold to buy them just from the quests in the tavern alone. A good thing to notice here is the weekend events (different every weekend) in the tavern where you can for example obtain more gold on one weekend, on the next one more exp and yes in that scenario I always go for the stuff that is active on the event.
Q: Should I do dungeons higher than my current level?[]
A: Because the epic drops from dungeon monsters are rare (25%), it is expected that you do not get an epic item. Therefore you do not lose much from completing a dungeon earlier than your current level. Try to save the last stage since you are guaranteed an epic drop.
Gameplay[]
(Good guide for the gameplay, but probably too long to read: http://forum.sfgame.us/showthread.php?t=6986)
Level 1-3: []
(Do not buy a mount yet)
Take the quest that takes the least time. Should there be a tie, take the quest that gives fewer exp. You want to maximize your mushroom chances in the early stages of the game. Upgrade stats accordingly. Note that mounts do not reduce quests below a minute.
Level 4-9:[]
(Save up for the raptor/ tiger mount (-30% quest time))
By now the quests should take a fair amount of time to complete solol it is necessary to reduce the time per quest by using a mount. We will be saving the gryphon mount for another time. For now the raptor mount will suffice. Use above guidelines to take quests but do not use gold to upgrade stats. Once you get 10 gold, buy the raptor.
Level 10-30:[]
Always take the quest that gives a superior item or a dungeon key first.
With gryphon mount: Take the best exp 2.5 minute quest. Otherwise take the quest with the best exp/time ratio.
With raptor mount: Take the quest with the best exp/time ratio.
Level 30+:[]
Keep focusing on high experience quest, the gold gathering will happen anyways
Tips[]
Guilds[]
Try to join a guild with exp/gold bonus as soon as possible starting level 9-10. It drastically improves your questing results. You can do this by clicking hall of fame and then guild. A guild also regularly attacks another guild. The experience is as good as a medium 10 minute quest. This happens twice a day.
From the question of which class to choose, to monstrous dungeons in the pyramids of madness. In this guide you will be walked through until level 110 for a pleasant introduction to Shakes & Fidget.
Character Selection
When creating a character, you can choose one of these classes:
| Class | Main Attribute | Ability | Damage | Hit Points |
|---|---|---|---|---|
| Warrior | Strength | Shield Block | 4 | 5 |
| Mage | Intelligence | — | 9 | 2 |
| Scout | Dexterity | Evade | 5 | 4 |
| Assassin | Dexterity | Double Attack | 4 (2x) | 4 |
| Battle Mage | Strength | Arcane Comet | 4 | 5 |
| Berserker | Strength | Rage Attack | 4 | 4 |
| Demonhunter | Dexterity | Revive | 5 | 4 |
| Druid | Intelligence | Bear form/Eagle form | 3 | 5 |
| Bard | Intelligence | Instrument | 9 | 2 |
Shakes & Fidget Classes — number13
![]()

As you can see, the classes differ in their abilities, but they are all about equally good in terms of game balance. After choosing a class, you also have to decide for a race, but that only adds a few attribute points.
The race can also be changed by editing your avatar later in the game. So if these few extra attribute points actually matter to you, you can still adapt the race to your class.
Until level 10, it is quickly explained what to do. After you have created your account, you first validate your email to receive 10 extra mushrooms. You now have a total of 25 mushrooms, of which you then lease the dragon as a mount.
Right at the beginning there are different ways to get XP (before quests). On the one hand you get XP for the first 10 arena battles won, at the same time it is also possible to win XP at the wheel of fortune. You should take advantage of these opportunities before starting with quests to maximize your XP. Once you start with quests, make sure to always select the quest with the highest XP/time ratio. This is the fastest way to progress.
Before level ten, you also save up 25 gold, that is how much the scrapbook later costs in the magic shop. It is important that the magic shop is not visited during this time. This way, the scrapbook can appear with a certain chance without the use of mushrooms.
Level 10: Scrapbook and Dungeon #1
As soon as you reach level ten, you pause the quests for the time being. Now it’s time to start filling the scrapbook.
The items in the shops are only generated when you click on them for the first time. If you do this with level 1, only level 1 items are available in the shop. If you click the magic shop for the first time at level 10, the scrapbook can be offered immediately. If not, it should only cost a few mushrooms until it is finally available.
All defeated opponents including their equipment are added to the scrapbook. In order to fill the scrapbook as quickly as possible, you should look for opponents who are easy to defeat and have filled almost all item slots.
In addition to the items, there are also some achievements in the scrapbook. While some of them can be done right from the start, others can take months to unlock. I can recommend two guides for the achievements:
Shakes & Fidget: 9 Achievements that you can do right off the bat
In order to get a head start on a new server, it is important to fill your scrapbook from day one. You can complete these 9 achievements on the first day of the server and dust off the bonuses.
 number13julian
Shakes & Fidget: All 80 Achievements — Guide
The achievements in Shakes & Fidget grant big bonuses to the attributes if you know how to get them. Here you get to know the tricks so that you can get to all achievements as quickly as possible.
number13julian
From level 10 it is also possible to send messages. Use this to ask a strong guild whether they still have an open spot for you. Guilds give big bonuses to gold and experience through adventures.
Finally, the first dungeon key can also be found from level 10 during a quest. In the dungeons you will be confronted with much tougher monsters, at the same time the reward of gold and experience is significantly higher. The reward in the dungeons can also include epic items. These are usually much stronger than those you can get in the shops.
The dungeons are discussed separately in this post. An overview of the level requirements up to level 110 can be found under Dungeons.
Level 25: Fortress
At level 25, the construction of the fortress can be started. The main building is built for 100 gold. All other structures start from there.
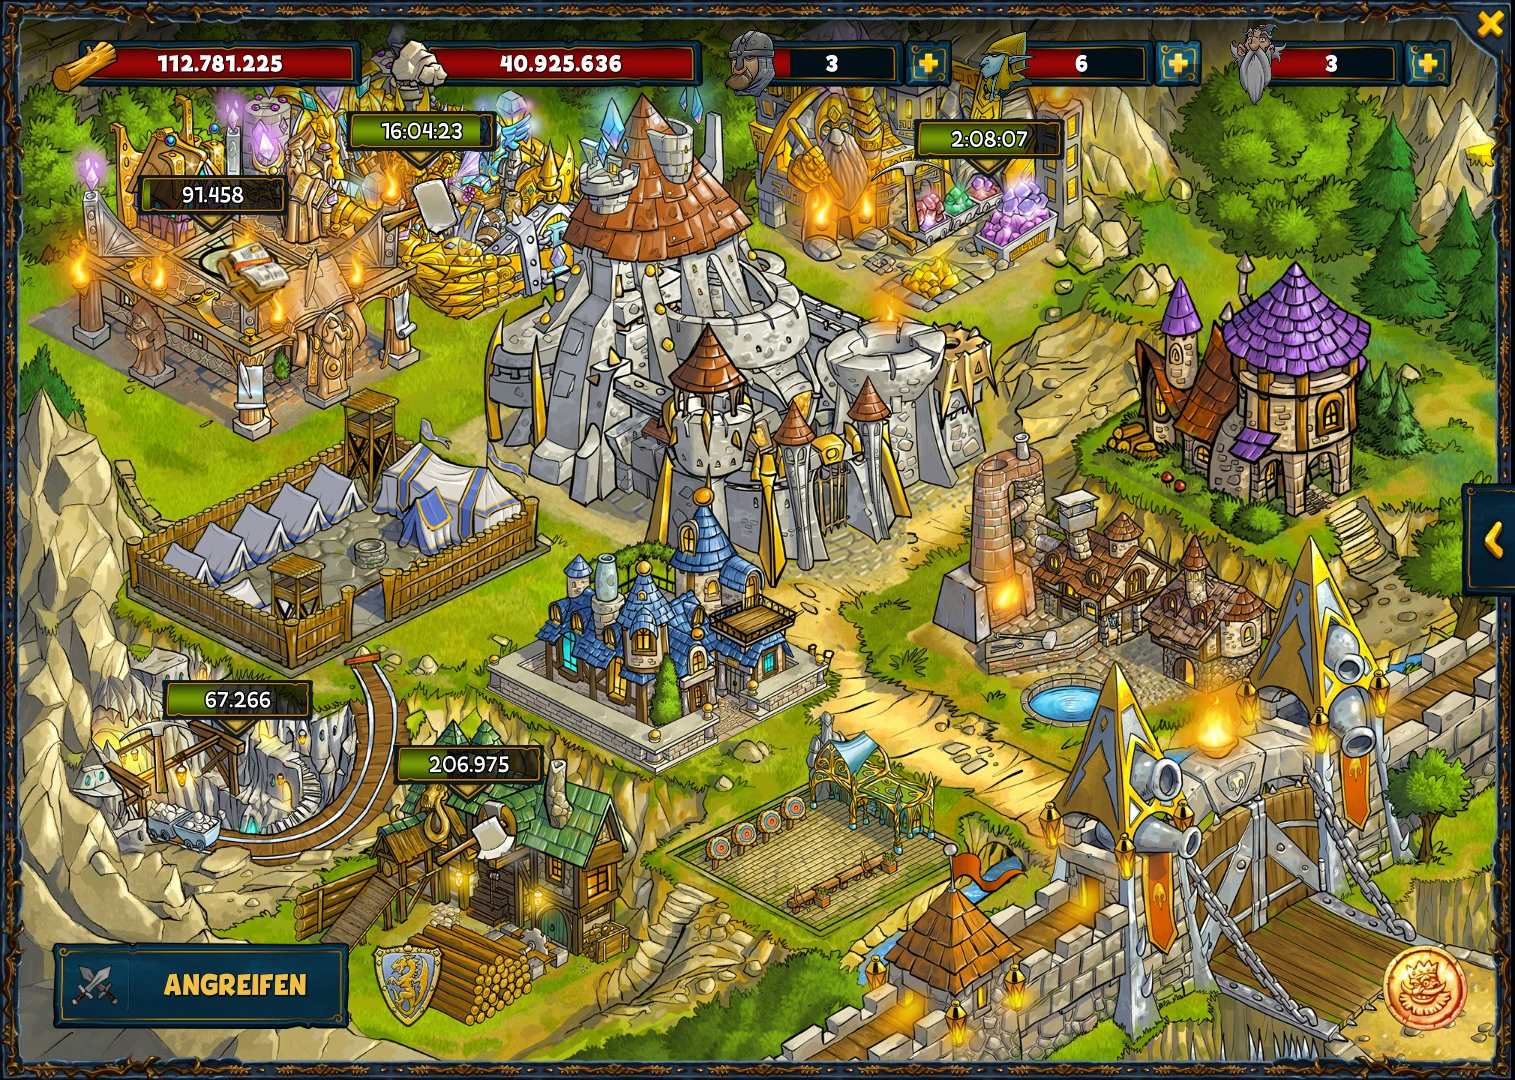
The fortress works kind of like a Clash of Clans mini-game, with resource buildings being pulled up that are needed for further expansion. Ultimately, the fortress gives you additional backpack slots, experience points and access to the gems.
Items with sockets are available from level 25 onwards. Gems are gathered in the mine of your fortress and then put into these sockets. This gives your character huge bonuses on his attributes.
You can find a detailed guide about the fortress in this blog post:
Shakes & Fidget: Fortress Guide
With level 25, the player unlocks the fortress — this allows you to mine powerful gems, that can be placed in the sockets of all items. Gems give the character valuable bonuses on all attributes, which are hugely important for fights in the arena and dungeons.
number13julian
Level 50: The Magic Mirror
During adventures you cannot fight in dungeons or in the arena. After all, you can’t split yourself up. However, the magic mirror helps to solve this problem.
From level 50, mirror shards can now drop while quests, which when put together result in the magic mirror. So you can go on an adventure while your mirror image faces the dungeon monsters or arena opponents. The mirror consists of 13 shards (coincidence?) that have to be found and dragged onto your avatar. It can take up to level 70-75 to collect them all.
After that, it is much more pleasant to progress with the scrapbook, since you don’t have to wait for the quests to finish. You can also earn more gold, because the same applies to the city guard: While your character is on guard, the mirror image can fight in the arena or dungeons.
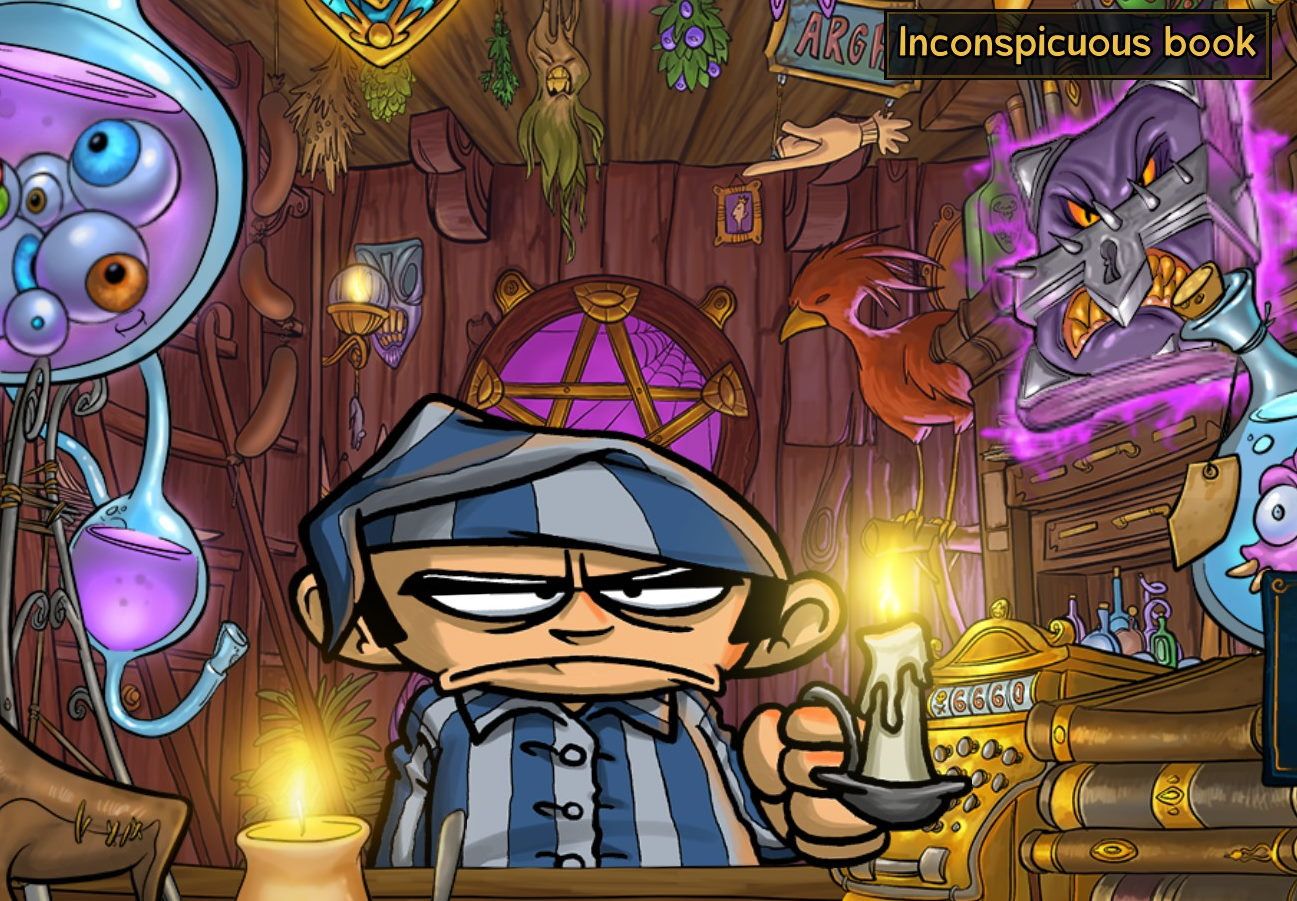
Level 66: The Witch
The inconspicuous book» in the magic shop brings you to the witch. Scrolls can be purchased there that add important effects to your equipment. For a complete guide to the upgrades and how to get them, check out this blog post:
Shakes & Fidget: Everything You Need to Know About the Witch
What does the witch do in Sfgame and when do you unlock her? What you can throw into the witch’s cauldron and all further explanations can be found in this guide.
number13julian
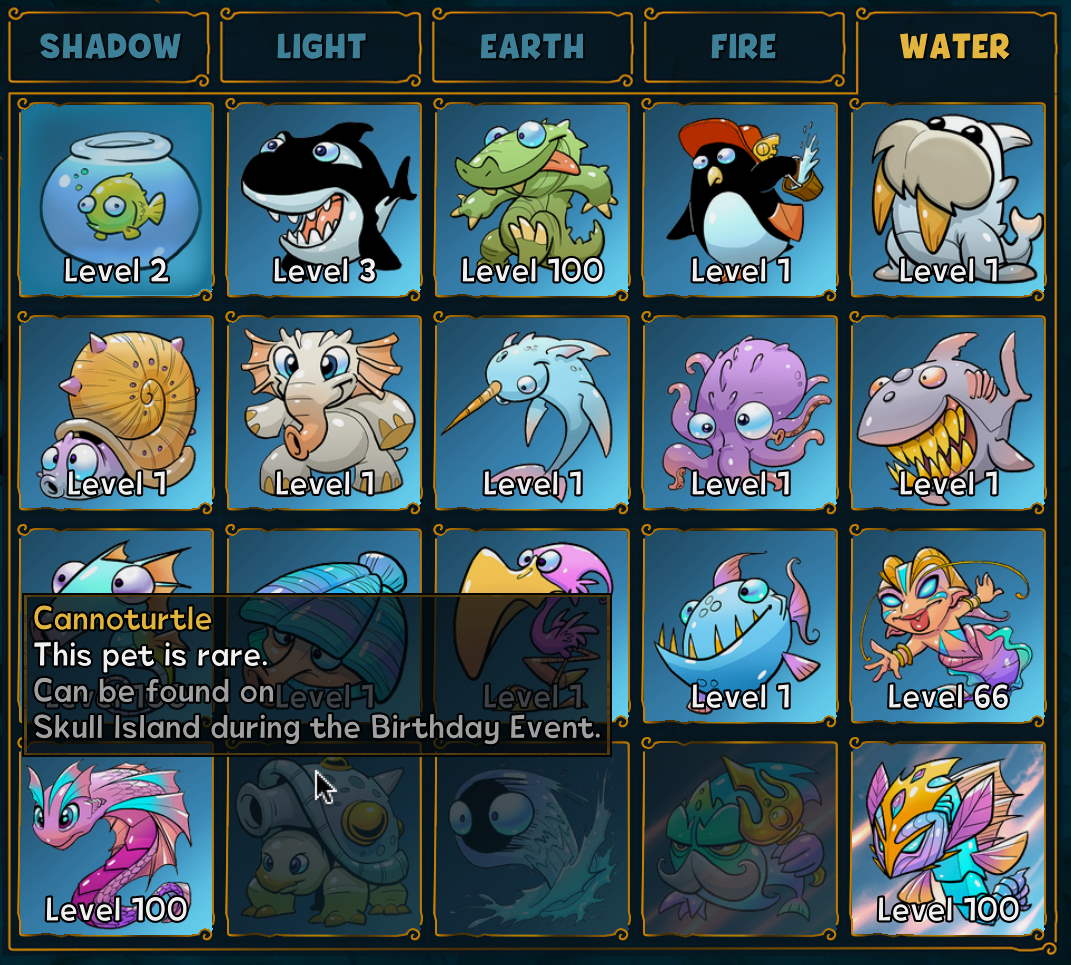
Level 75: Pets
At level 75, a nest full of eggs can be found during quests. You can then get to your pets via the stable. There they can be fed and pet fights can be carried out. There are five pet habitats in total:
- Shadow — Fruit: Blackberry (Bonus on Constitution)
- Light — Fruit: Lemon (Bonus on Dexterity)
- Earth — Fruit: Apple (Bonus on Intelligence)
- Fire — Fruit: Strawberry (Bonus on Luck)
- Water — Fruit: Plum (Bonus on Strength)
For each pet of a specific habitat found, you receive a pack bonus of 1% on the corresponding attribute. So if you have 5 pets of the water habitat, your character gets a 5% bonus to the strength attribute.
As soon as a pet level reaches level 100, the character receives another 0,5% bonus on the corresponding attribute. This increases further to 1% at the maximum level 200.
To unlock the pets, the corresponding pet must first be defeated in the habitat. This pet’s egg can then be found during a quest. Each pet has certain conditions that must be met (time of day, day of the week, season, quest area, etc.). You can also see the conditions if you move the mouse over a locked pet.
Various fruits can be found during quests, with which the pets are fed and improved. If you win habitat battles, you will get a fruit of the habitat aswell.
You can also have up to five pet fights a day against other players’ pets. The reward for winning a fight is also a fruit. Up to three fruits can be fed to a pet per day.
In another post about Shakes & Fidget you will find the optimal strategy for feeding your pets efficiently:
Shakes & Fidget: Ultimate Pet-Guide
Since the initial release of pets, a lot has changed in Shakes & Fidget. Here you will learn everything you need to know to level your pets even faster!
number13julian
Level 85: The Holy Grail
The holy grail makes filling up the scrapbook much easier for you. The grail can be found in the gem mine from level 85, instead of a gem.
If you activate the Grail, missing items from the scrapbook will now be highlighted. This affects the items in the shops, as well as the items of all characters in the hall of fame.
Level 90: The Blacksmith
As soon as the character reaches level 90, he gets access to the blacksmith. You can get to it by clicking on the obscure pommel in the weapon shop. The blacksmith offers the following services:
- Provide items with a socket
- Remove gem from the socket
- Improve attributes of items
- Dismantling items for resource extraction
- Change the look of epic items
- Swap rune bonus of two items
Shakes & Fidget: All About the Blacksmith
The blacksmith is an extremely important tool to give your equipment in Shakes & Fidget the final touch. He will improve it by a lot, allowing you to fight much better. In this post, we’ll explain all the functions of the blacksmith in detail.
![]() number13Julian
number13Julian
Level 99: The Demon Portal
As soon as you reach level 99, you can also enter the demon portal in addition to the usual dungeons. Here you will face an overwhelming opponent whom you can only fight once per day.
The damage done to the opponent is remained. However, the monster regenerates 10% of its hit points every day at midnight. If you are actually able to defeat your opponent, you will receive 1% bonus hit points for your character. A total of 50 enemies are hidden behind the portal, which corresponds to a total hit points bonus of 50%.
From level 99, the guild’s demon portal will also open for you. Here you can fight against even stronger opponents. As with the dungeon demon portal, the opponent regenerates 10% of his health every day. If you defeat the opponent, the entire guild receives a damage bonus of 1%. This bonus also increases to a maximum of 50%.
Level 100: The Toilet of the Arcane Gods
From level 100 it is possible to find the key to the toilet during a quest. An item can be thrown into the toilet every day to fill up the mana tank a little further. Depending on which item is thrown into the tank, it fills up faster.
When the tank is finally full, the toilet can be flushed. This increases the aura by one level and the gods grant you a (possibly epic) item.
Each level of the aura increases the quality of the items in the shops by 1, at the same time a little more mana is required for the next flush.
Shakes & Fidget: All About the Toilet of the Arcane Gods
The Toilet of the Arcane Gods improves the items offered to you in the stores. It is also essential to equip your tower companions. You’ll learn everything about the toilet in Sfgame in this post.
![]() number13Julian
number13Julian

Level 105: Arena Manager
At level 105, clicking on the coin in the arena leads to the arena manager. Here you are no longer the gladiator in the ring, but the manager of your own arena. This mini-game is about increasing the arena’s income by expanding the seats and offers of the arena.
Once enough revenue is earned, the entire arena can be sacrificed for a few runes, and the game starts over. However, this time a little faster: Each rune brings a 5% bonus to the arena income.
From 1000 runes collected, the stores can also offer rune-enhanced items for your character. With this you get e.g. bonuses on damage dealt, hit points, gold, or experience to name a few.
In the detailed guide to the arena manager you can find out more about the various bonuses and strategies for the fastest possible progress:
Shakes & Fidget: New Update adds Arena Manager
Not only the new German server number 40 started last weekend, also a new update was welcomed in Shakes & Fidget: The Arena Manager is a new mini-game, which can be found from level 105 in the arena.
number13julian

Dungeons #1-9
The dungeon keys can be found on quests at regular intervals. The only exception are dungeons #6 and #9, with these two the keys can also be found in the shops.
| Level | Dungeon | Name | Key |
|---|---|---|---|
| 10 | #1 | Desecrated Catacombs | Quest |
| 20 | #2 | The Mines of Gloria | Quest |
| 30 | #3 | The Ruins of Gnark | Quest |
| 40 | #4 | The Cutthroat Grotto | Quest |
| 50 | #5 | The Emerald Scale Altar | Quest |
| 70 | #6 | The Toxic Tree | Quest / Magic Shop |
| 80 | #7 | The Magma Stream | Quest |
| 95 | #8 | The Frost Blood Temple | Quest |
| 110 | #9 | The Pyramids of Madness | Quest / Weapon Shop |
Overview
Shakes и Fidget – это веселая и забавная пародия с юмором на фэнтезийные RPG игры, выполнена игра на браузерной основе и Flesh движке. Но не смотря на свою простоту эта игра удостоена наградой как “одна из лучших ролевых игр”! Звучит странно? Однако в SFGAME более 50 миллионов игроков, и это одна из самых популярных онлайн-игр в мире!. Я не использовал чужие гайды и информацию руководств других пользователей! Все писал во время прохождения игры и использовал информацию взятую с переводов официального разработчика и издателя. (с) PblCb – В этом руководстве, я написал подробно об игре.- Описал различные нюансы самой игры.———————————————- Незабываем оценивать руководство автора.- Ваша положительная оценка является благодарностью за работу автора.- Спасибо за внимание и приятной вам игры.
01. О игре
 . И так, перед вами самая забавная и смешная пародия на RPG игры! В различных местах и локациях вы увидите различные предметы и прорисовки из известных вам игр и фильмов.
. Изначально игра была создана для игры в браузере[s1.sfgame.ru], а затем перекочевала на телефоны и планшеты. Вы можете найти игру в AppStore и GooglePlay[play.google.com].
. Игра очень проста в управлении и вы в ней легко освоитесь. Смело присоединяйтесь и создайте себе героя, погружайтесь в опасный мир кишащий монстрозайцами (да-да такие тут есть) и наместниками ада! Вперед навстречу великим приключениям и очень веселому юмору! Так, же вы сможете разносить в пух и прах других игроков на арене, завоевывая уважение и ранг. Набирайся опыта, зарабатывай золото… можете даже основать с друзьями собственную гильдию!
02. Создание персонажа и привязка аккаунта
 . При входе в игру вам необходимо будет создать своего персонажа. Вы выбираете пол, класс персонажа и его расу, после чего дадите ему имя. При выборе будьте внимательны на параметры, которые необходимы для класса и какие параметры изменяет та или иная раса.
. Далее вас по просят выполнить привязку созданного персонажа через следующие авторизации на выбор:
– Почта (указав свой email, необходимо будет подтвердить аккаунт)
 – FaceBook (попросит подтверждение аккаунта, через соц. сеть FaceBook)
– Steam (на изображении отсутствует, но в игре будет – привязка к STEAM клиенту)
– GooglePlay (привязывает к аккаунту Google – эта опция для мобильных телефонов)
Совет: Если вы собираетесь продолжать играть в эту игру серьезно и у вас есть в наличии смартфон на Android или iOS, то лучше всего выполнить регистрацию через почту – таким образом вы сможете играть и в телефоне и на компьютере.
 . Когда будете вводить ник-нейм вашего персонажа(аккаунта), не забудьте выбрать сервер!! Советую выбирать: Россия, Мир 1.
. После регистрации вы начнете игру, причем вам будут помогать подсказки, они появляются только один раз, так что читайте внимательно!
03. Параметры персонажа
. Параметры персонажа влияют на множество действий и очень зависят в сражениях, когда вы сражаетесь с другим классом – не свойственным вашему. Для начала мы узнаем о параметрах:

- Strenght (Сила) – Главный параметр для воина, который влияет на атаку. Так же этот параметр повышает защиту против класса воина.
- Dexterity (Ловкость) – Главный параметр для лучника, который влияет на атаку. Так же этот параметр повышает защиту против класса лучника.
- Intelligence (Ум) – Главный параметр для мага, который влияет на атаку. Так же этот параметр повышает защиту против класса лучника.
- Constitution (Выносливость) – параметр повышающий очки здоровья.
- Luck (Удача) – Увеличивает шанс нанести критический урон.
. Данные параметры можно увеличивать одевая снаряжение, выпивать зелья (все это можно приобрести в магазинах оружия и волшебства), повышать медали (в меню персонажа) и прокачивать параметры за монеты (в меню персонажа).
. Когда вы определитесь с классом и расой, то всегда на арене и в сражениях сравнивайте свои параметры с параметрами противника.
04. Классы и расы
. В игре на данный момент всего три класса и восемь видов рас. Рассмотрим параметры дающие классы и расы:
— Классы:
Параметры Классы:
Воин

Маг

Лучник

Сила:
Ловкость:
Ум:
Выносливость:
Удача:
+7
+3
-0
+5
-0
-0
-0
+8
+2
+5
+1
+7
+1
+4
+2
— Расы:
Параметры Расы:
Люди


Орки


Эльфы


Сила:
Ловкость:
Ум:
Выносливость:
Удача:
-0
-0
-0
-0
-0
+1
-0
-1
-0
-0
-1
+2
-0
-1
-0
Параметры Расы:
Темные Эльфы


Карлики


Гоблины


Сила:
Ловкость:
Ум:
Выносливость:
Удача:
-2
+2
+1
-1
-0
-0
-2
-1
+2
+1
-2
+2
-0
-1
+1
Параметры Расы:
Гномы


Демоны


Сила:
Ловкость:
Ум:
Выносливость:
Удача:
-2
+3
-1
-1
+1
+3
-1
-0
+1
-3
05. Меню игры и главный город
. Рассмотрим меню игры и сам город, так как некоторые дополнительные функции имеются только на карте города. Узнал я различне дополнительные функции, сравнивая игру с версиями браузера и телефона.

- 01. Состояние ваших средств, количество ваших монет и грибов (грибы тут являются донатной валютой).
- 02. Ссылки открывающие страницу в браузере – выходящие на страницы разработчика.
- 03. Настройки игры (рекомендую туда зайти и поставить галочку “сравнение вещей” – это поможет вам определять быстрее, какая вещица лучше).
- 04. Помощь и поддержка – там будет ссылка на форум поддержки, а так же сможете почитать условия и правила.
- 05. В этой области отображается сервер на котором вы играете.
- 06. Возвращает окно действий на предыдущее, пока не откроете площадь города. Если открыта площадь города и вы нажмете на крестик, то вы выполните выход из игры к меню выбора аккаунта.
- 07. Аватарка вашего персонажа (отображается только на главной площади), при нажатии войдете в профиль вашего персонажа.
- 08. Таверна – тут вы можете выполнять задания или испытать удачу играя в азартную игру на деньги с одним из посетителей.
- 09. Арена – в этом месте вы можете сражаться с другими игроками.
- 10. Городская вахта – если вы решили некоторое время не играть, то можете поставить вашего персонажа на вахту зарабатывать деньги в ваше отсутствие.
- 11. Магазин оружия – в этом месте продают боевое снаряжение и оружие
- 12. Волшебный магазин – в этом месте продают магическую бижутерию и зелья.
- 13. Конюшня – тут вы можете приобрести скакуна, который сокращает время исполнения заданий.
- 14. Дилер грибов – тут вы можете приобрести за реальные деньги “грибы”, это донатная валюта в игре.
- 15. Персонаж – открывает окно вашего персонажа, там будет ваше снаряжение, инвентарь и параметры.
- 16. Почта – тут вы можете читать сообщения о нападениях и ваших сражениях, а так же переписываться с вашими друзьями в игре.
- 17. Гильдия – тут вы можете создать свою собственную гильдию, для того чтобы присоединиться к существующей гильдии, необходимо искать в зале славе в разделе гильдий и выбирать в описании функцию “связаться с лидером гильдии”.
- 18. Зал славы – Кто круче? Узнаете тут!
- 19. Темницы – так же именуются как подземелья.
- 20. Крепость – когда вы достигните 25-ого уровня, вы сможете построить свою крепость и отстраивать свои владения.
- 21. Парящие кристаллы – очень полезные для вас!
- 22. Переносит вас в меню заданий.
- 23. Аппарат везения доктора Абавуву – оно же колесо фортуны, тут вы можете получать призы бесплатно раз в сутки, последующие вращения колеса будут стоить вам целого гриба!
06. Меню выбора аккаунта (привязка к почте)
 . Если вы случайно нажали на крестик или хотите помочь другу, поиграть за его аккаунт то вы на верном пути. Вы можете создать нового персонажа использовав гостевой вход (1), а так же выбрав аккаунт (4) сможете удалить ненужный (2) и определившись начать игру (3).
. При гостевом входе вы указываете ник персонажа и если такого нету на указанном сервере, вы сможете зарегистрировать его себе, если же ник уже существует, то вас попросят ввести пароль от персонажа. Если вы решили добавить свой старый аккаунт или с телефона или браузера, то выбрав ник, сервер и вписав верный пароль = автоматически добавите аккаунт в клиент стима и игра продолжиться за выбранный аккаунт.
. Если ваш аккаунт создан был в Steam, то не печальтесь. Выходите в меню выбора аккаунта и выбираете функцию “управление”, далее выбираете “изменить почту” и указываете свою, после чего подтвердаете и наслаждаетесь.
07. Таверна
 . В этом помещении вы увидите трех основных и действующих персонажей:
- – Cлева за столом сидит “жулик” предоставляющий вам игру “наперстки” на ваше состояние. Как вы не старались следить за шариком, разброс все равно будет случайным, так что это игра на удачу.
- – По середине за столом сидит один из заказчиков, ищущего наемника для выполнения задач. Вы сможете выбрать одно задание из трех на выбор, в самом задании будет описано сколько времени займет путь, сколько вам заплатят и в редких случаях предлагают вам предмет в награду (параметры которого вы можете посмотреть перед заданием).
- – Справа стоит бармен за стойкой и он вам предложит восполнить полосу “жажды приключения”, для продолжения совершения подвигов – но стоимость будет оцениваться в грибах!
. По поводу заданий – чем выше ваш уровень, тем круче будут давать вам задания, за выполнения которых будет большее вознаграждение, но время выполнения станет дольше. Но в итоге вам станет тяжело высчитывать, при выборе выполнить задание самое приносящее золото или же опыт и для этого есть уже готовый калькулятор, который я нашел на интернет просторах – Калькулятор наград[sf.kalais.net]:
- В “Reward (silver)” указываете число серебряных (помните 1 золотое = 100 серебряным) монет, которое вы получите за выполнение задание.
- В “Experience” указываете количества опыта, получаемого после завершения задания.
- В “Time (min:sec)” указываете время, которое потребует задание на выполнение. К примеру так “5:30” – двоеточие обязательно писать.
 . Так же вы увидите желтую полоску “Жажда приключений” которая полностью восстанавливается в начале каждого дня – это ваша энергия для выполнения заданий. То есть, вы можете бесплатно выполнить определенное количество заданий, после чего придется покупать за грибы у бармена, а так же у бармена есть ограничение по количеству восполнении энергии для заданий.
. Если вы не улучшали свои параметры и не одевали снаряжение очень долго время, то при достижении уровня, вы сможете напороться на чудище по заданию – где вы можете проиграть и не выполнить свою миссию.
08. Арена
 . На арене вы сможете сразиться с одним из трех предоставленных персонажей, за победу вы получите очки славы и монеты! Но если вы проиграете, то потеряете свою славу и свои монетки…
. Бесплатно вы можете выходить на ринг раз в 10 минут, если же вы хотите драться дальше без ожидания времени, то бой будет стоить вам “грибом”.
. При выборе противника, учитывайте его класс – указанный на иконке противника, так же не забывайте про уровень. А во внимание берите его параметры, если даже ваши классы не совпадают, учитывайте ваш параметр защиты против данного класса.
09. Городская вахта
 . На городской вахте вы можете оставить своего персонажа на время вашего отсутствия, причем за это вы будете получать вознаграждения в монетах. Если вы остановите свою службу в вахте, то не получите вознаграждение! По мере роста уровня вашего персонажа будет больше его награда, причем с повышением каждого уровня! Для примера выпишу из таблицы разницу между несколькими уровнями персонажа:
Уровень персонажа
Награда за службу
1
10 
20
5  12
12
100
651
10. Магазины оружия и волшебства
 . В этих магазинах вы сможете приобрести различное снаряжение и магические вещи. Так же вы можете в волшебном магазине приобрести зелья которые повышают определенные параметры на ограниченное время.
. Так же могу предложить калькулятор для просчета параметров оружия – Калькулятор параметров оружия[sf.kalais.net].
 . Выбираете класс оружия и откроется страница, где вы можете сравнить два оружия по параметрам.
. Ненужные предметы вы можете продать в магазине из инвентаря, который расположен над продавцом. Просто перетащите из инвентаря к продавцу предмет и вещь будет продана.
11. Конюшня (маунты)
 . В данной игре существуют маунты – они же скакуны и транспорт перемещения. Вам предоставят 4 вида маунтов и у каждого будет своя цена, в зависимости скорости перемещения.
. В игре маунты являются самым необходимым, ведь благодаря им вы сможете понижать затраты времени на выполнение заданий, что собственно облегчает ваши трудности и ускоряет продвижение вашего героя экономией времени.
 . На начальных уровнях в них особой необходимости не будет, но когда вы начнете достигать высот и задания начнут занимать больше времени, тут то вы и побежите в конюшню за своим личным маунтом.
. В зависимости от расы вашего персонажа, будут предоставлены разные маунты. Если вы человек, эльф, карлик или гном – то вашими маунтами будут тигр, корова, лошадь и гриф-дракон. Если же вы орк, гоблин, темный эльф или демон – то вашими маунтами будут свинья, волк, хищник и дракон-гриф. Разницы в маунтах не будет, только их внешний вид и названия.
. Маунты и их возможности:
Маунты:
Параметры:
Стоимость:
Свинья
Время в пути -10%
1 на 14 дней
Волк
Время в пути -20%
5 на 14 дней
Хищник
Время в пути -30%
10+1 на 14 дней
Дракон-гриф
Время в пути -50%
Бонус – Вам дают экологическую награду, основанную на вашем уровне, один раз за покупку или продление.
25 на 14 дней
Корова
Время в пути -10%
1 на 14 дней
Лошадь
Время в пути -20%
5 на 14 дней
Тигр
Время в пути -30%
10+1 на 14 дней
Гриф-Дракон
Время в пути -50%
Бонус – Вам дают экологическую награду, основанную на вашем уровне, один раз за покупку или продление.
25 на 14 дней
. При приобретении более лучшего питомца, приведет к полному удалению предыдущего. Причем никакого продления не будет, все с чистого нуля. Учтите это при выборе своего скакуна, но на начальном этапе советую и рекомендую выбирать ЛошадьВолка и по карману не бьет и донат ненужен, а способным тратить два гриба в месяц – берите не думая ТигрХищник.
12. Дилер грибов (Донат)
 . Собственно тут вы сможете купить за реальные деньги такую валюту как грибы! Честно говоря игра не сильно ввязывает игрока на донат, но тем кто не хочет тратить свое время или быстрее совершать свои действия и быстрее прокачиваться – предоставляется донат. Не переживайте, без доната играть можно и это не урезает ваши права как игрока.
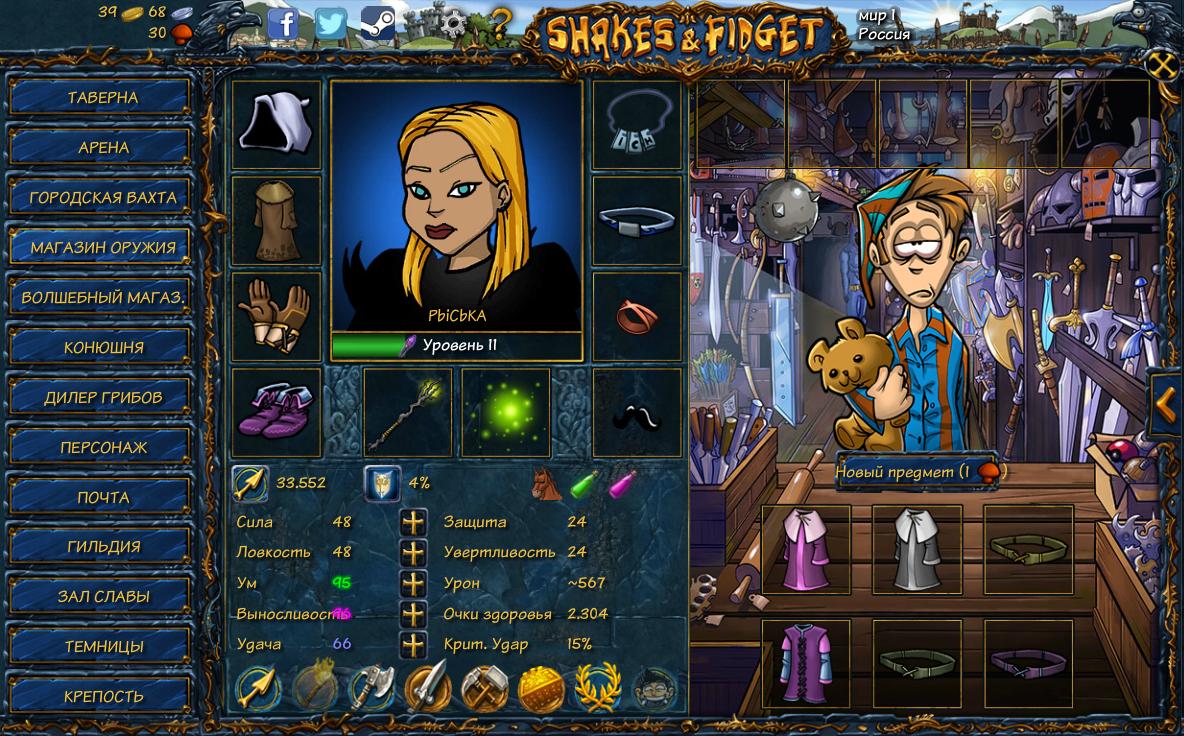
13. Меню персонажа
. В этом меню мы сможем увидеть всю свою статистику и свое снаряжение, но для большей точности я решил упростить и расписать все необходимое:

- 01. Рюкзак в котором хранятся неиспользуемые вещи и ячеек доступных на первое время всего пять, потом можно расширить за счет склада в крепости, так что берегите место и складируйте правильно.
- 02. Описание персонажа, тут вы сможете написать “описание” вашего персонажа, и все игроки проходящие профиль вашего персонажа будут видеть это описание.
- 03. Снаряжение одетое на вашем персонаже, вы можете перетаскивать вещи из рюкзака и обратно.
- 04. Аватарка вашего персонажа, если нажать на неё, то за определенную стоимость вы сможете сменить пол, класс и расу.
- 05. Ваше место по рейтингу среди всех игроков, зависит от набитой “славы” на арене в одиночных PvP боях.
- 06. Указывает процент снижения брони – “Снижение урона действует для врагов того же уровня. Формула расчета: Ваша броня делиться на ваш уровень, так же и у врага. У каждого класса свои ограничения: Воин до 50%, Маг до 10%, Лучник до 25%.
- 07. Эффекты наложенные на вашего персонажа отображаются в этой области, в эффектах можно использовать одного любого скакуна (маунта) и три на выбор зелья. Больше эффектов получить или использовать нельзя.
- 08. ПараметрыСтатистика вашего персонажа, а так же вы сможете поднять параметры вашего персонажа за определенную плату. Чем выше вы подымаете параметр, тем выше будет его цена.
- 09. Медали, которые получил ваш персонаж. Они получаются за определенные действия вашего персонажа, причем медали могут улучшаться до 12 ранга. С каждым получением медали или её улучшением, вы будете получать дополнительный стат ко всем атрибутам вашего персонажа (Таблица медалей будет описана ниже).
- 10. Особая медаль, она улучшается только тогда, когда вы нажав на неё пригласите друга начать игру и он примет ваше приглашение (в игре другу обязательно надо побывать и подтвердить второе сообщение о создании аккаунта, чтобы получить вам эту медаль).
14. Медали персонажа
И так, чтобы вы знали необходимое для фарма медалек и получения от них дополнительных стат, предоставляю вам таблицу:
Медаль Прогресса:
Степень:
Необходимый уровень персонажа для получения:

-1
-2
-3
-2
-5
-10

-4
-5
-6
-20
-30
-40

-7
-8
-9
-50
-60
-70

-10
-11
-12
-80
-90
-100
Медаль Героизма:
Степень:
Зачистить необходимое количество этажей для получения:

-1
-2
-3
-1
-5
-10

-4
-5
-6
-20
-30
-40

-7
-8
-9
-50
-60
-70

-10
-11
-12
-80
-90
-100
Медаль Гладиатора:
Степень:
Необходимые победы на арене для получения:

-1
-2
-3
-1
-5
-10

-4
-5
-6
-25
-50
-100

-7
-8
-9
-250
-500
-1000

-10
-11
-12
-2500
-5000
-10000
Медаль Путешественника:
Степень:
Выполнение заданий для получения:

-1
-2
-3
-1
-5
-10

-4
-5
-6
-25
-50
-100

-7
-8
-9
-250
-500
-1000

-10
-11
-12
-2500
-5000
-10000
Медаль Труда:
Степень:
Количество часов отработанных на вахте для получения:

-1
-2
-3
-1
-5
-10

-4
-5
-6
-25
-50
-100

-7
-8
-9
-250
-500
-1000

-10
-11
-12
-2500
-5000
-10000
Медаль Торговца:
Степень:
Количество полученного золота с продажи предметов для получения:

-1
-2
-3
-1
-5
-10

-4
-5
-6
-25
-50
-100

-7
-8
-9
-250
-500
-1000

-10
-11
-12
-2500
-5000
-10000
Медаль Уважения:
Степень:
Уровень репутации для получения:

-1
-2
-3
-1000
-1500
-2500

-4
-5
-6
-5000
-10000
-15000

-7
-8
-9
-20000
-25000
-30000

-10
-11
-12
-35000
-40000
-50000
Медаль Дружбы:
Степень:
Количество добавленных друзей для получения:

-1
-2
-3
-1
-2
-3

-4
-5
-6
-4
-5
-6

-7
-8
-9
-7
-8
-9

-10
-11
-12
-10
-11
-12
. Одна степень приравнивается к +1 единицы ко всем атрибутам персонажа. А так же за открытие всех медалек до 12 степени вы получите в общей сложности +96 к атрибутам персонажа.
15. Темницы (Подземелья)
 . В игре есть специальные подземелья (темницы) и общественных подземелий всего 13, это те подземелья в которых вы можете побывать самостоятельно, а в остальных могут находиться только гильдии. Из доступных 13 подземелий игрок по мере роста своего уровня будет находить в заданиях ключи для первых 9 подземелий, остальные подземелья откроются после зачистки первых 9 подземелья.
. В каждом подземелье у вас есть шанс получить следующие вещи:
- 50% шанс получить обычный предмет.
- 25% шанс получить эпический предмет.
- 100% шанс получить эпический предмет за зачистку 10-ого этажа в каждом подземелье.
. Проходите подземелья по совместительству с прокачкой персонажа и получайте хорошую награду! В подземельях монстры имеют различные параметры, поэтому когда вы откроете несколько и более подземелий, вам необходимо будет сравнивать параметры монстров для более удачного прохождения подземелья.
16. Аппарат везения доктора Абавуву
 . Это ежедневный бонус для халявщиков, так как раз в сутки можно крутануть колесо один раз бесплатно. Последующие вращения колеса обойдутся оплатой грибами… Во всех случаях во время вращения колеса вы будете получать случайную награду, которая указана на самом колесе. Например если вам попались грибы, то вы получите от 1 гриба до 10+, все же случайность – такая случайность.
. Для владельцев телефона найти это помещение легко, а вот играющие через браузер или Steam зайдут только с локации города. Само помещение отмечено и указано в разделе “5” данного руководства.
17. Альбом высокой точности (дотошности)
. В игре, по достижению 10 уровня вашего персонажа, вы можете встретить в магазине “Книга точности” имеющую маленькую цену. Покупайте её и используйте! Она вам пригодиться, так как она увеличивает набираемый вами опыт.
— Начнем с названия книги:
. Названия на Русском интерфейсе неправильное, так как с английского книга называется “scrapbook of meticulousness” – переводиться приблизительно как “Альбом дотошности”. Но после приобретения книги и просмотра профиля персонажа, она уже будет называется верно.
— Приобретение книги:
. Этот Альбом можно приобрести в Магическом магазине начиная с 10-го уровня. Но вам она может и долго не попадаться, так что не отчаивайтесь, рано или поздно вы в любом случае её приобретете. Стоимость книги будет 25 золотых монет!
 — Внешний вид (по заметкам другого автора):
. Альбом очень напоминает по внешнему виду “Никрономикон” из фильма Evil dead 3 (очень веселый фильм).
 — Использование и приминение:
- 1. Приобретая книгу вы должны её использовать на персонаже, после чего она будет отображаться в параметрах игрока и показывать на сколько процентов опыта игрок будет получать за прохождение заданий и битв в подземельях.
- 2. В окне персонажа, где параметры защиты вы можете нажать на альбом и открыть его, там вы увидите предметы и монстры, которых встречали в игре и увидите сколько информации собрано в альбоме и сколько еще необходимо.
- 3. Эта книга очень напоминает альбом для фотографий, только вместо личных фотографий вы собираете фотографии игровых предметов. В альбом попадают:
– убитые вами монстры, боссы и рейдбоссы;
– вещи, купленные вами в магазине (Важно: необходимо обязательно одевать все вещи на себя в инвентаре после их покупки для активации в альбоме).
– вещи побежденных вами игроков, когда вы инициируете бой (Важно: в альбом не попадают вещи с побежденных вами игроков, когда бой начали они). - 4. За собранную вами “коллекцию” вам будет начисляться бонус к поулчаемому опыту на квестах, пропорционально заполненности Альбома. Максимум можно накопить бонус: +100% к опыту за 2022 фотографий. В этом то вся соль. И именно это побуждает хайлевлов нападать на лоулевыл для “фотографирования” лоулевельного оружия, доспехов, аксессуаров.


— Как открыть предметы других классов? – Все очень просто, нападайте на более слабых игроков в списке “Зала славы” другого класса. При победе над ними вы будете получать в список вещи, которые были на них одеты во время сражения.
— У меня в альбоме отображены в одном пункте одна вещь в нескольких расцветках, как мне быть? — Будьте внимательны, вещи одного класса могут иметь разные цвета и альбом это учитывает, поэтому всегда сравнивайте вещи в цветах. Не полученные вещи будут иметь серый оттенок.
18. О еженедельных ивентах
. Разработчики каждую неделю, в выходные (суббота и воскресенье), устраивают забавные и занимательные ивенты, чтобы игроки не были в рутине однообразия. Причем никто не знает, какой ивент ожидает нас на каждой неделе… Различий ивентов очень большое и каждый имеет свои особенности!
— Как узнать об ивенте? – В таверне у бармена вы всегда можете узнать о ивенте, если он наступил, и необходимые действия для выполнения. А так же атмосферу праздников составят наряды в самой таверне!
— Какие ивенты бывают и что на них делать нужно? – Ниже приведу таблицу с описаниями различных ивентов. Таблица будет пополняться еженедельно!
Изображение таверны:
Описание и действия:

– Ивент: Урожай Грибов
– Описание и действия: В этот ивент большой урожай грибов по всему лесу и окрестностям, отправляйтесь на задания из таверны требующих большее кол-во времени, таким образом шанс по пути собрать 1 гриб будет выше. В такой день вы можете позволить себе кружку у бармена и прокачать своего персонажа!

– Ивент: Выходные мудрости
– Описание и действия: В этот ивент вы будете получать больше опыта выполняя задания.
ХХ. Продолжение следует

<– Подписывайся на это руководство! Зачем? Так оно будет пополняться и дополнять в себя информацию о игре… Будь смелым и храбрым войном и следи за обновлением информации. Скоро все все все все все все все все все все все все все все все все все все все все будет в этом руководстве!
ХХ. Итоги (Обзор автора)
Прямая ссылка на обзор автора – оценивайте.
Прямая ссылка на группу в STEAM.
. Бесплатная браузерная игра перекочевала на телефоны, а теперь появилась в STEAM’е. Не смотря на награды и заслуги игры, не каждому она будет по вкусу. Как вы читали в описании “это веселая и юморная пародия на фэнтезийные RPG” – да и это так, действительно ценители классики в жанре RPG оценят эту игру по достоинству, но не новое поколение.
 . Замечательный ироничный юмор и красивая рисовка в стиле комиксов – дают о себе знать и выводят игру в приятную атмосферу фэнтези и боевых сражений. В некоторых моментах игре все же не достает качественная анимация…
. Для владельцев мобильных телефонов на системе Android и iOS – явно подходящая игра! Зарегистрировал свой аккаунт по почте, привязал к Steam аккаунту и GooglePlay, теперь играюсь в неё с телефона и изредка захожу через Steam.
. В завершении оцениваю игру в 7 хромых хоббитов на 10 адских кроликов. Рекомендую эту игру любителям и фанатам классических РПГ.
———————————————–
Данное руководство редактируется и постепенно будет пополнять информацию… Спасибо за внимание и приятной вам игры!
 Группа PblCb work’s: [link]
Группа DungeonGames_TV: [link]
Twitch канал: [link]
Страница в ВК: [link]
Обновленное гайд по созданию персонажа с кратким описанием способностей класса и списком уровней в конце.
Содержание
- Создание персонажей и список классов
- Расы
- Классы
- Сравнение уровней и классов
Создание персонажей и список классов
Расы
Доступно восемь рас. Каждая раса оказывает небольшое влияние на стартовые атрибуты, которые в долгосрочной перспективе не имеют значения (и, следовательно, не важны), поэтому выбирайте то, что вам больше нравится.
Стоит также отметить, что вы сможете изменить расу и внешний вид персонажа всего за одно золото в любое время (поэтому выбор не является постоянным).

Классы
Примечание: Бард и Друид будут изменены в ближайшем будущем, поэтому их описание может быть соответствующим образом изменено.
В настоящее время доступно девять классов. В отличие от рас, класс изменить нельзя.
К сожалению, на данный момент классы не полностью сбалансированы (поэтому следующий раздел состоит из списка классов), но я все же предлагаю немного поэкспериментировать, прежде чем выбирать окончательный класс, так как игра особенно гриндовая и потребуются годы, чтобы закончить даже PVE-контент (нет смысла выбирать класс охотника на демонов, если он вам действительно не нравится, даже если сейчас он S-уровня).

Поскольку способности не объясняются подробно на экране создания персонажа, я опишу их кратко.
Воин
- Жизнь: x5
- Урон: x2
- Броня: 50%
- Способность: 25% шанс заблокировать входящую атаку
Разведчик
- Жизнь: x4
- Урон: x2,5
- Броня: 25%
- Способность: 50% шанс уклониться от входящей атаки
Маг
- Жизнь: x2
- Урон: x4,5
- Броня: 10 %
- Способность: Атаки игнорируют броню. Аннулирует способность противника (разведчики не могут уклоняться, воины не могут блокировать, охотники на демонов не могут возрождаться, …). Примечание: Берсеркер является исключением, поскольку он по-прежнему может использовать свою способность против Магов (но также получает х2 урона)
Убийца
- Жизнь: x4
- Урон: как у Разведчика. примечание: Ассасин использует 2 одноручных оружия и атакует дважды за ход. Урон масштабируется так, чтобы он был похож на урон разведчика
- Броня: 25%
- Способность: 50% шанс уклониться от входящей атаки
Боевой маг
- Жизнь: x5
- Урон: x2
- Броня: 50%. примечание: 10% от экипировки и 40% от классовой способности (таким образом, боевой маг всегда будет иметь 40+% брони)
- Способность: в начале стреляет огненным шаром, который наносит до 33% урона HP противник. Не работает против магов или боевых магов
Берсерк
- Жизнь: x4
- Урон: х2,5. примечание: Берсеркер использует 1 одноручное оружие (как воин), но имеет скрытый множитель, делающий его урон равным урону разведчика
- Броня: 25%. примечание: берсерк использует экипировку воина, но значение брони уменьшается вдвое
- Способность: после атаки есть 50% шанс снова атаковать (может делать это бесконечно). примечание: несмотря на формулировку, это то же самое, что и способность уклонения разведчика, за исключением того, что она также работает против магов, что делает Берсеркера действительно сильным средством для зачистки подземелий
Охотник на демонов
- Жизнь: x4
- Урон: x2,5
- Броня: 50%
- Способность: 44% шанс возродиться с 90% HP. После каждого возрождения шансы уменьшаются на 2%, а HP на 10% (1-е возрождение, шанс 44% при 90% HP, 2-е возрождение 42% при 80% HP, … ).
Друид
Друид имеет 3 формы животных на выбор (можно изменить вручную). Каждая форма будет изменять ваши способности и атрибуты. примечание: форма тигра и медведя наносит половину урона магам и бардам.

Орел
- Жизнь: x3
- Урон: x4,5*0,33 (1/3 от магического урона)
- Броня: 10%
- Способность: 50% шанс выполнить атаку махом, наносящую 500% урона . После каждого наскока шанс падает на 5%.
Медведь
- Жизнь: x5
- Урон: x4,5*0,4 (аналогично урону Воина) + бонус
- Броня: 50%
- Способность: 20% шанс заблокировать входящую атаку и бонус к урону на основе недостающего HP %.
Тигр
- Жизнь: x4
- Урон: x4,5*0,56 (аналогично урону разведчика)
- Броня: 25%
- Способность: Запускается в скрытом режиме, с 35% шансом уклониться от входящих атак. После успешного уклонения переключитесь в режим ярости, без шансов уклониться от атак, но с увеличенным критическим уроном и шансами. После критического удара вернитесь в скрытый режим и т. д.
Бард
Бард может играть на 3 разных инструментах (может переключаться между ними вручную). Каждый инструмент имеет разные способности, но атрибуты всегда следующие:
- Жизнь: x2
- Урон: x4,5
- Броня: 25%
Различные инструменты хорошо показаны на следующем снимке экрана:

Какой бы инструмент вы ни использовали, в бою Бард будет играть мелодию каждые 4 раунда. Продолжительность мелодии может варьироваться от 1 до 4 раундов в зависимости от ее уровня (шанс 25% для уровня 1, шанс 50% для уровня 2 и шанс 25% для уровня 3). Соотношение Con/Int также влияет на продолжительность мелодии (если ваше Con составляет >= 75% вашего Int, вы получите несколько бонусных раундов за мелодии, поэтому важно поддерживать достаточно высокое Con).
Сравнение уровней и классов
Прежде чем перейти к списку уровней, важно сделать некоторые предпосылки.
< р>Количество купленных грибов и игровые знания имеют большое влияние на производительность определенного персонажа, поэтому для того, чтобы список уровней имел смысл, он должен основываться на одних и тех же грибах и знаниях.
Есть одно. Главный фактор, который следует учитывать при ранжировании классов: волатильность.
Проще говоря, волатильность класса можно определить по тому, насколько ему повезет победить более сильных противников.
Низкая волатильность выгодна против противников с более низкими характеристиками (и наоборот против противников с более высокими характеристиками). Это означает, что классы с высокой волатильностью будут иметь лучшую производительность в подземельях, таким образом получая больше уровней и характеристик, чем классы с низкой волатильностью (помните: мы рассматриваем те же самые грибы, которые оплачиваются).
Примечание: именно поэтому учитываются только пвп (и одинаковые статы) для сравнения классов недостаточно; с теми же грибами Охотник на Демонов будет прогрессировать намного быстрее, чем Воин, и будет иметь преимущество в уровне и характеристиках.
Уровень
S-ранг: Охотник на Демонов
- Несбалансированный для честных матчей и действительно высокой волатильности, в настоящее время лучший универсал.
A-ранг: Берсерк
- < ли>Очень хорошая производительность в подземельях (в основном лучший разведчик, потому что его способность работает против магов). Немного страдает в ПВП против Мага (получает двойной урон, высокая волатильность делает его немного непостоянным).
B-ранг: Счет – Убийца
- Хорошая производительность в подземельях и хорошая согласованность в PvP.
С-ранг: Маг
- Не очень хорош в как в подземельях, так и в PvP.
Ранг D: Воин – Боевой маг
- Их низкая волатильность была бы хороша в PVP против противников с более низкими характеристиками, но их плохая производительность в подземельях затрудняет (читай: дорого) получение этого преимущества.
Уточняется: Друид – Бард
- Эти два класса пересматриваются, поэтому позже они будут добавлены в список уровней.
- В настоящее время у Барда действительно хорошая производительность в подземельях, но он страдает против берсерков в PvP.
- Друид, с другой стороны, имеет хорошую производительность в подземельях в начале игры, но позже страдает от подземелий с высоким HP-Mage.
Please note that this guide is written for players who do not intend to purchase mushrooms with real money.
FAQ[]
Q: How should I spend my mushrooms?[]
A: If you want to increase the amount of quests you can do, you should save it for the gryphon mount (25 mushrooms over 14 days). Gryphon doubles the amount of quests you can do over 14 days. A combination of the raptor/tiger and beer still should not beat the gryphon. Should you have under 25 mushrooms and no mount, then you should buy a raptor or tiger (30% mount).
Q: How should I allocate my stats?[]
A: 1 luck is worth approximately 40% of your primary attribute. 1 Cons is worth approximately 80% of your primary attribute. The other two attributes are worth about 10% of your primary attribute. Allocate points accordingly. Try to keep cons about 60-80% of your primary attribute.
Eg:
If you’re a mage, the importance of stats goes in this order:
Intelligence
Constitution (60 — 80% of your intelligence)
Luck (40% of your intelligence)
Q: What should I buy from the weapon or magic shop?[]
A: Do not purchase any items that cost mushroom(s). Otherwise, always upgrade your current equipment whenever possible selling your old item. It is optimal to buy cons, primary attribute, and eternal life potions whenever they become available.
Q: When should I use potions?[]
A: It’s a good idea to stack them and use them all at the same time to make some progress with dungeons. Otherwise, feel free to use them whenever. Another option is to use them when you get a new one to replace the old one.
Q: Is arena good?[]
A: Arena is fun but it is not a good source of income. Honor does not help your character other than the achievement stats. Just remember to do arena with as little gold as possible.
Q: Should I take quests which give exp or gold?[]
A: It’s recomended to take gold. It makes it easier to buy stats, which are then needed to complete better quests. Taking exp gives will eventually mean less successful quest completions, so it’s not recommended. Take the quests in the following priority: Superior equipment, best gold ratio, dungeon key, low time.
Edit: Some people believe what is written above, but it’s not completely true. EXP always outclasses gold, but if you take quests with high EXP reward only, you will fall behind eventually, leading to losses from low levels. You should keep it balanced.
If you’re going for a «cookie cutter» build, meaning you don’t want to think too much about the missions you do, then you should probably go for the method cited above the edit, since if you keep going for gold your equipment will always keep getting better, meaning that you won’t fail missions or lose to low levels. The only downside to this is that you’re not going the optimal route, but going for the optimal route is a tiring process, you should decide which route you want to go depending on the time you want to allocate to the game.
A2: Going for Exp has always been my #1, with more Exp you achieve a higher level therefore you can unlock higher level items for which you will have the gold to buy them just from the quests in the tavern alone. A good thing to notice here is the weekend events (different every weekend) in the tavern where you can for example obtain more gold on one weekend, on the next one more exp and yes in that scenario I always go for the stuff that is active on the event.
Q: Should I do dungeons higher than my current level?[]
A: Because the epic drops from dungeon monsters are rare (25%), it is expected that you do not get an epic item. Therefore you do not lose much from completing a dungeon earlier than your current level. Try to save the last stage since you are guaranteed an epic drop.
Gameplay[]
(Good guide for the gameplay, but probably too long to read: http://forum.sfgame.us/showthread.php?t=6986)
Level 1-3: []
(Do not buy a mount yet)
Take the quest that takes the least time. Should there be a tie, take the quest that gives fewer exp. You want to maximize your mushroom chances in the early stages of the game. Upgrade stats accordingly. Note that mounts do not reduce quests below a minute.
Level 4-9:[]
(Save up for the raptor/ tiger mount (-30% quest time))
By now the quests should take a fair amount of time to complete solol it is necessary to reduce the time per quest by using a mount. We will be saving the gryphon mount for another time. For now the raptor mount will suffice. Use above guidelines to take quests but do not use gold to upgrade stats. Once you get 10 gold, buy the raptor.
Level 10-30:[]
Always take the quest that gives a superior item or a dungeon key first.
With gryphon mount: Take the best exp 2.5 minute quest. Otherwise take the quest with the best exp/time ratio.
With raptor mount: Take the quest with the best exp/time ratio.
Level 30+:[]
Keep focusing on high experience quest, the gold gathering will happen anyways
Tips[]
Guilds[]
Try to join a guild with exp/gold bonus as soon as possible starting level 9-10. It drastically improves your questing results. You can do this by clicking hall of fame and then guild. A guild also regularly attacks another guild. The experience is as good as a medium 10 minute quest. This happens twice a day.
From the question of which class to choose, to monstrous dungeons in the pyramids of madness. In this guide you will be walked through until level 110 for a pleasant introduction to Shakes & Fidget.
Character Selection
When creating a character, you can choose one of these classes:
| Class | Main Attribute | Ability | Damage | Hit Points |
|---|---|---|---|---|
| Warrior | Strength | Shield Block | 4 | 5 |
| Mage | Intelligence | — | 9 | 2 |
| Scout | Dexterity | Evade | 5 | 4 |
| Assassin | Dexterity | Double Attack | 4 (2x) | 4 |
| Battle Mage | Strength | Arcane Comet | 4 | 5 |
| Berserker | Strength | Rage Attack | 4 | 4 |
| Demonhunter | Dexterity | Revive | 5 | 4 |
| Druid | Intelligence | Bear form/Eagle form | 3 | 5 |
| Bard | Intelligence | Instrument | 9 | 2 |
Shakes & Fidget Classes — number13
![]()
As you can see, the classes differ in their abilities, but they are all about equally good in terms of game balance. After choosing a class, you also have to decide for a race, but that only adds a few attribute points.
The race can also be changed by editing your avatar later in the game. So if these few extra attribute points actually matter to you, you can still adapt the race to your class.
Until level 10, it is quickly explained what to do. After you have created your account, you first validate your email to receive 10 extra mushrooms. You now have a total of 25 mushrooms, of which you then lease the dragon as a mount.
Right at the beginning there are different ways to get XP (before quests). On the one hand you get XP for the first 10 arena battles won, at the same time it is also possible to win XP at the wheel of fortune. You should take advantage of these opportunities before starting with quests to maximize your XP. Once you start with quests, make sure to always select the quest with the highest XP/time ratio. This is the fastest way to progress.
Before level ten, you also save up 25 gold, that is how much the scrapbook later costs in the magic shop. It is important that the magic shop is not visited during this time. This way, the scrapbook can appear with a certain chance without the use of mushrooms.
Level 10: Scrapbook and Dungeon #1
As soon as you reach level ten, you pause the quests for the time being. Now it’s time to start filling the scrapbook.
The items in the shops are only generated when you click on them for the first time. If you do this with level 1, only level 1 items are available in the shop. If you click the magic shop for the first time at level 10, the scrapbook can be offered immediately. If not, it should only cost a few mushrooms until it is finally available.
All defeated opponents including their equipment are added to the scrapbook. In order to fill the scrapbook as quickly as possible, you should look for opponents who are easy to defeat and have filled almost all item slots.
In addition to the items, there are also some achievements in the scrapbook. While some of them can be done right from the start, others can take months to unlock. I can recommend two guides for the achievements:
Shakes & Fidget: 9 Achievements that you can do right off the bat
In order to get a head start on a new server, it is important to fill your scrapbook from day one. You can complete these 9 achievements on the first day of the server and dust off the bonuses.
number13julian
Shakes & Fidget: All 80 Achievements — Guide
The achievements in Shakes & Fidget grant big bonuses to the attributes if you know how to get them. Here you get to know the tricks so that you can get to all achievements as quickly as possible.
number13julian
From level 10 it is also possible to send messages. Use this to ask a strong guild whether they still have an open spot for you. Guilds give big bonuses to gold and experience through adventures.
Finally, the first dungeon key can also be found from level 10 during a quest. In the dungeons you will be confronted with much tougher monsters, at the same time the reward of gold and experience is significantly higher. The reward in the dungeons can also include epic items. These are usually much stronger than those you can get in the shops.
The dungeons are discussed separately in this post. An overview of the level requirements up to level 110 can be found under Dungeons.
Level 25: Fortress
At level 25, the construction of the fortress can be started. The main building is built for 100 gold. All other structures start from there.
The fortress works kind of like a Clash of Clans mini-game, with resource buildings being pulled up that are needed for further expansion. Ultimately, the fortress gives you additional backpack slots, experience points and access to the gems.
Items with sockets are available from level 25 onwards. Gems are gathered in the mine of your fortress and then put into these sockets. This gives your character huge bonuses on his attributes.
You can find a detailed guide about the fortress in this blog post:
Shakes & Fidget: Fortress Guide
With level 25, the player unlocks the fortress — this allows you to mine powerful gems, that can be placed in the sockets of all items. Gems give the character valuable bonuses on all attributes, which are hugely important for fights in the arena and dungeons.
number13julian
Level 50: The Magic Mirror
During adventures you cannot fight in dungeons or in the arena. After all, you can’t split yourself up. However, the magic mirror helps to solve this problem.
From level 50, mirror shards can now drop while quests, which when put together result in the magic mirror. So you can go on an adventure while your mirror image faces the dungeon monsters or arena opponents. The mirror consists of 13 shards (coincidence?) that have to be found and dragged onto your avatar. It can take up to level 70-75 to collect them all.
After that, it is much more pleasant to progress with the scrapbook, since you don’t have to wait for the quests to finish. You can also earn more gold, because the same applies to the city guard: While your character is on guard, the mirror image can fight in the arena or dungeons.
Level 66: The Witch
The inconspicuous book» in the magic shop brings you to the witch. Scrolls can be purchased there that add important effects to your equipment. For a complete guide to the upgrades and how to get them, check out this blog post:
Shakes & Fidget: Everything You Need to Know About the Witch
What does the witch do in Sfgame and when do you unlock her? What you can throw into the witch’s cauldron and all further explanations can be found in this guide.
number13julian
Level 75: Pets
At level 75, a nest full of eggs can be found during quests. You can then get to your pets via the stable. There they can be fed and pet fights can be carried out. There are five pet habitats in total:
- Shadow — Fruit: Blackberry (Bonus on Constitution)
- Light — Fruit: Lemon (Bonus on Dexterity)
- Earth — Fruit: Apple (Bonus on Intelligence)
- Fire — Fruit: Strawberry (Bonus on Luck)
- Water — Fruit: Plum (Bonus on Strength)
For each pet of a specific habitat found, you receive a pack bonus of 1% on the corresponding attribute. So if you have 5 pets of the water habitat, your character gets a 5% bonus to the strength attribute.
As soon as a pet level reaches level 100, the character receives another 0,5% bonus on the corresponding attribute. This increases further to 1% at the maximum level 200.
To unlock the pets, the corresponding pet must first be defeated in the habitat. This pet’s egg can then be found during a quest. Each pet has certain conditions that must be met (time of day, day of the week, season, quest area, etc.). You can also see the conditions if you move the mouse over a locked pet.
Various fruits can be found during quests, with which the pets are fed and improved. If you win habitat battles, you will get a fruit of the habitat aswell.
You can also have up to five pet fights a day against other players’ pets. The reward for winning a fight is also a fruit. Up to three fruits can be fed to a pet per day.
In another post about Shakes & Fidget you will find the optimal strategy for feeding your pets efficiently:
Shakes & Fidget: Ultimate Pet-Guide
Since the initial release of pets, a lot has changed in Shakes & Fidget. Here you will learn everything you need to know to level your pets even faster!
number13julian
Level 85: The Holy Grail
The holy grail makes filling up the scrapbook much easier for you. The grail can be found in the gem mine from level 85, instead of a gem.
If you activate the Grail, missing items from the scrapbook will now be highlighted. This affects the items in the shops, as well as the items of all characters in the hall of fame.
Level 90: The Blacksmith
As soon as the character reaches level 90, he gets access to the blacksmith. You can get to it by clicking on the obscure pommel in the weapon shop. The blacksmith offers the following services:
- Provide items with a socket
- Remove gem from the socket
- Improve attributes of items
- Dismantling items for resource extraction
- Change the look of epic items
- Swap rune bonus of two items
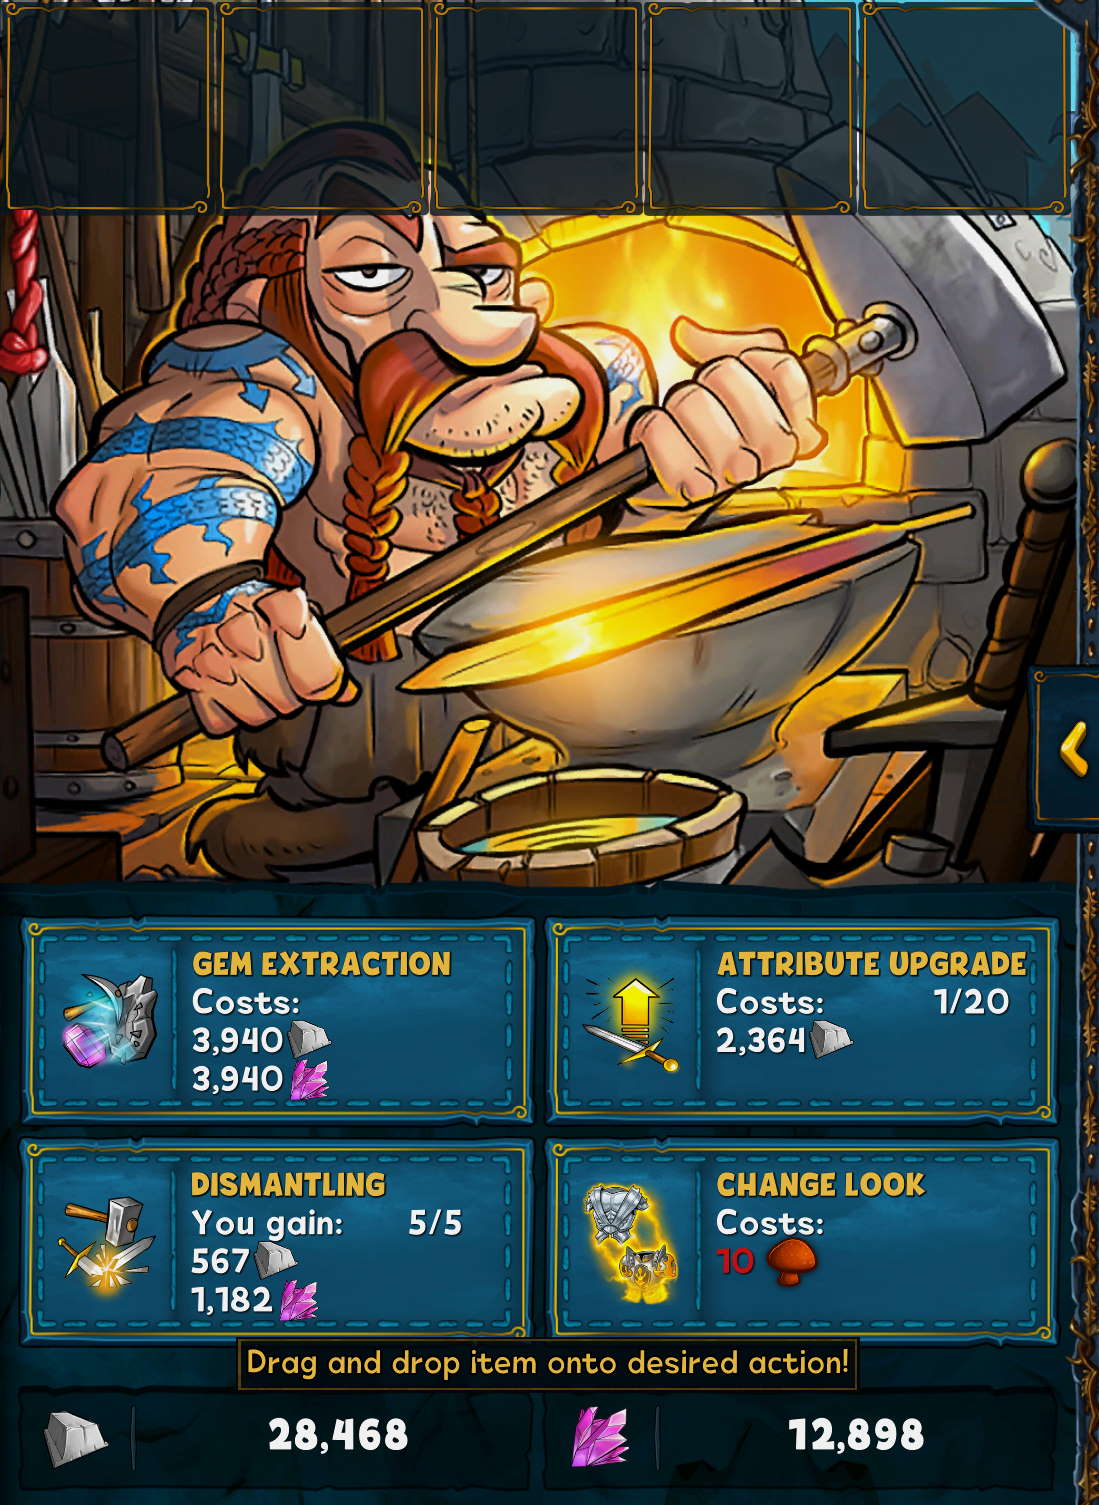
In order to use the blacksmith, some items must first be dismantled. Up to five items per day can be dismantled into their components. You will be credited with metal and arcane resources. Normal items give a lot of metal, while epic items bring a balanced mix of metal and arcane resources.
These resources can now be used to upgrade your items. An item can carry up to twenty upgrades, with each additional upgrade becoming more expensive. When an item with upgrades is sold, the player receives back all invested resources.
Level 99: The Demon Portal
As soon as you reach level 99, you can also enter the demon portal in addition to the usual dungeons. Here you will face an overwhelming opponent whom you can only fight once per day.
The damage done to the opponent is remained. However, the monster regenerates 10% of its hit points every day at midnight. If you are actually able to defeat your opponent, you will receive 1% bonus hit points for your character. A total of 50 enemies are hidden behind the portal, which corresponds to a total hit points bonus of 50%.
From level 99, the guild’s demon portal will also open for you. Here you can fight against even stronger opponents. As with the dungeon demon portal, the opponent regenerates 10% of his health every day. If you defeat the opponent, the entire guild receives a damage bonus of 1%. This bonus also increases to a maximum of 50%.
Level 100: The Toilet of the Arcane Gods
From level 100 it is possible to find the key to the toilet during a quest. An item can be thrown into the toilet every day to fill up the mana tank a little further. Depending on which item is thrown into the tank, it fills up faster:
- 50 mana: epic item
- 30 mana: gem
- 25 mana: normal item
- 10 mana: potion
When the tank is finally full, the toilet can be flushed. This increases the aura by one level and the gods grant you a (possibly epic) item.
Each level of the aura increases the quality of the items in the shops by 1, at the same time a little more mana is required for the next flush.
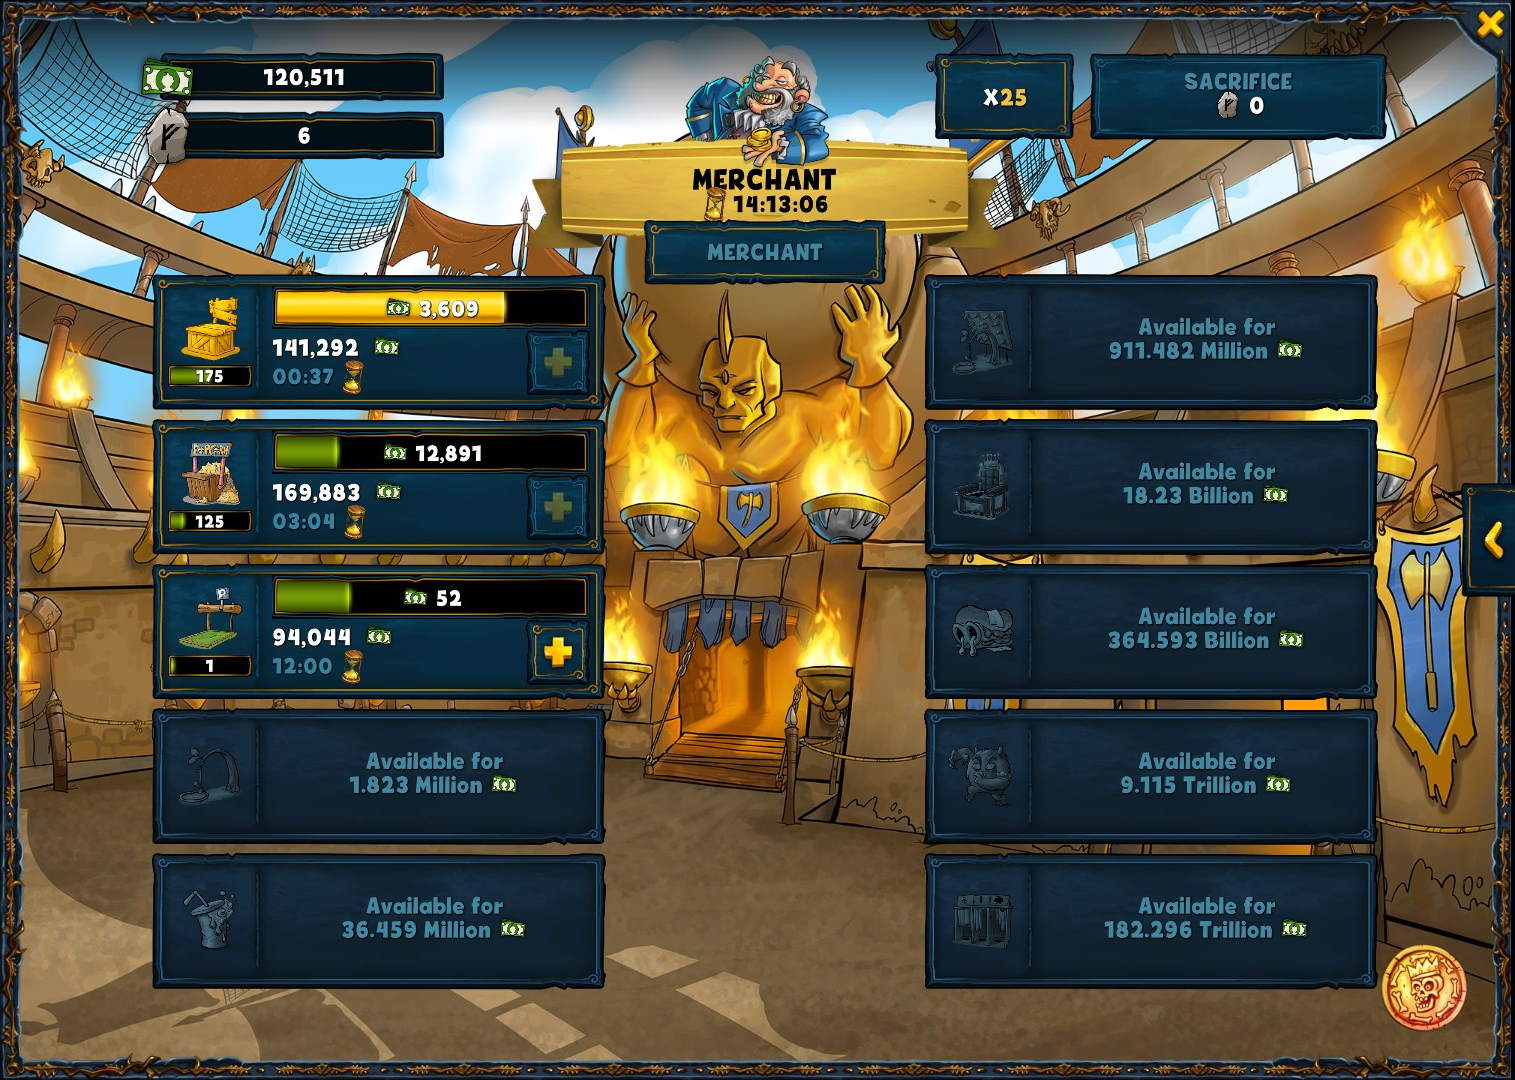
Level 105: Arena Manager
At level 105, clicking on the coin in the arena leads to the arena manager. Here you are no longer the gladiator in the ring, but the manager of your own arena. This mini-game is about increasing the arena’s income by expanding the seats and offers of the arena.
Once enough revenue is earned, the entire arena can be sacrificed for a few runes, and the game starts over. However, this time a little faster: Each rune brings a 5% bonus to the arena income.
From 1000 runes collected, the stores can also offer rune-enhanced items for your character. With this you get e.g. bonuses on damage dealt, hit points, gold, or experience to name a few.
In the detailed guide to the arena manager you can find out more about the various bonuses and strategies for the fastest possible progress:
Shakes & Fidget: New Update adds Arena Manager
Not only the new German server number 40 started last weekend, also a new update was welcomed in Shakes & Fidget: The Arena Manager is a new mini-game, which can be found from level 105 in the arena.
number13julian
Dungeons #1-9
The dungeon keys can be found on quests at regular intervals. The only exception are dungeons #6 and #9, with these two the keys can also be found in the shops.
Dungeon Overview
| Level | Dungeon | Name | Key |
|---|---|---|---|
| 10 | #1 | Desecrated Catacombs | Quest |
| 20 | #2 | The Mines of Gloria | Quest |
| 30 | #3 | The Ruins of Gnark | Quest |
| 40 | #4 | The Cutthroat Grotto | Quest |
| 50 | #5 | The Emerald Scale Altar | Quest |
| 70 | #6 | The Toxic Tree | Quest / Magic Shop |
| 80 | #7 | The Magma Stream | Quest |
| 95 | #8 | The Frost Blood Temple | Quest |
| 110 | #9 | The Pyramids of Madness | Quest / Weapon Shop |
-
Tavern
The tavern, the first menu item in the navigation bar, is the placewhere you can select and accept a quest. The quest givers are next to the…
-
Daily Bonus
After the first login of the day, the daily bonus is displayed. The login bonus must be actively collected. If you have not done so yet, you…
-
Special Quests
Sparkling quests are so-called special quests. They are a bit more difficult, but with better rewards for completing them. You can find mush…
-
Gambler
You find the gambler in the left back of the tavern.ThimblerigYou can bet gold and mushrooms. The gambler hides a ball under one of the cups…
-
Confidential Secret Mission of the Day
From character level 10, you will find a message on the toilet door in the tavern: the secret mission of the day. Here every day …
-
The Flying Tube
In the tavern and at Dr. Abawuwu’s you can find the Flying Tube.There you can (if available) watch ads and gain Lucky Coins for the wheel of…
-
City Guard
You can earn some gold by working for the city guard.The head of the city guard which you can see on the first floor of the tavern is always…
-
Arcane Toilet
If you click the top-right toilet door in the tavern (after finding the toilet key on a quest, which is possible from level 100), you can go…
-
Arena
In the arena three random players from the Hall of Fame are ready to fight that have a similar rank to your own character.If you defeat your…
-
Arena Manager
Reaching level 105 unlocks the Arena Manager. The goal of the arena manager is to build an economically thriving arena, sacrifice your progr…
-
Weapon Shop
Depending on a hero’s character class, Shakes offers different items in the weapon shop that matches the class.Items can be bought for gold …
-
Magic Shop
In Fidget’s magic shop you can find magic items and buy them there.Items can be bought for gold or a combination of gold and mushrooms. To d…
-
Potions
Potions can be bought in the magic shop and improve a certain attribute for a certain time (e.g. three days). The attribute is displayed by …
-
Quicksand Hourglass
Quicksand Hourglasses can be used to finish quests instantly. Hourglasses are activated automatically with the purchase. How many you own an…
-
Blacksmith
You get access to the blacksmith after reaching level 90.There are several ways to get to the blacksmith: either click the «Obscure Pommel» …
-
Socket Upgrade
At the blacksmith, you can move an item from the inventory to the «Socket upgrade» field to add a socket for a gem. This is possible for all…
-
Attribute Upgrade
An item can be upgraded by the blacksmith up to 20 times. The number of times an item has been upgraded is displayed in the area of the corr…
-
Dismantle Item
Every day, the blacksmith can dismantle up to five items into metal and arcane splinters.If an item is dismantled, it is irretrievably destr…
-
Gem Extraction
Use the blacksmith’s «Extract gem» service to remove gems from items.The removed gem lands in your inventory. Unfortunately, the item in whi…
-
Swap Runes
The «Swap runes» service allows you to swap runes of different items you own (whether equipped or in your backpack) at the blacksmith.To swa…
-
How can I change the look of epic items?
You can change the look of an epic item for 10 mushrooms by right-clicking the item and selecting the respective function.All epics that are…
-
Witch
You can access the witch from level 66. Pay her a visit by clicking the «Inconspicuous Book» next to Fidget in the magic shop or click the m…
-
Spell Scrolls
Once spell scrolls are unlocked, they will be displayed above the witch. There they can also be purchased directly by clicking on the corres…
-
Stable
Mounts can be leased in the stable. They shorten quest times. Moreover, some have an additional bonus.You can always extend the leasing peri…
-
Pets
From level 75 you get the chance to find a nest with valuable eggs on a tavern quest.Then you can click the door on the right side of the st…
-
Pet Fights
At the bottom left of the pet overview, daily battles can be fought against packs of other players. Every day a certain element is determine…
-
Pet Habitat Fights
Each element has its own habitat (five elements = five habitats) in which you can compete against other previously unknown pets of the eleme…
-
How can I upgrade Pets?
There are several ways to make pets stronger:Pack: The more pets of an element have been explored and found, the more comfortable they feel….
-
Advantages from Pets
In addition to gold and XP from the 100 habitat fights, the packs give bonuses to the corresponding attributes of a hero: 1% per pet of the …
-
Where Can I Find Pets?
Once pets have been defeated in their habitats, they can usually be found on quests after meeting certain requirements. Some rare pets have …
-
Dungeons
In the Light and Shadow Worlds (can be accessed via the menu button «Dungeons»), there are 28 dungeons each in which monsters are waiting to…
-
Light World
You can access Light World via the menu button «Dungeons». There are several dungeons, but all of them are locked. Keys can be found on ques…
-
The Demon’s Portal
Demon’s Portal in Light WorldStarting at level 99, you gain access to the Demon’s Portal, a special dungeon.The Demon’s Portal can be entere…
-
Shadow World
As soon as the tower and its three companions have been unlocked and you have reached at least level 125, you get the chance to mine the key…
-
The Tower
Once you have successfully defeated the first nine dungeons, you will not only gain access to dungeon 10, but to the tower, too. The tower c…
-
Companions
Companions can be upgraded and equipped with items just like the main character. The arrow keys to the left and right of each character’s pr…
-
Legendary Items
Legendary items are the best items you can get in Shakes & Fidget. They are better than epic items, always have a gem slot and a rune (a…
-
Where do I get legendary gems?
Legendary gems can be found in the gem mine of the fortress as soon as there is at least one picture of a Legendary item in the scrapbook. T…
-
Fortress
You can build your own fortress from character level 25.You start (after being charged a few gold pieces) with a small main building and the…
-
Fortress and Hall of Knights
Fortress (main building)Can be upgraded to max. level 20.The higher the main building’s level the more wood and stone can be secured from fo…
-
Woodcutter’s Hut
Can be upgraded up to level 20.Produces x units wood per hour. The higher the level of the building, the more wood is produced and the more …
-
Quarry
Can be upgraded up to level 20.Produces x units stone per hour. The higher the level of the building, the more stone is produced and the mor…
-
Laborers’ Quarters
Can be upgraded up to level 15.The higher the upgrade, the shorter the times other fortress and underworld buildings take. This also reduces…
-
Gem Mine
Can be upgraded up to level 100.You can mine gems in the gem mine. Mining a gem costs resources and takes a certain amount of time.Mining ge…
-
Treasury and Secret Storage
TreasuryCan be upgraded up to level 45.At the start of the game you can only carry five items in the backpack. To be able to store more, you…
-
Academy
Can be upgraded up to level 20.Teachers research here and generate XP that can be collected by clicking/tapping the building. The amount of …
-
Barracks
Can be upgraded up to level 15.In the barracks soldiers are trained you can attack other players with to raid wood and stone. The higher the…
-
Fortifications
Can be upgraded to level 20.If you want to protect yourself from attacks of other players, then you should build fortifications.The stronger…
-
Archery Guild
Can be upgraded up to level 15.Archers are trained in the archers’ guild. They are used to defend the fortress.The higher the archers’ guild…
-
Mages’ Tower
Can be upgraded up to level 15.In the mages’ tower mages are trained. They defend your fortress.The special feature of mages is that the att…
-
Smithy
Can be upgraded up to level 20.In order to upgrade battle units (soldiers, archers, mages), you can build the smithy.The higher the upgrade …
-
Fortress Attack
Once enough soldiers have been trained in the barracks, the «Attack» button (bottom left of fortress view) can be used to attack other playe…
-
Defending the Fortress
When a fortress is attacked, the archers and mages stationed in the fortress defend it. In addition, your fortifications contribute to the d…
-
How much wood and stone can be looted/lost from a fortress attack?
In the first 48 hours after the construction of the main building with level 1, no one can steal wood and stone from this fortress. After th…
-
Underworld
After unlocking the tower and upgrading your gem mine to level 10, the Heart of Darkness can be found in the mine.When the Heart of Darkness…
-
Heart of Darkness
Can be upgraded up to level 15.You can find the Heart of Darkness in the gem mine after upgrading it to level 10 and unlocking the tower in …
-
Underworld Gate
Can be upgraded up to level 15.In order to reap the souls of fallen heroes, you need to lure them into your underworld first, then defeat th…
-
Soul Extractor
Can be upgraded up to level 15.You can reap souls with the soul extractor and claim them.The higher the upgrade level of the extractor, the …
-
Torture Chamber
Can be upgraded up to level 15.The higher the upgrade level of the torture chamber, the more souls you can reap from every lured hero.
-
Goblin Pit
Can be upgraded up to level 15.You can train goblins in the goblin pit. They form the first line of defense against lured heroes.The higher …
-
Troll Block
Can be upgraded up to level 15.You can train trolls in the troll block.The higher the upgrade level of the troll block, the more trolls you …
-
Keeper
Can be upgraded up to level 15.The higher the upgrade level of the keeper, the stronger it becomes to defeat lured heroes.The strength of th…
-
Gladiator Trainer
Can be upgraded up to level 15.The higher the upgrade level of the gladiator trainer, the higher the critical damage of your main character,…
-
Gold Pit
Can be upgraded up to level 100.The gold pit produces gold.The higher the upgrade level of the gold pit and your character level, the more g…
-
Adventuromatic
Can be upgraded up to level 15.The Adventuromatic (also called time machine) stores thirst you did not consume in the tavern. Stored thirst …
-
How can I lure heroes into the underworld?
You can lure unprepared heroes into your underworld every day. Defeat them to gain their souls. Selecing a hero is simple. The higher the up…
-
How can units be upgraded in the underworld?
Combat units in the underworld can be upgraded in two ways so they can take on higher-level heroes.By upgrading the goblin pit, troll block …
-
How can a guild be formed?
In order to found a guild, you only need two things: 10 gold and a guild name.Moreover, you must not be in a guild when founding a new one.T…
-
How can I leave a guild?
You can leave a guild by clicking your name in the list of guild members followed by a click on the red «Leave guild» icon.
-
What can I do in a guild?
On the left side you’ll find the list of members. There you can see all members with their active potions, last activity and Hall of Knights…
-
How can I create / change the coat of arms?
The coat of arms is important for a guild.Any guild member can click on it, design it in the editor and then suggest it. However, only the g…
-
Guild Menu
Guild leaders and officers have access to the guild menu and its adminitrative functions. Here is the list of functions:Icon | Function | De…
-
Guild Leader
Each guild can have only one guild leader. Guild leaders can start battles, invite players from the Hall of Fame, kick players and upgrade t…
-
Officer
Officers can start guild fights, invite players from the Hall of Fame, kick regular members and upgrade the guild. In contrast to guild lead…
-
How to create a guild description?
In the guild description, the guild leader can describe the guild and/or leave information for guild members.If you put /// in the descripti…
-
Guild Upgrades
Each member of a guild adds his/her personal skill points to the guild. These points are valid for one of the two guild upgrades each and ca…
-
Guild War
Guild war means that one guild declares war on another.After a preparation phase of 10 hours during which guild members can get ready for at…
-
Guild Raid
The guild raid button allows guild leaders or officers (level 50 required to start a guild raid.The cost of such an attack is paid by the pl…
-
Guild Pet
The guild pet fights the brutally dangerous Hydra.The guild pet is only available when the guild leader has reached level 150 and at least o…
-
Mail
In your mail you can read messages and send messages to other players from character level 10. Guild news, fight results and general message…
-
Hall of Fame
Here you can find all the in-game rankings. The rank of your own character is highlighted. You can search for other players or guilds by ent…
-
Dr. Abawuwu
You can spin Dr. Abawuwu’s wheel of fortune up to 20 times a day.The first try is always free. Each additional time costs either a mushroom …
-
Character Overview
If you click on your character image in the top left navigation bar, you can see your character in detail.On the left side your currently eq…
-
Character Overview
Tap your avatar to display your character in detail.On the left side your currently equipped items, the avatar, name, your guild, level and …
-
Classes
WarriorMain attribute: strengthTraits:Wears a shield that can block attacks with a chance up to 25% (does not work against magic attacks) Ma…
-
Races
When creating a new character, you don’t need to choose a class only, but a race as well. Every race has advantages and disadvantages that h…
-
Magic Mirror
From character level 50 you can find the 13 shards of the magic mirror on tavern quests. Shards will be added to your portrait automatically…
-
Scrapbook of Meticulousness
From character level 10 you can buy the Scrapbook of Meticulousness in the magic shop. After the purchase it will be instantly available.The…
-
Achievements
If you complete certain tasks or milestones in the game, you’ll permanently receive five bonus points per achievement on each of …
-
How do I unlock the achievement Globetrotter?
In order to complete the achievement «Globetrotter», you need to visit all 21 locations at least once on the same day and defeat the monster…
-
How to change my avatar?
If you click on your avatar in the character overview to edit it.Changing your avatar costs 1 mushroom.
-
City Map
Click the top-right X button to display the town screen.Here you will find various buildings such as the city guard, the tavern or the Hall …
-
Weapon Shop
Depending on a hero’s character class, Shakes offers different items in the weapon shop that match your class. Items can be bought for gold …
-
Magic Shop
In Fidget’s magic shop you can find magic items and buy them there.Items can be bought for gold or a combination of gold and mushrooms. To d…
-
Blacksmith
You get access to the blacksmith after reaching level 90.There are several ways to get to the blacksmith: either tap the «Obscure Pommel» of…
-
Socket Upgrade
At the blacksmith, you can move an item from the inventory to the «Socket upgrade» field to add a socket for a gem. This is possible for all…
-
Attribute Upgrade
An item can be upgraded up to 20 times by the blacksmith. The number of times an item has been upgraded is displayed in the area of the corr…
-
Dismantle Item
Every day, the blacksmith can dismantle up to five items into metal and arcane splinters.If an item is dismantled, it is irretrievably destr…
-
Gem Extraction
Use the blacksmith’s «Extract gem» service to remove gems from items.The removed gem lands in your inventory. Unfortunately, the item in whi…
-
Swap Runes
The «Swap runes» service allows you to swap runes of different items you own (whether equipped or in your backpack) at the blacksmith.To swa…
-
How can I change the look of epic items?
You can change the look of an epic item for 10 mushrooms by tapping the item and selecting the respective function.All epics that are alread…
-
Witch
You can access the witch from level 66. Pay her a visit by tapping the «Conspicuous Book» next to Fidget in the magic shop or tapping the ic…
-
Spell Scrolls
Once spell roles are unlocked, they are displayed above the witch. There they can also be purchased directly by tapping the corresponding sp…
-
Barracks
Can be upgraded up to level 15.In the barracks soldiers are trained you can attack other players with to raid wood and stone. The higher the…
-
Archery Guild
Can be upgraded up to level 15.Archers are trained in the archers’ guild. They are used to defend the fortress.The higher the archers’ guild…
-
Mages’ Tower
Can be upgraded up to level 15.In the mages’ tower mages are trained. They defend your fortress.The special feature of mages is that the att…
-
Goblin Pit
Can be upgraded up to level 15.You can train goblins in the goblin pit. They form the first line of defense against lured heroes.The higher …
-
Troll Block
Can be upgraded up to level 15.You can train trolls in the troll block.The higher the upgrade level of the troll block, the more trolls you …
-
Keeper
Can be upgraded up to level 15.The higher the upgrade level of the keeper, the stronger it becomes to defeat lured heroes.The strength of th…
-
What can I do in a guild?
Here you can find guild wars, raids, the Demon’s Portal and the mushroom catapult. Tap the icons to get ready for fights or start them if yo…
-
Pet Fights
In pet view tap the sword icon to display pet fights. There you can fight against the pets of other players. Every day a certain element is …
-
Pet Habitat Fights
Each element has its own habitat (five elements = five habitats) in which you can compete against other previously unknown pets of the eleme…
-
Fortress Attack
Once enough soldiers have been trained in the barracks, the sword icon can be used to attack other players. You always get targets based on …
-
Pets
From level 75 you get the chance to find a nest with valuable eggs on a tavern quest.Then you can tap the pet icon in the stable to get to t…
-
Mail
In your mail you can read messages and send them to other players from character level 10. Guild news, fight results and general messages al…
-
Where do I get Arcane Splinters?
Arcane splinters can be obtainedfrom special payment packs.from the game of dice in the tavern.by dismantling items at the blacksmith.from D…
-
Where do I get metal?
Metal can be obtainedfrom special payment packs.by dismantling items at the blacksmith.as reward from the Hellevator event.from quests durin…
Поговорим о вещах, связанных с рейдами на вражеские замки в shakes and fidget.
Перед атакой вы располагаете развед-данными о защитниках крепости и вероятной добыче.
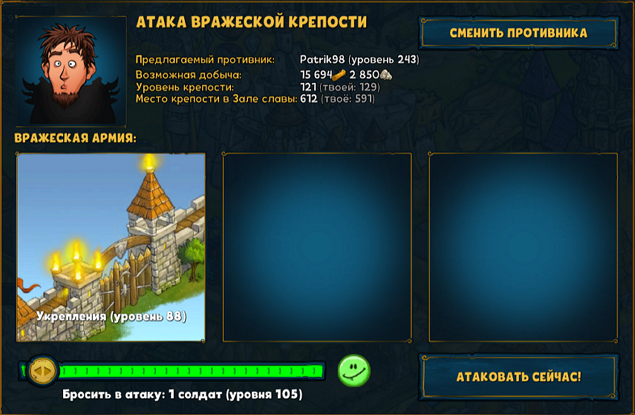
Кроме того, в зависимости от кол-ва выбранных солдат, вы получаете прогноз на исход битвы. На скриншоте сверху — вам потребуется всего 1 солдат для атаки, а на следующем скриншоте он неблагоприятен, даже если отправить всех имеющихся солдат.
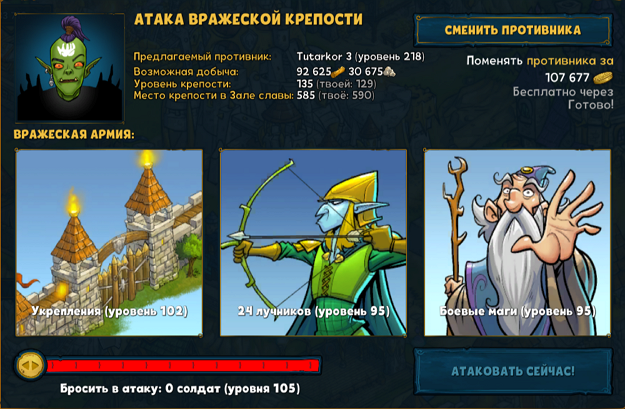
В случае плохого прогноза, у вас есть несколько вариантов действия:
- Сменить противника. Это можно делать бесплатно каждые 5 минут.
- Отправить 1 солдата, проиграть, но при этом вам покажут следующего противника. Который, возможно, окажется вам по силам.
- Подождать, когда подготовятся дополнительные рекруты, проверить прогноз или снова вернуться к первым вариантам.
Подводные камни
Кейс — только маги
Всё кажется относительно просто: вы знаете прогноз, и можете «листать» противников тем или иным способом. Но обратите внимание, что кол-во магов-защитников не указано.
Если вас ожидает «полный комплект» вражеский войск, то скорее всего кол-во магов равно половине кол-ва лучников. При этом прогноз практически никогда не врет.
Но если в защите только маги, прогноз оказывается неверным, и вам придется самому угадывать нужное кол-во солдат, требуемых для успешной атаки.
Отправка одного солдата
Как я упомянул — вы можете сменить противника, отправив только одного солдата. Для армии это небольшая потеря, а вам не нужно ждать пять минут для бесплатной смены противника.
Но при этом вас могут контратаковать. Особенность контратаки заключается в том, что она возможна, даже если включена т.н. защита. Но в этом случае, вы потеряете только ресурсы, накопленные в шахтах.
Награды
Если в начале игры вы атакуете противника в основном для достижения ачивок:


То позднее — это способ добыть ресурсы для строительства, т.к. шахты добывают очень мало, а постройки требуют всё больше и больше дерева и камня.
Немного о защите собственной крепости
Даже обладая мощными стенами и отрядом защитников, вы будете защищены только от точно такого такого же отряда нападающих (по кол-ву и уровню). Стена конечно же даёт вам небольшое преимущество, но если вы не топовый игрок на сервере, то вас обязательно «вынесут».
При этом вы потеряете как ресурсы, так и защитников крепости. А чем круче защитники, тем дороже они стоят в пересчете на те же ресурсы, которые вы пытаетесь сохранить.
А т.к. успешный рейд против вас все равно неизбежен — то тратить ресурсы на защитные войска почти не имеет смысла.
Потому я рекомендую два сценария защиты, оба из которых исключают строительство лучников. В первом варианте — вы вообще не строите защитников (только стена), а во втором — рекрутируете только магов (+ стена), кол-во которых при штурме неизвестно вашему противнику.
Данная запись опубликована в 02.02.2020 13:56 и размещена в Shakes & Fidget: Remastered.
Вы можете перейти в конец страницы и оставить ваш комментарий.
Introduction
Welcome on website with guides for Shakes & Fidget.
Here you can find a lot of informations about the game, some tips and useful tools.
Website is constantly updated with new content so check it regularly!
News
Game update 11.1 — Hellevator: guild event
2022-03-02
Game update 11.1 introduces new guild event — «Hellevator». There are also some changes and bugfixes.
Spring 2022 — spring pets
2022-03-01
Spring is coming to Shakes & Fidget and with it come some rare pets to catch!

Valentine’s Day 2022
2022-02-14
Today is the Valentine’s Day, and on this day you can catch a rare pet and get a gift!

Valentine’s Day Challenge — win 3000 mushrooms!
2022-02-09
Valentine’s Day is coming soon, so it’s time for challenge «Fight for love» in which over 20 influencers will take part, and players can win 3000 mushrooms!

Introducing new server w53 — events weekend and special code
2022-01-19
The newest international server — w53
will be launched soon, prepare for the event weekend with some new stuff as well

Happy New Year 2022
2021-12-31
New Year’s Eve is coming… Let’s celebrate New Year — 2022 together with Shakes & Fidget
«Lord of the Things» — legendary dungeon and update 11.0
2021-12-14
Another game update that features legendary dungeon «Lord of the Things» and more!

Introducing new server w52 — events weekend and special code
2021-12-02
The newest international server — w52
will be launched soon, prepare for the event weekend with some new stuff as well
Winter 2021 — winter pets and epics
2021-12-01
Winter is coming to Shakes & Fidget and with it come some rare pets to catch!
Do you have any sugestions about website, found some errors, or something is missing? Let me know!

Up to date guide on character creation, with a brief description of class abilities and a class tierlist at the end.
Contents
- Character Creation and Classes Tierlist
- Races
- Classes
- Tierlist and Class Comparison
Races
There are eight races available. Each race has a small impact on starting attributes, which is irrelevant in the long run (and, thus, non-important), so choose whichever you prefer.
It’s also worth noting that you will be able to change race and character appearance for just one gold, anytime you would like to (so the choice is not permanent).
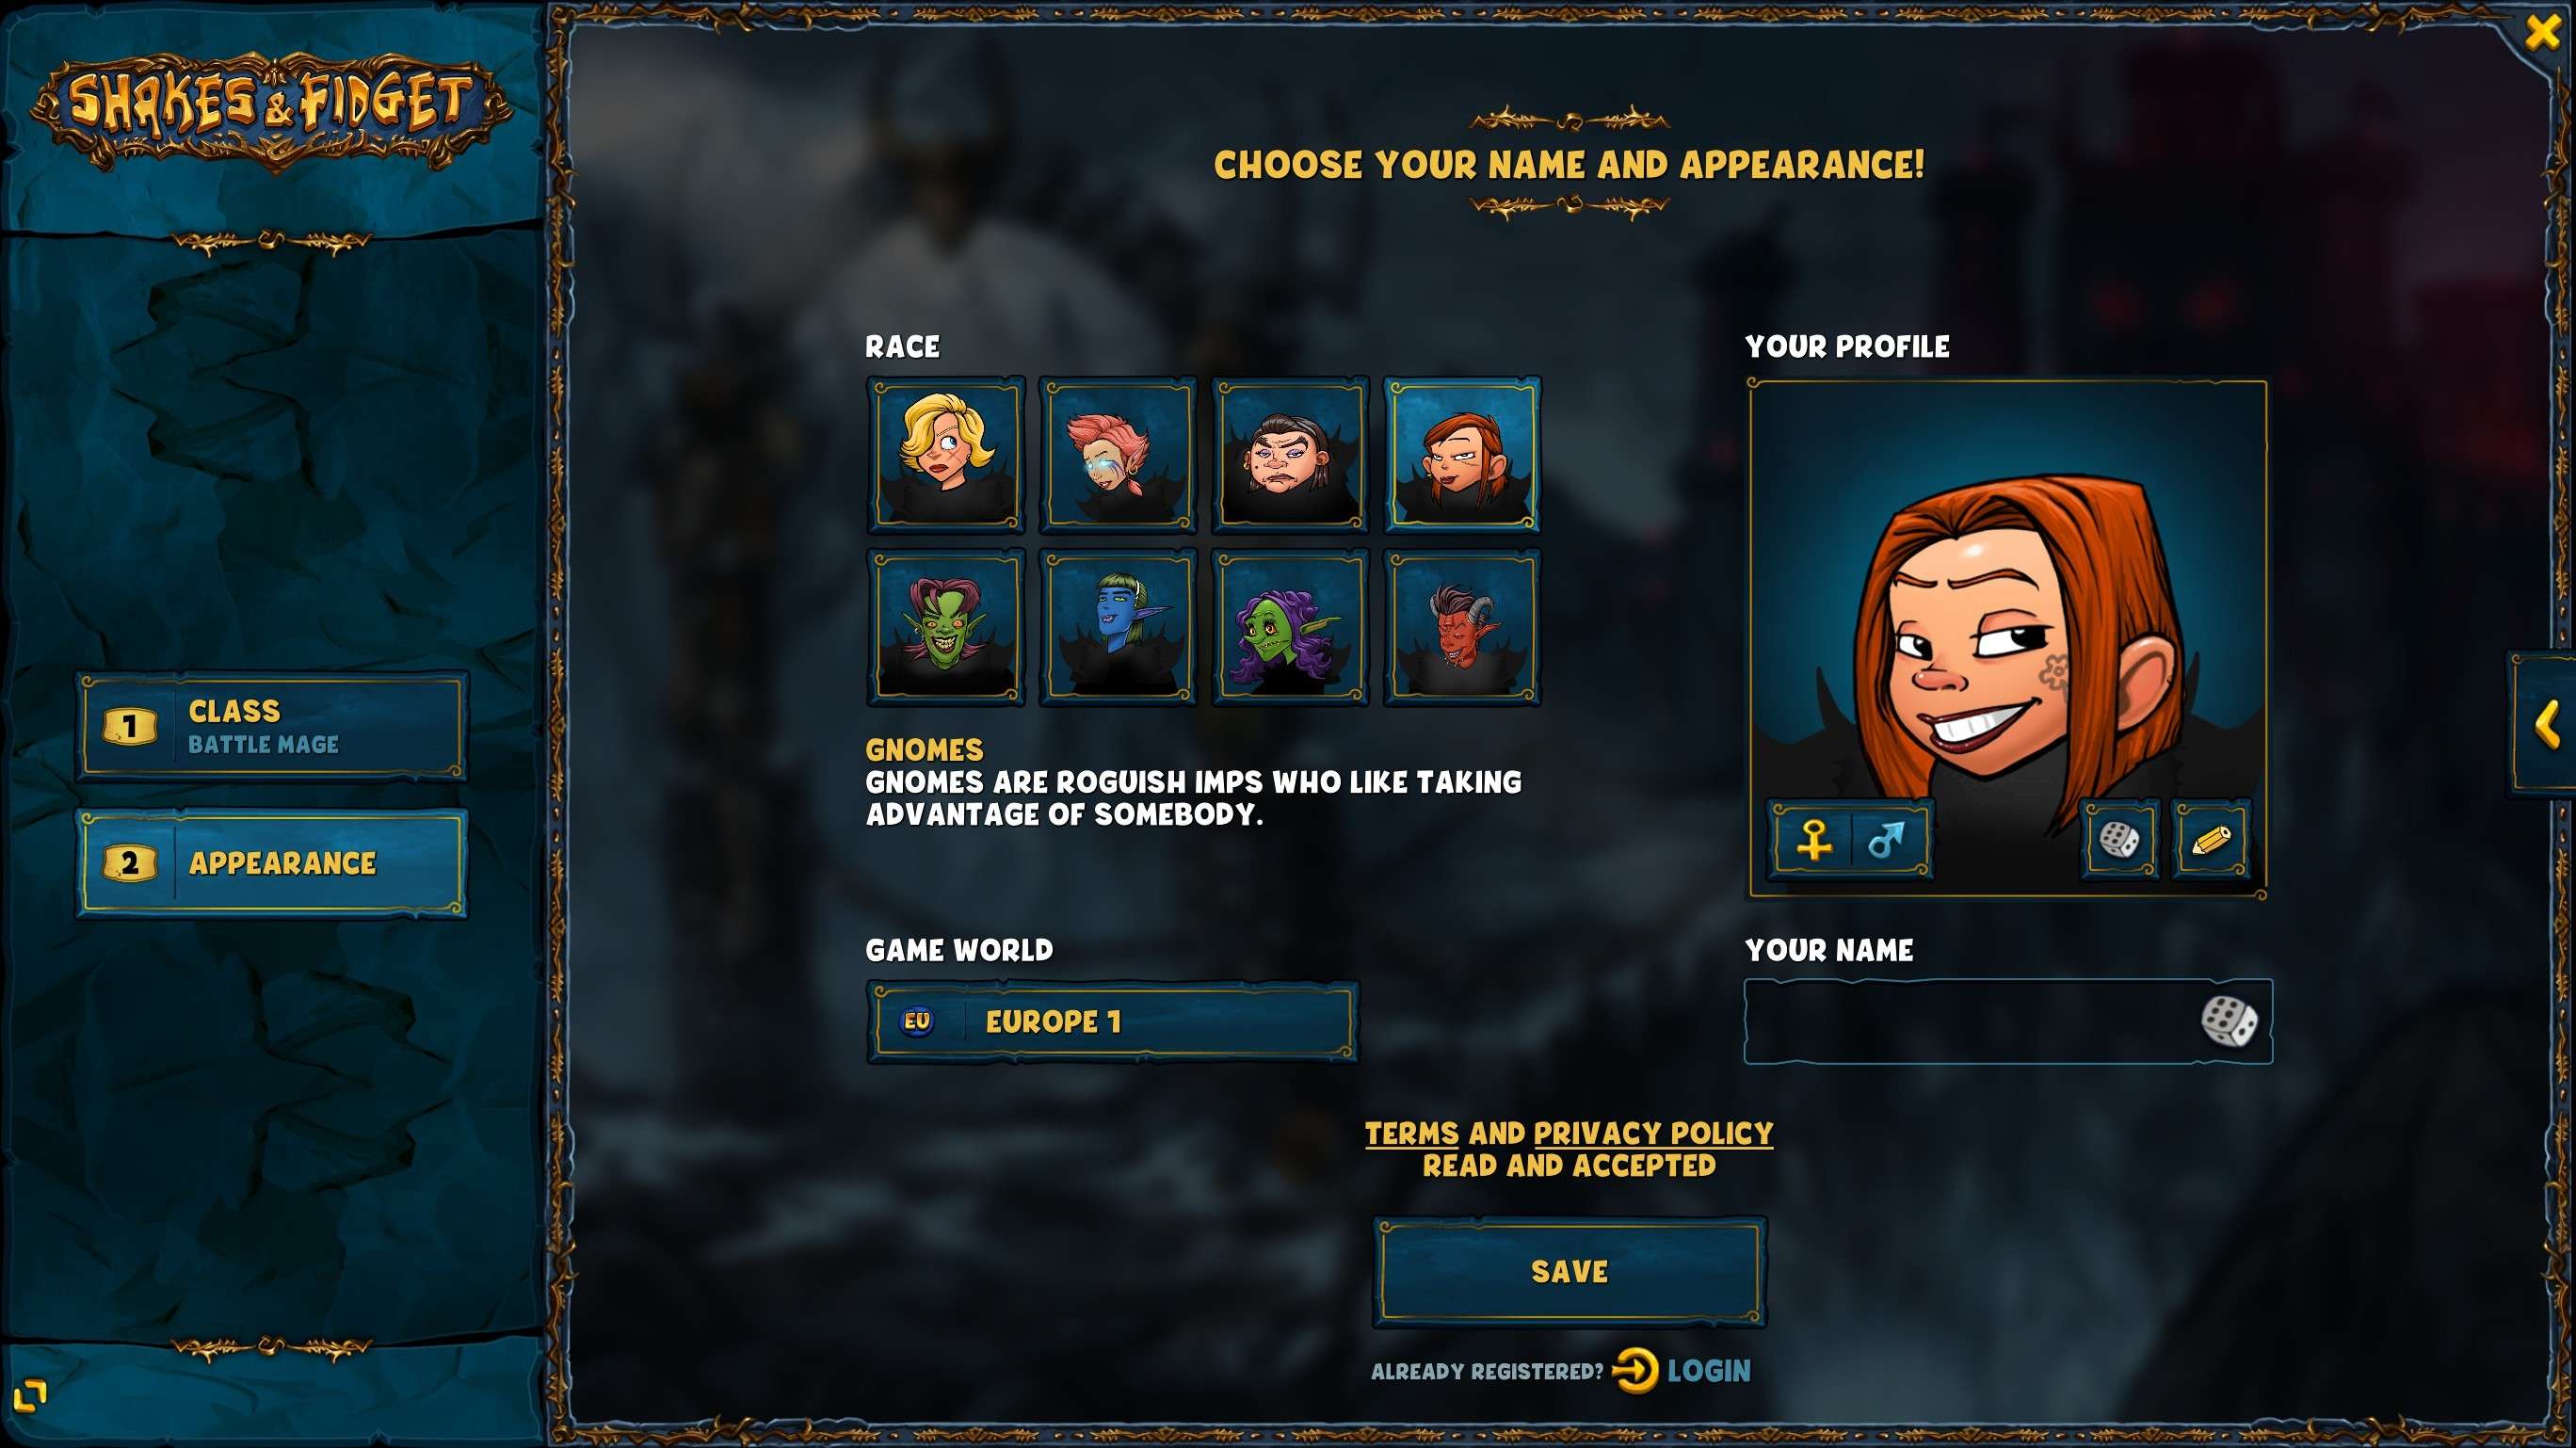
Classes
Note: Bard and Druid are going to be modified in the near future, so their description may be changed accordingly.
Currently, there are nine classes available. Contrary to races, class cannot be changed.
Unfortunately, classes are not completely balanced at the moment (which is why the next section consists of a class tierlist), but I still suggest to experiment a bit before choosing a definitive class, since the game it’s particularly grindy and it will take years to finish even PVE content (no point in picking the Demon Hunter class if you really dislike it, even if it is S-tier right now).

Since abilities are not explained throughly in the character creation screen, I will describe them briefly.
Warrior
- Life: x5
- Damage: x2
- Armor: 50%
- Ability: 25% chance to block an incoming attack
Scout
- Life: x4
- Damage: x2,5
- Armor: 25%
- Ability: 50% chance to evade an incoming attack
Mage
- Life: x2
- Damage: x4,5
- Armor: 10%
- Ability: Attacks ignore armor. Nullifies opponent’s ability (Scouts cannot evade, Warriors cannot block, Demon Hunters cannot revive, … ). Note: Berserker is an exception since it can still use its ability against Mages (but also take x2 damage)
Assassin
- Life: x4
- Damage: Similar to Scout. note: Assassin uses 2 one-handed weapons and attacks twice per turn. Damage is scaled so that it’s similar to Scout damage
- Armor: 25%
- Ability: 50% chance to evade an incoming attack
Battle Mage
- Life: x5
- Damage: x2
- Armor: 50%. note: 10% from equip and 40% from class ability (so Battle Mage will always have 40+% armor)
- Ability: at the start, shoots a fireball that deals up to 33% HP damage to the opponent. It doesn’t work against Mages or Battle Mages
Berserker
- Life: x4
- Damage: x2,5. note: Berserker uses 1 one-handed weapon (like a warrior) but has an hidden multiplier that makes its damage equal to the Scout
- Armor: 25%. note: Berserker uses Warrior equip but the armor value is cut in half
- Ability: After an attack has a 50% chance to attack again (can do this indefinitely). note: despite the wording it’s the same as Scout evading ability, except that it also works against Mages, making Berserker really strong for clearing dungeons
Demon Hunter
- Life: x4
- Damage: x2,5
- Armor: 50%
- Ability: 44% chance to revive with 90% HP. After each revive, chances decrease by 2% and HP by 10% (1st revive, 44% chance with 90% HP, 2nd revive 42% with 80% HP, … ).
Druid
Druid has 3 animals form to choose from (can be changed manually). Each form will modify your abilities and attributes. note: tiger and bear form deals half damage against Mages and Bards.
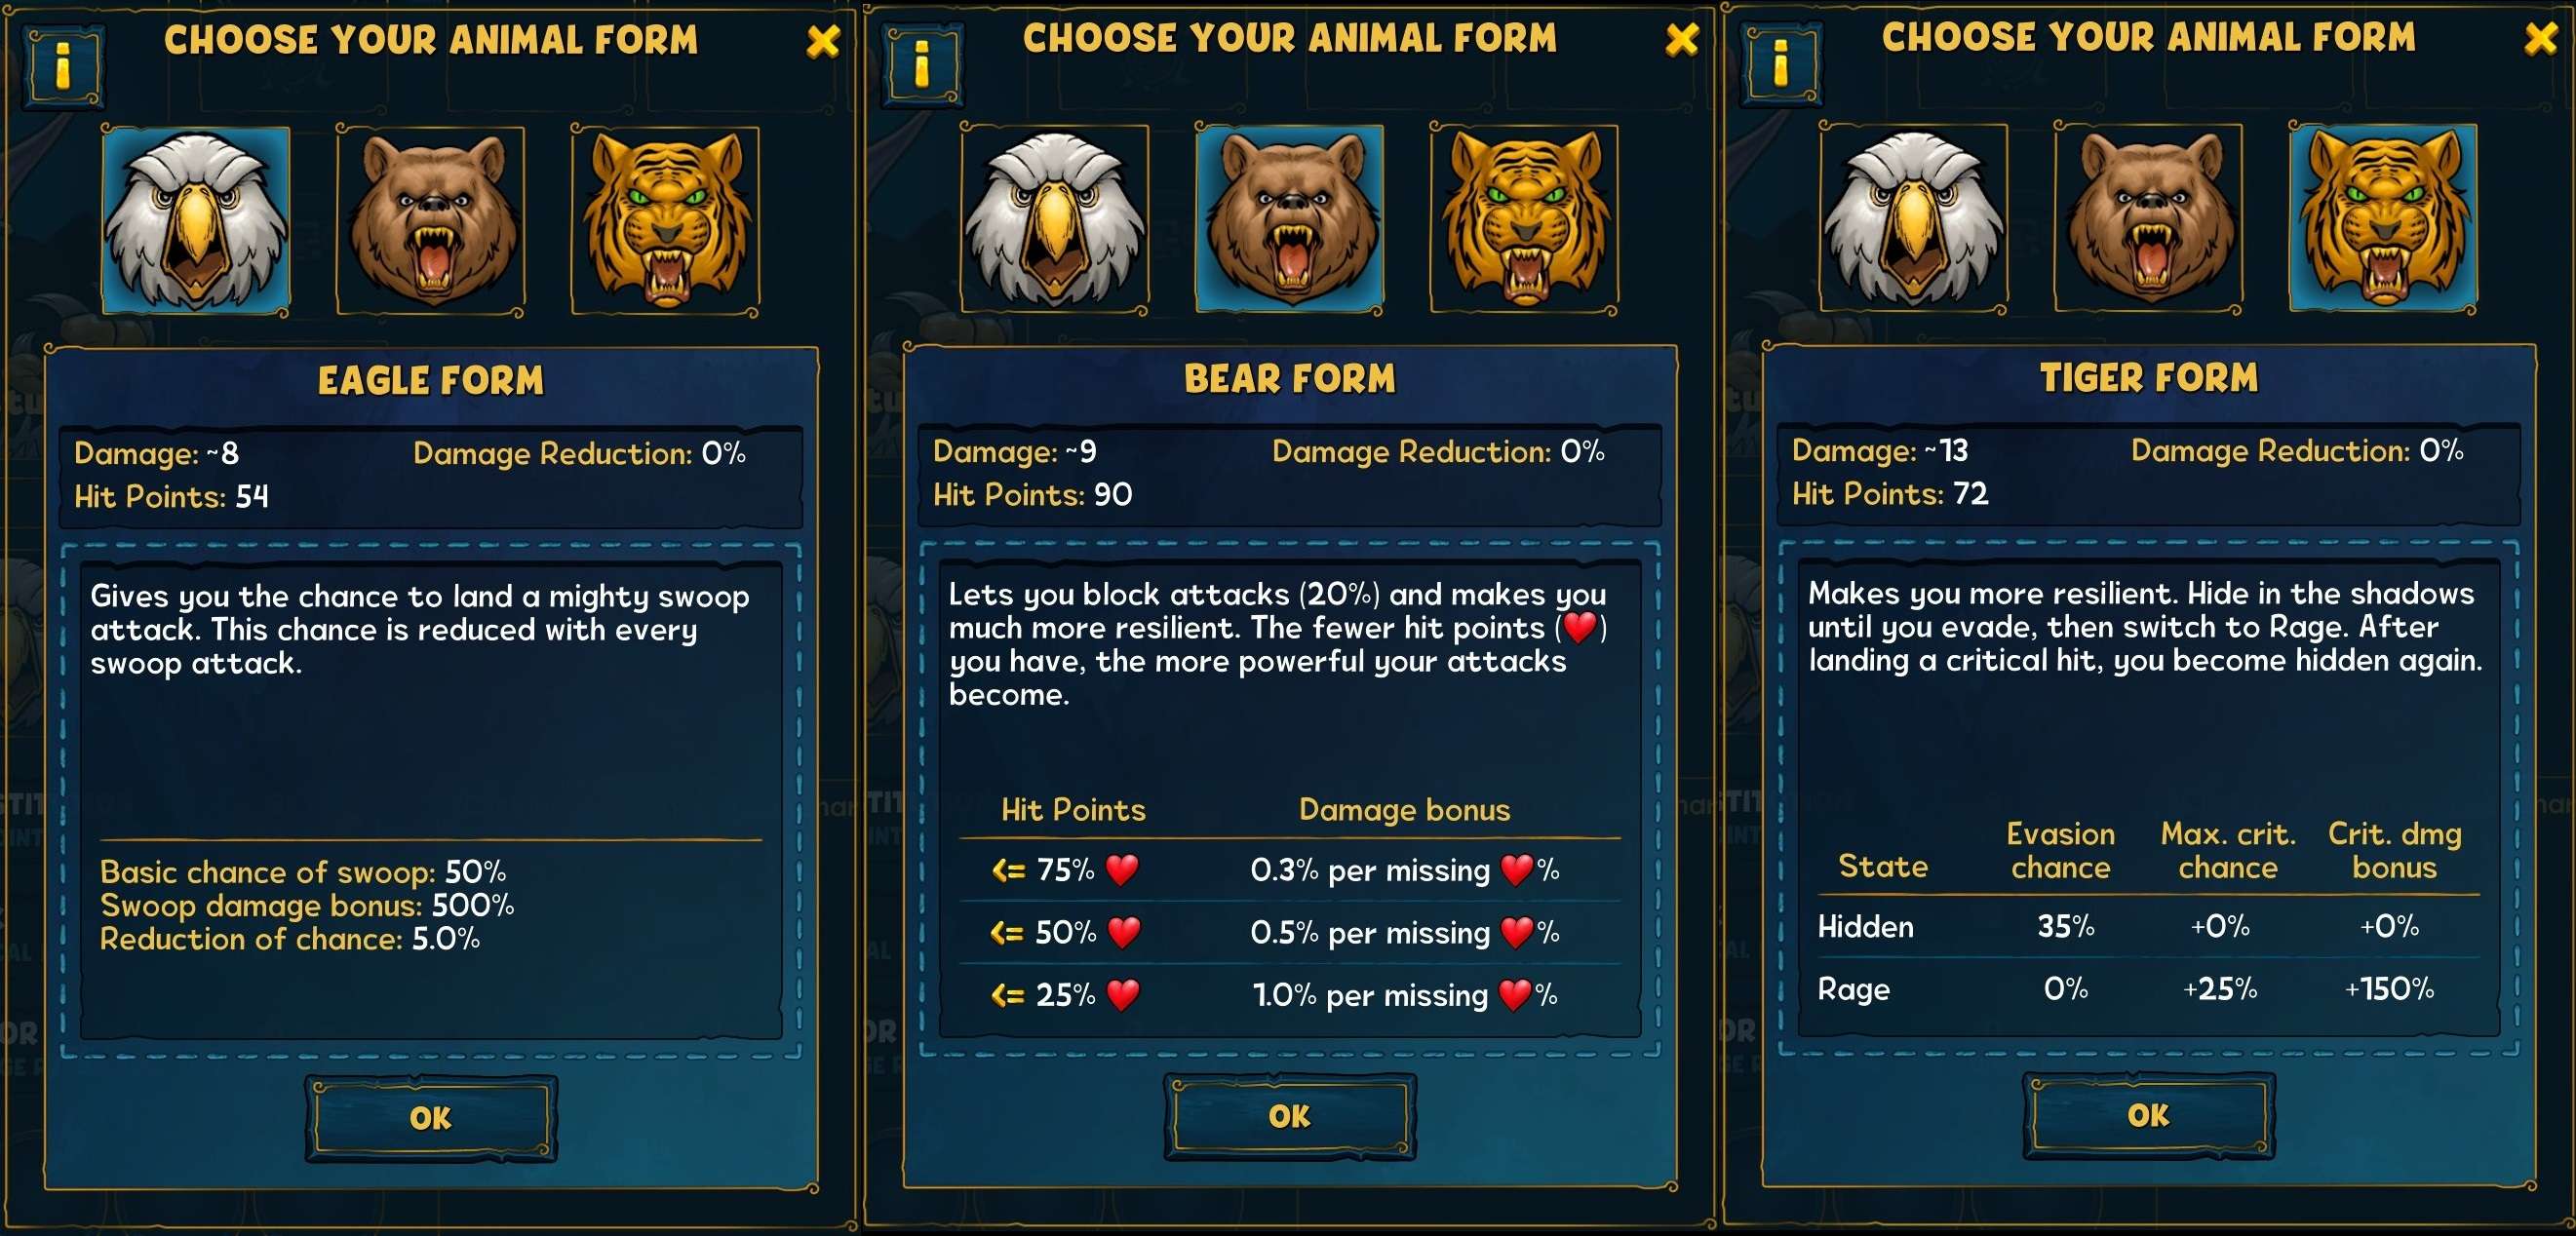
Eagle
- Life: x3
- Damage: x4,5*0,33 (1/3 of Mage damage)
- Armor: 10%
- Ability: 50% chance to perform a swoop attack that deals 500% damage. After each swoop, the chance drop by 5%.
Bear
- Life: x5
- Damage: x4,5*0,4 (similar to Warrior damage) + bonus
- Armor: 50%
- Ability: 20% chance to block an incoming attack and a bonus to damage based on the missing HP %.
Tiger
- Life: x4
- Damage: x4,5*0,56 (similar to Scout damage)
- Armor: 25%
- Ability: Starts in Hidden mode, with 35% chance to evade incoming attacks. After a successful dodge switch to Rage mode, with no chance of evading attacks but increased crit damage and chances. After a crit, switch back to Hidden mode and so on.
Bard
Bard can play 3 different instruments (can change between them manually). Each instrument has different abilities, but attributes are always the following:
- Life: x2
- Damage: x4,5
- Armor: 25%
The different instruments are well explained in the following screenshot:

Whichever instrument you are going to use, in combat the Bard will play a tune every 4 rounds. The length of the tune can go from 1 to 4 rounds depending on its level (25% chance for level 1, 50% chance for level 2 and 25% chance for level 3). Con / Int ratio also has an effect on tune length (if your Con is >= 75% of you Int you will get some bonus rounds for the tunes, so it’s important to keep Con high enough).
Tierlist and Class Comparison
Before jumping on the tierlist, it’s important to make some premises.
The amount of mushrooms bought and the game knowledge have a big impact on the performance of a certain character, so for a tierlist to make sense it has to be based on the same mushroomspaid and knowledge.
There is one main factor to consider to rank classes: volatility.
Simply put, the volatility of a class can be determined by how lucky it can get to beat stronger opponents.
Low volatility is advantageous against opponents with lower stats (and the opposite against opponents with higher stats). This means that classes with high volatility will have a better dungeon performance, thus gaining more levels and stats than low volatility classes (remember: we are considering the same mushrooms paid).
Note: that is why considering only pvp (and same stats) to compare classes is not sufficient; with the same mushrooms a Demon Hunter will progress much faster than a Warrior and will have level and stats advantage.
Tierlist
S-rank: Demon Hunter
- Unbalanced for fair matchups and really high volatility, currently the best all-rounder.
A-rank: Berserker
- Very good dungeon performance (basically a better scout because its ability works against mages). Suffers a bit in PVP against Mage (takes double damage, the high volatility makes it a bit inconsistent).
B-rank: Scount – Assassin
- Good dungeon performance and ok consistency in PVP.
C-rank: Mage
- Not very good in both dungeons and PVP performance.
D-rank: Warrior – Battle Mage
- Their low volatility would be good in PVP against opponents with lower stats, but their bad dungeon performance makes it difficult (read: expensive) to gain that advantage.
TBD: Druid – Bard
- These two classes are under revision, so they will be added to the tierlist later on.
- Currently, Bard has really good dungeon performance but suffers against Berserkers in PVP.
- Druid on the other hand has good dungeon performance in early game, suffers later on against high-HP-Mage dungeons.
Shakes & Fidget Game Manual by KO771
Topics
-
General Information
-
Registration
-
Tavern
-
Arena
-
City Guard
-
Weapon Shop
-
Magic Shop
-
Stable
-
Mushrooms
-
Character
-
Mail
-
Guild
-
Hall of Fame
-
Dungeons
-
Options
General Information
Shakes & Fidget – The Game is a flash-based browser game. You do not have to download or install any software. The title is free to play and does not contain advertisements.
Shakes & Fidget – The Game’s continued development, support and server costs will be funded through free-to-play design. You can buy additional mushrooms in-game that help you progress faster. For example, the mushrooms can be traded in to allow you to raise the daily quest limit.
Now that your familiar with the philosophy behind the game, the rest of manual will be dedicated to a short overview of the game functions, and some hints to getting started as a hero(ine). The manual does not guarantee you the top position in the Hall of Fame, of course, but it might help you on your way to the top.
Registration

Step one
Here you can choose your gender, race, class and appearance in-game.
Please note that the choice of your race and class will affect your attributes at the start
Class
Warrior
Strengh: +7
Dexterity: +3
Intelligence: 0
Constitution: +5
Luck: 0
Mage
Strengh: 0
Dexterity: 0
Intelligence: +8
Constitution: +2
Luck: +5
Scout
Strengh: +1
Dexterity: +7
Intelligence: +1
Constitution: +4
Luck: +2
Race
good attitude
Human
Strengh: 0
Dexterity: 0
Intelligence: 0
Constitution: 0
Luck: 0
Elf
Strengh: -1
Dexterity: +2
Intelligence: 0
Constitution: -1
Luck: 0
Dwarf
Strengh: 0
Dexterity: -2
Intelligence: -1
Constitution: +2
Luck: +1
Gnome
Strengh: -2
Dexterity: +3
Intelligence: -1
Constitution: -1
Luck: +1
bad attitude
Orc
Strengh: +1
Dexterity: 0
Intelligence: -1
Constitution: 0
Luck: 0
Dark Elf
Strengh: -2
Dexterity: +2
Intelligence: +1
Constitution: -1
Luck: 0
Goblin
Strengh: -2
Dexterity: +2
Intelligence: 0
Constitution: -1
Luck: +1
Demon
Strengh: +3
Dexterity: -1
Intelligence: 0
Constitution: +1
Luck: -3
Later in the game you can change your race, but not your class. It will not affect the bonuses you got after the character creation and registration

Step two
Click on “Save Character” and you will get to step two of the registration progress.
Here you are asked to type in a name for your avatar, your email address (for completing the registration progress with a validation code) and a personal password.
Please read the Terms and Conditions afterwards, confirm that you agree with these and proceed to step three.
Step three
Now you can start playing. An email will be sent to the email address provided. This email contains two links:
1. Your personal recruiting link
2. Your personal validation link (to validate your email address and account)
Please note:
Without validating your account you will have some limitations in the game, such as not being able to donate gold to your guild.
Validating has other benefits: After completing the process you will receive 10 free mushrooms.
Tavern

The Tavern is the first stop for adventurers and those who want to become one of them. Here you can meet persons that are willing to give you several tasks, allowing you to earn money and collect experience. By clicking on the person sitting on the table in front of you, you can review three quests and choose one of them.
Below you can see your “Thirst for Adventure” bar. Each quest reduces your thirst.
The reduction is equal to the length of the quest (one minute = one adventure point). But you can refill it by clicking on the bartender and drinking one beer (one beer = 20 Adventure Points). This procedure can be repeated up to ten times per day.
In the back is a third person in the tavern, The Hustler.
Here you can play a little game of luck. You can wager money or mushrooms* and get the chance to double your pool – if you pick the correct cone.
You can also set your gold bet by simple typing in “/gold x” in the guild chat” and then go to The Hustler.
* only after buying additional mushrooms for the first time.
Hint: The “Thirst for Adventure” refills automatically at midnight Server Time (the bar goes up to 100 again).
Hint: Unused “Thirst for Adventure” points expire at midnight.
Hint: You can find mushrooms and items when you return from a successful quest. But always watch your backpack’s space. If there isn’t a free slot available then the gained item will be lost.
Hint: For every quest you complete successfully you will also receive 10 Honor Points.
Arena

An eye for an eye… welcome to the Arena!
Here you can compare your skills with all the other heroes and win (or lose) gold and honor.
The system automatically chooses an opponent that has about as much honor points as you. Alternatively, you can manually type in a name of another player and click on ‘OK’ to attack.
Your earnings by winning will be reduced if your opponent has less honor points than you
Hint: After every fight you have to wait 10 minutes. You want to get to the next fight faster? The arena leader will look the other way if you bribe him with a mushroom.
Hint: You can bypass the fighting animation by clicking “skip”. You will instantly see the result of the fight.
City Guard

Everybody needs money, even a mighty hero such as yourself.
You can work as a city guard for up to ten hours straight. It’s not the most glamorous job in the world, but you get paid well.
Hint: If you cancel the job before the timer ends you won’t get a paycheck.
Hint: The higher your level, the better the payment.
Weapon Shop

Every hero knows that you are only as good as your equipment.
In the Weapon Shop you can buy a variety of useful items. Weapons, shoes, helmets, belts and other equipment will help increase your defense and other stats.
By moving the mouse cursor over an item you can check the bonuses and its price. Some items cost gold. Some are so special that the trader also wants mushrooms from you.
How to buy an item
If you have enough gold (and mushrooms, if required), simply click and drag the item into one of your backpack slots.
To equip, just drag it into an inventory slot.
Can I sell items?
Of course. Just click and drag the item that you want to sell into your backpack first, then drag it over the dealer’s inventory and release the mouse button. You will receive 25% of the gold price the item cost when you bought it.
Hint: The selection changes daily at Midnight Pacific Time. You can get a new random selection instantly by paying a mushroom.
Hint: The higher your level is, the better the offered items.
Magic Shop

No fantasy without magic.
The Magic Shop has the same functionality as the Weapon Shop. It offers magic necklaces, rings, accessories and potions.
Hint:
Potions are more complicated than your average items:
– Potions are activated by dragging them to your character’s portrait picture.
– Up to three potions can be active at the same time.
– Potions boosting the same attribute will cancel the effect of the previous one, resetting the timer.
– Active potions will be shown on the character screen on the right side above the achievements.
– By double-clicking an active potion icon the effect will be canceled.
Stable

Don’t want to walk? – Get yourself a mount!
You can rent a mount for 14 days at a time at the stable. It will reduce the amount of time it takes to complete a quest.
Hint: You can extend the rental period by booking the same mount again. The duration of the rental will be increased.
Hint: You can replace an existing mount with a faster model, but the old mount will be lost.
Hint: The mount selection varies for the two factions, but prices and stats are the same.
Hint: The “environmental award” can only be collected once.
Mushrooms

Mushrooms are an additional currency which can help you to speed up your progress in the game. You can purchase additional mushrooms from this menu.
Hint: Depending on the payment method, the duration between ordering and accrediting the mushrooms can differ from 30 seconds to one or two days (method “transfer”).
Character

Character overview
Displays:
– Equipped items
– Backpack
– Character picture including name and guild name
– Current level including progress towards the next level
– Current attributes
Hint: If you move your mouse cursor over particular attributes, additional information is displayed.
Hint: Move your mouse cursor over the plus sign next to the attributes to see how much an increase will cost.
On the right side of the screen you can see, and change, your character description.
Below you can take a look at your mount (if you have one) and the remaining time on your mount rental agreement.
Further below you will see the total armor value based on your current equipment.
Active potions will be shown to the right of the armor value. Move the mouse cursor over a potion icon for additional details.
Last but not least you can see your eight achievement medals.
Each one will give you a small attribute bonus if you fulfill the requirements. Mouse over to get more information.

Someone wants to tell you something, someone attacked you, invited you in to his (or her) guild or you want to write someone?
This is the right place.
Correspond with other users, read your mail or check arena reports. Most of your community notices will reside here.
Hint: You can save up to 100 mails.
Hint: If there is new mail the “mail” button will pop up.
Guild

Teamwork is important – joining a guild has many benefits.
To create a guild you’ll need 10 gold and a guild name. Then you have access to the guild screen (see above).
On top is the name of your guild, in the upper left corner is your rank in the Guild Hall of Fame and your guild honor as earned from all guild wars.
On the left side you can see the progress level of three guild features.
Fortress:
Member limit for your guild. After creating a guild you start with 10 slots (you plus 9 other players).
You can expand this feature by clicking on the plus button. The price is displayed in the next line.
The maximum number of guild members is 50.
Treasure:
By expanding this feature you will get a percentage bonus on earned gold from quests and city guard work shifts.
There are 50 steps up to the maximum of 100%.
Instructor:
Similar to “Treasure”, this feature increases the amount of experience earned from quests.
There are 50 steps up to the maximum of 100%.
In the middle of the screen you can see your guild description.
This description can only be changed by the guild leader (the player with the crown in front of his name).
Hint: Other players can view your guild by clicking it in the Guild Hall of Fame. They are also able to read the description. You can split the description by using /// in the text field. Everything written before /// can be read by guild members only; everything behind it can be read by all other players.
An example:
To guild: Important information on …
///
Hello all, we are in need of a few good active heroes. Just mail me!
The first part is shown only to guild members, the second part also to other players visiting your guild overview!
Below the description you can see your guild account.
Every member can donate gold or mushrooms (gold after validating the account, mushrooms after buying additional mushrooms for the first time).
You can donate either by clicking the + button next to the gold or mushroom symbol or by entering a chat command:
/gold xxx – you donate xxx gold
/mushroom xxx – you donate xxx mushrooms
Hint: Donated gold or mushrooms cannot be retrieved – so be careful when donating!
On the right side is the member list.
Members are displayed in the order in which they were invited.
Color codes for member names:
Gray: this player has been invited but is not an active member – They have yet to accept the invitation.
Orange: active member but offline at the moment.
Yellow: active member and online at the moment.
Guild ranking symbols for member names:
Crown: the Guild Leader
Medal: an Officer
Smiley: common member
The rights of the Guild Leader:
– Can change the guild description
– Can invite and kick members
– Can promote officers
– Can buy guild feature expansions
– Can pass over his leader position to a different member
The rights of officers:
– Can invite members
– Can buy guild feature expansions
Hint: If a leader leaves his guild and has not determined a new leader before, the oldest officer is automatically promoted to guild leader.
If there is no officer, then the person on rank #2 in the member list will be picked as the new leader.
Below you can see 5 buttons.
1. Invite – by clicking this button you can invite new players (if it is gray, you already have the actual maximum of members)
2. View Profile – you can read the profile of the highlighted player in the member list.
3. Kick – you kick the highlighted player in the member list from the guild.
4. Officer – you grant (or revoke) officer rights to the highlighted player in the member list.
5. Leader – you hand over your guild leader rights to the highlighted player in the member list (you will become an officer after that).
On the bottom of the screen you can see the guild chat.
Click in the chat line to type a message and hit the “Return/Enter” key on your keyboard to send the message.
If you are not viewing the guild screen and a new message appears in guild chat, the guild button will pop up on the main menu.
GUILD WARS
On the left-hand side, there are two icons between the guild upgrades and the guild chat: a sword (attack another guild) and a shield (defend your guild against another attacking guild).
The Guild Leader or an Officer can click on the sword icon to initiate an attack at any time, whereas the other guild members can only click on it after their Guild Leader’s orders. The shield icon becomes clickable only if another guild is about to attack your guild.
The sword icon has two functions:
Guild Leader:
By clicking on the sword the Hall of Fame is displayed. There you can select an opponent and also see which guilds are currently under attack (orange) and therefore cannot be attacked by you. After visiting the guild page of your selected opponent, you have to click on the sword again in order to initiate the attack.
Other guild members:
The date and time of an attack is shown under your guild description. Ten hours pass between the declaration of war and the actual attack. You can go to war (and join your guild’s fellow heroes) by clicking on the sword. You take part in the battle only after clicking on the icon.
The shield icon:
If another guild is about to attack your guild, date and time of the attack are displayed under the guild description. In the course of ten hours, guild members can volunteer to defend their guild by clicking on the shield. All guild members take part and try to defend their guild: members that have clicked on the shield fight with 100% of their constitution, whereas members that have not clicked on the icon have only 50% in the upcoming battle.
Color chart of guild members:
Guild is not at war:
grey-transparent – invited member
dark yellow – active member, currently offline
gold – active member, currently online
Guild is at war:
dark red-transparent – invited member
dark red – active member, currently offline and not ready for war
bright red – active member, currently online and not ready for war
dark yellow – active member, currently offline and ready for war
gold – active member, currently online and ready for war
General information:
Both the attacking and defending guild can view the date and time of the attack. Moreover, you can also see which guild members are ready for war (as represented by colors; viewable via mouse-over).
In the course of preparation for war (ten hours), an attacking guild cannot declare war on another guild, whereas the defending guild cannot be attacked by another guild.
However, the attacking guild can be attacked by other guilds and the defending guild can declare war on another guild. In short: a guild can only attack and be attacked once at the same time.
Costs for Guild Wars:
War is never cheap. Every attack costs gold from the Guild Treasure. The actual costs depend on an attacked guild’s Fortress level. For more information, visit this link: http://forum.sfgame.co.uk/showthread.php?t=35 .
The Guild Leader can see the actual costs in-game by moving the mouse cursor over the other guild’s sword icon.
Once the time of an attack has come (the ten hours have passed), the war is started. Two heroes (one of each guild) fight each round. The order of fighters is related to their current levels – the higher a fighter’s level, the later his or her turn. The winner of each round faces the other guild’s next fighter with his or her remaining hit points. The battle ends once a guild runs out of fighters.
The actual battle animation can be cancelled by clicking on “Skip”. The battle’s final screen will displayed next. Every guild member can view the battle only once (by clicking on “Guild”), unless you are already on the guild screen at the beginning of a battle. In this case, the battle animation will start automatically.
Victory in a Guild War:
Attacker:
In case of victory, the attacker gains Honor (depending on the guilds’ difference in Honor). The amount of experience depends on the other guild’s Honor. If the attacker loses the war, the guild loses Honor.
Defender:
If an attack is warded off, the guild gains Honor (depending on the guilds’ difference in Honor). If the defending guild loses the war, the guild loses Honor.
After a Guild War:
After a Guild War the guild has to rest for 90 minutes. Only after these 90 minutes can another guild be attacked.
GUILD DUNGEONS
If you are level 50+ and an officer, you can initiate a guild dungeon attack. The guild leader must be level 50+ too.
Mouse over the attack button to see the cost of the attack.
The guild’s progress (how many of the 50 dungeons have already been cleared) is displayed on the top left next to guild honor and the Hall of Fame rank.
All guild members that have clicked to join the attack and have been a member of the guild for 24 hours at least automatically participate in the guild dungeon attack regardless of their level.
How Guild Dungeons work:
The attack automatically starts at the given date. All participating guild members attack the dungeon monsters similar to a guild battle. If you succeed all participating characters are awarded an experience bonus in relation to their level. In addition, your guild features can be upgraded with each dungeon cleared. If you lose you can try again but all gold spent on an attempt to clear the dungeon is lost.
Hint: if you have cleared a dungeon with a guild you can enter the same dungeon with another guild again but you will not get more experience points. Each dungeon adds experience points to your character only once.
Hint: if you miss a guild dungeon attack because you have not clicked the button to join your fellow guild members you will not be awarded anything nor can the attack be repeated. However, you will benefit from the bonus of the guild upgrades.
Hall of Fame

The Hall of Fame – everyone who plays on your server can be seen here.
There are in fact two Halls of Fame – one for the players and one for the guilds.
You can switch between them by simple clicking on the appropriate tab on the top.
If you click on the name of a player, or guild, additional information is shown. Check out your rivals before fighting them!
Hint: You cannot attack guild members when choosing opponents from the Hall of Fame. To attack guild members, go to the arena and manually type in the name of the player.
Dungeons

Dungeons have been found under the city.
There are 10 dungeons overall, each one with 10 floors.
To explore them you have to find the keys that open their doors.
When (and how) will you find which key?
Key 1 from level 10 (quest)
Key 2 from level 20 (quest)
Key 3 from level 30 (quest)
Key 4 from level 40 (quest)
Key 5 from level 50 (quest)
Key 6 from level 70 (quest + shop)
Key 7 from level 80 (quest)
Key 8 from level 95 (quest)
Key 9 from level 110 (quest + shop)
Dungeon 10 will be opened after clearing all other 9 dungeons
Keys can be found by completing quests (similar to other items) and some keys can also be bought in the shops.
In dungeons you can win experience, gold and have a 50% chance of obtaining an item.
Hint: You can find powerful epic items in dungeons. The chance to find one of those is 25%. If you beat a final boss (floor 10 of every dungeon) you will always get an epic item.
Hint: Once cleared you cannot return to a dungeon or floor.
Options

You can change many settings in the option menu.
– Alter your character’s appearance
– Change your email address (new validation will be required)
– Change your password
– Get a new validation mail (if you haven’t already received yours)
– Delete your account
– Set the volume of the sound effects.
– Deactivate some animations to improve game performance (especially on older PCs).
In the lower right corner the version number of the game is displayed. If you move your mouse cursor over it you can see additional information such as your account ID.

Обновленное гайд по созданию персонажа с кратким описанием способностей класса и списком уровней в конце.
Содержание
- Создание персонажей и список классов
- Расы
- Классы
- Сравнение уровней и классов
Создание персонажей и список классов
Расы
Доступно восемь рас. Каждая раса оказывает небольшое влияние на стартовые атрибуты, которые в долгосрочной перспективе не имеют значения (и, следовательно, не важны), поэтому выбирайте то, что вам больше нравится.
Стоит также отметить, что вы сможете изменить расу и внешний вид персонажа всего за одно золото в любое время (поэтому выбор не является постоянным).
Классы
Примечание: Бард и Друид будут изменены в ближайшем будущем, поэтому их описание может быть соответствующим образом изменено.
В настоящее время доступно девять классов. В отличие от рас, класс изменить нельзя.
К сожалению, на данный момент классы не полностью сбалансированы (поэтому следующий раздел состоит из списка классов), но я все же предлагаю немного поэкспериментировать, прежде чем выбирать окончательный класс, так как игра особенно гриндовая и потребуются годы, чтобы закончить даже PVE-контент (нет смысла выбирать класс охотника на демонов, если он вам действительно не нравится, даже если сейчас он S-уровня).
Поскольку способности не объясняются подробно на экране создания персонажа, я опишу их кратко.
Воин
- Жизнь: x5
- Урон: x2
- Броня: 50%
- Способность: 25% шанс заблокировать входящую атаку
Разведчик
- Жизнь: x4
- Урон: x2,5
- Броня: 25%
- Способность: 50% шанс уклониться от входящей атаки
Маг
- Жизнь: x2
- Урон: x4,5
- Броня: 10 %
- Способность: Атаки игнорируют броню. Аннулирует способность противника (разведчики не могут уклоняться, воины не могут блокировать, охотники на демонов не могут возрождаться, …). Примечание: Берсеркер является исключением, поскольку он по-прежнему может использовать свою способность против Магов (но также получает х2 урона)
Убийца
- Жизнь: x4
- Урон: как у Разведчика. примечание: Ассасин использует 2 одноручных оружия и атакует дважды за ход. Урон масштабируется так, чтобы он был похож на урон разведчика
- Броня: 25%
- Способность: 50% шанс уклониться от входящей атаки
Боевой маг
- Жизнь: x5
- Урон: x2
- Броня: 50%. примечание: 10% от экипировки и 40% от классовой способности (таким образом, боевой маг всегда будет иметь 40+% брони)
- Способность: в начале стреляет огненным шаром, который наносит до 33% урона HP противник. Не работает против магов или боевых магов
Берсерк
- Жизнь: x4
- Урон: х2,5. примечание: Берсеркер использует 1 одноручное оружие (как воин), но имеет скрытый множитель, делающий его урон равным урону разведчика
- Броня: 25%. примечание: берсерк использует экипировку воина, но значение брони уменьшается вдвое
- Способность: после атаки есть 50% шанс снова атаковать (может делать это бесконечно). примечание: несмотря на формулировку, это то же самое, что и способность уклонения разведчика, за исключением того, что она также работает против магов, что делает Берсеркера действительно сильным средством для зачистки подземелий
Охотник на демонов
- Жизнь: x4
- Урон: x2,5
- Броня: 50%
- Способность: 44% шанс возродиться с 90% HP. После каждого возрождения шансы уменьшаются на 2%, а HP на 10% (1-е возрождение, шанс 44% при 90% HP, 2-е возрождение 42% при 80% HP, … ).
Друид
Друид имеет 3 формы животных на выбор (можно изменить вручную). Каждая форма будет изменять ваши способности и атрибуты. примечание: форма тигра и медведя наносит половину урона магам и бардам.
Орел
- Жизнь: x3
- Урон: x4,5*0,33 (1/3 от магического урона)
- Броня: 10%
- Способность: 50% шанс выполнить атаку махом, наносящую 500% урона . После каждого наскока шанс падает на 5%.
Медведь
- Жизнь: x5
- Урон: x4,5*0,4 (аналогично урону Воина) + бонус
- Броня: 50%
- Способность: 20% шанс заблокировать входящую атаку и бонус к урону на основе недостающего HP %.
Тигр
- Жизнь: x4
- Урон: x4,5*0,56 (аналогично урону разведчика)
- Броня: 25%
- Способность: Запускается в скрытом режиме, с 35% шансом уклониться от входящих атак. После успешного уклонения переключитесь в режим ярости, без шансов уклониться от атак, но с увеличенным критическим уроном и шансами. После критического удара вернитесь в скрытый режим и т. д.
Бард
Бард может играть на 3 разных инструментах (может переключаться между ними вручную). Каждый инструмент имеет разные способности, но атрибуты всегда следующие:
- Жизнь: x2
- Урон: x4,5
- Броня: 25%
Различные инструменты хорошо показаны на следующем снимке экрана:
Какой бы инструмент вы ни использовали, в бою Бард будет играть мелодию каждые 4 раунда. Продолжительность мелодии может варьироваться от 1 до 4 раундов в зависимости от ее уровня (шанс 25% для уровня 1, шанс 50% для уровня 2 и шанс 25% для уровня 3). Соотношение Con/Int также влияет на продолжительность мелодии (если ваше Con составляет >= 75% вашего Int, вы получите несколько бонусных раундов за мелодии, поэтому важно поддерживать достаточно высокое Con).
Сравнение уровней и классов
Прежде чем перейти к списку уровней, важно сделать некоторые предпосылки.
< р>Количество купленных грибов и игровые знания имеют большое влияние на производительность определенного персонажа, поэтому для того, чтобы список уровней имел смысл, он должен основываться на одних и тех же грибах и знаниях.
Есть одно. Главный фактор, который следует учитывать при ранжировании классов: волатильность.
Проще говоря, волатильность класса можно определить по тому, насколько ему повезет победить более сильных противников.
Низкая волатильность выгодна против противников с более низкими характеристиками (и наоборот против противников с более высокими характеристиками). Это означает, что классы с высокой волатильностью будут иметь лучшую производительность в подземельях, таким образом получая больше уровней и характеристик, чем классы с низкой волатильностью (помните: мы рассматриваем те же самые грибы, которые оплачиваются).
Примечание: именно поэтому учитываются только пвп (и одинаковые статы) для сравнения классов недостаточно; с теми же грибами Охотник на Демонов будет прогрессировать намного быстрее, чем Воин, и будет иметь преимущество в уровне и характеристиках.
Уровень
S-ранг: Охотник на Демонов
- Несбалансированный для честных матчей и действительно высокой волатильности, в настоящее время лучший универсал.
A-ранг: Берсерк
- < ли>Очень хорошая производительность в подземельях (в основном лучший разведчик, потому что его способность работает против магов). Немного страдает в ПВП против Мага (получает двойной урон, высокая волатильность делает его немного непостоянным).
B-ранг: Счет – Убийца
- Хорошая производительность в подземельях и хорошая согласованность в PvP.
С-ранг: Маг
- Не очень хорош в как в подземельях, так и в PvP.
Ранг D: Воин – Боевой маг
- Их низкая волатильность была бы хороша в PVP против противников с более низкими характеристиками, но их плохая производительность в подземельях затрудняет (читай: дорого) получение этого преимущества.
Уточняется: Друид – Бард
- Эти два класса пересматриваются, поэтому позже они будут добавлены в список уровней.
- В настоящее время у Барда действительно хорошая производительность в подземельях, но он страдает против берсерков в PvP.
- Друид, с другой стороны, имеет хорошую производительность в подземельях в начале игры, но позже страдает от подземелий с высоким HP-Mage.
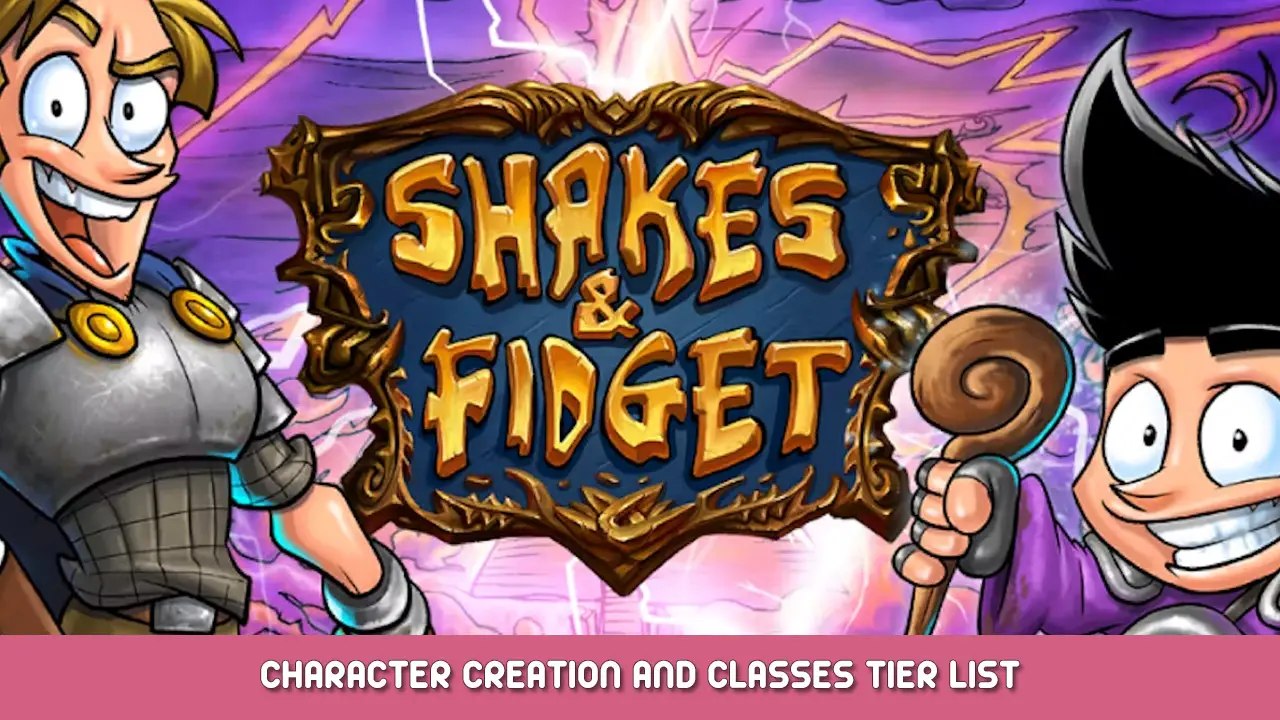
- Тема: Встряхивания и непоседа
- Дата выпуска:
- Разработчик:
- Издатель:
Актуальное руководство по созданию персонажа с кратким описанием способностей класса и списком уровней класса в конце.
Скачки
Доступно восемь гонок. Каждая раса оказывает небольшое влияние на стартовые атрибуты, что не имеет значения в долгосрочной перспективе (и, следовательно, неважно), поэтому выбирайте то, что вам больше нравится.
Также стоит отметить, что вы сможете изменить расу и внешний вид персонажа всего за одно золото в любое время (поэтому выбор не является постоянным).
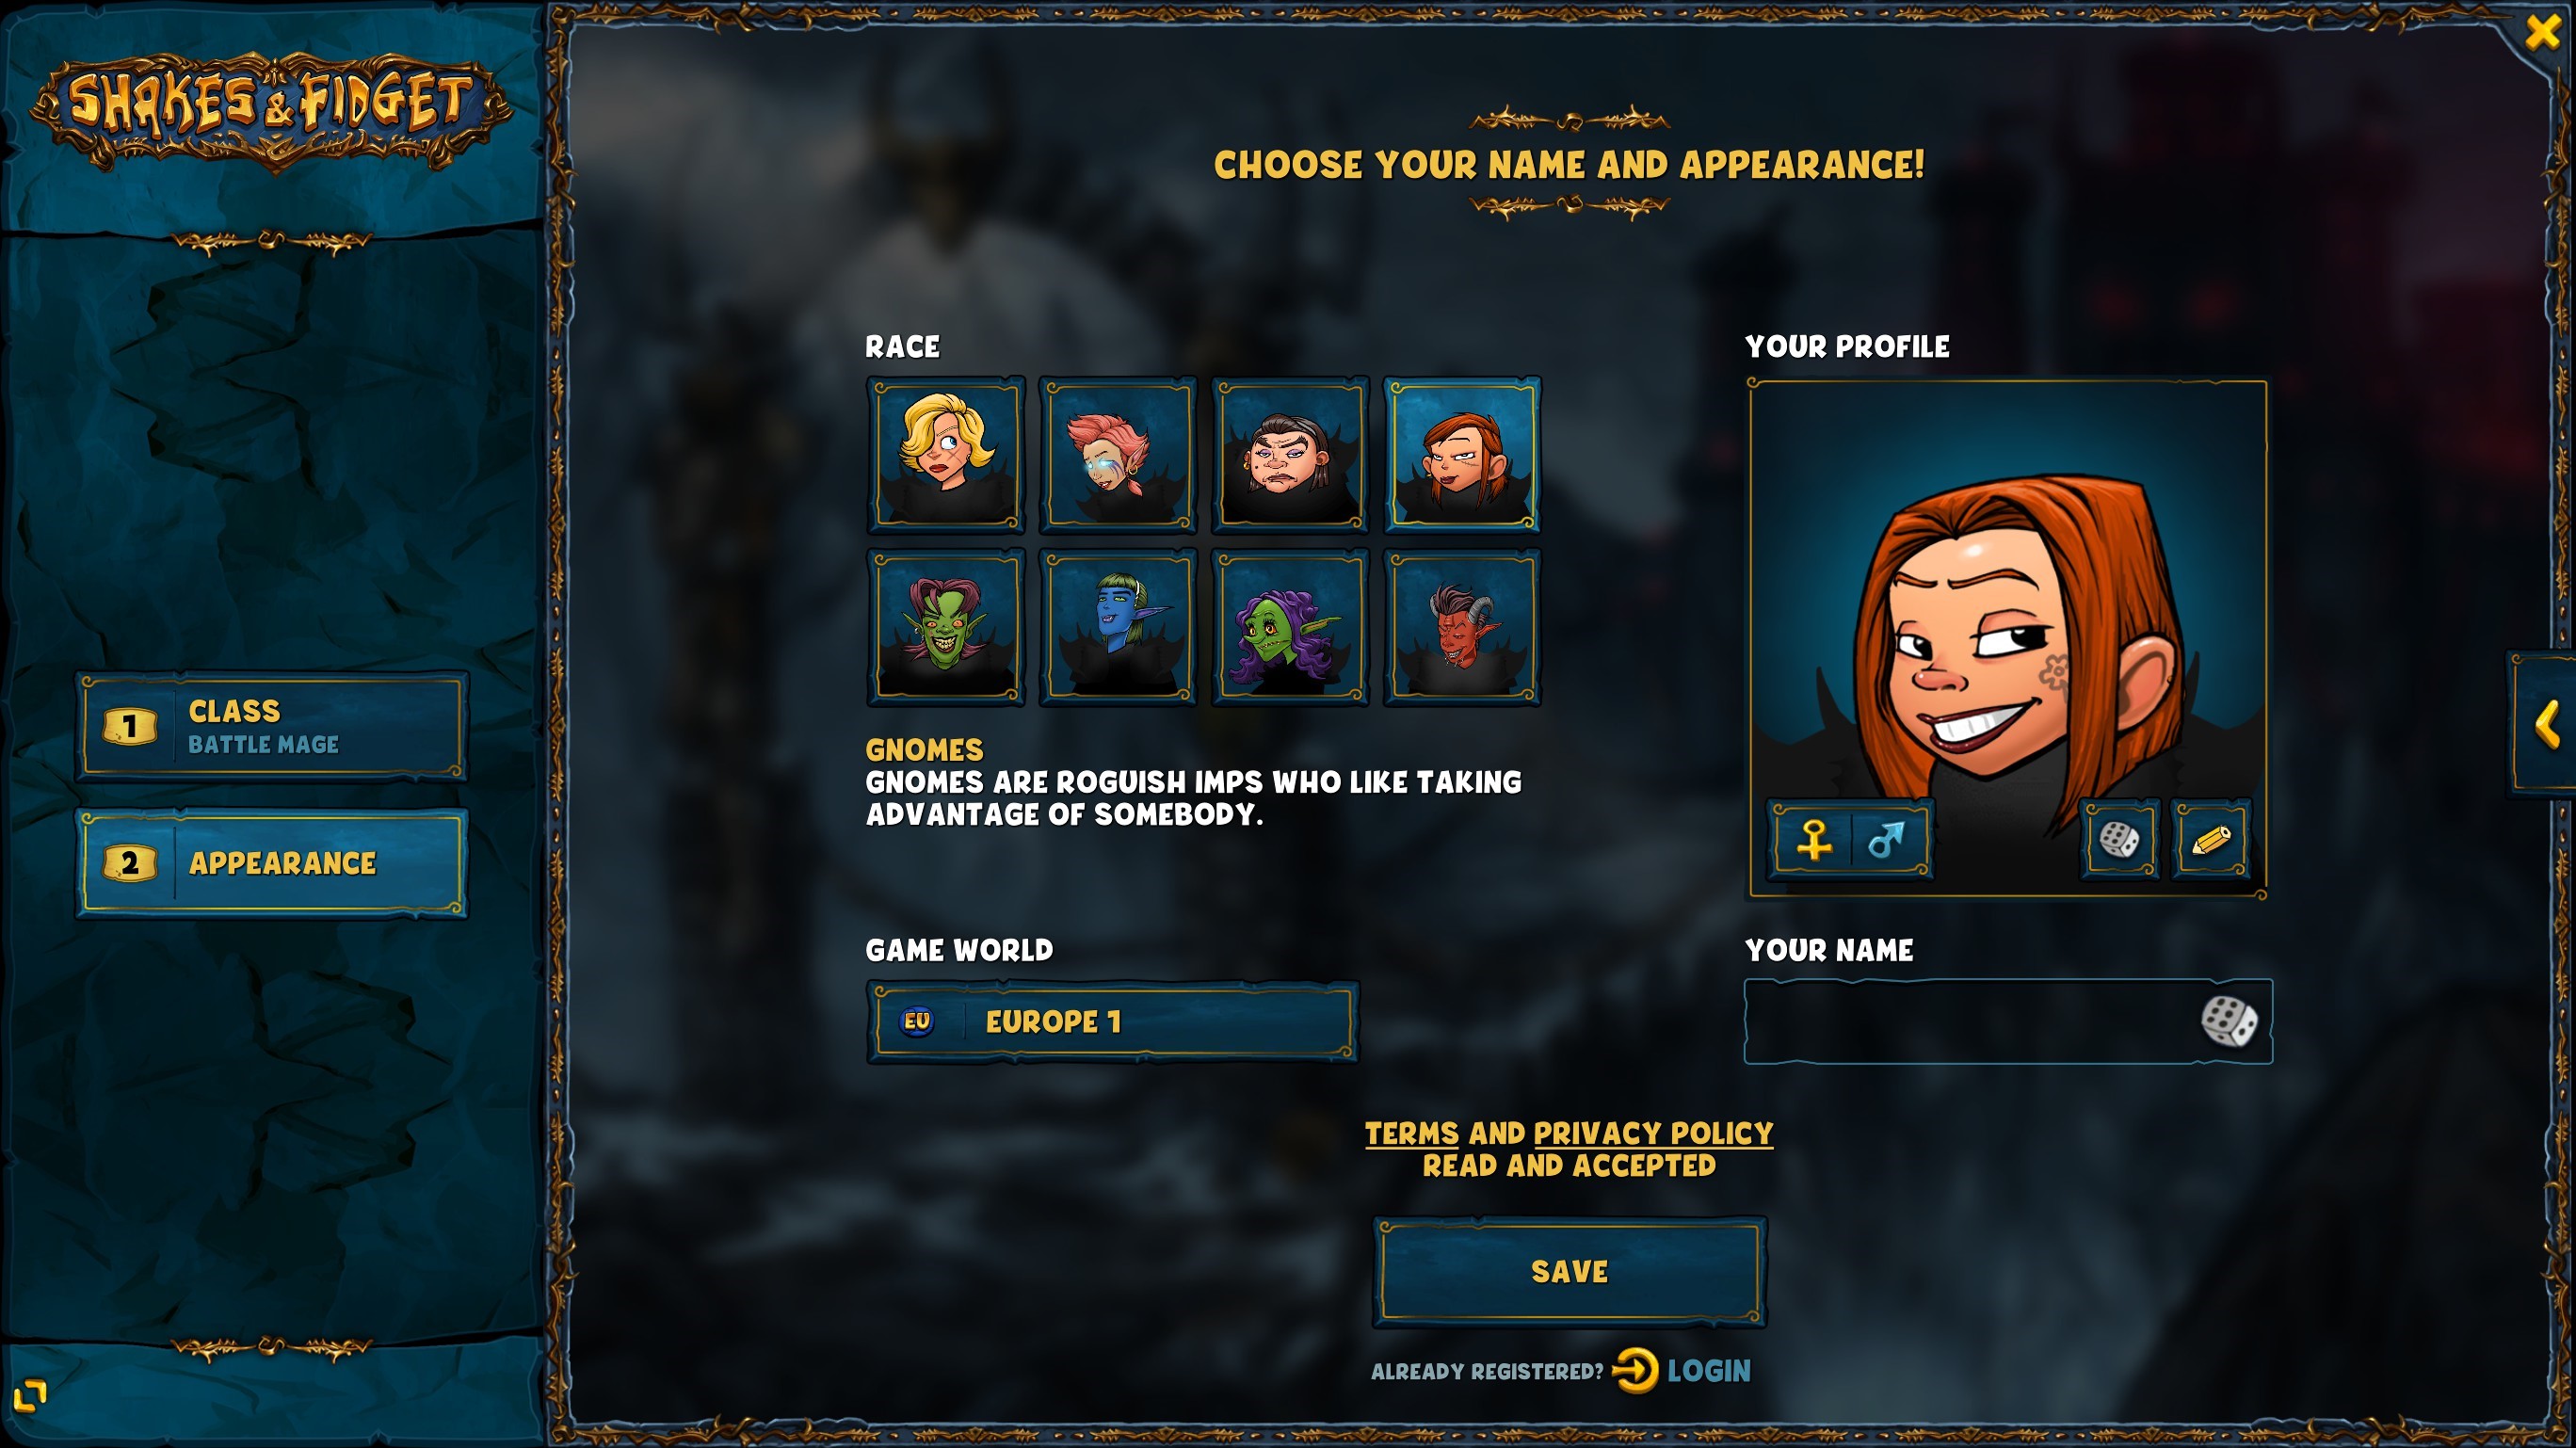
Классы
ПРИМЕЧАНИЕ: Бард и Друид будут изменены в ближайшем будущем, поэтому их описание может быть соответствующим образом изменено. На данный момент доступно девять классов. В отличие от рас, класс нельзя изменить.
К сожалению, на данный момент классы не полностью сбалансированы (поэтому следующий раздел состоит из списка уровней классов), но я все же предлагаю немного поэкспериментировать, прежде чем выбрать окончательный класс, так как игра особенно жесткая, и потребуются годы, чтобы закончите даже PVE-контент (нет смысла выбирать класс охотника на демонов, если он вам действительно не нравится, даже если сейчас он S-уровня).
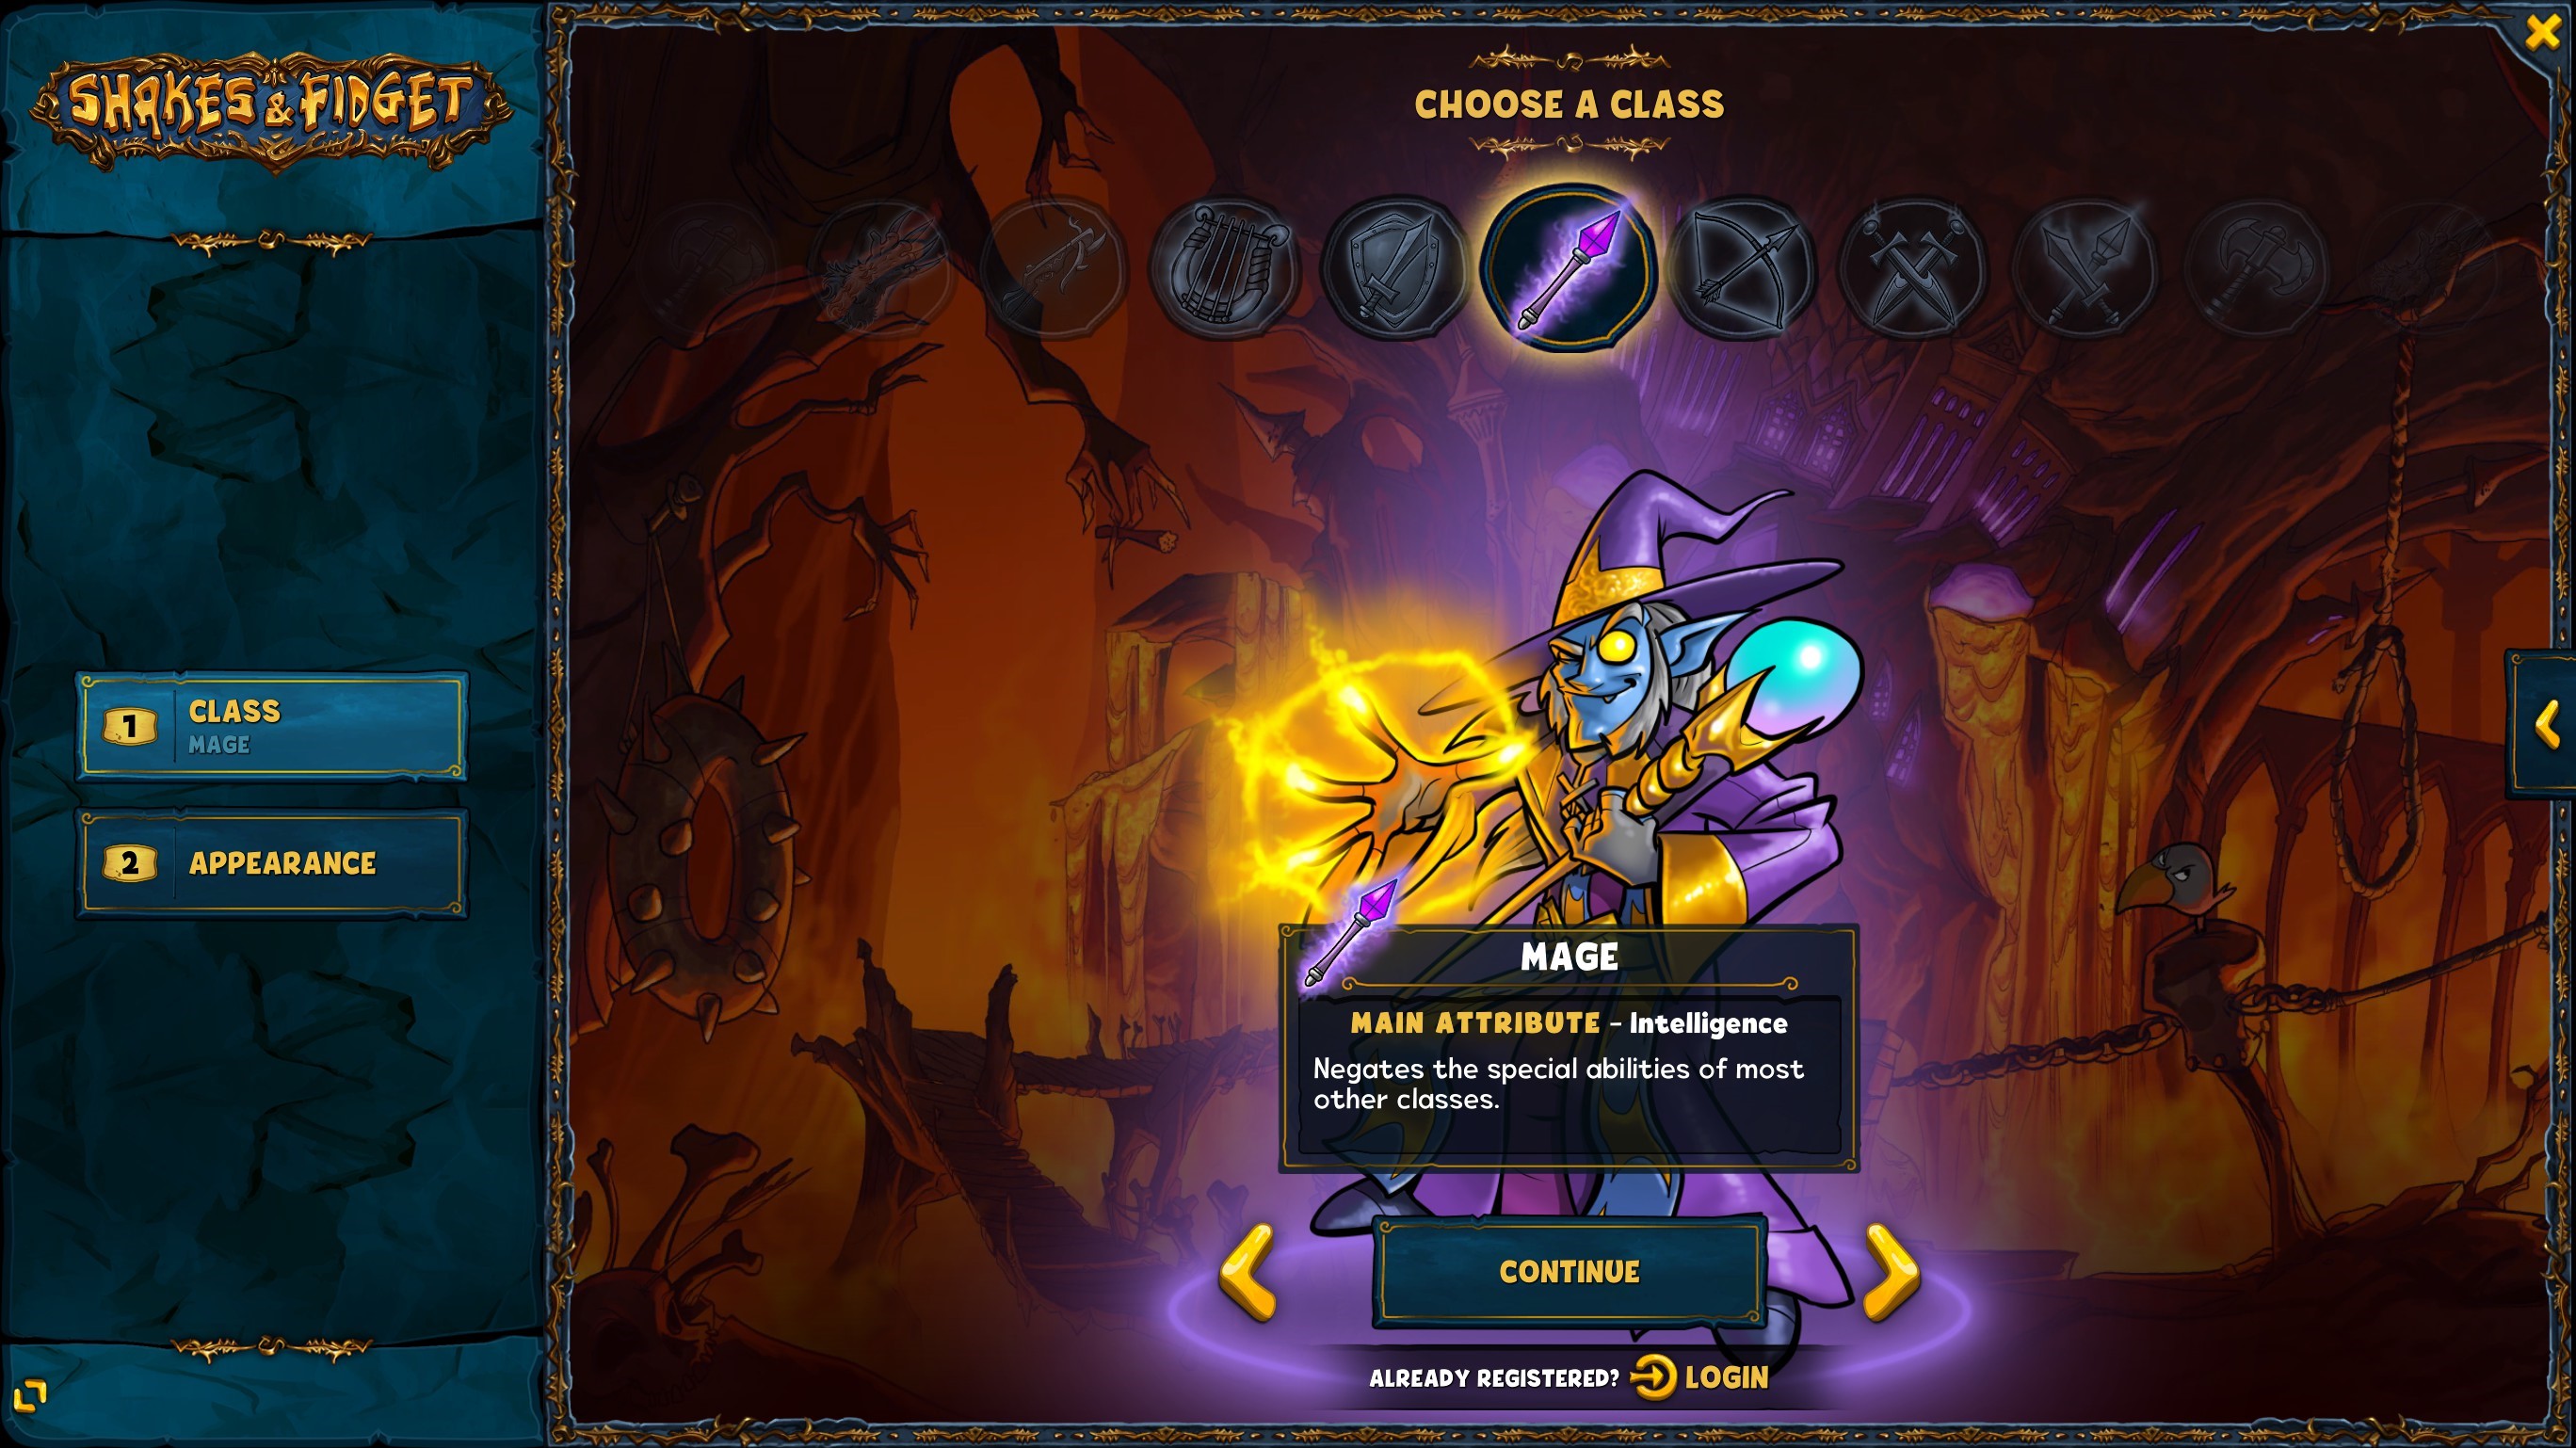
Поскольку способности не объясняются подробно на экране создания персонажа, я опишу их кратко.
Воин
- Жизнь: х5
- Урон: х2
- Броня: 50%
- Способность: 25% шанс заблокировать входящую атаку
Разведчик
- Жизнь: х4
- Урон: х2,5
- Броня: 25%
- Способность: 50% шанс уклониться от входящей атаки
Маг
- Жизнь: х2
- Урон: х4,5
- Броня: 10%
- Способность: Атаки игнорируют броню. Аннулирует способность противника (Разведчики не могут уклоняться, Воины не могут блокировать, Охотники на Демонов не могут возрождаться, …). примечание: Берсерк является исключением, так как он все еще может использовать свою способность против Магов (но также получает х2 урона)
Убийца
- Жизнь: х4
- Урон: как у Разведчика. примечание: Ассасин использует 2 одноручных оружия и атакует дважды за ход. Урон масштабируется так, чтобы он был похож на урон разведчика.
- Броня: 25%
- Способность: 50% шанс уклониться от входящей атаки
боевой маг
- Жизнь: х5
- Урон: х2
- Броня: 50%. примечание: 10% от экипировки и 40% от классовых способностей (таким образом, боевой маг всегда будет иметь 40+% брони)
- Способность: на старте стреляет огненным шаром, который наносит противнику до 33% урона от ХП. Не работает против магов или боевых магов.
Неистовый
- Жизнь: х4
- Урон: х2,5. примечание: Берсерк использует 1 одноручное оружие (как воин), но имеет скрытый множитель, делающий его урон равным урону разведчика
- Броня: 25%. примечание: Берсеркер использует экипировку Воина, но стоимость брони уменьшена вдвое.
- Способность: После атаки имеет 50% шанс снова атаковать (может делать это бесконечно). Примечание: несмотря на формулировку, это то же самое, что и способность уклонения Разведчика, за исключением того, что она также работает против Магов, что делает Берсеркера действительно сильным для зачистки подземелий.
Охотник на демонов
- Жизнь: х4
- Урон: х2,5
- Броня: 50%
- Способность: 44% шанс возродиться с 90% HP. После каждого возрождения шансы уменьшаются на 2%, а HP на 10% (1-е возрождение, шанс 44% с 90% HP, 2-е возрождение 42% с 80% HP, …).
друид
Друид имеет 3 формы животных на выбор (которые можно изменить вручную). Каждая форма будет изменять ваши способности и атрибуты.
Примечание: форма тигра и медведя наносит половину урона магам и бардам.
орел
- Жизнь: х3
- Урон: x4,5*0,33 (1/3 урона Мага)
- Броня: 10%
- Способность: 50% шанс выполнить атаку свупом, которая наносит 500% урона. После каждого наскока шанс падает на 5%.
медведь
- Жизнь: х5
- Урон: x4,5*0,4 (аналогично урону Воина) + бонус
- Броня: 50%
- Способность: 20% шанс заблокировать входящую атаку и бонус к урону в зависимости от недостающего % HP.
Tiger
- Жизнь: х4
- Урон: x4,5*0,56 (аналогично урону Разведчика)
- Броня: 25%
- Способность: Начинается через Скрытый режим, с 35% шансом уклониться от входящих атак. После успешного уклонения переключитесь на Режим ярость, без шансов уклониться от атак, но с увеличенным критическим уроном и шансами. После крита переключитесь обратно в скрытый режим и так далее.
БардБард может играть на 3 разных инструментах (может переключаться между ними вручную). Каждый инструмент имеет разные способности, но атрибуты всегда следующие:
- Жизнь: х2
- Урон: х4,5
- Броня: 25%
Различные инструменты хорошо объяснены на следующем снимке экрана:
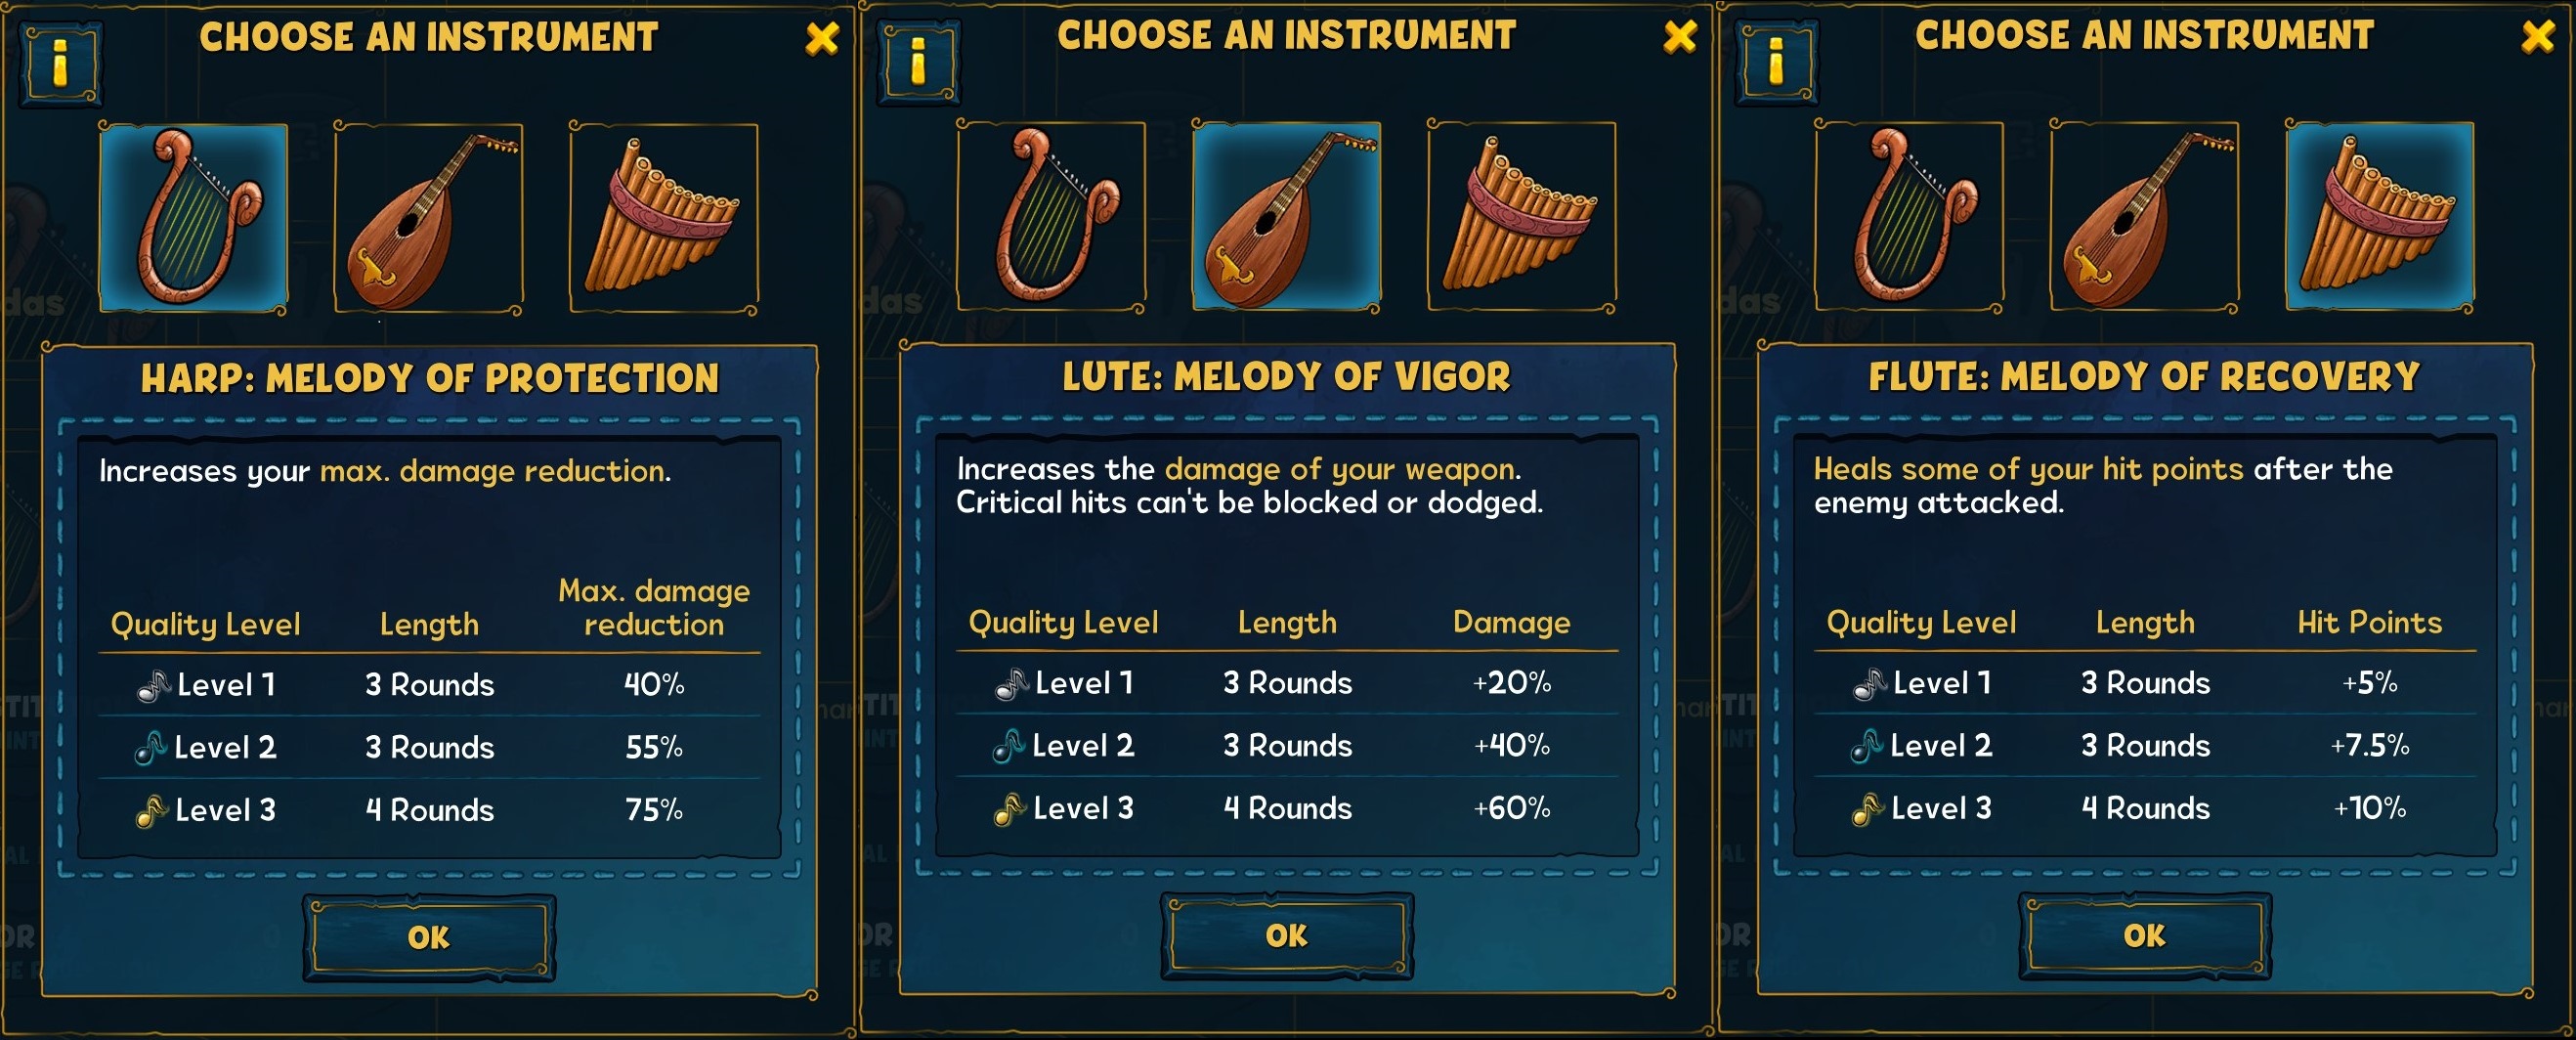
Какой бы инструмент вы ни использовали, в бою Бард будет играть мелодию каждые 4 раунда. Продолжительность мелодии может варьироваться от 1 до 4 раундов в зависимости от ее уровня (шанс 25% для уровня 1, шанс 50% для уровня 2 и шанс 25% для уровня 3). Соотношение Con / Int также влияет на длину мелодии (если ваше Con >= 75% от вашего Int, вы получите несколько бонусных раундов для мелодий, поэтому важно поддерживать достаточно высокое Con).
Список уровней и сравнение классов
Прежде чем перейти к списку уровней, важно сделать некоторые предпосылки.
Количество купленных грибов и игровые знания имеют большое влияние на производительность определенного персонажа, поэтому для того, чтобы список уровней имел смысл, он должен основываться на одних и тех же оплаченных грибах и знаниях. Есть один главный фактор, который следует учитывать при ранжировании классов: изменчивость.
Проще говоря, волатильность класса можно определить по тому, насколько ему повезет победить более сильных противников.
Низкая волатильность выгодна против противников с более низкими характеристиками (и против противников с более высокими характеристиками). Это означает, что классы с высокой волатильностью будут иметь лучшую производительность в подземельях, таким образом, получая больше уровней и характеристик, чем классы с низкой волатильностью (помните: мы рассматриваем те же грибы как платные).
примечание: именно поэтому рассматривать только PvP (и одинаковые характеристики) для сравнения классов недостаточно; с одними и теми же грибами Охотник на Демонов будет прогрессировать намного быстрее, чем Воин, и будет иметь преимущество в уровне и характеристиках.
Список уровней
S-ранг: Охотник на демонов
Несбалансированный для честных матчей и действительно высокой волатильности, в настоящее время лучший универсал.
A-ранг: Берсерк
Очень хорошая производительность в подземельях (в основном лучший разведчик, потому что его способность работает против магов). Немного страдает в PVP против Мага (получает двойной урон, высокая волатильность делает его немного непостоянным).
B-ранг: Счет – Убийца
Хорошая производительность в подземельях и хорошая согласованность в PvP.
C-ранг: Маг
Не очень хорош как в подземельях, так и в PVP.
Ранг D: Воин – Боевой маг
Их низкая волатильность была бы хороша в PVP против противников с более низкими характеристиками, но их плохая производительность в подземельях усложняет задачу (читать: дорого), чтобы получить это преимущество.
TBD: Друид — Бард
Эти два класса находятся в стадии пересмотра, поэтому позже они будут добавлены в список уровней.
В настоящее время у Барда очень хорошая производительность в подземельях, но он страдает от берсерков в PvP.
Друид, с другой стороны, имеет хорошую производительность в подземельях в ранних играх, но позже страдает от подземелий с высоким HP-Mage.
Это все, чем мы делимся сегодня для этого Встряхивания и непоседа гид. Это руководство было первоначально создано и написано Матире. Если нам не удастся обновить это руководство, вы можете найти последнее обновление, следуя этому ссылке.
Если вы считаете, что какой-либо контент на этом сайте нарушает ваши права, включая ваши права на интеллектуальную собственность, немедленно свяжитесь с нами, используя нашу контактную форму.
Встряхивания и непоседа
Теги:Руководство