-
Contents
-
Table of Contents
-
Bookmarks
Quick Links
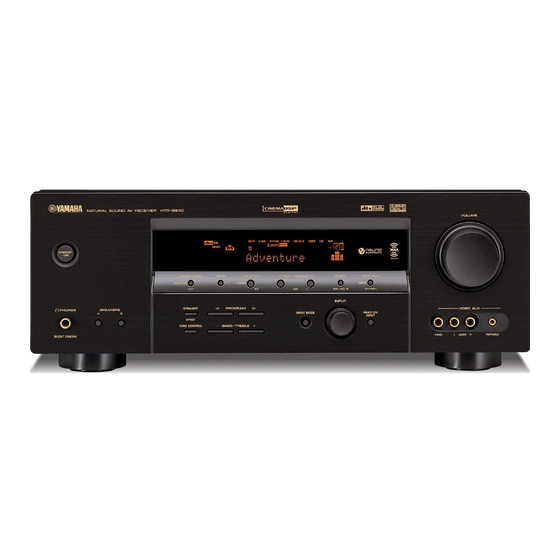
RX-V459/HTR-5940/DSP-AX459
This manual has been provided for the use of authorized YAMAHA Retailers and their service personnel.
It has been assumed that basic service procedures inherent to the industry, and more specifically YAMAHA Products, are already
known and understood by the users, and have therefore not been restated.
WARNING:
IMPORTANT:
The data provided is believed to be accurate and applicable to the unit(s) indicated on the cover. The research, engineering, and
service departments of YAMAHA are continually striving to improve YAMAHA products. Modifications are, therefore, inevitable
and specifications are subject to change without notice or obligation to retrofit. Should any discrepancy appear to exist, please
contact the distributor’s Service Division.
WARNING:
IMPORTANT:
I CONTENTS
Front Panels ……………………………………………….. 3–5
Rear Panels …………………………………………………. 5–9
Internal View ………………………………………………… 13
…………………………………. 16–37
1 0 0 9 9 8
AV RECEIVER/AV AMPLIFIER
Failure to follow appropriate service and safety procedures when servicing this product may result in personal
injury, destruction of expensive components, and failure of the product to perform as specified. For these reasons,
we advise all YAMAHA product owners that any service required should be performed by an authorized
YAMAHA Retailer or the appointed service representative.
The presentation or sale of this manual to any individual or firm does not constitute authorization, certification or
recognition of any applicable technical capabilities, or establish a principle-agent relationship of any form.
Static discharges can destroy expensive components. Discharge any static electricity your body may have
accumulated by grounding yourself to the ground buss in the unit (heavy gauge black wires connect to this buss).
Turn the unit OFF during disassembly and part replacement. Recheck all work before you apply power to the unit.
………………………….. 11–12
……… 14–15
……………………… 38
2006
This manual is copyrighted by YAMAHA and may not be copied or
redistributed either in print or electronically without permission.
HTR-5935
SERVICE MANUAL
IMPORTANT NOTICE
Display Data …………………………………………….. 39–40
Ic Data ……………………………………………………….. 41–50
Block Diagrams ………………………………………. 53–55
Remote Control ………………………………………. 96–97
Advanced Setup ……………………………………………. 98
All rights reserved.
P.O.Box 1, Hamamatsu, Japan
‘06.02
Summary of Contents for Yamaha RX-V459
Сервисный мануал по ремонту ресиверов Yamaha RX-V459, HTR-5940, DSP-AX459, HTR-5935
Вес файла: 14.4 MБ
Скачиваний: 1045

Дополнительные категории:
Основные категории
📘сотовые телефоны,
📘радиотелефоны,
📘проводные телефоны,
📘телевизоры и мониторы,
📘видеотехника,
📘аудиотехника,
📘бытовая техника,
📘измерительная техника,
📘медоборудование,
📘источники питания,
📘разное,
📘инструкции,
📘прошивки,
📘книги и журналы,
-
Contents
-
Table of Contents
-
Troubleshooting
-
Bookmarks
Quick Links
G
RX-V459
AV Receiver
Ampli-tuner audio-vidéo
OWNER’S MANUAL
MODE D’EMPLOI
BEDIENUNGSANLEITUNG
BRUKSANVISNING
GEBRUIKSAANWIJZING
ИНСТРУКЦИЯ ПО ЭКСПЛУАТАЦИИ
Related Manuals for Yamaha RX-V459
Summary of Contents for Yamaha RX-V459
-
Page 1
RX-V459 AV Receiver Ampli-tuner audio-vidéo OWNER’S MANUAL MODE D’EMPLOI BEDIENUNGSANLEITUNG BRUKSANVISNING GEBRUIKSAANWIJZING ИНСТРУКЦИЯ ПО ЭКСПЛУАТАЦИИ… -
Page 2
YAMAHA will not be held responsible for any damage resulting from use of this unit with a voltage other than specified. -
Page 3: Table Of Contents
INTRODUCTION FEATURES… 2 GETTING STARTED… 3 Supplied accessories … 3 Installing batteries in the remote control … 3 CONTROLS AND FUNCTIONS … 4 Front panel … 4 Remote control… 6 Front panel display … 8 Rear panel … 10 PREPARATION CONNECTIONS …
-
Page 4: Features
Center: 90 W Surround: 90 W + 90 W Surround back: 90 W Sound field features Proprietary YAMAHA technology for the creation of sound fields Dolby Digital/Dolby Digital EX decoder DTS/DTS-ES Matrix 6.1, Discrete 6.1, DTS Neo:6, DTS 96/24 decoder…
-
Page 5: Getting Started
Supplied accessories Check that you received all of the following parts. Remote control Batteries (2) (AA, R6, UM-3) POWER POWER POWER POWER STANDBY STANDBY POWER POWER MD/CD-R MD/CD-R TUNER TUNER DTV/CBL DTV/CBL V-AUX V-AUX MULTI CH IN MULTI CH IN CODE SET CODE SET DISC SKIP…
-
Page 6: Controls And Functions
CONTROLS AND FUNCTIONS CONTROLS AND FUNCTIONS Front panel STANDBY PHONES SPEAKERS SILENT CINEMA 1 STANDBY/ON Turns on this unit or set it to the standby mode (see page 25). Notes • In the standby mode, this unit consumes a small amount of power in order to receive infrared signals from the remote control.
-
Page 7
8 Front panel display Shows information about the operational status of this unit (see page 8). 9 TUNING MODE (AUTO/MAN’L) Switches between automatic tuning (the AUTO indicator is turned on) and manual tuning (the AUTO indicator is turned off) (see page 43). 0 VOLUME Controls the output level of all audio channels. -
Page 8: Remote Control
CONTROLS AND FUNCTIONS Remote control This section describes the function of each control on the remote control used to control this unit. To operate other components, see “REMOTE CONTROL FEATURES” on page 78. STANDBY POWER POWER POWER MD/CD-R TUNER DTV/CBL V-AUX MULTI CH IN CODE SET…
-
Page 9
A MULTI CH IN Selects the component connected to the MULTI CH INPUT jacks as the input source when using an external decoder, etc. (see page 36). B CODE SET Use to set up remote control codes (see page 80). C SLEEP Sets the sleep timer (see page 33). -
Page 10: Front Panel Display
CONTROLS AND FUNCTIONS Front panel display MATRIX DISCRETE VIRTUAL STANDARD ENHANCER DIGITAL PL x 1 Decoder indicators The respective indicator lights up when any of the decoders of this unit function. 2 ENHANCER indicator Lights up when the Compressed Music Enhancer mode is turned on (see page 35).
-
Page 11
F Headphones indicator Lights up when headphones are connected (see page 31). G NIGHT indicator Lights up when you select a night listening mode (see page 31). H HiFi DSP indicator Lights up when you select a HiFi DSP sound field program (see page 55). -
Page 12: Rear Panel
CONTROLS AND FUNCTIONS Rear panel AUDIO AUDIO MULTI CH INPUT CD-R FRONT (PLAY) (REC) DTV/CBL MONITOR DTV/CBL VIDEO S VIDEO TUNER FM ANT FRONT UNBAL. 1 Video component jacks See pages 17 and 18 for connection information. 2 Audio component jacks See page 20 for connection information.
-
Page 13: Connections
Subwoofer (SW) The use of a subwoofer with a built-in amplifier, such as the YAMAHA Active Servo Processing Subwoofer System, is effective not only for reinforcing bass frequencies from any or all channels, but also for hi-fi stereo reproduction of the LFE (low-frequency effect) channel included in Dolby Digital and DTS sources.
-
Page 14: Connecting Speakers
CONNECTIONS Connecting speakers Be sure to connect the left channel (L), right channel (R), “+” (red) and “–” (black) properly. If the connections are faulty, no sound will be heard from the speakers, and if the polarity of the speaker connections is incorrect, the sound will be unnatural and lack bass.
-
Page 15
Connect surround speakers (4, 5) to these terminals. SURROUND BACK terminals Connect a surround back speaker (6) to these terminals. SUBWOOFER jack Connect a subwoofer with a built-in amplifier (7) (such as the YAMAHA Active Servo Processing Subwoofer System) to this jack. CONNECTIONS Speaker layout… -
Page 16
CONNECTIONS Connecting the speaker cable Remove approximately 10 mm (0.4 in) of insulation from the end of each speaker cable and then twist the exposed wires of the cable together to prevent short circuits. 10 mm (0.4 in) Loosen the knob. Red: positive (+) Black: negative (–) Insert one bare wire into the hole on the side… -
Page 17: Information On Jacks And Cable Plugs
Information on jacks and cable plugs Audio jacks and cables DIGITAL AUDIO AUDIO PORTABLE COAXIAL (White) (Red) (Orange) Left and right Stereo Coaxial analog audio analog digital audio cable plug audio cable plug mini cable plug Audio jacks This unit has four types of audio jacks. Connection depends on the availability of audio jacks on your other components.
-
Page 18: Audio And Video Signal Flow
CONNECTIONS Audio and video signal flow Audio signal flow for AUDIO OUT (REC) AUDIO PORTABLE Analog output Note This unit handles digital and analog signals independently. Thus, audio signals input at the analog jacks are output only at the analog AUDIO OUT (REC) jacks.
-
Page 19: Connecting A Tv
CONNECTIONS Connecting a TV Connect your TV to the VIDEO MONITOR OUT jack, the S VIDEO MONITOR OUT jack or the COMPONENT VIDEO MONITOR OUT jacks of this unit. CAUTION Do not connect this unit or other components to the AC power supply until all connections between components are complete.
-
Page 20: Connecting A Dvd Player, A Dvd Recorder, A Vcr Or An Stb
CONNECTIONS Connecting a DVD player, a DVD recorder, a VCR or an STB Connect your DVD player, DVD recorder, VCR or STB (set-top box) using the same type of video connections as those made for your TV (see page 17). The cable TV receiver and the satellite receiver are examples of the STB. CAUTION Do not connect this unit or other components to the AC power supply until all connections between components are complete.
-
Page 21
Connecting a DVD recorder or a VCR AUDIO VIDEO S VIDEO Audio in Video in Video out Audio out Connecting an STB Cable TV receiver or satellite receiver Audio out Video out S-video out AUDIO DTV/CBL DTV/CBL VIDEO S VIDEO S-video out S-video in Component video out… -
Page 22: Connecting A Cd Player, An Md Player Or A Tape Deck
CONNECTIONS Connecting a CD player, an MD player or a tape deck Connect your CD player, MD player or tape deck via analog connection. CAUTION Do not connect this unit or other components to the AC power supply until all connections between components are complete.
-
Page 23: Connecting A Multi-Format Player Or An External Decoder
Connecting a multi-format player or an external decoder This unit is equipped with 6 additional input jacks (FRONT L/R, CENTER, SURROUND L/R and SUBWOOFER) for discrete multi-channel input from a multi-format player, external decoder, sound processor or pre-amplifier. Connect the output jacks on your multi- format player or external decoder to the MULTI CH INPUT jacks.
-
Page 24: Connecting The Fm And Am Antennas
• A properly installed outdoor antenna provides clearer reception than an indoor one. If you experience poor reception quality, install an outdoor antenna. Consult the nearest authorized YAMAHA dealer or service center about outdoor antennas. AM loop antenna (supplied) Indoor FM antenna…
-
Page 25: Connecting The Power Cable
Connecting the power cable Once all connections are complete, plug the power cable into the AC wall outlet. CAUTION VOLTAGE SELECTOR (Asia and General models only) The VOLTAGE SELECTOR on the rear panel of this unit must be set for your local voltage BEFORE plugging the power cable into the AC wall outlet.
-
Page 26: Setting The Speaker Impedance
CONNECTIONS Setting the speaker impedance CAUTION If you are to use 4 or 6 ohm speakers, set “SP IMP.” to “6 MIN” as follows BEFORE using this unit. STANDBY PRESET/TUNING FM/AM A/B/C/D/E l PRESET/TUNING EDIT NEXT LEVEL STRAIGHT PROGRAM PHONES SPEAKERS INPUT MODE EFFECT…
-
Page 27: Turning On This Unit And Setting It To The Standby Mode
Turning on this unit and setting it to the standby mode When all connections are complete, turn on this unit. STANDBY/ON STANDBY PRESET/TUNING FM/AM A/B/C/D/E l PRESET/TUNING MEMORY TUNING MODE EDIT NEXT LEVEL MAN’L/AUTO FM INPUT STRAIGHT PROGRAM PHONES SPEAKERS INPUT MODE EFFECT TONE CONTROL…
-
Page 28: Basic Setup
BASIC SETUP The “BASIC SETUP” feature is a useful way to set up your system quickly and with minimal effort. Notes • Make sure you disconnect your headphones from this unit. • If you wish to configure this unit manually using more precise adjustments, use the detailed parameters in “SOUND MENU” (see page 70).
-
Page 29
Press d to select “SUBWOOFER” and then j / i to select the desired setting. ENTER A/B/C/D/E A/B/C/D/E A/B/C/D/E PRESET/CH SUBWOOFER .. YES Choices: YES, NONE • Select “YES” if you have a subwoofer in your system. • Select “NONE” if you do not have a subwoofer in your system. -
Page 30
BASIC SETUP Press j / i to select the desired setting. ENTER A/B/C/D/E A/B/C/D/E PRESET/CH CHECK OK? .. YES Choices: YES, NO • Select “YES” to complete the setup procedure if the test tone levels from each speaker were satisfactory. •… -
Page 31: Playback
CAUTION Extreme caution should be exercised when you play back CDs encoded in DTS. If you play back a CD encoded in DTS on a DTS-incompatible CD player, you will only hear some unwanted noise that may damage your speakers. Check whether your CD player supports CDs encoded in DTS. Also, check the sound output level of your CD player before you play back a CD encoded in DTS.
-
Page 32
PLAYBACK Rotate VOLUME on the front panel (or press VOLUME +/– on the remote control) to adjust the volume to the desired output level. VOLUME Front panel Press TONE CONTROL on the front panel repeatedly to select “TREBLE” or “BASS” and then press BASS/TREBLE +/–… -
Page 33: Using Other Features
USING OTHER FEATURES Using SILENT CINEMA SILENT CINEMA allows you to enjoy multi-channel music or movie sound, including Dolby Digital and DTS sources, through ordinary headphones. SILENT CINEMA activates automatically whenever you connect headphones to the PHONES jack while listening to CINEMA DSP or HiFi DSP sound field programs (see page 55).
-
Page 34: Selecting The Input Mode
USING OTHER FEATURES “NIGHT:CINEMA” and “NIGHT:MUSIC” adjustments are stored independently. Notes • You cannot use the night listening modes in the following cases: – when the “DIRECT STEREO” mode (see page 37) is selected. – when the component connected to the MULTI CH INPUT jacks is selected as the input source (see page 36).
-
Page 35: Using The Sleep Timer
Using the sleep timer Use this feature to automatically set this unit to the standby mode after a certain amount of time. The sleep timer is useful when you are going to sleep while this unit is playing or recording a source. The sleep timer also automatically turns off any external components connected to AC OUTLET(S) (see page 23).
-
Page 36: Adjusting The Speaker Level
USING OTHER FEATURES Adjusting the speaker level You can adjust the output level of each speaker while listening to a music source. This is also possible when playing sources input at the MULTI CH INPUT jacks. Note This operation will override the level adjustments made in “BASIC SETUP”…
-
Page 37: Selecting The Compressed Music Enhancer Mode
Selecting the Compressed Music Enhancer mode Compression artifacts (such as the MP3 format) are created by a lossy compression scheme where the audio is resampled to lower the bitrate and to remove sounds that are indistinguishable to typical human hearing. The Compressed Music Enhancer feature of this unit enhances your listening experience by regenerating the missing harmonics in a compression artifact.
-
Page 38: Selecting The Multi Ch Input Component
USING OTHER FEATURES Selecting the MULTI CH INPUT component Use this feature to select the component connected to the MULTI CH INPUT jacks (see page 21) as the input source. Press MULTI CH INPUT on the front panel (or MULTI CH IN on the remote control) so that “MULTI CH INPUT”…
-
Page 39: Enjoying Pure Hi-Fi Stereo Sound
Enjoying pure hi-fi stereo sound The “DIRECT STEREO” mode allows sources to bypass the decoders and DSP processors of this unit so that you can enjoy pure hi-fi sound from 2-channel PCM and analog sources. Press AMP on the remote control and then press DIRECT ST.
-
Page 40: Playing Video Sources In The Background
USING OTHER FEATURES The following information appears in the front panel display for a few seconds. Signal format Signal format display. When this unit cannot detect a digital signal, it automatically switches to analog input. Display status: Analog, Digital, Dolby Digital, DTS, PCM, Unknown Digital Note “Unknown Digital”…
-
Page 41: Enjoying Surround Sound
ENJOYING SURROUND SOUND Enjoying multi-channel sources in surround If you connected a surround back speaker, use this feature to enjoy 6.1-channel playback for multi-channel sources using the Dolby Pro Logic IIx, Dolby Digital EX or DTS-ES decoders. Press AMP on the remote control and then press EXTD SUR.
-
Page 42: Enjoying 2-Channel Sources In Surround
ENJOYING SURROUND SOUND Enjoying 2-channel sources in surround Signals input from 2-channel sources can also be played back on multi-channels. Press AMP and then press STANDARD on the remote control repeatedly to switch between the “SUR. STANDARD” and “SUR. ENHANCED” programs or press MOVIE to select the “MOVIE THEATER”…
-
Page 43: Using Virtual Cinema Dsp
Using Virtual CINEMA DSP Virtual CINEMA DSP allows you to enjoy the CINEMA DSP programs without surround speakers. It creates virtual speakers to reproduce the natural sound field. If you set “SUR. LR” NONE” (see page 70), Virtual to “ CINEMA DSP activates automatically whenever you select a CINEMA DSP sound field program (see page 55).
-
Page 44: Recording
RECORDING Recording adjustments and other operations are performed from the recording components. Refer to the operating instructions for those components. Notes • When this unit is set to the standby mode, you cannot record between other components connected to this unit. •…
-
Page 45: Fm/Am Tuning
There are 2 tuning methods: automatic and manual. Automatic tuning is effective when station signals are strong and there is no interference. If the signal from the station you want to select is weak, tune into it manually. You can also use the automatic and manual preset tuning features to store up to 40 stations (A1 to E8: 8 preset station numbers in each of the 5 preset station groups).
-
Page 46: Manual Tuning
FM/AM TUNING Manual tuning If the signal received from the station you want to select is weak, tune into it manually. Note Manually tuning into an FM station automatically switches the tuner to monaural reception to increase the signal quality. STANDBY l PRESET/TUNING PRESET/TUNING…
-
Page 47: Automatic Preset Tuning
Automatic preset tuning You can use the automatic preset tuning feature to store FM stations with strong signals up to 40 (A1 to E8: 8 preset station numbers in each of the 5 preset station groups) of those stations in order. You can then recall any preset station easily by selecting the preset station number.
-
Page 48: Manual Preset Tuning
FM/AM TUNING Automatic preset tuning options You can specify the preset number from which this unit stores FM stations and/or begins tuning toward lower frequencies. Note First carry out steps 1 through 3 in “Automatic preset tuning” on page 45. •…
-
Page 49: Selecting Preset Stations
Press PRESET/TUNING l / h to select a preset station number (1 to
 while the MEMORY indicator is flashing. • Press h to select a higher preset station number. • Press l to select a lower preset station number. PRESET/TUNING LEVEL MD/CD-R pTUNER…
 -
Page 50: Exchanging Preset Stations
FM/AM TUNING Press PRESET/TUNING l / h on the front panel (or PRESET/CH u / d on the remote control) to select the desired preset station number (1 to 8). The preset station group and number appear in the front panel display along with the station band and frequency.
-
Page 51
Select preset station “A5” using A/B/C/D/E and PRESET/TUNING l / h. “A5” and the MEMORY indicator flash in the front panel display. See “Selecting preset stations” on page 47. PRESET/TUNING A/B/C/D/E NEXT MD/CD-R pTUNER V-AUX DTV/CBL A5:FM 90.60MHz Flashes Press EDIT again. “EDIT E1–A5”… -
Page 52: Radio Data System Tuning (U.k. And Europe Models Only)
RADIO DATA SYSTEM TUNING (U.K. AND EUROPE MODELS ONLY) RADIO DATA SYSTEM TUNING (U.K. AND EUROPE MODELS ONLY) Radio Data System (U.K. and Europe models only) is a data transmission system used by FM stations in many countries. The Radio Data System function is carried out among the network stations. This unit can receive various Radio Data System data such as PS (program service), PTY (program type), RT (radio text), CT (clock time), and EON (enhanced other networks) when receiving Radio Data System broadcasting stations.
-
Page 53: Using The Radio Data System Station Network
Press PTY SEEK START on the remote control to start searching for all the available Radio Data System preset stations. The name of the selected program type flashes and the PTY HOLD indicator lights up in the front panel display while this unit is searching for stations. PTY SEEK START POP M…
-
Page 54: Displaying The Radio Data System Information
RADIO DATA SYSTEM TUNING (U.K. AND EUROPE MODELS ONLY) Press EON on the remote control repeatedly to select one of the 4 Radio Data System program types (NEWS, AFFAIRS, INFO or SPORT). The name of the selected program type appears in the front panel display.
-
Page 55
Press FREQ/TEXT on the remote control repeatedly to select the desired Radio Data System display mode. FREQ/TEXT Frequency display • Select “PS” to display the name of the Radio Data System program currently being received. • Select “PTY” to display the type of the Radio Data System program currently being received. -
Page 56: Sound Field Programs
The acoustics in your room could be changed to those of a concert hall, a dance floor, or a room with virtually any size at all. This ability to create sound fields at will is exactly what YAMAHA has done with the digital sound field processor.
-
Page 57: Sound Field Program Descriptions
(DSP) chip containing several sound field programs which you can use to enhance your playback experience. The YAMAHA CINEMA DSP modes are compatible with all Dolby Digital, DTS, and Dolby Surround sources. Set “INPUT MODE” to “AUTO” (see page 32) to enable this unit to automatically switch to the appropriate digital decoder according to the input signal.
-
Page 58: For Music Sources
SOUND FIELD PROGRAMS Remote control Sound FIeld Program button MOVIE THEATER Spectacle MOVIE THEATER Sci-Fi MOVIE THEATER Adventure MOVIE THEATER General SUR. STANDARD SUR. ENHANCED For music sources You can select from the following sound fields when playing music sources, like CD, FM/AM broadcasting, tapes, etc. Press the PROGRAM l / h buttons on the front panel (or press AMP and then press one of the sound field program selector buttons on the remote control) to select the desired sound field program (see page 54).
-
Page 59: Changing Sound Field Parameter Settings
Changing sound field parameter settings You can enjoy good quality sound with the initial factory settings. Although you do not have to change the initial factory settings, you can change some of the parameters to better suit the input source or your listening room. Notes •…
-
Page 60: Sound Field Parameter Descriptions
SOUND FIELD PROGRAMS Sound field parameter descriptions You can adjust the values of certain digital sound field parameters so that the sound fields are recreated accurately in your listening room. Not all of the following parameters are found in every program. To change sound field parameter settings to suit your listening environment, see page 57 for details.
-
Page 61
Sound field parameter ROOM SIZE Room size. Presence, surround, and surround back room size. Adjusts the apparent size of the surround sound field. The larger the value, the larger the surround sound field becomes. As the P.ROOM SIZE sound is repeatedly reflected around a room, the larger the hall is, the longer the time between S.ROOM SIZE the original reflected sound and the subsequent reflections. -
Page 62
SOUND FIELD PROGRAMS Sound field parameter REV.TIME Reverberation time. Adjusts the amount of time taken for the dense, subsequent reverberation sound to decay by 60 dB at 1 kHz. This changes the apparent size of the acoustic environment over an extremely wide range. Set a longer reverberation time for “dead” sources and listening room environments, and a shorter time for “live”… -
Page 63
Sound field parameter REV.LEVEL Reverberation level. Adjusts the volume of the reverberation sound. The larger the value, the stronger the reverberation becomes. Control range: 0 to 100% 2ch Stereo 2-channel stereo direct. Bypasses the decoders and DSP processors of this unit for pure hi-fi stereo sound when playing 2-channel analog sources. -
Page 64
SOUND FIELD PROGRAMS Sound field parameter PRO LOGIC IIx Music Pro Logic IIx Music and Pro Logic II Music panorama. Sends stereo signals to the surround speakers as well as the front speakers for a wraparound effect. PRO LOGIC II Music PANORAMA Choices: OFF, ON PRO LOGIC IIx Music… -
Page 65: Sound Field Program Speaker Layouts
Sound field program speaker layouts Sound output from each speaker depends on the type of audio signals being input. Refer to the diagrams in the table below to understand the speaker layout for each sound field program. Note Be advised that there may be no or not enough sound output from speakers depending on the type of input source being played back. Furthermore, there may be some channels that can only be used partially when they are adjusted to specific aspects of movies, such as special sound effects, etc.
-
Page 66: Sound Field Programs Sound Field Programs
SOUND FIELD PROGRAMS Sound field program MOVIE THEATER Spectacle Sci-Fi Adventure General SUR. STANDARD DOLBY DIGITAL PRO LOGIC SUR. STANDARD PLII Movie PLII Music PLII Game PLIIx Movie PLIIx Music PLIIx Game SUR. STANDARD Neo:6 Cinema Neo:6 Music 2-channel audio 2-channel audio (monaural) (stereo)
-
Page 67: Dolby Digital
2-channel audio Sound field program SUR. ENHANCED DOLBY DIGITAL PRO LOGIC SUR. ENHANCED PLII Movie PLIIx Movie SUR. ENHANCED Neo:6 Cinema STRAIGHT Monaural playback DIRECT STEREO Monaural playback 2-channel audio (monaural) (stereo) Pro Logic Pro Logic Pro Logic II Pro Logic IIx SOUND FIELD PROGRAMS 5.1/6.1-channel audio *…
-
Page 68: Set Menu
SET MENU You can use the following parameters in “SET MENU” to adjust a variety of system settings and customize the way this unit operates. Change the initial settings (indicated in bold under each parameter) to reflect the needs of your listening environment.
-
Page 69
Option menu 3 OPTION MENU Use this menu to manually adjust the optional system parameters. Parameter A)DISPLAY SET Adjusts the brightness of the display. B)MEMORY GUARD Locks sound field program parameters and other “SET MENU” settings. C)PARAM. INI Initializes the parameters of a group of sound field programs. D)MULTI ZONE Specifies the location of the speakers connected to the SPEAKERS B terminals. -
Page 70: Using Set Menu
SET MENU Using SET MENU Use the remote control to access and adjust each parameter. FREQ/TEXT MODE PTY SEEK START TV VOL TV CH VOLUME TV MUTE TV INPUT MUTE STEREO MUSIC ENTERTAIN MOVIE STANDARD SELECT EXTD SUR. DIRECT ST. SPEAKERS ENHANCER NIGHT…
-
Page 71
Press u / d repeatedly and then press ENTER to select and enter the desired submenu. Repeat step 5 and 6 to navigate to and enter the items you want to adjust. To return to the previous menu level, press RETURN. ENTER A/B/C/D/E A/B/C/D/E… -
Page 72: Sound Menu
SET MENU 1 SOUND MENU Use this menu to manually adjust any speaker settings or compensate for video signal processing delays when using LCD monitors or projectors. Speaker settings A)SPEAKER SET Use this feature to manually adjust any speaker settings. If you are not satisfied with the bass sounds from your speakers, you can change these settings according to your preference.
-
Page 73
LFE/Bass out BASS OUT Use this feature to select the speakers that output the LFE (low-frequency effect) and the low-frequency signals. Choices: SWFR, FRNT, BOTH • Select “SWFR” (subwoofer) if you connected a subwoofer. The LFE signals as well as the low- frequency signals of other speakers set to “SML”… -
Page 74
SET MENU Speaker distance C)SP DISTANCE Use this feature to manually adjust the distance of each speaker and the delay applied to the respective channel. Ideally, each speaker should be the same distance from the main listening position. However, this is not possible in most home situations. -
Page 75: Input Menu
Dynamic range F)D. RANGE Use this feature to select the amount of dynamic range compression to be applied to your speakers or headphones. This setting is effective only when this unit is decoding Dolby Digital and DTS signals. Speaker SP D.R Adjusts the speaker compression.
-
Page 76
SET MENU Input mode B)INPUT MODE Use this feature to set this unit to reset “INPUT MODE” back to “AUTO” (see page 32) regardless of the previous setting or to recall the last input mode (“AUTO”, “DTS”, or “ANALOG”) used for that source whenever you turn on this unit. -
Page 77: Option Menu
3 OPTION MENU Use this menu to adjust the optional system parameters. Display settings A)DISPLAY SET Dimmer DIMMER Use this feature to adjust the brightness of the front panel display. Control range: – 4 to 0 Control step: 1 • Press j to make the front panel display dimmer. •…
-
Page 78: Advanced Setup
ADVANCED SETUP This unit has additional menus that are displayed in the front panel display. The advanced setup menu offers additional operations to adjust and customize the way this unit operates. Change the initial settings (indicated in bold under each parameter) to reflect the needs of your listening environment.
-
Page 79
Speaker impedance SP IMP. Use this feature to set the speaker impedance of this unit so that it matches that of your speakers. Choices: 8 MIN, 6 MIN • Select “8 MIN” to set the speaker impedance to 8 • Select “6 MIN” to set the speaker impedance to 6 SP IMP. -
Page 80: Remote Control Features
REMOTE CONTROL FEATURES In addition to controlling this unit, the remote control can also operate other audiovisual components made by YAMAHA and other manufacturers. To control your TV or other components, you must set the appropriate remote control code for each input source (see page 80).
-
Page 81: Controlling Other Components
Controlling other components Once you set the appropriate remote control codes (see page 80), use the input selector buttons and component you want to control. Note that some buttons may not correctly operate the selected component. Remote DVD player control AV POWER Power REC/…
-
Page 82: Setting Remote Control Codes
Note You may not be able to operate your YAMAHA component even if a YAMAHA remote control code is initially set as listed above. In this case, try setting other YAMAHA remote control codes. While hold down CODE SET, press one of the input selector button or component you want to set up.
-
Page 83: Resetting The System
RESETTING THE SYSTEM Use this feature to reset all the parameters of this unit to the initial factory settings. Notes • This procedure completely resets all the parameters of this unit including the “SET MENU” parameters. However, the advanced setup menu parameters will not be initialized.
-
Page 84: Troubleshooting
Refer to the table below when this unit does not function properly. If the problem you are experiencing is not listed below or if the instruction below does not help, set this unit to the standby mode, disconnect the power cable, and contact the nearest authorized YAMAHA dealer or service center. General…
-
Page 85
Problem The sound suddenly The protection circuitry has been activated goes off. because of a short circuit, etc. The sleep timer has turned off this unit. The sound is muted. Sound is heard from Incorrect cable connections. the speaker on one side only. -
Page 86
TROUBLESHOOTING Problem Dolby Digital or DTS The connected component is not set to sources cannot be output Dolby Digital or DTS digital played. (Dolby Digital signals. or DTS indicator in “INPUT MODE” is set to “ANALOG”. the front panel display does not light up.) A humming sound is Incorrect cable connections. -
Page 87
Tuner Problem FM stereo reception is The characteristics of FM stereo noisy. broadcasts may cause this problem when the transmitter is too far away or the antenna input is poor. There is distortion, and There is multi-path interference. clear reception cannot be obtained even with a good FM antenna. -
Page 88: Glossary
GLOSSARY Audio information Dolby Digital Dolby Digital is a digital surround sound system that gives you completely independent multi-channel audio. With 3 front channels (front L/R and center), and 2 surround stereo channels, Dolby Digital provides 5 full-range audio channels. With an additional channel especially for bass effects, called LFE (Low Frequency Effect), the system has a total of 5.1-channels (LFE is counted as 0.1 channel).
-
Page 89: Video Information
LFE 0.1 channel This channel reproduces low-frequency signals. The frequency range of this channel is from 20 Hz to 120 Hz. This channel is counted as 0.1 because it only enforces a low-frequency range compared to the full-range reproduced by the other 5/6 channels in Dolby Digital or DTS 5.1/6.1-channel systems.
-
Page 90: Sound Field Program Information
SILENT CINEMA YAMAHA has developed a natural, realistic sound effect DSP algorithm for headphones. Parameters for headphones have been set for each sound field so that accurate representations of all the sound field programs can be enjoyed on headphones.
-
Page 91: Specifications
AUDIO SECTION • Minimum RMS Output Power for Front, Center, Surround, Surround back 20 Hz to 20 kHz, 0.06% THD, 8 … 90 W • Maximum Power (EIAJ) [Asia, China, Korea and General models] 1 kHz, 10% THD, 8 … 130 W •…
-
Page 92: Dvd Player
224, 232, 239, 297 THOMSON FERGUSON 223, 265, 266 TOSHIBA FIRST LINE VIDECH FUNAI 277, 278 WARDS FISHER 233, 295 YAMAHA FRABA 234, 235, 236, 293, 297 LG/GOLDSTAR 297, 298, 239, 237 ADMIRAL GOODMANS 296, 298, 223 AIWA GRUNDIG 229, 238, 249 AKAI…
-
Page 93
YAMAHA ELECTRONICS (UK) LTD. YAMAHA HOUSE, 200 RICKMANSWORTH ROAD WATFORD, HERTS WD18 7GQ, ENGLAND YAMAHA SCANDINAVIA A.B. J A WETTERGRENS GATA 1, BOX 30053, 400 43 VÄSTRA FRÖLUNDA, SWEDEN YAMAHA MUSIC AUSTRALIA PTY, LTD. 17-33 MARKET ST., SOUTH MELBOURNE, 3205 VIC., AUSTRALIA…
 while the MEMORY indicator is flashing. • Press h to select a higher preset station number. • Press l to select a lower preset station number. PRESET/TUNING LEVEL MD/CD-R pTUNER…
 ![]()
YAMAHA RX-V459 HTR-5940 DSP-AX459 HTR-5935 SERVICE

Type:  (PDF)
(PDF)
Size
6.1 MB
Page
49
Category
AUDIO
SERVICE MANUAL
If you get stuck in repairing a defective appliance
download
this repair information for help. See below.
Good luck to the repair!
Please do not offer the downloaded file for sell only
use it for personal usage!
Looking for similar yamaha manual?
Document preview [1st page]

Click on the link for free download!
Document preview [2nd page]

Click on the link for free download!
Please tick the box below to get download link:
- Also known:
YAMAHA RXV-459 RXV459 HTR5940 DSPAX459 HTR5935 RXV 459 HTR 5940 DSPAX 5935 RX V459 DSP AX459 RX-V459 HTR-5940 DSP-AX459 HTR-5935
- If you have any question about repairing write your question to the Message board. For this no need registration.
- If the site has helped you and you also want to help others, please Upload a manual, circuit diagram or eeprom that is not yet available on the site.
Have a nice Day! - Please take a look at the below related repair forum topics. May be help you to repair.
Warning!
If you are not familiar with electronics, do not attempt to repair!
You could suffer a fatal electrical shock! Instead, contact your nearest service center!
Note! To open downloaded files you need acrobat reader or similar pdf reader program. In addition,
some files are archived,
so you need WinZip or WinRar to open that files. Also some files are djvu so you need djvu viewer to open them.
These free programs can be found on this page: needed progs
If you use opera you have to disable opera turbo function to download file!
If you cannot download this file, try it with CHROME or FIREFOX browser.
Relevant AUDIO forum topics:
Tisztelt Kollégák!
Napokban hozzám került egy cd hibás Yamaha CRX-M5 hifi torony. A hibajelenség az volt, hogy nem olvasta be a lemezeket, csak forgatta azokat.
Mérések, tesztek alapján a lemezforgató és a fej mozgató motor is hibás volt. Kicseréltem mindkettőt. Optikát megtisztítottam.
3 tálcás cd játszóval rendelkezik a készülék. Érdekesség, hogy ezek után csak az egyik tálcából volt hajlandó beolvasni a lemezt. Többször próbáltam állítani a lemeztányér magasságát. Azt eredményezte, hogy mindig másik tálcáról tudta beolvasni a lemezt, pedig az egész mechanika együtt mozog, amikor tálcát választ a hifi.
Nehezen sikerült beállítanom, most mindegyik tálcáról beolvas, viszont nem mindig olvas be elsőre és ha léptetek a zeneszámok között nem mindig találja meg a track-et (vagy csak nehezen).
Ha beolvasta a lemezt és nem léptetem, akkor szépen végig lejátssza a lemezt.
Észrevettem még azt, hogy a fej mozgató motor folyamatosan oda-vissza forog lejátszás közben. De nem nagy fordulatokat tesz, inkább olyan mintha remegne.
A motorvezérlő IC tápját biztosító tranzisztor elég rendesen melegszik. Motorvezérlő IC-t cseréltem. Rendeltem bele egy új lézer fejet is, de azzal be sem olvasott, akármit csináltam vele.
Ha van ötlete, tanácsa valakinek, azt szívesen fogadnám!
Sziasztok
A címben említett típusú erősítő 1 sec után visszatér STAND-BY-ba.
A DIAG mode megy, és ezt a hibát dobja : PS PRT 21 C
Az biztos, hogy úgy lett bekapcsolva, hogy az impedancia választó középen volt (kölcsön volt adva). Átállítottam normál-ba (8Ohm), de nem változott semmi.
Szerintetek végfok lehet a gond ? Ahogy nézem a 21-es érték rossz, mert 28-43-ig kellene lennie.
Előre is köszönöm
Szisztok!
Hát sajna fenti hangfalam egyik magasa elszállt.:(
Tudnátok segíteni tekercselésben címmel,tanáccsal mert feltétlen meg szeretném csináltatni!
Üdv:Mika.
Üdv!
Keresem a fenti erősitő rajzát. Amit a kereső talál, az egy sokkal bonyolultabb erősitőé…
Köszönöm!
Közben megkaptam egy másik fórumon. Feltöltöttem ide is.
Similar manuals:
If you want to join us and get
repairing help
please sign in or sign up by completing a simple electrical test
or write your question to the Message board without registration.
You can write in English language into the forum (not only in Hungarian)!
E-Waste Reduce

YAMAHA ELECTRONICS CORPORATION, USA
6660 ORANGETHORPE AVE., BUENA PARK, CALIF. 90620, U.S.A.
YAMAHA CANADA MUSIC LTD.
135 MILNER AVE., SCARBOROUGH, ONTARIO M1S 3R1, CANADA
YAMAHA ELECTRONIK EUROPA G.m.b.H.
SIEMENSSTR. 22-34, 25462 RELLINGEN BEI HAMBURG, GERMANY
YAMAHA ELECTRONIQUE FRANCE S.A.
RUE AMBROISE CROIZAT BP70 CROISSY-BEAUBOURG 77312 MARNE-LA-VALLEE CEDEX02, FRANCE
YAMAHA ELECTRONICS (UK) LTD.
YAMAHA HOUSE, 200 RICKMANSWORTH ROAD WATFORD, HERTS WD18 7GQ, ENGLAND
YAMAHA SCANDINAVIA A.B.
J A WETTERGRENS GATA 1, BOX 30053, 400 43 VÄSTRA FRÖLUNDA, SWEDEN
YAMAHA MUSIC AUSTRALIA PTY, LTD.
17-33 MARKET ST., SOUTH MELBOURNE, 3205 VIC., AUSTRALIA
2006 All rights reserved.
RX-V459
Printed in Malaysia WG73610
AV Receiver
Ampli-tuner audio-vidéo
OWNER’S MANUAL
MODE D’EMPLOI
BEDIENUNGSANLEITUNG
BRUKSANVISNING
GEBRUIKSAANWIJZING
ИНСТРУКЦИЯ ПО ЭКСПЛУАТАЦИИ
G