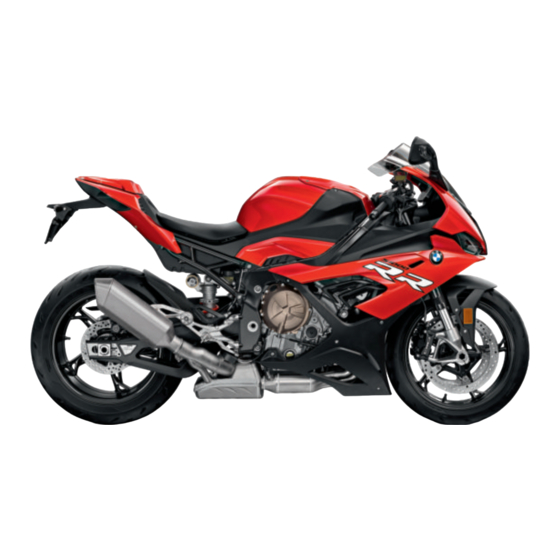
Page 1 — S 1000 RR
BMW MotorradRider’s ManualS 1000 RRThe UltimateRiding Machine
Page 2 — Dealership details
OverviewChapter 2 of this Rider’s Manu-al will provide you with an initialoverview of your motorcycle. Allmaintenance and repair work onthe motor
Page 3
Mode changesA mode change involves func-tions in the engine managementsystem, the ABS and the DTCand is possible only in certain op-erating states:No
Page 4 — *01417726901*
ing force exceeds the maxim-um transferrable limit, the wheelsstart to lock and the motorcycleloses its directional stability; a fallis imminent. Befo
Page 5 — Welcome to BMW
Severe braking can causethe rear wheel to lift off theground.When you brake, bear in mindthat ABS control cannot be reliedon in all circumstances to p
Page 6 — Table of Contents
Electronic enginemanagement with BMWMotorrad DTCwith BMW Motorrad Race ABSand DTCOEHow does DTC work?The BMW Motorrad DTC com-pares the speed of rotat
Page 7
If the front wheel lifts clear of theground under severe accelera-tion, the DTC reduces enginetorque until the front wheel re-gains contact with the g
Page 8
AccessoriesAccessoriesGeneral instructions. . . . . . . . . . . . . . . . 102Luggage . . . . . . . . . . . . . . . . . . . . . . . . . . . 1028101zAcc
Page 9
General instructionsBMW Motorrad recommendsthe use of parts and accessoriesfor your motorcycle that are ap-proved by BMW for this purpose.Genuine BMW
Page 10 — General instructions
MaintenanceMaintenanceGeneral instructions. . . . . . . . . . . . . . . . 104Toolkit . . . . . . . . . . . . . . . . . . . . . . . . . . . . . 104Engi
Page 11 — Currency
General instructionsThe Maintenance chapter de-scribes straightforward proced-ures for checking and replacingcertain wear parts.Special tightening tor
Page 12
9 Reversible screwdriverbladeWith star-head and TorxT25Remove the front seat( 54).Removing and installingbody panelsReplacing turn indicat-or bulbs, f
Page 13 — General views
EquipmentWhen you ordered your BMWmotorcycle, you chose variousitems of custom equipment. ThisRider’s Manual describes option-al extras (OE) offe
Page 14
Engine oil, specified levelBetween MIN and MAXmarksIf the oil level is below the MINmark:Top up the engine oil ( 106).If the oil level is above the MA
Page 15 — General view, left side
tem undertaken by trained andqualified specialists.Checking operation ofbrakesPull the handbrake lever.The pressure point must beclearly perceptible.P
Page 16
Visually inspect the brake padsto ascertain their thickness.Viewing direction: from the reartoward brake pads 1.Brake-pad wear limit, rearmin 1.0 mm (
Page 17 — General view, right side
Check the brake fluid level inbrake fluid reservoir 1.Wear of the brake padscauses the brake fluid levelin the reservoir to sink.Brake fluid level, fr
Page 18 — Handlebar fitting, left
Check the brake fluid level inrear reservoir 1.Wear of the brake padscauses the brake fluid levelin the reservoir to sink.Brake fluid level, rearDOT4
Page 19 — Handlebar fitting, right
tion: From in front toward theinside of the right side panel.Coolant, specified levelbetween MIN and MAXmarks on the expansion tankIf the coolant drop
Page 20 — Underneath the seat
Remove screws 2, 3 and 4.Pull the fairing side panel atposition 5 to disengage it fromthe rubber buffer and remove.Disconnect plug 6.Remove the side p
Page 21 — Instrument panel
Install screw 1.ClutchChecking clutch operationPull the clutch lever.The pressure point must beclearly perceptible.If the pressure point is not clearl
Page 22 — Headlight
Repeat the steps in this pro-cedure until clutch play is setcorrectly.TyresChecking tyre tread depthYour motorcycle’s handlingand grip can be imp
Page 23 — Status indicators
Checking chain tensionMake sure the ground is leveland firm and place the motor-cycle on its stand.Turn the rear wheel until itreaches the position wi
Page 25 — Standard warnings
Locknut of the final-drivechain tensioning screw16 NmTighten quick-release axlenut 1 to the specified tight-ening torque.Rear quick-release axle inswi
Page 26
are programmed into the controlunit and are fundamental to allcalculations. Any change in theseinfluencing variables, caused forexample by a switch to
Page 27 — Warnings, overview
Force the brake pads 4 slightlyapart by rocking brake caliper 5back and forth against brakedisc 6.Carefully pull the brake calipersback and out until
Page 29 — Turn-indicator bulb
ceptible, and repeat this opera-tion several times.Remove the rear wheelMake sure the ground is leveland firm and place the motor-cycle on its stand.R
Page 30
caliper carrier 8 to the rear andremove.The sprocket and thespacer sleeves on leftand right are loose fits in thewheel. Make sure that theseparts are
Page 31
Roll the rear wheel as farforward as possible and loopchain 7 over the sprocket.Insert right adjusting plate 6in the swinging arm in such away that an
Page 32 — DTC warnings
wheel stand and the rear wheelcan topple.Place the motorcycle on itscentre stand or another auxiliarystand before lifting the frontwheel with the BMW
Page 33
Rear-wheel standInstalling auxiliary standat rear wheelUse basic stand with tool num-ber (0 402 241) and adapters(2 152 839).Install adapter pins(2 15
Page 34 — Anti-theft alarm
Engage the auxiliary stand inthe rear wheel swinging armand apply even pressure topush it down to the ground.BulbsGeneral instructionsA warning appear
Page 35
General viewsGeneral viewsGeneral view, left side. . . . . . . . . . . . . . . 11General view, right side . . . . . . . . . . . . . 13Handlebar fittin
Page 36 — DWA ! appears on
Remove cover 2 so that thehigh-beam headlight bulb canbe replaced.Disconnect plug 3.Remove bulb 4 from the sock-et.Replace the defective bulb.Do not t
Page 37 — Motorcycle dropped
Remove parking-light cover 1.Push down retainer 2 (using ascrewdriver if necessary) andpull socket 3 out of the head-light housing.Remove bulb 4 from
Page 38 — VDS! (Vertical Down Sensor)
Install socket 3 in the socket,making sure that retainer 2 en-gagesInstall the cover.Replacing parking-lightbulb, rightMake sure the ground is levelan
Page 39 — Operation
Bulb for parking lightW5W / 12 V / 5 WInsert bulb 4 into the socket.Install socket 3 in the socket,making sure that retainer 2 en-gagesInstall the cov
Page 40 — Ignition switch and
Turn bulb 2 counter-clockwiseand remove it from the bulbhousing.Replace the defective bulb.Do not touch the glass ofnew bulbs with your fingers.Use a
Page 41 — Setting clock
LED rear lightIf the number of LEDs in the rearlight that have failed exceeds thenumber stated in the TechnicalData below, the rear light mustbe repla
Page 42 — Residual range
Push the bulb into the bulbsocket.Press parking-light bulb sock-et 1 into the light housing.FusesRemoving fuseRisk of fire if an attempt ismade to jum
Page 43 — Turn indicators
Installing fuseReplace the defective fuse witha fuse of the correct amperagerating.The fuse assignments andfuse amperage ratings spe-cified for your m
Page 44 — Hazard warning
and the other end to the neg-ative terminal of the dischargedbattery.Start the engine of the vehiclewith the discharged batteryin the usual way; if th
Page 45 — Deactivating ABS function
Remove the front seat ( 54).Disconnection in the wrongsequence increases the riskof short-circuits.Always proceed in the correctsequence.Disconnect ne
Page 47 — Ride mode
with BMW Motorrad RaceABSOENote the different positionsof the battery and terminals 1and 2.Install the front seat ( 54).Recharging batteryDisconnect t
Page 48 — SLICK mode 4 as an extra se
CareCareCare products . . . . . . . . . . . . . . . . . . . . . 138Washing motorcycle . . . . . . . . . . . . . . . 138Cleaning easily damaged compon-
Page 49
Care productsBMW Motorrad recommendsthat you use the cleaning andcare products you can obtainfrom your authorised BMWMotorrad dealer. The substancesin
Page 50
Even fly-remover pads or clean-ing pads with hard surfaces canproduce scratches.Soften stubborn dirt andinsects by covering the af-fected areas with a
Page 51 — Spring preload
BMW Motorrad recommendsBMW tar remover for removingspecks of tar. Remember to waxthe parts treated in this way.Protective wax coatingBMW Motorrad reco
Page 52
Technical dataTechnical dataTroubleshooting chart . . . . . . . . . . . . . 142Threaded fasteners . . . . . . . . . . . . . . . . 143Engine . . . . .
Page 53
Troubleshooting chartEngine does not start at all or is difficult to start.Possible cause RemedySide stand Retract the side stand ( 60).Gear engaged a
Page 54
Threaded fastenersFront wheel Value ValidQuick-release axle in threadedbushM24 x 1.5 50 NmClamping screws in axle holderM8 x 35 19 NmRadial brake cali
Page 55
Rear wheel Value ValidClamping screw to top springretainerM5 x 25 3 NmSpring strut to main frameM10 x 65 56 NmMirrors Value ValidMirror to front panel
Page 56
EngineEngine design Transversely mounted, four-cylinder four-strokein-line engine tilted 32° forward, with four valvesper cylinder, two overhead camsh
Page 57 — Front and rear seats
General view, left side1 Adjuster, spring preload,front ( 47)Adjuster for front rebound-stage damping ( 50)2 Adjuster for rearcompression-stagedamping
Page 58
FuelRecommended fuel grade Super unleaded95 ROZ/RON89 AKIUsable fuel capacity approx. 17.5 lReserve fuel approx. 4 lEngine oilEngine oil, capacity 3.9
Page 59 — Luggage loops
ClutchClutch type Multiplate oil-bath clutch, anti-hoppingTransmissionGearbox type Claw-shift 6-speed gearbox, integrated into en-gine blockGearbox tr
Page 60
Rear-wheel driveType of final drive Chain driveType of rear suspension Two-arm cast-aluminium swinging armFinal drive, number of teeth (Pinion / sproc
Page 61
BrakesType of front brake Hydraulically radially operated twin disc brake with4-piston radial fixed calipers and floating brakediscsBrake-pad material
Page 62 — Safety instructions
Rear wheelRear wheel type Cast aluminium, MT H2Rear wheel rim size 6.0″ x 17″Tyre designation, rear 190 / 55 ZR 17Tyre pressureTyre pressure
Page 63 — Checklist
BatteryBattery type AGM (Absorbent Glass Mat) batteryBattery rated voltage 12 VBattery rated capacity 10 Ahwith anti-theft alarm (DWA)OE12 AhSpark plu
Page 64 — Starting
FrameFrame type Cast light alloy weldment with bolt-on light-alloyrear frameType plate location Steering head, rightVIN location Steering head, rightD
Page 65 — ABS self-diagnosis
WeightsUnladen weight 203 kg, DIN unladen weight, ready for road, 90 %load of fuel, without optional extrasPermissible gross weight 405 kgMaximum payl
Page 67 — Shifting gear
ServiceServiceBMW Motorrad service . . . . . . . . . . . . 156BMW Motorrad service quality . . . . . 156BMW Motorrad Service Card: on-the-spot breakdo
Page 69 — Wet brakes
BMW Motorrad serviceAdvanced technology requiresspecially adapted methods ofmaintenance and repair.If maintenance and re-pair work is performed in-exp
Page 70 — Refuelling
down, contact BMW Motorrad’sMobile Service. The specialistswill provide the necessary adviceand assistance.You will find important country-specif
Page 71
Confirmation of maintenance workBMW Pre-deliveryCheckCompletedonStamp, signatureBMW Running-inCheckCompletedonOdometer readingNext serviceat the lates
Page 72
BMW ServiceCompletedonOdometer readingNext serviceat the latestonor, if logged beforehand,Odometer readingStamp, signatureBMW ServiceCompletedonOdomet
Page 73 — On the race track
BMW ServiceCompletedonOdometer readingNext serviceat the latestonor, if logged beforehand,Odometer readingStamp, signatureBMW ServiceCompletedonOdomet
Page 74 — SETUP-MENU, as applicable
BMW ServiceCompletedonOdometer readingNext serviceat the latestonor, if logged beforehand,Odometer readingStamp, signatureBMW ServiceCompletedonOdomet
Page 75
BMW ServiceCompletedonOdometer readingNext serviceat the latestonor, if logged beforehand,Odometer readingStamp, signatureBMW ServiceCompletedonOdomet
Page 76 — LAPTIMER mode
Confirmation of serviceThe table is intended as a record of maintenance and repair work, the installation of optional accessoriesand, if appropriate,
Page 77
Item OdometerreadingDate12164zService
Page 78
AAbbreviations and symbols, 6ABSControl, 14Engineering details, 96Operation, 41Self-diagnosis, 61Warnings, 25Anti-theft alarmTelltale light, 17Warning
Page 79 — —:—:
General view, right side1 Brake-fluid reservoir, rear( 109)2 VIN and type plate (onsteering-head bearing,right)3 Brake-fluid reservoir, front( 108)4 C
Page 80 — Selecting saved lap
DDampingAdjuster, front, 11Adjuster, rear, 11, 13Adjusting, 49DimensionsTechnical data, 152Drop switchWarnings, 33DTCControl, 14Engineering details, 9
Page 81
HeadlightOverview, 18Helmet holder, 16, 55High-beam headlightSwitching on, 39Telltale light, 20Horn, 14IIdleTelltale light, 20IgnitionSwitching off, 3
Page 82 — INFO RETURN appears on
RRear-wheel driveTechnical data, 148Rear-wheel standInstalling, 124Refuelling, 66Reserve volumeWarning, 24Residual range, 38Restoring to use, 140Rev.
Page 83
ToolkitContents, 104Stowage, 16Torques, 143TransmissionFor starting, 60Technical data, 147Trim panelsRemoving and installing, 111Troubleshooting chart
Page 84
Handlebar fitting, left1 High-beam headlight andheadlight flasher ( 39)Control for the laptimer( 74)2 Operating the ABSControl for DTC3 Control for ha
Page 85 — Selecting a parameter
Handlebar fitting, right1 Control for selecting theride mode ( 43)2 Starting engine ( 60)3 Emergency off switch (killswitch) ( 41)215zGeneral views
Page 86
Motorcycle data/dealership detailsMotorcycle dataModelVehicle identification numberColour codeDate of first registrationRegistration numberDealership
Page 87 — SETUP MENU appears on
Underneath the seat1 Batterywith BMW MotorradRace ABSOEdifferent battery position:set further back and turned180°2 Helmet holder ( 55)3 Luggage loops
Page 88
Instrument panel1 Panels for warning and tell-tale lights ( 20) ( 21)2 Rev. counter3 Shift light ( 63)4 Ambient-light brightnesssensor (for adapting t
Page 89
Headlight1 Side light2 Low-beam headlight3 High-beam headlight218zGeneral views
Page 90
Status indicatorsStatus indicatorsStandard status indicators . . . . . . . . . . 20Standard warnings . . . . . . . . . . . . . . . . . . 21ABS warning
Page 91
Standard statusindicatorsMultifunction display1 Speedometer2 Coolant temperature3 Clock ( 37)4 Odometer and tripmeters( 38)5 Ride mode ( 43)6 Gear ind
Page 92 — Removing and installing
If the motorcycle covers long dis-tances in the course of the year,under certain circumstances itmight be necessary to have itserviced at a date in ad
Page 93
If a warning string 2 appears onthe display it is accompaniedby the ‘General’ warning light 3showing red or yellow.If two or more warnings o
Page 94
Warnings, overviewTelltale lights Status indicators MeaningLights up yellowEWS ! appears onthe displayElectronic immobiliser active ( 24)Lights up Fue
Page 95
Electronic immobiliseractiveGeneral warning light showsyellow.EWS ! appears on the display.Possible cause:The key being used is not au-thorised for st
Page 96
lower than normal: adapt yourstyle of riding accordingly.Possible cause:The engine control unit has dia-gnosed a fault. In exceptionalcases, the engin
Page 97
Details described or illustratedin this booklet may differ fromthe motorcycle’s actual specifica-tion as purchased, the accessor-ies fitted or th
Page 98
Mode of presentationABS warnings are indicated byone of the ABS warning lights.ABS warning lightdescribed in this manual.Possible alternative warningl
Page 99
Warnings, overviewTelltale lights Status indicators MeaningFlashesABS self-diagnosis not completed( 28)Lights upABS deactivated ( 28)Lights upABS faul
Page 100 — Engineering details
ABS self-diagnosis notcompletedABS warning light flashes.Possible cause:The ABS function is notavailable, because self-diagnosis did not complete. The
Page 101
Warnings, overviewTelltale lights Status indicators MeaningQuick-flashes DTC intervention ( 30)Slow-flashes Self-diagnosis not completed ( 30)Lights u
Page 102
DTC interventionDTC warning light quick-flashes.The DTC has detected a degreeof instability at the rear wheeland has intervened to reducetorque. The w
Page 103 — Electronic engine
Mode of presentationAnti-theft alarm warnings appearas plain-text warnings 2 in com-bination with the ‘General’ warn-ing light 3 showing aft
Page 104
Warnings, overviewTelltale lights Status indicators MeaningDWALO ! appearson the displayAnti-theft alarm battery weak ( 33)Lights up yellowDWA ! appea
Page 105 — Accessories
Anti-theft alarm batteryweakDWALO ! appears on the dis-play.This error message appearsonly briefly after the pre-ride check completes.Possible cause:T
Page 106
Drop switch missing ordefectiveVDS! (Vertical Down Sensor)appears on the display.Possible cause:The drop switch is registeredwith the motorcycle’
Page 107 — Maintenance
OperationOperationIgnition switch and steering lock . . . . 36Electronic immobiliser EWS . . . . . . . . . 37Clock . . . . . . . . . . . . . . . . . .
Page 108
Important data for refuellingFuelRecommended fuel grade Super unleaded95 ROZ/RON89 AKIUsable fuel capacity approx. 17.5 lReserve fuel approx. 4 lTyre
Page 109 — Engine oil
Ignition switch andsteering lockKeysYou receive two master keys andone spare key. Please consultthe information on the electronicimmobiliser (EWS) if
Page 110 — Brake system
Electronic immobiliserEWSThe motorcycle’s electronicsexchange certain continuouslychanging signals with the elec-tronics in the key; these signal
Page 111 — Brake pads
Press button 2 to step theminutes reading down.When the minutes reading iscorrect, press and hold downbutton 2 until the numberstops flashing.This com
Page 112 — Brake fluid
residual-range readout cannot beupdated.The calculated range is anapproximate value. Con-sequently, BMW Motorrad re-commends that you should nottry to
Page 113
The turn indicators are can-celled automatically afteryou have ridden for approxim-ately 10 seconds, or covered adistance of about 200 m.Push button 1
Page 114
Emergency off switch(kill switch)1 Emergency off switch (killswitch)Operating the kill switchwhen riding can causethe rear wheel to lock and thuscause
Page 115 — Side panel
with BMW Motorrad Race ABSand DTCOEPress and hold down button 1until first DTC warning light 3and then ABS warning light 2change their status.The DTC
Page 116
Press and hold down button 1until DTC warning light 3changes status.DTC warning light starts toshow.Release button 1 within twoseconds.DTC warning lig
Page 117
Press button 1.Arrow 1 and selection menu 2show. The current setting isshown at position 3.If the coding plug has been in-serted the menu includes the
Page 118
menu disappears from the dis-play.The mode selected in this wayis retained with the engine-characteristic adaptations, ABSand DTC settings even aftert
Page 119
Welcome to BMWWe congratulate you on yourchoice of a motorcycle fromBMW and welcome you to thecommunity of BMW riders.Familiarise yourself with your n
Page 120
When the coding plug is inser-ted, RAIN mode 1 is activatedautomatically for safety reasons.Setting riding mode ( 43).Install the front seat ( 54).Bra
Page 121
Spring preloadSettingIt is essential to set spring pre-load of the front suspension tosuit the terrain. Increase springpreload for riding in rough ter
Page 122
words), use the tool from theon-board toolkit to turn adjust-ing screws 3 in direction a.To increase the difference (re-duce spring preload, in otherw
Page 123
Your motorcycle’s hand-ling will suffer if you do notmatch the spring-preload anddamping-characteristic settings.Adjust the damping characteristi
Page 124
To increase damping: Use thetool from the on-board kit toturn the adjusting screw in theappropriate direction so thatmark 2 points to a higher read-in
Page 125
To increase damping: Use thetool from the on-board kit toturn the adjusting screw in theappropriate direction so thatmark 2 points to a higher read-in
Page 126 — Front-wheel stand
To increase damping: Use thetool from the on-board tool-kit to turn the adjusting screwor the adjusting ring, as ap-plicable, in the appropriate dir-e
Page 127
mark 2 points to a higher read-ing on the scale.To reduce damping: Use thetool from the on-board kit toturn the adjusting screw in theappropriate dire
Page 128 — Rear-wheel stand
seat, upholstered side down,on a clean surface.Installing rear seatEngage the rear seat inmounts 2 on left and right,then apply pressure to the rearof
Page 129
Push the upholstery of thefront seat forward slightlyabove the screw holes andhold it in this position.Install screws 1.Helmet holderSecuring helmet t
Page 130
Table of ContentsYou can also consult the index atthe end of this Rider’s Manual ifyou want to find a particular topicor item of information.1 Ge
Page 131
Use the loops 1 and the rearfootrests, for example, to se-cure luggage to the rear seat.In this process, take care not todamage the rear trim panels.4
Page 132
RidingRidingSafety instructions . . . . . . . . . . . . . . . . . . 58Checklist . . . . . . . . . . . . . . . . . . . . . . . . . . . . 59Starting . .
Page 133
Safety instructionsRider’s equipmentDo not ride without the correctclothing. Always wear:HelmetMotorcycling jacket andtrousersGlovesBootsThis app
Page 134
Catalytic converterIf misfiring causes unburned fuelto enter the catalytic converter,there is a danger of overheatingand damage.For this reason, obser
Page 135
Security of the luggageTension and lubrication of thedrive chainAt regular intervals:Engine oil level (every refuellingstop)Brake-pad wear (every thir
Page 136
aborted if you start the enginebefore it completes.Phase 1Telltale and warning lights 1light up, ‘General’ warning light2 shows yellow.The n
Page 137 — Jump starting
ABS warning light flashes.ABS self-diagnosiscompletedThe ABS warning light goesout.If an indicator showing an ABSfault appears when ABS self-dia-gnosi
Page 138
Try to do most of your rid-ing during this initial period ontwisting, fairly hilly roads, avoid-ing high-speed main roads andhighways if possible.Comp
Page 139
Shift light flashing: enginespeed too highShift speedWhen the motorcycle is on themove, the shift light indicates theengine speed at which the ridersh
Page 140
Shift assistance is not available inthe following situations:Gearshifts with the clutchpressedGearshifts with the throttlevalve closed (engine overrun
Page 141
SETUP mode . . . . . . . . . . . . . . . 81In the gravel trap . . . . . . . . . . . . 88Removing and installing mir-rors . . . . . . . . . . . . . . .
Page 142 — Body panels
Apply the brakes in good timeuntil the brake discs and brakepads have dried out.Salt on brakesThe brakes may fail to takeeffect immediately if themoto
Page 143 — Paint care
Open the protective cap.Use the ignition key to unlockcap 1 of the fuel tank and popthe cap open.Refuel with fuel of the gradestated below; do not fil
Page 145
On the race trackOn the race trackMultifunction display . . . . . . . . . . . . . . . . 70LAPTIMER mode . . . . . . . . . . . . . . . . . . . 72INFO m
Page 146 — Troubleshooting chart
Multifunction displaySelecting display modeRepeatedly press button 2 untilthe reading shows the modeyou want.ROAD mode: The ROAD modeprovides you with
Page 147 — Threaded fasteners
Overview of modeselectionsolid line: short pressbroken line: press and holddown1 Operating odometer( 38)2 Set the clock ( 37).3 Starting timing ( 74).
Page 148
LAPTIMER modeMode of presentation1 Speedometer2 Current lap3 Engine temperature4 The readings in these linescan be changed by therider ( 72)Shown here
Page 149
Overview of LAPTIMERmodesolid line: short pressbroken line: press and holddown1 Ending timing ( 75).2 Interrupt the timing( 75).3 Starting timing ( 74
Page 150
Customising displaylayoutTo change the layout of thedisplay in LAPTIMER mode,repeatedly press button 2 untilthe layout of the display suitsyour prefer
Page 151 — Transmission
Interrupting timingPress button 1 to interrupt tim-ing.Press button 1 again to re-sume timing.Ending timingBegin by pressing button 1 tointerrupt timi
Page 152 — Running gear
BMW Motorrad servicenetwork . . . . . . . . . . . . . . . . . . . 157Maintenance work. . . . . . . . . 157Confirmation of mainten-ance work . . . . .
Page 153 — Wheels and tyres
INFO modeSelecting saved lapRepeatedly press button 1or button 2 to view each lapstored in memory one after theother.If you pull away from rest inthis
Page 154 — Electrics
Overview of INFO modesolid line: short pressbroken line: press and holddown1 Selecting saved lap( 76).2 Delete the lap times( 80).3 Direct jump to the
Page 155
Information per lap1 Alternately: Top speed(max) and lowest speed(min) on the lap currentlydisplayed2 Lap for which the data onthe display apply3 Alte
Page 156 — Dimensions
Clearing all saved dataHold down button 1 until INFOCLEAR ALL appears.Hold down button 2 to clear allthe saved data and return tothe LAPTIMER mode.Act
Page 157 — Riding specifications
Deleting lap timesRepeatedly press button 1 orbutton 2 until the lap you wantto delete appears on the dis-play.Press and hold down button 2to delete t
Page 158
SETUP modeSelecting a parameterRepeatedly press button 1 orbutton 2 until the parameteryou want appears on the dis-play.If you pull away from rest int
Page 159
Overview of SETUP modesolid line: short pressbroken line: press and holddown1 Selecting a parameter( 81).2 Direct jump to ROADmode3 Set the parameter
Page 160
Setting parameterPress and hold down button 2until the parameter starts toflash.Repeatedly press button 1 orbutton 2 until the value youwant appears o
Page 161 — Maintenance work
Engine speed for shiftlight OFFEngine speed for shift light OFFin rpm.You can select only enginespeeds that are higher than theshift light ON speed.Sh
Page 162 — BMW Running-in
Version 1The second line shows the run-ning time for the current lap,the best lap saved in memoryis shown in the third line.Version 2The second line s
Page 163 — BMW Service
General instructionsGeneral instructionsOverview . . . . . . . . . . . . . . . . . . . . . . . . . . . . 6Abbreviations and symbols . . . . . . . . .
Page 164
Version 4The second line shows the timerecorded for the preceding lap,the best lap saved in memory isshown in the third line.Version 5The second line
Page 165
Display-freeze period forthe most recent timeFreeze time in seconds.After the start of a new lap thetime for the preceding lap re-mains visible for th
Page 166
In the gravel trapDTC deactivationOn very loose surfaces (for ex-ample in a gravel trap of a racetrack), DTC’s attempts to con-trol propulsive po
Page 167 — Confirmation of service
Mirror to front panel car-rierThread-locking compound:Mechanical thread lock5 NmRemoving and installingnumber-plate carrierRemoving number-platecarrie
Page 168 — Item Odometer
Hold the number-plate carrierin position and work the cablethrough opening 3.Install screws 2.Connect plug 1.Install the rear seat ( 54).Removing and
Page 169
Seat the side panel in the rub-ber buffer at position 5.Install screws 2, 3 and 4.Install screw 1.Installing front flashingturn indicatorRemove screw
Page 170
Hold the flashing turn indicatorin position and install screw 2.Clip in the turn-signal cable atposition 1.Install the side panel ( 112).692zOn the ra
Page 171
Engineering detailsEngineering detailsRide mode . . . . . . . . . . . . . . . . . . . . . . . . . . 94Brake system with BMW MotorradRace ABS . . . . .
Page 172
Ride modeSelectionYou can choose the mode thatbest suits the weather, the roadconditions and your style of rid-ing from four ride modes:RAINSPORT (sta
Page 173
sible to induce slight drift whenexiting corners.RACERACE is the sportiest modeavailable without the coding pluginserted.Power increase and engineresp
- Manuals
- Brands
- BMW Manuals
- Motorcycle
- S 1000 RR —
- Rider’s manual
-
Contents
-
Table of Contents
-
Troubleshooting
-
Bookmarks
Quick Links
BMW Motorrad
Rider’s Manual (US Model)
S 1000 RR
Related Manuals for BMW S 1000RR
Summary of Contents for BMW S 1000RR
-
Page 1
BMW Motorrad Rider’s Manual (US Model) S 1000 RR… -
Page 2
Motorcycle/Retailer Data Motorcycle Data Retailer Data Model Contact in Service Ms./Mr. Vehicle identification number Phone number Color number Initial registration Retailer’s address/phone number (com- License plate pany stamp) -
Page 3
BMW motorcycle owners and riders. Familiarize yourself with Should you want to sell your your new motorcycle so that you BMW one day, please also re- can ride it safely and confidently member to turn over the Ride’s in all highway traffic situations. -
Page 4: Table Of Contents
Table of Contents 3 Displays ….23 Tire Pressure Monitor Indicator and warning (TPM) ….. . . 70 1 General instructions .
-
Page 5
Adjusting clutch lever ..99 8 On the racetrack..129 9 Technology in de- Steering ….. 99 tail . -
Page 6
….. . 236 BMW Service … . . 236 Light sources . -
Page 7: General Instructions
General instructions Overview ……6 Abbreviations and symbols ..6 Equipment .
-
Page 8: Overview
When the time comes to sell claims may be denied as a result. your BMW, please remember NOTICE Special informa- National-market version. to hand over this Rider’s Manual; tion on operating and in- it is an important part of the mo- Optional extra.
-
Page 9: Equipment
Dynamic Damping Con- trol. All dimensions, weights and per- The high safety and quality stan- formance data contained this dards of BMW motorcycles are Dynamic Traction Con- Rider’s Manual refer to the Ger- maintained by consistent, on- trol. man DIN standards and comply going development efforts em- with their tolerance specifications.
-
Page 10: Additional Sources Of Information
Depending on the country, BMW Motorrad retailers the vehicle owner can be iden- Data memory Your BMW Motorrad retailer is tified using the vehicle identifi- always happy to answer any of cation number and license plate General your questions.
-
Page 11
Qualified service partners The vehicle owner can have a Specialist workshops Operating data in the vehicle BMW Motorrad retailer or other Service providers qualified service partner or spe- Control units process data so Vehicle users may request in- cialist workshop read out the that the vehicle can run. -
Page 12
Vehicle responses in specific The information can be read out recorder in the vehicle can be driving situations, such as acti- by a BMW Motorrad retailer or reset by a BMW Motorrad retailer vation of dynamic driving sys- or other qualified service partner… -
Page 13
mation is transmitted to the mo- Data input and data transfer Data about the use of Inter- in the vehicle net services. This data can be bile end device. This includes for stored locally in the vehicle or instance position data and other General general vehicle data, depending is on a device connected to the… -
Page 14
transmitter and receiver or via Any collection, processing and personally integrated mobile end use of personal data that goes devices such as smartphones. beyond the provision of services Online functions, as they are take place only as permitted by called, are used over this mobile law, on the basis of a contractual phone connection. -
Page 15: Overviews
Overviews General view, left side ….15 General view, right side … . . 17 Underneath the seat ….18 Multifunction switch, left .
-
Page 17: General View, Left Side
General view, left side without Dynamic Damp- ing Control (DDC) without Dynamic Damp- Adjusting the compression ing Control (DDC) damping on rear wheel Adjusting the rebound- 105). stage damping on front without Dynamic Damp- wheel ( 104). ing Control (DDC) Adjusting the spring Adjusting spring preload at preload on the front wheel…
-
Page 19: General View, Right Side
General view, right side Brake-fluid reservoir, rear 176) Vehicle identification num- ber (on the steering-head bearing) Type plate (on the steering-head bearing) Brake-fluid reservoir, front 175) Checking coolant level 178) Engine oil indicator 171) Oil filler opening ( 173)
-
Page 20: Underneath The Seat
Underneath the seat Battery ( 193) Rider’s Manual (US Model) On-board tool kit ( 168) Data link connector 197) Fuses ( 196)
-
Page 21: Multifunction Switch, Left
Multifunction switch, left Deactivating DTC ( High-beam headlight and headlight flasher ( with cruise control Switch on cruise-control system ( 64). Hazard warning flashers with riding modes Pro Adapt DTC ( 139). Turn indicators ( Horn Multi-Controller Operating elements Rocker button MENU…
-
Page 22: Right
Multifunction switch, right with heated grips Heated handlebar grips 70). Riding mode ( Emergency on/off switch (kill switch) ( Starter button Start the engine ( 116). Race start with Launch Control ( 136)
-
Page 23: Instrument Cluster
Instrument cluster Indicator and warning lights Shiftpoint light ( 121) TFT display ( Anti-theft alarm LED with anti-theft alarm sys- tem (DWA) Alarm signal ( Photosensor (for adjusting brightness of instrument lighting)
-
Page 25: Displays
Displays Indicator and warning lights ..24 TFT display in Pure Ride view ..25 TFT display in the View menu ..27 Warning lights .
-
Page 26: Indicator And Warning Lights
Indicator and warning lights Turn indicator, left Operating turn signals 60). High beam ( General warning light Turn indicator, right DTC ( ABS ( 149)
-
Page 27: Tft Display In Pure Ride View
TFT display in Pure Ride view Hill Start Control ( Tachometer ( Speedometer Rider info. status line with cruise control Switch on cruise-control system ( 64). RACE PRO riding mode with riding modes Pro Configuration for the race- track ( 135) Switch Speed Limit Info on or off (…
-
Page 28
12 Connection status ( 13 Mute ( 14 Operating assistance 15 Heated grip settings… -
Page 29: Tft Display In The View Menu
TFT display in the View menu Hill Start Control ( Speedometer with cruise control Switch on cruise-control system ( 64). Switch Speed Limit Info on or off ( 83). with riding modes Pro Adapt DTC ( 139). RACE PRO riding mode with riding modes Pro Configuration for the race- track (…
-
Page 30: Warning Lights
Warning lights 12 Mute ( 13 Operating assistance Display 14 Heated grip settings Warnings are displayed with ap- propriate warning lights. 15 Menu area Warnings are indicated by the general warning light in conjunc- tion with a dialog in the TFT display.
-
Page 31
White: (—) there is no valid value. Instead of the value, dashes 5 are displayed. NOTICE The evaluation of the individual values is possible in part only af- ter a certain riding duration or speed. If a measured value can- Value display Check Control dialog not yet be displayed due to un-… -
Page 32
again as long as the error per- sists. -
Page 33
Overview of warning indicators Indicator and warning Display text Meaning lights Displayed in yellow. Vehicle voltage too low ( General warning light lights up yel- low. Vehicle voltage low. Displayed in red. Vehicle voltage critical ( General warning light shows red. Vehicle voltage critical! General warning… -
Page 34
Indicator and warning Display text Meaning lights General warning Coolant temper- Coolant temperature too high ( ature too high! light shows red. General warning No communica- Engine control failure ( light lights up yel- tion with en- low. gine control. General warning Fault in the en- Engine in emergency-operation mode… -
Page 35
Indicator and warning Display text Meaning lights Tire pressure Tire pressure is outside the approved not at tolerance range ( setpoint. Tire press. monitor. Loss of pressure. «—» Transmission fault ( General warning «—» Sensor faulty or system fault ( light lights up yel- low. -
Page 36
Indicator and warning Display text Meaning lights Side stand mon- Side stand monitoring faulty ( itoring faulty. ABS indicator ABS self-diagnosis not completed and warning light flashes. ABS indicator and ABS deactivated ( warning light lights ABS indicator and Limited ABS ABS fault ( availability! warning light lights… -
Page 37
Indicator and warning Display text Meaning lights DTC indicator DTC self-diagnosis not completed and warning light flashes slowly. DTC indicator and Off! DTC switched off ( warning light lights Traction con- trol deacti- vated. DTC indicator and Traction con- DTC error ( warning light lights trol failure! Traction con-… -
Page 38
Indicator and warning Display text Meaning lights Fuel reserve is be- Fuel down to reserve ( ing used up. Drive to the nearest filling station. Green stop symbol Hill Start Control active ( is displayed. Yellow stop symbol Hill Start Control is automatically deacti- flashes. -
Page 39
Indicator and warning Display text Meaning lights L-Con not Shiftpoint light Launch Control not ready ( available. lights up or flashes. Clutch too hot. is displayed. Displayed in white. Service due ( Service due! Displayed in yellow. General warning Service date missed ( light lights up yel- low. -
Page 40
If the 12-V battery is inserted preferably an authorized incorrectly or the terminals re- WARNING BMW Motorrad retailer. versed (e.g. when jump starting), it can blow the fuse for the alter- Failure of vehicle systems Vehicle voltage critical nator regulator. -
Page 41
For de- Front parking lamp tails please contact a special- Anti-theft alarm faulty! ist service facility, preferably batt. capacity low. an authorized BMW Motorrad Tail light faulty! No limitations. Arrange Retailer. an appointment at a Possible cause: specialist workshop. -
Page 42
Engine damage facility, preferably an authorized Operation of the anti-theft alarm Be sure to observe the mea- BMW Motorrad retailer. system is no longer ensured sures listed below. when the motorcycle’s battery Anti-theft alarm system Possible cause: is disconnected. -
Page 43
Serious fault in en- rized BMW Motorrad retailer. Accident hazard gine control. Onward Engine control failure Avoid rapid acceleration and journey possible. Damage passing maneuvers. -
Page 44
WARNING as soon as possible at an authorized specialist workshop, Damage to engine during preferably an authorized emergency operation BMW Motorrad retailer. Accident hazard Drive slowly and avoid rapid Tire inflation pressure acceleration and passing ma- with tire pressure monitor neuvers. -
Page 45
Before adjusting the tire pres- For further information about compensation and are always sure, check the information on the BMW Motorrad tire pres- based on the following tire air temperature compensation and sure monitor, see the «Technol- temperature: tire pressure adjustment in the ogy in detail»… -
Page 46
Displayed in red. Check the tires for damage and BMW Motorrad retailer. driveability. In the event of uncertainty about Tire pressure not at Can the tire still be driven on: the driveability of the tire: setpoint. -
Page 47
Have fault eliminated at a spe- warning light also lights up cialist service facility, preferably cialist service facility, preferably is this a permanent fault. an authorized BMW Motorrad an authorized BMW Motorrad In this case: retailer. retailer. Have fault eliminated at a spe-… -
Page 48
Contact an authorized service for a short time immediately fol- facility, preferably an authorized Possible cause: lowing the Pre-Ride-Check. BMW Motorrad retailer. The side-stand switch or its wiring is damaged. Possible cause: Motorcycle has fallen over Contact an authorized service… -
Page 49
( 155). preferably an authorized Possible cause: Have the malfunction corrected BMW Motorrad retailer. The ABS system was deacti- as soon as possible at an vated by the rider. authorized specialist workshop, preferably an authorized Switch on ABS function 150). -
Page 50
DTC indicator and warning DTC indicator and warning to an ABS Pro fault message light flashes slowly. light lights up. 155). Off! Have the malfunction corrected as soon as possible at an authorized specialist workshop, preferably an authorized BMW Motorrad retailer. -
Page 51
Possible cause: authorized specialist workshop, Secure vehicle tools. preferably an authorized The DTC control unit has de- Do not damage the rotational BMW Motorrad retailer. tected an error. speed sensor. Limited DTC availability ATTENTION It must be noted that only lim- ited DTC function is available. -
Page 52
DTC fault preferably an authorized WARNING 158). BMW Motorrad retailer. Have the malfunction corrected In this state, the motorcycle is Rough engine running or as soon as possible at an probably heavily damped and is… -
Page 53
Gear not trained shop, preferably an authorized when the side stand is folded out. BMW Motorrad retailer. The gear indicator flashes. Engine was stopped. The gearshift assistant Pro Hazard warning lights Hill Start Control is deactivated has no function. -
Page 54
Shiftpoint light lights up or marks in the menu windows MY shop, preferably an authorized flashes. VEHICLE and SERVICE RE- BMW Motorrad retailer. L-Con not available. QUIREMENTS. The operating and road safety Clutch too hot. is displayed. of the vehicle remains un-… -
Page 55
Have service performed reg- ularly by a specialist work- shop, preferably an authorized BMW Motorrad retailer. The operating and road safety of the vehicle remains un- changed. The best-possible value reten- tion of the vehicle is ensured. -
Page 57: Operation
Operation Steering and ignition lock … 56 Rider and passenger seats ..72 Emergency on/off switch (kill switch) ……57 Lights .
-
Page 58: Steering And Ignition Lock
Steering and ignition Switching on ignition lock Vehicle keys You are provided with 2 ignition keys. Should you lose your keys, re- fer to the information regarding the electronic immobilizer (EWS) 57). Turn the ignition key to posi- A single key fits the steering and tion 1 while moving the handle- Turn vehicle key to position 1.
-
Page 59: Emergency On/Off Switch
Handlebars not locked. The vehicle key can now be If you lose one of your motorcy- removed. cle keys, you can have it disabled by your authorized BMW motor- EWS Electronic cycle retailer. immobilizer When having a key disabled you…
-
Page 60: Lights
Lights WARNING NOTICE Switch on low-beam Operation of the emergency The parking lights are a strain headlight ON/OFF switch when riding on the battery. Do not leave the Switch on the ignition. ignition switched on longer than Danger of falling due to blocking Start engine.
-
Page 61: Hazard Warning Flashers
Headlight courtesy delay Parking lights NOTICE feature Switch off ignition ( 57). Switch off ignition. The hazard warning flashers place a strain on the battery. Do not use the hazard warning flashers for longer than absolutely necessary. Immediately after switching off the ignition, push button 1 to Immediately after turning off left and hold it until the parking…
-
Page 62: Turn Indicators
Turn indicators Comfort turn signals Speed is above 60 mph (100 km/h): after flashing five Operating turn signals times. Switching on ignition ( 56). When button 1 is pressed and held slightly longer to the right or left, the turn signals will only turn off automatically after reaching the distance depending on the speed.
-
Page 63
DTC indicator and warning to flash if self-diagnosis has not light remains illuminated. been completed. Possible DTC system status ON The DTC function is switched is displayed. off. Release button 1 after Switching on DTC changeover of the status. DTC indicator and warning light remains off or contin- ues to flash. -
Page 64: Riding Mode
ABS control, and DTC control Riding mode is provided for each of these sce- Use of the riding modes narios. BMW Motorrad has developed with Dynamic Damping Control riding scenarios for your motor- (DDC) cycle from which you can select…
-
Page 65: Cruise-Control System
played. The guide 4 shows how Cruise-control system Display while adjusting many riding modes are available. (road sign detection with cruise control active) Display while adjusting (road sign detection not active) Press button 1 repeatedly un- The symbol 1 for the cruise con- til the desired riding mode is trol is displayed in the Pure Ride shown.
-
Page 66
Switch on cruise-control Press button 1 forward and Adjustment range of hold. system cruise-control system The motorcycle accelerates with infinite variability (no 12…130 mph (20…210 km/h) steps). Cruise-control indicator light If button 1 is no longer lights up. pressed, the speed reached is maintained and saved. -
Page 67
you might have intended slowing The motorcycle decelerates Cruise-control indicator light with infinite variability (no goes out. to a lower speed. steps). Cruise-control indicator light Resuming former cruising If button 1 is no longer lights up. speed pressed, the speed reached is maintained and saved. -
Page 68: Hill Start Control
Hill Start Control Manually brake to secure the Hill Start Control is activated. vehicle. To switch off the.Hill Start Display Control, activate the handbrake lever 1 or the footbrake lever NOTICE again. Hill Start Control is only a con- Stop symbol disappears. venience system for easier hill- starting and should, therefore, Alternatively, drive off in 1st or…
-
Page 69
Switch Hill Start Control Hill Start Control Pro is now NOTICE activated. on and off To switch off Hill Start Con- Hill Start Control Pro drive-off Switching on ignition ( 56). trol Pro, activate the handbrake assistant should not be used for Go to menu Settings, Vehi- lever 1 or the footbrake lever gradients of more than 40%. -
Page 70: Shiftpoint Light
Shiftpoint light Hill Start Control Pro is now To turn on automatic Hill Start deactivated. Control Pro, select Auto. Turning the shiftpoint More information about Hill Hill Start Control Pro can be light on and off Start Control Pro can be found activated by firmly applying the in the Technology in detail handbrake or footbrake lever.
-
Page 71: Anti-Theft Alarm System
The anti-theft alarm system is type of alarm sound can be set quency of 0 Hz corresponds to active. continuous lighting. by an authorized BMW Motorrad retailer. Changes to the brightness and Alarm signal the flashing frequency are sig- If an alarm was activated while…
-
Page 72: Tire Pressure Monitor
Deactivate DWA Switching the minimum clination of the vehicle. The anti- theft alarm system responds if, pressure warning on or off Switch on the ignition. for example, if the wheel is stolen Turn indicators light up once. The minimum pressure of the or the motorcycle is towed.
-
Page 73: Onboard Computer
The handlebar grips can be Scroll to the right until the ON- NOTICE heated at two different levels. BOARD COMPUTER menu win- dow is displayed. 50 % heating output The increase in power consumption caused by the Reset on-board computer heated grips can drain the 100 % heating output Call up on-board computer…
-
Page 74: Rider And Passenger
Install the hump cover Scroll to the right until the TRIP COMPUTER menu win- dow is displayed. Reset travel on-board computer Call up travel on-board com- puter ( 71). Press MENU rocker button down. Using the ignition key 1, unlock Select Automatic reset or the lock for the hump cover 2.
-
Page 75
Remove rider’s seat Using the ignition key 1, un- Position the passenger seat 1; lock the lock for the passenger hook in the fixing mechanism 2 Press the cover of the rider’s seat 2. when doing so. seat 1 slightly forward on the Remove the passenger seat 2 Press the passenger seat 1 seat surface and expose the… -
Page 76
Installing rider’s seat Insert and position the rider’s seat 1 at the front in the fixing mechanism 4. Press the cover of the rider’s seat 1 slightly forward on the seat surface and expose the lug 2. Position and install the screw 3. -
Page 77: Tft Display
TFT display General notes ….. . . 76 Principle ……77 Pure Ride view .
-
Page 78: General Notes
Connected App used if the TFT display is con- Do not use while riding (except With the BMW Motorrad Con- nected with a mobile end de- for applications without opera- nected App, you can call up in- vice and a helmet ( 86).
-
Page 79: Principle
Move cursor down in lists. On some mobile devices, e.g. Make settings. with operating system iOS, the Reduce volume. BMW Motorrad Connected App must be called up before using. Tilt Multi-Controller to the left: Notice concerning current Activate the function according status to the operating feedback.
-
Page 80
Operating instructions in Scroll to right in lists. In the Pure Ride view: change the operating focus to the navi- In the My Vehicle menu: leaf to the main menu gator. the next menu sheet. MENU short press down: Rocker button MENU functions Change a hierarchy level down. -
Page 81
Operating instructions in on whether it is possible to re- turn to the top. submenus Operating instruction 2: an- In addition to the operating in- other submenu level can be structions in the main menu, called up. there are additional operating in- Operating instruction 3: there structions in submenus. -
Page 82
Switching functions on Symbol 3 indicates that the Settings function can be switched off. Press Multi-Controller 1 re- and off Symbol 4 indicates that the peatedly briefly to the right un- function can be switched on. til the desired menu item is marked. -
Page 83
down until the desired entry is Changing the display for The last used menu is called marked. up. The last marked entry is rider info status line selected. To move the cursor up in lists, Requirement turn the Multi-Controller 1 The vehicle is at a standstill. -
Page 84
Select content of rider Driving time 1 info. status line Call up menu Settings, Driving time 2 Display, Status line content. Break 1 Turn on desired displays. It is possible to change be- tween the selected displays in Break 2 the rider info. -
Page 85: Pure Ride View
Vehicle is connected to a com- gine speed range display will no patible mobile terminal. The longer change. BMW Motorrad Connected app The upshift recommendation is is installed on the mobile termi- adjusted dynamically as well. nal.
-
Page 86: General Settings
Range General settings The range is displayed to- gether with a warning once the Adjusting the volume fuel reserve is reached. Connect the rider’s helmet and After refueling, the range is re- the passenger helmet ( 87). calculated if the fuel quantity is Increase volume: turn Multi- greater than the fuel reserve.
-
Page 87: Bluetooth
Set clock Adjust language Reset all settings Call up menu Settings, Sys- All settings in the Settings Switching on ignition ( 56). menu can be reset to the fac- Call up menu Settings, Sys- tem settings, Language. tory settings. The following languages can be tem settings, Date and set: Call up menu Settings.
-
Page 88
On some mobile devices, e.g. no guarantee for smooth opera- with operating system iOS, the Perform pairing tion in every situation. BMW Motorrad Connected App Call up menu Settings, Con- must be called up before using. nections. Possible sources of… -
Page 89
menu. The following Bluetooth Visible mobile end devices are If the Bluetooth connection connections are displayed: displayed. does not work as expected, the troubleshooting chart in the Select the mobile end device Mobile device Technical data chapter may and confirm. Rider’s helmet provide assistance. -
Page 90
The connection is established and the connection status is updated. If the connection cannot be established, the troubleshoot- ing chart in the Technical data chapter may provide assis- tance. ( 213) If the Bluetooth connection does not work as expected, the troubleshooting chart in the Technical data chapter may provide assistance. -
Page 91: My Vehicle
My vehicle Start screen Check Control display Display ( Coolant temperature Range ( Total mileage Service display ( Rear tire pressure ( Vehicle voltage ( 195) Front tire pressure (…
-
Page 92
Operating instructions Scroll through menu with tire pressure monitor (TPM) windows TIRE PRESSURE SERVICE REQUIREMENTS Further information on the tire pressure and CC messages can be found in the Displays chapter. NOTICE Check Control messages are Operating instruction 1: tab dynamically added as additional that shows how far to the left Go to menu My vehicle. -
Page 93
Service requirement If the time remaining until the next service is less than a month, or if the next service is due within 700 miles (1000 km), a white CC message is displayed. -
Page 94: Navigation
Navigation Operate these systems or de- Call up the BMW Motorrad vices only if the traffic situation Connected app and start the Warnings allows. route guidance. If necessary, stop and oper- Call up menu Navigation in WARNING ate the system or devices at a the TFT display.
-
Page 95
Switch spoken directions favorite in the BMW Motorrad Select special destination and Connected app. It is not confirm. on or off possible to create new favorites Select Start route guid- Connect the rider’s helmet and on the TFT display. ance and confirm. -
Page 96: Media
Go to menu Media. The following functions can be NOTICE used in the context menu: Start playback or Pause BMW Motorrad recommends playback. setting the volume for media For search and playback, select and conversations via mobile end the category Now playing,…
-
Page 97: Display Software Version
Make a phone call Conversations with Display software multiple users version A second telephone call can be Call up menu Settings, In- accepted during a conversation. formation, Software ver- The first conversation will be put sion. on hold. The number of active telephone calls is displayed in the Display license Telephone menu.
-
Page 99: Setting
Setting Mirrors ……98 Headlight ……98 Brakes .
-
Page 100: Mirrors
If there are doubts as to the cor- rect headlight range, have the Headlight adjustment checked by a spe- Headlight adjustment, cialized workshop, preferably by an authorized BMW Motorrad right-hand/left-hand retailer. traffic This motorcycle’s headlight fea- Turn the adjustment wheel 1 tures a symmetrical low beam.
-
Page 101: Adjusting Clutch Lever
Steering NOTICE Adjusting the steering The adjustment wheel can be damper turned more easily if you press the handbrake lever forward when doing so. Adjustment options: from position 1: smallest dis- tance between handlebar grip Turn the adjustment wheel 1 and brake lever into the desired position.
-
Page 102: Spring Preload
Remove the engine jack. then 4 clicks in direction B. specialist workshop, preferably Park motorcycle on a level, firm (Racing mode) an authorized BMW Motorrad re- surface. tailer. Spring preload Load motorcycle with rider. Adjusting the spring…
-
Page 103
To reduce the compression Lift the motorcycle using the Adjustment of spring (increase the spring preload), engine jack until the rear wheel preload dependent on turn the adjustment screw 3 in has been fully relieved. loading direction A using a tool from the onboard tool kit. -
Page 104
(compression) between the To increase the compression measured values. (reduce the spring preload), turn the adjustment ring 2 in Adjustment of spring direction B using a tool from preload dependent on the onboard tool kit. loading Tighten screw 1 to tightening torque. -
Page 105
Place the motorcycle under NOTICE load with a rider and possibly with luggage. Settings on the DDC system With the assistance of a can only be made when the ig- 2nd person, measure the nition is switched on, as this is distance D between points 1 the only way the electric valves and 2 again and calculate… -
Page 106: Damping
Damping mark 2 points to a higher scale value. Setting To decrease damping: turn Damping must be adjusted to the adjustment screw with tool road conditions and the spring from onboard tool kit so that preload. the mark 2 points to a lower A rough road surface requires scale value.
-
Page 107
mark 2 points to a higher scale value. To decrease damping: turn adjustment screw with tool from onboard tool kit so that the mark 2 points to a lower scale value. Rebound stage, basic setting, front Adjust rebound-stage damping Adjust compression damping Position 5 (Road mode with using adjustment screw 1 and via adjustment screw 1. -
Page 108
To reduce damping: turn ad- CAUTION justment screw to the left in – direction using tool from on- Hot exhaust system board tool kit. Burn hazard Do not touch hot exhaust Compression stage, ba- system. sic setting, rear Park motorcycle on a level, firm Turn the adjustment screw 1 surface. -
Page 109: Ride Height
187 lbs (85 kg)) your skill range, please contact a specialist workshop, preferably a Ride height Loosen clamping bolts 1. BMW Motorrad retailer. To increase the ride height, with Race package turn the adjustment screw 2 in Adjusting the ride height direction A.
-
Page 110: Swinging Arm
Adjust the ride height to the Tighten clamping bolts 1. swinging arm pivot point set- specialist workshop, preferably a Clamping bolt on adjust- ting: BMW Motorrad retailer. ment strut Adjusting the swinging 6 lb/ft (8 Nm) arm pivot point Remove engine jack.
-
Page 111
of 90° in each case to set the nector are fixed in the same desired position. position (mark). Install the fixing screw 1. Install the fixing screw 1. Position of swinging arm Position of swinging arm pivot point connector in pivot point connector in main frame on right main frame on left… -
Page 112: Ddc Calibration
Calibrating the DDC Nut for swinging arm Nut on swing axle Place the motorcycle on the pivot point connector on side stand or a suitable auxiliary frame Thread-locking compound: stand. Do not sit on the mo- Thread-locking compound: mechanical torcycle during the calibration. Loctite 270, high-strength Remove any pieces of luggage.
-
Page 113
Select Repeat. If the calibration is still un- successful after several at- tempts, please contact a spe- cialist workshop, preferably an BMW Motorrad Partner. -
Page 115: Riding
Riding Safety information ….114 Observe checklist ….115 Before every journey: .
-
Page 116: Safety Information
Your authorized cycle: Burn hazard BMW Motorrad retailer will be Settings of spring-strut and happy to advise you and has shock absorber system the correct clothing for every CAUTION Imbalanced load purpose.
-
Page 117: Observe Checklist
Catalytic converter Danger of overheating Observe checklist There is a danger of overheating Use the following checklist to ATTENTION and damage if misfiring causes check your motorcycle at regu- unburned fuel to enter the cat- lar intervals. Engine idling for a lengthy alytic converter.
-
Page 118: Starting
a gear engaged. The engine will Checking the rear brake pad NOTICE thickness ( 174). switch itself off if it is started with the transmission in neutral and Checking the front brake fluid The starting attempt is automati- then a gear is engaged before level ( 175).
-
Page 119
All indicator and warning lights The self-diagnosis routine checks tine not completed are switched on. whether the BMW Motorrad In- After a longer standstill of the tegral ABS is ready for opera- ABS function is not available vehicle, an animation is displayed tion. -
Page 120
Phase 2 displayed. The self-diagnosis routine Check wheel sensors while Check the display of all indica- is determining whether starting off. tor and warning lights. BMW Motorrad DTC is ready for ABS indicator and warning operation. The self-diagnosis light flashes. -
Page 121: Breaking In
(300…1000 km)) Have the malfunction corrected Brake early. as soon as possible at an No full throttle (Mileage authorized specialist workshop, 0…621 miles (0…1000 km)) preferably an authorized Observe mileage, after which BMW Motorrad retailer. the running-in check should be performed.
-
Page 122: Shifting Gears
When changing gear using the reaction. BMW Motorrad are run in. This running in proce- Pro Gear-shift Assistance func- recommends disengaging dure is essential if the tires are to…
-
Page 123: Shiftpoint Light
Vehicle settings disengaged at the same time. menu (also see the «Operation» Locking up of the front wheel chapter). is prevented by BMW Motorrad Race ABS. Brakes With the frequently instructed «forced braking,» in which the How do you achieve…
-
Page 124
ABS Pro front wheel to lock up with min- Delayed or poorer braking action imal braking action. This results must be expected in the follow- Physical riding limits in a reduced braking action. ing situations: When driving in the rain and WARNING Descending mountain through puddles. -
Page 125: Parking Your Motorcycle
Falling cannot be excluded the braking effect and engages Always check that the ground if the throttle grip is accidentally under the stand is level and Although ABS Pro and pressed during braking. firm. Dynamic Brake Control represent valuable support and an Fold out side stand and park NOTICE enormous safety advantage for…
-
Page 126
Recommended fuel qual- ATTENTION WARNING Refueling with leaded fuel Escaping of fuel due to ex- Premium grade unleaded fuel pansion under exposure to Damage to catalytic converter (max. 5 % ethanol, E5) heat with overfilled fuel tank Do not refuel with leaded gaso- 91 AKI (98 ROZ/RON) Accident hazard line or gasoline with metallic… -
Page 127: Securing Motorcycle For Transporta
ing until fuel is no higher than Fuel reserve lower edge of filler neck. NOTICE Approx. 1.1 gal (Approx. 4 l) If refueling is carried out after Press fuel tank cap down firmly running on fuel reserve, the re- to close. sulting filling capacity must be Remove the ignition key and greater than the fuel reserve so…
-
Page 128
Do not pinch components, e.g. brake lines or wiring harnesses. Lay straps at front over lower fork bridge on both sides. Tension straps downward. Remove the screws 1 and re- ATTENTION move the fork partition 2. Motorcycle tips to the side when raising Component damage cause by tipping over… -
Page 129
After transportation, position the fork partition 2 and install the screws 1. -
Page 131: On The Racetrack
On the racetrack Displays for racing mode … 130 LAPTIMER ……133 Vehicle settings for racing mode .
-
Page 132: Displays For Racing Mode
Displays for racing mode Sport 1 display with riding modes Pro Adapt DTC ( 139). Maximum DTC torque re- duction Current DTC torque reduc- tion Tachometer Maximum braking deceler- ation Current braking decelera- tion Maximum angle of inclina- tion Current angle of inclination Unit for displaying rpm: 1000 RPM…
-
Page 133
Sport 2 display with riding modes Pro Adapt DTC ( 139). Maximum DTC torque re- duction Current DTC torque reduc- tion Tachometer Difference between the last lap time and the ref- erence time, or difference between the current lap time and the reference time Reference time: The fastest lap from the laps… -
Page 134
Sport 3 display with riding modes Pro Adapt DTC ( 139). Maximum DTC torque re- duction Current DTC torque reduc- tion Tachometer Current angle of inclination Maximum angle of inclina- tion Reference time: The fastest lap from the laps currently saved, or the fastest lap ever saved 133) Current lap time… -
Page 135: Laptimer
LAPTIMER The time for the current lap Laps can be used to go to the restarts at 00:00:00. current lap times and riding Start time recording data. 99 laps can be saved. The stopped time of a racing Go to menu Sport and switch If you do not delete any laps lap is displayed for a config- to the Sport 2 or Sport 3…
-
Page 136: Vehicle Settings For Racing
a new race can be recorded at is displayed before the current functions Media, Telephone, lap time is shown. other times and compared with and Navigation. the best lap from previous races. Reference: Selection of Configuration menu The best ever racing lap can be which best time is shown as deleted in the LAPTIMER menu.
-
Page 137: Mode
The following parameters can be RACE PRO 1, RACE PRO 2, and Light warnings: If the turn set: RACE PRO 3 riding modes. signals are removed or the license-plate carrier is detached Engine If RACE PRO riding mode is for racetrack use, the vehicle Engine Brake deactivated, all predefined rid- electronics will interpret this…
-
Page 138: Launch Control
If a setting is also saved in a When the Launch Control is ac- standard riding mode, this rid- tive, the engine torque is reduced ing mode is specified. so that, for example, the maxi- mum propulsion on level ground Change a setting as desired.
-
Page 139
Perform start as usual, open The number of subsequent starts throttle grip at least to such with Launch Control is limited for an extent that speed limiting is clutch protection. The number reached. of starts still possible is shown Open throttle grip completely in the display, e.g. -
Page 140: Pit Lane Limiter
Using the Pit Lane Limiter The throttle grip reacts again NOTICE as usual. Depending on the race track, The speed resulting from the upshift and drive around curves maximum RPM depends on the in the inclined position. gear ratio and the tire size. If third gear is engaged or the Reading display range angle of inclination is greater…
-
Page 141: Dtc
with riding modes Pro Select the desired RACE PRO WARNING riding mode. The control can be adjusted in detail as part of the configuration When the starter button is NOTICE of the RACE PRO riding modes. released, the engine accel- Configuring the RACE PRO rid- erates according to the posi- DTC can also be adjusting while…
-
Page 142: Chassis Settings For Racing
( 101). button 1 down to reduce the turns sufficiently. In this case, DTC control. BMW Motorrad recommends with Dynamic Damping Control The set value is shown on the switching off the DTC temporar- (DDC) display and lies between -7 ily.
-
Page 143: Removing And Installing Mirror
with Race package Adjusting the rebound-stage damping on the front wheel with M package 104). Adjust the ride height ( 107). Adjusting the rebound-stage Adjust the swinging arm damping on the rear wheel 108). 105). Removing and installing Adjusting the compression mirror damping on the rear wheel Remove the screws 1 and 2.
-
Page 144
NOTICE If the mirrors with integrated turn Use the M Cover Kit from signals are removed for racetrack BMW Motorrad to cover the use, the vehicle electronics will exposed screw sockets and re- interpret this as a defective light secure the components. -
Page 145
Installing mirrors Park motorcycle on a level, firm surface. Remove trim panel attachment. Position the air inlet flap 1 and Unclip the air inlet flap at the clip in at the top 2. top in the arrow direction and remove it in a downward motion. -
Page 146: Removing And Installing License
Insert the mirrors on the left and right into the mounts 1. Connect the connector for the Position the windshield in right-hand turn signal 1 and the the arrow direction. left-hand turn signal 2. Install screws 1 and 2. Install the nuts 1 and 2 on the Removing and installing rear side of the trim panel with the appropriate torque.
-
Page 147
Do not ride on public roads Disconnect the connector for without a number plate the license plate light 2 and carrier. left-hand turn signal 3. Park motorcycle on a level, firm NOTICE surface. If the license plate carrier is re- with passenger package moved for racetrack use, the Remove passenger seat… -
Page 148
NOTICE Use the M Cover Kit from BMW Motorrad to cover the resulting opening. Disconnect the connector for Remove screws 1. the right-hand turn signal 1. Carefully clip in the tail cowl- ing 1 on the left and right, first vertically 2, then horizontally 3. -
Page 149
Remove the hump cover 72). Carefully clip in the tail cowling Carefully unclip the tail cowl- in the arrow direction. ing 1 on the left and right, first horizontally 2, then vertically 3. Install screws 1 and 2. Remove the screws 1 and 2. Carefully unclip the tail cowling with passenger package on the left and right in the ar-… -
Page 150
Hook in the license-plate car- rier 1. Feed in the cable for the right- Connect the connector for the hand turn signal 1, left-hand license plate light 2 and left- turn signal 2, and license plate hand turn signal 3. Install screws 1. -
Page 151: Switching Off Abs When Riding On The Racetrack
with passenger package Install passenger seat ( 73). Install the hump cover ( 72). Switching off ABS when riding on the racetrack Deactivating ABS function Requirement Carefully clip in the tail cowl- Press and hold the button 1 for ing 1 on the left and right, first at least three seconds.
-
Page 152: Gearshift-Pattern Reverser
More information about brake speed, an ABS fault has oc- systems with BMW Motorrad curred. Integral ABS can be found in the Technology in detail chap- min 6 mph (min 10 km/h)
-
Page 153
Reversing shift pattern Transfer the gearshift rod 4 The shift pattern reversal for to the thread for the inverted racing mode is set up. ATTENTION gearshift pattern 1. Riding with shift pattern re- versal on public roads Expiry of operating license for public roads Do not use shift pattern rever- sal on public roads. -
Page 155: Technology In De
Technology in detail General notes ….. . 154 Antilock Braking System (ABS) ..154 Dynamic Damping Control (DDC) .
-
Page 156: General Notes
If the maximum transferable brak- to the road is restored. At this ing force is exceeded when the point, the BMW Motorrad Integral ATTENTION rider increases the brake pres- ABS must assume extremely low Attempt at a burn-out de-…
-
Page 157
In what ways is the will block very late, even if the The ABS ensures driving sta- BMW Motorrad Race ABS brakes are applied forcefully. bility on any surface within the noticeable to the rider? Consequently, ABS does not limits of driving physics. -
Page 158
How important is regular Apart from problems on the WARNING BMW Motorrad Race ABS, maintenance? unusual riding conditions can Braking in curves also cause a fault message to be WARNING Risk of accident despite ABS generated. The rider is always responsi-… -
Page 159: Dynamic Damping Control
ABS control Advantages for the rider the EDC valves. As a result, the chassis and suspension is ad- From a technical standpoint, The advantages of ABS Pro for justed to the conditions of the ABS Pro adjusts the ABS control the rider are sensitive response surface.
-
Page 160: Dynamic Traction Control
ment system adapts the engine Special situations If an additional leveling sensor torque when the slip limit is ex- is installed, an existing sensor As lean angles increase, accel- ceeded. is replaced, or the running gear eration potential is also progres- DTC can only provide support height is changed, a calibration sively restricted by the laws of…
-
Page 161: Riding Mode
This case cannot In the RACE riding mode: op- be controlled by BMW Motorrad For each riding mode, a coor- timum throttle response, maxi- DTC. dinated setting is available for…
-
Page 162
ation may be slightly reduced Wheelie is possible, optimum with riding modes Pro on dry roads. propulsion. In the RACE PRO riding In the DYNAMIC riding mode: modes, additionally: soft throttle with riding modes Pro high performance on dry roads. response, maximum torque, In the RACE PRO riding modes In poor road conditions, opti-… -
Page 163: Dynamic Brake Control
Changing setting riding mode has been switched with riding modes Pro over. In the RACE PRO riding Riding modes can be changed modes: the use of the ABS when the vehicle is at a standstill Dynamic Brake Control can be individually adjusted. with the ignition switched on.
-
Page 164: Tire Pressure Control
Tire pressure control Behavior during emergency shutting off the gas. This en- braking sures activation of emergency (TPC/RDC) braking. If emergency braking is with tire pressure monitor If the gas is shut off (throttle applied at a speed of more (TPM) position <5%) during than 10 km/h, in addition…
-
Page 165
continue to transmit the mea- Temperature do not match the values shown sured readings for some time in the TFT display. compensation after the vehicle comes to a stop. The tire inflation pressure is tem- Tire pressure adjustment perature dependent, i.e. it in- Transmission time of the Compare the RDC value in the creases or decreases together… -
Page 166: Shift Assistant
sition until the gear change is Benefits Example completed. A further increase 70-80 % of all gear changes of the force applied to the gear can be performed without us- lever during the gear-shift op- ing the clutch. 2.9 psi (0.2 bar) eration is not necessary.
-
Page 167: Hill Start Control
gear to be engaged. Over- partial integral ABS brake system, quired to drive off, making ad- revving is thus prevented. without the rider having to con- ditional turning of the throttle tinuously operate the brake lever. grip necessary. When Hill Start Control is acti- Maximum engine speed Behavior when the vehicle is vated, pressure builds in the rear…
-
Page 168
made aware about the deactiva- tion of the Hill Start Control by the following behavior: Brake warning jerk The brake is released briefly and is immediately reactivated. This causes a jerking behavior that the rider can feel. The partial integral ABS brake system sets a speed of approx. -
Page 169: Maintenance
Maintenance General notes ….. . 168 Fuses ……196 On-board tool kit .
-
Page 170: General Notes
Control (DDC) your motorcycle on DVD, which with Race package Adjusting the compres- you can obtain from your autho- sion damping on the rized BMW Motorrad retailer. with M package front wheel ( 104). Adjusting the ride height without Dynamic Damp-…
-
Page 171: Front Wheel Stand
( 106). ATTENTION without Dynamic Damp- ing Control (DDC) Use of the BMW Motorrad Adjusting the compres- front wheel stand without an sion damping on rear additional center or auxiliary wheel ( 105).
-
Page 172: Rear-Wheel Stand
Rear-wheel stand Mounting the rear-wheel stand Turn the bracket 2 with the Attach the auxiliary stand to the long sides facing the inside. front suspension and press it on the ground evenly. Adjust the mounting pieces 3 to the width of the service Use the basic stand with the adapters inserted into the front tool number (83 30 0 402 241)
-
Page 173: Engine Oil
Install the service adapter (83 Turn the bracket 2 with the Attach the rear wheel stand to 30 2 152 841) 1 into the rear long sides facing the outside. the rear wheel swing arm and wheel swinging arm at the left press it on the ground evenly.
-
Page 174
BMW Motorrad ADVANTEC Ultimate oil. NOTICE Approx. 1.2 gal (Approx. 4.5 l) BMW Motorrad recommends oc- (with filter replacement) casionally checking the motor oil If oil level is below minimum after a journey of at least 50 km… -
Page 175: Brake System
Top up the engine oil to the Have the brakes checked by a specified level. specialist workshop, preferably Park motorcycle on a level, firm an authorized BMW Motorrad Checking the engine oil level surface. dealer. 171). Wipe the area around the oil Install cap of oil filler opening 1.
-
Page 176
Have brake pads replaced at an authorized service facil- ity, preferably an authorized BMW Motorrad retailer. Checking the rear brake pad thickness Park motorcycle on a level, firm Front brake-pad wear Rear brake-pad wear surface. -
Page 177
The brake fluid level in the brake- The brake fluid level must BMW Motorrad retailer. fluid reservoir drops due to brake not fall below the MIN mark. pad wear. (Brake fluid reservoir horizon-… -
Page 178
NOTICE cialist workshop, preferably The brake fluid level must The brake fluid level in the brake- an authorized BMW Motorrad not fall below the MIN mark. fluid reservoir drops due to brake dealer. (Brake fluid reservoir horizon- pad wear. -
Page 179: Clutch
WARNING increasing operation: Have the clutch checked by an Insufficient brake fluid in the authorized workshop, preferably brake-fluid reservoir an authorized BMW Motorrad Considerably reduced braking retailer. performance caused by air in the brake system Check clutch lever play Adjust the riding mode imme- Requirement diately until the fault is rectified.
-
Page 180: Coolant
If the correct clutch play play can only be set through further unscrewing, contact a specialist workshop, preferably a BMW Motorrad retailer. Read the coolant level on the expansion tank 1. Direction Check clutch lever play of view: from front looking at 177).
-
Page 181: Tires
Tires Topping up coolant Checking the tire pressure WARNING Incorrect tire inflation pres- sure Poorer handling characteristic of motorcycle, reduction of tire service life Required coolant level Ensure proper tire inflation Open the expansion tank pressure. cap 1. Between MIN and MAX Top up coolant to the specified WARNING marks on the expansion tank…
-
Page 182: Wheel Rims And Tires
If the tire tread has worn tires) ity, preferably an authorized down to the level of the marks, BMW Motorrad retailer. Tire pressure, rear the tire is completely worn. The locations of the marks are indi- Check tire tread depth cated on the edge of the tire, e.g.
-
Page 183: Wheels
RDC sensor is not The wheel sizes play an impor- damaged. Inform the authorized tant role with DTC. The diameter BMW Motorrad retailer or the and width of the wheels stored specialist workshop about the in the control unit have particular RDC sensor.
-
Page 184
ABS malfunction when pressing the brake pads cle, preferably using a The left clamp fixes the apart BMW Motorrad front-wheel threaded bushing in position Do not actuate the brakes with stand, continuing until the the brake caliper removed. wheel rotates freely. -
Page 185
Installing the front wheel Lift the front wheel and install cialized workshop, preferably the quick-release axle 1 with an authorized BMW Motorrad WARNING retailer. the specified torque. Use of a wheel which does Quick-release axle in… -
Page 186
Position the brake caliper 2 on Fasten the cable for the wheel Clamping screw in axle the left and position the cable speed sensor in the holder 1. adapter routing 3. Insert the wheel speed sensor Install the screws 1 with the into the bore and fasten with Tightening sequence: Tighten appropriate torque. -
Page 187
Brake pistons are pressed Remove front wheel stand and back. auxiliary stand. Removing rear wheel Raise motorcycle, preferably with a BMW Motorrad rear- Remove the quick-release wheel stand. axle 2 and take out the adjust- Mounting the rear-wheel stand ment plate 1. -
Page 188
1 to the front and set it to a BMW authorized workshop, the chain 1 from the sprocket the side. preferably by a BMW Motorrad wheel. Roll rear wheel toward rear out retailer. of swinging arm. -
Page 189
NOTICE Ensure that the brake line and ABS sensor cable are correctly positioned. The brake line and the ABS sensor cable must be located in their guides in order to prevent contact with the rear wheel or exhaust system. Roll the rear wheel on the sup- Insert the right-hand adjust- port into the swinging arm. -
Page 190: Light Sources
For de- panel tails please contact a special- ist service facility, preferably NOTICE an authorized BMW Motorrad Retailer. The working steps described here for the right fairing side All light sources on the vehicle panel also apply logically for the are LED light sources.
-
Page 191
Install fairing side panel Bend the engine spoiler 2 Install screws 1. down slightly and remove the Install screws 2. Insert the fairing side panel 1 screw 1. into the nozzles 2. Removing the hump trim panel with passenger package Remove passenger seat 72). -
Page 192
seat surface and expose the lug 2. Remove screw 3. Lift the rider’s seat 1 at the rear and unhook the fixing mechanism 4. Lay the rider’s seat on a clean surface with the upholstered side down. Remove the screws 1 and 2. Carefully unclip the tail cowl- ing 1 on the left and right, first Carefully unclip the tail cowling… -
Page 193
Installing the hump trim panel Lift the hump trim panel 1 Carefully clip in the panels 4 in in the arrow direction and the arrow direction into the remove it from the retaining hump trim panel 2. Position the hump trim panel 1 tab 2. -
Page 194: Jump-Starting
with passenger package Install passenger seat ( 73). Install the hump cover ( 72). Jump-starting CAUTION Touching live parts of the ig- Insert and position the rider’s Carefully clip in the tail cowl- nition system when the en- seat 1 at the front in the fixing ing 1 on the left and right, first gine is running mechanism 4.
-
Page 195: Battery
Allow engine on support mo- Disconnect jumper cable from ATTENTION torcycle to run while jump- negative terminals first, then starting. disconnect second cable from Contact between crocodile positive terminals. Begin by clamping one end of clips of jump leads and mo- the red jumper cable to the Installing rider’s seat ( 74).
-
Page 196
4. DWA. trickle-charger to the battery. with M battery NOTICE BMW Motorrad has developed a trickle-charger specially designed for compatibility with the elec- tronics of your motorcycle. Using this charger, you can keep the battery charged during long pe-… -
Page 197
Follow the disconnection Follow the installation Position the wiring harness sequence. sequence. positive terminal 1 and install the screw 2. Remove the screw 1 and take Position the wiring harness Position the wiring harness off the wiring harness negative positive terminal 1 and install negative terminal 3 and install terminal 2 and press to the the screw 2. -
Page 198: Fuses
Install battery NOTICE ATTENTION NOTICE In the case of longer periods Bypassing defective fuses when the motorcycle is not be- Risk of short circuit and fire If the vehicle has been discon- ing used, the battery must be Do not bypass defective fuses. nected from the battery for a recharged regularly.
-
Page 199: Data Link Connector
On- shop, preferably an authorized Board Diagnostics. BMW Motorrad retailer. Motorcycle experiences malfunc- 15 A Install the fuse holder 1 in the tions Instrument cluster holder.
-
Page 200: Chain
2 from the holder 3. BMW Motorrad recommends Install passenger seat ( 73). The interface for the diagnos- using BMW Motorrad chain Install the hump cover ( 72). tics and information system lubricant or: can be connected to the data…
-
Page 201
Checking chain sag Make sure that the same scale If the measured value is outside value 4 is set on the left and the approved tolerance: Park motorcycle on a level, firm right. Adjusting chain sag ( 199). surface. Tighten the lock nuts 3 on the Turn the rear wheel until the Adjusting chain sag left and right to the specified… -
Page 202
Permissible chain length max 5.7 in (max 144 mm) (measured over the center of 10 rivets, chain under ten- sion) If the chain has reached the max- imum approved length: Contact an authorized service facility, preferably an authorized BMW Motorrad retailer. -
Page 203: Accessories
Accessories General notes ….. . 202 Connector for optional acces- sories ……202 M Cover Kit .
-
Page 204: General Notes
BMW. Therefore, Use of products from other BMW assumes responsibility for The vehicle is equipped with the manufacturers these products. BMW will not be following connectors for special Safety risk held liable for unapproved parts and racing accessories:…
-
Page 205
Under left-hand fairing side panel Connector for DWA and Terminating resistor M data logger Connector for DWA and Anti-theft alarm system M data logger Plug for special and racing accessories: Under the hump cover Power supply and LIN without anti-theft alarm system Spring travel sensor for (DWA) front forks (racing acces-… -
Page 206: Connector For Optional Ac
Under the hump cover Remove the hump cover ATTENTION 72). Removing the hump trim panel Penetration of dirt and mois- 189). ture in the open connector Unlock protective cap or ter- Malfunctions minating resistor and pull off Remount cover cap or termi- connector.
-
Page 207: M Cover Kit
M Cover Kit Installing the license-plate car- rier ( 147). Covering openings in the Installing mirrors ( 143). body Installing the M Cover Kit Requirement The M Cover Kit is used to pro- fessionally attach the front-fairing panel and to cover the openings in the body if the mirrors and license-plate carrier have been Hook in and position the cover…
-
Page 208
Removing the M Cover Kit Remove screws 2. Remove the cover for the mir- Remove screws 1. ror mount 1. Unhook the cover for the license-plate carrier 1 and remove it in a downward motion. -
Page 209: Care
Care Care products ….. 208 Washing your motorcycle ..208 Cleaning sensitive motorcycle parts .
-
Page 210: Care Products
BMW Motorrad recommends hazard care products available at your that you use BMW Insect Re- Brake early until the brake ro- authorized BMW Motorrad mover to soften and wash off tors and brake pads are dry.
-
Page 211: Cleaning Sensitive Motorcy
Do not use abrasive cleaners or Rubber Do not use chemical cleaners containing alcohol or cleansers. Treat rubber components with solvents. water or BMW rubber protection Do not use insect sponges or coating agent. Chrome sponges with a hard surface. Carefully clean chrome parts ATTENTION…
-
Page 212: Paint Care
Washing the motorcycle regu- mends removing tar stains with stand pivots with a suitable lu- larly will help counteract the long- BMW tar remover. Then add bricant. term effects of substances that a protective wax coating to the damage the paint, especially if Preserve bare metal and paint at these locations.
-
Page 213: Technical Data
Technical data Troubleshooting chart … . . 212 Performance data ….231 Threaded fasteners ….215 Fuel.
-
Page 214: Troubleshooting Chart
Troubleshooting chart Engine does not start at all or is very difficult to start. Possible cause Remedy Side stand extended and gear engaged Fold in side stand. Gear engaged and clutch not operated Place transmission in neutral or disengage clutch. No fuel in tank Refueling ( 124).
-
Page 215
Bluetooth connection is not established. Possible cause Remedy Necessary pairing steps were not performed. Refer to the operating instructions of the commu- nication system for the necessary steps for pair- ing. Connectivity functions are deactivated because Go to menu Settings and deactivate Race- the racetrack functions are activated. -
Page 216
Active route guidance is not displayed in the TFT display. Possible cause Remedy Navigation from the BMW Motorrad Con- Call up the BMW Motorrad Connected App on nected App was not transferred. the connected mobile end device before riding. Route guidance cannot be started. -
Page 217: Threaded Fasteners
Threaded fasteners Front wheel Value Valid Quick-release axle in threaded bush M24 x 1.5 37 lb/ft (50 Nm) Clamping screw in axle adapter M8 x 35 Tightening sequence: Tighten the screws 6 times, alternating between one and the other each time 14 lb/ft (19 Nm) Radial brake caliper in axle mount…
-
Page 218
Rear wheel Value Valid Nut for swinging arm pivot point connector on frame M36 x 0.75, Replace nut 37 lb/ft (50 Nm) Loctite 270, high-strength Nut on swing axle M18 x 1.5, Replace nut 74 lb/ft (100 Nm) mechanical Rear-wheel quick-release axle in swinging arm M24 x 1.5 74 lb/ft (100 Nm) -
Page 219
Rear wheel Value Valid Spring strut on the relay lever M12 x 75 — 10.9 74 lb/ft (100 Nm) micro-encapsulated Mirrors Value Valid Mirror on front panel carrier M6, Replace nut 6 lb/ft (8 Nm) mechanical License-plate carrier on rear Value Valid frame… -
Page 220: Fuel
Fuel Recommended fuel quality Premium grade unleaded fuel (max. 5 % ethanol, 91 AKI (98 ROZ/RON) 93 AKI Alternative fuel quality Super unleaded (restrictions with regard to power and fuel consumption) (max. 10 % ethanol, E10) 89 AKI (95 ROZ/RON) 90 AKI Usable fuel quantity Approx.
-
Page 221: Engine Oil
SAE 5W-40, API SJ/JASO MA2, Additives (for in- stance, molybdenum-based substances) are pro- hibited, because they would attack the coatings on engine components, BMW Motorrad recom- mends BMW Motorrad ADVANTEC Ultimate oil. Engine oil, quantity for topping up max 1.4 quarts (max 1.3 l), Difference between…
-
Page 222: Engine
Engine Engine number location Lower part of crankcase, right Engine type A10A10A Engine design 4-cylinder, 4-stroke, in-line Displacement 999 cc (999 cm Cylinder bore 3.1 in (80 mm) Piston stroke 2 in (49.7 mm) Compression ratio 13.,3:1 Rated output 207 hp (152 kW), at engine speed: 13500 min Torque 83 lb/ft (113 Nm), at engine speed: 11000 min Maximum engine speed…
-
Page 223: Clutch
Clutch Clutch design Multiple-disc oil bath (anti-hopping) with self-rein- forcement Transmission Transmission design Claw-shifted 6-speed transmission integrated in engine housing Transmission gear ratios 1.652 (76:46 teeth), Primary gear ratio 2.647 (45:17 teeth), 1st gear 2.091 (46:22 teeth), 2nd gear 1.727 (38:22 teeth), 3rd gear 1.500 (33:22 teeth), 4th gear 1.360 (34:25 teeth), 5th gear 1.261 (29:23 teeth), 6th gear…
-
Page 224: Rear-Wheel Drive
Rear-wheel drive Type of final drive Chain drive Number of teeth of rear-wheel drive (Pinion/ 17:45 sprocket) Secondary gear ratio 2.,647 Frame Frame design Aluminum composite bridge frame, integrated en- gine Location of type plate Frame at front right on steering head Location of the vehicle identification number Frame at front right on steering head…
-
Page 225: Suspension
Suspension Front wheel Type of front suspension Upside-down telescopic forks Spring travel, front 4.7 in (120 mm), on front wheel with Dynamic Damping Control (DDC) 4.7 in (120 mm), on front wheel Rear wheel Type of rear suspension Aluminum bearer swinging arm Type of final drive Chain drive Spring travel, rear…
-
Page 226: Brakes
Brakes Front wheel Type of front brake Two-rotor disk brake, diameter 320 mm, 4-piston fixed caliper with M carbon wheels Two-rotor disk brake, diameter 320 mm, 4-piston fixed caliper with M forged wheels Two-rotor disk brake, diameter 320 mm, 4-piston fixed caliper Front brake pad material Sintered metal…
-
Page 227: Wheels And Tires
Wheels and tires Recommended tire combinations An overview of the current tire approvals is avail- able from your authorized BMW Motorrad retailer or on the Internet at bmw-motorrad.com. Speed category of front/rear tires W, minimum requirement: 168 mph (270 km/h)
-
Page 228
Front tire designation 120/70 ZR 17 Load index for front tire min 58 g/cm Permissible front-wheel imbalance max 0.2 oz (max 5 g) Balance weight for front wheel (Half of each max 2.8 oz (max 80 g) weights must be attached on the right and left of the rim respectively) Rear wheel Rear wheel design… -
Page 229: Electrical System
Tire inflation pressure Tire pressure, front 36.3 psi (2.5 bar), One-up, with cold tires 36.3 psi (2.5 bar), Two-up mode with load, with cold tires Tire pressure, rear 42.1 psi (2.9 bar), One-up, with cold tires 42.1 psi (2.9 bar), Two-up mode with load, with cold tires Electrical system Fuses…
-
Page 230
Battery Battery design AGM battery (Absorbent Glass Mat) with M battery Lithium ion battery Battery voltage 12 V with M battery 12 V Battery capacity 8 Ah with M battery 5 Ah Spark plugs Spark plugs, manufacturer and designation NGK LMAR9FI-10G Light sources Bulb for high-beam headlight Bulbs for low-beam headlight… -
Page 231: Dimensions
Dimensions Motorcycle length 81.6 in (2073 mm), over rear wheel Motorcycle height 45.3 in (1151 mm), across mirrors at DIN unladen weight 45.5 in (1155 mm), Without mirror and with DIN unladen weight Motorcycle width 33.4 in (848 mm), with mirrors 29.1 in (740 mm), without mounted parts Rider’s seat height 32.4 in (824 mm), without driver at DIN unladen…
-
Page 232: Weights
Weights Vehicle curb weight 434 lbs (197 kg), DIN unladen weight, ready for road, 90 % full tank of gas, without OE with M package 427 lbs (193.7 kg) with Race package 431 lbs (195.3 kg) with passenger package 436 lbs (197.8 kg) with M carbon wheels 431 lbs (195.3 kg) with M battery…
-
Page 233: Performance Data
Performance data Top speed >124 mph (>200 km/h)
-
Page 235: Service
Maintenance procedures ..236 BMW Service ….. . 236 Maintenance schedule … . . 239 Maintenance confirmations .
-
Page 236: Defects
NHTSA may order the manufac- turer to perform a recall and remedy campaign. However, the NHTSA cannot become involved in individual problems between you, your authorized BMW Motorrad retailer, or BMW of North America, LLC.
-
Page 237: Bmw Motorrad Service
BMW Motorrad retailer. network, BMW Motorrad Entries can attend to you and your To ensure that your BMW con- Maintenance work that has been motorcycle in over 100 countries sistently remains in optimal con- performed is recorded in the di- around the globe.
-
Page 238: Bmw Motorrad Mobility
BMW motorcycle with extra se- More information on the topic of curity by offering a wide array of service is available at: BMW Service is carried out once assistance services in the event bmw-motorrad.com/service a year. The scope of the ser-…
-
Page 241: Maintenance Schedule
Maintenance schedule BMW Running-in check (including oil change) BMW standard scope of service Engine oil change with fil- Check valve clearance Check timing Replace all spark plugs Replace air filter insert Oil change in the tele- scopic forks Change brake fluid in en-…
-
Page 242: Maintenance Confirmations
Maintenance confirmations BMW Service standard scope The repair procedures belonging to the BMW Service standard package are listed below. The actual maintenance work applicable for your vehicle may differ. Performing the vehicle test using the BMW Motorrad diagnosis system Visual inspection of the brake lines, brake hoses, and connections…
-
Page 243
BMW pre-delivery BMW Running-in check Check performed performed at km Next service latest or, if reached earlier at km Stamp, signature Stamp, signature… -
Page 244
BMW Service Work performed performed BMW Service Engine oil change with filter at km Checking valve clearance Checking valve timing (cylinder head Next service cover removed) latest Replacing all spark plugs Replacing air cleaner element or, if reached earlier Oil change — telescopic fork… -
Page 245
BMW Service Work performed performed BMW Service Engine oil change with filter at km Checking valve clearance Checking valve timing (cylinder head Next service cover removed) latest Replacing all spark plugs Replacing air cleaner element or, if reached earlier Oil change — telescopic fork… -
Page 246
BMW Service Work performed performed BMW Service Engine oil change with filter at km Checking valve clearance Checking valve timing (cylinder head Next service cover removed) latest Replacing all spark plugs Replacing air cleaner element or, if reached earlier Oil change — telescopic fork… -
Page 247
BMW Service Work performed performed BMW Service Engine oil change with filter at km Checking valve clearance Checking valve timing (cylinder head Next service cover removed) latest Replacing all spark plugs Replacing air cleaner element or, if reached earlier Oil change — telescopic fork… -
Page 248
BMW Service Work performed performed BMW Service Engine oil change with filter at km Checking valve clearance Checking valve timing (cylinder head Next service cover removed) latest Replacing all spark plugs Replacing air cleaner element or, if reached earlier Oil change — telescopic fork… -
Page 249
BMW Service Work performed performed BMW Service Engine oil change with filter at km Checking valve clearance Checking valve timing (cylinder head Next service cover removed) latest Replacing all spark plugs Replacing air cleaner element or, if reached earlier Oil change — telescopic fork… -
Page 250
BMW Service Work performed performed BMW Service Engine oil change with filter at km Checking valve clearance Checking valve timing (cylinder head Next service cover removed) latest Replacing all spark plugs Replacing air cleaner element or, if reached earlier Oil change — telescopic fork… -
Page 251
BMW Service Work performed performed BMW Service Engine oil change with filter at km Checking valve clearance Checking valve timing (cylinder head Next service cover removed) latest Replacing all spark plugs Replacing air cleaner element or, if reached earlier Oil change — telescopic fork… -
Page 252
BMW Service Work performed performed BMW Service Engine oil change with filter at km Checking valve clearance Checking valve timing (cylinder head Next service cover removed) latest Replacing all spark plugs Replacing air cleaner element or, if reached earlier Oil change — telescopic fork… -
Page 253
BMW Service Work performed performed BMW Service Engine oil change with filter at km Checking valve clearance Checking valve timing (cylinder head Next service cover removed) latest Replacing all spark plugs Replacing air cleaner element or, if reached earlier Oil change — telescopic fork… -
Page 254
BMW Service Work performed performed BMW Service Engine oil change with filter at km Checking valve clearance Checking valve timing (cylinder head Next service cover removed) latest Replacing all spark plugs Replacing air cleaner element or, if reached earlier Oil change — telescopic fork… -
Page 255
BMW Service Work performed performed BMW Service Engine oil change with filter at km Checking valve clearance Checking valve timing (cylinder head Next service cover removed) latest Replacing all spark plugs Replacing air cleaner element or, if reached earlier Oil change — telescopic fork… -
Page 256: Service Confirmations
Service confirmations The table serves to provide evidence of maintenance and repair work, as well as installed optional acces- sories and special campaigns performed. Work performed at km Date…
-
Page 257
Work performed at km Date… -
Page 259: Appendix
Appendix Certificate for Electronic Immobi- lizer ……. . 258 Certificate for Tire Pressure Con- trol .
-
Page 260: Immobilizer
FCC Approval This device complies with Any changes or modifi- Part 15 of the FCC rules. cations not expressly Ring aerial in the Operation is subject to the approved by the party ignition switch following two conditions: responsible for compliance (1) This device may not could void the user’s cause harmful inter-…
-
Page 261
Approbation de informations avec la clé de Toute modification contact via l’antenne qui n’aurait pas été la FCC annulaire. approuvée expressément Antenne annulaire Le présent dispositif est par l’organisme responsa- conforme à la partie 15 ble de l’homologation peut présente dans le des règles de la FCC. -
Page 262: Control
Certification Tire Pressure Control (TPC) FCC ID: MRXBC54MA4 FCC ID: MRXBC5A4 IC: 2546A-BC54MA4 IC: 2546A-BC5A4 This device complies with Part 15 of the FCC Le présent appareil est conforme aux CNR Rules and with Industry Canada license-exempt d’Industrie Canada applicables aux appareils RSS standard(s).
-
Page 263: Ment Cluster
Declaration of Conformity Turkey Robert Bosch Car Multimedia GmbH, ICC6.5in tipi telsiz sisteminin 2014/53/EU Radio equipment TFT instrument cluster nolu yönetmeliğe uygun olduğunu beyan eder. AB Uygunluk Beyanı’nın tam metni, aşağıdaki For all Countries without EU internet adresinden görülebilir: http://cert.bosch- carmultimedia.net Technical information BT operating frq.
-
Page 264
Canada Mexico This device complies with Industry Canada’s La operación de este equipo está sujeta a las licence-exempt RSSs and part 15 of the FCC siguientes dos condiciones: Rules. Operation is subject to the following two (1) es posible que este equipo o dispositivo no conditions: cause interferencia perjudicial y (1) this device may not cause interference, and… -
Page 265
Thailand Le présent appareil est conforme aux CNR เครื ่ อ งโทรคมนาคมและอุ ป กรณ์ น ี ้ d’Industrie Canada applicables aux appareils radio exempts de licence. L’exploitation est autorisée มี ค วามสอดคล้ อ งตามข้ อ กํ า หนดของ กทช. aux deux conditions suivantes : (1) l’appareil ne (This telecommunication equipments is in doit pas produire de brouillage, et (2) l’appareil compliance with NTC requirements) -
Page 266: Index
Installing, 196 Dynamic Brake Control Abbreviations and symbols, 6 depends on riding mode, 122 Maintenance instructions, 193 Safety information, 121 Position on motorcycle, 18 Displays, 46 Technical Data, 224 Removing, 196 Self-diagnosis, 117, 118 Breaking in, 119 Technical data, 228 Technology in detail, 154 Bulbs Best ever lap, 134…
-
Page 267
Clock Diagnostic connector Engine Adjusting, 85 Fasten, 198 Indicator light for engine Clutch control, 41 Position on motorcycle, 18 Adjusting clutch lever, 99 Parking, 57 Release, 197 Adjusting play, 178 Starting, 116 Dimensions Checking operation, 177 Technical Data, 229 Technical Data, 220 Checking play, 177 DTC, 19 Warning light for electronic… -
Page 268
Fall sensor Hump trim panel Hazard warning flashers Indicator light, 46 Installing, 191 Control, 19, 20 Frame Removing, 189 Technical Data, 222 Operating, 59 Front wheel stand Headlight Mounting, 169 Ignition Adjustment for right-hand/left- Fuel Switching off, 57 hand traffic, 98 Fuel specifications, 123 Switching on, 56 Headlight range, 98… -
Page 269
Laptimer Maintenance Navigation Maintenance schedule, 239 Adjusting, 133 Operating, 92 Maintenance confirmations, 240 End time entry, 133 Notice concerning current Maintenance intervals, 236 status, 7 Operating, 133 Media Start time recording, 133 Operating, 94 Launchcontrol, 135, 136 Onboard computer, 71 Menu Start of race, 137 Calling up, 80… -
Page 270
TFT display, 25, 27 Racetrack, 134 Riding mode Chassis and suspension Adjusting, 62 Underneath seat, 18 adjustment settings, 140 Control, 20 Displays for racing mode, 129 Technology in detail, 159 Pairing, 86 Pit-lane limiter, 138 Road sign detection Parking light, 59 Race start with Launch switch on or off, 83 Phone… -
Page 271
Shifting gears TFT display, 21 Tachometer, 21 Shiftpoint light, 121 Control, 19 Tachometer, 83 Upshift recommendation, 84 Operating, 80, 81 Technical data Overview, 25, 27 Spark plugs, 228 Battery, 228 Selecting display readings, 77 Speedometer, 21 Brakes, 224 Spring preload Tire Pressure Control TPC/RDC Clutch, 221 Display, 42… -
Page 272
Type plate Light source defect, 39 Position on motorcycle, 17 My vehicle, 89 Overview, 24 TPM Tire Pressure Monitor, 43 Values Vehicle voltage, 38 Display, 28 Weights Vehicle identification number Load capacity table, 15 Position on motorcycle, 17 Technical Data, 230 Vehicle voltage Wheels Warning indicator, 38… -
Page 274
80788 Munich, Germany quently when servicing your Reprints and duplication of this vehicle. work, in whole or part, are pro- For more information visit: hibited without the express writ- www.P65Warnings.ca.gov/ ten approval of BMW Motorrad, passenger-vehicle Aftersales. -
Page 275
42.1 psi (2.9 bar), One-up, with cold tires 42.1 psi (2.9 bar), Two-up mode with load, with cold tires You can find further information on all aspects of your vehicle at: bmwmotorrad.com BMW recommends *01409899567* Order No.: 01 40 9 899 567 09.2018, 1st edition, 07…
- Manuals
- Brands
- BMW Manuals
- Motorcycle
- S 1000 RR —
Manuals and User Guides for BMW S 1000 RR -. We have 15 BMW S 1000 RR — manuals available for free PDF download: Rider’s Manual, Owner’s Manual, Brochure

BMW S 1000 RR — Rider’s Manual (285 pages)
Brand: BMW
|
Category: Motorcycle
|
Size: 3.65 MB
Table of Contents
-
Table of Contents
4
-
1 General Instructions
7
-
Overview
8
-
Abbreviations and Symbols
8
-
Equipment
9
-
Technical Data
9
-
Currentness
10
-
Additional Sources of Information
10
-
Tion
10
-
Certificates and Operating Li
10
-
Cences
10
-
Data Memory
10
-
Certificates and Operating
10
-
Licences
10
-
System
14
-
Intelligent Emergency Call
15
-
-
2 General Views
19
-
General View, Left Side
21
-
General View, Right Side
23
-
Underneath the Seat
24
-
Multifunction Switch, Left
25
-
Multifunction Switch
25
-
Right
26
-
Multifunction Switch, Right
26
-
-
Instrument Panel
27
-
-
3 Status Indicators
29
-
Indicator and Warning Lights
30
-
TFT Display in Pure Ride View
31
-
TFT Display in View Menu
33
-
Warnings
34
-
-
4 Operation
61
-
Ignition Switch/Steering Lock
62
-
Emergency off Switch
63
-
Switch)
63
-
Intelligent Emergency Call
64
-
Call
64
-
Lights
66
-
Hazard Warning Lights System
68
-
Tem
68
-
Turn Indicators
68
-
Dynamic Traction Control
69
-
(Dtc)
69
-
Dynamic Traction Control (DTC)
69
-
-
Riding Mode
70
-
Cruise-Control System
72
-
Hill Start Control
75
-
Gearshift Light
78
-
Anti-Theft Alarm (DWA)
78
-
Tyre Pressure Monitoring
80
-
(Rdc)
80
-
Heated Handlebar Grips
80
-
Tyre Pressure Monitoring (RDC)
80
-
-
On-Board Computer
81
-
Front and Rear Seats
81
-
-
5 TFT Display
85
-
General Instructions
86
-
Principle
87
-
Pure Ride View
93
-
General Settings
94
-
Bluetooth
95
-
My Vehicle
99
-
Navigation
102
-
Media
104
-
Phone
104
-
Display Software Version
105
-
Display Licence Information
105
-
Tion
105
-
-
6 Adjustment
107
-
Mirrors
108
-
Headlight
108
-
Brakes
108
-
Adjust the Clutch Lever
109
-
Steering
109
-
Spring Preload
110
-
Damping
113
-
Riding Height
116
-
Swinging Arm
118
-
DDC Calibration
120
-
-
7 Riding
121
-
Safety Information
122
-
Comply with Checklist
123
-
Always before Riding off
123
-
At Every Third Refuelling Stop
124
-
Starting
124
-
Running in
126
-
Shifting Gear
127
-
Gearshift Light
128
-
Brakes
129
-
Parking Your Motorcycle
131
-
Cycle
131
-
Refuelling
131
-
Securing Motorcycle for Transporta
133
-
Tion
133
-
-
Advertisement

BMW S 1000 RR — Rider’s Manual (275 pages)
Brand: BMW
|
Category: Motorcycle
|
Size: 3.56 MB
Table of Contents
-
Table of Contents
4
-
1 General Instructions
7
-
Overview
8
-
Abbreviations and Symbols
8
-
Equipment
9
-
Technical Data
9
-
Notice Concerning Current Status
9
-
Tus
9
-
Additional Sources of Information
10
-
Tion
10
-
Certificates and Operating Permits
10
-
Mits
10
-
Data Memory
10
-
-
2 Overviews
15
-
General View, Left Side
17
-
General View, Right Side
19
-
Underneath the Seat
20
-
Multifunction Switch, Left
21
-
Multifunction Switch
21
-
Right
22
-
Multifunction Switch, Right
22
-
-
Instrument Cluster
23
-
-
3 Displays
25
-
Indicator and Warning Lights
26
-
TFT Display in Pure Ride View
27
-
TFT Display in the View Menu
29
-
Warning Lights
30
-
-
4 Operation
57
-
Steering and Ignition Lock
58
-
Emergency On/Off Switch
59
-
Switch)
59
-
Lights
60
-
Hazard Warning Flashers
61
-
Turn Indicators
62
-
Dynamic Traction Control
62
-
(Dtc)
62
-
Dynamic Traction Control (DTC)
62
-
-
Riding Mode
64
-
Cruise-Control System
65
-
Hill Start Control
68
-
Shiftpoint Light
70
-
Anti-Theft Alarm System
71
-
(Dwa)
71
-
Anti-Theft Alarm System (DWA)
71
-
-
Tire Pressure Monitor
72
-
(Tpm)
72
-
Heated Handlebar Grips
72
-
Tire Pressure Monitor (TPM)
72
-
-
Onboard Computer
73
-
Rider and Passenger
74
-
Seats
74
-
Rider and Passenger Seats
74
-
-
-
5 TFT Display
77
-
General Notes
78
-
Principle
79
-
Pure Ride View
85
-
General Settings
86
-
Bluetooth
87
-
My Vehicle
91
-
Navigation
94
-
Media
96
-
Phone
96
-
Display Software Version
97
-
Display License Information
97
-
Tion
97
-
-
6 Setting
99
-
Mirrors
100
-
Headlight
100
-
Brakes
100
-
Adjusting Clutch Lever
101
-
Steering
101
-
Spring Preload
102
-
Damping
106
-
Ride Height
109
-
Swinging Arm
110
-
DDC Calibration
112
-

BMW S 1000 RR — Rider’s Manual (254 pages)
Brand: BMW
|
Category: Motorcycle
|
Size: 3.32 MB
Table of Contents
-
Table of Contents
4
-
1 General Instructions
7
-
Overview
8
-
Abbreviations and Symbols
8
-
Equipment
9
-
Technical Data
9
-
Actuality
9
-
-
2 General Views
11
-
General View, Left Side
13
-
DDC
15
-
General View, Left Side, with DDC
15
-
-
General View, Right Side
17
-
Underneath the Seat
18
-
Multifunction Switch, Left
19
-
Multifunction Switch
19
-
Right
21
-
Multifunction Switch, Right
21
-
-
Instrument Panel
22
-
-
3 Status Indicators
23
-
Telltale and Warning Lights
24
-
Multifunction Display
25
-
ABS Pro Indicator
26
-
Warnings
26
-
Electronic Immobiliser
31
-
Control Unit
32
-
Abs Fault
34
-
Asc Fault
35
-
Asc Intervention
35
-
Asc Switched off
35
-
Speed Warning
38
-
-
-
4 Operation
41
-
Ignition Switch/Steering Lock
42
-
Electronic Immobiliser
43
-
Emergency off Switch
43
-
Switch)
43
-
Lights
44
-
Hazard Warning Flashers
45
-
Turn Indicators
45
-
Multifunction Display
47
-
Resetting Tripmeter
49
-
Clock
50
-
Anti-Theft Alarm (DWA)
50
-
Anti-Lock Brake System
52
-
(Abs)
52
-
Anti-Lock Brake System (ABS)
52
-
-
Automatic Stability Control
54
-
(Asc)
54
-
Dynamic Traction Control
55
-
(Dtc)
55
-
Dynamic Traction Control (DTC)
55
-
-
Riding Mode
56
-
Cruise-Control System
59
-
Speed Warning
61
-
Heated Handlebar Grips
63
-
Front and Rear Seats
64
-
Helmet Holder
66
-
Luggage Loops
66
-
-
5 Adjustment
69
-
Mirrors
70
-
Headlight
70
-
Brakes
70
-
Steering
71
-
Spring Preload
71
-
Damping
76
-
Front Wheel
78
-
DDC
80
-
Rear Wheel
80
-
-
6 Riding
83
-
Safety Instructions
84
-
Checklist
85
-
Starting
86
-
Running in
90
-
Shifting Gear
91
-
Brakes
92
-
Parking Your Motorcycle
94
-
Refuelling
95
-
Securing Motorcycle for Transporta
97
-
Advertisement

BMW S 1000 RR — Rider’s Manual (244 pages)
Brand: BMW
|
Category: Motorcycle
|
Size: 3.24 MB
Table of Contents
-
Table of Contents
4
-
1 General Instructions
7
-
Overview
8
-
Abbreviations and Symbols
8
-
Equipment
9
-
Technical Data
9
-
Notice Concerning Current Sta
9
-
Tus
9
-
-
2 Overviews
11
-
General View, Left Side
13
-
General View, Left Side with DDC
15
-
DDC
15
-
General View, Right Side
17
-
Multifunction Switch, Left
18
-
Multifunction Switch
18
-
Right
20
-
Multifunction Switch, Right
20
-
-
Underneath Seat
21
-
Instrument Cluster
22
-
-
3 Displays
23
-
Warning and Indicator
24
-
Lights
24
-
Multifunction Display
25
-
Warning Lights
26
-
Abs Error
34
-
Asc Error
35
-
Asc Intervention
35
-
Asc Switched off
35
-
Service Display
39
-
Cruising Range
40
-
-
-
4 Operation
41
-
Steering and Ignition Lock
42
-
Ignition
42
-
Electronic Immobilizer
43
-
Emergency On/Off Switch
43
-
Switch)
43
-
-
Lights
44
-
Hazard Warning Flashers
45
-
Turn Indicator
45
-
Multifunction Display
47
-
Resetting Tripmeter
49
-
Alarm System
50
-
Clock
52
-
Anti-Lock Brake System
52
-
Automatic Stability Control
53
-
Trol
53
-
Control
54
-
Dynamic Traction Control
54
-
-
Riding Mode
55
-
Cruise Control
59
-
Speed Warning
61
-
Heated Handlebar Grips
62
-
Rider and Passenger Seats
63
-
Removing Passenger Seat
64
-
Helmet Holder
65
-
Luggage Straps
66
-
-
5 Setting
67
-
Mirrors
68
-
Headlight
68
-
Brakes
68
-
Steering
69
-
Spring Preload
69
-
Damping
74
-
DDC
77
-
-
6 Riding
81
-
Safety Instructions
82
-
Observe Checklist
83
-
Starting
84
-
Breaking in
87
-
Brake Pads
88
-
Shifting Gears
89
-
Brakes
90
-
Parking Your Motorcycle
91
-
Refueling
92
-
Secure Motorcycle for Transport
94
-
Port
94
-
BMW S 1000 RR — Rider’s Manual (250 pages)
Brand: BMW
|
Category: Motorcycle
|
Size: 3.24 MB
Table of Contents
-
Table of Contents
4
-
General Instructions
7
-
Overview
8
-
Abbreviations and Symbols
8
-
Equipment
9
-
Technical Data
9
-
Notice Concerning Current Sta
9
-
Tus
9
-
Overviews
11
-
General View, Left Side
13
-
General View Left Side with DDC
15
-
General View, Right Side
17
-
Underneath Seat
18
-
Multifunction Switch, Left
19
-
Multifunction Switch
19
-
Right
20
-
Multifunction Switch, Right
20
-
Instrument Panel
21
-
Displays
23
-
Indicator and Warning Lights
24
-
Multifunction Display
25
-
ABS Pro Display
26
-
Warning Lights
26
-
Operation
41
-
Steering and Ignition Lock
42
-
Electronic Immobilizer
43
-
Emergency On/Off Switch
43
-
Switch)
43
-
Lights
44
-
Hazard Warning Lights System
45
-
Tem
45
-
Turn Indicators
45
-
Multifunction Display
47
-
Clock
50
-
Anti-Theft Alarm (DWA)
50
-
Antilock Brake System
52
-
(Abs)
52
-
Antilock Brake System (ABS)
52
-
Dynamic Traction Control
53
-
(Dtc)
53
-
Dynamic Traction Control (DTC)
53
-
Riding Mode
54
-
Cruise Control
57
-
Speed Warning
59
-
Heated Handlebar Grips
60
-
Rider’s Seat and Hump Cover
61
-
Helmet Holder
63
-
Luggage Straps
64
-
Setting
67
-
Mirrors
68
-
Headlight
68
-
Brakes
68
-
Steering
69
-
Spring Preload
69
-
Damping
74
-
DDC
77
-
Riding
81
-
Safety Information
82
-
Checklist
83
-
Starting
84
-
Running in
87
-
Shifting Gears
88
-
Brakes
89
-
Parking Your Motorcycle
91
-
Refueling
92
-
Securing Motorcycle for Trans
94
-
On the Racetrack
95
-
Display for Racing Mode
96
-
Laptimer
98
-
Race Info
103
-
Setup Menu
111
-
Setup DDC-Sys
117
-
Setup Equipment
118
-
Setup Racetrack
120
-
Setup User-Mode
125
-
Dtc
127
-
Start of Race
128
-
Speed Limiter for Pit Lane
130
-
Tion
131
-
Mirror Removal and Installation
131

BMW S 1000 RR — Owner’s Manual (196 pages)
Brand: BMW
|
Category: Motorcycle
|
Size: 2.6 MB
Table of Contents
-
Table of Contents
4
-
1 General Instructions
7
-
Overview
8
-
Abbreviations and Symbols
8
-
Equipment
9
-
Technical Data
9
-
Notice Concerning Current Sta
9
-
Tus
9
-
-
2 Overviews
11
-
General View, Left Side
13
-
General View, Right Side
15
-
Multifunction Switch, Left
16
-
Multifunction Switch
16
-
Right
17
-
Multifunction Switch, Right
17
-
-
Underneath Seat
18
-
Instrument Cluster
19
-
-
3 Displays
21
-
Multifunction Display
22
-
Warning and Indicator Lights
23
-
ABS Pro Display
24
-
Service Display
24
-
Cruising Range
25
-
Warning Lights
25
-
Parking Light Bulb
31
-
Abs Error
33
-
-
-
4 Operation
37
-
Steering and Ignition Lock
38
-
EWS Electronic Immobilizer
39
-
Lizer
39
-
Clock
39
-
Odometer
40
-
Speed Warning
40
-
Lights
42
-
Turn Indicators
42
-
Hazard Warning Flashers
43
-
Emergency-Off Switch
44
-
Switch)
44
-
Heated Handlebar Grips
44
-
BMW Motorrad Race
45
-
Abs
45
-
BMW Motorradrace ABS
45
-
-
Dynamic Traction Control
46
-
(Dtc)
46
-
Dynamic Traction Control (DTC)
46
-
-
Riding Mode
47
-
Brakes
50
-
Mirrors
50
-
Spring Preload
51
-
Damping
53
-
Tires
57
-
Headlight
57
-
Rider and Passenger Seats
58
-
Helmet Holder
59
-
Luggage Straps
60
-
-
5 Riding
61
-
Safety Instructions
62
-
Observe Checklist
63
-
Starting
64
-
Breaking in
66
-
Shifting Gears
67
-
Steering
69
-
Brakes
69
-
Parking Your Motorcycle
71
-
Refueling
72
-
Fastening Motorcycle for Trans
73
-
On the Racetrack
77
-
BMW S 1000 RR — Rider’s Manual (180 pages)
Brand: BMW
|
Category: Motorcycle
|
Size: 2.3 MB
Table of Contents
-
Table of Contents
4
-
1 General Instructions
7
-
Overview
8
-
Abbreviations and Symbols
8
-
Equipment
9
-
Technical Data
9
-
Notice Concerning Current Sta
9
-
Tus
9
-
-
2 Overviews
11
-
General View, Left Side
13
-
General View, Right Side
15
-
Multifunction Switch, Left
16
-
Multifunction Switch
16
-
Right
17
-
Multifunction Switch, Right
17
-
-
Underneath Seat
18
-
Instrument Cluster
19
-
-
3 Displays
21
-
Multifunction Display
22
-
Warning and Indicator Lamps
23
-
Service Display
24
-
Cruising Range
25
-
Warning Lamps
25
-
Parking Light Bulb
30
-
Abs Error
31
-
Abs Deactivated
31
-
-
-
4 Operation
35
-
Steering and Ignition Lock
36
-
EWS Electronic Immobilizer
36
-
Lizer
36
-
Clock
37
-
Odometer
38
-
Speed Warning
38
-
Resetting Tripmeter
38
-
Lights
39
-
Parking Lights
39
-
Turn Indicators
40
-
Hazard Warning Flashers
40
-
Emergency-Off Switch
41
-
Switch)
41
-
Kill Switch
41
-
Heated Handlebar Grips
41
-
BMW Motorrad Race ABS
42
-
Dynamic Traction Control
43
-
(Dtc)
43
-
Dynamic Traction Control (DTC)
43
-
-
Riding Mode
44
-
Brakes
47
-
Mirrors
47
-
Spring Preload
48
-
Damping
50
-
Tires
54
-
Headlight
54
-
Rider and Passenger Seats
55
-
Removing Passenger Seat
55
-
Helmet Holder
56
-
Luggage Loops
57
-
-
5 Riding
59
-
Safety Instructions
60
-
Catalytic Converter
60
-
Checklist
61
-
Starting
61
-
Starting the Engine
61
-
Breaking in
64
-
Brake Pads
64
-
Shifting Gears
65
-
Steering
66
-
Adjusting the Steering Damper
66
-
Brakes
67
-
Parking Your Motorcycle
68
-
Refueling
68
-
Fuel Specifications
68
-
Side Stand
68
-
-
Fastening Motorcycle for Trans
70
-
BMW S 1000 RR — Rider’s Manual (180 pages)
Brand: BMW
|
Category: Motorcycle
|
Size: 2.26 MB
Table of Contents
-
Table of Contents
4
-
1 General Instructions
7
-
Overview
8
-
Abbreviations and Symbols
8
-
Equipment
9
-
Technical Data
9
-
Currentness of this man
9
-
Ual
9
-
-
2 Overviews
11
-
General View, Left Side
13
-
General View, Right Side
15
-
Multifunction Switch, Left
16
-
Multifunction Switch
16
-
Right
17
-
Multifunction Switch, Right
17
-
Underneath Seat
18
-
Instrument Cluster
19
-
-
3 Status Indicators
21
-
Multifunction Display
22
-
Warning and Indicator Lamps
23
-
Service Display
24
-
Cruising Range
25
-
Warning Indicators
25
-
Parking Light Bulb
30
-
Abs Error
31
-
Abs Deactivated
31
-
-
-
4 Operation
35
-
Steering and Ignition Lock
36
-
EWS Electronic Immobilizer
37
-
Lizer
37
-
Clock
37
-
Odometer
38
-
Speed Warning
38
-
Lights
40
-
Turn Signals
40
-
Hazard Warning Flashers
41
-
Emergency-Off Switch
42
-
Switch)
42
-
Heated Handlebar Grips
42
-
BMW Motorrad Race ABS
43
-
Dynamic Traction Control
44
-
(Dtc)
44
-
Dynamic Traction Control (DTC)
44
-
Riding Mode
45
-
Brakes
47
-
Mirrors
48
-
Spring Preload
48
-
Damping
51
-
Tires
54
-
Headlight
55
-
Driver and Passenger
55
-
Seats
55
-
Driver and Passenger Seats
55
-
Helmet Holder
57
-
Luggage Loops
58
-
-
5 Riding
59
-
Safety Instructions
60
-
Checklist
61
-
Starting
61
-
Breaking in
64
-
Shifting Gears
65
-
Steering
66
-
Brakes
67
-
Parking Your Motorcycle
68
-
Refueling
68
-
Securing Motorcycle for Trans
69
-

BMW S 1000 RR — Rider’s Manual (182 pages)
Brand: BMW
|
Category: Motorcycle
|
Size: 2.22 MB
Table of Contents
-
Table of Contents
4
-
1 General Instructions
7
-
Overview
8
-
Abbreviations and Symbols
8
-
Equipment
9
-
Technical Data
9
-
Currency
9
-
-
2 General Views
11
-
General View, Left Side
13
-
General View, Right Side
15
-
Handlebar Fitting, Left
16
-
Handlebar Fitting, Right
17
-
Underneath the Seat
18
-
Instrument Panel
19
-
Headlight
20
-
-
3 Status Indicators
21
-
Standard Status Indicat
22
-
Ors
22
-
Telltale Lights
22
-
-
Standard Warnings
23
-
ABS Warnings
29
-
DTC Warnings
31
-
Anti-Theft Alarm Warnings
33
-
-
4 Operation
37
-
Emergency off Switch (Kill)
37
-
Ignition Switch and Steering Lock
38
-
Electronic Immobiliser EWS
39
-
Clock
39
-
Odometer and Tripmeters
40
-
Residual Range
40
-
-
Lights
41
-
Turn Indicators
41
-
Hazard Warning Flashers
42
-
Emergency off Switch
43
-
Switch)
43
-
Kill Switch
43
-
BMW Motorrad Race ABS
43
-
Dynamic Traction Control DTC
44
-
Dtc
44
-
Ride Mode
45
-
Brakes
48
-
Mirrors
49
-
Spring Preload
49
-
Damping
51
-
Tyres
55
-
Front and Rear Seats
56
-
Helmet Holder
57
-
Luggage Loops
58
-
-
5 Riding
59
-
Safety Instructions
60
-
Checklist
61
-
Starting
61
-
Starting Engine
62
-
Running in
64
-
Shifting Gear
65
-
Shift Assistant
66
-
-
Brakes
67
-
Parking Your Motorcycle
68
-
Refuelling
68
-
Secure the Motorcycle for Transport
70
-
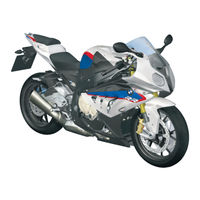
BMW S 1000 RR — Rider’s Manual (179 pages)
Brand: BMW
|
Category: Motorcycle
|
Size: 2.26 MB
Table of Contents
-
Table of Contents
4
-
1 General Instructions
7
-
Overview
8
-
Abbreviations and Symbols
8
-
Equipment
9
-
Technical Data
9
-
Currency
9
-
-
2 General Views
11
-
General View, Left Side
13
-
General View, Right Side
15
-
Multifunction Switch, Left
16
-
Multifunction Switch
16
-
Right
17
-
Multifunction Switch, Right
17
-
-
Underneath the Seat
18
-
Instrument Panel
19
-
-
3 Status Indicators
21
-
Multifunction Display
22
-
Warning and Telltale Lights
23
-
Service-Due Indicator
24
-
Range
25
-
Warnings
25
-
Status Indicators
26
-
Abs Fault
31
-
Abs Deactivated
31
-
Speed Warning
33
-
-
-
4 Operation
35
-
Ignition Switch/Steering Lock
36
-
Electronic Immobiliser
36
-
Electronic Immobiliser EWS
37
-
Clock
37
-
Ers
38
-
Odometer and Tripmeters
38
-
-
Resetting Tripmeter
38
-
Speed Warning
39
-
Lights
40
-
Turn Indicators
41
-
Hazard Warning Flashers
41
-
Emergency off Switch
42
-
Switch)
42
-
Grip Heating
42
-
BMW Motorrad Race
43
-
Abs
43
-
BMW Motorrad Race ABS
43
-
-
Dynamic Traction Control DTC
44
-
Dtc
44
-
Ride Mode
45
-
Brakes
48
-
Mirrors
48
-
Spring Preload
48
-
Damping
51
-
Front Wheel
53
-
Tyres
55
-
Headlight
55
-
Front and Rear Seats
56
-
Helmet Holder
57
-
Luggage Loops
58
-
-
5 Riding
59
-
Safety Instructions
60
-
Checklist
61
-
Starting
61
-
Running in
64
-
Shifting Gear
65
-
Steering
66
-
Brakes
67
-
Parking Your Motorcycle
68
-
Refuelling
68
-
Securing Motorcycle for Transporta
69
-
BMW S 1000 RR — Rider’s Manual (173 pages)
Brand: BMW
|
Category: Motorcycle
|
Size: 2.14 MB
Table of Contents
-
Table of Contents
6
-
1 General Instructions
9
-
Overview
10
-
Abbreviations and Symbols
10
-
Equipment
11
-
Technical Data
11
-
Currency
11
-
-
2 General Views
13
-
General View, Left Side
15
-
General View, Right Side
17
-
Handlebar Fitting, Left
18
-
Handlebar Fitting, Right
19
-
Underneath the Seat
20
-
Instrument Panel
21
-
Headlight
22
-
-
3 Status Indicators
23
-
Standard Status Indicat
24
-
Ors
24
-
Standard Warnings
25
-
ABS Warnings
29
-
DTC Warnings
32
-
Anti-Theft Alarm Warnings
34
-
Drop Switch
37
-
-
4 Operation
39
-
Ignition Switch and Steering Lock
40
-
Electronic Immobiliser EWS
41
-
Clock
41
-
Odometer and Tripmeters
42
-
Lights
43
-
Turn Indicators
43
-
Hazard Warning Flashers
44
-
Emergency off Switch
45
-
Switch)
45
-
BMW Motorrad Race ABS
45
-
Dynamic Traction Control DTC
46
-
Dtc
46
-
Ride Mode
47
-
Brakes
50
-
Mirrors
50
-
Spring Preload
51
-
Damping
53
-
Tyres
57
-
Front and Rear Seats
57
-
Helmet Holder
59
-
Luggage Loops
59
-
-
5 Riding
61
-
Safety Instructions
62
-
Checklist
63
-
Starting
64
-
Running in
66
-
Shifting Gear
67
-
Brakes
69
-
Refuelling
70
-
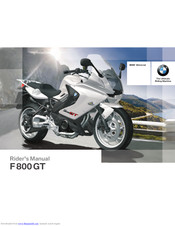
BMW S 1000 RR — Rider’s Manual (148 pages)
Brand: BMW
|
Category: Motorcycle
|
Size: 1.75 MB
Table of Contents
-
Table of Contents
4
-
1 General Instructions
7
-
Overview
8
-
Abbreviations and Symbols
8
-
Equipment
9
-
Technical Data
9
-
Currency
9
-
-
2 General Views
11
-
General View, Left Side
13
-
General View, Right Side
15
-
Underneath the Seat
16
-
Underneath the Centre Trim
17
-
Panel
17
-
Multifunction Switch, Left
18
-
Multifunction Switch
18
-
Right
19
-
Multifunction Switch, Right
19
-
-
Instrument Panel
20
-
-
3 Status Indicators
21
-
Warning and Telltale
21
-
Warning and Telltale Lights
22
-
Multifunction Display
23
-
Warnings
24
-
Mode of Presentation
24
-
Outside Temperature
28
-
Abs Fault
33
-
Asc Switched off
33
-
Asc Fault
33
-
Asc Intervention
33
-
-
Play
34
-
Fuel Level
34
-
Fuel Reserve
34
-
On-Board Computer Display
34
-
-
Service-Due Indicator
35
-
Outside Temperature
36
-
Tyre Pressure
36
-
-
4 Operation
39
-
Ignition Switch/Steering Lock
40
-
Electronic Immobiliser
40
-
Electronic Immobiliser
41
-
(Ews)
41
-
Clock
41
-
Electronic Immobiliser (EWS)
41
-
-
Reading
42
-
Resetting Tripmeter
43
-
Stopwatch
44
-
Lights
45
-
Turn Indicators
46
-
Hazard Warning Flashers
47
-
Emergency off Switch
47
-
Switch)
47
-
Heated Handlebar Grips
48
-
BMW Motorrad ASC
48
-
Clutch
49
-
Brakes
50
-
Mirrors
51
-
Spring Preload
51
-
Damping
52
-
Electronic Suspension Adjustment
53
-
Justment (ESA)
53
-
(Esa)
53
-
-
Tyres
54
-
Headlight
54
-
Seat
55
-
Helmet Holder
56
-

BMW S 1000 RR — Brochure (36 pages)
Brand: BMW
|
Category: Motorcycle
|
Size: 3.41 MB

BMW S 1000 RR — Brochure (19 pages)
Brand: BMW
|
Category: Motorcycle
|
Size: 2.9 MB
BMW S 1000 RR — Brochure (19 pages)
Brand: BMW
|
Category: Motorcycle
|
Size: 3.38 MB
Advertisement
Related Products
-
BMW S 1000 RR — 2009
-
BMW S 1000 RR — 2010
-
BMW 2013 S 1000R
-
BMW S 1000XR
-
BMW S1000RRKidsBike
-
BMW S 1000R 2015
-
BMW S 1000R 2018
-
BMW S 1000XR 2018
-
BMW S 1000XR 2019
-
BMW S 1000 RR 2021
BMW Categories
Automobile
Motorcycle
Automobile Accessories
Engine
Car Navigation system
More BMW Manuals
Посмотреть инструкция для BMW S 1000 RR (2020) бесплатно. Руководство относится к категории мотоциклы, 13 человек(а) дали ему среднюю оценку 9.2. Руководство доступно на следующих языках: русский. У вас есть вопрос о BMW S 1000 RR (2020) или вам нужна помощь? Задайте свой вопрос здесь
Не можете найти ответ на свой вопрос в руководстве? Вы можете найти ответ на свой вопрос ниже, в разделе часто задаваемых вопросов о BMW S 1000 RR (2020).
Как перевести мили в километры?
1 миля равна 1,609344 километрам, а 1 километр — 0,62137119 милям.
В чем разница между топливом E10 и E5?
В топливе E10 содержится до десяти процентов этанола, в то время как в E5 содержится менее пяти процентов. Соответственно, топливо E10 менее вредит окружающей среде.
Какова рекомендуемая частота замены масляного фильтра в двигателе BMW?
В большинстве двигателей масляный фильтр необходимо менять через каждые 6000 километров (около 4000 миль).
Как часто следует менять масло в двигателе BMW?
В большинстве двигателей масло необходимо менять через каждые 6000 километров (около 4000 миль).
Как удалить ржавчину с устройства BMW мотоцикл?
1. Замочите поржавевшую деталь в уксусе, пока ржавчина не размокнет полностью. 2. Обрабатывайте ржавчину уксусом в течение 24 часов. 3. Удалите ржавчину с помощью металлической щетки или алюминиевой фольги.
Инструкция BMW S 1000 RR (2020) доступно в русский?
Да, руководствоBMW S 1000 RR (2020) доступно врусский .
Не нашли свой вопрос? Задайте свой вопрос здесь
Home /
Motorcycle Repair Service Manuals
/ BMW
/ S1000RR
BMW S1000RR Service Repair Manuals on Motor Era

Motor Era offers service repair manuals for your BMW S1000RR — DOWNLOAD your manual now! BMW S1000RR service repair manuals
Complete list of BMW S1000RR motorcycle service repair manuals:
BMW S1000RR (K46) 2009 — 2013 service repair manual
BMW S1000RR (K46) 2009 — 2013 service repair manual
BMW S1000RR & S1000RR (USA) Complete Workshop Service Repair Manual 2010 2011 2012 2013
BMW S1000RR S1000RR USA 2010-2013 Service Repair Workshop Manual Download PDF
BMW S1000RR Motorcycle Service Manual (Multilingual)
BMW S1000RR Multi-Language Motorcycle Complete Workshop Service Repair Manual
BMW S1000RR Multi Language Motorcycle Service Repair Workshop Manual Download PDF
BMW Motorcycle S Models K46 S1000RR 2009-2013 Service Repair Workshop Manual Download PDF
BMW S1000RR Motorcycle Complete Workshop Service Repair Manual 2009 2010 2011 2012 2013
2009-2010 BMW S1000RR Motorcycle Workshop Repair & Service Manual (262MB CD, Searchable, Printable)
BMW S1000RR S 1000 RR Motorcycle Complete Workshop Service Repair Manual 2010 2011 2012 2013
BMW S1000RR Workshop service repair manual 2009 — 2011
BMW S1000RR 2010-2011 — Workshop Service Manual — Multilanguage
2012 2013 . BMW . S1000RR . parts list catalogue manual → View webpages ( download→pdf→url )
2014 . BMW . S1000RR . parts list catalogue manual → View webpages ( download→pdf→url )
2010 2011 . BMW . S1000RR . parts list catalogue manual → View webpages ( download→pdf→url )
BMW S1000RR (K46) 2009 — 2013 service repair manual
BMW S1000RR Motorcycle Service Manual (Complete)
2009-2012 BMW S1000RR Motorcycle Service Repair Manual (EN-FR-DE-IT-ES-JP)
BMW S1000 RR 2009-2013 SERVICE REPAIR MANUAL
BMW Motorrad Repair And Service Data RSD 06.2016 bmw manual
BMW Motorcycles repair and service data
BMW Motorcycles repair and service data (service manuals) (06 2013)
BMW Motorcycles repair and service data (service manuals) (0
BMW Motorcycles repair and service data (service manuals)
BMW Motorcycles repair and service data (service manuals) (03 2014)
BMW S1000RR 2010 2011 2013 SERVICE REPAIR MANUAL
BMW S1000RR 2010-2011 Workshop Service Manual
BMW S1000RR S1000RR USA SERVICE REPAIR MANUAL 2010-2012
BMW S1000RR S 1000 RR BIKE REPAIR & OWNERS MANUAL
BMW S1000rr 2010-2011 service repair manual
BMW S1000RR USA SERVICE REPAIR PDF MANUAL DOWNLOAD 2010-2012
BMW S1000RR SERVICE REPAIR PDF MANUAL 2010-2013
BMW S1000RR S 1000 RR SERVICE REPAIR MANUAL 2010-2013