Данная статья является переводом. Ссылка на оригинальную статью.
API — это набор определений и протоколов. API нужны для разработки и интеграции приложений, поскольку облегчают обмен данными между двумя частями программного обеспечения, например, поставщиком информации (сервером) и пользователем.
API определяют содержимое, доступное клиенту, выполняющему вызов от производителя, возвращающего ответ. Программы используют API для взаимодействия, получения информации или выполнения функций.
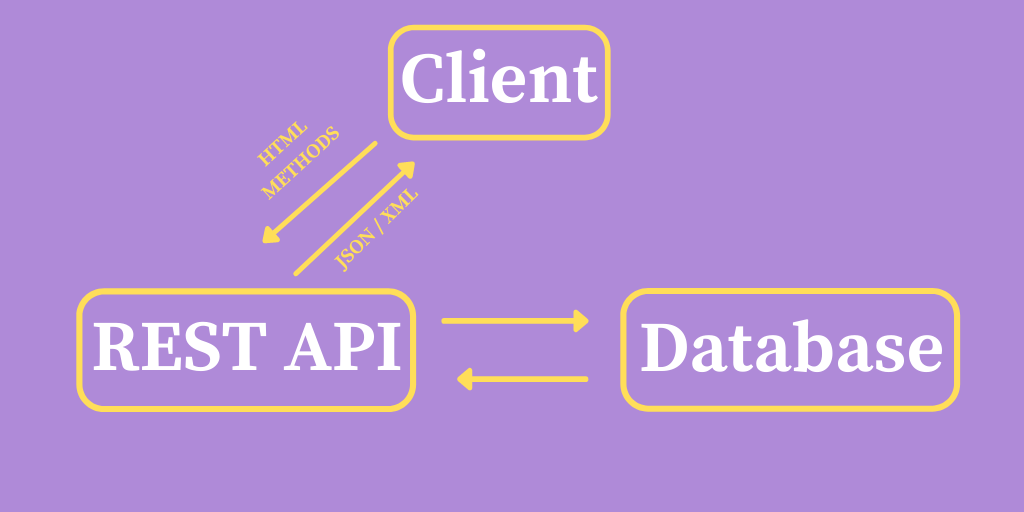
API выступает в роли посредника между пользователями (клиентами) и ресурсами (серверами).
Когда пользователи делают запросы к API или посещают интернет-магазин, они ожидают быстрого ответа. Поэтому необходимо оптимизировать Magento TTFB (Time To First Byte) или использовать другие стратегии повышения производительности, которые лучше работают для выбранной CMS.
Причины для интеграции API:
- оптимизация обмена ресурсами и информацией;
- контроль доступа с помощью аутентификации и определения прав;
- безопасность;
- отсутствие необходимости разбираться в специфике ПО;
- согласованное взаимодействие между сервисами, даже если сервисы используют разные технологии.
2. Обзор REST API
RESTful относится к программной архитектуре, которая расшифровывается как Representational State Transfer (Передача репрезентативного состояния). Эта архитектура известна в контексте стандартизации использования систем обмена информацией (веб-сервисов).
Эти веб-сервисы используют протокол без статического состояния, чтобы сделать текстовые представления онлайн-ресурсов доступными для чтения и обработки. Клиент выполняет действия на основе HTTP, такие как выборка, обновление и удаление.
REST создан в 2000 году с целью повышения производительности, масштабируемости и простоты за счёт введения ограничений на API. Ниже приведены некоторые цели использования API REST.
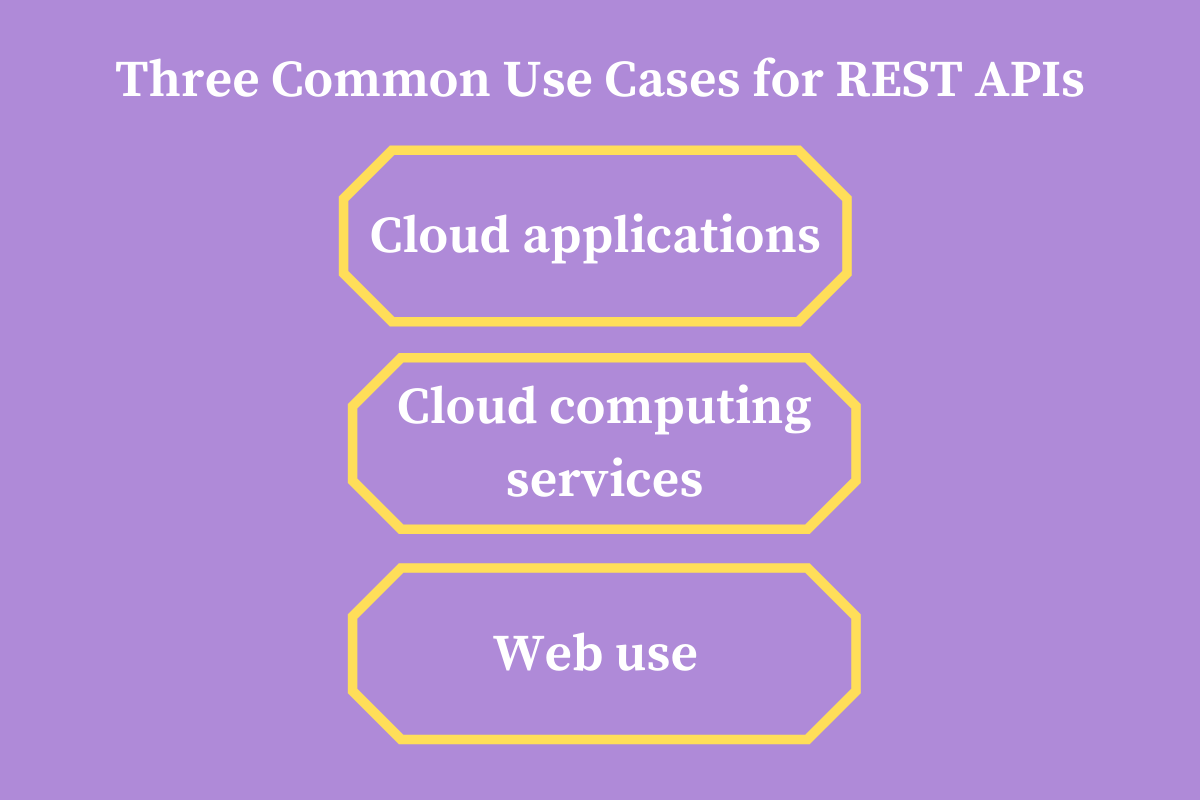
2.1. Использование интернета
Для REST нет специальной клиентской технологии, поскольку REST подходит для различных проектов, таких как:
- Веб-разработка.
- iOS-приложения.
- IoT-устройства.
- Windows Phone приложения.
Поскольку не требуется придерживаться конкретного клиентского стека, допустимо построить любую инфраструктуру для своей компании.
2.2. Приложения в облаке
Вызовы REST API подходят для облачных приложений благодаря отсутствию состояния. Если возникнут проблемы, компоненты без сохранения состояния разворачиваются повторно и могут расширяться, чтобы управлять сдвигами трафика.
2.3. Облачные вычисления
Соединение API с сервисом требует управления декодированием URL-адреса. Поэтому REST стал полезным в облачных сервисах. Архитектура RESTful API станет стандартом в будущем благодаря облачным вычислениям и микросервисам.
3. Как работают REST API?
Данные (такие как изображения, видео и текст) воплощают ресурсы в REST. Клиент посещает URL-адрес и отправляет серверу запрос, чтобы получить ответ.
4. Концепции REST API
Запрос (URL, к которому обращаетесь) содержит четыре компонента:
- Конечная точка, являющаяся URL-адресом со структурой
root-endpoint/?. - Метод с типом (GET, POST, PUT, PATCH, DELETE).
- Заголовки, выполняющие функции аутентификации, предоставление информации о содержимом тела (допустимо использовать параметр
-Hили--headerдля отправки заголовков HTTP) и т. д. - Данные (или тело) – это то, что отправляется на сервер с помощью опции
-dили--dataпри запросах POST, PUT, PATCH или DELETE.
HTTP-запросы разрешают работать с базой данных, например:
- POST-запрос для создания записей.
- GET-запрос на чтение или получение ресурса (документа или изображения, набора других ресурсов) с сервера.
- PUT и PATCH-запросы для обновления записей.
- DELETE-запрос на удаление ресурса с сервера.
Эти операции обозначают четыре возможных действия CRUD: создание, чтение, обновление и удаление.
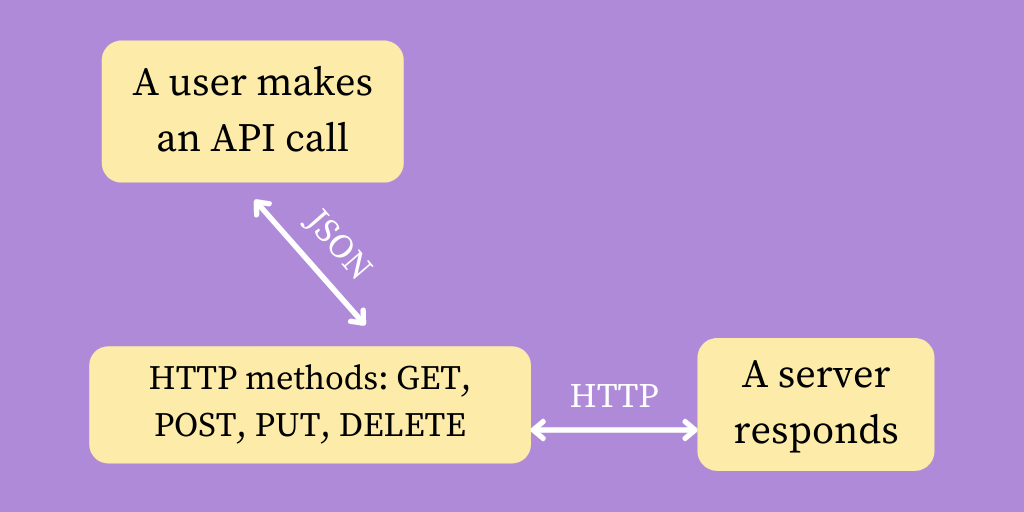
Сервер отправляет данные клиенту в формате:
- HTML.
- JSON (распространённый формат благодаря независимости от компьютерных языков и доступности для людей и машин).
- XLT.
- PHP.
- Python.
- Текст.
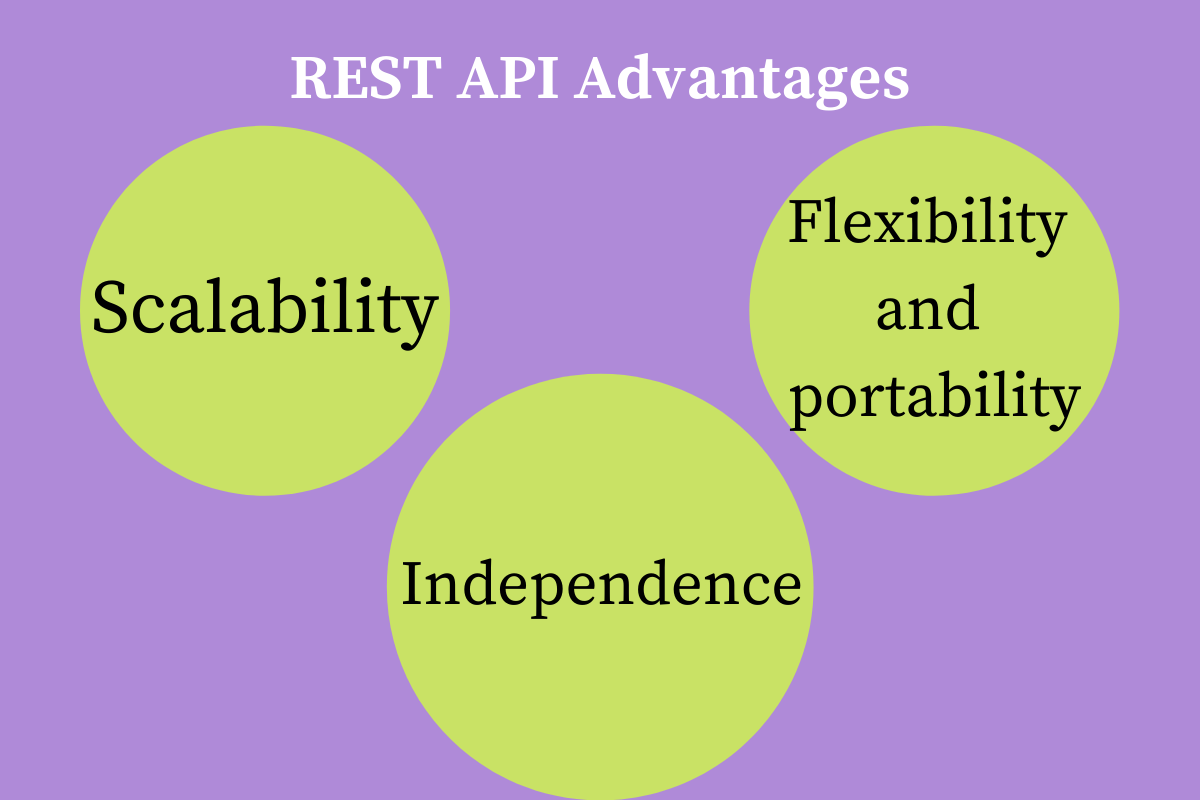
5. Зачем использовать REST API?
Преимущество REST над другими API, такими как SOAP в масштабируемости, гибкости, переносимости и независимости.
5.1. Не полагаться на структуру проекта
Раздельная работа клиента и сервера означает, что разработчики не привязаны к каким-либо частям проекта. Благодаря адаптивным REST API, разработчики могут развивать каждый аспект, не влияя на другой.
5.2. Портативность и адаптивность
REST API работают, когда данные запроса доставлены. REST API разрешают мигрировать с одного сервера на другой и обновлять базу данных, когда потребуется.
5.3. Масштабирование проекта в будущем
Поскольку клиент и сервер действуют независимо, программисты могут быстро разработать продукт.
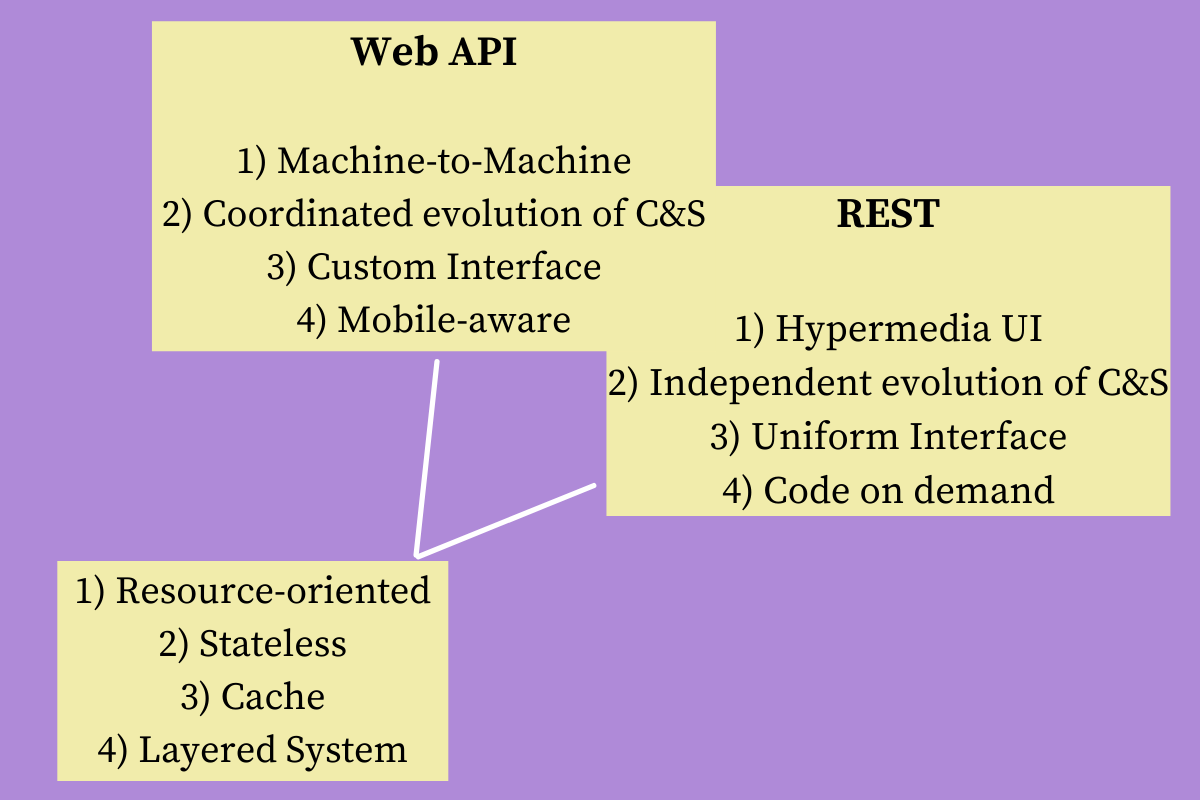
6. Особенности стиля архитектуры RESTful
Разработчикам приходится учитывать жёсткую структуру некоторых API, таких как SOAP или XML-RPC. Но REST API — это другое. REST API поддерживают широкий спектр типов данных и могут быть написаны практически на любом языке программирования.
Шесть архитектурных ограничений REST являются принципами разработки решения и заключаются в следующем:
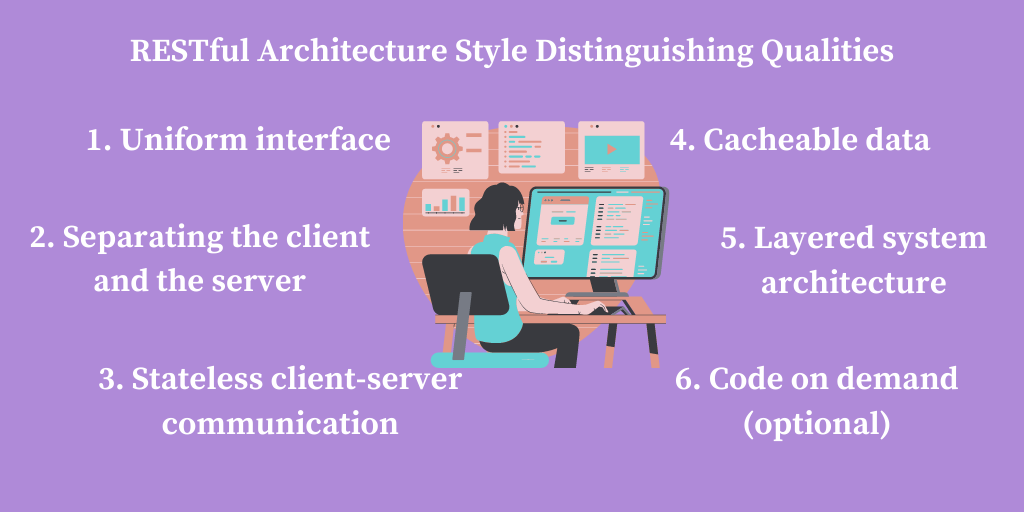
6.1. Унифицированный интерфейс (последовательный пользовательский интерфейс)
Эта концепция диктует, что запросы API к одному и тому же ресурсу, независимо от происхождения, должны быть идентичными, то есть на одном конкретном языке. Один универсальный идентификатор ресурса (URI) ассоциируется с одними и теми же данными, такими как имя пользователя или адрес электронной почты.
Другой принцип унифицированного интерфейса гласит, что сообщения должны быть информативными. Сообщения должны быть понятны серверу, чтобы определить, как с ними обращаться (например, тип запроса, MIME-типы и т. д.).
6.2. Разделение клиента и сервера
Архитектурный стиль REST использует особый подход к реализации клиента и сервера. Дело в том, что клиент и сервер могут работать независимо и не обязаны знать друг о друге.
Например, у клиента только универсальный идентификатор запрошенного ресурса (URI) и не может общаться с серверной программой другим способом. Однако, сервер не должен влиять на клиентское ПО. Поэтому сервер отправляет данные по HTTP. Это означает что, если клиентский код изменится, это не повлияет на работу сервера.
Серверный код в той же лодке: изменение серверной части не повлияет на работу клиента.
Клиентские и серверные программы могут быть модульными и независимыми до тех пор, пока каждая сторона знает, какой формат сообщения доставлять другой. Отделение пользовательского интерфейса от ограничений хранения данных улучшает гибкость интерфейса на разных платформах и повышает масштабируемость.
Кроме того, каждый компонент выигрывает от разделения, поскольку может развиваться независимо. Интерфейс REST помогает клиентам:
- Иметь доступ к одним и тем же конечным точкам REST.
- Выполнять одинаковые действия.
- Получать одинаковые ответы.
6.3. Нестационарная связь между клиентами и серверами
Системы на основе REST не имеют состояния, то есть состояние клиента остаётся неизвестным для сервера и наоборот. Это ограничение разрешает серверу и клиенту понимать отправленное сообщение, даже если они не видели предыдущие.
Чтобы обеспечить соблюдение этого ограничения без статичности, требуется использовать ресурсы, а не команды. Это имена существительные в сети. Их цель – описать объект, который требуется сохранить или передать другим службам.
Допустимо контролировать, изменять и повторно использовать компоненты, затрагивая систему частично, поэтому преимущества этого ограничения включают достижение:
- стабильности;
- скорости;
- масштабируемости RESTful-приложений.
Обратите внимание, что каждый запрос должен содержать всю информацию, необходимую для выполнения. Клиентские приложения должны сохранять состояние сессии, поскольку серверные приложения не должны хранить данные, связанные с клиентским запросом.
6.4. Кэшируемые данные
REST требует кэширования ресурсов на стороне клиента или сервера везде, где это возможно. Кэширование данных и ответов имеет решающее значение, поскольку обеспечивает высокую производительность на стороне клиента.
Хорошо управляемое кэширование может уменьшить или устранить некоторые взаимодействия клиент-сервер.
Это также даёт серверу больше возможностей масштабирования благодаря меньшей нагрузке на сервер. Кэширование увеличивает скорость загрузки страниц и разрешает получить доступ к ранее просмотренному контенту без подключения к интернету.
6.5. Архитектура многоуровневой системы
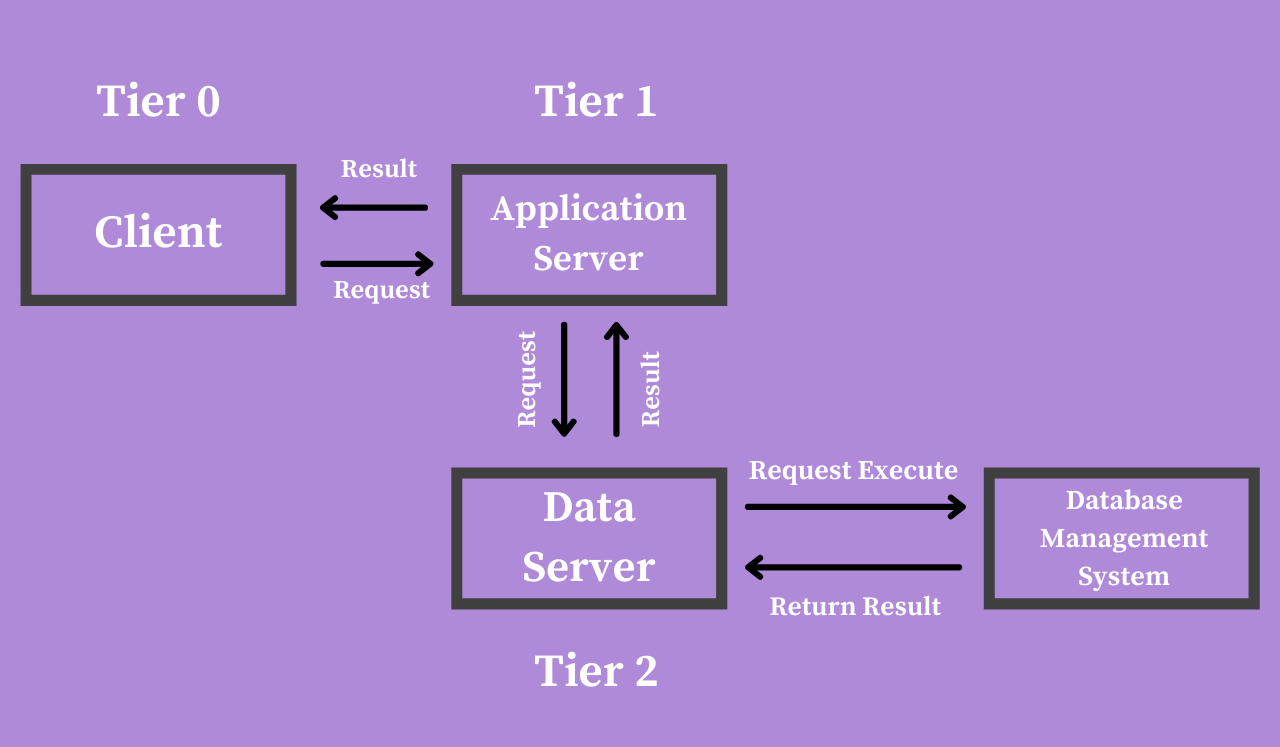
Следующее обсуждаемое ограничение — это многоуровневая структура RESTful. Этот принцип включает в себя группировку слоёв с определёнными функциями.
Слои REST API имеют свои обязанности и располагаются в иерархическом порядке. Например, один слой может отвечать за хранение данных на сервере, второй — за развёртывание API на другом сервере, а третий — за аутентификацию запросов на другом сервере.
Эти слои действуют как посредники и предотвращают прямое взаимодействие между клиентскими и серверными приложениями. В результате клиент не знает, к какому серверу или компоненту обращается.
Когда каждый слой выполняет заданную функцию до передачи данных следующим, что повышает общую безопасность и гибкость API, так как добавление, изменение, удаление API не влияет на другие компоненты интерфейса.
6.6. Кодирование по требованию (необязательно)
Предоставление статических представлений ресурсов в формате XML или JSON — популярный сценарий использования REST API.
Однако этот архитектурный стиль разрешает пользователям загружать и выполнять код в виде апплетов или сценариев (например, JavaScript). Например, клиенты могут получить код рендеринга для виджетов пользовательского интерфейса, обратившись к API.
7. Проблемы, которые следует ожидать при использовании REST API
С пониманием дизайна REST API и архитектурного ограничения, необходимо знать о проблемах, которые следует ожидать при использовании этого архитектурного стиля:
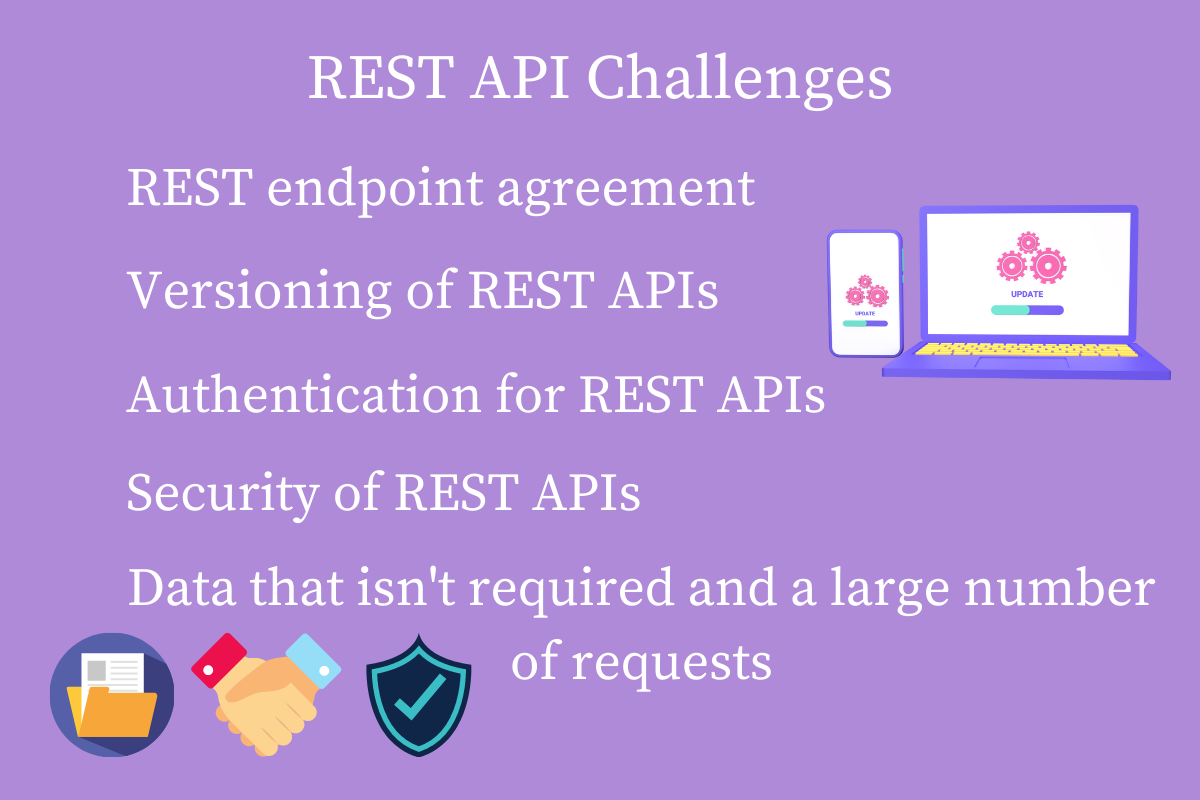
7.1. Соглашение по конечным точкам REST
API-интерфейсы должны оставаться единообразными независимо от конструкции URL. Но с ростом возможных комбинаций методов становится труднее поддерживать единообразие в больших кодовых базах.
7.2. Версионность как свойство REST API
API требуют регулярного обновления или версионирования, чтобы предотвратить проблемы с совместимостью. Однако старые конечные точки остаются работоспособными, что увеличивает рабочую нагрузку.
7.3. Множество методов аутентификации
Допустимо определить, какие ресурсы доступны тем или иным типам пользователей. Например, определить, какие сторонние службы получают доступ к адресам электронной почты клиентов или другой конфиденциальной информации, и что эти службы делают с этими переменными.
Но 20 методов авторизации могут затруднить первоначальный вызов API. Поэтому разработчики не продолжают проект из-за первоначальных трудностей.
7.4. Уязвимости безопасности REST API
Хотя RESTful API имеют многоуровневую структуру, могут возникнуть некоторые проблемы с безопасностью. Например, если приложение недостаточно защищено из-за отсутствия шифрования, то приложение может раскрыть конфиденциальные данные.
Или хакер может отправлять тысячи запросов API в секунду, вызывая DDoS-атаку или другие неправомерные действия службы API, которые приведут к краху сервера.
7.5. Чрезмерный сбор данных и запросы
Сервер может вернуть запрос с данными, которые могут быть ненужными. Или может понадобиться выполнить несколько запросов, чтобы получить необходимую информацию.
***
Подведение итогов
Неудивительно, что API в будущем упорядочат веб-коммуникации. Их цель — позволить любым веб-приложениям взаимодействовать и обмениваться данными. Например, они помогают растущим онлайн-компаниям разрабатывать надёжные, масштабируемые и необычные системы.
Материалы по теме
- Как превратить базу данных в RESTful API
- 🛠 Хватит использовать REST для API!
- Разбираем по косточкам компьютерные сети: HTTP, TCP, REST
- 😎✔️ 15 лучших практик разработки и проектирования REST API
Время на прочтение
4 мин
Количество просмотров 823K
Эта статья начинает серию постов о разработке REST API:
- Введение в REST API — RESTful веб-сервисы
- Различия REST и SOAP
- Разработка REST API — что такое Contract First (контракт в первую очередь)?
- Разработка REST API — что такое Code First (код в первую очередь)?
- REST API — Что такое HATEOAS?
- Рекомендации по REST API — примеры проектирования веб-сервисов на Java и Spring
Она содержит введение в RESTful веб-сервисы и краткий обзор REST и HTTP.

Intro to RESTful Web Services
REST означает REpresentational State Transfer (Википедия: «передача состояния представления»). Это популярный архитектурный подход для создания API в современном мире.
Вы изучите:
- Что такое REST?
- На чем основан REST API?
- Как используется HTTP при создании REST API?
- Что такое ресурс?
- Как вы определяете ресурсы REST API?
- Каковы лучшие практики при разработке REST API?
Что такое REST?
REST расшифровывается как REpresentational State Transfer. Это был термин, первоначально введен Роем Филдингом (Roy Fielding), который также был одним из создателей протокола HTTP. Отличительной особенностью сервисов REST является то, что они позволяют наилучшим образом использовать протокол HTTP. Теперь давайте кратко рассмотрим HTTP.
Краткий обзор HTTP
Давайте сначала откроем браузер и зайдем на веб-страницу:

А затем щелкните на одной из страниц результатов:

Далее мы можем нажать на ссылку на странице, на которой мы оказались:

И перейти на другую страницу:

Вот как мы обычно просматриваем веб страницы.
Когда мы просматриваем страницы в Интернете, за кулисами происходит много вещей. Ниже приведено упрощенное представление о том, что происходит между браузером и серверами, работающими на посещаемых веб-сайтах:

Протокол HTTP
Когда вы вводите в браузере URL-адрес, например www.google.com, на сервер отправляется запрос на веб-сайт, идентифицированный URL-адресом.
Затем этот сервер формирует и выдает ответ. Важным является формат этих запросов и ответов. Эти форматы определяются протоколом HTTP — Hyper Text Transfer Protocol.
Когда вы набираете URL в браузере, он отправляет запрос GET на указанный сервер. Затем сервер отвечает HTTP-ответом, который содержит данные в формате HTML — Hyper Text Markup Language. Затем браузер получает этот HTML-код и отображает его на экране.
Допустим, вы заполняете форму, присутствующую на веб-странице, со списком элементов. В таком случае, когда вы нажимаете кнопку «Submit» (Отправить), HTTP-запрос POST отправляется на сервер.
HTTP и RESTful веб-сервисы
HTTP обеспечивает базовый уровень для создания веб-сервисов. Поэтому важно понимать HTTP. Вот несколько ключевых абстракций.
Ресурс
Ресурс — это ключевая абстракция, на которой концентрируется протокол HTTP. Ресурс — это все, что вы хотите показать внешнему миру через ваше приложение. Например, если мы пишем приложение для управления задачами, экземпляры ресурсов будут следующие:
- Конкретный пользователь
- Конкретная задача
- Список задач
URI ресурса
Когда вы разрабатываете RESTful сервисы, вы должны сосредоточить свое внимание на ресурсах приложения. Способ, которым мы идентифицируем ресурс для предоставления, состоит в том, чтобы назначить ему URI — универсальный идентификатор ресурса. Например:
- Создать пользователя: POST /users
- Удалить пользователя: DELETE /users/1
- Получить всех пользователей: GET /users
- Получить одного пользователя: GET /users/1
REST и Ресурсы
Важно отметить, что с REST вам нужно думать о приложении с точки зрения ресурсов:
Определите, какие ресурсы вы хотите открыть для внешнего мира
Используйте глаголы, уже определенные протоколом HTTP, для выполнения операций с этими ресурсами.
Вот как обычно реализуется служба REST:
- Формат обмена данными: здесь нет никаких ограничений. JSON — очень популярный формат, хотя можно использовать и другие, такие как XML
- Транспорт: всегда HTTP. REST полностью построен на основе HTTP.
- Определение сервиса: не существует стандарта для этого, а REST является гибким. Это может быть недостатком в некоторых сценариях, поскольку потребляющему приложению может быть необходимо понимать форматы запросов и ответов. Однако широко используются такие языки определения веб-приложений, как WADL (Web Application Definition Language) и Swagger.
REST фокусируется на ресурсах и на том, насколько эффективно вы выполняете операции с ними, используя HTTP.
Компоненты HTTP
HTTP определяет следующую структуру запроса:
- строка запроса (request line) — определяет тип сообщения
- заголовки запроса (header fields) — характеризуют тело сообщения, параметры передачи и прочие сведения
- тело сообщения (body) — необязательное
HTTP определяет следующую структуру ответного сообщения (response):
- строка состояния (status line), включающая код состояния и сообщение о причине
- поля заголовка ответа (header fields)
- дополнительное тело сообщения (body)
Методы HTTP-запроса
Метод, используемый в HTTP-запросе, указывает, какое действие вы хотите выполнить с этим запросом. Важные примеры:
- GET: получить подробную информацию о ресурсе
- POST: создать новый ресурс
- PUT: обновить существующий ресурс
- DELETE: Удалить ресурс
Код статуса ответа HTTP
Код состояния всегда присутствует в ответе HTTP. Типичные примеры:
- 200 — успех
- 404 — cтраница не найдена
По этому вопросу имеется авторское видео.
Резюме
В статье приведен на верхнем уровне обзор архитектурного стиля REST. Подчеркивается тот факт, что HTTP является основным строительным блоком REST сервисов. HTTP — это протокол, который используется для определения структуры запросов и ответов браузера. Мы видели, что HTTP имеет дело главным образом с ресурсами, доступными на веб-серверах. Ресурсы идентифицируются с помощью URI, а операции над этими ресурсами выполняются с использованием глаголов, определенных протоколом HTTP.
Наконец, мы рассмотрели, как службы REST наилучшим образом используют функции, предлагаемые HTTP, для предоставления ресурсов внешнему миру. REST не накладывает никаких ограничений на форматы представления ресурсов или на определение сервиса.
Дополнительное чтение
Foundations of RESTful Architecture
Developing REST APIs

Hi everyone! In this tutorial we’re going to take a deep dive into REST APIs.
I recently wrote this article where I explained the main differences between common API types nowadays. And this tutorial aims to show you an example of how you can fully implement a REST API.
We’ll cover basic setup and architecture with Node and Express, unit testing with Supertest, seeing how we can consume the API from a React front-end app and finally documenting the API using tools such as Swagger.
Keep in mind we won’t go too deep into how each technology works. The goal here is to give you a general overview of how a REST API works, how its pieces interact, and what a full implementation might consist of.
Let’s go!
Table of Contents
- What is REST?
- How to Build a REST API with Node and Express
- How to Test a REST API with Supertest
- How to Consume a REST API on a Front-end React App
- How to Document a REST API with Swagger
- Wrapping up
What is REST?
Representational State Transfer (REST) is a widely used architectural style for building web services and APIs.
RESTful APIs are designed to be simple, scalable, and flexible. They are often used in web and mobile applications, as well as in Internet of Things (IoT) and microservices architectures.
Main Characteristics:
- Stateless: REST APIs are stateless, which means that each request contains all the necessary information to process it. This makes it easier to scale the API and improves performance by reducing the need to store and manage session data on the server.
- Resource-based: REST APIs are resource-based, which means that each resource is identified by a unique URI (Uniform Resource Identifier) and can be accessed using standard HTTP methods such as GET, POST, PUT, and DELETE.
- Uniform Interface: REST APIs have a uniform interface that allows clients to interact with resources using a standardized set of methods and response formats. This makes it easier for developers to build and maintain APIs, and for clients to consume them.
- Cacheable: REST APIs are cacheable, which means that responses can be cached to improve performance and reduce network traffic.
- Layered System: REST APIs are designed to be layered, which means that intermediaries such as proxies and gateways can be added between the client and server without affecting the overall system.
Pros of REST APIs:
- Easy to learn and use: REST APIs are relatively simple and easy to learn compared to other APIs.
- Scalability: The stateless nature of REST APIs makes them highly scalable and efficient.
- Flexibility: REST APIs are flexible and can be used to build a wide range of applications and systems.
- Wide support: REST APIs are widely supported by development tools and frameworks, making it easy to integrate them into existing systems.
Cons of REST APIs:
- Lack of standards: The lack of strict standards for REST APIs can lead to inconsistencies and interoperability issues.
- Limited functionality: REST APIs are designed to handle simple requests and responses and may not be suitable for more complex use cases.
- Security concerns: REST APIs can be vulnerable to security attacks such as cross-site scripting (XSS) and cross-site request forgery (CSRF) if not implemented properly.
REST APIs are best for:
- REST APIs are well-suited for building web and mobile applications, as well as microservices architectures and IoT systems.
- They are particularly useful in situations where scalability and flexibility are important, and where developers need to integrate with existing systems and technologies.
In summary, REST APIs are a popular and widely used architectural style for building web services and APIs. They are simple, scalable, and flexible, and can be used to build a wide range of applications and systems.
While there are some limitations and concerns with REST APIs, they remain a popular and effective option for building APIs in many different industries and sectors.
How to Build a REST API with Node and Express
Node.js is an open-source, cross-platform, back-end JavaScript runtime environment that allows developers to execute JavaScript code outside of a web browser. It was created by Ryan Dahl in 2009 and has since become a popular choice for building web applications, APIs, and servers.
Node.js provides an event-driven, non-blocking I/O model that makes it lightweight and efficient, allowing it to handle large amounts of data with high performance. It also has a large and active community, with many libraries and modules available to help developers build their applications more quickly and easily.
Express.js is a popular web application framework for Node.js, which is used to build web applications and APIs. It provides a set of features and tools for building web servers, handling HTTP requests and responses, routing requests to specific handlers, handling middleware, and much more.
Express is known for its simplicity, flexibility, and scalability, making it a popular choice for developers building web applications with Node.js.
Some of the key features and benefits of Express.js include:
- Minimalistic and flexible: Express.js provides a minimalistic and flexible structure that allows developers to build applications the way they want to.
- Routing: Express.js makes it easy to define routes for handling HTTP requests and mapping them to specific functions or handlers.
- Middleware: Express.js allows developers to define middleware functions that can be used to handle common tasks such as authentication, logging, error handling, and more.
- Robust API: Express.js provides a robust API for handling HTTP requests and responses, allowing developers to build high-performance web applications.
Our architecture
For this project we’ll follow a layers architecture in our codebase. Layers architecture is about dividing concerns and responsibilities into different folders and files, and allowing direct communication only between certain folders and files.
The matter of how many layers should your project have, what names should each layer have, and what actions should it handle is all a matter of discussion. So let’s see what I think is a good approach for our example.
Our application will have five different layers, which will be ordered in this way:
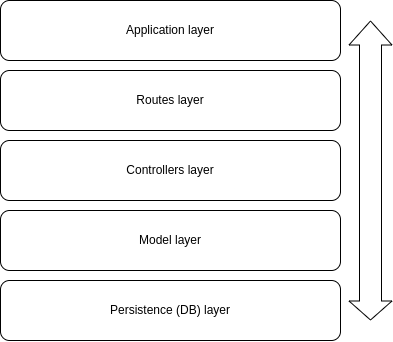
- The application layer will have the basic setup of our server and the connection to our routes (the next layer).
- The routes layer will have the definition of all of our routes and the connection to the controllers (the next layer).
- The controllers layer will have the actual logic we want to perform in each of our endpoints and the connection to the model layer (the next layer, you get the idea…)
- The model layer will hold the logic for interacting with our mock database.
- Finally, the persistence layer is where our database will be.
An important thing to keep in mind is that in these kinds of architectures, there’s a defined communication flow between the layers that has to be followed for it to make sense.
This means that a request first has to go through the first layer, then the second, then the third and so on. No request should skip layers because that would mess with the logic of the architecture and the benefits of organization and modularity it gives us.
If you’d like to know some other API architecture options, I recommend you this software architecture article I wrote a while ago.
The code
Before jumping to the code, let’s mention what we’ll actually build. We’ll be building an API for a pet shelter business. This pet shelter needs to register the pets that are staying in the shelter, and for that we’ll perform basic CRUD operations (create, read, update and delete).
Now yeah, let’s get this thing going. Create a new directory, hop on to it and start a new Node project by running npm init -y.
Then install Express by running npm i express and install nodemon as a dev dependency by running npm i -D nodemon (Nodemon is a tool we’ll use to get our server running and test it). Lastly, also run npm i cors, which we’ll use to be able to test our server locally.
App.js
Cool, now create an app.js file and drop this code in it:
import express from 'express'
import cors from 'cors'

import petRoutes from './pets/routes/pets.routes.js'

const app = express()
const port = 3000

/* Global middlewares */
app.use(cors())
app.use(express.json())

/* Routes */
app.use('/pets', petRoutes)

/* Server setup */
if (process.env.NODE_ENV !== 'test') {
    app.listen(port, () => console.log(`⚡️[server]: Server is running at https://localhost:${port}`))
}

export default app
This would be the application layer of our project.
Here we’re basically setting up our server and declaring that any request that hits the /pets direction should use the routes (endpoints) we have declared in the ./pets/routes/pets.routes.js directory.
Next, go ahead and create this folder structure in your project:
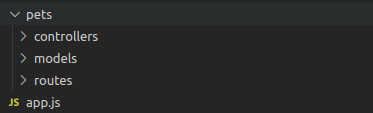
Routes
Hop on to the routes folder, create a file called pets.routes.js, and drop this code in it:
import express from "express";
import {
  listPets,
  getPet,
  editPet,
  addPet,
  deletePet,
} from "../controllers/pets.controllers.js";

const router = express.Router();

router.get("/", listPets);

router.get("/:id", getPet);

router.put("/:id", editPet);

router.post("/", addPet);

router.delete("/:id", deletePet);

export default router;
In this file we’re initializing a router (the thing that processes our request and directs them accordingly given the endpoint URL) and setting up each of our endpoints.
See that for each endpoint we declare the corresponding HTTP method (get, put, and so on) and the corresponding function that that endpoint will trigger (listPets, getPet, and so on). Each function name is quite explicit so we can easily know what each endpoint does without needing to see further code. 
Lastly, we also declare which endpoint will receive URL parameters on the requests like this: router.get("/:id", getPet); Here we’re saying that we’ll receive the id of the pet as an URL parameter.
Controllers
Now go to the controllers folder, create a pets.controllers.js file, and put this code in it:
import { getItem, listItems, editItem, addItem, deleteItem } from '../models/pets.models.js'

export const getPet = (req, res) => {
    try {
        const resp = getItem(parseInt(req.params.id))
        res.status(200).json(resp)

    } catch (err) {
        res.status(500).send(err)
    }
}

export const listPets = (req, res) => {
    try {
        const resp = listItems()
        res.status(200).json(resp)

    } catch (err) {
        res.status(500).send(err)
    }
}

export const editPet = (req, res) => {
    try {
        const resp = editItem(parseInt(req.params.id), req.body)
        res.status(200).json(resp)

    } catch (err) {
        res.status(500).send(err)
    }
}

export const addPet = (req, res) => {
    try {
        const resp = addItem(req.body)
        res.status(200).json(resp)

    } catch (err) {
        res.status(500).send(err)
    }
}

export const deletePet = (req, res) => {
    try {
        const resp = deleteItem(parseInt(req.params.id))
        res.status(200).json(resp)

    } catch (err) {
        res.status(500).send(err)
    }
}
Controllers are the functions that each endpoint request will trigger. As you can see, they receive as parameters the request and response objects. In the request object we can read things such as URL or body parameters, and we’ll use the response object to send our response after doing the corresponding computation.
Each controller calls a specific function defined in our models.
Models
Now go to the models folder and create a pets.models.js file with this code in it:
import db from '../../db/db.js'

export const getItem = id => {
    try {
        const pet = db?.pets?.filter(pet => pet?.id === id)[0]
        return pet
    } catch (err) {
        console.log('Error', err)
    }
}

export const listItems = () => {
    try {
        return db?.pets
    } catch (err) {
        console.log('Error', err)
    }
}

export const editItem = (id, data) => {
    try {
        const index = db.pets.findIndex(pet => pet.id === id)

        if (index === -1) throw new Error('Pet not found')
        else {
            db.pets[index] = data
            return db.pets[index]
        }
    } catch (err) {
        console.log('Error', err)
    }
}

export const addItem = data => {
    try {
        const newPet = { id: db.pets.length + 1, ...data }
        db.pets.push(newPet)
        return newPet

    } catch (err) {
        console.log('Error', err)
    }
}

export const deleteItem = id => {
    try {
        // delete item from db
        const index = db.pets.findIndex(pet => pet.id === id)

        if (index === -1) throw new Error('Pet not found')
        else {
            db.pets.splice(index, 1)
            return db.pets
        }
    } catch (error) {

    }
}
These are the functions responsible for interacting with our data layer (database) and returning the corresponding information to our controllers.
Database
We wont use a real database for this example. Instead we’ll just use a simple array that will work just fine for example purposes, though our data will of course reset every time our server does.
In the root of our project, create a db folder and a db.js file with this code in it:
const db = {
    pets: [
        {
            id: 1,
            name: 'Rex',
            type: 'dog',
            age: 3,
            breed: 'labrador',
        },
        {
            id: 2,
            name: 'Fido',
            type: 'dog',
            age: 1,
            breed: 'poodle',
        },
        {
            id: 3,
            name: 'Mittens',
            type: 'cat',
            age: 2,
            breed: 'tabby',
        },
    ]
}

export default db
As you can see, our db object contains a pets property whose value is an array of objects, each object being a pet. For each pet, we store an id, name, type, age and breed.
Now go to your terminal and run nodemon app.js. You should see this message confirming your server is alive: ⚡️[server]: Server is running at https://localhost:3000.
How to Test a REST API with Supertest
Now that our server is up and running, let’s implement a simple test suit to check if each of our endpoints behaves as expected.
If you’re not familiar with automated testing, I recommend you read this introductory article I wrote a while ago.
SuperTest is a JavaScript library that is used for testing HTTP servers or web applications that make HTTP requests. It provides a high-level abstraction for testing HTTP, allowing developers to send HTTP requests and make assertions about the responses received, making it easier to write automated tests for web applications.
SuperTest works with any JavaScript testing framework, such as Mocha or Jest, and can be used with any HTTP server or web application framework, such as Express.
SuperTest is built on top of the popular testing library Mocha, and uses the Chai assertion library to make assertions about the responses received. It provides an easy-to-use API for making HTTP requests, including support for authentication, headers, and request bodies.
SuperTest also allows developers to test the entire request/response cycle, including middleware and error handling, making it a powerful tool for testing web applications.
Overall, SuperTest is a valuable tool for developers who want to write automated tests for their web applications. It helps ensure that their applications are functioning correctly and that any changes they make to the codebase do not introduce new bugs or issues.
The code
First we’ll need to install some dependencies. To save up terminal commands, go to your package.json file and replace your devDependencies section with this. Then run npm install
  "devDependencies": {
    "@babel/core": "^7.21.4",
    "@babel/preset-env": "^7.21.4",
    "babel-jest": "^29.5.0",
    "jest": "^29.5.0",
    "jest-babel": "^1.0.1",
    "nodemon": "^2.0.22",
    "supertest": "^6.3.3"
  }
Here we’re installing the supertest and jest libraries, which we need for our tests to run, plus some babel stuff we need for our project to correctly identify which files are test files.
Still in your package.json, add this script:
  "scripts": {
    "test": "jest"
  },
To end with the boilerplate, in the root of your project, create a babel.config.cjs file and drop this code in it:
//babel.config.cjs
module.exports = {
    presets: [
      [
        '@babel/preset-env',
        {
          targets: {
            node: 'current',
          },
        },
      ],
    ],
  };
Now let’s write some actual tests! Within your routes folder, create a pets.test.js file with this code in it:
import supertest from 'supertest' // Import supertest
import server from '../../app' // Import the server object
const requestWithSupertest = supertest(server) // We will use this function to mock HTTP requests

describe('GET "/"', () => {
    test('GET "/" returns all pets', async () => {
        const res = await requestWithSupertest.get('/pets')
        expect(res.status).toEqual(200)
        expect(res.type).toEqual(expect.stringContaining('json'))
        expect(res.body).toEqual([
            {
                id: 1,
                name: 'Rex',
                type: 'dog',
                age: 3,
                breed: 'labrador',
            },
            {
                id: 2,
                name: 'Fido',
                type: 'dog',
                age: 1,
                breed: 'poodle',
            },
            {
                id: 3,
                name: 'Mittens',
                type: 'cat',
                age: 2,
                breed: 'tabby',
            },
        ])
    })
})

describe('GET "/:id"', () => {
    test('GET "/:id" returns given pet', async () => {
        const res = await requestWithSupertest.get('/pets/1')
        expect(res.status).toEqual(200)
        expect(res.type).toEqual(expect.stringContaining('json'))
        expect(res.body).toEqual(
            {
                id: 1,
                name: 'Rex',
                type: 'dog',
                age: 3,
                breed: 'labrador',
            }
        )
    })
})

describe('PUT "/:id"', () => {
    test('PUT "/:id" updates pet and returns it', async () => {
        const res = await requestWithSupertest.put('/pets/1').send({
            id: 1,
            name: 'Rexo',
            type: 'dogo',
            age: 4,
            breed: 'doberman'
        })
        expect(res.status).toEqual(200)
        expect(res.type).toEqual(expect.stringContaining('json'))
        expect(res.body).toEqual({
            id: 1,
            name: 'Rexo',
            type: 'dogo',
            age: 4,
            breed: 'doberman'
        })
    })
})

describe('POST "/"', () => {
    test('POST "/" adds new pet and returns the added item', async () => {
        const res = await requestWithSupertest.post('/pets').send({
            name: 'Salame',
            type: 'cat',
            age: 6,
            breed: 'pinky'
        })
        expect(res.status).toEqual(200)
        expect(res.type).toEqual(expect.stringContaining('json'))
        expect(res.body).toEqual({
            id: 4,
            name: 'Salame',
            type: 'cat',
            age: 6,
            breed: 'pinky'
        })
    })
})

describe('DELETE "/:id"', () => {
    test('DELETE "/:id" deletes given pet and returns updated list', async () => {
        const res = await requestWithSupertest.delete('/pets/2')
        expect(res.status).toEqual(200)
        expect(res.type).toEqual(expect.stringContaining('json'))
        expect(res.body).toEqual([
            {
                id: 1,
                name: 'Rexo',
                type: 'dogo',
                age: 4,
                breed: 'doberman'
            },
            {
                id: 3,
                name: 'Mittens',
                type: 'cat',
                age: 2,
                breed: 'tabby',
            },
            {
                id: 4,
                name: 'Salame',
                type: 'cat',
                age: 6,
                breed: 'pinky'
            }
        ])
    })
})
For each endpoint, the tests send HTTP requests and check the responses for three things: the HTTP status code, the response type (which should be JSON), and the response body (which should match the expected JSON format).
- The first test sends a GET request to the /pets endpoint and expects the API to return an array of pets in JSON format.
- The second test sends a GET request to the /pets/:id endpoint and expects the API to return the pet with the specified ID in JSON format.
- The third test sends a PUT request to the /pets/:id endpoint and expects the API to update the pet with the specified ID and return the updated pet in JSON format.
- The fourth test sends a POST request to the /pets endpoint and expects the API to add a new pet and return the added pet in JSON format.
- Finally, the fifth test sends a DELETE request to the /pets/:id endpoint and expects the API to remove the pet with the specified ID and return the updated list of pets in JSON format.
Each test checks whether the expected HTTP status code, response type, and response body are returned. If any of these expectations are not met, the test fails and provides an error message.
These tests are important for ensuring that the API is working correctly and consistently across different HTTP requests and endpoints. The tests can be run automatically, which makes it easy to detect any issues or regressions in the API’s functionality.
Now go to your terminal, run npm test, and you should see all your tests passing:
> restapi@1.0.0 test
> jest

 PASS  pets/routes/pets.test.js
  GET "/"
    ✓ GET "/" returns all pets (25 ms)
  GET "/:id"
    ✓ GET "/:id" returns given pet (4 ms)
  PUT "/:id"
    ✓ PUT "/:id" updates pet and returns it (15 ms)
  POST "/"
    ✓ POST "/" adds new pet and returns the added item (3 ms)
  DELETE "/:id"
    ✓ DELETE "/:id" deletes given pet and returns updated list (3 ms)

Test Suites: 1 passed, 1 total
Tests:       5 passed, 5 total
Snapshots:   0 total
Time:        1.611 s
Ran all test suites.
How to Consume a REST API on a Front-end React App
Now we know our server is running and our endpoints are behaving as expected. Let’s see some more realistic example of how our API might be consumed by a front end app.
For this example, we’ll use a React application, and two different tools to send and process our requests: the Fetch API and the Axios library.
React is a popular JavaScript library for building user interfaces. It allows developers to create reusable UI components and efficiently update and render them in response to changes in application state.
The Fetch API is a modern browser API that allows developers to make asynchronous HTTP requests from client-side JavaScript code. It provides a simple interface for fetching resources across the network, and supports a variety of request and response types.
Axios is a popular HTTP client library for JavaScript. It provides a simple and intuitive API for making HTTP requests, and supports a wide range of features, including request and response interception, automatic transforms for request and response data, and the ability to cancel requests. It can be used both in the browser and on the server, and is often used in conjunction with React applications.
The code
Let’s create our React app by running yarn create vite and following the terminal prompts. Once that’s done, run yarn add axios and yarn add react-router-dom (which we’ll use to setup basic routing in our app).
App.jsx
Put this code within your App.jsx file:
import { Suspense, lazy, useState } from 'react'
import { BrowserRouter as Router, Routes, Route, Link } from 'react-router-dom'
import './App.css'

const PetList = lazy(() => import ('./pages/PetList'))
const PetDetail = lazy(() => import ('./pages/PetDetail'))
const EditPet = lazy(() => import ('./pages/EditPet'))
const AddPet = lazy(() => import ('./pages/AddPet'))

function App() {

  const [petToEdit, setPetToEdit] = useState(null)

  return (
    <div className="App">
      <Router>
        <h1>Pet shelter</h1>

        <Link to='/add'>
          <button>Add new pet</button>
      </Link>

        <Routes>
          <Route path='/' element={<Suspense fallback={<></>}><PetList /></Suspense>}/>

          <Route path='/:petId' element={<Suspense fallback={<></>}><PetDetail setPetToEdit={setPetToEdit} /></Suspense>}/>

          <Route path='/:petId/edit' element={<Suspense fallback={<></>}><EditPet petToEdit={petToEdit} /></Suspense>}/>

          <Route path='/add' element={<Suspense fallback={<></>}><AddPet /></Suspense>}/>
        </Routes>

      </Router>
    </div>
  )
}

export default App
Here we’re just defining our routes. We’ll have 4 main routes in our app, each corresponding to a different view:
- One to see the whole list of pets.
- One to see the detail of a single pet.
- One to edit a single pet.
- One to add a new pet to the list.
Besides, we have a button to add a new pet and a state that will store the information of the pet we want to edit.
Next, create a pages directory with these files in it:
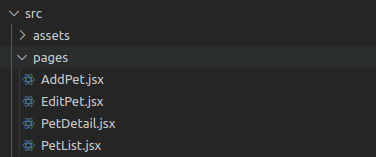
PetList.jsx
Let’s start with the file responsible for rendering the whole list of pets:
import { useEffect, useState } from 'react'
import { Link } from 'react-router-dom'
import axios from 'axios'

function PetList() {
    const [pets, setPets] = useState([])

    const getPets = async () => {
        try {
            /* FETCH */
            // const response = await fetch('http://localhost:3000/pets')
            // const data = await response.json()
            // if (response.status === 200) setPets(data)

            /* AXIOS */
            const response = await axios.get('http://localhost:3000/pets')
            if (response.status === 200) setPets(response.data)

        } catch (error) {
            console.error('error', error)
        }
    }

    useEffect(() => { getPets() }, [])

    return (
        <>
            <h2>Pet List</h2>

            {pets?.map((pet) => {
                return (
                    <div key={pet?.id}>
                        <p>{pet?.name} - {pet?.type} - {pet?.breed}</p>

                        <Link to={`/${pet?.id}`}>
                            <button>Pet detail</button>
                        </Link>
                    </div>
                )
            })}
        </>
    )
}

export default PetList
As you can see, logic-wise we have 3 main things here:
- A state that stores the list of pets to render.
- A function that executes the corresponding request to our API.
- A useEffect that executes that function when the component renders.
You can see that the syntax for making the HTTP request with fetch and Axios is rather similar, but Axios is a tiny bit more succinct. Once we make the request, we check if the status is 200 (meaning it was successful), and store the response in our state.
Once our state is updated, the component will render the data provided by our API.
Remember that to make calls to our server, we must have it up and running by running
nodemon app.jsin our server project terminal.
PetDetail.jsx
Now let’s go to the PetDetail.jsx file:
import { useEffect, useState } from 'react'
import { useParams, Link } from 'react-router-dom'
import axios from 'axios'

function PetDetail({ setPetToEdit }) {

    const [pet, setPet] = useState([])

    const { petId } = useParams()

    const getPet = async () => {
        try {
            /* FETCH */
            // const response = await fetch(`http://localhost:3000/pets/${petId}`)
            // const data = await response.json()
            // if (response.status === 200) {
            //     setPet(data)
            //     setPetToEdit(data)
            // }

            /* AXIOS */
            const response = await axios.get(`http://localhost:3000/pets/${petId}`)
            if (response.status === 200) {
                setPet(response.data)
                setPetToEdit(response.data)
            }

        } catch (error) {
            console.error('error', error)
        }
    }

    useEffect(() => { getPet() }, [])

    const deletePet = async () => {
        try {
            /* FETCH */
            // const response = await fetch(`http://localhost:3000/pets/${petId}`, {
            //     method: 'DELETE'
            // })

            /* AXIOS */
            const response = await axios.delete(`http://localhost:3000/pets/${petId}`)

            if (response.status === 200) window.location.href = '/'
        } catch (error) {
            console.error('error', error)
        }
    }

    return (
        <div style={{ display: 'flex', flexDirection: 'column', justifyContent: 'center', aligniItems: 'center' }}>
            <h2>Pet Detail</h2>

            {pet && (
                <>
                    <p>Pet name: {pet.name}</p>
                    <p>Pet type: {pet.type}</p>
                    <p>Pet age: {pet.age}</p>
                    <p>Pet breed: {pet.breed}</p>

                    <div style={{ display: 'flex', justifyContent: 'center', aligniItems: 'center' }}>

                        <Link to={`/${pet?.id}/edit`}>
                            <button style={{ marginRight: 10 }}>Edit pet</button>
                        </Link>

                        <button
                            style={{ marginLeft: 10 }}
                            onClick={() => deletePet()}
                        >
                            Delete pet
                        </button>
                    </div>
                </>
            )}
        </div>
    )
}

export default PetDetail
Here we have two different kind of requests:
- One that gets the information of the given pet (which behaves very similar to the previous request we saw). The only difference here is we’re passing an URL parameter to our endpoint, which at the same time we’re reading from the URL in our front-end app.
- The other request is to delete the given pet from our register. The difference here is once we confirm that the request was successful, we redirect the user to the root of our app.
AddPet.jsx
This is the file responsible for adding a new pet to our register:
import React, { useState } from 'react'
import axios from 'axios'

function AddPet() {

    const [petName, setPetName] = useState()
    const [petType, setPetType] = useState()
    const [petAge, setPetAge] = useState()
    const [petBreed, setPetBreed] = useState()

    const addPet = async () => {
        try {
            const petData = {
                name: petName,
                type: petType,
                age: petAge,
                breed: petBreed
            }

            /* FETCH */
            // const response = await fetch('http://localhost:3000/pets/', {
            //     method: 'POST',
            //     headers: {
            //         'Content-Type': 'application/json'
            //     },
            //     body: JSON.stringify(petData)
            // })

            // if (response.status === 200) {
            //     const data = await response.json()
            //     window.location.href = `/${data.id}`
            // }

            /* AXIOS */
            const response = await axios.post(
                'http://localhost:3000/pets/',
                petData,
                { headers: { 'Content-Type': 'application/json' } }
            )

            if (response.status === 200) window.location.href = `/${response.data.id}`

        } catch (error) {
            console.error('error', error)
        }
    }

    return (
        <div style={{ display: 'flex', flexDirection: 'column', justifyContent: 'center', aligniItems: 'center' }}>
            <h2>Add Pet</h2>

            <div style={{ display: 'flex', flexDirection: 'column', margin: 20 }}>
                <label>Pet name</label>
                <input type='text' value={petName} onChange={e => setPetName(e.target.value)} />
            </div>

            <div style={{ display: 'flex', flexDirection: 'column', margin: 20 }}>
                <label>Pet type</label>
                <input type='text' value={petType} onChange={e => setPetType(e.target.value)} />
            </div>

            <div style={{ display: 'flex', flexDirection: 'column', margin: 20 }}>
                <label>Pet age</label>
                <input type='text' value={petAge} onChange={e => setPetAge(e.target.value)} />
            </div>

            <div style={{ display: 'flex', flexDirection: 'column', margin: 20 }}>
                <label>Pet breed</label>
                <input type='text' value={petBreed} onChange={e => setPetBreed(e.target.value)} />
            </div>

            <button
                style={{ marginTop: 30 }}
                onClick={() => addPet()}
            >
                Add pet
            </button>
        </div>
    )
}

export default AddPet
Here we’re rendering a form in which the user has to enter the new pet info.
We have a state for each piece of information to enter, and in our request we build an object with each state. This object will be the body of our request.
On our request, we check if the response is successful. If it is, we redirect to the detail page of the newly added pet. To redirect, we use the id returned in the HTTP response.
EditPet.jsx
Finally, the file responsible for editing a pet register:
import React, { useState } from 'react'
import axios from 'axios'

function EditPet({ petToEdit }) {

    const [petName, setPetName] = useState(petToEdit?.name)
    const [petType, setPetType] = useState(petToEdit?.type)
    const [petAge, setPetAge] = useState(petToEdit?.age)
    const [petBreed, setPetBreed] = useState(petToEdit?.breed)

    const editPet = async () => {
        try {
            const petData = {
                id: petToEdit.id,
                name: petName,
                type: petType,
                age: petAge,
                breed: petBreed
            }

            /* FETCH */
            // const response = await fetch(`http://localhost:3000/pets/${petToEdit.id}`, {
            //     method: 'PUT',
            //     headers: {
            //         'Content-Type': 'application/json'
            //     },
            //     body: JSON.stringify(petData)
            // })

            /* AXIOS */
            const response = await axios.put(
                `http://localhost:3000/pets/${petToEdit.id}`,
                petData,
                { headers: { 'Content-Type': 'application/json' } }
            )

            if (response.status === 200) {
                window.location.href = `/${petToEdit.id}`
            }
        } catch (error) {
            console.error('error', error)
        }
    }

    return (
        <div style={{ display: 'flex', flexDirection: 'column', justifyContent: 'center', aligniItems: 'center' }}>
            <h2>Edit Pet</h2>

            <div style={{ display: 'flex', flexDirection: 'column', margin: 20 }}>
                <label>Pet name</label>
                <input type='text' value={petName} onChange={e => setPetName(e.target.value)} />
            </div>

            <div style={{ display: 'flex', flexDirection: 'column', margin: 20 }}>
                <label>Pet type</label>
                <input type='text' value={petType} onChange={e => setPetType(e.target.value)} />
            </div>

            <div style={{ display: 'flex', flexDirection: 'column', margin: 20 }}>
                <label>Pet age</label>
                <input type='text' value={petAge} onChange={e => setPetAge(e.target.value)} />
            </div>

            <div style={{ display: 'flex', flexDirection: 'column', margin: 20 }}>
                <label>Pet breed</label>
                <input type='text' value={petBreed} onChange={e => setPetBreed(e.target.value)} />
            </div>

            <button
                style={{ marginTop: 30 }}
                onClick={() => editPet()}
            >
                Save changes
            </button>
        </div>
    )
}

export default EditPet
This behaves very similar to the AddPet.jsx file. The only difference is that our pet info states are initialized with the values of the pet we want to edit. When those values are updated by the user, we construct an object that will be our request body and send the request with the updated information. Quite straightforward.
And that’s it! We’re using all of our API endpoints in our front end app. =)
How to Document a REST API with Swagger
Now that we have our server up and running, tested, and connected to our front end app, the last step in our implementation will be to document our API.
Documenting and API generally means declaring which endpoints are available, what actions are performed by each endpoint, and the parameters and return values for each of them.
This is useful not only to remember how our server works, but also for people who want to interact with our API.
For example, in companies it’s very usual to have back-end teams and front-end teams. When an API is being developed and needs to be integrated with a front-end app, it would be very tedious to ask which endpoint does what, and what parameters should be passed. If you have all that info in a singe place, you can just go there and read it yourself. That’s what documentation is.
Swagger is a set of open-source tools that help developers build, document, and consume RESTful web services. It provides a user-friendly graphical interface for users to interact with an API and also generates client code for various programming languages to make API integration easier.
Swagger provides a comprehensive set of features for API development, including API design, documentation, testing, and code generation. It allows developers to define API endpoints, input parameters, expected output, and authentication requirements in a standardized way using the OpenAPI specification.
Swagger UI is a popular tool that renders OpenAPI specifications as an interactive API documentation that allows developers to explore and test APIs through a web browser. It provides a user-friendly interface that allows developers to easily view and interact with API endpoints.
How to Implement Swagger
Back in our server app, to implement Swagger we’ll need two new dependencies. So run npm i swagger-jsdoc and npm i swagger-ui-express.
Next, modify the app.js file to look like this:
import express from 'express'
import cors from 'cors'
import swaggerUI from 'swagger-ui-express'
import swaggerJSdoc from 'swagger-jsdoc'

import petRoutes from './pets/routes/pets.routes.js'

const app = express()
const port = 3000

// swagger definition
const swaggerSpec = {
    definition: {
        openapi: '3.0.0',
        info: {
            title: 'Pets API',
            version: '1.0.0',
        },
        servers: [
            {
                url: `http://localhost:${port}`,
            }
        ]
    },
    apis: ['./pets/routes/*.js'],
}

/* Global middlewares */
app.use(cors())
app.use(express.json())
app.use(
    '/api-docs',
    swaggerUI.serve,
    swaggerUI.setup(swaggerJSdoc(swaggerSpec))
)

/* Routes */
app.use('/pets', petRoutes)

/* Server setup */
if (process.env.NODE_ENV !== 'test') {
    app.listen(port, () => console.log(`⚡️[server]: Server is running at https://localhost:${port}`))
}

export default app
As you can see, we’re importing the new dependencies, we’re creating a swaggerSpec object that contains config options for our implementation, and then setting a middleware to render our documentation in the /api-docs directory of our app.
By now, if you open your browser and go to http://localhost:3000/api-docs/ you should see this:
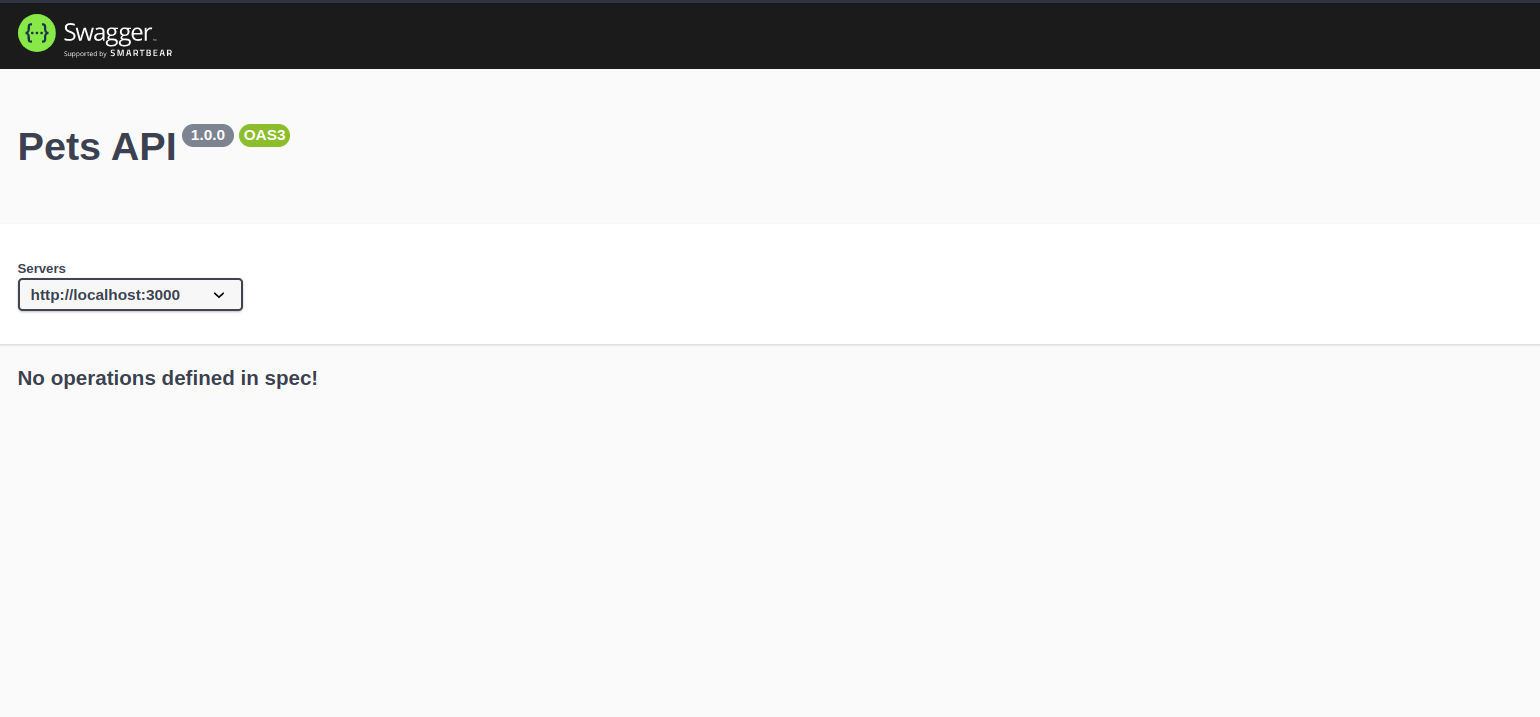
The cool thing about Swagger is it provides an out-of-the-box UI for our docs, and you can easily access it in the URL path declared in the config.
Now let’s write some actual documentation!
Hop on to the pets.routes.js file and replace its code with this:
import express from "express";
import {
  listPets,
  getPet,
  editPet,
  addPet,
  deletePet,
} from "../controllers/pets.controllers.js";

const router = express.Router();

/**
 * @swagger
 * components:
 *  schemas:
 *     Pet:
 *      type: object
 *      properties:
 *          id:
 *              type: integer
 *              description: Pet id
 *          name:
 *              type: string
 *              description: Pet name
 *          age:
 *              type: integer
 *              description: Pet age
 *          type:
 *              type: string
 *              description: Pet type
 *          breed:
 *              type: string
 *              description: Pet breed
 *     example:
 *          id: 1
 *          name: Rexaurus
 *          age: 3
 *          breed: labrador
 *          type: dog
 */

/**
 * @swagger
 * /pets:
 *  get:
 *     summary: Get all pets
 *     description: Get all pets
 *     responses:
 *      200:
 *         description: Success
 *      500:
 *         description: Internal Server Error
 */
router.get("/", listPets);

/**
 * @swagger
 * /pets/{id}:
 *  get:
 *     summary: Get pet detail
 *     description: Get pet detail
 *     parameters:
 *       - in: path
 *         name: id
 *         schema:
 *           type: integer
 *         required: true
 *         description: Pet id
 *     responses:
 *      200:
 *         description: Success
 *      500:
 *         description: Internal Server Error
 */
router.get("/:id", getPet);

/**
 * @swagger
 * /pets/{id}:
 *  put:
 *     summary: Edit pet
 *     description: Edit pet
 *     parameters:
 *       - in: path
 *         name: id
 *         schema:
 *           type: integer
 *         required: true
 *         description: Pet id
 *     requestBody:
 *       description: A JSON object containing pet information
 *       content:
 *         application/json:
 *           schema:
 *              $ref: '#/components/schemas/Pet'
 *           example:
 *              name: Rexaurus
 *              age: 12
 *              breed: labrador
 *              type: dog
 *     responses:
 *     200:
 *        description: Success
 *     500:
 *       description: Internal Server Error
 *
 */
router.put("/:id", editPet);

/**
 * @swagger
 * /pets:
 *  post:
 *      summary: Add pet
 *      description: Add pet
 *      requestBody:
 *          description: A JSON object containing pet information
 *          content:
 *             application/json:
 *                 schema:
 *                    $ref: '#/components/schemas/Pet'
 *                 example:
 *                    name: Rexaurus
 *                    age: 12
 *                    breed: labrador
 *                    type: dog
 *      responses:
 *      200:
 *          description: Success
 *      500:
 *          description: Internal Server Error
 */
router.post("/", addPet);

/**
 * @swagger
 * /pets/{id}:
 *  delete:
 *     summary: Delete pet
 *     description: Delete pet
 *     parameters:
 *       - in: path
 *         name: id
 *         schema:
 *           type: integer
 *         required: true
 *         description: Pet id
 *     responses:
 *     200:
 *        description: Success
 *     500:
 *       description: Internal Server Error
 */
router.delete("/:id", deletePet);

export default router;
As you can see, we’re adding a special kind of comment for each of our endpoints. This is the way Swagger UI identifies the documentation within our code. We’ve put them in this file since it makes sense to have the docs as close to the endpoints as possible, but you could place them wherever you want.
If we analyze the comments in detail you could see they’re written in a YAML like syntax, and for each of them we specify the endpoint route, HTTP method, a description, the parameters it receives and the possible responses.
All comments are more or less the same except the first one. In that one we’re defining a «schema» which is like a typing to a kind of object we can later on reuse in other comments. In our case, we’re defining the «Pet» schema which we then use for the put and post endpoints.
If you enter http://localhost:3000/api-docs/ again, you should now see this:

Each of the endpoints can be expanded, like this:

And if we click the «Try it out» button, we can execute an HTTP request and see what the response looks like:

This is really useful for developers in general and people who want to work with our API, and very easy to set up as you can see.
Having an out-of-the-box UI simplifies the interaction with the documentation. And having it within our codebase as well is a great bonus, as we can modify and update it without the need of touching anything else but our own code.
Wrapping Up
As always, I hope you enjoyed the handbook and learned something new. If you want, you can also follow me on LinkedIn or Twitter.
See you in the next one!

Learn to code for free. freeCodeCamp’s open source curriculum has helped more than 40,000 people get jobs as developers. Get started
Руководств по созданию отзывчивого REST API
REST становится общим подходом для представления сервисов окружающему миру. Причина его популярности заключается в его простоте, легкости использования, доступе через HTTP и другие.
Любое программное обеспечение развивается с течением времени. Это может потребовать различных версий для всех существенных изменений в приложении. Когда дело доходит до версии REST приложения, то оно становится одной из самых обсуждаемых тем среди сообщества разработчиков REST.

Скриншот документации API одного из проектов
Ниже представлены две характеристики, которые должны быть определены перед использованием HTTP метода:
-
Безопасность: HTTP метод считается безопасным, когда вызов этого метода не изменяет состояние данных. Например, когда вы извлекаете данные с помощью метода GET, это безопасно, потому что этот метод не обновляет данные на стороне сервера.
-
Идемпотентность: когда вы получаете один и тот же ответ, сколько раз вы вызываете один и тот же ресурс, он известен как идемпотентный. Например, когда вы пытаетесь обновить одни и те же данные на сервере, ответ будет таким же для каждого запроса, сделанного с одинаковыми данными.
Не все методы являются безопасными и идемпотентными. Ниже представлен список методов, которые используются в REST приложениях и показаны их свойства:
|
HTTP метод |
Безопасный |
Идемпотентный |
|---|---|---|
|
GET |
✅ |
✅ |
|
POST |
❌ |
❌ |
|
PUT |
❌ |
✅ |
|
DELETE |
❌ |
✅ |
|
OPTIONS |
✅ |
✅ |
|
HEAD |
✅ |
✅ |
Ниже приведен краткий обзор каждого метода и рекомендации по их использованию:
-
GET: этот метод является безопасным и идемпотентным. Обычно используется для извлечения информации и не имеет побочных эффектов.
-
POST: этот метод не является ни безопасным, ни идемпотентным. Этот метод наиболее широко используется для создания ресурсов.
-
PUT: этот метод является идемпотентным. Вот почему лучше использовать этот метод вместо POST для обновления ресурсов. Избегайте использования POST для обновления ресурсов.
-
DELETE: как следует из названия, этот метод используется для удаления ресурсов. Но этот метод не является идемпотентным для всех запросов.
-
OPTIONS: этот метод не используется для каких-либо манипуляций с ресурсами. Но он полезен, когда клиент не знает других методов, поддерживаемых для ресурса, и используя этот метод, клиент может получить различное представление ресурса.
-
HEAD: этот метод используется для запроса ресурса c сервера. Он очень похож на метод GET, но HEAD должен отправлять запрос и получать ответ только в заголовке. Согласно спецификации HTTP, этот метод не должен использовать тело для запроса и ответа.
Различия между PUT и PATCH
Различия между PUT и PATCH
Запрос PUT заменит все содержимое ресурса в приложении, в то время как запрос PATCH используется для внесения изменений в часть ресурса, редко используется.
SSL должен быть! Вы всегда должны применять SSL для своего REST приложения. Доступ к вашему приложения будет осуществляется из любой точки мира, и нет никакой гарантии, что к нему будет обеспечен безопасный доступ. С ростом числа инцидентов с киберпреступностью мы обязательно должны обеспечить безопасность своему приложению.
Стандартные протоколы проверки аутентификации облегчают работу по защите вашего приложения. Не используйте базовый механизм аутентификации. Используйте OAuth2 для лучшей безопасности ваших сервисов.
Шаблоны конечных точек URL
Шаблоны конечных точек URL
CRUD — модель в множественном числе
CRUD — модель в множественном числе
Нестандартные методы — действие + модель ИЛИ тип данных
Нестандартные методы — действие + модель ИЛИ тип данных
// экспорт всех постов с указанием формата
[GET] /export/posts?type=xml
// массовое удаление постов
[DELETE] /delete/posts?id=1,2,5,7
// добавление товара в избранное
[POST] /product-favorites
Отправка большого объема данных через HTTP не очень хорошая идея. Безусловно, возникнут проблемы с производительностью, поскольку сериализация больших объектов JSON станет дорогостоящей. Best practice является разбиение результатов на части, а не отправка всех записей сразу. Предоставьте возможность разбивать результаты на странице с помощью _limit или _page параметров.
HTTP определяет различные коды ответов для указания клиенту различной информации об операциях. Ваше REST приложение могло бы эффективно использовать все доступные HTTP-коды, чтобы помочь клиенту правильно настроить ответ. Далее представлен список кодов ответов HTTP:
-
200 OK — это ответ на успешные GET, PUT, PATCH или DELETE. Этот код также используется для POST, который не приводит к созданию.
-
201 Created — этот код состояния является ответом на POST, который приводит к созданию.
-
204 Нет содержимого. Это ответ на успешный запрос, который не будет возвращать тело (например, запрос DELETE)
-
304 Not Modified — используйте этот код состояния, когда заголовки HTTP-кеширования находятся в работе
-
400 Bad Request — этот код состояния указывает, что запрос искажен, например, если тело не может быть проанализировано
-
401 Unauthorized — Если не указаны или недействительны данные аутентификации. Также полезно активировать всплывающее окно auth, если приложение используется из браузера
-
403 Forbidden — когда аутентификация прошла успешно, но аутентифицированный пользователь не имеет доступа к ресурсу
-
404 Not found — если запрашивается несуществующий ресурс
-
405 Method Not Allowed — когда запрашивается HTTP-метод, который не разрешен для аутентифицированного пользователя
-
410 Gone — этот код состояния указывает, что ресурс в этой конечной точке больше не доступен. Полезно в качестве защитного ответа для старых версий API
-
415 Unsupported Media Type. Если в качестве части запроса был указан неправильный тип содержимого
-
422 Unprocessable Entity — используется для проверки ошибок
-
429 Too Many Requests — когда запрос отклоняется из-за ограничения скорости
Возможно, что-то упустили в списке. Думайте также сами.
формат: YYYY-MM-DDTHH:MM:SSZ
Например, created_at, has_like, display_name
Ваше REST API приложение должно возвращать всегда ответ в виде:
«data»: [], // и {}/null, если сущность одна
«message»: «Локализированное сообщение API»,
Ошибки валидации вида errors.prop[]
Ошибки валидации вида errors.prop[]
Ошибки валидации выдавать в виде:
«Поле Имя Обязательно для заполнения.»,
«Поле Имя должно иметь больше 6 символов.»
«message»: «Ошибка валидации»,
GET-параметры по общему функционалу
GET-параметры по общему функционалу
Имена, приведённые ниже, совпадают с полями
json-server
, что упростит и ускорит разработку FrontEnd специалистам.
GET /posts?_page=7&_limit=20
Использовать . для доступа к глубинным свойствам
GET /posts?title=json-server&author=typicode
GET /comments?author.name=typicode
GET /posts?_sort=views&_order=asc
GET /posts/1/comments?_sort=votes&_order=asc
Добавьте _start и _end или _limit (также включите X-Total-Count заголовок в ответ)
GET /posts?_start=20&_end=30
GET /posts/1/comments?_start=20&_end=30
GET /posts/1/comments?_start=20&_limit=10
Добавьте _gte или _lte для получения диапазона
GET /posts?likes_gte=10&likes_lte=20
Добавьте _ne, чтобы исключить значение
Добавить _like в фильтр (поддержка RegExp)
GET /posts?title_like=server
Чтобы включить дочерние ресурсы, добавьте _embed
GET /posts?_embed=comments
GET /posts/1?_embed=comments
Чтобы включить родительский ресурс, добавьте _expand
GET /comments?_expand=post
GET /comments/1?_expand=post
Чтобы получить или создать вложенные ресурсы (по умолчанию один уровень, добавьте пользовательские маршруты для большего)
API означает интерфейс прикладного программирования. Любое программное обеспечение с определенной функцией называется приложением при обсуждении API. Вы можете сравнить интерфейс API с соглашением об обслуживании между двумя программами, которые определяют запросы и ответы. Если вы новичок в API, мы рекомендуем вам ознакомиться с нашим Руководство для начинающих по API и Обзор API REST блог, прежде чем читать этот.
API REST позволяют получить доступ к данным CRM по протоколу HTTP/HTTPS. Вы можете выполнять такие действия, как создание, обновление, извлечение или удаление операций с любой информацией записи CRM. Это также позволит вам хранить данные конфигурации, специфичные для расширения и пользователя, или подключаться к внешним приложениям, используя сохраненные данные, специфичные для расширения. Доступ ко всем этим данным возможен с помощью базовой авторизации, то есть по имени пользователя и ключу доступа.
Ниже приведены пять основных шагов, которые можно использовать для создания любого API:
- Планировать API: рекомендации по разработке вашего API содержатся в спецификациях API, таких как OpenAPI. Желательно заранее рассмотреть различные варианты использования и убедиться, что API соответствует текущим стандартам разработки API.
- Создайте API: дизайнеры API создают прототипы новых API с небольшими изменениями существующих API. Разработчики могут адаптировать прототип к внутренним требованиям после его тестирования.
- Протестируйте API: Подобно тестированию программного обеспечения, тестирование API необходимо для защиты от ошибок и недостатков. Протестируйте API на устойчивость к онлайн-атакам, используя инструменты для тестирования API.
- Документировать API: Хотя API говорят сами за себя, документация может помочь пользователям. В сервис-ориентированной архитектуре чаще используются хорошо документированные API с различными функциями и вариантами использования. Напишите справочный документ, чтобы указать направление и помочь другим создавать свои API.
- Маркетинг API: Существуют онлайн-рынки, где разработчики могут покупать и продавать API другим, точно так же, как это делается для розничных товаров на eBay, Amazon и Flipkart. Вы можете зарабатывать деньги на своем API, разместив его.
В этом блоге вы узнаете, как создать пользовательскую команду REST API с помощью Vtiger API Designer. Итак, приступим.
Что такое дизайнер API?
Конструктор API — это инструмент или разработчики приложений, которые могут использовать для создания пользовательских API-интерфейсов веб-служб. Вы можете определить пользовательские конечные точки службы и параметры запроса. Эти API-интерфейсы можно использовать для взаимодействия с данными CRM, интеграции с внешними приложениями, а также для предоставления этих данных API-интерфейсам Javascript VTAP для использования на пользовательских страницах или виджетах в пользовательском интерфейсе Vtiger.
Вы можете создавать API-интерфейсы, используя язык дизайна приложений Vtiger (ВАДЛ), который частично основан на синтаксисе XML. VADL позволяет администраторам или разработчикам, не обладающим навыками программирования высокого уровня, легко определять API, но обладая базовыми знаниями в области программирования, вы быстро создаете эффективные API.
REST API следуют стандартному протоколу REST API, и вы можете определить их конечные точки следующим образом:
| https://instance.odx.vtiger.com/restapi/vtap/api/YOUR_CUSTOM_API_PATH |
|---|
Для REST API поддерживаются следующие методы HTTP-запросов:
- ПОЛУЧИТЬ
- POST
- ПОЛОЖИЛ
- УДАЛИТЬ
Давайте посмотрим, как вы можете использовать VTAP для создания собственного REST API.
Пользователи Vtiger CRM могут создавать API-интерфейсы REST, которые будут подключать CRM к другим сторонним приложениям, или создавать новые, расширяющие функциональные возможности CRM. Вот пример:
Давайте создадим REST API, который может доступ к данным из специфичный модуль с помощью ВТАП.
Ниже приведен пример API, который извлекает данные из модуля CRM под названием организации чтобы отобразить пять лучших организаций с самым высоким годовым доходом с именем API как топ_организации. Вы можете использовать другое имя, чтобы сохранить его уникальным.
Прежде чем мы начнем, давайте разберемся с компонентами XML и VDAL, которые будут использоваться для определения действий в приведенном выше примере API.
В следующей таблице описаны компоненты XML и VDAL, которые будут использоваться для определения пользовательского API REST для доступа и отображения данных CRM.
| Компонент XML и VDAL | Действие |
|---|---|
| API-метод = «получить» | Определение метода HTTP-запроса |
| выберите модуль = «Учетные записи» | Определите модуль для получения данных с помощью выберите |
| запись имя поля = «имя учетной записи»> |
Определите поля в записи для извлечения данных из запись |
| sort имя поля = «годовой_доход» порядок = «по убыванию» / поле /Сортировать |
Определите условия для результата таблицы, используя sort |
| предел макс = «5 ″ страница = » @ страница» / предел | Определите количество отображаемых сведений о записи с помощью предел |
| /Выбрать / api |
Завершите закрытие всех открытых тегов |
Внимание что все компоненты XML и VDAL в приведенной выше таблице должны быть заключены в теги (<>).
Выполните следующие шаги, чтобы создать REST API, описанный выше:
- Войдите в свою учетную запись Vtiger CRM.
- Нажмите Главное меню.
- Нажмите Платформа.
- Выберите Конструктор API.
- Нажмите +Добавить API.
- Нажмите Создавай рядом с REST API. Откроется окно Добавить REST API.
- Добавить REST-API: введите или выберите информацию для следующего:
- Модули: выберите модуль CRM, из которого необходимо получить доступ к данным.
- Имя: введите уникальный идентификатор для API.
- Статус: Установите флажок, чтобы активировать API.
- Нажмите Save..
- После добавления API вы увидите встроенную среду IDE, в которой вы будете использовать VADL для определения API и узлов XML для получения данных CRM. Обратитесь к таблице выше, чтобы понять компоненты XML и VADL.
- Нажмите Сохранить и опубликовать опубликовать построенный API.


Вы можете получить доступ и протестировать вышеуказанный REST API из любого внешнего приложения, используя следующий URL-адрес.
| https://instance.odx.vtiger.com/restapi/vtap/api/top_organizations |
|---|
Внимание что приведенный выше URL-адрес является примером, и вам нужно будет определить конечную точку в соответствии с вашим экземпляром CRM.
Знаете ли вы?
Приведенные выше данные можно использовать для отображения в виде списка на пользовательской странице или для гистограммы и других динамических результатов с использованием компонентов javascript для определения ваших API. Все пользовательские API REST, созданные в API Designer, также могут быть доступны с помощью API-интерфейсы VTAP Javascript.
Чтобы узнать больше о создании пользовательских API и VTAP, ознакомьтесь с Документация ВТАП.