-
Contents
-
Table of Contents
-
Bookmarks
Quick Links
Chapters
-
Table of Contents
7 -
Your Vehicle at a Glance 2
17 -
Safety Features of Your Vehicle 3
27 -
Features of Your Vehicle 4
91 -
Driving Your Vehicle 5
245 -
What to Do in an Emergency 6
403 -
Maintenance 7
433 -
Specifications, Consumer Informa — 8 Tion and Reporting Safety Defects
525
Related Manuals for Kia Soul 2022
Summary of Contents for Kia Soul 2022
-
Page 2
WARNING – California Proposition 65 “Operating, servicing and maintaining a passenger vehicle or off-road vehicle can expose you to chemicals including engine exhaust, carbon monoxide, phthalates, and lead, which are known to the State of California to cause cancer and birth defects or other reproductive harm. -
Page 3
Please drive safely, and enjoy your Kia vehicle! 2021 Kia America, Inc. All rights reserved. May not be reproduced or translated in whole or in part without the written consent of Kia America, Inc. Printed in Korea… -
Page 5
and follow ALL procedures and rec — How to use this manual ommendations provided in these We want to help you get the great — WARNING’S, CAUTION’S and est possible driving pleasure from NOTICE’S. your vehicle. Your Owner’s Manual can assist you in many ways. WARNING We strongly recommend that you A WARNING indicates a situation in… -
Page 7: Table Of Contents
Table of Contents Introduction Your vehicle at a glance Safety features of your vehicle Features of your vehicle Driving your vehicle What to do in an emergency Maintenance Specifications, Consumer information and Reporting safety defects Abbreviation Index…
-
Page 9
Introduction Introduction Fuel requirements …………..1-2 Vehicle modifications …………… 1-5 Vehicle break-in process …………1-5 Vehicle handling instructions ……….1-6 Risk of fire or burns when parking or stopping vehicle ..1-6 Vehicle data collection and event data recorders ….1-7… -
Page 10: Introduction
(Consult an your fuel efficiency and could lower authorized Kia dealer for details.) your MPG results. Tighten the cap until it clicks one Methanol may cause drivability…
-
Page 11: Introduction
— and damage to your vehicle’s engine ered by your New Vehicle Limited and fuel system. Kia recommends Warranty. that customers do not use fuel with an ethanol content exceeding 15%.
-
Page 12
Introduction Fuel requirements Fuel Additives Operation in foreign countries Kia recommends that you use good If you are going to drive your vehicle quality gasolines treated with in another country, be sure to: detergent additives such as TOP Observe all regulations regarding registration and insurance. -
Page 13: Vehicle Modifications
Introduction Vehicle modifications Vehicle modifications Vehicle break-in process By following a few simple precau — This vehicle should not be modified. Modification of your vehicle could tions for the first 600 miles (1,000 km) you may add to the perfor — affect its performance, safety or durability and may even violate gov — mance, economy and life of your…
-
Page 14: Vehicle Handling Instructions
Introduction Vehicle handling instructions Risk of fire or burns when park — Vehicle handling instructions ing or stopping vehicle As with other vehicles of this type, Do not park or stop the vehicle failure to operate this vehicle cor — near flammable items such as rectly may result in loss of control, leaves, paper, oil, and tires.
-
Page 15: Vehicle Data Collection And Event Data Recorders
Introduction Vehicle data collection and event data recorders Vehicle data collection and event der, age, and crash location) are recorded. However, other parties, data recorders such as law enforcement, could This vehicle is equipped with an combine the EDR data with the type event data recorder (EDR).
-
Page 17: Your Vehicle At A Glance
Your vehicle at a glance Your vehicle at a glance Exterior overview…………..2-2 Interior overview…………… 2-5 Instrument panel overview …………. 2-7 Engine compartment …………… 2-9…
-
Page 18: Your Vehicle At A Glance
Your vehicle at a glance Exterior overview Your vehicle at a glance Exterior overview Front view OSK3011001N * The actual shape may differ from the illustration. 1. Hood 4-31 2. Head lamp (Features of your vehicle) 4-92 Head lamp (Maintenance) 7-67 3.
-
Page 19
Your vehicle at a glance Exterior overview Front windshield wiper blades (Maintenance) 7-32 8. Windows 4-26 9. Front ultrasonic sensor 4-87… -
Page 20
Your vehicle at a glance Exterior overview Rear view OSK3011002N * The actual shape may differ from the illustration. 1. Door locks 4-18 2. Fuel filler door 4-33 3. Rear combination lamp (Maintenance) 7-72, 7-74 4. High mounted stop lamp (Maintenance) 7-75 5. -
Page 21: Interior Overview
Your vehicle at a glance Interior overview Interior overview OSK3011003N * The actual shape may differ from the illustration. 1. Inside door handle 4-19 2. Power window switch 4-28 3. Central Door lock/unlock switch 4-20 4. Power window lock switch 4-30 5.
-
Page 22
Your vehicle at a glance Interior overview 14.ESC Off button 5-39 15.Steering wheel 4-40 16.Tilt and telescopic steering control lever 4-42 17.Inner fuse panel 7-52 18.Hood release lever 4-31 19.Transmission shift lever 5-18, 5-24 20.Seat… -
Page 23: Instrument Panel Overview
Your vehicle at a glance Instrument panel overview Instrument panel overview OSK3011004N * The actual shape may differ from the illustration. 1. Audio remote control buttons Steering wheel audio controls (Refer to the «CAR MULTIMEDIA SYSTEM USER’S MANUAL».) 2. Driver’s front air bag 3-53 3.
-
Page 24
Your vehicle at a glance Instrument panel overview 12.Front seat warmer / Seat air ventilation 4-136, 4-138 13.Power outlet 4-139 14.Heated steering wheel On/Off button 4-42 15.Drive mode button 5-49 16.Center console storage box 4-132 17.Parking brake 5-35 18.Glove box 4-133 19.Passenger’s front air bag 3-53… -
Page 25: Engine Compartment
Your vehicle at a glance Engine compartment Engine compartment (Gasoline) 1.6 T-GDi OSK3078001NR (Gasoline) 2.0 MPI OSK3078053NR * The actual engine cover in the vehicle may differ from the illustration. 1. Engine coolant reservoir 7-23 2. Engine oil filler cap 7-21 3.
-
Page 27
Safety features of your vehicle Safety features of your vehicle Important safety precautions ……….3-3 Seat ………………… 3-5 Feature of Seat Leather…………3-7 Front seat adjustment — manual seat…….. 3-8 Front seat adjustment — power seat…….. 3-10 Headrest for front seat…………3-11 Seatback pocket (if equipped)………. -
Page 28
Safety features of your vehicle Do not install a child restraint on the front passenger’s seat ………………3-43 Air bag warning light…………3-44 Supplemental Restraint System (SRS) components and functions …………….3-44 Occupant Detection System (ODS)……..3-47 Driver’s and passenger’s front air bag……3-53 Side air bag …………….3-56 Curtain air bag……………3-58 Air bag collision sensors …………3-60 Why didn’t my air bag go off in a collision? (Inflation and… -
Page 29: Safety Features Of Your Vehicle
Safety features of your vehicle Important safety precautions Safety features of your vehi — ries to occupants who sit too close to them, or who are not properly restrained. Infants, young children, and shorter adults are at the great — Important safety precautions est risk of being injured by an inflat — You will find many safety precau -…
-
Page 30
Safety features of your vehicle Important safety precautions Most states have laws prohibiting drivers from texting. Some states and cities also prohibit drivers from using handheld phones. NEVER let the use of a mobile device distract you from driving. You have a responsibility to your passengers and others on the road to always drive safely, with your hands on the wheel as well… -
Page 31: Seat
Safety features of your vehicle Seat Seat OSK3038001NR Front seat WARNING 1. Forward and backward Loose objects 2. Seatback angle Do not place anything in the driver’s 3. Seat cushion height footwell or under the front seats. 4. Lumbar support (if equipped) Loose objects in the driver’s foot 5.
-
Page 32
Safety features of your vehicle Seat operate properly, or passenger’s WARNING hips may slide under the lap portion Uprighting seat of the seat belt during an accident Do not press the release lever on a or a sudden stop. manual seatback without holding and controlling the seatback. -
Page 33: Feature Of Seat Leather
Safety features of your vehicle Seat WARNING WARNING Unexpected Seat Movement Cargo Area After adjusting a manual seat, Do not allow passengers to ride in the cargo area under any circum — always check that it is locked by shifting your weight to the front stance.
-
Page 34: Front Seat Adjustment — Manual Seat
Safety features of your vehicle Seat area is high which provides driving Front seat adjustment — manual seat comfort and stability. The front seat can be adjusted by CAUTION using the control levers located on the outside of the seat cushion. Belts with metallic accessories, zippers or keys inside the back pocket may damage the seat fab -…
-
Page 35
Safety features of your vehicle Seat Seatback angle To lower the seat cushion, push down the lever several times. To raise the seat cushion, pull up the lever several times. WARNING Reclining seatback Sitting in a reclined position when the vehicle is in motion can be dan — gerous. -
Page 36: Front Seat Adjustment — Power Seat
Safety features of your vehicle Seat Forward and backward Front seat adjustment — power seat (if equipped) The front seat can be adjusted by using the control switches located on the outside of the seat cushion. Before driving, adjust the seat to the proper position so you can easily control the steering wheel, pedals and switches on the instrument…
-
Page 37: Headrest For Front Seat
Safety features of your vehicle Seat Seat cushion height 1. Press the front portion of the switch to increase support, or the rear portion of the switch, to decrease support. 2. Release the switch once it reaches the desired position. Headrest for front seat The driver’s and front passenger’s seats are equipped with a headrest…
-
Page 38
Safety features of your vehicle Seat Adjusting the height up and down Also, adjust the headrest as close to your head as possible. For this rea — son, the use of a cushion that holds the body away from the seatback is not recommended. -
Page 39
Safety features of your vehicle Seat Removal critical neck and head support in a crash. Type A Reinstallation Type A OSK3038011NR Type B OSK3038013NR Type B OSK3038012NR To remove the headrest: 1. Recline the seatback (2) with the recline lever or switch (1). 2. -
Page 40: Seatback Pocket (If Equipped)
Safety features of your vehicle Seat Headrest for rear seat WARNING The rear seat is equipped with Headrest Reinstallation headrests in all the seating positions To reduce the risk of injury to the for the occupant’s safety and com — head or neck, always make sure the fort.
-
Page 41: Armrest
Safety features of your vehicle Seat Adjusting the height up and down while pressing the release button (if equipped) (1). Then adjust it to the appropriate height and ensure that it locks in position. Armrest (if equipped) To use the armrest, pull it forward from the seatback.
-
Page 42
Safety features of your vehicle Seat seat belts are available for use. This could result in serious injury or death in case of an accident or sudden stop. To fold down the rear seatback 1. Set the front seatback to the upright position and if necessary, slide the front seat forward. -
Page 43
Safety features of your vehicle Seat To unfold the rear seat ward, resulting in injury caused by being struck by the seatback. WARNING Rear Seatback To ensure maximum protection in the event of an accident or sudden stop, when returning the rear seat to the upright position: Be careful not to damage the seat OSKEV039050NR… -
Page 44
Safety features of your vehicle Seat Cargo loading CAUTION Make sure the engine is off, the Rear seat belts transmission is in P (Park) and the When returning the rear seatbacks parking brake is securely applied to the upright position, remember whenever loading or unloading to return the rear shoulder belts to cargo. -
Page 45: Seat Belts
Safety features of your vehicle Seat belts Seat belts Always wear both the shoulder portion and lap portion of the lap/ The following explains seat belts shoulder belt. precautions and how to fasten seat belts. WARNING Seat belt restraint system Damaged seat belt For maximum restraint system pro — Replace the entire seat belt assem -…
-
Page 46: Driver’s Seat Belt Warning
Safety features of your vehicle Seat belts No modifications or additions Driver’s seat belt warning should be made by the user which As a reminder to the driver, the would either prevent the seat belt driver’s seat belt warning lights will adjusting devices from operating illuminate for approximately 6 sec — to remove slack, or prevent the…
-
Page 47: Front Passenger’s Seat Belt Warning
Safety features of your vehicle Seat belts the speed is under 12 mph (20 km/ If you start to drive without the h). When the speed is 12 mph (20 passenger seat belt fastened or you km/h) and faster, the warning light unfasten the seat belt when you will blink and warning chime will drive 12 mph (20 km/h) and faster,…
-
Page 48: Seat Belt — Driver’s 3-Point System With Emergency Locking Retractor
Safety features of your vehicle Seat belts Seat belt — Driver’s 3-point system WARNING with emergency locking retractor You should place the lap belt portion The following explains how to fas — as low as possible and snugly across ten and adjust the driver’s seat belt. your hips.
-
Page 49: Seat Belts — Front Passenger And Rear Seat 3-Point System With Combination Locking Retractor
Safety features of your vehicle Seat belts Height adjustment WARNING You can adjust the height of the Shoulder belt positioning shoulder belt anchor to one of the 4 Verify the shoulder belt anchor is positions for maximum comfort and locked into position at the appropri — safety.
-
Page 50
Safety features of your vehicle Seat belts always be seated in the rear seat. NOTICE NEVER place any infant restraint Although the combination retractor system in the front seat of the provides the same level of protec — vehicle. tion for seated passengers in either This type of seat belt combines the emergency or automatic locking features of both an emergency… -
Page 51
Safety features of your vehicle Seat belts OSK3038022NR OSK3038023NR 1. Rear right seat belt fastening To release the seat belt: buckle 2. Rear center seat belt fastening buckle 3. Rear left seat belt fastening buckle WARNING Prior to fastening the rear seat belts, ensure the latch matches the seat belt buckle. -
Page 52: Stowing The Rear Seat Belt
Safety features of your vehicle Seat belts Stowing the rear seat belt OSK3051259N The pre-tensioner seat belts may OSK3038053NR be activated, when a frontal collision If the center seat belt is not in use, is severe enough, together with the always lock the latch plate into the air bags.
-
Page 53
Safety features of your vehicle Seat belts If the system senses excessive ten — 2. Retractor pre-tensioner assembly 3. SRS control module sion on the driver or passenger’s 4. Emergency fastening device (EFD) seat belt when the pre-tensioner system activates, the load limiter WARNING inside the retractor pre-tensioner will release some of the pressure on… -
Page 54: Seat Belt Precautions
Do not attempt to inspect or replace the pre-ten — NOTICE sioner seat belts yourself. This must be done by an authorized Kia dealer. Small children are best protected from injury in an accident when properly restrained in the rear seat…
-
Page 55
Safety features of your vehicle Seat belts Restraint System (CRS)» on page 3- WARNING Small children Do not allow small children to ride in Larger children the vehicle without an appropriate child restraint system. If the shoul — Children who are too large for child der belt comes in contact with your restraint systems should always child’s neck or face, your child is too… -
Page 56: Care Of Seat Belts
Safety features of your vehicle Seat belts consult a physician for recommen — WARNING dations. Pinched seat belt Make sure that the webbing and/or One person per belt buckle does not get caught or Two people (including children) pinched in the rear seat when should never attempt to use a single returning the rear seatback to its seat belt.
-
Page 57: Child Restraint System (Crs)
Kia dealer. maneuver. WARNING Restraint Location Never install a child or infant seat in the front passenger’s seat.
-
Page 58
Infants and younger children must be restrained in an appropriate NOTICE rear-facing or forward-facing CRS After an accident, have a Kia dealer that has first been properly secured check the child restraint system, to the rear seat of the vehicle. Read… -
Page 59: Selecting A Child Restraint System (Crs)
Safety features of your vehicle Child Restraint System (CRS) Selecting a Child Restraint System quickly, resulting in injuries to the (CRS) child in the vehicle. When selecting a CRS for your child, always: WARNING Make sure the CRS has a label Seat Belt Use certifying that it meets applicable Federal Motor Vehicle Safety…
-
Page 60: Installing A Child Restraint System (Crs)
Safety features of your vehicle Child Restraint System (CRS) keep the child positioned in the seat limit allowed by your child and reduces the stress to the neck restraint’s manufacturer. Once your child outgrows the for — and spinal cord. All children under age one must ward- facing child restraint, your always ride in a rear-facing infant…
-
Page 61
Safety features of your vehicle Child Restraint System (CRS) Properly secure the child restraint Lower anchors are metal bars built to the vehicle. All child restraints into the vehicle. There are two lower must be secured to the vehicle anchors for each LATCH seating with the lap part of a lap/shoulder position that will accommodate a belt or with the LATCH system. -
Page 62
Safety features of your vehicle Child Restraint System (CRS) Securing a child restraint with the position. LATCH lower anchors are LATCH anchors system only to be used in the left and right rear outboard seating positions. You To install a LATCH-compatible child may damage the anchors or the restraint in either of the rear out — anchors may fail and break in a colli -… -
Page 63
This could cause the anchor or attach — ment to come loose or break. Always have the LATCH system inspected by your authorized Kia dealer after an accident. An acci — ODEEV058039NR dent can damage the LATCH sys -… -
Page 64
Safety features of your vehicle Child Restraint System (CRS) tether anchor. It may not work 3. Check that the child restraint is securely attached to the seat by properly if attached to something pushing and pulling the seat for — else. -
Page 65
Safety features of your vehicle Child Restraint System (CRS) To install a child restraint system on the rear seats, do the following: 1. Place the child restraint system on a rear seat and route the lap/ shoulder belt around or through the child restraint, following the restraint manufacturer’s instruc — tions. -
Page 66
Safety features of your vehicle Child Restraint System (CRS) 7. Double check that the retractor is out of the restraint and allow the in the «automatic locking» mode seat belt to retract fully. by attempting to pull more of the seat belt out of the retractor. -
Page 67: Air Bag — Advanced Supplemental Restraint System
Safety features of your vehicle Air bag — advanced supplemental restraint system Air bag — advanced supplemental restraint system OSKEV039029NR * The actual air bags in the vehicle may differ from the illustration. 1. Driver’s front air bag 2. Passenger’s front air bag 3.
-
Page 68: How Does The Air Bag System Operate
Safety features of your vehicle Air bag — advanced supplemental restraint system How does the air bag system oper — When a rollover is detected, side ate? and/or curtain air bags will remain Air bags are activated (able to inflated longer to help provide protection from ejection, espe — inflate if necessary) only when the ignition switch has been…
-
Page 69: Do Not Install A Child Restraint On The Front Passenger’s Seat
Safety features of your vehicle Air bag — advanced supplemental restraint system ing comfortable control of the vehi — bag related parts in the steering cle. A distance of at least 10 inches wheel, instrument panel and the (25 cm) from your chest to the roof rails above the front and rear steering wheel is recommended.
-
Page 70: Air Bag Warning Light
If any of the following conditions or fatal injuries to the child. occur, this indicates a malfunction in the air bag system. Have an autho — rized Kia dealer inspect the air bag WARNING system as soon as possible. Air bag deployment…
-
Page 71: Occupant Detection System (Ods)
Safety features of your vehicle Air bag — advanced supplemental restraint system 5. Retractor pre-tensioner assem — Driver’s front air bag (2) blies* 6. Air bag warning light 7. SRS control module (SRSCM) 8. Front impact sensors 9. Side impact sensors 10.Side pressure sensors 11.Occupant detection system (Front passenger’s seat only)
-
Page 72
Such objects may occurs, have your vehicle immedi — become dangerous projectiles if the ately inspected by an authorized air bag deploys. Kia dealer. WARNING NOTICE Flying objects Before you replace a fuse or discon -… -
Page 73
Safety features of your vehicle Air bag — advanced supplemental restraint system Occupant Detection System (ODS) nates the words PASSENGER AIR BAG » » indicates the front Your vehicle is equipped with an passenger air bag system is deac — occupant detection system in the tivated. -
Page 74
Safety features of your vehicle Air bag — advanced supplemental restraint system wearing the safety belt properly) for the most effective protection by the air bag and the safety belt. The ODS (Occupant Detection System) may not function prop — erly if the passenger takes actions which can defeat the detection system. -
Page 75
Safety features of your vehicle Air bag — advanced supplemental restraint system Condition and operation in the front passenger occupant detection system Indicator/Warning light Devices Condition detected by the «PASSENGER occupant classification sys — SRS warning Front passenger AIR BAG OFF» light air bag indicator light… -
Page 76
Safety features of your vehicle Air bag — advanced supplemental restraint system done at an authorized Kia service senger airbag. It is important for the center. driver to instruct the passenger as After the passenger seat has to the proper seating instructions as been removed or installed for contained in this manual. -
Page 77
Safety features of your vehicle Air bag — advanced supplemental restraint system Never sit with hips shifted Never lean on the door or center towards the front of the seat. console. Never sit on one side of the front passenger seat. ODEEV058057NR Never excessively recline the front passenger seatback. -
Page 78
Safety features of your vehicle Air bag — advanced supplemental restraint system water bottles, on the passenger Proper position seat. Do not use electronic devices, such as laptops and satellite radios, that use inverter chargers. ODEEV058064NR When an adult is seated in the front passenger seat, if the PASSENGER AIR BAG «… -
Page 79: Driver’s And Passenger’s Front Air Bag
Safety features of your vehicle Air bag — advanced supplemental restraint system is illuminated, because the air bag Any child age 12 and under should will not deploy in the event of a ride in the rear seat. Children too crash.
-
Page 80
Safety features of your vehicle Air bag — advanced supplemental restraint system Driver’s front air bag tion than that offered by the seat belt system alone in case of a fron — tal impact of sufficient severity. The SRS uses sensors to gather infor — mation about the driver’s and front passenger’s seat belt usage and impact severity. -
Page 81
Front air bags are not intended to system. That contact is Kia’s toll- deploy in side-impact, rear-impact free Customer Assistance center at or rollover crashes. However, when 1-800-333-4Kia. However, Kia does… -
Page 82: Side Air Bag
Safety features of your vehicle Air bag — advanced supplemental restraint system result in injury, due to accidental Side air bag deployment of the air bags or by Your vehicle is equipped with a side rendering the SRS inoperative. air bag in each front seat. WARNING No attaching objects No objects (such as crash pad cover,…
-
Page 83
— If seat or seat cover is damaged, over situations. have the vehicle checked and repaired by an authorized Kia WARNING dealer. Inform the dealer that Unexpected deployment your vehicle is equipped with side… -
Page 84: Curtain Air Bag
Safety features of your vehicle Air bag — advanced supplemental restraint system cushion. It could cause harm if the vehicle is in a crash severe enough to cause the air bags to deploy. Never place or insert any object into any small opening near the side airbag labels attached to the vehicle seats.
-
Page 85
NOTICE Never try to open or repair any components of the side and curtain air bag system. This should only be done by an authorized Kia dealer. WARNING No attaching objects Do not place any objects over the air bag. Also, do not attach any… -
Page 86: Air Bag Collision Sensors
Safety features of your vehicle Air bag — advanced supplemental restraint system Air bag collision sensors The air bag collision sensors are located in the following positions OSK3031039N OSK3031040N OSK3031041N OSK3038042NR OSK3038043NR * The actual shape and position of sensors may differ from the illustration. 1.
-
Page 87: Why Didn’t My Air Bag Go Off In A Collision
Have the vehicle front collision. checked and repaired by an authorized Kia dealer. Side and/or curtain air bags Side and/or curtain air bags are Problems may arise if the sensor…
-
Page 88
Safety features of your vehicle Air bag — advanced supplemental restraint system Similarly, although side and curtain be able to provide any additional air bags are designed to inflate in benefit. certain side impact collisions, they Front air bags may not inflate in may inflate in other types of colli — side impact collisions, because sions where a side force is detected… -
Page 89: Supplemental Restraint System (Srs) Care
The side and roof rails must be performed by air bags may inflate if the vehicle is an authorized Kia dealer. Improper tilted, such as when being towed, handling of the SRS system may because of the rollover sensors in result in serious personal injury.
-
Page 90: Air Bag Warning Label
Safety features of your vehicle Air bag — advanced supplemental restraint system Air bag warning label Air bag warning labels, some required by the U.S. National High — way Traffic Safety Administration (NHTSA), are attached to the sun visor to alert the driver and passen — gers of potential risks of the air bag system.
-
Page 91
Features of your vehicle Features of your vehicle Keys ……………….. 4-6 Smart key………………. 4-7 This device complies with Part 15 of the FCC rules..4-9 Remote keyless entry…………4-10 Transmitter precautions …………. 4-12 This device complies with Part 15 of the FCC rules..4-12 Battery replacement ………… -
Page 92
Features of your vehicle Closing the fuel filler door ………..4-33 Sunroof ………………4-36 Sunshade…………….4-36 Tilt open/close……………4-37 Slide open/close …………..4-37 Automatic reversal ……………4-38 Resetting the sunroof …………4-39 Sunroof open warning …………4-39 Steering wheel……………..4-40 Electronic power steering ………..4-40 Tilt & telescopic steering wheel ………4-41 Adjusting steering wheel angle and height……4-42 Heated steering wheel …………4-42 Horn ………………4-43… -
Page 93
Features of your vehicle Warning and indicator lights……….4-71 Warning lights …………… 4-71 Indicator lights …………..4-77 Head-Up Display (HUD)…………4-80 Rear View Monitor (RVM)…………4-83 Reverse Parking Distance Warning (PDW) ……4-84 Forward/Reverse Parking Distance Warning (PDW)..4-87 Lighting………………4-92 Battery saver function …………4-92 Headlight escort function ……….. -
Page 94
Features of your vehicle Operating rear window defroster……..4-106 Outside mirror defroster……….4-107 Manual climate control system ……… 4-108 Heating and air conditioning ……….4-109 System operation ………….. 4-113 Climate control air filter ……….. 4-115 Checking the amount of air conditioner refrigerant and compressor lubricant ………… -
Page 95
Features of your vehicle Center console storage ………….4-132 Glove box…………….4-133 Sunglass holder…………..4-133 Luggage net holder …………4-134 Increase cargo space…………4-134 Interior features …………..4-135 Cup holder…………….4-135 Seat warmer ……………4-136 Air ventilation seat ………….4-138 Sun visor …………….4-139 Power outlet ……………4-139 USB charger……………..4-140 Wireless smart phone charging system……4-142 Coat hook …………….4-145 Floor mat anchor(s) …………4-145 Cargo area cover…………..4-146… -
Page 96: Features Of Your Vehicle
To fold the key, fold the key manu — WARNING ally while pressing the release but — ton. Aftermarket keys Use only Kia original parts for the CAUTION ignition key in your vehicle. If an aftermarket key is used, the ignition Key button operation…
-
Page 97: Smart Key
Features of your vehicle Smart key Smart key Smart key (if equipped) To remove the mechanical key, With a smart key, you can lock or press and hold the release button unlock a door and even start the and remove the mechanical key. engine without inserting the key.
-
Page 98
Tow the vehicle, if neces — Any door except the liftgate is sary, and contact an authorized opened. Kia dealer. A maximum of 2 smart keys can Unlocking Pressing the button of the driver’s be registered to a single vehicle. If… -
Page 99
Features of your vehicle Smart key immediately take the vehicle and Do not leave the smart key near key to your authorized Kia dealer metallic objects such as golf bags, to protect it from potential theft. metal cases and so on. -
Page 100: Remote Keyless Entry
Features of your vehicle Remote keyless entry Remote keyless entry (if NOTICE equipped) Changes or modifications not Using the remote keyless entry, you expressly approved by the party can lock and unlock the doors responsible for compliance could remotely. void the user’s authority to operate the equipment.
-
Page 101
Features of your vehicle Remote keyless entry Type C 4 seconds. The hazard warning lights will blink (for smart key, the chime also sounds) twice again to indicate that all doors are unlocked. After pressing this button, the doors will lock automatically unless you open any door within 30 seconds. -
Page 102: Transmitter Precautions
(1) within 32 feet transmitter (or smart key), contact (10 m) distance from the vehicle. an authorized Kia dealer. Press the remote start button (5) If the transmitter is in close prox — for over 2 seconds within 4 sec — imity to your cell phone or smart onds after locking the doors.
-
Page 103: Battery Replacement
If you are unsure expressly approved by the party how to use or replace the battery, responsible for compliance, it will contact an authorized Kia dealer. not be covered by your manufac — Using the wrong battery can cause turer’s vehicle warranty.
-
Page 104
ON posi — the engine from being started. tion. If you need additional keys or lose your keys, consult an authorized Kia To activate the immobilizer sys tem: dealer. Turn the ignition key to the OFF CAUTION position. -
Page 105: Theft-Alarm System
Features of your vehicle Theft-alarm system cause the immobilizer system to Theft-alarm system (if malfunction. equipped) This system is designed to provide protection from unauthorized entry This device complies with Part 15 into the vehicle. of the FCC rules. Operation is subject to the following two conditions: 1.
-
Page 106: Theft-Alarm Stage
Features of your vehicle Theft-alarm system handle with the smart key in your After completion of the steps above, possession. the hazard warning lights will blink After completion of the steps once to indicate that the system is above, the hazard warning lights armed.
-
Page 107: Disarmed Stage
The system will be disarmed when: and wait for 30 seconds. Then the system will be disarmed. Transmitter If you lose your keys, consult your authorized Kia dealer. The door unlock button is pressed. The engine is started. (within 3 CAUTION seconds) The ignition switch is in the «ON»…
-
Page 108: Door Locks
Features of your vehicle Door locks Door locks Once the doors are unlocked, they may be opened by pulling the door handle. Operating door locks from outside When closing the door, push the the vehicle door by hand. Make sure the doors are closed securely.
-
Page 109
Features of your vehicle Door locks button will unlock and the door NOTICE will open. Always turn the ignition switch to Doors cannot be locked if the the OFF position, engage the park — smart key is in the vehicle and a ing brake, close all windows, and door is open. -
Page 110
Features of your vehicle Door locks With central door lock switch If the smart key is in the vehicle and any door is opened, the doors Driver side will not lock even though the right portion (1) for driver side or upper portion (1) for passenger side of the central door lock switch is pressed. -
Page 111: Rear Occupant Alert (Roa) System
Features of your vehicle Door locks Door lock/unlock features Impact sensing door unlock system All doors will automatically unlock when an impact causes the air bags to deploy. Speed sensing door lock system All doors will automatically lock after the vehicle speed exceeds 10 mph (15 km/h).
-
Page 112
Features of your vehicle Door locks CAUTION The Rear Occupant Alert (ROA) sys — tem uses a rear door opened and closed history. The history is reset after the driver turns off ignition normally, exits the vehicle and locks the door remotely using the remote keyless entry. -
Page 113: Liftgate
Features of your vehicle Liftgate Liftgate If unlocked, the liftgate can be opened by pressing the handle When you open the liftgate, you will and pulling it up. see a space where you can load the Once the liftgate is opened and cargo.
-
Page 114: Closing The Liftgate
Features of your vehicle Liftgate Closing the liftgate Opening the liftgate in emergency Your vehicle is equipped with the Lower and push down the liftgate emergency liftgate safety release firmly. Make sure that the liftgate is lever located on the bottom of the securely latched.
-
Page 115
Features of your vehicle Liftgate CAUTION Make sure there are no people or objects around the liftgate before opening or closing the liftgate. Wait until the liftgate is open fully and stopped before loading or unloading cargo from the vehicle. WARNING Do not grasp the part supporting the liftgate (gas lifter), as this may… -
Page 116: Windows
Features of your vehicle Windows Windows The doors of this vehicle are equipped with power windows that can be operated by a switch. OSK3048038NR 1. Driver’s door power window switch 2. Front passenger’s door power window switch 3. Rear door (left) power window switch 4.
-
Page 117
Features of your vehicle Windows NOTICE NOTICE In cold and wet climates, power win — While driving with the rear windows dows may not work properly due to down or with the sunroof (if freezing conditions. equipped) in an open (or partially open position), your vehicle may demonstrate a wind buffeting or The ignition switch must be in the… -
Page 118
Features of your vehicle Windows Window opening and closing in operation, pull up the switch briefly to the opposite direction of the window movement. Type A To open or close a window, press Type C — Auto up/down window (if down or pull up the front portion of equipped) the corresponding switch to the… -
Page 119
Features of your vehicle Windows Automatic reversal for Type C pulling up the switch. The automatic reverse feature will not operate if If the upward movement of the the window is raised using the half — window is blocked by an object or way position on the power window part of the body, the window will switch. -
Page 120: Power Window Lock Switch
Features of your vehicle Windows Power window lock switch same time. This will also ensure the longevity of the fuse. The driver can disable the power window switches on the rear pas — Always double check to make sure sengers’ doors by pressing the all arms, hands, head and other power window lock switch to the obstructions are safely out of the…
-
Page 121: Hood
Features of your vehicle Hood Hood 2. Go to the front of the vehicle, raise the hood slightly, push the The hood serves as a cover for the secondary latch (1) up side and lift engine compartment. Open the the hood (2). hood if maintenance work needs to be performed in the engine com — partment or if you need to look at…
-
Page 122: Closing The Hood
Features of your vehicle Hood Closing the hood WARNING 1. Before closing the hood, check the Unsecured hood following: Always double check to be sure that All filler caps in the engine com — the hood is firmly latched before partment must be correctly driving away.
-
Page 123: Fuel Filler Door
Features of your vehicle Fuel filler door Fuel filler door Opening the fuel filler door The fuel filler door must be opened from inside the vehicle by pulling up the fuel filler door opener. OSK3048050NR 4. To remove the cap turn the fuel filler cap (2) counterclockwise.
-
Page 124
Features of your vehicle Fuel filler door fuel or if you hear a hissing sound, WARNING wait until the condition stops before Static electricity completely removing the cap. Before touching the fuel nozzle, If pressurized fuel sprays out, it can you should eliminate potentially cover your clothes or skin and sub — dangerous static electricity dis -… -
Page 125
— page 1-2. line. If the fuel filler cap requires replace — ment, use only a genuine Kia cap or the equivalent specified for your WARNING vehicle. An incorrect fuel filler cap Cell phone fires… -
Page 126: Sunroof
Features of your vehicle Sunroof Sunroof (if equipped) Do not leave the engine running and the key in your vehicle with If your vehicle is equipped with a unsupervised children. Unat — sunroof, you can slide or tilt your tended children could operate the sunroof with the sunroof switch sunroof, which could result in located on the overhead console.
-
Page 127: Tilt Open/Close
Features of your vehicle Sunroof NOTICE NOTICE The sunshade will open automati — The sunroof glass cannot slide open cally when the sunroof glass moves, and tilt open at the same time. You but the sunshade does not close cannot tilt open while the sunroof automatically when the sunroof glass is slide open, and you cannot glass is closed.
-
Page 128: Automatic Reversal
Features of your vehicle Sunroof To stop the sunroof movement at objects may get caught causing any point, push the sunroof switch injuries or vehicle damage. Never deliberately use your body in any direction. parts to test the automatic rever — sal function.
-
Page 129: Resetting The Sunroof
Features of your vehicle Sunroof 3. Release the switch when the sun — Water may wet the interior of the vehicle. roof glass is fully closed. Do not extend any luggage out — 4. Push the switch forward until the side the sunroof while driving.
-
Page 130: Steering Wheel
Should you notice any change in the effort required to steer during nor — mal vehicle operation, have the power steering checked by an authorized Kia dealer. NOTICE The following symptoms may occur during normal vehicle operation:…
-
Page 131: Tilt & Telescopic Steering Wheel
Tilt & telescopic steering wheel abnormally. Take your vehicle to A tilt and telescopic steering wheel an authorized Kia dealer and have allows you to adjust the steering the vehicle checked as soon as wheel before you drive possible.
-
Page 132: Adjusting Steering Wheel Angle And Height
Features of your vehicle Steering wheel again and then lock the steering WARNING wheel. Steering wheel adjustment Never adjust the angle and height of Heated steering wheel (if equipped) the steering wheel while driving. You may lose steering control. With the ignition switch in the ON position, pressing the heated steer — ing wheel button warms the steer — Adjusting steering wheel angle and…
-
Page 133: Horn
Features of your vehicle Steering wheel may impair the function of the Horn heated steering wheel system. To sound the horn, press the area When cleaning the heated steer — indicated by the horn symbol on ing wheel, do not use an organic your steering wheel (see illustra — solvent, such as paint thinner, tion).
-
Page 134: Mirrors
Features of your vehicle Mirrors Mirrors dampened with glass cleaner. Do not spray glass cleaner directly on the This vehicle is equipped with a rear — mirror. It may cause the liquid view mirrors inside and outside to cleaner to enter the mirror housing. provide views of objects behind the vehicle.
-
Page 135
Features of your vehicle Mirrors Day/night rearview mirror with 1. Virtual Assist button Telematics function (if equipped) 2. UVO (Voice local search) button 3. Roadside assist button For day and night function: Electric chromic mirror (ECM) with UVO service (if equipped) ODEEV068034NR * (1): Day, (2): Night Make this adjustment before you… -
Page 136: Outside Rearview Mirror
Features of your vehicle Mirrors Outside rearview mirror WARNING Your vehicle is equipped with both Mirror adjustment left-hand and right-hand outside Do not adjust or fold the outside rearview mirrors. rearview mirrors while the vehicle is Be sure to adjust the mirror angles moving.
-
Page 137
Features of your vehicle Mirrors longer than necessary, the motor may be damaged. Do not attempt to adjust the out — side rearview mirror by hand. Doing so may damage the parts. Folding the outside rearview mirror Manual type To fold the outside rearview mirror, grasp the housing of the mirror and then fold it toward the rear of the vehicle. -
Page 138: Instrument Cluster
Features of your vehicle Instrument cluster Instrument cluster Type A OSK3048100NR Type B OSK3048101NR * The actual cluster and contents of the LCD display in the vehicle may differ from the illustration. 1. Tachometer 2. Speedometer 3. Engine coolant temperature gauge 4.
-
Page 139: Instrument Cluster Control
Features of your vehicle Instrument cluster Instrument cluster control Gauges The gauges display various informa — The brightness of the instrument tion such as the speed of the vehi — panel illumination is changed by pressing the illumination control cle, the amount of charge of the button («+»…
-
Page 140
Features of your vehicle Instrument cluster Use the tachometer to select the overheats, refer to «If the engine correct shift points and to prevent overheats» on page 6-8. lugging and/or over-revving the engine. WARNING CAUTION Never remove the radiator cap when the engine is hot. -
Page 141
Features of your vehicle Instrument cluster Odometer On inclines or curves, the fuel gauge pointer may fluctuate or the low fuel warning light may come on earlier than usual due to the movement of fuel in the tank. NOTICE Fuel Gauge Running out of fuel can expose vehi — cle occupants to danger. -
Page 142: Transmission Shift Indicator
Features of your vehicle Instrument cluster The outside temperature on the Neutral: N display may not change immedi — Drive: D Sports Mode: 1, 2, 3, 4, 5, 6 ately like a general thermometer to prevent the driver from being dis — tracted.
-
Page 143: Lcd Display
Features of your vehicle LCD display LCD display The LCD display shows trip com — puter and other information. LCD Display Control The LCD display modes can be changed by using the control but — tons. OSK3041143N : MODE button for changing modes : MOVE switch for chang — ing items…
-
Page 144: Lcd Display Modes
Features of your vehicle LCD display LCD Display Modes The LCD display provides 5 modes. You can switch modes by pressing the Mode button. Mode Trip Computer Driving Assist Master warning Turn By Turn User Settings (TBT) Smart Cruise The Master Fuel Economy Route Guidance Head-Up Display…
-
Page 145
Features of your vehicle LCD display Trip computer mode Driving Assist mode OSK3048114NR OSK3048116NR The trip computer mode displays This mode displays the state of: information related to vehicle driv — Lane Safety system ing parameters including fuel econ — Driver Attention Warning omy, tripmeter information and Smart Cruise Control… -
Page 146
Features of your vehicle LCD display Master warning mode If the warning situation is resolved, the master warning light will be turned off and the Master Warning icon will disappear. User settings mode In this mode, you can change the settings of the instrument cluster, doors, lamps, etc. -
Page 147
Features of your vehicle LCD display Shift to P to edit settings / Engage parking brake to edit settings This warning message appears if you try to adjust the User Settings while driving. OSK3048130NR For your safety, change the User Settings after parking the vehicle, applying the parking brake and moving the shift lever to P (Park). -
Page 148
Features of your vehicle LCD display 1. Head-Up Display (if equipped) Explanation Display Height Adjust the height (1~20) of the HUD image on the HUD screen. Rotation Adjust the degree (-5~+5) of the HUD rotation. Brightness Adjust the intensity (1~20) of the HUD brightness. If below items are checked, the items will be activated. -
Page 149
Features of your vehicle LCD display 3. Door Explanation Disable: The auto door unlock operation will be canceled. Enable on speed: All doors will be automatically locked when the vehicle speed exceeds 9.3 mph (15 km/h). Auto Lock Enable on Shift (if equipped with Dual clutch transmission/Intelligent variable transmission) : All doors will be automatically locked if the vehicle is shifted from the P (Park) position to the R (Reverse), N (Neutral), or D (Drive) position.(With the Engine ON, it is activated.). -
Page 150
To reset the service interval function. NOTICE To use the service interval menu, consult an authorized Kia dealer. If the service interval is activated and the time and distance is adjusted, messages are displayed in the following situations each time the vehicle is turned on. -
Page 151
Features of your vehicle LCD display 8. Other features (if equipped) Explanation If this item checked, the average fuel economy will reset automatically Fuel Economy Auto Reset after refueling or after ignition. US gallon, UK gallon Fuel Economy Unit To select the Fuel economy unit. * For more details, refer to «Trip Computer»… -
Page 152: Lcd Displays
Features of your vehicle LCD displays LCD displays (if equipped) LCD displays show the following information to drivers. OSK3048142NR Trip information LCD modes Warning messages OSK3040144NR Trip information (Trip computer) Fuel Economy The trip computer is a microcom — puter-controlled driver information system that displays information related to driving.
-
Page 153
Features of your vehicle LCD displays — Fuel economy range: 0~99.9 or ENGINE START/STOP button is mpg or L/100 km turned to ON. The average fuel economy can be reset both manually and auto — Instant Fuel Economy (2) matically. This mode displays the instant Manual reset fuel economy during the last few… -
Page 154: Service Mode
Features of your vehicle LCD displays If the engine is running, even 4 hours, the information will not when the vehicle is not in motion, be reset. the information will be accumu — If you press «OK» button for more lated.
-
Page 155: Driving Info Display
Features of your vehicle LCD displays Service in Driving info display At the end of each driving cycle, the It calculates and displays when you Driving Info message is displayed. need a scheduled maintenance ser — vice (mileage or days). If the remaining mileage or time reaches 900 miles (1,500 km) or 30 days, «Service in»…
-
Page 156
Features of your vehicle LCD displays Key not in vehicle for smart key mean that the engine is overheated system and may be damaged. This warning message illuminates if * If your vehicle is overheated, refer the smart key is not in the vehicle to «If the engine overheats»… -
Page 157
Features of your vehicle LCD displays Low Pressure warning display CAUTION Before driving the vehicle, you should confirm that the door/hood/ liftgate is fully closed. Also, check that there is no door/hood/liftgate open warning light or message dis — played on the instrument cluster. Sunroof open warning display (if equipped) OSK3068004NR… -
Page 158
User Settings mode in the clus — removed, have your vehicle ter LCD display. inspected by an authorized Kia dealer. Shift to P or N to start engine for smart key system Press START button again for… -
Page 159
Assist. Have your vehicle inspected by an authorized Kia inspected by a professional work — dealer. shop. Kia recommends to contact an authorized Kia dealer/service part — * For more details, refer to»Smart ner. Cruise Control (SCC) (if equipped)»… -
Page 160
Attention Alert. In this case, have from over-speeding, rapid accelera — the vehicle inspected by an autho — tion, sudden braking or sharp turn — rized Kia dealer. ing, etc. * For more information, refer to «Driver Attention Warning (DAW) (if equipped)»… -
Page 161: Warning And Indicator Lights
SRS. 2. With the vehicle stopped, check In this case, have the vehicle the brake fluid level immediately inspected by an authorized Kia and add fluid as required (For dealer. more details, refer to «Brake fluid» on page 7-27). Then check all brake components for fluid leaks.
-
Page 162
This warning light illuminates: In this case, have your vehicle Once you set the ignition switch towed to an authorized Kia dealer or ENGINE START/STOP button to and inspected. the ON position. — It illuminates for approximately Dual-diagonal braking system 3 seconds and then goes off. -
Page 163
Have your vehicle inspected by an 2. Turn the engine off and check the authorized Kia dealer as soon as alternator drive belt for looseness possible. or breakage. In this case, have the vehicle… -
Page 164
When the fuel tank is nearly empty. after adding oil or if oil is not available, have the vehicle If the fuel tank is nearly empty: inspected by an authorized KIA Add fuel as soon as possible. dealer/service partner. Contin — ued driving with the warning… -
Page 165
When there is a malfunction with driver the following situations the TPMS. Forward Collision-Avoidance In this case, have your vehicle Assist malfunction (if equipped) inspected by an authorized Kia Forward Collision-Avoidance dealer. Assist sensor blocked (if * For more details, refer to «Tire equipped) -
Page 166
Collision-Avoidance Assist (FCA) the LED headlamp. (Sensor fusion) (if equipped)» on In this case, have your vehicle page 5-63. inspected by an authorized Kia dealer. Door Ajar Warning Light This warning light blinks: When there is a malfunction with This warning light illuminates: a LED headlamp related part. -
Page 167: Indicator Lights
When there is a malfunction with — The indicator light goes off the ESC system. after starting the engine. In this case, have your vehicle inspected by an authorized Kia This indicator light blinks: dealer. When there is a malfunction with the immobilizer system.
-
Page 168
This happens because of the low STOP button is ON. battery voltage. It does not mean In this case, have your vehicle the system is malfunctioning. inspected by an authorized Kia dealer. Turn Signal indicator Light This indicator light blinks: This indicator light blinks:… -
Page 169
Features of your vehicle Warning and indicator lights Lane Keeping Assist Indicator High Beam Indicator Light (if equipped) This indicator light illuminates: The LKA indicator will illuminate When the headlights are on and in when you turn Lane Keeping Assist the high beam position. -
Page 170: Head-Up Display (Hud) (If
Features of your vehicle Head-Up Display (HUD) Head-Up Display (HUD) (if ECO Mode Indicator Light equipped) This indicator light illuminates: The Head-Up Display is a transpar — When you select «ECO» mode as ent display which projects a shadow drive mode. of some information of the instru — * For more details, refer to «Drive ment cluster and navigation on the…
-
Page 171
Head-Up Display. Water or inspection or repair, have your other liquids can break when it vehicle inspected or repaired by flows into the Head-Up Display. an authorized Kia dealer. Do not expose the combiner to strong light. The combiner may be deformed. -
Page 172
Features of your vehicle Head-Up Display (HUD) * Road Signs and Turn By Turn navi — Do not use organic solvents, detergents or abrasive cloths to gation information are available clean the Head-Up Display. Wipe it depending on the region. off with a soft cloth. -
Page 173: Rear View Monitor (Rvm)
Features of your vehicle Rear View Monitor (RVM) Rear View Monitor (RVM) mally. Always keep the camera lens clean. However, do not use Rear View Monitor will activate with chemical solvents such as strong the ignition switch or ENGINE detergents containing high alka — START/STOP button in the ON and line or volatile organic solvents the shift lever in the R (Reverse)
-
Page 174: Reverse Parking Distance Warning (Pdw)
Features of your vehicle Reverse Parking Distance Warning (PDW) Reverse Parking Distance Warn — before moving the vehicle in any direction. Stop immediately if you ing (PDW) (if equipped) are aware of a child anywhere near Reverse Parking Distance Warning your vehicle.
-
Page 175
Features of your vehicle Reverse Parking Distance Warning (PDW) closest one will be recognized 6. Wireless transmitters or mobile first. phones are within range of the sensor. Types of warning sound 7. The sensor is covered with snow. When an object is 24 in to 48 in 8. -
Page 176
Parking Distance Warning. If this an incorrect distance. Use caution. occurs, have your vehicle checked by When the sensor is frozen or cov — an authorized Kia dealer as soon as ered with snow, dirt, or water, the possible. sensor may be inoperative until… -
Page 177: Forward/Reverse Parking Distance Warning (Pdw)
Features of your vehicle Forward/Reverse Parking Distance Warning (PDW) Forward/Reverse Parking Dis — much attention to what is in front and behind of you as you would in a tance Warning (PDW) (if vehicle without Forward/Reverse equipped) Parking Distance Warning. Forward/Reverse Parking Distance Warning assists the driver during WARNING…
-
Page 178
Features of your vehicle Forward/Reverse Parking Distance Warning (PDW) The indicator of the Parking Safety button turns on automati — cally and activates Forward/ Reverse Parking Distance Warning when you shift the gear to the R (Reverse) position. It will turn off automatically when you drive above 6.2 mph (10 km/h). -
Page 179
Features of your vehicle Forward/Reverse Parking Distance Warning (PDW) Type of warning indicator and sound Warning indicator Distance from object Warning sound When driving forward When driving backward Buzzer beeps intermit — 24 ~ 40 in Front (60 ~ 100 cm) tently Buzzer beeps intermit — 24 ~ 48 in… -
Page 180
Features of your vehicle Forward/Reverse Parking Distance Warning (PDW) Non-operational conditions of For — Detecting range may decrease ward/Reverse Parking Distance when: Warning Outside air temperature is extremely hot or cold. Forward/Reverse Parking Distance Undetectable objects smaller than Warning may not operate normally 40 in (100 cm) and narrower than when: 6 in (14 cm) in diameter. -
Page 181
If this occurs, we recommend that installed. Also, small or slim objects, the function be checked by an or objects located between sensors authorized Kia dealer. may not be detected. Always visually check in front and NOTICE behind the vehicle when driving. Be… -
Page 182: Lighting
Features of your vehicle Lighting Lighting Headlight escort function If you turn the ignition switch or This vehicle is equipped with a vari — ENGINE START/STOP button to the ety of lights to illuminate the inte — ACC or OFF position with the head — rior and exterior of the vehicle.
-
Page 183: Lighting Control
Features of your vehicle Lighting Lighting control Headlight position The light switch has a Headlight and a Parking light position. OSK3040413NR When the light switch is in the head — light position, the head, tail, license OSK3040411NR To operate the lights, turn the knob lights will turn ON.
-
Page 184: Operating High Beam
Features of your vehicle Lighting matically depending on the amount To prevent the battery from being discharged, do not leave the lights of light outside the vehicle. on for a prolonged time while the vehicle is off. CAUTION Never place anything over the WARNING sensor (1) located on the instru — High beams…
-
Page 185: Operating Turn Signals And Lane Change Signals
Features of your vehicle Lighting Operating turn signals and lane NOTICE change signals If an indicator flash is abnormally quick or slow, a bulb may be burned out or have a poor electrical connec — tion in the circuit. One-touch lane change function To activate an one-touch lane change function, move the turn sig — nal lever slightly and then release it.
-
Page 186: High Beam Assist (Hba) (If
Features of your vehicle Lighting Turn the fog light switch (1) to The details of operation with the the OFF position. light switch while the High Beam Assist is on are below. High Beam Assist (HBA) (if If the light switch is pushed away, equipped) High Beam Assist will turn off and the high beam will be on.
-
Page 187
) will illu — master warning light ( reflecting sign, flashing sign or minate. Take your vehicle to an mirror ahead. authorized Kia dealer and have the — When there is a temporary function checked. reflector or flash ahead (con — struction area). -
Page 188
If you disassemble the camera and assemble it again, take your vehi — cle to an authorized Kia dealer and have the function checked. When you replace or reinstall the windshield glass take your vehicle to an authorized Kia dealer and have the function checked. -
Page 189: Wipers And Washers
Features of your vehicle Wipers and washers Wipers and washers C: Wash with brief wipes (front) D: Rear wiper/washer control The wipers and washers remove foreign substances from the wind — Continuous wipe Intermittent wipe shield and rear window, helping to maintain visibility.
-
Page 190
Features of your vehicle Wipers and washers placed in the AUTO mode, use cau — wiper and washer, it may damage the wiper and washer system. tion in the following situations to avoid any injury to the hands or other parts of the body: Auto control (if equipped) Do not touch the upper end of the windshield glass facing the rain… -
Page 191: Operating Windshield Washer
Features of your vehicle Wipers and washers Operating windshield washer CAUTION Use this function when the wind — Washer pump shield is dirty. To prevent possible damage to the washer pump, do not operate the washer when the fluid reservoir is empty.
-
Page 192: Operating Rear Window Wiper And Washer Switch
Features of your vehicle Interior lights Operating rear window wiper and Interior lights washer switch This vehicle is equipped with lights The rear window wiper and washer throughout the vehicle to illuminate switch is located at the end of the the interior.
-
Page 193: Room Lamp
Features of your vehicle Interior lights Room lamp Map lamp Type A Type A OSK3048098NR ODEEV068148NR Type B Type B OSK3048007NR OSK3048006NR : The light stays on at all times. Press the lens (1) to turn ON the map lamp. To turn the map lamp OFF press the lens (1) again.
-
Page 194: Liftgate Room Lamp
Features of your vehicle Interior lights smart key as long as the doors (3): Press this switch to turn are not opened. the front and rear room lamps on — The map lamp and room lamp and off. will stay on for approximately 20 minutes if a door is opened Liftgate room lamp with the ignition switch or…
-
Page 195: Vanity Mirror Lamp
Features of your vehicle Interior lights Vanity mirror lamp (if equipped) Glove box lamp (if equipped) The glove box lamp comes on when the glove box is opened. ODEEV068157NR Push the switch to turn the light on or off. OSK3048009NR : The lamp will turn on if this CAUTION button is pressed.
-
Page 196: Welcome System
Features of your vehicle Welcome system Welcome system (if equipped) Defroster The welcome system is a function The vehicle is equipped with a that illuminates the surroundings or defroster for removing frost or fog the interior when the driver from the rear window. approaches or exits the vehicle.
-
Page 197: Outside Mirror Defroster
Features of your vehicle Defroster Type A Press the rear window defroster button again. Outside mirror defroster If your vehicle is equipped with the outside rearview mirror defrosters, they will operate at the same time you turn on the rear window defroster.
-
Page 198: Manual Climate Control System
Features of your vehicle Manual climate control system Manual climate control system OSK3048301NR 1. Fan speed control knob 2. Air intake control button 3. Mode selection knob 4. Rear window defroster button 5. Temperature control knob 6. Air conditioning button (if equipped) CAUTION Operating the blower when the igni -…
-
Page 199: Heating And Air Conditioning
Features of your vehicle Manual climate control system Heating and air conditioning OSK3041314N 1. Start the engine. 2. Set the mode to the desired position. For improving the effectiveness of heating and cooling; Heating: Cooling: 3. Set the temperature control to the desired position. 4.
-
Page 200
Features of your vehicle Manual climate control system Mode selection Floor/Defrost-Level (A, C, D, E) The mode selection knob controls Most of the air flow is directed to the direction of the air flow through the floor and the windshield with a the ventilation system. -
Page 201
Features of your vehicle Manual climate control system Temperature control MAX A/C selection The temperature control knob To operate the MAX A/C, turn the allows you to control the tempera — temperature knob to extreme left. ture of the air flowing from the ven — Air flow is directed toward the tilation system. -
Page 202
Features of your vehicle Manual climate control system Recirculated air position Do not sleep in a vehicle with the With the recirculated air air conditioning or heating system position selected, air from on. It may cause serious harm or the passenger compart — death due to a drop in the oxygen ment will be drawn through the level and/or body temperature. -
Page 203: System Operation
Features of your vehicle Manual climate control system Setting the fan speed control System operation knob to the «0» position turns off the fan. Ventilation 1. Set the mode to the position. Turning off the blowers 2. Set the air intake control to the To turn off the blowers: outside (fresh) air position.
-
Page 204
Air conditioning vehicle and new replacement MAC Kia Air Conditioning Systems are evaporators shall be certified (and filled with environmentally friendly labeled) as meeting SAE Standard refrigerant*. -
Page 205: Climate Control Air Filter
Features of your vehicle Manual climate control system electrical equipment, air condi — ing, however, continual operation tioning should only be used with in this mode may cause the air the windows closed. inside the vehicle to become stale. During cooling operation, you may occasionally notice a misty air Air conditioning system operation flow because of rapid cooling and…
-
Page 206: Checking The Amount Of Air Conditioner Refrigerant And Compressor Lubricant
When the air flow rate suddenly vehicle may occur. To prevent dam — decreases, have the system age, the air conditioning system in checked by an authorized Kia your vehicle should only be serviced dealer. by trained and certified technicians.
-
Page 207: Air Conditioning Refrigerant Label
Features of your vehicle Manual climate control system sphere is harmful to individuals and environment. Failure to heed these warnings can lead to serious injuries. Air Conditioning refrigerant label Example OKA4040574N * The actual Air Conditioning refrig — erant label in the vehicle may dif — fer from the illustration.
-
Page 208: Automatic Climate Control System
Features of your vehicle Automatic climate control system Automatic climate control system OSK3048302NR 1. Driver’s temperature control knob 2. AUTO (automatic control) button 3. Front windshield defroster button 4. Rear window defroster button 5. Air conditioning button 6. Air intake control button 7.
-
Page 209: Heating And Air Conditioning Automatically
Features of your vehicle Automatic climate control system Heating and air conditioning auto — time to deselect the front matically windshield defroster function. 1. Press the AUTO button. The ‘AUTO’ sign will illuminate The modes, fan speeds, air intake on the information display once and air-conditioning will be con — again.) trolled automatically by setting…
-
Page 210: Manual Heating And Air Conditioning
Features of your vehicle Automatic climate control system Manual heating and air conditioning The heating and cooling system can be controlled manually by pressing but — tons or turning knob(s) other than the AUTO button. OSK3041314N In this case, the system works sequentially according to the order of but — tons or knob(s) selected.
-
Page 211: Mode Selection
Features of your vehicle Automatic climate control system Mode selection Floor/Defrost-Level (A, C, D, E) The mode selection button controls Most of the air flow is directed to the direction of the air flow through the floor and the windshield with a the ventilation system.
-
Page 212: Temperature Control
Features of your vehicle Automatic climate control system The outlet vents can be opened or control, operate the system in the following method to improve heat — closed separately using the thumb- ing. wheel. (if equipped) Turn off or lower the blower, right Also, you can adjust the direction of after starting the engine.
-
Page 213: Controlling Air Intake
Features of your vehicle Automatic climate control system Adjusting the driver and passenger side temperature individually Press the «SYNC» button again to adjust the driver and passenger side temperature individually. The illumination of button turns off. Operate the driver side tempera — ture control knob to adjust the driver side temperature.
-
Page 214: Controlling Fan Speed
Features of your vehicle Automatic climate control system excessively dry air in the passenger Press the A/C button to turn the air conditioning system on (indi — compartment. cator light will illuminate). Press the button again to turn the Controlling fan speed air conditioning system off.
-
Page 215: Turning Off The Front Air Climate Control
Features of your vehicle Automatic climate control system Turning off the front air climate When the automatic ventilation is control canceled, the indicator blinks 3 times. When the automatic ventila — tion is activated, the indicator blinks 6 times. System operation Ventilation 1.
-
Page 216
CAUTION The refrigerant system should Air conditioning (if equipped) only be serviced by trained and All Kia Air Conditioning Systems are certified technicians to insure filled with R-1234yf refrigerant. proper and safe operation. 1. Start the vehicle. Press the air The refrigerant system should be conditioning button. -
Page 217: Climate Control Air Filter
Features of your vehicle Automatic climate control system ger side of the vehicle. This is a CAUTION normal system operation charac — When opening the windows in humid teristic. weather, air conditioning may cre — Operating the air conditioning ate water droplets inside the vehi — system in the recirculated air cle.
-
Page 218: Checking The Amount Of Air Conditioner Refrigerant And Compressor Lubricant
When the air flow rate suddenly by trained and certified technicians. decreases, the system should be checked at an authorized Kia dealer. WARNING Vehicles equipped with R-1234yf Checking the amount of air condi -…
-
Page 219: Air Conditioning Refrigerant Label
Features of your vehicle Windshield defrosting and defogging Failure to heed these warnings can Windshield defrosting and lead to serious injuries. defogging When the windshield is covered with frost or moisture, the front view is Air Conditioning refrigerant label blurred, you should remove the Example frost and moisture.
-
Page 220: Manual Climate Control System
Features of your vehicle Windshield defrosting and defogging To defrost outside windshield to improve heater and defroster efficiency and to reduce the prob — ability of fogging up the inside of the windshield. Manual climate control system You can defog or defrost using the manual climate control system.
-
Page 221: Defogging Logic
Features of your vehicle Windshield defrosting and defogging according to the detected ambi — 1. Set the fan speed to the desired position. ent temperature. 2. Select desired temperature. 3. Press the defroster button ( Defogging logic (if equipped) 4. The outside (fresh) air position To reduce the possibility of fogging will be selected automatically and up the inside of the windshield, the…
-
Page 222: Storage Compartment
Features of your vehicle Storage compartment If the battery has been discharged Storage compartment or disconnected, it resets to the These compartments can be used to defog logic status. store small items required by the driver or passengers. Turning the defogging logic on or To avoid possible theft, do not leave valuables in the storage compartment.
-
Page 223: Glove Box
Features of your vehicle Storage compartment To open the center console storage: Sunglass holder Pull up the lever. Glove box OSK3048013NR To open the sunglass holder: Press the cover and the holder will slowly open. OSK3048012NR To open the glove box: Place your sunglasses with the Pull the handle and the glove box lenses facing out.
-
Page 224: Luggage Net Holder
OSK3048015NR attach the luggage net. 2. Fold the rear part of the luggage board frontward If necessary, Kia recommends con — tacting an authorized Kia dealer. CAUTION To prevent damage to the goods or the vehicle, be careful when carrying fragile or bulky objects in the lug — gage compartment.
-
Page 225: Interior Features
Features of your vehicle Interior features Interior features There are various features inside the vehicle for the convenience of the occupants. Cup holder The front and rear seats of the vehicle have cup holders to accom — modate cups. OSK3040408NR 4.
-
Page 226: Seat Warmer
Features of your vehicle Interior features Front Seat warmer (if equipped) The seat warmer is provided to warm the front seats during cold weather. Front seat (Type A) OSK3048020NR Center (if equipped) OSK3048023NR Front seat (Type B) OSK3048021NR Cups or small beverage cans may be placed in the cup holders.
-
Page 227
Features of your vehicle Interior features Rear seat Rear seat The seat warmer defaults to the OFF position whenever the ignition switch or ENGINE START/STOP but — ton is turned on. Temperature control (Automatic) The seat warmer starts to auto — OSK3048025NR matically control the seat tempera — With the ignition switch or ENGINE… -
Page 228: Air Ventilation Seat
Features of your vehicle Interior features To ventilate your seat cushion, WARNING press the switch (blue color). Seat warmer burns Each time you press the button, the airflow will change as follows: The seat warmer may cause burns, even at low temperature, if used over a long period of time.
-
Page 229: Sun Visor
Features of your vehicle Interior features Sun visor otherwise, it could result in battery discharge and possible sun visor Use the sun visor to shield direct damage. light through the front or side win — dows. Power outlet (if equipped) The power outlet is designed to provide power for mobile tele — phones or other devices designed to…
-
Page 230: Usb Charger
Features of your vehicle Interior features Use the power outlet only when WARNING the vehicle is on and remove the Electric shock accessory plug after use. Using Do not put a finger or a foreign the accessory plug for prolonged object (pen, etc.) into a power outlet periods of time with the vehicle and do not touch with a wet hand.
-
Page 231
Features of your vehicle Interior features Center Digital devices with fast charging: — 9.0 V, 1.67 A Digital devices with normal charging: — 5.0 V, 2.1 A CAUTION Use the USB car charger with the ignition on. Otherwise, Vehicle battery can be discharged. Use the official USB cable of the manufacturer of the digital device OSK3048075NR… -
Page 232: Wireless Smart Phone Charging System
Features of your vehicle Interior features Wireless smart phone charging smart phone, the wireless charging function may not oper — system (if equipped) ate properly. A wireless smart phone charging 2. Place the smart phone on the system is located in front of the center of the wireless charging center console.
-
Page 233
Features of your vehicle Interior features through warning messages and CAUTION sound (applicable for vehicles with Metal in Wireless Charging System voice guidance function) after the If any metallic object, such as a coin, ‘Good bye’ function on the instru — is located between the wireless ment cluster ends. -
Page 234
Features of your vehicle Interior features The wireless charging system will be orange after the smart phone stop when any of the doors are is fully charged. This is due to the opened (applicable for vehicles particular characteristic of the smart phone and not a malfunc — equipped with smart keys). -
Page 235: Coat Hook
Features of your vehicle Interior features This device complies with Part 15 clothes. Also, do not put heavy, of the FCC rules. sharp or breakable objects in the clothing’s pockets. In an accident or Operation is subject to the following when the curtain air bag is inflated, two conditions: it may cause vehicle damage or…
-
Page 236: Floor Mat Anchors
Features of your vehicle Interior features Cargo area cover (if equipped) WARNING After market floor mat Do not install after market floor mats that are not capable of being securely attached to the vehicle’s floor mat anchors. Unsecured floor mats can interfere with pedal operation.
-
Page 237
Features of your vehicle Interior features OSK3040034NR OSK3040031NR 2. Firmly hold the folded part of the WARNING cover and lift it up. Do not place objects on the cargo area cover. Such objects may be thrown about inside the vehicle and possibly injure vehicle occupants during an accident or when braking. -
Page 238: Exterior Features
Distrib — your vehicle may be obtained from ute the load as evenly as possible an authorized Kia dealer. across the crossbars (if equipped) and roof rack and secure the load NOTICE firmly.
-
Page 239: Audio System
Features of your vehicle Audio system that may result in loss of vehicle Audio system control or rollover resulting in an accident. NOTICE Always drive slowly and turn cor — If you install an after market HID ners carefully when carrying head lamp, your vehicle’s audio and items on the roof rack.
-
Page 240: Usb Port
Features of your vehicle Audio system AM and FM radio signals are broad — USB port cast from transmitter towers You can use the USB port to plug in located around your city. They are an USB. intercepted by the radio antenna on your vehicle.
-
Page 241
Features of your vehicle Audio system they curve around obstructions resulting in better signal coverage. FM radio station OSK3048403NR Flutter/Static — Weak FM signals or large obstructions between the transmitter and your radio can disturb the signal causing static or ODEEV068219NR fluttering noises to occur. -
Page 242
Features of your vehicle Audio system Multi-Path Cancellation — Radio WARNING signals being received from sev — Cell phone use eral directions can cause distor — Do not use a cellular phone while tion or fluttering. This can be driving. Stop at a safe location to caused by a direct and reflected use a cellular phone. -
Page 243: Declaration Of Conformity
Features of your vehicle Declaration of Conformity Consult the dealer or an experi — Declaration of Conformity enced radio/TV technician for help. This equipment has been tested and CAUTION found to comply with the limits for a Any changes or modifications to this Class B digital device, pursuant to device not explicitly approved by the part 15 of the FCC Rules.
-
Page 245
Driving your vehicle Driving your vehicle Be sure the exhaust system does not leak……5-7 Before driving …………….5-8 Key positions …………….5-10 Illuminated ignition switch ……….5-10 Ignition switch position…………5-10 Starting the engine ………….. 5-11 ENGINE START/STOP button ……….5-13 Illuminated ENGINE START/STOP button …… -
Page 246
Driving your vehicle Vehicle stability management (VSM) ……..5-42 Hill-start Assist Control (HAC)……….5-44 Good braking practices …………5-44 ISG (Idle Stop and Go) system ……….5-45 Auto stop …………….5-46 Auto start …………….5-47 Condition of ISG system operation……..5-47 ISG system deactivation…………5-48 ISG system malfunction …………5-48 Drive mode integrated control system…….5-49 Forward Collision-Avoidance Assist (FCA) (Front view camera only) ………………5-51… -
Page 247
Driving your vehicle Setting and activating Forward Collision-Avoidance Assist ………………5-64 Forward Collision-Avoidance Assist (FCA) (Sensor fusion) setting initial warning activation time ……5-64 Prerequisite for Forward Collision-Avoidance Assist activa — tion ………………5-65 Forward Collision-Avoidance Assist warning message and brake control …………….. -
Page 248
Driving your vehicle Detecting sensors (rear corner radars ……5-92 Warning message …………..5-92 Limitations of Blind-Spot Collision Warning…..5-94 This device complies with Part 15 of the FCC rules..5-97 Driver Attention Warning (DAW) ……….5-98 Setting and activating the Driver Attention Warning ..5-98 Displaying the driver’s attention level ……5-99 Taking a break………….. -
Page 249
Driving your vehicle Resuming Smart Cruise Control set speed ….5-111 Turning Smart Cruise Control off ……..5-112 Setting vehicle distance………….5-112 When the lane ahead is clear: ……….5-113 When there is a vehicle ahead of you in your lane:..5-113 Adjusting the sensitivity of Smart Cruise Control ..5-116 Converting to Cruise Control mode ………5-117 Limitations of Smart Cruise Control …….5-117 This device complies with Part 15 of the FCC rules. -
Page 250
Driving your vehicle The radio frequency components (Rear Corner Radar) complies :…………….5-138 Economical operation …………5-143 Special driving conditions ……….. 5-145 Winter driving …………… 5-149 Trailer towing …………… 5-153 Vehicle load limit …………..5-153 Steps for Determining Correct Load Limit — ….5-154 Certification label…………… -
Page 251: Driving Your Vehicle
— neath side of the vehicle, have the exhaust system checked as soon as possible by an authorized Kia dealer. WARNING Engine exhaust Do not inhale exhaust fumes or leave your engine running in a enclosed area for a prolonged time.
-
Page 252: Before Driving
Driving your vehicle Before driving Before driving that distract the driver should not be used during vehicle operation. Before getting into the vehicle, you should examine the car and its sur — roundings. After getting into the Before starting vehicle, you should check a number Close and lock all doors.
-
Page 253
Driving your vehicle Before driving WARNING WARNING Check surroundings Proper footwear Always check the surrounding areas Always wear appropriate shoes near your vehicle for pedestrians, when operating your vehicle. especially children, before putting a Unsuitable shoes (high heels, ski vehicle into D (Drive) or R (Reverse). boots, sandals, etc.) may interfere with your ability to use the brake and accelerator pedals. -
Page 254: Key Positions
Driving your vehicle Key positions Key positions (if equipped) Your vehicle is equipped with four different ignition positions. Illuminated ignition switch Whenever a front door is opened, the ignition switch will illuminate for your convenience, provided the igni — tion switch is not in the ON position. OSK3058160NR LOCK (1) The ignition key can be removed…
-
Page 255: Starting The Engine
Driving your vehicle Key positions START (4) WARNING Turn the ignition switch to the Key holder START position to start the engine. Do not attach small purses, multiple The engine will crank until you keys, or any other heavy accesso — release the key;…
-
Page 256
Driving your vehicle Key positions 3. Turn the ignition switch to START onds before reengaging the starter. and hold it there until the engine Improper use of the starter may starts (a maximum of 10 sec — damage it. onds), then release the key. It should be started without depressing the accelerator. -
Page 257: Engine Start/Stop Button
Try locking the steering wheel again. If the problem is not solved, have the system checked by an autho — rized Kia dealer. In addition, if the ENGINE START/ OSK3058001NR STOP button is in the OFF position…
-
Page 258
Driving your vehicle ENGINE START/STOP button The steering wheel unlocks and NOTICE electrical accessories are opera — You are able to turn off the engine tional. (START/RUN) or vehicle power (ON), If the ENGINE START/STOP button is only when the vehicle is not in in the ACC position for more than 1 motion. -
Page 259: Starting The Engine
Driving your vehicle ENGINE START/STOP button OFF → ACC → ON → OFF or ACC Do not place any movable objects around the driver’s seat as they may move while driving, interfere NOTICE with the driver and lead to an accident.
-
Page 260
Driving your vehicle ENGINE START/STOP button (Steep accelerating and deceler — is not in the vehicle» will appear on ating should be avoided.) the instrument cluster and LCD win — dow. And if all doors are closed, the Starting and stopping the engine chime will sound for 5 seconds. -
Page 261
Driving your vehicle ENGINE START/STOP button clutch pedal (if equipped) before starting the engine. CAUTION Do not press the ENGINE START/ STOP button for more than 10 seconds except when the stop lamp fuse is blown. Do not turn the ignition switch to OSK3051002N the START position with the engine running. -
Page 262: Intelligent Variable Transmission (Ivt)
Driving your vehicle Intelligent variable transmission (IVT) Intelligent variable transmission WARNING (IVT) (if equipped) Intelligent Variable Transmission The Intelligent Variable Transmis — (IVT) sion (IVT) automatically shifts Always check the surrounding depending on speed, accelerate areas near your vehicle for peo — pedal position.
-
Page 263
Driving your vehicle Intelligent variable transmission (IVT) ward gear position with the Never leave a child unattended in brakes on. a vehicle. When stopped on an incline, do not hold the vehicle stationary CAUTION with engine power. Use the ser — vice brake or the parking brake. -
Page 264
Driving your vehicle Intelligent variable transmission (IVT) The engine brake will not work which could lead to an accident. CAUTION Always park the vehicle in «P» (Park) for safety and engage the parking brake. OSK3058004NR D (Drive) SPORT mode manages the driving This is the normal forward driving dynamics by automatically adjusting position. -
Page 265: Shift Lock System
Driving your vehicle Intelligent variable transmission (IVT) In sports mode, downshifts are the transmission from P (Park) into made automatically when the R (Reverse) unless the brake pedal is vehicle slows down. When the depressed. vehicle stops, 1st gear is auto — To shift the transmission from P matically selected.
-
Page 266: Ignition Key Interlock System
7. Have the system inspected by a professional workshop. Kia rec — road. If the protective mode is trig — ommends to visit an authorized gered on an incline, the driver may Kia dealer.
-
Page 267
Driving your vehicle Intelligent variable transmission (IVT) Slow down before shifting to a more likely to be seriously injured lower gear. Otherwise, the lower or killed than a properly belted gear may not be engaged. occupant. Always use the parking brake. Do Avoid high speeds when cornering not depend on placing the trans — or turning. -
Page 268: Dual Clutch Transmission (Dct)
Driving your vehicle Dual clutch transmission (DCT) Moving up a steep grade from a Dual clutch transmission (DCT) standing start (if equipped) To move up a steep grade from a The dual clutch transmission has 7 standing start: forward speeds and one reverse 1.
-
Page 269
Driving your vehicle Dual clutch transmission (DCT) The Dual Clutch Transmission WARNING gives the driving feel of a manual To reduce the risk of serious injury transmission, yet provides the or death: ease of a fully automatic trans — ALWAYS check the surrounding mission. -
Page 270: Lcd Display For Warning Message
Then hold the vehicle on the cluster. In this case, have the sys — incline with the foot brake. tem checked by an authorized Kia If the vehicle is held on a hill by dealer. applying the accelerator pedal or…
-
Page 271
Driving your vehicle Dual clutch transmission (DCT) Ignoring the warnings can lead to and allow the transmission to damage to the transmission. cool. If you ignore this warning, the driving condition may become Transmission high temperature worse. You may experience abrupt shifts, frequent shifts, or jerkiness. -
Page 272: Transmission Ranges
Resume driving.» appears you can continue to drive your vehicle. When possible, drive the vehicle smoothly. If any of the warning messages in the LCD display continue to blink, for your safety, have the system checked by an authorized Kia dealer.
-
Page 273
Driving your vehicle Dual clutch transmission (DCT) R (Reverse) CAUTION Use this position to drive the vehicle Always park the vehicle in P (Park) backward. for safety and engage the parking brake. CAUTION Always come to a complete stop D (Drive) before shifting into or out of R (Reverse);… -
Page 274: Paddle Shifter
Driving your vehicle Dual clutch transmission (DCT) D (Drive) position into the manual care to keep the engine rpms gate. below the red zone. To return to D (Drive) range opera — tion, push the shift lever back into Paddle shifter (if equipped) the main gate.
-
Page 275: Shift Lock System
Driving your vehicle Dual clutch transmission (DCT) system changes from manual mode WARNING to automatic mode. Always fully depress the brake pedal before and while shifting out With the shift lever in the manual of the P (Park) position into another mode position to avoid inadvertent motion Pull the [+] or [-] paddle shifter once…
-
Page 276: Ignition Key Interlock System
Always use the parking brake. Do install the cap. not depend on placing the trans — 7. Have the system inspected by a professional workshop. Kia rec — mission in P (Park) to keep the car ommends to visit an authorized from moving.
-
Page 277
Driving your vehicle Dual clutch transmission (DCT) the gear position indicated on the or objects are anywhere near the cluster before driving. vehicle. During the rocking operation the vehicle may suddenly move for — Driving in the opposite direction of the selected gear can lead to a ward of backward as it becomes dangerous situation by shutting… -
Page 278: Brake System
Driving your vehicle Brake system Brake system WARNING Your vehicle has power-assisted Steep hill braking brakes, parking brake, and various Avoid continuous application of the braking systems for safe driving. brakes when descending a long or steep hill by increasing the regener — Power brakes ation level.
-
Page 279: Parking Brake
Driving your vehicle Brake system except in an emergency situation. WARNING Applying the parking brake while the Brake wear vehicle is moving at normal speeds Do not ignore high pitched wear can cause a sudden loss of control sounds from your brakes. If you of the vehicle.
-
Page 280
P or does not release all the way, have (Park). the system checked by a profes — sional workshop. Kia recommends to CAUTION visit an authorized Kia dealer. Driving with the parking brake Be cautious when parking on a hill. -
Page 281: Anti-Lock Brake System (Abs)
Driving your vehicle Brake system Under some conditions your park — not start the engine). This light will ing brake can freeze in the be illuminated when the parking engaged position. This is most brake is applied with the ignition likely to happen when there is an switch in the START or ON position.
-
Page 282
Driving your vehicle Brake system should be driven at reduced speeds NOTICE in the following circumstances: A click sound may be heard in the When driving on rough, gravel or engine compartment when the snow-covered roads vehicle begins to move after the When driving with tire chains engine is started. -
Page 283
Electronic stability control (ESC) problem with your ABS. Contact an The ESC system is designed to sta — authorized Kia dealer as soon as bilize the vehicle during cornering possible. maneuvers. When you drive on a road having… -
Page 284
Driving your vehicle Brake system Electronic Stability Control System WARNING is functioning properly. For maximum protection, always wear your seat belt. No system, no matter how advanced, can compen — Electronic stability control (ESC) sate for all driver error and/or driv — operation ing conditions. -
Page 285: Electronic Stability Control (Esc)
Driving your vehicle Brake system Indicator light the vehicle rpm (revolutions per minute) to increase. ESC indicator light Electronic stability control (ESC) operation off ESC OFF indicator light This car has 2 kinds of ESC off states. If the vehicle stops when ESC When ignition switch or ENGINE is off, ESC remains off.
-
Page 286: Driving Your Vehicle
Driving your vehicle Brake system To turn ESC off while driving, WARNING press the ESC OFF button while Tire/Wheel size driving on a flat road surface. When replacing tires and wheels, make sure they are the same size WARNING as the original tires and wheels Operating ESC installed.
-
Page 287
( ) or EPS warning light remains on, take your vehicle to an For maximum protection, always authorized Kia dealer and have the wear your seat belt. No system, no system checked. matter how advanced, can compen — sate for all driver error and/or driv — ing conditions. -
Page 288: Hill-Start Assist Control (Hac)
Kia dealer WARNING for assistance. Maintaining Brake Pressure on Don’t coast down hills with the Incline vehicle out of gear.
-
Page 289: Isg (Idle Stop And Go) System
Driving your vehicle ISG (Idle Stop and Go) system down. When you are moving ISG (Idle Stop and Go) system slowly enough for it to be safe to Your vehicle may be equipped with do so, pull off the road and stop in the ISG system, which reduces fuel a safe place.
-
Page 290: Auto Stop
Driving your vehicle ISG (Idle Stop and Go) system Auto stop NOTICE If you open the engine hood in auto To stop the engine in idle stop stop mode, the following will hap — mode pen: The ISG system will deactivate (the light on the ISG OFF button will illuminate).
-
Page 291: Condition Of Isg System Operation
Driving your vehicle ISG (Idle Stop and Go) system The cooling and heating perfor — Auto start mance of the climate control sys — tem is unsatisfactory. To restart the engine from idle stop mode Condition of ISG system operation The ISG system will operate under the following condition: The driver s seatbelt is fastened…
-
Page 292: Isg System Deactivation
ISG system continuously does not work cor — rectly, have your vehicle inspected by an authorized Kia dealer. When the engine is in Idle Stop mode, it’s possible to restart the engine without the driver taking any…
-
Page 293: Drive Mode Integrated Control System
Driving your vehicle Drive mode integrated control system doing anything in the engine com — Drive mode integrated control partment, stop the engine by turn — system ing the ignition switch to the LOCK/ The drive mode may be selected OFF position or removing the igni — according to the driver’s preference tion key.
-
Page 294
Driving your vehicle Drive mode integrated control system SPORT mode If the vehicle is set to ECO mode, when the engine is turned OFF SPORT mode focuses on and restarted the Drive Mode set — dynamic driving. ting will remain in ECO mode. When the DRIVE MODE button is pressed and the SPORT mode is NOTICE… -
Page 295: Forward Collision-Avoidance Assist (Fca) (Front View Camera Only)
Driving your vehicle Forward Collision-Avoidance Assist (FCA) (Front view camera only) When driving the vehicle with the Forward Collision-Avoidance automatic transmission gear shift Assist (FCA) (Front view camera lever in manual mode: only) (if equipped) The system will be limited accord — Forward Collision-Avoidance Assist ing to the shift location.
-
Page 296: Setting And Activating Forward Collision-Avoidance Assist
Forward Collision-Avoidance Assist the ignition switch or ENGINE activated, take your vehicle to an START/STOP button to the ON posi — authorized Kia dealer and have the tion and by selecting: function checked. Go to the «User Settings in the cluster →…
-
Page 297: Prerequisite For Forward Collision-Avoidance Assist Activation
Driving your vehicle Forward Collision-Avoidance Assist (FCA) (Front view camera only) When the vehicle ahead brakes accordance with the collision risk suddenly or you increase the levels. speed of your vehicle, the driver Forward Collision-Avoidance can notice the warning alarm is Assist automatically activates early even though the later option upon placing the ignition switch or…
-
Page 298
Driving your vehicle Forward Collision-Avoidance Assist (FCA) (Front view camera only) collision, such as when a vehicle accordance with the collision risk ahead suddenly brakes. levels. You should control the brake directly because Forward Collision-Avoidance Assist does Collision Warning (1st warning) not control the brake. -
Page 299: Brake Operation
Driving your vehicle Forward Collision-Avoidance Assist (FCA) (Front view camera only) If you select «Warning Only» for the vehicle, even though there is no Forward Collision-Avoidance warning message or warning alarm. Assist setting, Forward Collision- Avoidance Assist activates and WARNING produces only warning alarms in accordance with the collision risk Forward Collision-Avoidance Assist…
-
Page 300: Warning Message And Warning Light
When the camera is covered with played. In this case, take your dirt, snow, or debris, Forward Colli — vehicle to an authorized Kia dealer sion-Avoidance Assist operation and have the function inspected. may not be able to detect other Use only genuine parts to repair vehicles.
-
Page 301: Forward Collision-Avoidance Assist Malfunction
( warning light ( ) will illuminate minate. In this case, take your vehi — cle to an authorized Kia dealer and and the warning message will have the function inspected. appear for a few seconds. Forward Collision-Avoidance Assist…
-
Page 302: Limitations Of Forward Collision-Avoidance Assist
Driving your vehicle Forward Collision-Avoidance Assist (FCA) (Front view camera only) Both Forward Collision-Avoidance Forward Collision-Avoidance Assist warning light and warning Assist does not operate when the vehicle is in reverse. message will disappear once the ESC Forward Collision-Avoidance warning light issue is resolved. Assist is not designed to detect other objects on the road such as WARNING…
-
Page 303
Driving your vehicle Forward Collision-Avoidance Assist (FCA) (Front view camera only) Collision-Avoidance Assist may not as a construction zone, railroad, etc. operate normally. The driver must Backlight is reflected in the direc — pay careful attention in the follow — ing situations where Forward Colli — tion of the vehicle (including front light from the vehicle ahead) -
Page 304
Driving your vehicle Forward Collision-Avoidance Assist (FCA) (Front view camera only) reflected by the water on the Always pay attention to road and road surface. driving conditions, and if necessary, The back light is projected in the depress the brake pedal to reduce direction of the vehicle’s motion your driving speed in order to main — (including the headlights of vehi -… -
Page 305
Driving your vehicle Forward Collision-Avoidance Assist (FCA) (Front view camera only) The performance of Forward Colli — the vehicle changes lanes abruptly. sion-Avoidance Assist may be In this case, you must maintain a safe braking distance, and if neces — decreased while driving upward or downward on a slope. -
Page 306
Always pay authorized Kia dealer. attention to road and driving condi — tions, while driving and, if neces — NOTICE sary, depress the brake pedal to… -
Page 307: Forward Collision-Avoidance Assist (Fca) (Sensor Fusion)
Driving your vehicle Forward Collision-Avoidance Assist (FCA) (Sensor fusion) responsible for compliance could Forward Collision-Avoidance void the user’s authority to oper — Assist (FCA) (Sensor fusion) (if ate the device. equipped) Forward Collision-Avoidance Assist Radio frequency radiation exposure is designed to detect and monitor a information: vehicle ahead or detect a pedestrian This equipment complies with FCC…
-
Page 308: Driving Your Vehicle
Forward Collision-Avoidance while cornering. Assist activated, take your vehicle Always drive cautiously to prevent to an authorized Kia dealer and have unexpected and sudden situations the function checked. from occurring. Forward Collision- Avoidance Assist does not stop…
-
Page 309: Prerequisite For Forward Collision-Avoidance Assist Activation
Driving your vehicle Forward Collision-Avoidance Assist (FCA) (Sensor fusion) Prerequisite for Forward Collision- Forward Collision-Avoidance Avoidance Assist activation Assist automatically deactivates upon canceling the ESC. When the Forward Collision-Avoidance Assist ESC is canceled, Forward Collision- will activate when Forward Collision- Avoidance Assist cannot be acti — Avoidance Assist is selected on the vated on the LCD display.
-
Page 310
Driving your vehicle Forward Collision-Avoidance Assist (FCA) (Sensor fusion) Collision Warning (1st warning) the possible maximum operating speed may be reduced.) — If you select «Warning Only», Forward Collision-Avoidance Assist activates and produces only warning alarms in accor — dance with the collision risk lev — els. -
Page 311: Brake Operation
Driving your vehicle Forward Collision-Avoidance Assist (FCA) (Sensor fusion) the vehicle ahead and the envi — tor pedal, or when the driver ronment surrounding it, the pos — abruptly operates the steering sible maximum operating speed wheel. The braking control is automati — may be reduced.) For vehicle, pedestrian and cyclist, cally canceled when risk factors…
-
Page 312: Detecting Sensors (Front View Camera/Front Radar)
Driving your vehicle Forward Collision-Avoidance Assist (FCA) (Sensor fusion) NOTICE Forward Collision-Avoidance Assist assesses the risk of a collision by monitoring several variables such as the distance to the vehicle/pedes — trian ahead, the speed of the vehi — cle/pedestrian ahead, and the driver’s operation of the vehicle.
-
Page 313: Warning Message And Warning Light
Forward Collision-Avoidance Assist Have the vehicle inspected by an may not be able to detect vehicle, authorized Kia dealer. pedestrian or cyclist. If the front bumper becomes damaged in the area around the radar sensor, Forward Collision- Avoidance Assist may not operate properly.
-
Page 314: Forward Collision-Avoidance Assist Malfunction
) will illu — master warning light ( certain situations, the front view minate. In this case, take your vehi — camera recognition function or cle to an authorized Kia dealer and front radar may not detect the have the function checked.
-
Page 315: Limitations Of Forward Collision-Avoidance Assist
Driving your vehicle Forward Collision-Avoidance Assist (FCA) (Sensor fusion) vehicle, pedestrian or cyclist (if Forward Collision-Avoidance equipped) ahead. Forward Colli — Assist does not detect vehicles in sion-Avoidance Assist may not the oncoming lane. activate and the warning mes — Forward Collision-Avoidance Assist does not detect cross traf — sage will not be displayed.
-
Page 316
Driving your vehicle Forward Collision-Avoidance Assist (FCA) (Sensor fusion) operate normally. The driver must nition function. (for example a pay careful attention in the follow — tractor trailer, etc.) ing situations where Forward Colli — The camera s field of view is not well illuminated (either too dark sion-Avoidance Assist operation or too much reflection or too… -
Page 317
Driving your vehicle Forward Collision-Avoidance Assist (FCA) (Sensor fusion) be detected by the camera recog — The camera is damaged. nition function. (for example a The brightness outside is too low tractor trailer, etc.) such as when the headlamps are The camera s field of view is not not on at night or the vehicle is well illuminated. -
Page 318
Driving your vehicle Forward Collision-Avoidance Assist (FCA) (Sensor fusion) Driving on a curve detect the vehicle, pedestrian or cyclist traveling in front on a curved road. This may result in no alarm and braking when necessary. Always pay attention to road and driving conditions, and if necessary, depress the brake pedal to reduce your driving speed in order to main -… -
Page 319
Driving your vehicle Forward Collision-Avoidance Assist (FCA) (Sensor fusion) ODEEV069241NR ODEEV069244NR Forward Collision-Avoidance Assist may recognize a vehicle or pedes — trian or cyclist in the next lane or outside the lane when driving on a curved road. If this occurs, the function may unnecessarily alarm the driver and apply the brake. -
Page 320
Driving your vehicle Forward Collision-Avoidance Assist (FCA) (Sensor fusion) Always keep your eyes forward while driving upward or downward on a slope, and, if necessary, depress the brake pedal to reduce your driving speed in order to main — tain distance. Changing lanes OSK3058048NR When driving in stop-and-go traffic,… -
Page 321: Detecting Pedestrian Or Cyclist
Driving your vehicle Forward Collision-Avoidance Assist (FCA) (Sensor fusion) ground clearance, it may induce a The pedestrian or cyclist is small. The pedestrian has impaired hazardous situation. Always pay attention to road and driving condi — mobility. tions, while driving and, if neces — The sensor recognition is limited.
-
Page 322: Radio Frequency Radiation Exposure Information
This equipment should be installed radar signals after removal, take and operated with minimum dis — your vehicle to an authorized Kia tance of 8 in (20 cm) between the dealer and have the function radiator (antenna) and your body.
-
Page 323: Lane Keeping Assist (Lka) (If
NOTICE When you replace the windshield glass, front view camera or sys — tem, take your vehicle to an authorized Kia dealer and have the function checked to need a calibration. The function is designed to detect OSK3051266NR…
-
Page 324: Lane Keeping Assist Operation
Driving your vehicle Lane Keeping Assist (LKA) If you drive with your hands off ON position, take the following the steering wheel, Lane Keeping steps: Assist will stop controlling the Press the Lane Safety button located on the instrument panel steering wheel after the hands on the lower left hand side of the off alarm.
-
Page 325: Warning Message
Driving your vehicle Lane Keeping Assist (LKA) For further details, refer to «LCD Display Modes» on page 4-54. After Lane Keeping Assist is acti — vated, if both lane markers are detected, vehicle speed is over 40 mph (64 km/h) and all the activation conditions are satisfied, a green steering wheel indicator will illumi — nate and the steering wheel will be…
-
Page 326
Driving your vehicle Lane Keeping Assist (LKA) Keep hands on steering wheel (When Active Lane Keeping Assist is activated, if equipped) If the driver takes hands off the steering wheel for several seconds while the Active Lane Keeping Assist is activated, the function will warn the driver. -
Page 327
Driving your vehicle Lane Keeping Assist (LKA) — In bad weather — In bad road conditions — When the steering wheel needs to be controlled by the driver frequently. The steering wheel may feel heavier when the steering wheel is assisted by the function than when it is not. -
Page 328: The Function Will Be Canceled When
Driving your vehicle Lane Keeping Assist (LKA) changed. Lane Keeping Assist cannot assist steering if the vehi — cle follows lane marker too closely. The control of ESC (Electronic Stability Control) or VSM (Vehicle Stability Management) is acti — vated. The steering will not be assisted when you drive fast on a sharp OSK3051267L…
-
Page 329: Driver’s Attention
Driving your vehicle Lane Keeping Assist (LKA) Driver’s Attention stitutes for the lines such as a construction area. The driver must be cautious in the — There are crosswalk signs or following situations because the other symbols on the road. function is limited when recognition — The lane suddenly disappears of the lane marker is poor or limited:…
-
Page 330: Lane Keeping Assist Malfunction
If the problem is not solved, take Lane Keeping Assist malfunction your vehicle to an authorized Kia If there is a problem with the func — dealer and have the function tion a message will appear. If the checked.
-
Page 331
Driving your vehicle Lane Keeping Assist (LKA) mode, the steering wheel will not be controlled. When the vehicle’s front wheel contacts the inside edge of lane line, Lane Keeping Assist issues the lane departure warning. Lane Keeping Assist/Lane Departure Warning function is OFF. OSK3058117NR Active Lane Keeping Assist The active Lane Keeping Assist… -
Page 332: Blind-Spot Collision Warning (Bcw)
Driving your vehicle Blind-Spot Collision Warning (BCW) Blind-Spot Collision Warning 2. Closing at high speed (BCW) (if equipped) Blind-Spot Collision Warning uses radar sensors in the rear bumper to monitor and warn the driver of an approaching vehicle in the driver’s blind spot area.
-
Page 333: Setting And Activating Blind-Spot Collision Warning
Driving your vehicle Blind-Spot Collision Warning (BCW) changing lanes or backing up the If you press the Blind-Spot Safety vehicle. button while ‘Warning Only’ is Blind-Spot Collision Warning sys — selected the indicator on the but — tem may not detect every object ton will turn off and the function alongside the vehicle.
-
Page 334: Operating Conditions
Driving your vehicle Blind-Spot Collision Warning (BCW) First stage alert NOTICE If you change the warning volume, the warning volume of other func — tion may change. Always be aware before changing the warning vol — ume. Operating Conditions The function enters the ready sta — tus, when ‘Warning Only’ is selected OSKEV051302L If a vehicle is detected within the…
-
Page 335
Driving your vehicle Blind-Spot Collision Warning (BCW) To avoid accidents, do not focus only on the warning light and neglect to see the surrounding of the vehicle. Drive safely even though the vehicle is equipped with a Blind- Spot Collision Warning. Do not solely rely on the function but check your surroundings before changing lanes or backing the… -
Page 336: Detecting Sensors
In this case, a warning message may not be dis — played. Have the vehicle inspected by an authorized Kia dealer. Do not apply foreign objects such as a bumper sticker or a bumper guard near the radar sensor or apply paint to the sensor area.
-
Page 337
— mally after about 10 minutes of driving the vehicle. If the function still does not operate normally have your vehicle inspected by an authorized Kia dealer. NOTICE Turn off Blind-Spot Collision OSK3058082NR Warning and Rear Cross-Traffic… -
Page 338: Limitations Of Blind-Spot Collision Warning
The function will The vehicle is driven on a curved turn off automatically. Have your road. vehicle inspected by an authorized The vehicle is driven through a Kia dealer. tollgate. The road pavement (or the peripheral ground) abnormally contains metallic components (i.e.
-
Page 339
Driving your vehicle Blind-Spot Collision Warning (BCW) possibly due to subway construc — If there is a low height vehicle tion). such as a sports car. The brake pedal is depressed. There is a fixed object near the vehicle, such as a guardrail. ESC (Electronic Stability Control) is While going down or up a steep activated. -
Page 340
Driving your vehicle Blind-Spot Collision Warning (BCW) Driving on a curve Driving where the road is merging/ dividing OSK3058029NR Blind-Spot Collision Warning may OSK3058030NR Blind-Spot Collision Warning may not operate properly when driving not operate properly when driving on a curved road. In certain where the road is merging/dividing. -
Page 341
Driving your vehicle Blind-Spot Collision Warning (BCW) Driving where there is a structure function may not detect the vehicle beside the road in the next lane. Also, in certain instances, the func — tion may wrongly recognize the ground or structures. Always pay attention to road and driving conditions, while driving. -
Page 342: Driver Attention Warning (Daw)
Driving your vehicle Driver Attention Warning (DAW) interference that may cause Driver Attention Warning (DAW) undesired operation. (if equipped) Driver Attention Warning is designed to warn the driver of potentially hazardous driving situa — tions if it detects inattentive driving practices.
-
Page 343: Displaying The Driver’s Attention Level
Driving your vehicle Driver Attention Warning (DAW) driving practices faster than Nor — mal mode. Normal Sensitivity: Driver Atten — tion Warning alerts the driver of his/her fatigue level or inattentive driving practices. Off: Driver Attention Warning is deactivated. The set-up of Driver Attention Warning will be applied when the OSP2N051253L vehicle is re-started.
-
Page 344: Taking A Break
Driving your vehicle Driver Attention Warning (DAW) Taking a break Driver Attention Warning resets in the following situations. The «Consider taking a break» mes — The vehicle is turned OFF. sage appears on the LCD display and The driver unfastens the seat belt a warning sounds suggest that the and then opens the driver’s door driver take a break when the driver’s…
-
Page 345: Driver Attention Warning Malfunction
OSK3058097NR Pay extreme caution to keep the In this case, take your vehicle to an camera sensor dry. authorized Kia dealer and have the Do not arbitrarily disassemble the function checked. camera assembly, or apply any impact on the camera assembly.
-
Page 346: Cruise Control (Cc)
Driving your vehicle Cruise Control (CC) tion Warning system warning Cruise Control (CC) (if equipped) sounds. Cruise Control allows you to pro — gram the vehicle to maintain a con — stant speed without pressing the CAUTION accelerator pedal. Driver Attention Warning system This function is designed to function may not provide alerts in the fol — above approximately 20 mph (30…
-
Page 347: Cruise Control Switch
Driving your vehicle Cruise Control (CC) gize after approximately 3 seconds. CANCEL: Cancels Cruise Control This delay is normal. operation. Setting Cruise Control speed NOTICE To activate Cruise Control, depress the brake pedal at least once after turning the ignition switch to the ON position or starting the engine.
-
Page 348: Increasing Cruise Control Set Speed
Driving your vehicle Cruise Control (CC) desired speed will automatically Decreasing the cruising speed be maintained. On a steep grade, the vehicle may slow down or speed up slightly while going downhill. Increasing Cruise Control set speed: OSK3051056N Follow either of these procedures: Push the SET- button and hold it.
-
Page 349: Cancelling Cruise Control
Driving your vehicle Cruise Control (CC) Cancelling Cruise Control Resuming cruising speed at more than approximately 20 mph (30 km/h) OSK3051058N Follow either of these procedures: OSK3051057N Depress the brake pedal. If any method other than the Press the CANCEL button located on the steering wheel.
-
Page 350: Smart Cruise Control (Scc) (If
Driving your vehicle Smart Cruise Control (SCC) Smart Cruise Control (SCC) (if part to cancel Smart Cruise Control is in normal condition. equipped) Smart Cruise Control is designed to allow you to program the vehicle to WARNING maintain a constant speed and a Smart Cruise Control Limitations predetermined distance to the vehi — Smart Cruise Control is a supple -…
-
Page 351: Driving Assist Button
Driving your vehicle Smart Cruise Control (SCC) — Road surrounded by multiple Always set the vehicle speed steel constructions (subway under the speed limit in your construction, steel tunnel, etc) country. — Parking lot Always pay continuous attention — Lanes beside guard rail on a to road and driving conditions road even when Smart Cruise Control is…
-
Page 352: Setting Smart Cruise Control Speed
Driving your vehicle Smart Cruise Control (SCC) Setting Smart Cruise Control speed 4. Release the accelerator pedal. The desired speed will automati — 1. Press the CRUISE button, to turn cally be maintained. the function on. The CRUISE indi — cator in the instrument cluster NOTICE will illuminate.
-
Page 353: Decreasing Smart Cruise Control Set Speed
Driving your vehicle Smart Cruise Control (SCC) Push the RES+ button, and Push the SET- button, and release it immediately. The cruis — release it immediately. The cruis — ing speed will increase by 1.0 mph ing speed will decrease by 1.0 (1.0 km/h) each time you Push mph (1.0 km/h) each time you the RES+ button in this manner.
-
Page 354
Driving your vehicle Smart Cruise Control (SCC) Canceled manually The vehicle speed is under 5 mph (10 km/h). The vehicle speed is over 110 mph (170 km/h). The ESC, ABS or TCS is operating. The ESC is turned off. The sensor or the cover is dirty or blocked with foreign matter. -
Page 355: Resuming Smart Cruise Control Set Speed
Driving your vehicle Smart Cruise Control (SCC) to an authorized Kia dealer and have Resuming Smart Cruise Control set speed the function checked. NOTICE OSK3051057N If any method other than the «RES+» or «SET-» button was used to cancel cruising speed and the…
-
Page 356: Turning Smart Cruise Control Off
Driving your vehicle Smart Cruise Control (SCC) Turning Smart Cruise Control off Select the appropriate distance according to road conditions and vehicle speed. Each time the button is pressed, the vehicle distance changes as follows: For example, if you drive at 56 mph (90 km/h), the distance OSK3051055N maintain as follows;…
-
Page 357: When The Lane Ahead Is Clear
Driving your vehicle Smart Cruise Control (SCC) When the lane ahead is clear: When there is a vehicle ahead of you in your lane: OSK3058105NR The vehicle speed will maintain the OSK3058101NR set speed. WARNING Following Distance To avoid collisions, always be aware of the selected speed and vehicle distance settings when activating your Smart Cruise Con -…
-
Page 358
Driving your vehicle Smart Cruise Control (SCC) The warning chime sounds and LCD display blinks if it is hard to maintain the selected distance to the vehicle ahead. If the warning chime sounds, actively adjust the vehicle speed by depressing the brake pedal according to the road and driving conditions. -
Page 359
Driving your vehicle Smart Cruise Control (SCC) depressing the brake pedal accord — Warning message ing to the road and driving condi — tions. Detecting sensor (front radar sen sor) OSK3058072NR When the sensor lens cover is blocked with dirt, snow, or debris, Smart Cruise Control operation may stop temporarily. -
Page 360: Adjusting The Sensitivity Of Smart Cruise Control
If this occurs, take your OSK3058073NR vehicle to an authorized Kia dealer The message will appear when the and have the function checked. vehicle distance control function is Use only a genuine Kia sensor not functioning normally.
-
Page 361: Converting To Cruise Control Mode
Driving your vehicle Smart Cruise Control (SCC) tance is slower than normal The driver may choose to only use the Cruise Control mode (speed con — speed. Normal: Vehicle speed to the vehi — trol function) by doing as follows: cle ahead to maintain the set dis — 1.
-
Page 362
Driving your vehicle Smart Cruise Control (SCC) depressing the brake pedal accord — Driving on a curve ing to the road and driving condi — tions ahead. Adjust your speed by depressing the brake pedal or applying the acceler — ator pedal according to road and driving conditions ahead. -
Page 363
Driving your vehicle Smart Cruise Control (SCC) or brake pedal according to the road and driving conditions ahead. Changing lanes OSK3058050NR Your vehicle may accelerate when a vehicle ahead of you disappears. When you are warned that the vehi — OSK3058051NR cle ahead of you is not detected, A vehicle which moves into your lane… -
Page 364
Driving your vehicle Smart Cruise Control (SCC) Vehicles with small rear profiles reduce your driving speed in order such as trailers with no loads to maintain a safe distance. A vehicle ahead cannot be recog — nized correctly by the sensor if any of following occurs: When the vehicle is pointing upwards due to overloading in the… -
Page 365
Driving your vehicle Smart Cruise Control (SCC) Keep a safe distance according to For safe operation, carefully read road conditions and vehicle speed. and follow the instructions in this If the vehicle distance is too close manual before use. during a high-speed driving, a Do not use Smart Cruise Control serious collision may result. -
Page 366: Radio Frequency Radiation Exposure Information
Driving your vehicle Rear Cross-Traffic Collision Warning (RCCW) / Rear Cross-Traffic Collision-Avoidance Assist (RCCA) Radio frequency radiation exposure Rear Cross-Traffic Collision information: Warning (RCCW) / Rear Cross- This equipment complies with FCC Traffic Collision-Avoidance radiation exposure limits set forth Assist (RCCA) (if equipped) for an uncontrolled environment.
-
Page 367: Setting And Activating Rear Cross-Traffic Collision Warning/Rear Cross-Traffic Collision-Avoidance Assist
Driving your vehicle Rear Cross-Traffic Collision Warning (RCCW) / Rear Cross-Traffic Collision-Avoidance Assist (RCCA) Stability Control in certain situa — Blind-Spot Safety → Rear Cross- Traffic Safety’. tions. Rear Cross-Traffic Collision- WARNING Avoidance Assist and Rear Cross- Traffic Collision Warning is ready to Always be aware of road and be activated when ‘Rear Cross- traffic conditions while driving…
-
Page 368: Setting The Warning Volume Of Rear Cross-Traffic Collision Warning
Driving your vehicle Rear Cross-Traffic Collision Warning (RCCW) / Rear Cross-Traffic Collision-Avoidance Assist (RCCA) Late: Select this warning activa — * The function will not activate when tion time when the traffic is light the vehicle speed exceeds 7 mph and you are driving in a low speed.
-
Page 369: Rear Cross-Traffic Collision-Avoidance Assist Alert
Driving your vehicle Rear Cross-Traffic Collision Warning (RCCW) / Rear Cross-Traffic Collision-Avoidance Assist (RCCA) the instrument cluster or multime — Left dia screen. The warning will stop when: the detected vehicle moves out of the sensing area or when the vehicle is right behind your vehicle or when the vehicle is not approach — ing your vehicle or…
-
Page 370
Driving your vehicle Rear Cross-Traffic Collision Warning (RCCW) / Rear Cross-Traffic Collision-Avoidance Assist (RCCA) the brake pedal and check the sur — Left roundings. The brake activation by the func — tion lasts for about 2 seconds. The driver must pay attention as the brake is disengaged after 2 seconds. -
Page 371: Detecting Sensor (Rear Corner Radar Sensor)
Driving your vehicle Rear Cross-Traffic Collision Warning (RCCW) / Rear Cross-Traffic Collision-Avoidance Assist (RCCA) bumper is blocked by a vehicle or Rear Cross-Traffic Collision- Avoidance Assist is not a substi — obstacle. The driver should always use tute for safe driving practices, but extreme caution while operating a convenience function only.
-
Page 372: Warning Message
In this case, a warning message may not be dis — played. Have the vehicle inspected OSK3058082NR by an authorized Kia dealer. This warning message may appear Do not apply foreign objects, such when: as a bumper sticker or a bumper…
-
Page 373
— mally after about 10 minutes of Type A driving the vehicle. If the function still does not operate normally have your vehicle inspected by an authorized Kia dealer. NOTICE Turn off Blind-Spot Collision Warning and Rear Cross-Traffic OSK3058083NR… -
Page 374: Limitations Of The Function
Driving your vehicle Rear Cross-Traffic Collision Warning (RCCW) / Rear Cross-Traffic Collision-Avoidance Assist (RCCA) Limitations of the function While going down or up a steep road where the height of the lane The driver must be cautious in the is different. below situations, because the func — Driving on a narrow road where tion may not detect other vehicles…
-
Page 375
Driving your vehicle Rear Cross-Traffic Collision Warning (RCCW) / Rear Cross-Traffic Collision-Avoidance Assist (RCCA) Always pay attention to your sur — ESC (Electronic Stability Control) malfunctions. roundings while backing up. The tire pressure is low or a tire is damaged. When the vehicle is in a complex The brake is reworked. -
Page 376
Driving your vehicle Rear Cross-Traffic Collision Warning (RCCW) / Rear Cross-Traffic Collision-Avoidance Assist (RCCA) When the vehicle is parked diago When the vehicle is on/near a slope nally OSK3051037N The function may not operate prop — OSK3058036NR [A]: Vehicle erly when the vehicle is on/near a slope. -
Page 377
Driving your vehicle Rear Cross-Traffic Collision Warning (RCCW) / Rear Cross-Traffic Collision-Avoidance Assist (RCCA) The function may not operate prop — This device complies with Part 15 of the FCC rules. erly when pulling in the vehicle to the parking space where there is a Operation is subject to the following structure at the back or side of your two conditions:… -
Page 378: Declaration Of Conformity
Driving your vehicle Declaration of conformity Declaration of conformity (if equipped) The radio frequency components (Front radar) complies: For Korea OSP2061032L Europe and countries subject to CE cer — tification OSP2061031L For United States and American terri — tories, Micronesia, Dominican Republic, Honduras OJA060067L OYB060040L…
-
Page 379
Driving your vehicle Declaration of conformity For Canada OSP2061033L OSP2061034L For Taiwan OCK060060L… -
Page 380
Driving your vehicle Declaration of conformity CCAI19LP0490T6 For Serbia OSP2061036L For Oman OSP2061035L For Australia OSP2061037L For Moldova OCK060062L OCK060065L… -
Page 381
Driving your vehicle Declaration of conformity For Ukraine For Brazil OSP2061039L ODL3059228L For Singapore OSP2061040L OCK060066L For Russia For United Arab Emirates ODL3059224L OSP2061038L… -
Page 382: The Radio Frequency Components (Rear Corner Radar) Complies
Driving your vehicle Declaration of conformity For Malaysia The radio frequency components (Rear Corner Radar) complies : For United States and American terri — tories, Micronesia, Dominican Republic, Honduras OSP2061041L For Jordan OSP2061042L For Mexico OYB060040L OSP2061043L For Israel OSP2061044L OYB060041L…
-
Page 383
Driving your vehicle Declaration of conformity For Canada For Taiwan OYB060043L For Indonesia OYB060044L For Malaysia OYB060042L OYB060045L… -
Page 384
Driving your vehicle Declaration of conformity For Singapore OYB060049L For Mexico OYB060046L For Vietnam OYB060050L For Japan OYB060047L For Brazil OYB060051L OYB060048L… -
Page 385
Driving your vehicle Declaration of conformity For Ukraine For United Arab Emirates OYB060052L OYB060056L For Botswana OYB060053L For Jordan OYB060057L For Ghana OYB060054L For Oman OYB060058L OYB060055L… -
Page 386
Driving your vehicle Declaration of conformity For Zambia For Mozambique OYB060062L Europe and countries subject to CE cer — tification OYB060059L For Jamaica OYB060060L OYB060063L For Paraguay OYB060061L For Uzbekistan ODL3059239L… -
Page 387: Economical Operation
Driving your vehicle Economical operation Economical operation brake pedal may cause the brakes to overheat, which reduces their Your vehicle’s fuel economy depends effectiveness and may lead to mainly on your style of driving, more serious consequences. where you drive and when you drive. Take care of your tires.
-
Page 388
— economy and safety. Therefore, cle.Weight reduces fuel economy. have an authorized Kia dealer per — Don’t let the engine idle longer form scheduled inspections and than necessary. If you are waiting maintenance. -
Page 389: Special Driving Conditions
Driving your vehicle Special driving conditions narrower track to make them capa — Special driving conditions ble of performing in a wide variety If driving conditions deteriorate due of offroad applications. to poor weather or road conditions, Specific design characteristics give you should pay even more attention them a higher center of gravity than than usual to your driving.
-
Page 390
Driving your vehicle Special driving conditions SUVs have a significantly higher Rocking the vehicle rollover rate than other types of If it is necessary to rock the vehicle vehicles. to free it from snow, sand, or mud, Specific design characteristics first turn the steering wheel right (higher ground clearance, nar — and left to clear the area around… -
Page 391
Driving your vehicle Special driving conditions h). Spinning the wheels at high make it much more difficult to see speeds when the vehicle is station — at night. Avoid staring directly at the head — ary could cause tires to overheat, which could result in tire damage lights of oncoming vehicles. -
Page 392
Driving your vehicle Special driving conditions If you believe you may have got — Never exceed the maximum tire inflation pressure shown on the ten your brakes wet, apply them tires. lightly while driving until normal braking operation returns. WARNING Driving in flooded areas Under/over inflated tires Always check the tires for proper… -
Page 393: Winter Driving
Driving your vehicle Winter driving Winter driving Tire chains are not legal in all states. Check state laws before fitting tire Severe weather conditions in the chains. winter result in greater wear and other problems. Snow tires To minimize the problems of winter If you mount snow tires on your driving, you should follow these vehicle, make sure they are radial…
-
Page 394
Driving your vehicle Winter driving Tire chains Retighten or remount the chains if they are loose. When using tire chains, install tire chains only on the front tires. Chain installation When installing chains, follow the manufacturer’s instructions and mount them as tightly possible. Make sure the snow chains are SAE class «S»… -
Page 395
Driving your vehicle Winter driving can be checked by an authorized Kia CAUTION dealer or a service station. Snow chains Chains that are the wrong size or Check spark plugs and ignition sys — improperly installed can damage your vehicle’s brake lines, suspen — Inspect your spark plugs as sion, body and wheels. -
Page 396
Driving your vehicle Winter driving anti-freeze as these may damage light, emergency flares, sand, the paint finish. shovel, jumper cables, window scraper, gloves, ground cloth, cover — alls, blanket, etc. Don’t let your parking brake freeze Under some conditions your parking brake can freeze in the engaged position. -
Page 397: Trailer Towing
Driving your vehicle Trailer towing Trailer towing Vehicle load limit We do not recommend using this The vehicle load limit is displayed on vehicle for trailer towing. the tire and loading information label on the driver’s door. Tire and loading information label The label located on the driver’s door sill gives the original tire size, cold tire pressures recommended…
-
Page 398: Steps For Determining Correct Load Limit
Driving your vehicle Vehicle load limit However, the seating capacity may gers in your vehicle, the amount of be reduced based upon the weight available cargo and luggage load of all of the occupants, and the capacity is 650 lbs. (1400-750 (5 weight of the cargo being carried or 150) = 650 lbs.) towed.
-
Page 399
Driving your vehicle Vehicle load limit Example 1 Item Description Total Subtract Occupant 750 lbs. Weight (340 kg) 150 lbs. (68 kg) 5 Available Cargo and 99 lbs. Luggage weight (45 kg) Example 3 ODEEV078137NR Item Description Total Vehicle Capacity 849 lbs. -
Page 400: Certification Label
Driving your vehicle Vehicle load limit front or rear axle and vehicle capac — Certification label ity weight. Exceeding these ratings The certification label is located on can affect your vehicle’s handling the driver’s door sill at the center and braking ability. pillar.
-
Page 401: Vehicle Weight
Driving your vehicle Vehicle weight weight that can be carried by a sin — Vehicle weight gle axle (front or rear). These num — This chapter will guide you in the bers are shown on the compliance proper loading of your vehicle and/ label.
-
Page 403
What to do in an emergency What to do in an emergency Road warning…………….6-3 Hazard warning flasher…………6-3 In case of an emergency while driving……..6-4 If the Vehicle Stalls While Driving ……..6-4 If the engine stalls at a crossroad or crossing ….6-4 If you have a flat tire while driving…….. -
Page 404: What To Do In An Emergency
What to do in an emergency Towing………………6-24 Towing without Wheel Dollies when using a Towing Service ………………6-25 Using removable towing hook ……….6-25 Emergency towing ……………6-26…
-
Page 405: What To Do In An Emergency
What to do in an emergency Road warning What to do in an emergency ter fascia panel. All turn signal lights will flash simultaneously. The hazard warning flasher oper — Road warning ates whether your vehicle is run — When in an emergency situation ning or not.
-
Page 406: In Case Of An Emergency While Driving
4. Try to start the vehicle again. If do not park in the median area your vehicle will not start, contact between the two traffic lanes. an authorized Kia dealer or seek When the vehicle is stopped, turn other qualified assistance. on your emergency hazard flash -…
-
Page 407: If The Engine Will Not Start
4. If the engine still does not start, 1. If your vehicle has an Intelligent call an authorized Kia dealer or Variable Transmission, be sure the seek other qualified assistance. shift lever is in N (Neutral) or P (Park) and the emergency brake is set.
-
Page 408: Emergency Starting
What to do in an emergency Emergency starting Emergency starting WARNING When the vehicle will not start Frozen batteries because of low battery power, you Do not attempt to jump start the may need to jump start the vehicle. vehicle if the discharged battery is frozen, as the battery may rupture Jump starting or explode.
-
Page 409: Push-Starting
This acid is poisonous have your vehicle checked by an and highly corrosive. authorized Kia dealer. NOTICE Jump-starting Make sure to connect one end of the 1. Make sure the booster battery is…
-
Page 410: If The Engine Overheats
— and set the parking brake. ately and call the nearest 3. If the air conditioning is on, turn it authorized Kia dealer for assis — off. tance. 4. If engine coolant is running out 8.
-
Page 411: Tire Pressure Monitoring System (Tpms)
LCD soon as possible by an authorized display. Kia dealer. When the engine overheats from low engine coolant, suddenly add — ing engine coolant may cause cracks in the engine.
-
Page 412: Effective Use Of The Tire Pressure Monitoring System (Tpms)
What to do in an emergency Tire Pressure Monitoring System (TPMS) mine the proper tire inflation pres — Tire pressure is displayed 1~2 minutes later after driving. sure for those tires.) If tire pressure is not displayed As an added safety feature, your when the vehicle is stopped, vehicle has been equipped with a «Drive to display»…
-
Page 413: Low Tire Pressure Telltale
If any of the below happens, have sible. the system checked by an autho — Inflate the tires to the proper pres — rized Kia dealer. sure as indicated on the vehicle’s 1. The low tire pressure telltale / placard or tire inflation pressure…
-
Page 414: Tire Pressure Monitoring System (Tpms) Malfunction Indicator
The low Have the system checked by an tire pressure telltale will be turned authorized Kia dealer as soon as off if the tire pressure is above the possible to determine the cause of recommended tire inflation pres — the problem.
-
Page 415: Tire Replacement With Tpms
TPMS sensor mounted on the the flat tire repaired by an autho — replaced spare wheel is initiated by rized Kia dealer as soon as possible an authorized Kia dealer, the TPMS or replace the flat tire with the malfunction indicator and the low spare tire.
-
Page 416
Have the tire with TPMS serviced or replaced NOTICE by an authorized Kia dealer. You may not be able to identify a Protecting TPMS low tire by simply looking at it. Tampering with, modifying, or dis -… -
Page 417: If You Have A Flat Tire
What to do in an emergency If you have a flat tire If you have a flat tire supported by a jack since the vehicle can easily roll off the jack. Use vehi — If you have a flat tire, you can cle support stands.
-
Page 418: Removing And Storing The Spare Tire
What to do in an emergency If you have a flat tire To prevent the jack from «rattling» Changing tires while the vehicle is in motion, store 1. Park on a level surface and apply the parking brake firmly. it properly. 2.
-
Page 419
What to do in an emergency If you have a flat tire 7. Place the jack at the front (1) or WARNING rear (2) jacking position closest to Jack location the tire you are changing. Place the jack at the designated loca — To reduce the possibility of injury, tions under the frame. -
Page 420
What to do in an emergency If you have a flat tire WARNING Installing a wheel Make sure the wheel makes good contact with the hub when installed. If the contact of the mounting sur — face between the wheel and hub is not good, the wheel nuts could come loose and cause the loss of a wheel. -
Page 421
OSK3061010N Reusing lug nuts 18.After changing wheels, have an Make certain during wheel removal authorized Kia dealer tighten the that the same nuts that were wheel nuts to their proper torque removed are reinstalled — or, if as soon as possible. -
Page 422: Important — Use Of Compact Spare Tire
What to do in an emergency If you have a flat tire wheel and a collision resulting in NOTICE serious injuries. Check the inflation pressure afterin — stalling the spare tire. Adjust it tothe specified pressure, as neces — Important — use of compact spare tire sary.
-
Page 423
What to do in an emergency If you have a flat tire Do not use tire chains on the compact spare tire. Because of the smaller size, a tire chain will not fit properly. This could dam — age the vehicle and result in loss of the chain. -
Page 424
What to do in an emergency If you have a flat tire Jack label Type A OHYK060005 Type B OHYK060001 Type C OSK3068045NR * The actual Jack label in the vehicle may differ from the illustration. For more detailed specifications, refer to the label attached to the jack. 1. -
Page 425
What to do in an emergency If you have a flat tire 10.Jack manufacturer 11.Production date 12.Representative company and address… -
Page 426: Towing
If emergency towing is necessary, we recommend having it done by an WARNING authorized Kia dealer or a commer — cial tow-truck service. Side and curtain Air bag If your vehicle is equipped with side…
-
Page 427: Towing Without Wheel Dollies When Using A Towing Service
What to do in an emergency Towing Do not tow the vehicle with four Towing without Wheel Dollies when using a Towing Service wheels in contact with the ground if it is the vehicle equipped with When towing your vehicle in an DCT or IVT.
-
Page 428: Emergency Towing
4. Remove the towing hook and If towing is necessary, have it done install the cover after use. by an authorized Kia dealer or a commercial tow truck service. Use extreme caution when towing the vehicle. A driver must be in the…
-
Page 429
What to do in an emergency Towing vehicle to steer it and operate the Before emergency towing, check if the hook is not broken or dam — brakes. aged. Towing in this manner may be done Fasten the towing cable or chain only on hard-surfaced roads for a securely to the hook. -
Page 430
What to do in an emergency Towing Rear that you contact an authorized Kia dealer or a commercial tow truck service for assistance. Tow the vehicle as straight ahead as possible. Keep away from the vehicle during towing. Emergency towing precautions 1. -
Page 431
What to do in an emergency Towing mile (1.6 km) when towing. (for CAUTION Dual Clutch Transmission and Intelligent Variable Transmission Intelligent Variable Transmission (IVT) vehicle) Vehicles with Intelligent Variable Transmission (IVT) can only be CAUTION towed to by ordinary vehicle when Dual clutch transmission there is no IVT transmission oil leak — If the car is being towed with all… -
Page 433
Maintenance Maintenance Engine compartment …………… 7-4 Maintenance services…………… 7-5 Owner maintenance …………..7-7 Scheduled maintenance service ……….7-8 Explanation of scheduled maintenance items….7-17 Engine oil and filter …………..7-21 Checking the engine oil level……….7-21 Engine coolant …………….. 7-23 Checking the coolant level……….. -
Page 434
Maintenance Tire rotation …………….7-39 Wheel alignment and tire balance ……..7-40 Tire replacement …………..7-40 Wheel replacement …………..7-41 Tire traction…………….7-41 Tire maintenance…………..7-41 Tire sidewall labeling …………7-41 Tire terminology and definitions ……..7-45 All season tires…………..7-47 Summer tires …………….7-48 Snow tires …………….7-48 Tire chains…………….7-48 Radial-ply tires…………..7-49 Low aspect ratio tire…………7-49 Fuses ………………7-50… -
Page 435
Maintenance Replacing stop/tail and turn signal lamp (bulb type) bulb (Rear combination lamp Type A) ……..7-72 Replacing tail/back-up lamp bulb (Rear combination lamp Type A) ………………. 7-73 Replacing stop and tail lamp (LED type) bulb (Rear combi — nation lamp Type B) …………. 7-74 Replacing high mounted stop lamp (LED type) bulb .. -
Page 436: Maintenance
Maintenance Engine compartment Maintenance Engine compartment (Gasoline) 1.6 T-GDi OSK3078001NR (Gasoline) 2.0 MPI OSK3078053NR * The actual engine cover in the vehicle may differ from the illustration. 1. Engine coolant reservoir 8. Engine oil dipstick 2. Engine oil filler cap 9.
-
Page 437: Maintenance Services
Kia dealer perform this work. are not covered. An authorized Kia dealer has fac — We recommend you have your vehi — tory-trained technicians and genu — cle maintained and repaired by an ine Kia parts to service your vehicle authorized Kia dealer.
-
Page 438
As explained earlier in this section, serious bodily injury. Turn the vehi — several procedures can be done only cle off and wait until the metal parts by an authorized Kia dealer with cool down to perform maintenance special tools. work on the vehicle. -
Page 439: Owner Maintenance
The following lists are vehicle checks pressure. and inspections that should be per — formed by the owner or an autho — rized Kia dealer at the frequencies While operating your vehicle: indicated to help ensure safe, Check for vibrations in the steer — dependable operation of your vehi — ing wheel.
-
Page 440: Scheduled Maintenance Service
Maintenance Scheduled maintenance service Check the inflation pressures of all Scheduled maintenance service tires including the spare for tires Follow the Normal Maintenance that are worn, show uneven wear, Schedule if the vehicle is usually or are damaged. operated where none of the follow — Check for loose wheel lug nuts.
-
Page 441
Maintenance Scheduled maintenance service If your vehicle is operated in any of the prior listed conditions, you should inspect, replace or refill more frequently, using the severe usage maintenance schedule instead of the normal usage maintenance schedule. NOTICE After 10 years or 100,000 miles (150,000 km), we recommend to use severe maintenance schedule. -
Page 442
Maintenance Scheduled maintenance service Normal maintenance schedule — Non Turbo Models The following maintenance services must be performed to ensure good emission control and performance. Keep receipts for all vehicle services to protect your warranty. Where both mileage and date are shown, the fre — quency of service is determined by whichever occurs first. -
Page 443
— If there are some important safety matters like fuel flow restriction, surging, loss of power, hard starting problem etc., replace the fuel filter immediately regardless of maintenance schedule and consult an authorized Kia dealer for details. -
Page 444
Maintenance Scheduled maintenance service Maintenance Under Severe Usage Conditions — Non Turbo Models The following items must be serviced more frequently on cars mainly used under severe driving conditions. Refer to the chart below for the appropri — ate maintenance intervals. R: Replace I: Inspect and if necessary, adjust, correct, clean or replace Maintenance… -
Page 445
Maintenance Scheduled maintenance service Normal maintenance schedule — Turbo Models The following maintenance services must be performed to ensure good emission control and performance. Keep receipts for all vehicle emission services to protect your warranty. Where both mileage and time are shown, the frequency of service is determined by whichever occurs first. -
Page 446
1.6 T-GDi * 1. If T0P TIER Detergent Gasoline is not available, one bottle of additive is recom — mended. Additives are available from your authorized Kia dealer along with information on how to use them. Do not mix other additives. -
Page 447
— If there are some important safety matters like fuel flow restriction, surging, loss of power, hard starting problem etc., replace the fuel filter immediately regardless of maintenance schedule and consult an authorized Kia dealer for details. -
Page 448
Maintenance Scheduled maintenance service Maintenance Under Severe Usage Conditions — Turbo Models The following items must be serviced more frequently on cars mainly used under severe driving conditions. Refer to the chart below for the appropri — ate maintenance intervals. R: Replace I: Inspect and if necessary, adjust, correct, clean or replace Maintenance… -
Page 449: Explanation Of Scheduled Maintenance Items
Check the fuel lines, fuel hoses and The following parts require sched — connections for leakage and dam — uled maintenance. age. Have an authorized Kia dealer replace any damaged or leaking Engine oil and filter parts immediately. The engine oil and filter should be…
-
Page 450: Air Cleaner Filter
The coolant should be changed at of deterioration or damage. the intervals specified in the main — tenance schedule. Air cleaner filter A Genuine Kia air cleaner filter is Intelligent Variable Transmission (IVT) fluid (if equipped) recommended when the filter is replaced.
-
Page 451
Maintenance Explanation of scheduled maintenance items eventually, transmission failure. Use owners to take the following steps only specified Intelligent Variable to prevent corrosion: Transmission (IVT) fluid. 1. Wash the undercarriage of your vehicle regularly throughout the winter and do a thorough washing Dual clutch transmission Fluid in the spring to remove road salt Inspect the dual clutch transmission… -
Page 452
Maintenance Explanation of scheduled maintenance items Exhaust pipe and muffler parts and, if necessary, repack the grease. Visually inspect the exhaust pipes, muffler and hangers for cracks, Air conditioning refrigerant deterioration, or damage. Start the engine and listen carefully for any Check the air conditioning lines and exhaust gas leakage. -
Page 453
Maintenance Engine oil and filter Engine oil and filter CAUTION When you wipe the oil level gauge, Checking the engine oil level you should wipe it with a clean cloth. Engine oil is used for lubricating, When mixed with debris, it can cooling, and operating various cause engine damage. -
Page 454
— sary. Changing the engine oil and filter Have engine oil and filter changed by an authorized Kia dealer according to the Maintenance Schedule at the OSK3071003L beginning of this chapter. (Gasoline) 2.0 MPI… -
Page 455
Maintenance Engine coolant periods of time. Used engine oil con — Engine coolant tains chemicals that have caused The high-pressure cooling system cancer in laboratory animals. Always has a reservoir filled with year protect your skin by washing your round antifreeze coolant. The reser — hands thoroughly with soap and voir is filled at the factory. -
Page 456
Maintenance Engine coolant Do not use alcohol or methanol WARNING coolant or mix them with the Radiator cap specified coolant. Do not use a solution that con — tains more than 60% antifreeze or less than 35% antifreeze, which would reduce the effective — ness of the solution. -
Page 457
Maintenance Engine coolant 1. Check if the radiator cap label is Checking the coolant level straight In front. WARNING Engine room front view Removing radiator cap Never attempt to remove the radiator cap while the engine is operating or hot. Doing so might lead to cooling system damage and could result in serious personal injury from escaping hot coolant or… -
Page 458
Bring the level to F, but do not overfill. If frequent additions are required, see an authorized Kia dealer for a cooling system inspection. Changing the coolant Have the coolant changed by an authorized Kia dealer according to the Maintenance Schedule at the beginning of this chapter. -
Page 459
If the fluid level is exces — sively low, have the brake system operate smoothly. checked by an authorized Kia dealer. Checking the brake fluid level Use only the specified brake fluid. Check the fluid level in the reservoir (Refer to «Recommended lubricants… -
Page 460
To maintain your vehicle s best make sure that it doesn’t run out. brake and ABS/ESC performance, use Kia genuine brake fluid as in the specification. Checking the washer fluid level (Classification :SAE J1703,… -
Page 461
2. If the stroke is more or less than specified, have the parking brake adjusted by an authorized Kia dealer. Stroke: 5~7 «clicks» at a force of 44 lbs. (20 kg, 196 N) -
Page 462: Replacing Air Cleaner Filter
When removing the air cleaner fil — ter, be careful that dust or dirt does not enter the air intake, or damage may result. Use a Kia genuine part. Use of a non-genuine part could damage the air flow sensor. OSK3078073NR…
-
Page 463: Climate Control Air Filter
Maintenance Climate control air filter Climate control air filter 1. Open the glove box. The climate control air filter should be replaced according to the main — tenance schedule. If the vehicle is operated in severely air-polluted cities or on dusty rough roads for a long period, it should be inspected more frequently and replaced ear — lier.
-
Page 464: Wiper Blades
Maintenance Wiper blades 4. Reassemble in the reverse order Wiper blades of disassembly. When the wipers no longer clean When replacing the climate control adequately, the blades may be worn air filter install it properly. Other — or cracked, and require replacement. wise, the system may produce noise To prevent damage to the wiper and the effectiveness of the filter…
-
Page 465: Replacing Front Windshield Wiper Blade
Maintenance Wiper blades are not wiping properly, clean both Do not pull wiper arm forward, since it could chip the hood paint. the window and the blades with a good cleaner or mild detergent, and 2. Compress the clip and slide the rinse thoroughly with clean water.
-
Page 466: Replacing Rear Window Wiper Blade
ODEEV098019NR 3. Make sure the blade assembly is installed firmly by trying to pull it slightly. To prevent damage to the wiper arms or other components, have an authorized Kia dealer replace the wiper blade.
-
Page 467: Battery
Maintenance Battery Battery WARNING The battery powers the engine in Risk of explosion order to move the vehicle as well as Keep lit cigarettes and all supplying power to the various other flames or sparks devices installed in the vehicle. away from the battery.
-
Page 468
The battery contains lead. Do not dispose of it after use. Please return the bat — Battery recharging tery to an authorized Kia dealer to Your vehicle has a maintenance- be recycled. free, calcium-based battery Never attempt to recharge the bat -… -
Page 469: Tires And Wheels
Maintenance Tires and wheels lyte of any cell exceeds 120 F (49 Tires and wheels For proper maintenance, safety, and Wear eye protection when check — maximum fuel economy, you must ing the battery during charging. always maintain recommended tire Disconnect the battery charger in inflation pressures and stay within the following order.
-
Page 470: Checking Tire Inflation Pressure
Maintenance Tires and wheels Never overload your vehicle. Be WARNING careful not to overload a vehicle Tire underinflation luggage rack if your vehicle is Inflate your tires consistent with equipped with one. the instructions provided in this Warm tires normally exceed rec — manual.
-
Page 471: Tire Rotation
Maintenance Tires and wheels 1. Remove the valve cap from the Tire rotation tire valve stem. To equalize tread wear, it is recom — 2. Press the tire gauge firmly onto mended that the tires be rotated the valve to get a pressure mea — every 6,000 miles (10,000 km) (For surement.
-
Page 472: Wheel Alignment And Tire Balance
Maintenance Tires and wheels Rotate radial tires that have an Tire replacement asymmetric tread pattern only from If the tire is worn evenly, a tread front to rear and not from right to wear indicator will appear as a solid left.
-
Page 473: Wheel Replacement
Tire sidewall labeling This information identifies and Wheels describes the fundamental charac — Wheels that do not meet Kia specifi — teristics of the tire and also provides cations may fit poorly and result in the tire identification number (TIN) damage to the vehicle or unusual for safety standard certification.
-
Page 474
Maintenance Tires and wheels vehicles or light trucks; however, not all tires have this marking). 235: Tire width in millimeters. 65: Aspect ratio. The tire’s section height as a percentage of its width. R: Tire construction code (Radial). 17: Rim diameter in inches. 108: Load Index, a numerical code associated with the maximum ODEEV098031NR… -
Page 475
Maintenance Tires and wheels WARNING Speed Rating Maximum Speed Tire age Symbol 112 mph (180 km/h) Replace tires within the recom — 118 mph (190 km/h) mended time frame. Failure to 130 mph (210 km/h) replace tires as recommended can 149 mph (240 km/h) result in sudden tire failure, which Above 149 mph (240 km/h) -
Page 476
Maintenance Tires and wheels can be carried by the tire. When The relative performance of tires depends upon the actual conditions replacing the tires on the vehicle, of their use, however, and may always use a tire that has the same depart significantly from the norm load rating as the factory installed due to variations in driving habits,… -
Page 477: Tire Terminology And Definitions
Maintenance Tires and wheels excessive temperature can lead to Bias Ply Tire A pneumatic tire in sudden tire failure. The grade C cor — which the plies are laid at alternate responds to a level of performance angles less than 90 degrees to the which all passenger vehicle tires centerline of the tread.
-
Page 478
Maintenance Tires and wheels always face outward when mounted Occupant Distribution Designated on a vehicle. seating positions. Kilopascal (kPa) The metric unit for Outward Facing Sidewall The side of a asymmetrical tire that has a par — air pressure. ticular side that faces outward Light truck (LT) tire A tire desig — when mounted on a vehicle. -
Page 479: All Season Tires
Tread The portion of a tire that All season tires comes into contact with the road. Kia specifies all season tires on Treadwear Indicators Narrow bands, some models to provide good per — sometimes called «wear bars,» that…
-
Page 480: Summer Tires
Maintenance Tires and wheels Summer tires WARNING Kia specifies summer tires on some Do not use summer tires at tem — models to provide superior perfor — peratures below 45 F (7 C) or mance on dry roads. when driving on snow or ice. At…
-
Page 481: Radial-Ply Tires
Maintenance Tires and wheels chain to avoid contact with the Longer wearing tires can be more vehicle body. susceptible to irregular tread wear. To prevent body damage, It is very important to follow the tire retighten the chains after driving rotation interval shown in this sec — 0.3~0.6 miles (0.5~1.0 km).
-
Page 482: Fuses
If the tire is impacted, we recom — damage by fuses. mend that you inspect the tire Blade type condition or contact an authorized Kia dealer. To prevent damage to the tire, inspect the tire condition and pressure every 1,900 miles (3,000 km).
-
Page 483
Never replace a fuse with any — recommend that you consult with thing but another fuse of the an authorized Kia dealer. same rating. A higher capacity fuse could cause damage and possibly a fire. -
Page 484: Replacing Inner Panel Fuse
WARNING Electrical wiring repairs All electrical repairs should be per — formed by authorized Kia dealer — OSK3071011N 3. Pull the suspected fuse straight ships using approved Kia parts. out. Use the removal tool pro -…
-
Page 485: Replacing Engine Compartment Fuse
If it fits loosely, an authorized Kia dealer for assis — consult an authorized Kia dealer. tance. CAUTION…
-
Page 486
Have the vehicle checked by disconnected. In such a case, the cause of the problem may be dis — an authorized Kia dealer. connection of the main fuse (BFT type), which is located inside the positive battery terminal (+) cap. -
Page 487: Fuse/Relay Panel Description
If the a fire. Have the vehicle checked by battery cap is not securely closed, an authorized Kia dealer. moisture may enter the system and damage the electrical components. Battery fuse…
-
Page 488
Maintenance Fuses Driver’s side fuse panel NOTICE Not all fuse panel descriptions in this manual may be applicable to your vehicle. It is accurate at the time of printing. When you inspect the fuse panel in your vehicle, refer to the fuse panel label on the inside of the fuse cover. -
Page 489
Maintenance Fuses Description Fuse rating Protected component Sound Mood Lamp, E/R Junction Block (Power Outlet Relay), Audio, Front/Rear USB Charger, Wireless Charger, AMP, MODULE2 10 A Driver/Passenger Door Mood Range Lamp, Power Outside Mirror Switch, A/V & Navigation Head Unit, IBU Driver/Passenger Power Outside Mirror, A/C Control Mod — HEATED MIRROR 10 A… -
Page 490
Maintenance Fuses Description Fuse rating Protected component SUNROOF 20 A Sunroof Motor 25 A [W/O ISG] AMP, [With ISG] DC-DC Converter Front Seat Warmer Control Module, Front Air Ventilation S/HEATER FRT 20 A Seat Control Module P/SEAT (DRV) 25 A POWER SEAT MODULE (DRV) P/SEAT (PASS) 25 A… -
Page 491
Maintenance Fuses Engine compartment fuse panel OSK3078080NR OSK3070069NR Refer to the following table for a description of the fuse. Fuse Name Fuse rating Circuit Protected Alternator, E/R Junction Block (Fuse — VACUUM PUMP, 150 A (G4FJ) OIL PUMP, POWER OUTLET1), ESC (Electronic Stability 180 A (G4NH) Control)1, ESC (Electronic Stability Control)2) MDPS… -
Page 492
Maintenance Fuses Fuse Name Fuse rating Circuit Protected PCB (Printed Circuit Board) Block (Engine Control Relay, 60 A Fuse — ECU3, ECU4, HORN, A/C) 60 A ICU Junction Block (IPS Control Module) 60 A ICU Junction Block (IPS Control Module) ICU Junction Block (Fuse — P/WINDOW LH, P/WINDOW RH, 50 A TAILGATE OPEN, SUNROOF, AMP, S/HEATER FRT, P/SEAT… -
Page 493
Maintenance Fuses Fuse Name Fuse rating Circuit Protected [(Gasoline) 1.6 T-GDi] ECM (Engine Control Module) ECU4 15 A [(Gasoline) 2.0 MPI] PCM (Power train Control Module) HORN 15 A Horn Relay 10 A A/C COMP Relay IGN COIL 20 A Ignition Coil #1/#2/#3/#4 SENSOR3 10 A… -
Page 494
Maintenance Fuses Refer to the following table for the relay type. Relay Name Type PTC HEATER 2 Relay MICRO COOLING FAN 2 Relay MICRO PDM 3 (IG1) Relay MICRO START #1 Relay MICRO HEAD LAMP HI Relay MICRO PDM 4 (IG2) Relay MICRO FUEL PUMP Relay MICRO… -
Page 495
Maintenance Fuses Battery terminal cover OSK3078015NR… -
Page 496
Maintenance Fuses OSK3070091NR NOTICE Not all fuse panel descriptions in this manual may be applicable to your vehicle. It is accurate at the time of printing. When you inspect the fuse panel in your vehicle, refer to the fuse panel label. -
Page 497: Light Bulbs
Maintenance Light bulbs Light bulbs CAUTION Light bulbs are installed in various Light replacement parts of the vehicle to provide light — Be sure to replace the burned-out ing inside and outside the vehicle as bulb with one of the same wattage well as to alert other vehicles.
-
Page 498
This is especially aiming be adjusted by an authorized true if you have to remove the Kia dealer after an accident or after the headlight assembly is rein — headlamp assembly to get to the stalled. -
Page 499: Headlamp Bulb
Maintenance Light bulbs Light bulb position (Front) Fog lamp Head lamp — Type A OSK3078019NR 1. Front turn signal lamp (Bulb Type) OSK3078016NR 2. Headlamp (Low/High) Head lamp — Type B 3. Position lamp/Daytime running lamp (Bulb Type) 4. Side marker (Bulb/LED Type) 5.
-
Page 500
Maintenance Light bulbs Light bulb position (Rear) High mounted stop lamp Rear combination lamp — Type A OSK3071022N 1. Tail lamp (Bulb type) OSK3078020NR 2. Tail and stop lamp (Bulb type) Rear combination lamp — Type B 3. Rear turn signal lamp (Bulb type) 4. -
Page 501: Replacing Headlamp (High/Low Beam) Bulb (Headlamp Type A,B)
Headlamp bulb Replacing Headlamp (High/Low beam) bulb (Headlamp Type A,B) If the Headlamp (High/Low) (1) does not operate, have the vehicle checked by an authorized Kia dealer. Type A / Type B OSK3078081NR WARNING Halogen bulbs Handle halogen bulbs with care.
-
Page 502: Replacing Position Lamp/Drl/Front Turn Signal Lamp Bulb
(LED type) replacement (Headlamp Type B) Type A If the position lamp + DRL (LED) (1) does not operate, have the vehicle checked by an authorized Kia dealer. OSK3078041NR Type B OSK3078023NR The LED lamps cannot be replaced as a single component because it is an integrated unit.
-
Page 503: Replacing Headlamp (Led Type) (Headlamp Type C)
If the front fog lamp (1) does not time running lamp/Position lamp operate, have the vehicle checked by does not operate, have the vehicle an authorized Kia dealer. checked by an authorized Kia dealer. Type A OSK3078024NR OSK3078026NR The LED lamps cannot be replaced…
-
Page 504: Replacing Side Repeater Lamp (Led Type) Bulb
If the side repeater lamp (LED), does 1. Open the liftgate. not operate, have the vehicle 2. Loosen the lamp assembly retain — checked by an authorized Kia dealer. ing screws with a screwdriver. OSK3078027NR OSK3078054NR The LED lamps cannot be replaced 3.
-
Page 505: Replacing Tail/Back-Up Lamp Bulb (Rear Combination Lamp Type A)
Maintenance Light bulbs the bulb align with the slots in the Tail lamp socket. 6. Insert a new bulb by inserting it into the socket and rotating it until it locks into place. 7. Install the socket in the assembly by aligning the tabs on the socket with the slots in the assembly and turning the socket clockwise.
-
Page 506: Replacing Stop And Tail Lamp (Led Type) Bulb (Rear Combination Lamp Type B)
If the stop and tail lamp (LED) type) (1), does not operate, have (1,2),does not operate, have the the vehicle checked by an autho — vehicle checked by an authorized Kia rized Kia dealer. dealer. OSK3071029N The LED lamps cannot be replaced…
-
Page 507: Replacing High Mounted Stop Lamp (Bulb Type) Bulb
Maintenance Light bulbs Replacing high mounted stop lamp (bulb type) bulb 1. Open the liftgate. 2. Remove the cover. OSK3078058NR 5. Replace the bulbs by pulling it out from the socket. OSK3078056NR 3. Loosen the retaining bolts and remove the hose (1). OSK3078059NR 6.
-
Page 508: Replacing License Plate Lamp Bulb
Maintenance Light bulbs Replacing license plate lamp bulb Replacing map lamp (bulb type) bulb OSK3071036N 1. Remove the lamp assembly by OSK3078084NR using a flat-blade screwdriver. 1. Using a flat-blade screwdriver, 2. Remove the socket from the gently pry the lens cover from assembly by turning the socket lamp housing.
-
Page 509: Replacing Map Lamp (Led Type) Bulb
Light bulbs Replacing map lamp (LED type) Replacing vanity mirror lamp bulb bulb If the map lamp (LED) does not operate, have the vehicle checked by an authorized Kia dealer. ODEEV098065NR WARNING Interior lamps Prior to working on the Interior OSK3078085NR The LED lamps cannot be replaced lamps, ensure that the «OFF»…
-
Page 510: Replacing Room Lamp (Bulb Type) Bulb
Replacing room lamp (bulb type) Replacing room lamp (LED type) bulb bulb If the Room lamp (LED) does not operate, have the vehicle checked by an authorized Kia dealer. ODEEV098066NR WARNING Interior lamps ODEEV098067NR The LED lamps cannot be replaced…
-
Page 511: Replacing Glove Box Lamp
If the Liftgate room lamp (LED) does not operate, have the vehicle Be careful not to dirty or damage checked by an authorized Kia dealer. the lens, lens tab, and plastic hous — ings. The LED lamps cannot be replaced as a single component because they are part of an integrated unit.
-
Page 512: Appearance Care
Maintenance Appearance care Appearance care NOTICE Use the information in the following Be careful not to dirty or damage sections to keep the exterior and the lens, lens tab, and plastic hous — interior of your vehicle clean. ings. Exterior care Use the information in the following sections to maintain the exterior of your vehicle.
-
Page 513
Maintenance Appearance care Finish maintenance CAUTION Do not use strong soap, chemical Washing To help protect your vehicle’s finish detergents or hot water, and do from rust and deterioration, wash it not wash the vehicle in direct sun — thoroughly and frequently at least light or when the body of the once a month with lukewarm or cold vehicle is warm. -
Page 514
Maintenance Appearance care automatic car washing, etc.) the WARNING vehicle. After washing the vehicle, test the brakes while driving slowly to see if Waxing they have been affected by water. If Wax the vehicle when water will no braking performance is impaired, longer bead on the paint. -
Page 515
Maintenance Appearance care retention system, the vehicle sus — promptly. Exposed metal will quickly rust and may develop into a major pension, the exhaust system, and repair expense. even the body frame. The National Highway Traffic Safety NOTICE Administration has warned all vehi — cle owners of all brands of the need If your vehicle is damaged and to take the following steps:… -
Page 516
Maintenance Appearance care Clean the wheel when it has which leave unprotected metal cooled. exposed to corrosion. Use only a mild soap or neutral High-corrosion areas detergent, and rinse thoroughly If you live in an area where your with water. Also, be sure to clean vehicle is regularly exposed to cor — the wheels after driving on salted rosive materials, corrosion protec -… -
Page 517
Maintenance Appearance care and not be trapped inside to accel — To help prevent corrosion You can help prevent corrosion from erate corrosion. beginning by observing the follow — ing: Keep your garage dry Don’t park your vehicle in a damp, Keep your vehicle clean poorly ventilated garage. -
Page 518: Interior Care
Maintenance Appearance care fertilizers, cleaning materials or CAUTION chemicals in the vehicle. Leather These should be carried only in When cleaning leather products proper containers and any spills or (steering wheel, seats etc.), use leaks should be cleaned up, flushed neutral detergents or low alcohol with clean water and thoroughly content solutions.
-
Page 519
Maintenance Appearance care Cleaning the leather seats and moderate pressure using a soft sponge or microfiber cloth. Remove all contaminations instantly. Refer to instructions Velcro closures on clothing or sharp below for removal of each contami — objects may cause snagging or nant. -
Page 520: Emission Control System
Do not scrape or scratch the inside maintained by an authorized Kia of the rear window. This may result dealer in accordance with the main — in damage of the rear window tenance schedule in this manual.
-
Page 521
Maintenance Emission control system back on by pressing the ESC Purge Control Solenoid Valve (PCSV) The purge control solenoid valve is switch again. controlled by the Engine Control Module (ECM); when the engine 1. Crankcase emission control sys — coolant temperature is low during idling, the PCSV closes so that evap — The positive crankcase ventilation orated fuel is not taken into the… -
Page 522
Maintenance Emission control system and could be lethal if inhaled. Follow WARNING the instructions on this page to Fire avoid CO poisoning. Do not park, idle or drive the vehi — Do not operate the engine in con — cle over or near flammable fined or closed areas (such as objects, such as grass, vegetation, garages) any more than what is… -
Page 523: California Perchlorate Notice
Maintenance California perchlorate notice and adjustments must be made California perchlorate notice by an authorized Kia dealer. Perchlorate Material-special han — Avoid driving with an extremely dling may apply, See low fuel level. Running out of fuel https://dtsc.ca.gov/perchlorate could cause the engine to misfire, damaging the catalytic converter.
-
Page 525: Specifications, Consumer Information And Reporting
Specifications, Consumer informa — tion and Reporting safety defects Specifications, Consumer information and Reporting safety defects Dimensions…………….. 8-2 Engine ………………8-3 Bulb wattage …………….8-4 Tires and wheels …………… 8-5 Gross vehicle weight …………..8-6 Luggage volume……………. 8-6 Air conditioning system…………8-6 Recommended lubricants and capacities ……
-
Page 526
Specifications, Consumer information and Re — Dimensions porting safety defects Specifications, Consumer information and Reporting safety defects Dimensions Item Size: in (mm) Overall length 165.2 (4,195) Overall width 70.9 (1,800) 205/60R16 63.0 (1,600) Without Roof rack 215/55R17 63.5 (1,613) 235/45R18 63.6 (1,615) Overall height 205/60R16… -
Page 527: Engine
Specifications, Consumer information and Re — Engine porting safety defects Engine Item (Gasoline) 1.6 T-GDi (Gasoline) 2.0 MPI Displacement: cu in (cc) 97.08 (1591) 121.9 (1999) Bore x Stroke: in (mm) 3.03 x 3.36 (77 x 85.4) 3.18 x 3.81 (81 x 97.0) Firing order 1-3-4-2 1-3-4-2…
-
Page 528: Bulb Wattage
Specifications, Consumer information and Re — Bulb wattage porting safety defects Bulb wattage Light Bulb Wattage Bulb type Type A Headlamp (Low/High) 55/60 Type B Headlamp (Low/High) HB3LL Type C Headlamp (Low/High) Front turn signal lamps (Bulb) 2357NA P21/5W Front position lamps 5 (LED*) Type A, B (LED*)
-
Page 529: Tires And Wheels
Specifications, Consumer information and Re — Tires and wheels porting safety defects Tires and wheels Inflation pressure [bar (psi, kPa)] Wheel lug nut Load Speed Tire Wheel torque Capacity capacity Maximum load Normal load Item size size lbf ft (kgf m, kg SS km/h Front Rear…
-
Page 530: Gross Vehicle Weight
MAX: Behind seat folded with out luggage under tray Air conditioning system Items Weight of Volume oz (g) Classification Refrigerant 15.87 0.88 (450 25) R-1234yf Compressor lubricant 4.23 0.35 (120 10) Have your vehicle inspected by an authorized Kia dealer.
-
Page 531: Recommended Lubricants And Capacities
*2. Use only specified genuine Continuously variable Transmission fluid. The use of non-specified fluid (even marked as compatible with genuine) could result in shift quality deterioration and vibrations, eventually, the transmission failure. *3. To maintain your vehicle s best brake and ABS/ESC performance, use Kia genuine brake fluid as in the specification.
-
Page 532: Recommended Sae Viscosity Number
Specifications, Consumer information and Re — Recommended SAE viscosity number porting safety defects Recommended SAE viscosity Engine oil viscosity (thickness) has an effect on fuel economy and cold number weather operating (engine start and engine oil flowability). Lower viscos — CAUTION ity engine oils can provide better Always be sure to clean the area…
-
Page 533: Vehicle Identification Number (Vin)
Specifications, Consumer information and Re — Vehicle identification number (VIN) porting safety defects Vehicle identification number Vehicle certification label (VIN) The vehicle certification label attached on the driver’s side center The vehicle identification number pillar gives the vehicle identification (VIN) is the number used in register — number (VIN).
-
Page 534: Tire Specification And Pressure Label
Specifications, Consumer information and Re — Tire specification and pressure label porting safety defects Tire specification and pressure Engine number label The engine number is stamped on the engine block as shown in the The tire label located on the driver’s drawing.
-
Page 535: Air Conditioner Compressor Label
Specifications, Consumer information and Re — Air conditioner compressor label porting safety defects Air conditioner compressor label Refrigerant label A compressor label informs you the The refrigerant label is located on type of compressor your vehicle is the front body trim. equipped with such as model, sup — plier part number, production num — ber, refrigerant (1) and refrigerant…
-
Page 536: Consumer Assistance (U.s. Only)
Vehicle Identification Number Roadside Assistance is provided on (VIN) to verify coverage at the time all new current model year Kia Vehi — of your call. The VIN can be found on cles from the date the vehicle is…
-
Page 537
Fleet vehicles are excluded from NOTICE reimbursement under Kia’s Trip Roadside Assistance benefits are Interruption Policy. not available for any Kia vehicle that has ever been or should have been Registering your vehicle in a foreign issued a «salvage» title or similar country «branded»… -
Page 538: Electrical Equipment (U.s. Only)
However, before any additional elec — 3. There may not be an Authorized trical equipment is installed in your Kia Dealer in the area in which you vehicle, consult an Authorized Kia plan to register your vehicle. You Dealer, in order to ensure that you may additionally experience diffi — do not void your warranty.
-
Page 539: Reporting Safety Defects (U.s. Only)
— tion. Reporting Safety Defects. Kia vehicles are designed and manu — If you believe that your vehicle has a factured to meet or exceed all appli — defect which could cause a crash or cable safety standards.
-
Page 540: Online Factory Authorized Manuals (U.s. Only)
Specifications, Consumer information and Re — Online factory authorized manuals (U.S. only) porting safety defects Online factory authorized man — uals (U.S. only) The following publications are avail — able on www.KiaTechinfo.com. Service manual This manual covers maintenance and recommended procedures for repair to engine and chassis compo — nents.
-
Page 541: Abbreviation
Abbreviation Abbreviation Abbreviation…………….A-2…
-
Page 542
Abbreviation Abbreviation Abbreviation Environmental Protection Agency Abbreviation Electronic Power Steering Anti-lock Brake System Electronic Stability Control Absorbent Glass Mat Forward Collision-Avoidance Assist Anti Knock Index Federal Communications Commis — Blind-Spot Collision Warning sion FMVSS Child Restraint System Federal Motor Vehicle Safety Standards Driver Attention Warning Front… -
Page 543
Intelligent Power Switch Occupant Detection System ORVR Onboard Refueling Vapor Recov — Idle Stop and Go Intelligent Variable Transmission Printed Circuit Board Kia Motors America Power train Control Module LATCH PCSV Lower Anchors and Tether for CHildren Purge Control Solenoid Valve… -
Page 544
Abbreviation Abbreviation Supplemental Restraint System SRSCM SRS Control Module Speed Symbol Turn By Turn Transmission Control Module Traction Control System Tire Identification Number TPMS Tire Pressure Monitoring System Vehicle Identification Number Vehicle Stability Management without… -
Page 545: Index
Index Index…
-
Page 546
Index automatic climate control system 4-118 air conditioning 4-124 air conditioning refrigerant label 4-117 4-129 adjusting steering wheel angle and automatic ventilation 4-125 height 4-42 checking the amount of air bag collision sensors 3-60 air conditioner refrigerant and air bag warning label 3-64 4-116 4-128… -
Page 547
applying the parking brake 5-36 replacing filter 7-31 electronic stability control (ESC) 5-39 clothes hanger 4-145 good braking practices 5-44 combined instrument, see hill-start assist control (HAC) 5-44 instrument cluster 4-48 parking brake 5-35 consumer assistance 8-12 power brakes 5-34 coolant 7-23 releasing the parking brake… -
Page 548
door lock dual clutch transmission shift rear occupant alert (ROA) indicator 4-52 system 4-21 door locks 4-18 central door lock switch 4-20 electric chromic mirror (ECM) with child-protector rear door lock 4-21 from inside the vehicle 4-19 UVO service 4-45 from outside the vehicle 4-18 electrical equipment… -
Page 549
brake hoses and lines 7-19 Forward Collision-Avoidance Assist coolant 7-18 (FCA) (Sensor fusion) 5-63 cooling system 7-18 brake operation 5-67 drive shafts and boots 7-20 front view camera / front rader steering gear box, linkage and boots/ sensor 5-68 lower arm ball joint 7-20 limitations 5-71… -
Page 550
replacing motor compartment illuminated ignition switch 5-10 fuse 7-53 immobilizer 4-13 indicator lights 4-77 inside rearview mirror 4-44 instrument cluster 4-48 gauges 4-49 gauges 4-49 glove box 4-133 instrument cluster control 4-49 good braking practices 5-44 instrument panel overview gross vehicle weight intelligent variable transmission (IVT) 5-18… -
Page 551
emergency liftgate safety release 4-24 opening the liftgate 4-23 jump starting liftgate room lamp 4-104 jump-starting light bulbs 7-65 bulb replacement precaution 7-65 position lamp/DRL (LED type) replacement (Headlamp Type B) 7-70 replacing back-up lamp bulb (Rear folding key combination lamp Type A) 7-73 smart key replacing front fog lamp bulb… -
Page 552
auto light 4-93 maintenance services battery saver function 4-92 owner maintenance precautions daytime running light 4-92 owner s responsibility front fog light 4-95 map lamp 4-103 headlight (headlamp) escort master warning mode 4-56 function 4-92 mirrors 4-44 headlight position 4-93 day/night rearview mirror 4-44 4-45 high beam assist… -
Page 553
avoidance assist (RCCA) replacing high mounted stop lamp 5-122 detecting sensor 5-127 (LED type) bulb 7-74 limitations 5-130 replacing license plate lamp setting and activating 5-123 bulb 7-76 warning message 5-128 replacing liftgate room lamp rear cross-traffic collision warning bulb 7-79 (RCCW) 5-122… -
Page 554
rotation (tire) smart cruise control (SCC) 7-39 5-106 accelerating temporarily with smart cruise control on 5-109 adjusting the sensitivity 5-116 SAE viscosity number converting to cruise control 5-117 mode scheduled maintenance decreasing smart cruise control set service speed 5-109 maintenance under severe usage increasing smart cruise control set conditions 7-12… -
Page 555
starting difficulties, see vehicle will tire specification and pressure not start label 8-10 starting the engine with tires and wheels 7-37 smart key all season tires 7-47 5-16 checking tire inflation pressure 7-38 steering wheel 4-40 low aspect ratio tire 7-49 adjusting steering wheel angle and radial-ply tires… -
Page 556
defogging 4-129 windshield washers 4-99 USB charger winter driving 4-140 5-149 user settings mode 4-56 snow tires 5-149 snowy or icy conditions 5-149 tire chains 5-150 wiper blades 7-32 vanity mirror lamp 4-105 blade inspection 7-32 vehicle break-in process replacing blade 7-33 replacing rear window wiper vehicle certification label…
Предлагаю вашему вниманию руководство по эксплуатации KIA Soul 2013 модельного года и раннее. Надеюсь материал окажется для вас полезным.
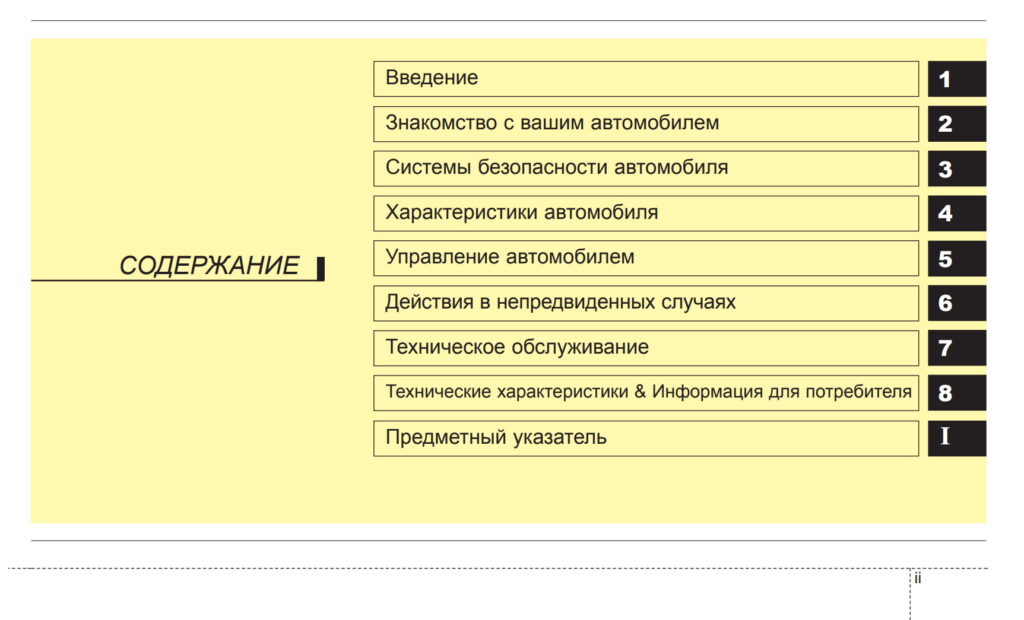
В руководстве по эксплуатации представлены основные моменты по управлению, сервисному обслуживанию и нюансах эксплуатации автомобиля KIA Soul.
Скачать “Инструкция руководство по эксплуатации KIA Soul AM”
Инструкция-руководство-по-эксплуатации-KIA-Soul-AM.pdf – Загружено 284 раза – 14,63 МБ
Просмотров статьи: 457

Soul
Член клуба
-
в клубе с 22.04.2019
-
сообщений: 455
-
Luxe 2.0 АКПП
-
329
-
#1
Руководство пользователя KIA SOUL SK3, которое идет вместе с машиной, скачивается с официального сайта КИА.РУ по ссылкам
Зарегистрируйтесь, чтобы увидеть эту ссылку
а это сервисная книжка
Зарегистрируйтесь, чтобы увидеть эту ссылку
навигация
Зарегистрируйтесь, чтобы увидеть эту ссылку
брошюра
Зарегистрируйтесь, чтобы увидеть эту ссылку
ПСФ
Новичок
-
в клубе с 19.03.2020
-
сообщений: 1
-
Prestige 2.0 АКПП
-
1
-
#2
А где купить руководство по обслуживанию и ремонту

Валек
Соуловод
-
в клубе с 30.01.2020
-
сообщений: 13
-
Prestige 2.0 АКПП
-
5
-
#3
Эх. Мне Эл схема нужна. Хочу саб под сиденье поставить

kgv
Новичок
-
в клубе с 27.10.2020
-
сообщений: 2
-
Edition Plus 2.0 АКПП
-
1
-
#4
Эх. Мне Эл схема нужна. Хочу саб под сиденье поставить
Под своё не ставь — яйца оторвёт!
А если серьёзно, почему под сиденье, а не в багажник, как штатный? Играет хорошо.
Последнее редактирование:

Robustos
Член клуба
-
в клубе с 08.09.2019
-
сообщений: 1 581
-
697
-
#5
Эх. Мне Эл схема нужна. Хочу саб под сиденье поставить
Усилок под сиденье надо. Сабику место в багажнике

Actek11
SoulStar
-
в клубе с 23.02.2021
-
сообщений: 81
-
Prestige 2.0 АКПП
-
28
-
#6
Саб под сиденьем выдает низкие частоты, супер неполезные для организма!!!
Soul
Член клуба
-
в клубе с 22.04.2019
-
сообщений: 455
-
Luxe 2.0 АКПП
-
329
-
#7
Саб под сиденьем выдает низкие частоты, супер неполезные для организма!!!
о да, это из разряда боязни радиоволн от сотовых и Wifi xD
100 ватный саб ничего вам не сделает
Actek11
SoulStar
-
в клубе с 23.02.2021
-
сообщений: 81
-
Prestige 2.0 АКПП
-
28
-
#8
о да, это из разряда боязни радиоволн
Нет, с радиоволнами дружу всю жизнь, плюс работа. Там генерируются сверхнизкие частоты малой мощности, если далеко, то не страшно, а вблизи даст эффект. Но не смертельно, думаю не вреднее сотовой вышки на соседнем доме с мощностью несколько сот Ватт. Сам любитель глубоких низов, потеплеет малость хочу в штатное место поставить нештатный сабик.

tmkidm
Член клуба
-
в клубе с 18.11.2020
-
сообщений: 241
-
Comfort 1.6 АКПП
-
68
-
#9
Руководство пользователя KIA SOUL SK3, которое идет вместе с машиной, скачивается с официального сайта КИА.РУ по ссылкам
Зарегистрируйтесь, чтобы увидеть эту ссылку
а это сервисная книжка
Зарегистрируйтесь, чтобы увидеть эту ссылку
парни, а что-то ссылочки указанные больше никуда не ведут…
Кто-то может поделиться актуальными ссылками или просто руководством в пдф?
Спасибо.

Djo
Член клуба
-
в клубе с 17.10.2019
-
сообщений: 483
-
Prestige 1.6 АКПП
-
278
-
#10
парни, а что-то ссылочки указанные больше никуда не ведут…
Кто-то может поделиться актуальными ссылками или просто руководством в пдф?
Спасибо.
Так зачем ходить по ссылкам из форума, если можно напрямую зайти на сайт КИА и там скачать все, что нужно? Свежее, это 22 модельный год? Ну, вот, пожалуйста:
Зарегистрируйтесь, чтобы увидеть эту ссылку

komdimm
Новичок
-
в клубе с 28.03.2021
-
сообщений: 8
-
Style 2.0 АКПП
-
14
-
#11
руководство по ремонту и эксплуатации
Зарегистрируйтесь, чтобы увидеть эту ссылку
Soul
Член клуба
-
в клубе с 22.04.2019
-
сообщений: 455
-
Luxe 2.0 АКПП
-
329
-
#12
Так зачем ходить по ссылкам из форума, если можно напрямую зайти на сайт КИА и там скачать все, что нужно?
потому что на форуме ссылки как раз на сайт киа с этими руководствами

Вик_Тор
Член клуба
-
в клубе с 05.03.2020
-
сообщений: 182
-
Luxe 2.0 АКПП
-
77
-
#13
руководство по ремонту и эксплуатации
Зарегистрируйтесь, чтобы увидеть эту ссылку
Благодарствую, добрый человек!
Djo
Член клуба
-
в клубе с 17.10.2019
-
сообщений: 483
-
Prestige 1.6 АКПП
-
278
-
#14
потому что на форуме ссылки как раз на сайт киа с этими руководствами
Вот в том и вопрос, зачем ходить по неизвестным ссылкам с форумов, ведущим на одну версию руководства, если можно без «посредников», зайти сразу на первоисточник и выбрать именно то, что нужно в данный момент? Тем более, что там уже как минимум две версии руководства.

VVN
Член клуба
-
в клубе с 31.08.2019
-
сообщений: 2 064
-
Luxe 2.0 АКПП
-
1 346
-
#15
Вот в том и вопрос, зачем ходить по неизвестным ссылкам с форумов, ведущим на одну версию руководства, если можно без «посредников», зайти сразу на первоисточник и выбрать именно то, что нужно в данный момент? Тем более, что там уже как минимум две версии руководства.
Некоторые не могут найти ответ на свой вопрос, который висит двумя сообщениями выше, а тут целая новая ссылка…

EvgenijBip
Новичок
-
в клубе с 24.04.2023
-
сообщений: 1
-
#16
очень даже нечего . . . .

Johnniesal
Новичок
-
в клубе с 13.05.2023
-
сообщений: 5
-
#17
I can not participate now in discussion — there is no free time. But I will be released — I will necessarily write that I think on this question.
ssa1s

Wlad
Член клуба
-
в клубе с 13.10.2020
-
сообщений: 564
-
Luxe 2.0 АКПП
-
261
-
#18
I can not participate now in discussion — there is no free time. But I will be released — I will necessarily write that I think on this question.
ssa1s
а чё таким уродам делать в группе где бабла не снять???)))

Igorzqf
Новичок
-
в клубе с 03.05.2023
-
сообщений: 3
-
#19
Есть кто из модераторов, нужна ваша помощь в изменении моего пароля?
Может мне создать новый логин и пароль?
Прошу подсказать.
С уважением.

Sergyfm
Новичок
-
в клубе с 08.05.2023
-
сообщений: 1
-
#20
Help is needed?
I can’t write to the topic.
Yours faithfully.
Есть кто из модераторов?
Как создать свое первое сообщение.
С уважением.
SOUL SM10-QSG-01 Настоящие беспроводные наушники

Прежде всего, спасибо
Мы надеемся, что вам понравится ваша покупка и участие в нашем маленьком сообществе под названием SOULNATION. Каждый продукт SOUL разработан с акцентом на три ключевых элемента: мощность, ясность и комфорт. Мы стремимся предоставить вам продукцию высочайшего качества с использованием новейших технологий и лучшей стоимостью. Мы будем рады услышать ваши мысли или увидеть одну или две фотографии в наших социальных сетях. Еще раз спасибо за вашу поддержку. Вы причина, по которой мы можем продолжать идти
-СОУЛ команда
У каждой ДУШИ есть история, расскажите нам свою…
- У каждой ДУШИ есть история.
- Сердце каждого поступка – причина почему.
- Это движет каждым человеком.
- Бег, прыжки и танцы.
- If стоит за каждым предпринимателем, художником, музыкантом, танцором и спортсменом.
- Стремление, упорство. и преодоление. Это заставляет вас рано вставать и держит вас допоздна. Это тот голос в твоей голове, который говорит..
НАЧАЛО РАБОТЫ

АВТО СОПРЯЖЕНИЕ

ЗАРЯДКА

СБРОС

СЕНСОРНОЕ УПРАВЛЕНИЕ

СОДЕРЖАНИЕ

ПРЕДУПРЕЖДЕНИЕ
- ЗАПРЕЩАЕТСЯ использовать спирт, растворители для краски, моющие средства,ampoo или другие растворители для очистки.
- ЗАПРЕЩАЕТСЯ намеренно погружать наушники под воду.
- НЕ стирайте наушники в стиральной машине
- НЕ подвергайте изделие воздействию очень высоких или низких температур.
- НЕ оставляйте изделие рядом со свечами, кухонными плитами и открытым огнем.
- ЗАПРЕЩАЕТСЯ разбирать изделие каким-либо образом во избежание поражения электрическим током.
- Заряжайте аккумулятор только в соответствии с инструкциями, предоставленными компанией.
- НЕ мойте зарядный бокс.
ВНИМАНИЕ!
РИСК ВЗРЫВА ПОВЫШАЕТСЯ ПРИ ЗАМЕНЕ БАТАРЕИ НЕПРАВИЛЬНОГО ТИПА. УТИЛИЗИВАЙТЕ ИСПОЛЬЗОВАННЫЕ БАТАРЕИ СОГЛАСНО ИНСТРУКЦИЯМ.
ИНСТРУКЦИЯ
НЕ ВЫБРАСЫВАЙТЕ ИСПОЛЬЗОВАННЫЕ БАТАРЕИ ВМЕСТЕ С БЫТОВЫМИ МУСОРАМИ. УТИЛИЗАЦИЯ АККУМУЛЯТОРНОЙ БАТАРЕИ ДОЛЖНА СООТВЕТСТВОВАТЬ МЕСТНЫМ ЗАКОНОДАТЕЛЬСТВАМ ПО ЗАЩИТЕ ОКРУЖАЮЩЕЙ СРЕДЫ.
ХАРАКТЕРИСТИКИ
- Версия BT: V5.3
- Profile: HFP, A2DP, AVRCP
- Кодек: SBC, AAC
- Диапазон: 10 метров (33 фута)
- Время зарядки (полный заряд): прибл. два часа
- Время воспроизведения: до 25 часов (зависит от громкости и содержания)
- В режиме ожидания: до 3 месяцев
- Размеры: 54Ш x 28В x 36Д (мм)
- Вес: 41 г
Назначение
Офисное и домашнее использование
SOUL Electronics не несет никакой ответственности за любой ущерб этому изделию или травмы, вызванные небрежным, неправильным или неправильным использованием изделия или использованием изделия в целях, не рекомендованных производителем.
Как избежать повреждения слуха
ПОЖАЛУЙСТА, ОБРАТИТЕ ВНИМАНИЕ: Прослушивание звука в течение длительного времени на высоком уровне громкости может привести к необратимому повреждению слуха, поэтому каждый раз перед использованием изделия проверяйте уровень громкости, установленный на регуляторе громкости, и избегайте прослушивания звука на высоком уровне громкости.
Уведомление о декларации
На работу устройства (устройств) могут повлиять сильные статические, электрические или знаковые потребности (радиоустановки, мобильные телефоны, микроволны, электростатические разряды). В этом случае попробуйте увеличить расстояние от устройств, вызывающих помехи.
Декларация соответствия
Настоящим SOUL Electronics заявляет, что этот продукт соответствует соответствующим правилам безопасности Директивы ЕС 2014/53/ЕС. Полная декларация или yai DEequesled через наш webсайт
www.soulnaton.comподдержка
Безопасность батареи
Этот продукт оснащен литий-полимерным аккумулятором. Не повреждайте, не открывайте и не разбирайте батарею и не используйте ее вamp и/или коррозионные условия. Используйте только совместимые зарядные устройства. Никогда не бросайте батареи в огонь и никогда не подвергайте их воздействию высоких температур. Не подвергайте изделие воздействию температур выше 60°C (140F).
Распоряжение
Символ перечеркнутого мусорного бака означает, что вы не можете утилизировать этот продукт вместе с обычными бытовыми отходами, вместо этого отнесите его в пункт утилизации электрического и электронного оборудования. Для получения информации о местных пунктах утилизации обратитесь в местные органы власти, на сайт общественных мест или в компанию, где вы приобрели этот продукт. Раздельный сбор и переработка бывших в употреблении предметов электрического и электронного оборудования предотвращает вредное воздействие содержащихся в них вредных веществ на здоровье человека и загрязнение окружающей среды. Сохраните эту информацию для дальнейшего использования.
Документы / Ресурсы
Компания KIA Теперь, когда вы стали владельцем автомобиля KIA, вам, возможно, придется отвечать на множество вопросов, например, «Что такое KIA?», «Кто такой KIA» или «Что означает KIA?». Вот ответы на некоторые из этих вопросов. Во-первых, KIA является старейшей автомобильной компанией в Корее.
Предисловие Спасибо за то, что вы выбрали автомобиль KIA. Если Вам понадобится сервисное обслуживание, помните, что авторизованный дилер знает этот автомобиль лучше всех. В распоряжении авторизованного дилера находятся специалисты, прошедшие практику на предприятиях, в его сервисных центрах
СОДЕРЖАНИЕ Введение 1 Знакомство с вашим автомобилем 2 Системы безопасности автомобиля 3 Характеристики автомобиля 4 Управление автомобилем 5 Действия в непредвиденных случаях 6 Техническое обслуживание 7 Технические характеристики & Информация для потребителя 8 Предметный указатель I ii
Введение 1 Как пользоваться настоящим руководством / 1-2 Требования к топливу / 1-3 Порядок обкатки автомобиля / 1-7 Условные обозначения на cвeтoвыx индикaтopax приборной панели / 1-8
Введение КАК ПОЛЬЗОВАТЬСЯ НАСТОЯЩИМ РУКОВОДСТВОМ A010000AUN Мы хотим помочь Вам получить максимально возможное удовольствие от вождения данного автомобиля. Настоящее Руководство пользователя может оказать содействие в этом различными способами. Мы настойчиво рекомендуем прочитать руководство
Введение ТРЕБОВАНИЯ К ТОПЛИВУ Автомобили с бензиновым двигателем A020101AUN Неэтилированный бензин B Еврoпе Для достижения оптимальных рабочих характеристик автомобиля мы рекомендуем вам применять неэтилированный бензин с октановым числом RON (по исследовательскому методу) 95/антидетонационным
Введение A020102AUN A020103AUN Этилированный бензин (при наличии) В исполнении для некоторых стран автомобили этой модели рассчитаны на использование этилированного бензина. Перед использованием этилированного бензина уточните у авторизованного дилера KIA, возможно ли использование этилированного
Введение A020104AUN A020105AUN A020106AUN Использование метилтербутилэфира (MTBE) Не рекомендуется использовать в данном автомобиле топлива, объемная доля метилтербутилэфира (MTBE) в которых превышает 15,0% (весовая доля кислорода — 2,7%). Использование топлив, объемная доля метилтербутилэфира
Введение A020107AUN Эксплуатация автомобиля за рубежом При поездке в другую страну на данном автомобиле следует обеспечить: • соблюдение всех требований в отношении регистрации и страховки; • определение наличия в продаже топлива необходимого качества. 1 6 Автомобили с дизельным двигателем
Введение A020202AUN Биодизель Имеющиеся в продаже топливные смеси с содержанием биодизельного топлива не более 5%, известные под названием “B5 biodiesel”, могут быть использованы в вашем автомобиле, если они удовлетворяют требованиям евростандарта EN 14214 или эквивалентных спецификаций. (EN
Введение УСЛОВНЫЕ ОБОЗНАЧЕНИЯ НА СВЕТОВЫХ ИНДИКАТОРАХ ПРИБОРНОЙ ПАНЕЛИ A050000AAM Контрольная лампа сигнализации о незакрытой двери Контрольная лампа низкого давления масла в двигателе Контрольная лампа непристегнутого ремня безопасности Контрольная лампа рулевого управления с электроприводом
Введение Контрольная лампа системы предпускового подогрева (только для автомобилей с дизельным двигателем) Контрольная лампа топливного фильтра (только для автомобилей с дизельным двигателем) Контрольная лампа системы круиз-контроля* Контрольная лампа режима SET системы круизконтроля* *: при
Знакомство с вашим автомобилем Общий вид салона / 2-2 Общий вид приборной панели / 2-3 Отсек двигателя / 2-4 2
Знакомство с вашим автомобилем ОБЩИЙ ВИД САЛОНА 1. Кнопка запирания/отпирания дверей ……………………………………….4-10 2. Кнопка складывания наружных зеркал заднего вида* ………………….4-37 3. Переключатель управления настройкой наружных зеркал заднего вида
Знакомство с вашим автомобилем ОБЩИЙ ВИД ПРИБОРНОЙ ПАНЕЛИ 1. Передняя подушка безопасности водителя*……………………………………3-53 2. Управление осветительными приборами/указателями поворота .4-60 3. Приборная панель………………………4-38 4. Управления стеклоочистителями/
Знакомство с вашим автомобилем ОТСЕК ДВИГАТЕЛЯ 1. Расширительный бачок системы охлаждения двигателя………………..7-29 2. Крышка маслозаливной горловины двигателя …………………………………..7-28 3. Бачок тормозной жидкости …………7-32 4. Топливный фильтр*
Сиденье / 3-2 Ремни безопасности / 3-15 Детское сиденье / 3-31 Система подушек безопасности (дополнительная система пассивной безопасности) / 3-45 Системы безопасности автомобиля 3
Системы безопасности автомобиля СИДЕНЬЕ Переднее сиденье (1) Вперед и назад (2) Наклон спинки сиденья (3) Высота положения подушки сиденья (сиденье водителя)* (4) Обогрев сидений* (5) Подголовник (6) Подлокотник (сиденье водителя)* Задние сидений (7) Складывание спинки сиденья (8) Подголовник * :
Системы безопасности автомобиля ОСТОРОЖНО — Посторонние предметы Посторонние предметы, оказавшиеся в зоне ног водителя, могут стать помехой при нажатии педалей, что может привести к дорожнотранспортному происшествию. Не располагайте никаких вещей под передними сиденьями. ОСТОРОЖНО — Возвращение
Системы безопасности автомобиля (Продолжение) • Во время движения спинки сидений водителя и пассажиров всегда должны стоять вертикально, а поясная часть ремня безопасности должна находиться у них на бедрах как можно ниже и удобнее. Это наилучшее положение с точки зрения обеспечения защиты человека
Системы безопасности автомобиля Регулировку положения сиденья производите до начала движения. Убедитесь в том, что сиденье надежно зафиксировано, попытавшись переместить вперед-назад без использования рычага. Если сиденье движется, значит, оно не зафиксировано должным образом. (продолжение) • Для
Системы безопасности автомобиля OAM039003 OAM039004 OPA039052 C010102AUN C010103AUN C010104BUN Наклон спинки сиденья Для отклонения назад спинки сиденья: 1. Слегка наклонитесь вперед и поднимите рычаг регулировки наклона спинки сиденья, расположенный с внешней стороны сиденья в задней его части. 2.
Системы безопасности автомобиля ОСТОРОЖНО • Для максимальной эффективности в случае аварии подголовник должен быть отрегулирован таким образом, чтобы его середина располагалась на той же высоте, что и центр тяжести головы пассажира. В общем случае, центр тяжести головы большинства людей
Системы безопасности автомобиля OAM039007 HNF2041-1 Снятие Для снятия подголовника, вытянуть его на максимальную высоту, затем нажать отпускающую кнопку (1), одновременно вытягивая подголовник (2). Для установки подголовника обратно, вставьте штыри (3) в отверстия, нажав отпускную кнопку (1). Затем
Системы безопасности автомобиля ✽ К СВЕДЕНИЮ Во время нахождения переключателя обогрева сиденья во положении ON (Вкл.), система подогрева, расположенная в сиденье, включается и выключается автоматически в зависимости от температуры сиденья. ВНИМАНИЕ • При очистке сидений от загрязнения не
Системы безопасности автомобиля Регулировка заднего сиденья C010307BUN-C1 Складывание заднего сиденья Спинки задних сидений могут быть сложены для упрощения перевозки длинномерных предметов или для увеличения объема багажного отделения автомобиля. ОСТОРОЖНО OSA038123 OUN028040/H C010109AVQ-C1
Системы безопасности автомобиля (продолжение) Это может привести к получению серьезных травм или к гибели людей в случае дорожнотранспортного происшествия или внезапной остановки автомобиля. Предметы, которые перевозятся в автомобиле со сложенной спинкой заднего сиденья, не должны выступать выше
Системы безопасности автомобиля 5. Для использования заднего сиденья по назначению поднимите его спинку назад, потянув вверх рычаг складывания спинки заднего сиденья, так, чтобы послышался щелчок при ее фиксации на своем месте. Убедитесь в том, что положение спинки сиденья зафиксировано. 6. Верните
Системы безопасности автомобиля ОСТОРОЖНО — Багаж Необходимо всегда фиксировать положение багажа для предотвращения его резкого перемещения по автомобилю при столкновении, что может вызвать нанесение травм людям, находящимся в транспортном средстве. Особую осторожность следует соблюдать в отношении
Системы безопасности автомобиля ОСТОРОЖНО • Для максимальной эффективности в случае аварии подголовник должен быть отрегулирован таким образом, чтобы его середина располагалась на той же высоте, что и центр тяжести головы пассажира. В общем случае, центр тяжести головы большинства людей
Системы безопасности автомобиля РЕМНИ БЕЗОПАСНОСТИ C020100AUN Система ремней безопасности ОСТОРОЖНО • Для обеспечения максимального уровня защиты ремни безопасности всегда должны быть застегнуты во время движения автомобиля. • Наибольшая эффективность ремней безопасности достигается при нахождении
Системы безопасности автомобиля (продолжение) Безопасная очистка ремня может выполняться при помощи туалетного мыла и воды. Необходимо заменить ремень безопасности при наличии потертостей, загрязнения или повреждений его матерчатой части. Очень важно произвести замену всего ремня в сборе после
Системы безопасности автомобиля Если ремень безопасности водителя не застегнут при повороте ключа зажигания в положение ON (Вкл.), или если он будет расстегнут после поворота ключа зажигания в ON (Вкл.), зуммер предупреждения о незастегнутом ремне безопасности будет работать в течение примерно 6
Системы безопасности автомобиля OAM039044L Задние (при наличии) Если в момент включения зажигания (не двигателя) ремень безопасности заднего пассажирского сиденья не пристегнут, загорается соответствующая контрольная лампа. Лампа горит до тех пор, пока ремень безопасности не будет пристегнут. Кроме
Системы безопасности автомобиля Длина ремня будет настроена автоматически только после того, как поясная часть ремня будет натянута вручную так, чтобы он плотно прилегал к бедрам сидящего человека. При медленном и плавном наклоне человека длина ремня увеличится, что позволит человеку свободно
Системы безопасности автомобиля ОСТОРОЖНО • Проверьте фиксацию узла регулировки высоты крепления ремня на соответствующей высоте. Никогда не размещайте плечевой ремень безопасности поперек шеи или лица человека. Неправильное размещение ремней безопасности может привести к получению серьезных травм
Системы безопасности автомобиля B210A01NF-1 Как расстегнуть ремень безопасности Для того чтобы расстегнуть ремень безопасности, нужно нажать на кнопку (1) его пряжки. После этого ремень автоматически будет втянут в кожух устройства автоматического натяжения. Если этого не произойдет, проверьте, не
Системы безопасности автомобиля Слишком высоко Нормально B220A04NF C020103AAM Поясной ремень безопасности (при наличии) Как застегнуть ремень безопасности: Для того чтобы застегнуть двухточечный ремень статического типа, необходимо вставить его металлический язычок в пряжку. В момент запирания
Системы безопасности автомобиля ОСТОРОЖНО B210A02NF-1 Как расстегнуть ремень безопасности Если нужно расстегнуть ремень безопасности, нажмите на кнопку (1), расположенную на его пряжке. Центральный поясной ремень имеет механизм запирания, отличный от механизмов запирания плечевых ремней
Системы безопасности автомобиля OMG035300 C020200AUN-C1 Ремни безопасности с преднатяжителем (при наличии) В данном автомобиле ремни безопасности водителя и пассажира, находящегося на переднем сиденье, оборудованы преднатяжителями. Это устройство предназначено для того, чтобы плотнее прижать
Системы безопасности автомобиля ОСТОРОЖНО Для максимальной эффективности работы ремней безопасности, оснащенных преднатяжителями: 1. Ремень безопасности должен работать в соответствии с требованиями и должен быть нормально отрегулирован. Ознакомьтесь со всей важной информацией и мерами
Системы безопасности автомобиля ВНИМАНИЕ Если существует отказ в системе преднатяжителей ремней безопасности, эта сигнальная лампа будет гореть даже в случае исправности системы подушек безопасности SRS. Если лампа, сигнализирующая о неисправности системы подушек безопасности SRS, не загорается при
Системы безопасности автомобиля C020300AUN Меры предосторожности при использовании ремней безопасности ОСТОРОЖНО Водитель и все пассажиры автомобиля всегда должны быть пристегнуты ремнями безопасности. Ремни безопасности и детские сиденья уменьшают вероятность получения серьезных травм или
Системы безопасности автомобиля ✽ К СВЕДЕНИЮ Наилучшая защита для малолетних детей при дорожно-транспортном происшествии обеспечивается в том случае, когда они должным образом зафиксированы от перемещения при помощи специального сиденья, которое соответствует стандартам безопасности страны, в
Системы безопасности автомобиля C020302AUN C020305AUN-C1 Беременные женщины Рекомендуется использование ремней безопасности для беременных женщин в целях уменьшения вероятности получения травм в дорожно-транспортном происшествии. В случае применения ремня безопасности поясная часть ремня должна
Системы безопасности автомобиля C020400AEN C020401AEN C020403ASA Уход за ремнями безопасности Периодический проверка ремней безопасности Все ремни безопасности должны периодически проверяться на износ и повреждения любого типа. Все поврежденные детали должны заменяться как можно скорее. Когда
Системы безопасности автомобиля ДЕТСКОЕ СИДЕНЬЕ C030000CUN При поездке в автомобиле дети должны находиться на заднем сиденье, и их положение всегда должно быть зафиксировано таким образом, чтобы минимизировать риск получения травмы при дорожнотранспортном происшествии, неожиданной остановке или
Системы безопасности автомобиля (продолжение) Проверьте температуру поверхности кресла и пряжек застежек перед тем, как поместить в это кресло ребенка. • Если детское сиденье безопасности не используется, храните его в багажнике или пристегивайте ремнями безопасности, чтобы не допустить его резкого
Системы безопасности автомобиля (продолжение) • Никогда не оставляйте детей без присмотра в автомобиле даже на короткое время. Может произойти быстрый нагрев автомобиля, что вызовет получение серьезных телесных повреждений детьми, которые находятся внутри него. Даже очень маленькие дети могут
Системы безопасности автомобиля Детское кресло, расположенное лицом назад CRS09 Детское кресло, расположенное лицом вперед OUN026150 C030100AUN-TD Использование детского кресла Для малолетних детей использование соответствующих детских сидений является обязательным. 3 34 Такое детское сиденье
Системы безопасности автомобиля E2MS103005 C030102AUN Установка детского кресла с использованием трехточечного ремня безопасности Для установки детского кресла на центральную или боковую часть заднего сиденья следует сделать следующее: 1. Поместите детское кресло на сиденье и просуньте трехточечный
Системы безопасности автомобиля Если необходимо натянуть ремень, подайте ленту ремня внутрь кожуха устройства автоматического натяжения. Если расстегнуть ремень безопасности и дать ему возможность втянуться внутрь кожуха устройства автоматического натяжения, это устройство автоматически вернется в
Системы безопасности автомобиля C030105AAM Пригодность детских кресел для размещения в различных местах автомобиля — для стран Европы Используйте те детские кресла, применение которых официально разрешено, и которые подходят для ребенка по размеру. Информация по использованию детских кресел
Системы безопасности автомобиля ОСТОРОЖНО OAM039048 C030103AUN-AM Фиксация детского кресла при помощи привязного крепления (при наличии) Замки для закрепления крюков детского сиденья расположены на полу за задними сиденьями. 3 38 2GHA3300L 1. Пропустите ремень крепления детского сиденья над спинкой
Системы безопасности автомобиля ОСТОРОЖНО — Проверка детского кресла Убедитесь в надежности фиксации детского кресла путем попытки перемещения его в различных направлениях. Если не обеспечить правильного крепления детского кресла, оно может колебаться, проворачиваться, наклоняться или отделяться от
Системы безопасности автомобиля Сиденье, оснащенное системой ISOFIX, может быть установлено только в случае его сертификации применительно к данному автомобилю в соответствии с требованиями норм ECE-R44. Индикатор положения крепления ISOFIX Крепление ISOFIX 3 40 OUN038139L OUN036140L На нижней
Системы безопасности автомобиля Детское кресло должно быть установлено и должно использоваться в соответствии с руководством по установке, которое прилагается к креслу, оборудованному креплениями типа ISOFIX. ОСТОРОЖНО Установите детское сиденье безопасности тыльной стороной вплотную к спинке
Системы безопасности автомобиля ОСТОРОЖНО • Не устанавливайте детское сиденье в центр заднего сиденья с использованием расположенных на автомобиле замков типа ISOFIX. Замки типа ISOFIX предназначены только для фиксации детского сиденья в правой или в левой части заднего сиденья. Не используйте
Системы безопасности автомобиля C030106AAM Соответствие детских сидений местам их установки в автомобилях, оснащенных системой ISOFIX — для стран Европы Крепление (фиксирующее устройство) Переднее пассажирское сиденье Расположение ISOFIX в автомобиле Заднее боковое Заднее боковое сиденье (сторона
Системы безопасности автомобиля (продолжение) L3 : Пригодно для удерживающей системы «Römer DUO Plus», разрешенной для использования в серийном производстве (разрешение №: E1 R44-04301133) L4 : Пригодно для удерживающей системы «Römer Baby-Safe ISOIFX Plus + Baby-Safe Auto Base ISOFIX», разрешенной
Системы безопасности автомобиля СИСТЕМА ПОДУШЕК БЕЗОПАСНОСТИ (ДОПОЛНИТЕЛЬНАЯ СИСТЕМА ПАССИВНОЙ БЕЗОПАСНОСТИ) (ПРИ НАЛИЧИИ) C040000AUN-U1 (1) Передняя подушка безопасности водителя (2) Передняя подушка безопасности пассажира* (3) Боковая подушка безопасности* (4) Надувная шторка* *: при наличии
Системы безопасности автомобиля C040900AUN-U1 Принцип работы системы подушек безопасности • Подушки безопасности находятся в рабочем состоянии только при нахождении ключа зажигания в положении ON (Вкл.) или START (Пуск). • Их раскрытие происходит мгновенно в случае серьезного лобового или бокового
Системы безопасности автомобиля • Существуют даже такие обстоятельства, при которых контакт человека с подушкой безопасности, размещенной в рулевом колесе, приводил к получению повреждений смертельного характера, особенно в том случае, когда тот располагался чересчур близко к рулевому колесу.
Системы безопасности автомобиля При раскрытии передней подушки безопасности пассажира она может причинить ребенку серьезные травмы или повреждения смертельного характера. Если автомобиль оборудован переключателем включения и выключения передней подушки безопасности, в случае необходимости ее можно
Системы безопасности автомобиля ОСТОРОЖНО • Особая опасность! Не устанавливайте детское кресло, расположенное в положении “лицом назад”, на сиденье, перед которым находится подушка безопасности! • Никогда не устанавливайте детское кресло на переднее пассажирское сиденье. При раскрытии передней
Системы безопасности автомобиля OKM039160L C040100AAM Элементы системы подушек безопасности SRS и их функции В систему подушек безопасности SRS входят следующие элементы: 1. Модуль передней подушки безопасности водителя 2. Модуль передней подушки безопасности пассажира* 3. Модули боковых подушек
Системы безопасности автомобиля Передняя подушка безопасности водителя (1) Передняя подушка безопасности водителя (2) Передняя подушка безопасности водителя (3) B240B01L B240B02L B240B03L Модули подушек безопасности находятся в центре рулевого колеса и внутри передней панели напротив пассажирского
Системы безопасности автомобиля Передняя подушка безопасности пассажира (продолжение) • При установке освежителя воздуха внутри салона следует исключить его размещение рядом с приборами или на поверхности приборной панели. Такие предметы могут резко прийти в движение и привести к получению травм
Системы безопасности автомобиля Передняя подушка безопасности водителя OAM039027 Передняя подушка безопасности пассажира Ваш автомобиль оборудован Вспомогательной системой безопасности (Подушками безопасности), а так же поясным и плечевым ремнями безопасности, как для водителя, так и для пассажира.
Системы безопасности автомобиля (продолжение) Всегда соблюдайте меры предосторожности в отношении ремней безопасности, подушек безопасности и безопасности людей, которые находятся в автомобиле, содержащиеся в данном руководстве. Для уменьшения вероятности получения серьезных травм или повреждений
Системы безопасности автомобиля (продолжение) • Не прикасайтесь к проводке или к другим элементам системы подушек безопасности SRS, не разъединяйте их контакты. Такие действия могут привести к получению травм в результате случайного раскрытия подушек безопасности SRS или в результате приведения
Системы безопасности автомобиля (продолжение) • Для максимальной защиты во всех случаях дорожнотранспортных происшествий все люди, находящиеся в автомобиле включая водителя, должны быть пристегнуты ремнями безопасности с целью минимизации вероятности получения серьезных травм или гибели в случае
Системы безопасности автомобиля Для включения передней подушки безопасности пассажира необходимо вставить главный ключ от автомобиля в соответствующий переключатель, расположенный внутри перчаточного ящика и повернуть его в положение ON (Вкл.). Лампа, сигнализирующая об отключении передней подушки
Системы безопасности автомобиля ВНИМАНИЕ • Если переключатель передней подушки безопасности пассажира неисправен, на приборной панели загорится лампа, сигнализирующая о неисправности системы подушек безопасности. И в таком случае лампа, сигнализирующая об отключении передней подушки безопасности
Системы безопасности автомобиля (продолжение) • Никогда не устанавливайте детское кресло в положении “лицом назад” на переднем пассажирском сиденье до тех пор, пока не будет отключена передняя подушка безопасности пассажира. Ребенок может получить серьезные травмы или погибнуть в результате
Системы безопасности автомобиля Они предназначены для обеспечения защиты водителя и/или пассажира, находящегося на переднем сиденье, в дополнении к той, которая предоставляется только ремнями безопасности. Боковые подушки безопасности раскрываются только в боковых столкновениях конкретного типа в
Системы безопасности автомобиля (продолжение) • Не располагайте никаких предметов (зонт, портфель и т.д.) между передней дверью и передним сиденьем. При раскрытии боковой подушки безопасности такие предметы могут резко прийти в движение и стать причиной травм. • Для предупреждения неожиданного
Системы безопасности автомобиля ОСТОРОЖНО • Для обеспечения наибольшей эффективности защиты, предоставляемой системой боковых подушек безопасности (боковыми подушками безопасности и надувными шторками), и для исключения получения травм во время раскрытия таких подушек, водитель и пассажиры,
Системы безопасности автомобиля C040800AUN-C1 Почему подушка безопасности не раскрылась при столкновении? (Условия, при которых происходит и не происходит раскрытие подушки безопасности) Существует много типов дорожнотранспортных происшествий, в которых не ожидается получение дополнительной защиты
Системы безопасности автомобиля ОСТОРОЖНО • Не допускается наносить удары по тем местам, где расположены подушки безопасности или датчики, или подвергать их ударному воздействию от посторонних предметов. Это может вызвать неожиданное раскрытие подушки безопасности, что может привести к получению
Системы безопасности автомобиля OVQ036018N OUN026090 Боковые подушки безопасности (при наличии) Боковые подушки безопасности (боковые подушки безопасности и/или надувные шторки) предназначены для того, чтобы раскрыться в случае, когда удар зарегистрирован датчиками бокового столкновения в
Системы безопасности автомобиля OUN036087 OVQ036018N 1VQA2089 • Передние подушки безопасности не предназначены для того, чтобы раскрываться при ударе в заднюю часть автомобиля, поскольку силой такого удара находящиеся в нем люди перемещаются назад. В таком случае подушки безопасности при их
Системы безопасности автомобиля 1VQA2090 1VQA2091 1VQA2092 • Непосредственно перед столкновением обычно водители прибегают к резкому торможению. Это приводит к смещению вниз передней части автомобиля, в результате чего он оказывается под транспортным средством с более высоким дорожным просветом.
Системы безопасности автомобиля C041100AUN-C1 Уход за системой подушек безопасности SRS Система SRS практически не требует обслуживания, поэтому в ней отсутствуют компоненты, доступные для обслуживания пользователем. Если сигнальная лампа подушка безопасности (AIR BAG) системы SRS не загорается или
Системы безопасности автомобиля (продолжение) • При необходимости снятия элементов системы подушек безопасности или при необходимости утилизации автомобиля следует соблюдать определенные меры предосторожности. Все эти предосторожности известны авторизованному дилеру компании KIA, который может
Системы безопасности автомобиля • Удерживайте людей, находящихся в автомобиле, на расстоянии от крышек подушек безопасности. Все люди, находящиеся в автомобиле, должны сидеть вертикально, плотно опираясь на спинку сиденья, и быть пристегнутыми ремнями безопасности, а ступни их ног должны стоять на
Системы безопасности автомобиля C041400AUN Установка дополнительного оборудования или внесение изменений в конструкцию автомобиля, оборудованного подушками безопасности Внесение изменений в конструкцию автомобиля путем изменения его силового каркаса, системы бамперов, передней части, боковых
Ключи / 4-3 Дистанционное управление замками дверей / 4-6 Замки дверей / 4-9 Дверь багажного отделения / 4-14 Остекление / 4-16 Капот / 4-20 Крышка горловины топливного бака / 4-22 Характеристики автомобиля Люк / 4-26 Рулевое колесо / 4-30 Зеркала заднего вида / 4-33 Приборная панель / 4-38 Система
Устранение инея и запотевания с лобового стекла / 4-83 Отделения для хранения вещей / 4-86 Элементы внутренней отделки салона / 4-88 Элементы внешней отделки / 4-93 Аудиосистема / 4-95 4 Характеристики автомобиля
Характеристики автомобиля КЛЮЧИ Tип A ОСТОРОЖНО OUN026060 OUN046100L Tип B D010100AUN-U1 Запишите номер ключа Вашего автомобиля Кодовый номер ключа указан на номерной табличке, прикрепленной к ключам автомобиля. В случае потери ключей от автомобиля авторизованный дилер компании KIA использует этот
Характеристики автомобиля Если ключ признается подлинным, происходит запуск двигателя. Если ключ не признается подлинным, двигатель не запустится. ОСТОРОЖНО Используйте в автомобиле только оригинальные ключи зажигания KIA. Ключ, приобретенный на рынке запчастей, может не вернуться в положение ON из
Характеристики автомобиля ✽ К СВЕДЕНИЮ При запуске двигателя не допускайте нахождения рядом с замком зажигания других ключей со встроенным передатчиком иммобилайзера. В противном случае двигатель может не запуститься или может выключиться вскоре после запуска. После приобретения нового автомобиля
Характеристики автомобиля ДИСТАНЦИОННОЕ УПРАВЛЕНИЕ ЗАМКАМИ ДВЕРЕЙ (ПРИ НАЛИЧИИ) D020101AUN-EE Tип A OAM049001A Tип B Запирание (1) При нажатии кнопки запирания происходит блокировка замков всех дверей. Если все двери при этом закрыты, огни аварийной сигнализации мигнут один раз для информирования о
Характеристики автомобиля D020200AAM Меры предосторожности при использовании пульта дистанционного управления ✽ К СВЕДЕНИЮ Пульт дистанционного управления не будет работать в следующих случаях: • Ключ находится в замке зажигания. • Пульт находится за пределами максимального расстояния передачи
Характеристики автомобиля 1. Вставьте инструмент с тонким лезвием в прорезь и аккуратно подденьте центральную крышку пульта дистанционного управления. 2. Замените батарейку. При замене убедитесь, что положительный полюс батарейки (“+”) обращен ввepx, как показано на рисунке. 3. Установите батарейку
Характеристики автомобиля ЗАМКИ ДВЕРЕЙ Закрыть Открыть • После разблокировки замков открыть дверь можно, потянув ручку двери на себя. • При закрытии двери нужно на нее нажать. Убедитесь в надежности закрытия дверей. ✽ К СВЕДЕНИЮ OAM049003 D050100AUN-AM Управление замками дверей снаружи автомобиля •
Характеристики автомобиля Открыть • Если потянуть внутреннюю ручку двери при заблокированной кнопке блокировки двери, кнопка разблокируется, и дверь откроется (при наличии). • Блокировка передних дверей невозможна, если ключ находится в замке зажигания, и хотя бы одна из дверей открыта. Закрыть
Характеристики автомобиля • Вместе с тем, если ключ находится в замке зажигания, и любая из передних дверей остается открытой, нажатие передней части клавиши переключателя централизованного управления замками дверей не приведет к запиранию дверей. OAM049006 D050202AUN-U1 Автомобили, оборудованные
Характеристики автомобиля ОСТОРОЖНО — Дети, оставленные без присмотра Салон закрытого автомобиля может нагреться до чрезвычайно высокой температуры, что может привести к гибели или вреду здоровью оставленных без присмотра детей или животных, не имеющих возможности выбраться из автомобиля. Более
Характеристики автомобиля 1. Откройте заднюю дверь. 2. Переместите расположенный на задней кромке двери переключатель устройства блокировки замка двери, предотвращающего ее открывание детьми, в положение Lock ( ). При нахождении переключателя в таком положении задняя дверь не откроется, даже если
Характеристики автомобиля ДВЕРЬ БАГАЖНОГО ОТДЕЛЕНИЯ • После разблокировки замка дверь багажного отделения можно открыть, нажав на ручку и потянув ее на себя. ✽ К СВЕДЕНИЮ В холодных и влажных климатических условиях замки и механизмы дверей могут работать плохо из-за замерзания. ОСТОРОЖНО OAM049009
Характеристики автомобиля ОСТОРОЖНО — Багажное отделение в задней части автомобиля Не допускается перевозка людей в багажном отделении в задней части автомобиля, в котором отсутствуют какие-либо средства фиксации пассажиров. Для предупреждения телесных повреждений в случае дорожнотранспортного
Характеристики автомобиля ОСТЕКЛЕНИЕ D080000AUN-SA (1) Переключатель управления электрическим стеклоподъемником окна двери водителя (2) Переключатель управления электрическим стеклоподъемником окна двери переднего пассажира (3) Переключатель управления электрическим стеклоподъемником задней (левой)
Характеристики автомобиля D080100AUN Электрические стеклоподъёмники Для работы электрических стеклоподъемников ключ в замке зажигания должен находиться в положении ON. На каждой двери расположен переключатель управления электрическим стеклоподъемником данной двери. Однако, на месте водителя
Характеристики автомобиля ВНИМАНИЕ OAM049012 OAM049014 D080102AUN D080104AHM-U1 Автоматическое открытие окна (при наличии) (окно двери водителя) Быстро сместите клавишу переключателя управления электрическим стеклоподъемником до второго фиксированного положения (6), и стекло двери водителя
Характеристики автомобиля ОСТОРОЖНО — Остекление • НИКОГДА не оставляйте ключ зажигания внутри автомобиля. • НИКОГДА не оставляйте детей без присмотра внутри автомобиля. Даже очень маленькие дети могут непреднамеренно привести автомобиль в движение, оказаться зажатыми в окнах или иным образом
Характеристики автомобиля КАПОТ OAM049015 D090100AUN-U1 Открытие капота 1. Потяните за ручку открывания капота для разблокировки его замка. Капот должен немного приоткрыться. 4 20 OAM049016 OAM049017 2. Подойдите к передней части автомобиля, приподнимите капот, потяните за рычаг его блокировки (1),
Характеристики автомобиля D090200APA Закрытие капота 1. Перед тем, как закрыть капот, проверьте следующее: • Пробки всех заправочных горловин в отсеке двигателя должны быть установлены правильным образом. • Необходимо убрать из отсека двигателя перчатки, ветошь и любые иные горючие материалы. 2.
Характеристики автомобиля КРЫШКА ГОРЛОВИНЫ ТОПЛИВНОГО БАКА ✽ К СВЕДЕНИЮ OHD046014 D100100APB Открытие крышки горловины топливного бака Крышка топливного бака открывается изнутри автомобиля с помощью специальной ручки. 4 22 Если крышка горловины топливного бака не открывается из-за того, что вокруг
Характеристики автомобиля D100200AUN Закрытие крышки горловины топливного бака 1. Чтобы установить крышку горловины на место, поверните ее по часовой стрелке до щелчка. Щелчок указывает на то, что крышка надежно затянута. 2. Закройте крышку горловины топливного бака и слегка надавите на нее, а
Характеристики автомобиля (продолжение) • Перед тем, как прикоснуться к заправочному пистолету, необходимо снять представляющий потенциальную опасность заряд статического электричества. Для этого прикоснитесь к любой металлической детали автомобиля, находящейся на безопасном расстоянии от горловины
Характеристики автомобиля (продолжение) Автомобильное топливо очень легко воспламеняется, и его возгорание может привести к пожару. • В случае возгорания в процессе заправки отойдите подальше от автомобиля и немедленно обратитесь к персоналу АЗС, а затем в пожарную службу. Следуйте всем их
Характеристики автомобиля ЛЮК (ПРИ НАЛИЧИИ) ✽ К СВЕДЕНИЮ • В холодных и влажных климатических условиях люк может работать плохо из-за замерзания. • После мойки автомобиля или после дождя убедитесь в полном удалении воды с люка перед тем, как открыть его. ВНИМАНИЕ OAM049018 D110000AHM-EE Люк в крыше
Характеристики автомобиля OAM049019 D110100AHM Сдвигание люка Чтобы открыть или закрыть люк крыши (сдвиг вручную), передвиньте рычаг управления люком крыши вперед или назад до первого порогового положения. При движении рычага вниз люк крыши закрывается. Чтобы открыть люк крыши автоматически:
Характеристики автомобиля OAM049020 D110200AHM Поднятие люка Чтобы открыть люк крыши (функция автоматического наклона), передвиньте рычаг управления вверх до второго порогового положения. Произойдет наклон люка крыши до полного открытия. Чтобы остановить наклон люка в любой момент, задействуйте
Характеристики автомобиля D110500AHM-EE Сброс настроек системы управления люком Если аккумуляторная батарея автомобиля была отключена или разрядилась, необходимо следующим образом сбросить настройки системы управления люком: OBK049019 D110300AEN Солнцезащитная шторка Солнцезащитная шторка
Характеристики автомобиля РУЛЕВОЕ КОЛЕСО D130100APB-U1 Рулевое управление с электроприводом (при наличии) Рулевое управление с электроприводом обеспечивает более легкое управление автомобилем посредством электродвигателя. При выключенном двигателе или при отказе усилителя рулевого управления
Характеристики автомобиля D130300AUN Регулировка угла наклона рулевого колеса Регулировка угла наклона рулевого колеса позволяет Вам настроить его положение перед началом движения. Кроме того, рулевое колесо с такой системой можно поднять максимально вверх во время выхода из автомобиля и посадки в
Характеристики автомобиля ✽ К СВЕДЕНИЮ Для включения звукового сигнала нажмите на зону на рулевом колесе, обозначенную соответствующим символом (см. рисунок). Звуковой сигнал будет работать только во время нажатия на эту зону. ВНИМАНИЕ OAM049022 D130500AUN Звуковой сигнал Для включения звукового
Характеристики автомобиля ЗЕРКАЛА ЗАДНЕГО ВИДА D140100AHM D140102AUN-C1 Внутреннее зеркало заднего вида Электрохромическое зеркало заднего вида (ECM) (при наличии) Электрохромическое зеркало заднего вида автоматически ограничивает ослепляющий эффект фар идущего сзади автомобиля в ночное время или в
Характеристики автомобиля ВНИМАНИЕ При очистке зеркала используйте бумажное полотенце или аналогичный материал, смоченный средством для очистки стекла. Не распыляйте это средство непосредственно на зеркало, поскольку в результате оно может попасть внутрь корпуса зеркала. D140200AUN-C1 Задний вид
Характеристики автомобиля ОСТОРОЖНО — Зеркала заднего вида • Правое зеркало заднего вида имеет выпуклую поверхность. Для некоторых стран левое наружное зеркало заднего вида также выполняется выпуклым. Предметы в таком зеркале кажутся находящимися дальше, чем они есть на самом деле. • Используйте
Характеристики автомобиля ВНИМАНИЕ OAM049027 Зеркала с электроприводом складывания (при наличии) Переключатель дистанционного управления положением зеркал заднего вида позволяет настроить углы установки правого и левого наружных зеркал заднего вида. Для регулировки положения любого из зеркал
Характеристики автомобиля ВНИМАНИЕ OAM049029 Зеркала с электроприводом складывания (при наличии) Чтобы сложить наружное зеркало заднего вида, нажмите на кнопку. Для его раскладывания нажмите кнопку еще раз. Электропривод зеркала заднего вида действует даже при переключателе зажигания в положении
Характеристики автомобиля ПРИБОРНАЯ ПАНЕЛЬ 1. Тахометр 2. Индикаторы указателей поворота 3 3. Спидометр 4. Указатель температуры двигателя 4 5. Контрольные и индикаторные 1 2 лампы 2 6. Указатель положения рычага 5 6 7 8 5 автоматической коробки передач* (только для автомобилей с автоматической
Характеристики автомобиля Приборы Тип А ■ Бензиновый ■ Дизельный D150201AHM OAM049031 Спидометр Спидометр показывает скорость движения автомобиля. Он размечен в метрической системе единиц измерения (км/час) и/или в британской системе единиц измерения (миль/час). Тип B OAM049032 D150202AFD
Характеристики автомобиля ВНИМАНИЕ Тип A Тип B Не допускается работа двигателя при частоте, соответствующе КРАСНОЙ ЗОНЕ тахометра. Это может привести к серьезному повреждению двигателя. OAM049033L/OAM049033 D150203AUN-C1 Указатель температуры двигателя Этот прибор указывает на температуру
Характеристики автомобиля Тип A Тип B OAM049034L/OAM049034 D150204AHM-EE-C1 Указатель уровня топлива Указатель уровня топлива показывает примерный уровень топлива в топливном баке. Емкость топливного бака указана в разделе 8. В дополнение к указателю уровня топлива на автомобиле предусмотрена
Характеристики автомобиля D150300AUN Контрольные и индикаторные лампы OAM049030L OUN029208K D150205AUN-C1 D150206ATD-C1 Одометр (км или мили) Одометр указывает полное расстояние, которое проехал автомобиль. Также он может оказаться полезным для определения времени выполнения периодического
Характеристики автомобиля D150302AUN Контрольная лампа подушек безопасности (при наличии) Эта контрольная лампа загорается примерно на 6 секунд каждый раз после поворота ключа зажигания в положение ON. Эта лампа загорается также в случае наличия неисправности в системе подушек безопасности. Если
Характеристики автомобиля D150303AUN-U1 Контрольная лампа антиблокировочной системы тормозов (ABS) (при наличии) Эта лампа загорается при повороте ключа зажигания в положение ON и гаснет примерно через 3 секунды, если система исправна. Если эта лампа продолжает гореть после включения зажигания,
Характеристики автомобиля D150304AED D150307AUN Предупреждение о не пристегнутых ремнях безопасности В качестве напоминания для водителя и пассажира на переднем сиденье при включении зажигания контрольные лампы ремней безопасности загораются примерно на шесть секунд. Это происходит независимо от
Характеристики автомобиля (продолжение) В такой ситуации следует остановить автомобиль, как только для этого представится безопасная возможность, выключить двигатель и проверить уровень масла. Если уровень масла в двигателе ниже нормы, долейте масло до нормы и снова запустите двигатель. Если лампа
Характеристики автомобиля D150308BUN-U1 Контрольная лампа включения стояночного тормоза и низкого уровня тормозной жидкости Предупреждение о включении стояночного тормоза Эта лампа загорается, если стояночный тормоз находится во включенном состоянии, а ключ в замке зажигания находится в положении
Характеристики автомобиля D150312AUN-U1 D150313AUN-U1 D150315AUN Индикатор выбранной передачи (при наличии) Контрольная лампа системы зарядки Контрольная лампа открытия двери багажного отделения Этот индикатор показывает положение рычага переключения автоматической коробки передач. Эта контрольная
Характеристики автомобиля D150317AUN D150318AUN-C1 D150320AUN-U1 Индикатор работы иммобилайзера (при наличии) Эта лампа загорается, когда ключ с передатчиком системы иммобилайзера вставляется в замок зажигания и переводится в положение ON для запуска двигателя. После этого можно запустить
Характеристики автомобиля ВНИМАНИЕ • Продолжительное движение с горящей контрольной лампой неисправности системы снижения токсичности выброса может привести к повреждению элементов этой системы, что скажется на ходовых характеристиках автомобиля и/или на потреблении топлива. • Если эта лампа
Характеристики автомобиля D150324AUN-EE-C1 D150325AUN-C1 D150331AAM Контрольная лампа отключения системы ESP (при наличии) Эта контрольная лампа загорается при повороте ключа зажигания в положение ON и должна погаснуть в течение примерно 3 секунд. Для отключения системы ESP нажмите соответствующую
Характеристики автомобиля ОСТОРОЖНО — Низкое давление в шинах Слишком низкое давление в шинах может привести к потере управления автомобилем и увеличению тормозного пути. Продолжение движения при низком давлении в шинах может привести к перегреву и механическому разрушению шин. 4 52 Индикатор
Характеристики автомобиля D150327AUN D150328AUN-U1 Зуммер напоминания о наличии ключа в замке зажигания (при наличии) Если открыть дверь водителя при наличии ключа в замке зажигания (в положении ACC или LOCK) начинает работать соответствующий зуммер. Это необходимо для предотвращения оставления
Характеристики автомобиля D150329AUN-U1 Контрольная лампа топливного фильтра (для автомобилей с дизельным двигателем) Эта контрольная лампа загорается примерно через 3 секунды после поворота ключа в замке зажигания в положение ON, или после запуска двигателя, а затем гаснет. Если она загорается во
Характеристики автомобиля СИСТЕМА ЗАДНЕЙ ПАРКОВКИ (ПРИ НАЛИЧИИ) ОСТОРОЖНО Система задней парковки OAM049036 D170000AEN Система задней парковки помогает водителю во время движения задним ходом путем включения зуммера при обнаружении любого предмета на расстоянии 120 см (47 дюймов) от задней части
Характеристики автомобиля D170102AEN D170200AEN Типы предупреждающих звуковых сигналов • При наличии предмета на расстоянии 120 — 81 см (47 — 32 дюйма) от заднего бампера: Прерывистый сигнал зуммера. • При наличии предмета на расстоянии 80 — 41 см (31 — 16 дюймов) от заднего бампера: Увеличение
Характеристики автомобиля Радиус действия системы может снижаться в следующих случаях: 1. Загрязнение поверхности датчика посторонними предметами, например снегом или водой. (Радиус действия вернется в норму при удалении загрязнения). 2. Температура окружающего воздуха крайне высокая или низкая.
Характеристики автомобиля D170400BUN-U1 ОСТОРОЖНО Проявляйте повышенную внимательность при вождении автомобиля в непосредственной близости от объектов, находящихся на дороге, в частности от пешеходов, особенно от детей. Учитывайте, что некоторые объекты могут не быть обнаружены датчиками в
Характеристики автомобиля СИСТЕМА КОНТРОЛЯ МЕРТВОЙ ЗОНЫ ВИДИМОСТИ ПЕРЕД АВТОМОБИЛЕМ (ПРИ НАЛИЧИИ) Данная система является вспомогательным средством обзора с выводом изображения на дисплей зеркала заднего вида при движении автомобиля задним ходом. Задний вид ОСТОРОЖНО OAM049025L • Эта система
Характеристики автомобиля СВЕТОВАЯ АВАРИЙНАЯ СИГНАЛИЗАЦИЯ Для выключения аварийной сигнализации надо еще раз нажать на соответствующую кнопку. OAM049039 D180000AUN-U1 Система световой аварийной сигнализации должна использоваться всегда при остановке автомобиля в небезопасном месте. Во время
Характеристики автомобиля Для управления осветительными приборами поверните ручку на торце рычажка управления в одно из следующих положений: (1) Выключено (2) Стояночные огни (3) Фары Tип A Tип A OAM049040L Tип B OBK049046N Tип B OAM049040 OAM049041 D190400AUN-C1 D190401AUN-U1 Управление
Характеристики автомобиля ✽ К СВЕДЕНИЮ Tип A Tип A Свет фар включается только при ключе зажигания в положении ON. OBK049047N Tип B OBK049050N Tип B OAM049042 OAM049044 D190402AUN-C1 D190500AUN Фары ( ) Когда переключатель управления осветительными приборами находится в данном положении (второе
Характеристики автомобиля Для предотвращения разряда аккумуляторной батареи не оставляйте осветительные приборы включенными на длительное время при неработающем двигателе. Tип A Tип A OBK049049N Tип B OBK049051N Tип B OAM049043 Для мигания дальним светом фар потяните рычаг на себя. При его
Характеристики автомобиля После завершения поворота указатели автоматически выключаются. Если указатель продолжает мигать после завершения маневра, вручную верните рычаг в нейтральное (O/OFF) положение. Для подачи сигнала перестроения немного поверните рычаг указателя поворота и удерживайте в
Характеристики автомобиля OAM049046L D190800APB Задний противотуманный фонарь (при наличии) Для включения задних противотуманных фар переведите в положение ВКЛ (ON) переключатели основных и задних противотуманных фар. Для включения задних противотуманных фар при включенном (ON) переключателе
Характеристики автомобиля Ниже приведены примеры правильной установки регулятора. Для случаев загрузки автомобиля, которые не приведены ниже, регулятор должен быть установлен в положении, которое ближе всего соответствует типу загрузки, указанному в перечне. Загрузка автомобиля OAM049098L
Характеристики автомобиля СТЕКЛООЧИСТИТЕЛИ И СТЕКЛООМЫВАТЕЛИ Стеклоочиститель и омыватель лобового стекла Стеклоочиститель и омыватель заднего стекла (при наличии) Tип A Tип A’ Tип B Tип B’ A : Управление скоростью работы стеклоочистителя (пepeднегo) · / / MIST — Один проход · O / OFF — Выключен ·
Характеристики автомобиля D200100AAM Стеклоочистители Стеклоочистители работают при включенном зажигании следующим образом. / / MIST: Чтобы включить один цикл стеклоочистителя, переместите рычаг в положение ( / / MIST) и отпустите его с рычагом в положение OFF (ОТКЛ). Стеклоочистители будут
Характеристики автомобиля ВНИМАНИЕ Для предотвращения возможного повреждения насоса стеклоомывателя ветрового стекла не включайте стеклоомыватель при отсутствии жидкости в его бачке. ОСТОРОЖНО Не пользуйтесь стеклоомывателем ветрового стекла при минусовой температуре без предварительного нагрева
Характеристики автомобиля ОСВЕЩЕНИЕ САЛОНА D210000AUN (1) Индивидуальная лампа (при наличии) Включение и выключение лампы производится нажатием переключателя. Эта лампа обеспечивает водителю и пассажиру направленный пучок света, которым можно удобно воспользоваться для освещения карты или для
Характеристики автомобиля (3) DOOR Освещение салона включается при открытии любой из дверей (в том числе задней) независимо от положения ключа зажигания. При отпирании дверей при помощи пульта дистанционного управления светильник горит в течение примерно 30 секунд, пока не будет открыта какая-либо
Характеристики автомобиля ОБОГРЕВАТЕЛЬ Обогреватель заднего окна автоматически отключается после приблизительно 20 минут работы или при переводе ключа зажигания в положение “OFF” (Выкл.). Для выключения обогревателя нажмите на кнопку его включения еще раз. D220000AUN ВНИМАНИЕ Для предотвращения
Характеристики автомобиля СИСТЕМА УПРАВЛЕНИЯ МИКРОКЛИМАТОМ С РУЧНЫМ УПРАВЛЕНИЕМ (ПРИ НАЛИЧИИ) 1. Ручка настройки скорости вращения вентилятора 2. Ручка выбора режима работы 3. Ручка управления температурным режимом 4. Переключатель режимов подачи воздуха 5. Кнопка включения обогревателя заднего
Характеристики автомобиля D230100AUN-SA Обогрев и кондиционирование воздуха 1. Запустите двигатель. 2. Установите ручку выбора режима работы по своему усмотрению. Для повышения эффективности обогрева и охлаждения; — Обогрев: — Охлаждение: 3. Установите ручку управления температурой воздуха по
Характеристики автомобиля OAM049058 Расположенные на регуляторе шесть символов представляют следующие режимы работы: максимальный режим работы кондиционера (MAX A/C), подача воздуха через вентиляционные отверстия передней панели, через вентиляционные отверстия передней панели и в нижнюю часть
Характеристики автомобиля Подача воздуха в нижнюю часть салона и на ветровое стекло — сопла (А, C, E, D) Основная часть воздуха направляется в нижнюю часть салона и на ветровое стекло, а незначительное его количество подается к боковым соплам для предотвращения обмерзания остекления. Подача воздуха
Характеристики автомобиля OAM049063 D230103AUN-U1 Переключатель режимов подачи воздуха Этот орган управления используется для выбора одного из двух режимов подачи воздуха: подача внешнего (свежего) воздуха или рециркуляция. Для изменения режима подачи воздуха нажмите кнопку управления. Рециркуляция
Характеристики автомобиля ОСТОРОЖНО • Продолжительная работа системы управления микроклиматом в режиме рециркуляции может привести к повышению влажности воздуха в салоне, что может вызвать запотевание остекления и ухудшение обзора. • Нельзя спать в автомобиле при включенной системе
Характеристики автомобиля Работа системы D230501AUN Вентиляция 1. Установите ручку управления режимом в положение . 2. Установите переключатель режимов подачи воздуха в положение подачи внешнего (свежего) воздуха. 3. Установите ручку управления температурой воздуха по своему усмотрению. 4.
Характеристики автомобиля • Для предупреждения запотевания лобового стекла с внутренней стороны, следует установить переключатель режимов подачи внешнего воздуха в положение, соответствующее подаче свежего воздуха, ручку настройки скорости вращения вентилятора и ручку управления температурой
Характеристики автомобиля Советы по эксплуатации системы кондиционирования • Если автомобиль был оставлен на стоянке под прямыми солнечными лучами в жаркую погоду, откройте на короткое время окна автомобиля для выпуска горячего воздуха из салона наружу. • Чтобы содействовать уменьшению запотевания
Характеристики автомобиля В результате на внутренней поверхности ветрового стекла будет выпадать влага даже в случае работы системы в режиме подачи внешнего (свежего) воздуха. В таком случае обратитесь к авторизованному дилеру компании KIA для замены фильтра. ✽ К СВЕДЕНИЮ • Замену фильтра
Характеристики автомобиля УСТРАНЕНИЕ ИНЕЯ И ЗАПОТЕВАНИЯ С ВЕТРОВОГО СТЕКЛА D250000AUN ОСТОРОЖНО — Обогрев ветрового стекла Не используйте положение или в режиме охлаждения при высоком уровне влажности наружного воздуха. Разница между температурой наружного воздуха и температурой ветрового стекла
Характеристики автомобиля Если автоматического включения системы кондиционирования и режима подачи наружного (свежего) воздуха не произойдет, нажмите соответствующую кнопку. D250300AUN-U1 Алгоритм работы системы устранения запотевания OAM049067 D250102AUN-C1 Для устранения инея с внешней стороны
Характеристики автомобиля Это указывает на отмену алгоритма работы системы устранения запотевания или ее возврат в ранее запрограммированное состояние. При разрядке или отключении аккумуляторной батареи произойдет возврат алгоритма работы системы устранения запотевания к исходным установкам.
Характеристики автомобиля ОТДЕЛЕНИЯ ДЛЯ ХРАНЕНИЯ ВЕЩЕЙ D270000AHM В этих отсеках можно небольшие предметы. хранить ВНИМАНИЕ • Во избежание возможной кражи не оставляйте ценные предметы в отделениях для хранения вещей. • Всегда держите крышки отделений для хранения вещей закрытыми во время движения
Характеристики автомобиля OAM049072 D270400BUN-C1 Универсальный контейнер (при наличии) Tип A (при наличии) Контейнер можно использовать для хранения мелких предметов. OAM049071 OAM049074 D270401AAM D270500BUN-C1 Tип B (при наличии) Для открывания ящика потяните рычаг вверх, после чего откроется
Характеристики автомобиля ЭЛЕМЕНТЫ ВНУТРЕННЕЙ ОТДЕЛКИ САЛОНА ОСТОРОЖНО • Не удерживайте прикуриватель в нажатом положении после того, как он нагреется, поскольку это может привести к его перегреву. • Если прикуриватель не выйдет из гнезда в течение 30 секунд, извлеките его вручную во избежание
Характеристики автомобиля D280300AUN-U1 Держатель для напитков ОСТОРОЖНО — Горячие жидкости • Не устанавливайте открытые стаканы с горячими жидкостями в держатель для напитков во время движения автомобиля. Пролитая горячая жидкость может вызвать ожоги. Получение таких ожогов водителем может
Характеристики автомобиля Предусмотрен держатель для карточек (4), предназначенный для хранения карточек оплаты за пользование платными дорогами. (при наличии) Передние ВНИМАНИЕ OAM049079 Задняя часть салона (при наличии) OAM049080 D280500AAM Электрическая розетка (при наличии) Электрическая
Характеристики автомобиля (продолжение) • Некоторые электронные приборы могут служить источниками помех при их включении в электрическую розетку автомобиля. Они могут быть причиной повышенного шума при работе аудиосистемы и ненормальной работы других электронных систем или приборов, которые
Характеристики автомобиля OSA047133/H OSA047143 OAM049094 D280700AUN-C1 D280800AUN-SA D281000AUN-C1 Крючок для пакетов (при наличии) Крючок для одежды (при наличии) Сетка фиксации багажа (при наличии) ВНИМАНИЕ Не вешайте на крючок сумки весом более 3 кг (7 фунтов). Это может привести к его
Характеристики автомобиля При необходимости обратитесь к авторизованному дилеру компании KIA для приобретения сетки фиксации багажа. ЭЛЕМЕНТЫ ВНЕШНЕЙ ОТДЕЛКИ ✽ К СВЕДЕНИЮ Если автомобиль оборудован люком, убедитесь в том, что груз размещен на верхнем багажнике так, чтобы не препятствовать работе
Характеристики автомобиля ОСТОРОЖНО • Ниже приведены ограничения по весу для грузов, которые могут быть размещены на верхнем багажнике. Распределите нагрузку на верхнем багажнике настолько равномерно, насколько возможно, и надёжно закрепите её. КРЫША 75 кг (165 фунтов) РАВНОМЕРНОЕ
Характеристики автомобиля АУДИОСИСТЕМА ВНИМАНИЕ OAM049093 Антенна D300102AUN-SA Антенна на крыше Внешняя антенна автомобиля предназначена для приёма радиосигналов в AM-диапазоне и в FM-диапазоне. Эта антенна съемного типа. Для снятия поверните ее против часовой стрелки. Для установки поверните ее
Характеристики автомобиля VOLUME (VOL / ) (1) • Нажмите кнопку MUTE для выключения звука. • Для включения звука нажмите кнопку MUTE еще один раз. Режим RADIO (радиоприемник) Она будет работать в качестве кнопки выбора заранее настроенных радиостанций (PRESET STATION). Режим CDP (CD-плеер) Она будет
Характеристики автомобиля 1. ON : Подсветка включена. 2. MOOD : Подсветка автоматически меняется с определенным временным интервалом. 3. MUSIC : Подсветка мигает или меняет оттенки в такт звучащей музыке. Если звук не включен, подсветка не горит. 4. OFF : Подсветка выключена. 5. +/- : Для
Характеристики автомобиля Прием радиосигналов AM-диапазона Радиостанция FM-диапазона Рельеф местности ¢ ¢¢ Здания ¢ ¢¢ Зона, свободная от препятствий для радиосигнала ¢ ¢¢ Мосты из металлоконструкций JBM002 JBM003 JBM004 Сигналы AM-диапазона могут приниматься на большем удалении от радиостанции,
Характеристики автомобиля Снизить влияние этого явления можно путем уменьшения уровня высоких частот в тембре сигнала до того момента, пока источник помех не исчезнет. Станция 2 88,1 МГц Станция 2 88,3 МГц JBM005 • Появление сигнала другой радиостанции: по мере ослабления сигнала FM-диапазона
Характеристики автомобиля Использование сотового телефона или радиостанции с двухсторонней связью Использование сотового телефона внутри автомобиля может привести к возникновению шумов в звуковом сигнале аудио оборудования. Это не свидетельствует о неисправности. В подобной ситуации используйте
Характеристики автомобиля Обращение с дисками (при наличии) • При слишком высокой температуре внутри автомобиля откройте его окна для проветривания перед использованием автомобильной аудиосистемы. • Копирование и использование файлов форматов MP3/WMA без разрешения является незаконным. Используйте
Характеристики автомобиля РАДИОПРИЕМНИК, НАСТРОЙКА, РЕГУЛИРОВКА ГРОМКОСТИ, УПРАВЛЕНИЕ (PA710/PA715 ЕВРОПА) 1. Кнопка переключения диапазона (FM/AM) С помощью данной кнопки включается режим FM или AM, а при последующих нажатиях диапазоны переключаются в следующем порядке: FM1 ➟ FM2 ➟ MW ➟ LW ➟
Характеристики автомобиля 4. Кнопка ВКЛ./ВЫКЛ. питания и ручка регулировки громкости 6. Кнопка AST (Автоматическое сохранение) Включает и выключает приемник, когда ключ зажигания находится в положении ACC или ON. При повороте регулятора громкости вправо громкость увеличивается, при повороте влево
Характеристики автомобиля • SCROLL (ПРОКРУТКА) Чтение текста, длина которого превышает размер дисплея. Включение/выключение этой функции осуществляется регулятором громкости. • RETURN (ВОЗВРАТ) При выборе этой отображается экран предыдущего режима. функции настройки • TEMP (ТЕМПЕРАТУРА) Изменение
Характеристики автомобиля • Регулировка FADER (передние задние громкоговорители) Для выделения звука задних громкоговорителей необходимо вращать ручку управления по часовой стрелке (громкость передних громкоговорителей уменьшается). При вращении ручки управления против часовой стрелки выделяется
Характеристики автомобиля РАДИОПРИЕМНИК, НАСТРОЙКА, РЕГУЛИРОВКА ГРОМКОСТИ, УПРАВЛЕНИЕ (PA710/PA715 ДЛЯ ВСЕХ РЕГИОНОВ) 1. Кнопка выбора режима FM Включает режим FM и при каждом нажатии обеспечивает переключение между FM1 и FM2. 2. Кнопка выбора режима АМ Нажатием кнопки [AM] выбирается диапазон АМ.
Характеристики автомобиля 4. Кнопка ВКЛ./ВЫКЛ. питания и ручка регулировки громкости 6. Кнопка AST (Автоматическое сохранение) Включает и выключает приемник, когда ключ зажигания находится в положении ACC или ON. При повороте регулятора громкости вправо громкость увеличивается, при повороте влево
Характеристики автомобиля • SCROLL (ПРОКРУТКА) Чтение текста, длина которого превышает размер дисплея. Включение/выключение этой функции осуществляется регулятором громкости. • RETURN (ВОЗВРАТ) При выборе этой отображается экран предыдущего режима. функции настройки • TEMP (ТЕМПЕРАТУРА) Изменение
Характеристики автомобиля • Регулировка FADER (передние задние громкоговорители) Для выделения звука задних громкоговорителей необходимо вращать ручку управления по часовой стрелке (громкость передних громкоговорителей уменьшается). При вращении ручки управления против часовой стрелки выделяется
Характеристики автомобиля CD (PA710/PA715 EUROPE) 1. Слот загрузки CD 2. Кнопка выдвигания лотка компакт-диска 3. Кнопка выбора режимов CD/AUX 4. Кнопка автоматического выбора трека 5. Кнопка повторного воспроизведения 6. Кнопка случайного выбора композиции 7. Индикатор CD CD (PA710/PA715 ДЛЯ ВСЕХ
Характеристики автомобиля 1. Слот загрузки CD Вставьте диск в приемный лоток и мягко подтолкните его вперед. Если переключатель зажигания находится в положении ON или АСС, то питание аудиосистемы будет автоматически включено при загрузке компакт-диска. Данный проигрыватель поддерживает только
Характеристики автомобиля • RDM: Файлы/композиции в текущей папке/на текущем диске проигрываются в случайной последовательности. • A.RDM (только MP3/WMA): Все файлы на текущем диске проигрываются в случайной последовательности. 7. Индикатор CD Если переключатель зажигания находится в позиции ON или
Характеристики автомобиля ИСПОЛЬЗОВАНИЕ USB (PA710/PA715 ЕВРОПА) 1. Кнопка выбора USB 2. Кнопка перемещения по трекам 3. Кнопка повторного воспроизведения 4. Кнопка выбора режима Случайный выбор RANDOM 5. Кнопка выбора режима Поиск 6. Кнопка выбора режима Информация ИСПОЛЬЗОВАНИЕ USB (PA710/PA715
Характеристики автомобиля 1. Кнопка выбора USB Если подключено USB-устройство, происходит переход из любого другого режима в режим USB для проигрывания композиций, хранящихся в USB-накопителе. Если дополнительного устройства не подключено и не загружен CD, в течение 3 с отображается сообщение «No
Характеристики автомобиля 6. Кнопка выбора режима Информация 8. Кнопка перемещения между папками При нажатии кнопки на дисплее отображается информация о текущем проигрываемом файле в следующей последовательности FILE NAME ➟ TITLE ➟ ARTIST ➟ ALBUME ➟ FOLDER ➟ TOTAL FILE ➟ Normal Display ➟ FILE NAME
Характеристики автомобиля (Продолжение) 2) Для воспроизведения файла WMA степень его сжатия должна составлять от 8 кбит/с до 320 кбит/с. • При подключении и отключении внешних устройств USB соблюдайте меры предосторожности для защиты от статических разрядов. • MP3-проигрыватели с кодированным
Характеристики автомобиля (Продолжение) • Если используются такие устройства, как приобретаемый отдельно USB-hub (концентратор USB), аудиосистема автомобиля может не опознать устройство USB. Подсоединяйте устройства USB непосредственно к мультимедийному разъему автомобиля. • Если на устройстве USB
Характеристики автомобиля ИСПОЛЬЗОВАНИЕ iPod (PA710/PA715 ЕВРОПА) 1. Кнопка выбора режима iPod 2. Кнопка перемещения по трекам 3. Кнопка повторного воспроизведения 4. Кнопка выбора режима Случайный выбор (RANDOM) 5. Кнопка выбора режима Информация 6. Ручка поиска и кнопка ввода ИСПОЛЬЗОВАНИЕ iPod
Характеристики автомобиля 1. Кнопка выбора режима iPod Нажатие этой кнопки при подсоединенном iPod-устройстве запускает воспроизведение аудиозаписей, хранящихся в этом устройстве. Если iPod-устройство не подсоединено, после отображения сообщения “No Media” (Отсутствует носитель) система
Характеристики автомобиля ✽ ПРИ ИСПОЛЬЗОВАНИИ УСТРОЙСТВА iPod ОБРАТИТЕ ВНИМАНИЕ НА СЛЕДУЮЩЕЕ • Некоторые модели iPod могут не поддерживать протокол передачи данных, и файлы не будут проигрываться. (поддерживаемые модели iPod: Mini, 4G, Photo, Nano, 5G) • Порядок поиска или воспроизведения
Пepeд пoeздкoй / 5-3 Положения ключа зажигания / 5-4 Запуск двигателя / 5-6 Механическая коробка передач / 5-8 Автоматическая коробка передач / 5-12 Тормозная система / 5-19 Система круиз-контроля / 5-31 Пpиeмы экoнoмичнoгo вoждeния / 5-36 Ездa в ocoбыx дopoжныx ycлoвияx / 5-38 Езда в зимних
Управление автомобилем E010000AUN-C1 ОСТОРОЖНО — ВЫХЛОПНЫЕ ГАЗЫ — ИСТОЧНИК ОПАСНОСТИ! Выхлопные газы двигателя могут быть очень опасными. Когда бы Вы не почувствовали запах выхлопных газов внутри салона автомобиля, немедленно открывайте окна. • Не вдыхайте выхлопные газы. В выхлопных газах
Управление автомобилем ПЕРЕД ПОЕЗДКОЙ E020100AUN Перед тем, как сесть в автомобиль • Убедитесь в чистоте всех стекол, наружных зеркал и внешних световых приборов. • Проверьте состояние шин. • Загляните под автомобиль, не появились ли утечки. • Если Вы собираетесь подать назад, убедитесь, что там
Управление автомобилем ОСТОРОЖНО ПОЛОЖЕНИЯ КЛЮЧА ЗАЖИГАНИЯ ✽ К СВЕДЕНИЮ Если возникают проблемы при попытке перевести переключатель зажигания в положение автоматического регулирования скорости, то попробуйте повернуть ключ, одновременно вращая рулевое колесо вправо-влево, чтобы сбросить излишнюю
Управление автомобилем ОСТОРОЖНО — Замок зажигания • Никогда не поворачивайте ключ зажигания в положения LOCK (Блокировка) или ACC (Вспомогательное) во время движения автомобиля. Это приведет к потере управляемости и тормозов, что может стать причиной дорожно-транспортного происшествия. •
Управление автомобилем ЗАПУСК ДВИГАТЕЛЯ E040000AUN ОСТОРОЖНО Для управления автомобилем всегда надевайте подходящую обувь. Неудобная для управления обувь (высокие каблуки, лыжные ботинки и т.п.) может помешать вам нажимать педали тормоза, газа и сцепления (при наличии). E040100AUN Запуск двигателя
Управление автомобилем E040101AUN Запуск дизельного двигателя Холодный дизельный двигатель следует предварительно подогреть перед запуском, а также прогреть перед началом движения. 1. Убедитесь, что стояночный тормоз включен. 2. Механическая коробка передач полностью выжмите педаль сцепления и
Управление автомобилем МЕХАНИЧЕСКАЯ КОРОБКА ПЕРЕДАЧ (ПРИ НАЛИЧИИ) E050100BUN-C1 Управление механической коробкой передач Переключать передачи можно без подтягивания кольца (1). При переключении передач необходимо потянуть вверх кольцо (1). OAM059001 E050000AUN 5 8 В механической коробке бывает 5
Управление автомобилем • В холодную погоду переключение может быть затруднено до прогрева смазки коробки передач. Это нормальное явление и не вредит коробке. • Если ваш автомобиль полностью неподвижен, и не удается включить 1-ю передачу или R (Задний ход) , то установите рычаг на N (Нейтраль) и
Управление автомобилем E050102AUN E050200AUN-C1 Понижение передачи Если вам требуется замедлить скорость в условиях интенсивного движения транспорта или при движении на крутой подъем, необходимо понизить передачу, прежде чем начнется торможение двигателем. Понижение передачи позволяет снизить
Управление автомобилем ОСТОРОЖНО • Всегда пристегивайтесь! Вероятность получения тяжелой травмы или смерти в результате столкновения намного выше у непристегнутого водителя или пассажира, чем у пристегнутого. • Не проходите повороты или развороты на высокой скорости. • Не делайте резких движений
Управление автомобилем АВТОМАТИЧЕСКАЯ КОРОБКА ПЕРЕДАЧ (ПРИ НАЛИЧИИ) E060100AUN-U1 Работа автоматической коробки передач В высокопроизводительной коробке передач имеются 4 передних и 1 задняя передачи. Конкретные передачи выбираются автоматически, в зависимости от положения рычага переключения
Управление автомобилем Переключение из положения N (Нейтраль) на переднюю или заднюю передачу происходит плавнее при нажатии педали тормоза. ОСТОРОЖНО — Автоматическая коробка передач • Перед тем как поставить рычаг переключения передач в положение D (Движение) или R (Задний ход), всегда
Управление автомобилем ВНИМАНИЕ Переключение в положение P (Парковка) во время движения автомобиля может привести к поломке коробки передач. R (Задний ход) Это положение для движения автомобиля задним ходом. ВНИМАНИЕ Перед включением или выключением передачи R (Задний ход) автомобиль необходимо
Управление автомобилем L (Пониженная передача) Перемещайте рычаг переключения передач в это положение при езде в тяжелых условиях и при затяжных подъемах. При спуске под уклон с включенной системой O/D (4-й передаче) вы можете уменьшить скорость автомобиля без использования тормозов, нажав кнопку
Управление автомобилем E060102AAM Система блокировки переключения передач (при наличии) Для вашей безопасности в автоматических коробках имеется система блокировки переключения передач, которая не позволяет переключиться из положений P (Парковка) в положение R (Задний ход), если не нажата педаль
Управление автомобилем • Всегда ставьте автомобиль на стояночный тормоз. Не надейтесь на то, что установка рычага в положение P (Парковка) удержит автомобиль от движения. • Будьте предельно внимательны при движении на скользкой поверхности. Особая осторожность требуется при торможении, ускорении
Управление автомобилем E060203AUN ОСТОРОЖНО При застревании автомобиля в снегу, грязи, песке и т.п. вы, возможно, захотите выбраться за счет его раскачивания впередназад. Не делайте этого, если вблизи автомобиля есть люди или какие-либо объекты. В процессе раскачивания автомобиль может неожиданно
Управление автомобилем ТОРМОЗНАЯ СИСТЕМА E070100AUN Усилитель тормозов Ваш автомобиль оборудован тормозной системой с усилителем, автоматически подстраиваемой в процессе нормальной эксплуатации. Если в тормозной системе с усилителем произойдет потеря мощности в результате глушения двигателя или по
Управление автомобилем E070101AUN E070102AUN-C1 В случае отказа тормозов В случае отказа рабочих тормозов во время движения автомобиля, можно аварийно остановиться с помощью стояночного тормоза. Тормозной путь, однако, будет намного длиннее обычного. Индикатор износа дисковых тормозов На вашем
Управление автомобилем ВНИМАНИЕ Движение с включенным стояночным тормозом вызывает чрезмерный износ тормозных колодок (или накладок) и ротора тормоза. OAM059004 Стояночный тормоз E070201AFD-SA Применение стояночного тормоза Для приведения в действие стояночного тормоза сначала нажмите на педаль
Управление автомобилем ОСТОРОЖНО • Во избежание непреднамеренного движения автомобиля во время остановки и выхода из него, не пользуйтесь рычагом переключения передач как стояночным тормозом. Включите стояночный тормоз И надежно установите рычаг переключения передач в положение 1 (1-я передача) или
Управление автомобилем По возможности, немедленно прекратите движение. Если это невозможно, будьте предельно внимательны при управлении автомобилем и продолжайте движение только до безопасного места или до станции техобслуживания. E070300AUN-EE-U1 Антиблокировочная тормозная система (ABS) (при
Управление автомобилем Система ABS постоянно отслеживает скорость вращения колес. В момент приближения блокировки колес, система ABS начнет периодически подстраивать прилагаемое к ним гидравлическое тормозное давление. Если Вы тормозите в условиях, когда возможна блокировка колес, то можете
Управление автомобилем (продолжение) В это время будет проходить самодиагностика системы ABS, и лампа погаснет, если все нормально. Если лампа не погаснет, то это свидетельствует о возможной неисправности в системе ABS. Как можно скорее обратитесь к авторизованному дилеру компании KIA. ВНИМАНИЕ •
Управление автомобилем ОСТОРОЖНО OAM059006 E070500AUN-EE Электронная система стабилизации курсовой устойчивости (ESP) (при наличии) Система ESP предназначена для стабилизации автомобиля на поворотах. Система ESP проверяет, в каком направлении Вы устанавливаете руль, и куда действительно движется
Управление автомобилем ✽ К СВЕДЕНИЮ Когда автомобиль начнет движение после запуска двигателя, из отсека двигателя может послышаться щелчок. Это нормальное явление, свидетельствующее о правильности работы электронной системы стабилизации курсовой устойчивости. E070501AUN-EE Работа электронной
Управление автомобилем E070502AUN-EE Система ESP отключена Состояние ESP OFF (Система ESP выкл.) • Чтобы отключить работу системы ESP, нажмите кнопку ESP OFF (загорится контрольная лампа ESP OFF). • Если установить ключ зажигания в положение LOCK (Блокировка) при выключенной системе ESP, то система
Управление автомобилем E070504AUN-C1 Использование кнопки ESP OFF (Выключение системы ESP) Во время движения: • Систему ESP полезно оставлять постоянно включенной при любой возможности. • Чтобы выключить систему ESP во время движения, выберите ровную дорожную поверхность и нажмите кнопку ESP OFF.
Управление автомобилем • Не двигайтесь под уклон накатом. Это очень опасно. Не снимайте автомобиль с передачи. Включите тормоза для снижения скорости, затем переключитесь на пониженную передачу, чтобы поддерживать безопасную скорость за счет торможения двигателем. • Не ездите “на тормозах”. Не
Управление автомобилем СИСТЕМА КРУИЗ-КОНТРОЛЯ (ПРИ НАЛИЧИИ) E090000AUN Система круиз-контроля позволяет запрограммировать автомобиль таким образом, чтобы он поддерживал постоянную скорость без необходимости удерживать ногу на педали газа. Система предназначена для работы на скоростных режимах свыше
Управление автомобилем OAM059010L E090100AUN-KM Чтобы установить скорость круиз-контроля: 1. Для включения системы нажмите кнопку CRUISE ON-OFF на рулевом колесе. На комбинации приборов загорится указатель CRUISE. 2. Доведите скорость автомобиля до требуемой, которая должна превышать 40 км/ч (25
Управление автомобилем • Нажмите выключатель RES+ и сразу отпустите его. Скорость круизконтроля будет увеличиваться на 2,0 км/ч (1,2 мили/ч) — для дизельного двигателя при каждом использовании выключателя RES+ данным образом. • Нажмите выключатель SET- и сразу отпустите его. Скорость круизконтроля
Управление автомобилем Каждое из этих действий приведет к отмене работы круиз-контроля (на приборной панели погаснет контрольная лампа SET (Установка)), но система при этом не отключится. Если Вы захотите возобновить работу круиз-контроля, нажмите выключатель RES+, находящийся на рулевом колесе.
Управление автомобилем E090700AUN-AM Выключить режим круизконтроля можно одним из следующих способов: OAM059011L E090600AUN-C1 Чтобы вернуться к скорости круиз-контроля на скорости более 40 км/ч (25 миль/ч): • нажмите кнопку CRUISE ON-OFF («включение-выключение системы автоматического поддержания
Управление автомобилем ПРИЕМЫ ЭКОНОМИЧНОГО ВОЖДЕНИЯ E100000AUN-U1 Потребление топлива вашим автомобилем зависит главным образом от вашего стиля, времени и места вождения. Каждый из этих факторов влияет на расстояние, которое Вы сможете проехать на одном литре (галлоне) топлива. Максимально
Управление автомобилем • Поддерживайте чистоту автомобиля. Для обеспечения максимального срока службы автомобиль необходимо держать в чистоте и свободным от корродирующих веществ. Особенно важно, чтобы под днищем не накапливались грязь, лед и т.п.. Эти отложения увеличивают массу автомобиля, что
Управление автомобилем ЕЗДА В ОСОБЫХ ДОРОЖНЫХ УСЛОВИЯХ E110100AUN-U1 Опасные дорожные условия В опасных дорожных условиях, когда дорога покрыта водой, снегом, льдом, грязью, песком и т.п., выполняйте следующие рекомендации: • Управляйте автомобилем осторожно, увеличив дистанцию на торможение. •
Управление автомобилем ОСТОРОЖНО — Пробуксовывание колес Не допускайте пробуксовывания колес, особенно на скоростях выше 56 км/ч (35 миль/ч). Пробуксовывание колес на высоких скоростях вращения и неподвижном автомобиле может привести к перегреву шин с возможностью их взрыва и ранения окружающих. ✽
Управление автомобилем OCM053010 E110400AUN Управление автомобилем в ночное время Поскольку ночное вождение опаснее дневного, следует помнить несколько важных советов: • Уменьшите скорость и увеличьте дистанцию между вами и другими автомобилями, поскольку в ночное время снижается видимость,
Управление автомобилем • Поддерживайте хорошее состояние очистителя лобового стекла. Меняйте щётки стеклоочистителя, если они начинают делать полосы и пропускать отдельные области лобового стекла при работе. • Плохое состояние шин может привести к их пробуксовыванию на мокром дорожном покрытии во
Управление автомобилем ОСТОРОЖНО • Недокачанные или перекачанные шины могут приводить к трудностям в управлении, вплоть до его потери, а неожиданный разрыв шины к дорожнотранспортным происшествиям, травмам и даже к смерти. Всегда проверяйте давление в шинах перед поездкой. Рекомендованные давления
Управление автомобилем ЕЗДА В ЗИМНИХ УСЛОВИЯХ E120100AUN Заснеженная или обледенелая дорога 1VQA3005 E120000AUN-U1 Более суровые условия зимней погоды приводят к повышенному износу компонентов и другим проблемам. С целью их минимизации выполняйте приведенные далее рекомендации. Для передвижения по
Управление автомобилем ВНИМАНИЕ ОСТОРОЖНО — Размер зимних шин Зимние шины должны быть аналогичны по размеру и типу стандартным шинам автомобиля. Несоблюдение этого правила окажет отрицательное влияние на безопасность и управляемость автомобиля. Не устанавливайте шипованные шины без предварительного
Управление автомобилем Установка цепей Устанавливая цепи, следуйте инструкциям производителя и затягивайте их как можно плотнее. С установленными цепями вести автомобиль следует медленно. Если Вы услышите звук касания цепей о корпус или о шасси, остановитесь и подтяните их. Если они все еще
Управление автомобилем E120200AUN E120300AUN E120500AUN Используйте высококачественную этиленгликолевую охлаждающую жидкость Проверьте аккумуляторную батарею и кабели Проверка свечей и системы зажигания Зимой аккумуляторная батарея испытывает дополнительную нагрузку. Осмотрите аккумуляторную
Управление автомобилем E120700AUN E120800AUN-U1 E120900AUN Заливайте в систему омывателя стекол только одобренный антифриз Не допускайте замерзания стояночного тормоза Не допускайте скапливания льда и снега под днищем автомобиля Чтобы не допустить замерзания воды в системе омывателя стекол,
Управление автомобилем БУКСИРОВКА ПРИЦЕПА (ДЛЯ СТРАН ЕВРОПЫ) E140000ASA-C1 Буксировка при помощи автомобиля должна производиться в соответствии с Правилами дорожного движения конкретной страны. Поскольку законы разных стран отличаются друг от друга, могут отличаться и требования к буксировке
Управление автомобилем ✽ К СВЕДЕНИЮ — Для стран Европы • Максимальную технически допустимая нагрузку на задний мост можно превысить не более, чем на 15%, а максимальную технически допустимую массу автомобиля с грузом — не более, чем на 10 % или 100 кг (220,4 фунта) (используется наименьшая из этих
Управление автомобилем • Левая сторона E140100ASA • Правая сторона Важно иметь правильное сцепное оборудование. Боковой ветер, проходящий близко автопоезд и неровные дороги — вот некоторые из причин, по которым следует иметь подходящее сцепное устройство. Соблюдайте следующие правила: • Потребуется
Управление автомобилем E140200AUN-U1 Страховочные цепи Между автомобилем и прицепом необходимо закрепить страховочные цепи. Проведите страховочные цепи под дышлом прицепа, чтобы оно не упало на дорогу в случае его отсоединения от сцепного устройства. Инструкции по использованию страховочных цепей
Управление автомобилем E140401AUN E140403AUN E140405AUN Расстояние до впереди идущего автомобиля Поддерживайте в два раза большее расстояние до впереди идущего автомобиля по сравнению с движением без прицепа. Это поможет вам избежать резкого торможения и поворотов. Движение задним ходом Возьмитесь
Управление автомобилем Не подключайте систему световых приборов прицепа непосредственно к аналогичной системе автомобиля. Пользуйтесь только одобренными жгутами проводки прицепа. Авторизованный дилер компании KIA может помочь вам с монтажом жгута проводки. ОСТОРОЖНО Использование неодобренных
Управление автомобилем E140407ATD Парковка на склонах Как правило, если автомобиль снабжен прицепом, его парковка на склонах недопустима. Непредвиденное скатывание автомобиля с прицепом вниз по склону может привести серьезным травмам и гибели людей. ОСТОРОЖНО — Парковка на склонах Парковка
Управление автомобилем Перед троганием с места парковки на склоне 1. При установке рычага механической коробки передач на нейтраль, а автоматической — в положение Р (Парковка), нажмите педаль тормоза и удерживайте ее, пока вы: • Запускаете двигатель; • Переключаетесь на передачу; и • Отпускаете
Управление автомобилем E140600ASA-C1 Если Вы решили буксировать прицеп Далее приведены несколько важных правил буксировки прицепов: • Подумайте об использовании устройства демпфирования колебаний прицепа. Информацию о них можно получить у продавца сцепных устройств. • В течение первых 2000 км (1200
Управление автомобилем Опорная нагрузка от дышла Полная масса прицепа Полная нагрузка на мост C190E01JM Полная масса автомобиля C190E02JM E140601ASA E140602ASA Масса прицепа Какова безопасная масса прицепа? Его масса никогда не должна превышать максимальной массы прицепа с тормозной системой. Но
Управление автомобилем МАССА АВТОМОБИЛЯ ОСТОРОЖНО — Прицеп • Никогда не нагружайте прицеп в задней части больше, чем в передней. На переднюю часть прицепа должно приходиться примерно 60% общей массы прицепа; а на заднюю часть прицепа — примерно 40% общей массы прицепа. • Никогда не перегружайте
Управление автомобилем E160500AUN Полная номинальная нагрузка на мост (GAWR) Максимально допустимая нагрузка, которая может быть приложена к одному мосту (переднему или заднему). Эти значения приведены в табличке соответствия. Полная нагрузка на каждый мост никогда не должна превышать полной
Сигнализация при остановке на дороге / 6-2 B случае непредвиденного случая во время движения / 6-3 Если не удается запустить двигатель / 6-4 Запуск двигателя от внешнего источника электроэнергии / 6-5 Если двигатель перегревается / 6-7 Если спущeнa шинa (зaмeнa нa зaпacнyю шинy) / 6-8 Система
Действия в непредвиденных случаях СИГНАЛИЗАЦИЯ ПРИ ОСТАНОВКЕ НА ДОРОГЕ Ее нужно использовать при любых аварийных работах или остановках на обочине. Нажать выключатель световой сигнализации можно при любом положении ключа зажигания. Выключатель световой сигнализации находится на центральной консоли
Действия в непредвиденных случаях В СЛУЧАЕ НЕПРЕДВИДЕННОГО СЛУЧАЯ ВО ВРЕМЯ ДВИЖЕНИЯ F020100AUN Если двигатель заглох на перекрестке или переезде • Если двигатель заглох на перекрестке или переезде, установите рычаг переключения передач в положение N (Нейтраль) и затем вручную переместите автомобиль
Действия в непредвиденных случаях ЕСЛИ НЕ УДАЕТСЯ ЗАПУСТИТЬ ДВИГАТЕЛЬ F030100AUN-U1 Если двигатель не запускается или вращается медленно 1. Если в автомобиле установлена автоматическая коробка передач, поставьте рычаг переключения передач в положение N (Нейтраль) или P (Парковка), и включите
Действия в непредвиденных случаях ЗАПУСК ДВИГАТЕЛЯ ОТ ВНЕШНЕГО ИСТОЧНИКА ЭЛЕКТРОЭНЕРГИИ F040100AUN Кабели для запуска двигателя от внешнего источника Запуск двигателя от внешнего источника (-) (+) (-) (+) Внешняя аккумуляторная батарея Разряженный аккумулятор 1VQA4001 F040000AUN Подключайте кабели
Действия в непредвиденных случаях F040101ASA Процедура запуска двигателя от внешнего источника 1. Убедитесь, что напряжение внешней батареи равно 12 В, и заземлите ее минусовой вывод. 2. Если внешняя батарея находится на другом автомобиле, не допускайте их соприкосновения. 3. Отсоедините все
Действия в непредвиденных случаях ЕСЛИ ДВИГАТЕЛЬ ПЕРЕГРЕВАЕТСЯ F050000ASA-U1 Если указатель температуры показывает на перегрев, происходит снижение мощности, слышится громкое гудение или стук, скорее всего, перегрелся двигатель. В этом случае следует: 1. При первой же безопасной возможности съехать
Действия в непредвиденных случаях ЕСЛИ СПУЩЕНА ШИНА (ЗАМЕНА НА ЗАПАСНУЮ ШИНУ, ПРИ НАЛИЧИИ) F070101ASA-U1 (Продолжение) • Пользуйтесь специально предназначенными для домкрата местами спереди и сзади автомобиля; никогда не упирайте домкрат в бамперы и любые другие части автомобиля. • Автомобиль может
Действия в непредвиденных случаях (Продолжение) • Убедитесь, что все дети находятся в безопасном месте вдали от дороги и от автомобиля, который собираются поднять домкратом. OAM069008 1VQA4022 F070200ASA F070300ASA-C1 Извлечение и хранение запасной шины Замена шин Поверните против часовой стрелки
Действия в непредвиденных случаях ОСТОРОЖНО 1VQA4023 4. Достаньте из автомобиля колесный ключ, домкрат, рукоятку домкрата и запасное колесо. 5. Заблокируйте спереди и сзади колесо, диагонально противоположное месту установки домкрата. 6 10 — Замена шины • Для предотвращения движения автомобиля во
Действия в непредвиденных случаях OCM054013 7. Установите домкрат в переднее или заднее положение для домкрата, ближайшее к заменяемому колесу. Ставьте домкрат в специально предназначенных местах под рамой. Места для установки домкрата представляют собой приваренные к раме пластины с двумя
Действия в непредвиденных случаях 9. Ослабьте колесные гайки и открутите их вручную. Плавно снимите колесо со шпилек и положите его плашмя, чтобы оно не укатилось. Для установки колеса на ступицу возьмите запасное колесо, совместите отверстия со шпильками и надвиньте колесо на них. При
Действия в непредвиденных случаях Момент затяжки колесных гаек: Колесо из стали и алюминиевого сплава: 9 — 11 кгс м (65 — 79 фунт-фут) OUN047019 Затем установите ключ в соответствии с рисунком и затяните колесные гайки. Следите, чтобы торцевая насадка плотно обхватывала гайку. Не вставайте на
Действия в непредвиденных случаях ОСТОРОЖНО — Колесные шпильки Повреждение шпилек может приводить к потере их способности удерживать колесо. Это может привести к потере колеса, столкновению и тяжелым травмам. Для предотвращения “громыхания” домкрата, рукоятки домкрата, колесного ключа и запасного
Действия в непредвиденных случаях Соблюдайте следующие меры предосторожности при использовании компактного запасного колеса: • Ни при каких обстоятельствах не превышайте скорость 80 км/ч (50 миль/ч); при более высокой скорости можно испортить шину. • Убедитесь, что ваша скорость достаточно мала для
Действия в непредвиденных случаях СИСТЕМА КОНТРОЛЯ ДАВЛЕНИЯ В ШИНАХ (TPMS) (ПРИ НАЛИЧИИ) TPMS F060000AFD-C1 (1) Индикатор неисправности системы TPMS (2) Сигнализатор низкого давления в шинах При холодной погоде необходимо ежемесячно проверять давление в каждой из шин, включая запасное колесо (при
Действия в непредвиденных случаях В автомобиле также предусмотрен индикатор неисправности системы TPMS, обеспечивающий контроль за правильной работой системы. На индикаторе неисправности системы TPMS предусмотрен отдельный индикатор, на котором отображается символ “TPMS”. Если индикатор
Действия в непредвиденных случаях ВНИМАНИЕ При холодной погоде сигнализатор низкого давления в шинах может загореться, если в шине установлено давление, рекомендованное для теплой погоды. Это не означает неисправность системы TPMS, поскольку понижение температуры приводит к пропорциональному
Действия в непредвиденных случаях ✽ К СВЕДЕНИЮ • Индикатор неисправности системы TPMS может также загораться при проезде автомобиля мимо кабелей электропередач или радиопередатчиков (например мимо поста автомобильной инспекции, государственных учреждений, радиовещательных станций, военных объектов,
Действия в непредвиденных случаях В каждом колесе установлен датчик давления в шине, который установлен внутри шины позади золотникового штока. Необходимо использовать колеса, совместимые с системой TPMS. Рекомендуется всегда выполнять обслуживание шин у уполномоченного дилера компании KIA. После
Действия в непредвиденных случаях ОСТОРОЖНО — TPMS • Система TPMS не предназначена для оповещения о внезапном повреждении шины, вызванном внешними факторами, например острыми предметами на дороге. • Если поведение автомобиля на дороге становится неустойчивым, немедленно снимите ногу с педали газа,
Действия в непредвиденных случаях БУКСИРОВКА Для получения информации о буксировке прицепом обратитесь к главе “Буксировка прицепа” в разделе 5. буксирная тележка Можно буксировать автомобиль, приподняв передние колеса и оставив задние колеса на земле (без буксирных тележек). Подложите под передние
Действия в непредвиденных случаях При аварийной буксировке автомобиля без использования буксирных тележек для колес: 1. Переведите ключ зажигания в положение ACC (Вспомогательное). 2. Установите рычаг переключения передач в положение N (Нейтраль). 3. Снимите автомобиль со стояночного тормоза.
Действия в непредвиденных случаях OAM069011 F080300ASA Аварийная буксировка Если необходима аварийная буксировка, рекомендуется пользоваться услугами авторизованного дилера KIA или коммерческой службы техпомощи. 6 24 Если при аварии буксирная служба помочь не может, автомобиль можно какое-то время
Действия в непредвиденных случаях F080301AUN ОСТОРОЖНО Будьте очень осторожны при буксировке автомобиля. • Избегайте резких стартов и других маневров, накладывающих дополнительную нагрузку на аварийный буксирный крюк, трос или цепь. Крюк, буксирный трос или цепь могут сломаться и причинить
Действия в непредвиденных случаях ВНИМАНИЕ- Автоматическая коробка передач • Буксировка автомобиля на всех четырех колесах допускается только передним ходом. Убедитесь, что коробка передач стоит на нейтральной передаче. Не буксируйте со скоростью выше 40 км/ч (25 миль/ч) и на расстояние более 25 км
Отсек двигателя / 7-2 Комплекс работ по техническому обслуживанию / 7-4 Техническое обслуживание, выполняемое владельцем автомобиля / 7-7 Комплекс работ по периодическому техническому обслуживанию / 7-9 Позиции периодического технического обслуживания / 7-23 Система смазки двигателя / 7-27 Жидкость
Техническое обслуживание ОТСЕК ДВИГАТЕЛЯ ■ Бензиновый двигатель 1. Расширительный бачок для жидкости системы охлаждения 2. Крышка маслозаливной горловины двигателя 3. Бачок для тормозной жидкости 4. Воздушный фильтр 5. Блок плавких предохранителей 6. Отрицательная клемма аккумуляторной батареи 7.
Техническое обслуживание ■ Дизельный двигатель 1. Расширительный бачок для жидкости системы охлаждения 2. Крышка маслозаливной горловины двигателя 3. Бачок для тормозной жидкости 4. Топливный фильтр 5. Воздушный фильтр 6. Блок плавких предохранителей 7. Отрицательная клемма аккумуляторной батареи
Техническое обслуживание КОМПЛЕКС РАБОТ ПО ТЕХНИЧЕСКОМУ ОБСЛУЖИВАНИЮ G020000AUN G020100AUN При проведении любых работ по техническому обслуживанию или проверке технического состояния автомобиля следует проявлять наивысшую степень осторожности во избежание повреждения автомобиля или получения травм.
Техническое обслуживание G020200AUN Меры предосторожности при проведении технического обслуживания владельцем автомобиля Неправильное или неполное проведение технического обслуживания может привести к возникновению неисправностей. В данном разделе даны указания по выполнению только наиболее простых
Техническое обслуживание (продолжение) • Выполнение работ под капотом при работающем двигателе может представлять опасность для здоровья. Опасность усиливается, если на вас надеты ювелирные изделия или свободная одежда. Они могут попасть в движущиеся детали и стать причиной травмы. Таким образом,
Техническое обслуживание ТЕХНИЧЕСКОЕ ОБСЛУЖИВАНИЕ, ВЫПОЛНЯЕМОЕ ВЛАДЕЛЬЦЕМ АВТОМОБИЛЯ G030000AUN Ниже даны перечни проверок технического состояния автомобиля, которые должны проводиться с указанной периодичностью владельцем или авторизованным дилером компании KIA для обеспечения безопасной и
Техническое обслуживание • Проверьте работу автоматической коробки передач в режиме “P” (парковка). • Проверьте работу стояночного тормоза. • Убедитесь в отсутствии следов утечек жидкостей под днищем автомобиля (вода, капающая из системы кондиционирования воздуха в процессе работы или после
Техническое обслуживание КОМПЛЕКС РАБОТ ПО ПЕРИОДИЧЕСКОМУ ТЕХНИЧЕСКОМУ ОБСЛУЖИВАНИЮ G040000AED Придерживайтесь графика технического обслуживания в обычном объеме, если автомобиль не эксплуатируется постоянно в одном из перечисленных ниже режимов. Если автомобиль регулярно эксплуатируется в одном из
Техническое обслуживание G040100ASA-C1 ГРАФИК ТЕХНИЧЕСКОГО ОБСЛУЖИВАНИЯ ПРИ ЭКСПЛУАТАЦИИ В ОБЫЧНЫХ УСЛОВИЯХ -БЕНЗИНОВЫЙ ДВИГАТЕЛЬ ПЕРИОДИЧНОСТЬ Количество месяцев или пробег, в зависимости от того, что наступит раньше ТЕХНИЧЕСКОГО 12 24 36 48 60 72 84 96 Месяцы ОБСЛУЖИВАНИЯ ПОЗИЦИЯ ОБСЛУЖИВАНИЯ
Техническое обслуживание ГРАФИК ТЕХНИЧЕСКОГО ОБСЛУЖИВАНИЯ ПРИ ЭКСПЛУАТАЦИИ В ОБЫЧНЫХ УСЛОВИЯХ — БЕНЗИНОВЫЙ ДВИГАТЕЛЬ (ПРОДОЛЖЕНИЕ) ПЕРИОДИЧНОСТЬ Количество месяцев или пробег, в зависимости от того, что наступит раньше ТЕХНИЧЕСКОГО 12 24 36 48 60 72 84 96 Месяцы ОБСЛУЖИВАНИЯ ПОЗИЦИЯ ОБСЛУЖИВАНИЯ
Техническое обслуживание ГРАФИК ТЕХНИЧЕСКОГО ОБСЛУЖИВАНИЯ ПРИ ЭКСПЛУАТАЦИИ В ОБЫЧНЫХ УСЛОВИЯХ — БЕНЗИНОВЫЙ ДВИГАТЕЛЬ (ПРОДОЛЖЕНИЕ) ПЕРИОДИЧНОСТЬ Количество месяцев или пробег, в зависимости от того, что наступит раньше ТЕХНИЧЕСКОГО Месяцы 12 24 36 48 60 72 84 96 ОБСЛУЖИВАНИЯ ПОЗИЦИЯ ОБСЛУЖИВАНИЯ
Техническое обслуживание ГРАФИК ТЕХНИЧЕСКОГО ОБСЛУЖИВАНИЯ ПРИ ЭКСПЛУАТАЦИИ В ОБЫЧНЫХ УСЛОВИЯХ — БЕНЗИНОВЫЙ ДВИГАТЕЛЬ (ПРОДОЛЖЕНИЕ) ПЕРИОДИЧНОСТЬ Количество месяцев или пробег, в зависимости от того, что наступит раньше ТЕХНИЧЕСКОГО 12 24 36 48 60 72 84 96 Месяцы ОБСЛУЖИВАНИЯ ПОЗИЦИЯ ОБСЛУЖИВАНИЯ
Техническое обслуживание ГРАФИК ТЕХНИЧЕСКОГО ОБСЛУЖИВАНИЯ ПРИ ЭКСПЛУАТАЦИИ В ОБЫЧНЫХ УСЛОВИЯХ — БЕНЗИНОВЫЙ ДВИГАТЕЛЬ (ПРОДОЛЖЕНИЕ) ПЕРИОДИЧНОСТЬ Количество месяцев или пробег, в зависимости от того, что наступит раньше ТЕХНИЧЕСКОГО 12 24 36 48 60 72 84 96 ОБСЛУЖИВАНИЯ Месяцы 10 20 30 40 50 60 70 80
Техническое обслуживание G040200ASA-C1 ТЕХНИЧЕСКОЕ ОБСЛУЖИВАНИЕ ПРИ ТЯЖЕЛЫХ УСЛОВИЯХ ЭКСПЛУАТАЦИИ АВТОМОБИЛЯ БЕНЗИНОВЫЙ ДВИГАТЕЛЬ Ниже приведен перечень позиций, требующих более частого технического обслуживания при тяжелых условиях эксплуатации автомобиля. В ниже расположенной таблице указана
Техническое обслуживание Операция технического обслуживания Периодичность технического обслуживания Условия эксплуатации I Производите проверки чаще, если этого требуют условия эксплуатации C, D, E, F, G I Производите проверки чаще, если этого требуют условия эксплуатации C, D, E, G, H I
Техническое обслуживание G040300ASA-C1 ГРАФИК ТЕХНИЧЕСКОГО ОБСЛУЖИВАНИЯ ПРИ ЭКСПЛУАТАЦИИ В ОБЫЧНЫХ УСЛОВИЯХ — ДИЗЕЛЬНЫЙ ДВИГАТЕЛЬ ПЕРИОДИЧНОСТЬ Количество месяцев или пробег, в зависимости от того, что наступит раньше ТЕХНИЧЕСКОГО 12 24 36 48 60 72 84 96 ОБСЛУЖИВАНИЯ Месяцы ПОЗИЦИЯ ОБСЛУЖИВАНИЯ
Техническое обслуживание ГРАФИК ТЕХНИЧЕСКОГО ОБСЛУЖИВАНИЯ ПРИ ЭКСПЛУАТАЦИИ В ОБЫЧНЫХ УСЛОВИЯХ ДИЗЕЛЬНЫЙ ДВИГАТЕЛЬ (ПРОДОЛЖЕНИЕ) ПЕРИОДИЧНОСТЬ Количество месяцев или пробег, в зависимости от того, что наступит раньше ТЕХНИЧЕСКОГО 12 24 36 48 60 72 84 96 Месяцы ОБСЛУЖИВАНИЯ ПОЗИЦИЯ ОБСЛУЖИВАНИЯ Мили
Техническое обслуживание ГРАФИК ТЕХНИЧЕСКОГО ОБСЛУЖИВАНИЯ ПРИ ЭКСПЛУАТАЦИИ В ОБЫЧНЫХ УСЛОВИЯХ — ДИЗЕЛЬНЫЙ ДВИГАТЕЛЬ (ПРОДОЛЖЕНИЕ) ПЕРИОДИЧНОСТЬ Количество месяцев или пробег, в зависимости от того, что наступит раньше ТЕХНИЧЕСКОГО 12 24 36 48 60 72 84 96 ОБСЛУЖИВАНИЯ Месяцы ПОЗИЦИЯ ОБСЛУЖИВАНИЯ
Техническое обслуживание ГРАФИК ТЕХНИЧЕСКОГО ОБСЛУЖИВАНИЯ ПРИ ЭКСПЛУАТАЦИИ В ОБЫЧНЫХ УСЛОВИЯХ ДИЗЕЛЬНЫЙ ДВИГАТЕЛЬ (ПРОДОЛЖЕНИЕ) ПЕРИОДИЧНОСТЬ Количество месяцев или пробег, в зависимости от того, что наступит раньше ТЕХНИЧЕСКОГО 12 24 36 48 60 72 84 96 ОБСЛУЖИВАНИЯ Месяцы ПОЗИЦИЯ ОБСЛУЖИВАНИЯ Мили
Техническое обслуживание G040400ASA-C1 ТЕХНИЧЕСКОЕ ОБСЛУЖИВАНИЕ ПРИ ТЯЖЕЛЫХ УСЛОВИЯХ ЭКСПЛУАТАЦИИ АВТОМОБИЛЯ ДИЗЕЛЬНЫЙ ДВИГАТЕЛЬ Ниже приведен перечень позиций, требующих более частого технического обслуживания при тяжелых условиях эксплуатации автомобиля. В ниже расположенной таблице указана
Техническое обслуживание Операция технического обслуживания Периодичность технического обслуживания Условия эксплуатации I Производите проверки чаще, если этого требуют условия эксплуатации C, D, E, G, H I Производите проверки чаще, если этого требуют условия эксплуатации C, D, E, G, H Стояночный
Техническое обслуживание ПОЗИЦИИ ПЕРИОДИЧЕСКОГО ТЕХНИЧЕСКОГО ОБСЛУЖИВАНИЯ G050100AUN G050300AUN G050400AUN Моторное масло и масляный фильтр двигателя Фильтрующий элемент топливного фильтра Топливные трубопроводы, гибкие шланги и соединения Моторное масло и масляный фильтр двигателя следует менять с
Техническое обслуживание ОСТОРОЖНО — Только для автомобилей с дизельным двигателем Не допускайте проведения работ по обслуживанию системы впрыска топлива при работающем двигателе или в пределах 30 секунд после его выключения. Насос высокого давления, топливный коллектор, форсунки и трубопроводы
Техническое обслуживание G050800AUN G051100AUN G051400AUN Воздушный фильтр Система охлаждения При замене рекомендуется использовать оригинальный воздушный фильтр, поставляемый компанией KIA. G050900AUN Проверьте элементы системы охлаждения двигателя, такие как радиатор, расширительный бачок, гибкие
Техническое обслуживание G051600AUN Тормозная жидкость Проверьте уровень тормозной жидкости в расширительном бачке тормозной системы. Уровень должен находиться между рисками “MIN” и “MAX” на боковой поверхности бачка. Используйте только тормозную жидкость, соответствующую классам DOT 3 или DOT 4.
Техническое обслуживание СИСТЕМА СМАЗКИ ДВИГАТЕЛЯ 3. Выключите двигатель и подождите несколько минут (около 5 минут), чтобы дать маслу возможность стечь в поддон картера. 4. Извлеките щуп, вытрите начисто и повторно вставьте до упора. ОСТОРОЖНО — Шланг радиатора OAM079001 G060100AUN-HM Проверка
Техническое обслуживание ВНИМАНИЕ Не заливайте избыточное количество моторного масла. Это может привести к повреждению двигателя. OAM079004 Если он находится вблизи метки “L”, долейте такое количество масла, чтобы уровень поднялся до метки “F”. Не заливайте избыточное количество масла. Для
Техническое обслуживание ЖИДКОСТЬ СИСТЕМЫ ОХЛАЖДЕНИЯ G070000AUN G070100ASA-U1 В систему охлаждения высокого давления входит бачок, заполненный всепогодной охлаждающей жидкостью с низкой температурой замерзания. Охлаждающая жидкость заливается в бачок на заводе-изготовителе. Проверяйте степень
Техническое обслуживание G070101AUN-U1 OAM079005 Проверьте состояние всех шлангов систем охлаждения и обогрева, а также их соединения. Замените все изношенные или имеющие вздутия шланги. Уровень охлаждающей жидкости должен находиться между отметками “L” и “F” на стенке расширительного бачка при
Техническое обслуживание G070200AUN-U1 Замена охлаждающей жидкости Замена охлаждающей жидкости должна производиться авторизованным дилером компании KIA в соответствии с графиком технического обслуживания, приведенным в начале данного раздела. ВНИМАНИЕ OAM079006 ОСТОРОЖНО — Крышка радиатора Не
Техническое обслуживание ТОРМОЗНАЯ ЖИДКОСТЬ И ЖИДКОСТЬ В ПРИВОДЕ ВЫКЛЮЧЕНИЯ СЦЕПЛЕНИЯ (ПРИ НАЛИЧИИ) Если уровень низкий, долейте жидкость до отметки “MAX”. По мере увеличения пробега уровень будет снижаться. Это связано с состоянием накладок тормозов и не является признаком неисправности. Если
Техническое обслуживание ЖИДКОСТЬ КОРОБКИ ПЕРЕДАЧ КОРОБКИ ПЕРЕДАЧ (ПРИ НАЛИЧИИ) ВНИМАНИЕ Следите за тем, чтобы тормозная жидкость/жидкость в приводе выключения сцепления не попадала на лакокрасочное покрытие кузова автомобиля, поскольку это приведет к его повреждению. Не следует использовать
Техническое обслуживание 4. Если проверка уровня жидкости производится при холодной коробке передач (температура трансмиссионной жидкости 20~30°C (68~86°F)), долейте жидкость до линии “C (COLD)” (холодная) на щупе, после чего повторно проверьте уровень согласно шагу 2, описанному выше. HOT COLD
Техническое обслуживание ✽ К СВЕДЕНИЮ Отметки диапазона “C (COLD)” (холодная) являются справочными величинами и не могут быть использованы для определения уровня трансмиссионной жидкости. ✽ К СВЕДЕНИЮ Новая жидкость для автоматической коробки передач должна иметь красный цвет. Красный краситель
Техническое обслуживание ЖИДКОСТЬ ОМЫВАТЕЛЯ ВЕТРОВОГО СТЕКЛА ОСТОРОЖНО OAM079008 G120100ASA-C1 Проверка уровня жидкости в бачке омывателя ветрового стекла Проверьте уровень жидкости в бачке омывателя и долейте жидкость, если необходимо. При отсутствии специального раствора можно использовать чистую
Техническое обслуживание СТОЯНОЧНЫЙ ТОРМОЗ ТОПЛИВНЫЙ ФИЛЬТР (ДЛЯ АВТОМОБИЛЕЙ С ДИЗЕЛЬНЫМ ДВИГАТЕЛЕМ) G150100ASA-ED Слив воды из топливного фильтра OAM059004 G140100ASA Проверка стояночного тормоза Проверьте ход стояночного тормоза, подсчитав количество щелчков, слышимых при полном его включении с
Техническое обслуживание 3. Прокачайте насос (1) примерно 15 раз. 4. Удалите воздух из топливного фильтра, вывернув болт (2) крестовой отверткой и ввернув его обратно. 5. Прокачайте насос (1) примерно 5 раз. ✽ К СВЕДЕНИЮ • При удалении воздуха используйте ветошь во избежание разбрызгивания топлива.
Техническое обслуживание ВОЗДУШНЫЙ ФИЛЬТР OAM079043 G160100AUN Замена фильтра При необходимости воздушный фильтр должен быть заменен на новый; чистка и повторное использование воздушного фильтра не допускаются. OAM079044 OAM079046 1. Отпустите защелки, крепящие крышку воздушного фильтра, и откройте
Техническое обслуживание Замену фильтра необходимо производить в соответствии с графиком технического обслуживания. Если автомобиль эксплуатируется в районах с повышенной запыленностью или песчаных районах, интервалы между заменами фильтрующего элемента должны быть меньше интервалов, рекомендуемых
Техническое обслуживание ЩЕТКИ СТЕКЛООЧИСТИТЕЛЯ 1JBA5122 G180100AUN Проверка состояния щеток ✽ К СВЕДЕНИЮ Известно, что горячий промышленный воск, который наносится в автоматических автомобильных мойках, осложняет очистку лобового стекла. Загрязнение лобового стекла или щеток стеклоочистителя
Техническое обслуживание 1JBA7037 OED076040 1LDA5023 G180201AUN G180202AED Щетка стеклоочистителя ветрового стекла 1. Поднимите рычаг стеклоочистителя и поверните узел щетки, чтобы получить доступ к защелке. Щетка стеклоочистителя заднего окна (при наличии) 1. Поднимите рычаг стеклоочистителя и
Техническое обслуживание АККУМУЛЯТОРНАЯ БАТАРЕЯ • Если автомобиль не будет использоваться в течение продолжительного времени, отсоедините кабели от аккумуляторной батареи. OED076041 2. Установите новую щетку в сборе, вставляя центральную часть в отверстие на рычаге стеклоочистителя, пока не
Техническое обслуживание ОСТОРОЖНО — Основные опасности, связанные с эксплуатацией аккумуляторной батареи При работе с аккумуляторными батареями внимательно прочтите следующие указания. Не подносите к батарее зажженные сигареты, открытый огонь из других источников и не производите искр. В элементах
Техническое обслуживание G190200AUN Подзарядка аккумуляторной батареи В вашем автомобиле установлена не требующая обслуживания аккумуляторная батарея, изготовленная с использованием кальция. • Если произошел разряд аккумуляторной батареи в течение короткого промежутка времени (например, по причине
Техническое обслуживание G190300AUN-SA ОСТОРОЖНО • Перед выполнением операций по техническому обслуживанию или подзарядке аккумуляторной батареи, отключите все электрооборудование и выключите двигатель. • Кабель, идущий к отрицательной клемме аккумуляторной батареи, должен отключаться первым, а
Техническое обслуживание КОЛЕСА И ШИНЫ G200100AUN G200200AUN Уход за шинами Рекомендуемое давление воздуха в холодных шинах Для обеспечения надлежащего технического обслуживания, безопасности в эксплуатации и максимальной экономии топлива, рекомендуется постоянно поддерживать рекомендуемое давление
Техническое обслуживание ОСТОРОЖНО — Недостаточное давление в шинах Значительное понижение давления (на 70 кПа (10 фунтов/кв. дюйм) и более) может привести к резкому усилению нагрева, становясь причиной разрывов шин, отслоения протектора и других повреждений шин, вследствие чего может произойти
Техническое обслуживание ОСТОРОЖНО — Накачивание шин Повышенное и пониженное давление в шине снижает ее ресурс, негативно сказывается на управляемости автомобиля и может привести к повреждению шины. Это, в свою очередь, может привести к потере управления автомобилем и получению травм. ВНИМАНИЕ —
Техническое обслуживание Снимите колпачок со штока зарядного клапана шины. Для выполнения измерения давления плотно прижмите манометр к клапану. Если при холодных шинах давление соответствует рекомендуемой величине, указанной на шине и в табличке с данными о допустимой загрузке автомобиля,
Техническое обслуживание G200400AUN Перестановка колес Для выравнивания износа протектора рекомендуется переставлять колеса через каждые 12 000 км (7 500 миль) пробега или ранее, если происходит неравномерный износ. Проводя перестановку, проверьте правильность балансировки колес. При перестановке
Техническое обслуживание При перестановке колес необходимо проверить тормозные колодки на наличие износа. ✽ К СВЕДЕНИЮ В случае радиальных шин, имеющих ассиметричный рисунок протектора, возможна только перестановка передних колес назад. Перестановка колес с левой на правую сторону не допускается. 7
Техническое обслуживание ВНИМАНИЕ ОСТОРОЖНО — Замена Индикатор износа протектора Установка балансировочных грузиков, не соответствующих требованиям, может привести к повреждению алюминиевых дисков колес вашего автомобиля. Используйте только соответствующие требованиям балансировочные грузики.
Техническое обслуживание (Продолжение) • При замене шин запрещается одновременная установка на одном автомобиле шин с радиальным и диагональным расположением слоев корда. При переходе от шин с радиальным кордом к шинам с диагональным кордом необходимо заменить все шины (включая шину запасного
Техническое обслуживание G200700BUN G200800AUN-U1 G200900ASA Замена колес Сцепление шин с дорогой При замене колес, независимо от причины, по которой она выполняется, убедитесь, что новые колеса эквивалентны оригинальным заводским по диаметру, ширине обода и вылету колеса. Сцепление шины с дорогой
Техническое обслуживание G201001AUN 1 5,6 7 1. Производитель или торговая марка Указан производитель торговая марка. или 4 G201002AUN-C1 2 3 1 I030B04JM G201000AUN Маркировка на боковой поверхности шины В маркировке указаны основные характеристики шины, а также идентификационный номер шины (TIN),
Техническое обслуживание H — символ, обозначающий скоростную категорию шины. Для получения дополнительной информации смотри таблицу скоростных категорий, приведенную в данном разделе. Обозначение размера колеса На колеса также наносится маркировка, содержащая данные, необходимые при выполнении
Техническое обслуживание G201003APA 3. Проверка ресурса шины (TIN: идентификационный номер шины) Все шины со сроком более 6 лет, отсчитывая от даты изготовления, (включая запасную шину) должны быть заменены новыми. Дата изготовления шины указывается на ее боковой поверхности (в некоторых случаях, с
Техническое обслуживание G201005AUN G201007BUN 5. Максимальное допустимое давление воздуха в шинах Эта величина соответствует наибольшему давлению, которое может выдержать шина. Не превышайте максимальное допустимое давление в шине. Рекомендуемые значения давления в шине указываются в табличке
Техническое обслуживание Сцепление с дорогой — AA, A, B & C Существуют следующие категории качества по сцеплению с дорогой AA, A, B и C в порядке ухудшения характеристик. Категории представляют собой способность автомобиля тормозить на влажном асфальтовом или бетонном покрытии в ходе
Техническое обслуживание ПЛАВКИЕ ПРЕДОХРАНИТЕЛИ Предохранитель ножевого типа Исправный предохранитель Сгоревший предохранитель Предохранитель патронного типа Исправный предохранитель Сгоревший предохранитель Мультипредохранитель Исправный предохранитель Сгоревший предохранитель OBK079042
Техническое обслуживание ОСТОРОЖНО — Замена предохранителя • Для замены плавкого предохранителя всегда используйте предохранитель того же номинала. • Установка предохранителя с большим номинальным током может привести к повреждению и возникновению пожара. • Запрещается даже временно устанавливать
Техническое обслуживание ✽ К СВЕДЕНИЮ При отсутствии запасных предохранителей используйте предохранители с тем же номинальным током, установленные в цепях устройств, которые не являются обязательными для работы автомобиля, таких как прикуриватель. Если фары или другие электрические элементы не
Техническое обслуживание OAM079023 Только для автомобилей с дизельными двигателями 2. Нажмите на крышку панели плавких предохранителей и снимите ее. 3. Проверьте извлеченный предохранитель. Замените, если требуется. Чтобы извлечь или вставить плавкий предохранитель, используйте специальные щипцы,
Техническое обслуживание ✽ К СВЕДЕНИЮ Если главный плавкий предохранитель перегорел, обратитесь к авторизованному дилеру компании KIA. Внутренняя панель плавких предохранителей Панель плавких предохранителей в отсеке двигателя G210300AAM-EE Описание панели плавких предохранителей и реле Под крышкой
Техническое обслуживание Внутренняя панель плавких предохранителей P/WDW LH Номинальный ток предохранителя 25A P/WDW RH 25A FOLD’G HAZARD TAIL LH 10A 15A 10A TAIL RH 10A IGN 2 10A RR WIPER 15A S/HTD F/WPR 20A 25A AMP S/ROOF F/FOG T/GATE R/FOG 25A 20A 15A 15A 10A Описание 7 66 Защищаемый элемент
Техническое обслуживание Описание A/CON Номинальный ток предохранителя 10A H/LP ACC ACC SOCKET HTD MIRR 10A 10A 15A 10A DR LOCK STOP 20A 15A TCU 10A ABS IGN 1 10A 10A AUDIO POWER ROOM CONNECTOR 15A 10A RR P/OUTLET A/BAG IGN COIL T/SIG CLUSTER ECU 15A 15A 15A 10A 10A 10A START B/UP LP A/BAG IND 10A
Техническое обслуживание Панель плавких предохранителей в отсеке двигателя BATT 2 Номинальный ток предохранителя 50A BATT 1 50A C/FAN MAIN 30A 150A ABS 2 ABS 1 RR HTD BLW MDPS DSL IGN 2 ECU A F/FILTER HTR F/PUMP IGN 1 H/LP HI AH/LP LO HORN H/LP LO RH H/LP LO LH 40A 40A 40A 40A 80A 150A 40A 30A 30A
Техническое обслуживание ECU B Номинальный ток предохранителя 10A ECU 3 ECU 2 ECU 1 10A 10A 20A INJECTOR 15A SENSOR 10A A/CON 10A Описание Защищаемый элемент Дизель — TCM Бензин — ECM, PCM Дизель — Клапан регулировки давления топлива Дизель — Переключатель стоп-сигнала Дизель — ECM Бензин — ECM,
Техническое обслуживание ЛАМПЫ ОСВЕЩЕНИЯ G220000AUN ОСТОРОЖНО — Выполнение работ, связанных с лампами освещения Перед выполнением работ, связанных с осветительными приборами, поставьте автомобиль на стояночный тормоз, убедитесь, что ключ зажигания установлен в положение “LOCK” и выключите лампы во
Техническое обслуживание G270A03O OAM079029 G220100APB(UN-KM) G220101AAM Замена ламп в фарах, габаритных фонарях, указателях поворота и передних противотуманных фарах Лампа фары (1) (2) (3) (4) Фары (дальний свет/ближний свет) Габаритный фонарь Передний указатель поворота Передняя противотуманная
Техническое обслуживание 8. Установите новую лампу и защелкните фиксатор, совместив его с выемкой на лампе. 9. Подсоедините разъем патрона лампы фары. 10. Установите крышку лампы фары, повернув ее по часовой стрелке. 11. Подсоедините разъем питания в задней части фары. 12. Установите фару на кузов
Техническое обслуживание 4. Установите патрон в фару, совместив его фиксаторы с выемками фары. Нажмите на патрон и поверните его по часовой стрелке. OAM079050L G220102AAM Лампа указателя поворота, габаритный фонарь 1. Извлеките патрон из фары, повернув его против часовой стрелки так, чтобы
Техническое обслуживание 5. Вставьте новую лампу в гнездо. 6. Повторно соберите гнездо с рассеивателем. 7. Подключите электрический разъём лампы. 8. Установите узел лампы обратно на кузов автомобиля. OAM079030 OAM079031L G220200AUN G220300AAM-EE Замена лампы бокового повторителя указателя поворота
Техническое обслуживание OAM079033 OAM079032 1. Откройте дверь багажного отделения. 2. Ослабьте стопорные винты узла фонаря при помощи отвертки с крестовым наконечником. 3. Демонтируйте узел заднего комбинированного фонаря с корпуса автомобиля. 5. Извлеките лампу из гнезда, нажав на нее и вращая
Техническое обслуживание Задняя противотуманная фара 1. Выкрутите винт и снимите блокфару с автомобиля. 2. Отсоедините электрический разъем лампы. 3. Извлеките патрон лампы из блока, повернув его против часовой стрелки таким образом, чтобы язычки патрона совместились с пазами в блоке. 4. Извлеките
Техническое обслуживание Индивидуальная лампа (при наличии) ОСТОРОЖНО Перед выполнением работ, связанных с лампами освещения салона, убедитесь, что нажата клавиша “OFF” (выключить), во избежание ожога пальцев рук или получения удара электрическим током. OAM079037 OFD067030 Лампа освещения салона
Техническое обслуживание УХОД ЗА ВНЕШНИМ ВИДОМ АВТОМОБИЛЯ Внешний уход G230101AUN Общие меры предосторожности при осуществлении внешнего ухода При использовании химических моющих средств или полиролей очень важно следовать указаниям, приведенным в табличках. Внимательно читайте все предостерегающие
Техническое обслуживание OJB037800 ВНИМАНИЕ • Мойка отсека двигателя водой, в т. ч. водой под напором, может привести к отказу электрических цепей, расположенных в отсеке двигателя. • Ни при каких обстоятельствах не допускайте попадания воды или других жидкостей на электричecкиe/электронные
Техническое обслуживание ✽ К СВЕДЕНИЮ Если ваш автомобиль поврежден или требует любого ремонта или замены каких-либо металлических деталей, убедитесь, что в автомастерской проводят антикоррозионную обработку заменяемых и ремонтируемых деталей. G230104AUN Уход за полированными металлическими
Техническое обслуживание G230106AUN G230107ASA-U1 Уход за алюминиевыми колесными дисками Алюминиевые диски имеют защитное покрытие. • Не используйте абразивные моющие средства, полировальные составы, сольвенты или проволочные щетки для очистки алюминиевых колесных дисков. Это может привести к
Техническое обслуживание Влага — источник коррозии Влага создает те условия, в которых возникновение коррозии наиболее вероятно. Например, коррозионные процессы ускоряются при высокой влажности, особенно когда температура окружающего воздуха находится немного выше ноля. При таких условиях
Техническое обслуживание Обеспечьте отсутствие влаги в гараже Нельзя парковать автомобиль в сыром, плохо проветриваемом гараже. Это создает подходящие условия для коррозии. Особенно это относится к тем случаям, когда вы моете автомобиль внутри гаража или заезжаете в гараж на мокром, покрытом
Техническое обслуживание G230202AUN Чистка обшивки и элементов внутренней отделки Винил Удалите пыль и слабые загрязнения с поверхности виниловых элементов, используя метелку или пылесос. Очистите их поверхности при помощи специального очистителя для виниловых элементов. Ткань Удалите пыль и слабые
Техническое обслуживание СИСТЕМА СНИЖЕНИЯ ТОКСИЧНОСТИ ВЫБРОСОВ G270000AUN На систему снижения токсичности выбросов вашего автомобиля распространяется действие ограниченной гарантии. Подробная информация о гарантийных обязательствах приведена в буклете «Гарантийное и техническое обслуживание»,
Техническое обслуживание G270200AUN-C1 G270202AUN-U1 G270300AUN 2. Система снижения токсичности выбросов из топливного бака Электромагнитный клапан управления продувкой накопителя топливных паров (PCSV) Электромагнитный клапан управления продувкой накопителя топливных паров управляется блоком ЕСМ;
Техническое обслуживание G270302AUN Меры предосторожности, касающиеся выхлопных газов двигателя (угарный газ) • Угарный газ может присутствовать среди прочих выхлопных газов. Таким образом, при появлении любого запаха выхлопных газов внутри вашего автомобиля, необходимо, чтобы автомобиль был
Техническое обслуживание • Прекращайте эксплуатацию автомобиля при наличии признаков неисправности двигателя, таких как пропуск зажигания, или при заметном снижении характеристик автомобиля. • Запрещается эксплуатировать двигатель с нарушением установленных режимов. Примерами таких нарушений могут
Габаритные размеры / 8-2 Мощность ламп освещения / 8-2 Шины и кoлeca / 8-3 Рекомендуемые смазочные материалы и информация об объемах / 8-4 Cерийный номер автомобиля (VIN) / 8-7 Eртификационная табличка автомобиля / 8-7 Табличка технических характеристик/ значений давления в шинах / 8-8 Серийный
Технические характеристики & Информация для потребителя МОЩНОСТЬ ЛАМП ОСВЕЩЕНИЯ ГАБАРИТНЫЕ РАЗМЕРЫ I010000BUN-EE-C1 I030000AKM-ED Параметр мм (дюйм) Тип лампы Мощност Общая длина 4105 (161,6) Общая ширина 1785 (70,3) Общая высота*1 1610 (63,4) / 1660 (65,4)*2 Фары (ближний свет/дальний свет)
Технические характеристики & Информация для потребителя ШИНЫ И КOЛECA I020000AUN-EE-AM Давление в шине, бар Наимено вание Размер шины Размер колеса (фунт на кв. дюйм, кПа) Номинальная нагрузка *1 Максимальная нагрузка Передняя Задняя Передняя Задняя Полноразмерная шина Компактная запасная шина (при
Технические характеристики & Информация для потребителя РЕКОМЕНДУЕМЫЕ СМАЗОЧНЫЕ МАТЕРИАЛЫ И ИНФОРМАЦИЯ ОБ ОБЪЕМАХ I040000AUN-EE-C1 Для достижения оптимального режима работы двигателя и трансмиссии, а также увеличения их сроков службы используйте только качественные смазочные материалы. Качественные
Технические характеристики & Информация для потребителя I040100AUN-C1 Рекомендуемые значения коэффициента вязкости по классификации SAE ВНИМАНИЕ Обязательно убедитесь в чистоте пространства вокруг крышки любой заливной горловины, сливного отверстия и масляного щупа перед проверкой уровня масла или
Технические характеристики & Информация для потребителя Диапазон температур для рекомендуемых значений коэффициента вязкости по классификации SAE. Температура °C -30 -20 -10 0 10 20 30 40 (°F) -10 0 20 40 60 80 100 50 120 20W-50 Масло для бензинового двигателя 1* Масло для дизельного двигателя
Технические характеристики & Информация для потребителя СЕРИЙНЫЙ НОМЕР АВТОМОБИЛЯ (VIN) Tип A ЕРТИФИКАЦИОННАЯ ТАБЛИЧКА АВТОМОБИЛЯ (ПРИ НАЛИЧИИ) Tип B (при наличии) Tип A OVQ076002N OUN088001 H010000AAM H010010AAM Серийный номер автомобиля — это номер, который используется при регистрации вашего
Технические характеристики & Информация для потребителя ТАБЛИЧКА ТЕХНИЧЕСКИХ ХАРАКТЕРИСТИК/ЗНАЧЕНИЙ ДАВЛЕНИЯ В ШИНАX СЕРИЙНЫЙ НОМЕР ДВИГАТЕЛЧ ■ 1,6 Бензиновый двигатель ■ Дизельный двигатель OAM089003 ■ 2,0 Бензиновый двигатель OUN086005 H030000AUN Установленные на вашем автомобиле шины выбраны для
Предметный указатель I
Предметный указатель A Автоматическая коробка передач ……………………….5-12 Аккумуляторная батарея ……………………………………7-43 Аудиосистема ……………………………………………………….4-95 Б Буксировка
Предметный указатель Л Лампы освещения………………………………………………..7-70 Люк ……………………………………………………………………..4-26 М Мощность ламп освещения ………………………………….8-2 Масса автомобиля
Предметный указатель T Табличка технических характеристик/значений давления в шинах ………………………………………………8-8 Техническое обслуживание, выполняемое владельцем автомобиля ……………………………………..7-7 Топливный