In this section we are going to hopefully cover everything you ever wanted to
know about the RPM Packaging format, and if not then hopefully the contents of
the Appendix will satisfy the craving for knowledge that has
been left out of this section.
What is an RPM?
To kick things off, let’s first define what an RPM actually is. An RPM package
is simply a file that contains some files as well as information the system
needs to know about those files. More specifically, it is a file containing a
cpio archive and metadata about itself. The cpio archive is the payload
and the RPM Header contains the metadata. The package manager rpm uses this
metadata to determine things like dependencies, where to install files, etc.
Conventionally speaking there are two different types of RPM, there is the
Source RPM (SRPM) and the binary RPM. Both of these share a file format and
tooling, but they represent very different things. The payload of a SRPM is a
SPEC file (which describes how to build a binary RPM) and the actual source
code that the resulting binary RPM will be built out of (including any patches
that may be needed).
RPM Packaging Workspace
In the Prerequisites section we installed a package named
rpmdevtools which provides a number of handy utilities for RPM Packagers.
Feel free to explore the output of the following command and check out the
various utilities manual pages or help dialogs.
$ rpm -ql rpmdevtools | grep bin
For the sake of setting up our RPM Packaging workspace let’s use the
rpmdev-setuptree utility to create our directory layout. We will then define
what each directory in the directory structure is meant for.
$ rpmdev-setuptree

$ tree ~/rpmbuild/
/home/maxamillion/rpmbuild/
|-- BUILD
|-- RPMS
|-- SOURCES
|-- SPECS
`-- SRPMS

5 directories, 0 files
| Directory | Purpose |
|---|---|
| BUILD | Various %buildroot directories will be created here whenpackages are built. This is useful for inspecting a postmortem of a build that goes bad if the logs output don’t provide enough information. |
| RPMS | Binary RPMs will land here in subdirectories of Architecture. For example: noarch and x86_64 |
| SOURCES | Compressed source archives and any patches should go here, this is where the rpmbuild command will look for them. |
| SPECS | SPEC files live here. |
| SRPMS | When the correct arguments are passed to rpmbuild tobuild a Source RPM instead of a Binary RPM, the Source RPMs (SRPMS) will land in this directory. |
What is a SPEC File?
A SPEC file can be thought of the as the recipe that the rpmbuild
utility uses to actually build an RPM. It tells the build system what to do by
defining instructions in a series of sections. The sections are defined between
the Preamble and the Body. Within the Preamble we will define a series of
metadata items that will be used through out the Body and the Body is where
the bulk of the work is accomplished.
Preamble Items
In the table below you will find the items that are used in RPM Spec files in
the Preamble section.
| SPEC Directive | Definition |
|---|---|
Name |
The (base) name of the package, which should match the SPEC file name |
Version |
The upstream version number of the software. |
Release |
The initial value should normally be 1%{?dist}, this value should be incremented each new release of the package and reset to 1 when a new Version of the software is built. |
Summary |
A brief, one-line summary of the package. |
License |
The license of the software being packaged. For packages that are destined for community distributions such as Fedora this must be an Open Source License abiding by the specific distribution’s Licensing Guidelines. |
URL |
The full URL for more information about the program (most often this is the upstream project website for the software being packaged). |
Source0 |
Path or URL to the compressed archive of the upstream source code (unpatched, patches are handled elsewhere). This is ideally a listing of the upstream URL resting place and not just a local copy of the source. If needed, more SourceX directives can be added, incrementing the number each time such as: Source1, Source2, Source3, and so on. |
Patch0 |
The name of the first patch to apply to the source code if necessary. If needed, more PatchX directives can be added, incrementing the number each time such as: Patch1, Patch2, Patch3, and so on. |
BuildArch |
If the package is not architecture dependent, i.e. written entirely in an interpreted programming language, this should be BuildArch: noarch otherwise it will automaticallyinherit the Architecture of the machine it’s being built on. |
BuildRequires |
A comma or whitespace separated list of packages required for building (compiling) the program. There can be multiple entries of BuildRequires each on its own line in the SPEC file. |
Requires |
A comma or whitespace separated list of packages required by the software to run once installed. There can be multiple entries of Requires each on itsown line in the SPEC file. |
ExcludeArch |
In the event a piece of software can not operate on a specific processor architecture, you can exclude it here. |
There are three “special” directives listed above which are Name,
Version, and Release which are used to create the RPM package’s
filename. You will often see these referred to by other RPM Package Maintainers
and Systems Administrators as N-V-R or just simply NVR as RPM package
filenames are of NAME-VERSION-RELEASE format.
For example, if we were to query about a specific package:
$ rpm -q python
python-2.7.5-34.el7.x86_64
Here python is our Package Name, 2.7.5 is our Version, and 34.el7 is
our Release. The final marker is x86_64 and is our architecture, which is
not something we control as a RPM Packager (with the exception of noarch,
more on that later) but is a side effect of the rpmbuild build environment,
something we will cover in more detail later.
Body Items
In the table below you will find the items that are used in RPM Spec files in
the body.
| SPEC Directive | Definition |
|---|---|
%description |
A full description of the software packaged in the RPM, this can consume multiple lines and be broken into paragraphs. |
%prep |
Command or series of commands to prepare the software to be built. Example is to uncompress the archive in Source0. This can contain shell script. |
%build |
Command or series of commands used to actually perform the build procedure (compile) of the software. |
%install |
Command or series of commands used to actually install the various artifacts into a resulting location in the FHS. Something to note is that this is done within the relative context of the %buildroot (more on that later). |
%check |
Command or series of commands to “test” the software. This is normally things such as unit tests. |
%files |
The list of files that will be installed in their final resting place in the context of the target system. |
%changelog |
A record of changes that have happened to the package between different Version or Release builds. |
Advanced items
There are a series of advanced items including what are known as scriptlets
and triggers which take effect at different points through out the
installation process on the target machine (not the build process). These are
out of the scope of this document, but there is plenty of information on them in
the Appendix.
BuildRoots
The term “buildroot” is unfortunately ambiguous and you will often get various
different definitions. However in the world of RPM Packages this is literally
a chroot environment such that you are creating a filesystem hierarchy in
a new “fake” root directory much in the way these contents can be laid down upon
an actual system’s filesystem and not violate its integrity. Imagine this much
in the same way that you would imagine creating the contents for a tarball
such that it would be expanded at the root (/) directory of an existing system
as this is effectively what RPM will do at a certain point during an
installation transaction. Ultimately the payload of the resulting Binary RPM is
extracted from this environment and put into the cpio archive.
RPM Macros
A rpm macro is a straight text substitution that can be conditionally assigned
based on the optional evaluation of a statement when certain built-in
functionality is used. What this means is that we can have RPM perform text
substitutions for us so that we don’t have to.
An example of how this can be extremely useful for a RPM Packager is if we
wanted to reference the Version of the software we are packaging multiple
times through out our SPEC file but only want to define it one time. We would
then use the %{version} macro and it would be substituted in place by
whatever the actual version number is that was entered in the Version field of
the SPEC.
Note
One handy utility of the rpm command for packagers is the --eval
flag which allows you to ask rpm to evaluate a macro. If you see a macro in
a SPEC file that you’re not familiar with, you can quickly evaluate the
expression.
$ rpm --eval %{_bindir}
/usr/bin

$ rpm --eval %{_libexecdir}
/usr/libexec
A common macro we will encounter as a packager is %{?dist} which signifies
the “distribution tag” allowing for a short textual representation of the
distribution used for the build to be injected into a text field.
For example:
# On a RHEL 7.x machine
$ rpm --eval %{?dist}
.el7

# On a Fedora 23 machine
$ rpm --eval %{?dist}
.fc23
For more information, please reference the More on Macros
section of the Appendix.
Working with SPEC files
As a RPM Packager, you will likely spend a large majority of your time, when
packaging software, editing the SPEC file. The spec file is the recipe we use to tell
rpmbuild how to actually perform a build. In this section we will discuss
how to create and modify a spec file.
When it comes time to package new software, a new SPEC file must be created.
We could write one from scratch from memory but that sounds boring
and tedious, so let’s not do that. The good news is that we’re in luck and
there’s an utility called rpmdev-newspec. This utility will create a new spec file for us. We
will just fill in the various directives or add new fields as needed. This
provides us with a nice baseline template.
If you have not already done so by way of another section of the guide, go ahead
and download the example programs now and place them in your
~/rpmbuild/SOURCES directory.
-
bello-0.1.tar.gz
-
pello-0.1.1.tar.gz
-
cello-1.0.tar.gz
- cello-output-first-patch.patch
Let’s go ahead and create a SPEC file for each of our three implementations of
our example and then we will look at the SPEC files and the
Note
Some programmer focused text editors will pre-populate a new file with the
extension .spec with a SPEC template of their own but rpmdev-newspec
is an editor-agnostic method which is why it is chosen here.
$ cd ~/rpmbuild/SPECS

$ rpmdev-newspec bello
bello.spec created; type minimal, rpm version >= 4.11.

$ rpmdev-newspec cello
cello.spec created; type minimal, rpm version >= 4.11.

$ rpmdev-newspec pello
pello.spec created; type minimal, rpm version >= 4.11.
You will now find three SPEC files in your ~/rpmbuild/SPECS/ directory all
matching the names you passed to rpmdev-newspec but with the .spec file
extension. Take a moment to look at the files using your favorite text editor,
the directives should look familiar from the
What is a SPEC File? section. We will discuss the
exact information we will input into these fields in the following sections that
will focus specifically on each example.
Note
The rpmdev-newspec utility does not use Linux Distribution specific
guidelines or conventions, however this document is targeted towards using
conventions and guidelines for Fedora, CentOS, and RHEL so you will
notice:
We remove the use of rm $RPM_BUILD_ROOT as it is no longer necessary to
perform that task when building on RHEL or CentOS 7.0 or newer or on
Fedora version 18 or newer.
We also will favor the use of %{buildroot} notation over
$RPM_BUILD_ROOT when referencing RPM’s Buildroot for consistency with
all other defined or provided macros through out the SPEC
There are three examples below, each one is meant to be self-sufficient in
instruction such that you can jump to a specific one if it matches your needs
for packaging. However, feel free to read them straight through for a full
exploration of packaging different kinds of software.
| Software Name | Explanation of example |
|---|---|
| bello | Software written in a raw interpreted programming language does doesn’t require a build but only needs files installed. If a pre-compiled binary needs to be packaged, this method could also be used since the binary would also just be a file. |
| pello | Software written in a byte-compiled interpreted programming language used to demonstrate the installation of a byte compile process and the installation of the resulting pre-optimized files. |
| cello | Software written in a natively compiled programming language to demonstrate an common build and installation process using tooling for compiling native code. |
bello
Our first SPEC file will be for our example written in bash shell script that
you downloaded (or you created a simulated upstream release in the General
Topics and Background Section) and placed its source code
into ~/rpmbuild/SOURCES/ earlier. Let’s go ahead and open the file
~/rpmbuild/SPECS/bello.spec and start filling in some fields.
The following is the output template we were given from rpmdev-newspec.
Name:           bello
Version:
Release:        1%{?dist}
Summary:

License:
URL:
Source0:

BuildRequires:
Requires:

%description


%prep
%setup -q


%build
%configure
make %{?_smp_mflags}


%install
rm -rf $RPM_BUILD_ROOT
%make_install


%files
%doc


%changelog
* Tue May 31 2016 Adam Miller <maxamillion@fedoraproject.org>
-
Let us begin with the first set of directives that rpmdev-newspec has
grouped together at the top of the file: Name, Version, Release,
Summary. The Name is already specified because we provided that
information to the command line for rpmdev-newspec.
Let’s set the Version to match what the “upstream” release version of the
bello source code is, which we can observe is 0.1 as set by the example
code we downloaded (or we created in the General Topics and Background Section).
The Release is already set to 1%{?dist} for us, the numerical value
which is initially 1 should be incremented every time the package is updated
for any reason, such as including a new patch to fix an issue, but doesn’t have
a new upstream release Version. When a new upstream release happens (for
example, bello version 0.2 were released) then the Release number should
be reset to 1. The disttag of %{?dist} should look familiar from the
previous section’s coverage of RPM Macros.
The Summary should be a short, one-line explanation of what this software
is.
After your edits, the first section of the SPEC file should resemble the
following:
Name:           bello
Version:        0.1
Release:        1%{?dist}
Summary:        Hello World example implemented in bash script
Now, let’s move on to the second set of directives that rpmdev-newspec has
grouped together in our SPEC file: License, URL, Source0.
The License field is the Software License associated with the source code
from the upstream release. The exact format for how to label the License in your
SPEC file will vary depending on which specific RPM based Linux distribution
guidelines you are following, we will use the notation standards in the Fedora
License Guidelines for this document and as such this field will contain the
text GPLv3+
The URL field is the upstream software’s website, not the source code
download link but the actual project, product, or company website where someone
would find more information about this particular piece of software. Since we’re
just using an example, we will call this https://example.com/bello. However,
we will use the rpm macro variable of %{name} in its place for consistency
and the resulting entry will be https://example.com/%{name}.
The Source0 field is where the upstream software’s source code should be
able to be downloaded from. This URL should link directly to the specific
version of the source code release that this RPM Package is packaging. Once
again, since this is an example we will use an example value:
https://example.com/bello/releases/bello-0.1.tar.gz and while we might want
to, we should note that this example URL has hard coded values in it that are
possible to change in the future and are potentially even likely to change such
as the release version 0.1. We can simplify this by only needing to update
one field in the SPEC file and allowing it to be reused. we will use the value
https://example.com/%{name}/releases/%{name}-%{version}.tar.gz instead of
the hard coded examples string previously listed.
After your edits, the top portion of your spec file should look like the
following:
Name:           bello
Version:        0.1
Release:        1%{?dist}
Summary:        Hello World example implemented in bash script

License:        GPLv3+
URL:            https://example.com/%{name}
Source0:        https://example.com/%{name}/release/%{name}-%{version}.tar.gz
Next up we have BuildRequires and Requires, each of which define
something that is required by the package. However, BuildRequires is to tell
rpmbuild what is needed by your package at build time and Requires
is what is needed by your package at run time. In this example there is no
build because the bash script is a raw interpreted programming language
so we will only be installing files into locations on the system, but it does
require the bash shell environment in order to execute so we will need to
define bash as a requirement using the Requires directive.
Since we don’t have a build step, we can simply omit the BuildRequires
directive. There is no need to define is as “undefined” or otherwise, omitting
its inclusion will suffice.
Something we need to add here since this is software written in an interpreted
programming language with no natively compiled extensions is a BuildArch
entry that is set to noarch in order to tell RPM that this package does not
need to be bound to the processor architecture that it is built using.
After your edits, the top portion of your spec file should look like the
following:
Name:           bello
Version:        0.1
Release:        1%{?dist}
Summary:        Hello World example implemented in bash script

License:        GPLv3+
URL:            https://example.com/%{name}
Source0:        https://example.com/%{name}/release/%{name}-%{version}.tar.gz

Requires:       bash

BuildArch:      noarch
The following directives can be thought of as “section headings” because they
are directives that can define multi-line, multi-instruction, or scripted tasks
to occur. We will walk through them one by one just as we did with the previous
items.
The %description should be a longer, more full length description of the
software being packaged than what is found in the Summary directive. For the
sake of our example, this isn’t really going to contain much content but this
section can be a full paragraph or more than one paragraph if desired.
The %prep section is where we prepare our build environment or workspace
for building. Most often what happens here is the expansion of compressed
archives of the source code, application of patches, and potentially parsing of
information provided in the source code that is necessary in a later portion of
the SPEC. In this section we will simply use the provided macro %setup -q.
The %build section is where we tell the system how to actually build the
software we are packaging. However, since this software doesn’t need to be built
we can simply leave this section blank (removing what was provided by the
template).
The %install section is where we instruct rpmbuild how to install our
previously built software (in the event of a build process) into the
BUILDROOT which is effectively a chroot base directory with nothing in it
and we will have to construct any paths or directory hierarchies that we will
need in order to install our software here in their specific locations. However,
our RPM Macros help us accomplish this task without having to hardcode paths.
Since the only thing we need to do in order to install bello into this
environment is create the destination directory for the executable bash
script file and then install the file into that directory, we can do so by using
the same install command but we will make a slight modification since we are
inside the SPEC file and we will use the macro variable of %{name} in its
place for consistency.
The %install section should look like the following after your edits:
%install

mkdir -p %{buildroot}/%{_bindir}

install -m 0755 %{name} %{buildroot}/%{_bindir}/%{name}
The %files section is where we provide the list of files that this RPM
provides and where it’s intended for them to live on the system that the RPM is
installed upon. Note here that this isn’t relative to the %{buildroot} but
the full path for the files as they are expected to exist on the end system
after installation. Therefore, the listing for the bello file we are
installing will be %{_bindir}/%{name} (this would be /usr/bin/bello if
we weren’t using the rpm macros).
Also within this section, you will sometimes need a built-in macro to provide
context on a file. This can be useful for Systems Administrators and end users
who might want to query the system with rpm about the resulting package.
The built-in macro we will use here is %license which will tell rpmbuild
that this is a software license file in the package file manifest metadata.
The %files section should look like the following after your edits:
%files
%license LICENSE
%{_bindir}/%{name}
The last section, %changelog is a list of date-stamped entries that
correlate to a specific Version-Release of the package. This is not meant to be
a log of what changed in the software from release to release, but specifically
to packaging changes. For example, if software in a package needed patching or
there was a change needed in the build procedure listed in the %build
section that information would go here. Each change entry can contain multiple
items and each item should start on a new line and begin with a - character.
Below is our example entry:
%changelog
* Tue May 31 2016 Adam Miller <maxamillion@fedoraproject.org> - 0.1-1
- First bello package
- Example second item in the changelog for version-release 0.1-1
Note the format above, the date-stamp will begin with a * character,
followed by the calendar day of the week, the month, the day of the month, the
year, then the contact information for the RPM Packager. From there we have
a - character before the Version-Release, which is an often used convention
but not a requirement. Then finally the Version-Release.
That’s it! We’ve written an entire SPEC file for bello! In the next section
we will cover how to build the RPM!
The full SPEC file should now look like the following:
Name:           bello
Version:        0.1
Release:        1%{?dist}
Summary:        Hello World example implemented in bash script

License:        GPLv3+
URL:            https://www.example.com/%{name}
Source0:        https://www.example.com/%{name}/releases/%{name}-%{version}.tar.gz

Requires:       bash

BuildArch:      noarch

%description
The long-tail description for our Hello World Example implemented in
bash script

%prep
%setup -q

%build

%install

mkdir -p %{buildroot}/%{_bindir}

install -m 0755 %{name} %{buildroot}/%{_bindir}/%{name}

%files
%license LICENSE
%{_bindir}/%{name}

%changelog
* Tue May 31 2016 Adam Miller <maxamillion@fedoraproject.org> - 0.1-1
- First bello package
- Example second item in the changelog for version-release 0.1-1
pello
Our second SPEC file will be for our example written in the Python
programming language that you downloaded (or you created a simulated upstream
release in the General Topics and Background
Section) and placed its source code into ~/rpmbuild/SOURCES/
earlier. Let’s go ahead and open the file ~/rpmbuild/SPECS/bello.spec
and start filling in some fields.
Before we start down this path, we need to address something somewhat unique
about byte-compiled interpreted software. Since we we will be byte-compiling
this program, the shebang is no longer applicable because the resulting file
will not contain the entry. It is common practice to either have a
non-byte-compiled shell script that will call the executable or have a small
bit of the Python code that isn’t byte-compiled as the “entry point” into
the program’s execution. This might seem silly for our small example but for
large software projects with many thousands of lines of code, the performance
increase of pre-byte-compiled code is sizeable.
Note
The creation of a script to call the byte-compiled code or having
a non-byte-compiled entry point into the software is something that upstream
software developers most often address before doing a release of their
software to the world, however this is not always the case and this exercise
is meant to help address what to do in those situations. For more
information on how Python code is normally released and distributed
please reference the Software Packaging and Distribution documentation.
We will make a small shell script to call our byte compiled code to be the entry
point into our software. We will do this as a part of our SPEC file itself in
order to demonstrate how you can script actions inside the SPEC file. We will
cover the specifics of this in the %install section later.
Let’s go ahead and open the file ~/rpmbuild/SPECS/pello.spec and start
filling in some fields.
The following is the output template we were given from rpmdev-newspec.
Name:           pello
Version:
Release:        1%{?dist}
Summary:

License:
URL:
Source0:

BuildRequires:
Requires:

%description


%prep
%setup -q


%build
%configure
make %{?_smp_mflags}


%install
rm -rf $RPM_BUILD_ROOT
%make_install


%files
%doc


%changelog
* Tue May 31 2016 Adam Miller <maxamillion@fedoraproject.org>
-
Just as with the first example, let’s begin with the first set of directives
that rpmdev-newspec has grouped together at the top of the file:
Name, Version, Release, Summary. The Name is already
specified because we provided that information to the command line for
rpmdev-newspec.
Let’s set the Version to match what the “upstream” release version of the
pello source code is, which we can observe is 0.1.1 as set by the example
code we downloaded (or we created in the General Topics and Background Section).
The Release is already set to 1%{?dist} for us, the numerical value
which is initially 1 should be incremented every time the package is updated
for any reason, such as including a new patch to fix an issue, but doesn’t have
a new upstream release Version. When a new upstream release happens (for
example, pello version 0.1.2 were released) then the Release number
should be reset to 1. The disttag of %{?dist} should look familiar
from the previous section’s coverage of RPM Macros.
The Summary should be a short, one-line explanation of what this software
is.
After your edits, the first section of the SPEC file should resemble the
following:
Name:           pello
Version:        0.1.1
Release:        1%{?dist}
Summary:        Hello World example implemented in Python
Now, let’s move on to the second set of directives that rpmdev-newspec has
grouped together in our SPEC file: License, URL, Source0.
The License field is the Software License associated with the source code
from the upstream release. The exact format for how to label the License in your
SPEC file will vary depending on which specific RPM based Linux distribution
guidelines you are following, we will use the notation standards in the Fedora
License Guidelines for this document and as such this field will contain the
text GPLv3+
The URL field is the upstream software’s website, not the source code
download link but the actual project, product, or company website where someone
would find more information about this particular piece of software. Since we’re
just using an example, we will call this https://example.com/pello. However,
we will use the rpm macro variable of %{name} in its place for consistency.
The Source0 field is where the upstream software’s source code should be
able to be downloaded from. This URL should link directly to the specific
version of the source code release that this RPM Package is packaging. Once
again, since this is an example we will use an example value:
https://example.com/pello/releases/pello-0.1.1.tar.gz
We should note that this example URL has hard coded values in it that are
possible to change in the future and are potentially even likely to change such
as the release version 0.1.1. We can simplify this by only needing to update
one field in the SPEC file and allowing it to be reused. we will use the value
https://example.com/%{name}/releases/%{name}-%{version}.tar.gz instead of
the hard coded examples string previously listed.
After your edits, the top portion of your spec file should look like the
following:
Name:           pello
Version:        0.1.1
Release:        1%{?dist}
Summary:        Hello World example implemented in Python

License:        GPLv3+
URL:            https://example.com/%{name}
Source0:        https://example.com/%{name}/release/%{name}-%{version}.tar.gz
Next up we have BuildRequires and Requires, each of which define
something that is required by the package. However, BuildRequires is to tell
rpmbuild what is needed by your package at build time and Requires
is what is needed by your package at run time.
In this example we will need the python package in order to perform the
byte-compile build process. We will also need the python package in order to
execute the byte-compiled code at runtime and therefore need to define
python as a requirement using the Requires directive. We will also need
the bash package in order to execute the small entry-point script we will
use here.
Something we need to add here since this is software written in an interpreted
programming language with no natively compiled extensions is a BuildArch
entry that is set to noarch in order to tell RPM that this package does not
need to be bound to the processor architecture that it is built using.
After your edits, the top portion of your spec file should look like the
following:
Name:           pello
Version:        0.1
Release:        1%{?dist}
Summary:        Hello World example implemented in Python

License:        GPLv3+
URL:            https://example.com/%{name}
Source0:        https://example.com/%{name}/release/%{name}-%{version}.tar.gz

BuildRequires:  python
Requires:       python
Requires:       bash

BuildArch:      noarch
The following directives can be thought of as “section headings” because they
are directives that can define multi-line, multi-instruction, or scripted tasks
to occur. We will walk through them one by one just as we did with the previous
items.
The %description should be a longer, more full length description of the
software being packaged than what is found in the Summary directive. For the
sake of our example, this isn’t really going to contain much content but this
section can be a full paragraph or more than one paragraph if desired.
The %prep section is where we prepare our build environment or workspace
for building. Most often what happens here is the expansion of compressed
archives of the source code, application of patches, and potentially parsing of
information provided in the source code that is necessary in a later portion of
the SPEC. In this section we will simply use the provided macro %setup -q.
The %build section is where we tell the system how to actually build the
software we are packaging. Here we will perform a byte-compilation of our
software. For those who read the General Topics and Background Section, this portion of the example should look familiar.
The %build section of our SPEC file should look as follows.
%build

python -m compileall pello.py
The %install section is where we instruct rpmbuild how to install our
previously built software into the BUILDROOT which is effectively a
chroot base directory with nothing in it and we will have to construct any
paths or directory hierarchies that we will need in order to install our
software here in their specific locations. However, our RPM Macros help us
accomplish this task without having to hardcode paths.
We had previously discussed that since we will lose the context of a file with
the shebang line in it when we byte compile that we will need to create
a simple wrapper script in order to accomplish that task. There are many options
on how to accomplish this including, but not limited to, making a separate
script and using that as a separate SourceX directive and the option we’re
going to show in this example which is to create the file in-line in the SPEC
file. The reason for showing the example option that we are is simply to
demonstrate that the SPEC file itself is scriptable. What we’re going to do is
create a small “wrapper script” which will execute the Python byte-compiled
code by using a here document. We will also need to actually install the
byte-compiled file into a library directory on the system such that it can be
accessed.
Note
You will notice below that we are hard coding the library path. There are
various methods to avoid needing to do this, many of which are addressed in
the Appendix, under the More on Macros section, and are specific to the programming language in
which the software that is being packaged was written in. In this example we
hard code the path for simplicity as to not cover too many topics
simultaneously.
The %install section should look like the following after your edits:
%install

mkdir -p %{buildroot}/%{_bindir}
mkdir -p %{buildroot}/usr/lib/%{name}

cat > %{buildroot}/%{_bindir}/%{name} <<-EOF
#!/bin/bash
/usr/bin/python /usr/lib/%{name}/%{name}.pyc
EOF

chmod 0755 %{buildroot}/%{_bindir}/%{name}

install -m 0644 %{name}.py* %{buildroot}/usr/lib/%{name}/
The %files section is where we provide the list of files that this RPM
provides and where it’s intended for them to live on the system that the RPM is
installed upon. Note here that this isn’t relative to the %{buildroot} but
the full path for the files as they are expected to exist on the end system
after installation. Therefore, the listing for the pello file we are
installing will be %{_bindir}/pello. We will also need to provide a %dir
listing to define that this package “owns” the library directory we created as
well as all the files we placed in it.
Also within this section, you will sometimes need a built-in macro to provide
context on a file. This can be useful for Systems Administrators and end users
who might want to query the system with rpm about the resulting package.
The built-in macro we will use here is %license which will tell rpmbuild
that this is a software license file in the package file manifest metadata.
The %files section should look like the following after your edits:
%files
%license LICENSE
%dir /usr/lib/%{name}/
%{_bindir}/%{name}
/usr/lib/%{name}/%{name}.py*
The last section, %changelog is a list of date-stamped entries that
correlate to a specific Version-Release of the package. This is not meant to be
a log of what changed in the software from release to release, but specifically
to packaging changes. For example, if software in a package needed patching or
there was a change needed in the build procedure listed in the %build
section that information would go here. Each change entry can contain multiple
items and each item should start on a new line and begin with a - character.
Below is our example entry:
%changelog
* Tue May 31 2016 Adam Miller <maxamillion@fedoraproject.org> - 0.1-1
- First bello package
- Example second item in the changelog for version-release 0.1-1
Note the format above, the date-stamp will begin with a * character,
followed by the calendar day of the week, the month, the day of the month, the
year, then the contact information for the RPM Packager. From there we have
a - character before the Version-Release, which is an often used convention
but not a requirement. Then finally the Version-Release.
That’s it! We’ve written an entire SPEC file for pello! In the next section
we will cover how to build the RPM!
The full SPEC file should now look like the following:
Name:           pello
Version:        0.1.1
Release:        1%{?dist}
Summary:        Hello World example implemented in Python

License:        GPLv3+
URL:            https://www.example.com/%{name}
Source0:        https://www.example.com/%{name}/releases/%{name}-%{version}.tar.gz

BuildRequires:  python
Requires:       python
Requires:       bash

BuildArch:      noarch

%description
The long-tail description for our Hello World Example implemented in
Python

%prep
%setup -q

%build

python -m compileall %{name}.py

%install

mkdir -p %{buildroot}/%{_bindir}
mkdir -p %{buildroot}/usr/lib/%{name}

cat > %{buildroot}/%{_bindir}/%{name} <<-EOF
#!/bin/bash
/usr/bin/python /usr/lib/%{name}/%{name}.pyc
EOF

chmod 0755 %{buildroot}/%{_bindir}/%{name}

install -m 0644 %{name}.py* %{buildroot}/usr/lib/%{name}/

%files
%license LICENSE
%dir /usr/lib/%{name}/
%{_bindir}/%{name}
/usr/lib/%{name}/%{name}.py*


%changelog
* Tue May 31 2016 Adam Miller <maxamillion@fedoraproject.org> - 0.1.1-1
  - First pello package
cello
Our third SPEC file will be for our example written in the C programming
language that we created a simulated upstream release of previously (or you
downloaded) and placed its source code into ~/rpmbuild/SOURCES/ earlier.
Let’s go ahead and open the file ~/rpmbuild/SPECS/cello.spec and start
filling in some fields.
The following is the output template we were given from rpmdev-newspec.
Name:           cello
Version:
Release:        1%{?dist}
Summary:

License:
URL:
Source0:

BuildRequires:
Requires:

%description


%prep
%setup -q


%build
%configure
make %{?_smp_mflags}


%install
rm -rf $RPM_BUILD_ROOT
%make_install


%files
%doc


%changelog
* Tue May 31 2016 Adam Miller <maxamillion@fedoraproject.org>
-
Just as with the previous examples, let’s begin with the first set of directives
that rpmdev-newspec has grouped together at the top of the file:
Name, Version, Release, Summary. The Name is already
specified because we provided that information to the command line for
rpmdev-newspec.
Let’s set the Version to match what the “upstream” release version of the
cello source code is, which we can observe is 1.0 as set by the example
code we downloaded (or we created in the General Topics and Background Section).
The Release is already set to 1%{?dist} for us, the numerical value
which is initially 1 should be incremented every time the package is updated
for any reason, such as including a new patch to fix an issue, but doesn’t have
a new upstream release Version. When a new upstream release happens (for
example, cello version 2.0 were released) then the Release number should
be reset to 1. The disttag of %{?dist} should look familiar from the
previous section’s coverage of RPM Macros.
The Summary should be a short, one-line explanation of what this software
is.
After your edits, the first section of the SPEC file should resemble the
following:
Name:           cello
Version:        1.0
Release:        1%{?dist}
Summary:        Hello World example implemented in C
Now, let’s move on to the second set of directives that rpmdev-newspec has
grouped together in our SPEC file: License, URL, Source0. However,
we will add one to this grouping as it is closely related to the Source0 and
that is our Patch0 which will list the first patch we need against our
software.
The License field is the Software License associated with the source code
from the upstream release. The exact format for how to label the License in your
SPEC file will vary depending on which specific RPM based Linux distribution
guidelines you are following, we will use the notation standards in the Fedora
License Guidelines for this document and as such this field will contain the
text GPLv3+
The URL field is the upstream software’s website, not the source code
download link but the actual project, product, or company website where someone
would find more information about this particular piece of software. Since we’re
just using an example, we will call this https://example.com/cello. However,
we will use the rpm macro variable of %{name} in its place for consistency.
The Source0 field is where the upstream software’s source code should be
able to be downloaded from. This URL should link directly to the specific
version of the source code release that this RPM Package is packaging. Once
again, since this is an example we will use an example value:
https://example.com/cello/releases/cello-1.0.tar.gz
We should note that this example URL has hard coded values in it that are
possible to change in the future and are potentially even likely to change such
as the release version 1.0. We can simplify this by only needing to update
one field in the SPEC file and allowing it to be reused. we will use the value
https://example.com/%{name}/releases/%{name}-%{version}.tar.gz instead of
the hard coded examples string previously listed.
The next item is to provide a listing for the .patch file we created earlier
such that we can apply it to the code later in the %setup section. We will
need a listing of Patch0: cello-output-first-patch.patch.
After your edits, the top portion of your spec file should look like the
following:
Name:           cello
Version:        1.0
Release:        1%{?dist}
Summary:        Hello World example implemented in C

License:        GPLv3+
URL:            https://example.com/%{name}
Source0:        https://example.com/%{name}/release/%{name}-%{version}.tar.gz

Patch0:         cello-output-first-patch.patch
Next up we have BuildRequires and Requires, each of which define
something that is required by the package. However, BuildRequires is to tell
rpmbuild what is needed by your package at build time and Requires
is what is needed by your package at run time.
In this example we will need the gcc and make packages in order to
perform the compilation build process. Runtime requirements are fortunately
handled for us by rpmbuild because this program does not require anything
outside of the core C standard libraries and we therefore will not need to
define anything by hand as a Requires and can omit that directive.
After your edits, the top portion of your spec file should look like the
following:
Name:           cello
Version:        0.1
Release:        1%{?dist}
Summary:        Hello World example implemented in C

License:        GPLv3+
URL:            https://example.com/%{name}
Source0:        https://example.com/%{name}/release/%{name}-%{version}.tar.gz

BuildRequires:  gcc
BuildRequires:  make
The following directives can be thought of as “section headings” because they
are directives that can define multi-line, multi-instruction, or scripted tasks
to occur. We will walk through them one by one just as we did with the previous
items.
The %description should be a longer, more full length description of the
software being packaged than what is found in the Summary directive. For the
sake of our example, this isn’t really going to contain much content but this
section can be a full paragraph or more than one paragraph if desired.
The %prep section is where we prepare our build environment or workspace
for building. Most often what happens here is the expansion of compressed
archives of the source code, application of patches, and potentially parsing of
information provided in the source code that is necessary in a later portion of
the SPEC. In this section we will simply use the provided macro %setup -q.
The %build section is where we tell the system how to actually build the
software we are packaging. Since wrote a simple Makefile for our C
implementation, we can simply use the GNU make command provided by
rpmdev-newspec. However, we need to remove the call to %configure
because we did not provide a configure script. The %build section of our
SPEC file should look as follows.
%build
make %{?_smp_mflags}
The %install section is where we instruct rpmbuild how to install our
previously built software into the BUILDROOT which is effectively a
chroot base directory with nothing in it and we will have to construct any
paths or directory hierarchies that we will need in order to install our
software here in their specific locations. However, our RPM Macros help us
accomplish this task without having to hardcode paths.
Once again, since we have a simple Makefile the installation step can be
accomplished easily by leaving in place the %make_install macro that was
again provided for us by the rpmdev-newspec command.
The %install section should look like the following after your edits:
The %files section is where we provide the list of files that this RPM
provides and where it’s intended for them to live on the system that the RPM is
installed upon. Note here that this isn’t relative to the %{buildroot} but
the full path for the files as they are expected to exist on the end system
after installation. Therefore, the listing for the cello file we are
installing will be %{_bindir}/cello.
Also within this section, you will sometimes need a built-in macro to provide
context on a file. This can be useful for Systems Administrators and end users
who might want to query the system with rpm about the resulting package.
The built-in macro we will use here is %license which will tell rpmbuild
that this is a software license file in the package file manifest metadata.
The %files section should look like the following after your edits:
%files
%license LICENSE
%{_bindir}/%{name}
The last section, %changelog is a list of date-stamped entries that
correlate to a specific Version-Release of the package. This is not meant to be
a log of what changed in the software from release to release, but specifically
to packaging changes. For example, if software in a package needed patching or
there was a change needed in the build procedure listed in the %build
section that information would go here. Each change entry can contain multiple
items and each item should start on a new line and begin with a - character.
Below is our example entry:
%changelog
* Tue May 31 2016 Adam Miller <maxamillion@fedoraproject.org> - 0.1-1
- First cello package
Note the format above, the date-stamp will begin with a * character,
followed by the calendar day of the week, the month, the day of the month, the
year, then the contact information for the RPM Packager. From there we have
a - character before the Version-Release, which is an often used convention
but not a requirement. Then finally the Version-Release.
That’s it! We’ve written an entire SPEC file for cello! In the next section
we will cover how to build the RPM!
The full SPEC file should now look like the following:
Name:           cello
Version:        1.0
Release:        1%{?dist}
Summary:        Hello World example implemented in C

License:        GPLv3+
URL:            https://www.example.com/%{name}
Source0:        https://www.example.com/%{name}/releases/%{name}-%{version}.tar.gz

Patch0:         cello-output-first-patch.patch

BuildRequires:  gcc
BuildRequires:  make

%description
The long-tail description for our Hello World Example implemented in
C

%prep
%setup -q

%patch0

%build
make %{?_smp_mflags}

%install
%make_install


%files
%license LICENSE
%{_bindir}/%{name}


%changelog
* Tue May 31 2016 Adam Miller <maxamillion@fedoraproject.org> - 1.0-1
- First cello package
RPM Guide
Eric Foster-Johnson
Copyright � 2005 Eric Foster-Johnson
�� �����������:
������ ����� � ��� �������� �������� ������� Red Hat ��� ��������� Open Publication License. �������, ��� ��� �������� ������������� ����������� ��������������� �������� � ��������� ������� � ����������������. ���� ���, ���� ��������, �� ���, �������� ���, ����������, �� ���� ��
vlad_goreletsky(at)lexpr.ru
���, ��� ����������� ������� ��������� �����������, ������ ������������� ������������ RPM. ���, ��� ���� ���� � ������� ��� ������� rpm, ������������ rpm ��� src.rpm
��������� �� ���������� �����������. ��������� �� ����� �� �����������. ����� �� ��� ����� ������� ��� �����, ���� ����� ���.
� ������ �� ��������� � ������������� ��������� ����������. ����� ���� ������ ������ �� ��������� � ������. ��� �������� ���������, �� ����� �� ��� ��������. ������, ��� ������������� �������� � �������� ���� �������.
���� ����������
��������: http://www.lexpr.ru/node/11
������ ����������� Red Hat Package Manager
1.1 ������������� ������� ���������� ��������
1.2 ���� ���������� RPM
1.2.1 �������� �������������
1.2.2 �������������� �� ������� «�����»
1.2.3 ����������� ���������� �������
1.2.4 ����������� �����������
1.2.5 ����������� ��������
1.2.6 ����������� �������
1.2.7 ��������� ��������� ����������
1.2.8 «������» �������� ����
1.3 ������������ RPM
������ 2. ����� RPM
2.1.1 �������� � ��������� ����� ������
2.1.2 ������ ����� rpm
2.1.3 �������� rpm � rpm � �������� �����
2.2 ���� ������ RPM
2.3 ������� RPM
������ 3. ������������� RPM
3.1 ������� rpm
3.2 ��������� � ���������� �������
3.2.1 ����� ���������
3.2.2 ����� ����������
3.2.3 ���������� � ������ freshen
3.2.5 ��������� ����� ����
3.2.6 ��������� ������� � �������� �����
3.3 �������� �������
3.4 ������ ����� rpm
������ 4. ������������� ���� ������ RPM
4.1 ������� � �� RPM
4.1.1 ������� � �������
4.1.3 ��� �������� ��������������� �������
4.1.4 ������ ������ ����������� ����?
4.2 ��������� ���������� � �������
4.2.1 �������� ������
4.2.2 ������ �������
4.2.3 ������ ������ ������
4.2.4 ������ ���������������� ������ ������
4.2.5 ������ ������ ������������ ������
4.2.6 ������ ������� ������ ������
4.2.7 ������ ��������
4.2.8 ������ ���������
4.2.9 �������������� ��������
4.2.10 ���������������� �������
4.2.11 ������ �������
4.3 ��������� ���������� �� ����� rpm-������
4.4 ����������� ������������� �������
4.4.1 ����������� ������� � �����
4.4.2 ��������� ��������
4.5 ������ � �� RPM
4.5.1 �������� ��������� ����� �� RPM
4.5.2 ����������� �� RPM
4.5.3 �������� ����� �� RPM
������ 5. ����������� �������
5.1 �������� � ��������� ������������
5.1.1 �����������
5.1.2 ����������� ������
5.1.3 ���������
5.1.4 ������������ �����������
5.2.1 �������� ������������ ���� Requires
5.2.2 �������� ������������ ���� Provides
5.2.3 �������� �� ���������
5.2.4 ����� ����� ������� ������ �����������?
5.2.5 ����� ����� ������������� ������ �����������?
5.3 ��������
������ 6. ����������
6.1 �������� � ����������
6.1.1 ����� ���������� ����������
6.1.2 ������� ����������
6.2 ���������� � �������� rpm
6.2.1 �������������� ����������
6.2.2 ����� ����������
6.3 ���������� ������ �������
������ 7. ����������� ����������� ��� ���������� RPM
7.1 ���������� ������������ ����������� � ������� rpm-�������
7.1.1 rpmfind � rpm2html
7.2 �����, ����������� RPM, � ���������
7.3 ������� ������������ ����������� �������
7.3.1 Yum
7.3.2 ������������� ������� yum
7.3.3 ����������� ��������� �������� ���������� ��������
������ 8. �������� rpm-�������: �����
8.1 ���������� � ������ ������
8.1.1 ������������ — ��� ����� �������
8.1.2 ������������ ������������ �����������
8.1.3 ��������������� ������ ��
8.1.4 ������������ ����������
8.1.5 �������������� ������������
8.2 ������ rpm-������
8.2.1 �������������� ��������� ����������
8.2.2 ���������� ��������� ���� � ������ ������
8.2.3 �������� spec-�����
8.2.4 ������ ������ � ������� ������� rpmbuild
8.2.5 ����������� ��������� �������
������ 9. ������ �� spec-������
9.1 ������ spec-�����
9.2 �������� ��������� spec-����
9.3 ���������� � ������ � spec-�����
9.3.1 �������� ������
9.3.2 ��������� ���� ������
9.3.3 ����� ������ ������� � �������� �����
9.3.4 ����� ������
9.4 �������� ������
9.4.1 ���������� � ������
9.4.2 ������ ��
9.4.3 ����������� ��
9.4.4 ������� ����� ������
9.4.5 ����������� ������������ ��������
9.5 ���������� ������ ������
9.5.1 ������������� ��������
9.5.2 ����� ���������
9.5.3 ������� ������ ��� ������ ������������ ��� ����������������
9.5.4 ����������� ��������� ������
9.5.5 ����������� ������ %files
9.5.6 ������������������ �������� ������ ������
9.5.7 ��������� ������ ��� ������������� ������
9.6 ���������� ������� � ������ ���������
9.7 �������
9.7.1 ���������� �������
9.7.2 �������, ����������� ��� spec-�����
9.7.3 ����������� ������ �������
9.7.4 ��������� ��������
9.8 �������� spec-����� � XML �������
������ 10. ����������� ����������� RPM
10.1 ����������� ������
10.1.1 ����� ������������
10.1.2 ��������� ��������������� ����������
10.1.3 ����������� ������
10.1.4 ������������� �������� ������ ������������
10.2 ��������� ���������
10.3 ��������� ����������� ��������
10.4 �������� ����������
10.4.1 �������������� ���������� � ����������
10.4.2 ������� � ����������
10.4.3 ������ ����������
10.5 �������� ������� � ����������������� ������
10.5.1 ������� ��������
10.5.2 �������������� ������ files
10.5.3 �������� �������� ������� � ����������������� ������
10.6 �������� ������
10.6.1 �������� �������
10.6.2 �������� �����
10.6.3 ������������-��������� �������
������ 11. ��������������� ������ � ������� ������� rpmbuild
11.1.1 ��������� ������
11.1.2 ������������ ������
11.1.3 ������� ������
11.1.4 �������
11.1.5 ������ ��� ������ ��������
11.2 ������ rpm-������� ��� �������� spec-�����
11.2.1 ����� rpmbuild ��� ������ � tar-��������
11.2.2 ��������� ��������� ������
11.3 ������ � ��������, ����������� �������� ��� (src.rpm)
11.3.1 ���������� �������� ������� �� src.rpm
11.3.2 �������������� �������� ������� �� src.rpm
11.4 ������������ ��������� �������
11.4.1 �������� ��������� ������������ ����������� GPG
11.4.2 ���������������� �������
11.4.3 ������������ ������� � ������� ������� rpmbuild
11.4.4 ������������ � ������� ������� rpm
11.4.5 ����������� ��������
11.4.6 ������ ���������� �����
������ 12. ��������������� ����������� ����������� �������� �������
12.1.1 ������������� �������� vim ��� ���������� �������������� spec-������
12.1.2 ���������� ������� � ������� emacs-������� rpm-spec-mode
12.1.3 ������� spec-����� � ������� rpmlint
12.1.4 ������������� rpm2cpio ��� ���������� ������ �� �������� �������
������ 13. �������������� — ����������� ����� ������ ��� ������ «������� ����»
13.1 ����� � ������� — ��� �������� ���������� �������� ����� ������
13.1.1 �������������� ������������ ��������
13.1.2 ����������� rpmbuild
13.1.3 �� ��������� �������� �������
13.1.4 ��������� �������������� ��������� ������������
13.1.5 �� ��������� � ������ %files ��������
13.1.6 ���������� ����������� �����������
13.2 ����� �� �������� ����� ����������� ������������. �������� ������ ��������
13.2.1 ��������� ����: ���������� � ������
13.2.2 ��������� ����: ������
������ 14. ������������� �������� RPM � ������� ��������
14.1 ���������
14.2 ������������� ����� ���������� ������
14.3 ��� ����������, ����� ����� ���������, � ����� — ������?
14.4 ������ shell-����������
14.4.1 �������� �������
14.4.2 ������ �������
14.4.3 �������� ��� ������� �������
14.4.4 �������������� ������� � �������
14.4.5 �������� ���������� � ������
14.5 ����� � rpm-�������
14.6 ������� � �� RPM
14.6.1 ������ ������ �������, ������������� �������������
14.6.2 ������ html-������������ � ������
������ 15. ���������������� RPM �� C
15. ���������������� RPM �� C
15.1.1 ��������� ��������� ��� C-����������������
15.1.2 ��������� ��������� ���������������� RPM
15.1.3 ������������� ���������� RPM
15.1.4 ���������� � �������� RPM ��������
15.1.5 ��������� ���������� � RPM ���������
15.2 ���� popt
15.2.1 ���������� popt
15.2.2 ���������������� � popt
15.2.3 ��������� ������
15.2.4 ���������� ������
15.2.5 ��������� ����� ��������� ������ rpm
15.3 ������ � rpm-�������
15.3.1�������� rpm-�����
15.3.2 ������ ���������� �������������� rpm � ���������
15.3.3 ������ ������
15.3.4 �������� ���� � ���������� ������
15.3.5 �������� rpm-�����
15.4 ���������������� � �� RPM
15.4.1 ��������� ��
15.4.2 ��� �����������
15.5 ��������� rpm-����� � �������������� ������
������ 16. ���������������� RPM �� Python
16.1.1 ��������� ��������� ��� ���������������� �� Python
16.1.2 ������������� Python � ����������� �����������
16.2 �������� Python API
16.3 ���������������� � �� RPM
16.3.1 ������ � �� RPM
16.3.2 ������� � �� RPM
16.3.3 ������ � ������� ������
16.3.4 ������� � ���������� �������
16.3.5 ����� ���������� � �������
16.3.6 ��������� ��������
16.4 ������ ������ �������
16.4.1 ������ ������ �� ����� ������
16.4.2 ��������� ������ �����������
16.5 ��������� ������������
16.6 ��������� � ���������� �������
16.6.1 ���������� ���� ����������
16.6.2 �������� ����������
16.6.3 �������� � ��������������� ������� ��������� ����������
16.6.4 ������ ����������
������ 17. ���������������� RPM �� Perl
17. ���������������� RPM �� Perl
17.1 ��������� � ������������� RPM-������� Perl
17.2 ������ � rpm-�������
17.2.1 �������� rpm-�����
17.2.2 ��������� �������� ����� ������ �� ����� ������
17.2.3 ������� ������
17.2.4 ����� ����� � ������
17.2.5 ��������, �������� �� ���� ������ ������� � ��������� ������
17.3 ������ � �� RPM
17.3.1 �������� �� RPM
17.3.2 ����� �������
17.3.3 ����� ������ �������
17.3.4 �������������� ������� ������
17.3.5 ��������� ���������� � �������
17.3.6 ��������� ������
17.3.7 �������� ��
������ 18. ������������� RPM � ��-Red Hat ��������
18.1 � ��������� ��������� rpm-������� � ��-Red Hat ��������
18.1.1 ������ ������� RPM
18.1.2 ���������� �� �� �������
18.1.3 �����������
18.1.4 ���� ���������
18.1.5 ���� ������ �� ��������, �������� ����� �� ����������
18.2 ������� ������� ������ �������
18.2.1 �������� �������, ����������� ��� ����������� ������������
18.2.2 ������ � �������������� ���������� ������������
18.2.3 ������ � �������������� ���������
18.2.4 �������� ������� � ���������������� ������
18.2.5 ���������� ��������� ������ RPM
18.3 ������ � ��-rpmbased �������������� � ������� alien
18.4 �������������� RPM
������ 19. ������������� RPM � ������ ������������ ��������
19.1 ������ RPM �� ������ ������������ ��������
19.1.1 ��������� RPM ��� ������� �������
19.1.2 ������ RPM ��� Windows
19.2 �������������� RPM �� ������ ������������ ��������
19.2.1 ���������� ����
19.2.2 ���������� ��
19.2.3 ���������� � ����� INSTALL
19.2.4 ����������, ����������� RPM
19.2.5 ����������� ��� ������ RPM
19.2.6 ������ RPM
19.2.7 ������� �������
19.3 ��������� � ��������� ������� RPM
19.3.1 �������������� �� RPM
19.3.2 �������� ��������� RPM
19.4 �������� rpm-������� ��� ��-Linux ������
19.4.1 ��������� ��������� ������
19.4.2 �����-������ �������
������ 20. ��������� ��������� RPM
20.1 ��������� ��������� � ������� RPM-��������
20.1.1 ����������� ��������
20.1.2 ���������������� �������
20.2 ���������������� RPM
20.2.1 �������� ������� ���������
20.2.2 ������������ rpmrc-������
20.2.3 ��������� ���������
20.3 ���������� ����������� popt
20.3.1 ����������� �����������
20.3.2 ���������������� ����������
������ 21. ���������� �� �������� RPM
21.1.1 ������� rpm � ������ ��������
21.1.2 ������� rpm � ������� ��������� � ���������� (upgrade, freshen, install)
21.1.3 ������� rpm � ������ ��������
21.1.4 ������� rpm � ������ �������
21.1.5 ������� rpm � ������ �����������
21.1.6 ������� rpm � ������ ������ � �� RPM
21.1.7 ������ �����
21.2.1 ������� rpmbuild. ������ ����������� �������� spec-�����
21.2.2 ������� rpmbuild. ������ �� tar-������
21.2.3 ���������� ������� �� ������� � �������� �����
21.2.4 ��������� ���� ������
������ 22. ��������� spec-�����
22.1 ����, ���������� ���������� � ������
22.1.1 �����������
22.1.2 ��������� ������
22.1.3 ����, ���������� ���������� � ������������
22.1.4 ����� � �������� �����
22.2.1 ������� ����������� ����������
22.2.2 ������� �������
22.2.3 ���������� �������
22.3.1 ���������� � ������
22.3.2 ������
22.3.3 ���������
22.3.4 �������
22.3.5 ������� ������ ��������� � ��������
22.4 �����
22.4.1 �������� ������� � ���������������� ������
22.5 ������ ���������
������ 23. �������� ���������������� RPM
23 �������� ���������������� RPM
������ 24. ������ ����� rpm-������
24.1 ���� ������
24.1.1 ��������� �������������
24.1.2 �������
24.1.3 �����
24.1.3.1 ���� ������
24.1.3.2 ������� ���� ������
24.1.3.3 ���� �������
24.1.3.4 ���� ��� ������������ ����������
24.1.3.5 ���� ���������� � ������
24.1.3.6 ���� ������������
24.1.4 ��������
������ 25. �������, ����������� RPM
25.1.1 ���� rpm.org
25.1.2 ����� ��� ������ ������� rpm
25.1.3 �����, ����������� �������� RPM
��� �� ����������� � ���� ��������� ������� 26 — ��������� ��������� � ��������������� �������� ���������� � Linux, 27 — �������������� RPM (����� GPL)
����� ������, � ������� ����������� ������ ������
Introduction
RPM is a command-line utility for managing packages on Unix/Linux systems. It allows you to install, query, update, verify and remove RPM packages.
It is the default package manager for Red Hat based systems and only works with the .rpm format. You can install such packages using the rpm or the yum command.
In this article, you will learn how to use rpm commands with easy-to-follow examples.

Prerequisites
- A system running Linux.
- Access to the command line/terminal.
- Access to root or an account with sudo privileges.
Linux RPM Command Syntax
The basic syntax for the command is:
sudo rpm [option] [package_name]To see a full list of command options, run:
sudo rpm --help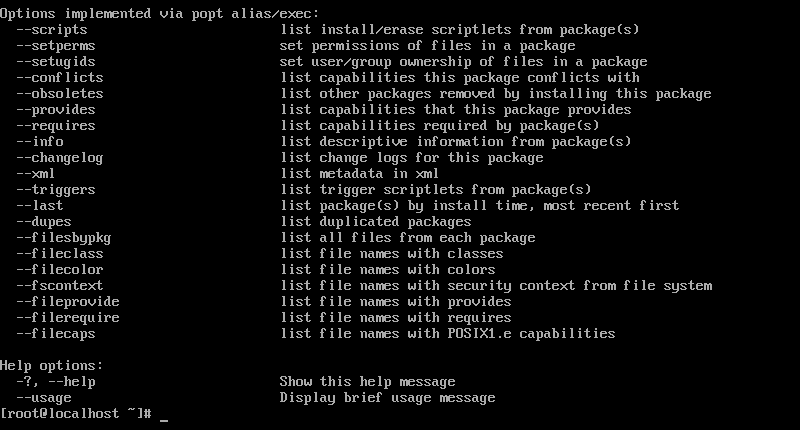
RPM Command Options
Below you will find the most popular command options used with the rpm command and their meaning.
-e, --erase |
Remove (uninstall) package(s). |
-h, --hash |
Print hash marks as the package installs. |
-i, --install |
Install package(s). |
-l, --list |
List files in a package. |
-q, --query |
Query package(s). |
-s, --state |
Display the state of the listed files. |
-U, --upgrade |
Upgrade package(s). |
-v, --verbose |
Provide more detailed output. |
-V, --verify |
Verify package(s). |
The rpm command is simple to use and allows combining multiple options to customize each query. Explore some of the most commonly used commands listed below and try out how they work with a sample package.
Install RPM Packages
To install RPM packages with the rpm command, use the syntax:
sudo rpm -ivh package_nameThe command includes the options:
-i(install)
-v(verbose output)
-h(print hash marks to show the installation process)
Before installing, you need to download the appropriate file. The package has to be compatible with the system architecture of the machine.
Note: To download packages, use the curl or wget command.
For instance, to install the MySQL package, you run:
sudo rpm -ivh mysql80-community-release-el7-5.noarch.rpmTo install an RPM package without previously downloading it, provide the URL:
sudo rpm -ivh package_URLFor example:
sudo rpm -ivh https://dev.mysql.com/get/mysql80-community-release-el7-5.noarch.rpm
Upgrade RPM Packages
RPM upgrades a package by uninstalling the current version and installing the latest one.
The command for upgrading a package is:
sudo rpm -Uvh package_name-U(upgrade)-v(verbose mode)-h(print hash marks to show upgrading process)
To upgrade MySQL, use:
sudo rpm -Uvh mysql80-community-release-el7-5.noarch.rpm
If the new version requires additional dependencies, you must install them manually. RPM lists the missing dependencies in the output after running the command.
To ignore the message and update without the dependencies, add the --nodeps option to the command:
sudo rpm -Uvh --nodeps package_nameRemove RPM Packages
Remove RPM packages using the -e (--erase) option:
sudo rpm -e package_nameTo see the verbose output, add the -v option to the command:
sudo rpm -ev package_nameTo delete an RPM package without removing dependencies, add --nodeps:
sudo rpm -ev --nodeps package_nameFor example, to remove MySQL without removing its dependencies, you run:
sudo rpm -ev --nodeps mysql80-community-release-el7-5.noarchDisplay Package Information After Installing
To see available information about an installed RPM package, use the -qi option, which instructs RPM to query info:
sudo rpm -qi package_nameThe output displays the installed information, package version, and a short description.
To do so for MySQL, run:
sudo rpm -qi mysql89-community-release-el7-5.noarch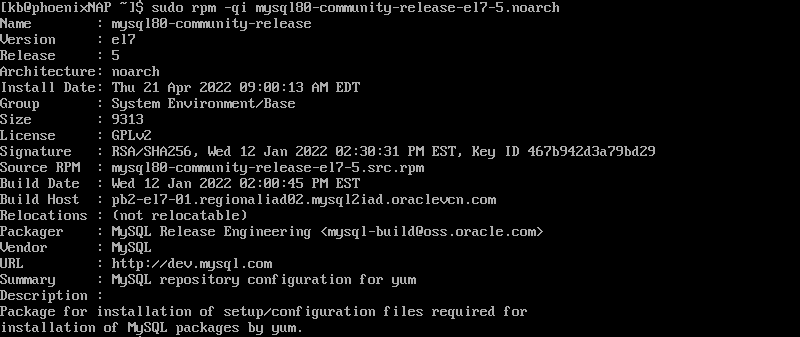
Display Package Information Before Installing
The command for displaying information about a package prior to installation is:
sudo rpm -qip package_nameThe command includes the options:
-qi(query information)-p(query/verify a package)
To display information before installing the MySQL package, use the command:
sudo rpm -qip mysql89-community-release-el7-5.noarch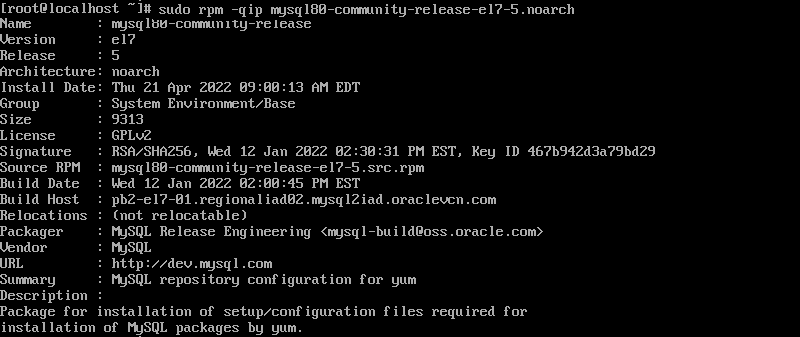
Check Package Dependencies Before Installing
RPM allows you to check the dependencies of packages prior to installing them on the system. Bear in mind, you need to have the RPM package downloaded locally to see a list of dependencies.
The command for doing so is:
rpm -qpR package_nameThe options are:
-q(query format)-p(query/verify a package)-R(list package dependencies)
For example, to list the dependencies for installing the MySQL RPM package, you run:
rpm -qpR mysql80-community-release-el7-5.noarchVerify Packages
Verifying packages means comparing metadata from the RPM database with the information from the installed files.
You can verify all installed packages using the command:
sudo rpm -Va-V(verify)-a(all)
To verify a specific package run:
sudo rpm -Vp package_name-V(verify)-p(package)
Verify the installed MySQL package with:
sudo rpm -Vp mysql80-community-release-el7-5.noarch.rpmFind Manual Pages
To list available documentation related to an installed RPM package, use the -qdf option:
sudo rpm -qdf package_nameThe command options are:
-q(query format)-d(list documentation files)-f(query package owning file)
To find manual pages for MySQL, use the command:
sudo rpm -qdf mysql80-comunity-release-el7-5.noarch.rpmList All Files of an Installed Package
See detailed information about a package by listing all its files, use the -ql option and instructs RPM to query list:
sudo rpm -ql package_nameFor example, to list files of the sample MySQL package, you run:
sudo rpm -ql mysql80-community-release-el7-5.noarch
List Installed Packages
List all of the installed RPM packages on the system by running the following:
sudo rpm -qaThe command includes the -qa option, which instructs RPM to query all.
List Recently Installed Packages
To display a list of all the recently installed packages, use the -qa (query all) option along with the --last attribute:
sudo rpm -qa --lastThe output lists all the installed RPM packages, ordering them by the latest package on top.
Where to Find and Download RPM Packages?
You can find and download RPM packages on the following websites:
- rpmfind.net
- http://rpm.pbone.net/
- https://freshrpms.net/
Conclusion
In this article, you learned how to use the rpm command for installing, verifying, upgrading, and deleting packages. Still, it is recommended to use the yum or dnf command for such actions as they automatically deal with dependencies.
Этот документ нацелен на то, чтобы помочь людям, которые хотят выпускать пакеты для дистрибутива ROSA Desktop. В частности, он подчёркивает, чем пакеты ROSA отличаются от пакетов, написанных для других дистрибутивов, основанных на RPM. Этот документ может быть полезен разработчикам ROSA, а также сторонним разработчикам.
ROSA Desktop — дистрибутив операционной системы GNU/Linux — выпускается и издаётся компанией РОСА, силами различных добровольцев, тестеров, переводчиков.
Содержание
- 1 Предисловие
- 2 Установка программного обеспечения
- 2.1 Основы
- 2.2 Сборка пакетов для ROSA Desktop
- 3 Предварительные задачи
- 3.1 Создание требуемых папок
- 3.2 Не создавайте файл .rpmmacros
- 4 Сборка RPM
- 4.1 Из существующих «исходников» RPM
- 4.2 Сборка из исходных текстов
- 4.2.1 Предварительные проверки
- 4.3 Внутри spec-файла
- 4.3.1 Раздел заголовка (header)
- 4.3.2 Раздел подготовки к сборке (prep)
- 4.3.3 Раздел сборки (build)
- 4.3.4 Раздел установки (install)
- 4.3.5 Раздел очистки (clean)
- 4.3.6 Раздел файлов (files)
- 4.3.7 Раздел журнала изменений (changelog)
- 4.3.7.1 Что такое журналы изменений
- 4.3.7.2 История изменений в системе контроля версий
- 4.4 Сборка
- 4.5 Оптимизация процесса сборки
- 5 Проверка RPM-пакета
- 5.1 Основные проверки
- 5.2 Запуск Rpmlint
- 5.3 Install test
- 6 Что-то пошло не так?
- 7 Предустановочные и постустановочные сценарии
- 7.1 Основы
- 7.2 Работа с обновлениями
- 8 Файловые триггеры
- 9 More macros
- 10 Interaction with urpmi and rpmdrake
- 11 Группы пакетов ROSA
- 12 Лицензии
- 13 Alternative: checkinstall
- 14 Некоторые ссылки
- 14.1 RPM
- 14.2 Использование diff и patch
Предисловие
Предполагается, что читатель имеет опыт использования Linux. Ему должны быть известны основные команды, структура каталогов, и ему уже приходилось использовать rpm хотя бы для установки пакетов.
Этот документ построен таким образом, чтобы провести читателя шаг за шагом к получению rpm-пакета, который смог бы хорошо интегрироваться в ROSA Desktop.
В первом приближении, RPM обозначает три понятия:
- программу, предназначенную для установки или создания пакетов;
- формат, использующийся в пакетах (двоичных или исходного кода), созданных программой rpm;
- файл, который называется «пакетом», содержащий бинарный или исходный код, и информационный заголовок. Заголовок содержит инструкции по установке и удалению программы.
Программа rpm, с пользовательской точки зрения — мощный менеджер пакетов. Она играет роль посредника для любых действий, выполняемых с пакетами rpm. Кроме того, она может:
- установить или обновить пакет, учитывая зависимости;
- во время установки пакета подготовить действия, чтобы сделать установленную программу готовой к использованию;
- восстановить случайно удалённые файлы, принадлежащие пакету;
- показать информацию о том, что данный пакет уже установлен;
- найти пакет, к которому относится определённый файл;
- проверить текущую установку на выполнение требования зависимостей уже установленных пакетов;
- др.
С точки зрения программиста, программа rpm — упаковщик, скрывающий в одном единственном rpm-файле всю информацию, необходимую для установки программы на данную платформу.
Важно различать с самого начала пакеты с исходным кодом .src.rpm, и бинарные пакеты (пакеты, содержащие двоичный код) .<archtype>.rpm.
Первые содержат полное дерево исходного кода, т. е. кода написанного программистом, плюс весь материал, добавленный упаковщиком, необходимый для настройки, компиляции и установки программы. Как правило, этот материал состоит из спек-файла и патчей (если они есть).
Вторые содержат откомпилированный бинарный код и все файлы (документация, файлы настроек, пиктограммы, …), которые должны устанавливаться на целевой системе. Он также содержит процедуру, используемую для помещения файлов в соответствующие каталоги файловой системы, и действия, которые необходимо выполнить, чтобы получить нормально функционирующую программу.
Установка программного обеспечения
Основы
Хотя изначально программа rpm была разработана для дистрибутива Red Hat Linux, она также работает и в других дистрибутивах, основанных на rpm: OpenMandriva, Suse, Fedora и т. д.; на всех этих системах программа rpm уже установлена.
Бинарный rpm-пакет, который вы будете собирать для ROSA, может не работать в других дистрибутивах.
Сборка пакетов для ROSA Desktop
Сборка пакетов для Cooker (т. е. разрабатываемой версии ROSA Desktop) всегда сопровождается применением патчей и прочих улучшений со стороны rpm. Перед началом сборки убедитесь, что в системе установлены все перечисленные ниже пакеты:
$ sudo urpmi rpm rpm-build spec-helper libtool rpmlint
- rpm — сам rpm;
- rpm-build — содержит сценарии, используемые при сборке пакетов;
- spec-helper — инструмент для минимализации спек-файлов с помощью некоторой автоматизации: разбор бинарных файлов, сжатие страниц руководств (man-страниц);
- libtool — используется некоторыми конфигурационными сценариями для сборки совместно используемых библиотек;
- rpmlint — используется для проверки корректности сгенерированного файла src.rpm.
Предварительные задачи
Создание требуемых папок
Перед тем, как приступить к сборке, нужно позаботиться об организации «рабочего места»: программе rpm необходимо определённое дерево каталогов в вашем «домашнем» каталоге. Это дерево можно создать с помощью следующей команды: mkdir -p ~/rpm/{BUILD,RPMS/$ARCH,RPMS/noarch,SOURCES,SRPMS,SPECS,tmp} .
Замените $ARCH на название архитектуры, для который планируется выполнять сборку. Обычно это i586 или x86_64, но может быть также sparc, alpha или ppc.
![]()
Примечание
Сборка rpm-пакетов с правами суперпользователя может быть опасной, потому что бинарные файлы устанавливаются в систему перед пакетированием, таким образом, всегда нужно собирать пакеты с правами нормального пользователя, если вы не хотите случайно засорить систему.
Дерево каталогов должно иметь следующую структуру:
- ~/rpm/BUILD: каталог для собранных исходников.
- ~/rpm/RPMS: содержит каталоги, по одному каталогу на каждую архитектуру, куда кладутся бинарные пакеты после сборки.
- ~/rpm/RPMS/i586: каталог для хранения rpm-пакетов для процессоров i586.
- ~/rpm/RPMS/x86_64: каталог для хранения rpm-пакетов для процессоров x86_64.
- ~/rpm/RPMS/noarch: каталог для хранения rpm-пакетов, не зависящих от архитектуры процессора.
- ~/rpm/SOURCES: файлы исходного кода (например, mypackage.tar.bz2).
- ~/rpm/SPECS: спек-файлы, которые мы должны построить.
- ~/rpm/SRPMS: собранные src.rpm-пакеты.
- ~/rpm/tmp: для временных файлов, которые создаются программой rpm во время сборки пакетов.
![]()
Примечание
программе rpm необходимы каталоги для различных архитектур в ~/rpm/RPMS. Если они отсутствуют, вы получите сообщение об ошибке.
Не создавайте файл .rpmmacros
Ряд руководств по сборке пакетов RPM советуют создать в «домашнем» каталоге файл конфигурации .rpmmacros с персональной информацией, которая будет добавлена в метаданные пакета, такой как значения %packager, %vendor и другие. Не делайте этого. Все подобные поля заполняются автоматически системой сборки. Однако, Вы все-таки можете создать этот файл, если Вы хотите указать другую директорию для сборки, отличную от /home/user/rpm. В этом случае укажите значения только для %_topdir и %_tmppath макросам. Не указывайте значения для других макросов.
Сборка RPM
Из существующих «исходников» RPM
Сборка с использованием существующих исходных кодов возможна в том случае, если пакет уже есть в репозиториях дистрибутива.
Последнюю версию rpm-файла можно взять из Cooker. Список зеркал Cooker находится на странице зеркала Cooker. Там можно найти:
- SRPMS
- Каталог для хранения rpm с «исходниками» (main, contrib, non-free, др.) для различных процессорных архитектур (i586, x86_64, …);
- media/main
- Для бинарных rpm из main;
- media/contrib
- Для бинарных rpm из contrib;
- media/non-free
- Для бинарных rpm из non-free;
* ‘media/jpackage для бинарных rpm noarch. (jpackage нет)
Чтобы изменить source rpm для ROSA Linux, введите команду rpm -ivh мой_пакет.src.rpm. Эта команда установит все файлы с исходными кодами в созданный вами каталог ~/rpm.
![]()
Примечание
Программу urpmi можно настроить таким образом, чтобы она сама загружала «исходники».
Например:
[camille@kenobi ~/rpm]$ rpm -i /cooker/SRPMS/ktron-1.0.1-2mdv.src.rpm
[camille@kenobi ~/rpm]$ ls -R *
SRPMS:
SPECS:
ktron.spec
SOURCES:
ktron-1.0.1.tar.bz2
RPMS:
noarch/ i686/ i586/ i386/
BUILD:
Из приведённого выше примера видно, что программа rpm установила в rpm-дерево файл с исходными кодами ktron-1.0.1.tar.bz2 и спек-файл. Было бы полезным пересобрать текущую версию пакета, чтобы понять, как он компилируется. Для этого нужно воспользоваться программой rpmbuild, запустив её с опцией buildall:
[camille@kenobi ~/rpm]$ cd ~/rpm/SPECS
[camille@kenobi ~/rpm]$ rpmbuild -ba ktron.spec
[camille@kenobi ~/rpm]$ ls -l ~/rpm/RPMS/i586/ktron-1.0.1-2mdv.i586.rpm
[camille@kenobi ~/rpm]$ ls -l ~/rpm/SRPMS/ktron-1.0.1-2mdv.src.rpm
Если сборка завершилась без ошибок (а она, кстати, может длиться несколько часов, если собирается какой-нибудь сложный пакет, например, ядро), собранный пакет и пакет с исходными кодами будут находиться в каталогах ~/rpm/RPMS/i586 и ~/rpm/SRPMS/ соответственно. Для того, чтобы установить собранный пакет, необходимо получить права суперпользователя. Для этого нужно ввести в терминале команду su и ввести пароль суперпользователя. Чтобы выйти из режима суперпользователя используйте клавиатурное сочетание клавиш «Ctrl+D» или наберите команду exit. Для сборки и пересборки пакетов с «исходниками» привилегий суперпользователя не требуется.
Журнал сборки может быть достаточно объёмным, его можно сохранить для последующего просмотра.
В подкаталогах ~/rpm/BUILD обычно можно получить доступ к пропатченным «исходникам» (если один или более патчей находились в каталоге ~/rpm/SOURCES), бинарникам, скомпилированным библиотекам, страницам руководств и т. д. Спек-файл описывает исходный код и патч-файлы, способы сборки и установки пакета.
Теперь, чтобы исправить ktron, нужно лишь внести изменения в спек-файл, а затем пересобрать пакет.
![]()
Примечание
Каждый пакет, собираемый ROSA Desktop, использует систему контроля версий CVS. Это позволяет записывать каждое состояние пакета, т. е. разработчик может обратиться к архиву для просмотра сделанных изменений. Если сделанные изменения по каким-либо причинам не являются желательными, разработчик может их отменить.
Каждый спек-файл хранится в модуле SPECS/<package> или contrib-SPECS/<package>. К нему можно получить доступ на cvs.mandriva.com.
Сборка из исходных текстов
Допустим, вы нашли интересную программу на сайте Freshmeat или Sourceforge, и вы хотите, чтобы эта программа стала доступной для всех пользователей ROSA Desktop.
Скачайте архив с исходным кодом и поместите его в каталог SOURCES.
Предварительные проверки
- Лицензия
- Несмотря на распространённость лицензии GPL, есть ещё множество не-GPL лицензий. Необходимо точно определить лицензию программного обеспечения, чтобы узнать, можно ли включать его в дистрибутив. Мы не принимаем программы, использующие проприетарные лицензии, но для клуба есть несколько исключений. Также, мы не можем принять программы, которые не позволяют нам свободно их распространять. Список лицензий, которые разрешены к использованию в дистрибутиве, находится на странице Mandriva.
- Сжатие tar-архива
- Мы рекомендуем использовать исходный tar-архив без каких-либо изменений. Если исходники распространяются с использованием различных методов сжатия, мы часто отдаём предпочтение .tar.bz2. Избегайте сжатия патчей (полученные diff и др. подобными программами) и других текстовых файлов (файлы настроек, сценарии и т. д.), т. к. они занимают, как правило, очень мало места, в противном случае будет сложнее увидеть изменения в файлах различий (diff-файлах) Subversion (Subversion в свою очередь сам использует некоторую форму сжатия).
![]()
Примечание
Для критических к безопасности пакетов мы рекомендуем не изменять исходный код, т. к. это приведёт к изменению контрольной суммы и подписи. Мы рекомендуем оставлять такие пакеты в их исходном состоянии, примером такого пакета может служить OpenSSH.
Внутри spec-файла
Вот мы и добрались до одной из важнейших глав этого документа. Spec-файл содержит всю необходимую информацию для:
- компиляции программы, сборки исходного кода и бинарного rpm-пакета;
- установки и удаления программы.
Короче говоря, спек-файл описывает моделируемую компиляцию и установку, говорит rpm, какие файлы, полученные в результате инсталляции, должны быть упакованы, и как они должны в итоге устанавливаться в системе. Команды выполняются с использованием командной оболочки /bin/sh, таким образом, конструкции команд вида [ -f configure.in ] && autoconf являются корректными и их можно применять.
Мы рассмотрим основные возможности, используемые в одном из спек-файлов. По мере того, как вы будете собирать всё больше и больше rpm-пакетов, вы поймёте, что существуют некоторые дополнительные параметры, о которых мы не рассказывали. Более подробную информацию можно получить в книге Maximum RPM (см. раздел 7).
![]()
Примечание
Мы рекомендуем открыть пару спек-файлов, чтобы посмотреть, как они работают. Список спек-файлов и патчей можно получить здесь. Вы можете взять шаблоны для спек-файлов, чтобы начать изучение с чистого листа.
Рассмотрим следующий пример спек-файла, взятого из Cooker:
Name:           gif2png
Summary:        Tools for converting websites from using GIFs to using PNGs
Version:        2.0.1
Release:        1
Source0:        http://www.tuxedo.org/~esr/gif2png/%{name}-%{version}.tar.bz2
Source1:        %{name}-%{version}-rosa-addon.tar.bz2
Patch0:         gif2png-2.0.1-bugfix.patch
URL:            http://www.tuxedo.org/~esr/gif2png/

Group:          Applications/Multimedia
License:        MIT-like
Requires:       python

%description
Tools for converting GIFs to PNGs. The program gif2png converts GIF files
to PNG files. The Python script web2png converts an entire web tree, also
patching HTML pages to keep IMG SRC references correct.

%prep
%setup -q -a 1
%patch -p1

%build
%configure
%make

%install
%makeinstall

%files
%defattr(0755,root,root)
%doc README NEWS COPYING AUTHORS
%{_mandir}/man1/gif2png.1*
%{_mandir}/man1/web2png.1*
%{_bindir}/gif2png
%{_bindir}/web2png

# При подготовке пакетов для ROSA не создавайте раздел %changelog самостоятельно!
%changelog
* Mon Nov 02 1999 Camille Begnis <camille@mandrakesoft.com> 2.0.1-rosa2012
- Upgraded to 2.0.1

* Mon Oct 25 1999 Camille Begnis <camille@mandrakesoft.com> 2.0.0-rosa2012
- Specfile adaptations for Mandrake
- add python requirement
- gz to bz2 compression
Символ «%» в начале строки может означать:
- начало секции (раздела) (prep, build, install, clean);
- встроенный макрос сценария командной оболочки (setup, patch);
- директива, используемая специальными секциями (разделами) (defattr, doc, …).
Name:     gif2png
Version:  2.0.1
Release:  1
Эти три строки автоматически определяют константы, которые можно использовать в других разделах спек-файла, называемые %{name} , %{version} и %{release} . Некоторые пакеты могут формировать релиз с помощью устаревшего макроса %mkrel, который в дистрибутивах ROSA просто возвращает свой аргумент.
Кроме того, есть несколько тегов, о которых вы, возможно, захотели бы узнать, но которых нет в примере спек-файла. Есть некоторые теги, которые вы можете встретить. Никто не требует, чтобы вы помнили все теги, если вы только приступили к сборке rpm-пакетов, но после некоторого времени этот список может послужить хорошей отправной точкой!
Теперь настало время объяснить, как формируется имя пакета. Очень важно всегда следовать этому соглашению, чтобы ваша работа была понятной для остальных.
- Бинарный пакет обозначается следующим образом: имя-версия-релиз.arch.rpm (name—version—release.arch.rpm)
- Пакет с исходным кодом обозначается следующим образом: имя-версия-релиз.src.rpm (name—version—release.src.rpm) (т. е. в нашем случае — gif2png-2.0.1-1mdk.src.rpm)
Имя, в основном, выбирается, исходя из названия главного бинарного пакета, хотя, при наличии веских причин, можно использовать другое имя.
Версия — это номер в имени оригинального исходного файла архива: name-version.tar.gz.
Релиз — это число, следующее за версией, увеличиваемое с каждой новой сборкой пакета, которая может быть связана с применением дополнительных патчей, изменениями внесёнными в спек-файл и даже тривиальным обновлением пиктограммы.
Summary: tools for converting websites from using GIFs to using PNGs
Эта строка представляет собой описание пакета.
Source0: http://www.tuxedo.org/~esr/gif2png/%{name}-%{version}.tar.bz2
Эта строка говорит rpm, какой файл исходного кода должен быть использован для сборки пакета. Заметьте, что имени файла предшествует полный URL (что, в общем случае, не обязательно), указывающий на веб-сайт, на котором расположен оригинальный исходный код. rpm уберёт URL, сохранив только имя файла, и произведёт поиск в каталоге SOURCES. Хотя предоставление полного URL и не является обязательным, его использование строго рекомендуется, таким образом любой желающий сможет узнать, где можно скачать исходники.
![]()
Примечание
Информация о URL позволяет таким инструментам, как rpmbuildupdate, автоматически пересобирать новые версии программ (подробнее см. rpmbuildupdate).
Если файлов с исходным кодом несколько, используйте несколько строк, начинающихся с Source1: …, Source2: … и т. д. соответственно.
Patch0: gif2png-2.0.1-bugfix.patch
Это необязательный тег. Его можно использовать в двух случаях:
- Вы исправили ошибку в исходном коде программы и создали патч, который должен быть применён к исходному коду программы перед компиляцией.
- Вы узнали, что для данного пакета программы где-то в сети есть патч, и скачали этот патч.
Все патчи должны находиться в каталоге SOURCES. Если патчей несколько, то они должны называться Patch1, Patch2 и т. д.
URL: http://www.tuxedo.org/~esr/gif2png/
Эта строка указывает на домашнюю страницу программы. Её использование не является обязательным, но мы всё же рекомендуем её указывать.
Group: Multimedia
Этот фрагмент говорит программе rpm, в какой части дерева пакетов разместить наш пакет. Эта возможность используется фронт-эндами пакетных менеджеров таких, как rpmdrake и kpackage.
Полная структура групп, которая, кстати говоря, отличается от аналогичных групп Red Hat, представлена на странице Packaging group. Очень важно следовать принятым соглашениям о группах, иначе ваш пакет внесёт неразбериху в дерево пакетов.
License: MIT-like
Этот тег определяет лицензию, выбранную держателем авторских прав, которая будет применяться к программному обеспечению, находящемуся в пакете. Чаще всего это GPL. На страницах лицензии РОСА и политика лицензирования представлены полные списки разрешённых к использованию лицензий.
BuildRequires: python
Обозначает, что для компиляции rpm потребуются библиотеки языка python, часто необходимо указывать, например, libpyglib-gi2, python-devel, если какой-то пакет не найти сразу, то можно поискать его с помощью команды urpmi -p ИмяПакета, так как он может содержаться в другом пакете, это указывается командой
Provides: libgif2png
в Provides указывается имя библиотеки, которая может использоваться другими программами (предоставляется)
Requires: python
Эта строка была добавлена, потому что одна из программ, включённых в пакет, является сценарием написанным на языке программирования Python. Это означает, что для корректной работы программы потребуется интерпретатор python.
Можно использовать требование к минимальной (или конкретной) версии. Например:
Requires: python >= 1.5.1
В редких случаях приложение может конфликтовать с другими уже установленными библиотеками или старыми версиями приложений, чтобы убрать их из системы при установке нужно сообщить об этом пользователю, для этого используется тег
Conflicts: python <= 1.0.0
Некоторые пакеты становятся устаревшими после установки новых библиотек, чтобы отметить их и удалить используется тег
Obsoletes: gif2png < 2.0.0
Ниже следует тег описания:
%description
Tools for converting GIFs to PNGs. The program gif2png converts GIF files
to PNG files. The Python script web2png converts an entire web tree, also
patching HTML pages to keep IMG SRC references correct.
Это совершенно особый тег внутри заголовочной части спек-файла, потому что он содержит текст, который может занимать произвольное количество строк и параграфов. Текст содержит полное описание программного обеспечения, которое помогает пользователю решить нужно ли устанавливать данный пакет или нет.
В целях улучшения восприятия спек-файлов, переводы тегов summary и description хранятся в специальных файлах, называемых <package>.po.
Эти файлы хранятся в poSPECS модуле в CVS Cooker. Когда создаётся новый пакет, основной po-файл автоматически создаётся в этом модуле для будущих переводов.
Этот метод подразумевает, что весь текст внутри спек-файла написал на английском языке. Однако, есть пакеты, предназначенные для определённых языков (например, ispell-de). В этом случае рекомендуется наличие текста на двух языках: на английском и на языке, для которого предназначен этот пакет. Для этого надо будет использовать специальные теги: Summary(de): .. и %description -l de.
Раздел подготовки к сборке (prep)
%prep
%setup -q -a 1
%patch0 -p1
В этом резделе записан первый сценарий, выполняемый программой rpm. Он делает следующее:
- создаёт каталог верхнего уровня для сборки (в BUILD);
- распаковывает оригинальный исходный код в каталог сборки;
- применяет патчи (если они есть) к исходному коду.
%setup -q -a 1
Это встроенный макрос, который выполняет следующие действия:
- переходит в дерево сборки;
- распаковывает исходный код (-q означает, что распаковка сопровождается минимальным выводом информации);
- изменяет владельца и права доступа к файлам с исходным кодом.
По умолчанию распаковывается первый исходный код (т. е. который имеет номер 0), для любых других исходников необходимо использовать дополнительные параметры, в нашем примере фрагмент -a 1 говорит, что мы также хотим распаковать исходный код с номером 1.
Есть и другие интересные возможности при использовании макроса %setup:
- -c name — переключатель -с говорит, что сначала должен создаваться каталог, и только затем должен осуществляться переход в этот каталог и происходить распаковка Source0. Это может оказаться полезным в том случае, если пакет tar.bz не имеет родительского каталога.
- -D — не удалять каталог перед распаковкой. Полезно лишь при наличии более одного макроса setup. Может использоваться только в setup-макросах, следующих за первым (но в первом — никогда).
- -T — этот параметр перекрывает действие по умолчанию распаковки Source из tar-архива и требует -b 0 или -a 0 для получения распакованного главного файла исходного кода. Этот параметр Необходим при наличии вторичных исходников.
- -n name — используйте этот переключатель, если имя rpm-пакета отличается от имени, получаемого при распаковке Source. Например: если имя rpm-пакета program-version-revision, а Source распаковывается в program-version-date, процесс сборки rpm не сможет перейти в каталог program-version, поэтому используйте -n program-version-date, тогда rpm будет знать о новом каталоге, в котором и следует продолжить работу.
%patch0 -p1
Макрос, ответственный за применение патчей к исходникам. Его параметр -p<num> передаётся патч-программе. Допустим, что у вас есть другой патч Patch1, объявленный в разделе header, в таком случае вы должны будете добавить строку %patch1 -p1. Добавление команды -b .your_suffix является хорошим тоном, ведь таким образом вы можете сообщить другим, что делает ваш патч, или кто выполнил патч. Например, если Вася сделал патч, то он мог бы написать %patch -p1 -b .vasya, или, если патч сделал Петя, тогда это могло бы быть %patch -p1 -b .petya.
Раздел сборки (build)
%build
Этот раздел должен содержать сценарий, отвечающий за фактическую сборку программного обеспечения. Раздел состоит из команд, используемых при сборке пакета из дерева исходников, извлечённого из tar-архива.
%configure
Эта строка используется для настройки исходников. Макрос %configure запускает команду ./configure со множеством дополнений таких, как
export CFLAGS="$RPM_OPT_FLAGS"
перед началом настройки (configure), и параметрами такими, как
i586-mandrake-linux --prefix=/usr --datadir=/usr/share
и т. д.
Иногда такие аргументы не поддерживаются сценарием configure. В таком случае, найдите причину и запустите ./configure с соответствующими параметрами. С помощью %{targetplatform} сообщите о целевой платформе вызову configure, если это поддерживается. Конечно, нужно избегать определения архитектуры в спек-файле; для x86 она будет определена в i586-mandrake-linux, как показно в примере выше.
![]()
Примечание
Чтобы использовать макрос %configure с разделяемыми библиотеками, понадобится пакет libtool.
При сборке и тестировании вашего пакета, вы должны удостовериться, что целевой хост действительно является i586; особенно, когда компиляция происходит на процессорах более высокого типа, конфигурационный скрипт по умолчанию должен обнаружить ваш процессор, и произвести для него оптимизацию. Цель макроса %configure отменить это поведение.
%make
Это простой макрос, который подготоваливает в основном make с соответствующими мультипроцессорными параметрами -j<num>.
Для исходников, использующих xmkmf, вы должны заменить следующий make этим:
make CDEBUGFLAGS="$RPM_OPT_FLAGS" CXXDEBUGFLAGS="$RPM_OPT_FLAGS"
Для других пакетов, в большинстве случае (но не во всех) будет работать и просто make.
Раздел установки (install)
%install
В этом разделе должен содержаться сценарий, отвечающий за фактическую установку пакета в симулируемый установочный каталог: %{buildroot}.
Он должен содержать все команды, необходимые для того, чтобы сделать программу готовой к запуску на пользовательской системе.
%makeinstall
Это строка устанавливает программу в симулируемый установочный каталог для autoconf-исходников. Этот макрос будет расширен до «make install» со множеством параметров для установки в симулируемый каталог %{buildroot}, например,
prefix=%{buildroot}%{_prefix} bindir=%{buildroot}%{_bindir}
и т. д.
В некоторых случаях сценарий configure может быть частично поломан. Возможно, вам понадобится погрузится в Makefile’ы, чтобы найти дополнительные параметры, чтобы установить его правильно. Один из наиболее распространённых: иногда вам нужно использовать make DESTDIR=%{buildroot} install.
Чтобы сохранить место на жёстком диске и время загрузки, ROSA использует lzma для сжатия man и info страниц. Это делается автоматически инструментарием rpm.
Раздел очистки (clean)
Не используйте раздел clean в spec-файлах ROSA. При необходимости, используйте rpmbuild —clean ….
Раздел файлов (files)
%files
Этот раздел состоит из списка файлов, находящихся в симулируемом дереве каталогов; эти файлы будут использоваться при сборке пакета.
Список файлов должен быть написан в спек-файле вручную. Он может быть создан из списка файлов, созданных программой rpm в дереве каталога сборки. Чтобы создать список, наберите команду rpmbuild -bi mypackage.spec, процесс сборки остановится сразу после симулируемой установки. Затем, просмотрите каталог симулируемой установки (в нашем случае ~/rpm/tmp/gif2png-buildroot), чтобы увидеть, какие файлы предполагается положить в пакет (чаще всего кладутся все файлы).
Вы никогда не должны использовать find для получения списка файлов пакета; необходимо явно перечислять все файлы, что позводит избежать ошибок при сборке новых версий ПО. Единственным исключением являются файлы локализации, для которых следует использовать %find_lang %{name} в разделе %install и добавить %files -f %{name}.lang в секцию %files (см. описание макросов ниже).
Замечание о структуре каталогов: установленные файлы пакета должны следовать рекомендациям FHS http://www.pathname.com/fhs.
%defattr(0755,root,root)
Этот тег задаёт атрибуты, которые будут применяться ко всем файлам, копируемым в систему пользователя. Аргументы означают:
- -: все атрибуты для регулярных файлов остаются неизменными;
- root: владелец файла — root;
- root: группа файла — root;
- 0755: атрибуты, применённые ко всем каталогам, принадлежащим пакету — 0755 (rwxr-xr-x).
%doc README NEWS COPYING AUTHORS
Специальный тег %doc помечает файлы, которые являются частью документации пакета. Файлы документации будут помещены в /usr/share/doc/gif2png-2.0.1/. Этот каталог будет создан автоматически. Файлы %doc задаются относительно каталога извлечённых из tar-архива исходников в каталоге BUILD.
%{_mandir}/man1/gif2png.1*
%{_mandir}/man1/web2png.1*
Рекомендуется перечислять в отдельности каждую man или info-страницу.
Также, вы можете задаться вопросом: почему вместо gif2png.1.lzma используется gif2png.1*? Это сделано для того, чтобы сохранить совместимость с другими системами, которые используют сжатие gzip вместо lzma. Если вы нашли такие ссылки на lzma сжатие в спеке, замените их регулярным выражением, как в примере выше. Чаще всего вы можете использовать %{_mandir}/man1/*, что соответствует всем файлам в директории man1.
%{_bindir}/gif2png
%{_bindir}/web2png
Как вы можете видеть, для каждого необходимого пути есть макрос нужного типа. Вот наиболее полезные:
(полный список доступен в файле /usr/lib/rpm/macros): %{_prefix} , %{_bindir} , %{_sbindir} , %{_datadir} , %{_libdir} , %{_sysconfdir} , %{_mandir} , %{_infodir} . Для игр используйте %{_gamesbindir} и %{_gamesdatadir} .
Раздел журнала изменений (changelog)
Внимание! Здесь представлена общая информация о секции changelog. Вы не должны добавлять эту секцию в spec-файл самостоятельно, поскольку она генерируется автоматически из истории изменений в системе контроля версий.
Что такое журналы изменений
%changelog
Этот раздел предназначен для хранения записей о различных изменениях, сделанных в пакете. Каждая новая сборка пакета должна сопровождаться параграфом в этом разделе, также как и каждый новый номер версии программы. Соблюдается следующая структура этих параграфов:
* Mon Nov 02 1999 Camille Begnis <camille@mandrakesoft.com> 2.0.1-1mdk
- первая строка параграфа начинается со знака звёздочки «*» и отделяется от неё пробелом;
- три буквы, обозначающие день недели;
- три буквы, обозначающие месяц;
- две цифры дня месяца;
- четыре цифры года;
- имя человека, создавшего пакет;
- его же фамилия;
- его же адрес электронной почты в угловых скобках «<>»;
- текущая версия и релиз.
- Upgraded to 2.0.1
Затем следует одна строка, начинающаяся с «-», в которой описывается изменение в пакете.
Примеры:
- spec file stolen from korganizer.
- last snapshot before release
- ROSA adaptations.
- Fix bug in /etc/zsh use USERNAME instead of USER.
- Remove petit bouchon which annoys other players.
- Improve /etc/z* to source the /etc/profile.d/ files.
- fix typo in examples directory name
- fixed QT libs version requirements
- add patch to handle Earl Grey tea
По умолчанию в собранный пакет помещаются только записи не старше 1 года. Это поведение может быть изменено настройкой значения %_changelog_truncate
История изменений в системе контроля версий
Информация для секции changelog автоматически генерируется из истории изменений системы контроля версий. Каждая строка сообщения из истории изменений становится записью в секции changelog, начинающейся с дефиса.
Сообщения автоматически группируются по имени и email-адресу автора.
Если вы не хотите, чтобы строка из истории изменений попала в changelog пакета, добавьте в начале строки «SILENT: «. Пустые строки также игнорируются.
Сборка
Наконец, наш спек-файл готов. Наберите грудью побольше воздуха, присядьте и наберите команду rpmbuild -ba mypackage.spec.
Также можно добавить параметр —clean, который очистит каталог BUILD после завершения сборки пакета. Это может оказаться полезным, если у вас мало свободного места на жёстком диске.
Процесс может закончиться со следующими результатами:
- exit 0;
- все остальные случаи.
There are then two possibilities for the last line of your process:
- 0.01% probabilities: + exit 0
- 99.99% probabilities for other cases.
You are in the second case? Congratulations you passed the test, you are not an alien.
Good luck, so long, have a look to rpm building options (man rpmbuild ) to debug your work, look at other persons’ specfiles, etc..
There is a very clean way to build packages: use rpmbuild -bs —rmspec —rmsource (in order to remove anything from the original build) and then do a rpmbuild —rebuild.
Оптимизация процесса сборки
Когда вы запускаете команду для сборки вашего пакета, вы точно были уведмлены сообщением вида: foo-devel is necessary for foo2.
Это означает, что нужна информация из других пакетов, использующихся для разработки (обычно, такие файлы имеют названия вида foo.h). Если у вас их нет, компиляция остановится, или, даже если компиляция закончится успешно, пакет будет лишён некоторых возможностей.
Сборочный кластер ROSA имеет множество таких предустановленных пакетов для разработки (devel-пакетов). В случае, если один из обязательных пакетов не был перечислен в спек-файле, пакет будет собран на кластере в любом случае. Но отсутствие такой информации не позволит собрать пакет на машинах, на которых отсутствует devel-пакет, делая отладку и обновление более трудной.
Взгляните на веб-сайт программы, для которой подготавливается пакет, там можно найти информацию о необходимых компонентах.
Чтобы найти эти «missing BuildRequires», выполняя сборку, в системе должны присутствовать только самые основные пакеты для разработки:
- glibc-devel
- libncurses5-devel
- libstdc++6-devel
После этого устанавливайте только те пакеты для разработчиков, которые попросит команда сборки rpm.
Запуская сборку, следите за сообщениями checking for…
Если вы увидите что-то наподобие checking for foo… foo.h not found, это означает, что заголовочный файл в вашей системе не найден.
Найдите пакет для разработк, содержащий foo.h, но будьте осторожны: вы можете найти больше одного пакета. Поэтому выберите тот, что подходит в наибольшей степени. К примеру, не следует выбирать пакет, имеющий отношение к компьютерной сети, если вы собираете приложение, предназначенное для работы со звуком.
Затем, установите пакет в систему, не забудьте добавить его имя в раздел BuildRequires вашего спек-файла.
Отсутствующие заголовочные файлы могут быть найдены во время компиляции. Если она останавливается, проверьте наличие других foo.h и примените тот же способ.
Проверка RPM-пакета
Основные проверки
Перво-наперво нужно проверить следующее:
- созданы ли rpm в соответствующих каталогах с корректными именами (в каталогах ~/rpm/SRPMS/ и ~/rpm/RPMS/i586/);
- корректна ли информация, полученная с помощью команды rpm -qlivp —changelog мой_пакет.(src.)rpm.
Запуск Rpmlint
После этого, вы должны воспользоваться утилитой Rpmlint, которая выполнит различные проверки пакета. Перед запуском rpmlint убедитесь, что у вас установлен пакет rpmlint-mandriva-policy, содержащий правила проверки для Росы. Наберите rpmlint мой_пакет.<archtype>.rpm для получения отчёта об определённом пакете. Чтобы получить более подробную информацию, используйте ключ -i. Вы должны проверить rpm и src.rpm. Дополнительную информацию по ошибкам, которые встречаются при сборке, можно найти на странице проблемы сборки пакетов.
Install test
Теперь необходимо проверить установку и обновление пакета на любой машине (желательно отличной от той, на которой проходила сборка), и удостовериться, что:
- Созданы все необходимые файлы с нужными правами и владельцами
- Все скрипты, выполняющиейся при установке, отработали успешно
- У всех исполняемых файлов установлен бит executable, а файлы с документацией доступны всем пользователям
Для полноты тестирования можно также проверить процесс удаления пакета, функциональность установленного ПО и тому подобное.
Если все тесты прошли успешно, то вы почти у цели — осталось только отправить пакет в репозиторий.
Что-то пошло не так?
Если вы читаете этот документ, то это уже хорошо. Если вы не найдете ответ на интересующий вас вопрос здесь, попробуйте также обратиться к следующим источникам:
- Официальный документ RPM-HOWTO (устанавливается в систему вместе с программой rpm).
- Книга Red Hat Maximum RPM, которая доступна на http://www.redhat.com/docs/books/max-rpm/max-rpm-html/.
- посмотрите на spec-файлы схожих пакетов — возможно, их авторы сталкивались со схожими проблемами
- Задайте вопрос в почтовой рассылкеразработчиков ROSA .
Если вы полагаете, что найденные вами решения могут быть полезны остальным, сообщите об этом авторам документов, в которые вы бы хотели добавить описания этих решений.
Предустановочные и постустановочные сценарии
Основы
RPM-пакет представляет из себя нечто большее, чем просто архив с файлами, которые извлекаются в определённые каталоги на клиентских системах.
Система предоставляет программистам мощную возможность: предустановочные и постустановочные сценарии. Эти сценарии позволяют сборщику пакета вписать фрагмент кода, который будет запущен на клиентской машине при установке или удалении пакета.
Эти сценарии создаются из любых допустимых команд интерпретатора командной строки. Вот четыре из них:
Имеются некоторые предупреждения относительно этих сценариев. Во-первых, вы должны уложиться в размер буфера 8192, во-вторых, сценарии не должны быть интерактивными. Всё, что требует от пользователя ручного ввода, является неверным, т. к. это нарушает неинтерактивность процедур установки RPM.
- %pre — этот сценарий выполняется перед установкой пакета в систему.
- %post — этот сценарий выполняется после установки пакета в систему.
- %preun — этот сценарий выполняется перед удалением пакета из системы.
- %postun — этот сценарий выполняется после удаления пакета из системы.
Назначение таких сценариев может быть чрезвычайно многообразным. Сценарии должны быть спроектированы таким образом, чтобы не навредить системе. Помните, что сценарии выполняются от имени суперпользователя. Они относятся к задачам системного администрирования, завершающим установку нового приложения. Например:
- Добавить в cron запуск программы через равные интервалы времени
- Запустить chkconfig, чтобы запустить службу во время загрузки
- …
Работа с обновлениями
Работа с пакетами осложняется тем фактом, что пакет может быть обновлен, а не просто установлен или удален. проблема заключается в том, что при обновлении скрипт %postun новой версии пакета запускается после скрипта %post старой версии, и то, что сделал последний скрипт, может быть потеряно.
Часто полезно убедиться, что те или иные действия производятся только при установке/удалении пакета, но не при обновлении. Для обработки таких ситуаций RPM передает специальный аргумент скриптам %pre, %preun, %post и %postun.
Аргумент содержит количество различных версий данного пакета, которые будут установлены на машине после выполнения данного скрипта. Например, при установке нового пакета, скриптам %pre и %post будет передано значение «1». При обновлении пакета, скрипты %pre и %post новой версии получат значение «2», скрипты %preun и %postun старой версии — «1».
| Параметр \ Скрипт | %pre | %post | %preun | %postun |
|---|---|---|---|---|
| первоначальная установка | 1 | 1 | N/C | N/C |
| обновление | 2 | 2 | 1 | 1 |
| удаление | N/C | N/C | 0 | 0 |
Наличие такого параметра позволяет программистам различать, в какой ситуации запускается скрипт — при установке или при обновлении пакета.
- Для скриптов установки (%post, %pre) — если параметр $1 равен «1», то происходит первоначальная установка
- Для скриптов удаления (%postun, %preun) — если параметр $1 равен «0», то происходит удаление пакета; иначе это обновление либо установка с опцией —force.
Для проверки значение параметра, можно использовать следующую конструкцию:
%postun
if [ $1 -eq 0 ]; then
    ### Выполнение действий, специфичных для удаления пакета
fi
if [ $1 -eq 1 ]; then
    ### Выполнение действий, специфичных для обновления пакета
fi
Файловые триггеры
Чтобы избавиться от необходимости выполнения часто встречающихся задач — таких как выполнение «%post -p /sbin/ldconfig» или «%update_menus» — в ROSA используются файловые триггеры RPM.
More macros
При сборке пакетов для Росы, вы можете использовать в spec-файле различные макросы для выполнения типичных задач.
- Обработка info-старниц:
%post
%__install_info %{name}.info

%preun
%__install_info %{name}.info
- Обновление системы меню. В Росе используется Меню XDG.
%post
%{update_menus}

%postun
%{clean_menus}
- Обработка файлов локализации. Хорошей практикой является не ручное перечисление всех .mo-файлов, которые обычно находятся в поддиректориях /usr/share/locale/.., а использование специального макроса в секции %install, которые создаст отдельный файл с перечнем файлов с локализациями:
%find_lang %{name}
Созданный файл необходимо указать в секции files:
%files -f %{name}.lang
- Макропопределения, используемые при сборке — %configure и %makeinstall. Они автоматически устанавливают префикс для установки, а также различные директории (такие как bindir, datadir и другие). Как правило, эти макросыф отлично работают с небольшими пакетами, но могут потербовать дополнительной настройке при сборке сложных продуктов. Макрос %make вызывает команду make с соответствующей опцией -j<num>, распараллеливая сборку на многоядерных машинах. Если вам все-таки необходимо вызвать скрипт ./configure напрямую, никогда не указывайте название целевой аппаратной архитектуры. Для этих целей есть макрос %{targetplatform} (или даже %{targetcpu} , если необходима более точная информация).
- Сборка серверного ПО. Для сборки, от которого требуется повышенная надежность в ущерб производительности, мы используем специальный макрос %serverbuild, который необходимо вызвать до начала самой сборки. Этот макрос выставляет необходимые значения флагов оптимизации. Секция %build при этом выгдядит следующим образом:
%build
%serverbuild
%configure
%make
- Макросы для init-скриптов. При установке пакета, в котором содержится init-скрипт (файл в директории /etc/init.d), необходимо зарегистрировать этот скрипт вызовом chkconfig —add ..; при обновлении, этого делать не надо, но если скрипт работает, то он должен быть перезапущен; при удалении пакета, необходимо удалить информацию о скрипте. Для этих целей у нас есть соответсвующий макрос:
%post
%_post_service <initscript-name>

%preun
%_preun_service <initscript-name>
- Обработка ghost-файлов. Некоторые пакеты (в частности, многие игры), содержат файлы, которые в некоторый момент времени могут отсутствовать в системе. Такие файлы необходимо помечать как ghost и обрабатывать с помощью специальных макросов:
%install

(...)

mkdir -p %{buildroot}/var/lib/games
touch %{buildroot}/var/lib/games/powermanga.hi

%post
%create_ghostfile /var/lib/games/powermanga.hi root games 664

(...)

%files
%attr(664, root, games) %ghost /var/lib/games/powermanga.hi
Макрос %create_ghostfile будет развернут в следующую конструкцию:
if [ ! -f /var/lib/games/powermanga.hi ]; then
  touch /var/lib/games/powermanga.hi
  chown root.games /var/lib/games/powermanga.hi
  chmod 664 /var/lib/games/powermanga.hi
fi
- Привязка типов фалов .desktop / MIME к приложениям: система меню XDG позволяет привязывать приложения к файлам с заданным MIME-типом в файлах .desktop. При установке или удалении .desktop-файла, необходимо запустить утилиту update-desktop-database, используя соответствующие макросы:
%post
%update_desktop_database

%postun
%clean_desktop_database
- База данных MIME-типов Freedesktop.org: база данных, используемая для получения всех возможных типов MIME с соответствующими расширениями файлов или их «магическими» числами, должна обновляться посредством вызова следующих макросов:
%post
%update_mime_database

%postun
%clean_mime_database
- Кэш иконок: все пакеты, содержащие иконки, устанавливаемые в /usr/share/icons/hicolor (или другие директории, предусмотренные спецификациями freedesktop, — например, /usr/share/icons/gnome или /usr/share/icons/crystalsvg ) должны обновлять кэш иконок, как показано в следующем примере (данное требование не относится к иконкам, хранящимся в /usr/share/icons, /usr/share/icons/mini или /usr/share/icons/large):
...
%file
...
%{_iconsdir}/hicolor/*
%{_iconsdir}/crystalsvg/*
....

%post
%update_icon_cache hicolor
%update_icon_cache crystalsvg

%postun
%update_icon_cache hicolor
%update_icon_cache crystalsvg
- Регистрация схем GConf: Схемы GNOME GConf должны устанавливаться и удаляться с помощью следующих макросов:
...
# каждый ключ схемы соответствует файлу с именем /etc/gconf/schemas/<key>.schemas
%define schemas apps_gnome_settings_daemon_default_editordesktop_gnome_font_rendering desktop_gnome_peripherals_keyboard_xkb fontilus themus

%post
%post_install_gconf_schemas %{schemas}

%preun
%preun_uninstall_gconf_schemas %{schemas}
- Обновление бд scrollkeeper: если устанавливается файл .omf, то необходимо обновить базу данных scrollkeeper (используемую для индексирования документации в формате docbook):
...
%post
%update_scrollkeeper

%postun
%clean_scrollkeeper
Interaction with urpmi and rpmdrake
Sometimes it’s necessary to warn the user about some particular care that should be taken when upgrading or installing a specific version of a package. rpmdrake-2.1.3-11mdk and above supports this: it searches in rpms for text files named README.install.urpmi, README.update.urpmi or README.urpmi, and displays them.
README.install.urpmi is displayed only for installed packages; README.update.urpmi only for upgraded packages; README.urpmi is displayed in both cases.
Группы пакетов ROSA
Каждый пакет должен относиться к одной из групп RPM, используемых в ROSA.
Лицензии
По вопросам, относящимся к лицензиям ПО, собираемого в пакеты, обращайтесь к Licensing policy.
Alternative: checkinstall
A very easy way to build RPMs for personal use is to install the checkinstall package; compile from source as usual (./configure && make && sudo make install), but just replace the make install step by checkinstall. This automates building an RPM, and is very simple to use. The advantage is that you don’t ever have to bypass the package manager when compiling from source. (However, it’s probably A Good Idea to build RPMs «properly» as described above, if you intend to distribute them to others.)
Некоторые ссылки
RPM
- Статья IBM по сборке rpm
- Статья из журнала redhat по сборке rpm
- Учебное пособие в формате Pdf, созданное GuruLabs, по сборке rpm
- Руководство RPM Red Hat
- CentOS how to setup RPM Build Environment
Использование diff и patch
- Использование diff и patch