4-я Красноармейская, 2А
Санкт-Петербург, 190005
Email: info@lenmoto.ru
Телефон: +7 (921) 930-81-18
Телефон: +7 (911) 928-08-06
Компания ЛенМото
Запчасти, аксессуары, экипировка, тюнинг для мотоциклов, скутеров, квадроциклов, снегоходов, багги, гидроциклов, катеров и лодочных моторов.
Подпишитесь на наши новости
Подписаться
-
#1
Parts catalogues Yamaha SnowMobiles (для всех)
Каталог запчастей для Яамаха VK540EL 2006года.
-
1,7 MB
Просмотры: 14.255
-
#2
Руководство пользователя Yamaha VK540E
По просьбам трудящихся вот Руководство пользователя на Русском языке Yamaha VK540E и BR250
-
5,8 MB
Просмотры: 34.963
-
#3
Re: Сервис-мануал для Viking 540
Service Manual
-
1,4 MB
Просмотры: 9.701 -
1,4 MB
Просмотры: 5.133 -
1,4 MB
Просмотры: 4.560 -
400,6 KB
Просмотры: 4.376
-
#4
Re: Сервис-мануал для Viking 540
Parts catalog
-
1,5 MB
Просмотры: 4.864
-
#5
Re: Сервис-мануал для Viking 540
Assembly manual
-
2,7 MB
Просмотры: 4.807
-
#6
Re: Сервис-мануал для Viking 540
Руководство пользователя на русском языке
-
1,4 MB
Просмотры: 8.365 -
1,4 MB
Просмотры: 5.124 -
166,7 KB
Просмотры: 4.458
-
#7
-
2,8 MB
Просмотры: 4.896
-
#8
Только такой
-
6,9 MB
Просмотры: 4.012
-
#9
-
1,7 MB
Просмотры: 2.357
-
#10
На русском
-
8,7 MB
Просмотры: 6.646
-
#11
Всем привет на днях автоматом перевел тексты по ремонту, каталог запчастей и еще чегото правда получилось не совсем корректно но понять можно если раскинуть извилинами потом распечатал анлийский мануал потом распечатал переведенный на русский его разрезал и приклеил на английский текст, а почему так сделал при переводе не сохранились картинки.
-
50,3 KB
Просмотры: 2.579 -
92,7 KB
Просмотры: 2.067 -
344,8 KB
Просмотры: 2.088
-
#12
Re: Сервис-мануал для Viking 540
Фрун написал(а):
Помогите открыть качнуть это: Parts catalog
Вложения:
Parts catalog-VK540.rar [1.49 МБ]
Скачиваний: 875
не пускает, говорит что я, не автаризован(((9
-
#13
Re: Сервис-мануал для Viking 540
Антонио 1 написал(а):
Фрун написал(а):
Помогите открыть качнуть это: Parts catalog
Вложения:
Parts catalog-VK540.rar [1.49 МБ]
Скачиваний: 875не пускает, говорит что я, не автаризован(((9
Прикольно 
-
#14
Re: Сервис-мануал для Viking 540
Фрун написал(а):
Прикольно
….. Я тоже не авторизован для скачивания своего же файла.

-
#15
Блинн мужики, и как быть(((
Надо найти номера на две деталюшки и заказать.
Викинг 540 Е 2007 года рождения
Нужен номер ремня вариатора и сальника масляного насоса, который качает и смешивает масло с бензом
Номера на передние салазки гусенецы вроде нашел, а вот с остальным проблема(((((
По году выпуска в каталогах 3ех цилиндровый мотор с вод.охлаждением, а по факту стоит 2ух с воздушкой 
Как правильно идентифицировать ХЗ ((((
-
#16
Антонио 1 написал(а):
Блинн мужики, и как быть(((
Надо найти номера на две деталюшки и заказать.
Викинг 540 Е 2007 года рождения
Нужен номер ремня вариатора и сальника масляного насоса, который качает и смешивает масло с бензом
Номера на передние салазки гусенецы вроде нашел, а вот с остальным проблема(((((
Ваши детали с ценами:
87X-17641-00-00 V-BELT (2.390)
93101-10090-00 OIL SEAL (169)
8AC-47414-10-00 FRAME, SLIDING 4 (15.490)
8AC-47411-10-00 FRAME, SLIDING 1 (15.490)
*в скобках цены
-
#17
Camarat написал(а):
Антонио 1 написал(а):
Блинн мужики, и как быть(((
Надо найти номера на две деталюшки и заказать.
Викинг 540 Е 2007 года рождения
Нужен номер ремня вариатора и сальника масляного насоса, который качает и смешивает масло с бензом
Номера на передние салазки гусенецы вроде нашел, а вот с остальным проблема(((((Ваши детали с ценами:
87X-17641-00-00 V-BELT (2.390)
93101-10090-00 OIL SEAL (169)
8AC-47414-10-00 FRAME, SLIDING 4 (15.490)
8AC-47411-10-00 FRAME, SLIDING 1 (15.490)
*в скобках цены
На ремень и сальник точно эти номера ?! 

А про салазки ПАРДОН 
Снежик VK540E 2007 год
JYE8AC0028A062243 № двс 8AC-061954
Если это поможет.
С УВАЖЕНИЕМ Антон.
-
#18
Антонио 1 написал(а):
Camarat написал(а):
Антонио 1 написал(а):
Блинн мужики, и как быть(((
Надо найти номера на две деталюшки и заказать.
Викинг 540 Е 2007 года рождения
Нужен номер ремня вариатора и сальника масляного насоса, который качает и смешивает масло с бензом
Номера на передние салазки гусенецы вроде нашел, а вот с остальным проблема(((((Ваши детали с ценами:
87X-17641-00-00 V-BELT (2.390)
93101-10090-00 OIL SEAL (169)
8AC-47414-10-00 FRAME, SLIDING 4 (15.490)
8AC-47411-10-00 FRAME, SLIDING 1 (15.490)
*в скобках ценыНа ремень и сальник точно эти номера ?!
(не хочу обидеть!) просто еще раз уточняюсь, что бы не наступить на грабли

А про салазки ПАРДОНошибся, нужна накладка салазки П-образная, номер её вроде 8AC47421-00XX или замена 8AC47421-0000
Снежик VK540E 2007 год
JYE8AC0028A062243 № двс 8AC-061954
Если это поможет.
С УВАЖЕНИЕМ Антон.
Антон, скачайте каталог, он для вашего вин номера.
Ремень и сальник смело заказывайте под моими номерами.
Накладка на Полоз:
8AC-47421-00-XХ америка (не поставляется)
8AC-47421-00-00 RUNNER, SLIDING 1 европа (1.990)
-
1,1 MB
Просмотры: 5.481
-
#19
Camarat написал(а):
Антонио 1 написал(а):
Camarat написал(а):
Антонио 1 написал(а):
Блинн мужики, и как быть(((
Надо найти номера на две деталюшки и заказать.
Викинг 540 Е 2007 года рождения
Нужен номер ремня вариатора и сальника масляного насоса, который качает и смешивает масло с бензом
Номера на передние салазки гусенецы вроде нашел, а вот с остальным проблема(((((Ваши детали с ценами:
87X-17641-00-00 V-BELT (2.390)
93101-10090-00 OIL SEAL (169)
8AC-47414-10-00 FRAME, SLIDING 4 (15.490)
8AC-47411-10-00 FRAME, SLIDING 1 (15.490)
*в скобках ценыНа ремень и сальник точно эти номера ?!
(не хочу обидеть!) просто еще раз уточняюсь, что бы не наступить на грабли

А про салазки ПАРДОНошибся, нужна накладка салазки П-образная, номер её вроде 8AC47421-00XX или замена 8AC47421-0000
Снежик VK540E 2007 год
JYE8AC0028A062243 № двс 8AC-061954
Если это поможет.
С УВАЖЕНИЕМ Антон.Антон, скачайте каталог, он для вашего вин номера.
Ремень и сальник смело заказывайте под моими номерами.
Накладка на Полоз:
8AC-47421-00-XХ америка (не поставляется)
8AC-47421-00-00 RUNNER, SLIDING 1 европа (1.990)
ОГРОМНОЕ СПАСИБО!!!!!!!!! 
-
#21
Тоже не могу скачать мануал по VK-540 — пишет, что не авторизован. Как быть?
Может кто даст другую ссылочку?
-
#22
Сервисмануал VK540 .zip password:

-
12,4 MB
Просмотры: 13.732
-
#23
Решил сюда сбросить фото отчёт о ремонте коробки передач VK-540. Сразу оговорюсь, что авторство не моё, автору сказал бы спасибо, но не знаю кто он.
-
1,6 MB
Просмотры: 2.253
-
#24
Sven71 написал(а):
Тоже не могу скачать мануал по VK-540 — пишет, что не авторизован. Как быть?
Может кто даст другую ссылочку?
Скачай и установи программу для PDF файлов и будет тебе счастье
-
#25
camarat пытаюсь открыть ,а он пароль требует-подскажи как быть?
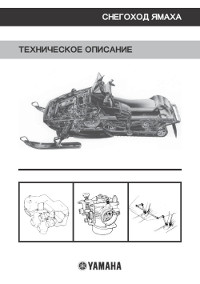
Описание конструкции снегохода Yamaha.
- Год издания: —
- Страниц: 65
- Формат: PDF
- Размер: 6,9 Mb
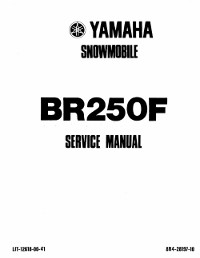
Руководство на английском языке по техническому обслуживанию и ремонту снегохода Yamaha BR250F.
- Год издания: 1981
- Страниц: 191
- Формат: PDF
- Размер: 8,7 Mb
Руководство по эксплуатации и техническому обслуживанию снегоходов Yamaha BR250TG и Yamaha VK540EG.
- Год издания: 2001
- Страниц: 88
- Формат: PDF
- Размер: 8,7 Mb
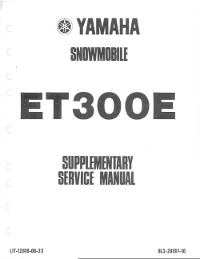
Дополнение к руководству по техническому обслуживанию и ремонту снегохода Yamaha ET300E.
- Год издания: 1980
- Страниц: 8
- Формат: PDF
- Размер: 790 Kb
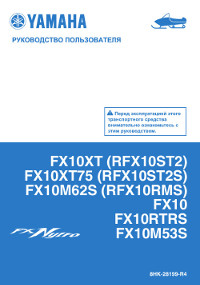
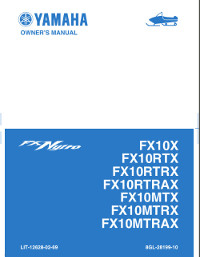
Сборник руководств по эксплуатации и техническому обслуживанию снегоходов Yamaha FX Nytro моделей FX10/RFX10 различных модификаций.
- Год издания: 2007-2012
- Страниц: 94/118/122
- Формат: PDF
- Размер: 32,0 Mb
Сборник руководств на английском языке по эксплуатации и техническому обслуживанию снегоходов Yamaha FX Nytro модели FX10 различных модификаций.
- Год издания: 2007-2011
- Страниц: 92/104
- Формат: PDF
- Размер: 18,5 Mb
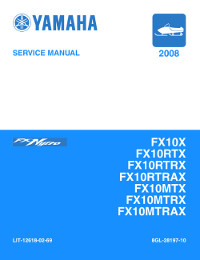
Руководство на английском языке по техническому обслуживанию и ремонту снегохода Yamaha FX Nytro модели FX10 различных модификаций.
- Год издания: 2007
- Страниц: 410
- Формат: PDF
- Размер: 13,5 Mb
Руководство по эксплуатации и техническому обслуживанию снегоходов Yamaha MM700/VT700/VX700ER.
- Год издания: 2001
- Страниц: 100
- Формат: PDF
- Размер: 9,2 Mb
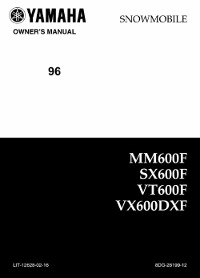
Сборник руководств на английском языке по эксплуатации и техническому обслуживанию снегоходов Yamaha MM600/MM700/SX600/VT600/VT700/VX600/VX700 различных модификаций.
- Год издания: 1998-2002
- Страниц: —
- Формат: PDF
- Размер: 32,0 Mb
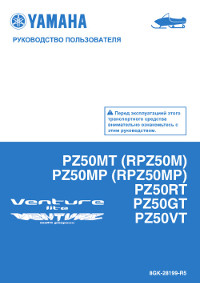
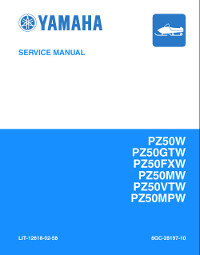
Сборник руководств по эксплуатации и техническому обслуживанию снегоходов Yamaha PZ50/RPZ50 Venture различных модификаций.
- Год издания: 2006/2012
- Страниц: 110/120
- Формат: PDF
- Размер: 11,7 Mb
Сборник руководств на английском языке по эксплуатации и техническому обслуживанию снегоходов Yamaha PZ50 Phazer, Venture различных модификаций.
- Год издания: 2006-2009
- Страниц: 88/92/98/104
- Формат: PDF
- Размер: 21,6 Mb
Сборник руководств на английском языке по техническому обслуживанию и ремонту снегохода Yamaha PZ50 Phazer, Venture различных модификаций.
- Год издания: 2006-2007
- Страниц: 424/114
- Формат: PDF
- Размер: 21,2 Mb
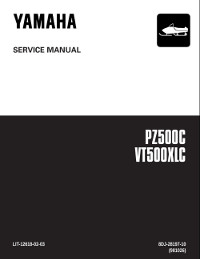
Руководство на английском языке по техническому обслуживанию и ремонту снегоходов Yamaha PZ500C и Yamaha VT500XLC.
- Год издания: 1998
- Страниц: 209
- Формат: PDF
- Размер: 6,0 Mb
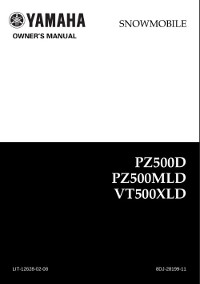
Руководство на английском языке по эксплуатации и техническому обслуживанию снегоходов Yamaha PZ 500D/PZ500MLD/VT500XLD.
- Год издания: 1999
- Страниц: 83
- Формат: PDF
- Размер: 2,4 Mb
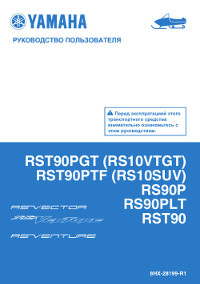
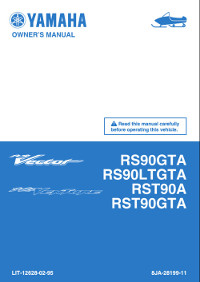
Сборник руководств по эксплуатации и техническому обслуживанию снегоходов Yamaha RS10/RS90/RSG90/RST90 RS Vecror, RS Venture различных модификаций.
- Год издания: 2004/2011/2012
- Страниц: 100/108/162
- Формат: PDF
- Размер: 31,0 Mb
Сборник руководств на английском языке по эксплуатации и техническому обслуживанию снегоходов Yamaha RS90/RSG90/RST90 RS Vector, RS Venture различных модификаций.
- Год издания: 2004-2011
- Страниц: —
- Формат: PDF
- Размер: 63,5 Mb
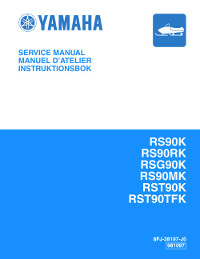
Сборник руководств на английском языке по техническому обслуживанию и ремонту снегоходов Yamaha RS90/RSG90/RST90 RS Venture различных модификаций.
- Год издания: 2004/2006/2008
- Страниц: 414/202/299
- Формат: PDF
- Размер: 37,1 Mb
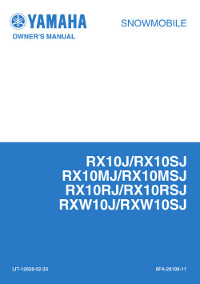
Сборник руководств по эксплуатации и техническому обслуживанию снегоходов Yamaha RX10/RXW10 Apex различных модификаций.
- Год издания: 2001-2012
- Страниц: —
- Формат: PDF
- Размер: 28,6 Mb
Сборник руководств на английском языке по эксплуатации и техническому обслуживанию снегоходов Yamaha RX90/RXW90 Apex различных модификаций.
- Год издания: 2002-2010
- Страниц: —
- Формат: PDF
- Размер: 48,2 Mb
Руководство на английском языке по эксплуатации и техническому обслуживанию снегоходов Yamaha SRX700G.
- Год издания: 2001
- Страниц: 84
- Формат: PDF
- Размер: 6,6 Mb
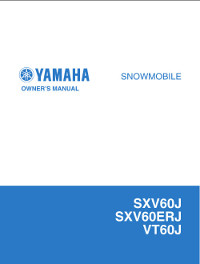
Сборник руководств по эксплуатации и техническому обслуживанию снегоходов Yamaha SXV60/SXV70/VT60/VT70 различных модификаций.
- Год издания: 2003
- Страниц: 113/127
- Формат: PDF
- Размер: 10,5 Mb
Сборник руководств на английском языке по эксплуатации и техническому обслуживанию снегоходов Yamaha SXV60/SXV70/VT60/VT70 различных модификаций.
- Год издания: 2001-2005
- Страниц: —
- Формат: PDF
- Размер: 48,3 Mb
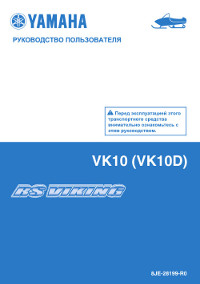
Сборник руководств по эксплуатации и техническому обслуживанию снегоходов Yamaha VK10/VK10D RS Viking.
- Год издания: 2007/2012
- Страниц: 98/108
- Формат: PDF
- Размер: 15,6 Mb
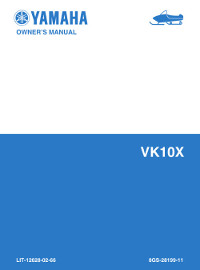
Сборник руководств на английском языке по эксплуатации и техническому обслуживанию снегоходов Yamaha VK10L и Yamaha VK10X.
- Год издания: 2005/2007
- Страниц: 98/88
- Формат: PDF
- Размер: 7,9 Mb
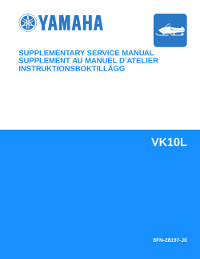
Дополнение к руководству по техническому обслуживанию и ремонту снегоходов Yamaha VK10L/VK10W.
- Год издания: 2005-2006
- Страниц: 360/103
- Формат: PDF
- Размер: 12,2 Mb
Руководство по эксплуатации и техническому обслуживанию снегоходов Yamaha VK540E/VK540EC.
- Год издания: 2012
- Страниц: 82
- Формат: PDF
- Размер: 3,2 Mb
Сборник руководств на английском языке по эксплуатации и техническому обслуживанию снегоходов Yamaha VK540EG/VK540EK.
- Год издания: 2001/2004
- Страниц: 76
- Формат: PDF
- Размер: 4,8 Mb
Руководство на английском языке по техническому обслуживанию и ремонту снегохода Yamaha VK540EK.
- Год издания: 2000
- Страниц: 211
- Формат: PDF
- Размер: 4,9 Mb
Руководство по эксплуатации и техническому обслуживанию снегохода Yamaha VT500XL.
- Год издания: 2001
- Страниц: 84
- Формат: PDF
- Размер: 8,2 Mb
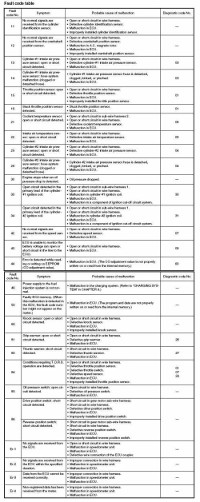
Коды неисправностей Yamaha.
- Год издания: —
- Страниц: 11
- Формат: JPG
- Размер: 1,7 Mb
Сервисный мануал VK-540 на русском языке
Сервисный мануал VK-540 на русском языке
Сервисный мануал VK-540 на русском языке
со сноумоторса подогнали..
«Was mich nicht umbringt, macht mich stärker…»
Friedrich Wilhelm Nietzsche
-
Бонч - .
- Сообщения: 27488
- Зарегистрирован: 13 дек 2009, 08:30
- Откуда: Мурманск
- Благодарил (а): 21905 раз.
- Поблагодарили: 17107 раз.
- Имя: Александр
- Техника: BoatMaster 300S Самурай; MPS II (3.2 TD, 4AT, snorkel Safari, body lift — 4 sm, 285/75 r17 + Come Up Seal DS 9,5)
-
- Сайт
Объявления
Re: Сервисный мануал VK-540 на русском языке
Николаевна » 27 янв 2016, 09:32
А там нет ещё на Yamaha VENTURE 480 TF 2000 г.в. 
Вот на такой
http://old.sport-elit.ru/snow/yamaha/archive/sn-070.asp
Настоящие рыбаки уху не едят.они ею закусывают…..
-
Николаевна - Терская поморка
- Сообщения: 11676
- Зарегистрирован: 03 апр 2012, 10:39
- Откуда: Терский берег-летом,Оленегорск-зимой.
- Благодарил (а): 14209 раз.
- Поблагодарили: 10177 раз.
- Имя: Надежда
- Дополнительная информация: А ну её,эту работу!
- Техника: Шеви , Yamaha, Skandik WT 550.
Re: Сервисный мануал VK-540 на русском языке
Бонч » 27 янв 2016, 10:41
у меня где то было куча мануалов.. но скорей всего только на английском.
надо в компе дома рыться..
«Was mich nicht umbringt, macht mich stärker…»
Friedrich Wilhelm Nietzsche
-
Бонч - .
- Сообщения: 27488
- Зарегистрирован: 13 дек 2009, 08:30
- Откуда: Мурманск
- Благодарил (а): 21905 раз.
- Поблагодарили: 17107 раз.
- Имя: Александр
- Техника: BoatMaster 300S Самурай; MPS II (3.2 TD, 4AT, snorkel Safari, body lift — 4 sm, 285/75 r17 + Come Up Seal DS 9,5)
-
- Сайт
Re: Сервисный мануал VK-540 на русском языке
Николаевна » 27 янв 2016, 10:44
Есть на анлгийском ,не владею,только Хенде Хох знаю
Настоящие рыбаки уху не едят.они ею закусывают…..
-
Николаевна - Терская поморка
- Сообщения: 11676
- Зарегистрирован: 03 апр 2012, 10:39
- Откуда: Терский берег-летом,Оленегорск-зимой.
- Благодарил (а): 14209 раз.
- Поблагодарили: 10177 раз.
- Имя: Надежда
- Дополнительная информация: А ну её,эту работу!
- Техника: Шеви , Yamaha, Skandik WT 550.
Re: Сервисный мануал VK-540 на русском языке
Николаевна » 27 янв 2016, 10:56
Тимофей,вы сначала посмотрели -они на английском.
Настоящие рыбаки уху не едят.они ею закусывают…..
-
Николаевна - Терская поморка
- Сообщения: 11676
- Зарегистрирован: 03 апр 2012, 10:39
- Откуда: Терский берег-летом,Оленегорск-зимой.
- Благодарил (а): 14209 раз.
- Поблагодарили: 10177 раз.
- Имя: Надежда
- Дополнительная информация: А ну её,эту работу!
- Техника: Шеви , Yamaha, Skandik WT 550.
Вернуться в Народный мануал VK-540
Перейти:
Кто сейчас на конференции
Сейчас этот форум просматривают: нет зарегистрированных пользователей и гости: 1
-
Page 1
SERVICE MANUAL… -
Page 3: How To Use This Manual
ESS00002 ESS00004 NOTICE HOW TO USE THIS MANUAL This manual was written by the Yamaha Motor Particularly important information is distin- Company primarily for use by Yamaha dealers guished in this manual by the following nota- and their qualified mechanics. It is not possible tions: to put an entire mechanic’s education into one…
-
Page 4
ESS00006 ILLUSTRATED SYMBOLS (Refer to the illustration) Illustrated symbols 1 to 8 are designed as thumb tabs to indicate the chapter’s number and content. 1 General information 2 Periodic inspection and adjustment 3 Chassis 4 Power train 5 Engine overhaul 6 Carburetion 7 Electrical 8 Specifications… -
Page 5
INDEX GENERAL INFORMATION INFO PERIODIC INSPECTIONS AND INSP ADJUSTMENTS CHASSIS CHAS POWER TRAIN POWR ENGINE CARBURETION CARB ELECTRICAL ELEC SPECIFICATIONS SPEC… -
Page 6: Table Of Contents
CHAPTER 1. THROTTLE OVERRIDE SYSTEM (T.O.R.S.) CHECK ….2-11 GENERAL INFORMATION STARTER (CHOKE) CABLE FREEPLAY ADJUSTMENT ..2-12 MACHINE IDENTIFICATION .
-
Page 7
FRONT SUSPENSION ….ENGINE ASSEMBLY ….HANDLING NOTES . -
Page 8
CHAPTER 7. STARTER MOTOR ….7-21 ELECTRICAL CHARGING SYSTEM ….7-24 CIRCUIT DIAGRAM . -
Page 10: Chapter 1. General Information
MACHINE IDENTIFICATION INFO ESS00011 GENERAL INFORMATION ESS00012 MACHINE IDENTIFICATION ESS00013 FRAME SERIAL NUMBER The frame serial number 1 is located on the right hand side of the frame (just below the front of the seat). ESS00014 ENGINE SERIAL NUMBER The engine serial number 2 is located on the left hand side of the crankcase.
-
Page 11: Important Information
IMPORTANT INFORMATION INFO ESS00015 IMPORTANT INFORMATION ESS00016 PREPARATION FOR REMOVAL AND DIS- ASSEMBLY 1. Remove all dirt, mud, dust, and foreign mate- rial before removal and disassembly. While cleaning, take care to protect the elec- trical parts, such as relays, switches, motor, resistors, controllers, etc., from high pres- sure water splashes.
-
Page 12: All Replacement Parts
ESS00017 ALL REPLACEMENT PARTS We recommend using genuine Yamaha parts for all replacements. Use oil and grease recom- mended by Yamaha for assembly and adjust- ments. ESS00018 GASKETS, OIL SEALS, AND O-RINGS 1. All gaskets, seals, and O-rings should be re- placed when an engine is overhauled.
-
Page 13: Circlips
IMPORTANT INFORMATION INFO ESS00021 CIRCLIPS All circlips should be inspected carefully before reassembly. Always replace piston pin clips af- ter one use. Replace misshapen circlips. When installing a circlip 1 , make sure that the sharp edged corner 2 is positioned opposite to the thrust 3 it receives.
-
Page 14: Special Tools
SPECIAL TOOLS INFO ESS00023 SPECIAL TOOLS Some special tools are necessary for a com- pletely accurate tune-up and assembly. Using the correct special tool will help prevent dam- age that can be caused by the use of improper tools or improvised techniques. NOTE: Be sure to use the correct part number when or- dering the tool, since the part number may differ…
-
Page 15: For Power Train Service
SPECIAL TOOLS INFO D Rotor holding puller P/N: YU-33270 (for U.S.A./Canada) 90890-01362 (for Europe) This tool is used to remove the magneto rotor. D Rotor holding tool P/N: YU-01235 (for U.S.A./Canada) 90890-01235 (for Europe) This tool is used to remove the starter pulley. ESS00026 FOR POWER TRAIN SERVICE D Primary sheave holder…
-
Page 16: For Carburetion Service
SPECIAL TOOLS INFO D Clutch separator adapter P/N: YS-34480 (for U.S.A./Canada) 90890-01740 (for Europe) This tool is used when disassembling and as- sembling the primary sheave. D YXR clutch bushing jig kit P/N: YS-39752 This tool is used for removal and installation of primary clutch weight and roller bushings.
-
Page 17
SPECIAL TOOLS INFO D Electro tester P/N: YU-33260-A (for U.S.A./Canada) 90890-03021 (for Europe) This instrument is invaluable for checking the electrical system. -
Page 18: Chapter 2. Periodic Inspections And Adjustments
INSP INTRODUCTION/PERIODIC MAINTENANCE TABLE ESS00029 PERIODIC INSPECTIONS AND ADJUSTMENTS ESS00030 INTRODUCTION This chapter includes all information necessary to perform recommended inspections and adjust- ments. These preventive maintenance procedures, if followed, will ensure more reliable machine operation and a longer service life. In addition, the need for costly overhaul work will be greatly reduced. This information applies to machines already in service as well as new machines that are being prepared for sale.
-
Page 19
INSP INTRODUCTION/PERIODIC MAINTENANCE TABLE Every Initial 1 month Pre- Seasonally operation Item Remarks 800 km check 3,200 km (500 mi) (Daily) (2,000 mi) (40 hr) (160 hr) Drive track / Idler Check deflection, wear and damage. wheels Adjust / replace if necessary. Check wear and damage. -
Page 20: Engine
INSP SPARK PLUGS ESS00032 ENGINE ESS00033 SPARK PLUGS 1. Remove: S Spark plug caps S Spark plugs 2. Inspect: S Electrodes 1 Damage/wear ! Replace the spark plug. S Insulator color 2 3. Measure: S Spark plug gap a Out of specification ! Regap. Use a wire thickness gauge.
-
Page 21: Oil Pump
INSP OIL PUMP ESS00034 OIL PUMP ESS00035 Air bleeding CAUTION: The oil pump and oil delivery line must be bled in the following cases: S Any portion of the oil system has been dis- connected. S The machine has been turned on its side. S The oil tank has been run empty.
-
Page 22
INSP OIL PUMP 10. Remove: S Bleed bolt 1 S Gasket (bleed bolt) 11. Drain the oil until no more air bubbles ap- pear from the bleed hole. 12. Inspect: S Gasket 1 (bleed bolt) Damage/wear ! Replace. 13. Install: S Gasket 1 (bleed bolt) S Bleed bolt 2 14. -
Page 23: Oil Filter Inspection
INSP OIL FILTER INSPECTION/ENGINE OIL LINE INSPECTION OIL FILTER INSPECTION 1. Remove: S Oil tank 1 2. Remove: S Oil filter 1 NOTE: Plug the oil hoses so that the oil will not run out of the oil tank and oil pump. 3.
-
Page 24: Fuel Line Inspection
INSP FUEL LINE INSPECTION/FUEL FILTER INSPECTION ESS00037 FUEL LINE INSPECTION 1. Inspect: S Fuel hose 1 S Fuel delivery hoses 2 S Vacuum hose 3 Cracks/damage ! Replace. FUEL FILTER INSPECTION 1. Remove: S Side cover (left 1 and right 2 ) S Plate 3 2.
-
Page 25: Fuel Filter Inspection
INSP FUEL FILTER INSPECTION 5. Remove: S Seat 1 6. Remove: S Fuel lever indicator hose 1 S Oil level indicator hose 2 S Center cover 3 7. Remove: S Spring bands 1 S Cap 2 S Fuel filter 3 8.
-
Page 26: Cooling Fan Belt Tension Adjustment
INSP COOLING FAN BELT TENSION ADJUSTMENT COOLING FAN BELT TENSION ADJUST- MENT 1. Adjust: S Fan belt deflection a Pushed at belt center by hand. Out of specification ! Adjust. Fan belt deflection a : 8 mm (0.31 in)/ 4 X 6 kg (8.8 X 13.2 lb) 2.
-
Page 27: Engine Idle Speed Adjustment
ENGINE IDLE SPEED ADJUSTMENT/ INSP THROTTLE CABLE FREEPLAY ADJUSTMENT ESS00044 ENGINE IDLE SPEED ADJUSTMENT 1. Adjust: S Engine idle speed Adjustment steps: S Start the engine and let it warm up. S Turn the throttle stop screw 1 in or out until the specified engine idle speed is obtained.
-
Page 28: Throttle Override System (T.o.r.s.) Check
INSP THROTTLE OVERRIDE SYSTEM (T.O.R.S.) CHECK ESS00048 THROTTLE OVERRIDE SYSTEM (T.O.R.S.) CHECK WARNING When checking T.O.R.S.: S Be sure the parking brake is applied. S Be sure the throttle lever moves smoothly. S Do not run the engine up to the clutch en- gagement speed.
-
Page 29: Starter (Choke) Cable Freeplay Adjustment
STARTER (CHOKE) CABLE FREEPLAY ADJUSTMENT/ INSP EXHAUST SYSTEM INSPECTION ESS00050 STARTER (CHOKE) CABLE FREEPLAY AD- JUSTMENT 1. Pull back the starter cable outer tube 1 . 2. Measure: S Starter cable freeplay a Out of specification ! Adjust. Starter cable freeplay a : 0.5 X 1.5 mm (0.02 X 0.06 in) 3.
-
Page 30: Power Train
INSP DRIVE V-BELT ESS00054 POWER TRAIN ESS00055 DRIVE V-BELT 1. Remove: S Drive V-belt guard 1 WARNING S Be sure there are shims (2 pcs) 1 between secondary fixed and sliding sheaves when installing the NEW belt. S If there is no gap, the clutch engagement speed will be reduced.
-
Page 31
INSP DRIVE V-BELT Number V-belt width of spacers 35 mm (1.38 in) or more 2 spacers 34 mm (1.34 in) 1 spacer 33 mm (1.30 in) No spacer Replace the 32 mm (1.26 in) or less V-belt 3. Remove: S Drive V-belt 1 Removal steps: S Rotate the secondary sliding sheave clock- wise 2 and push it 3 so that it separates from… -
Page 32
INSP DRIVE V-BELT 5. Inspect: S Primary sheave S Secondary sheave Oil or grease adhered to the primary and secondary sheaves ! Remove the oil or grease using a rag soaked in lacquer thinner or solvent. Check the primary and secondary sheaves. -
Page 33: Sheave Distance And Offset Adjustment
INSP SHEAVE DISTANCE AND OFFSET ADJUSTMENT ESS00055 SHEAVE DISTANCE AND OFFSET ADJUST- MENT 1. Measure: S Sheave distance a Use the sheave gauge. Out of specification ! Adjust. Sheave distance a : 267 X 270 mm (10.5 X 10.6 in) Sheave gauge: 90890-01702, YS-91047-3 2.
-
Page 34
INSP SHEAVE DISTANCE AND OFFSET ADJUSTMENT Shim size Part Number Thickness 90201-252F1 0.5 mm (0.02 in) 90201-25527 1.0 mm (0.04 in) 90201-25526 2.0 mm (0.08 in) S Install the secondary sheave and bolt (sec- ondary sheave). Bolt (secondary sheave): 60 Nm (6.0 mSkg, 43 ftSlb) S Recheck the sheave offset. -
Page 35: Engagement Speed Check
INSP ENGAGEMENT SPEED CHECK/ADJUSTING THE BRAKE ESS00057 ENGAGEMENT SPEED CHECK 1. Place the machine on a level surface of hard- packed snow. 2. Check: S Clutch engagement speed Checking steps: S Start the engine, and open the throttle lever gradually. S Check the engine speed when the machine starts moving forward.
-
Page 36: Brake Pad Inspection
INSP BRAKE PAD INSPECTION/DRIVE CHAIN ESS00062 BRAKE PAD INSPECTION 1. Apply the brake lever. 2. Inspect: S Brake pad thickness a Out of specification ! Replace brake pad as a set. Wear limit a : 10 mm (0.39 in) ESS00065 DRIVE CHAIN ESS00066 Oil level inspection…
-
Page 37
INSP DRIVE CHAIN ESS00067 Oil replacement Oil replacement steps: S Place the oil pan under the drain hole 1 . S Remove the oil drain bolt 2 and drain the oil. CAUTION: Be sure to remove any oil from the heat pro- tector. -
Page 38: Track Tension Adjustment
INSP TRACK TENSION ADJUSTMENT ESS00069 TRACK TENSION ADJUSTMENT WARNING A broken track or track fittings, and debris thrown by the track could be dangerous to an operator or bystanders. Observe the fol- lowing precautions. S Do not allow anyone to stand behind the machine when the engine is running.
-
Page 39: Slide Runner Inspection
TRACK TENSION ADJUSTMENT/ INSP SLIDE RUNNER INSPECTION a. Start the engine and rotate the track once or twice. Stop the engine. b. Check the track alignment with the slide run- ner 3 . If the alignment is incorrect, turn the left and right adjusters to adjust.
-
Page 40: Chassis
INSP SKI/SKI RUNNER/STEERING SYSTEM ESS00071 CHASSIS ESS00072 SKI/SKI RUNNER 1. Check: S Ski S Ski runner Wear/Damage ! Replace. Ski runner wear limit 1 : 4.5 mm (0.18 in) ESS00073 STEERING SYSTEM ESS00074 Freeplay check 1. Check: S Steering system freeplay Move the handlebar up and down and back and forth.
-
Page 41
INSP STEERING SYSTEM ESS00075 Toe-out adjustment 1. Place the machine on a level surface. 2. Check: S Ski toe-out Point the skis forward. Out of specification ! Adjust. Ski toe-out ( a – c ): 0 X 15 mm (0 X 0.59 in) Ski stance b (center to center): 960 mm (37.8 in) 3. -
Page 42: Lubrication
INSP LUBRICATION ESS00076 LUBRICATION ESS00077 Brake lever, throttle lever and throttle cable 1. Lubricate the brake lever pivot, throttle lever and the ends of the throttle cable and brake cable. Recommended lubricant: Esso Beacon 325 Grease WARNING Apply a dab of grease onto only the end of the cable.
-
Page 43
INSP LUBRICATION ESS00078 Front and rear suspension 1. Use a grease gun to inject grease into the nipples 1 and ball joints 2 . Recommended lubricant: Esso Beacon 325 Grease or Aeroshell Grease #7A A Front B Rear 2-26… -
Page 44: Electrical
INSP HEADLIGHT BEAM ADJUSTMENT ESS00079 ELECTRICAL ESS00080 HEADLIGHT BEAM ADJUSTMENT 1. Place the machine on a level surface. 2. Measure the distance from the floor to the center of the headlight and place a mark on the wall equal to distance H from the floor. 3.
-
Page 45: Battery Inspection
INSP BATTERY INSPECTION ESS00081 BATTERY INSPECTION WARNING Battery electrolyte is dangerous; it contains sulfuric acid and therefore is poisonous and highly caustic. Always follow these preventive measures: S Avoid bodily contact with electrolyte as it can cause severe burns or permanent eye injury.
-
Page 46
INSP BATTERY INSPECTION 3. Check: S Specific gravity Less than 1.280 ! Recharge battery. Charging current: 1.4 amps/10 hrs Specific gravity: 1.280 at 20_C (68_F) Replace the battery if: S Battery voltage will not rise to a specific value or if bubbles fail to rise even after many hours of charging. -
Page 47: Fuse Inspection
INSP FUSE INSPECTION FUSE INSPECTION 1. Remove: S Fuse 1 S Spare fuse 2 2. Inspect: S Fuse Inspection: S Connect a pocket tester to the fuse and check it for continuity. NOTE: Set the tester selector to “Ω 1” position. Pocket tester: 90890-03112, YU-03112 S If the tester indicates…
-
Page 48: Tuning
INSP CARBURETOR TUNING ESS00083 TUNING ESS00084 CARBURETOR TUNING The carburetors are set at the factory to run at temperatures of 0_C X –20_C (32_F X –4_F) at sea level. If the machine is to be operated un- der conditions other than those specified above, the carburetors must be properly ad- justed.
-
Page 49
NOTE: These jetting specifications are subject to change. Consult the latest technical information from Yamaha to be sure you have the most up- to-date jetting specifications. 1 Main jet 2 Pilot jet 3 Pilot screw… -
Page 50
INSP CARBURETOR TUNING ESS00088 Guide for carburetion 2E301 1. Fuel flow chart: A guide to the fuel flow rate according to the throttle opening. CAUTION: If the air intake silencer and air chamber are removed from the carburetors, the change in pressure in the intake will create a lean mixture that could result in severe engine damage. -
Page 51
INSP CARBURETOR TUNING ESS00089 Low speed tuning The carburetors are built so that low speed tun- ing can be done by adjusting the pilot screw 1 and throttle stop screw 2 . CAUTION: Never run the engine without the air intake silencer installed. -
Page 52
INSP CARBURETOR TUNING ESS00090 Main jet selection chart Main jet selection chart Spark plug color Diagnosis Remedy Light tan or gray Carburetors are tuned properly. Dry black or fluffy Mixture is too rich. Replace the main jet with the next smaller deposits size. -
Page 53
INSP CARBURETOR TUNING ESS00091 Troubleshooting Trouble Diagnosis Adjustment Hard starting Insufficient fuel Add gasoline. Excessive use of Return the starter lever to its seated position so the starter or that the starter valve is fully closed. choke S Check and, if necessary, clean the fuel tank air Fuel passage is clogged or frozen vent, the fuel filter and all of the fuel passages. -
Page 54
INSP CARBURETOR TUNING Trouble Diagnosis Adjustment Poor performance Starter valve is left Return the starter lever to its seated position so at high speeds: open that the starter valve is fully closed. S Power loss Clogged air vent Remove and clean the air vent. S Poor acceleration Poor acceleration S Remove the main jet, clean it with compressed… -
Page 55: Clutch
INSP CLUTCH ESS00092 CLUTCH Silver Yellow ESS00093 High altitude Blue White Specifications Model: VK540E X 1,000 m 1,200 X 1,800 m 1,800 m X ELEVATION (3,000 X 6,500 ft) (6,500 ft X) (X 3,500 ft) Idle speed APPROX. 1,200 r/min Clutch engarement APPROX.
-
Page 56
INSP CLUTCH/GEAR SELECTION The clutch may require tuning depending upon where the machine will be operated and the de- sired handling characteristics. The clutch can be tuned by changing the engagement and shifting speeds. Clutch engagement speed is defined as the en- gine speed at which the machine first begins to move from a complete stop. -
Page 57: Gear Selection
INSP GEAR SELECTION 1 Chain and sprocket pat number Part name Teeth & links Part no. Standard Drive sprocket 17 teeth 83R-17682-00 VK540E Driven sprocket 39 teeth 83R-47548-00 VK540E Chain 70 links 94880-06070 VK540E 2 Gear ratio Drive gear 17 teeth Driven gear 2.29 39 teeth…
-
Page 58
INSP GEAR SELECTION 6 Primary spring Spring identification color code Spring rate color Preload color Spring rate Preload Wire Outside Free Color No. of Standard Parts No. N / mm gauge diameter length coils (kg / mm) (kg) mm (in) mm (in) mm (in) 90501-481J1… -
Page 59
INSP GEAR SELECTION 9 Rollers I.D. 8 mm (0.3 in) ROLLER with OUTSIDE BUSHING IDENTIFICATION BUSHING PART Standard DIAMETER TYPE (P / N) MARK (Width) NUMBER 88R-17624-01 Vespel 15.6 mm No Mark (0.61 in) VK540E 90380-08183 14.6 mm (0.57 in) 2-42… -
Page 60: High Altitude Tuning
INSP HIGH ALTITUDE TUNING ESS00096 HIGH ALTITUDE TUNING To attain the best performance in high altitude conditions, carefully tune the snowmobile as outlined below. Check STD settings Carburetors Spark plugs Adjust the main jet size according to the chart Test the main jet Adjust the size of the main jet Not OK (performance &…
-
Page 61: Rear Suspension
INSP REAR SUSPENSION ESS00100 REAR SUSPENSION ESS00101 Stopper band 1. Adjust: S Stopper band tension CAUTION: Make sure the left and right sides of the rear suspension stopper band are adjusted evenly. NOTE: This adjustment affects the handling character- istics of the machine. Adjustment steps: S Loosen the locknut 1 .
-
Page 62
INSP REAR SUSPENSION Extension spring preload 1. Adjust: S Extension spring preload Adjuster Turn in Turn out Preload Harder Softer Snow Condition Soft Standard 16 mm (0 63 in) 16 mm (0.63 in) Length CAUTION: Be sure the left and right spring preload is same. -
Page 63
INSP REAR SUSPENSION ESS00103 Rear suspension-full rate 1. Adjust: S Full rate adjuster Adjustment steps: S Loosen the nut 1 1/2 or 3/4 turns, while hold- ing the adjusting bolt 2 securely with a wrench so it does not move. CAUTION: Never allow the adjusting bolt 2 to move while loosening the nut. -
Page 64
INSP REAR SUSPENSION This model has a “Easy adjust” system for the Full rate adjuster. The bolt has teeth on it. So when the bolt is turned, it rides up and down the bracket. NOTE: S The nut has to be loosen first, while the bolt is held in place with a wrench. -
Page 65: Chapter 3. Chassis
CHAS STEERING ESS00104 CHASSIS ESS00105 STEERING 15 Nm (1.5 mDkg, 11 ftDlb) Order Job name/Part name Q’ty Remarks Handlebar removal Remove the parts in the order listed below. Steering pad (rear) Steering pad (front) Handlebar holder (upper) Handlebar Handlebar holder (lower) For installation, reverse the removal procedure.
-
Page 66
CHAS STEERING ESSO beacon 325 grease or Aeroshell greaes #7A 19 Nm (1.9 mDkg, 14 ftDlb) 27 Nm (2.7 mDkg, 20 ftDlb) 43 Nm (4.3 mDkg, 31 ftDlb) 25 Nm (2.5 mDkg, 18 ftDlb) Order Job name/Part name Q’ty Remarks Steering column and tie rod removal Removing the parts in the order listed below. -
Page 67: Inspection
CHAS STEERING ESS00106 INSPECTION 1. Inspect: D Handlebar 1 D Steering column 2 Bends/cracks/damage ! Replace. WARNING Do not attempt to straighten a bent column. This may dangerously weaken the column. 2. Inspect: D Bearings (steering column) 1 D Steering column 2 (bearing contact sur- faces) Scratches/wear/damage ! Replace.
-
Page 68: Installation
CHAS STEERING ESS00107 INSTALLATION 1. Install: D Tie-rod 1 D Relay rod 2 NOTE: D Install the rod end 3 with the left-hand thread onto the tie-rod on the right side. D The threads on both a rod ends must be the same length.
-
Page 69
CHAS STEERING 4. Adjust: D Skis Adjustment steps: D Temporarily install the handlebar. D Hold the handlebar straight and check that the skis are at right angles to the handlebar. D Loosen the locknuts (relay rod) 1 . D Position the skis parallel in the riding direc- tion. -
Page 70: Ski
CHAS ESS00108 ESSO beacon 325 grease or 43 Nm (4.3 mDkg, 31 ftDlb) Aeroshell greaes #7A 21 Nm (2.1 mDkg, 15 ftDlb) Fit the stopper with its raised portion positioned in front. Be careful not to reverse the mounting positions of the left and right ski assemblies. Order Job name/Part name Q’ty…
-
Page 71: Inspection
CHAS ESS00109 INSPECTION 1. Inspect: D Ski 1 D Ski runner 2 D Ski stopper 3 Wear/cracks/damage ! Replace. D Mounting bolt 4 D Collar 5 Wear/damage ! Replace.
-
Page 72: Front Suspension
CHAS FRONT SUSPENSION ESS00111 FRONT SUSPENSION 43 Nm (4.3 mDkg, 31 ftDlb) 21 Nm (2.1 mDkg, 15 ftDlb) 2 Nm (0.2 mDkg, 1.4 ftDlb) 16 Nm (1.6 mDkg, 11 ftDlb) 5 Nm (0.5 mDkg, 3.6 ftDlb) 10 Nm (1.0 mDkg, 7.2 ftDlb) ESSO beacon 325 grease or Aeroshell greaes #7A Order…
-
Page 73: Inspection
CHAS FRONT SUSPENSION ESS00112 HANDLING NOTES WARNING This shock absorber contains highly com- pressed nitrogen gas. Befor handling the shock absorber read and make sure that you understand the following information. The manufacturer cannot be held responsible for property damage or personal injury that may result from improper handlind.
-
Page 74: Installation
CHAS FRONT SUSPENSION 4. Inspect: D Spring Wear/cracks/damage ! Replace. 5. Measure: D Spring free length a Out of specification ! Replace. Spring free length limit: 235.0 mm (9.25 in) 6. Inspect: D Oil seals Damage ! Replace. ESS00114 INSTALLATION 1.
-
Page 75
CHAS FRONT SUSPENSION 3. Tighten: Suspension bracket nut: 43 Nm (4.3 mDkg, 31 ftDlb) Set screw: 2 Nm (0.2 mDkg, 1.4 ftDlb) LOCTITE NOTE: Install the suspension bracket so that the “L” mark is on the left side and the “R” mark is on the right side. -
Page 76: Chapter 4. Power Train
POWR PRIMARY SHEAVE AND DRIVE V-BELT ESS00117 POWER TRAIN ESS00118 PRIMARY SHEAVE AND DRIVE V-BELT 120 Nm (12.0 mDkg, 85 ftDlb) 60 Nm (6.0 mDkg, 43 ftDlb) Order Job name/Part name Q’ty Remarks Primary sheave removal Remove the parts in the order listed below. V-belt Blind cap Primary sheave assembly…
-
Page 77
POWR PRIMARY SHEAVE AND DRIVE V-BELT 6 Nm (0.6 mDkg, 4.3 ftDlb) 14 Nm (1.4 mDkg, 10 ftDlb) 200 Nm (20 mDkg, 145 ftDlb) Clean the threads. 16 mm (0.63 in) Apply LOCTITE #648 as illustrated in 35 mm And then tighten the spider. (The spider must (1.18 1.38 in) be turned counterclockwise to be tightened.) -
Page 78: Removal
POWR PRIMARY SHEAVE AND DRIVE V-BELT ESS00119 REMOVAL 1. Remove: D Drive V-belt guard D Drive V-belt D Grommet 1 2. Remove: D Primary sheave assembly 1 NOTE: Use the primary sheave holder 2 and primary sheave puller 3 . Primary sheave holder: 90890-01701, YS-01880 Primary sheave puller:…
-
Page 79: Disassembly
POWR PRIMARY SHEAVE AND DRIVE V-BELT ESS00120 DISASSEMBLY 1. Remove: D Fixed sheave 1 D Stopper 2 D Sliding sheave 3 D Bushing 4 D Spider 5 Removal steps: D Immerse the primary sheave assembly in 80_ X 100_C (176_ X 212_F) water for several minutes.
-
Page 80: Inspection
POWR PRIMARY SHEAVE AND DRIVE V-BELT ESS00121 INSPECTION 1. Inspect: D Spider 1 D Sliding sheave 2 D Fixed sheave 3 D Primary sheave cap 4 Cracks/damage ! Replace. 2. Inspect: D Primary sheave spring 1 Cracks/damage ! Replace. 3. Measure: D Primary sheave spring free length a Out of specification ! Replace the primary sheave spring.
-
Page 81
POWR PRIMARY SHEAVE AND DRIVE V-BELT 6. Inspect: D Weight 1 D Roller 2 D Bushing 3 D Slider 4 D Rivet 5 D Collar Wear/scratches/damage ! Replace. Slider inside clearance Min. 0 mm (0 in) Max. 0.3 mm (0.0118 in) Rivet replacement steps: D Remove old rivet with the appropriate drill. -
Page 82: Assembly
POWR PRIMARY SHEAVE AND DRIVE V-BELT ESS00122 ASSEMBLY 1. Install: D Sliding sheave (onto the spider) NOTE: Be sure the sliding sheave match mark (X) is aligned with the spider match mark (X). 2. Install: D Fixed sheave (onto the spider) NOTE: Apply LOCTITE to the fixed sheave as shown.
-
Page 83
POWR PRIMARY SHEAVE AND DRIVE V-BELT D Tighten the spider to specification using the clutch spider separator (bar wrench) 3 . Spider: 200 Nm (20 mDkg, 145 ftDlb) CAUTION: The spider has a left-handed thread. WARNING D Do not operate the primary sheave until the LOCTITE has dried completely. -
Page 84: Installation
POWR PRIMARY SHEAVE AND DRIVE V-BELT ESS00123 INSTALLATION 1. Install: D Primary sheave assembly CAUTION: Be sure to remove any oil or grease from the tapered portion of the crankshaft and spider using a cloth dampened with thinner. 2. Apply: D YAMALUBE 2-cycle oil or an equivalent grease (to threads of primary sheave bolt) 3.
-
Page 85: Secondary Sheave
POWR SECONDARY SHEAVE ESS00124 SECONDARY SHEAVE 60 Nm (6.0 mDkg, 43 ftDlb) 21 Nm (2.1 mDkg, 15 ftDlb) Order Job name/Part name Q’ty Remarks Secondary sheave removal Remove the parts in the order listed below. V-belt Secondary shaft (jackshaft) With secondary sheave Washer Shim –…
-
Page 86
POWR SECONDARY SHEAVE Standard position: No. 2 Standard twist angle: Standard position: “C” ESSO beacon 325 grease or Aeroshell grease #7A Order Job name/Part name Q’ty Remarks Secondary sheave disassembly Remove the parts in the order listed below. Circlip Washer Spring seat Secondary spring Sliding sheave… -
Page 87: Disassembly
POWR SECONDARY SHEAVE ESS00125 DISASSEMBLY WARNING D Use extreme CAUTION when disassem- bling the secondary sheave since serious injury can occur due to the sudden release of spring tension. Use the sheave com- pressor to contain the spring tension be- fore removing the nuts (spring seat).
-
Page 88: Inspection
POWR SECONDARY SHEAVE ESS00126 INSPECTION 1. Inspect: D Sliding sheave 1 D Fixed sheave 2 D Spring seat 3 D Shims 4 Cracks/damage ! Replace. 2. Inspect: D Bushing (spring seat) 1 D Sliding sheave (V-belt contact surface) 2 Scratches/wear/damage ! Replace. D Sliding bushing 3 Unsymmetrical wear/damage ! Replace.
-
Page 89: Assembly
POWR SECONDARY SHEAVE ESS00127 ASSEMBLY 1. Install: D Secondary sheave spring 1 D Spring seat 2 NOTE: Hook the end of the secondary sheave spring into the spring holes in the sliding sheave. Hook the other end of the spring into the holes in the spring seat.
-
Page 90: Installation
POWR SECONDARY SHEAVE ESS00128 INSTALLATION 1. Lubricate: D Splines (fixed sheave) Recommended grease: Esso beacon 325 grease or Aeroshell grease #7A 2. Tighten: Secondary sheave bolt: 60 Nm (6.0 mDkg, 43 ftDlb) 3. Adjust: D V-belt position Refer to “DRIVE V-BELT” in CHAPTER 2. D Sheave distance D Sheave offset D Secondary sheave freeplay (clearance)
-
Page 91: Drive Chain Housing
POWR DRIVE CHAIN HOUSING ESS00132 DRIVE CHAIN HOUSING 10 Nm (1.0 mDkg, 7.2 ftDlb) 21 Nm (2.1 mDkg, 15 ftDlb) 10 Nm (1.0 mDkg, 7.2 ftDlb) Order Job name/Part name Q’ty Remarks Drive chain housing removal Remove the parts in the order listed below. Brake caliper Refer to “BRAKE”…
-
Page 92
POWR DRIVE CHAIN HOUSING 10 Nm (1.0 mDkg, 7.2 ftDlb) 100 Nm (10.0 mDkg, 72 ftDlb) Order Job name/Part name Q’ty Remarks Drive chain housing disassembly Remove the parts in the order listed below. Shift link lever Chain tensioner adjuster Chain housing cover Chain tensioner Shift fork guide bar… -
Page 93: Inspection
POWR DRIVE CHAIN HOUSING ESS00133 INSPECTION 1. Inspect: D Drive chain housing 1 D Drive chain housing cover 2 Cracks/damage ! Replace. D Oil seals (drive chain housing) Wear/damage ! Replace. D Bearings (drive chain housing and cover) 3 Pitting/damage ! Replace. D Bearing (chain tensioner) 4 Pitting/damage ! Replace the bearing and the inner race holder as a set.
-
Page 94
POWR DRIVE CHAIN HOUSING 3. Inspect: D Shift forks 1 On the gear and shift cam contact surfaces. Wear/chafing/bends/damage ! Replace. 4. Check: D Shift fork movement On its guide bar. Unsmooth operation ! Replace fork and/or guide bar. 5. Inspect: D Shift cam grooves 1 Wear/damage/scratches ! Replace. -
Page 95
POWR DRIVE CHAIN HOUSING 11. Inspect: D Axle bearings D Shift cam bearing Pitting/damage ! Replace. 12. Inspect: D Shift linkage levers 1 D Spacer 2 D Torsion spring 3 Wear/damage ! Replace. 13. Inspect: D Circlips D Washers Damage/looseness/bends ! Replace. 4-20… -
Page 96
POWR DRIVE CHAIN HOUSING 14. Measure: D 14 link section a of the drive chain Using a spring scale, pull on the drive chain with 36 kg (80 lbs) of force b . Out of specification ! Replace the drive chain. -
Page 97: Installation
POWR DRIVE CHAIN HOUSING ESS00134 INSTALLATION 1. During installation, pay attention to the fol- lowing. A Make sure that the bearing seals face towards the drive chain as shown. Be sure to install the spacers in their origi- nal positions, otherwise the brake disc and jackshaft will stick.
-
Page 98: Secondary Shaft (Jackshaft)
POWR SECONDARY SHAFT (JACKSHAFT) ESS00135 SECONDARY SHAFT (JACKSHAFT) 60 Nm (6.0 mDkg, 43 ftDlb) 21 Nm (2.1 mDkg, 15 ftDlb) Order Job name/Part name Q’ty Remarks Secondary shaft (jackshaft) removal V-belt Secondary shaft (jackshaft) With secondary sheave Secondary sheave For installation, reverse the removal procedure.
-
Page 99
POWR SECONDARY SHAFT (JACKSHAFT) Order Job name/Part name Q’ty Remarks Secondary shaft (jackshaft) Remove the parts in the order listed below. disassembly Secondary sheave Circlip Bearing housing Circlip Bearing Secondary shaft (jackshaft) For assembly, reverse the removal procedure. 4-24… -
Page 100: Inspection
POWR SECONDARY SHAFT (JACKSHAFT) ESS00136 INSPECTION 1. Inspect: D Secondary shaft (jackshaft) 1 Scratches (excessive)/damage ! Replace. D Splines 2 Wear/damage ! Replace the jackshaft. D Bearing 3 Scratches/wear/damage ! Replace the jackshaft. INSTALLATION 1. Install: D Secondary sheave 1 Secondary sheave bolt 2 : 60 Nm (6.0 mDkg, 43 ftDlb) 2.
-
Page 101: Brake
POWR BRAKE ESS00138 BRAKE 48 Nm (4.8 mDkg, 34.7 ftDlb) Order Job name/Part name Q’ty Remarks Brake pad removal Remove the parts in the order listed below. Brake caliper assembly Brake disc Brake pads For installation, reverse the removal procedure. 4-26…
-
Page 102: Brake Pad Replacement
POWR BRAKE ESS00139 BRAKE PAD REPLACEMENT 1. Remove: D Brake caliper NOTE: D Do not depress the brake lever when the cali- per or disc is off the machine otherwise the brake pads will be forced shut. D Replace the pads as a set if either one is found to be worn to the wear limit a .
-
Page 103
POWR BRAKE D Screw in the adjusting screw 1 , and when it contacts lightly with the end of the back up plate, then back out the adjusting screw 1 1/2 to turn. D Fit the end of the adjusting ratchet 1 into the adjusting screw 2 , and align the cut in the guide 3 with the projection of the stationary cover 4 , then install the guide 3 , which is… -
Page 104
POWR BRAKE 2 Nm (0.2 mDkg, 1.4 ftDlb) 9 Nm (0.9 mDkg, 6.5 ftDlb) ESSO beacon 325 grease or Aeroshell grease #7A Order Job name/Part name Q’ty Remarks Brake caliper disassembly Remove the parts in the order listed below. Back up plate End cover Adjusting ratchet Stationary cover… -
Page 105: Brake Caliper Inspection
POWR BRAKE BRAKE CALIPER INSPECTION 1. Inspect: D One way lock 2 1 D Stationary cover 2 D Lever 3 D Spiral gear 4 (lever) Cracks/wear/damage ! Replace. Replacement steps: D Remove the one way lock 2 1 using a thin flat- head screw driver.
-
Page 106: Installation
POWR BRAKE INSTALLATION 1. Assemble: D Caliper body Assemblage steps: D Lubricate the spiral gears 1 on the caliper body and lever 2 with silicone grease. D Align the projection mark 1 on the lever with the “86” mark 2 on the caliper body, screw the lever 3 counterclockwise to the caliper body.
-
Page 107
POWR BRAKE D Screw in the adjusting screw 1 , and when it contacts lightly with the end of the back up plate, then back out the adjusting screw 1 1/2 to turn. D Fit the end of the adjusting ratchet 1 into the adjusting screw 2 , and align the cut in the guide 3 with the projection of the stationary cover 4 , then install the guide 3 , which is… -
Page 108: Slide Rail Suspension
POWR SLIDE RAIL SUSPENSION SLIDE RAIL SUSPENSION 72 Nm (7.2 mDkg, 52 ftDlb) Order Job name/Part name Q’ty Remarks Slide rail suspension removal Remove the parts in the order listed below. Tension adjuster Loosen. Blind cap Slide rail suspension For installation, reverse the removal procedure.
-
Page 109
POWR SLIDE RAIL SUSPENSION 4 Nm (0.4 mDkg, 2.9 ftDlb) 16 Nm (1.6 mDkg, 11 ftDlb) 49 Nm (4.9 mDkg, 35 ftDlb) 72 Nm (7.2 mDkg, 52 ftDlb) 30 Nm (3.0 mDkg, 22 ftDlb) ESSO beacon 325 grease or Aeroshell grease #7A Order Job name/Part name Q’ty… -
Page 110
POWR SLIDE RAIL SUSPENSION 72 Nm (7.2 mDkg, 52 ftDlb) 49 Nm (4.9 mDkg, 35 ftDlb) 24 Nm (2.4 mDkg, 17 ftDlb) 80 Nm (8.0 mDkg, 58 ftDlb) ESSO beacon 325 grease or Aeroshell grease #7A Order Job name/Part name Q’ty Remarks Spacer… -
Page 111
POWR SLIDE RAIL SUSPENSION 50 Nm (5.0 mDkg, 36 ftDlb) 34 Nm (3.4 mDkg, 25 ftDlb) 27 Nm (2.7 mDkg, 20 ftDlb) 80 Nm (8.0 mDkg, 58 ftDlb) ESSO beacon 325 grease or Aeroshell grease #7A Order Job name/Part name Q’ty Remarks Pivot arm… -
Page 112: Inspection
POWR SLIDE RAIL SUSPENSION ESS00148 INSPECTION 1. Inspect: D Suspension wheel D Guide wheel Cracks/damage ! Replace. D Wheel bearing Wheel turns roughly ! Replace. 2. Inspect: D Stopper band 1 Frayed/damage ! Replace. D Pull rods 2 Bends/damage ! Replace. D Shock absorbers 3 Oil leaks/damage ! Replace.
-
Page 113: Front Axle And Track
POWR FRONT AXLE AND TRACK ESS00149 FRONT AXLE AND TRACK 21 Nm (2.1 mDkg, 15 ftDlb) 85 Nm (8.5 mDkg, 61 ftDlb) Order Job name/Part name Q’ty Remarks Front axle and track removal Remove the parts in the order listed below. Drive chain housing Refer to “DRIVE CHAIN HOUSING”.
-
Page 114
POWR FRONT AXLE AND TRACK 85 Nm (8.5 mDkg, 61 ftDlb) Order Job name/Part name Q’ty Remarks Front axle disassembly Remove the parts in the order listed below. Front axle housing Bearing Sprocket wheel For assembly, reverse the removal procedure. 4-39… -
Page 115: Inspection
POWR FRONT AXLE AND TRACK ESS00150 INSPECTION 1. Inspect: D Track 1 D Slide metal 2 Wear/cracks/damage ! Replace. 2. Inspect: D Sprocket wheel 1 Wear/break/damage ! Replace. D Front axle 2 Bends/scratches (excessive)/damage ! Replace. ESS00151 INSTALLATION 1. Install: D Sprocket wheels D Guide wheels NOTE:…
-
Page 116: Chapter 5. Engine
EXHAUST ASSEMBLY ESS00152 ENGINE ESS00153 EXHAUST ASSEMBLY 30 Nm (3.0 mDkg, 22 ftDlb) Order Job name/Part name Q’ty Remarks Exhaust assembly removal Remove the parts in the order listed below. Spring 1 Spring 2 Spring 3 Exhaust assembly Exhaust pipe joint For installation, reverse the removal procedure.
-
Page 117: Inspection
EXHAUST ASSEMBLY ESS00154 INSPECTION 1. Inspect: D Exhaust joint 1 D Exhaust pipe 2 D Exhaust silencer 3 Cracks/damage ! Replace. D Exhaust gaskets 4 Exhaust gas leaks ! Replace.
-
Page 118: Engine Assembly
ENGINE ASSEMBLY ESS00156 ENGINE ASSEMBLY 53 Nm (5.3 mDkg, 38 ftDlb) 103 Nm (10.3 mDkg, 74 ftDlb) Order Job name/Part name Q’ty Remarks Engine removal Remove the parts in the order listed below. Exhaust assembly Refer to “EXHAUST ASSEMBLY”. Carburetor Refer to “CARBURETOR”…
-
Page 119: Inspection
ENGINE ASSEMBLY ESS00157 INSPECTION 1. Inspect: D Engine bracket (front) 1 D Engine bracket (rear) 2 Cracks/damage ! Replace. ESS00158 INSTALLATION NOTE: After installing all parts, refer to “CABLE ROUT- ING” in CHAPTER 8, to check the cable, lead and hose routings. 1.
-
Page 120: Cylinder Head And Cylinder
CYLINDER HEAD AND CYLINDER ESS00159 CYLINDER HEAD AND CYLINDER 20 Nm (2.0 mDkg, 14 ftDlb) 13 Nm (1.3 mDkg, 9.4 ftDlb) 25 Nm (2.5 mDkg, 18 ftDlb) 1 Nm (0.1 mDkg, 0.7 ftDlb) 25 Nm (2.5 mDkg, 18 ftDlb) 14 Nm (1.4 mDkg, 10 ftDlb) Order Job name/Part name Q’ty…
-
Page 121: Removal
CYLINDER HEAD AND CYLINDER ESS00160 REMOVAL 1. Remove: D Piston pin clips D Piston pins D Pistons D Small end bearings NOTE: D Before removing the piston pin clip, cover the crankcase with a clean rag so that you will not accidentally drop the clip into the crankcase.
-
Page 122
CYLINDER HEAD AND CYLINDER 3. Eliminate: D Carbon deposits (from the cylinders) Use the rounded scraper 1 . CAUTION: Do not use a sharp instrument. Avoid dam- aging or scratching the surface. 4. Eliminate: D Carbon deposits (from the piston crown and ring grooves) 5. -
Page 123
CYLINDER HEAD AND CYLINDER Standard Wear limit 73.00 X 73.02 Cylinder bore 73.10 mm (2.874 X 2.875 (2.878 in) 0.05 mm Taper (T) – (0.002 in) Out of round 0.01 mm – (0.0004 in) C = Maximum D T = (Maximum of D or D ) –… -
Page 124
CYLINDER HEAD AND CYLINDER 8. Measure: D Side clearance (piston rings) Use the feeler gauge 1 . Out of specification ! Replace the piston and/or rings. NOTE: Eliminate the carbon deposits from the piston ring grooves and rings before measuring the side clearance. -
Page 125
CYLINDER HEAD AND CYLINDER 11. Measure: D Outside diameter (piston pin) a Out of specification ! Replace the piston pin. Outside diameter (piston pin) a : 19.995 X 20.000 mm (0.7872 X 0.7874 in) 12. Measure: D Piston pin-to-piston clearance Out of specification ! Replace the piston. -
Page 126: Installation
CYLINDER HEAD AND CYLINDER ESS00162 INSTALLATION 1. Install: D Reed valves D Reed valve stoppers NOTE: D Place the reed valve 1 with its concave sur- face facing toward the reed valve seat 2 . D Fit the reed valve stopper cut a into the corre- sponding cut b on the reed valve.
-
Page 127
CYLINDER HEAD AND CYLINDER CAUTION: D Always use new piston pin clips. D Do not allow the clip gap to align with the piston pin slot. 5. Check: D Piston ring position CAUTION: D Make sure that the ring ends are properly fitted around the ring locating pins in the piston grooves. -
Page 128
CYLINDER HEAD AND CYLINDER 9. Install: D Gasket (cylinder head) D Cylinder heads 10. Tighten: D Nuts (cylinder head) Tightening steps: D Temporarily tighten the cylinder head nuts 1 X 6 as follows. 1st step: D Tighten the nuts 1 X 6 Nut (cylinder head) 1 X 6 : 13 Nm (1.3 mDkg, 9.4 ftDlb) 2nd step:… -
Page 129: Oil Pump, Crankcase And Crankshaft
OIL PUMP, CRANKCASE AND CRANKSHAFT ESS00167 OIL PUMP, CRANKCASE AND CRANKSHAFT 13 Nm (1.3 mDkg, 9.4 ftDlb) 21 Nm (2.1 mDkg, 15 ftDlb) Order Job name/Part name Q’ty Remarks Oil pump, crankcase and crankshaft Remove the parts in the order listed below. removal Oil pump Oil pump drive gear…
-
Page 130: Inspection
OIL PUMP, CRANKCASE AND CRANKSHAFT ESS00168 INSPECTION 1. Measure: D Runout Use the V-blocks and a dial gauge. Out of specification ! Replace or repair the crankshaft. Dial gauge: 90890-03097, YU-03097 Runout limit: : 0.03 mm (0.0012 in) : 0.04 mm (0.0016 in) : 0.05 mm (0.0020 in) a 97 mm (3.82 in) b 93 mm (3.66 in)
-
Page 131: Oil Pump Stroke Adjustment
OIL PUMP, CRANKCASE AND CRANKSHAFT 4. Inspect: D Lower crankcase 1 D Upper crankcase 2 D Front left brackets 3 D Front right brackets 4 D Rear bracket 5 D Dampers 6 Cracks/damage ! Replace. 5. Inspect: D Oil pump Cracks/damage ! Replace.
-
Page 132
OIL PUMP, CRANKCASE AND CRANKSHAFT 4. Measure: D Maximum pump stroke b Out of specification ! Adjust. Maximum pump stroke b : 1.65 X 1.87 mm (0.065 X 0.074 in) Maximum pump stroke measurement steps: D Pull the oil pump cable 1 out of its sheath as far as it will go. -
Page 133: Installation
OIL PUMP, CRANKCASE AND CRANKSHAFT ESS00169 INSTALLATION 1. Install: D Stopper rings 1 (onto the lower crankcase bearing as shown) 2 Knock pin A Lower crankcase B Upper crankcase 2. Install: D Crankshaft assembly (to upper crankcase) NOTE: Set the knock pins 1 on the upper crankcase and labyrinth seal into the pin holes 2 of the bearings and upper crankcase by turning the bearings and labyrinth seal.
-
Page 134: Oil Pump
OIL PUMP, CRANKCASE AND CRANKSHAFT OIL PUMP 1. Install D Dowel pins D Oil pump 1 5-19…
-
Page 135: Cdi Magneto
CDI MAGNETO ESS00170 CDI MAGNETO 85 Nm (8.5 mDkg, 61 ftDlb) Order Job name/Part name Q’ty Remarks CDI magneto removal Remove the parts in the order listed below. Rotor Stator assembly Charge coil Lighting coil 1 Lighting coil 2 Pulser coil For installation, reverse the removal procedure.
-
Page 136: Removal
CDI MAGNETO ESS00171 REMOVAL 1. Remove: D Nut 1 (CDI magneto) NOTE: Attach the universal rotor holder 2 to hold the CDI magneto. Universal rotor holder: 90890-01235, YU-01235 2. Remove: D Rotor 1 NOTE: Attach the rotor holding puller 2 to the CDI magneto and fully tighten the tool holding bolts, but make sure the tool body is parallel with the CDI magneto.
-
Page 137: Installation
CDI MAGNETO ESS00172 INSTALLATION NOTE: After installing all parts, refer to “CABLE ROUT- ING” in CHAPTER 8, to check the cable, lead and hose routings. 1. Pass the magneto leads 1 throught the hole, and install the grommet 2 to the crank- case.
-
Page 138: Engine Cooling Fan
ENGINE COOLING FAN ESS00173 ENGINE COOLING FAN 43 Nm (4.3 mDkg, 3.1 ftDlb) Order Job name/Part name Q’ty Remarks Engine cooling fan removal Removing the parts in the order listed below. Cooling fan cover Fan belt driven pulley Shim – Refer to “COOLING FAN BELT TENSION ADJUSTMENT”…
-
Page 139: Removal
ENGINE COOLING FAN ESS00174 REMOVAL 1. Remove: D Cylinder air shroud 1 D Seal rubber stay 2 (air duct) D Cooling fan cover 3 2. Remove: D Recoil starter 1 3. Remove: D Starter pulley 1 D Fan belt drive pulley 3 D Fan belt 4 NOTE: Attach the universal rotor holder 2 to hold the…
-
Page 140: Inspection
ENGINE COOLING FAN ESS00175 INSPECTION 1. Inspect: D Upper air shroud 1 Cracks/damage ! Replace. 2. Inspect: D Cooling fan grill 1 D Cooling fan housing 2 Cracks/damage ! Replace. 3. Inspect: D Cooling fan belt 1 Wear/cracks/damage ! Replace. 4.
-
Page 141: Installation
ENGINE COOLING FAN ESS00176 INSTALLATION 1. Install: D Seal rubber 1 D Cooling fan housing 2 D Engine mounting bracket 3 D Starter motor 4 2. Install: D Fan belt 1 D Fan belt drive pulley 2 D Starter pulley 3 NOTE: Attach the universal rotor holder 4 to hold the starter pulley.
-
Page 142: Recoil Starter
RECOIL STARTER ESS00177 RECOIL STARTER 10 Nm (1.0 mDkg, 7.2 ftDlb) 23 Nm (2.3 mDkg, 17 ftDlb) Order Job name/Part name Q’ty Remarks Recoil starter removal Remove the parts in the order listed below. Exhaust assembly Refer to “EXHAUST ASSEMBLY”. Recoil starter assembly Special washer Drive plate…
-
Page 143: Removal
RECOIL STARTER ESS00178 REMOVAL 1. Remove: D Starter handle 1 D Ground lead 2 NOTE: To remove the starter handle, untie the knot 3 in the starter rope and then re-tie a knot 4 in the rope end so that it is not pulled into the recoil starter case 5 .
-
Page 144: Installation
RECOIL STARTER ESS00180 INSTALLATION 1. Hook the starter spring around the post in the starter case. Carefully wind the spring coun- terclockwise, and fit the spring into the case. NOTE: After installing the spring thoroughly apply low- temperature grease. 2. Pass the starter rope end into the sheave drum, and knot the rope end.
-
Page 145
RECOIL STARTER 7. Install: D Spring (drive plate) D Spring seat D Drive plate D Special washer D Washer D Spring washer D Nut NOTE: Be sure the cutout portion in the drive plate fits over the post on the drive pawl. Nut (drive plate): 10 Nm (1.0 mDkg, 7.2 ftDlb) LOCTITE… -
Page 146: Chapter 6. Carburetion
CARB CARBURETOR ESS00197 CARBURETION ESS00198 CARBURETOR Order Job name/Part name Q’ty Remarks Carburetor removal Remove the parts in the order listed below. T.O.R.S. lead Starter cable Throttle cable Oil pump cable Fuel hose Clamp For installation, reverse the removal procedure.
-
Page 147
CARB CARBURETOR 3 Nm (0.3 mDkg, 2.2 ftDlb) 2 Nm (0.2 mDkg, 1.4 ftDlb) 0.8 Nm (0.08 mDkg, 0.58 ftDlb) 5 Nm (0.5 mDkg, 3.6 ftDlb) 9 Nm (0.9 mDkg, 6.5 ftDlb) 3.5 Nm (0.35 mDkg, 2.53 ftDlb) Order Job name/Part name Q’ty Remarks Carburetor disassembly… -
Page 148: Inspection
CARB CARBURETOR ESS00201 INSPECTION 1. Inspect: D Carburetor body D Fuel passage Contamination ! Clean. NOTE: D Use a petroleum based solvent for cleaning. D Blow out all passages and jets with com- pressed air. 2. Inspect: D Float 1 Damage ! Replace.
-
Page 149: Assembly
CARB CARBURETOR 6. Check: D Throttle valve movement Stick ! Replace carburetor body. ESS00202 ASSEMBLY NOTE: D Before reassembling, wash all parts in clean gasoline. D Always use new gaskets and O-rings. 1. Tighten: D Inner parts Main nozzle: 3 Nm (0.3 mDkg, 2.2 ftDlb) Valve seat: 5 Nm (0.5 mDkg, 3.6 ftDlb) Main jet:…
-
Page 150: Installation
CARB CARBURETOR D If the float height is not within specification, in- spect the valve seat and needle valve. D If either is worn, replace them both. D If both are fine, adjust the float height by bend- ing the float arm tang 1 on the float. D Recheck the float height.
-
Page 151: Fuel Pump
CARB FUEL PUMP ESS00206 FUEL PUMP Order Job name/Part name Q’ty Remarks Fuel pump removal Remove the parts in the order listed below. Fuel hose Fuel delivery hose Vacuum hose Fuel pump assembly For installation, reverse the removal procedure.
-
Page 152: Inspection
CARB FUEL PUMP ESS00207 INSPECTION 1. Inspect: D Fuel hose 1 D Fuel delivery hoses 2 D Vacuum hose 3 Clogs/damage ! Replace. 2. Check: D Fuel pump operation Checking steps: D Connect the Mity vac 1 to the pulser hose 2 . Mity vac: 90890-06756, YB-35956 D Place a container 3 under the end of the fuel…
-
Page 153: Chapter 7. Electrical
ELEC SWITCH INSPECTION ELECTRICAL SWITCH INSPECTION SWITCH INSPECTION Use a pocket tester to check the terminals for continuity. If the continuity is faulty at any point, replace the switch. Pocket tester: 90890-03112, YU-03112 NOTE: D Set the pocket tester to “0” before starting a test.
-
Page 154: Ignition System
ELEC IGNITION SYSTEM IGNITION SYSTEM CIRCUIT DIAGRAM…
-
Page 155: Troubleshooting
ELEC IGNITION SYSTEM TROUBLESHOOTING NO SPARK OR WEAK SPARK. Check the spark plug gap. OUT OF SPECIFICATION Repair or replace the spark plug. Check the spark plug cap resistance. OUT OF SPECIFICATION Replace the spark plug cap. Check the ignition coil resistance. OUT OF SPECIFICATION Replace the ignition coil.
-
Page 156: Spark Plug Cap
ELEC IGNITION SYSTEM SPARK PLUG CAP 1. Remove: D Spark plug cap 2. Connect: D Pocket tester (to the spark plug cap) 3. Measure: D Spark plug cap resistance Out of specification ! Replace. Spark plug cap resistance: 5 kΩ at 20_C (68_F) IGNITION COIL 1.
-
Page 157: Spark Plug
ELEC IGNITION SYSTEM SPARK PLUG 1. Remove: D Spark plugs 2. Measure: D Spark plug gap Standard spark plug: BR9ES (NGK) Spark plug gap: 0.7 X 0.8 mm (0.028 X 0.031 in) THROTTLE OVERRIDE SYSTEM (T.O.R.S.) If the carburetor or throttle cable should mal- function during operation, T.O.R.S.
-
Page 158: Handlebar Switch (Right)
ELEC IGNITION SYSTEM HANDLEBAR SWITCH (RIGHT) Engine stop switch and throttle switch 1. Disconnect: D Handlebar switch (right) coupler 2. Connect: D Pocket tester 3. Check: D Engine stop switch continuity Faulty ! Replace the handlebar switch (right). Switch position Continuity RUN (pulled out) OFF (pushed in)
-
Page 159: Main Switch
ELEC IGNITION SYSTEM MAIN SWITCH 1. Disconnect: D Main switch coupler 2. Connect: D Pocket tester 3. Check: D Main switch continuity Faulty ! Repalce. Switch position Continuity Color code Switch position B / W R / W START Continuity…
-
Page 160: Lighting System
ELEC LIGHTING SYSTEM LIGHTING SYSTEM CIRCUIT DIAGRAM…
-
Page 161: Troubleshooting
ELEC LIGHTING SYSTEM TROUBLESHOOTING HEADLIGHT, TAIL LIGHT AND/OR METER LIGHT DO NOT COME ON. Check the bulb(s). NO CONTINUITY Replace the bulb(s). Check the headlight beam switch and lighting coil. FAULTY Replace the headlight beam switch and/or lighting coil. Correct the connection and/or replace the rectifier/regulator.
-
Page 162: Bulb(S)
ELEC LIGHTING SYSTEM BULB(S) 1. Remove: D Headlight bulb a D Tail/brake light bulb b D Meter light bulb c 2. Connect: D Pocket tester (to the bulb terminals) WARNING Keep flammable products and your hands away from the bulb while it is on; it will be hot.
-
Page 163: Signal System
ELEC SIGNAL SYSTEM SIGNAL SYSTEM CIRCUIT DIAGRAM 7-11…
-
Page 164: Troubleshooting
ELEC SIGNAL SYSTEM TROUBLESHOOTING BRAKE LIGHT DOES NOT COME ON. Check the tail/brake light bulb. NO CONTINUITY Replace the bulb. Check the brake light switch. FAULTY Replace the brake light switch. Check the main switch and fuse. FAULTY Replace the main switch and/or fuse. Replace and/or charge battery and/or correct connection.
-
Page 165: Troubleshooting
ELEC SIGNAL SYSTEM 8E181 TROUBLESHOOTING BACK BUZZER DOES NOT SOUND. Check the gear positon switch. FAULTY Replace the gear position switch. Check the lighting coil. OUT OF SPECIFICATION Replace the lighting coil. Check the back buzzer. DOES NOT SOUND Adjust and/or replace the back buzzer. Correct connection and/or replace the rectifier/regulator.
-
Page 166: Tail/Brake Light Bulb
ELEC SIGNAL SYSTEM TAIL/BRAKE LIGHT BULB 1. Remove: D Tail/brake light bulb Terminal Continuity – – BRAKE LIGHT SWITCH 1. Check: D Brake light switch continuity Faulty ! Replace. Switch position Continuity Brake lever operates Brake lever does not operate GEAR POSITION SWITCH 1.
-
Page 167: Grip Warmer System
ELEC GRIP WARMER SYSTEM GRIP WARMER SYSTEM CIRCUIT DIAGRAM 7-15…
-
Page 168: Troubleshooting
ELEC GRIP WARMER SYSTEM 8E281 TROUBLESHOOTING GRIP WARMER DOES NOT OPERATE. Check the resistor. NO CONTINUITY Replace the resistor. Check the grip and thumb warmer. NO CONTINUITY Replace the grip warmer and/or thumb warmer. Check the grip warmer switch. INCORRECT Replace the grip warmer switch.
-
Page 169: Grip And Thumb Warmer Coil
ELEC GRIP WARMER SYSTEM GRIP AND THUMB WARMER COIL 1. Disconnect: D Grip warmer leads 1 D Thumb warmer coupler 2 2. Connect: D Pocket tester (to the grip warmer coil leads and/or thumb warmer coil leads) 3. Check: D Grip warmer 1 continuity D Thumb warmer 2 continuity No continuity ! Replace both grips together or separately and/or the handlebar switch.
-
Page 170: Electrical Starting System
ELEC ELECTRICAL STARTING SYSTEM ELECTRICAL STARTING SYSTEM CIRCUIT DIAGRAM 7-18…
-
Page 171: Troubleshooting
ELEC ELECTRICAL STARTING SYSTEM TROUBLESHOOTING STARTER MOTOR DOES NOT OPERATE. WARNING Before starter motor operation, push the “ENGINE STOP” switch to “OFF”. 1. Connect: D Starter relay terminals (battery side and starter motor side) Check the battery and connectors. Replace and/or charge the battery.
-
Page 172: Main Switch
ELEC ELECTRICAL STARTING SYSTEM FAULTY Check the main switch, fuse and rectifier. Replace the main switch, fuse and/or rectifi- Correct connection. MAIN SWITCH 1. Disconnect: D Main switch coupler 1 2. Connect: D Pocket Tester (to main switch coupler) 3. Check: D Main switch continuity Faulty ! Replace.
-
Page 173: Starter Motor
ELEC ELECTRICAL STARTING SYSTEM STARTER MOTOR Order Job name/Part name Q’ty Remarks Starter motor disassembly Remove the parts in the order listed below. Rear cover Brush plate Starter yoke Clip Pinion gear Front cover For assembly, reverse the removal procedure. 7-21…
-
Page 174
ELEC ELECTRICAL STARTING SYSTEM STARTER MOTOR Inspection 1. Inspect: D Commutator (outer surface) Dirty ! Clean with #600 grit sandpaper 1 . Hold the armature in a vise 2 and copper or aluminium plate 3 . CAUTION: Lightly grip the armature with a vise. 2. -
Page 175
ELEC ELECTRICAL STARTING SYSTEM 5. Measure: D Brush length a Out of specification ! Replace. Brush length limit a : 8.5 mm (0.33 in) 6. Measure: D Brush spring pressure Fatigue/Out of specification ! Replace as a set. Brush spring pressure: 150 g (28.22 5.30 oz) Assembly… -
Page 176: Charging System
ELEC CHARGING SYSTEM CHARGING SYSTEM CIRCUIT DIAGRAM 7-24…
-
Page 177: Troubleshooting
ELEC CHARGING SYSTEM 8E011 TROUBLESHOOTING BATTERY IS NOT CHARGED. OUT OF SPECIFICATIONS 1. Connect: D Pocket tester (to battery terminals) D Check the battery. 2. Measure: D Replace and/or charge battery. D Battery voltage D Fluid gravity Battery voltage: more than 12 V at 20 C (68 F) OUT OF SPECIFICATION 1.
-
Page 178: Battery
ELEC CHARGING SYSTEM BATTERY Inspection 1. Inspect: D Battery fluid level Below lower level ! Refill. 1 Upper level 2 Lower level 2. Check: D Specific gravity Less than 1.280 ! Recharge battery. Battery Storage The battery should be stored if the vehicle is not to be used for a long period.
-
Page 179: Chapter 8. Specifications
6,500 r/min Maximum torque r/min 6,000 r/min Starting system Electric and recoil hand starter Lubrication system: Separate lubrication (YAMAHA AUTOLUBE) Engine Oil: Type YAMALUBE 2-cycle oil or Equivalent Tank capacity 2.5 L (2.2 Imp qt, 2.6 US qt) Drive chain housing oil: Type Gear oil API “GL-3”…
-
Page 180
Brake type Caliper type disc brake Operation method Handle lever, left hand operated Electrical: Ignition system/manufacturer CDI/YAMAHA Generator system Flywheel magneto Bulb wattage X quantity: 12 V, 60 W/55 W X 1 Headlight 12 V, 8 W/23 W X 1 Tail/brake light 12 V, 3.4 W X 1… -
Page 181: Maintenance Specifications
SPEC MAINTENANCE SPECIFICATIONS 9E011 MAINTENANCE SPECIFICATIONS ENGINE Model VK540E Cylinder head: 30.2 X 30.8 cm Volume (With spark plug) <Warp limit> <0.03 mm (0.0012 in)> Lines indicate straightedge measurement. Cylinder: Material Aluminum alloy with cast iron sleeve 73.00 X 73.02 mm (2.874 X 2.875 in) Bore size <Taper limit>…
-
Page 182
SPEC MAINTENANCE SPECIFICATIONS Model VK540E Crankshaft: 59.95 X 60.00 mm (2.360 X 2.362 in) Crank width “A” 199.75 X 200.25 mm (7.86 X 7.88 in) Crank width “B” Crankshaft deflection “C”: Below 0.03 mm (0.0012 in) Below 0.04 mm (0.0016 in) Below 0.05 mm (0.0020 in) Measuring points: 97.0 mm (3.82 in) -
Page 183
SPEC MAINTENANCE SPECIFICATIONS Model VK540E Fuel pump: Type DIAPHRAM Manufacturer MIKUNI Oil pump: Color code White Plunger diameter 5.5 mm (0.22 in) Worm gear ratio 1/44 (0.023) 0.20 X 0.25 mm (0.008 X 0.010 in) Minimum stroke 1.65 X 1.87 mm (0.065 X 0.074 in) Maximum stroke Pump cable free play 1 mm (0.98… -
Page 184: Power Train
SPEC MAINTENANCE SPECIFICATIONS POWER TRAIN Model VK540E Transmission: Type V-belt automatic 3.8 X 0.95 : 1 Range of ratio Engagement r/min 2,600 300 r/min Shift r/min 6,700 300 r/min 267 X 270 mm (10.5 X 10.6 in) Sheave center distance “A” 14.5 X 17.5 mm (0.57 X 0.69 in) Sheave offset “B”…
-
Page 185
SPEC MAINTENANCE SPECIFICATIONS Model VK540E Secondary sheave spring: Part number 90508-50746 Color code White Outside diameter 65 mm (2.6 in) Wire diameter 5 mm (0.20 in) Twist angle Hole position Sheave side-spring side Spring rate 8.7 Nmm/rad (0.89 kg/mm, 48.7 lb/in) Number of coils 4.74 Free length… -
Page 186
SPEC MAINTENANCE SPECIFICATIONS Model VK540E Shock absorber: Damping force (Extension) Front 510 N/0.3 m/s (52 kg/0.3 m/s, 115 lb/0.3 m/s) Rear 2650 N/0.3 m/s (270.4 kg/0.3 m/s, 596 lb/0.3 m/s) Damping force (Compression) Front 1780 N/0.3 m/s (181.6 kg/0.3 m/s, 400 lb/0.3 m/s) Rear 780 N/0.3 m/s (79.6 kg/0.3 m/s, 176 lb/0.3 m/s) -
Page 187: Chassis
SPEC MAINTENANCE SPECIFICATIONS CHASSIS Model VK540E Frame: Frame material Steel Seat height 713 mm (28.1 in) Laggage box location Under seat Steering: Lock-to-lock angle (Left) 24.9D (R ski) 26.6D (L ski) (Right) 28.4D (R ski) 25.9D (L ski) Ski alignment Toe-out 0 X 15 mm (0 X 0.6 in) Toe-out size…
-
Page 188: Electrical
Ignition system: Ignition timing (B.T.D.C.) 17D (1.55 mm) at 7,000 r/min CDI: Magneto model/manufacturer F8AT/YAMAHA 16.0 X 24.0 Ω at 20D C (68D F) Pulser coil resistance (Color code) (White/Red – Black) 220 X 330 Ω at 20D C (68D F)
-
Page 189
SPEC MAINTENANCE SPECIFICATIONS Model VK540E Flywheel magneto: Model/manufacturer F8AT/YAMAHA Lighting voltage (minimum) 11.8 V at 3,000 r/min 0.24 X 0.36 Ω at 20D C (68D F) Lighting coil resistance: (Color code) (Yellow – Black) 0.32 X 0.48 Ω at 20D C (68D F) -
Page 190: High Altitude Settings
SPEC MAINTENANCE SPECIFICATIONS HIGH ALTITUDE SETTINGS VK540E Tempera- – 30D C –20D C – 10D C 0D C 10D C 20D C ture (– 22D F) (– 4D F) (14D F) (32D F) (50D F) (68D F) Altitude #141.3 (STD) 0 X 100 m #142.5 #140…
-
Page 191: Tightening Torque
SPEC MAINTENANCE SPECIFICATIONS TIGHTENING TORQUE Tightening torque Part to be tightened Part to be tightened Remarks Remarks mSkg ftSlb Crankcase (First) Tighten the bolts in two (Final) stages. Front engine mount bolt (left) 10.3 Front engine mount bolt (right) Rear engine mount bolt Cylinder head (First) Tighten the bolts in two…
-
Page 192
SPEC MAINTENANCE SPECIFICATIONS Tightening torque Part to be tightened Part to be tightened Remarks Remarks mSkg ftSlb Steering bearing holder (bolt) Handlebar holder Relay-rod and steering colum Relay-rod and suspension arm Relay-rod end locknut Apply LOCTITE Tie-rod and suspension arm Tie-rod end locknut Apply LOCTITE Ski and suspension bracket… -
Page 193: General Torque
GENERAL TORQUE SPECIFICATIONS/ SPEC DEFINITION OF UNITS GENERAL TORQUE General torque SPECIFICATIONS specifications (nut) (nut) (bolt) (bolt) This chart specifies torque for standard fasten- mSkg ftSlb ers with standard I.S.O. pitch threads. Torque 10 mm 6 mm specifications for special components or as- 12 mm 8 mm semblies are included in the applicable sections…
-
Page 194
SPEC CABLE ROUTING 8-16… -
Page 195: Cable Routing
SPEC CABLE ROUTING CABLE ROUTING Fasten the wire harness and speedometer cable with a steel clamp. Ground lead Fasten the wire lead and wire negative lead with a steel clamp. Fasten the wire harness and wire lead with a steel clamp. Wire harness Starting motor Fasten the wire harness and…
-
Page 196
SPEC CABLE ROUTING 8-18… -
Page 197
SPEC CABLE ROUTING Battery Fuse box Secondary shaft (jackshaft) Battery positive lead Starter switch Carburetor Delivery hose Fasten the wire lead, wire nega- tive lead and speedometer cable with a plastic clamp. Route the oil hose under the en- gine mount bracket. Engine Wire negative lead Wire lead… -
Page 198
SPEC CABLE ROUTING 8-20… -
Page 199
SPEC CABLE ROUTING Engine stop switch coupler Route the engine stop switch lead backward the handlebar. Thumb warmer coupler Clamp Route the throttle cable front- ward the handlebar. Fuel tank Grip warmer connector Brake cable Clamp Do not fasten the throttle cable and brake cable. -
Page 200
SPEC CABLE ROUTING 8-22… -
Page 201
SPEC CABLE ROUTING Fasten the wire wariness, fuel tank breather hose and oil tank breather hose with a plastic band. Oil tank Gear position switch Wire harness sub lead Drive chain case Fasten the wire harness and fuel tank breather hose at the white tape mark, with a clamp. -
Page 202
SPEC CABLE ROUTING 8-24… -
Page 203
SPEC CABLE ROUTING Speedometer Back buzzer Headlight Tachometer (option) Set the clamp at the illustrated. Clamp the tachometer lead for a model without tachometer. Headlight lead Speedometer cable Fasten the headlight lead and speedometer cable at white tape mark, with a plastic clamp. Clamp Fasten the headlight lead and speedometer cable with a plastic… -
Page 204
SPEC CABLE ROUTING 8-26… -
Page 205
SPEC CABLE ROUTING Clamp on the frame Clamp in the cargo space Do not be loosen. Grommet Grommet Route the tail / stop light lead into the pipe. Clamp on the rear bumper Tail / brake light lead connector Taillight unit Plastic band Tail / brake light lead 8-27… -
Page 206
SPEC CABLE ROUTING 8-28… -
Page 207
SPEC CABLE ROUTING Oil hose Joint Oil level hose Clip Hose protector Oil strainer Oil tank breather hose Oil tank Clamp on the oil tank After routing the fuel hoses, push the clamp to broken, and hold the hoses. Protector Fuel delivery hose Fuel hose Screw… -
Page 208
Back buzzer Speedometer light Tachometer light Tachometer Headlight Gear position switch Thumb warmer Grip warmer Grip warmer switch Main switch Fuse Rectifier regulator Starter relay Battery Tail / brake light Spark plug Ignition coil Starter motor CDI unit CDI magneto Voltage regulator Engine stop switch Throttle switch… -
Page 209
WIRING DIAGRAM VK540E… -
Page 211
2000. 05 X 1. E. ITP PRINTED ON RECYCLED PAPER PRINTED IN U.S.A.


