Многое, за что можно поругать Blender, но лишь отчаянный станет критиковать его возможности моделирования объектов. Он неоднократно доказал свою гибкость и удобство при работе с объектами, и не останавливается на достигнутом. Но даже те, кто создают модели с его помощью ежедневно, не всегда знают всех его возможностей, а порой просто забывают о наличии той или иной функции.
Список книг:
— Руководство по Cycles v1.4
— Руководство по EEVEE v1.0
— Руководство по Freestyle v1.0 (с видеоматериалами)
— Инструменты моделирования в Blender v1.1
Название: Руководства по Blender в 4 книгах
Год издания: 2018-2019
Автор: Артём Слаква
Жанр: 3D моделирование, Руководства, Материалы, Шейдеры
Язык: Русский
Количество страниц: много
Формат: PDF, WMV
Качество: Отличное
Размер: 1.15 Gb
Скачать: Руководства по Blender в 4 книгах (2018-2019) PDF, WMV
Скачать | Download | TurboBit
https://turb.to/thg945wuc5ml/Blender-4.rar.html
Скачать | Download | HitFile
https://hitf.to/TK6YFPB/Blender-4.rar.html
Скачать | Download | Turbo.to
https://turb.to/thg945wuc5ml/Blender-4.rar.html
Скачать | Download | Hil.to
https://hitf.to/TK6YFPB/Blender-4.rar.html
Скачать | Download | RapidGator
https://rg.to/file/7020fa4f356faeba852f07ef15443dc0/Blender-4.rar.html
Артём Слаква | Руководство по Freestyle (версия 1.0 по Blender 2.79) (2018) [PDF, EPUB] —
Автор: Артём Слаква
Издательство: Самиздат (Blender3D)
Жанр: 3D моделирование, Нефотореалистичный рендеринг
Формат: PDF, EPUB
Качество: Изначально электронное (ebook)
Иллюстрации: Цветные
Описание:
В данной книге собрано все, что имеет хоть какое-то отношение к движку рендеринга Freestyle.
Freestyle — это нефотореалистичный движок рендеринга ребер и линий.
NPR — Non-Photorealistic Rendering (нефотореалистичный рендеринг) — область компьютерной графики, посвященная созданию методов имитации большого разнообразия выразительных стилей в цифровом искусстве. В отличие от традиционной компьютерной графики, сфокусированной на фотореализме, NPR основывается на других художественных стилях, таких как графика, живопись, техническая иллюстрация и мультипликационный стиль.
К книге прилагаются
Скачать .torrent
Чтобы скачать торрент-файл
Артём Слаква — Руководство по Freestyle (версия 1.0 по Blender 2.79) (2018)
Вам нужно Авторизоваться на сайте под своим логином. Если у Вы ещё не зарегистрированы, тогда Вам нужно пройти Регистрацию
FreeStyle Lite Manual
Virtually Pain-Free Testing
No Coding Required
The FreeStyle Lite System Uses the World’s Smallest Sample So You Can Test on a Variety of Locations
Most Test Sites Available
The human figure above shows the areas where you can test with the FreeStyle Lite System. Avoid moles, veins, bones, and tendons.
We recommend that you test on your fingers if you are testing for hypoglycemia (low blood glucose) or if you suffer from hypoglycemia unawareness.
Important Information About Your FreeStyle® Lite Blood Glucose Monitoring System
How the FreeStyle Lite System Should Be Used
- The FreeStyle Lite System is intended for use outside the body (in other words, in vitro diagnostic use only).
- The FreeStyle Lite System is used for measuring blood glucose (also known as blood sugar) from samples taken from the forearm, upper arm, hand, thigh, calf, or fingers.
The FreeStyle Lite Meter should only be used with FreeStyle Lite Test Strips and FreeStyle Control Solution. Using other test strips and control solution with this meter can produce inaccurate results.
Do use the FreeStyle Lite System for:
- Testing blood glucose.
- Testing only with fresh capillary whole blood samples.
Do not use the FreeStyle Lite System for:
- The diagnosis of diabetes.
- Testing on newborns.
- Testing of arterial blood.
- The FreeStyle Lite System contains small parts that may be dangerous if swallowed.
- Peritoneal dialysis solutions containing Icodextrin or compounds of Galactose ≥13 mg/dL, Maltose ≥20 mg/dL or Lactose ≥10 mg/dL cause the FreeStyle Lite Blood Glucose Monitoring System to overestimate blood glucose test results.
Please read all the instructions provided in this Owner’s Booklet and practice the testing procedures before using the FreeStyle Lite System. Blood glucose monitoring should be done with the guidance of a healthcare professional.
- Severe dehydration and excessive water loss may cause false low results. If you believe you are suffering from severe dehydration, consult your physician immediately.
- Test results below 60 mg/dL mean low blood glucose (hypoglycemia).
- Test results greater than 240 mg/dL mean high blood glucose (hyperglycemia).
- If you get results below 60 mg/dL or above 240 mg/dL and do not have symptoms of hypoglycemia or hyperglycemia, repeat the test. If you have symptoms or continue to get results that fall below 60 mg/dL or above 240 mg/dL, follow the treatment advice of your healthcare professional.
- If you are experiencing symptoms that are not consistent with your blood glucose test and you have followed all instructions described in the FreeStyle® Lite Owner’s Booklet, call your healthcare professional.
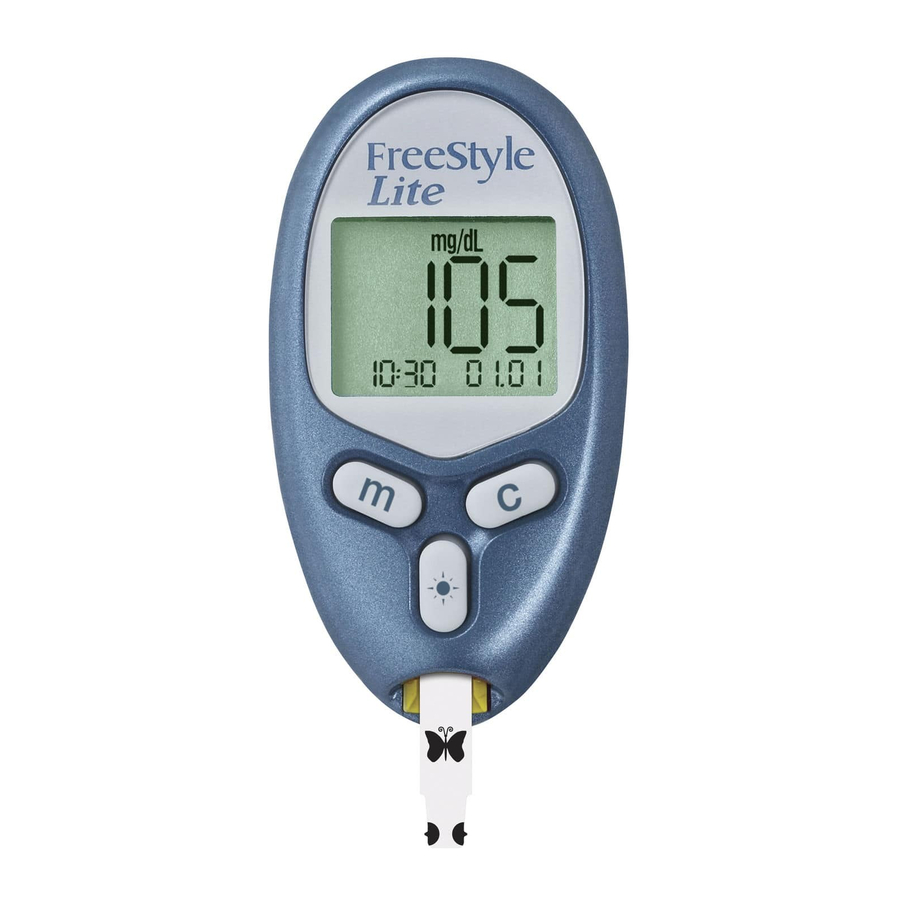
The FreeStyle® Lite Meter and How It Works
System Check Screen
This screen always appears when the meter is turned on so that you can make sure the display is working properly. Do not use the meter if the system check screen does not match the example here. Please call Customer Care.

Display Screen
Displays your test results and other important information.
m (Mode) Button
- Move to different mode settings.
- Scrolls backward.
- Silence a reminder alarm.
Light Button
Controls the display backlight and test light.
Sample Areas (dark-colored half-circles on Test Strip)
Apply blood or control solution to one Sample Area only. Insert strip into the meter printed side up (see image above).
Data Port
Download test results. Requires a compatible data management system. For more information, please go to our website or call Customer Care.
c (Configure) Button
- Marks a control solution test.
- Scrolls forward.
- Displays clock.
- Silence a reminder alarm.
Test Strip Port
Insert the Top end of a new FreeStyle Lite Test Strip here. The meter powers on when you insert the test strip.
The FreeStyle® Lite Meter Display

Memory Mode Symbol
Shows you test results stored in the meter memory.
Control Solution Test Result Symbol
Shows that you have marked a test result as a control solution test.
Battery Symbol
Appears when you should replace your meter battery.
Test Result Area
Displays test results.
Message Area
Displays date, time, and number of tests.

The FreeStyle Lite Test Strip
Apply blood or control solution to only one Test Strip Sample Area per test.
Test Strip Sample Area
Use only one sample area of the test strip per test. Do not apply blood to both sample areas. Test strips may be used only once. Discard used test strips. You can continue to fill the test strip for up to 60 seconds. Be sure to reapply the sample to the same sample area.
The cap or vial contains drying agents that may be harmful if inhaled or swallowed and may cause skin or eye irritation.
The FreeStyle Lite Meter should only be used with FreeStyle Lite Test Strips. Using other test strips with this meter can produce inaccurate results.
Important Test Strip Information
- The FreeStyle Lite System has an operating range of 40° to 104°F (4º to 40°C).
- Store the test strip package in a cool, dry place between 40° and 86°F (4° to 30°C).
- Use test strips only within the system operating temperature range.
- Keep away from direct sunlight and heat.
- Store your test strips in their original vial only; never transfer them to another vial or any other container.
- Never store individual test strips outside the vial.
- After removing a FreeStyle Lite Test Strip from the vial, immediately close the vial cap tightly.
- With clean, dry hands, you may touch the test strip anywhere when removing it from the vial or inserting it into the meter.
- Do not use test strips beyond the expiration date. This may cause inaccurate results.
- Do not bend, cut, or alter FreeStyle Lite Test Strips.
Note: For further information, refer to the FreeStyle Lite Test Strip package insert.
The FreeStyle® Control Solution

FreeStyle Control Solution is a red liquid that contains a fixed amount of glucose that is used to:
- Practice testing without having to use your own blood.
- Ensure that your meter and test strips are working together properly.
A control solution test should be performed when you question your results and want to confirm that your monitor and test strips are working properly.
For information on how to obtain Control Solution, call Customer Care at 1-888-522-5226.
Important Control Solution Information
FreeStyle® Control Solution is good for three months after opening the bottle or until the expiration date printed on the label, whichever comes first.
Count forward three months from the date you open a new bottle of control solution. This is your discard date. Write this date on the side of the control solution bottle.
Example: You open the control solution on January 15th. Count forward three months to April 15th. This is the discard date that you record on the bottle.
- Use only FreeStyle Control Solution with your FreeStyle Lite System.
- Replace the cap on the control solution bottle immediately after using.
- Do not use control solution past the expiration date.
- Do not add water or any liquid to control solution.
- Control solution tests are specified to be accurate only when used between 59° to 104°F (15° to 40°C).
- Control solution test results should fall within the range printed on the test strip vial label.
The control solution range is a target range for control solution only. It is not a target range for your blood glucose level. - If control solution results are out of this range, repeat the test.
- If your control solution test results continue to fall outside the range printed on the test strip vial, do not use the FreeStyle Lite System to test your blood glucose. Contact Customer Care.
Results from FreeStyle Control Solution tests do not reflect your blood glucose level.
Performing a Control Solution Test
- Insert the top of the test strip into your meter until it stops. This will power on the meter.

System Check Screen
When the meter powers on, this screen will appear so that you can make sure the display is working properly.
System Check - Wait for the meter to display the Blood Drop and Test Strip symbols.
- Gently touch only the Sample Area of the test strip to the control solution.
Do not apply control solution to both Test Strip Sample Areas.
If the sound prompt is on, your meter will beep when the test strip is full. A short line then moves clockwise around the display screen while the sample is processing.
The result will appear on the display screen and if the sound is on, your meter will beep twice. To mark the result as a control solution result, press and hold the «c» button for two seconds until the control solution symbol ( ) appears at the top left of the display screen.
If you have marked a blood glucose test as a control solution test by mistake, you can unmark it by pressing and holding the «c» button again for two seconds. - Compare your control solution test result to the range printed on your test strip vial label. Your control solution results should fall within the range printed on the side of your test strip vial.
Out of range test results may be caused by:- Expired or bad control solution.
- Expired or bad test strip.
- Error in performing test.
- Watered-down control solution.
- Meter malfunction.
- Control solution test done outside 59° to 104°F.
To turn the meter off, remove the test strip.


Testing Your Blood Glucose
To ensure accurate results, wash your hands and test site (for example, your forearm) with soap and water. Make sure there is no cream or lotion on the test site. Thoroughly dry your hands and test site.
- With the FreeStyle® Lite Meter, you can test your blood glucose on your forearm, fingers, upper arm, hand, thigh, or calf.
- Testing with the FreeStyle Lite Meter requires a very small sample size, 0.3 microliters of blood; about the size of pinhead (example: ● ).
We recommend that you test on your fingers if you are testing for hypoglycemia (low blood glucose) or if you suffer from hypoglycemia unawareness.
Times when you may be checking for low blood glucose include:
- When you are feeling symptoms such as weakness, sweating, nervousness, headache, or confusion.
- When you have delayed a meal after taking insulin.
- When your healthcare professional advises you to do so.
Performing a Blood Glucose Test
- Prepare Your Meter
Insert a FreeStyle Lite Test Strip into the meter until it stops. The meter will power on.
Note: If you do not start the test within two minutes, the meter will turn off. To restart your meter, take out the unused FreeStyle Lite Test Strip and reinsert it into the meter.
System Check Screen
When the meter powers on, this screen will appear so that you can make sure the display is working properly.
System Check
The Blood Drop and Test Strip symbols will appear on the display screen. Your meter is now ready to apply blood sample.
Blood Drop and Test Strip Symbols
The FreeStyle Lite Meter should only be used with FreeStyle Lite Test Strips. Using other test strips with this meter can produce inaccurate results. - Obtain a Blood Sample
Select a test site. There are differences in testing on fingers versus other alternative sites.
Use your lancing device to obtain a blood sample. Refer to the Lancing Device insert for detailed instructions on how to use the FreeStyle Lancing Device.
If you are testing for hypoglycemia (low blood glucose), or if you suffer from hypoglycemia unawareness, we recommend that you test on your fingers. - Filling the FreeStyle Lite Test Strip with Blood
- Make sure that the FreeStyle Lite Test Strip is in the meter and the meter is powered on. (If the meter is off, take out the test strip and reinsert it into the meter.) You are now ready to apply the blood sample.
- Bring the FreeStyle Lite Test Strip to the blood sample at a slight angle.
- The FreeStyle Lite Test Strip acts like a sponge and pulls the blood into the strip through the sample area.
- Do not press the FreeStyle Lite Test Strip against the test site.
- Do not scrape the blood onto the FreeStyle Lite Test Strip.
- Do not apply blood to the flat side of the FreeStyle Lite Test Strip.
- Do not apply blood to the FreeStyle Lite Test Strip when the FreeStyle Lite Test Strip is out of the meter.
- Do not put blood or foreign objects into the FreeStyle Lite Test Strip port.
- Make sure that the FreeStyle Lite Test Strip is in the meter and the meter is powered on. (If the meter is off, take out the test strip and reinsert it into the meter.) You are now ready to apply the blood sample.
- Waiting for Result
- Do not pull the FreeStyle Lite Test Strip away until you hear one beep or see the short line moving clockwise on your meter screen. This means you have enough blood and the meter is reading your glucose.
- If after five seconds your meter does not show a short line moving around the display screen, the sample may be too small. You may add blood to the same sample area of the test strip from which you started for up to 60 seconds from the time of the first application.
- The test result is complete when your blood glucose test result is shown on the display screen and you will hear two beeps.
- On average, your reading will display in 5 seconds. The time that the meter takes depends on your blood glucose level. The higher your glucose level, the longer it takes to get a result.


Potential Bruising
It is possible you may experience bruising at the test site. If bruising does occur, you may choose to lance another test site.
LO and HI Readings
Low or high blood glucose readings can indicate a potentially serious medical condition. The FreeStyle® Lite Meter displays results from 20 to 500 mg/dL.
If your test result is lower than 20 mg/dL, LO will appear on the meter display screen. This reading indicates severe hypoglycemia (low blood glucose).
LO Reading with Symptoms
If you have a LO reading and have symptoms such as weakness, sweating, nervousness, headache or confusion, then follow your doctor’s recommendation to treat hypoglycemia.
LO Reading
LO Reading without Symptoms
If you get a LO reading, but have no symptoms of low blood glucose, then retest with a new test strip on your fingers. If you still get a LO reading, follow your doctor’s recommendation to treat hypoglycemia.
If your test is above 500 mg/dL, HI will appear on the display screen. This indicates severe hyperglycemia (high blood glucose).
HI Reading with Symptoms
If you feel symptoms such as fatigue, thirst, excess urination, or blurry vision, then follow your doctor’s recommendation to treat hyperglycemia.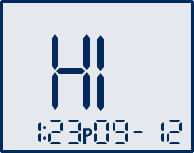
HI Reading
HI Reading without Symptoms
If you get a HI reading, but have no symptoms of high blood glucose, then retest with a new test strip. If you still get a HI reading, follow your doctor’s recommendation to treat hyperglycemia.
Using Your Meter’s Lights
Depending on what mode your meter is in, pressing the light button (![]() ) turns on either the display backlight or the test light.
) turns on either the display backlight or the test light.
Using the Display Backlight
Pressing the light button powers on the display backlight in all modes except when applying a sample. When applying a sample, the light button turns the test light on.
The display backlight goes out when you press the light button ( ![]() ) again or when the meter is inactive for 10 seconds.
) again or when the meter is inactive for 10 seconds.
Using the Test Light
Pressing the light button while the Blood Drop and Test Strip symbols appear on the display screen powers on the test light
The test light goes out:
- When you press the light button again.
- When the meter receives the correct amount of blood for a test (the FreeStyle Lite Test Strip is filled).
- After 60 seconds of no activity.
- When a FreeStyle Lite Test Strip is removed from the meter.
If you use either the backlight or the test light during the test mode, the backlight lights again to show you the test results after the measurement is complete.
Meter Set-Up

- To Enter Setup Mode
Start with the meter off (no test strip inserted). Press and firmly hold the «m» button until the display screen appears. - To Exit at Any Time
Press and hold the «m» button until the meter turns off. - To Move Through the Screens
Press the «m» button to move through all the setup screens such as reminder alarms, sound level, time, date, and so on. - To Change Settings Within the Screen
Press the «c» (configure) button.
 display screen appears.
Setting the Reminder Alarms
You may set up any or all of the reminder alarms (1-4). Note: A reminder alarm will never sound during a test.
To set a reminder alarm or multiple reminder alarms, please follow these steps.
- Start with the meter off. Press the «m» button and hold until the
 display appears with 01234. You are now in the reminder alarm setting mode and the «0» is blinking.
 - To move to the first reminder alarm press the «c» button once. You are now ready to set reminder alarm 1 («1» is blinking).
Select reminder alarm - Press the «m» button to move to the hour setting. With the hour blinking, press the «c» button until the correct hour appears.
Select hour - Press the «m» button to move to the minute setting. With the minute blinking, press the «c» button until the correct minute appears.
Select minute - Press the «m» button to move to the reminder alarm volume setting. Default setting is off. Press the «c» button to select the desired volume setting: low, high, or off.
Select reminder alarm volume - Press the «m» button to finalize your alarm setting. This will bring you back to the reminder alarm setting mode. If you wish to set multiple reminder alarms press «c» to move to reminder alarm 2. Repeat.
Select reminder alarm


Note: To save your reminder alarm settings and exit set up mode, press and hold the «m» button until the meter turns off. Press the «m» button when «0» is blinking to move to the next set-up screen without setting any reminder alarms.
Setting the Sound
There are three (3) sound volume options:
Off
Low
High
There are three sound volume options to let you know when the test strip is full, when the reading is done, and when an error occurs:
- Press the «c» button until the desired sound level appears
- Press the «m» button to move to «Setting the Time.»
Setting the Time

Hour
Minute
- With the hour blinking, press the «c» button until the correct hour appears. The default for the meter is the 12-hour time format. The «P» displays for «PM» times.
- Press the «m» button to move to minute setting.
- With the minute blinking, press the «c» button until the correct minute appears.
- Press the «m» button to move to «Setting the Time Format.»
Setting the Time Format

Time Format
- With the hour mode blinking, press the «c» button to move between 12-hour and 24-hour format. The time automatically updates to the format selected.
- Press the «m» button to move to «Setting the Date.»
Setting the Date and Date Format

Month
Day
Year
- With the month blinking, press the «c» button until the correct month appears.
- Press the «m» button to move to the day setting.
- With the day blinking, press the «c» button until the correct day appears.
- Press the «m» button to move to «Date Format.»
- With the date blinking, press the «c» button to select month-day or day-month format. The date automatically updates to the format selected.
- Press the «m» button to move to the year setting.
- With the year blinking, press the «c» button until the correct year appears.
You have completed Meter Set-Up.
- To move to «Setting the User Reminder Alarms» press the «m» button.
- To exit press and hold the «m» button.
Meter Results
Meter Memory
- To Enter
Start with the meter off (no test strip inserted). Press the «m» button and release; the first memory screen to appear will be your 7-day average. - To Exit
Press and hold the «m» button until the meter turns off.
7-, 14-, 30- Day Average
The first memory display screen you see is your 7-day average. This includes all the readings from the last 7 days starting from the current date and time shown on the meter. (Control solution, LO, and HI readings are not included in the average.)
n = indicates the number of results included in your average
The «c» button allows you to scroll forward to 14- and 30-day averages. Continue to press the «c» button to view stored test results. Your most recent result will display first.
The «m» button allows you to scroll backward.
Test Results
The meter stores the last 400 test readings with time and date. You may scroll through all of the readings by pressing and holding the «c» button. The first reading you see is the most recent result.
Temperature: A result with a thermometer symbol indicates that the reading was taken outside of the meter’s specified operating temperature range and may not be accurate. This value is included in your 7-, 14- and 30-day averages.
LO Reading: A LO reading (under 20 mg/dL) is included in the memory as LO.
HI Reading: A HI reading (over 500 mg/dL) is included in the memory as HI.
Blood Glucose Test
A result without a control solution symbol (![]() ) indicates that it is a blood glucose reading. The date and time of the test will appear on the bottom of the screen.
) indicates that it is a blood glucose reading. The date and time of the test will appear on the bottom of the screen.
Control Solution Test
A value with (![]() ) indicates that you have marked this reading as a control solution test. The date and time of the control solution reading will appear on the bottom of the screen.
) indicates that you have marked this reading as a control solution test. The date and time of the control solution reading will appear on the bottom of the screen.
Data Download
The «PC» symbol displays when a data cable is inserted in the meter data port. You cannot perform a test while the data cable is in the meter data port.
The meter will display «PC» until the data cable is removed from the data port.
(Requires a compatible data management system.)
For more information, please go to our website or call Customer Care.
Meter Maintenance
Battery
Your FreeStyle® Lite Meter comes with one preinstalled, #2032, 3 volt, lithium battery. The battery provides enough power for the meter to perform about 500 tests. If your battery runs low, the battery symbol (  ) appears on every display screen until you change the battery. When the battery runs low, the display backlight and test light may not power on.
When this symbol appears, or when the backlight and test light begin to dim, you should replace the battery immediately.
- To avoid losing the time and date settings, replace the battery within one minute of removing the old battery.
- If you take more than one minute to replace the battery, you may need to reset the time and date to get the correct 7-, 14- and 30-day averages. If the time and date settings are lost, the time and date displays flash 12:00 and 00-00 until they are reset.
- Removing the battery does not affect the meter’s memory log or previously-stored user settings (such as date and time format).
- Even if you lose your time and date settings – you can perform a blood glucose test, and results will not be affected.
Replacing the Battery
- Turn the meter over. Press in the battery door clip to open. Swing the battery door up to open and then off the meter. To remove the battery, push the battery downward to release the battery.
- Install the battery with the positive (+) sign up toward you.
- To close, angle the battery door back onto the meter and swing down until it snaps into place.


 Note: Batteries need to be properly disposed of. For this purpose, all shops selling batteries provide battery collection boxes on their premises.
Caring for Your Meter
Avoid getting dirt, dust, blood, control solution, water, or any other liquid in the meter’s test strip and data ports.
Clean the outside of the meter using a cloth dampened with one of the following:
- Mild detergent/mild soap and water.
- 70% isopropyl alcohol.
- A mix of one part household bleach, nine parts water.
Never immerse the meter in water or any other liquid. - Very low blood glucose (less than 20 mg/dL).
System Troubleshooting
Error Messages
Error 1

Possible Causes
- Sample is too small.
- Problem with the FreeStyle Lite Test Strip.
- Problem with the meter.
- Very low blood glucose (less than 20 mg/dL).
What You Should Do
- If you have symptoms such as weakness, sweating, nervousness, headache, or confusion, follow your doctor’s recommendation for treating hypoglycemia.
- Conduct a control solution test using a new FreeStyle Lite Test Strip. If the results of the control solution test are within the range printed on the side of your test strip vial, retest using blood and a new FreeStyle Lite Test Strip.
- If the retest using control solution does not work or the error persists, call Customer Care.
Error 2

Possible Causes
- Problem with the FreeStyle Lite Test Strip.
- Problem with the meter.
- Very high glucose (above 500 mg/dL).
- HIGH control solution applied when temperature is too cold. (This applies only to control solution that is labeled as HIGH.)
What You Should Do
- If you have symptoms such as thirst, fatigue, excess urination, or blurry vision, follow your doctor’s recommendation for treating hyperglycemia.
- Conduct a control solution test using a new FreeStyle Lite Test Strip. If the results of the control solution test are within the range printed on the side of your test strip vial, retest using blood and a new FreeStyle Lite Test Strip.
- If the retest using control solution does not work or the error persists, call Customer Care.
Error 3

Possible Causes
- Incorrect test procedure. For example, putting blood on the test strip before inserting the test strip into the meter or applying blood before the Blood Drop and Test Strip symbols display.
- Problem with the FreeStyle Lite Test Strip.
- Problem with the meter.
What You Should Do
- Be sure you see the Blood Drop and Test Strip symbols on the display screen before you apply blood or control solution.
- Conduct a control solution test using a new FreeStyle Lite Test Strip. If the results of the control solution test are within the range printed on the side of your test strip vial, retest using blood and a new FreeStyle Lite Test Strip.
- If the retest using control solution does not work or the error persists, call Customer Care.
Error 4

Possible Causes
- Problem with FreeStyle Lite Test Strip.
- Problem with the meter.
What You Should Do
- Conduct a control solution test using a new test strip. If the results of the control solution test are within the range printed on the side of your test strip vial, retest using blood and a new FreeStyle Lite Test Strip.
- If the retest using control solution does not work or the error persists, call Customer Care.
Troubleshooting
Meter does not enter the test mode after inserting a test strip |
|
| Probable Cause | What to Do |
| The battery is dead. | Replace the battery (and reset the date and time, if necessary.) |
| The battery is installed incorrectly or there is no battery in the meter. | Check that the battery is installed correctly with the positive (+) sign facing upward, toward you. |
| Test strip inserted upside down, wrong end in, or incompletely inserted into the meter. | Insert the FreeStyle Lite Test Strip with the printed side up and the top of the strip in the meter. |
| Defective meter or test strips. | Call Customer Care. |
| Blood or foreign objects put into the test strip port. | Call Customer Care. |
Test does not start after applying the blood sample |
|
| Probable Cause | What to Do |
| Blood sample too small. | You may add blood to the same sample area of the FreeStyle Lite Test Strip from which you started for up to 60 seconds from the time of the first application. If necessary, repeat the test using a new FreeStyle Lite Test Strip and a larger blood sample. |
| Defective test strip. | Repeat the test with a new FreeStyle Lite Test Strip |
| Sample applied after meter times out (two minutes) and turns off. | Repeat the test using a new test strip. Wait until you see the Blood and Test Strip symbols on the display screen before you apply the blood sample. |
| Defective meter or test strips. | Call Customer Care. |
FreeStyle Lite System Specifications
| Assay Method | Coulometric electrochemical sensor |
| Automatic Shutoff | Two minutes after last user action |
| Battery Life | 500 tests |
| Calibration | Plasma equivalent |
| Hematocrit | 15% to 65% |
| Measurement Units | mg/dL |
| Meter Storage Temp. | -4º to 140º F (-20º to 60º C) |
| Memory | 400 blood glucose and control solution tests with date and time |
| Operating Relative Humidity | 5% to 90% (non-condensing) |
| Operating Temperature | 40° to 104°F (4º to 40º C) |
| Power Source | One #2032, 3 volt, lithium battery, replaceable |
| Result Range | 20 to 500 mg/dL |
| Sample | Whole blood, capillary |
| Sample Size | 0.3 microliter (300 nanoliters) |
| Size | Width 1.57″ x Length 2.9″ x Depth 0.65″ |
| Test Time | Average of 5 seconds |
| Weight | 1.4 oz. including battery |
Call Customer Care Toll Free at 1-888-522-5226
www.AbbottDiabetesCare.com

Documents / Resources
References
- Abbott Diabetes Care Division – Helping People with Diabetes
Download manual
Here you can download full pdf version of manual, it may contain additional safety instructions, warranty information, FCC rules, etc.
Download FreeStyle Lite Manual
- Книги / Дизайн,интерьер,декор
- 14-02-2020, 14:10
- 2 042
- 0
- colt4
")
Многое, за что можно поругать Blender, но лишь отчаянный станет критиковать его возможности моделирования объектов. Он неоднократно доказал свою гибкость и удобство при работе с объектами, и не останавливается на достигнутом. Но даже те, кто создают модели с его помощью ежедневно, не всегда знают всех его возможностей, а порой просто забывают о наличии той или иной функции.
Список книг:
-Руководство по Cycles v1.4
-Руководство по EEVEE v1.0
-Руководство по Freestyle v1.0 (с видеоматериалами)
-Инструменты моделирования в Blender v1.1
Название: Руководства по Blender — 4 книги
Год издания: 2018-2019
Автор: Артём Слаква
Жанр: 3D моделирование, Материалы, Шейдеры
Количество страниц: много
Формат: PDF, WMV
Язык: Русский
Размер: 1.15 Gb
Скачать Артём Слаква: Руководства по Blender — 4 книги (2018-2019)

Коментарии
Информация
Посетители, находящиеся в группе Гости, не могут оставлять комментарии к данной публикации.
- Книги / Дизайн,интерьер,декор
- 14-02-2020, 14:10
- 1 695
- 0
- colt4
Многое, за что можно поругать Blender, но лишь отчаянный станет критиковать его возможности моделирования объектов. Он неоднократно доказал свою гибкость и удобство при работе с объектами, и не останавливается на достигнутом. Но даже те, кто создают модели с его помощью ежедневно, не всегда знают всех его возможностей, а порой просто забывают о наличии той или иной функции.
Список книг:
-Руководство по Cycles v1.4
-Руководство по EEVEE v1.0
-Руководство по Freestyle v1.0 (с видеоматериалами)
-Инструменты моделирования в Blender v1.1
Название: Руководства по Blender — 4 книги
Год издания: 2018-2019
Автор: Артём Слаква
Жанр: 3D моделирование, Материалы, Шейдеры
Количество страниц: много
Формат: PDF, WMV
Язык: Русский
Размер: 1.15 Gb
Скачать Артём Слаква: Руководства по Blender — 4 книги (2018-2019)
Коментарии
Информация
Посетители, находящиеся в группе Гости, не могут оставлять комментарии к данной публикации.
Артём Слаква | Руководство по Freestyle (версия 1.0 по Blender 2.79) (2018) [PDF, EPUB] —
Автор: Артём Слаква
Издательство: Самиздат (Blender3D)
Жанр: 3D моделирование, Нефотореалистичный рендеринг
Формат: PDF, EPUB
Качество: Изначально электронное (ebook)
Иллюстрации: Цветные
Описание:
В данной книге собрано все, что имеет хоть какое-то отношение к движку рендеринга Freestyle.
Freestyle — это нефотореалистичный движок рендеринга ребер и линий.
NPR — Non-Photorealistic Rendering (нефотореалистичный рендеринг) — область компьютерной графики, посвященная созданию методов имитации большого разнообразия выразительных стилей в цифровом искусстве. В отличие от традиционной компьютерной графики, сфокусированной на фотореализме, NPR основывается на других художественных стилях, таких как графика, живопись, техническая иллюстрация и мультипликационный стиль.
К книге прилагаются
Скачать .torrent
Чтобы скачать торрент-файл
Артём Слаква — Руководство по Freestyle (версия 1.0 по Blender 2.79) (2018)
Вам нужно Авторизоваться на сайте под своим логином. Если у Вы ещё не зарегистрированы, тогда Вам нужно пройти Регистрацию
Автор: Артем Слаква
Название: Руководство по Freestyle

Описание:
Freestyle — это нефотореалистичный движок рендеринга ребер и линий. Еще можно сказать, что Freestyle — это Line art.
NPR (Non-Photorealistic Rendering (нефотореалистичный рендеринг)) — область компьютерной графики, посвященная созданию методов имитации большого разнообразия выразительных стилей в цифровом…
Вам необходимо зарегистрироваться для просмотра ссылок
Для просмотра содержимого вам необходимо авторизоваться
- Регистрация
- 25/11/2019
- Сообщения
- 305.626
- Репутация
- 53.330
-
#1
Руководство по Freestyle
Артем Слаква

Freestyle — это нефотореалистичный движок рендеринга ребер и линий. Еще можно сказать, что Freestyle — это Line art.
NPR (Non-Photorealistic Rendering (нефотореалистичный рендеринг)) — область компьютерной графики, посвященная созданию методов имитации большого разнообразия выразительных стилей в цифровом…
Воспользоваться поиском по форуму 🔍
Этот курс появится в скором времени на форуме SHAREWOOD.BIZ. Проверьте по поиску форума, возможно данный курс уже слит.
-
Contents
-
Table of Contents
-
Troubleshooting
-
Bookmarks
Quick Links
4.6″
Distributed by:
Abbott Diabetes Care
666 Doncaster Road
Doncaster 3108
Victoria, Australia
ABN 95000 180 389
1800-801-478
FreeStyle, Libre, and related brand marks are marks of Abbott. Other trademarks are
the property of their respective owners.
Patent: https://www.abbott.com/patents
©2019-2021 Abbott ART43974 Rev. A 02/21
ART43974_rev-A_cover.indd 1-2
ART43974_rev-A_cover.indd 1-2
FLASH GLUCOSE MONITORING SYSTEM
.257″
.224″
4.6″
User’s Manual
2/17/21 8:33 AM
2/17/21 8:33 AM