Настройка электрогитары — непростая задача даже для опытных игроков. Однако гитары электрические и другие в целом без проблем поддаются настройке. Как правило, настройка инструмента сбивается вследствие разных причин. Деформации дерева, загрязнение ладов грифа, разрывы струн. Умение настраивать инструмент по инструкции видится востребованным всегда. Важной частью развития музыканта здесь является формирование связи с инструментом, плюс понимание работы конструкции электрогитары. Поэтому рассмотрим эту значимую тему – как настроить электрогитару на оптимальное звучание по инструкции и другими подходами.
СОДЕРЖИМОЕ ПУБЛИКАЦИИ :
- 1 Главные моменты настройки электрогитары
- 1.1 Установка под действие и юстировка гитарного моста
- 1.2 Настройка ферменного стержня электрической гитары
- 1.3 Настройка интонации звучания музыкального инструмента
- 1.4 Настройка и чистка инструмента с учётом инструкции
- 2 Настроить электрогитару по видео инструкции + релакс
Главные моменты настройки электрогитары
Недорогие инструменты, которыми обычно пользуются начинающие гитаристы, традиционно имеют слабую (низкокачественную) настройку. Это один из факторов, усложняющих игру на таких музыкальных инструментах.
DENN ST100 WH

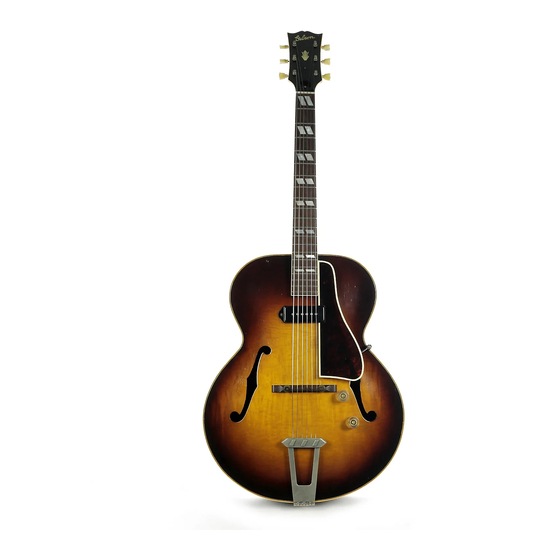
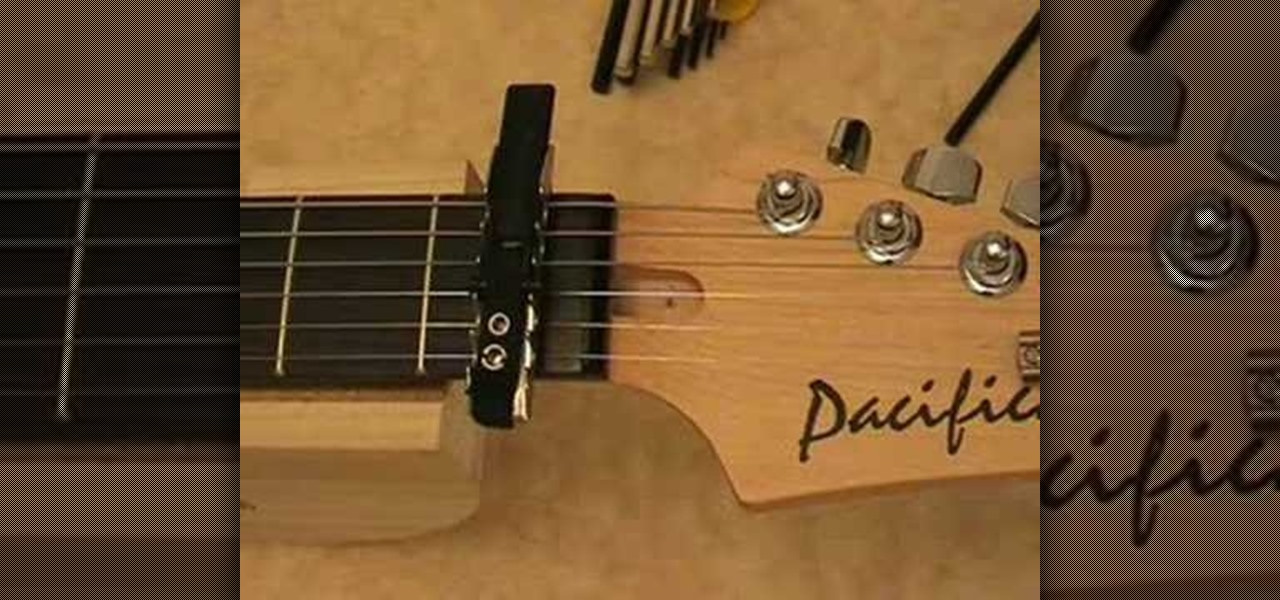
Например, старая конструкция «Fender Squier», стоимостью около $100, как правило, побуждает гитаристов прибегать к настройке с целью получить лучшую игровую отдачу. Что же, посмотрим, что здесь можно сделать по инструкции или без таковой?
Установка под действие и юстировка гитарного моста
Идеальный эффект звучания — это вопрос субъективный. Игра:
- металла
- джаза,
- блюза,
требует разных действий. Для первых двух жанров необходимы относительно высокие уровни действия, чтобы брать сложные аккордовые формы. А вот играть блюз придётся несколько более интенсивными действиями по отношению к струнам и более динамичным «копанием» нот.
Между тем, независимо от стиля игры, струны посредством механизма моста следует выставлять как можно ближе к ладам, обеспечивая таким способом удобство игры. Но чрезмерно близкое расположение недопустимо, иначе в процессе игры обещает проявиться неприятный остаточный гул, искажающий чистоту звучания аккордов.
LAG T-170D CE

Лучший вариант точной настройки — измерение расстояния от линии поверхности грифа до нижней линии струн. Это расстояние на 17-м ладу грифа обычно составляет около 0,625 мм для оптимального параметра настройки.
Гитарный мост (механизм – «синхронизированное тремоло» типа «Strat» или другой) даёт возможность индивидуально контролировать высоту каждой гитарной струны, регулируя по инструкции соответствующее седло.
Эта настройка полезна, учитывая разную толщину каждой струны электрогитары. Инструкция гласит: чтобы уменьшить высоту, достаточно повернуть винт седла по часовой стрелке с помощью универсального ключа-шестигранника. Соответственно с учётом всё той же инструкции, для увеличения высоты, вращение седельного винта выполняется против часовой стрелки.
Настройка ферменного стержня электрической гитары
Стержень фермы электрогитары представляет собой стальной винт, внедрённый внутри грифа гитары для усиления крепления и предотвращения деформации. Возможна перестройка грифа путём натяжения или ослабления стержня, но в этом случае требуется соблюдать осторожность.
DENN ST100 BK

Инструкция предупреждает о чрезмерном закручивании стержня по часовой стрелке. Так увеличивается сила натяжения, соответственно, существует риск облома грифа. Поэтому корректировку таким способом инструкция предусматривает только в случае крайней необходимости. Например, два раза в год при смене сезонов, когда изменяется уровень влажности.
Для оценки прямолинейности грифа следует:
- Приподнять электрогитару.
- Внимательно оценить глазомером, подобно направлению взгляда в прицел винтовки.
- Линейно гриф должен немного приподниматься, чтобы вызывать оптимальный резонанс звучания струн.
- Если прямолинейность грифа совершенная, при таком положении грифа электрогитара, как правило, звучит с эффектом «жужжания».
И такой эффект только усиливается с переходом в положение опущенного грифа. При снижении уровня влажности окружающей среды, гриф электрогитары обычно поднимается. Этот момент и заставляет производить незначительную регулировку грифа по инструкции. Настройка выполняется специальной регулировочной гайкой под шестигранный ключ.
Следует соблюдать осторожность в момент кручения винта. Инструкция рекомендует совершать не больше 1/8 оборота регулировочной гайки с последующей проверкой положения грифа. Существуют электрогитары, имеющие ферменный стержень одностороннего действия с гайкой, ориентированной на передней бабке, но гайка может располагаться заподлицо с корпусом.
КОМБОУСИЛИТЕЛЬ

Эта конфигурация отмечена у многих акустических гитар. Также существуют электрогитары, оснащённые ферменным стержнем двойного действия (например, Rickenbackers). Инструкция на такое изделие допускает регулировку в обоих направлениях для достижения лучшей точности и стабильности грифа.
Настройка интонации звучания музыкального инструмента
Как и при настройке действия, инструкция требует от гитариста настройки нужной интонации, не меняя при этом струн. Однако если планируется полная замена струн, настройка интонации электрогитары требуется по умолчанию.
Нередкой видится ситуация, когда открытые струны звучат гармонично, но в моменты игры отмечается несколько фальшивая интонация на высоких нотах, взятых прижимом струн на ладах грифа. По инструкции, ноты на 12-м ладу должны звучать ровно на одну октаву выше нот соответствующих открытых струн.
Звучащая длина струны (мензура) — это расстояние между внутренним краем верхнего порожка (на грифе) и точкой, где струна контактирует с седлом моста (нижний порожек). Средней точкой является центр 12-го лада. Есть электрогитары с мензурой 25½ » — широко распространенные модели. Другой не менее распространённой конфигурацией мензуры является параметр 24 ¾ «.
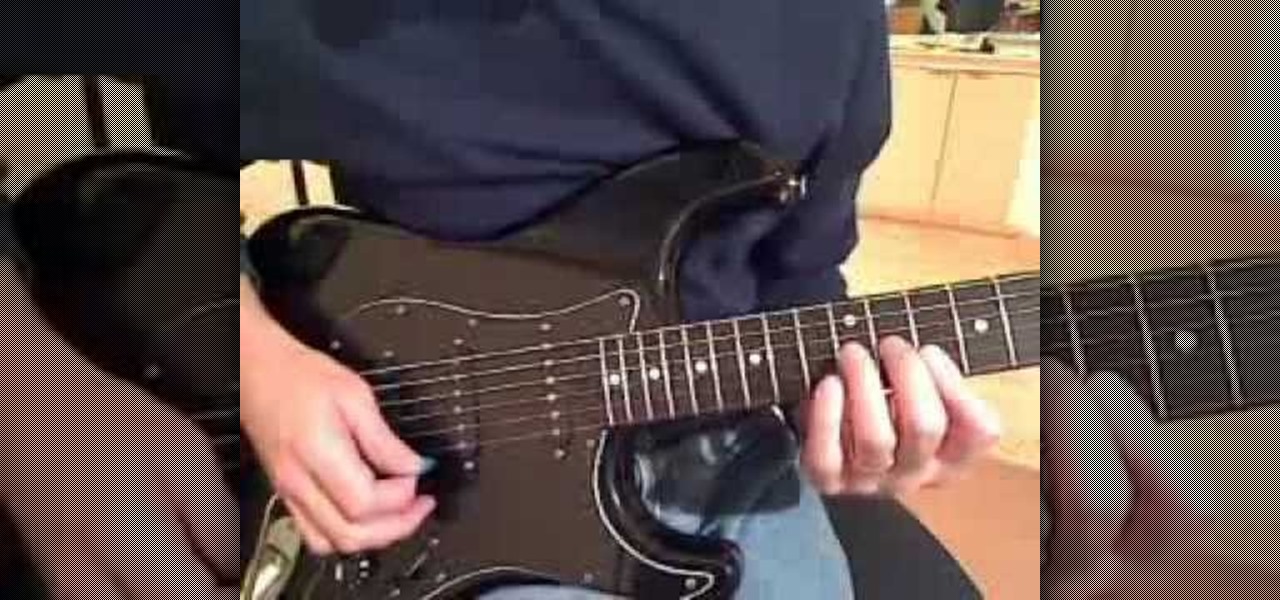
Мост гитарный типа «Strat» позволяет регулировать интонацию каждой струны индивидуально. Используя небольшую отвертку с крестообразным шлицем, гитаристу доступно настроить длину мензуры на увеличение, поворачивая (согласно инструкции) регулировочный винт седла по часовой стрелке.
INSPECTOR

Тем же способом допустимо укоротить звучащую длину струны — повернуть винт седла против часовой стрелки. Когда чувствуется значительное сопротивление при повороте винтов, возможно, это связано с образованием грязи на седле. Тогда необходимо провести чистку механизма электрогитары по инструкции — тканью из микро-фибры с последующей полировкой.
Помимо использования тюнера настройки, быстрый способ проверить интонацию:
- сыграть ноту на 12-м ладу,
- слегка поджать струну пальцем к середине лада,
- сыграть гармонику той же ноты.
Взятая нота должна быть той же высоты, что и гармоника. Если звучит диез, соответствующее седло по инструкции необходимо отодвинуть назад. Если же в момент теста слышен звук бемоль, седло следует сдвинуть вперёд.
Настройка и чистка инструмента с учётом инструкции
Результат настройки во многом зависит от степени чистоты электрогитары. Гитаристу, независимо от требований инструкции, всегда надлежит мыть руки, прежде чем начинать пользоваться электрогитарой. Тем не менее, загрязнение инструмента со временем неизбежно. Это нормальная практика, включающая дополнительно к настройке, чистку электрогитары.
Следует отметить: легче и проще чистить электрогитару периодически, нежели допускать значительное загрязнение, требующее глубокой чистки инструмента. Периодичности обслуживания требует также инструкция на музыкальные инструменты.
В процессе чистки не желательно снимать все струны, так как этот ход приведёт к нарушению настроенного ранее баланса грифа. Согласно инструкции, гриф электрогитары чистят сухой или слегка влажной тканью на основе микро-фибры, последовательно снимая по одной струне с последующей установкой на место после очистки участка. Инструкцией также рекомендуется использовать кондиционер для грифов, например, из серии «D’Addario Planetwaves Hydrate».
PHOENIX-7

Если гриф электрогитары сделан из дерева палисандра, инструкция допускает использовать лимонное масло в умеренных количествах для качественной очистки и кондиционирования.
Однако по той же инструкции на электрогитары — не допускается применять чистые (мебельные) лимонные масла. Лучший вариант — применение марочного лимонного масла, которое производится специально для электрогитар, например, «Dunlop 65 Ultimate Lemon Oil».
Лимонные масла, изготовленные специально под электрогитары, сильно разбавлены, поэтому содержат малый объём чистого лимонного масла. Основную долю состава занимает минеральное масло.
Чистое лимонное масло обладает высокой степенью кислотности, что приводит к разрушению точек склеивания частей электрогитары. Чистка грифа по инструкции – наиболее трудная часть работы. Остальные участки электрогитары обычно чистятся легче и проще.
Настроить электрогитару по видео инструкции + релакс
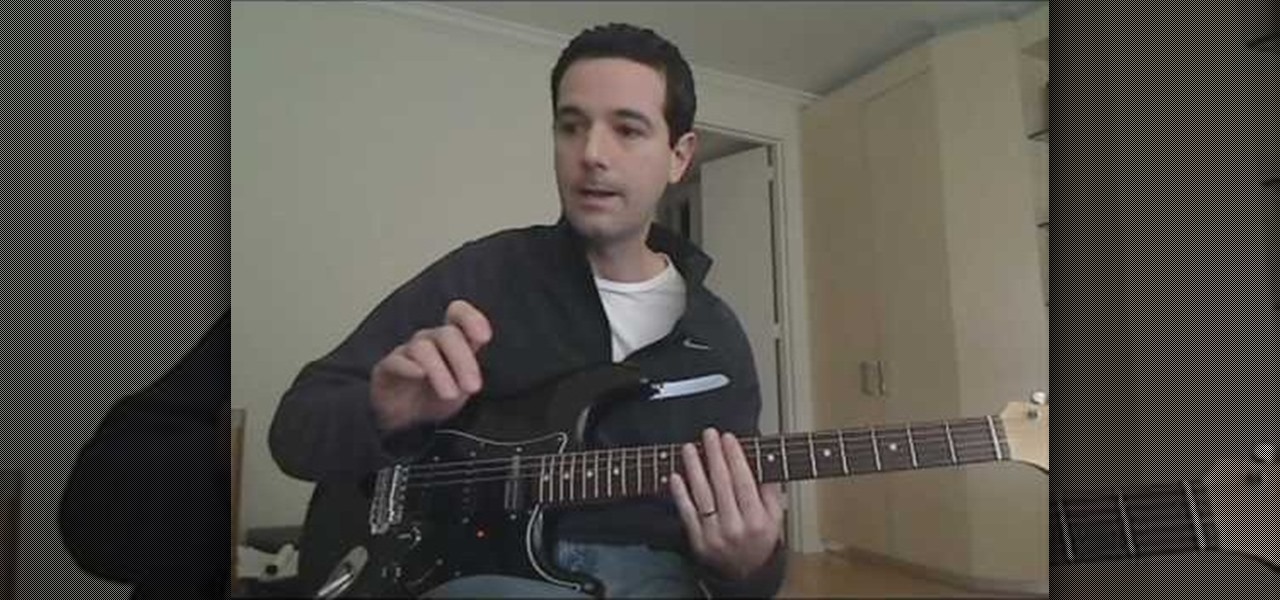
Видеоролик ниже демонстрирует основы настройки электрогитары — своеобразную инструкцию для начинающих гитаристов. Существуют разные способы настройки электрогитар, но этим способом — одним из распространённых, должен владеть каждый гитарист:
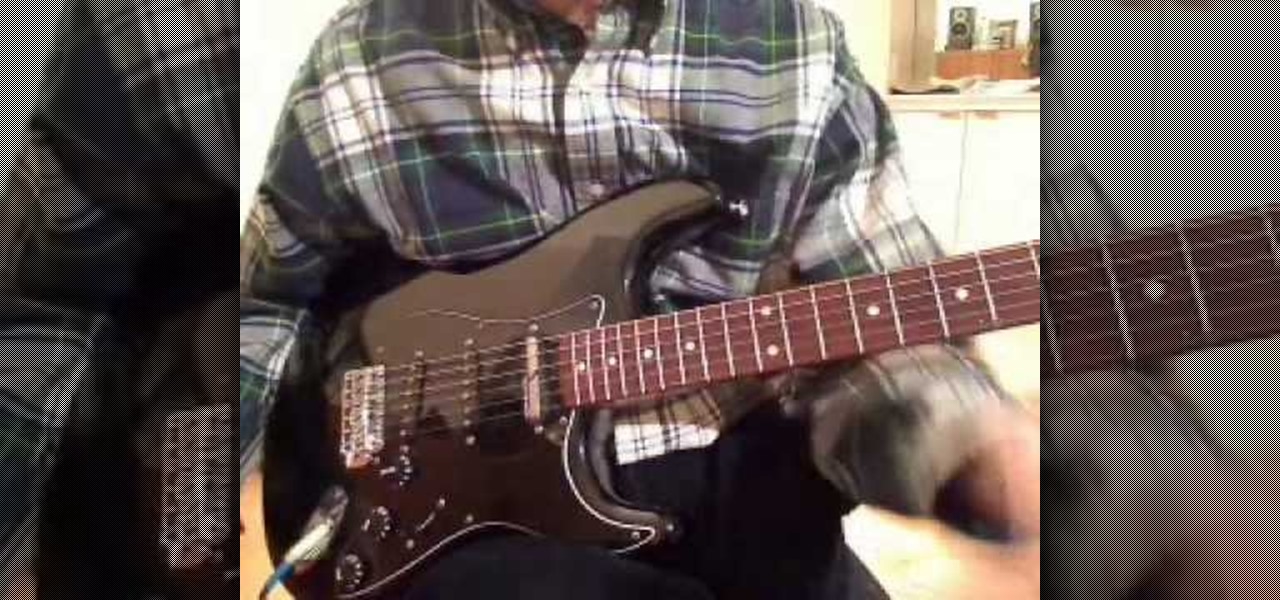
О том, как звучит качественно настроенная гитара и какие вещи способен воспроизводить хорошо настроенный музыкальный инструмент. Релакс за гранью возможного:
-
Contents
-
Table of Contents
-
Bookmarks
Quick Links
Related Manuals for Gibson Electric guitar
Summary of Contents for Gibson Electric guitar
-
Page 1
OWNER’S MANUAL… -
Page 2
1550-07 GUS… -
Page 3
© 2007 Gibson Guitar Corp. -
Page 4
To the new Gibson owner: Congratulations on the purchase of your new Gibson electric guitar—the world’s most famous electric guitar from the leader of fretted instruments. Please take a few minutes to acquaint yourself with the information in this booklet regarding materials, electronics, “how to,”… -
Page 5: Table Of Contents
The Components of the Solidbody Electric Guitar Gibson Innovations The History of Gibson Electric Guitars DESIGN AND CONSTRUCTION Body Neck and Headstock Pickups Controls Bridge Tailpiece CARE AND MAINTENANCE Finish Your Guitar on the Road Things to Avoid Strings Install Your Strings Correctly…
-
Page 6: The Components Of The Solidbody Electric Guitar
Three-way 12th Fret Tailpiece Button Bridge Pickups Toggle Switch Marker/Inlay Neck Fret Fingerboard Headstock The Components of the Solidbody Electric Guitar Featuring a Les Paul Standard in Heritage Cherry Sunburst Input Jack Tone Binding Volume Body Single Truss Machine Tuning…
-
Page 7
Button Body Tailpiece Bridge Pickups Neck Marker/Inlay Fret Fingerboard Headstock Three-way Toggle Switch The Components of the Solidbody Electric Guitar Featuring a V-Factor Faded in Worn Cherry Input Jack Tone Volume Pickguard Truss Machine Tuning Control Controls Heads Keys Cover… -
Page 8: Gibson Innovations
Here are just a few of the Gibson innovations that have reshaped the guitar world: 1894 – First archtop guitar 1922 – First ƒ-hole archtop, the L-5 1936 – First professional quality electric guitar, the ES-150 1947 – P-90 single-coil pickup introduced 1948 – First dual-pickup Gibson, the ES-300 1949 –…
-
Page 9
1958 – First semi-hollowbody guitar, the ES-335 1961 – SG body style introduced in the Les Paul line 1963 – Firebird guitars and Thunderbird basses introduced 1969 – Les Paul Personal and Professional with low-impedance pickups introduced 1979 – L.P. Artist with active electronics introduced 1982 –… -
Page 10
A BRIEF HISTORY OF GIBSON ELECTRIC GUITARS Gibson’s legendary acoustic engineer, Lloyd Loar, was experimenting with electric instruments in 1924, at the dawn of electronic amplification. However, Gibson’s struggle to dominate the banjo market took precedence through the 1920s, and it wasn’t until the mid-1930s that the company once again turned its attention to electric guitars. -
Page 11
The first postwar Gibson electrics followed the prewar concept of an electric guitar as a conventional acoustic archtop with a pickup installed on the top. Gibson added a second pickup to the ES-300 in 1948 and then became the first company to offer a three-pickup model with the introduction of the ES-5 in 1949. -
Page 12
In 1954 the growing popularity of the Les Paul Model prompted Gibson to expand the line. On the high end, the Les Paul Custom sported an Ebony finish and low frets for fast action, and it immediately gained two nicknames: the Black Beauty and the Fretless Wonder. On the more affordable end, the Les Paul Jr. -
Page 13
The body of the Les Paul Jr. received a pair of rounded horns to become Gibson’s first double- cutaway solidbody. And the finish color on the Les Paul Model was changed to Cherry Sunburst, which let the grain of the maple top show through. The model name was changed to Les Paul Standard, and the sunburst Standards from 1958-60 would become some of the most valuable collectibles in the guitar world. -
Page 14
As Gibson celebrated the 50th anniversary of the Les Paul in 2002, the company rocked the guitar world once again by introducing the first digital electric guitar. It represents the biggest advance in electric guitar design since the instrument was invented, and moreover, it serves notice that Gibson electric guitars will continue to epitomize the highest levels of Quality, Prestige and Innovation. -
Page 15: Body
DESIGN AND CONSTRUCTION Body. The solidbody guitar was invented to increase sustain, produce a brilliant tone, and eliminate feedback caused by a vibrating top. These qualities are enhanced by wood with high density, such as maple. Les Paul would have preferred for his model to have had a solid maple body, but density translates to weight, and a solid maple Les Paul Model would have been exceed- ingly heavy.
-
Page 16: Pickups
Neck Specifications. Gibson designs its guitar necks to complement and enhance the unique characteristics of each model. Neck profiles can be “rounded ’50s” or “slim ’60s” (or a slight V-shape available only on the BluesHawk). Scale length (string length) is 24 3/4″ on the Les Paul, X-Factor and SG models, 25 1/2″…
-
Page 17: Controls
without the “dog ears” are nicknamed “soapbar” because the original cream-colored plastic covers on the 1952 Les Paul Model resembled bars of soap. When the P-90 was introduced in 1946, it was the most powerful pickup of its kind. And it still is. Among the many exam- ples of the P-90 sound are Carlos Santana’s Les Paul Special on Santana’s classic recordings, Leslie West’s Les Paul Jr.
-
Page 18
Volume controls: The two knobs closest to the fingerboard control the volume of the pickups. The volume knob nearest the bridge controls the “front” or neck pickup; the knob nearest the edge of the guitar controls the “back” or bridge pickup. Tone controls: The knob or knobs farthest away from the fingerboard control tone. -
Page 19: Bridge
The Tune-o-matic Bridge. The Tune-o-matic bridge allows for adjustment in overall bridge height and individual string length. Height is adjustable up and down by means of thumb wheels under the bridge at either end. Each string saddle is adjustable forward and back with a small standard screwdriver.
-
Page 20: Tailpiece
The tune-o-matic bridge was designed to adjust for string changes (gauge or type) and other physical changes but not for problems with intonation due to string wear. Should a string lose its intonation due to wear, we strongly recommend changing the string and not the bridge setting.
-
Page 21: Finish
CARE AND MAINTENANCE Finish. A Gibson instrument always attracts attention, whether it is on a concert stage before thousands or on a guitar stand in a home studio. After the classic body lines of a Gibson, the finish makes the strongest impression. Perspiration acids, heavy fingerprinting, dust, and grime from on-the-job usage are unavoid- able.
-
Page 22: Things To Avoid
Heat and cold: Gibson’s nitrocellulose finish can expand or contract to adjust to extreme tem- peratures and humidities—but not to sudden changes in temperature or humidity. Just as a hot drink will crack a chilled glass, the finish of a Les Paul will crack if a guitar that has been sitting in the trunk of a car in wintertime is suddenly exposed to the warm air of a heated room.
-
Page 23: Strings
Avoid sharp blows to any part of your instrument. Be particularly alert to possible blows to the back of the headstock, machine heads (tuners), and in the neck heel area. Many headstock breaks are the result of a guitar being knocked over or dropped while it’s still in the case, so do not stand the case on its end.
-
Page 24: Install Your Strings Correctly
When changing strings, we recommend changing one string at a time in order to maintain ten- sion on the neck and bridge. The pressure of the strings holds the bridge and saddles in place, and removing all the strings could necessitate a new setup. Use high quality strings.
-
Page 25: Brand Of Strings
Gibson has been offering its own strings since 1907, and Gibson has more experience than any other string maker when it comes to matching strings to Gibson guitars. Gibson strings are manufactured to exacting standards to achieve the highest level of quality and performance.
-
Page 26: String Gauge
NEW TECHNOLOGY — THE GIBSON ROBOT GUITAR The Impossible is Now Possible. Introducing the Gibson Robot Guitar, the world’s first guitar with robot technology. Gibson’s Robot Guitar is the only guitar available with the auto-tuning system described herein as original equipment. Your Gibson Robot Guitar will be pre-calibrated for a standard .010-.046 set of strings.
-
Page 27
THE MASTER CONTROL KNOB (MCK) The Master Control Knob not only serves as the master control for all aspects of this amazing, self-tuning system, but it will communicate with you as you learn its “language.” The MCK is quite powerful and has many uses, and we believe you will find that MCK functions will become second nature to you once you have tried them a few times. -
Page 28
The MCK’s LED display will show various symbols and colors and these will be explained in the various modes of operation available to you. During the tuning process, they will behave as follows: String LEDs Display Actions During Tuning Operations: string not tuned = solid red measuring frequency = red flashing Powerheads turning = yellow flashing… -
Page 29
PRECAUTIONS: • Never try to manually turn the tuning pegs on the Powerheads unless they are in the disengaged position (pulled out and away from the peghead). • Do not attempt to open the cover of the peghead electronics, the Powerheads, or the body CPU as this will void your warranty. -
Page 32
GUIDE TO FUNCTIONS AND DISPLAY MODES DURING TUNING OPERATIONS Function MCK Position Display LEDs Action Remarks Instantly Pull MCK out All string LEDs Strum all strings While you strum, Powerheads start turning, individual Activated Tuning shining red gently strings will shine green (440Hz, EADGBE when in tune, all LEDs will is factory default) -
Page 33
Function MCK Position Display LEDs Action Remarks DADGAD Tuning Pull MCK out and turn A LED shining blue Enter by pressing While you strum, Powerheads start turning, individual 440Hz, DADGAD to A LED the display once— strings will shine green b, #, and all string when in tune, all LEDs will LEDs will shine red… -
Page 34
Function MCK Position Display LEDs Action Remarks E Flat Tuning Pull MCK out and turn B LED shining blue Enter by pressing While you strum, Powerheads start turning, individual 440Hz, to B LED the display once— strings will shine green EbAbDbGbBbeb b, #, and all string when in tune, all LEDs will… -
Page 35
Function Display LEDs Action Remarks Reference Tuning I LED shining red Pull out (disengage) the Strum the SAME string you have just tuned to your reference pitch. When this string’s LED shines solid peg of the Powerhead (Tune to selected green its frequency has been measured and stored. -
Page 36
Function Display LEDs Action Remarks Custom Altered To create your own When all strings of your Custom Altered ”Custom Altered Tuning Tuning have been registered, the string LEDs Tuning,” disengage will flash blue 3 times. You may now store each Powerhead of the your Custom Altered Tuning to one of the string required and tune factory preset positions. -
Page 37
STRING UP / STRING DOWN MODES Function MCK Position Display LEDs Action Remarks String Up Mode Pull MCK out and turn Revolving Arrow and Activate String Up Powerheads will begin to Revolving Arrow LED # LED shine green Mode by pressing winding strings up the display for 3 close to normal tuning. -
Page 38
TO RESTRING YOUR ROBOT GUITAR First ensure that all Powerheads are disengaged by pulling the pegs away from the peghead. This is very important! Turn each peg so that the post-hole is roughly in line with each corresponding string as it leaves the nut of your guitar. Guide each string through your tailpiece, over the saddle (where contact is essential), through the nut slot and then the post-hole as you would with any other guitar, but place a slight amount of tension by hand before screwing each locking nut down tight. -
Page 39
TO ACTIVATE STRING UP MODE FOR A SINGLE STRING (as in the case of replacing a string broken while playing) Install the string in the manner described above (remember saddle contact is crucial!). Simply select the LED for the string you are replacing, turn to the green revolving arrow and toggle it from green to red and back to green. -
Page 40
INTONATION MODE (ONLY GIBSON MODELS) Before starting the Intonation Mode we recommend to perform Normal tuning 440Hz Function MCK Position Display LEDs Action Remarks I LED shining blue Pull MCK out and turn Intonation Mode Activate Intonation to | LED Mode by pressing the display for 3 seconds. -
Page 41
Function MCK Position Display LEDs Action Remarks Now a colored blink MCK is now in the Intonation Mode I LED shining blue code displays the position of the string appropriate correction you are intonating. For each green LED for the intonation screw. turn the screw half For example: turn clockwise… -
Page 42
Function Display LEDs Action Remarks Access Calibration Calibration C LED shines red 435Hz = C and E LED blue Mode by pressing the Mode 436Hz = C and E LED blue, # LED red display for 3 seconds. 437Hz = C and A LED blue The C LED will shine 438Hz = C and A LED blue, # LED red blue. -
Page 43
PLEASE NOTE: Once you have selected your desired fundamental, press the display down for three seconds. Now choose a tuning and strum the strings. The Global Calibration Offset is applied to each selected tuning. To check the selected Global Calibration Offset, pull MCK out and press LED C for three seconds. -
Page 44
SETUP MODE The various important functions in Setup Mode can be accessed individually once Setup Mode is activated. We will now describe how to enter and exit Setup Mode, and we’ll list the various functions it contains afterward. Function MCK Position Display LEDs Action Remarks… -
Page 45
Function MCK Position Display LEDs Action Remarks Exit Setup Push MCK back in Setup Mode You can exit Setup Mode without switches off Mode at any time saving changes All outer LEDs will Exit Setup Mode; Dependent on Setup Setup Mode Your Setup Mode flash blue-green 3 saving changes… -
Page 46
FUNCTIONS INCLUDED IN SETUP MODE Function MCK Position Display LEDs Action Remarks Press display once Restoring Factory Defaults will LED D shining blue, Restore Enter Setup Mode and do the following: and Factory Peg LED shines white Factory Defaults turn to LED D Preset positions set to default •… -
Page 47
Function MCK Position Display LEDs Action Remarks Global Enter Setup Mode LED C shining blue, Turn MCK left When a Calibration Calibration turn to LED C and Peg LED shines white (Counterclockwise) Mode is in effect, Offset press display once to switch off your selected On / Off… -
Page 48
FUNCTIONS INCLUDED IN SETUP MODE Function MCK Position Display LEDs Action Remarks Instantly Enter Setup Mode Turn MCK to I and Last Tuning is Activated and turn to LED press Enter activated on startup Last Tuning and press Enter Instantly Activated Enter Setup Mode Turn MCK to one Select Preset Tuning is… -
Page 49
Function Display LEDs Action Remarks Press display once. Speed / Pegs shines white, The Powertune system is adjustable to a pitch Current Speed / Accuracy A shines blue accuracy of .2 Cent. However, this will cause Accuracy setting will Settings tuning functions to take slightly longer, and in be indicated by live applications a relaxed accuracy is advisable. -
Page 50
FUNCTIONS INCLUDED IN SETUP MODE Function MCK Position Display LEDs Action Remarks Turn MCK left to # shines green when DRC # will be shining green Enter Setup Mode Dynamic Runtime switch off DRC, is on, b shines red when or b will be shining red, turn to G LED and Control On / Off… -
Page 51
CALIBRATING POWERHEADS The Robot Guitar will be pre-calibrated for a standard .010-.046 set of strings. If you change string gauges, restore factory defaults, or are installing the system yourself, you may first want to calibrate the Powerheads individually using the Motor Calibration Mode as described below. -
Page 52
CHARGING AND BATTERY INFORMATION The Robot Guitar comes with a battery pack containing two rechargeable batteries. A special charger is also included with the system. The battery charge level is indicated each time you activate your system, as indicated below. You may expect more than 200 tunings between charges. -
Page 53
Function MCK Position Display LEDs Action Remarks Now you will see a For optimum performance, Your current charge Pull MCK out, turn to Charge Mode flashing red battery you will want a charge level will be displayed C LED and press symbol on the MCK, level of 8-10 green flashing for about 3 seconds. -
Page 54
EMERGENCY CHARGE MODE The system now has an Emergency Charge Mode (ECM) if its internal rechargeable battery goes completely dead or too low in charge to run the normal Charge Function. Put MCK in the C position. Plug your patch cable into the charging device and connect and plug in the transformer. -
Page 55
SHORT CIRCUIT WARNING In the event of a short circuit from negative to ground (Strings E or A to D or G) the white peg symbol will flash. This can be caused if strings are not trimmed properly at the headstock.If the short circuit runs from B or hi E to D, A or low E, the peg will flash yellow. -
Page 56
A LIFETIME OF MUSIC Your Gibson electric guitar is a lifetime investment. With proper care, it will not only maintain its value as a top quality instrument, it will also continue to pay musical dividends for generations to come. Your investment in the world’s finest electric guitar is supported by the No. 1 Customer Service team in the musical instrument industry. -
Page 59
NOTES ____________________________________________________________________________________________ __________________________________________________________________________________________________ _______________________________________ ___________________________________________________________ __________________________________________________________________________________________________ _______________________________________________________________________________ ___________________ __________________________________________________________________________________________________ __________________________________________________________________________________________________ ________________________________________________________________________ __________________________ __________________________________________________________________________________________________ __________________________________________________________________________________________________ ______________ ____________________________________________________________________________________ __________________________________________________________________________________________________ ______________________________________________________ ____________________________________________ __________________________________________________________________________________________________ __________________________________________________________________________________________________ ___________________________________________ _______________________________________________________ __________________________________________________________________________________________________… -
Page 60
NOTES ____________________________________________________________________________________________ __________________________________________________________________________________________________ _______________________________________ ___________________________________________________________ __________________________________________________________________________________________________ _______________________________________________________________________________ ___________________ __________________________________________________________________________________________________ __________________________________________________________________________________________________ ________________________________________________________________________ __________________________ __________________________________________________________________________________________________ __________________________________________________________________________________________________ ______________ ____________________________________________________________________________________ __________________________________________________________________________________________________ ______________________________________________________ ____________________________________________ __________________________________________________________________________________________________ __________________________________________________________________________________________________ ___________________________________________ _______________________________________________________ __________________________________________________________________________________________________… -
Page 61
NOTES ____________________________________________________________________________________________ __________________________________________________________________________________________________ _______________________________________ ___________________________________________________________ __________________________________________________________________________________________________ _______________________________________________________________________________ ___________________ __________________________________________________________________________________________________ __________________________________________________________________________________________________ ________________________________________________________________________ __________________________ __________________________________________________________________________________________________ __________________________________________________________________________________________________ ______________ ____________________________________________________________________________________ __________________________________________________________________________________________________ ______________________________________________________ ____________________________________________ __________________________________________________________________________________________________ __________________________________________________________________________________________________ ___________________________________________ _______________________________________________________ __________________________________________________________________________________________________… -
Page 62
NOTES ____________________________________________________________________________________________ __________________________________________________________________________________________________ _______________________________________ ___________________________________________________________ __________________________________________________________________________________________________ _______________________________________________________________________________ ___________________ __________________________________________________________________________________________________ __________________________________________________________________________________________________ ________________________________________________________________________ __________________________ __________________________________________________________________________________________________ __________________________________________________________________________________________________ ______________ ____________________________________________________________________________________ __________________________________________________________________________________________________ ______________________________________________________ ____________________________________________ __________________________________________________________________________________________________ __________________________________________________________________________________________________ ___________________________________________ _______________________________________________________ __________________________________________________________________________________________________… -
Page 64
309 Plus Park Boulevard Nashville, TN 37217 1.800.4GIBSON www.gibson.com…


How To:
Play «The Final Countdown» by Europe on electric guitar
Want to master «The Final Countdown» by Europe on the guitar? See how it’s done with this free video guitar lesson, which presents a complete breakdown of the song and its chords. While this tutorial is geared toward those who already have some knowledge of the guitar, players of all skill level should be able to follow along given adequate time and effort. For more information, and to get started playing «The Final Countdown» on your own guitar, watch this video tab!

How To:
Play «Stairway to Heaven» by Led Zeppelin on electric guitar
Want to play Led Zeppelin’s «Stairway to Heaven» on the electric guitar? See how it’s done with this free video guitar lesson, which presents a complete breakdown of the song and its chords in tab notation. While this tutorial is geared toward those who already have some knowledge of the guitar, players of all skill level should be able to follow along given adequate time and effort. For more information, and to get started playing this Led Zeppelin song on your own guitar, watch this video t…
How To:
Play «Throw Down the Sword» by Wishbone Ash on guitar
Playing your favorite songs on the guitar is not as difficult as it seems. With this tutorial you can learn how to play «Throw Down the Sword» by Wishbone Ash on the electric guitar. This lesson is geared towards intermediate guitarists because it assumes prior knowledge of guitar playing. Marty Schwartz covers the finger picking as well as the chord structure for «Throw Down the Sword.» Watch this how to video and you will be able to sing and play «Throw Down the Sword» by Wishbone Ash.
How To:
Play «Sweet Home Alabama»
Learn how to play guitar with this classic Lynyrd Skynyrd song from our favorite guitar teacher Justin Sandercoe. This is the first video but make sure you watch the second one so you can play all of «Sweet Home Alabama». This is really for advanced players.

How To:
Play «Where the Streets Have No Name» by U2 on electric guitar
Want to master «Where the Streets Have No Name» by U2? See how it’s done with this free video guitar lesson, which presents a complete (and we mean complete) breakdown of the song and its constituent parts. While this tutorial is geared toward those who already have some knowledge of the guitar, players of all skill level should be able to follow along given adequate time and effort. For more information, and to get started playing «Where the Streets Have No Name» on your own guitar, just tak…
How To:
Play «One» by Metallica on electric guitar
In this video we learn how to play «One» by Metallica on electric guitar. Start out with the beginning of the song. You will take the first finger on the second fret of the A string and your ring finger on the fourth fret of the E string. Play back and forth going between the different strings and then take your ring finger off and open up the string. As you continue to play you will begin to form the song. Go from the beginning to the middle and the end. Make sure to add in the chorus and ad…
How To:
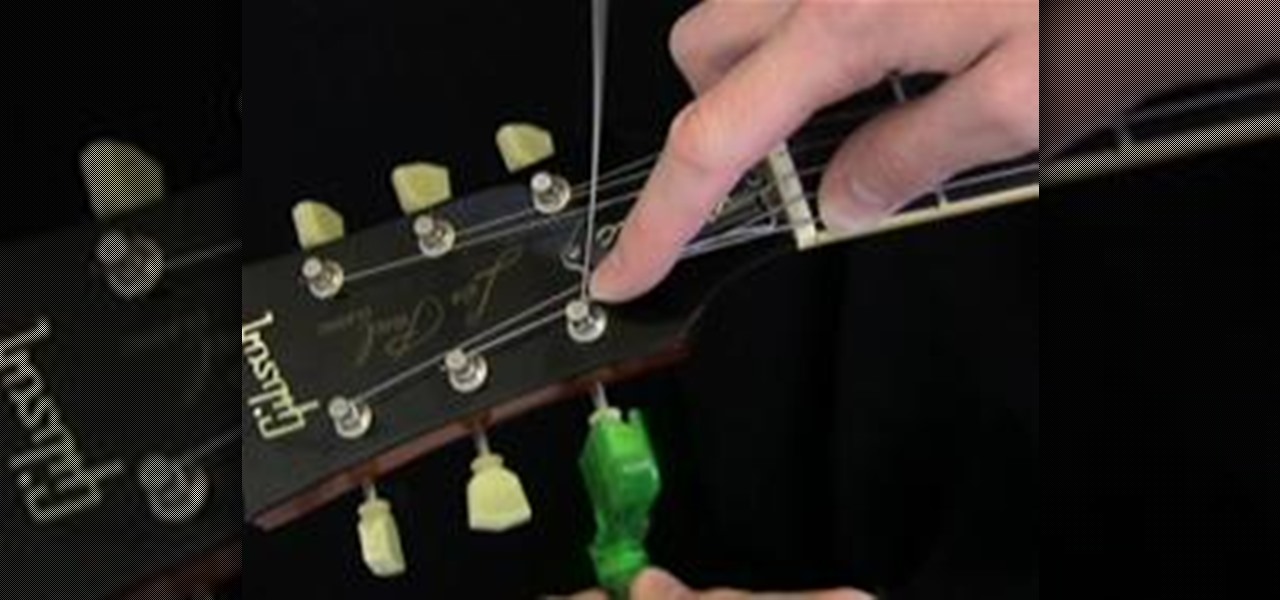
String An Electric Guitar
A First Timer’s Guide When some new guitarists break their first string they stash it in the closet and forget about it. Me, I put the sweaty axe back in its case and asked my parents to take me to the local music store. After a morning full of senseless racket emanating from my bedroom, my mom welcomed the drive.

How To:
Play «Black Dog» by Led Zeppelin on the electric guitar
Want to play Led Zeppelin’s «Black Dog» on the electric guitar? See how it’s done with this free video guitar lesson, which presents a complete breakdown of the song and its chords in tab notation. While this tutorial is geared toward those who already have some knowledge of the guitar, players of all skill level should be able to follow along given adequate time and effort. For more information, and to get started playing this Led Zeppelin song on your own guitar, watch this video tutorial.
How To:
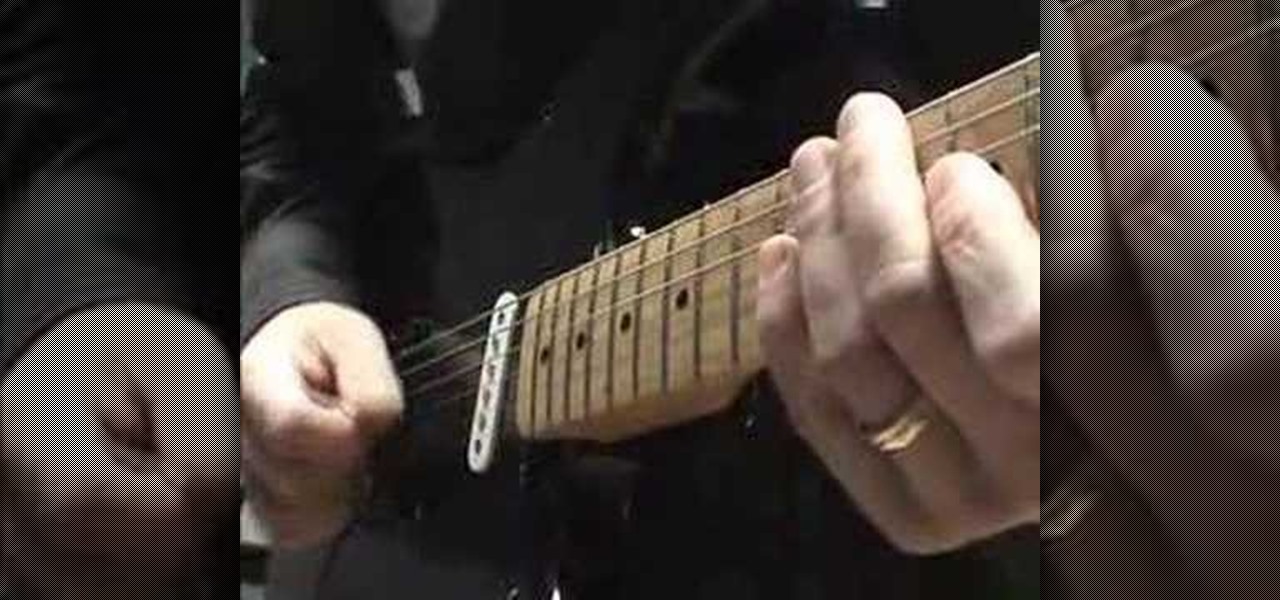
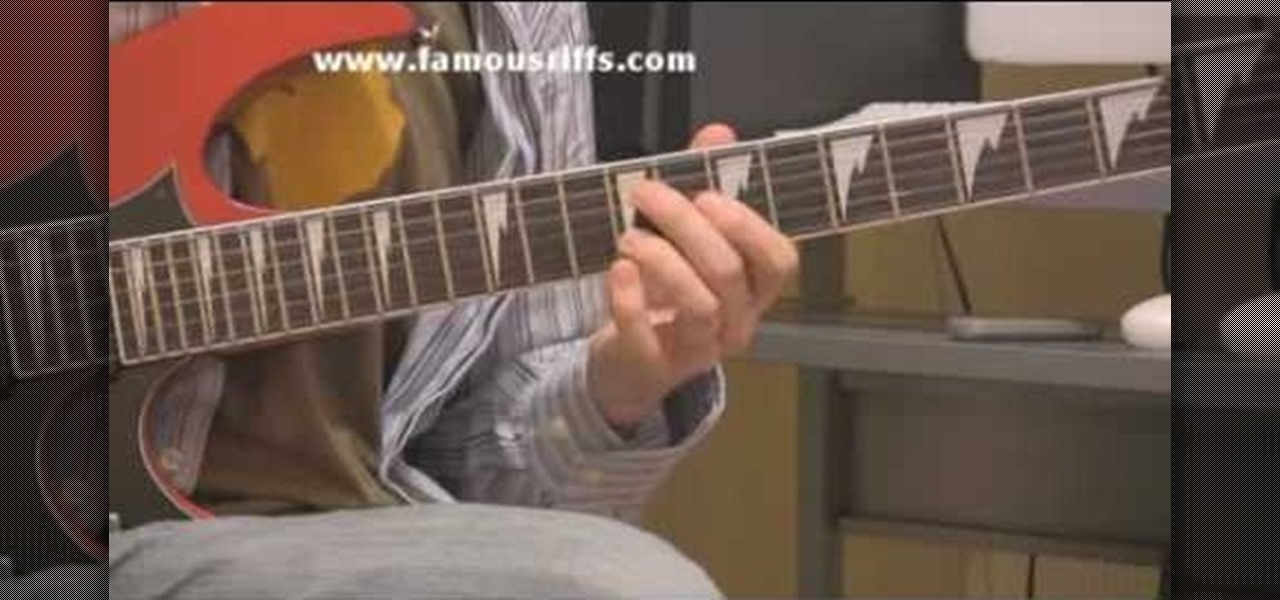
Play a sliding 9th chord on a blues guitar
In this video, we learn how to play blues guitar: a sliding 9th chord. First, play a G9 chord, where you will here all of the chords around it as you play. You can slide this chord around one or two frets to hear different sounds come from it. It’s a great vehicle to slide up and down. You can also use the fifth string to go up and down, which will create a more funky sound while playing. Use the four and five chords for the most interesting sounds. You can also put the fifth in the bass to m…
How To:
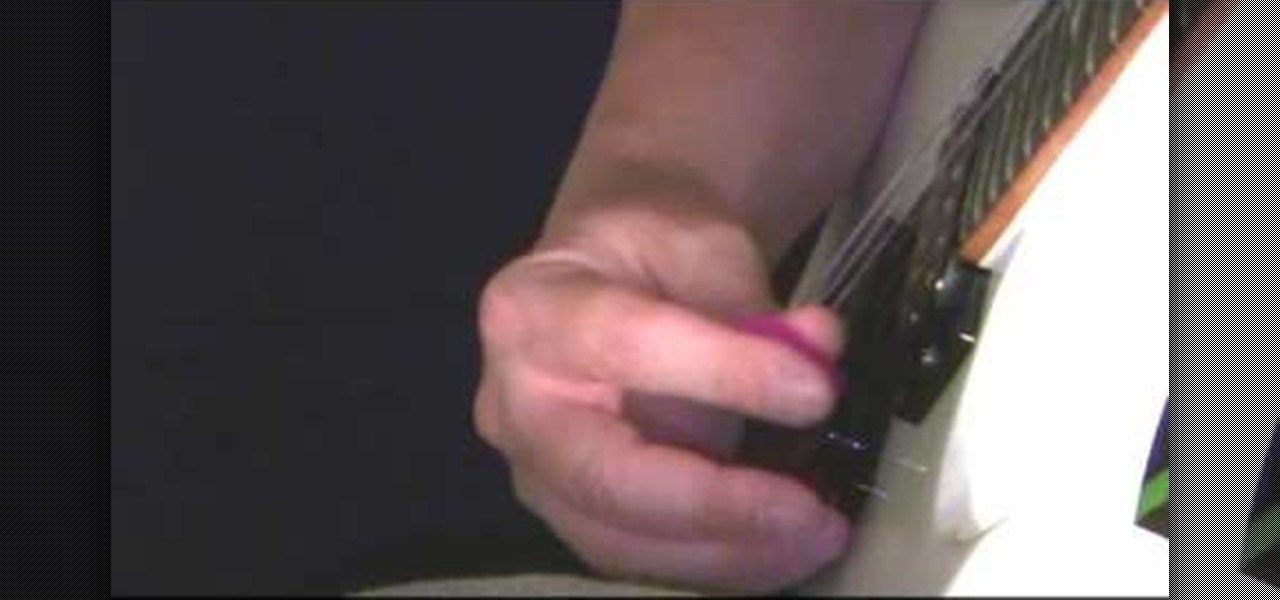
Hold your guitar pick for different types of chords
In this how-to video, you will learn how to hold your pick in different ways for certain styles of guitar playing. You must have a pick and guitar. Hold the pick between your index finger and thumb. Feel free to modify the way to hold it so that you are comfortable with it. For strumming, keep your picking hand loose. This will allow you to comfortable strum up and down. For picking chords, relax your picking hand and allow the pick to be slightly more perpendicular when picking. For shreddin…
How To:
Hold you guitar pick for more accuracy
In this video tutorial, viewers learn how to properly hold a guitar pick. Don’t hold the pick with the point facing down because it can easily slip and cause you to lose accuracy. Instead, hold the pick with the point facing forward. Don’t let the pick stick out too much. Secure it behind the index finger and under the thumb. This video provides a visual demonstration for viewers to easily follow along. This video will benefit those viewers who are beginning to play the guitar and would like …
How To:
Put strings on an electric guitar
In this how-to video, you will learn how to change your guitar strings. This is essential in learning how to maintain your guitar. Make sure you roll up your used guitar strings and throw them away in the trash. Unwrap the new strings. The string bag should have a label of what string it is. Put the correct string through the end of the hole in the back of the guitar. It should come out the other side. Pull it through and make sure the end of the string with the ball stops the string from goi…

How To:
Paint a 5150 Van Halen replica guitar
This three part tutorial shows you how to pait a EVH Kramer 5150. You’ll paint and design, doing it all for less than $350.00. It covers all the steps from primer, taping, painting, clearing coating, and assembly. After watching this you’ll have your very own Van Halen replica electric guitar to jam out with.

How To:
Change a guitar string on a Stratocaster
In this how-to video, you will learn how to change a guitar string on a Stratocaster. You need a guitar, a new set of strings, and a diagonal wire cutter. You might also need a string winder. You will need a guitar tuner and a guitar cable if you have an electric guitar. First, remove the broken string from the guitar. Push the broken string down and through the bridge. Remove the other end from the tuning post. Take the correct string and unroll it. Do not bend the string in any way. Take th…
How To:
Play «Thunderstruck» by AC/DC on electric guitar
This is a great instructional video on how to play thunderstruck by AC/DC on electric guitar. Thunderstruck is played mainly on B string. It is the second string as you may be aware of. First you should start with 12th fret and hit that note. Then move to 10th fret and 9th fret. Then go back to 10fret and back to 9th fret. Then you have to go 7 and then again 9 and then 5. Now go to 7th fret and then to 4 and 5. Then to 4 and 5 and again 4 and 5 and finally to 4. You can write down on these n…

How To:
Play «November Rain» by Guns N’ Roses on the guitar
This guitar lesson shows how to play Guns and Roses’ «November Rain» from the album «Use Your Illusion» . In this three part lesson you’ll learn how to play the chords in the verses, bridge and chorus. Soon enough you’ll be playing just like Slash himself on the electric guitar.

How To:
Play the «Star Spangled Banner» on electric guitar
In this video we are about to see how to play the «Star Spangled Banner» on electric guitar. This is a basic lesson to all the beginners in guitar. It starts with the E string. It travels from tabs 10-7-3 to start off with the anthem and returns back. Now to the next string below E. Go through 9-7-5 tabs and return back via 7-9-10 of the E string. Even though there are various ways of play the star spangled banner this method is easy to learn for the new users. Then play it once more with a 4…
How To:
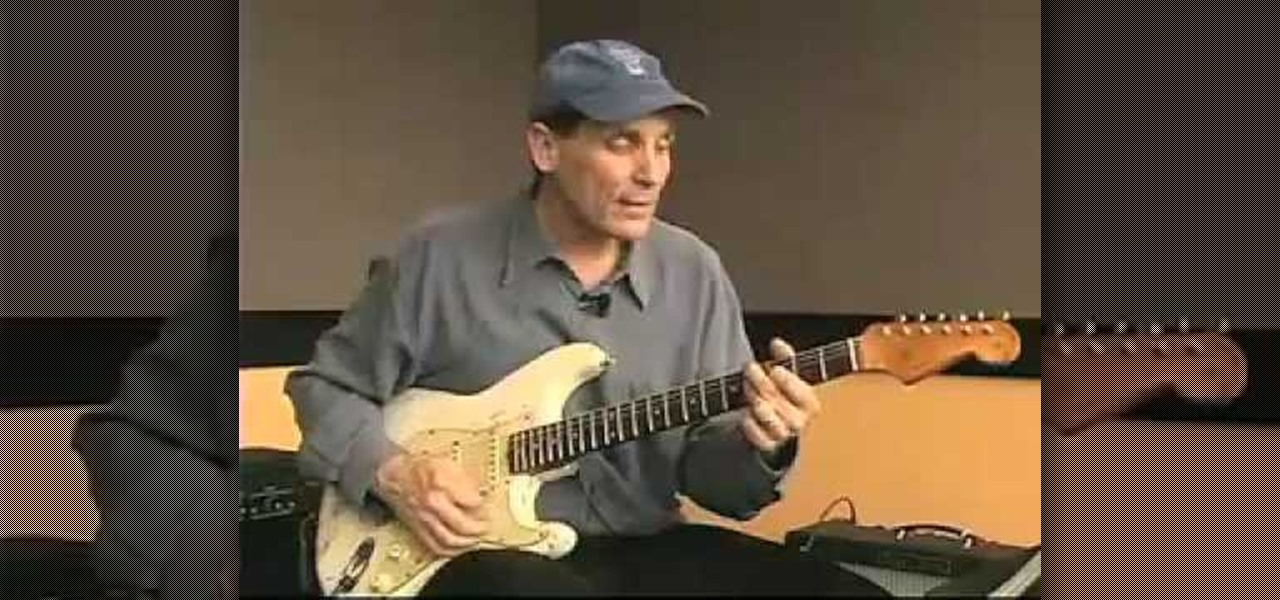
Adjust the neck on an electric guitar
Step by step tutorial video on adjusting the neck of your guitar. First you need to remove the truss rod cover to gain access to the truss rod. Make sure you have the correct Allen key when adjusting your truss rod. If your guitar came with it’s own Allen key make sure you use that one. Put a capo on the first fret. To increase the tension on the truss rod turn the Allen key to the right. To decrease the tension turn it to the left. Always check the gap between the frets and the strings.

How To:
Play «Smells Like Teen Spirit» (Nirvana) on guitar
In this electric guitar video lesson, brought to you by GuitarJamz, host Marty Schwarz, will teach you how to play «Smells Like Teen Spirit» by Nirvana, from the Nevermind album. As you follow along with him, he teaches you the progression of the chords used in the song, breaking down each part of the song, teaching you the chords and explaining the strum pattern and picking of the guitar riffs. This is a great video for beginners who are looking to learn power chords and songs to play with t…

How To:
Play blues on an electric guitar like Joe Bonamassa
If you’re a musician in need of some lessons, there’s no better way to learn than with MusicRadar’s so-called «Tuition» instructions. Although the title tuition is misleading, this video class is anything but costly, because it’s free, right here. Whether you’re looking for help with your voice, bass, electric guitar, drums, guitar effects, piano, Logic Pro or production techniques, Music Radar is here to show you the way.

How To:
Play «Head Over Heels» by Tears For Fears on guitar
Playing your favorite songs on the guitar is not as difficult as it seems. With this tutorial you can learn how to play «Head Over Heels» by Tears for Fears on the electric guitar. This lesson is geared towards intermediate guitarists because it assumes prior knowledge of guitar playing. This lesson covers the finger picking as well as the chord structure for «Head Over Heels.» Watch this how to video and you will be able to sing and play «Head Over Heels» by Tears for Fears.

How To:
Impress on the bass guitar
Have you always wanted to play the Bass Guitar but have no idea where to begin, let alone which way round to hold it? Don’t worry as we are going to show you an easy Blues riff that anyone can play with just five to ten minutes practice! Learn the bass guitar basics. Impress on the bass guitar.

How To:
Create Awesome Sweep Picking Licks While Improving Your Guitar Technique
If you are having problems playing your sweep picking arpeggios fast and clean then you are not alone. Many guitarists have the same problem. I suffered from the same problem, years ago. In fact, playing sweep picking arpeggios with poor technique is one of the most common problems that I encounter with my guitar students. After helping them overcome these challenges I have discovered 2 different approaches to improving your sweep picking technique. The first will keep you frustrated with bad…
How To:
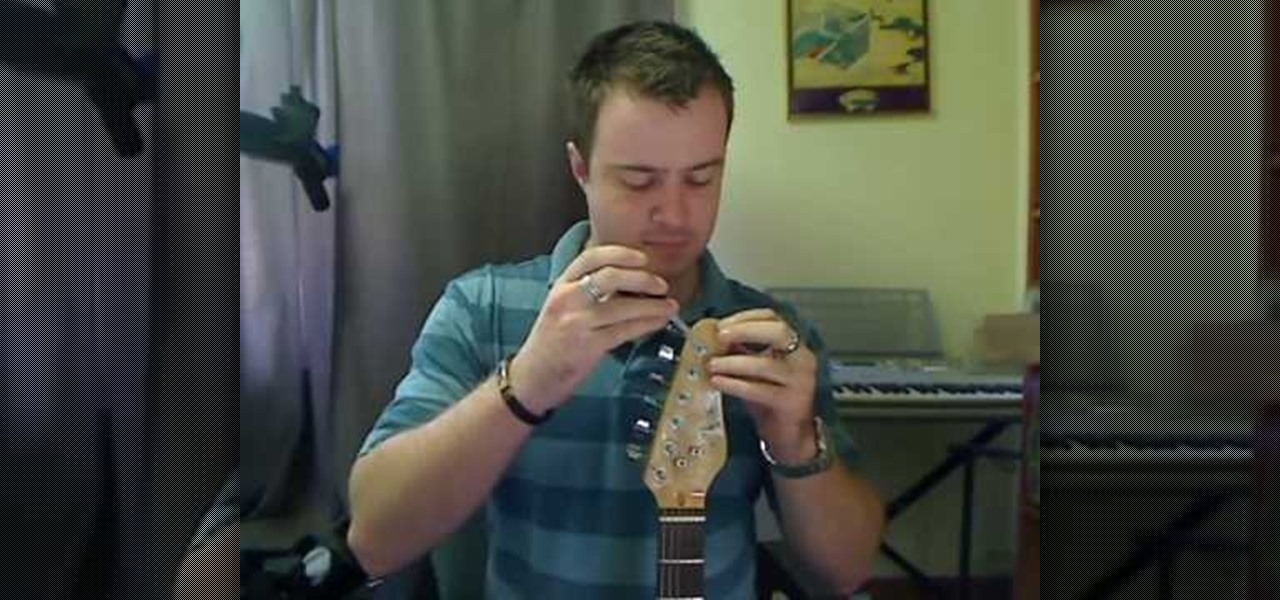
Restring & Tune an Electric Guitar
Hello again, faithful readers. For today’s lesson, we will be learning the correct way to restring and tune an electric guitar. I almost wasn’t going to post this because it is so basic. But, as with many basic tasks, there are a lot of people who know how to do it, but can’t really do it right. If you are a new guitarist, this is an essential piece of maintenance work, because guitar shops usually charge way too much for this task. Of course, I’m kinda cheap, so even 5 bucks is too much for …

How To:
Modify Your Guitar Pedals
Guitar pedals add character to your playing. However, musicians still say that certain pedals by themselves don’t live up to its promise of a perfect sound. Therefore, instead of replacing your guitar pedals with new and expensive ones, you can modify your pedals using different DIY kits available online and at local music stores.
How To:
Play «Beautiful Day» by U2 on the electric guitar
Want to play a beautiful version of «Beautiful Day» by U2? See how it’s done with this free video guitar lesson, which presents a complete (and we mean complete) breakdown of the song and its constituent parts. While this tutorial is geared toward those who already have some knowledge of the guitar, players of all skill level should be able to follow along given adequate time and effort. For more information, and to get started playing «Beautiful Day» on your own guitar, watch this video guit…
How To:
Play «Until the End of the World» by U2 on electric guitar
Want to play «Until the End of the World» by U2? See how it’s done with this free video guitar lesson, which presents a complete (and we mean complete) breakdown of the song and its constituent parts. While this tutorial is geared toward those who already have some knowledge of the guitar, players of all skill level should be able to follow along given adequate time and effort. For more information, and to get started playing «Until the End of the World» on your own guitar, watch this video g…
How To:
Play «With or Without You» by U2 on guitar
Want to master «With or Without You» by U2? See how it’s done with this free video guitar lesson, which presents a complete (and we mean complete) breakdown of the song and its constituent parts. While this tutorial is geared toward those who already have some knowledge of the guitar, players of all skill level should be able to follow along given adequate time and effort. For more information, and to get started playing «With or Without You» on your own guitar, watch this video guitar tab!

How To:
Play «I’ll Go Crazy If I Don’t Go Crazy Tonight» by U2
Want to master «I’ll Go Crazy If I Don’t Go Crazy Tonight» by U2? See how it’s done with this free video guitar lesson, which presents a complete (and we mean complete) breakdown of the song and its constituent parts. While this tutorial is geared toward those who already have some knowledge of the guitar, players of all skill level should be able to follow along given adequate time and effort. For more information, and to get started playing «IGCIIDGCT» on your own guitar, watch this video g…

How To:
Play «I Still Haven’t Found What I’m Looking For» by U2 on guitar
Want to master «I Still Haven’t Found What I’m Looking For» by U2? See how it’s done with this free video guitar lesson, which presents a complete (and we mean complete) breakdown of the song and its constituent parts. While this tutorial is geared toward those who already have some knowledge of the guitar, players of all skill level should be able to follow along given adequate time and effort. For more information, and to get started playing «ISHFWILF» on your own guitar, watch this video g…

How To:
Play «Magnificent» by U2 on electric guitar
Want to do a magnificent job of playing «Magnificent» by U2? See how it’s done with this free video guitar lesson, which presents a complete (and we mean complete) breakdown of the song and its constituent parts. While this tutorial is geared toward those who already have some knowledge of the guitar, players of all skill level should be able to follow along given adequate time and effort. For more information, and to get started playing «Magnificent» on your own guitar, just take a look!
How To:
Play «New Year’s Day» by U2 on electric guitar
Want to play «New Year’s Day» by U2? See how it’s done with this free video guitar lesson, which presents a complete (and we mean complete) breakdown of the song and its constituent parts. While this tutorial is geared toward those who already have some knowledge of the guitar, players of all skill level should be able to follow along given adequate time and effort. For more information, and to get started playing «New Year’s Day» on your own guitar, just take a look!
How To:
Play «Bad» by U2 on the electric guitar (with and without delay)
Want to be good—even great—at playing «Bad» by U2? See how it’s done with this free video guitar lesson, which presents a complete (and we mean complete) breakdown of the song and its constituent parts. While this tutorial is geared toward those who already have some knowledge of the guitar, players of all skill level should be able to follow along given adequate time and effort. For more information, and to get started playing «Bad» on your own guitar, just take a look!
How To:
Play «Smooth Criminal» by Michael Jackson on electric guitar
Want to master «Smooth Criminal» by Michael Jackson? See how it’s done with this free video guitar lesson, which presents a complete breakdown of the song and its constituent riffs. While this tutorial is geared toward those who already have some knowledge of the guitar, players of all skill level should be able to follow along given adequate time and effort. For more information, and to get started playing MJ’s «Smooth Criminal» on your own guitar, just take a look!

How To:
Play «Tighten Up» by the Black Keys on electric guitar
Want to master «Tighten Up» by the Black Keys? See how it’s done with this free video guitar lesson, which presents a complete breakdown of the song and its constituent riffs. While this tutorial is geared toward those who already have some knowledge of the guitar, players of all skill level should be able to follow along given adequate time and effort. For more information, and to get started playing «Tighten Up» on your own guitar, just take a look!

Если вы думаете, что настроить гитару – это просто подкрутить колки перед игрой, вы ошибаетесь. Высота струн, прогиб грифа, положение звукоснимателей, мензура – все это можно и нужно менять, чтобы добиться лучшего звучания и удобства игры на инструменте. В этой статье мы рассмотрим глубокую настройку электрогитары: как это делается и зачем это надо.

Регулировка прогиба грифа
Гриф электрогитары (а также большинства акустик с металлическими струнами) – это не просто кусок дерева. Внутри него находится изогнутый металлический стержень, который называется анкером. Его задача – повысить прочность инструмента и препятствовать деформации. Натяжение струн медленно, но верно сгибает гриф, а металл удерживает его на месте.
Влажность климата и возраст древесины также могут деформировать гриф. На конце анкера есть специальная гайка. Подкручивая ее, можно сгибать или разгибать стержень, изменяя прогиб грифа. Таким образом вы всегда можете ответить на негативное влияние внешней среды и вернуть инструменту исходное состояние.
Проверить, нуждается ли гитара в настройке, очень просто. Прижмите 6-ю струну одновременно на первом и на последнем ладах. Если она соприкасается с каким-либо порожком, анкер нужно ослабить. Если промежуток слишком большой – натянуть. Учитывайте, что проверять надо на настроенном инструменте. И именно в том строе, в котором играете чаще всего.

Идеальное расстояние зависит от инструмента, но обычно должно составлять 0,2–0,3 мм. Если струны будут сильно близко, они могут дребезжать при игре и портить весь звук. Если далеко – можете забыть о скоростной игре.
В самой настройке тоже нет ничего сложного. С помощью шестигранного ключа нужно подкрутить анкерный болт. Обычно он находится на головке грифа в специальном отверстии. Часто оно закрыто небольшой крышкой, которую следует предварительно открутить. В редких случаях отверстие может располагаться с другого конца – на месте крепления грифа к корпусу.
Чтобы ослабить анкер, подкрутите болт против часовой стрелки. Чтобы подтянуть – по часовой. Здесь очень важно не торопиться. Провернули ключ на четверть оборота – проверьте. Крутить гайку туда-сюда не слишком полезно для вашего инструмента.

Подобную проверку нужно проводить раз в полгода-год. Также стоит учитывать, что, крутя анкерный болт, вы изменяете высоты струн и мензуру гитары. Поэтому необходимо проводить глубокую настройку электрогитары целиком.
Высота струн
С этим параметром все просто: чем ниже струны, тем меньше времени и усилий вы будете тратить на то, чтобы их прижать. Это один из самых важных параметров для скоростной игры. Когда количество извлекаемых нот превышает 15 за секунду, каждое мгновенье на счету.
С другой стороны, струны во время игры постоянно колеблются. Амплитуда небольшая, но все же. Если в процессе игры вы слышите дребезжание, шуршание и металлический лязг, придется расстояние увеличить. Точные значения назвать невозможно. Они зависят от толщины струн, вашего стиля игры, прогиба грифа и изношенности ладовых порожков. Это все определяется опытным путем.
Высота струн настраивается на бридже электрогитары (струнодержателе). Вам понадобится шестигранник или отвертка. Начните с расстояния в 2 мм. Отрегулируйте положение 6-й струны и попробуйте поиграть на ней. Не дребезжит? Смело выставляйте на тот же уровень остальные, не забывая их тестировать. Потом опустите еще на 0,2 мм и поиграйте. И так далее.

Как только услышали лязг, поднимите струну на 0,1 мм и поиграйте снова. Если призвуки ушли, вы отыскали оптимальное положение. Обычно «зона комфорта» 1-й струны лежит в пределах 1,5–2 мм, а 6-й – 2–2,8 мм.
К проверкам отнеситесь серьезно. Извлеките несколько нот на каждом (это важно) ладу. Попробуйте поиграть что-нибудь драйвовое, с сильной атакой. Сделайте несколько бендов. Выжмете из гитары максимум при настройке – сможете быть уверены, что она не подведет вас на концерте или во время записи.
Разные типы фурнитуры настраиваются по-разному. Например, если у вас стоит Tune-o-matic (струны сквозь корпус), вы не сможете задать высоту для каждой струны по отдельности. Зато сумеете сделать небольшой перекос от толстой к тонкой.
Настройка мензуры
Мензура – это рабочая длина струн. Иначе говоря, это расстояние от нулевого порожка на конце грифа до бриджа гитары. Не каждый струнодержатель позволяет менять мензуру – на некоторых она строго определяется во время производства. Но на большинстве фурнитуры, особенно тремоло-систем, такая возможность есть.
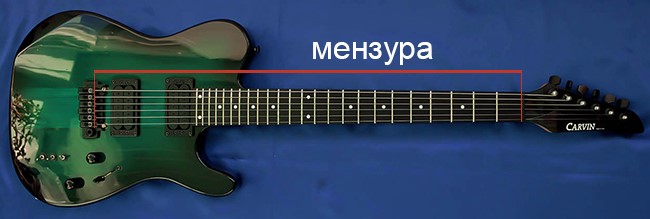
В отличие от безладовых скрипок и виолончелей, гитара не может похвастаться абсолютной точностью нот. Даже на идеально настроенном инструменте будет возникать небольшие погрешности. Небольшая подстройка мензуры для каждой струны позволяет минимизировать эти неточности.
Крутится все, опять же, отверткой или небольшим шестигранником. Нужные болты находятся на задней стороне бриджа. Начните с 1-й струны. Извлеките натуральный флажолет на 12-м ладу. Прикоснитесь к струне над ладовым порожком, но не прижимайте ее, а затем щипните пальцем другой руки. Затем зажмите струну и сравните звуки. Они должны быть абсолютно идентичны. Если флажолет звучит выше, мензуру надо увеличить, если ниже – сократить. Аналогичным образом отрегулируйте длину остальных струн.

Так как немногие гитаристы могут похвастаться абсолютным музыкальным слухом, рекомендуется использовать тюнер. Если тюнера у вас нет – установите программу, например, ApTuner.
Положение звукоснимателей
Теперь, когда вы разобрались с прогибом грифа, высотой и длиной струн, гитара почти готова к игре. Осталась мелочь – настройка звукоснимателей. А точнее, расстояния от них до струн. Это не менее важный момент – от него зависит громкость звука и наличие «волчков» (сильно перегруженные грязные ноты).
Ваша задача – максимально приблизить звукосниматели к струнам, но с двумя условиями. Во-первых, вы не должны цеплять звучок медиатором во время активной игры. Во-вторых, ни одна из зажатых на последнем ладу струн не должна давать посторонние неприятные звуки.

Регулируется высота с помощью болтов на корпусе звукоснимателей. Подкручивайте поочередно обе стороны и пробуйте играть. И так, пока не найдете оптимальное положение.
Звукосниматель следует располагать не параллельно струнам. Басовые имеют больший диаметр и большую амплитуду колебаний. Поэтому они должны находиться от катушек на чуть большем расстоянии.
Автор статьи – Молянов Павел
Этот струнный инструмент подобно аналогам нуждается в своевременной подстройке. Важно настроить правильную высоту струн на электрогитаре, чтобы музыкант не портил слух нелепо звучащими нотами, а слушатели не раздражались из-за искаженной композиции. Опытные исполнители не задаются вопросом, как правильно настроить электрогитару, а новичкам эти знания необходимы.
Существуют разные способы: начинающим музыкантам будет сложнее настраивать инструмент на слух, зато можно воспользоваться специальными программами.
Как правильно настроить электрогитару
Строй инструмента может «подвинуться» в разных ситуациях: на концерте, репетиции, занятиях дома или выступлений в кругу близких и знакомых. Поэтому музыкант должен уметь быстро восстановить его.
Что потребуется
 Настройка электрогитары предполагает использование камертона или тюнера, в том числе программы онлайн. Необходимо выбрать камертон с частотой 440 Гц, издающий образец ноты «ля». Порядок действий таков:
- Ударить приспособлением о твердый предмет – он издаст звук.
- Зажать 1-ю струну на 5-м ладу, поместив палец ровно, и извлечь звук.
- Тон камертона и струны должен совпадать. Если он разбегается, нужно поворачивать колок до тех пор, пока звучание не станет одинаковым.
На этом использование камертона завершено. Дальше гитарист настраивает инструмент на слух, зажимая струны на определенных ладах и добиваясь звучания в унисон.
Необходимые инструменты
Для настройки электрогитары пользуются камертоном, тюнером, слухом. Неправильный строй бывает связан с положением грифа, высотой струн. Поэтому пользуются такими приспособлениями:
- Шлицевой отверткой.
- Крестовой отверткой.
- Шестигранным ключом.

Некоторые фирмы разрабатывают специальные инструменты для своей продукции.
Пошаговый план
Настройка анкерного стержня
Чтобы гитара извлекала правильные звуки, нужно проверить состояние грифа, в особенности анкера – стального стержня диаметром 5-6 мм, у которого на одном конце есть болт (у некоторых моделей – на двух). Регулировка грифа электрогитары достигается поворотом болта и изменением натяжения. Анкер выполняет две функции: компенсирует силу натяжения, которую оказывают струны, благодаря чему гриф сохраняет форму и не прогибается, а также настраивает инструмент в соответствии с запросами исполнителя и техникой его игры.

Чтобы настроить анкерный стержень, нужно:
- Отпустить струны.
- Взять шестигранный ключ и вставить его как можно глубже в резьбу, чтобы не сорвать ее. Анкерная гайка располагается в основании грифа или его голове.
- Не затягивать анкерный стержень так, чтобы сорвались болты.
- Вращения должны быть медленными и осторожными. Опытные гитаристы советуют за один раз совершать половину оборота, лучше всего – 30 градусов. Поворот ключа вправо затягивает анкер, влево – ослабляет его положение.
- После каждого поворота гайки следует оставить инструмент неподвижным на 30 мин., чтобы дерево приняло форму. После этого необходимо оценить положение грифа.
Из-за изменения прогиба грифа строй гитары станет другим, поэтому после настройки анкерного стержня следует проверить звучание струн. Натяжение грифа проверяют спустя несколько часов: этот срок покажет, насколько успешен результат. Важно знать, из какого дерева сделана гитара, ведь разные сорта сырья неодинаково реагируют на натяжение. Например, клен очень податлив, а красное дерево меняет форму медленно.
Правильное положение анкера
Чтобы проверить настройку стержня, следует нажать зажать струну на 1-м, 18-м или 20-м ладах. Если на 6-м и 7-м ладах от поверхности до струны остается 0,21-0,31 мм – инструмент имеет правильное натяжение грифа. Для бас-гитары эти значения составляют 0,31-0,4 мм.
Правильные техники регулировки гитары
Прежде чем настроить электрогитару, необходимо удостовериться в безопасности. Когда нужно уменьшить прогиб грифа, следует ослабить струны: в процессе регулировки они натягиваются. Если эти детали старые или стертые, какая-нибудь струна может порваться и травмировать.
Высота струн над грифом
После любых действий с анкером следует проверить звучание инструмента. Высота струн на электрогитаре проверяется над 12 ладом: измеряют расстояние от металлического порожка до струны. 1-я должна располагаться на 1-1,5 мм, 6-я – на 1,5-2,5 мм.

На слух
При настройке электрогитары без вспомогательных инструментов важно получить правильное звучание первой струны. Нужно зажать ее на 5-м ладу: если звучит нота «ля», дальше можно продолжать настраивание. Очередность действий такова:
- 2-я струна зажимается на 5-м ладу: она должна звучать как 1-я чистая.
- 3-я – на 4-м ладу: ее звучание должно совпадать с 2-й струной.
- Остальные струны зажимаются на 5-м ладу. В этом строй электрогитары похож на классический инструмент.
При помощи тюнера
Это приспособление поможет точно настроить инструмент в концертных условиях или при достаточном шуме: индикатор покажет, насколько чистый звук у гитары. С помощью инструментального кабеля гитара соединяется с тюнером. Достаточно дернуть струну: если индикатор отклоняется вправо или влево от шкалы, колок поворачивают и ослабляют или натягивают струну, пока она не станет звучать в унисон.
Можно использовать онлайн тюнеры – специальные программы, которые работают аналогично реальным устройствам. Их преимущество в простоте использования: достаточно скачать онлайн тюнер на компьютер или смартфон, чтобы настраивать инструмент в любом месте.
Приложения-тюнеры для смартфона
Для Андроид:
-
Guitar Tuna
-
Ultimate Guitar Tuner
-
Настройка гитары
Для iOS:
-
Guitar Tuna
- Pro Guitar Tuner
Возможные проблемы и нюансы
При настройке электрогитары с помощью напольного тюнера необходимо следить, чтобы частота устройства была 440 Гц.
Иначе его звучание будет отличаться от строя ансамбля.
Ответы на вопросы
| 1. Какие причины расстройки электрогитары? | Повороты колков при транспортировке, растяжение струн при постоянной игре, их износ, а также температурные перепады и влажность – это факторы, влияющие на строй инструмента. |
| 2. Каким способом лучше настраивать электрогитару? | Новичку пригодится тюнер, а опытный музыкант может настроить инструмент на слух. |
| 3. Нужно ли обращать внимание на высоту струн? | Безусловно. Перед регулировкой звучания инструмента нужно проверить, как располагаются струны относительно грифа. Если они прилегают к его поверхности или находятся дальше, нужно отрегулировать анкерный стержень. |
Вместо вывода
Высота струн электрогитары определяет качество звучания инструмента. Перед ее регулировкой нужно проверить положение грифа, осторожно и неспешно поворачивать анкерный стержень. На состояние инструмента влияют разные факторы: сила натяжения струн, температура, влажность. После регулировки грифа можно настраивать звучание струн на слух или с помощью тюнера.