ПАРАДАВТО
Карта сайта
Форма обратной связи
ООО «ПарадАвто», 220024, Республика Беларусь, г. Минск, ул. Стебенева, 20В
Наш рейтинг: 4.5 из 5 ★★★★★ на основании 120 отзывов
Вся представленная на сайте информация, касающаяся стоимости и технических характеристик автомобилей, условий сервисного обслуживания носит информационный характер и не является публичной офертой. Для получения подробной информации просьба обращаться к ближайшему официальному дилеру ООО «УАЗ». Опубликованная на данном сайте информация может быть изменена в любое время без предварительного уведомления.

Данная инструкция на русском языке предназначена для автомобиля
УАЗ Патриот (2016 — 2017), описывает принцип работы и основные моменты эксплуатации устройства.
Производитель настойчиво рекомендует перед включением автомобиля
внимательно изучить настоящую инструкцию.
Инструкция для автомобиля
представлена в формате PDF. Все современные браузеры уже поддерживают данный формат и сложностей с открытием файла возникнуть не должно.
Но если открыть инструкцию все же не удается, то необходимо установить на компьютер программу для чтения PDF файлов, например, Acrobat Reader. Если у вас возникли сложности с открытием инструкции на смартфоне под управлением Android, нужно установить, например, Adobe Acrobat Reader.
Комментарии (0)
Комментарии про другие Автомобили
Другие Автомобили УАЗ
ПАРАДАВТО
Карта сайта
Форма обратной связи
ООО «ПарадАвто», 220024, Республика Беларусь, г. Минск, ул. Стебенева, 20В
Наш рейтинг: 4.5 из 5 ★★★★★ на основании 120 отзывов
Вся представленная на сайте информация, касающаяся стоимости и технических характеристик автомобилей, условий сервисного обслуживания носит информационный характер и не является публичной офертой. Для получения подробной информации просьба обращаться к ближайшему официальному дилеру ООО «УАЗ». Опубликованная на данном сайте информация может быть изменена в любое время без предварительного уведомления.
- Главная
- Документация
Руководства по эксплуатации и сервисные книжки на УАЗ

Патриот, Пикап
Руководство по эксплуатации:
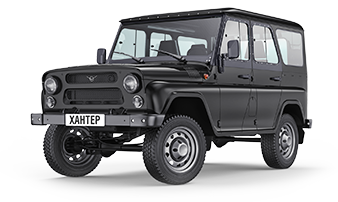
Хантер
Руководство по эксплуатации:
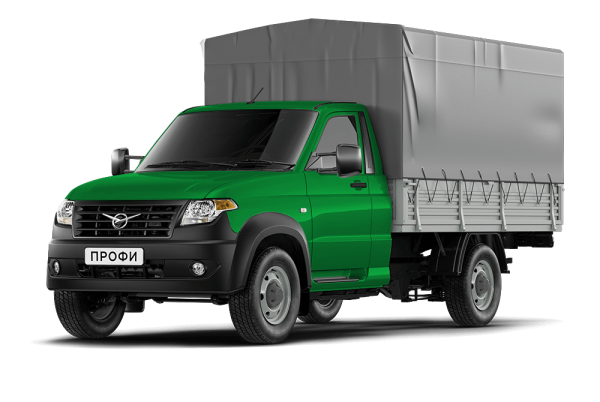
Профи
Руководство по эксплуатации:

Классический коммерческий ряд
Руководство по эксплуатации:
Большой архив с огромным количеством технической информации по УАЗ Патриот
(схемы, руководства по эксплуатации, инструкции, техническая документация, что требовать от дилеров по предпродажной подготовке, куда смотреть и что проверить в машине при покупке, порядок подготовки к эксплуатации нового автомобиля УАЗ Патриот и т.п.):
yadi.sk/d/6szsBp9YStNrn
yadi.sk/d/OWXfNHsff7hJC
Руководства и инструкции от завода-изготовителя:
www.uaz.ru/owner/manuals
Большая подборка литературы по УАЗам различных моделей:
www.uazbuka.ru/lib/
Сервис поиска запчастей по каталожному номеру на Патриот:
www.uazbuka.info/?model=438
Каталог деталей УАЗ Патриот 2017 м.г.:
www.drive2.ru/l/546403129130745928/
yadi.sk/d/LG2SQWo3w4-adQ
Отличия Патриотов разных годов выпуска:
uazpatriot.info/forum_uaz…6&t=3222&p=103789#p103789
В помощь начинающему УАЗоводу:
uazpatriot.ru/forum/viewtopic.php?f=32&t=21729
Ответы на часто задаваемые вопросы с форума patriot4x4.ru:
www.patriot4x4.ru/joomla2…-forum&catid=25&Itemid=44
Ответы на часто задаваемые вопросы с форума uazbuka.ru:
forum.uazbuka.ru/forumdisplay.php?f=72
Как обкатывать новый УАЗ Патриот:
www.drive2.ru/cars/uaz/pa…nsky/journal/657763/#post
Система перекачки между баками УАЗ Патриот:
www.drive2.ru/cars/uaz/pa…nsky/journal/656135/#post
Подборка маркировок запчастей от других авто на автомобиль УАЗ Патриот
www.drive2.ru/l/2922619/
www.drive2.ru/l/5031438/?…91821647&page=0#a91821647
forum.uazbuka.ru/showthread.php?t=29041
www.drive2.ru/l/3135591/
Фотоотчёты по шумоизоляции салона УАЗ Патриот:
www.drive2.ru/l/3470030/
www.drive2.ru/l/7547411/
www.drive2.ru/l/6234753/
www.drive2.ru/l/1201135/
Доработка переднего пассажирского сиденья (чтобы оно полностью складывалось и раскладывалось):
www.drive2.ru/l/7319250/
www.patriot4x4.ru/forum/i….php?showtopic=7803&st=60
Инструкция по выводу сапунов мостов и раздаточной коробки под капот:
www.drive2.ru/cars/uaz/pa…nsky/journal/590791/#post
Установка рации СиБи диапазона и антенны:
www.drive2.ru/cars/uaz/pa…nsky/journal/589274/#post
Установка шноркеля на УАЗ Патриот:
www.drive2.ru/cars/uaz/pa…nsky/journal/652647/#post
www.uazpatriot.ru/forum/n…-gbo-4-t18950.html#500463
Изготовление спального места в УАЗ Патриот:
www.drive2.ru/cars/uaz/pa…nsky/journal/589361/#post
Лифт кузова (боди-лифт):
www.drive2.ru/cars/uaz/pa…nsky/journal/599749/#post
Усиленная подвеска на УАЗ Патриот:
www.drive2.ru/cars/uaz/pa…nsky/journal/657017/#post
Пошаговая фотоинструкция по замене штатных 3-листовых рессор на 4-листовые от УАЗ-Барс
www.drive2.ru/l/6447561/
Пошаговая фотоинструкция по замене ГРМ
www.drive2.ru/l/6386657/
Усиление проушин и бамперов для поднятия Хай-джеком:
www.drive2.ru/l/4394736/
Установка второго аккумулятора:
www.drive2.ru/l/801231/
www.drive2.ru/l/3738229/,
www.drive2.ru/l/3299539/
Установка «дворников» на фары Патриота:
www.uazpatriot.ru/forum/d…iot-kolhoznie-t11446.html
Установка двух газовых баллонов (торы) в багажник:
www.uazpatriot.ru/forum/g…o-vishlo-foto-t14881.html
Самостоятельная настройка газового оборудования:
www.uazpatriot.ru/forum/s…oborudovaniya-t22257.html
Краткий обзор комплектов сцепления на УАЗ Патриот
www.drive2.ru/cars/uaz/pa…nsky/journal/655410/#post
Краткий обзор по резине и дискам для УАЗов
www.drive2.ru/l/8822019/
ОТЧЕТ о замене СЦЕПЛЕНИЯ (в картинках):
www.uazpatriot.ru/forum/m…a-v-kartinkah-t12371.html
Краткий обзор блокировок на УАЗ Патриот
www.drive2.ru/cars/uaz/pa…tizansky/journal/3248242/
Замена штатного сцепления на усиленное SACHS от BMW 635/735:
www.drive2.ru/cars/uaz/pa…nsky/journal/589709/#post
Модернизация механической раздаточной коробки УАЗ — замена шестерней и переделка на понижение 3.2
www.uazpatriot.ru/forum/h…zin-t17467-45.html#608121
Замена дефлекторов системы отопления:
www.uazpatriot.ru/forum/n…m-deflektoram-t14489.html
Установка выключателей массы:
Выключатель массы с тросовой тягой в салон:
www.uazpatriot.ru/forum/v…assi-t3216-45.html#647117
Дистанционное реле отключения массы:
www.uazpatriot.ru/forum/h…benzin-t17467.html#465697
Замена привода стеклоочистителя на усиленный с электродвигателем BOSCH:
www.drive2.ru/cars/uaz/pa…nsky/journal/649273/#post
Замена расширительного бачка на Волговский или Газелевский:
www.uazpatriot.ru/forum/r…chok-t7330-75.html#794610
Улучшение вентиляции подкапотного пространства путём врезки «жабер»:
www.drive2.ru/cars/uaz/pa…nsky/journal/590723/#post
Несколько видов «жабер»:
www.uazpatriot.ru/forum/z…ay-sam-t23362.html#720575
Доработка рычага раздатки с целью уменьшения шумов от него:
www.uazpatriot.ru/forum/t…chka-razdatki-t18927.html
www.drive2.ru/cars/uaz/pa…urnal/288230376152989369/
Установка калитки на заднюю часть машины (снять запасное колесо с двери багажника):
Самодельный вариант:
www.uazpatriot.ru/forum/u…nem-t15708-90.html#384708
Покупной вариант:
www.uazpatriot.ru/forum/k…plenie-zapaski-t9682.html
Возврат к штатной конструкции шкворневого узла на мостах (удаление подшипников, установка шкворней с бронзовыми вкладышами):
www.uazpatriot.ru/forum/v…zla-na-mostah-t23572.html
Электронное руководство по ремонту шкворневого узла»Спайсер»:
www.uazpatriot.ru/forum/e…vogo-uzla-spa-t14596.html
Дополнительная пневматическая подвеска для УАЗ Патриот:
www.uazpatriot.ru/forum/pnevmopodveska-t12108.html
Разбираем и ремонтируем КПП Dymos:
www.uazpatriot.ru/forum/r…korobku-dymos-t20255.html
Диски, подходящие на УАЗ Патриот:
www.uazpatriot.ru/forum/d…atriot-spisok-t12020.html
Потолочная консоль на УАЗ Патриот:
www.uazpatriot.ru/forum/p…l-pod-ratsiyu-t16052.html
Инструкция по прокачке ГУР Delphi:
www.uazpatriot.ru/forum/i…ke-gur-delphi-t23097.html
Второй контур уплотнителей на двери УАЗ Патриот:
www.uazpatriot.ru/forum/e…-uplotniteley-t22566.html
Справочник по блокам управления УАЗ Патриот и методам их диагностики:
2a2.ru/patriot/
Конструкция и эксплуатация нового дизельного двигателя ЗМЗ-51432 СRS на автомобилях УАЗ Патриот:
www.uazpatriot.ru/forum/k…zmz-51432-srs-t22328.html
Эксплуатация нового дизельного двигателя ЗМЗ-51432 СRS на автомобилях УАЗ Патриот:
www.uazpatriot.ru/forum/e…2-srsichast-2-t30504.html
Эксплуатация дизельного двигателя IVECO F1A на автомобилях УАЗ Патриот:
www.uazpatriot.ru/forum/d…atel-iveco-f1a-t9298.html
Эксплуатация новой электрораздатки DYMOS:
uazpatriot.ru/forum/viewtopic.php?f=17&t=30330
Самостоятельная замена цепи новой электрораздатки DYMOS:
www.drive2.ru/l/6632281/
Пошаговая фотоинструкция по самостоятельной антикоррозийной обработке нового Патриота:
uazpatriot.ru/forum/viewtopic.php?f=138&t=28544
Полное описание предохранителей и реле:
vsepredohraniteli.ru/other/uaz-patriot.html
- Главная
- УАЗ
- Патриот
- Пошаговый ремонт в фотографиях УАЗ Патриот с 2016 г., 2.7 л.
Год выпуска:
2016 — 2020 гг.
Найдено 5 книг стоимостью от 236 руб.
Быстро купить книгу в оригинальной качественной версии PDF от издательства
Найдено 4 книги стоимостью от 2982 руб.
Купить бумажную версию книги с доставкой по вашему адресу
Скачать руководство с предоставленного файлообменника
Книга по ремонту УАЗ Патриот предназначена для использования владельцами автомобилей марки УАЗ Патриот, Пикап, Карго, выпускаемых начиная с 2016 года. Данные транспортные средства оснащаются бензиновыми двигателями объемом 2.7 л. В руководстве представлены подробные электросхемы, а также качественные фотографии, отражающие процесс выполнения ремонтных работ.
Руководство по эксплуатации УАЗ Патриот, представленное в данном разделе, можно купить в формате PDF и скачать на свое мобильное устройство. В пособии содержится вся необходимая информация об устройстве основных систем автомобиля, его характеристиках, а также рекомендации по ремонту и обслуживанию. Здесь можно узнать цены на руководство по ремонту и подобрать необходимое издание.
| Магазин | Тип книги | Цена | Информация |
|---|---|---|---|
| AUTOINFORM96 | Книга | 2982 руб. | |
| AUTODATA | Книга | 3358 руб. | |
| AUTOINFORM96 | Книга | 3932 руб. | |
| LABIRINT | Книга | 5852 руб. |
Эксплуатация УАЗ Патриот
Похожие руководства на сайте
- Главная
- УАЗ
- Патриот
- Пошаговый ремонт в фотографиях УАЗ Патриот с 2016 г., 2.7 л.
Год выпуска:
2016 — 2020 гг.
Найдено 5 книг стоимостью от 358 руб.
Быстро купить книгу в оригинальной качественной версии PDF от издательства
Найдено 4 книги стоимостью от 2982 руб.
Купить бумажную версию книги с доставкой по вашему адресу
Скачать руководство с предоставленного файлообменника
Книга по ремонту УАЗ Патриот предназначена для использования владельцами автомобилей марки УАЗ Патриот, Пикап, Карго, выпускаемых начиная с 2016 года. Данные транспортные средства оснащаются бензиновыми двигателями объемом 2.7 л. В руководстве представлены подробные электросхемы, а также качественные фотографии, отражающие процесс выполнения ремонтных работ.
Руководство по эксплуатации УАЗ Патриот, представленное в данном разделе, можно купить в формате PDF и скачать на свое мобильное устройство. В пособии содержится вся необходимая информация об устройстве основных систем автомобиля, его характеристиках, а также рекомендации по ремонту и обслуживанию. Здесь можно узнать цены на руководство по ремонту и подобрать необходимое издание.
| Магазин | Тип книги | Цена | Информация |
|---|---|---|---|
| AUTOINFORM96 | Книга | 2982 руб. | |
| AUTODATA | Книга | 3690 руб. | |
| AUTOINFORM96 | Книга | 4310 руб. | |
| LABIRINT | Книга | 5852 руб. |
Эксплуатация УАЗ Патриот
Похожие руководства на сайте
- Manuals
- Brands
- UAZ Manuals
- Automobile
- PATRIOT
- Operation manual
-
Contents
-
Table of Contents
-
Bookmarks
Quick Links
Ulyanovsk Automobile Plant, PJSC
Motor Vehicles
UAZ PATRIOT,
UAZ PICKUP,
UAZ CARGO
Operation Manual
OM 05808600.132-2011
Sixth Edition
2016
Related Manuals for UAZ PATRIOT
Summary of Contents for UAZ PATRIOT
-
Page 1
Ulyanovsk Automobile Plant, PJSC Motor Vehicles UAZ PATRIOT, UAZ PICKUP, UAZ CARGO Operation Manual OM 05808600.132-2011 Sixth Edition 2016… -
Page 2
WARNIN G! The Operation Manual details the necessary rules of motor vehicle operation and maintenance. Prior to motor vehicle operation, please read the Operation Manual and the vehicle log book carefully. In particular, please read the sections «Safety requirements and warnings», «New motor vehicle running-in»… -
Page 3: Chapter 1. General Information
Chapter 1. GeNeRAl INfORMATION Motor vehicle UAZ Patriot (UAZ-3163, UAZ-31638) — light, two-axle, off-road, 4×4 type, with an all-metal five-door bodyshell. Motor vehicle UAZ Pickup (UAZ-23632, UAZ-23638) — cargo-carrying (pickup), two-axle, off-road, 4×4 type, with a four-door cabin and a cargo compartment.
-
Page 4: Back Axle
MOTOR VEHICLE MARKING The motor vehicle’s name plate (Fig. 1.1) is installed on the B-pillar of the bodyshell side on the right-hand side of the motor vehicle. Vehicle identification number is marked on the name plate (Fig. 1.1) and on the motor vehicle body, on the bottom windsheild panel (Fig.
-
Page 5
Indicating part III — year of vehicle manufacture and its order number. Bodyshell identification number is stamped on the upper radiator cowl frame connector (Fig. 1.2). Chassis identification number is stamped on the right-hand frame side member, at the rear (Fig. 1.3). engines ZMZ-40906 and ZMZ-51432’s identification number is stamped on the area located to the left of the crankcase, above engine front support fastening lug bosses (Fig. -
Page 6
ZMZ-51432 ZMZ-40906 Fig. 1.4. Location of ZMZ-40906 and ZMZ-51432 engines’ identification number: I — descriptive part (VDS) consists of six characters. The first five characters (digits) represent the engine model code. If a model code contains fewer than five characters, a zero shall be entered in the free space at the end of the identifica- tion. -
Page 7: Specification
SPECIFICATION UAZ Patriot UAZ Pickup UAZ Cargo UAZ-23602 UAZ-23608 Designation UAZ-3163 UAZ-31638 UAZ-23632 UAZ-23638 (01/02) (01/02) General data Vehicle dimensions* Shown in Fig. 1.5-1.11 Maximum bearing capacity (including driver and (665/575) passengers), kg Seating capacity (including driver’s seat) Maximum gross vehicle weight,…
-
Page 8
Fig. 1.5. Main dimensions of UAZ PATRIOT motor vehicle with gross weight (dimensions are given for reference) To center To center of tow eye of tow eye * — depending on package… -
Page 9
Fig. 1.6. Main dimensions of UAZ PICKUP motor vehicle with gross weight (dimensions are given for reference) To center To center of tow eye of tow eye * — dimensions with tonneau cover ** — depending on package… -
Page 10
Fig. 1.7. Main dimensions of UAZ PICKUP motor vehicle with a load box cover with gross weight (dimensions are given for reference) To center To center of tow eye of tow eye * — depending on package… -
Page 11
Fig. 1.8. Main dimensions of UAZ PICKUP motor vehicle with a load box top bow (dimensions are given for reference) To center To center of tow eye of tow eye * — depending on package… -
Page 12
Fig. 1.9. Main dimensions of UAZ PICKUP motor vehicle with a load box shelter with gross weight (dimensions are given for reference) To center To center of tow eye of tow eye * — depending on package… -
Page 13
Fig. 1.10. Main dimensions of UAZ CARGO motor vehicle with gross weight (dimensions are given for reference) To center To center of tow eye of tow eye… -
Page 14
Fig. 1.11. Main dimensions of UAZ CARGO motor vehicle with a food van or a general purpose van with gross weight (dimensions are given for reference) To center To center of tow eye of tow eye * — dimension for an insulated van… -
Page 15
Unladen weight distribution over axle, kg: 1,120 1,160 on the front axle 1,150 1,190 1,150 1,205 (1,096/1,097) (1,147/1,149) on the back axle 1,010 (1,089/1,178) (1,088/1,176) Maximum speed, km/h 135 (125*) 135 (125*) Fuel consumption rate moving at uniform velocity 11.5 12 (13.5*) 10 (11.5*) 90 km/h, l/100 km… -
Page 16
31 (60) degree ( %) Inmost wading depth, m engine Model ZMZ-40906 ZMZ-51432 Designation UAZ-3163, UAZ-23632, UAZ-23602 UAZ-31638, UAZ-23638,UAZ-23608 Type four-stroke, with spark-plug ignition diesel turbo-charged Cylinder number Four Cylinder arrangement In-line, vertical Firing order… -
Page 17
Actual displacement, cm 2,693 2,235 Compression ratio 19.0 Minimum rotation frequency 800-900 850-900 for crankshaft in idle, min. Maximum torque, N•m 217.0 (22.1) 270 (27.5) (kgf•m) as per Rules 85 at 3,900 min. at 1,300-2,800 min. UNECE GOST R 41.85) Maximum capacity, kW (h.p.): 99.0 (134.6) 83.5 (113.5) -
Page 18
Dependent , front suspension — springing, on two longitudinal and one lateral arm, with an suspension type anti-roll bar, rear suspension — on two longitudinal semi-elliptic leaf-less springs with an anti-roll bar * For motor vehicles with a transfer case by UAZ PJSC… -
Page 19
Shock absorbers Four, hydro-pneumatic, telescopic, bilateral Wheels and tires: wheels Disc, with a whole rim, steel 6 1/2 Jx16H2 with a radial, tubeless tire 225/75R16 or of light- metal alloy 7Jx16H2, 7Jx18H2 with radial tubeless tires 235/70R16, 245/70R16, 245/60R18 with hubcaps. Wheel mounting — by five nuts. A spare wheel with tires 16″- with a steel wheel, with a tire 245/60R18 —… -
Page 20
Designation UAZ-3163, UAZ-23632, UAZ-23602 UAZ-31638, UAZ-23638, UAZ-23608 Wiring system Single wire, the negative pole is connected with motor vehicle earth Line voltage (rated), V Generator 11.203.640 by Pramo-Iskra) 14V, 80A, AAK 5730 («Iskra») 14V, 80A , 5122.3771 (Pramo-Electro) 14V, 80A 5122.3771 (Pramo-Electro), 14V, 80A or… -
Page 21
14-15 – 14-15 – 14-15 – force of 8 kgf, mm Belt deflection of a fan drive, a steering booster pump, A/C – – – compressor (option) at force of 4 kgf, mm *For UAZ Patriot motor vehicles… -
Page 22
A gap between spark plug – – – +0.15 +0.15 +0.15 electrodes, mm Brake pedal free play, mm Front wheels toe-in 0°4′-0°10′ Largest turning angle front 31-32 inner wheel, deg. Steering control total backlash (steering wheel angle from the position corresponding to the beginning of steerable wheels turning in one direction to the steering wheel position… -
Page 23
Fuel tanks: right/left 36/36 Engine cooling system 14.0 Engine lubrication system Brake hydraulic drive system Gearbox housing Transfer housing: «Dymos» UAZ PJSC Bevel gear housing: front axle back axle Power hydraulic steering 1.25 system Clutch hydraulic drive system 0.18 Windshield washer reservoir… -
Page 24: Chapter 2. Safety Requirements And Warnings
Chapter 2. SAfeTY ReQUIReMeNTS AND WARNINGS SAFETY REqUIREMENTS 1. When operating a motor vehicle it is necessary to observe road traffic regulations and safety requirements, keep the motor vehicle in good repair and carrying out timely maintenance and correct possible malfunctions in order to avoid injury to yourself and others.
-
Page 25
21. Catalyst operational temperature is 400-800°C (UAZ-3163, UAZ-23632, UAZ-23602) and 400-600°C (UAZ-31638, UAZ- 23638, UAZ-23608). It is prohibited to operate a motor vehicle without catalyst protection screens. When driving a motor vehicle and while parked, make sure that the exhaust system is not in contact with flammable materials (e.g. -
Page 26
30. Maximum permitted weight of the cargo hauling in the trunk compartment (including trunk compartment weight), when installing it on the UAZ Patriot motor vehicle’s bows, shall not exceed 50 kg. In case of a motor vehicle without bows, cargo hauling on the roofing is not provided. -
Page 27: Warnings
— do not carry out maintenance operation and repair of a motor vehicle with engine on, except for specific works that require engine start according to the procedure, with that take special care; — avoid bringing hands, parts of clothing and tools dangerously close to operating drive belts, pulleys, etc.;…
-
Page 28
necessary to check oil feed to the hydraulic pushers or to replace faulty hydraulic pushers. 5. For fail-safe operation and to prevent accelerator pedal breakdown it is recommended: — do not apply excessive loads on the pedal lever after operating stroke ending;… -
Page 29
15. Avoid spilling acids, soda solutions, brake fluid, antifreeze and fuel on the painted surface of the bodyshell, wheels and rubber parts. 16. In order to prevent turbidity of the headlamp assembly lenses and scratches on them: — dry foreign materials on the external surface of the lens must be cleaned off only by pre-moistening them with plenty of water;… -
Page 30
28. The opened lift gate or the back header can block visibility of the back lighting means of your motor vehicle for other road users. Before opening the lift gate of UAZ Patriot or the back header of UAZ Cargo motor vehicle, install breakdown triangle on the road as per GOST R 41.27-99. -
Page 31: Chapter 3. Control Elements, Motor Vehicle Interior And Bodyshell Equipment
Chapter 3. CONTROl eleMeNTS, MOTOR VeHICle INTeRIOR AND BODYSHell eQUIPMeNT Layout of the control elements and the driver seat equipment is shown in Figs. 3.1, 3.2 : 1 — cowling (see section «Interior heating and ventilation»). 2 — side window blower nozzle. 3 —…
-
Page 34
with a puddle lamp (depending on package) that switches on automatically when the cover is opened. 12+ — starting preheater timer. (Operation and maintenance information is specified in the manufacturing plant instruction (manual) attached to the motor vehicle). 13 — shift lever. (See lever positions on the shift lever handle and Fig. -
Page 35: Lighting Means Control Module
LIGHTING MEANS CONTROL MODULE Lighting means control module (LMCM) is shown in Fig. 3.4. 1 — external lights switch. Has three positions (clockwise): » » — lighting is OFF (daytime running lights are ON if available); » » — tail lamps, license plate light and cluster illuminating are ON;…
-
Page 36: Steering Column With The Steering Wheel, Multi-Function Understeering Switch And The Ignition Starter Switch
STEERING COLUMN WITH STEERING WHEEL, MULTI-FUNCTION UNDERSTEERING SWITCH AND IGNITION STARTER SWITCH The steering column with the steering wheel, the multi-function understeering switch, the ignition starter switch and the steering column toward angle control lever are shown in Fig. 3.5. 1 —…
-
Page 37
2 — wiper and washer lever, have the following positions: I — wiper and washer are OFF; II — windshield intermittent wiper is ON (unstable position); III — windshield intermittent wiper is ON (stable position). Intermittent wiper and adjustment of delay between brush strokes is provided by the intermittent wiper, located in the relay and fuse units: — when switching the wiper understeering switch to the… -
Page 38: Cluster
4 — ignition and door key. Three keys are attached to the motor vehicle, each key is designed to unlock door locks and to start up the ignition. The transponder, an electronic chip that saves the unique identification number, is embedded in the motor vehicle key bow.
-
Page 39
UAZ, PJSC to carry out diagnostic works. If the lamp blinks, engine operation is not permitted, the motor vehicle must… -
Page 40: Engine Lubrication System
UAZ, PJSC, to carry out diagnostic works. Prolonged operation with the malfunction signal device switched on can lead to malfunction of the engine control system elements.
-
Page 41
(green). It lights up after starting up the ignition and should go out if this mode is not ON. For a motor vehicle with the transfer case of UAZ, PJSC, the signal device is not used. — transfer case malfunction signal device (yellow). -
Page 42: Floor Standing Box With Blocks And Control Keys
— coolant temperature in the engine (for dual needle cluster); — fuel level in the fuel tank (for dual needle cluster); — motor vehicle power supply voltage; — motor vehicle total and daily mileage. Daily mileage counter reset is performed by long (over 2 s) pressing the cluster switch; — time of day (in 24-h format).
-
Page 43
Unit 1 Unit 2 Fig. 3.7. Floor standing box with unit and keys control (see item description in the text) 4L — all-wheel drive with underdrive. This mode is used to overcome difficult choke points, for hill climbing (overcoming downwards slopes) with high gradient, driving at low speed, to increase drawbar pull, etc. -
Page 44
Driving mode change 2H=> 4H: To switch on all-wheel drive «4H» mode: — release accelerator pedal; — press and hold the clutch pedal; — set the handle from the «2H» position to the «4H» position. If switching is successful, the symbol is switched in the cluster;… -
Page 45
— stop the motor vehicle; — press and hold the clutch pedal; — set the switch handle from the «4H» position through the «4L» position to the unstable position «•» and hold it until the signal device in the cluster switches on; — when the signal device switches on in the cluster, release the switch handle (the switch handle self-resets to the… -
Page 46: Motor Vehicle’s Electronic Anti-Theft System With The Engine Control Unit Me 17.9.71 (Engine Zmz-40906)
Motor vehicle’s electronic anti-theft system with the engine control unit Me 17.9.71 (engine ZMZ-40906) The anti-theft system set includes three ignition keys, in whose bows the transponders are embedded. The keys are equal in terms of their functional capabilities. The system allows eight ignition keys to be registered.
-
Page 47
— in 25 s in case of engine stop and there are no efforts to re-start the engine; — after power failure. «OFF» state — the immobilizer does not prevent engine start. The immobilizer ON signal device is OFF. The system switches over to this state (disarming) after starting up the ignition provided that the key code is recognized successfully. -
Page 48
— the system is in the «key teaching» state — the signal device switches on 4 times for a period of 3 s (1.5 s — OFF/1.5 s — ON). Keys registration. Only ignition keys that are in «initial» and «registered»… -
Page 49
For this purpose it is necessary to switch the system over to the «key upgrading» state and re-register keys: — start up the ignition using one of the registered keys, turning it into position I (Fig. 3.10) of the ignition starter switch; — make sure that ignition is started up, key code is recognized (the immobilizer turning-on signal device is OFF);… -
Page 50: Power Pack Control System
(the first, the second registered keys and additional keys). Key registration is completed if the signal device switches ON and goes out in 2 s. If key registration is unsuccessful, the immobilizer turning- on signal device will continue blinking and the system will be locked until the ignition is started up using any of the registered keys.
-
Page 51
It is prohibited to operate the system if there is a possibility of the ingression of corrosive liquids, acids, water, oil and petrol in the CU, DSDM and RCP. System functions: — central locking and unlocking with the key; — central door locking and unlocking from the inside of interior;… -
Page 52
Door locks unlocking and armed mode switching off using the To unlock all door locks and the T/gate lock and switch armed mode OFF it is necessary to short press button 2 on the RCP. Switching armed mode OFF is accompanied by a double blink of the T/signals and interior lighting switching ON. -
Page 53
Fig. 3.14. Driver side door switch module with multiplex control: 1 -passenger door descending window glass guide interlocking switch; 2 — central door locking switch (except for UAZ CARGO); 3 — right T/gate descending window glass guide control switch; 4 — left T/gate descending window glass guide control switch;… -
Page 54
Remotely switching alarm system («Panic») ON To switch alarm system ON remotely, it is necessary to press button 4 of the RCP twice or hold it pressed for at least 2 seconds. The alarm system switches ON for 5 s. To switch it OFF, press any button of the RCP. -
Page 55
disabling mode is activated, the symbol on button 1 has yellow illumination. Pressing the button again cancels disabling, etc. If a driver and a passenger simultaneously control any door window position, the command from the DSDM switches has priority. If passengers simultaneously control front and back windows of the right side doors, a window control command from the right front door switch has priority. -
Page 56
System operation in armed mode When armed mode is switched ON the system monitors the states of the following security zones: — side doors; — cowl; — T/gate; — ignition starter switch; — driver side door lock; — accumulator battery voltage. If any of the following actions take place in the armed mode: — opening of any side door;… -
Page 57
Fig. 3.15. Remote control panel: 1 — screw; 2 — replace battery outside the system reception signal range has exceeded 1000, the system stops responding to control panel commands. In this case the full system teaching procedure should be carried out. Full system teaching In case of full system teaching, all previously recorded control panel codes will be deleted, and new codes will be recorded in… -
Page 58: Defensive Parking System
7. In max. 3 s cycle the ignition; 8. Max. 3 s after starting up the ignition press button 4 on the control panel to be taught and hold it pressed; 9. Wait until the system status signal device in the cluster starts blinking fast (about 3 s after pressing button 4);…
-
Page 59
Warning! Defensive parking system is optional equipment that facilitates motor vehicle driving but does not drive a motor vehicle itself, therefore the manufacturing plant is not responsible for any possible damages when driving in reverse. Operation procedure 1. Putting the system into operation. When starting up the ignition and with reverse gear engaged the system should be set into operation automatically, and a short high-tone horn is given with a duration of 0.2-0.3 s. -
Page 60
Fig. 3.16. DPS sensor layout: A, B, C, D — rear sensors; E, F, G, H — front sensors When a motor vehicle approaches a hindrance, an intermittent acoustic tone signal is given with tone frequency of 1-3 kHz. The interval time between tone «sendings» reduces as the distance to the hindrance reduces, up to continuous horn at a distance of 60 + 5 cm and less. -
Page 61: Autocruise» And «Overspeed Limiter» System
— the motor vehicle moves in reverse with speed of over 5 km/h; — system’s elements or electric circuits are faulty. DPS may give a faulty horn of hindrance from behind in the following cases: — when installing optional equipment or changing motor vehicle bumper installation height;…
-
Page 62: Vehicle Interior And Body Equipment
VEHICLE INTERIOR AND BODY EqUIPMENT Interior heating, ventilation and conditioning The vehicle is equipped with heating-and-ventilating unit and climate control unit produced by Sanden. The units are controlled by control board 5 (Fig. 3.1, 3.2). Control panel (Fig. 3.12) is meant for maintaining of temperature in the interior set by the driver and performs the following functions: — Motoreducer control of the heatr flaps;…
-
Page 63
In addition, rotary switch 2 has yellow illumination, which indicates malfunctions in heating-and-ventilating unit and climate control unit control system (this function is activated only when the control panel is scanned with certifier via diagnostic K-Line channel) detected by the control panel. It also indicates «Interior preheating»… -
Page 64
Control elements Handle 1 (Fig. 3.12) controls the motoreducer of the choke flap which helps to control air temperature at the climate control unit output («Manual» mode / controls the interior air temperature («AUTO» mode)). The current position of the switch is shown by marker 5 on the moving part of the handle. -
Page 65
Fig. 3.13. Deflector: 1 — flap control lever; 2 — air currents control lever WARNING! Low air cooling of the windscreen is allowed when the interior or foot air cooling mode is switched on. When the interior heater is switched to any air cooling mode, the presence of small air currents is allowed in directions different from the selected mode, pictured on handle pictograph 2 (Fig. -
Page 66
Offset Fig. 3.14. Additional heater: 1 — heater tubes; 2 — a hose for supplying the cooling fluid to the heater; 3 — electric motor with a pump (for ZMZ-40905 engine); 4 — fitting; 5 — lid of the compartment in the floor tunnel lining; 6 — switch unit (Fig. 3.7); 7 — case of the tunnel lining glove compartment;… -
Page 67
Interior ventilation Blowing ventilation of the interior is performed via the same channels, when the handle 1 (Fig. 3.12) is arranged at maximum counter clockwise position. Drawing ventilation is performed via air holes in the rear roof liner and inner panel of the tail gate apertures, via ventilation grille with valves and rolled down door window. -
Page 68
If the control panel in «Intensive windscreen heating» mode receives a signal to switch on a conditioner, then the conditioner will be switched on and the system will perform the drying of the climate control unit. «AUTO» mode is turned on by switch » «… -
Page 69
If rotary switch 3 is turned to «OFF» position, then the rotary speed of the fan corresponds to position 2 of rotary switch 3 (i. e. fan is rotating at minimum speed). When the «Preheating interior» mode is turning on, the heater flaps go to the following positions: — air current distribution flaps to «At the feet»… -
Page 70: Lighting Lamps
Recirculation mode can be activated with a button more effective cooling (air induction from the motor vehicle interior). Warning. Prolonged usage of the recirculation mode can cause window fogging and stuffy air in the interior. WARNING! Turn on the air conditioner even during cold seasons at least one to two times per month for 5-10 minutes.
-
Page 71: Interior Rearview Mirror
— when turning on and off the «Security» mode via a radio channel of the remote control panel; — when receiving «Find motor vehicle in unlighted parking area» command via remote control panel; — when turning on the ignition, after all the doors are closed while the lamp is still in «on»…
-
Page 72: Doors
Fig. 3.16. Lighting lamps, interior rearview mirror, sun visors and hand grip: 1,5 — sun visors; 2 — interior rearview mirror; 3 — a unit of pilot lamps; 4 — rear interior lighting lamp; 6 — hand grip; 7 — seat belt height adjuster Fig.
-
Page 73
1 downward (Fig. 3.19), 6 (Fig. 3.21). The windows of the side doors go up and down by turning the switches of the power windows 3, 4, 5, 6 (Fig. 3.9 for UAZ Patriot, UAZ Pickup) or 1, 2 (Fig. 3.22 for UAZ Cargo). -
Page 74
Fig. 3.19 Tail gate (view from outside): 1 — lever for blocking a door interior handle;2 — door handle; 3 — pad housing of license plate lamp 4 + — rear view camera Fig. 3.20. Front door (view from the interior): 1 —… -
Page 75
Fig. 3.21. Rear door (view from the interior): 1 — locking button; 2 — door handle 3 — power window control switch; 4 — place for loud-speaker mounting; 5 — pocket; 6 — lever for locking door interior handle; 7 — armrest handle The driver bears full responsibility for inappropriate usage of the power windows. -
Page 76: Seats
passengers left in the motor vehicle from getting injured accidentally. If the key was left inside the motor vehicle, the system warns the driver about it by making the immobilizer buzzer produce beeping sounds when the driver’s door is open. Never close the motor vehicle from outside if there are passengers inside it —…
-
Page 77
disease, it is recommended that you do not use the heater. It may result in burns on the back, buttocks and legs. If you still want to use the seat heating, it is recommend that you turn on the heating for short periods of time. -
Page 78
For your convenience, make the adjustments with the door open. The driver’s seat in some motor vehicle configurations is equipped with a lumbar support mechanism and seat height adjustment. Lever 4 for adjustment of the lumbar support is located on the inner side surface of the backrest. -
Page 79
— to return the pillow to its initial position, turn it back to the horizontal position (for UAZ Pickup until the lock is activated); — mount the headrests. Change the position of the rear seat with the rear doors open. -
Page 81: Seat Belts
4 until it clicks. Press the red button of the lock to unfasten the belt. The center seat belt of the UAZ Pickup is a static lap belt. The seat belt height adjuster has three fixed positions. The position of the upper mounting point of the seat belt is adjusted by moving belt guide support 2 up or down.
-
Page 82
1 — seat belt height adjuster; 2 — seat belt guide bracket; 3 — lock catch; 4 — lock; 5 — inertia reel; 6 — clip; 7 — adjuster for static middle belt (UAZ Pickup) WARNING! When the motor vehicle moves, the seat backrest angle should be minimal, but sufficient for the convenience of the driver and passengers. -
Page 83: Fuel Tank Plug
Unfastened seat belt signal device. If the seat belt of the driver is not fastened when the ignition is turned on, the seat belt signal device on the instrument cluster turns on. The signal device turns off when the ignition is turned off or the strap is inserted to the retractable seat belt.
-
Page 84: Hood
Hood In order to open the hood, pull lever 21 (see Fig. 3.1, 3.2) between the hood and the radiator lining, push the clamp of hook 1 (Fig. 3.27) and lift the hood. Take out bonnet stay 3 from holder 2 by pushing it and insert it into a special opening above the right head light.
-
Page 85
Windshield wipers should not be turned on when the windshield is dry. Keep the wiper blade rubber out of contact with fuel and oil. While operating, make sure the windshield wipers work properly and their parts are securely fixed. Periodically clean the windshield and rubber edges of the wiper blades from dirt and oil. -
Page 86: Luggage Compartment
WARNING! When switching on the washer of the tail gate door, there may be water feed delay up to 2,5 sec. Fig. 3.28. Underhood space (fragment): 1 — expansion tank of the engine cooling system; 2 — washer reservoir; 3 — auxiliary electric heater pump;…
-
Page 87: Chapter 4. Motor Vehicle Preparation Upon Receipt From The Manufacturer
Chapter 4. MOTOR VeHICle PRePARATION UPON ReCeIPT fROM THe MANUfACTUReR Dealers must sell the motor vehicle only after pre-purchase preparations, specified in the service book. If the motor vehicle was delivered to the sales point and traveled more than 100 kilometers (OST 37.001.082-82), all the preliminary preparations for ferrying must be carried out as a part of the pre-purchase preparations.
-
Page 88: Chapter 6. Starting And Shutting Down The Engine
Chapter 6. STARTING AND SHUTTING DOWN THe eNGINe GENERAL REqUIREMENTS WARNING! It is strictly forbidden to start and warm up the engine indoors without good ventilation in order to avoid carbon monoxide poisoning. It is forbidden to start the gasoline engine with improperly installed high-voltage wires from the ignition coils to the spark plugs or low-voltage wires to the ignition coils.
-
Page 89
3. The system functions correctly if a malfunction indicator lamp (on the instrument cluster) switches on and off. If the malfunction indicator lamp continues to glow, it is required to detect and remove the malfunction (refer to «Diagnostics»). WARNING! If the motor vehicle has malfunctioning systems (the malfunction indicator lamp continuously glows), it can cause the failure of the engine converter and oxygen sensor in exhaust gases. -
Page 90: Zmz-51432 Engine Starting
ZMZ-51432 ENGINE STARTING Fuel and oil should correspond to the season. If necessary, release the air from the feed system, as suggested in the «Engine» section. Warning! Do not press the throttle pedal during the starting of the engine! Do not drive the motor vehicle right after the starting of a cold engine.
-
Page 91: Chapter 7. Vehicle Driving In Different Road, Weather And Climatic Conditions
Shutting down the engine In order to shut down the engine, turn the ignition key to the «0» position. Before shutting down the engine, operation at low crankshaft speed for 3-5 minutes is required. Chapter 7. VeHICle DRIVING IN DIffeReNT ROAD, WeATHeR AND ClIMATIC CONDITIONS The operation and service life of the motor vehicle depends to a great extent on the features of its driving.
-
Page 92
Release the throttle pedal completely when braking with the engine. Brake the motor vehicle smoothly by gradually pressing the braking pedal. Any braking increases the wear of the tires and the fuel consumption. Avoid slipping of the wheels when braking, as it increases the braking path and wear of the tyres. -
Page 93
The rotational speed of the crankshaft should not be fast when making a descent, reduce the motor vehicle speed by gradually braking it. Overcome ditches, side ditches and trenches at low speed with the front axle engaged in the direction perpendicular to the decline with regard to the motor vehicle dimensions defining its cross-country capability. -
Page 94
When overcoming sandy soils, drive smoothly without jerks and stops. Turn smoothly and with a great radius. Switch on the highest possible gear and engage the front axle, in order to overcome the sand drifts and short sand upgrades in a rush. Avoid the slipping of the wheels. -
Page 95: Chapter 8. Vehicle Towing
Chapter 8. VeHICle TOWING The front and rear parts of the frame (Fig. 8.1) are equipped with towing eyes for flexible towing. Before towing, turn on the ignition (position I, Fig. 3.4) and light alarm. When towing, check the tension of the rope. Tow the motor vehicle smoothly, without jerks.
-
Page 96: Chapter 9. Vehicle Maintenance
Chapter 9. VeHICle MAINTeNANCe The scope and period of the motor vehicle maintenance are specified in the service book. The present manual contains the methods of motor vehicle maintenance and adjustment of its units and also the operations which should be carried out in the intervals between the maintenance actions in accordance with the warranty card of the service book.
-
Page 97: Seasonal Maintenance
SEASONAL MAINTENANCE Seasonal maintenance is performed twice a year (in spring and autumn) and, if possible, combines with the next maintenance in accordance to the warranty card of the service book. Prior to the summer season operation 1. Remove the oil pump cover and check the condition of the oil pump drive gears.
-
Page 98: Engine Gas Distribution Mechanism
Fig. 9.1. Sequence of the cylinder head bolt tightening engine gas distribution mechanism Camshaft drive is a two-stage chain. Chain tension is provided for by hydraulic tensioners. WARNING! Do not take the hydraulic tensioner out of the chain cover to prevent disengagement of the piston with the casing caused by the wrap spring.
-
Page 99
Fig. 9.2. Engine ZMZ-40906 (left side view): 1 — Coolant from radiator to water pump supply pipe; 2 — connection hoses; 3 — thermostat housing; 4 — control unit coolant temperature sensor; 5 — coolant branch pipe from thermostat to radiator; 6 — critically low oil pressure sensor;… -
Page 100: Engine Crankcase Ventilation System
Fig. 9.3. Engine ZMZ-40906 (right side view): 1 — Coolant to heater branch pipe; 2 — heater coolant discharge tube; 3 — knock sensor; 4 — fuel pipeline flanged socket/union nipple; 5 — common rail with injectors; 6 — «-» KMCUD wire connection pin; 7 — upper hydraulic tensioner cap;…
-
Page 101: Engine Cooling System
Fig. 9.4. Engine crankcase of ventilation: 1 — receiver; 2 — ventilation tube connects depression valve to receiver; 3 — depression valve; 4 — valve cap; 5 — oil reflector; 6 — Blow-By Gas flow; 7 — Blow-By Gas separated oil drain orifice; 8 — depression valve orifice; 9 —…
-
Page 102
Fig. 9.5. Engine cooling and heating system scheme: 1 — cabin heater radiator; 2 — heater radiator connection hoses; 3 — engine; 4 — thermostat; 5 — control unit coolant temperature sensor; 6 — expansion tank; 7 — expansion tank plug; 8 — Radiator assembly; 9 — motor fan; 10 — discharge plug;… -
Page 103
It is impossible to fill the system completely with the necessary coolant volume without engine launch due to the existence of air in the interior heaters and connecting hoses. Fill the system as follows: — set the additional heater (if installed) switcher 5 (Fig. 3.7) in ON position;… -
Page 104
To drain the fluid from the engine cooling system open the expansion tank plug, unscrew heat exchanger outlet plug 10 (Fig. 9.5) and unscrew cylinder head cap 14. When draining, set the additional heater (if installed) switch 5 (Fig. 3.7) in ON position. The generator and cooling system pump drive belt tension (Fig. -
Page 105: Gas Exhaust System
In case the clutch does not switch on and off properly, the engine can overheat. Check up is to be done at a specially equipped UAZ workshop. Keep the clutch surface clean. electric fan is installed on the cooling system radiator assembly at the front.
-
Page 106: Feed System
5. The control unit may not be exposed to temperatures above 80°C, e.g. in an oven dryer. Before arc welding operations, disconnect the battery wire and control unit connection. 7. To prevent rusting of pins during vapour cleaning, do not direct the nozzle to the system components.
-
Page 107
— when closing the tank filler necks, make sure the plugs are in good condition, the sealing gasket is present and undamaged, and ensure tight closing of the plugs by applying adequate force; — for partial fuelling of the motor vehicle, start from the right-side tank;… -
Page 109
Clogging of the strainer fuel module, final fuel filter, presence of dirt and mechanical admixtures in the fuel tank manifest first of all in deterioration of the pumping of the fuel from the left-side tank into the right-side one, unstable engine operation at high loads and degradation of the motor vehicle performance. -
Page 110: Fuel Supply And Ignition Control System
Fig. 9.9. Air filter: 1 — air filter cap; 2 — sealing spacer; 3 — filter housing; 4 — filter attachment collar; 5 — filtering element; 6 — nut; 7 — nut; 8 — air duct — loosen collars and remove angle and resonator hoses from air filter;…
-
Page 111
(Front view) Fig. 9.10. Data link connector (XS1): 4- ground; 6, 14- Sup-line; 7- K-line; 16-+12V — low compression; — deviation of gas distribution phases caused by incorrect assembly of the engine components; — air influx in the inlet pipe line; — poor fuel quality;… -
Page 112: Pre-Starting Heater
up. If the diagnostic lamp is on with the engine operating, the system and engine require maintenance as soon as possible. When ignition faults are present while engine is operating, the diagnostic lamp starts to blink and glows on while neutralizer exceeds the allowed temperature.
-
Page 113
Regularly monitor the oil level in the crankcase and refill when necessary. Check prior to the engine starting. If the oil level is to be checked after the engine stop, wait for at least 15 minutes to let the oil drain to the crankcase. The motor vehicle shall rest on an even horizontal surface. -
Page 114: Engine Crankcase Ventilation System
When oil critical pressure signal device turns off, stop the engine and check oil level in 5 minutes. Add oil as required. Please remember, the engine contains trapped oil at all times. Pour the oil in portions bringing oil level to the indicator to the upper mark ‘P’ .
-
Page 115
— fill replacement or special cleansing oil to the level indicator upper mark; — start the engine and let it run at minimum crankshaft rpm for at least 10 minutes; -drain cleansing oil; — replace oil filter 10 (see Fig. 9.12); — pour the fresh oil as indicated above. -
Page 116: Cooling System
crankcase ventilation system components. In this case, clean the components. During operation, do not break tightness of the ventilation system and do not allow the engine to run with the oil filler opened. This can result in failure of the turbocharger, contamination of the engine oil chambers, causes increased oil entrainment with crankcase gases and environment pollution.
-
Page 117
Fig. 9.13. Engine cooling and heating system pattern: 1 — cabin heater radiator; 2 — engine; 3 — recirculating gases cooler (RGC); 4 — thermostat; 5 — control unit coolant temperature sensor; 6 — fan; 7 — expansion tank; 8 — expansion tank plug; 9 — engine overheat sensor; 10 — Cooling System radiator;… -
Page 118
— repeat the above operation. It is impossible to fill the system completely with the necessary coolant volume without engine launch due to the existence of air in the interior heaters and connecting hoses. Fill the system as follows: — set the additional heater (if installed) switcher 5 (Fig. 3.7) to ON position;… -
Page 119
Without air conditioner With air conditioner Fig. 9.14. Fan drive belt, steering pump and air conditioner compressor: 1 — crankshaft damper pulley; 2 — fan, GUR pump and air breather compres- sor drive belt; 3 — tension roll; 4 — bolt; 5 — steering power booster pulley; 6 —… -
Page 120: Gas Exhaust System
WARNING! Use only the diesel fuel complying with the requirements of GOST R 52368. Various additives for fuel (including gasoline, kerosene etc.) may not be used. If the above requirements are not met, UAZ, PC shall bear no warranty responsibility in case of the fuel equipment failure. Precautions.
-
Page 121: Feed System
feed system (Fig. 9.16) Fuel runs to high pressure fuel pump 11 from the right side tank 7 through fine filter 10. final fuel filter with hand pumping and water detection sensor (BOSCH, 0 450 126 273) is shown on Fig. 9.17. Fuel heater turns on at IGN, when fuel temperature is below 4°C.
-
Page 123
Fuel Fuel inlet outlet Fig. 9.17. Fine fuel filter with priming pump: 1 — manual priming pump; 2 — heater; 3 — spacer; 4 — replaceable filter cartridge; 5 — settling drain plug with water presence indicator; 6 — fuel temperature sensor;… -
Page 124: Exhaust Gas Recirculation System
The jet pump is fixed on the fuel hoses near the frame right side member. High pressure fuel pump (HPfP) 11 (Fig. 9.16). Maintenance, adjustment, inspection and repair of HPFP and injectors are recommended to be carried out at BOSCH service centres.
-
Page 125: Engine Control System
Inlet of cooled inflation air Coolant outlet Inlet of cooled recirculated gases to the inlet tube Inlet of exhaust gases to the recirculated gas chiller Mixture of inflation air and cooled recirculated gases Coolant inlet Supply of compressed air from the compressor to the inflation air chiller Supply of part of exhaust Exhaust gas flow from the turbine…
-
Page 126
If the signalling lamp is on and no significant deterioration of ride performance is observed, you can continue motion at low speed to the nearest UAZ authorized service station to seek diagnostics. Long-term operation with the signalling lamp constantly on can lead to failure of the engine control system components. -
Page 127: Transmission
TRANSMISSION At slow speed, in gears 1 and 2, in acceleration-deceleration regime, an audible knock in the form of short clicks may occur in the driving system. When moving at higher gears of the gearbox and the transfer case at speed higher than 60 km/h in engine braking regime, as well as during free running (neutral position of the gearbox), noise in the driving system in the form of a slight low-frequency hum may occur;…
-
Page 128: Gearbox
Fig. 9.20. Driving the clutch master cylinder: 1 — tank cap; 2 — tank housing; 3 — master cylinder housing; 4 — safety cover; 5 — push rod; 6- nut; 7 — push rod sleeve; 8 — clutch release pedal; 9 —…
-
Page 129: Gearbox Housing
8 — motor drive; 9 — transfer case housing filler plug Fig. 9.22. Dymos 5-step gearbox, UAZ transfer case and clutch release cylinder: 1 — clutch release cylinder; 2 — transfer valve; 3 — gearbox; 4 — transfer case;…
-
Page 130: Propeller Shaft
Dymos transfer case (see Annex 3). Do oil check and refill in gearbox and dispense box simultaneously. WARNING! Different oils are used in the gearbox «Dymos» and in the transfer case PJSC UAZ (see Annex 3), blending is not permitted. WARNING! Transfer case «Dymos» malfunction signal device turns on after switch starting and turns off when the system in normal condition.
-
Page 131: Driving Axles
Applying solid oil or its mixtures for lubrication of the needle bearings can lead to their premature failure. Do not apply too much grease to the splines as it will bleed through the spline coupling, resulting in premature failure of the oil seals and possible plug knocking out of the slip yoke.
-
Page 132
During inspection of the steering knuckles, check the serviceability of adjusting bolts 1 (Fig. 9.25) and steering stop bolts 3. The value of steering angle B of the right wheel to the right, and of the left wheel to the left should be within the limits of 31-32°. -
Page 133
In case the control parameter is not reached, tighten the clamping bush once again by turning the wrench by 10-20° and tighten the nut 13 with the specified torque. In case air gap persists following threaded bush tightening, contact UAZ service to replace pins units liners. -
Page 134: Running Gear
RUNNING GEAR Suspension WARNING! Shock absorber disassembly is strictly forbidden to avoid accidents. The motor vehicle operation at malfunctioning or missing shock absorbers and worn out suspension joints is strictly prohibited. Front and rear shock absorbers are not interchangeable. Hydraulic shock absorbers are not served and repaired. Upon shock absorbers replacement, replace axle assembly.
-
Page 135: Wheel Hubs
Do not use a spare wheel. When swapping the wheels, ensure they are balanced. UAZ Patriot spare wheel with a plastic container is attached to the back door bracket by three nuts, depending on the package.
-
Page 136
down. Moreover, big air gaps in the front wheel hubs increase brake pedal travel. Adjust the wheel hub bearings in the following sequence: 1. Hang the motor vehicle or lift the jack from the side of the wheel whose bearings are to be adjusted. 2. -
Page 137: Control Systems
Fig. 9.28. Rear wheel hub: 1 — wheel; 2 — wheel hub bolt; 3 — wheel fastening nut; 4 — adjusting nut; 5 — axle fastening bolt; 6 — lock washer; 7 — locknut; 8 — thrust washer; 9 — axle; 10 — journal; 11 —…
-
Page 138
Replace the steering column propeller shaft if air gaps in the spline couplings are detected. If air gaps in the steering mechanism are detected, adjust the mechanism at UAZ service station. Tension of power steering pump drive belt see section «Engine cooling system». -
Page 139
Hydraulic power steering oil: level check and change. To check the oil level in oil tank 1 (Fig. 9.29) position the front wheels straight. Pour the oil to the oil tank up to the level of the filling strainer screen or no higher than 5 mm. Run the oil through the filter with the maximum pour size of 40 mym in advance. -
Page 140
WARNING! After a long parking (over 1 hour) in motor vehicles UAZ-23608, UAZ-23638, UAZ 31638, start going no earlier than 10-15 seconds after starting the engine, so that the vacuum pump can create the depression in the brake booster comfortable enough for braking. -
Page 141
Despite the fact that it does not affect the work of the brake hydraulic drive, it is recommended to contact UAZ service station to eliminate the problem. Illuminating of the red… -
Page 142
wear to a thickness of 1.5–2.0 mm, replace the shoes on both front brakes. To replace the brake shoes unscrew bolts 16, remove carrier 18 and spring 1. Check the brake disc. If its surface has deep notches and burrs, remove it, clean and grind. When the disc wears to a thickness of 20.4 mm, replace it. -
Page 143
cylinder tank and do not let the fluid overflow while moving the clip. It is forbidden to recess the pistons with a tire iron as it can deform guide bush 10 and damage clip 3 and boot 8. Replace worn brake shoes from both sides of the front axle. To bring the shoes to the disc press the brake pedal 2-3 times. -
Page 144
Fig. 9.32 Rear wheel brake (variation 2): a — anchor stud marks; 1 — anchor studs; 2 — shield; 3 — orifices for visual inspec- tion of brake linings; 4 — wheel brake cylinder; 5 -bypass valve; 6,12 — brake shoes; 7 —… -
Page 145
Air gap between the shoes and the drum is restored automatically as the linings wear. Replace the linings in case of their excessive wear (the rivets are sunk less than 0.5 mm). Move the pistons with the snap rings deep into the cylinder to put the drum on the shoes easily when replacing the worn shoes or linings. -
Page 146
Proportioning valve. The motor vehicles without ABS are equipped with the proportioning valve (Fig. 9.33), which ensures the optimal distribution of braking forces between the axles of motor vehicle and prevent the rear wheels from blocking earlier than the front wheels. When servicing the motor vehicle check the proportioning valve and clean it from dirt and check its attachment. -
Page 147
3. Screw bolt 3 until it touches piston tail 17 (see Fig. 9.33) of the valve. 4. Tighten bolt 3 (see Fig. 9.34) for 2-3 turns (14 edges of the bolt head). 5. Tighten the locknut. 6. Check the stroke of the valve piston (see above). 7. -
Page 148: Brake Systems
1. Remove the cap from the bypass valve of the wheel cylinder, from the crankcase or from the proportioning valve (for non- ABS motor vehicles) and put a special rubber hose (c. 400 mm long) on the valve. Drop the other end of the hose into a transparent vessel, no less than 0.5 L, which is half-filled with brake fluid.
-
Page 149
WARNING! After the motor vehicle stops, apply the parking brake. When parking the motor vehicle during cold seasons do not apply the parking brake after driving on a wet road, thereby preventing the shoes from freezing to the drums. Instead, shift into the first or the reverse gear (any position of the transfer case lever, except for neutral position) and put wheel wedges as required. -
Page 151
1. Check the air gaps correctness between the brake shoes and the rear brakes drums: press hard the brake pedal several times while the parking brake drive lever is lowered to its extreme position. 2. Lift the rear part of the motor vehicle and put secure struts under it. -
Page 152
Adjust the air gaps between the shoes and the drums as follows: 1. Shift the transfer case lever into neutral position. 2. Lower parking brake lever 1 (Fig. 9.37) into its extreme position. 3. Lift the motor vehicle with a hoist. When inspecting the motor vehicle from a pit, do the following: — put wedges under the front wheels;… -
Page 154: Electric Equipment
ELECTRIC EqUIPMENT Relay and fuse boxes All the discharge and control relays of the motor vehicle electric equipment, as well as the fuses, are installed in relay and fuse boxes in the cabin and engine compartment of the motor vehicle. The cabin relay and fuse box is located under the cap on the instrument panel, left from the steering column (Fig.
-
Page 155
To access the relay and fuse box, remove its cap. Before replacing a bad fuse, find out the reason for its blowing and eliminate it. Do not use metallic objects while removing a relay or a fuse. Do not use fuses not required by design (see Table 9.1). Table 9.1. -
Page 156: Alternator
Fig. 9.39. Relay and fuse box under the hood Alternator WARNING! Even short-time engine operation with the accumulator battery off can lead to alternator diodes damage. Turn off the accumulator battery while removing the alternator for maintenance. Keep the alternator clean. Blow the alternator with compressed air to remove dust.
-
Page 157: Starter
— to charge the battery, remove it from the vehicle and unscrew filler plugs; — the battery must be charged in a well-ventilated room. Electrolyte fume accumulation is dangerous to health and explosive. Accumulator battery 2 (Fig. 9.29) is installed on a bracket under the hood of the motor vehicle.
-
Page 158: Lighting System, Light And Audio Alarm
Starter drive should move freely with no jamming at the shaft splines, and it should return to the source position by the return spring. The anchor should not revolve when the drive gear goes in the working rotation direction. In case of reverse rotation the gear should revolve with the shaft.
-
Page 159
Fig. 9.40. Screen marking for headlamps adjustment: H — distance between the headlamps center and the ground level; V-V — mo- tor vehicle longitudinal axis projection; A-A, B-B — axes of headlamps centers Fig. 9.41. Headlamp: 1 — adjusting screw; 2 — adjusting gear with inner hexagon; 3 — high beam lamp;… -
Page 160
Fig. 9.42. Front fog light: 1 — adjusting screw; 2 — wiring harness connector To change the bulbs of high 3 and low 4 beams, remove cap 5. Disconnect the wire from lamps 3 and 4, release the ends of the lamp spring pawl from slots and remove the lamp. -
Page 161
Install halogen lamps wearing gloves, do not touch the lamp bulb. If the bulb has fat stains, remove them with alcohol. Side T/signals are located at UAZ Cargo on front fenders sideways. To change T/signal lamps press catches 1(Fig. 9.44) and remove T/signals, then take out socket 2 with the lamp. -
Page 162
1 — socket of brake signal lamp; 2 — socket of T/signals lamp; 3 — socket of reverse lamp; 4 — socket of fog lights and parking lamps Side T/Signals are located at UAZ Patriot and UAZ Pickup in rearview mirrors (Fig. 9.45). If the lamps are broken, they are replaced with a new rearview mirror. -
Page 163
7 (Fig. 9.48) and take out the lamp. Insert the screwer to slot 5, press pawl 6, and remove lens 3. Center high mount stop lamp is located at UAZ Patriot on the inside panel of the tail gate (Fig. 9.49). The bad lamp should be replaced. -
Page 164: Gages And Alarms
Fig. 9.52. Glove compartment lamp: 1 — lamp; 2 — lamp holder; 3 — catches luggage compartment lamp is located on the right side of the compartment (Fig. 9.53). To replace the lamp, remove the lamp shade by pushing it through the side hatch under cap 1. Release holder 3 and replace lamp 2.
-
Page 165: Radio Equipment
Radio equipment+ Loudspeakers are installed on door interior panels, and tweeters are installed on front door interior panels. The head unit of multimedia system with a monitor is located on the instrument panel. The monitor of multimedia system can show the picture from rear view camera 4 (Fig.
-
Page 166: Vehicle Lubrication
As required, recover the bodyshell floor pan, coated with bituminous mastic, by spreading the mastic with a special spray or with a brush. VEHICLE LUBRICATION Long and failure-free motor vehicle work mainly depends on the timely change of oil and grease in units and assemblies. It is strongly recommended to follow the instructions of this manual and the lubrication service Manual.
-
Page 167: Chapter 10. Tool And Appliances
Chapter 10. TOOl AND APPlIANCeS Each manufactured motor vehicle is equipped with the tools and appliances according to the list, enclosed in the motor vehicle. A jack (Fig. 10.1 or 10.2) is applied for lifting vehicle wheels when servicing or repairing .
-
Page 168
Fig. 10.1. Jack: 1 — housing; 2 — external screw; 3 — internal screw; 4 — head; 5 — pawl; 6 — handle; 7 — ratchet Option 1 Option 2 Fig. 10.2. Jack: 1 — hexagon under 22 mm wrench; 2 — yoke; 3 — extension… -
Page 169: Chapter 11. Preservation
4. To lower the wheel, rotate hexagon 1 counter-clockwise with the wheel wrench. At the end of work, fold the jack completely by rotating the hexagon with the wrench. Jack Maintenance: periodically clean the thread details from dirt and grease them. Inspect the riveted couplings, screws and levers of jacks.
-
Page 170: Maintenance Of Preserved Motor Vehicle
12. Cover the air filter inlet tube and the muffler tailpipe with solid-oiled paper. 13. Loosen the tension of ventilator and alternator drive belts. 14. Drain the fluid from the cooling system and from the windshield washer. 15. Seal the housings of the transfer case, front and rear axles by wrapping their safety valves in insulating tape.
-
Page 171: Depreservation
9. Check the tires and other rubber details. 10. Eliminate detected malfunctions. Depreservation 1. Remove greased paper from the details and preservation grease, wash the details with kerosene or unleaded gasoline. Thoroughly remove the grease from the details that can contact rubber details or painted surfaces.
-
Page 172: Annex 1. Motor Vehicle Lamps
A12-21-3 — of reverse light A12-21-3 — of fog and parking lights P21/5W 21+5 (A12-21+5-2) T/signal side repeaters of UAZ-23602 WY5W Side T/signals of UAZ-3163 and of UAZ-23632 License plate lamps AC12-5-1 Dome lamps and reading lamps Glove compartment lamp…
-
Page 173: Annex 2. Tightening Torque Of Main Threaded Couplings
Annex 2 TIGHTeNING TORQUe Of MAIN THReADeD COUPLINGS, kgf•m Engine and its systems: Bolts of crankcase cylinder head (ZMZ-40906 engine): pretension 3,3-3,7 holding min. 1 minute final tension — turn to angle 95° Valve cap bolts 0,5-0,7 Chain cap screws 2,0-2,5 Bolts of front cylinder head cap 1,2-1,8…
-
Page 174
Annex 2 (end) Bolts and nuts of gearbox and transfer case 4,0-5,6 Nuts and bolts of propeller shaft flanges 4,4-5,6 Pin nut 8-10 Bolts of axle housing caps 1,1-2,5 Bolts of front axle hub flanges and rear axle shafts flanges 6,0-7,0 Ball struts bolts 3,6-5,0… -
Page 175: Annex 3. Lubricants And Special Fluids
Place of lubrication/filling Name of lubricant or fluid Basic Foreign fuel UAZ-3163, UAZ-23602, UAZ-23632 Fuel Tank unleaded «Regular-92» gasoline (AI-92-4) GOST R 51105, AI-92-K4 GOST 32513*, Allowed: Premium Euro-95 type II (AI-95-4) and Super Euro-98 type II (AI-98-4) GOST R 51866, AI-95-K4, AI-98-K4 GOST 32513.*…
-
Page 176
Transmission oils Housing of Dymos gearbox and transfer case ZIC G-F Top75W-85, ZIC G-FF 75W-85, GT Transmission FF SAE 75W-85 — GL-4 of API classification Housing of PAO UAZ transfer case For all seasons: SAE 75W/90 — GL-3 of API classification… -
Page 177
Annex 3 (continued) Place of lubrication/filling Name of lubricant or fluid Basic Foreign Final drive housings of front and rear axles For all seasons: SAE 75W/90 — GL-5 of API classification Oil tank of YUBEI hydraulic power steering system: Mobil ATF 220, EZL 998, Shell Spirax S4 ATF HDX, TNK ATF IID;… -
Page 178
Annex 3 (end) Place of lubrication/filling Name of lubricant or fluid Basic Foreign Splines and joints of non-repairable propeller shafts Kluberplex BEM 41-141 fluids Hydraulic drives of clutch and brake system Brake fluid: SAE 1703F; DOT-4 «RosDot-4»; «Rosa»; «Rosa-3»; «Tom»; For ABS-equipped vehicles «Rosa DOT-4», «Rosa-3″… -
Page 179: Electric Equipment
Annex 4 INfORMATION on precious metals in motor vehicle electric equipment Manufacturing Name Precious Mass, g Type Metal 683.3709 Understeering switch silver 0,3034 6212.3827 Fuel Level sensor silver 0,013806 palladium 0,0048774 ruthenium 0,0008569 6002.3829 Oil emergency pressure sensor silver 0,0310…
-
Page 180: Table Of Contents
CONTeNTS Chapter 1. General Information …………..3 Motor vehicle marking …………….3 Specification ………………… 7 Chapter 2. Safety requirements and warnings ……….24 Safety requirements ………………24 Warnings ………………..27 Chapter 3. Control elements, motor vehicle interior and bodyshell equipment …………….31 Lighting means control module ……………35 Steering column with the steering wheel, multi-function understeering switch and the ignition starter switch………36 Cluster …………………38…
-
Page 181
Seasonal maintenance …………….97 Prior to the summer season operation ……….97 Prior to the winter season of operation ……….97 ZMZ-40906 Engine ……………..97 Engine suspension …………….97 Engine cylinder head …………….97 Engine gas distribution mechanism ………….98 Engine lubrication system …………..98 Engine crankcase ventilation system ……….100 Engine cooling system……………101 Gas exhaust system …………….105 Injection system with microprocessor fuel supply… -
Page 182
Gages and alarms …………….164 Radio equipment+ …………….165 Bodyshell ………………..165 Vehicle lubrication ……………..166 Chapter 10. Tool and appliances …………..167 Chapter 11. Preservation …………….169 Maintenance of preserved motor vehicle ……….170 Depreservation ………………171 Chapter 12. Transportation ……………..171 Chapter 13. Utilization …………….171 Annex 1. Motor vehicle lamps …………..172 Annex 2. -
Page 183
Memo… -
Page 184
UAZ PATRIOT, UAZ PICKUP, UAZ CARGO Operation Manual RE 05808600.132-2011 Sixth Edition Prepared for publishing by UAZ PJSC Chief Designer Department Editor-in-chief Chief Designer O.A. KRUPIN Editor I.L. NIKOLAEV Content by D.A. SHEMYREV…
- Главная
- Документация
\
Руководства по эксплуатации и сервисные книжки на УАЗ
Патриот, Пикап
Руководство по эксплуатации:
Хантер
Руководство по эксплуатации:
Профи
Руководство по эксплуатации:
Классический коммерческий ряд
Руководство по эксплуатации: