
Выкладываю PDF версии документации по ремонту и эксплуатации Skoda Octavia :
yadi.sk/d/a_38NFUm4a0SC
yadi.sk/d/NMxhXQ8Z4a0Mo
yadi.sk/d/snJwctJ31wgW5
yadi.sk/d/74uXWFHqEmgSh
Приятного просмотра.
P.S. Если скинуть на Ipad — то очень удобно, всегда под рукой…
Войдите или зарегистрируйтесь, чтобы писать комментарии, задавать вопросы и участвовать в обсуждении.
Все комментарии
Онлайн мануал по ремонту автомобиля Skoda Octavia 3
Пошаговое подробное руководство для ремонта, технического обслуживания и эксплуатации чешских автомобилей «Skoda Octavia 3» третьего поколения (заводской код 5Е). Эти автомобили производились с 2013 года по 2019 год и в данной инструкции описываются только машины, которые оснащались следующими двигателями:
Бензиновые моторы четырехцилиндровые объемом 1.2 литра (1197 см3, CJZB/CJZA), 1.4 литра (1395 см3, CHPA), 1.8 литра (1798 см3, CJSA/CJSB) и 2.0 литра (1984 см3, CHHB).
Дизельные моторы описываются объемом 1.6 литра (1598 см3, CLHB/CLHA/CRKB) и 2.0 литра (1968 см3, CKFB/CKFC/CRVC/CUPA).
Exclusive winery master class — Scania Service еще
Ссылка на этот раздел в различных форматах
TEXTHTMLBB Code
- Manuals
- Brands
- Skoda Manuals
- Automobile
- OCTAVIA TOUR —
- Owner’s manual
-
Contents
-
Table of Contents
-
Bookmarks
Quick Links
SIMPLY CLE VER
ŠkodaOctavia Tour
OWNER’S MANUAL
Related Manuals for Skoda OCTAVIA TOUR
Summary of Contents for Skoda OCTAVIA TOUR
-
Page 1
SIMPLY CLE VER ŠkodaOctavia Tour OWNER‘S MANUAL… -
Page 2
Introduction You have opted for a Škoda — our sincere thanks for your confidence in us. Your new Škoda offers you a vehicle featuring the most modern engineering and a wide range of equipment which you will undoubtedly wish to use to the full during your daily motoring. That is why, we recommend that you read this Owner’s Manual attentively to enable you to become familiar with your car and all that it offers as quickly as possible. -
Page 3
Introduction On-board literature The Service schedule The on-board literature for your vehicle consists of this “Owner’s contains: Manual” as well as the “Quick Reference Guide”, “Service Schedule” • Vehicle data; and “Help on the road”. There can also be a variety of other additional •… -
Page 4: Table Of Contents
Contents Contents Layout of this Owner’s Manual Power windows* ……Rear parking aid* ……Electric sliding/tilting roof* .
-
Page 5
Contents Driving Tips Battery ……..1.8 ltr./110 kW — EU4/EU3D . -
Page 6
Contents Using the system Safety Driving Tips General Maintenance Breakdown assistance Technical Data… -
Page 7: Layout Of This Owner’s Manual (Explanations)
Layout of this Owner’s Manual (explanations) Layout of this Owner’s Manual (explanations) The Owner’s Manual has been systematically designed, in order to make it easy for The section is continued on the next page. you to find and absorb the information you require. Notes Chapters, table of contents and subject index All four kinds of notes, which are used in the text, are always stated at the end of the…
-
Page 8: Using The System
Using the system Using the system Safety Driving Tips General Maintenance Breakdown assistance Technical Data…
-
Page 9
Cockpit Fig. 1 Certain items of equipment shown in the illustration are only fitted to particular model versions or are optional items of equipment. -
Page 10: Cockpit
Cockpit Cockpit Overview Ignition lock ……….Ashtrays .
-
Page 11: The Brief Instruction
The brief instruction The brief instruction Basic functions and important information Setting steering wheel position Introduction The chapter of the brief instruction is only used as a quick reference of the most important operating elements of the vehicle. It is neces- sary to observe all the information which is contained in the following chapters of the Owner’s Manual.
-
Page 12
The brief instruction WARNING (continued) WARNING minimum distance will mean that the airbag system will not be able to prop- Adjust the height of the belt in such a way that the shoulder part of the belt erly protect you — hazard! is positioned approximately across the middle of your shoulder — on no •… -
Page 13
The brief instruction Electric exterior mirror adjustment* Switching lights on and off Fig. 7 Inner part of door: Fig. 8 Dash panel: Light Rotary knob switch Heating of the external mirror Switching off all lights Adjusting left and right exterior mirrors simultaneously Switching on side lights … -
Page 14
The brief instruction Turn signal and main beam lever Intermittent switch, sensitivity setting rain sensor* Wipers off Intermittent wipe Slow wipe Fast wipe one time wipe Automatic wipe/wash Rear window wiper* Fig. 9 Turn signal and main Intermittent wipe — every 6 seconds beam lever Automatic wipe/wash Further information ⇒… -
Page 15
The brief instruction Safety switch – Unscrew the fuel filler cap anti-clockwise and place the fuel filler cap ⇒ fig. from above on the fuel filler flap Further information ⇒ page 44, “Buttons on the driver’s door”. Further information ⇒ page 156, “Refuelling”. Refuelling Bonnet remote release Fig. -
Page 16
The brief instruction Opening the bonnet Inspecting the engine oil level Fig. 15 Radiator grille: Locking lever Fig. 17 Dipstick Engine oil must not be refilled. Engine oil can be refilled. Engine oil must be refilled. Further information ⇒ page 163, “Check engine oil level”. Fig. -
Page 17: Instruments And Indicator/Warning Lights
Instruments and Indicator/Warning Lights Instruments and Indicator/Warning Lights General view of the instrument cluster Fig. 18 Instrument cluster Engine revolutions counter ⇒ page 16 in and operating at a normal temperature. Before reaching this zone shift up into the next higher gear. Coolant temperature gauge ⇒…
-
Page 18: Fuel Gauge
Instruments and Indicator/Warning Lights In order to avoid any damage to the engine, please pay attention to the following about 7 litres of fuel remaining in the tank. This symbol is a reminder for you, that notes regarding the temperature ranges: you must refuel.
-
Page 19: Counter For Distance Driven
Instruments and Indicator/Warning Lights Counter for distance driven Service Interval Display Fig. 19 Instrument cluster: Fig. 20 Service Interval Counter for distance driven Display: Note The distance which you have driven with your vehicle is shown in kilometres (km). Depending on the equipment installed in the vehicle, the text can differ slightly on On certain model versions, the readout is shown in “miles”.
-
Page 20: Digital Clock
Instruments and Indicator/Warning Lights • The display disappears within 20 seconds after switching on the ignition. The trip it is necessary to re-code the Service Interval Display if a new instrument cluster counter is also displayed after pressing the reset button for the trip counter (for is installed during repair work.
-
Page 21
Instruments and Indicator/Warning Lights The multi-functional indicator offers you a range of useful information. Total-trip memory (memory 2) The total distance driven memory gathers data from any number of individual jour- ⇒ page 21 The outside temperature neys up to a total of 99 hours and 59 minutes driving or 9.999 kilometres driven. The memory is deleted when either of these limits is reached and the calculation ⇒… -
Page 22
Instruments and Indicator/Warning Lights Selecting the functions Outside temperature – Press the rocker switch up or down. This will cause the individual functions of the multi-functional indicator to appear in the display one after the other. Setting function to zero –… -
Page 23
Instruments and Indicator/Warning Lights The display appears in litres/hour if the vehicle is stationary or driving at a low you must first erase the memory at this moment in time by pressing the button ⇒ page 20, fig. speed. The maximum distance indicated in both switch positions is 9 999 km. The indicator is set back to null if this period is exceeded. -
Page 24: Information Display
Instruments and Indicator/Warning Lights Information display* Lighting up of these symbols is combined with an acoustic warning signal. Information and texts giving warnings are also shown in the display ⇒ page 27. Introduction The display of text is possible in the following languages: Czech, English, German, French, Italian, Spanish, Portuguese.
-
Page 25
Instruments and Indicator/Warning Lights Door and boot lid warning Fig. 26 Information display: Control elements Fig. 27 Information display: Door warning ⇒ fig. 26 – You can activate the menu by pressing the rocker switch for more than 1 second. The door and boot lid warning lights up if at least one door or the boot lid is not –… -
Page 26: Auto Check Control
Instruments and Indicator/Warning Lights Auto Check Control Red symbols A red symbol signals danger. Car state The Auto Check Control carries out a check of certain functions and vehicle compo- nents. The check is performed constantly when the ignition is switched on, both when the vehicle is stationary, as well as when driving.
-
Page 27
Instruments and Indicator/Warning Lights If several operational faults of priority 1 exist, the symbols appear one after the other and are each illuminated for about 2 seconds. Yellow symbols A yellow symbol signals a warning. Fig. 30 Information display: Fuel level low The meaning of the yellow symbols: ⇒… -
Page 28: Warning Lights
Instruments and Indicator/Warning Lights Warning lights Overview The warning lights indicate certain functions or faults. Fig. 31 Instrument cluster with warning lights ⇒ page 29 Rear fog light ⇒ page 28 Turn signal lights (to the left) …
-
Page 29
Instruments and Indicator/Warning Lights WARNING (continued) ⇒ page 30 Airbag system* compartment, e.g. inspecting and replenishing oil and other fluids. It is also essential to observe all warnings ⇒ page 160. ⇒ page 30 Coolant temperature/coolant level ⇒… -
Page 30
Instruments and Indicator/Warning Lights Main beam Bulbs The indicator light comes on when the main beam is selected or also when the The warning light comes on if a bulb is faulty: headlight flasher is operated. •… -
Page 31
Instruments and Indicator/Warning Lights • Glow plug system (diesel engine) The warning light lights up for 3 seconds after switching on the ignition and then flashes again for 12 seconds. The warning light lights up for a cold engine when switching on the ignition (pre- Front passenger airbags switched off using the switch for front passenger heat position) 2 ⇒… -
Page 32
Instruments and Indicator/Warning Lights Windshield washer fluid level* obtain professional assistance from a specialist garage, otherwise it could lead to severe engine damage. The warning light comes on when the ignition is switched on if there is insuffi- If the coolant is within the specified range, the increased temperature may be cient fluid in the windshield washer system. -
Page 33
Instruments and Indicator/Warning Lights Do not continue your journey if for some reason it is not possible under the WARNING (continued) conditions prevailing to top up with oil. Keep the engine switched off and obtain • professional assistance from a specialist garage, otherwise it could lead to severe The red oil pressure light … -
Page 34
Instruments and Indicator/Warning Lights A fault in the entire brake system The warning light will come on and remains on if the TCS is switched off or if there is a fault in the system. If the ABS warning light … -
Page 35
Instruments and Indicator/Warning Lights Alternator The following text will be displayed in the information display*: HANDBRAKE ON The warning light comes on after the ignition has been switched on. It should go out after the engine has started. WARNING If the warning light does not go out after the engine has started, or comes on when •… -
Page 36: Unlocking And Locking
Unlocking and locking Unlocking and locking Carefully store the key ring on which there is the number, because a replacement key can only be ordered with this number in case the key is lost or damaged. You should also therefore hand over this key ring to the purchaser when selling the vehicle.
-
Page 37: Changing The Battery Of The Radio Remote Control
Unlocking and locking Changing the battery of the radio remote control – Take the used battery out of the housing cover. – Insert the new battery. Ensure that the “+” symbol on the battery is facing downwards. The correct polarity is also shown on the cover of the transmitter housing.
-
Page 38: Locking
Unlocking and locking Child safety lock Note The child safety lock prevents the rear door from being opened from It is only possible to start the engine of your car with a Genuine Škoda key with the the inside. matching code ⇒ page 29. Locking Valid for vehicles without a central locking system: Locking from outside…
-
Page 39: Central Locking System
Unlocking and locking Central locking system* If you wish, you can have a specialist garage activate the function of the single door opening mode. Description WARNING Unlocking or locking the vehicle causes all doors to be unlocked or locked at the Locking the doors prevents involuntary opening in an exceptional situation same time by the central locking system.
-
Page 40
Unlocking and locking The safe securing system is again activated the next time the vehicle is unlocked and – Turn the key in the locking cylinder of the driver’s door to the left in the locked again. ⇒ fig. unlock position The doors can be opened from the inside if the vehicle is locked and the safe –… -
Page 41
Unlocking and locking • If the driver door is opened, it cannot be locked; in order to avoid inadvertently Note locking the vehicle. You then have to lock the door separately after closing them. • The opened driver door cannot be locked. It must be locked separately after closing In the event of an accident in which the airbags are deployed, the locked doors are automatically unlocked from the inside in order to enable rescuers to gain access to the vehicle. -
Page 42: Remote Control
Unlocking and locking Boot lid WARNING (continued) • Do not press on the rear window when closing the boot lid, it could crack — risk of injury! Remote control* Description The vehicle can be unlocked and locked using the radio remote control. Fig.
-
Page 43: Synchonisation Of The Remote Control
Unlocking and locking Unlocking and locking car The safe securing system along with the anti-theft alarm system are, however, deactivated during these 30 seconds. In addition, when the car is unlocked, the electrically adjustable seats and exterior mirrors* move into the position assigned to this key. The stored setting of driver seat and exterior mirrors is retrieved.
-
Page 44: Anti-Theft Alarm System
Unlocking and locking • ated a number of times outside of the operative range of the equipment or the Boot lid, • battery on the remote control was replaced. Doors, • This means it is necessary to synchronise the code as follows: Ignition lock, •…
-
Page 45: Power Windows
Unlocking and locking Power windows* The buttons for the individual windows are located in the armrest of the driver’s ⇒ fig. door 41, front passenger door and in the rear doors*. Buttons on the driver’s door Buttons for the power windows in the armrest for the driver Button for the power window in the driver’s door Button for the power window in the front passenger’s door Button for the power window in the rear door on the right*…
-
Page 46
Unlocking and locking • Force limiter of the power windows After switching the ignition off, it is still possible to open or close the windows for a further 10 minutes. The automatic window closing will not operate during this time. The power windows are switched off completely once you open the driver or The electrically operated power windows are fitted with a force limiter. -
Page 47: Electric Sliding/Tilting Roof
Unlocking and locking • You can interrupt the opening or closing operation of the windows immediately by Repeat this operatiive cycle when the window stops. releasing the key. WARNING WARNING The system is fitted with a force limiter ⇒ page 45. If there is an obstacle, the •…
-
Page 48
Unlocking and locking Closing Note • If the battery has been disconnected and reconnected, it is possible that the Sliding closed/closing the sliding/tilting roof sliding/tilting roof does not close fully. Here you have to set the control dial to the ⇒… -
Page 49
Unlocking and locking Emergency operation – Press on the cover again by first of all inserting the plastic lugs and then pushing the cover up. – Have the fault rectified by a specialist workshop. Note It is necessary after each emergency operation (using Allen key) to move the sliding/tilting roof into the basic position. -
Page 50: Lights
Lights and Visibility Lights and Visibility Lights – Insert the activation fuse No. 17 in the fuse box. Switching off daylight driving lights* Switching lights on and off – Remove the cover of the fuse box on the left side of the dash panel ⇒…
-
Page 51
Lights and Visibility • Rear fog light The switching on of the described lights should only be undertaken in accord- ance with the legal requirements. • If a fault occurs in the light switch, the low beam comes on automatically Switching on the rear fog light •… -
Page 52
Lights and Visibility Instrument lighting* Headlamp range adjustment You can adjust the brightness of the instrument lighting. Once the low beam is switched on you can then adapt the range of the headlights to the load of the vehicle. Fig. -
Page 53
Lights and Visibility Switch for hazard warning lights The turn signal and main beam lever The parking lights and headlight flasher are also switched on and off using the turn signal and main beam lever. Fig. 49 Dash panel: Switch for hazard warning lights Fig. -
Page 54: Interior Lighting
Lights and Visibility Parking light Selecting function – Switch off the ignition. – Switch off the light. – Push the lever up or down — the right-hand or left-hand parking light – Switch off the ignition. is switched on. –…
-
Page 55
Lights and Visibility Rear interior lighting* – On the version without reading lights press the switch to the right, the symbol O appears. Door contact switching mechanism (front and rear* doors) – Press the switch to the right, the symbol … -
Page 56: Visibility
Lights and Visibility Visibility Sun visors Rear window heater Fig. 54 Sun visor: swivelling Fig. 53 Switch for rear window heater The sun visors can be pulled out of the fixtures and swiveled towards the side ⇒ fig. window. The visor above the interior mirror* can only be folded down. –…
-
Page 57: Windshield Wiper And Wash System
Lights and Visibility Windshield wiper and wash system Fast wipe – Position the lever up into position Windshield wiper Automatic wipe/wash for windscreen You can operate the windscreen wipers and automatic wipe/wash – Pull the lever towards the steering wheel into the spring-tensioned using the windscreen wiper lever.
-
Page 58
Lights and Visibility Switching windscreen wipers off Replacing wiper blades for the windscreen wipers – Move the lever back into its home position The windscreen wipers and the windscreen washer system only operate if the igni- tion is switched on. The rain sensor* automatically regulates the break between the individual wiper strokes depending on the intensity of the rain. -
Page 59: Rear-View Mirror
Lights and Visibility – Check whether the wiper blade is correctly attached. WARNING The same remarks apply here as for ⇒ page 57, “Replacing wiper blades for the • If the windscreen wipers are handled carelessly, there is a risk of damage windscreen wipers”.
-
Page 60
Lights and Visibility • The heating of the external mirror functions only when ignition is Contact your specialist garage if a fault exists with the power setting of the exte- rior mirrors. switched on. Electrically adjustable exterior mirrors* Carry out the adjustment at the set button next to the inner door handle when the ⇒… -
Page 61: Seats And Storage
Seats and Storage Seats and Storage Front seats WARNING (continued) minimum distance will mean that the airbag system will not be able to prop- Basic information erly protect you — hazard! The front seats and the head restraints must always also be correctly adjusted to match the body size of the occupant. The front seats have a wide range of different settings and can thus be matched to •…
-
Page 62: Adjusting Front Seats Electrically
Seats and Storage Adjusting front seats electrically* – Lower the seat if required by pushing or pumping lever down- wards. Adjusting seats Adjust the angle of the seat backrest – Relieve any pressure on the seat backrest (do not lean on it) and turn ⇒…
-
Page 63
Seats and Storage – Press one of the memory buttons and hold the button pressed for WARNING (continued) about 3 seconds until an audible signal confirms that the setting has • been stored. The setting of this button was stored. In view of the fact that the seats can also be adjusted when the ignition is switched off (even when ignition key withdrawn), you should never leave children unattended in the vehicle. -
Page 64
Seats and Storage Assigning radio remote control* to the memory buttons Retrieving settings with memory buttons – By pressing briefly: with the door open, operate the desired memory After storing the settings of the seat and exterior mirrors, you have 10 ⇒… -
Page 65: Head Restraints
Seats and Storage Information concerning the off switch of the memory system Best protection is achieved if the top edge of the head restraint is at the same level as the upper part of your head. ⇒ page 62, fig. After pressing the off switch of the memory system 61, the…
-
Page 66: Rear Seats
Seats and Storage Rear seats Folding seats forwards – Before folding the rear seats forwards, you must adapt the position of Folding the rear seats forwards the front seats in such a way that they are not damaged when the rear seats are folded forwards.
-
Page 67
Seats and Storage Move seats into the initial position Removing the seat cushion – Install the head restraints in the slightly lifted seat backrest. – Place the rear lateral seat belt behind the edge of the side trim ⇒ page 65, fig. panel –… -
Page 68: Pedals
Seats and Storage Seat heating of the front seats* Caution • You should not kneel on the seats or otherwise apply pressure at specific points in order to avoid damaging the heating elements of the seat heaters. • Do not clean the seats moist ⇒ page 152. Note •…
-
Page 69: Luggage Compartment
Seats and Storage luggage compartment WARNING (continued) centre of gravity. The speed and style of driving must be adjusted accord- Loading the luggage compartment ingly. • The items carried in the luggage compartment should be stored in such Please observe the following in the interest of having good handling char- a way that no objects are able to slip forward if there are any sudden driving acteristics of your vehicle: or braking manoeuvres undertaken — risk of injury!
-
Page 70
Seats and Storage Fixing nets — Net programme Octavia* Fig. 70 Luggage compart- ment: Lashing eyes (Combi) Fig. 71 Fixing net: Double horizontal pocket You can use the mounts which can be fitted in the openings in the body (Octavia) ⇒… -
Page 71
Seats and Storage WARNING Caution Do not place any objects with sharp edges in the nets — risk of net damage. The whole strength of the net makes it possible to load the pocket with objects of up to 1,5 kg in weight. Heavy objects are not secured sufficiently — risk of injury and net damage! Fixing nets — Net programme Combi* Caution… -
Page 72
Seats and Storage Luggage compartment cover (Octavia) Caution You can use the luggage compartment cover behind the head Please ensure that the heating elements of the rear window heater are not restraints for storing light and soft items. damaged as a result of objects placed in this area. Note Opening the tailgate also lifts up the luggage compartment cover. -
Page 73
Seats and Storage Removing – Have the foldable luggage compartment cover removed to transport bulky goods by pressing the slider from the side in the direction of arrow and removing the cover in the direction of arrow ⇒ page 71, fig. WARNING No objects should be placed on the luggage compartment cover. -
Page 74: Net Partition (Combi)
Seats and Storage Net partition (Combi)* – Fold open the loading floor. – Lock the loading floor by turning the locking bolts by approx. 90° Use the net partition behind the rear seats to the right. WARNING Pay attention when installing that the carrier rails and the variable loading floor are correctly fixed, otherwise the occupants are at risk.
-
Page 75
Seats and Storage – Roll the net partition at an angle of approx. 45° towards the boot lid in – Pull the net partiton net at the plate out of the housing ⇒ fig. the housing , so that it does not roll up automatically. –… -
Page 76: The Roof Rack
Seats and Storage The roof rack* Removing and installing net partition housing Description Pay attention to the following points if you wish to transport luggage or other items on the roof of your vehicle: • A special roof luggage rack system was developed for the vehicle, that is why you should only use a roof luggage rack which has been released for use by Škoda Auto.
-
Page 77
Seats and Storage Lashing points (Octavia) luggage rack system must not exceed the weight limit which is stated in the fitting instructions. WARNING • The items which you transport on the roof bar system must be reliably attached — risk of accident! •… -
Page 78: Note Holder
Seats and Storage Ashtray* WARNING • Do not place any hot beverages into the cup holder. If the vehicle moves, Front ashtray the hot beverages may spill — risk of scalding! • Do not use any cups or beakers which are made of brittle material (e.g. glass, porcelain).
-
Page 79: Cigarette Lighter*, Power Sockets
Seats and Storage Cigarette lighter*, power sockets Insert ashtray insert – Insert the ashtray insert and press it slightly in direction of arrow Cigarette lighter You can also use the socket on the cigarette lighter for other elec- WARNING trical appliances. Never lay flammable objects in the ashtray basin — risk of fire! Rear ashtray Fig.
-
Page 80: Storage Compartments
Seats and Storage ⇒ fig. – Open the cover of the power socket WARNING – Connect the plug of the electrical appliance to the socket. • Take care when using the cigarette lighter! Not paying proper attention or incorrect use the cigarette lighter in an uncontrolled manner may result in The power socket, which fulfils the requirements of DIN standard ISO 4165, must burns.
-
Page 81
Seats and Storage WARNING (continued) WARNING may distract you from concentrating on the traffic situation — risk of acci- The storage compartment must always be closed when driving for safety dent! reasons. • Use the storage compartments in the door panels only for small items which do not project out of the compartment in order to avoid any interfer- Storage compartment for spectacles* ence with the proper operation of the side airbags. -
Page 82
Seats and Storage Note Note Do not insert particularly large spectacles. The moving space of the arms can be restricted if the armrest is folded down. In city traffic the armrest should not be folded down. Front seat armrest with storage compartment* Rear seat armrest with storage compartment* Fig. -
Page 83
Seats and Storage – The armrest includes a storage compartment. Press the button in direction of arrow and open the storage compartment in direction of arrow Clothes hooks* Fig. 98 Rear door: Clothes hooks ⇒ fig. A clothes hook is located above the rear doors WARNING •… -
Page 84: Air Outlet Vents
Heating and air conditioning system Heating and air conditioning system Air outlet vents Unwarmed or cooled air will flow out of the opened air outlet vents according to ⇒ fig. 100 the setting of the control dial and according to outer atmospheric conditions.
-
Page 85
Heating and air conditioning system – Turn the blower switch into position 0 in order to switch the blower WARNING off. You should not leave recirculated air mode on over a longer period of time, – If you wish to shut off the fresh air supply, use the button — recircu- as “stale”… -
Page 86: Air Conditioning System
Heating and air conditioning system Setting of the control dial Button Set-up Air outlet vents 3 Air outlet vents 4 Defrosting the windscreen and To the right up to Open and align with the side Switched off Closing side windows the stop window Free windscreen and side win-…
-
Page 87
Heating and air conditioning system ⇒ fig. 101 The air conditioning only operates if button is pressed and the WARNING (continued) following conditions are met: accident increases. Switch recirculated air mode off as soon as the windows • engine running, begin misting up. -
Page 88
Heating and air conditioning system Controlling blower – When you again press the switch , the cooling system is switched off. The warning light in the button goes out. – Turn the blower switch into one of the positions, 1 to 4, in order to switch the blower on. -
Page 89
Heating and air conditioning system Setting of the control dial Button Set-up Air outlet vents 3 Air outlet vents 4 To the left up to briefly 4, then the fastest cooling switched on briefly switched on Opening Opening the stop 2 or 3 Desired temper- … -
Page 90: Climatronic* (Automatic Air Conditioning)
Heating and air conditioning system Climatronic* (automatic air conditioning) After switching on the cooling Condensation from the evaporator of the air condi- tioning may drip down and form a puddle below the vehicle. This is quite normal and not an indication of a leak! Description If you make a change before switching off the ignition, which differs from the auto- The Climatronic system is a combination of an automatic heating,…
-
Page 91
Heating and air conditioning system • We recommend that you do not smoke in the vehicle when the recirculating air Recirculated air mode mode is operating since the smoke which is drawn at the evaporator from the inte- Direction of air flow rior of the vehicle forms deposits in the evaporator of the air conditioning system. -
Page 92
Heating and air conditioning system Defrosting windscreen – Press the button AUTO — the warning light lights up in the button. The automatic mode is switched off by pressing the button for the air distribution Defrosting windscreen — switching on or increasing or decreasing the blower speed. -
Page 93
Heating and air conditioning system WARNING Note ⇒ page 90, fig. • If the windscreen mists up, press the button 102. After the “Stale air” may result in fatigue in the driver and occupants, reduce windscreen has been demisted, press the button AUTO attention levels and also cause the windows to mist up. -
Page 94: Starting-Off And Driving
Starting-off and Driving Starting-off and Driving Setting steering wheel position – Then push the lever up against the steering column until it locks into place. WARNING • You must not adjust the steering wheel when the vehicle is moving! • The driver must maintain a distance of at least 25 cm to the steering ⇒…
-
Page 95: Ignition Lock
Starting-off and Driving Ignition lock Move the steering wheel back and forward a little if the ignition key cannot, or cannot easily be turned into this position, in order to release the steering lock. Position The engine is started in this position. At the same time switched on low beam or main beam or other electrical components with major power consumption are briefly switched off.
-
Page 96
Starting-off and Driving • Petrol engines Let go of the key as soon as the engine starts otherwise there may be damage to the starter. These engines are fitted with a starter system which selects the correct fuel-air The engine running noises may louder at first be louder for a short time after mixture for every external air temperature. -
Page 97: Switching Off The Engine
Starting-off and Driving Shifting Starting the engine after the fuel tank has run dry It may take longer than normal to start the engine after refuelling if the fuel tank has run completely dry — up to one minute. This is because the fuel system must first of all be filled while the attempting to start the engine.
-
Page 98: Handbrake
Starting-off and Driving Handbrake WARNING • Please note that the handbrake must be fully released. A handbrake which is only partially released can result in the rear brakes overheating which will have a negative effect on the operation of the brake system — risk of accident! In addition this can result in premature wear of the rear brake pads.
-
Page 99: Cruise Control System (Ccs)
Starting-off and Driving Cruise control system (CCS)* Range of sensors The clearance warning begins at a distance of about 160 cm from the obstacle (area ⇒ page 97, fig. 108). The interval between the warning signals becomes shorter Introduction as the clearance is reduced. A continuous tone sounds from a distance of approx.
-
Page 100
Starting-off and Driving Storing a speed WARNING First ensure that it is not too high for the traffic conditions which exist at that moment before resuming the stored speed. Changing a stored speed You can also change the speed of the vehicle without depressing the accelerator. -
Page 101
Starting-off and Driving Switching off the cruise control system temporarily – You can switch off temporarily the cruise control system, if you depress the brake or clutch pedal. – You can likewise switch off the cruise control system by sliding the to the right — into the OFF position. -
Page 102: Communication
Communication Communication Mobile phone, handsfree-system* Initialisation – Withdraw the ignition key. Universal preparation for the phone – Insert the adapter without the mobile phone into the mount – Plug the adapter cable into the mobile phone socket. The socket is located on the mobile phone mount below.
-
Page 103: Mobile Phones And Two-Way Radio Systems
Communication Mobile phones and two-way radio systems Note Please also refer to the operating instructions of the mobile phones and two-way The installation of a mobile phone and two-way radio system in a vehicle should be radio systems. carried out by a specialist garage. Škoda Auto permits the operation of mobile phones and two-way radio systems with a professionally installed external aerial and a maximum transmission power of up to 10 watts.
-
Page 104: Safety
Passive Safety Safety Passive Safety • Basic information Three-point seat belts for all the seats*, • belt force limiter for front seats*, • Driving the safe way belt tensioner for front seats*, • seat belt height adjuster for front seats, Passive safety measures reduce the risk of injury in accident situa- •…
-
Page 105: Correct Seated Position
Passive Safety • Correct seated position Ensure that the lighting and the turn signal system are functioning properly. • Inspect the tyre inflation pressure. • Correct seated position for the driver Ensure that all the windows offer a good visibility to the outside. •…
-
Page 106
Passive Safety • Correct seated position for the front passenger Adjust the seat backrest so that you are able to reach the highest point of the steering wheel with your arms at a slight angle. The front passenger must maintain a distance of at least 25°cm from •… -
Page 107
Passive Safety Examples of an incorrect seated position WARNING (continued) An incorrect seated position can lead to severe injuries or death for • The seat backrests must not be angled too far back when driving other- the occupants. wise this will affect proper operation of the seat belts and of the airbag system — risk of injury! Seat belts offer their optimum protection only if the webbing of the seat belts is properly routed. -
Page 108
Passive Safety WARNING • If the occupant adopts an incorrect seated position, he is exposed to life- threatening injuries, in case he is hit by a deployed airbag. • Before setting off, please adopt the correct seated position and do not change this seated position while the car is moving. -
Page 109: Seat Belts
Seat belts Seat belts Why seat belts? It is important that you pay attention to safety measures, particularly when trans- porting children in the vehicle ⇒ page 123, “What you should know about trans- porting children!”. WARNING • Fasten your seat belt each time before setting off, also when driving in town! This also applies to the people seated at the rear — risk of injury! •…
-
Page 110: The Physical Principle Of A Frontal Collision
Seat belts The physical principle of a frontal collision the greater the amount of energy which has to be absorbed in the event of an acci- dent. The speed of the vehicle is, nevertheless, the most important factor. Doubling the speed of the vehicle from 25 km/h up to 50 km/hour increases the kinetic energy four times.
-
Page 111: How Are Seat Belts Correctly Fastened
Seat belts How are seat belts correctly fastened? WARNING (continued) • No two persons (also not children) should ever use a single seat belt Fastening three-point seat belts together. Fasten your seat belt before starting! • The maximum protection which seat belts can offer is only achieved if you are correctly seated ⇒…
-
Page 112
Seat belts Seat belt height adjuster – Slowly pull the belt webbing at the tongue of the lock over your chest and pelvis ⇒ – Insert the tongue of the lock into the seat belt buckle belonging to the seat until it is heard to lock in place. –… -
Page 113
Seat belts Taking seat belts off Rear middle three-point safety belt with safety lock for a child seat* In order to attach a child seat the rear middle three-point safety belt with the blocking, the so-called child safety locks, can be used. Switching child safety lock on –… -
Page 114: Belt Tensioners
Seat belts The pelvic belt* Shortening the pelvic belt – Pull on the free end of the belt. – Fix the excess belt length by threading it through the plastic slider. The adjustment of the belt length is facilitated by simultaniously pressing the belt tongue and the belt cover lengthwise.
-
Page 115
Seat belts WARNING (continued) • The protective function of the system is only adequate for a single acci- dent. If the belt tensioners have been deployed, it is then necessary to replace the entire system. • The Owner’s Manual must also be handed over to the new owner if the vehicle is sold. -
Page 116: Airbag System
Airbag system Airbag system Description of the airbag system WARNING • General information on the airbag system To enable the occupants of a vehicle to be protected with the greatest possible effect when the airbag is deployed, the front seats must be ⇒…
-
Page 117: Front Airbags
Airbag system • When are the airbags deployed? The dash panel must be replaced after the front passenger airbag has been deployed. • The airbag system is designed in such a way that the driver and the front passenger In the event of an accident in which the airbags are deployed: airbag* are deployed in the event of a frontal collision of major severity.
-
Page 118
Airbag system Function of the front airbags Risk of injury to the head and chest area is reduced by fully inflated airbags. Fig. 123 Front passenger airbag in the dash panel ⇒ page 116, fig. The front airbag for the driver is housed in the steering wheel 122. -
Page 119
Airbag system Important safety information regarding the front airbag system WARNING (continued) Correct use of the airbag system considerably reduces the risk of passenger seat, please comply with the appropriate national regulations injury! regarding the use of child safety seats. •… -
Page 120: Side Airbags
Airbag system Side airbags* Function of the side airbags Risk of injury to the upper part of the body is reduced by fully inflated Description of side airbags side airbags. The side airbag increases protection of the passenger concerned in the case of a side impact.
-
Page 121: Deactivating An Airbag
Airbag system Important safety information on the side airbag WARNING (continued) Correct use of the airbag system considerably reduces the risk of Auto. In view of the fact that the airbag inflates out of the backrest of the injury! seat, use of non-approved seat or protective covers would considerably impair the protective function of the side airbag.
-
Page 122
Airbag system • Switch for the front passenger airbag(s)* you are not able to maintain the distance of at least 25 cm between middle of steering wheel and chest, despite the driver seat being correctly adjusted; • special attachments are required in the area of the steering wheel because of a physical disability;… -
Page 123
Airbag system – Check whether the indicator light lights up in the lighting of WARNING (continued) the interior of the vehicle (front) when the ignition is switched on ⇒ page 121, fig. 129. − There is a risk of the front passenger airbag not being activated in the event of an accident. -
Page 124: Transporting Children Safely
Transporting children safely Transporting children safely What you should know about transporting children! Note Any varying national legal regulations take priority over the information provided in An introduction to the subject these instructions for use, or stated in this chapter. Accident statistics have revealed that children are generally more safely transported on the rear seats than on the front passenger seat.
-
Page 125
Transporting children safely Use of child safety seats on the front passenger seat WARNING (continued) Child safety seats should always be attached to the rear seats. • Children are exposed to an increased risk of injury in the event of an acci- dent if they lean forward or adopt an incorrect seated position when the vehicle is moving. -
Page 126
Transporting children safely Child safety and side airbag* WARNING (continued) Children must never be seated in the deployment area of side tion of travel) ⇒ page 120, “Deactivating an airbag”. If this is not done, there airbags. is a risk of the child suffering severe or even fatal injuries if the front passenger airbag is deployed. -
Page 127: Child Seat
Transporting children safely This applies particularly to children if they are not transported in accordance Child safety seats which have been tested for conformity to ECE-R 44 standard have with legal requirements. a non-detachable test seal (a large E within a circle and below this the test number) attached to the seat.
-
Page 128
Transporting children safely Child seats of group 0/0+ WARNING (continued) • If this is not done, a child seated on the front passenger seat may suffer severe or even fatal injuries if the front passenger airbag or airbags are deployed. •… -
Page 129
Transporting children safely WARNING (continued) WARNING passenger seat where the child is seated with its back facing in direction of • When transporting a child on the front passenger seat, please comply travel (in some countries also when the child is facing the direction of travel). with the appropriate national regulations regarding the use of child safety −… -
Page 130: Attaching A Child Seat Using The «Isofix» System
Transporting children safely WARNING • When transporting a child on the front passenger seat, please comply with the appropriate national regulations regarding the use of child safety seats. If required, the airbag has to be deactivated, − in a specialist garage −…
-
Page 131
Transporting children safely Complete installation instructions are enclosed with the child safety seat. WARNING • The locking eyes have just been developed for child safety seats which use the “ISOFIX” system. You should therefore never attach other child safety seats, seat belts or objects to the locking eyes — hazard! •… -
Page 132: Driving Tips
Intelligent Technology Driving Tips Intelligent Technology Electronic stability programme (ESP)* Operating principle The ESP switches on automatically when the engine is started and then conducts a self-test. The ESP control unit processes data from the individual systems. It also General processes additional measurement data which are supplied by highly sensitive sensors: the rotational velocity of the vehicle about its vertical axis, the lateral accel- eration of the vehicle, the braking pressure and the steering angle.
-
Page 133
Intelligent Technology • when driving with snow chains Operating principle • The EDL is activated automatically, that is without any action on the part of the when driving in deep snow or on a loose surface • driver. It monitors the speeds of the driven wheels with the aid of the ABS sensors. when it is necessary to rock a vehicle when it has become stuck. -
Page 134: Brakes
Intelligent Technology Traction control system (TCS) The TCS should normally always be switched on. It may be good practice in certain exceptional cases, such as when you wish to have wheel slip, to switch off the The traction control system prevents the driven wheels from spinning system.
-
Page 135: Brake Booster
Intelligent Technology Wet roads or road salt WARNING (continued) There may be a certain delay before the brakes take full effect under certain condi- • tions such as when driving through water, during heavy rain showers or after the When retrospectively mounting a front spoiler, solid wheel hubs etc. one vehicle has been washed in an automatic vehicle wash, since the brake discs and must ensure that the air supply to the front wheel brakes is not reduced brake pads may be moist or even have a coating of ice on them in winter.
-
Page 136: Antilock Brake System (Abs)
Intelligent Technology Antilock brake system (ABS)* Note • ABS prevents the wheels locking when braking. A warning light comes on if a fault occurs in the ABS system ⇒ page 32. • Changes to vehicle (e.g. on engine, on the brakes, on chassis or another combi- General nation of tyres and wheels) can influence the function of the ABS ⇒…
-
Page 137
Intelligent Technology WARNING (continued) • Adapt your speed to the conditions of the road surface and to the traffic situation. • The increased safety offered by the Brake Assist must not tempt you to take a greater safety risk than otherwise. -
Page 138: Driving And The Environment
Driving and the Environment Driving and the Environment The first 1 500 kilometres and then afterwards Caution All the speed and engine revolution figures apply only when the engine is at its A new engine normal operating temperature. Never rev up an engine which is cold, neither when The engine has to be run in during the first 1 500 kilometres.
-
Page 139: Catalytic Converter
Driving and the Environment Catalytic converter Caution • Proper operation of the emission control system (catalytic converter) On vehicles fitted with a catalytic converter, never let the fuel tank run is of major significance for driving your vehicle in an environmen- completely empty.
-
Page 140
Driving and the Environment Shifting gears and saving energy number of tips on how to protect the environment and at the same time save money. Shifting up early saves on fuel. The fuel consumption can naturally also be influenced by factors which are beyond the driver’s control. -
Page 141
Driving and the Environment Avoiding full throttle in the warming-up phase. This is why you should drive off right after starting the engine. Do avoid high engine revolutions at this time, however. Driving more slowly means saving fuel. Regular servicing A poorly tuned engine consumes an unnecessarily high amount of fuel. -
Page 142
Driving and the Environment Avoid driving short distances only increase fuel consumption but also tyre wear and the driving behaviour will worsen. Short distances result in an above-average high fuel consumption. Always check the inflation pressure of the tyres when cold. Do not drive with winter tyres all year round for this costs about 10 % more fuel. -
Page 143: Environmental Compatibility
Driving and the Environment • Keeping a log of your fuel consumption Solvent-free protection of the vehicle for transportation from the production plant to the customer; • If you really wish to keep a close check on your fuel consumption, it is best to enter The use of solvent-free adhesives;…
-
Page 144: Avoiding Damage To Your Vehicle
Driving and the Environment Headlight stickers can be obtained as a spare part from the specialist garages. The adaptation of the headlights with Xenon lamps (applies to vehicles which are designed for driving on the left and on the right) is performed by switching over a bezel in the module for low beam by a specialist garage.
-
Page 145: Towing A Trailer
Towing a trailer Towing a trailer Towing a trailer General Maintenance There are a number of points to pay attention to when towing a Technical requirements trailer. The towing device must satisfy certain technical requirements. Trailer load The permissible trailer load must on no account be exceeded. Your vehicle is designed primarily for transporting persons and luggage.
-
Page 146
Towing a trailer should be attached to folding arms. Adjust the mirrors so that they provide you with Distribution of weight an adequate field of view to the rear. The distribution of the weight is very poor if your vehicle is unladen and the trailer is laden. -
Page 147: Detachable Towing Device
Towing a trailer of the engine speed. One should also not drop a gear for this reason when towing Note a trailer as long as the engine can manage the slope without any drop in speed. • Do not carry out any modifications or repairs to the ball head or to any other components on the towing device.
-
Page 148: General Maintenance
Taking care of your vehicle and cleaning the vehicle General Maintenance Taking care of your vehicle and cleaning the vehicle General Care of the exterior of vehicle Proper care retains the value of your vehicle. Washing the vehicle Regular and proper care retains the value of your vehicle. It may also be one of the Frequent washing protects your vehicle.
-
Page 149
Taking care of your vehicle and cleaning the vehicle Automatic vehicle wash systems Rinse off the vehicle well after giving it a wash and dry it off using a chamois leather. The paintwork of the vehicle is sufficiently resistant that the vehicle can be washed WARNING normally in automatic vehicle wash plants without any problem. -
Page 150
Taking care of your vehicle and cleaning the vehicle WARNING Caution • You must not treat mat painted parts or plastic with polishing products or hard It is particularly important that you do not clean tyres with circular spray wax. jets. -
Page 151
Taking care of your vehicle and cleaning the vehicle Plastic parts The headlight lenses External plastic parts are cleaned by normal washing. Plastic parts and synthetic Please do not use any aggressive cleaning or chemical solvent products for cleaning leather can also be treated with special solvent-free plastic cleaning agents if a the front headlights — risk of damage to the plastic lenses. -
Page 152
Taking care of your vehicle and cleaning the vehicle Wheels Underbody protection Steel wheels The underside of your vehicle is protected for life against chemical and mechanical influences. You should also thoroughly wash the wheels and wheel trims when giving your vehicle its regular wash. -
Page 153: Care Of The Interior Of Vehicle
Taking care of your vehicle and cleaning the vehicle Engine compartment Upholstery cloth and cloth trim on the doors, luggage compartment cover, head- liner etc. are best treated with special cleaning products, using if necessary a dry foam and a soft sponge or brush. Good corrosion protection is very important, particularly in winter when one often drives over its salt-strewn roads.
-
Page 154
Taking care of your vehicle and cleaning the vehicle Removing stains Note – Remove fresh stains which are water-based (e.g. coffee, tea, juices, • Use a care cream with light blocker and impregnation effect regularly and each blood etc.) with an absorbent cloth or household paper or use the time after cleaning the leather. -
Page 155
Taking care of your vehicle and cleaning the vehicle WARNING (continued) • Inertia reel belts must be completely dried before being reeled up. -
Page 156: Fuel
Fuel Fuel Petrol You can find further information on refuelling ⇒ page 156, “Refuelling”. Grades of petrol Caution • Filling the tank even only once with leaded petrol will result in the catalytic There are various grades of petrol. Please check in order to know which grade of converter being destroyed.
-
Page 157: Refuelling
Fuel Refuelling Operation in winter Winter-grade diesel fuel A different grade of diesel fuel is available at filling stations in winter than during the summer. Using “summer-grade diesel fuel” at temperatures below 0°C can result in operational problems because the diesel becomes viscous as a result of paraffin separation.
-
Page 158: Emergency Release Of Fuel Filler Flap
Fuel – Unscrew the fuel filler cap anti-clockwise and place the fuel filler cap Caution ⇒ page 156, fig. from above on the fuel filler flap 146. • Before refuelling it is necessary to switch off the auxiliary heating system (auxil- Closing fuel filler cap iary heating and ventilation) *.
-
Page 159
Fuel Unlocking – Open the boot lid and remove the right inner paneling. – Pull on the control cable in direction of arrow in order to unlock the ⇒ page 157, fig. fuel filler flap 147. WARNING When unlocking the fuel filler flap manually, pay attention to sharp edges of the body — risk of injury. -
Page 160: Inspecting And Replenishing
Inspecting and replenishing Inspecting and replenishing Engine compartment Opening and closing the bonnet. Bonnet remote release Fig. 149 Radiator grille: Locking lever Fig. 148 Bonnet release lever Bonnet remote release – Pull the unlocking lever below the dash panel on the driver’s side ⇒…
-
Page 161
Inspecting and replenishing – Take the bonnet support out of its holder and set it in the opening WARNING ⇒ page 159, fig. designed for it 150. • Never open the bonnet if you see that steam or coolant is flowing out of Closing the bonnet the engine compartment — risk of scalding! Wait long enough until the steam or coolant has stopped escaping. -
Page 162
Inspecting and replenishing Overview of the engine compartment WARNING (continued) The main inspection points. remove any jewellery beforehand, tie up your hair and wear tight fitting clothing. • Please also comply with the warning instructions stated below when carrying out any essential work on the fuel system or on the electrical system: −… -
Page 163: Engine Oil
Inspecting and replenishing Engine oil Engine oil specifications for models with flexible service intervals (QG1) Engine oil specifications Engine oil specifications VW 503 00 Petrol engines The grade of engine oil should be selected in accordance with VW 504 00 precise specifications.
-
Page 164
Inspecting and replenishing Check engine oil level Oil level within range – You must top up the oil ⇒ page 163. It is sufficient, once this is done, The dipstick indicates the level of oil in the engine. to keep the oil level within range It is normal for the engine to consume oil. -
Page 165
Inspecting and replenishing – Inspect the oil level ⇒ page 163. Caution – Carefully screw on the cap of the filler opening and push the dipstick You must not pour any additives into the engine oil — risk of engine damage! in fully. -
Page 166: Cooling System
Inspecting and replenishing Check hydraulic oil Vehicles exported to countries with a cold climate (e.g. Sweden, Norway, Finland) are already factory-filled with a coolant which offers antifreeze protection down to The hydraulic system of the power steering is filled with the hydraulic oil designated about -35°C.
-
Page 167
Inspecting and replenishing Replenishing the coolant The coolant expansion bottle is located in the engine compartment on the right. – Switch the engine off. – Switch the engine off. – Allow the engine to cool down. – Open the bonnet ⇒ in “Working in the engine compartment”… -
Page 168: Brake Fluid
Inspecting and replenishing Brake fluid WARNING (continued) • You should also consult a doctor without delay if you have inadvertently Inspecting the brake fluid level swallowed coolant. Caution Do not continue your journey if for some reason it is not possible under the conditions prevailing to top up with coolant.
-
Page 169: Battery
Inspecting and replenishing WARNING For the sake of the environment • In view of the problems involved with proper disposal of brake fluid, the special Read and observe the warning notes ⇒ page 160, “Working in the engine tools and the professional knowledge required, you should have the brake fluid compartment”…
-
Page 170
Inspecting and replenishing WARNING (continued) WARNING • • Never charge a frozen or thawed battery — risk of explosion and caustic The battery acid is strongly corrosive and must, therefore, be handled burns! Replace a frozen battery. with the greatest of care. Always wear protective gloves, eye and skin •… -
Page 171
Inspecting and replenishing Battery with a charge level indicator, the so-called magic eye* Inspecting the electrolyte level The battery is practically maintenance-free under normal operating conditions. We do, however, recommend that you have the electrolyte level inspected from time to time by a specialist garage when outside temperatures are high or when driving on long trips. -
Page 172
Inspecting and replenishing – Only for “quick-charging”: Disconnect both battery cables (first of all WARNING “negative”, then “positive”). Never charge a frozen or thawed battery — risk of explosion and caustic – Carefully attach the terminal clamps of the charger to the battery burns. -
Page 173: Windshield Washer System
Inspecting and replenishing Windshield washer system Caution • On no account should you add radiator antifreeze or other additives to the windscreen washer fluid. • If the vehicle is fitted with headlight cleaning system, you should only add cleaning products which do not attack the polycarbonate coating of the headlights to the windscreen washer fluid.
-
Page 174: Wheels And Tyres
Wheels and Tyres Wheels and Tyres Wheels Note Please observe the various differing legal requirements regarding tyres. General information • New tyres do not offer optimal grip at first and should therefore be run in for Tyre life about 500 km at a moderate speed and an appropriately cautious style of driving. You will also profit from longer tyre life.
-
Page 175
Wheels and Tyres Wear indicators Always check the inflation pressure of tyres when cold. Do not reduce the higher pressure of warm tyres. Adapt the inflation pressure of the tyres accordingly if your vehicle is carrying a significantly higher payload. Driving style Fast cornering, sharp acceleration and braking (squealing tyres) increase wear-and- tear on your tyres. -
Page 176
Wheels and Tyres Changing wheels around We recommend that you have any work relating to tyres or wheels carried out by a specialist garage. Specialist garages have all of the necessary special tools and replacement parts available plus the required specialist knowledge and are also in a position to properly dispose of the old tyres. -
Page 177
Wheels and Tyres The date of manufacture is also stated on the tyre wall (possibly only on the inside Note of wheel): It is not normally possible to fit wheels from other models of cars for technical DOT … 50 08… reasons. -
Page 178
Wheels and Tyres Winter tyres WARNING The handling of your vehicle will be significantly improved when driving on wintry You must on no account drive your car at more than the permissible roads if you fit winter tyres. Summer tyres do not offer the same grip on ice, snow maximum speed for your winter tyres — risk of an accident resulting from and at temperatures below 7 °C because of their construction (width, rubber blend, tyre damage and loss of control over your car. -
Page 179
Wheels and Tyres Observe the national legal requirements relating to the maximum vehicle speed with snow chains. WARNING Please pay attention to the information in the supplied fitting instructions of the snow chain manufacturer. Caution You must take the chains off as soon as you drive on roads which are free of snow. They adversely affect the handling of your vehicle, damage the tyres and are rapidly destroyed. -
Page 180: Accessories, Changes And Replacement Of Parts
• tional faults. This interference can also impair not directly affected systems because Škoda Genuine Accessories which have been released for use and Skoda orig- of the networking of the electronic components. This means that the operating inal parts can be bought from specialist garages that professionally undertake the safety of your vehicle can be considerably jeopardized, a greater wear of vehicle assembly of parts which were purchased there.
-
Page 181
Accessories, changes and replacement of parts… -
Page 182: Breakdown Assistance
Breakdown assistance Breakdown assistance Breakdown assistance First-aid box*, Warning triangle* and bulb set* Please read carefully the instructions which are attached to the fire extin- guisher. The fire extinguisher must be checked by an authorised person or company annu- A space for stowing the first-aid box and the bulb set is located in a well of the ally (please observe the differing legal requirements).
-
Page 183: Vehicle Tool Kit
Breakdown assistance Vehicle tool kit Note Ensure that the box is always secured with the strap. Spray for repairing a tyre* Fig. 163 Luggage compart- ment: storage compartment for vehicle tool kit The vehicle tool kit and the lifting jack* are stowed in a box in the spare wheel* ⇒…
-
Page 184: Spare Wheel
Breakdown assistance • repair can be undertaken on the vehicle immediately. Please read the attached The warning label must not be covered after installing the wheel. • instructions carefully before the repair. Do not drive faster than 80 km/h with this spare wheel and pay particular atten- tion while driving.
-
Page 185
Breakdown assistance – Tighten the wheel bolts firmly, alternately and diagonally using the WARNING (continued) wrench* (crosswise) ⇒ page 186. prescribed distance from your vehicle while observing all national legal – Mount the full wheel trim/wheel trim cap or the caps. provisions. -
Page 186
Breakdown assistance Note Caution • • If you find, when changing the wheel, that the wheel bolts are corroded and Use the pressure of your hand, do not knock on the full wheel trim! Heavy difficult to turn, the bolts must be replaced before checking the tightening torque. knocks mainly on the points where the full wheel trim has not been inserted into •… -
Page 187
Breakdown assistance Wheel trim caps* Slackening wheel bolts – Push the wheel wrench* fully onto the wheel bolt – Grasp the end of the wrench* and turn the bolt about one turn to the ⇒ fig. left 169. Tightening wheel bolts –… -
Page 188
Breakdown assistance Raise vehicle WARNING You have to raise the vehicle with the lifting jack* in order to be able • Always raise the vehicle with the doors closed — risk of injury! to take off the wheel. • Take suitable measures to prevent the base of the lifting jack from slip- ping off — risk of injury! •… -
Page 189: Jump-Starting
Breakdown assistance – Reinstall the full wheel trim/wheel cap after removing the adapter or Jump-start cables place the cap onto the safety wheel bolt. Only use jump-start cables which have an adequately large cross-section and insu- lated terminal clamps. Please pay attention to the manufacturer’s instructions. –…
-
Page 190: Tow-Starting And Towing Vehicle
Breakdown assistance Start engine – Interrupt the attempt at starting an engine after 10 seconds if it does not start right away and wait for about 30 seconds before repeating the attempt. – Disconnect the cables on the engine in exactly the reverse order they were connected up.
-
Page 191
Breakdown assistance – Release the clutch particularly gently when starting off. Caution Driver of the towed vehicle If the gearbox of your vehicle no longer contains any oil because of a defect, your vehicle must only be towed in with the driven wheels raised clear of the ground, or –… -
Page 192
Breakdown assistance – Install again by positioning first of all the lugs of the grille in the guides – Wait until both vehicles are moving then release the clutch pedal on the vehicle and press in the grille. The protective grille must engage slowly. -
Page 193: Fuses And Light Bulbs
Fuses and light bulbs Fuses and light bulbs Electric fuses – Defect fuses can be detected by their melted metal strips. Replace the defect fuse by a new fuse of the same ampere number. Replacing fuses – Fit on the fuse cover again. Defect fuses must be replaced.
-
Page 194
Fuses and light bulbs Fuse cover in engine compartment Fuse assignment in engine compartment — version 1 The fuse box in the engine compartment exists in two different versions. You can determine which version your vehicle is fitted with after removing the fuse cover at the location of the fuses. Fig. -
Page 195: Fuse Assignment In Engine/Dash Panel
Fuses and light bulbs Fuse assignment in engine compartment — version 2 Fuse assignment in the dash panel Fig. 178 Schematic repre- sentation of fuse box in Fig. 179 Schematic repre- engine compartment — sentation of the fuse carrier version 2 in the dash panel Certain electrical components are only standard on certain vehicle model versions Certain electrical components are only standard on certain vehicle model versions…
-
Page 196: Bulbs
Fuses and light bulbs Power consumer Amperes Power consumer Amperes Power supply of the self-diagnosis Petrol engine: Control unit diesel engine: Control unit Brake lights Trailer socket, power socket in the luggage compart- Interior lighting, central locking system, interior lighting ment (without central locking system) Fog lights…
-
Page 197
Fuses and light bulbs Defect light bulbs should only be replaced with light bulbs of the same type. The Rear light unit Bulb (Octavia) Bulb (Combi) designation is located on the light socket or the glass bulb. Reversing light P21W P21W Changing certain bulbs is not something which you can do yourself, but requires to be done by a specialist. -
Page 198
Fuses and light bulbs – Press off the circlip from the cover and fold it in the direction of arrow Caution ⇒ fig. 180. Do not take hold of the glass bulb with naked fingers (even the smallest amount of –… -
Page 199
Fuses and light bulbs Main beam light and low beam light Note Get the headlight setting checked by a specialist garage after replacing the light bulb. Fog lights* Fig. 182 Change light bulbs for main beam lights and low beam lights Change light bulb for main beam light and low beam light –… -
Page 200
Fuses and light bulbs – Close the sprung wire clamp over the light socket. Press together the – Press the defective light bulb into the socket, turn to the left and sprung wire clamp and lock together again. remove. – Plug in plug. –… -
Page 201
Fuses and light bulbs – Press the defective light bulb into the socket, turn to the left and – Insert the light bulb holder again, the plastic tongue must lock in remove. place. – Insert the new light bulb and turn it to the right up to the stop. Licence plate light –… -
Page 202: Technical Data
Technical Data Technical Data Technical Data General information Weight The details given in the official vehicle registration documents always take prece- The loading capacity is reduced in line with the range of the special equipment. The dence over the details in the Owner’s Manual. Please refer to the official vehicle unloaden weight contains a fuel tank topped up to 90%.
-
Page 203: Fuel Consumption According To The Regulations (99/100/Eu)
Technical Data Gearbox code, paint number, interior equipment number, engine output, Urban traffic engine code The consumption measurement in urban traffic begins with starting of the cold Partial description of the vehicle engine. Afterwards the normal urban traffic is simulated. Vehicle identification number (VIN) Non-urban traffic The vehicle identification number — VIN (vehicle body number) is stamped into the…
-
Page 204: Dimensions
Technical Data Dimensions Dimensions (mm) OCTAVIA COMBI Length 4507 4513 Width 1731 1731 Width including exterior mirror 1984 1984 Height 1431/1455 1457/1481 Wheel base 2512 2512 Track gauge front / rear 1513/1494 1513/1494 Clearance The value corresponds to the status with rough road package. Using the system Safety Driving Tips…
-
Page 205: 1.4 Ltr./55 Kw — Eu4
Technical Data 1.4 ltr./55 kW — EU4 Engine Power output kW per rpm 55/5000 Maximum torque Nm per rpm 126/3800 Number of cylinders Displacement 1389 Fuel — unleaded petrol min. RON Performances OCTAVIA — M5 COMBI — M5 Maximum speed km/h Acceleration 0 — 100 km/h 15,3…
-
Page 206
Technical Data Capacities (in liter) Fuel tank capacity/of which spare 55/7 Reservoir for windscreen washer system/ with headlight cleaning system 3/5,5 Engine oil Cooling system of the vehicle Oil capacity with oil filter change. Inspect oil level according to filling — see Owner’s Manual. Weight (in kg) OCTAVIA — M5 COMBI — M5… -
Page 207: 1.6 Ltr./75 Kw — Eu4/Eu2 Ddk
Technical Data 1.6 ltr./75 kW — EU4/EU2 DDK Engine Power output kW per rpm 75/5600 Maximum torque Nm per rpm 148/3800 Number of cylinders Displacement 1595 Fuel — unleaded petrol min. RON Performances OCTAVIA — M5 COMBI — M5 Maximum speed km/h Acceleration 0 — 100 km/h 11,8…
-
Page 208
Technical Data Capacities (in liter) Fuel tank capacity/of which spare 55/7 Reservoir for windscreen washer system/ with headlight cleaning system 3/5,5 Engine oil Cooling system of the vehicle Oil capacity with oil filter change. Inspect oil level according to filling — see Owner’s Manual. Weight (in kg) OCTAVIA — M5 COMBI — M5… -
Page 209: 1.8 Ltr./110 Kw — Eu4/Eu3D
Technical Data 1.8 ltr./110 kW — EU4/EU3D Engine Power output kW per rpm 110/5700 Maximum torque Nm per rpm 210/1750-4600 Number of cylinders Displacement 1781 Fuel — unleaded petrol min. RON Performances OCTAVIA — M5 COMBI — M5 Maximum speed km/h Acceleration 0 — 100 km/h Fuel consumption (in ltr./100°km) and CO…
-
Page 210
Technical Data Capacities (in liter) Fuel tank capacity/of which spare 55/7 Reservoir for windscreen washer system/ with headlight cleaning system 3/5,5 Engine oil Cooling system of the vehicle Oil capacity with oil filter change. Inspect oil level according to filling — see Owner’s Manual. Weight (in kg) OCTAVIA — M5 COMBI — M5… -
Page 211: 1.9 Ltr./66 Kw Tdi — Eu3
Technical Data 1.9 ltr./66 kW TDI — EU3 Engine Power output kW per rpm 66/4000 Maximum torque Nm per rpm 210/1900 Number of cylinders Displacement 1896 Fuel Diesel Performances OCTAVIA — M5 COMBI — M5 Maximum speed km/h Acceleration 0 — 100 km/h 13,0 13,3 Fuel consumption (in ltr./100°km) and CO…
-
Page 212
Technical Data Capacities (in liter) Fuel tank capacity/of which spare 55/7 Reservoir for windscreen washer system/ with headlight cleaning sys- 3/5,5 Engine oil Cooling system of the vehicle Oil capacity with oil filter change. Inspect oil level according to filling — see Owner’s Manual. Weight (in kg) OCTAVIA — M5 COMBI — M5… -
Page 213: 1.9 Ltr./74 Kw Tdi Pd — Eu4
Technical Data 1.9 ltr./74 kW TDI PD — EU4 Engine Power output kW per rpm 74/4000 Maximum torque Nm per rpm 240/1800 Number of cylinders Displacement 1896 Fuel Diesel Performances OCTAVIA — M5 COMBI — M5 Maximum speed km/h Acceleration 0 — 100 km/h 11,8 11,9 Fuel consumption (in ltr./100°km) and CO…
-
Page 214
Technical Data Capacities (in liter) Fuel tank capacity/of which spare 55/7 Reservoir for windscreen washer system/ with headlight cleaning system 3/5,5 Engine oil Cooling system of the vehicle Oil capacity with oil filter change. Inspect oil level according to filling — see Owner’s Manual. Weight (in kg) OCTAVIA — M5 COMBI — M5… -
Page 215: Octavia — Vehicles Of The Group N1
Technical Data Octavia — Vehicles of the group N1 Engine 1.4 ltr./55 kW — EU4 1.6 ltr./75 kW — EU4 1.8 ltr./110 kW — EU4 1.9 ltr./74 kW TDI PD — EU4 Permissible gross weight 1690 1720 1775 1785 Unloaden weight ready for work 1230 1260 1315…
-
Page 216: Index
Index Index Auto Computer ……19 Brakes ……..133 Automatic seat adjustment .
-
Page 217
Index Child seat ……..126 Counter for distance driven ….18 Electronic stability programme . -
Page 218
Index Fixing net Hazard warning light system ….52 Combi ……..70 Warning light . -
Page 219
Index Locking and unlocking from inside … . . 40 Opening a single door ……38 Rear armrest . -
Page 220
Index Height adjustment ….. . . 111 Safety information ….. . . 109 taking off . -
Page 221
Index Windshield washer system ….172 Warning light ……31 Windshield wiper . -
Page 222
Škoda Auto pursues a policy of constant product and model development. We trust Reprinting, reproduction or translation, either in whole or in part, is not permitted that you will understand that changes to models in terms of shape, equipment and without the written consent of Škoda Auto. -
Page 223
SIMPLY CLE VER ŠkodaService ŠkodaGenuine Parts ŠkodaGenuine Accessories… -
Page 224
Look up „Environment“ in the Index to find out more. Please also refer to all the texts identified with a in this Owner ´ s Manual. Make your contribution — for the sake of the environment. www.skoda-auto.com Návod k obsluze Octavia Tour anglicky 05.09 S63.5610.34.20 1U0 012 003 KT…
Руководство на английском языке по техническому обслуживанию и ремонту автомобиля Skoda Octavia с 1996 года выпуска.
- Автор: —
- Издательство: Skoda Auto
- Год издания: 1996
- Страниц: —
- Формат: PDF
- Размер: 225,9 Mb
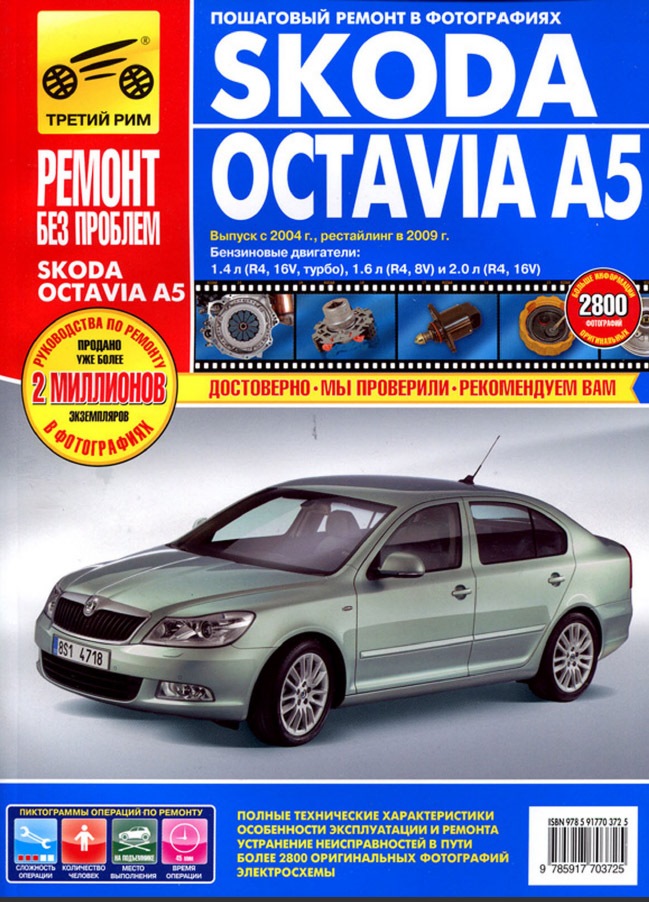
Руководство по техническому обслуживанию и ремонту автомобиля Skoda Octavia 1998-2004 годов выпуска с бензиновыми и дизельными двигателями.
- Автор: —
- Издательство: Алфамер
- Год издания: —
- Страниц: 424
- Формат: —
- Размер: —

Мультимедийное руководство по эксплуатации и ремонту автомобиля Skoda Octavia с 1996 года выпуска.
- Автор: —
- Издательство: —
- Год издания: —
- Страниц: —
- Формат: ISO
- Размер: 87,4 Mb
Мультимедийное руководство по эксплуатации и ремонту автомобиля Skoda Octavia с 1996 года выпуска с бензиновыми и дизельными двигателями.
- Автор: —
- Издательство: —
- Год издания: —
- Страниц: —
- Формат: —
- Размер: 201,5 Mb

Руководство по техническому обслуживанию и ремонту автомобиля Skoda Octavia с 2004 года выпуска.
- Автор: —
- Издательство: Skoda Auto
- Год издания: 1996
- Страниц: —
- Формат: PDF
- Размер: 864,2 Mb

Руководство по техническому обслуживанию и ремонту автомобиля Skoda Octavia с 1996 года выпуска.
- Автор: —
- Издательство: Skoda Auto
- Год издания: 1996
- Страниц: —
- Формат: PDF
- Размер: 486,5 Mb

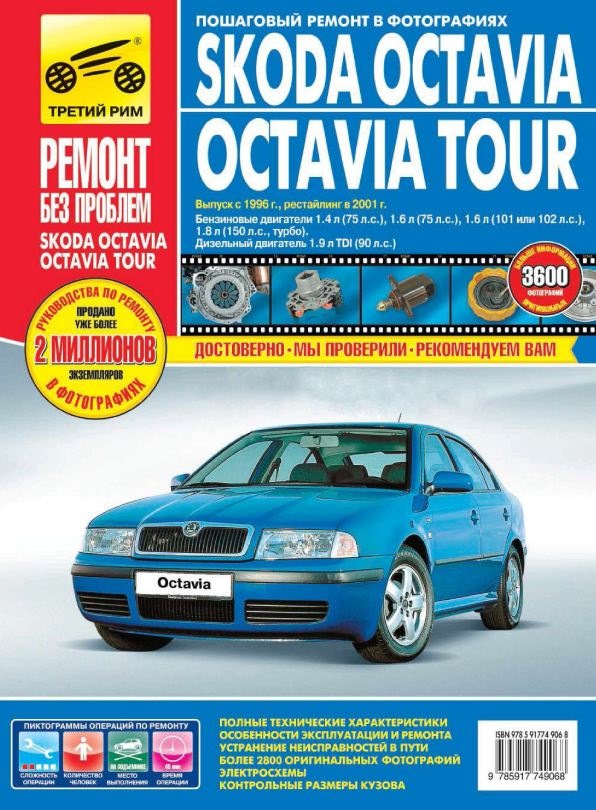
Руководство по эксплуатации и ремонту автомобилей Skoda Octavia и Skoda Octavia Tour 1996-2010 годов выпуска с бензиновыми и дизельными двигателями.
- Автор: —
- Издательство: Монолит
- Год издания: —
- Страниц: 356
- Формат: —
- Размер: —

Руководство по эксплуатации и ремонту автомобилей Skoda Octavia/Combi II/Scout серии A5 с 2004 года выпуска с бензиновыми и дизельными двигателями
- Автор: —
- Издательство: Монолит
- Год издания: —
- Страниц: 298
- Формат: —
- Размер: —
Руководство по эксплуатации и ремонту автомобилей Skoda Octavia II/Combi/Scout с 2008 года выпуска с бензиновыми и дизельными двигателями.
- Автор: —
- Издательство: Монолит
- Год издания: —
- Страниц: 476
- Формат: —
- Размер: —
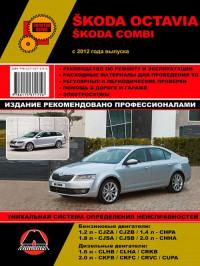
Руководство по эксплуатации и ремонту автомобилей Skoda Octavia и Skoda Octavia Combi с 2012 года выпуска с бензиновыми и дизельными двигателями.
- Автор: —
- Издательство: Монолит
- Год издания: —
- Страниц: 606
- Формат: —
- Размер: —

Руководство по эксплуатации и ремонту автомобилей Skoda Octavia с 2019 года выпуска с бензиновыми двигателями объемом 1,4/1,6/2,0 л.
- Автор: —
- Издательство: Монолит
- Год издания: —
- Страниц: 482
- Формат: —
- Размер: —

Руководство по эксплуатации и техническому обслуживанию автомобиля Skoda Octavia серии A5.
- Автор: —
- Издательство: Skoda Auto
- Год издания: 2011
- Страниц: 266
- Формат: PDF
- Размер: 3,9 Mb
Руководство по эксплуатации и техническому обслуживанию автомобиля Skoda Octavia серии A7.
- Автор: —
- Издательство: Skoda Auto
- Год издания: 2013
- Страниц: 308
- Формат: PDF
- Размер: 14,1 Mb
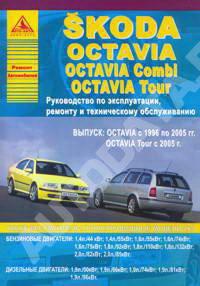
уководство по эксплуатации, техническому обслуживанию и ремонту автомобилей Skoda Octavia/Octavia Combi 1996-2005 гг и Octavia Tour с 2005 года выпуска с бензиновыми и дизельными двигателями.
- Автор: —
- Издательство: Арго-Авто
- Год издания: —
- Страниц: 728
- Формат: —
- Размер: —
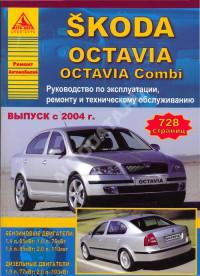
Руководство по эксплуатации, техническому обслуживанию и ремонту автомобилей Skoda Octavia/Octavia Combi с 2004 года выпуска с бензиновыми и дизельными двигателями.
- Автор: —
- Издательство: Арго-Авто
- Год издания: —
- Страниц: 728
- Формат: —
- Размер: —
Руководство по эксплуатации, техническому обслуживанию и ремонту автомобилей Skoda Octavia/Octavia Combi/RS/Scout с 2008 года выпуска с бензиновыми и дизельными двигателями.
- Автор: —
- Издательство: Арго-Авто
- Год издания: —
- Страниц: 808
- Формат: —
- Размер: —
Руководство по эксплуатации, техническому обслуживанию и ремонту автомобилей Skoda Octavia/Octavia Combi/RS с 2013 года выпуска с бензиновыми и дизельными двигателями.
- Автор: —
- Издательство: Анта-Эко
- Год издания: 2014
- Страниц: 592
- Формат: —
- Размер: —
Руководство по эксплуатации, техническому обслуживанию и ремонту автомобиля Skoda Octavia 1996-2002 годов выпуска с бензиновыми и дизельными двигателями.
- Автор: —
- Издательство: Автомастер
- Год издания: 2006
- Страниц: 297
- Формат: DjVu
- Размер: 24,1 Mb
Руководство по эксплуатации, техническому обслуживанию и ремонту автомобиля Skoda Octavia с 2004 года выпуска с бензиновыми двигателями объемом 1,4/1,6/2,0 л.
- Автор: —
- Издательство: Третий Рим
- Год издания: —
- Страниц: 334
- Формат: —
- Размер: —

Руководство по эксплуатации, техническому обслуживанию и ремонту автомобилей Skoda Octavia и Scoda Octavia Tour с 1996 года выпуска с бензиновыми двигателями объемом 1.4/1.6/2.0 л.
- Автор: —
- Издательство: Мир Автокниг
- Год издания: 2008
- Страниц: 496
- Формат: PDF
- Размер: 366,9 Mb
Руководство по эксплуатации, техническому обслуживанию и ремонту автомобиля Skoda Octavia с 2013 года выпуска.
- Автор: —
- Издательство: Мир Автокниг
- Год издания: —
- Страниц: 384
- Формат: —
- Размер: —
Руководство по эксплуатации, техническому обслуживанию и ремонту автомобиля Skoda Octavia с 2013 года выпуска.
- Автор: —
- Издательство: Мир Автокниг
- Год издания: —
- Страниц: 384
- Формат: —
- Размер: —

- Руководства по ремонту
- Руководство по ремонту Шкода Октавия 1996-2002 г.в.
Руководство по ремонту Skoda Octavia / Шкода Октавиа
Общая информация об автомобиле.
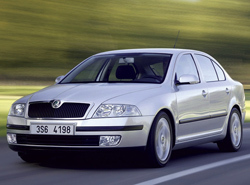
С концепцией этого автомобиля маркетологи попали в точку – он предназначен для широкого круга потребителей из европейских стран, которые во главу угла ставят практичность и умеренную стоимость. В середине 90-х годов было не много новых автомобилей, которые соответствовали этим критериям, и Octavia пришлась как нельзя кстати.
Чтобы снизить себестоимость, машину разработали на платформе А IV, ставшей общей для шести моделей концерна Volkswagen: VW Golf IV и Bora, Seat Toledo и Leon, Audi A3 и, собственно говоря, Skoda Octavia. Напомним, что с 1991 года чешская компания входит в состав Volkswagen. Вся техническая начинка была позаимствована у «родственников» по концерну – в Octavia применяются двигатели, трансмиссия и ходовая часть, успешно прошедшие испытание временем на многих моделях Volkswagen конца 80-х – начала 90-х годов. С чистого листа созданы только кузова «чешки», выбор которых также был предложен с учетом концепции модели – это 5-дверные лифтбеки и универсалы Combi с вместительными багажными отделениями, которые являются одними из наибольших не только среди соплатформенных моделей, но и среди «одноклассников» вообще. Плюс ко всему Octavia отличается и большой грузоподъемностью – около 580 кг!
Еще одна маркетинговая хитрость создателей, на которую купились потребители: «чешка» выглядит заметно крупнее своих «родственников» и очень схожа с более престижным Passat (В5), но стоит намного дешевле. Так почему рациональным потребителям было не купить чешскую машину?
Пришлась по душе Skoda Octavia и отечественным автолюбителям – спрос на нее оказался настолько высок, что было принято стратегически важное решение наладить ее сборку в Украине – с 2002 года эту модель собирают на заводе «Еврокар» в Соломоново (Закарпатская область).
Кузова Octavia оцинкованы, и коррозии не подвержены даже автомобили первых годов выпуска. Если же обнаружите ржавчину, то, как правило, это следствие некачественного ремонта после аварии.
Как правило, чаще всего у нас встречаются богато оснащенные машины в комплектации Ambient и Elegance. В последней можно встретить центральный замок, электропакет, передние подушки безопасности, кондиционер, ABS, литые колесные диски и «противотуманки». Хотя под заказ Octavia можно было укомплектовать еще «круче». Самую богатую версию Laurin&Klement можно узнать по кожаной отделке салона кремового цвета. Правда, такие автомобили в Украине – редкость. Сказывается высокая начальная стоимость. Машина в базовой комплектации Classic, как правило, оснащалась маломощным 75-сильным мотором, а скромный список ее оборудования включал гидроусилитель, рулевую колонку с регулируемой высотой, иммобилайзер и радиоподготовку.
Как правило, встречаются Octavia, оснащенные бензиновыми двигателями объемом от 1,6 до 2,0 л. Дизельные версии попадаются реже. Не встречаются и маломощные 1,4-литровые (официально они к нам не завозились). Кстати, один из 1,4-литровых агрегатов имеет одинаковую с 1,6-литровым мотором мощность – 75 л. с.
На агрегатах Octavia водяной насос приводится в действие ремнем ГРМ, поэтому при его замене (через каждые 60 тыс. км) рекомендуется обязательно проверить состояние «помпы». Если ее вал люфтит или подтекает антифриз, срочно замените насос, иначе встреча клапанов с поршнями станет неизбежной.
Мотористы фирменной СТО рассказали, что в 1,6-литровых 75-сильных двигателях были отмечены выходы из строя расходомеров воздуха. Причина – не совсем удачная конструкция воздухозаборного патрубка, в котором на входе установлена фильтрационная сетка. Со временем она забивается, что приводит к повышению нагрузки на потенциометр расходомера и в итоге – к его поломке. На других двигателях конструкцию патрубка усовершенствовали, убрав эту злополучную сетку.
Самый беспроблемный бензиновый агрегат – 1,6-литровый 101-сильный. Он отличается от аналогичного по объему 75-сильного собрата, который устанавливался еще на VW Golf II и Passat (B3), тем, что это более современный мотор с алюминиевым блоком и головкой блока цилиндров, более высокой степенью сжатия, другим диаметром цилиндров и ходом поршня.
2,0-литровые двигатели частенько потребляют больше масла, нежели остальные. По утверждению сервисменов, в отличие от моторов Audi 1,8 Т (150 л. с.), в аналогичном «шкодовском» агрегате маслоподводящий патрубок турбины не закоксовывается, хотя во время ТО проверить его состояние все же стоит.
↓ Комментарии ↓
1. Техническое обслуживание
1.0 Техническое обслуживание
1.1 Что должен знать водитель о своем автомобиле Шкода Октавия
1.2 Основные размеры автомобиля Шкода Октавия
1.3 Основные технические данные автомобилей Шкода типового ряда Октавия
1.4 Активная и пассивная безопасность автомобилей Шкода Октавия
1.5 Что означают омологические символы
1.6 Идентификационные номера
1.7 Материалы автомобиля для переработки
1.8 Оснащенность и обслуживание автомобилей Шкода Октавия
1.9 Технические осмотры и уход
2. Кузов
2.0 Кузов
2.1 Несущая часть кузова – каркас
2.2 Передние крылья
2.3 Пластмассовые подкрылки передних крыльев
2.4 Крышка моторного отсека (капот)
2.5 Накладка разделяющей перегородки
2.6 Двери и их уплотнение в раме кузова
2.7 Стекла дверей и их уплотнение
2.8 Стеклоподъемник окон дверей
2.9 Замки дверей
2.32. Кузов, передняя часть
2.33. Капот двигателя
2.34. Крышка багажника
2.35. Передние двери
2.36. Задние двери
2.37. Откидной люк в крыше автомобиля
2.38. Передний бампер
2.39. Задний бампер
2.40. Крышки
2.41. Защитные накладки
2.42. Рейка крыши
2.43. Наружное зеркало заднего вида
2.44. Внутреннее зеркало заднего вида
2.50. Панель приборов
2.51. Кабельная электропроводка
2.53. Наружное освещение автомобиля
2.58. Интерьер автомобиля (салон)
2.59. Приборная доска
2.60. Руль
2.61. Сидения передние и задние
3. Агрегат привода
3.0 Агрегат привода
3.1 Монтаж агрегата привода в кузове
3.2. Двигатели
4. Сцепление
4.0 Сцепление
4.1. Ремонт привода управления сцеплением
5. Коробки передач
5.0 Коробки передач
5.1. Механически управляемые коробки передач
5.2. Автоматическая коробка передач 01М
5.3. Ремонт коробки передач 02J
5.4. Ремонт коробки передач 02K
6. Топливная система
6.0 Топливная система
6.1 Топливный бак в сборе
6.2 Топливопроводы
6.3 Электрический топливный насос (только для бензиновых двигателей)
6.4 Система деаэрации топливной системы в бензиновом двигателе
6.5. Всасывание и фильтрация воздуха
7. Система охлаждения
7.0 Система охлаждения
7.1 Охлаждающая жидкость
7.2. Радиаторы и вентиляторы
7.3 Термостат
7.4 Расширительный бачок охлаждающей жидкости и его пробка
7.5 Соединительные шланги системы охлаждения и стягивающие хомуты
8. Выхлопная система
8.0 Выхлопная система
8.1 Выхлопная система в сборе (двигатель 1,6 – 55 кВт)
8.2 Выхлопная система в сборе (двигатель 1,8–92 кВт)
8.3 Выхлопная система в сборе (двигатель 1,9 TDI – 66 кВт)
9. Ходовая часть
9.0 Ходовая часть
9.1 Карданные ведущие валы
9.2. Передний мост
9.3. Задний мост
9.4. Подвеска
10. Колеса и шины
10.0 Колеса и шины
10.1 Диски колес
10.2 Шины
10.3 Колпаки колес
10.4 Колеса (установка и геометрия)
10.5 Рекомендуемые величины установки колес
11. Тормоза
11.0 Тормоза
11.1 Тормозная жидкость
11.2 Дисковые тормоза передних колес
11.3. Тормоза задних колес
11.4 Регулятор нагрузки
11.5. Вакуумный усилитель тормозов, главный тандемовый цилиндр
11.6 Тормозные трубопроводы и шланги
11.7. Тормозная система с ABS
11.8 ABS, применяемая в автомобилях Шкода типового ряда Октавия
11.9 Ручник – рычаг управления стояночным тормозом
12. Электросхемы
12.0 Электросхемы
12.1 Структура принципиальных схем электрооборудования
12.2 Символы, встречающиеся в схемах соединений
12.3 Пояснения к символам
12.4. Основная схема –»»OCTAVIA»», начиная с августа 1996 г.