+7 (863) 210-11-44
Покупай как юр. лицо
ЖурналАкцииКонфигураторДоставкаМагазиныОбратная связь
Каталог товаров
Войти
Избранное
Сравнение
Корзина
Бытовая техника
Техника для уборки
Пылесосы
TEFAL
4
2
Отзыва
Код товара: 1655006

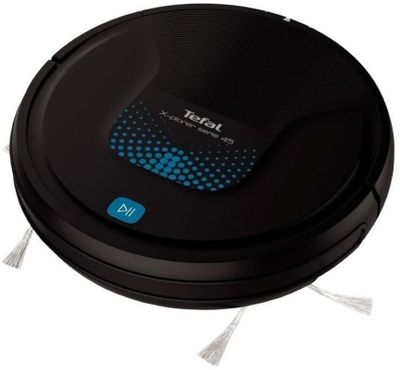


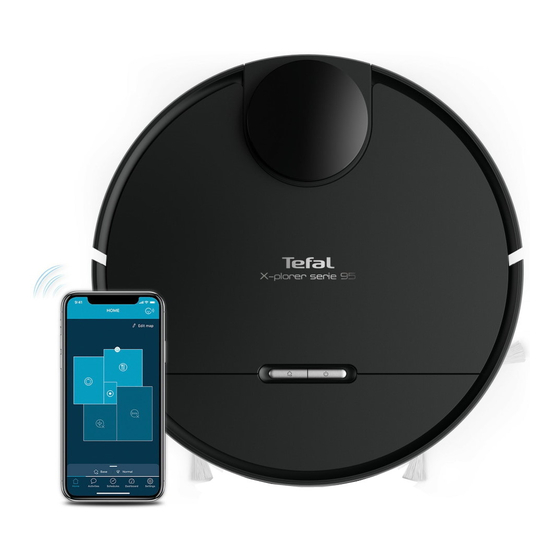
Робот-пылесос Tefal X-Plorer Serie 45 RG8275WH, черный [2211401051]
Код товара: 1655006
17 850₽
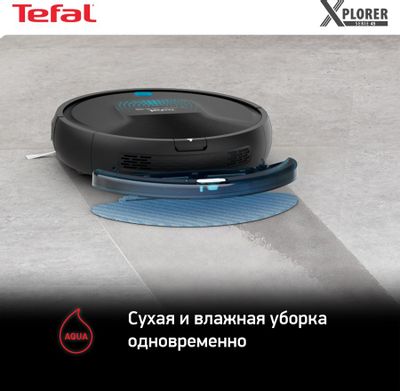
- Тип уборки: сухая/влажная;
- Пылесборник: контейнер; объем пылесборника: 0.44 л;
- Аккумулятор: Li-Ion;
- Насадки: боковые щетки;
- Датчики: падения,
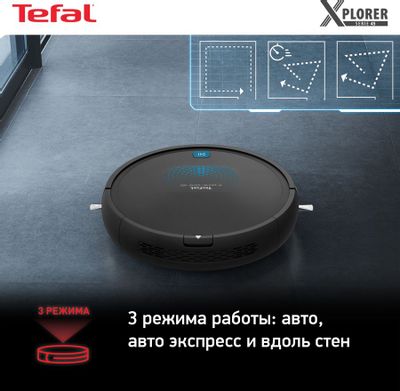
- Режимы: уборка вдоль стены,
Появились вопросы о товаре?

- Тип уборки: сухая/влажная;
- Пылесборник: контейнер; объем пылесборника: 0.44 л;
- Аккумулятор: Li-Ion;
- Насадки: боковые щетки;
- Датчики: падения,
- Режимы: уборка вдоль стены,
Появились вопросы о товаре?
17 850₽
17 850₽
О товаре
Характеристики
Аксессуары
Услуги5
Обзоры
Отзывы2
Вопрос-ответ4
Инструкции и документы3
Хочу быть в курсе акций и новинок
Контакты
Адреса магазинов
+7 (863) 210-11-44
- Журнал
- Акции
- Покупателям
- Информация
- Доставка
- Гарантия
- Кредит и рассрочка
- Сервисные центры
- Услуги
- Корпоративным клиентам
- Аренда помещений
- Партнёрская программа
- Обзоры
- Форум
- Клуб Ситилинк
- Конфигуратор
- Подбор расходных материалов
- Ситилинк
- Новости
- Вакансии
- Документы
© Ситилинк, 2008 – 2023
Политика обработки персональных данных
Мы используем файлы cookie. Подробнее
Мы используем файлы cookie для вашего удобства пользования сайтом и повышения качества рекомендаций. Подробнее
Главная
Каталог
Корзина
Избранное
Сравнение
Войти
-
Consumer services
>
-
User manual, instruction for use
>
-
Floor care
>
-
Robot vacuum cleaner
>

User manual and frequently asked questions EXPLORER SERIE 20
My best cleaning partner, even for mopping the floors
Tefal Explorer Serie 20 is an autonomous robot vacuum cleaner which attacks dust and dirt on hard floors. An automatic cleaning experience which is not only easy to handle, but promotes good level of cleaning performance. Qualitative technology combined with user-friendly interface features leading to satisfying results. A must for all hard floors.
Reference : RG6875WH
Frequent questions
Do not vacuum wet surfaces, any type of liquids, hot substances (embers, cigarettes), super fine substances (plaster, cement, ash, etc.), large sharp waste (glass), harmful products (solvents, abrasives, etc.), aggressive products (acids, cleaning products, etc.), inflammable and explosive products (oil or alcohol based).
Place the charging base station against a wall, on a flat surface and where the robot vacuum cleaner can easily find it.
This location must be free of any obstacles (including rugs). Leave at least 1,5 metre of space free to the left and the right, and 2 metres at the front of the base station. If the station is placed in a corner or difficult to find, the robot vacuum cleaner will not be able to reach it.
Place the base station’s power cable along the wall.
For more information, refer to the instructions in your user manual.
Leave the charging base station plugged in permanently (the automatic recharge function will not be available if the charging station is not activated).
Yes, your robot vacuum cleaner is equipped with drop sensors that detect stairs and gaps.
However, in some situations, the sensors are not as efficient. For example, curved staircase edges, rugs next to stairs, slippery surfaces and obstructions might affect the sensors’ performance.
Before running the robot vacuum cleaner ensure space has no obstacles, power cords, clothing, or other potentially dangerous objects which might cause the appliance breakdown or other accidents.
Yes, the robot can be charged on the charging station, even when the robot’s main power switch is turned off.
Check that the switch underneath the robot is correctly in the ‘ON’ position.
Empty the dust container into a bin after each use. Clean the dust compartment seals with a cloth.
It is recommended to clean the central brush once a week.
For more details, please refer to the User Manual.
It is recommended to clean the filters at least once a week.
For more details, please refer to the User Manual.
It is necessary to clean left, right and front wheels regularly to remove entangled hair and threads.
It is recommended to wipe sensors and charging terminals (of the robot and charging base) with a clean dry cloth once a week.
Turn off the robot before cleaning the sensors and charging terminals.
Do not use any cleaning products to clean the robot vacuum cleaner.
For some parts you can use the water, for the others you can use the dry cloth only. For more details, refer to the instruction manual.
It is recommended to replace the fine dust and foam filter every 6 months.
The side brushes should be replaced by new every 6 months.
Do not use your appliance. In order to avoid any danger, you must have them replaced by an approved vacuum repair company.
Do not use your appliance. To avoid any danger, do not touch the terminals. You must unplug the charging station and have it replaced by an approved vacuum repair company.
Check:
• If the dust container is full.
• The cleanliness of the filters.
• If there is an object or rubbish which may be obstructing the suction hole underneath the robot.
Several possible reasons exist:
• If the robot did not start from its docking station, it will not return to it. In this case, the robot will return to its starting point.
• If the robot vacuumed in Spot mode, the robot will return to its starting point.
• If the robot is lifted up and put back down on the floor, it will try to relocate itself. If it can’t, it will return to its starting point.
Check the following:
• The charging station must not be installed on a rug.
• The charging station must not be exposed to sunlight or near a heat source.
• The free space to the side and the front of the charging station adheres to the instructions in the user manual.
• The plug is correctly connected to the charging station.
• The charger cable is connected to the power supply.
• There are no obstructing objects around the charging base.
• There are no objects near the charging station terminals.
• The charging station is activated (LED indicator is green).
If after checking these elements, the robot still cannot find the base station, contact an approved vacuum repair company.
You can perform the following actions:
• Turn off and then turn on the main power switch.
• Unplug the cable and plug it again into the charging station.
• Make sure that the charging terminals and the sensor windows are not clogged up, then wipe the main body and the charging station with a dry cloth. Do not forget to switch off the main power switch and to turn off the robot before drying carefully.
• Check if there is no obstacle such as a reflective object, a chair, etc. near the charging station.
If after these steps, the automatic charging still does not work well, contact an approved vacuum repair company.
This is a regular case. The vacuum cleaner can remain connected to the docking station without any risk.
Caution: use only designated charger.
Check the following:
• If the switch underneath the robot is correctly in the ‘ON’ position.
• If the display is lit up. If not, charge up the robot on the base station.
Check the following:
• There are no obstucting objects under the wheels.
• The robot is not blocked due to differences in the floor level.
• There is no error message displayed. (see the troubleshooting and error codes section in your user manual)
You can perform the following actions:
• Make sure there are no obstructing objects within 10 cm of the staircases/gaps.
• Wipe up the sensor windows with a dry cloth.
If after these steps, the problem persists, please contact an approved vacuum repair company.
Make sure that the brush is not obstructed. Clean the brush from entangled hair and threads.
If the brush is damaged, replace it with a new one.
Flashing light and sound signal indicates an error.
For more details about the error description and solution, refer to User Manual.
You can perform the following actions:
• Check if the intake channel is not obstructed.
• Check if the dust bin is well fitted.
• Empty the dust bin if it is full.
• Remove the central brush and clean it.
• Check if the filter is not saturated.
If after these steps, the problem persists, please contact an approved vacuum repair company.
The power-brush safety feature is activated when the robot identifies a risk.
Two situations may occur:
• The power-brush gets stuck: the robot attempts to free it and stops the vacuuming and the power-brush.
• The robot will try to free the brush: if it can’t, it will turn off and you will have to clear it manually.
If the power-brush gets stuck in thick carpeting due to its long and/or thick fibers, or the robot has vacuumed the carpet for a long time, the power-brush will stop turning and the robot will continue vacuuming without it.
The robot may experience certain problems represented by error codes.
For more details about the error codes description and solution, refer to User Manual.
The filter may be inserted incorrectly. Try positioning the filter correctly into the slot on its holder.
After following the instructions in the user manual for starting the appliance, make sure that your electrical socket is working by plugging another appliance. If it still does not work, do not try to dismantle or repair the appliance yourself, instead, take it to an approved repair centre
No, the appliance is designed for indoor use only.
Yes, the robot vacuum cleaner’s sensors do not require the light to process the cleaning session.
The robot vacuum cleaner is efficient on the hard floor surfaces, including tile, parquet, laminate, vinyl, and carpets not thicker than 1,5cm.
Yes, it is recommended to use the robot vacuum cleaner to maintain the cleanliness, but there are still surfaces where the robot does not perform as efficient as non-robotic vacuum cleaners.
Yes, you can schedule a single cleaning session or set up a daily cleaning function through the mobile application.
The robot is limited to one program per day in order to ensure optimum cleaning of all accessible rooms.
Yes. The robot will switch to sleep mode when it is fully recharged.
Yes, the robot will automatically return to the charging base when the battery is low during cleaning.
Once charging is complete, the vacuum cleaner will restart the cleaning process.
This is because the robot didn’t start from its docking station: since the robot returns to its starting point, it will go back to where it began vacuuming in Spot mode.
Your appliance contains valuable materials which can be recovered or recycled. Leave it at a local civic waste collection point.
Please go to the “Accessories” section of the website to easily find whatever you need for your product.
Find more detailed information in the Guarantee section of this website.
If you believe that one part is missing, please call Consumer Services Center and we will help you find a suitable solution.
- Manuals
- Brands
- TEFAL Manuals
- Vacuum Cleaner
- X-plorer 95 Series
- User manual
-
Bookmarks
Quick Links
EN User’s guide
RU Руководство пользователя
PL Podręcznik użytkownika
ET Kasutusjuhend
X-plorer Serie 95
LV Lietotāja rokasgrāmata
LT Naudotojo vadovas
TR Kullanım kılavuzu
KK Пайдаланушы нұсқаулығы
1.
2.
3.
4.
5.
6.
7.
TEST
Related Manuals for TEFAL X-plorer 95 Series
Summary of Contents for TEFAL X-plorer 95 Series
-
Page 1
EN User’s guide LV Lietotāja rokasgrāmata RU Руководство пользователя LT Naudotojo vadovas PL Podręcznik użytkownika TR Kullanım kılavuzu KK Пайдаланушы нұсқаулығы ET Kasutusjuhend TEST X-plorer Serie 95… -
Page 2
KK Бірінші пайдалану алдында «Қауіпсіздік және пайдалану жөніндегі нұсқауларды» мұқият оқып шығыңыз EN For more information RU Для получения дополнительной информации PL Więcej informacji można znaleźć na stronie ET Lisateave LV Plašāka informācija LT Daugiau informacijos TR Daha fazla bilgi KK Толығырақ ақпарат www.tefal.com… -
Page 4
stool obstructions on staircases. cable EN : 9. Zderzak antykolizyjny 6. Mygtukas dulkių dėžutei ir ex. shoes books 1. Power / Start Pause 10. Czujnik wykrywania ścian vandens bakui išimti bowl 2. LDS (Laser Distance Sensor) 7. Dulkių dėžutė ir vandens ET : 3. -
Page 5
EN : 9. Filtr silnika 5. Vandens įleidimo anga EN : ET : TR : 1. Dust box and water tank 10. Filtr piankowy 6. Vandens įleidimo angos dangtelis 1. Anti-drop sensor 1. Kukkumiskaitse andur 1. Düşme önleyici sensör 2. Water outlet adapter 11. -
Page 6
EN : LV : 1. Lock 1. Fiksators Remove the bottom cover and connect the docking station with the adapter, and 2. Water outlet 2. Ūdens izplūde pay attention to arranging adapter connection wires to avoid being wound during 3. Removal button 3. -
Page 7
1. 1. 1. 1. 0.5m 0.5m 1.5m To place the docking station, make sure there is an empty area of 0.5m on the side Connect the adapter to a wall socket. The docking station lights when the robot is not and 1.5m in front of the docking station. -
Page 8
1. 1. Please fully charge the robot before using it for the first time. To do so, place the In order to extend the battery lifespan, always keep the robot charging on the docking robot on the docking station and align it to the charging terminal. When the robot is station while not using it. -
Page 9
Robotil on treppide ja avade tuvastamiseks kukkumisandurid. Kui robot need tuvastab, siis ta muudab suunda. Põrandapinna tasemeerinevuste õigeks tuvastamiseks tagage, et avade, treppide või trepiastmete läheduses ei ole maas esemeid (kotte, kingi jne). Robot ilma esemeteta trepi peal Robot kingade, kottide või muude esemetega trepi peal (robot ei suuda treppi õigesti tuvastada ja kukub). -
Page 10
1. 1. Press the button during 3 seconds to turn on power (when the robot is not being When the robot is turned on, press the button to start automatic cleaning (or use charged). The white indicator will be normally set on. X-plorer Series 75/95 app, see section 2). -
Page 11
1. 1. 1. 1. Odkurzacz automatycznie powraca do stacji dokującej w przypadku zaistnienia Robot açıldığında otomatik temizlemeyi başlatmak için düğmeye basın (veya jednego z poniższych warunków: X-plorer Series 75/95 uygulamasını kullanın, bkz. bölüm 2). • Odkurzacz zakończył sprzątanie Temizlemeyi duraklatmak için tekrar düğmeye basın . -
Page 12
1. 1. 1.5 m 1.5 m To fully benefit all the possibilities of your robot, download the free app “Tefal X-plorer Press the button during 3 seconds to start spot cleaning mode. The robot will Series 75&95” (you can use the QR code above to find it on AppStore or Google play) focus on a 1,5m x 1,5m specific area. -
Page 13
When the white indicator is flashing slowly, the device is waiting for connection. When the white indicator is flashing rapidly, the device is connecting WIFI. When the white indicator is normally set on, the device is connected ! Если белый индикатор медленно мигает, устройство ожидает подключения. Если белый… -
Page 14
month Wipe robot sensors with a dry, soft cloth including: • Wall sensor on the right side of the robot • Four anti-drop sensors on the bottom of the robot • Infrared anti-collision sensor in front of the robot on the bumper Please also wipe charging electrodes and the window of the charging dock regularly Протрите… -
Page 15
month month Aşağıdakiler de dahil olmak üzere robot sensörlerini kuru, yumuşak bir bezle temizleyin: • Robotun sağ tarafındaki duvar sensörü • Robotun alt tarafındaki dört düşme önleyici sensör • Tampon üzerinde robotun ön tarafındaki kızılötesi çarpışma önleyici sensör Lütfen şarj etme elektrotlarını ve şarj istasyonu penceresini de düzenli olarak temizleyin Төмендегілерді… -
Page 16
month month Tolmukasti ja veepaagi puhastamiseks avage roboti kate, vajutage vabastusnuppu ning võtke tolmukast ja veepaak välja. Vajutage tolmukasti avamisnuppu ja tühjendage tolmukast. Koputage tolmukasti, et sinna jäänud tolm välja raputada. Võtke välja vahtfilter ja kurdfilter. Puhastage filtreid puhastusharjaga. Põhjalikumaks puhastamiseks võib filtreid pesta. -
Page 17
month month Loputage veepaaki, tolmukasti ja filtrihoidikut põhjalikult veega. Laske veepaagil, tolmukastil ja filtrimoodulil enne järgmist kasutamist õhu käes kuivada. Asetage eelfilter, vahtfilter ja kurdfilter tagasi ning pange filtrihoidik uuesti tolmukasti. Ühendage veepaak ja tolmukast omavahel ning pange need masinasse tagasi. Rūpīgi ar ūdeni izskalojiet ūdens tvertni, putekļu tvertni un filtra moduli. -
Page 18
month month To replace the central brush after having cleaned it, put one end of the central brush To clean side brush, remove it by unscrewing it and use a cleaning brush to clean the into the corresponding hole first. Then press the brush cover and fix it with the locker side brush and the entanglements in the slot of the side brush. -
Page 19
month month Replace side brushes every 6 months. Throw away the old brushes and replace them To clean the wheels, clean the front, left and right wheels once a month. The wheel with new ones. Screw the new brushes on the robot. shaft may be entangled by hair, cloth strips, etc. -
Page 20
month month Component Cleaning the component Replacing the component Część Czyszczenie części Wymiana części Dust collector After each use Not applicable Pojemnik na kurz Po każdym użyciu Nie dotyczy Filter Once a week Twice per year Filtr Raz w tygodniu Dwa razy w roku Brush Once a week… -
Page 21
month month Detaļa Detaļas tīrīšana Detaļas nomaiņa Parça Parçanın temizlenmesi Parçanın değiştirilmesi Putekļu savācējs Pēc katras lietošanas Neattiecas Toz toplayıcı Her kullanım sonrasında Geçerli değil Filtrs Reizi nedēļā Divas reizes gadā Filtre Haftada bir Yılda iki kez Birste Reizi nedēļā Ja nepieciešams Fırça Haftada bir… -
Page 22
year year Every 6 months replace the pleated filter and the foam with new ones to maintain optimal performances. Для оптимальной работы прибора заменяйте гофрированный и поролоновый фильтры каждые 6 месяцев. Co 6 miesięcy należy wymienić filtr silnika i filtr piankowy na nowe, aby zadbać o optymalną… -
Page 23
FAULT SOLUTION • Make sure the robot is connected to power supply. Cannot start the robot • Make sure the battery is fully charged. • Check whether the robot is stuck or blocked by obstacles. • Check whether the battery is too low. •… -
Page 24
According to model: * Error W1: Battery abnormal. Please consult Please open the battery compartment, check whether the battery is When the robot fails, the red indicator on the robot will blink. Please check on the App the the instructions or APP. properly connected, and try to restart the robot. -
Page 25
В зависимости от модели: * НЕИСПРАВНОСТЬ РЕШЕНИЕ Если с роботом возникает какая-то проблема, на нем начинает мигать красный Не удается запустить робот- • Убедитесь, что робот-пылесос подключен к источнику питания. индикатор. Поищите в приложении указанный код ошибки. • Убедитесь, что аккумулятор полностью заряжен. пылесос… -
Page 26
Ошибка W1. Некорректная работа Откройте аккумуляторный отсек, проверьте правильность подключения PROBLEM ROZWIĄZANIE аккумулятора. См. инструкции или аккумулятора и попробуйте перезапустить робот-пылесос. Температура ПРИЛОЖЕНИЕ. аккумулятора слишком высокая или слишком низкая. Перед Nie można uruchomić odkurzacza • Upewnij się, że odkurzacz jest podłączony do zasilania. использованием… -
Page 27
Odpowiednio do modelu: * Błąd W1: Nieprawidłowe działanie Otwórz komorę akumulatora, sprawdź, czy akumulator jest prawidłowo Gdy odkurzacz się zepsuje, czerwona kontrolka odkurzacza zacznie migać. Sprawdź w akumulatora. Zapoznaj się z instrukcją lub podłączony i spróbuj ponownie uruchomić odkurzacz automatyczny. aplikacji podany kod błędu. -
Page 28
Vastavalt mudelile * TÕRGE LAHENDUS Roboti tõrke korral hakkab selle punane indikaator vilkuma. Vaadake rakendusest vastavat • Veenduge, et robot on toiteallikaga ühendatud. veakoodi. Robot ei käivitu • Veenduge, et aku on täis laetud. Veakood Lahendus • Kontrollige, kas robot on kinni jäänud või selle liikumisteel on takistusi. •… -
Page 29
Viga W1: aku viga. Lugege teavet Avage akusektsioon ja kontrollige, kas aku on õigesti ühendatud, seejärel kasutusjuhendist või rakendusest. proovige robotit taaskäivitada. Aku temperatuur võib olla liiga kõrge või madal. Oodake enne kasutamist, kuni aku temperatuur jõuab normtasemeni (0 °С~40 °С/32 °F~104 °F). Vea püsimise korral võtke ühendust meie teenindusosakonnaga. -
Page 30
KĻŪDA RISINĀJUMS • Pārliecinieties, ka robots ir pievienots strāvas apgādei. Robotu nevar ieslēgt • Pārliecinieties, ka akumulators ir pilnībā uzlādēts. • Pārbaudiet, vai robots nav iestrēdzis vai iesprūdis aiz priekšmetiem. • Pārbaudiet, vai akumulatora uzlādes līmenis nav pārāk zems. • Ja problēmu neizdodas novērst, izslēdziet robotu, nogaidiet 3 sekundes un Robots pēkšņi pārstāj darboties restartējiet. -
Page 31
Atbilstoši modelim: * Kļūda W1: akumulatora darbības Atveriet akumulatora nodalījumu, pārbaudiet, vai akumulators ir Ja robotam notiek darbības traucējums, uz robota mirgo sarkans indikators. Lietotnē traucējums. Skatiet instrukcijas vai lietotni. pareizi pievienots, mēģiniet restartēt robotu. Akumulatora temperatūra ir pārāk augsta vai pārāk zema. Pirms lietošanas nogaidiet, līdz akumulatora apskatiet attēloto kļūdas kodu. -
Page 32
Priklausomai nuo modelio: * GEDIMAS SPRENDIMAS Kai roboto veikimas sutrinka, ima mirksėti raudonas roboto indikatorius. Patikrinkite • Patikrinkite, ar robotas yra įjungtas į elektros tinklą. programėlėje nurodytą klaidos kodą. Nepavyksta paleisti roboto. • Patikrinkite, ar akumuliatorius visiškai įkrautas. Klaidos kodas Sprendimas •… -
Page 33
Klaida W1: Akumuliatorius netinkamai Atidarykite akumuliatoriaus skyrių, patikrinkite, ar akumuliatorius tinkamai ARIZA ÇÖZÜM veikia. Perskaitykite instrukcijas arba sujungtas ir pamėginkite iš naujo paleisti robotą. Akumuliatoriaus temperatūra patikrinkite programėlę. per aukšta arba per žema. Palaukite, kol akumuliatoriaus temperatūra vėl bus • Robotun güç kaynağına bağlı olduğundan emin olun. Robot çalışmaya başlamıyor normali (0 °С~40 °С… -
Page 34
Modele göre: * Hata W1: Pil anormal. Lütfen talimatlara Lütfen pil bölmesini açın, pilin doğru şekilde bağlanıp bağlanmadığını kontrol Robot hata verdiğinde robotun üzerindeki kırmızı gösterge yanıp söner. Lütfen belirtilen veya UYGULAMAYA bakın. edin ve robotu yeniden başlatmayı deneyin. Pil sıcaklığı çok yüksek veya çok düşüktür. -
Page 35
Үлгіге сәйкес: * АҚАУ ШЕШІМІ Робот істен шыққан кезде, роботтағы қызыл индикаторы жыпылықтайды. • Роботтың қуат көзіне қосылғанына көз жеткізіңіз. Құрылғыдағы қате кодын тексеріңіз. Робот іске қосылмайды • Батареяның толық зарядталғанына көз жеткізіңіз. Қате коды Шешімі • Роботтың тұрып қалғанын немесе басқа заттармен бұғатталғанын тексеріңіз. •… -
Page 36
The languages TR, KK are included in the safety instructions. W1 қатесі: батарея ақаулы. Нұсқауларды Батарея бөлімін ашып, батареяның дұрыс жалғанғанын тексеріңіз және немесе қолданбаны қараңыз. роботты қайта іске қосып көріңіз. Батарея температурасы тым жоғары немесе тым төмен. Пайдалану алдында батареяның температурасы қалыпты… -
Page 37
TEST Straight line test For measuring dust collection performance in accordance with IEC 62885-7, testers can activate the straight line test by using the remote control feature in the app menu. Проверка по прямой линии Для оценки эффективности сбора пыли в соответствии со стандартом IEC 62885-7 может быть… -
Page 38
2220004350/03…
![]() Руководство пользователя
Руководство пользователя Исследователь Серия 20
Перед первым использованием внимательно прочтите буклет «Инструкции по технике безопасности и эксплуатации».
Чтобы узнать больше


Ваш робот может столкнуться с трудностями на коврах: с бахромой, слишком толстыми, с длинным ворсом, слишком легкими (например, ковер в ванной).

Подключите адаптер к разъему питания на боковой стороне базы. Используйте только зарядное устройство, поставляемое с роботом: не используйте универсальные зарядные устройства.
Вставьте вилку шнура питания в сетевую розетку. Когда шнур питания подключен к розетке, проверьте верхнюю часть основания, горит ли зеленый индикатор.
Чтобы разместить док-станцию, убедитесь, что есть пустое пространство по 1 м с каждой стороны и 2 м перед док-станцией. Не устанавливайте док-станцию возле лестницы. Кабель должен быть тугим. Всегда кладите док-станцию на твердый пол. Не ставьте док-станцию на ковер.
Чтобы зарядить робота, включите его, нажав кнопку включения/выключения на 3 секунды. Поместите робота на док-станцию: зарядные пластины на роботе должны соприкасаться с пластинами на док-станции.
Когда кнопка включения/выключения мигает, робот заряжается. Как только кнопка включения/выключения перестанет мигать, это означает, что батарея полностью заряжена (6 часов).

У робота есть датчики падения для обнаружения ступенек и проемов. Робот изменит направление при их обнаружении. Чтобы правильно определить перепад уровня пола, убедитесь, что на полу рядом с просветами, лестницей или на ступенях лестницы нет предметов (сумок, обуви…).
Чтобы начать сеанс уборки, нажмите кнопку запуска на роботе или на пульте дистанционного управления. 
Чтобы завершить сеанс уборки, нажмите кнопку на роботе или на пульте дистанционного управления.
Чтобы отправить робота обратно на док-станцию, дважды нажмите кнопку робота или кнопку на пульте дистанционного управления.
Чтобы очистить все доступные зоны вашего дома, используйте случайный режим робота: нажмите кнопку случайного режима на пульте. 
Для уборки вдоль стен и в углах используйте краевой режим робота: нажмите кнопку краевого режима на пульте.
Чтобы запустить короткий 30-минутный сеанс уборки во всех доступных зонах вашего дома: нажмите на пульте дистанционного управления режим произвольной комнаты.

Внимание: Пульт не может автоматически подключаться к роботу, и соединение необходимо установить вручную. Для этого нажмите и удерживайте 6 секунд кнопку запуска на роботе, пока кнопка не начнет мигать оранжевым цветом.
Затем нажмите кнопку запуска на пульте дистанционного управления, одновременно нажимая кнопку запуска на роботе. Когда робот издает звуковой сигнал, соединение установлено успешно.
Если вы не можете подключить пульт к роботу, ознакомьтесь с книгой по технике безопасности. Для использования пульта необходимы 2 батарейки ААА, в комплект не входят.
Чтобы настроить время дня для вашего робота, нажмите кнопку часов на пульте дистанционного управления.
- Установите час дня с помощью стрелок вверх и вниз на пульте дистанционного управления.
- Когда час установлен, нажмите стрелку вправо, чтобы продолжить установку минут. Чтобы установить минуты, используйте стрелки вверх и вниз на пульте дистанционного управления.
- Когда часы и минуты установлены, подтвердите настройку, нажав кнопку запуска на пульте дистанционного управления. Робот подтвердит настройку звуковым сигналом.

Чтобы настроить ежедневный сеанс уборки по расписанию для вашего робота, нажмите кнопку расписания на пульте дистанционного управления.
- Установите час начала очистки с помощью стрелок вверх и вниз на пульте дистанционного управления.
- Когда час установлен, нажмите стрелку вправо, чтобы продолжить установку минут. Чтобы установить минуты, используйте стрелки вверх и вниз на пульте дистанционного управления.
- Когда часы и минуты установлены, подтвердите настройку, нажав кнопку запуска на пульте дистанционного управления. Робот подтвердит настройку звуковым сигналом. Робот начнет уборку каждый день в назначенное время.


Чтобы отменить ежедневный запланированный сеанс уборки, снова нажмите и удерживайте 3 секунды кнопку расписания. Когда ежедневный запланированный сеанс уборки отменяется, робот подтвердит это звуковым сигналом, и время расписания исчезнет с пульта дистанционного управления.
Робот следует опорожнять и чистить не реже одного раза в неделю. Нажмите кнопку на задней стороне робота и вытащите пылесборник. Чтобы опустошить его, откиньте крышку.

Для очистки фильтров выньте их из пылесборника. Аккуратно постучите сеткой фильтра над мусорным ведром, чтобы стряхнуть пыль.
Промойте поролоновый фильтр, сетку фильтра и пылесборник чистой водой. Не мочите фильтр тонкой очистки (белый фильтр). 
Дайте всем частям высохнуть примерно 12 часов. Не используйте мокрый фильтр или пылесборник. После высыхания поместите фильтры обратно в пылесборник.
Каждые 6 месяцев заменяйте фильтр тонкой очистки и поролоновый фильтр новыми для поддержания оптимальной производительности.
Очищайте щетку робота раз в неделю. Для этого переверните робота вверх ногами.
Чтобы снять щетку, откройте защитный кожух щетки, нажав на 2 защелки и потянув его вверх. Затем вытащите щетку из робота.


Харья пухастамисекс касуtage kääre, et eemaldada juuksekarvad.
Пухасtage roboti külgharju puhta kuiva lapiga.
Боковые щетки меняйте каждые 6 месяцев.
Выбросьте старые щетки и замените их новыми. Накрутите на робота новые щетки.
Внимание: Прежде чем прикасаться к чувствительным частям робота, убедитесь, что он выключен, нажав кнопку включения/выключения на 3 секунды.
Раз в неделю протирайте сухой мягкой тканью следующие детали: зарядные пластины робота, датчики падения, датчик расстояния и зарядные пластины на док-станции.
| Компонент | Очистка компонента | Замена компонента |
| Аспирационный патрубок | После каждого использования | Непригодный |
| Фильтр | Раз в неделю | Два раза в год |
| Щетка для детской посуды | Раз в неделю | Если необходимо |
| Зарядное основание | Раз в неделю | Непригодный |
| Датчики падения | Раз в неделю | Непригодный |
| Переднее колесо | Раз в неделю | Непригодный |
| Головки щеток | Раз в месяц | Два раза в год |

Не выбрасывайте робота в мусорное ведро.
Всегда надевайте перчатки и защиту.

Внимание: перед извлечением аккумулятора выключите робота. Переверните робота вверх дном, чтобы получить доступ к отсеку для батареи. Извлеките аккумулятор, нажав на защелки отсека для аккумулятора и потянув аккумулятор вверх. Отключите аккумулятор от робота. Утилизируйте аккумулятор и робота.

 ЕСТЬ ПРОБЛЕМА С ВАШИМ ПРИБОРОМ?
 ЕСТЬ ПРОБЛЕМА С ВАШИМ ПРИБОРОМ?
По модели:
- Зарядное устройство нагревается:
Это совершенно нормально. Пылесос может оставаться постоянно подключенным к зарядному устройству без какого-либо риска. - Зарядное устройство подключено, но ваш прибор не заряжается:
– Зарядное устройство неправильно подключено к прибору или неисправно.
Убедитесь, что зарядное устройство правильно подключено, или обратитесь в утвержденный сервисный центр для замены зарядного устройства. - Ваш прибор останавливается во время использования:
– Ваш прибор может перегреваться.
Выключите прибор и дайте ему остыть не менее чем на 1 час.
Если он неоднократно перегревается, обратитесь в утвержденный сервисный центр. - Прибор остановился после того, как мигал индикатор зарядки:
– В приборе разрядился аккумулятор.
Зарядите пылесос. - Электрощетка работает неправильно или издает шум:
– Вращающаяся щетка или шланг заблокированы.
Остановите пылесос и почистите их.
– Щетка изношена.
Обратитесь в авторизованный сервисный центр, чтобы заменить щетку.
– Ремень надет.
Обратитесь в авторизованный сервисный центр для замены ремня. - Электрощетка останавливается во время уборки:
– Сработала функция безопасности.
Остановите пылесос. Убедитесь, что ничто не мешает вращению щетки; если есть препятствие, удалите его и очистите щетку с электроприводом, затем включите пылесос. - Ваш пылесос тоже не пылесосит, издает шум, свистит:
– Впускной канал частично заблокирован.
Разблокировать это
– Пылесборник заполнен. - Опорожните его и очистите.
– Пылеуловитель установлен неправильно.
Правильно установите его.
– Засорена всасывающая головка.
Снимите силовую щетку и очистите ее.
– Защитный поролоновый фильтр насыщен.
Убери это.
| РГ68ХХ | |||
| Ошибка Индикатор |
Обозначения ошибок | Формы ошибок | Решения |
| Красный индикатор мигнет два раза и подаст звуковой сигнал | Выход из строя левого колеса | Левое колесо не крутится и перегружено. | Убедитесь, что левое колесо устройства не закрыто. |
| Красный индикатор мигнет три раза и подаст звуковой сигнал | Выход из строя правого колеса | Правое колесо не крутится и перегружено | Убедитесь, что правое колесо устройства не закрыто. |
| Красный индикатор мигает пять раз и издает звуковой сигнал | Выход из строя переднего колеса | Переднее колесо заблокировано и больше не вращается. | Пожалуйста, убедитесь, что маленькие колеса переднего колеса не закрыты. |
| Красный индикатор мигает шесть раз и издает звуковой сигнал. | Непрохождение наземной инспекции | Возникла проблема с наземной инспекцией. | Пожалуйста, убедитесь, что сенсорное окно в нижней части устройства не слишком скрыто. |
| Красный индикатор мигнет семь раз и подаст звуковой сигнал | Низкий ток или батарея | Заряд батареи был крайне низким (но не при подзарядке).tagе критическая точка). | Пожалуйста, установите устройство на док-станцию, чтобы зарядить его. |
| Красный индикатор мигает восемь раз и издает звуковой сигнал. | Выход из строя переднего бампера | Ударные выключатели на передней левой и правой панелях восстановлению не подлежат. | Пожалуйста, проверьте, нормально ли останавливается устройство. |
| Красный индикатор мигает девять раз и издает звуковой сигнал. | Выход из строя основной щетки | Колесо главного кисть перегружена или недостаточно заряжен. |
Убедитесь, что на основной щетке устройства нет посторонних предметов. |
| Красный индикатор мигает десять раз и издает звуковой сигнал | Выход из строя боковой щетки | Колесо боковой щетки перегружено или недостаточно заряжено. | Убедитесь, что такие элементы, как волосы или ткань, не намотаны на боковую щетку. |
| Красный индикатор мигает одиннадцать раз и издает звуковой сигнал. | Разрушение стены в разрезе | Возникла проблема с осмотром стен. | Пожалуйста, убедитесь, что прозрачное окно для осмотра стены не закрыто волосами или тканью. |
| Красный индикатор мигает двенадцать раз и издает звуковой сигнал. | Выход из строя вентилятора | Вентилятор вращается только при значительном токе. | Убедитесь, что лопасти вентилятора не ослаблены и не зажаты волосами или тканью. |
| Красный индикатор мигает четырнадцать раз и издает звуковой сигнал. | Ошибка загрузки | На устройство не подается питание или он не может отображать уровень заряда. | Убедитесь, что устройство подключено к док-станции. |
2220003385/03
Документы / Ресурсы
Рекомендации

Кухонная и бытовая техника — T-fal