Руководства и мануалы Mitsubishi Lancer Evolution 1
Руководства и мануалы Mitsubishi Lancer Evolution 2
Распиновка разъема подключения ECU Lancer Evo I (52,8 Kb)
Распиновка разъема подключения ECU Lancer Evo II (52,8 Kb)
Руководства и мануалы Mitsubishi Lancer Evolution 3
Руководства и мануалы Mitsubishi Lancer Evolution 4
Распиновка разъема подключения ECU Lancer Evo III (52,8 Kb)
Распиновка разъема подключения ECU Lancer Evo IV (103 Kb)
Преобразование ECU Evo 4, 5, 6 в Evo 7, 8 (382 Kb)
Руководства и мануалы Mitsubishi Lancer EVO 4 и EVO 5
Руководства и мануалы Mitsubishi Lancer Evolution 6
Техническая информация 1998 Lancer Evo 4 — 5 (2,25 Mb)
Руководство по ремонту 1998 Lancer Evo 4 — 5 (11,6 Mb)
Электрические схемы Lancer Evo 4 и Evo 5 (4,47 Mb)
Распиновка разъема подключения ECU Lancer Evo V (104 Kb)
Техническая информация 1999 Lancer Evo 6 (778 Kb)
Руководство по ремонту 1999 Lancer Evo 6 (10,2 Mb)
Электрические схемы Lancer Evo 6 (6,69 Mb)
Распиновка разъема подключения ECU Lancer Evo VI (103 Kb)
Руководства и мануалы Mitsubishi Lancer Evolution 7
Руководства и мануалы Mitsubishi Lancer Evolution 8
Техническая информация 2001 Lancer Evo 7 (4,68 Mb)
Руководство по ремонту 2001 Lancer Evo 7 (57,2 Mb)
Электрические схемы Lancer Evo 7 (22,4 Mb)
Распиновка разъема подключения ECU Lancer Evo VII (109 Kb)
Распиновка разъема подключения ECU Lancer Evo VII GT-A (166 Kb)
Распиновка разъемов подключения коробки передач Lancer Evo VII GT-A (42,3 Kb)
Техническая информация 2003 Lancer Evo 8 (1,18 Mb)
Руководство по ремонту 2003 Lancer Evo 8 (2,96 Mb)
Руководство по обслуживанию двигателя 4G63 (546 Kb)
Руководство по обслуживанию коробки передач (1,26 Mb)
Руководства 2003 Lancer Evo 8 USDM
Руководство по ремонту 2004 Lancer Evo 8 MR
Электрические схемы Lancer Evo 8 MR
Электрические схемы Lancer Evo 8 USDM
Руководства и мануалы Mitsubishi Lancer Evolution 9
Руководства и мануалы Mitsubishi Lancer Evolution 10
Руководство по ремонту 2005 Lancer Evo 9
Руководства 2005 Lancer Evo 9
Руководство по эксплуатации Lancer Evo 9 (на русском языке) 113 Mb
Электрические схемы Lancer Evo 9
Распиновка разъема подключения ECU Lancer Evo IX (119 Kb)
Схема ECU Lancer Evo 9 USDM (111 Kb)
Руководство по эксплуатации 2010 Lancer Evo 10
Руководства 2010 Lancer Evo 10
Обзор технической части Lancer Evo 10
Руководство по эксплуатации Lancer Evo X (на русском языке) 176 Mb NEW
Руководство по эксплуатации Lancer Evo X (на японском языке) (7,29 Mb)
Распиновка разъема подключения ECU Lancer Evo X (102 Kb)
Руководства и мануалы Mitsubishi Lancer RalliART / Galant Fortis
Руководство по эксплуатации Lancer RalliART/Galant Fortis (на русском языке) 127 Mb
Mitsubishi Lancer Evolution X: Руководства по эксплуатации
Материал из MMC Manuals
Перейти к навигации
Перейти к поиску
Руководства по эксплуатации Mitsubishi Lancer Evolution X. Брошюры, каталоги, спецификации, карты технического обслуживания.
↑ Mitsubishi Lancer Evolution X
| Язык/Language: | Русский • English |
|---|
Брошюры, каталоги, спецификации
- Каталог оригинальных аксессуаров для Mitsubishi Lancer Evolution X, рус., pdf, 1,19 МБ
- Каталог оригинальных аксессуаров для Mitsubishi Lancer Evolution X MY 2011, рус., pdf, 1,53 МБ
Руководства по эксплуатации
- Краткое руководство Mitsubishi Lancer Evolution X MY 2014 (North America), pdf, eng., 0,99 МБ
- Краткое руководство Mitsubishi Lancer Evolution X MY 2015 (North America), pdf, eng., 1,02 МБ
- Быстрое знакомство с Mitsubishi Lancer Evolution X, pdf, eng., 948 кБ
- Руководство по эксплуатации Mitsubishi Lancer Evolution X MY 2009, pdf, рус., 61,7 МБ
- Руководство по эксплуатации Mitsubishi Lancer Evolution X MY 2010 (Europe), pdf, eng., 21,8 МБ
- Руководство по эксплуатации Mitsubishi Lancer Evolution X MY 2012 (Europe), pdf, eng., 17,1 МБ
- Руководство по эксплуатации Mitsubishi Lancer Evolution X MY 2014 (Europe), pdf, eng., 10,4 МБ
- Руководство по эксплуатации Mitsubishi Lancer Evolution X MY 2010 (North America), pdf, eng., 18,5 МБ
- Руководство по эксплуатации Mitsubishi Lancer Evolution X MY 2011 (North America), pdf, eng., 19,0 МБ
- Руководство по эксплуатации Mitsubishi Lancer Evolution X MY 2012 (North America), pdf, eng., 19,0 МБ
- Руководство по эксплуатации Mitsubishi Lancer Evolution X MY 2013 (North America), pdf, eng., 19,7 МБ
- Руководство по эксплуатации Mitsubishi Lancer Evolution X MY 2014 (North America), pdf, eng., 40,9 МБ
- Руководство по эксплуатации Mitsubishi Lancer Evolution X MY 2015 (North America), pdf, eng., 43,1 МБ
Руководства по эксплуатации аудио-системы
- См. раздел Аудиооборудование: Руководства по эксплуатации
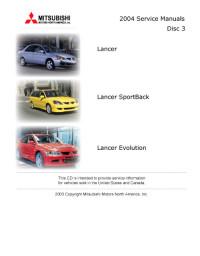
Мультимедийное руководство на английском языке по техническому обслуживанию и ремонту автомобилей Mitsubishi Lancer/Lancer SportBack/Lancer Evolution 2004 года выпуска.
- Автор: —
- Издательство: Mitsubishi Motors
- Год издания: 2003
- Страниц: —
- Формат: —
- Размер: 191,5 Mb
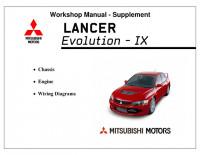
Руководство на английском языке по техническому обслуживанию и ремонту автомобиля Mitsubishi Lancer Evolution IX 2006 года выпуска.
- Автор: —
- Издательство: Mitsubishi Motors Corp.
- Год издания: 2005
- Страниц: —
- Формат: PDF
- Размер: 14,4 Mb

Руководство на английском языке по техническому обслуживанию и ремонту автомобиля Mitsubishi Lancer Evolution X 2010 года выпуска.
- Автор: —
- Издательство: Mitsubishi Motors Corp.
- Год издания: 2009
- Страниц: 5668
- Формат: PDF
- Размер: 151,9 Mb

Сборник руководств на английском языке по техническому обслуживанию и ремонту автомобиля Mitsubishi Lancer Evolution VIII 2003 года выпуска.
- Автор: —
- Издательство: Mitsubishi Motors Corp.
- Год издания: 2003
- Страниц: —
- Формат: PDF
- Размер: 129,3 Mb
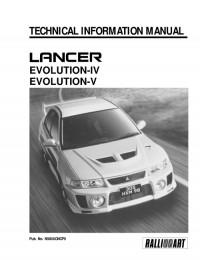
Техническое описание на английском языке автомобилей Mitsubishi Lancer Evolution IV/V.
- Автор: —
- Издательство: Ralliart Inc.
- Год издания: 1998
- Страниц: —
- Формат: PDF
- Размер: 2,1 Mb
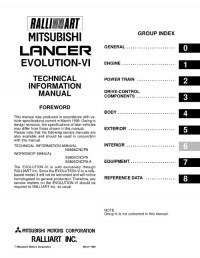
Руководство на английском языке по техническому обслуживанию и ремонту автомобилей Mitsubishi Lancer Evolution IV/V.
- Автор: —
- Издательство: Ralliart Inc.
- Год издания: 1998
- Страниц: —
- Формат: PDF
- Размер: 10,3 Mb

Руководство на английском языке по техническому обслуживанию и ремонту автомобиля Mitsubishi Lancer Evolution IX.
- Автор: —
- Издательство: Mitsubishi Motors Corp.
- Год издания: 2005
- Страниц: —
- Формат: PDF
- Размер: 144,1 Mb
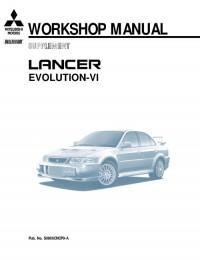
Руководство на английском языке по техническому обслуживанию и ремонту автомобиля Mitsubishi Lancer Evolution VI.
- Автор: —
- Издательство: Mitsubishi Motors Corp.
- Год издания: 1999
- Страниц: —
- Формат: PDF
- Размер: 9,6 Mb
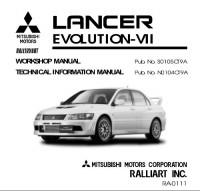
Сборник руководств на английском языке по техническому обслуживанию и ремонту автомобиля Mitsubishi Lancer Evolution VII.
- Автор: —
- Издательство: Mitsubishi Motors Corp.
- Год издания: 2001
- Страниц: —
- Формат: PDF
- Размер: 55,3 Mb
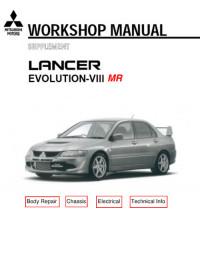
Сборник руководств на английском языке по техническому обслуживанию и ремонту автомобиля Mitsubishi Lancer Evolution VIII MR.
- Автор: —
- Издательство: Mitsubishi Motors Corp.
- Год издания: 2004
- Страниц: —
- Формат: PDF
- Размер: 15,0 Mb

Сборник руководств на английском языке по техническому обслуживанию и ремонту автомобиля Mitsubishi Lancer Evolution VIII.
- Автор: —
- Издательство: Mitsubishi Motors Corp.
- Год издания: 2003
- Страниц: —
- Формат: PDF
- Размер: 10,7 Mb
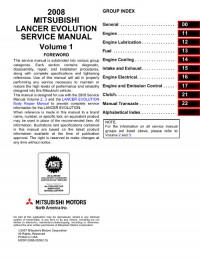
Сборник руководств (Tehnical Information Manual, Body Repair Manual, Service Manual) на английском языке по техническому обслуживанию и ремонту автомобиля Mitsubishi Lancer Evolution X 2008 года выпуска.
- Автор: —
- Издательство: Mitsubishi Motors Corp.
- Год издания: 2007
- Страниц: —
- Формат: PDF
- Размер: 167,6 Mb
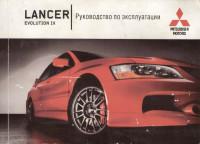
Руководство по эксплуатации и техническому обслуживанию автомобиля Mitsubishi Lancer Evolution IX.
- Автор: —
- Издательство: Mitsubishi Motors Corp.
- Год издания: 2006
- Страниц: —
- Формат: PDF
- Размер: 68,4 Mb
- Manuals
- Brands
- Mitsubishi MOTORS Manuals
- Automobile
- Lancer Evolution 2009
- Owner’s manual
-
Contents
-
Table of Contents
-
Bookmarks
Related Manuals for Mitsubishi MOTORS Lancer Evolution 2009
Summary of Contents for Mitsubishi MOTORS Lancer Evolution 2009
-
Page 1
OWNER’S MANUAL LANCER EVOLUTION — ENGLISH — OGEE10E1… -
Page 2
Repairs to your vehicle: LHD: Left-Hand Drive Vehicles in the warranty period: RHD: Right-Hand Drive All warranty repairs must be carried out by a MITSUBISHI MOTORS Au- M/T: Manual Transmission thorized Service Point. Vehicles outside the warranty period: Where the vehicle is repaired is at the discretion of the owner. -
Page 3
Table of contents Overview General information Locking and unlocking Seat and seat belts Instruments and controls Starting and driving For pleasant driving For emergencies Vehicle care Maintenance Specifications… -
Page 4
Overview Instruments and Controls (Driver’s area) E00100104737 1. Multi-information meter switch p. 3-05 2. Instruments p. 3-02 3. Shift paddles* p. 4-20, 4-21 4. Wiper and washer switch p. 3-46 5. Cruise control switches* p. 4-37 6. Ignition switch p. 1-13, 1-18, 4-09 7. -
Page 5
Overview 1. Shift paddles* p. 4-20, 4-21 2. Instruments p. 3-02 3. Multi-information meter switch p. 3-05 4. Wiper and washer switch p. 3-46 5. Cruise control switches* p. 4-37 6. ASC OFF switch p. 4-33 7. Trunk lid opener switch p. 1-29 8. -
Page 6
Overview Instruments and Controls (Instrument panel) E00100104740 1. Ventilators p. 5-02 2. Gearshift lever p. 4-15, 4-15 3. Supplemental restraint system — airbag (for front passenger’s seat) p. 2-18 4. Front passenger’s airbag ON-OFF switch p. 2-19, 2-21 5. Glove box p. 5-83 6. -
Page 7
Overview 1. Supplemental restraint system — airbag (for front passenger’s seat) p. 2-18 2. Gearshift lever p. 4-15, 4-15 3. Ventilators p. 5-02 4. Fuel tank filler door release lever p. 02 5. AWC switch* p. 4-28 6. Cup holder p. 5-85 7. -
Page 8
Overview Centre panel E00100600226 1. Audio* p. 5-09, 5-24 Digital clock* p. 5-45 Mitsubishi Multi-Communication System* Refer to the separate “Mitsubishi Multi-Communication System owner’s manual” 2. Hazard warning flasher switch p. 3-45 3. Front passenger seat belt warning lamp p. 2-08 4. -
Page 9
Overview Interior E00100203441 1. Adjustable seat belt anchor (for front seats) p. 2-08 Seat belts p. 2-06 2. Inside rear-view mirror p. 4-06 3. Sun visors p. 5-79 Vanity mirror p. 5-79 Card holder p. 5-79 4. Bottle holder (for front seats) p. 5-86 5. -
Page 10
Overview 1. Inside rear-view mirror p. 4-06 2. Adjustable seat belt anchor (for front seats) p. 2-08 Seat belts p. 2-06 3. Head restraints p. 2-05 4. Supplemental restraint system — side airbag (for front seats) p. 2-25 5. Front seats p. 2-03 6. -
Page 11
Overview Interior E00100203454 1. Assist grip p. 5-86 2. Coat hook p. 5-86 3. Supplemental restraint system — curtain airbag p. 2-25 4. Rear room lamp* p. 5-82, 8-23, 8-29 5. Rear seat p. 2-05 6. Cup holder p. 5-85 7. -
Page 12
Overview 1. Rear room lamp* p. 5-82, 8-23, 8-29 2. Supplemental restraint system — curtain airbag p. 2-25 3. Coat hook p. 5-86 4. Assist grip p. 5-86 5. AWC control fluid tank p. 8-06, 9-11 6. Tether anchorages for child restraint system p. 2-16 7. -
Page 13
Overview Trunk area (Except for vehicle with spare wheel) E00100300467 1. Trunk room lamp p. 8-23, 8-29 2. Tyre repair kit p. 6-05 3. Battery p. 6-02, 8-08 4. Tools p. 6-05 5. Jack p. 6-06 6. Front washer fluid reservoir p. 8-07… -
Page 14
Overview Trunk area (Vehicle with full size spare wheel) E00100300470 1. Trunk room lamp p. 8-23, 8-29 2. Battery p. 6-02, 8-08 3. Tools p. 6-05 4. Jack p. 6-06 5. Spare wheel p. 6-12, 6-13 6. Front washer fluid reservoir p. 8-07… -
Page 15
Overview Trunk area (Vehicle with compact spare wheel) E00100300483 1. Trunk room lamp p. 8-23, 8-29 2. Battery p. 6-02, 8-08 3. Tools p. 6-05 4. Jack p. 6-06 5. Spare wheel p. 6-12, 6-13 6. Front washer fluid reservoir p. 8-07… -
Page 16
Overview Outside (Front) E00100504076 1. Bonnet p. 8-03 2. Windscreen wipers and washer p. 3-46, 8-15 3. Sunroof* p. 1-38 4. Keyless entry system* p. 1-04 Keyless operation system* p. 1-08 Locking and unlocking p. 1-21 5. Fuel tank filler p. 02 6. -
Page 17
Overview Outside (Rear) E00100504089 1. Trunk lid p. 1-29 2. High-mounted stop lamp p. 8-23 3. Antenna p. 5-44 4. Tyre inflation pressures p. 8-11 Changing tyres p. 6-12 Tyre rotation p. 8-12 Tyre chains p. 8-13 5. Rear turn-signal lamps p. 3-42, 8-23, 8-27 6. -
Page 19: Table Of Contents
General information Fuel selection……………….02 Filling the fuel tank…………….02 Installation of accessories…………..04 Modification/alterations to the electrical or fuel systems….04 Genuine parts……………….05 Used engine oils safety instructions and disposal infor- mation………………05 Disposal information for used batteries………..05…
-
Page 20: Fuel Selection
(EN228) have the system checked as soon as possible 98 RON or higher When handling fuel, comply with the safe- at a MITSUBISHI MOTORS Authorized ty regulations displayed by garages and Service Point. filling stations. Your engine is designed to provide satisfactory per-…
-
Page 21
General information 2. The fuel tank filler is located on the rear left 4. While filling with fuel, store the cap in the side of your vehicle. capholder located on the inside of the fuel Open the fuel tank filler door with the re- tank filler door. -
Page 22: Installation Of Accessories
MITSUBISHI MOTORS guidelines. on the part of the appraiser or the official. Only in sories. the case of parts (MITSUBISHI MOTORS original Improper installation of electrical compo- replacement or exchange parts as well as nents may cause an electrical fire if incorrect-…
-
Page 23: Genuine Parts
Genuine parts Used engine oils safety Disposal information for used E00200500545 instructions and disposal batteries MITSUBISHI MOTORS has gone to great lengths information E00201300016 to bring you a superbly crafted automobile offering the highest quality and dependability. E00200600025 Your vehicle contains batteries Use MITSUBISHI MOTORS Genuine Parts, de- and/or accumulators.
-
Page 25
Locking and unlocking Keys………………..1-02 Electronic immobilizer (Anti-theft starting system)…..1-03 Keyless entry system*…………..1-04 Keyless operation system*…………1-08 Doors………………..1-24 Central door locks……………..1-26 Dead Lock System*…………..1-27 “Child-protection” rear doors…………1-29 Trunk lid………………1-29 Security alarm system…………..1-31 Electric window control…………..1-36 Sunroof*………………1-38… -
Page 26: Keys
Locking and unlocking Keys Type 2 NOTE The key number is stamped on the tag as in- The emergency key fits all locks. E00300102025 dicated in the illustration. Type 1 Make a record of the key number and store the key and key number tag in separate pla- The key fits all locks.
-
Page 27: Electronic Immobilizer (Anti-Theft Starting System)
“Keyless operation system: Electronic immobilizer or the keyless operation function was not tact your MITSUBISHI MOTORS Au- (Anti-theft starting system)” on pages 1-12, 1-17. used to lock the vehicle. thorized Service Point.
-
Page 28: Keyless Entry System
Press the UNLOCK switch (2). All the doors will E00300302072 Press the remote control switch to lock or unlock MITSUBISHI MOTORS Authorized Service be unlocked. If the front room lamp switch is in the the doors and to open the trunk lid.
-
Page 29
For further information, please contact your To fold more than 1 second to close all of the windows. MITSUBISHI MOTORS Authorized Service Within 30 seconds of locking the doors using the To stop the windows part-way, press the LOCK Point. -
Page 30
If you wish to add a remote control switch, erations can be used to make the adjustment. The keyless entry system does not operate in please contact your MITSUBISHI MOTORS Refer to the separate owner’s manual for de- the following conditions: Authorized Service Point. -
Page 31
2. You may purchase a replacement battery at the case. an electric appliance store. A MITSUBISHI MOTORS Authorized Serv- ice Point can replace the battery for you if you prefer. CAUTION When the remote control switch case is opened, be careful to keep water, dust, etc. -
Page 32: Keyless Operation System
(The keyless operation system can be used as a keyless entry system.) Please con- • When the keyless operation key battery is sult a MITSUBISHI MOTORS Authorized worn out. Service Point. • You can limit operations to locking and unlocking of the doors and to opening of the trunk lid.
-
Page 33
The battery life is 1 to 3 years, de- pending on usage conditions. When the bat- tery wears out, have it replaced at your MITSUBISHI MOTORS Authorized Serv- ice Point. Because the keyless operation key continual- ly receives signals, strong radio wave recep- NOTE tion could affect battery wear. -
Page 34
Locking and unlocking If the keyless operation key is within the op- To operate using the keyless operation The keyless operation function does not oper- erating range, even someone not carrying the ate under the following conditions: function key can lock and unlock the doors or open •… -
Page 35
Please consult a • You do not touch the sensor on the rear MITSUBISHI MOTORS Authorized Service of the handle. Point. • You touch the sensor on the rear of the… -
Page 36
The switch operations for the door can be of the turn-signal lamps). changed as follows. For further information, NOTE please contact your MITSUBISHI MOTORS Closing the door windows The keyless operation function does not oper- Authorized Service Point. Within 30 seconds of locking the doors using the ate when the trunk lid is open. -
Page 37
The engine is stopped, but the electrical devices take your vehicle and all remaining keys to such as the audio, accessory socket and cigarette your MITSUBISHI MOTORS Authorized lighter can be operated. Service Point. All the keys have to be reregis- tered in the immobilizer computer unit. -
Page 38
Locking and unlocking [Vehicles with Twin Clutch SST] CAUTION You could be carrying another keyless operation key with a First, set the gearshift lever to the “P” (PARK) po- different code, or the keyless Do not leave the ignition switch in the sition, and then slowly turn the ignition switch to operation key could be outside “ON”… -
Page 39
Door ajar prevention system E00306800105 information, please contact your E00308200275 MITSUBISHI MOTORS Authorized Service To lock Point. Turn the steering wheel until it is locked. Even if you have the keyless operation key within the engine start operating range, if the To unlock keyless operation key and vehicle ID codes Turn the ignition switch to the “ACC”… -
Page 40
Locking and unlocking 5. On vehicles with M/T, place the gearshift lev- CAUTION WARNING er in the “N” (Neutral) position. On vehicles with Twin Clutch SST, make Never run the engine in a closed or poor- Carry the key with you when leaving the sure the gearshift lever is in the “P”… -
Page 41
Locking and unlocking To operate without using the keyless At extreme cold ambient temperature Locking and unlocking the door If the engine won’t start, depress the accelerator ped- Turning the emergency key in the forward direc- operation function al about halfway while cranking the engine. Once tion locks the door, and turning it in the rear direc- E00306000077 the engine starts, release the accelerator pedal. -
Page 42
The engine is running, and all the vehicle’s electri- take your vehicle and all remaining keys to cal devices can be operated. your MITSUBISHI MOTORS Authorized Service Point. All the keys have to be reregis- START tered in the immobilizer computer unit. The The starter motor operates. -
Page 43
Locking and unlocking To turn from “ACC” to “LOCK” To unlock CAUTION 1. [Vehicles with M/T] Turn the emergency key to the “ACC” position Push the emergency key in at the “ACC” po- while moving the steering wheel slightly right and If the engine is stopped while driving, the sition and keep it depressed until it is turned left. -
Page 44
Locking and unlocking After starting the engine in cold weather, 6. While pushing the lock release button (A), re- Starting the engine drive in a way that keeps the engine speed move thecover of the ignition switch. E00307800434 low until the bar graph of engine coolant tem- Normal conditions perature display starts to move (the engine The starting procedure is as follows:… -
Page 45
Locking and unlocking 8. Insert the keyless operation key into the emer- Flooded engine WARNING gency key. If the engine was flooded during starting, first oper- ate the starter for 5 to 6 seconds while fully depress- Make sure to remove the keyless opera- ing the accelerator pedal, then start the engine with- tion key from the emergency key after out depressing the accelerator pedal. -
Page 46
The trunk lid must be closed manually after it has The sunroof cannot be stopped in a partly open po- as stated below. Please consult your been opened. sition. MITSUBISHI MOTORS Authorized Service Point. On vehicles equipped with Mitsubishi Multi-Communication System (MMCS),… -
Page 47
If you wish to add remote control switch, ual for details. locking or unlocking of the doors with please contact your MITSUBISHI MOTORS • Disable the “Close” operation of the elec- the blink of the turn-signal lamps) can be Authorized Service Point. A maximum of 4 tric window control and the sunroof. -
Page 48: Doors
You may purchase a replacement battery at er’s door when it is open. an electric appliance store. A MITSUBISHI MOTORS Authorized Serv- To lock or unlock with the key ice Point can replace the battery for you if you prefer.
-
Page 49
Locking and unlocking In a vehicle that has a Dead Lock System, it NOTE is not possible to unlock the door by pushing If the vehicle is equipped with the keyless op- the lock knob to the unlock side while the eration system, the door can be locked or un- Dead Lock System is set. -
Page 50: Central Door Locks
(Twin Clutch SST) position. These functions are not activated when the vehi- cle is shipped from the factory. To activate or de- activate these functions, please contact a MITSUBISHI MOTORS Authorized Service Point. 1- Lock 1- Lock…
-
Page 51: Dead Lock System
Dead Lock dow control: Lock switch” on page 1-37. System makes it impossible to unlock the doors us- Please consult a MITSUBISHI MOTORS Au- ing the inside lock knobs. thorized Service Point.
-
Page 52
UNLOCK switch (B) has been pressed, or the handle of the driver’s door or front pas- senger door has been gripped. For details, please contact a MITSUBISHI MOTORS Au- thorized Service point. On vehicles equipped with Mitsubishi Multi-Communication Sys- tem (MMCS), screen operations can be used to make the adjustment. -
Page 53: Child-Protection» Rear Doors
Locking and unlocking “Child-protection” rear doors Trunk lid E00300900856 E00301200524 WARNING The trunk cannot be opened from the in- side. Be careful not to allow children to get inside the trunk. If a child got trap- ped inside the trunk, a serious accident could result.
-
Page 54
Locking and unlocking 2. Press the trunk lid opener switch to open the Gently close the trunk lid from the outside so that it • Do not hang any object on the gas struts. trunk lid. The trunk lid will pop up slightly. is completely closed. -
Page 55: Security Alarm System
Locking and unlocking Security alarm system The security alarm has four modes: If, while the system is armed, the vehicle is un- locked using any means other than the keyless en- E00301500136 try system or keyless operation function {for exam- The security alarm system is designed to prevent un- System preparation mode (approx.
-
Page 56
Locking and unlocking you, press the UNLOCK switch (A) on the re- NOTE mote control switch to select the security When lending the vehicle to another person alarm settings mode. or allowing the vehicle to be driven by some- one who is unfamiliar with the security alarm system, be sure to give the person a Except for vehicles with the keyless operation system proper explanation of the security alarm sys-… -
Page 57
Locking and unlocking 2. Exit the vehicle and close all of the doors, The buzzer makes an intermittent beeping Number of times Security alarm settings mode the trunk lid and the bonnet. sound and the security indicator (B) in the au- the buzzer sounds 3. -
Page 58
“active” mode. trol switches, please contact your MITSUBISHI MOTORS Authorized Service Point. Cancelling the system The activation distance for keyless entry sys- E00301800155 tem is approximately 4 m. The following methods can be used to cancel the… -
Page 59
Locking and unlocking The time for the vehicle inside alarm can be Even if the battery is disconnected, the alarm adjusted. Please consult your MITSUBISHI activation memory will not be erased. MOTORS Authorized Service Point. Even though the alarm will not be activated On vehicles equipped with Mitsubishi Multi- if the battery is temporarily disconnected, Communication System (MMCS), screen op-… -
Page 60: Electric Window Control
Locking and unlocking Electric window control A window can be opened or closed by operating WARNING the corresponding switch. E00302200390 The electric windows can only be operated with the Before operating the electric window con- ignition switch in the “ON” position. trol, make sure that nothing is capable of being trapped (head, hand, finger, etc.).
-
Page 61
“Keyless operation system: To operate us- closed even with the driver’s switch. Refer to the separate owner’s manual for de- ing the keyless operation function” on page Please consult a MITSUBISHI MOTORS Au- tails. 1-10. thorized Service Point. • The timer period can be adjusted. -
Page 62: Sunroof
Locking and unlocking Sunroof* NOTE WARNING The safety mechanism can be activated if the E00302701217 The sunroof can only be operated with the ignition driving conditions or other circumstances Do not put head, hands or anything else switch in the “ON” position. cause the door windows to be subjected to a out of the sunroof opening while driving physical shock similar to that caused by a trap-…
-
Page 63
Locking and unlocking NOTE 2. Once the tilt up condition has been reached, Operating the sunroof repeatedly with the en- press and hold the switch (2) for a period of The sunroof stops just before reaching the gine stationary will run down the battery. Op- at least 3 seconds. -
Page 65
Seat and seat belts Seat………………..2-02 Seat adjustment…………….2-03 Front seat………………2-03 Rear seat………………2-05 Head restraints (Rear seat only)…………2-05 Seat belts………………2-06 Pregnant women restraint………….2-09 Seat belt pretensioner system and force limiter system….2-09 Child restraint…………….2-10 Seat belt inspection……………2-18 Supplemental restraint system (SRS) — airbag……2-18… -
Page 66: Seat
Seat and seat belts Seat E00400101074 1- Front seat To adjust forward or backward ® p. 2-03 To recline the seatback ® p. 2-04 Heated seats* ® p. 2-04 2- Rear seat Armrest ® p. 2-05 2-02…
-
Page 67: Seat Adjustment
Seat and seat belts Seat adjustment Front seat CAUTION E00400300428 E00400400012 To adjust forward or backward Adjust the driver’s seat so that you are comfortable Make sure the seat is adjusted by an and that you can reach the pedals, steering wheel, E00400500589 adult or with adult supervision for cor- Pull the seat adjusting lever and adjust the seat for-…
-
Page 68
Seat and seat belts To recline the seatback The indication lamp (A) will illuminate while the CAUTION heater is on. E00400600708 Adjust the seatback angle by turning the knob. • People with sensitive skin • Excessively tired people • People under the influence of alcohol or sleep inducing medication (cold medicine, etc.) Do not place heavy objects on the seat or… -
Page 69: Rear Seat
Seat and seat belts Rear seat Head restraints (Rear seat only) To raise the head restraint, move it upward. To low- er the restraint, move it downward while pushing E00401300018 E00403301035 the height adjusting knob (A) in the direction of the Armrest arrow.
-
Page 70: Seat Belts
Seat and seat belts To install Seat belts Confirm that the head restraint is facing the correct E00404800577 To protect you and your passengers in the event of direction, and then insert it into the seatback while an accident, it is most important that the seat belts pressing the height adjusting knob (A) in the direc- are worn correctly while driving.
-
Page 71
Seat and seat belts 3-point type seat belt WARNING WARNING (with emergency locking mechanism) No modifications or additions should be Never wear the lap portion of the belt E00404900695 This type of belt requires no length adjustment. made by the user which will either pre- across your abdomen. -
Page 72
Seat and seat belts Driver’s seat belt reminder/warning If you then repeatedly stop and start your vehicle WARNING with the seat belt unfastened, the warning lamp/dis- lamp and display play and tone will remind you to fasten your seat Do not install any accessory or sticker E00409800686 belt every time the vehicle starts moving. -
Page 73: Pregnant Women Restraint
E00405600064 force limiter system If you need to scrap the vehicle, please con- E00405700081 sult a MITSUBISHI MOTORS Author- The driver’s seat and front passenger’s seat each WARNING ized Service Point. It is important to do have a seat belt equipped with a pretensioner system.
-
Page 74: Child Restraint
Seat and seat belts Child restraint Caution for installing the child re- Use rearward facing child restraints in the rear seat or turn off the front passenger’s airbag ON-OFF straint on vehicle with front passenger E00406401200 switch. (Refer to “To turn an airbag off” on page When transporting children in your vehicle, some airbag 2-21.)
-
Page 75
Seat and seat belts The child restraint system should be appropri- WARNING ate for your child’s weight and height and properly fit the vehicle. For a higher degree When the child restraint system is not in of safety: THE CHILD RESTRAINT SYS- use, keep your child restraint system se- TEM SHOULD BE INSTALLED IN THE cured with the seat belt or remove it from… -
Page 76
Seat and seat belts Suitability for various ISOFIX positions E00411400100 Vehicle ISOFIX positions Mass group Size class Fixture Rear outboard Front passenger Rear centre Left side Right side Carrycot ISO/L1 ISO/L2 — Up to 10 kg ISO/R1 — Up to 13 kg ISO/R1 IL, IL* IL, IL*… -
Page 77
X- ISOFIX position not suitable for ISOFIX child restraint systems in this mass group and/or this size class. IL (Genuine part information) Genuine part No. ECE No. MZ313589 E1-04301146 MZ313045 E1-04301133 NOTE MITSUBISHI MOTORS Europe B.V. reserves the right to changes without any prior announcement. For detailed information, consult your MITSUBISHI MOTORS Authorized Service Point. 2-13… -
Page 78
U- Suitable for “universal” category restraints approved for use in this mass group. UF- Suitable for forward-facing “universal” category restraints approved for use in this mass group. L- Suitable for particular child restraints (MITSUBISHI MOTORS genuine parts). B- Built-in restraint approved for this mass group. -
Page 79
Seat and seat belts NOTE There is no applicable MITSUBISHI MOTORS Genuine Parts to the Mass Group “0- Up to 10 kg”. MITSUBISHI MOTORS Europe B.V. reserves the right to changes without any prior announcement. For detailed information, consult your MITSUBISHI MOTORS Authorized Service Point. -
Page 80
Seat and seat belts Installing a child restraint system to It is not necessary to retain the child restraint sys- Tether anchorage locations tem using the vehicle’s seat belts. There are 3 attachment points on the rear shelf, lo- the lower anchorage (ISOFIX child re- cated behind the top of your rear seat. -
Page 81
Seat and seat belts 2. Push the child restraint system’s connectors 5. Latch the top tether strap hook (F) of the Installing a child restraint system to a (A) into the slit (B) in accordance with the in- child restraint system to the tether anchorage 3-point type seat belt (with emergency structions provided by the child restraint sys- bracket (G) and tighten the top tether strap so… -
Page 82: Seat Belt Inspection
Seat and seat belts Seat belt inspection Supplemental restraint system E00406300475 (SRS) — airbag Check the belts for cuts, worn or frayed web- E00407201843 bing and for cracked or deformed metallic The information written in this Supplemental Re- parts. Replace the belt assembly if it is defec- straint System (SRS) section contains important tive.
-
Page 83
Seat and seat belts The SRS is NOT a substitute for the seat belts; for WARNING maximum protection in all types of crashes and ac- cidents, seat belts should ALWAYS be worn by ev- IT IS VERY IMPORTANT TO BE PROP- eryone who drives or rides in this vehicle. -
Page 84
Seat and seat belts Use rearward facing child restraints in the rear seat WARNING or turn off the front passenger’s airbag ON-OFF switch. (Refer to “To turn an airbag off” on page Infants and small children should never 2-21.) be unrestrained, stand up against the in- strument panel or held in your arms or on your lap. -
Page 85
Seat and seat belts Front passenger’s airbag OFF indication lamp To turn an airbag off WARNING E00411500169 E00410600349 The front passenger’s airbag OFF indication lamp Extreme Hazard! is located in the instrument panel. WARNING Do not use a rearward facing child re- straint on a seat protected by an airbag in front of it! To reduce risk of serious or fatal injury:… -
Page 86
We recommend you to have the system in- spected by a MITSUBISHI MOTORS Authorized Service Point. • If the indication lamp remains on when the front passenger’s airbag ON-… -
Page 87
Seat and seat belts Deployment of front airbags and driv- The front airbags and driver’s knee airbag will de- Examples of some typical conditions are shown in ploy if the severity of the impact is above the de- the illustration. er’s knee airbag signed threshold level, comparable to an approxi- E00412500270… -
Page 88
Seat and seat belts Such conditions are shown in the illustration. Examples of some typical conditions are shown in WARNING the illustration. Do not set anything on, or attach any- thing to, the instrument panel above the glove box. It might strike and injure an oc- cupant if the airbag inflates. -
Page 89
Seat and seat belts The label shown here is attached to the seatbacks WARNING WARNING with a side airbag. Do not attach accessories to the lower por- The airbag system is designed to work on- tion of the driver’s side instrument panel. ly once. -
Page 90
Seat and seat belts Deployment of side airbags and cur- Examples of some typical conditions are shown in The side airbags and curtain airbags MAY NOT the illustration. DEPLOY when… tain airbags With certain types of side collisions, the vehicle’s E00407701327 body structure is designed to absorb the shock to The side airbags and curtain airbags ARE DE-… -
Page 91
Seat and seat belts Because the side airbags and curtain airbags do not WARNING WARNING protect the occupant in all types of side collisions, be sure to always properly wear your seat belts. The side airbags and curtain airbags are Do not place any objects near or in front designed to supplement the driver and pas- of the seatback of either front seat. -
Page 92
Do not modify your steering wheel, seat to be done by a MITSUBISHI MOTORS belt retractor or any other SRS compo- Authorized Service Point. nents. For example, replacement of the… -
Page 93
SRS inspec- ted by a MITSUBISHI MOTORS Author- ized Service Point. NOTE When you transfer ownership of the vehicle… -
Page 95
Instruments and controls Instruments……………….3-02 Multi-information display………….3-03 Indication lamp, warning lamp, and information screen display list……………..3-22 Indication lamps…………….3-34 Warning lamps…………….3-34 Information screen display…………3-36 Combination headlamps and dipper switch……..3-38 Headlamp levelling……………3-42 Turn-signal lever…………….3-42 Adaptive Front lighting System (AFS)………3-43 Hazard warning flasher switch………….3-45 Fog lamp switch…………….3-45 Wiper and washer switch…………..3-46 Headlamp washer switch…………..3-49… -
Page 96: Instruments
Instruments and controls Instruments Tachometer NOTE You can adjust to 8 different levels for when E00500300605 E00500101046 The tachometer indicates the engine speed (r/min). the tail lamps are illuminated and 8 for when The tachometer can help you obtain more economi- they are not.
-
Page 97: Multi-Information Display
Instruments and controls Multi-information display E00519900580 The following information is included on the multi-information display: warnings, odometer/tripmeter, service reminder, engine coolant temperature, fuel remain- ing, outside temperature, Twin Clutch SST control mode, S-AWC (Super-All Wheel Control) control mode, shift lever position, average and momentary fuel con- sumption, driving range, average speed, S-AWC (Super-All Wheel Control) operation display, and meter illumination.
-
Page 98
Instruments and controls NOTE The trip computer function fuel units, temperature units, display language, and other settings can be changed. Refer to “Changing the function settings (when the ignition switch is “ON”)” on page 3-15. The display screen is different depending on whether the ignition switch is “OFF” or “ON”. Refer to “Information screen (when the ignition switch is “OFF”)”… -
Page 99
Instruments and controls Multi-information meter switch This mark is also displayed if there is an- Information screen (when the ignition other warning other than the one dis- E00520000480 switch is “OFF”) Each time the multi-information meter switch is op- played. When the cause of the warning E00520200466 erated, a sound is emitted and the multi-informa- display is eliminated, the “!”… -
Page 100
Instruments and controls Odometer/Tripmeter Interrupt display screen (when the ig- Example E00521201112 nition switch is “OFF”) Each time you lightly press the multi-information If tripmeter is displayed, only tripmeter E00520500502 meter switch, the display screen switches. will be reset. When there is information to be announced, such Odometer/Tripmeter →… -
Page 101
Instruments and controls If you press the multi-information meter switch, Door ajar warning display screen Information screen (when the ignition the display screen switches to the screen that was (when the ignition switch is “OFF”) switch is turned from “OFF” to “ON”) displayed before the warning display and the “!”… -
Page 102
Instruments and controls If there is a fault, the screen changes to warning dis- S-AWC (Super-All Wheel Con- Active Stability Control (ASC) play. Refer to “Warning display list (when the igni- trol) control mode display OFF display screen tion switch is “ON”)” on page 3-26. screen E00521000272 This is displayed when the Active Stabil-… -
Page 103
Instruments and controls 5- Average fuel consumption display, momenta- Odometer/Tripmeter CAUTION ry fuel consumption display E00524500148 6- Average speed display, momentary fuel con- If the engine is overheating, the sumption display display will be interrupted with 7- S-AWC (Super-All Wheel Control) opera- a warning display. -
Page 104
Instruments and controls When you refuel, the driving When the ignition switch is switch- The average speed display memo- range display is updated. ed from “ACC” or “LOCK” to ries for auto reset mode and man- However, if you only add a small “ON”, the mode setting is automat- ual reset mode are erased if the bat- amount of fuel, the correct value… -
Page 105
Instruments and controls Auto reset mode display setting It is possible to cancel the green When the average fuel consump- changed to the preferred units bar graph. Refer to “Changing the tion is being displayed, if you hold {km/L, mpg (US), mpg (UK) or function settings (when the igni- down the multi-information meter L/100 km}. -
Page 106
Instruments and controls Interrupt display screen (when the ig- NOTE NOTE display setting nition switch is “ON”) Warning display screens with a “ ” or “ ” changed to the preferred unit (°C mark displayed in the upper right of the E00522000501 or °F). -
Page 107
To modify the display settings, have it adjus- ing warning display to the previous screen. ted at a MITSUBISHI MOTORS Authorized When the fuel is reduced further to about 5 litres, Service Point. -
Page 108
3. After your vehicle is inspected at a 2. Press and hold the multi-information meter MITSUBISHI MOTORS Authorized Service switch for about 2 seconds or more to dis- CAUTION Point, it displays the time until the next peri- play “… -
Page 109
Instruments and controls Door ajar warning display screen Changing the function settings (when from the setting mode screen to the menu screen. (when the ignition switch is “ON”) the ignition switch is “ON”) E00522600477 E00522700218 If any of the doors or the trunk lid is not complete- 1. -
Page 110
Instruments and controls 4. Select the item to change on the menu screen 2. Lightly press the multi-information meter Auto reset mode and change to the desired setting. Refer to switch to select “AVG (average fuel consump- • When the average fuel consumption and the following items for further details on the tion and average speed setting)”. -
Page 111
Instruments and controls 2. Lightly press the multi-information meter 5. Press and hold the multi-information meter 2. Lightly press the multi-information meter switch to select “AVG UNIT (fuel consump- switch for about 2 seconds or more to change switch to select “ ” (temperature unit set- tion display setting)”. -
Page 112
Instruments and controls 2. Lightly press the multi-information meter 5. If you hold down the multi-information me- 2. Lightly press the multi-information meter switch to select “LANGUAGE” (language ter switch for about 2 seconds or more, the switch to select “ ” (language cooperative setting). -
Page 113
Instruments and controls • When A (language cooperation enabled) 2. Lightly press the multi-information meter 1. Press and hold the multi-information meter has been selected with the language coop- switch for about 2 seconds or more to switch switch to select “ ” (operation sound setting). erative control, language… -
Page 114
Instruments and controls 4. Lightly press the multi-information meter 3. Press and hold the multi-information meter 3. Press and hold the multi-information meter switch to select the time until the display. switch for about 2 seconds or more to switch switch for about 2 seconds or more to switch 5. -
Page 115
Instruments and controls NOTE The factory settings are as follows. • Average fuel consumption and average speed reset mode: A (Auto reset) • Fuel consumption display unit: L/100 km • Temperature unit: °C (Celsius) • Display language: ENGLISH • Cooperative language setting: A •… -
Page 116: Indication Lamp, Warning Lamp, And Information Screen Display List
Instruments and controls Indication lamp, warning lamp, and information screen display list E00523700013 Indicator and warning lamp list E00523800522 1- Adaptive Front lighting System (AFS) OFF indication lamp ® p. 3-34, 9- Brake warning lamp ® p. 3-34 10- Cruise control indication lamp* ® p. 4-38 3-44 2- Position lamp indication lamp ®…
-
Page 117
• An extremely strong electromagnetic wave is received from a source such as an illegal radio set, a spark from a wire, or a radar station. • Abnormal voltage or a static electricity discharge is generated by the operation of installed electrical equipment (including after-market parts). If the warning display appears many times, we recommend you to consult a MITSUBISHI MOTORS Authorized Service Point. 3-23… -
Page 118
Instruments and controls Warning display list (when the ignition switch is “OFF”) E00524000505 Screen Cause Solution (Reference) You have forgotten to turn off the lamps. Refer to “Lamps (headlamps, fog lamp, etc.) auto-cut- out function” on page 3-39. The theft-alarm is operating. Refer to “Security alarm”… -
Page 119
Instruments and controls Screen Cause Solution (Reference) There is a fault in the keyless operation system. Refer to “Keyless operation system” on page 1-08. 3-25… -
Page 120
Instruments and controls Warning display list (when the ignition switch is “ON”) E00524100551 Screen Cause Solution (Reference) There is a fault in the keyless operation system. Refer to “Keyless operation system” on page 1-08. 3-26… -
Page 121
Instruments and controls Screen Cause Solution (Reference) Immobilizer is registered. Refer to “Immobilizer” on page 1-03. Refer to “Emergency key” on page 1-17. The brake fluid level in the reservoir has fallen Immediately stop the vehicle in a safe place. to a low level. -
Page 122
Instruments and controls Screen Cause Solution (Reference) The engine is overheated. Stop the vehicle in a safe place and take correc- tive measures. Refer to “Engine overheating” on page 6-04. Twin Clutch SST fluid temperature is too high. Refer to “Twin Clutch SST” on page 4-15. You turned the ignition switch to the “ON”… -
Page 123
Instruments and controls Screen Cause Solution (Reference) There is a fault in the engine oil circulation sys- Immediately stop the vehicle in a safe place. tem. We recommend you to have it checked. Refer to “Oil pressure warning display” on page 3-37. -
Page 124
Instruments and controls Screen Cause Solution (Reference) There is a fault in the Adaptive Front lighting We recommend you to have it checked. Refer System (AFS). to “Adaptive Front lighting System (AFS)” on page 3-43. There is a fault in the S-AWC (Super-All We recommend you to have it checked. -
Page 125
Instruments and controls Screen Cause Solution (Reference) The outside temperature is 3 °C (37 °F) or less. Be careful of ice on the road. The road can be icy even when this warning is not displayed, so drive carefully. The timing chain may be worn. Have your vehicle inspected by a MITSUBISHI MOTORS Authorized Service Point. -
Page 126
Instruments and controls Other interrupt displays (when the ignition switch is “ON”) E00524200389 The operation status of each system is displayed on the information screen. Refer to the appropriate page for the system for further details. Screen System operation status Reference When the Active Stability Control (ASC) is op- Refer to “Active stability control (ASC)”… -
Page 127
Instruments and controls Screen Solution Stop the vehicle in a safe place, turn off the engine, and take a rest. Use this display as rough guide for taking rests during a long drive. The interval from the start of your trip until this message is displayed can be set. Refer to “Changing the function settings (when the ignition switch is “ON”)”… -
Page 128: Indication Lamps
Instruments and controls Indication lamps Adaptive Front lighting Sys- Warning lamps tem (AFS) OFF indication E00501600100 E00502400147 lamp Turn-signal indication lamps/ Brake warning lamp E00525000036 Hazard warning indication E00502502100 This indication lamp illuminates when This lamp illuminates when the ignition lamps the AFS is OFF.
-
Page 129
Instruments and controls NOTE CAUTION CAUTION Under conditions such as sporty driving, the brake fluid in the tank • The brake warning lamp If the lamp does not illuminate may move and the warning lamp does not illuminate when when the ignition switch is may come on temporarily. -
Page 130: Information Screen Display
Instruments and controls Information screen display CAUTION CAUTION E00524600022 Brake warning display If it illuminates while the en- If this warning stays illuminated and E00524700238 gine is running, there is a prob- does not go out while driving, there is a lem in the charging system.
-
Page 131
Instruments and controls Oil pressure warning display Engine oil level warning display NOTE Under conditions such as sporty driving, the E00524900171 E00526700030 brake fluid in the tank may move and the warning display may appear temporarily. If the warning display goes out after a while, there is not a problem with the brake system and the vehicle can be driven normally. -
Page 132: Combination Headlamps And Dipper Switch
The sensitivity of the automatic on/off con- dipper switch trol can be adjusted. E00506001786 further information, contact your MITSUBISHI MOTORS Authorized Service Headlamps Point. On vehicles equipped with MITSUBISHI NOTE Multi-Communication System (MMCS), Do not leave the lamps on for a long time screen operations can be used to make the ad- while the engine is stationary (not running).
-
Page 133
For further information, we recommend you E00532700051 have your vehicle checked. to consult a MITSUBISHI MOTORS Author- If, while the lamp switch is in the “ ” posi- ized Service Point. On vehicles equipped… -
Page 134
Instruments and controls When the engine was started using the key- Dipper (High/Low beam change) Welcome light less operation function, if the driver’s door is E00506200374 E00528900094 This function turns on the position and tail lamps opened and the ignition switch is in the When the lamp switch is in the “… -
Page 135
4. The headlamps will come on in the low For further information, we recommend you beam setting for about 30 seconds. After the to consult a MITSUBISHI MOTORS Author- headlamps go off, the headlamps can be ized Service Point. turned on again in the low beam setting for •… -
Page 136: Headlamp Levelling
3-flash function. When making a normal turn, use position For further information, we recommend you (1). The lever will return automatically when to consult a MITSUBISHI MOTORS Author- cornering is completed. ized Service Point. 2- Lane-change signals…
-
Page 137: Adaptive Front Lighting System (Afs)
Instruments and controls Adaptive Front lighting System When the steering wheel is turned (on a curve, for NOTE example), the road ahead in the direction in which The amount of steering wheel operation nec- (AFS) the car is being turned is illuminated. (The left bend- essary to illuminate the bending lamps E00525100053 ing lamp comes on when the car is turned leftward,…
-
Page 138
Instruments and controls Adaptive Front lighting System (AFS) When the emergency spare wheel is fitted on the car, the AFS may not work normally. indications Push the “AFS OFF” switch to turn the AFS E00525300185 off. Also, fit a standard wheel on the car in Indicator place of the emergency spare wheel as soon as possible. -
Page 139: Hazard Warning Flasher Switch
Instruments and controls Hazard warning flasher switch Fog lamp switch In case of vehicles with Daytime Running Lamp, the front fog lamps can be operated E00506600596 E00506700034 even if the lamp switch is set to the “OFF” Front fog lamp switch Use the hazard warning flasher switch when the ve- position.
-
Page 140: Wiper And Washer Switch
Instruments and controls To turn the rear fog lamp on again, turn the Wiper and washer switch If the blades are frozen to the windscreen, do not knob twice in the “ON” direction after turn- operate the wipers until the ice has melted and the E00507101553 ing on the headlamps.
-
Page 141
To protect the rubber parts of the wipers, this lever in the “LO” or “HI” position. operation of the wipers does not take place Contact a MITSUBISHI MOTORS Author- when the vehicle is stationary and the ambi- ized Service Point when replacing the wind- ent temperature is about 0 °C or lower. -
Page 142
Instruments and controls The wipers will operate once if the lever is raised Windscreen washer NOTE to the “MIST” position and released when the igni- It is possible to activate the following func- E00507200889 The windscreen washer can be operated with the ig- tion switch is in the “ON”… -
Page 143: Headlamp Washer Switch
They may scratch the glass surface and the For further information, we recommend you blades wear out prematurely. to consult a MITSUBISHI MOTORS Author- Before using the wipers in cold weather, ized Service Point. check that the wiper blades are not frozen on- •…
-
Page 144: Rear Window Demister Switch
Instruments and controls Rear window demister switch When cleaning the inside of the rear win- Horn switch dow, use a soft cloth and wipe lightly along E00507901115 E00508000448 the heater wires, being careful not to damage The rear window demister switch can be operated Press the steering wheel on or around the “…
-
Page 145
Starting and driving Economical driving……………4-02 Driving, alcohol and drugs…………4-02 Safe driving techniques…………..4-03 Running-in recommendations…………4-03 Parking brake…………….4-04 Parking………………4-05 Steering wheel height adjustment……….4-06 Inside rear-view mirror…………..4-06 Outside rear-view mirrors………….4-07 Ignition switch…………….4-09 Steering wheel lock…………..4-11 Starting and stopping the engine……….4-11 Turbocharger operation…………..4-13 Clutch pedal operation…………..4-14 Manual transmission*…………..4-15 Twin Clutch SST (Sport Shift Transmission)*……4-15 Full-time 4WD…………….4-26… -
Page 146: Economical Driving
Starting and driving Economical driving Speed Driving, alcohol and drugs At higher the vehicle speed, more fuel is con- E00600100819 E00600200067 For economical driving, there are some technical re- Driving after drinking alcohol is one of the most fre- sumed. Avoid driving at full speed. Even a slight re- quirements that have to be met.
-
Page 147: Safe Driving Techniques
Starting and driving Safe driving techniques Running-in recommendations E00600300433 E00600401343 Driving safety and protection against injury cannot For future performance and economy of your vehi- be fully ensured. However, we recommend that cle, we recommend that you carry out the follow- you pay extra attention to the following: ing precautions.
-
Page 148: Parking Brake
Starting and driving Parking brake NOTE CAUTION Apply sufficient force to the parking brake E00600501344 To park the vehicle, first bring it to a complete lever to hold the vehicle stationary after the Before driving, be sure that the parking stop, fully apply the parking brake lever sufficient- foot brake is released.
-
Page 149: Parking
Starting and driving Parking NOTE CAUTION If your vehicle is equipped with Twin Clutch E00600601390 To park the vehicle, fully engage the parking SST, be sure to apply the parking brake be- If the brake warning lamp does not extin- brake, and then move the gearshift lever to 1 fore moving the gearshift lever to the “P”…
-
Page 150: Steering Wheel Height Adjustment
Starting and driving When leaving the vehicle Steering wheel height adjustment Inside rear-view mirror Always carry the key and lock all doors when leav- E00600700378 E00600800135 1. Release the tilt lock lever while holding the Adjust the rear-view mirror only after making any ing the vehicle unattended.
-
Page 151: Outside Rear-View Mirrors
Starting and driving To reduce the glare Outside rear-view mirrors 1. Place the lever (A) to the same side as the mir- ror whose adjustment is desired. The lever (A) at the bottom of the mirror can be E00600900501 used to adjust the mirror to reduce the glare from To adjust the mirror position the headlamps of vehicles behind you during night Except for vehicles equipped with the mirror retractor switch…
-
Page 152
Starting and driving Retracting and extending the outside Retracting and extending the mirrors using the NOTE mirror retractor switch Be careful not to get your hands trapped mirrors With the ignition switch in the “ON” or “ACC” po- while a mirror is moving. E00618200213 The outside mirror can be folded in towards the sition, push the mirror retractor switch to retract… -
Page 153: Ignition Switch
20 minutes. Functions can be modified as stated below. E00601401669 [For vehicles equipped with the keyless opera- Please consult a MITSUBISHI MOTORS Au- tion system] thorized Service Point. For information on operations for vehicles equip- On vehicles equipped with Mitsubishi Multi-…
-
Page 154
60 minutes. • The ACC power auto-cutout function can be deactivated. For details, we recommend you to consult a MITSUBISHI MOTORS Authorized Service Point. On vehicles equipped with Mitsubishi Multi- Communication System (MMCS), screen op- erations can be used to make the adjustment. -
Page 155: Steering Wheel Lock
Starting and driving Steering wheel lock Starting and stopping the engine CAUTION E00601500490 E00620600155 [For vehicles equipped with the keyless opera- Remove the key when leaving the vehicle. Tips for starting tion system] In some countries, it is prohibited to leave For information on operations for vehicles equip- Do not operate the starter motor continuous- the key on the vehicle when parked.
-
Page 156
Starting and driving 5. On vehicles with M/T, place the gearshift lev- At extreme cold ambient temperature WARNING er in the “N” (Neutral) position. If the engine won’t start, depress the accelerator ped- On vehicles with Twin Clutch SST, make al about halfway while cranking the engine. -
Page 157: Turbocharger Operation
Starting and driving 3. For vehicles with M/T, turn the ignition If the temperature inside the engine compart- Turbocharger operation switch to the “LOCK” position to stop the en- ment is high, the cooling fans (A) will contin- E00611200038 gine, and then move the gearshift lever to the ue to operate for some time even if the en- gine is stopped.
-
Page 158: Clutch Pedal Operation
Starting and driving Turbocharger Clutch pedal operation NOTE If either of the following occurs, we recom- The turbocharger increases engine power by push- E00611300039 Observe the following cautions when using the ing large amounts of air into the engine’s cylinders. mend you to have the clutch inspected.
-
Page 159: Manual Transmission
Starting and driving Manual transmission* Twin Clutch SST (Sport Shift To shift into reverse from 5 gear, move the gearshift lever to the “N” (Neutral) position, E00602000421 Transmission)* The shift pattern is shown on the gearshift lever and then shift it into reverse. E00620900086 knob.
-
Page 160
Starting and driving The gearshift lever (A) has 2 gates; the main shift gate (B) and the manual shift gate (C). The pull-ring (D) must be pulled up while the brake pedal is depressed to move the gearshift lever. The pull-ring (D) must be pulled up to move the gearshift lever. -
Page 161
Starting and driving Gearshift lever position display In addition, when the vehicle is driven with the gear- WARNING shift lever in the “D” (DRIVE) position, the for- E00621100199 When the ignition switch is turned to the “ON” po- ward gear number is shown. Always depress the brake pedal when sition, the position of the gearshift lever is indica- shifting the gearshift lever into the other… -
Page 162
Starting and driving “R” REVERSE “D” DRIVE WARNING This position is to back up. This position is for normal driving. The transmis- sion automatically selects a suitable gear ratio for To avoid unintended vehicle movement your speed and acceleration. when the gearshift lever position display CAUTION Engine braking is automatically applied when nec- blinks and the buzzer beeps quicker,… -
Page 163
Starting and driving NOTE Twin Clutch SST control mode switch Twin Clutch SST Characteristic E00621400192 Damage to your vehicle caused by racing and/ control mode When the ignition switch is set to the “ON” posi- or driving on closed circuit tracks will not be tion, operate the Twin Clutch SST control mode Control mode for normal driv- covered under warranty. -
Page 164
Starting and driving Manual shift To shift from “S-Sport” mode to “Sport” mode CAUTION or To shift from “Sport” mode to “Normal” mode E00621600208 Using the gearshift lever (A) or the shift paddles While the vehicle is stopped or being driven, push Sudden engine braking and rapid acceler- (B), shifting can be performed manually. -
Page 165
Starting and driving Shifting using the gearshift lever NOTE Shifting using the shift paddles E00621700023 E00621800138 After manual shifting is selected using the gearshift lever, shifting up and down can al- Selecting manual shifting Selecting manual shifting so be performed using the shift paddles. While the vehicle is stopped or being driven, move While the vehicle is stopped or being driven with the gearshift lever from the “D”… -
Page 166
Starting and driving Shifting up Returning to “D” range operation Manual shift display Each time the + (SHIFT UP) shift paddle is pulled, When the gearshift lever is in the “D” (DRIVE) po- E00623500113 In manual shift, the currently selected gear is dis- the transmission shifts up 1 gear. -
Page 167
1. Depress the brake pedal and stop the vehicle checked by a MITSUBISHI MOTORS Authorized while traveling even if the accelerator ped- in a safe place. -
Page 168
Starting and driving For smoother vehicle performance, if you release CAUTION CAUTION the throttle while climbing a steep grade, the Twin Clutch SST may not upshift. This is normal, as the Do not race the engine with brake pedal • If the vehicle is continuously driven at computer is temporarily preventing shifting. -
Page 169
Starting and driving For longer waiting periods with the engine running, NOTE CAUTION place the gearshift lever in the “N” (NEUTRAL) po- On a slope, be sure to apply the parking sition and apply the parking brake, while holding brake before moving the gearshift lever to •… -
Page 170: Full-Time 4Wd
Starting and driving Full-time 4WD When the check engine warning lamp comes on CAUTION or blinking E00604900192 There could be a malfunction in the engine electron- Full-time 4WD vehicles are propelled by engine When the Twin Clutch SST fluid temper- ic control module.
-
Page 171: Cautions On Handling Of 4-Wheel Drive Vehicles
Starting and driving Cautions on handling of 4-wheel CAUTION CAUTION drive vehicles Always use tyres of the same size, same Do not tow 4WD vehicles with the front E00606800687 type, and same brand, and which have no or rear wheels on the ground (Type A or wear differences.
-
Page 172: S-Awc (Super-All Wheel Control)
Starting and driving S-AWC (Super-All Wheel CAUTION CAUTION Control) Be sure to use tyres that are the same speci- Control of the braking force does not en- E00622600032 fied size, type, and brand, and have no dif- hance the stopping performance of the ve- S-AWC is an integrated vehicle dynamics control ference in the amount of wear for all four hicle, therefore, pay careful attention to…
-
Page 173
Starting and driving Except for vehicles with steering wheel audio re- NOTE S-AWC control Operation mote control switches The control mode can be changed while the mode Push the switch down to change the control mode vehicle is moving. TARMAC Normally, use this control in the order “TARMAC”… -
Page 174
Starting and driving In addition, the S-AWC control mode display in sec- AYC operation display CAUTION tion (A) will go out at the same time. The amount of the yaw moment added by AYC is displayed as a bar graph. The S-AWC control mode display may flash under aggressive driving conditions. -
Page 175: Anti-Lock Brake System (Abs)
Starting and driving Anti-lock brake system (ABS) The ABS can be used after the vehicle has NOTE reached a speed over approximately 10 km/h If the ambient temperature drops and the vis- E00607101046 (6 mph). It stops working when the vehicle The anti-lock brake system (ABS) helps prevent cosity of the AWC control fluid increases, slows below approximately 5 km/h (3 mph).
-
Page 176
Starting and driving Under normal conditions, the ABS warning lamp If the ABS warning lamp/display and brake warn- Front only comes on when the ignition switch is turned ing lamp/display illuminate at the same time to the “ON” position and goes off a few seconds later. Warning lamp CAUTION Any of the following indicates that the… -
Page 177: Active Stability Control (Asc)
Starting and driving Active stability control (ASC) Stability control function NOTE An operation noise may be emitted from the E00619100017 E00616700139 The stability control function is designed to help The Active Stability Control (ASC) takes overall engine compartment in the following situa- the driver maintain control of the vehicle on slip- control of the anti-lock brake system, traction con- tions.
-
Page 178
Starting and driving If the “ASC OFF” switch is continuously ASC operation display CAUTION pressed after the ASC has been turned OFF When the ASC is oper- or the ASC and the braking control of AYC ating, the information Be sure to turn ON the ASC for normal have been turned off, an erroneous operation screen in the multi-infor- driving. -
Page 179: Low-Slung Suspension System
Starting and driving When a compact spare tyre has been put on Low-slung suspension system CAUTION your vehicle, the gripping ability of the tyre E00608900057 will be lower, making it more likely that the The system may be malfunctioning. display will blink. Park your vehicle in a safe place and stop CAUTION the engine.
-
Page 180: Braking
Starting and driving Braking WARNING WARNING E00607001508 All the parts of the brake system are critical to safe- If the power assist is lost or if either Do not leave any objects near the brake ty. We recommend you to have the vehicle brake hydraulic system stops working pedal or let a floor mat slide under it;…
-
Page 181: Power Steering System
Starting and driving Power steering system Cruise control* Cruise control switches E00624100044 E00607400071 E00609100708 When the engine is stopped, the power steering sys- Cruise control is an automatic speed control system tem will not function and it will require greater man- that keeps a set speed.
-
Page 182
Starting and driving To activate 2. Confirm that the Twin Clutch SST control “ACC RES” switch mode is set to “Normal” (on vehicles with Press and hold the “ACC RES” switch (C) while E00609300872 1. With the ignition switch in the “ON” posi- Twin Clutch SST). -
Page 183
Starting and driving When you reach your desired speed, release the Accelerator pedal Brake pedal switch. Your new cruising speed is now set. While driving at the set speed, use the accelerator While driving at the set speed, use the brake pedal, pedal to reach your desired speed and then press which disengages the cruise control, then press the the “COAST SET”… -
Page 184
Refer to “To resume the set speed” on page 4-41. (9 mph) or more below the set speed because inspected by a MITSUBISHI MOTORS of a hill, etc. Authorized Service Point. When your speed slows to about 40 km/h (25 mph)or less. -
Page 185: Cargo Loads
“ACC RES” switch (C) while driving at a MITSUBISHI MOTORS Authorized Service CAUTION speed of about 40 km/h (25 mph) or higher. Point. Do not load cargo or luggage higher than Roof carrier mounting brackets the top of the seatback.
-
Page 186
Starting and driving Roof carrier precaution Attaching the roof carrier NOTE Slide each cover (B) towards the front of the vehi- To prevent wind noise or reduction in fuel cle to remove it. economy, remove the roof carrier when not CAUTION in use. -
Page 187: Trailer Towing
Starting and driving Trailer towing E00610000244 WARNING Do not use this vehicle for trailer towing. It may cause an accident or damage the vehicle. 4-43…
-
Page 189
For pleasant driving Ventilators………………5-02 Automatic air conditioning…………5-04 Important operation tips for the air conditioning……5-08 Air purifier………………5-09 LW/MW/FM digital tuning radio with CD player*…..5-09 LW/MW/FM digital tuning radio with CD changer*….5-24 To use the external audio input function*……..5-39 Steering wheel audio remote control switches*……5-40 Error codes………………5-41 Handling of compact discs…………5-43 Antenna………………5-44… -
Page 190: Ventilators
For pleasant driving Ventilators To close the ventilator, move the knob (A) to the NOTE inside as far as possible. The cool air from the ventilators may appear E00700100777 as a mist. This is due to moist air being suddenly Left Right cooled by the air conditioning.
-
Page 191
For pleasant driving Changing the mode selection Foot/Face position Foot position Air flows to the upper part of the passenger com- Air flows mainly to the leg area. E00700301330 To change the position and amount of air flowing partment, and flows to the leg area. from the ventilators, turn the mode selection dial. -
Page 192: Automatic Air Conditioning
For pleasant driving Automatic air conditioning NOTE With the mode selection dial between the E00702400019 The air conditioning can only be used while the en- “ ” and “ ” positions, air flows mainly to gine is running. the leg area. With the modeselection dial be- tween the “…
-
Page 193
For pleasant driving The settings described above are the factory set- Temperature control dial CAUTION tings. The air selection and air conditioning E00703000399 Turn the temperature control dial clockwise or anti- switches can be customised (function setting Normally, use the outside position to keep clockwise. -
Page 194
For pleasant driving Enable automatic air control: A sound will be made every time you push the NOTE If the mode selection dial or blower speed se- switch. If a problem is detected in the air condition- lection dial is turned to the “AUTO” posi- ing system, the air conditioning operation in- tion, the air selection switch is also control- dication lamp (A) blinks. -
Page 195
For pleasant driving • When the setting is changed from enable 2. Set the temperature control dial to the de- If the blower speed selection dial, air condi- to disable 3 sounds are emitted and the in- sired temperature. tioning switch, mode selection dial, or air se- dication lamp flashes 3 times. -
Page 196: Important Operation Tips For The Air Conditioning
For pleasant driving Important operation tips for the For ordinary demisting For quick demisting Use this setting to keep the windscreen and door air conditioning windows clear of mist, and to keep the leg area heat- E00708300603 Park the vehicle in the shade. Parking in the hot sun will make the vehicle inside extremely hot, and it will require more time to cool the interior.
-
Page 197: Air Purifier
For pleasant driving It is recommended that the refrigerant be recovered Air purifier LW/MW/FM digital tuning radio and recycled for further use. E00708400473 with CD player* An air filter has been incorporated into this air con- During a long period of disuse E00708501211 ditioning so that dirt and dust are cleaned from the The audio system can only be used when the igni-…
-
Page 198
For pleasant driving Volume and tone control panel HOLD MODE Acoustic char- Details If the SOUND switch (4) is pushed and held for E00708600752 acteristics more than 2 seconds during the audio adjust mode, CLASSIC The optimum acoustic character- it will change to “Hold” mode. The selected audio istics for classical music, which mode will be held until the SOUND switch (4) is requires an overall sound bal-… -
Page 199
For pleasant driving NOTE Sound field Details When set to 0, it will beep. types When TYPE or FIELD is changed, the sound NORMAL This sound field produces a will cut out briefly, but this does not indicate sound effect where the vocals a malfunction. -
Page 200
For pleasant driving Radio control panel and display E00708900814 1- PWR (On-Off) switch 5- SEEK (Up-seek) button 2- AM/FM (FM/MW/LW selection) button 6- SEEK (Down-seek) button 3- Memory select buttons 7- FM (FM1/FM2/FM3) indicator 4- TUNE switch 8- ST (Stereo) indicator 5-12… -
Page 201
For pleasant driving To listen to the radio To enter frequencies into the memory NOTE E00716100857 Disconnecting the battery terminal erases all E00709000522 1. Press the PWR switch (1) or the AM/FM but- the radio frequencies stored in the memory. Manual setting ton (2) to turn ON the radio. -
Page 202
For pleasant driving Radio data system (RDS) E00709200292 1- PWR (On-Off) switch 8- SEEK (Down-seek) button 2- AM/FM (FM/MW/LW selection) button 9- CT (Clock time) indicator 3- Memory select buttons 10- RDS (Radio data system) indicator 4- TP (Traffic program) button 11- TP (Traffic program identification) indicator 5- PTY (Program type) button 12- PTY (Program type) indicator… -
Page 203
For pleasant driving If there are no frequencies broadcasting the same 18. CHILDREN AF (Alternative Frequencies) function programming, the radio searches a frequency broad- 19. SOCIAL E00720900074 The AF function finds a station broadcasting the casting the regional programming. The radio suc- 20. -
Page 204
For pleasant driving NOTE NOTE Traffic information E00721600111 If the SEEK button (7 tois pressed, the ra- After selecting a mode, you can leave the func- The radio will automatically tune in to traffic infor- dio will try to find out another broadcast of tion setup mode by taking either of the fol- mation broadcasts while receiving FM broadcasts the same program type as currently selected.
-
Page 205
For pleasant driving Function setup mode The TP search function can be turned ON and OFF. E00722500377 It is possible to change the following functions: Refer to “Function setup mode” on page 5-17. Emergency broadcasts E00721700112 TP-S PI-S Language of PTY display 1. -
Page 206
For pleasant driving 2. Press the TUNE switch (6) repeatedly to se- 3. Select the desired setting for each mode to be NOTE lect the mode you wish to change. turned ON and OFF as shown below. After selecting a mode, you can leave the func- The order is: AF →… -
Page 207
For pleasant driving CD control panel and display E00709500817 1- AM/FM button 13- FOLDER switch 2- CD (CD mode changeover) button (Track up) button 3- PWR (On-Off) switch (Track down) button 4- PAGE (Title scroll) button 16- CD indicator 5- DISP (Display) button 17- FOLDER indicator 6- RPT (Repeat) button 18- TRACK (Track number) indicator… -
Page 208
For pleasant driving To listen to a CD To listen to a music CD To listen to an MP3 CD This CD player allows you to play MP3 (MPEG Au- E00709601974 1. Insert the disc with the label facing up. dio Layer-3) files recorded on CD-ROMs, CD-Rs When a disc is inserted, the CD indicator (recordable CDs), and CD-RWs (rewritable CDs) -
Page 209
For pleasant driving NOTE CAUTION File selection While listening to a disc on which CD-DA in the order (CD-Digital Audio) and MP3 files have both Attempting to play a file not in the MP3 been recorded, you can switch between read- format that has the “.mp3”… -
Page 210
For pleasant driving Folder down NOTE To find the start of each track on a disc for playback Turn the FOLDER switch (13) anticlockwise until Press the SCAN button (10). “SCAN” will appear With a disc that contains both CD-DA and the desired folder number appears on the display. -
Page 211
For pleasant driving The display can show up to 12 characters. If CD text MP3 titles a folder name, track name, or item of ID3 tag The CD player can display disc and track titles for The CD player can display folder and track titles information has more than 12 characters, discs with converted disc and track title informa- for discs with converted folder and track informa-… -
Page 212: Lw/Mw/Fm Digital Tuning Radio With Cd Changer
For pleasant driving LW/MW/FM digital tuning radio Volume and tone control panel NOTE The SUB LEVEL can only be adjusted on ve- E00708600765 with CD changer* hicles with a premium sound system. E00708501208 On vehicles without a premium sound sys- The audio system can only be used when the igni- tem, when you press the SOUND switch (4), tion switch is in the “ON”…
-
Page 213
For pleasant driving NOTE Acoustic char- Details Sound field Details When set to 0, it will beep. acteristics types When SUB PUNCH, TYPE or FIELD is CLASSIC The optimum acoustic character- NORMAL This sound field produces a changed, the sound will cut out briefly, but istics for classical music, which sound effect where the vocals this does not indicate a malfunction. -
Page 214
For pleasant driving Radio control panel and display E00708900827 1- PWR (On-Off) switch 5- SEEK (Up-seek) button 2- AM/FM (FM/MW/LW selection) button 6- SEEK (Down-seek) button 3- Memory select buttons 7- FM (FM1/FM2/FM3) indicator 4- TUNE switch 8- ST (Stereo) indicator 5-26… -
Page 215
For pleasant driving To listen to the radio To enter frequencies into the memory NOTE E00716100860 Disconnecting the battery terminal erases all E00709000548 1. Press the PWR switch (1) or the AM/FM but- the radio frequencies stored in the memory. Manual setting ton (2) to turn ON the radio. -
Page 216
For pleasant driving Radio data system (RDS) E00709200306 1- PWR (On-Off) switch 8- SEEK (Down-seek) button 2- AM/FM (FM/MW/LW selection) button 9- CT (Clock time) indicator 3- Memory select buttons 10- RDS (Radio data system) indicator 4- TP (Traffic program) button 11- TP (Traffic program identification) indicator 5- PTY (Program type) button 12- PTY (Program type) indicator… -
Page 217
For pleasant driving If there are no frequencies broadcasting the same 18. CHILDREN AF (Alternative Frequencies) function programming, the radio searches a frequency broad- 19. SOCIAL E00720900087 The AF function finds a station broadcasting the casting the regional programming. The radio suc- 20. -
Page 218
For pleasant driving NOTE NOTE Traffic information E00721600124 If the SEEK button (7 tois pressed, the ra- After selecting a mode, you can leave the func- The radio will automatically tune in to traffic infor- dio will try to find out another broadcast of tion setup mode by taking either of the fol- mation broadcasts while receiving FM broadcasts the same program type as currently selected.
-
Page 219
For pleasant driving Function setup mode The TP search function can be turned ON and OFF. E00722500380 It is possible to change the following functions: Refer to “Function setup mode” on page 5-31. Emergency broadcasts E00721700125 TP-S PI-S Language of PTY display 1. -
Page 220
For pleasant driving 2. Press the TUNE switch (6) repeatedly to se- The setting will be shown on the display. NOTE lect the mode you wish to change. After selecting a mode, you can leave the func- The order is: AF → CT → REG → TP-S → tion setup mode by taking either of the fol- PI-S →… -
Page 221
For pleasant driving CD control panel and display E00709500820 1- AM/FM button 16- Disc-loading slot 2- CD (CD mode changeover) button 17- FOLDER switch 3- PWR (On-Off) switch (Track up) button 4- LOAD indicator (Track down) button 5- LOAD button 20- CD indicator 6- PAGE (Title scroll) button 21- FOLDER indicator… -
Page 222
For pleasant driving To listen to a CD 2. The autochanger will select the lowest-num- To set discs bered empty slot and switch to loading stand- E00709601987 The CD can be loaded or ejected by pressing the by mode. LOAD button (5) or the eject button (15) even if 3. -
Page 223
For pleasant driving NOTE To listen to a music CD To listen to an MP3 CD This autochanger allows you to play MP3 (MPEG If you press the eject button (15) while the Audio Layer-3) files recorded on CD-ROMs, CD- display is showing “LOAD DISC No. -
Page 224
For pleasant driving NOTE CAUTION File selection While listening to a disc on which CD-DA in the order (CD-Digital Audio) and MP3 files have both Attempting to play a file not in the MP3 been recorded, you can switch between read- format that has the “.mp3”… -
Page 225
For pleasant driving Folder down To repeat a folder (MP3 CDs only) Random playback for all folders on a disc (MP3 Turn the FOLDER switch (17) anticlockwise until While a song is playing, press the RPT button (8) CDs only) the desired folder number appears on the display. -
Page 226
For pleasant driving With a disc that contains both CD-DA and Characters that the autochanger cannot dis- NOTE MP3 files, the scan mode causes only files of play are shown as “•”. To return from ID3 tag information to the the same format (CD-DA only or MP3 files folder name, press the DISP button (7) again MP3 titles… -
Page 227
For pleasant driving To use the external audio input To activate the external audio input NOTE The connected audio equipment cannot be op- mode function* erated with the vehicle’s audio system. E00732200612 Depending on the connected audio equip- ment, it may produce noise from the speakers. Use the connected audio equipment’s own Auxiliary Audio connector (RCA)*… -
Page 228: Steering Wheel Audio Remote Control Switches
For pleasant driving Steering wheel audio remote Volume adjustment You can fast-reverse the disc by holding down the fast-reverse button (5). While the button is kept control switches* pressed, the disc will be fast-reversed. Volume up button — 1 E00710000607 While the button is pressed, the volume continues The remote control switch is located on the left to increase.
-
Page 229: Error Codes
For pleasant driving Error codes E00710100653 If an error code (1) appears in the display, take action in accordance with the table below. 5-41…
-
Page 230
Internal protection against high temperatures. Allow radio to cool by waiting about 30 minutes. ERROR Communication or power supply Communication error between external device and Consult a MITSUBISHI MOTORS Authorized error audio equipment. Service Point. Power supply error of external device. -
Page 231: Handling Of Compact Discs
For pleasant driving Handling of compact discs When storing compact discs, always store them in their separate cases. Never place com- E00723000180 pact discs in direct sunlight, or in any place Use only the type of compact discs that have where the temperature or humidity is high.
-
Page 232: Antenna
For pleasant driving Do not put additional labels (A) or stickers This player cannot play the CD-R/RW discs Antenna (B) on compact discs. Also, do not use any if the session is not closed. E00710500295 compact disc on which a label or sticker has This player cannot play CD-R/RW discs started to peel off or any compact disc that which contain other than CD-DA or MP3 da-…
-
Page 233: Digital Clock
For pleasant driving Digital clock* Select the automatic mode or the manual mode by NOTE performing the following operations: Be sure to remove the roof antenna in the fol- E00711800396 1. Press the PWR switch (A) to turn ON the au- lowing cases: dio system.
-
Page 234
For pleasant driving NOTE Automatic mode Set the time by pressing the various buttons as de- Although “PHONE” appear on the display, scribed below. The automatic mode can set the local time automat- the PHONE function is inoperative. 1. Keep the CLOCK button pressed until the ically by using the signal from the local RDS sta- time display flashes. -
Page 235
For pleasant driving ® Steering control switch Hands-free Bluetooth cellular WARNING E00727200034 phone interface system with ® Although the Hands-free Bluetooth cel- voice recognition* lular phone interface system with voice recognition allows you to make hands- E00726000240 ® The Hands-free Bluetooth cellular phone inter- free calls, if you choose to use the cellular face system with voice recognition uses a wireless… -
Page 236
For pleasant driving Pressing this button briefly during a call will NOTE NOTE enable voice recognition and allow voice com- When you press the SPEECH button to enter If the voice command that you say differs mand input. voice recognition mode with a cellular phone from the predefined command or cannot be paired to the system, current information on recognised due to ambient noise or some oth-… -
Page 237
For pleasant driving NOTE System recognises the command that you said Speaker enrollment If you do not start the speaker enrollment proc- and changes the language E00727500082 It takes about 10 to 15 minutes to complete the ess within 3 minutes of pressing the From the main menu, say English (Español,Fran- speaker enrollment process. -
Page 238
For pleasant driving NOTE Saying “Mute off” in the same way will turn off NOTE Completing the speaker enrollment process the MUTE function and cancel the mute on the mi- If you say “Retrain” you will proceed to Step will turn on the voice model automatically. crophone. -
Page 239
Answer “No” to cancel the setting of the pass- “Cancel” to quit the voice input mode and word and return to the main menu. NOTE then check with a MITSUBISHI MOTORS 5. The voice guide will say “Please say a 4-dig- ® Several… -
Page 240
For pleasant driving NOTE NOTE 9. The voice guide will say “Assign a priority ® The pairing code entered here is only used level between 1 and 7. One is the highest pri- A Bluetooth compatible cellular phone can- ® ority.”… -
Page 241: With Voice Recognition
For pleasant driving NOTE 1. Press the SPEECH button. Deleting a phone 2. Say “Setup”. To change the priority level of a specific E00728800024 Use the following procedure to delete a paired Blue- 3. Say “Select phone.” phone, redo the pairing process for that ®…
-
Page 242
For pleasant driving NOTE To make a call ® The Hands-free Bluetooth cellular phone in- If a telephone number is not registered for terface system with voice recognition sup- E00728900012 ® To use the Hands-free Bluetooth cellular phone in- the selected location, the voice guide will say ports local phone numbers with a minimum terface system with voice recognition to make a “{home/work/mobile/pager} not found for… -
Page 243
For pleasant driving 2. Say “Emergency.” Receiving calls 3. The voice guide will say “Select one of the ® following: new entry, edit, list names, delete The Hands-free Bluetooth cellular phone in- E00729600090 If an incoming phone call is received while the ig- or erase all, or say cancel to return to main terface system with voice recognition will au- nition switch is in the “ACC”… -
Page 244
For pleasant driving NOTE NOTE Edit When the confirmation function is on, the sys- When the confirmation function is on, the sys- E00729900019 You can edit information in the phone book by say- tem will confirm the location again. To con- tem will confirm again the telephone num- ing “Edit”… -
Page 245
For pleasant driving 2. If there are telephone numbers registered for 2. The system will confirm one more time. An- NOTE multiple locations for the selected name, the swer “Yes” to continue. You can call, edit or delete a name that is be- voice guide will say “Would you like to de- Answer “No”… -
Page 246
For pleasant driving Voice Command Tree E00730400027 Enter Enter Name Last number on Confirms with Confirms if the See Setup Number from connected the user if user wants to Phonebook Figure Phonebook phone is Emergency change language Figure redialed number should to the spoken be dialed language… -
Page 247
For pleasant driving Voice Command Tree — Phone book E00730500028 Enter Name Enter Name Entries Listed one Enter Name 1st Confirmation at a time Enter Location Enter Location Enter Location 2nd Confirmation Enter Number Current Number is Entry Deleted Phonebook played Cleared New Entry Added… -
Page 248
For pleasant driving Voice Command Tree — Setup E00730600029 List Phones by Ask user to select a Priority language Toggle Confirmation Promts on/off Say Number Confirm new (priority) of phone selected language Say 4 digit pin System Lists List Phones by to select change code. -
Page 249
For pleasant driving Commands and Alternatives E00730700033 Command Language Primary command Alternative commands English Setup French Configurer SETUP Spanish Configuración Italian Configura German Einrichtung English Phonebook French Répertoire PHONE BOOK Spanish Agenda Italian Rubrica German Telefonbuch English Dial French Composer DIAL Spanish Marcar… -
Page 250
For pleasant driving Command Language Primary command Alternative commands English Redial French Recomposer REDIAL Spanish Volver A Marcar Italian Ricomponi German Wahlwiederholung English Emergency French Numéro D’urgence EMERGENCY Spanish Emergencia Italian Emergenze German Notfall English Pairing Options French Options De Jumelage PHONE OPTIONS Spanish Opciones De Emparejamiento… -
Page 251
For pleasant driving Command Language Primary command Alternative commands English List Paired Phones French Liste Des Téléphones Jumelés LIST PAIRED PHONES Spanish Listar Teléfonos Emparejados Italian Elenca Telefoni Assegnati German Auflistung angekoppelten telefone Auflistung der angekoppelten telefone English Select Phone French Sélectionner Un Téléphone SELECT PHONE… -
Page 252
For pleasant driving Command Language Primary command Alternative commands English Confirmation Prompts French Invites De Confirmation CONFIRMATIONS Spanish Mensajes De Confirmación Italian Richieste Di Conferma German Eingabeaufforderungen Zur Bestätigung English Language French Langue LANGUAGE Spanish Idioma Italian Lingua German Sprache English New Entry French… -
Page 253
For pleasant driving Command Language Primary command Alternative commands English Call This Number French Appeler Ce Numéro CALL THIS NUMBER Spanish Llamar A Este Número Italian Chiama Questo Numero German Diese Nummer Anrufen English Edit Another Entry French Modifier Une Autre Inscription EDIT ANOTHER ENTRY Spanish Editar Otra Entrada… -
Page 254
For pleasant driving Command Language Primary command Alternative commands English Home French Masion, à La Maison HOME Spanish Casa, en Su Casa Italian Casa, a Casa German Zuhause English Work French Travail, au Travail WORK Spanish Trabajo, en Su Trabajo Italian Lavoro, al Lavoro German… -
Page 255
For pleasant driving Command Language Primary command Alternative commands English Continue French Continuer CONTINUE Spanish Continuar Italian Continua German Weiter English French Tous Spanish Todos Italian Tutte German Alle English Cancel French Annuler CANCEL Spanish Cancelar Italian Annulla German Abbrechen English Mute French… -
Page 256
For pleasant driving Command Language Primary command Alternative commands English French Spanish Sí Italian Sì German English French Spanish Italian German Nein English Zero French Zéro Zero Spanish Cero Italian Zero German Null English French Spanish Italian German Eins English French Deux Spanish… -
Page 257
For pleasant driving Command Language Primary command Alternative commands English Three French Trois Three Spanish Tres Italian German Drei English Four French Quatre Four Spanish Cuatro Italian Quattro German Vier English Five French Cinq Five Spanish Cinco Italian Cinque German Fünf English French… -
Page 258
For pleasant driving Command Language Primary command Alternative commands English Eight French Huit Eight Spanish Ocho Italian Otto German Acht English Nine French Neuf Nine Spanish Nueve Italian Nove German Neun English Star Asterisk ( * ) French Étoile (*) Star Spanish Asterisco ( * ) -
Page 259
For pleasant driving Command Language Primary command Alternative commands English French French Français Spoken Language (French) Spanish Francés Italian Francese German Französisch English Spanish French Espagnol Spoken Language (Spanish) Spanish Español Italian Spagnolo German Spanisch English Italian French Italien Spoken Language (Italian) Spanish Italiano Italian… -
Page 260
For pleasant driving Command Language Primary command Alternative commands English Phonebook Edit French Répertoire Modifier PHONE BOOK EDIT Spanish Agenda — Editar Italian Modifica Nella Rubrica German Telefonbuch Bearbeiten English Phonebook Delete French Répertoire Supprimer PHONE BOOK DELETE Spanish Agenda — Eliminar Italian Elimina Dalla Rubrica German… -
Page 261
For pleasant driving Command Language Primary command Alternative commands English Setup Confirmation Prompts French Configurer Les Invites De Confirmation Spanish Configurar Mensajes De Confirmación SETUP CONFIRMATIONS Italian Configura Richieste Di Conferma Einrichtung Der Eingabeaufforderungen Zur Bestä- German tigung English Setup Select Phone French Configurer Sélectionner Un Téléphone SETUP SELECT PHONE… -
Page 262
For pleasant driving Command Language Primary command Alternative commands English Setup Language French Configurer La Langue SETUP LANGUAGE Spanish Configurar Idioma Italian Configura Lingua German Einrichtung Sprache English Setup Password French Configurer Le PIN SETUP PASSWORD Spanish Configurar Contraseña Italian Configura Codice Di Accesso German Einrichtung Passwort… -
Page 263
For pleasant driving Command Language Primary command Alternative commands English Enable French Activer L’activer ENABLE Spanish Activar Italian Attivare German Aktivieren English Disable French Désactiver DISABLE Spanish Desactivar Italian Disattivare German Deaktivieren English Join Calls French Intégrer L’appel JOIN CALLS Spanish Unir Llamadas Italian… -
Page 264
For pleasant driving Enrollment Commands E00732400034 Special Characters # = “Hash” # = “Diése” # = “Cancelletto” # = “Raute” # = “Almohadilla” * = “Star” * = “Étoile” * = “Asterisco” * = “Stern” * = “Asterisco” Phrase # English French Italian… -
Page 265
For pleasant driving Phrase # English French Italian German Spanish 20 Call 1 (234) 567 — 8901 Appeler 1 (234) 567 — 8901 Chiama 1 (234) 567 — 8901 Anrufen 1 (234) 567 — 8901 Llamar 1 (234) 567 — 8901 21 Dial 639 — 1542 Composer 639 — 1542 Componi 639 — 1542… -
Page 266
For pleasant driving Phrase # English French Italian German Spanish Configurer les options de ju- Configura opzioni di asseg- Einrichtung: Ankopplung- Configurar opciones de em- 42 Setup Pairing Options melage nazione soptionen parejamiento 43 Pair A Phone Jumeler un téléphone Assegna un telefono Ein Telefon ankoppeln Emparejar un teléfono… -
Page 267: Sun Visors
For pleasant driving Sun visors Card holder Ashtray* E00732000098 E00711200521 E00711400855 Cards can be slipped into the holder (A) on the back of the sun visor. CAUTION Put out matches and cigarettes before they are placed in the ashtray. Don’t put papers and other things that burn into your ashtrays.
-
Page 268: Cigarette Lighter
30 seconds of being push- ed in. Pull it out and have the problem correc- ted at MITSUBISHI MOTORS Author- Rear seat ized Service Point. When the cigarette lighter socket is used as a power source for an electric appli- 1- Push all the way in.
-
Page 269: Accessory Socket
For pleasant driving Accessory socket* Interior lamps 1 (DOOR) — The front room & map lamp goes on when a door is opened. It goes E00711601199 E00712000395 The accessory socket can be used while the igni- off about 15 seconds after all tion switch is in the “ON”…
-
Page 270
E00712300301 The rear room lamp goes on when 2 ( ) — The room lamp can be turned on by sliding the MITSUBISHI MOTORS Authorized Service a door is opened. It goes off about room lamp switch. Point. 15 seconds after all doors are closed. -
Page 271: Storage Spaces
The interior lamp auto-cutout function can be deactivated. The time until the lamps auto- matically go off can be adjusted. For details, please consult a MITSUBISHI MOTORS Au- thorized Service Point. On vehicles equipped with Mitsubishi Multi- Communication System (MMCS), screen op- erations can be used to make the adjustment.
-
Page 272
For pleasant driving Floor console box Card holder NOTE There is a card holder on the inside of the glove box. The Auxiliary Audio connector (RCA) or the E00723300109 To open the console box, lift the release lever (A) Auxiliary Video connector (RCA) is located and raise the lid. -
Page 273: Cup Holder
For pleasant driving To use the boxes, remove the floor mat (A) and Cup holder Type 2 raise the lids (B). To use the cup holder, open the lid. E00714500596 Vehicles equipped with spare tyre CAUTION Do not drink beverages while driving the vehicle;…
-
Page 274: Bottle Holder
For pleasant driving Bottle holder Assist grip Coat hook E00718200142 E00732800083 E00725600281 These grips are to support the body by hand while There is a coat hook on the rear seat assist grip of seated in the vehicle. the driver’s side. CAUTION Do not drink beverages while driving the vehicle;…
-
Page 275
For emergencies If the vehicle breaks down…………6-02 Emergency starting……………6-02 Engine overheating……………6-04 Tools, jack and tyre repair kit…………6-05 How to change a tyre…………..6-12 Towing………………6-17 Operation under adverse driving conditions………6-19… -
Page 276: If The Vehicle Breaks Down
For emergencies If the vehicle breaks down Emergency starting 2. Set the parking brake firmly on each vehicle. Put an A/T or Twin Clutch SST in “P” E00800101010 E00800502196 (PARK) or a M/T in “N” (Neutral). Turn off If the vehicle breaks down on the road, move it to If the engine cannot be started because the battery the ignition switch.
-
Page 277
For emergencies 5. Connect one end of one jumper cable to the CAUTION WARNING positive (+) terminal of the joint terminal (B), and the other end to the positive (+) ter- Electrolyte is corrosive diluted sulphuric Use care not to get the jumper cable minal of the booster battery (C). -
Page 278: Engine Overheating
For emergencies Engine overheating 4. When the bar graph in the engine coolant tem- WARNING perature warning display in the multi-infor- E00800602041 mation display drops, stop the engine. When the engine has overheated, the information Do not attempt to remove the radiator screen in the multi-information display will be in- cap while the engine is hot.
-
Page 279: Tools, Jack And Tyre Repair Kit
For emergencies 6. Add coolant to the radiator and/or reserve Tools, jack and tyre repair kit Vehicles with tyre repair kit tank if necessary. (Refer to the “Mainte- E00800901223 nance” section.) Storage The tools, jack and tyre repair kit are stowed in the CAUTION trunk room.
-
Page 280
For emergencies Jack Tyre repair kit* Type B E00802000306 E00802200252 Before removing the jack, lift up the luggage floor This kit enables emergency repair of a small punc- board. ture in the tread area of a tyre that has run over a nail, screw, or similar object. -
Page 281
For emergencies • The puncture hole has a length or width Immediately change out of any clothes conta- CAUTION of 4 mm or more. minated with the tyre sealant. • The tyre is punctured in the side wall (A), If the tyre sealant gets in your eyes or on not in the tread (B). -
Page 282
For emergencies NOTE 8. Take the valve cap (F) off the tyre valve (G), CAUTION In cold conditions (when the ambient temper- then press the valve remover (H) onto the ature is 0 °C or lower), thickening of the tyre valve as illustrated. -
Page 283
For emergencies NOTE Turn ON the compressor switch (Q) and in- When removing and screwing in the valve in- flate the tyre to the specified pressure. sert using the valve remover, turn the valve remover by hand. Using a tool to turn the Type A valve remover could damage it. -
Page 284
18. After driving for 10 minutes or 5 km sure gauge to shock. It could malfunction. Please contact a MITSUBISHI MOTORS Au- (3 miles), check the tyre pressure using the thorized Service Point or another specialist air pressure gauge on the compressor. -
Page 285
The manufacturer is unable to guarantee that fied level, stop driving the vehicle and con- all tyre punctures can be repaired with the tact a MITSUBISHI MOTORS Authorized CAUTION tyre repair kit, in particular cuts or perfora- Service Point or another specialist. -
Page 286: How To Change A Tyre
For emergencies How to change a tyre WARNING CAUTION E00801202464 Before changing a tyre, first stop your vehicle in a Be sure to apply chocks or blocks to the The pressure should be periodically safe, flat location. correct tyre when jacking up the vehicle. checked and maintained at the specified 1.
-
Page 287
For emergencies CAUTION CAUTION Do not use the tyre chain with your com- Do not install more than one compact pact spare wheel. Because the diameter is spare wheel at the same time. different from that of a standard type, the tyre chain will not fit properly. -
Page 288
For emergencies 3. Rotate the jack by hand until the flange por- WARNING tion (B) fits in the groove (C) at the top of the jack. Stop jacking up the vehicle as soon as the tyre is raised off the ground. It is danger- ous to raise the vehicle any higher. -
Page 289
For emergencies Tighten the wheel nuts until the flang- CAUTION es of the wheel nuts touch the wheel and the wheel is not loose. Never apply oil to either the wheel bolts or the nuts, or they will tighten too much. NOTE Flange nuts can be temporarily used on the steel spare wheel, but return to the original… -
Page 290
For emergencies 2. To store the flat tyre or spare wheel, fit the Tightening torque installation clamp (A) by turning it clockwise. 88 to 108 Nm (Achieved by applying a force of 350 to 420 N at the end of the wheel nut wrench supplied with the vehicle.) CAUTION The tyre pressure should be periodically… -
Page 291: Towing
If your vehicle needs to be towed If towing is necessary, we recommend you to have This vehicle must not be towed by a tow it done by your MITSUBISHI MOTORS Author- Type A truck using sling lift type equipment ized Service Point or a commercial tow truck service.
-
Page 292
For emergencies 2. Cover the tip of the jack bar with a cloth, CAUTION CAUTION then use it to remove the cover (A) that is lo- cated on the front bumper. Do not tow the vehicle with the rope at an When the engine is not running, the excessive diagonal angle. -
Page 293: Operation Under Adverse Driving Conditions
For emergencies Operation under adverse driving Depressing the brake pedal during travel on CAUTION snowy or icy roads may cause tyre slippage conditions and skidding. When traction between the When towing or being towed down a long E00801702254 tyres and the road is reduced the wheels may slope, the brakes may overheat reducing skid and the vehicle cannot readily be the effectiveness.
-
Page 295
Vehicle care Vehicle care precautions……………7-02 Cleaning the interior of your vehicle……….7-02 Cleaning the exterior of your vehicle………..7-03… -
Page 296
Vehicle care Vehicle care precautions Cleaning the interior of your Upholstery E00900500177 E00900100900 vehicle 1. To maintain the value of your new vehicle, In order to maintain the value of your vehicle, it is E00900200552 handle the upholstery carefully and keep the necessary to perform regular maintenance using the After cleaning the interior of your vehicle with wa- interior clean. -
Page 297
Vehicle care Organic solvents such as benzine, kerosene, Cleaning the exterior of your CAUTION alcohol and petrol, acid or alkaline solvents vehicle may discolour the genuine leather surface. When washing the under side of your ve- E00900700111 Be sure to use neutral detergents. hicle or wheel, be careful not to injure If the following is left on your vehicle, it may Remove dirty patches or oil substances quick-… -
Page 298
Vehicle care CAUTION CAUTION CAUTION • Maintain a distance of approx. 50 cm • As your vehicle has rain sensor wip- Waxes containing high abrasive com- or more between the vehicle body and ers, place the wiper switch lever in the pounds should not be used. -
Page 299
Vehicle care Check body areas facing the road or the tyres care- Aluminium wheels NOTE fully for damage to the paint coat caused by flying To clean the inside of the rear window, al- E00901500132 1. Remove dirt using a sponge while sprinkling stones, etc. -
Page 300
Vehicle care Never spray or splash water on the electrical com- ponents in the engine compartment, as this may cause damage. Do not bring the nearby parts, the plastic parts and so on into contact with sulphuric acid (battery elec- trolyte) which may crack, stain or discolour them. -
Page 301
Maintenance Service precautions……………8-02 Catalytic converter…………….8-02 Bonnet……………….8-03 Engine oil………………8-04 Engine coolant…………….8-05 AWC control fluid…………….8-06 Washer fluid……………..8-07 Brake fluid/Clutch fluid*…………..8-07 Power steering fluid…………..8-08 Battery………………8-08 Tyres…………………8-10 Parking brake break-in…………..8-14 Wiper blade rubber replacement………..8-15 General maintenance…………..8-15 For cold and snowy weather…………8-16 Fusible links………………8-16 Fuses…………………8-17 Replacement of lamp bulbs…………8-22… -
Page 302: Service Precautions
Maintenance Service precautions Catalytic converter WARNING E01000100748 E01000200794 Adequate care of your vehicle at regular intervals For ordinary use, there are no particular precau- Be extremely cautious when working serves to preserve the value and appearance as long tions except that of using unleaded petrol. around the battery.
-
Page 303: Bonnet
Maintenance Bonnet E01000301978 CAUTION To avoid the risk of being burned, do not touch the air outlets (A) and air scoop (B) on the bonnet when the engine compart- ment is hot (when the engine is running or immediately after the vehicle has been driven).
-
Page 304: Engine Oil
Maintenance Engine oil CAUTION CAUTION E01000402093 After inserting the support bar into the Be careful that hands or fingers are not To check and refill engine oil slot, make sure the bar supports the bon- trapped when closing the bonnet. net securely from falling down on to your Make sure the engine hood is firmly head or body.
-
Page 305: Engine Coolant
Maintenance 7. If the oil level is below the specified limit, re- Select engine oil of the proper SAE viscosity Engine coolant move the cap located on the cylinder head number according to the atmospheric temper- E01000501013 cover and add enough oil to raise the level to ature.
-
Page 306: Awc Control Fluid
Fluid type Ambient tem- -15 -20 -25 -30 -35 -50 Lubricant MITSUBISHI MOTORS Genuine perature ATF SP III (minimum) °C Anti-freeze concentration % 8-06…
-
Page 307: Washer Fluid
Maintenance Washer fluid If the level is low, replenish the container with wash- Brake fluid/Clutch fluid* er fluid. E01000700773 E01000800556 The brake fluid and the clutch fluid share the reser- Windscreen washer voir tank. The windscreen washer fluid reservoir is in the trunk. To check the fluid level Check the washer fluid level at regular intervals and add washer fluid to the reservoir if necessary.
-
Page 308
Check to make certain that the power steering fluid Do not mix or add different brands of Be sure to have a MITSUBISHI MOTORS Author- level is always between the “MAX” and “MIN” lev- brake fluid to prevent chemical reactions. -
Page 309
“ON” position. Do- Be sure to have a MITSUBISHI MOTORS battery, particularly one that is not fully charged ing so could damage electric components. -
Page 310
Maintenance Tyres E01001300242 WARNING Driving with tyres that are worn, dam- aged or improperly inflated can lead to loss of control or blowout of the tyres which can result in a collision with seri- ous or fatal injury. 8-10… -
Page 311
Maintenance Tyre inflation pressures E01001401501 Normal loading Above 160 km/h (99 mph) Item Tyre size Front Rear Front Rear 2.2 bar (32 psi) 2.0 bar (29 psi) 2.5 bar (36 psi) 2.3 bar (33 psi) Normal tyre 245/40R18 93Y {220 kPa} {200 kPa} {250 kPa} {230 kPa}… -
Page 312
Maintenance Wheel condition Tyre rotation CAUTION E01001800579 E01001901001 Tyre wear varies with vehicle conditions, road sur- Always use tyres of the same size, same face conditions and individual driver’s driving hab- type, and same brand, and which have no its. To equalize the wear and help extend tyre life, wear differences. -
Page 313
Maintenance When rotating tyres, check for uneven wear and CAUTION CAUTION damage. Abnormal wear is usually caused by incor- rect tyre pressure, improper wheel alignment, out A compact spare tyre can be fitted tempo- Avoid the combined use of different types of balance wheel, or severe braking. -
Page 314
If one of the rear wheels has punctured, consult a MITSUBISHI MOTORS Authorized Serv- discs are replaced, in order to assure the best brake replace it with one of the front wheels ice Point. -
Page 315
Maintenance Wiper blade rubber replacement 4. Insert the wiper blade into the arm, starting General maintenance with the opposite end of the blade from the E01008200093 E01002700504 stopper. Make sure the hook (B) is fitted cor- 1. Lift the wiper arm off the windscreen. rectly in the grooves in the blade. -
Page 316
Maintenance Hinges and latches lubrication For cold and snowy weather Fusible links Check all latches and hinges, and, if necessary, E01002800257 E01002900580 The fusible links will melt to prevent a fire if a have them lubricated. Ventilation slots large current attempts to flow through certain elec- trical systems. -
Page 317
Maintenance Fuses 1. Open the fuse lid and pull to remove it. WARNING E01003002117 When changing fuses, do not damage the Fuse block location driver’s knee airbag harness or acciden- To prevent damage to the electrical system due to tally strike the airbag area with hard ob- shortcircuiting or overloading, each individual cir- jects. -
Page 318
Maintenance 2. Move the rod (A) on the left side of the 4. Remove the glove box fastener, and then re- Passenger compartment (RHD vehicles) glove box to the left side of the box. move the glove box. The fuse blocks in the passenger compartment are located behind the glove box at the position shown in the illustration. -
Page 319
Maintenance Fuse load capacity Passenger compartment fuse location (RHD) Symbol Electrical system Capaci- E01007700411 ties The fuse capacity and the names of electrical sys- Door locks 20 A Main fuse block tems protected by the fuses are indicated on the in- side of the fuse lid (LHD vehicles), the inside of Radio 15 A… -
Page 320
Maintenance Engine compartment fuse location table Symbol Electrical system Capaci- Sym- Electrical system Capaci- ties ties Engine compartment fuse location Heated door mirror 7.5 A Alternator 7.5 A AC power supply 15 A Headlamp washer 20 A Power seats 25 (20) Air conditioning 10 A 15 A… -
Page 321
Maintenance When using a substitute fuse, replace with a fuse of Sym- Electrical system Capaci- Sym- Electrical system Capaci- the correct capacity as soon as possible. ties ties Headlamp Anti-lock brake sys- Identification of fuse 40 A low beam Halogen E01008100337 (left) Anti-lock brake sys-… -
Page 322
Maintenance 3. Referring to the fuse load capacity table, 4. Insert a new fuse of the same capacity by us- Replacement of lamp bulbs check the fuse pertaining to the problem. ing the fuse puller and insert the fuse at the E01003100215 same place in the fuse block. -
Page 323
For repair and replacement, we recommend Check with a MITSUBISHI MOTORS Au- you to consult a specialist. thorized Service Point when the lamp needs 1- Front turn-signal lamps: 21 W (WY21W) to be repaired or replaced. -
Page 324
A high voltage is present in the power cir- cuit and in the bulbs and bulb terminals. To avoid the risk of an electric shock, con- tact a MITSUBISHI MOTORS Author- ized Service Point whenever repair or re- placement is necessary. -
Page 325
Maintenance 3. Turn the socket (E) anticlockwise and re- Front turn-signal lamps move it. E01003800430 1. Remove the clips (A) and clips (B), then re- move the duct (C) and the upper cover (D). Position lamps E01003700501 1. To create enough work space, turn the steer- ing wheel all the way in the direction oppo- 4. -
Page 326
Maintenance 3. Remove the bulb by pulling it out. 2. While holing down the tab (D), pull out the CAUTION socket (E). Handle halogen lamp bulbs with care. The gas inside halogen lamp bulbs is high- ly pressurized, so dropping, knocking, or scratching a halogen lamp bulb can cause it to shatter. -
Page 327
Maintenance Rear combination lamps 3. Remove the socket and bulb assemblies by NOTE turning them anticlockwise. When mounting the lamp unit, align the pins E01004201177 (D) on the lamp unit with the holes in the body. Stop and tail lamps and rear turn-signal lamps 1. -
Page 328
Maintenance 2. Remove the socket and bulb assemblies by Licence plate lamps 3. Remove the bulb by pulling it out. turning them anticlockwise. E01004600897 1. Remove the screws (A) from the licence plate lamp lens (B). Then, remove the lens and gasket (C), and withdraw the bulb. -
Page 329
Maintenance NOTE 2. While holding down the tab (A), pull out the Rear room lamp* bulb. When mounting the lens, align the tabs (B) E01004700537 When replacing the bulb, put the rear room lamp with the holes on the vehicle body. switch into the “OFF”… -
Page 331
Specifications Vehicle labeling…………….9-02 Vehicle dimensions……………9-04 Vehicle performance…………..9-05 Vehicle weight…………….9-06 Engine specifications…………..9-07 Electrical system…………….9-08 Tyres and wheels…………….9-09 Fuel consumption……………..9-10 Refill capacities…………….9-11… -
Page 332
Specifications Vehicle labeling Vehicle information code plate Please use this number when ordering replacement parts. The vehicle information code plate is riveted as E01100101863 shown in the illustration. Vehicle identification number The vehicle identification number is stamped as shown in the illustration. 1- Model code 2- Engine model code 3- Transmission model code… -
Page 333
Specifications Vehicle identification number plate (RHD vehicles only) The vehicle identification number is stamped on the plate riveted to the left front corner of the vehi- cle body. It is visible from outside of the vehicle through the windscreen. Engine number The engine number is stamped on the engine cylin- der block as shown in the illustration. -
Page 334
Specifications Vehicle dimensions E01100201460 Front track 1,545 mm Overall width 1,810 mm Front overhang 920 mm Wheel base 2,650 mm Rear overhang 935 mm Overall length 4,505 mm Ground clearance (unladen) 140 mm Overall height (unladen) 1,480 mm Rear track 1,545 mm Body 6.2 m… -
Page 335
Specifications Vehicle performance E01100300813 Item Twin Clutch SST Maximum speed 240 km/h (150 mph) 242 km/h (151 mph) 9-05… -
Page 336
Specifications Vehicle weight E01100403828 Item Twin Clutch SST 1,560 kg (LHD) 1,590 kg (LHD) 1,600 kg (LHD) Without optional parts 1,565 kg (RHD) 1,595 kg (RHD) 1,605 kg (RHD) Kerb weight 1,617 kg (LHD) 1,647 kg (LHD) 1,650 kg (LHD) With full optional parts 1,622 kg (RHD) 1,652 kg (RHD) -
Page 337
Specifications Engine specifications E01100601552 Engine model 4B11 No. of cylinders 4 in line Total displacement 1,998 cc Bore 86.0 mm Stroke 86.0 mm Camshaft Double overhead Mixture preparation Electronic injection Maximum output (EEC net) 217 kW/6,500 r/min Maximum torque (EEC net) 366 Nm/3,500 r/min 9-07… -
Page 338
Specifications Electrical system E01100801860 Voltage 12 V Type (JIS) S65D26L Battery Capacity (5HR) 44 Ah Alternator capacity 130 A Spark plug type ILKR8E6 9-08… -
Page 339
Specifications Tyres and wheels E01100902376 Tyre 245/40R18 93Y Size 18×8 1/2JJ Wheel Offset 38 mm 9-09… -
Page 340
Specifications Fuel consumption E01101100371 Item Combined Urban conditions Extra-urban conditions (g/km) Fuel consumption (g/km) Fuel consumption (g/km) Fuel consumption (L/100 km) (L/100 km) (L/100 km) 10.2 13.6 Twin Clutch SST 10.5 13.9 NOTE The values shown above apply to a vehicle on which optional equipment has not been fitted. The results given do not express or imply any guarantee of the fuel consumption of the particular vehicle. -
Page 341: Brake Fluid/Clutch Fluid
Specifications Refill capacities E01101303039 Item Quantity Lubricants 7.5 litres DIA QUEEN SUPER LONG LIFE COOLANT or equivalent Engine coolant {includes 0.65 litre in the re- serve tank} As required Genuine MITSUBISHI Power Steering Fluid or Power steering fluid ATF DEXRON III/DEXRON II Oil pan 4.8 litres Refer to page 8-04…
-
Page 342
Specifications Item Quantity Lubricants Washer fluid for windscreen 4.0 litres — 7.6 litres Dia Queen SSTF-I Twin Clutch SST fluid {includes 0.5 litres in the oil cooler} 2.5 litres Dia Queen NEW MULTI GEAR OIL Manual transmission oil API classification GL-3, SAE 75W-80 Transfer oil 0.8 litres Dia Queen LSD gear oil… -
Page 343
Alphabetical index LW/MW/FM digital tuning radio with CD play- Cautions on handling of 4-wheel drive vehi- er 5-09 cles 4-27 Steering wheel audio remote control Charge warning display 3-37 switches 5-40 Charge warning lamp 3-35 Accessory (Installation) 04 Automatic air conditioning 5-04 Check engine warning lamp 3-35 Accessory socket 5-81 Automatic headlamp levelling 3-42… -
Page 344
Alphabetical index Dipper (High/Low beam change) 3-40 Engine coolant 8-05,9-11 Hands-free Bluetooth® cellular phone interface sys- Doors Power steering fluid 8-08,9-11 tem with voice recognition 5-47 Lock and unlock 1-24 Washer fluid 8-07,9-11 Hazard warning flasher switch 3-45 Driver’s knee airbag system 2-22 For cold and snowy weather 8-16 Hazard warning indication lamps 3-34 Driving, alcohol and drugs 4-02… -
Page 345
Alphabetical index Modification/alterations to the electrical or fuel sys- LW/MW/FM digital tuning radio with CD chang- tems 04 er 5-24 Multi-information display 3-03 LW/MW/FM digital tuning radio with CD play- er 5-09 Jack 6-06 Rain sensor 3-46 Jump starting (Emergency starting 6-02 Rear fog lamp Bulb capacity 8-23 Oil pressure warning display 3-37… -
Page 346
Alphabetical index Rear seat 2-05 Sun visors 5-79 Twin Clutch SST (Sport Shift Transmission) 4-15 Seat belt 2-06 Card holder 5-79 Gearshift lever 4-15 Adjustable seat belt anchor 2-08 Vanity mirror 5-79 Gearshift lever positions 4-18 Child restraint 2-10 Sunroof 1-38 Manual shift 4-20 Force limiter system 2-09 Safety mechanism 1-38… -
Page 347
Alphabetical index Switch 3-46 Washing 7-03 Waxing 7-04 Weatherstripping 8-16 Weight 9-06 Welcome light 3-40 Wheel condition 8-12 Wheel Specification 9-09 Wiper Rain sensor 3-46 Switch 3-46 Windscreen 3-46 Wiper blades 8-15…
Mitsubishi Lancer Evolution AciD YelloW
AndysEvo
Был больше месяца назад
Андрей Тк…, 33 года
Я езжу на Mitsubishi Lancer Evolution AciD YelloW (до этого — Mitsubishi Lancer Evolution)
Одесса, Украина
Все чаще и чаще замечаю, что люди их спрашиваяю, по просьбам трудящихся залил на яндекс диск.
Пользуйтесь
Evo 8 Manual Eng
yadi.sk/d/ILuBQ2IroLR74
Evo 9 Manual
Rus
yadi.sk/d/LvWHELsroLG6Q
Eng
yadi.sk/d/GUpihB9doLG6W
Много мануалов по MMC онлайн
evoscan.com/vehicle-manuals
5 февраля 2016
Метки: своими руками
73
7
Ранее Если проблему можно решить деньгами — это расходы
Далее UAcarphoto май 2016
Разместить рекламу
Реклама
Машины в продаже
Комментарии
7
Войдите или зарегистрируйтесь, чтобы писать комментарии, задавать вопросы и участвовать в обсуждении.
Войти
Зарегистрироваться

MRaK888
Я езжу на Audi A5 (1G)
спасибо
6 лет

Izh-725
Я езжу на Nissan Note e-Power
Спасибо!
7 лет

kl-176
Я езжу на Subaru Impreza WRX STI (GD)
зачет! тоже искал)
7 лет

EN3MY88
Без машины
#
Вот еще может кто что найдет полезным
7 лет

ZloyShantagust
Я езжу на Mitsubishi Lancer Evolution IX
Спасибо тебе большое )
7 лет

A030
Я езжу на Audi A3 Sportback (8VA)
есть для эво 10 на русском в природе?
7 лет

AndysEvo
Автор
Я езжу на Mitsubishi Lancer Evolution IX
никогда не встречал, но может и есть
7 лет

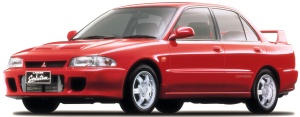
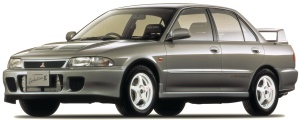
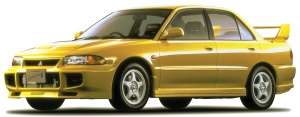
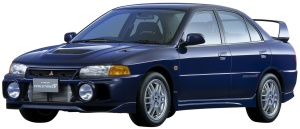
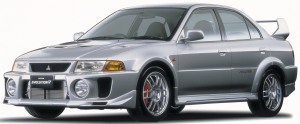
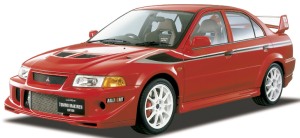
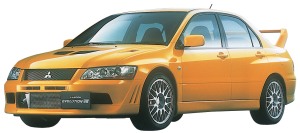
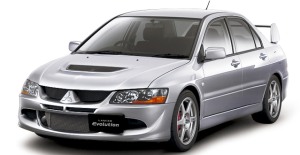
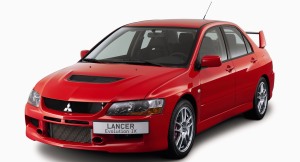
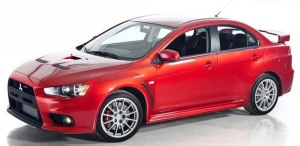
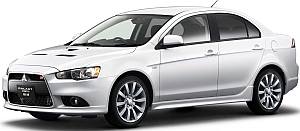


 is pressed, the ra- After selecting a mode, you can leave the func- The radio will automatically tune in to traffic infor- dio will try to find out another broadcast of tion setup mode by taking either of the fol- mation broadcasts while receiving FM broadcasts the same program type as currently selected.
