- Manuals
- Brands
- Maserati Manuals
- Automobile
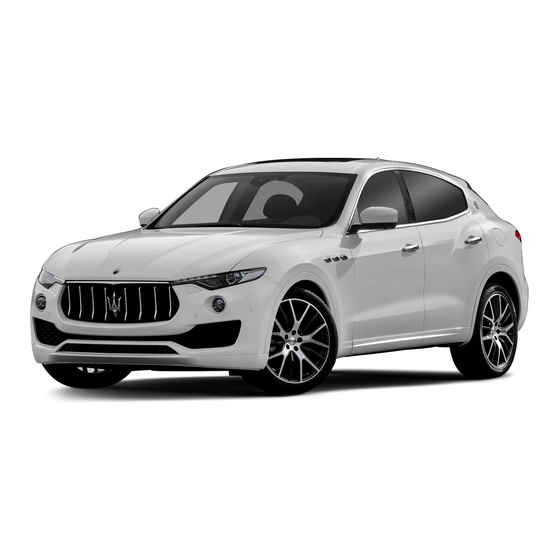
- Levante 2019
- Owner’s manual
-
Contents
-
Table of Contents
-
Troubleshooting
-
Bookmarks
Quick Links
Related Manuals for Maserati Levante 2019
Summary of Contents for Maserati Levante 2019
-
Page 1
Levante Owner’s Manual… -
Page 2
Dear Customer, thank you for choosing a Maserati. This vehicle represents the result of Maserati’s great experience in the design and production of sports, touring and racing vehicles. The purpose of this manual is to provide you with an understanding of the equipment, systems and controls of the vehicle and to explain how they work. -
Page 3
Introduction Before Starting Understanding the Vehicle Dashboard Instruments and Controls Driving In an Emergency Maintenance and Care Features and Specifications Index… -
Page 5
1 — Introduction Consulting the manual ……….. . . 6 Abbreviations . -
Page 6
Introduction Consulting the manual indications given are also valid for the version in mph. CAUTION! This Manual illustrates maintenance Aimed at preventing any damage to and use information related to the vehicle and thus hazards involving gasoline motorization models (3.8 V8 the safety of persons. -
Page 7
Increased Control and Automatic Locking Retractor. Efficiency. Air Quality Sensor. Lane Keeping Assist. Automatic Temperature Malfunction Indicator Light. Control. MTC+ Maserati Touch Control Plus. All-Wheel Drive. Occupant Restraint Brake Assist System. Controller. Blind Spot Assist. Pedestrian Emergency Brake Throttle Override. Braking. -
Page 8
Maserati reserves the right to carry out By following these instructions design and functional changes and to carefully the vehicle will certainly meet… -
Page 9
For service and scheduled maintenance Air-conditioning lines user must consider are reported on the Maserati suggests you to ask for High pressure gas, do not internal lid cover central label (see genuine parts since they are the result open. -
Page 10
Introduction Warning Symbols Warnings when Driving Windshield washer tank Windshield washer. Your driving skills will improve with We recommend you Engine — Engine Oil experience, but be especially careful use liquid with the Refilling Plug at the beginning. Always comply with characteristics indicated Engine oil. -
Page 11
• Maserati strongly recommends to turns or leaning over and abrupt use particular care when operating manoeuvres carried out at high the features and tools that may take speed that might cause the loss the attention off the road. -
Page 12
Introduction Vehicle Identification Data The VIN Number is also visible from the outside through the windshield on Vehicle Identification Number the front left corner of the dashboard. The vehicle’s identification number (VIN) is punched on the foot platform, in front of the right passenger rear seat. -
Page 13
Introduction Vehicle Identification Label Tire Information Label (Australia Paint Identification Label market) The label is fitted on the rear driver The label is applied on the lower left door’s ledge and it shows the This paper label is applied on the side of the hood. -
Page 14
Introduction Gasoline Fuel Warning Label — Diesel Engine The labels are applied inside the fuel filler door. Diesel NOTE: On the cars of some markets, inside the fuel filler door, there may be another label indicating to use only Low Sulphur Premium Diesel. -
Page 15
2 — Before Starting Keys …………… 16 Sentry Key ®… -
Page 16
Before Starting Keys In case the ignition switch does not change by pushing a button, the RKE The vehicle is equipped with a Remote transmitter (key fob) may have a low Keyless Entry transmitter and a Keyless or discharged battery. If this occurs it Ignition Node, to enter, start and is necessary to replace the battery in protect the vehicle. -
Page 17
Before Starting opening handle on the driver’s door, NOTE: NOTE: in case the battery of the vehicle or You can insert either side of the Refer to “MTC+ Settings” in Section the key fob are discharged. emergency key into the lock cylinder. “Dashboard Instruments and Controls”… -
Page 18
Before Starting Sentry Key ® Immobilizer If the light remains on after the ignition switch to OFF and lock all bulb check, it indicates that there is doors when leaving the vehicle System a problem with the electronics: this unattended. condition will result in the engine ®… -
Page 19
Immobilizer System serviced, bring all position lights and/or turn signals key fobs provided with the vehicle and the vehicle security light on the with you to the Maserati Service dashboard will flash. Centre. This light will fast flash for approximately 15 seconds, when the… -
Page 20
Before Starting and will then flash slowly until the with the driver and/or passenger vehicle is disarmed. door open. • Press the lock button on the key fob RKE transmitter. Rearming the System If something triggers the security alarm, and no quick action is taken to disarm it, the vehicle security alarm will turn off the beeper after 29 seconds, and turn off all of the visual… -
Page 21
Before Starting it was left open. In this condition, security alarm. If anyone enters the pressing the button on the key fob it will be necessary to first close the vehicle through the liftgate and three times within 5 seconds from the liftgate as described under «Open and opens a door, the alarm will trigger. -
Page 22
Before Starting Illuminated Entry/Exit activate. Courtesy & dimmable internal lighting, night front seats Lights will turn on and off when you lighting, and approach lighting will enter/exit the vehicle and operate stay on for 27 seconds. the buttons on the key fob RKE transmitter and/or on the “Passive Entry”… -
Page 23
Before Starting • After activating the liftgate opening Vehicle Lighting with command in the possible modes (see Open/Closed Doors “Open and Close the Liftgate” in this • If one or more doors are open, the section), the inner boot and liftgate central light, front/rear domelights lights will turn on and will stay on for (main and spot light), the instrument… -
Page 24
Before Starting Unlock the Vehicle with Key fob The RKE system allows you to lock or unlock the doors and the fuel filler door, open the liftgate and turn the approach/courtesy lights on from a distance up to approximately 10 m (33 ft). -
Page 25
Before Starting Unlock the Doors, Fuel Filler Requiring and Setting in section “Dashboard Instruments and Controls”. Door and Liftgate Additional Key fobs Turn Headlights On with Key fob Press and release the unlock button In order to purchase additional key on the key fob RKE transmitter once This feature activates the headlights fob RKE transmitters you need to bring… -
Page 26
Before Starting To replace the battery proceed as follows: • Remove the emergency key as indicated in “Keys” chapter of the current section. • Loosen the lateral screw that connects the two side covers with a torx T6 screwdriver. • Separate both parts of the key fob •… -
Page 27
“Services” on the website • Battery at an acceptable charge level. fails to remote start or exits remote www.maserati.com. • The shift lever is in P (Park) position. start prematurely: • The vehicle transmission is in •… -
Page 28
Before Starting To exit Remote Start Mode • “Remote Start Cancelled Fuel Low”. • “Remote Start Cancelled Time without Driving the Vehicle Expired”. Press and release the button • “Remote Start Disabled Start Vehicle time or allow the engine to run for the to Reset”. -
Page 29
“Services” on the website • Never leave children alone in www.maserati.com. a vehicle, or with access to an unlocked vehicle. • Do not allow children to be in a vehicle unattended. -
Page 30
Before Starting Power Doors Locking/ If power liftgate/Hands free (option) features (see “MTC+ Settings” in has been left open, it will stay open section “Dashboard Instruments and Unlocking Controls”). when you press lock button , and A power door lock switch and a the locking feature will only occur Automatic Door Unlock on Exit… -
Page 31
Before Starting Engage or Disengage the position, roll down the window, and Child-Protection Door Lock open the door using the outside door WARNING! handle. • Open the rear door. The system works properly if the ajar • Insert the tip of the emergency key Soft Door Close System (if door has a gap, between exterior door into the lock and rotate to the lock… -
Page 32
Before Starting Passive Entry System and immediately but with a slight delay (about 2 seconds). The “Passive Entry” system is an Unlock Door from the Driver enhancement to the vehicle’s Remote Side Keyless Entry (RKE) system. This feature allows you to lock and unlock With a valid key fob RKE transmitter the vehicle’s door(s) without having to within 1 m (3.3 ft) of the driver’s… -
Page 33
Before Starting transmitter inside your vehicle, the • the doors are manually locked using “Passive Entry” system is equipped the door lock knob positioned on the with an automatic door unlock feature door panel; which will function if the ignition •… -
Page 34
Before Starting (Continued) m (3.3 ft) of the liftgate, press the unlock the doors using this door button located between the licence handle. By pulling the external door and/or the lower button (on plate lights and lift it manually. handle, you can check if the car the outer edge of the left boot remains locked, without “Passive For vehicles equipped with power… -
Page 35
“Services” on the website operate the corresponding window. www.maserati.com. The window controls will operate only when the ignition switch is in the ACC or RUN position. -
Page 36
Before Starting NOTE: accidentally activated, posing a risk to NOTE: passengers remaining onboard. • The power window switches will • If the window runs into any obstacle remain active for up to 10 minutes during auto-closure, it will reverse Auto-Down Feature after the ignition switch is turned to direction and then go back down. -
Page 37
Before Starting Power Sunshades on Rear switch down to open the window completely. Door Windows (optional) Open and Close the Windows NOTE: and Sunroof with RKE • On vehicles provided with power Transmitter and Ignition Off sunshades on the rear windows, the When the ignition switch is in OFF window switches also operate the position, windows and sunroof (if… -
Page 38
Before Starting sunshade and the door panel, during lowering. CAUTION! Before activating the sunshade, make sure that no objects can interfere with its travel. The following images and the subsequent text show the possible starting positions (“A”, “B”, “C” and A. -
Page 39
Before Starting Pressing the control again to B. Sunshade fully rolled down 1 detent: the window opens (“DOWN” position) and Window partially until the control is closed (“UP” position) released and the sunshade stays down (pressing the control to 2 detent: the window opens completely). -
Page 40
Before Starting C. Sunshade fully rolled down Teach-in Cycle move downwards for approx. 2-3 (“DOWN” position) and Window millimetres (0.08-0.12 inches) and After battery disconnection, the completely open (“DOWN” position) the control unit will store this height following teach-in cycle is required to as upper limit. -
Page 41
Before Starting Open and Close the licence plate lights, when the vehicle section “Dashboard Instruments and has been unlocked using the key fob Controls”). Liftgate or the “Passive Entry” system. To manually close the liftgate, use the handles indicated in the picture. The manual liftgate can be unlocked from inside the vehicle by pressing the button on the front dome console. -
Page 42
Before Starting stop it at any intermediate position by pressing the button again whenever you wish to stop and resume the opening process. In addition to these commands, it is possible open and close the power liftgate/Hands free, or stop its movement, by simply moving your foot under the rear bumper, if the vehicle is so equipped with the kick sensor… -
Page 43
Before Starting and you press and release the upper In any case, when you press the lower • If the power liftgate/Hands free finds several obstacles during the button during the closing or button , the doors will not be same operating cycle, it will stop opening stroke, it will be stopped;… -
Page 44
Before Starting and partly open the liftgate when a reset cycle by carrying out a complete Press the upper or lower pressure is carried out, also slight, opening/closing sequence, after buttons and keep it pressed for 3 within their range shown in the figure. manually closing the liftgate. -
Page 45
Before Starting Entry System” in this section), which Free can be opened accidentally by • if the movement was stopped automatically releases and closes the an unintentional movement of the another kick operation will invert a power liftgate/Hands free when you foot. -
Page 46
Before Starting Liftgate Emergency Release Open and Close the Hood • Slightly lift the hood and push the safety catch as indicated by the If the power release control operated Opening arrow. The safety catch is located in by the key fob RKE transmitter or by the centre of the hood. -
Page 47
Before Starting Occupants Restraint that can be fixed with the three point seat belts or the Isofix anchorages. CAUTION! Systems NOTE: To prevent possible damage, do not The listed occupants restraint systems The advanced front air bags have a slam the hood to close it. are some of the most important safety multistage inflator design. -
Page 48
Before Starting worst injuries happen when people belt for more than one person, no are thrown from the vehicle. Seat belts matter what their size. WARNING! reduce the possibility of ejection and • Remember that, in the event of an •… -
Page 49
Before Starting belt reduces the risk of sliding under seat belt with your hand while it the belt in an accident. is rewinding, to prevent it from WARNING! twisting. • A belt that is buckled up into the wrong buckle will not protect you WARNING! properly. -
Page 50
Before Starting Three-Point Seat Belt should be close to, but not contacting, not activate the ALR. If the ALR is the neck. activated, you will hear a ratcheting Untwisting Procedure sound as the belt retracts. In this case, Push downward the upper part of the Use the following procedure to allow the belt to retract completely indicated slider above the shoulder… -
Page 51
Before Starting • The air bags are designed to work To buckle the seat belt proceed as • Insert the latch plate located at the together with the seat belts, not to follows: end of the lap portion of the belt A substitute them. -
Page 52
Before Starting sound. This indicates the safety belt is shortening of the metal cable and now in the automatic locking mode. from its protective sheath curled. WARNING! Automatic Locking Mode Unsetting It is strictly forbidden to remove or tamper with the pretensioner Unbuckle the three-point seat belt components. -
Page 53
Before Starting travelling at speeds greater than 8 km/h (5 mph), BeltAlert ® will provide both audio and visual notification on the instrument cluster. ® The front passenger seat BeltAlert not active when the front passenger seat is not occupied. BeltAlert ®… -
Page 54
Before Starting Supplemental Restraint Air Bag System Components The advanced front air bags have a multistage inflator design. This allows System (SRS) — Air Bags Your vehicle may be equipped the air bag to have different rates of with the following air bag system inflation based on the severity and components: This vehicle has advanced front air… -
Page 55
Before Starting The first stage inflator is triggered of the severity of the collision. During the drive your back must be immediately during an impact that Therefore, always release the as upright as comfort allows and be requires air bag deployment. This low passenger air bag when a rearward against the seat back with the seat output is used in less severe collisions. -
Page 56
Before Starting… -
Page 57
Before Starting… -
Page 58
Before Starting Supplemental Air bags Air Bag Deployment Sensors in the event of a side impact, thanks to the wide cushion inflation surface. and Controls Supplemental Seat-Mounted Side Air Each air bag features inflated Bags (SAB) Occupant Restraint Controller (ORC) chambers placed adjacent to the head Supplemental Seat-Mounted Side Air The Occupant Restraint Controller… -
Page 59
Before Starting frontal collisions depending on the RUN position. If the ignition switch severity and type of collision. is in the OFF position, in the ACC position, or not active, the air bag Advanced front air bags are not system is not activated and the air expected to reduce the risk of injury in bags will not inflate. -
Page 60
Maserati Service Centre service the and with such a high force that it windows in certain rollover events air bag system immediately. -
Page 61
These airborne particles may irritate replaced by a Maserati Service • cut off fuel to the engine; the skin, eyes, nose, or throat. If you Centre. Also, have the Occupant •… -
Page 62
The passenger air bag is normally vehicle to the Service Network. symbol will display for 2 activated (ON). • Only Maserati manufacturer seconds with the corresponding approved seat accessories may be message. used. If it is necessary to modify the air bag system for persons with disabilities, contact the Service Network. -
Page 63
Before Starting WARNING! • We recommend you to always fit any child seats on the rear seat, as this is the safest position in the event of a collision. • When the passenger side air bag is deactivated the passenger seated on the front seat will not have the additional protection of the air bag in the event of a collision. -
Page 64
Before Starting Child Restraint Systems cluster to make sure that it has • If you or another occupant is an actually been deactivated. adult with a medical condition that Everyone in your vehicle needs to be • Never carry children on your lap, not requires air bag deactivation, please buckled up all the time, including even newborns. -
Page 65
Before Starting All restraint devices must bear the NOTE: approval data, with the control mark Regardless of the type of child on a label firmly secured to the child restraint, always check that the seat seat which must never be removed. belt is well fastened by pulling on it. -
Page 66
• Always check that the seat belts do label certifying that it meets all not restrain the child’s throat. applicable Safety Standards. Maserati • Never allow a child to put the recommends that you make sure that shoulder belt under an arm or behind you can install the child restraint their back. -
Page 67
Before Starting Suitability of Passenger Seats for Universal Child Restraint System Use According to the European Directive 2003/20/EC the suitability of each passenger seat position for the fixing of universal child restraint systems is shown in the following table: Group Front passenger seat Outer rear seats Central rear seat… -
Page 68
Before Starting Installing Child Restraint Summary of Children Safety seat. All seat belts will loosen over Transporting Regulations: time, it is therefore necessary to Systems using the Vehicle Seat check them periodically and set them Children up to 12 years old or under Belt equipped with ALR properly. -
Page 69
Before Starting or post) (see the example in the run your finger along the intersection figure). of the seatback and seat cushion surfaces. Such anchorages can be reached pushing down or lifting the foldable end of the boot compartment cover. Isofix Universal child restraint systems are now available. -
Page 70
Before Starting • Lift the headrest. • Route the top tether to provide WARNING! WARNING! the most direct path between the • Fit the child seat when the car • Improper installation of a child anchorage behind the backrest and is stationary. -
Page 71
X = The seat is not fitted with Isofix systems. Maserati Recommended Child Restraint Systems for this Vehicle “Maserati Genuine Accessories” makes available a complete range of child restraint systems that can be fixed using the vehicle seat belts or through the Isofix anchorages. -
Page 72
Isofix basement (to be purchased separately) and the the vehicle seat belts (it can Isofix anchorages on rear outboard seat. also be used together with Maserati recommends this seat for this weight group. the “Maserati Peg Pérego Pushchair”). -
Page 73
Group: 2, 3 (15 – 36 kg / 33 – 79 lb) Maserati Peg Pérego Viaggio 2-3 Surefix Universal Approval Number: E24 040070 Semi-Universal Approval Number: E24 040071 This seat can only be installed in forward-facing position using the vehicle seat belts and,… -
Page 74
WARNING! Air bags deploying in the front seat • Never allow a child to seat Maserati recommends to install could harm your pet. An unrestrained improperly or to unbuckle the seat the child seat according to the pet will be thrown about and possibly belt while driving. -
Page 75
Before Starting Park Assist (optional) become active again if the vehicle speed is decreased to speeds less than The Park Assist (also called approximately 10 km/h (6.2 mph). “ParkSense”) system provides visual Park Assist Sensors and audible indications of the distance The four Park Assist sensors, located between the rear and/or front bumper in the rear bumper, monitor the area… -
Page 76
Before Starting four arcs while the two detection areas behind the car into five arcs. The system will indicate a detected obstacle by displaying arcs with fixed or flashing light and a characteristic sound according to the obstacle distance. The colour indicates the distance and the arc indicates the position of the detected obstacle. -
Page 77
Before Starting The following charts show the warning alert visualization when the system is detecting an obstacle. Front Sensors — Warning Alerts More than 120 cm 120-101 cm 100-61 cm 60-31 cm Less than 30 cm Front distance (50 in) (50-40 in) (40-24 in) (23.6-12.2 in) -
Page 78
Before Starting NOTE: After pressing the button the front sensors are damaged and require instrument cluster will display the service. Park Assist will turn off the front state of front parking sensors for park assist audible alert (chime) after When the shift lever is moved to R approximately five seconds. -
Page 79
Before Starting Park Assist System Usage over his/her shoulder when using Park Assist. Precautions NOTE: WARNING! • Jackhammers, large trucks, and other vibrations could affect the Drivers must be careful when backing performance of Park Assist. up even when using the Park Assist system. -
Page 80
Before Starting Rear Parking Camera When you set the volume, only the The rear parking camera is located on parking sensor acoustic signal will the rear of the vehicle above the rear (optional) be affected. The radio or any other licence plate. -
Page 81
Before Starting Surround View Camera Distance to the rear of the Zone vehicle CAUTION! System (optional) • To avoid vehicle damage, the rear Yellow 30 cm — 2 m (12 — 78 in) System components camera should only be used as a 2 — 4 m (78 — 157 in) or parking aid, as the rear camera is The system uses four cameras to… -
Page 82
Before Starting Once the “Surround Camera” screen present under the image: the edges is displayed, it is possible to choose of the pressed button will highlight. which images to display according to 4 The button will highlight and the type possible settings. -
Page 83
Before Starting (Neutral) and P (Park) position by using to avoid damage to property or that the driver looks frequently over the surround view camera delay menu. personal injury. his/her shoulder when using this • system. The camera system with surround For further information, see “MTC+ view is designed for use during Settings”… -
Page 84
Before Starting Safety Tips • Vehicle Safety Checks Do not run the engine in a closed garage or in confined areas any Seat Belts Transporting Passengers longer than needed to move your • Inspect the belt system periodically, vehicle in or out of the area. checking for cuts, frays, and loose •… -
Page 85
NOTE: • Check mounting of mats on a regular Lights and Indicator Lights The Maserati Service Network can basis. Always properly reinstall and • Have someone observe the operation provide you with any information secure floor mats that have been… -
Page 86
Before Starting chapter in section “Dashboard Instruments and Controls”). Door Latches • Check for positive closing, latching, and locking of doors and liftgate (see “Unlock the Vehicle with Key fob” chapter in this section). Fluid Leaks • Check area under vehicle after overnight parking for recent fluid leaks (oil, fuel, etc.). -
Page 87
3 — Understanding the Vehicle Interior Components ……….. . . 88 Front Seats . -
Page 88
Understanding the Vehicle Interior Components Dashboard Components… -
Page 89
Understanding the Vehicle Central Console Components Cover for cup holder and cigarette lighter/power socket compartment. Adjustable side air outlets. Rotary selectors and buttons for Engine START/STOP button. the multimedia navigation. Light switch. Hazard lights switch. Anti-theft system indicator. Drive height selector. Steering wheel controls. -
Page 90
Understanding the Vehicle Central light control button. Door lock button with “Passive Entry” function. Reading lights. Door outboard opening lock. Central light. Passenger air bag deactivation Rear Doors Components warning light (for versions/ markets, where provided). Button to switch off passenger compartment lights. -
Page 91
Understanding the Vehicle Front Seats Heated switch for right rear seat Use the rear switch 3 to adjust the (optional). The heated switch for lumbar support. Seats and seat belts are parts of the the left rear seat is on the left Occupant Restraint System of the rear door. -
Page 92
Understanding the Vehicle Seat Up/Down Adjustment Push the switch 3 upward or downward to raise or lower the The height of the seat can be adjusted WARNING! lumbar support. up- or downward. Remember that the headrests must be Grip switch 1 from the back side and positioned so that their upper edge is push it down or up. -
Page 93
Understanding the Vehicle Use the power switch 1 to move the seat up or down, forward or rearward or to recline the seat cushion. CAUTION! If the seat’s movement does not work, make sure that the corresponding fuse is not tripped (see chapter “Fuse Replacement”… -
Page 94
Understanding the Vehicle Power Lumbar (optional) In a collision you could slide under the seat belt, which could result in Power Lumbar (optional)Push the serious injury or death. switch 4 forward or rearward to increase or decrease the lumbar support. CAUTION! Push the switch 4 upward or Do not travel with the seatback… -
Page 95
Understanding the Vehicle level during the first 4 minutes of operation. WARNING! Then, the heat output will drop to the • Persons with low skin sensitivity normal HI-level. because of advanced age, chronic If the HI-level setting is selected, the illness, diabetes, spinal cord injury, system will automatically switch to LO- medication, alcohol use, exhaustion… -
Page 96
Understanding the Vehicle Driver Memory Seat (for “Air Conditioning Controls” in section • Within 15 seconds, touch the driver “Dashboard Instruments and Controls” or passenger seat soft-key a second versions/markets, where for further details. time to select LO-level ventilation. provided) When the MTC+ System is in any mode other than “Climate”… -
Page 97
Understanding the Vehicle • The “1” and “2” buttons which • Check on the instrument cluster for a previously memorized profile, are used to recall either of two the positive response of the actions pressing the corresponding memory programmed memory profiles. “Memory 1 (or 2) profile set”. -
Page 98
Understanding the Vehicle Rear Seats To recall the memory settings for mm (5.51 in) forward of the rear driver, press memory button number stop; Rear seats can fit three passengers. “1” or “2” on the driver’s door trim — will move to a position of ca. 80 mm Seats and seat belts are parts of the panel or the button on the RKE… -
Page 99
Understanding the Vehicle will be acknowledged by lever control seatback could cause severe injuries • To raise the head restraint, pull cable clicking in place to lock. in case of accident. upward on the head restraint. • When fastening a child seat on Ensure that seatback is fastened to the external rear seats, ensure that the position by trying to move it back and… -
Page 100
Understanding the Vehicle temperatures, especially if used for long periods of time. CAUTION! • Do not place anything on the seat The armrest is not designed to support that insulates against heat, such as the weight of an adult or a child: a blanket or cushion. -
Page 101
Understanding the Vehicle Steering Wheel NOTE: • Once a heat setting is selected, Adjustment heat will be felt within two to five minutes. This feature allows you to tilt the • The engine must be running for the steering column upward or downward heated seats to operate. -
Page 102
Understanding the Vehicle NOTE: The heated steering wheel can shut off early or may not turn on when the You can use your key fob with RKE steering wheel is already warm. transmitter or the memory buttons on the driver’s door trim panel to The heated steering wheel can be return the tilt/telescopic steering turned on and off using the MTC+… -
Page 103
Understanding the Vehicle Adjustable Pedals (for WARNING! versions/markets, where WARNING! • Persons who are unable to feel pain Do not adjust the pedals position provided) to the skin because of advanced while the vehicle is moving. You could age, chronic illness, diabetes, spinal lose control and have an accident. -
Page 104
Understanding the Vehicle Rear View Mirrors driver know that the BSA system may become limited if there is an (optional) is operational. For more obstruction in the adjustable pedal’s. External Mirrors details see chapter “Blind Spot Assist — BSA” in section “Driving”. External mirrors can be adjusted electrically and are equipped with anti-mist resistors operated by… -
Page 105
Understanding the Vehicle the adjacent lane and get a partial this section) corresponds to a mirror overlap with the visible image on the tilt position in reverse. inside rear-view mirror. NOTE: Power mirror preselected positions The mirrors tilt in reverse can be can be reset by operating the optional turned on and off using the MTC+ Memory Driver Seat device. -
Page 106
Understanding the Vehicle • If the mirrors are automatically folded after the last lock action, then CAUTION! they will automatically unfold when To avoid damage to the mirror during the ignition device is set on ACC or cleaning, never spray any cleaning RUN position. -
Page 107
Understanding the Vehicle Lights NOTE: • In certain European countries, the Light Switch position lights will only operate with the ignition switch in OFF position, or The light switch located on the left side of the dashboard is used for the with front fog lights and headlights position/DRL lights, headlights, side on. -
Page 108
Understanding the Vehicle The following table shows the on/off condition of external lights, according to the ignition device position, to the engine status, to the twilight sensor mode and to the light switch position. Ignition Twilight Light Switch Position Engine Device Sensor… -
Page 109
Understanding the Vehicle Automatic Headlights considered as an aid for the driver. If The delay interval begins when the necessary, switch the lights including ignition switch is placed in the OFF or This system automatically turns the front and rear fog lights on and off ACC position. -
Page 110
Understanding the Vehicle SmartBeam™ System (for Daytime Running Lights (DRL) dynamically modify the light shape produced by the dipped beam and by versions/markets, where The lighting system uses the same the full beam as well, to make the high or low intensity headlamps LED, provided) driver visibility as much comfortable respectively, for the DRL lights and… -
Page 111
Understanding the Vehicle The advantages offered by the AFS Light flux system are perceived especially in case WARNING! (B) Motorway 1200 lm of bad weather, fog and/or insufficient If xenon headlamp replacement road indications providing broader The picture shows the low beam is necessary, contact the Service illumination of the side zones, which distribution on the road with the… -
Page 112
Understanding the Vehicle The improved vertical illumination, in Other advantages are: start up five strategic steps in the case of fast acceleration and/or fast following situations: • a clearer light beam, with a cool deceleration, will assure the deeper white tone that allows a better •… -
Page 113
Understanding the Vehicle NOTE: distribution according to the current of the Service Network as soon as drive path. possible to check the system. The values reported in the tables may change depending on the destination The increased lateral illumination is market of the car. -
Page 114
Understanding the Vehicle beams until the approaching vehicle is out of view. Futhermore, the digital camera is able to detect the urban areas and the inhabited centers and to turn off the high beams when driving near of one of them. The properly working for this feature (if all the other conditions are met) is ensured between 35 km/h (21.7 mph) -
Page 115
Understanding the Vehicle The no glaring system is a multi- starting from a distance of about 100 shadow system, since it’s able to m (100 yd). create up to four light tunnels Activation Mode simultaneously, each tunnel zone is as The digital camera is the same used large as the obstacle that should not for the automatic high beam, and like… -
Page 116
Understanding the Vehicle The green indicator indicates that the Free” feature making it working “Auto High Beam Assist” feature is improperly. activated on MTC+; the blue indicator • Heavy rainy and foggy weather could indicates that all or only some high affect system performance, leaving beam LEDs are physically on in that the full beam switched on for longer… -
Page 117
Understanding the Vehicle • press the light switch again to turn off the front fog lights. NOTE: The left or right arrow on the speedometer and tachometer After a key-off/key-on cycle, the front instrument cluster respectively, flashes fog lights will activate automatically The green indicator in the to show proper operation of the front… -
Page 118
Understanding the Vehicle High Beams and Flashing You can signal another vehicle with your headlights by lightly pulling the To switch on the high beams with multifunction lever toward you. This the light switch in headlamp will turn on the high beams headlights or “AUTO”… -
Page 119
Understanding the Vehicle when they are no longer necessary • “Backlighting” (example shown in Press and release the switch ( ) to and every time the twilight sensor figure). select the option. A selection notice deactivates the external lights. • “Ambient Lighting”. pops up for 2 seconds and then the display reverts to the last modified Interior Lights… -
Page 120
Understanding the Vehicle The vehicle is equipped with a system that automatically adjusts headlight levelling according to ground clearance and vehicle load conditions. Dome Lights The dome lights integrated into the front dome console, include a central and two reading lights. The central light automatically turns on when one of the doors is opened If one or more doors are opened, the… -
Page 121
Understanding the Vehicle NOTE: when liftgate is opened and turn off when it is closed. The controls of the sunroof, the HomeLink and the button to switch off Park Assist system can be found on the front dome console. A light is available on the roof, under the sun visors;… -
Page 122
Understanding the Vehicle Wipers and Washers Press the button again to turn them off. The multifunction lever operates the When these lights are on, the direction wipers and washers acting on the indicators, the related arrow indicator windshield and on the window of on the instrument cluster and the the liftgate when the ignition switch button itself will flash. -
Page 123
Understanding the Vehicle • For low speed wiper operation automatically activates the relative (stable position «LO»): rotate the end wipers. CAUTION! of the multifunction control lever Rotate forward the end of the • Turn the washer acting on the forward to the first trigger after the multifunction lever to one of four windshield and on the window of intermittent setting. -
Page 124
Understanding the Vehicle on the windshield are turned on if position enabling to open the wiper • ® Use on the windshield of RainX the light switch is placed in “AUTO” arms and change the blades. products containing wax or silicone position. -
Page 125
Understanding the Vehicle The headlight washers will spray a timed high-pressure spray of washer WARNING! fluid onto each headlight lens every 11 Operate or service the windshield windshield wipers cycles. wiper blades without deactivating the wipers (“OFF” position), leaving Head Windshield Washer Nozzles the ignition switch in RUN can be (optional) dangerous for the operator since the… -
Page 126
Understanding the Vehicle Interior Features Once released, control will go back to any other object in the power outlets “OFF” position. as this will damage the outlet and Electric Power Outlets blow the fuse. Damages caused by improper use of the power outlet The vehicle is equipped with three are not covered by the New Vehicle or four 12 Volt (13 Amp) electric… -
Page 127
Understanding the Vehicle console you need to open the half- lids as indicated in the following WARNING! paragraph. High power consumption items plugged into this outlet for long periods may discharge the battery and/or prevent the engine from starting. Power Outlet inside the Boot The power outlet is positioned on the right side of the boot compartment. -
Page 128
Understanding the Vehicle CAUTION! • Use light and shatterproof containers. • Do not forcefully push unsuitable containers into the cup holders to prevent damage to the containers. • Do not store hot drinks. Cup Holders for Front Passengers The front cup holders are located By pressing the indicated button on To close one or both of the half-lids, beside the transmission lever and… -
Page 129
This USB input can be used for data exchange (refer to the «Maserati Touch Control Plus (MTC+)» guide for further details). Two other USB inputs for charging of connected source (CHARGE ONLY… -
Page 130
Understanding the Vehicle The MTC+ will then control the following functions: play, pause, fast forward, rewind, next track, previous track, random or repeat mode, selection and navigation of playlist/genre/singer/album/Podcast. CAUTION! Do not leave your USB device, iPod ® an external audio source in the vehicle By lowering the visor you can access Smoking Kit (optional) for extended periods of time: extreme… -
Page 131
Understanding the Vehicle WARNING! • The cigarette lighter reaches high temperatures. Handle it carefully and do not allow children to use it so as to avoid risk of fire and injury! • The cigarette lighter may not be used as a power outlet. Handholds and Cloth Hooks Handholds are fitted above the The rear seat passengers can use the… -
Page 132
Accessories) The Maserati Service Network can provide you with all information about the “Maserati iPad Holder” to be fixed to the slide rods of the front head restraints, available in the “Genuine Accessories” range. The information indicated on the label concerns passengers and luggage loading operations. -
Page 133
• Never drive with the liftgate The Maserati Service Network can open. Exhaust gases can enter the provide you with any information passenger compartment. about the items dedicated to •… -
Page 134
(see “Rear Seats” in this NOTE: section). The Maserati Service Network can provide you with information about By using the Railing Fastening Bar, WARNING! the available “Genuine Accessories”… -
Page 135
Understanding the Vehicle folded down position should not be The Maserati approved Ski and used as a play area by children when Snowboard Bag available in the the vehicle is in motion. They could “Genuine Accessories” range, can be be seriously injured in a collision. -
Page 136
Understanding the Vehicle Boot Compartment Cover Boot compartment cover is made of WARNING! two parts, the most outward one lifts After refitting the boot cover, make when liftgate is opened. sure that the lower ends of the The cover can be removed to obtain a inner part have properly engaged in larger cargo area, as follows: their guides. -
Page 137
• Before leaving for a trip, fasten all with protruding elements that might objects that might move to trunk scratch its surface. If necessary, protect floor, using the devices provided by Maserati for this purpose. -
Page 138
Understanding the Vehicle To install it, open the bag zip, unfold • Insert the net top ends in the slot on • When using the Cargo Net, do not the two parts until hearing the roof brackets (position load any heavy object on top of jointing elements clicking in place. -
Page 139
Understanding the Vehicle • Freeing the net lower part from the Should it be necessary to position • Fasten the lower tethers of Cargo Cargo Net structure. the Cargo Net in position B — more Net to external retainers, also used forward, i.e., behind the front seats — to fasten the top safety belt for use the top retainers next to external… -
Page 140
The Maserati Service Network can provide you with any information about the Maserati approved Carrying Items, available in the «Genuine Accessories» range. WARNING! •… -
Page 141
Understanding the Vehicle Power Sunroof with Indeed, a bulky and/or heavy load carried on the roof will affect driving Sunshade (optional) behaviour and steering response since it shifts the vehicle centre The sunroof and the sunshade are of gravity to a higher position power-controlled and can only be compared to normal conditions. -
Page 142
Understanding the Vehicle Venting Sunroof movement, the sunroof front panel • Do not allow small children to will automatically retract. If this occurs, operate the sunroof. Never insert Press and release the rear button; the remove the obstruction then press fingers, other body parts, or any sunroof front panel will open to the onwards and release the right switch… -
Page 143
Understanding the Vehicle Wind Buffeting HomeLink ® (for • within 5 seconds, press the right switch onwards again and keep it Wind buffeting can be described versions/markets, where pressed: the sunroof performs an as the perception of pressure or a provided) automatic complete opening and helicopter-type sound. -
Page 144
Understanding the Vehicle (Continued) For more efficient programming and “Vehicle security alarm” in section accurate transmission of the radio- “Before Starting”). frequency signal it is recommended that a new battery be placed in the hand-held transmitter of the device WARNING! that is being programmed to the •… -
Page 145
Understanding the Vehicle ® ® • Release immediately the Homelink the garage door opener/device is in • Press and hold the desired HomeLink button you want to program. the LEARN/TRAIN mode. button. • Continue holding the hand-held • Without releasing the button NOTE: transmitter button until the warning proceed with “Programming the… -
Page 146
If the garage door opener/device the two outside HomeLink ® buttons (I the section “Services” on the website activates, programming is complete. www.maserati.com. and III) until the warning light starts To program the remaining two flashing (after approximately 20 HomeLink ®… -
Page 147
Understanding the Vehicle Air Conditioning Distribution A/C Dual-zone… -
Page 148
Understanding the Vehicle A/C Four-zone… -
Page 149
Understanding the Vehicle Adjustable and fixed air vents allow • The fixed vents under the dashboard passengers to achieve the optimal are aimed at ventilating the comfort conditions. lower part of the front passenger compartment. Fixed Air Vents • The fixed vents, positioned on the upper part of the dashboard, beneath the windshield and on the windshield side pillars are meant… -
Page 150
Understanding the Vehicle 1 , located near each vent, allows to control the quantity of the air flow from fully closed to fully open, and vice versa. Excluding the adjustable vents on the upper surface of the dashboard, the grill of these vents can be oriented by operating on the central handle 2 . -
Page 151
4 — Dashboard Instruments and Controls Instrument Cluster …………152 Infotainment System . -
Page 152
Dashboard Instruments and Controls Instrument Cluster The instrument cluster is divided into three main areas displaying information, signs and text and/or icon messages. A — Analogue speedometer. It indicates the vehicle speed. B — Analogue tachometer. C — TFT display. In this area the odometer display shows the total V8 — Gasoline (in example GTS version) distance covered by the vehicle. -
Page 153
Dashboard Instruments and Controls Warning and Indicator Lights Malfunction Indicator Light (MIL) The Malfunction Indicator Light on Speedometer CAUTION! (MIL) is part of an onboard • When the ignition switch is in the The following telltales are displayed diagnostic system that monitors on the speedometer, and related RUN position and the indicator light engine and automatic transmission… -
Page 154
Dashboard Instruments and Controls Tire Pressure Monitoring Light Anti-Lock Braking System (ABS) If the light stays on with the engine Malfunction Warning Light running, there is a malfunction in the This warning light is connected ESC system. to the Tire Pressure Monitoring This light, and its related If the light still stays on after several System (TPMS). -
Page 155
Dashboard Instruments and Controls Warning and Indicator Light on Start&Stop Active Indicator problem with the anti-lock brake system (ABS) reservoir may have This telltale indicates that Tachometer occurred. the engine has been switched Following telltales are displayed In all the above situations, a related off automatically by the on the tachometer and related message will be displayed. -
Page 156
Dashboard Instruments and Controls the brake indicator light and the ABS Air Bag Indicator Light light illuminate. This light will illuminate for a WARNING! Immediate repair of the ABS system is few seconds for a bulb check If the warning light remains ON or if required. -
Page 157
5). There can be maximum 9 displayable submenu positions. WARNING! When the number of submenu Maserati urges you to use the seat points exceeds 9, the points are belts correctly fastened and adjusted replaced by a numerical value at all times. Correct use of the seat within the scroll arrows. -
Page 158
Dashboard Instruments and Controls 18* Combined telltale of ACC, directions to scroll upwards and LKA and HAS status. They are downwards the main menu titles. displayed in the cluster when The screen area in sector 1 (Main Area) one (or more) of these systems is will be updated and the selected title enabled and a different menu will be shown in sector 3 (Main Menu… -
Page 159
Dashboard Instruments and Controls When driver selects a main menu, if • Battery Voltage 10. VEHICLE SETTINGS the TSA feature is set on and a sign • AdBlue Level (Diesel only) • Speed Warning: enables, disables or and/or a speed limit icon is displayed •… -
Page 160
Dashboard Instruments and Controls the previous screen. Most of the • Navigation Messages messages of this type are then When the navigation menu is stored (as long as the condition that enabled on the MTC+, information activated them remains active) and pop-ups will be displayed while can be reviewed from the «Stored changing direction or approaching a… -
Page 161
Dashboard Instruments and Controls NOTE: refer to «Maserati Touch Control Plus Displays the current transmission (MTC+)» guide. temperature level. • Popup boxes might take up the space normally used to display main menu • Oil Temperature 2. VEHICLE INFO items and relevant submenus. -
Page 162
Dashboard Instruments and Controls NOTE: Displays mileage and days remaining • current ground clearance indicated to the execution of scheduled in front of vehicle and on a specific This strategy is also applicable in the maintenance service. indicator on top right corner; Transmission Temperature and Oil •… -
Page 163
Dashboard Instruments and Controls NOTE: To set these systems, see chapters “Adaptive Cruise Control — ACC”, “Highway Assist — HAS” and “Lane Keeping Assist — LKA” in section “Driving”. Press and release the button to return to the main menu. 5. -
Page 164
Dashboard Instruments and Controls • Fuel Economy Average in L/100km, For each of the “Trip A” and “Trip B” “Trip B” is reset after each key on/key MPG (UK) or MPG (US) sub-menus the screen will display the off cycle. following: Shows the average fuel economy Press and release the… -
Page 165
Dashboard Instruments and Controls • SD Card: folder, previous track, • Many signals current track and next track; • Signal not available • AUX: name of source, “Device Connected” text; • No Signal: “No Signal Available” text; BTSA • Mute: symbol “Mute”, the lines remain those displayed before the command “Mute”. -
Page 166
Dashboard Instruments and Controls in paragraph “Interior Lights” under Press and release the button to “Lights” in section “Understanding return to the main menu. the Vehicle”. 10. VEHICLE SETTINGS TFT Display: Example to modify With ignition switch in RUN position and vehicle stopped, press and release the “Speed Warning”… -
Page 167
Dashboard Instruments and Controls A pop-up message indicating that the Press and release the switch ( ) once limit has been exceeded will appear on again to view the related options: display. “Off” is the default status. A setting saved notification appears as a popup for 2 seconds and a white telltale indicating the set speed limit will appear on display. -
Page 168
• Range to Empty • On: Trip summary • Compass (only with navigation • Average L/100km or km/L (or MPG) system) Off: screen with Maserati logo and • Current L/100km or km/L (or MPG) • Outside Temp. trident • Trip A Distance •… -
Page 169
Dashboard Instruments and Controls function is set to «Off», the navigation information will not be displayed. If the “Outline Colouring” is set to “On”, the TFT side edge of engine temperature and fuel gauge indicators will change color depending on the selected Drive Mode: •… -
Page 170
“Off” to obtain the following display settings: • “On”: “Trip summary” screen (Trip B is reset after each key-on/key-off cycle); • “Off”: screen with Maserati logo and trident. The “Defaults” item of “Screen Setup” submenu allows restoring Maserati factory settings. -
Page 171
Dashboard Instruments and Controls TFT Display: Warning/Indicator Lights of Set Modes/Functions Display sections indicated in the figure show warning/indicator lights concerning all selected driving functions and all set functions/systems. The relevant messages will be indicated within the main area for five seconds, unless otherwise specified. -
Page 172
Dashboard Instruments and Controls Diesel… -
Page 173
Dashboard Instruments and Controls Charging System Warning Light N (Neutral) and idle the vehicle. If the temperature does not return to This warning light shows CAUTION! normal, immediately turn the engine the status of the electrical Continuous driving with the off and contact the Service Network. -
Page 174
This light indicates that the WARNING! • engine oil is overheated. The Maserati declines all responsibility After battery disconnection event, warning light is combined for whatever damage deriving from the warning light may be on. In this with the related displayed message. -
Page 175
Dashboard Instruments and Controls quantity of fuel in the tank, inside Contact the Service Network as soon down as the grip of the tires may be the indicator on display, will go from as possible. significantly reduced. white to amber. The indicator light flashes for 5 Automatic High Beam Failure Warning Refer to “Refuelling”… -
Page 176
Dashboard Instruments and Controls Start&Stop Disable Indicator indicator system, please visit a Service Centre. This indicator illuminates CAUTION! when Start&Stop is turned off Passenger’s Air bag Deactivated The presence of water inside through the controls located Indicator (if equipped) the fuel system can damage the on the right side of the steering wheel injection system and cause engine’s This warning light switches… -
Page 177
Dashboard Instruments and Controls Assist — LKA” and “Highway Assist — General Fault for Driving with a Trailer Stiff Suspension Setting Indicator HAS” in section “Driving”. (NOT for TROFEO version) This indicator light indicate The warning light and the that the stiff suspensions Forward Collision Warning (FCW) Off relevant message are displayed program (“S”) is on. -
Page 178
Dashboard Instruments and Controls is used for entering and exiting the and, once it sets, when it is temporarily Hill Descent Control (HDC) Ready vehicle. canceled (set speed in white below). This white light turns on to For further details, refer to “Adaptive indicate that HDC is ready to Cruise Control (CC) Ready or Canceled Cruise Control — ACC”… -
Page 179
Dashboard Instruments and Controls Gear Shift Indicator Light Carefully follow the indications shown on the display until regeneration is This indicator lights up to completed (see examples). indicate gear shift change in order to optimise fuel consumption. See “Drive Mode” in section “Driving”… -
Page 180
DPF clogged. Diesel needs servicing, or AdBlue ® needs • Maserati is not responsible for ® When AdBlue needs to be added to to be added to the tank in the boot defects occurring due to not the tank, its messages are displayed compartment. -
Page 181
Dashboard Instruments and Controls visible at each next start up. This been turned off, will not restart: ® mileage is the result of an estimated refuel AdBlue regularly (see chapter ® consumption that depends on the “Adding reducing agent AdBlue type of use of the vehicle. -
Page 182
Plus (MTC+) System, an advanced user are essential for a safe use of the interface which combines innovative system. Maserati advises you to read and exclusive technical features this add carefully and thoroughly. integrating entertainment, user… -
Page 183
Dashboard Instruments and Controls Tune/scroll control. from minimum to maximum and vice versa. Turn knob clockwise to increase Manual Controls and Devices the volume, counter-clockwise to decrease it. The volume status will be SD, AUX and USB Ports indicated in the top part of the MTC+ When an SD card is inserted into its display. -
Page 184
USB Device, highlighted on MTC+ display. AUX, Bluetooth and SD card as Main menu bar is set up by Maserati: When in “Radio” mode and the long as the requested media is it can be customised according to ignition switch in RUN position, you present. -
Page 185
Dashboard Instruments and Controls • Touch this soft-key to access Do not press the screen with any the air conditioning settings. hard or sharp objects (pen, USB stick, In this screen the following jewelry, etc.) which could scratch the controls are also available: Heated touch screen surface. -
Page 186
Dashboard Instruments and Controls • hold depressed and drag the icon device (Android or iOS), applications calls, access music, send and receive corresponding to the selected on the phone that are compatible with messages, get real-time directions on function until it overlaps the one to «Android Auto», «Apple CarPlay»… -
Page 187
Dashboard Instruments and Controls refer to the «Maserati Touch Control Plus (MTC+)» guide. With the smartphone connected via USB port, when a session is established and the mobile device (represented in Table A) or the MTC+ System (represented in Table B) is performing… -
Page 188
Dashboard Instruments and Controls Table A: device is performing an action MTC+ System : Active Mode Action Radio Media Navigation Phone Voice Rec. Screen: Screen: Screen: Screen: No App active Audio: Audio: Audio: Audio: Screen: Screen: Screen: Screen: Screen: Start Media Player Audio: Audio: Audio:… -
Page 189
Dashboard Instruments and Controls Table B: MTC+ is performing an action Device : Active Mode Action No App active Media Navigation Phone Call Voice Rec. Screen: Screen: Screen: Screen: Screen: Main Audio: Start Radio Audio: Audio: + mix Audio: Audio: prompt nav Screen: Screen:… -
Page 190
Dashboard Instruments and Controls Audio Controls and by pressing the bottom of the rocker switch you can lower it. Press The vehicle is equipped with audio the center button to mute the volume. controls that allow both driver and The left-hand control functions front passenger to operate the audio depend on the current source. -
Page 191
Dashboard Instruments and Controls Audio System dashboard, one on each front door panel and one on each side wall of The vehicle is equipped with an audio the boot, above the cover level. system that offers superior sound • Four 25 mm (1 in) diameter Tweeters: quality, higher sound pressure levels one at the base of the windshield and reduced energy consumption. -
Page 192
Dashboard Instruments and Controls High Premium System (SPL) and exceptional dynamic sound quality. The vehicle can be equipped with The speakers are tuned for maximum a “High Premium” audio system efficiency and compatible with the including 17 speakers and 1280 W of amplifier output stage ensuring best sound power, available upon request. -
Page 193
This feature allows you to disable the options are visible and adjustable. Start & Stop when frequent stops and NOTE: restarts of the engine may become • For further details refer also to annoying. the “Maserati Touch Control Plus (MTC+)” guide. Without ADAS… -
Page 194
Dashboard Instruments and Controls See «Automatic Start&Stop System» blind spot. When this happens, a Touching this soft-key the set page in section «Driving» for further light signal appears in the external of LKA system will be displayed (see details. rear-view mirror. picture). -
Page 195
Dashboard Instruments and Controls The current system setting is shown with Pedestrian Emergency Braking setting. This warns you of a possible in blue on the right side of the ABSA — PEB function) ahead, provide collision when you are much closer to soft-key. -
Page 196
Dashboard Instruments and Controls MTC+ Settings guidelines while in that gear as long as vehicle speed remains lower than Customer Programmable 12 km/h (8 mph). Features When vehicle is shifted into a different gear, the image will remain The MTC+ System uses a combination displayed for 10 seconds, or vehicle of keys able to access and change the is shifted in P (Park), or until vehicle… -
Page 197
Dashboard Instruments and Controls With ADAS In this mode the MTC+ System To scroll through the functions, move NOTE: allows you to access the following the cursor up or down, or touch the programmable features (some of • All settings must be edited with arrow . -
Page 198
Dashboard Instruments and Controls Display languages are specific to the target markets. After pressing the “Display” soft-key • Touchscreen Beep the following mode settings will be When in this display, you can turn available. on or shut off the sound activated by •… -
Page 199
(US)”. happen every time you connect your • Torque unit: smartphone. For further details refer select from: “Nm” or “lb-ft”. to the “Maserati Touch Control Plus (MTC+)” guide. Voice Commands After pressing “Voice” soft-key the Units following modes will be available. -
Page 200
Dashboard Instruments and Controls With this feature it is possible to view When in this mode, you can select lever is in R (Reverse) and the vehicle and set the following modes. the time format display. To change speed is less than 12 km/h (7.5 mph). the current setting, touch and release •… -
Page 201
Dashboard Instruments and Controls The system will retain its last known By selecting this feature, when current headlight off delay status, configuration state through ignition the shift lever is moved out of R touch and release the “0”, “30”, “60” cycles. -
Page 202
Dashboard Instruments and Controls By selecting this feature, the high of the button) and “2 Press” beam headlight will deactivate (sound on the second press of the automatically under certain button). conditions. See “Lights” in section • Sound Horn with Remote Start “Understanding the Vehicle”… -
Page 203
Dashboard Instruments and Controls — all doors will unlock no matter the foot, it is possible to disable the • Remote Start which “Passive Entry” equipped “Hand Free” function. The feature If the vehicle is equipped with the door handle is grasped; can be set to “On”… -
Page 204
Dashboard Instruments and Controls By selecting this feature, the power Select this mode to automatically alignment when servicing suspension window switches, radio, MTC+ Phone lower vehicle to minimum ground and/or steering parts. The feature can System, power sunroof (if equipped), clearance when driver takes be set to “On”… -
Page 205
Dashboard Instruments and Controls touch the slider in any point on the This feature provides simulated scale between the “+” and “–” soft- surround sound mode. Available keys. settings: “On” and “Off”. Phone/Bluetooth Press this soft-key to select and connect phones and audio sources. •… -
Page 206
«Maserati Touch connect. For further information, of the device you wish to connect. Control Plus (MTC+)», and their level see the «Maserati Touch Control Plus For further information, see the of compatibility. (MTC+)» guide. «Maserati Touch Control Plus (MTC+)»… -
Page 207
Dashboard Instruments and Controls and will also remove from system memory Bluetooth devices and presets. To remove personal information, select this feature and a pop-up will appear asking confirmation to delete all personal data. Select “OK” to clear, or “Cancel” to exit. Once the data have been cleared, a pop up appears confirming that personal data have been cleared and then the MTC+ will… -
Page 208
It is important to memorise and take note of the PIN since if it is The compartment is illuminated by a lost, you must contact the Maserati courtesy light when open (the light Service Network that will reset this will automatically switch off when the feature. -
Page 209
Dashboard Instruments and Controls NOTE: • “Glove Box Mode” and “Valet Mode” can not be activated at the same time. • “Glove Box Mode” and “Valet Mode” lock features must be activated when the glove box is already closed. If you activated one of these lock features when the glove box is opened, the glove box will not close properly and… -
Page 210
Dashboard Instruments and Controls Glove box is now locked and the MTC+ glove box that has been locked using in this condition until battery feed is will go back to “Controls” page. In the PIN code. restored. this condition, the system operation •… -
Page 211
Dashboard Instruments and Controls Analog Clock Air Conditioning Controls box using the PIN code and contact the Maserati Service Network to have To adjust the analog clock located on The vehicle is equipped with an unlock feature via PIN code checked. -
Page 212
Dashboard Instruments and Controls passengers using the soft-keys on display together with the active front MTC+ display. seats and steering wheel comfort functions. Dual Zone Climate Controls Description of Controls This system can be operated by using All described functions can be set and the controls of the climate control modified using the climate control panel on the dashboard, or the… -
Page 213
Dashboard Instruments and Controls To adjust driver and passenger side Provides the driver with independent temperature and fan speed, climate temperature control. Touch the blue control panel features rocker switches soft-key for cooler temperature. that can be pushed up to increase Touch the red soft-key for warmer temperature/speed, or down to… -
Page 214
Dashboard Instruments and Controls The temperature can also be adjusted the first speed, causes the A/C system windows to get quick defrosting/ by touching and sliding the bar shutdown (OFF condition). defogging. The LED on the button and the MTC+ soft-key illuminates when towards soft-key , to increase On the MTC+ display, touch the small… -
Page 215
Dashboard Instruments and Controls the system activates the function passenger zone, can be adjusted so air • “Bi-Level” mode for 5 minutes. The timing described comes from the dashboard vents, vents Air for each zone comes from the above is automatically reset and under the dashboard in direction of dashboard and central console the defrost/demisting function is… -
Page 216
Dashboard Instruments and Controls Air for each zone comes from all the conditioning system. When the air that closes the intake of the external adjustable/fixed and defrost/demist conditioning system is turned on, cool air by activating the air recirculation. vents. dehumidified air will flow through the button or the MTC+ vents into the cabin. -
Page 217
Dashboard Instruments and Controls Automatic Temperature NOTE: The next press of the button or the MTC+ soft-key restars the In cold weather, use of recirculation Control (ATC) operating cycle just described. mode may lead to window fogging. Automatic operation Select the MIX mode and increase NOTE: •… -
Page 218
Dashboard Instruments and Controls The user can also choose the direction Press the button to switch the rear of the airflow by selecting one of climate control on/off. The LED on the the available mode settings. A/C button turns on when the rear A/C is operation, recirculation control and “SYNC”… -
Page 219
Dashboard Instruments and Controls Provides the rear seats passengers with NOTE: • Adjust then the temperature you independent temperature control. wish to maintain by regulating the The Bi-Level mode is designed to left and/or right side temperature provide comfort by sending cooler air Push the button for cooler control buttons. -
Page 220
Dashboard Instruments and Controls Once you have entered the rear The system switch the ATC Block the settings of the rear climate screen, by touching the between manual and automatic climate. following soft-keys, the driver is able mode by controlling the interior Return to the front climate temperature (controls 3, 4) by control screen. -
Page 221
«Maserati Touch for about five minutes in the fresh Control Plus (MTC+)» guide. air by high blower setting. This will… -
Page 222
Dashboard Instruments and Controls (Continued) compatible with the MTC+, and their WARNING! level of compatibility. Any voice-controlled system should be The voice command communication used only in safe driving conditions system is fully integrated with the following all applicable regulations. vehicle’s audio system. -
Page 223
For further details refer to the function key on the main menu bar The short pressure of the VR «Maserati Touch Control Plus (MTC+) guide». button on the steering wheel allows The key words to activate the dialog… -
Page 224
Dashboard Instruments and Controls make phone calls, create notes and reminders, etc. -
Page 225
5 — Driving Normal Starting of the Engine ……… . 226 Automatic Start&Stop System . -
Page 226
The current display subsequently sets Maserati Logo in the center and the • Do not start the engine if the fuel up with the latest screenshot. complete odometer plus the open level in the tank is low. -
Page 227
Driving NOTE: system will automatically time out additive into the tank before the fuel after 30 minutes of inactivity and the using the funnel provided. Normal starting of either a cold or ignition will switch to the OFF position. a warm engine is obtained without Engine Start Failure pumping or pressing the accelerator After starting the engine, the idle… -
Page 228
Once this occurs, Never leave a vehicle out of the P release the accelerator pedal and the The Maserati Start&Stop system (Park) position, as it could move. brake pedal, wait 10 to 15 seconds, allows the engine to automatically NOTE: then repeat the “Normal starting of… -
Page 229
Driving Pressing the brake pedal and on the main bar or through the • When the vehicle is manoeuvring: shifting transmission into D (Drive) «Start&Stop Off» soft-key in the shift lever in R (Reverse). or R (Reverse) will deactivate the «Controls»… -
Page 230
Driving Automatic Restarting of the • When the accelerator pedal is being Move the shift lever to D (Drive) to pressed (together with the brake drive away. Engine pedal). The engine may automatically restart, • If a long time has passed since the before the brake pedal has been WARNING! last automatic stop of the engine. -
Page 231
Driving Start&Stop enabled is the default NOTE: • Touch the «Start&Stop Off» soft-key status. to disable the function. The highlighted soft-key indicates the disabled status of Start&Stop system When the Start&Stop function is and vice versa. turn off in the all following ways, in addition to the related message the •… -
Page 232
Driving Automatic Transmission NOTE: gearshift behaviour could become perfect as expected after few After user intervention, the Start&Stop The vehicle is equipped with an hundreds of km. system will automatically update the electronically controlled 8-speed status of the function in all contexts automatic transmission, which where it can be modified. -
Page 233
Driving • When leaving the vehicle, always remove the key fob and lock your WARNING! vehicle. • It is dangerous to move the shift • Do not leave the key fob in or near lever out of P (Park) or N (Neutral) the vehicle. -
Page 234
Driving • When P (Park) mode is selected, the letter “P” becomes brighter and “ ” appears brighter near “N”. Backlit on the shift lever depends on the status of the ignition device. The lever functions like a joystick, so releasing it after giving the command, it automatically returns to the two stable positions (vertical in line with… -
Page 235
Driving • If using the shift lever in M +/- (Manual) mode, you can activate it by moving the lever from D (Drive) to the left and then forward towards the “–“ symbol or back towards the “+” symbol and the gear is shifted. •… -
Page 236
Driving WARNING! • Never use the P (Park) mode as a substitute for the electric parking brake. Always apply the parking brake fully when parked to prevent vehicle movement and possible injury or damage. • Make sure the transmission is in P (Park) before leaving the vehicle. -
Page 237
Driving recommend to shift into R (Reverse) Set the parking brake and shift the and the best fuel economy. The only after the vehicle has come to a transmission into P (Park) mode if you transmission automatically shifts up complete stop. must leave the vehicle. -
Page 238
Driving • When in D (Drive) mode, using the This mode allows you to move the automatically once maximum engine paddles behind the steering wheel shift lever step by step forward “– speed is reached. (if equipped), will cause the system “… -
Page 239
Driving system activates the automatic return The indicator beside the displayed of the shift lever in D (Drive) mode. gear will light up just before reaching the required speed to change NOTE for Diesel Version downshift or upshift (example in the If the transmission is in SPORT figures). -
Page 240
Driving the indicator light will illuminate red warning light illuminates on the perform the following procedure again. instrument cluster preferably at a Service Center. In the event of a momentary problem, NOTE: the transmission can be reset to regain The gearshift indicator will only work all forward gears by performing the when the transmission is set in M +/- following steps. -
Page 241
Driving All-Wheel Drive WARNING! The active on-demand All-Wheel Drive There may be a slight delay for (AWD) system provides available AWD engagement after a wheel slip optimum traction for a wide variety of condition occurs. road and off-road surface and driving conditions. -
Page 242
Driving Drive Mode mode. In this mode, the vehicle has a faster throttle response and ESC sport Controls Preview calibration (not recommended on wet/slippery surfaces). Activating this Drive modes and ride heights to use drive mode, will also change the EPS the vehicle on and off road can be set setting. -
Page 243
Driving graphically displayed on instrument pressing the button, the dedicated LED ON – Button pressed Button cluster. The same screen is also will illuminate. It is necessary to press (LED ON) obtained when selecting the “Drive (ESC OFF) button for at least 3 •… -
Page 244
Driving the activation or deactivation of the other modes. The tables show the two configurations with: • (ESC OFF) button NOT pressed; • (ESC OFF) button pressed. -
Page 245
Driving WARNING! On Trofeo version, when CORSA drive mode is activated, the (ESC OFF) indicator light on the instrument cluster is on because the intervention of the Electronic Stability Control (ESC) system is lower than the other modes, but still present to allow a more sporty drive. -
Page 246
Driving Button pressed: LED ON OFF ROAD OFF ROAD OFF ROAD OFF ROAD OFF ROAD Button not I.C.E. I.C.E. I.C.E. I.C.E. I.C.E. pressed: LED OFF SPORT SPORT SPORT SPORT SPORT Kick down Yes — Soft Yes — Strong Yes — Strong Upshift rev. -
Page 247
Driving Button pressed: LED ON OFF ROAD OFF ROAD OFF ROAD OFF ROAD OFF ROAD Button not I.C.E. I.C.E. I.C.E. I.C.E. I.C.E. pressed: LED OFF SPORT SPORT SPORT SPORT SPORT Electric Power Normal Off Road Normal Sport Sport Steering (EPS) Suspensions setup Normal Off Road… -
Page 248
Driving (ESC OFF) Button NOT pressed (TROFEO Version only) Button pressed: LED OFF ROAD OFF ROAD OFF ROAD OFF ROAD OFF ROAD OFF ROAD I.C.E. I.C.E. I.C.E. I.C.E. I.C.E. I.C.E. Button SPORT SPORT SPORT SPORT SPORT SPORT not pressed: CORSA CORSA CORSA CORSA… -
Page 249
Driving Button pressed: LED OFF ROAD OFF ROAD OFF ROAD OFF ROAD OFF ROAD OFF ROAD I.C.E. I.C.E. I.C.E. I.C.E. I.C.E. I.C.E. Button SPORT SPORT SPORT SPORT SPORT SPORT not pressed: CORSA CORSA CORSA CORSA CORSA CORSA LED OFF Automatic Normal Anti — Stall Normal… -
Page 250
Driving Button pressed: LED OFF ROAD OFF ROAD OFF ROAD OFF ROAD OFF ROAD OFF ROAD I.C.E. I.C.E. I.C.E. I.C.E. I.C.E. I.C.E. Button SPORT SPORT SPORT SPORT SPORT SPORT pressed: LED CORSA CORSA CORSA CORSA CORSA CORSA Electric Power Normal Off Road Normal Sport… -
Page 251
Driving NOTE: A different drive mode can be set even with engine running and vehicle in motion. To activate a drive mode, press briefly the corresponding button. The LED on the button will light up and set drive mode screen will be displayed (example in the figure: NORMAL) for 5 seconds. -
Page 252
Driving To disable the SPORT mode without A Ride height. activating the CORSA mode, press the B Powertrain. same button once again: the two LED C ESC. will turn off. D Torque distribution. Monitoring Settings on Display E Suspension stiffness. By gaining access to “Drive mode”… -
Page 253
Driving The table below specifies the default, ride height and relevant commands that can be set, for each drive mode. Drive Mode Default Condition Possible Ride Height / Command Off Road • Off Road 1 / Via dedicated drive height selector according to current Off Road speed. -
Page 254
Driving Drive Mode Default Condition Possible Ride Height / Command Sport • Normal / Via dedicated drive height selector according to current speed. Normal • Aero 1 / Via dedicated drive height selector according to current speed. • Aero 2 / Only speed dependent. Normal •… -
Page 255
Driving Automatic Selection of “NORMAL” identified by the switch-on of the Drive Mode upon Ignition corresponding LED at the left side of (Predominant Mode) the selector and in the dedicated area at top right of the display. If “Off Road” drive mode was set before switching off the vehicle, The table below shows the possible “NORMAL”… -
Page 256
Driving suspension movements to ensure a Cluster” in section “Dashboard proper appearance. Instruments and Controls”). The change from one position to Display Messages another can occur only if the following After shifting selector to change requirements are met. position, a pop-up message will •… -
Page 257
Driving • Entry/Exit position not available: mode was set, “NORMAL” mode will or if vehicle speed exceeds 40 check the cause preventing this be set, but the user-set ride height km/h (25 mph), the vehicle will be control. will remain until the speed threshold automatically lowered to “Off Road is reached. -
Page 258
Driving “I.C.E.” drive mode. This is the MTC+ (refer to “MTC+ Settings” default ride height when “CORSA” in section “Dashboard Instruments drive mode (TROFEO version only) and Controls”). If this feature is is set. System automatically lowers enabled, the vehicle will only lower the vehicle when speed exceeds 170 if the gearshift lever is in P (Park), km/h (105 mph) or when it remains… -
Page 259
Driving To make a performance start in • With engine on, parking brake • With brake pedal pressed full with «Launch Control» mode, the following disengaged, brake pedal pressed and left foot, press full the accelerator conditions must be met: steering wheel straight, pull «–»… -
Page 260
Driving Off-Road Drive (25 mph). In case the vehicle speed should exceed this limit, ride height This vehicle is equipped with a specific will be put automatically to “Off Road Off Road driving mode which allows 1” while driving mode will remain to drive through various terrain “OFF ROAD”. -
Page 261
Driving changed in order to provide the in) of water. To maintain optimal most suitable level of torque and performance of your vehicle’s WARNING! selected gear to improve traction on heating and ventilation system it is Avoid driving through flowing or low-adherence condition and uphill recommended to switch the system standing water. -
Page 262
Driving Maintenance manufacturer’s advice on tire lightly and avoid locking or skidding pressure. the tires. After driving through water, have your • When driving in sand, adopt lowest vehicle fluids and lubricants inspected gear possible. Tire pressure set at the at the Service Network to assure the WARNING! lower limits may help to increase the… -
Page 263
Driving After Driving Off-road repeated heavy braking and downshift the transmission whenever possible in Off-road operation puts more stress WARNING! order to cool down the brakes. on your vehicle than does most on- Abrasive material in any part of the road driving. -
Page 264
Driving Parking Brake Cluster” in section “Dashboard by pressing the brake pedal and Instruments and Controls”). raising the lever located behind the The vehicle is equipped with an shift lever. electric automatic parking brake, also When the parking brake is applied, the called EPB (Electric Parking Brake). -
Page 265
Driving Deactivating Automatic Operation CAUTION! WARNING! The main function of the EPB is to It is advisable to keep the “Auto The automatic engagement function allow safe parking of the vehicle, can be deactivated/reactivated by Apply” function always active (On) so therefore it must only be applied selecting the menu item “Vehicle that the vehicle is properly secured… -
Page 266
Driving CAUTION! • Under certain conditions when the battery voltage is low, the electric automatic parking brake system may temporarily be deactivated for safety reasons. Therefore, typically upon starting the engine, when the battery voltage drops, a message may temporarily be displayed, indicating that automatic operation “Setting Saved”… -
Page 267
Driving Parking components. In these conditions, activate the Entry/Exit ride height to parking brake must not be used since avoid any contact of the bottom of Before leaving the vehicle, make sure the push of the power actuator might the car with the protrusions of the that the parking brake is fully applied not be sufficient to ensure vehicle ground. -
Page 268
Driving “Drive Away Inhibit” strategy In order to avoid a dangerous condition resulting from leaving the vehicle “not braked” with running engine and without driver on board, “Drive Away Inhibit” strategy alerts the driver with messages on the instrument cluster display and sounding chimes, then puts the transmission in P (Park). -
Page 269
Driving Brake and Stability Control direction. The system is also able to reduce the engine power. System WARNING! Through sensors fitted on the vehicle, • These systems cannot prevent the ESC system detects the driver’s The vehicle is endowed with an the natural laws of physics from chosen direction comparing it to the Electronic Stability Control System… -
Page 270
Driving threshold for ESC activation, allowing remain in this operational mode in front of yours and reduce your higher wheel spin than normally no longer than needed. Once the speed when entering a curve. situation requiring “ESC off” mode granted by the ESC system. The NOTE: is overcome, turn the ESC on again (ESC OFF) button is fitted beside the… -
Page 271
• if slippage affects both drive wheels, consider as “conflict” the sequence Maserati personnel. it reduces the power transmitted by “brake-first-then-accelerator” of pedal • Pumping the Anti-Lock Brakes will the engine;… -
Page 272
Driving Hill Start Assist (HSA) The system will not activate if the lift or roll-overs, especially those transmission is placed in N (Neutral) or that involve leaving the roadway The HSA system is designed to assist P (Park). or striking objects or other vehicles. the driver when starting a vehicle The capabilities of a ROM-equipped uphill. -
Page 273
Driving feel the brakes being applied to HDC enabling is indicated by the individual wheels to attempt to stop white light with below 3 dashes the trailer from swaying. on instrument panel display coming steady on. The light remains white TSM is disabled when the ESC system is while the driver operates the pedal partially deactivated (button… -
Page 274
Driving km/h (1.8 mph) : pressing the brake brake pedal, the light turns white pedal up to default speed of 8 km/h to indicate that HDC feature is (5 mph). The set value appears under temporarily cancelled. green light on the display. The set speed for HDC is selectable by the driver, and can be adjusted by using the pedal unit or the… -
Page 275
Driving Using the Brakes accelerator steadily, without conditions and is responsible for exceeding 30 km/h (18 mph). A maintaining a safe vehicle speed. • pop-up message and the green Prolonged use of the system might light will stay on. overheat the brakes. In case of CAUTION! •… -
Page 276
Driving New Brake Pads and/or Brake Use of the Engine excessive lining wear, and possible Discs brake damage. In an emergency full Breaking-In braking capacity may be impaired. New brake pads have to be “bed in”, Today’s most modern production and therefore only attain optimal … -
Page 277
Driving Specific Requirements for Gasoline precautions to avoid exceeding that Engines limit. CAUTION! Avoid exceeding 5000 rpm for the first • Under normal conditions, all red 1000 trip km (620 mi). warning lights on the instrument After starting the vehicle, do not cluster display should be off. -
Page 278
DPF clogged. the system will turn on the will soon occur. Immediate service is • Maserati is not responsible for malfunction indicator light (MIL). It required at the Service Network. defects occurring due to not will also store diagnostic codes and •… -
Page 279
Driving Electronic Cruise Control Control configuration depends on Control buttons have the following which driver assist systems are installed functions: The electronic Cruise Control (CC) to the vehicle. Standard Configuration enables the driver to maintain the In the standard configuration there is ON/OFF button to desired vehicle speed without pressing a specific button to enable and disable… -
Page 280
Driving (Continued) inactivity, the display goes back to last • In order to ensure proper operation, screen. WARNING! the CC system has been designed Activation Never leave the electronic Cruise to shut down if multiple systems Control system on when not in use. To turn the system on, push the are operated at the same time You could accidentally set the system… -
Page 281
Driving Driver Override 1 mph; a continuous pressure of the same will increase or decrease the set If the driver presses the accelerator speed of 10 km/h or 5 mph. pedal while the CC is on, such as to Release the switch when the desired overtake another vehicle, and exceeds speed is reached, and the new set the set speed limit, the system will… -
Page 282
Driving Using Electronic Cruise Control Adaptive Cruise Control — The ACC allows driver to keep Cruise Control active in limited or moderate on Hill ACC (optional) traffic conditions with no need to The transmission may be downshifted constantly restore the Cruise Control. ADAS Equipments on hills to maintain the vehicle set The ACC uses a radar sensor, located… -
Page 283
Driving braking (to avoid exceeding the be careful since his/her intervention • Does not always fully recognise initially set speed) so that the vehicle could be necessary. complex driving conditions and this keeps present distance, trying to • could cause wrong assessment of the It is always driver responsibility to adapt to the speed of the detected required safety distance. -
Page 284
Driving Displayed information depends on — Press it to switch from CC to ACC. system status: ready, set, temporarily ACC ON/OFF button. If enabled, cancelled or override. pressing this button will disable Apart from the image at the centre of the display, CC, ACC, HDC, LKA and HAS ON/OFF button with ACC set HAS systems status is represented by only . -
Page 285
Driving • When the door is opened at low speed. • When there has been an ESC event in the last 5 seconds, or is still active. • When there is an object too close in front of the vehicle. It is possible that more than one system is active at the same time such as ACC and ABSA just to mention… -
Page 286
Driving Driver Override power does not slow down the vehicle sufficiently to reach the If driver accelerates beyond the set WARNING! set speed, the brake system will speed or faster than the car would do Leaving the Adaptive Cruise Control automatically slow down the vehicle. -
Page 287
Driving Temporary Deactivation The system is deactivated and set Using this distance setting and the speed is deleted from system memory, vehicle speed, ACC calculates and sets A soft tap on the brake pedal, pushing if the ACC ON/OFF button is pressed or the gap to the vehicle ahead. -
Page 288
Driving To increase or decrease the number of • The vehicle ahead accelerates to a NOTE: bars, corresponding to the gap from speed above the set speed. The displayed warning is a warning vehicle ahead, press and release the • The vehicle ahead moves out of your for the driver to take action and does distance setting button. -
Page 289
For this reason the driver has to be pedal. the center of the front grille, behind attentive and ready to brake during the Maserati trident. While ACC with Stop is holding your automatic stops. vehicle at a standstill, if the driver… -
Page 290
Driving • Do not remove any screws from the at times of poor visibility, such as forwardfacing camera inspected at the sensor. Doing so could cause an ACC in snow or heavy rain and fog. The Service Network. system malfunction or failure and ACC and FCW systems may also Service ACC/FCW Warning require a sensor realignment. -
Page 291
Driving Precautions while Driving with vehicle speed and acceleration for stability reasons, with no target vehicle detected. Once the vehicle is out of Towing a Trailer the curve the system will resume your original Set Speed. This is a part WARNING! of normal ACC system functionality. -
Page 292
The “Regulatory Information” for all the radio frequency and radar devices can be consulted by accessing the section “Services” on the website www.maserati.com. Stationary Objects and Vehicles ACC does not react to stationary objects and stationary vehicles. For example, ACC will not react in… -
Page 293
Driving NOTE: FCW system is not intended for WARNING! towing: this could lead the system to Pedestrian Emergency Braking (PEB) is malfunctions and/or to late reaction. not intended to avoid a collision on its FCW monitors the information from own, nor can PEB detect every type of potential collision with pedestrian. -
Page 294
Driving NOTE: off-road, the FCW system should be or to apply any brake aid/brake deactivated to prevent unnecessary intervention in case of collisions with • Bad weather conditions, like strong warnings. If the vehicle ride height is pedestrians (if not equipped with rain, snow, etc., can lead to reduced set to “Off Road 1”… -
Page 295
Driving NOTE: The FCW system setting chosen by the User is kept in memory only for the current ignition cycle. Changing FCW Sensitivity and Active Braking The default status of FCW Sensitivity is the “Medium” setting. When also the active braking function (“Forward Collision Warning Active Braking”) Setting options are described in the NOTE:… -
Page 296
“Services” on the website the limited functionality or service at instrument cluster display together www.maserati.com. Service Network required are the same with steering torque application and as for the ACC system. For further steering wheel vibration (depending details, refer to “Adaptive Cruise… -
Page 297
Driving disabled by the system in order to Meanings of Settings minimize the risks. • «Visual» only: the system will not request any steering torque/vibration Speed Range of Use to correct the car trajectory. The system will only show on the TFT display when the vehicle is passing Speed km/h (mph) -
Page 298
Driving proper control module, hands not on inhibited by a turn indicator the steering wheel detected for more activation, therefore, graphic warning, WARNING! than a certain time. steering torque application and In rare cases, Lane Keeping Assist vibration will be terminated. In this High dynamic behaviours, driving on (LKA) may make an inappropriate condition in case of a vehicle detected… -
Page 299
Driving condition present or lane detection vibration if configured are in progress system not able to estimate properly when this graphic is shown. the lane); • Left/right grey line: the lane detection system is not able to detect that specific lane boundary; •… -
Page 300
“Services” on the website to the vehicle in front, for vehicle www.maserati.com. NOTE: speed, for braking in good time and The sensors are not able to detect for staying in lane. -
Page 301
Driving Blind Spot Assist — BSA and enters standby mode when the when the vehicle speed reaches transmission is in (P) Park. approximately 10 km/h (6 mph) or (optional, without ACC) higher and will alert the driver of vehicles in these areas. BSA System Operation The Blind Spot Assist (BSA) system uses two radar-based sensors, located… -
Page 302
Driving (Continued) Speed Range of Use damaged, the sensor may have become misaligned. Take your vehicle Speed km/h (mph) at the Service Network to verify sensor Minimum 10 (6) alignment. Having a sensor that is misaligned will result in the BSA not Engaged/activated 10 (6) operating to specification. -
Page 303
Driving opposite direction of the vehicle in their vision of oncoming vehicles may adjacent lanes. be blocked. The RCP system monitors the rear detection zones on both sides of the vehicle. Using sensors located on either side of the rear bumper, it detects any vehicles or objects that are moving toward the side of the vehicle with a minimum speed of approximately… -
Page 304
Driving BSA in Visual and Acoustic Mode When operating in “Visual & Acoustic” mode, the BSA system will provide a visual alert in the appropriate side view mirror based on a detected vehicle or object. Refer to chapter “MTC+ “Controls” Screen”… -
Page 305
“Services” on the website and audible alerts when a detected www.maserati.com. System in Faulty vehicle or object is present. Whenever The BSA system cannot properly an audible alert is requested, the radio operate due to a fault of its (if on) is also muted. -
Page 306
Driving Active Blind Spot Assist — available in the 60 — 180 km/h (37 — Highly dynamic behaviours, driving 112 mph) speed interval. All the speed on the lane boundary, off course will ABSA (optional, with ACC thresholds related to the BSA remain prevent the function from working. -
Page 307
Driving his/her expectation of the system, System strength can be set to «Low», Speed km/h (mph) reducing at the same time the possible «Medium» (default mode) or «High». Engaged/activated 60 (37) invasiveness. Maximum 180 (112) Setting modes can be selected from the MTC+ System (see «MTC+ System Limitation «Controls»… -
Page 308
Driving Active Blind Spot Assist in «Visual & When ABSA is turned on with any Haptic» Mode setting, RCP subsystem shall respond WARNING! with both visual and audible alerts When the system is on and configured • Risk of accident despite steering when a detected vehicle or object is “Visual &… -
Page 309
“Services” on the website • HAS is intended for use only on www.maserati.com. highways or limited access freeways with a fully attentive driver. When using HAS, hold the steering wheel and be aware of surrounding traffic and road conditions. -
Page 310
Driving HAS Operation • Turn signal not activated. instructions could result in serious • No faults related to this system. injury or death. With ACC set (see “Adaptive Cruise Crontrol – ACC” in this section), HAS • The following list does not fully Speed Range of Use system activates by simply pressing represent all situations in which HAS… -
Page 311
Driving HAS Monitoring on Instrument disabled by pressing the button on the steering wheel. Cluster HAS and the other ADAS systems conditions can be monitored on instrument cluster display by accessing the “Driver Assist” page with the buttons on the steering wheel (see “Instrument Cluster”… -
Page 312
Driving driver releases his/her grip from the «Driver Assist» page, the symbol steering wheel up to 3 seconds. with the figure of the hands in the centre of the display. According to such time frames, the system will change the attention level colour, silence the audio in the vehicle (if it is active) and emit audible chimes to invite the driver to take the control of… -
Page 313
Driving • Enter an Autonomous Emergency Braking (AEB) event (See chapter «Forward Collision Warning — FCW» in this section). • Turn signal activated. System Cancellation The HAS system will cancel (without driver intervention) if either of the following actions occur: •… -
Page 314
“Services” on the website traffic signs, traffic signs in wrong www.maserati.com. position like rotated or fallen poles. NOTE: • Overtaking restriction sign will be displayed only in markets where this Touching the soft-key on the side the is allowed. -
Page 315
Driving The system can be set to display the of the instrument cluster beside of the speed limit for several seconds the traffic signs when the speed of the main menu number and scroll arrows. unconditioned speed limit sign will vehicle is equal to the speed limit stop blinking because the manoeuvre The display area is divided in three… -
Page 316
Driving Tires — General Information they are covered or because of road and potholes can cause damage insufficient lighting. that result in tire failure. Tire Pressure • If the information in the navigation • Over-inflated or under-inflated tires system’s digital map is incorrect or can affect vehicle handling and can Proper tire inflation pressure out-of-date. -
Page 317
0.07 bar When the tread is worn to one of the conditions, Maserati strongly per 7°C of air temperature change. tread wear indicators, the tire should recommends to use tires equivalent Keep this in mind when checking tire be replaced. -
Page 318
Driving NOTE: This can cause unpredictable handling and stress to steering and Maserati recommends Maserati CAUTION! suspension components. You could Genuine Tires marked with “MGT” Replacing original tires with tires lose control and have a collision logo specifically designed for its of a different size may result in resulting in serious injury or death. -
Page 319
Snow Chains vehicle. Maserati approved traction devices (or snow chains) may be used to improve… -
Page 320
The Maserati Service Network can spare tire, is for temporary emergency use only. provide you with all information about the Maserati Snow Chains, available in This tire is identified by a label the «Genuine Accessories» range. indicating the driving speed limitations… -
Page 321
Driving Tire Pressure Monitoring The TPMS will continue to warn the driver of low tire pressure as long as System (TPMS) the condition persists and will not turn off until the tire pressure is equal or The Tire Pressure Monitoring System above the recommended cold inflation (TPMS) will warn the driver of a pressure. -
Page 322
Driving • Seasonal temperature changes will aftermarket tire sealants or balance affect tire pressure, and the TPMS beads if your vehicle is equipped with will monitor the actual tire pressure a TPMS, as damage to the sensors in the tire. may result. -
Page 323
Driving «Service Tire Pressure System» message automatically update, the graphic the «Service Tire Pressure System» display in the instrument cluster will message will no longer display, and a is displayed. pressure value will display in place of stop flashing, and the TPMS light the dashes. -
Page 324
Driving followed by a beeping sound. In subsequently displays dashes (—) in tires) with tires not endowed with Tire addition, the graphic in the instrument place of the pressure value. Pressure Monitoring System sensors, cluster will still display a flashing drive the vehicle for 20 minutes above pressure value corresponding to the 24 km/h (15 mph). -
Page 325
Driving Fuel Requirements Maserati recommends the use of TPMS will chime, the TPMS light gasoline that meets the WWFC will flash for 75 seconds and then turn Requirements of Gasoline specifications if they are available. off. The instrument cluster will then… -
Page 326
CAUTION! performance advantage beyond the fuel service station operator or • Maserati strongly recommends the gasoline of the same octane number change station. use of Premium diesel fuel ONLY. without MMT. Maserati recommends Use of lesser grade fuel (other than… -
Page 327
Driving Refuelling injection system damages and engine filler door is present a label show in operating problems. the picture. Fuel Filler Neck Access • The manufacturer requires that you must fuel this vehicle with Ultra Low To access the fuel filler neck, the filler Sulphur Highway Diesel fuel (15 ppm door must be unlocked. -
Page 328
Driving filler door is present a label show in strap, to prevent it from being lost the picture. while refuelling. WARNING! • To avoid the risk of fire, do not approach the filler with open flames or cigarettes! • To avoid the risk of inhaling noxious fumes, do not breathe close to the fuel filler door, when opened. -
Page 329
Driving • Wait approximately 10 seconds fuel nozzle of the service station when before removing the fuel nozzle in refueling. order to ensure completed supply of Only a nozzle of the suitable size can residual fuel and restrict the risk of open the closing tab. -
Page 330
Driving and Specifications”. When the fuel water has entered the fuel tank: nozzle “clicks” or shuts off, the fuel in this case, turn off the engine tank is basically full: it is possible to immediately and contact the Service further ensure refueling by enabling Network . -
Page 331
Driving Driving Conditions • avoid heavy meals before a trip. A light snack helps keep your reflexes Before the Trip sharp. In particular, avoid drinking alcohol. Check the following at regular intervals and always before long trips: • tire pressure and condition; WARNING! •… -
Page 332
Driving • Drive drive carefully. Night conditions Some advices for driving in the rain are Driving in Fog demand more focus and attention. listed below. If the fog is dense, avoid travelling if • Reduce your speed, especially on possible. •… -
Page 333
Driving Driving on Snow or Ice Please consider some general advice CAUTION! WARNING! for driving in these conditions, listed Be aware that rear fog lights can Rapid acceleration on slippery surfaces below. bother the drivers following your is dangerous. Unequal traction can •… -
Page 334
Driving Adding Reducing Agent safely, and avoiding damage to the vehicle or the environment. AdBlue ® (Diesel only) CAUTION! Suitable messages on the TFT display • AdBlue ® freezes at outer indicate when the AdBlue ® tank Specifications of Reducing temperatures of approximately needs filling (see chapter “Instrument Agent AdBlue… -
Page 335
2000 km (1200 mi) under normal accompanied by a single acoustic develop. driving conditions. signal. If so, have the vehicle serviced Maserati recommends refilling at any by the Service Network as soon as ® AdBlue distributor, through the possible. -
Page 336
Driving ® AdBlue level. These bottles contain the refilling, to prevent spillage of 2 litres of product approximately, AdBlue ® which is enough to extend range by • Extract the nozzle from the filler another 2000 km (1200 mi) at least. neck. -
Page 337
In this section you will find safety tips recommended by Maserati. If bottles Once the refilling is finished, insert and information on limits to the type are used for refilling, it is necessary ®… -
Page 338
Driving Do not exceed the maximum GVWR of Pressure Monitoring System (TPMS)” in the tow vehicle, the one for each axle this section. WARNING! (GAWR) and the mass that the vehicle Failure to load trailers heavier in front Field of Vision of External Rear is rated to tow (GTW) specified on the is the cause of many trailer accidents. -
Page 339
Driving The power input of the trailer lights color of cable corresponding to every must not exceed the values in the connector pin as shown in the figure. following list. • Position lights, side marker lights and number plate lights: 6 x 5W per side. •… -
Page 340
Driving 13-pin Connector Pin N. Function Wire Color Left turn signal Black-White Rear fog light White Lights ground (Lights GND) Brown Right turn signal Black-Green Left unit, including position light, side marker lights, and number plate light (*) Green-Red Stop lights Black-Red Right unit, including position light, side marker lights, and number plate light (*) Green-Black… -
Page 341
Driving 7-pin Connector (AUS) Pin N. Function Wire Color Left turn lights Yellow Reversing signal Black Earth return White Right turn lights Green Service brakes Blue Stop lights Rear lights Brown… -
Page 342
Driving If the hooking and/or the electrical connection between vehicle and trailer is faulty, the warning light and the relevant message are displayed on instrument cluster display (see example in the figure). • Slide cover downward to disengage On cars equipped with tire kit: the two projecting elements •… -
Page 343
Driving tongue can be installed only when in Should it be necessary to preload • Push the trailer tongue upwards: these conditions. the locking mechanism, proceed as the preloaded mechanism locks it follows: automatically in place. • remove the cap from the lock and insert the supplied key;… -
Page 344
Driving Connect the Electrical System of the Trailer (7-pin Connector – AUS) • After lowering protection cover, engage the trailer male connector into the car female connector. • Push trailer connector fully home and engage the safety lock, if any. 13-pin Connector NOTE: •… -
Page 345
Driving • Grip the trailer tongue firmly and • Clean the trailer tongue and remove • Push cover lower end toward bumper pull out the knob following the all residues, especially on the ends. until the two retainers click in place. direction of the arrow (1). -
Page 346
Driving the driver to control. You could lose immediately braking in a firm manually engage lower gear and control of your vehicle and have a manner. drive slowly. collision. • When towing a trailer, never exceed • Do not use electronic Cruise Control •… -
Page 347
The ball head bar must never be treated with high-pressure jets. The Maserati Service Network can provide you with any information about the Maserati approved Towing Items, available in the “Genuine Accessories” range. -
Page 348
Driving… -
Page 349
6 — In an Emergency Tool Kit …………..350 Hazard Warning Flashers . -
Page 350
In an Emergency Tool Kit The tools and other first-aid equipment are located in the boot inside a preformed container. To access the tools, lift the rear part of the boot ground coverage, by acting on the handle. It is possible to maintain the ground coverage in the lifted position when boot cover is not hooked to liftgate (figure 1 ), is hooked to liftgate (figure… -
Page 351
In an Emergency The tools layout in the container depends on the boot configuration of the vehicle, depending on the destination markets and customer requirements. A Tire Kit Configuration. B Spare Wheel Configuration. The tools inserted in the boot container are the following: Ref. -
Page 352
In an Emergency Hazard Warning Flashers The hazard warning flasher switch is located in the center of the central console, behind the multimedia navigation controls. Tire Kit Configuration Spare Wheel Configuration Once these operations are completed, stretch band and fasten it at the back of ground coverage, making sure to match the Velcro inserts. -
Page 353
In an Emergency In the Event of an flashers will continue to operate even • In multiple accidents occurred on though the ignition is placed in the motorways, particularly where Accident OFF position. visibility is poor, there is a high risk of being involved in other collisions. -
Page 354
In an Emergency Emergency Kit (for Engine Overheating • on the vehicles with compact spare wheel this kit is placed in the right versions/markets where To reduce potential overheating of the side of the boot compartment. provided) engine in city traffic, while stationary, This kit contains following: The Emergency Kit provides first aid in place the transmission in N (Neutral),… -
Page 355
In an Emergency In case of a Punctured Tire and stop the vehicle. Idle the vehicle NOTE: with the air conditioner turned off For the tire repair procedures with tire The vehicle can be equipped with until the temperature gauge drops repair kit see instructions included in a tire repair kit or with a compact back into the normal range. -
Page 356
In an Emergency (Continued) original conditions and eliminate the “Interior Features” in section “ tick next to selected mode: in this way WARNING! Understanding the Vehicle”). the pneumatic suspension system will • The jack should be used on level firm •… -
Page 357
In an Emergency using the specific fitting spanner insert provided with the “Wheel Security Stud Bolt Kit”, available in the “Genuine Accessories” range. In this case, the insert must be installed on the kit spanner. • Unscrew and pull out the spare wheel locking knob. -
Page 358
In an Emergency • • Stop the compressor pressing The compressor has been designed switch again, when the pressure exclusively to inflate compact spare indicated by the gauge reaches wheels; do not use it to inflate air the recommended level (see «Tire mattresses, dinghies etc. -
Page 359
In an Emergency • For safety reasons, it is absolutely forbidden to drive with more than one compact spare wheel fitted on the vehicle. • Snow chains cannot be fitted on the compact spare wheel. • The compact spare wheel can travel a maximum of 3000 km (1800 mi). -
Page 360
In an Emergency Emergency Release of the load it on a rescue vehicle, avoiding to move it if only the rear axle is lifted, Parking Brake since the torque converter of AWD system might be seriously damaged. In the event the electric parking brake For more information on vehicle locks due to a system failure (see towing, see «Towing a Disabled… -
Page 361
In an Emergency Transmission Manual Freeing the Stuck Vehicle • Slip the cover from its seat. Release of P (Park) If your vehicle is stuck in mud, sand, Position or snow, it can probably be moved backward and forward by a simple The manual disengagement of the rocking motion. -
Page 362
You could damage the by the sheath color (red = positive, electronic systems, particularly the WARNING! black = negative). Maserati provides on control units managing the ignition Fast spinning tires can be dangerous. request jumper cables created for its and fuel supply functions. -
Page 363
In an Emergency Battery Remote Posts Position — higher than 50°C/122°F or lower the engine compartment while the than -20°C/-4°F) create the right battery is stored in the boot. Diesel Engine conditions for ignition which could After lifting the hood (see “Open and For easier operation, remote battery then cause the battery to explode. -
Page 364
In an Emergency Jump-Start Procedure — the discharged battery after lifting the protection cap of the cable Gasoline Engines indicated on the external side of the integrated power module. WARNING! • Connect the opposite terminal clamp • Stay clear of the radiator cooling fan of the positive (+) jumper cable to whenever the hood is raised. -
Page 365
In an Emergency the positive (+) post of the booster • Turn off the heater, radio, and all battery. unnecessary electrical accessories. • Disconnect the opposite terminal • Set the parking brake, shift the clamp of the positive jumper cable automatic transmission into P (Park) from the remote positive (+) post of and turn the ignition to OFF. -
Page 366
In an Emergency Towing a Disabled Vehicle the positive (+) post of the booster position and release the parking battery. brake. Proper towing or lifting equipment • Disconnect the opposite terminal • If the vehicle battery is still charged , is required to prevent damage to clamp of the positive jumper cable turn off the engine and disengage… -
Page 367
Vehicle Towing Conditions It is necessary to inform the operators of the rescue vehicle about the vehicle Maserati only allows vehicle towing minimum height to avoid, during its with all four wheels off the ground. loading, any contact of the lower ends… -
Page 368
In an Emergency GranSport, GTS and TROFEO Versions GranSport and GTS Versions NOTE: • To access the rear tow hook seat, • Carefully clean the threaded seat Maximum work angle of towing cable or bar: 15 ° . remove the external cap on the right before screwing the hook. -
Page 369
7 — Maintenance and Care Scheduled Maintenance Service ……… 370 Scheduled Service Plan . -
Page 370
Customer. The service indicator system will Interval Running Coupons remind you the deadline for the Maserati has therefore provided for CAUTION! maintenance program. a series of checks and maintenance You are advised to notify the Service… -
Page 371
Service Network. The technicians at your dealership know your vehicle best, and have access to factory- approved information, genuine Maserati parts, and specially designed electronic and mechanical tools that can help prevent future costly repairs. The service indicator and message will… -
Page 372
Interval running coupons: every 20000 km (12500 mi) Main operations or 2 years (*) Vehicle road test Check with Maserati Diagnosi Engine oil and filter Engine coolant level Engine check for leaks Cooling system connections and lines (check for leaks) -
Page 373
Maintenance and Care Service coupons 1° 2° 3° 4° 5° 6° Interval running coupons: every 20000 km (12500 mi) Main operations or 2 years (*) Pollen filter Windshield fluid level — Windshield washer and headlight cleaner Headlight leveling Controls and adjustment systems in general, hinges, doors, engine compartment lid and luggage compartment Condition of the leather interiors (*) Interval running coupons for India, Australia, Morocco, Lebanon and Jordania markets are every 20000 km (12500 mi) -
Page 374
4° 5° 6° Interval running coupons: every 20000 km (12500 mi) Main operations or 1 year (*) Vehicle road test Check with Maserati Diagnosi Emission control Engine oil and filter ® AdBlue level Engine coolant level Engine check for leaks… -
Page 375
Maintenance and Care Service coupons 1° 2° 3° 4° 5° 6° Interval running coupons: every 20000 km (12500 mi) Main operations or 1 year (*) Windshield fluid level — Windshield washer and headlight cleaner Headlight leveling Controls and adjustment systems in general, hinges, doors, engine compartment lid and luggage compartment Condition of the leather interiors (*) Interval running coupons for India, Chile, Brazil and Argentina market vehicles are every 10000 km (6200 mi) or 1… -
Page 376
AdBlue ® ) into the exhaust gases. and always use suitable equipment, you should perform the following original Maserati spare parts (or When vaporised, it converts smog inspections more frequently than forming nitrogen oxides (NOx) into… -
Page 377
The following images show the system manages engine combustion Spare Parts position of the components involved in to allow the exhaust system’s catalytic Use of genuine Maserati parts for the maintenance service. converter to trap and burn Particulate normal or scheduled maintenance ®… -
Page 378
Maintenance and Care • Your vehicle has been equipped with improved fluids that protect the performance and durability of your vehicle and also allow extended maintenance intervals. Do not use chemical flushes for washing as the chemicals can damage your engine, transmission, electric power steering or air conditioning. -
Page 379
Maintenance and Care Maintenance Service Components — Gasoline Engines 3.8 V8 Engine — TROFEO Version Engine oil dipstick. Engine oil filler neck. Air cleaner filters. Engine coolant expansion reservoir cap. Coolant reservoir cap for transmission cooling system. Windshield/headlight washer fluid reservoir cap. Brake fluid reservoir access cover. -
Page 380
Maintenance and Care 3.8 V8 Engine — GTS version Inspection cover to access the engine oil level dipstick. Engine oil filler neck. Air cleaner filters. Engine coolant expansion reservoir cap. Coolant reservoir cap for transmission cooling system. Windshield/headlight washer fluid reservoir cap. Brake fluid reservoir access cover. -
Page 381
Maintenance and Care 3.0 V6 Engines Engine oil dipstick. Engine oil filler neck. Air cleaner filters. Engine coolant expansion reservoir cap. Coolant reservoir cap for transmission cooling system. Windshield/headlight washer fluid reservoir cap. Brake fluid reservoir access cover. A/C pollen filter access cover. Integrated power module (fuses). -
Page 382
Maintenance and Care Maintenance Service Components — Diesel Engine Engine oil dipstick. Engine oil filler neck inspection door. Fuel filter. Engine coolant expansion reservoir cap. Windshield/headlight washer fluid reservoir cap. Brake fluid reservoir access cover. A/C pollen filter access cover. Integrated power module (fuses). -
Page 383
Maintenance and Care Level Checks as distilled or deionized water when mixing the water/engine coolant (antifreeze) solution. The use of ENVIRONMENTAL! impure water will reduce the amount • The engine oils and fluids used of corrosion protection in the engine contain substances that are cooling system. -
Page 384
Maintenance and Care if the level in the coolant recovery (antifreeze) when adding coolant indicated on the bottle and inside the bottle does not drop when the throughout the life of your vehicle. filler neck. engine cools, the cooling system When adding engine coolant should be tested by a Service (antifreeze) use pure water only, such… -
Page 385
Maintenance and Care • If frequent engine coolant fluid level may be caused by a leak (antifreeze) additions are required, or too, and requires accurate checkup of if the level in the coolant recovery the braking system. bottle does not drop when the engine cools, the cooling system CAUTION! should be pressure-tested for leaks by… -
Page 386
This could result in an accident. NOTE: The Maserati Service Network Adding Windshield/Headlight Washer can provide you with information Fluid about the Maserati recommended The reservoir on the left side of the “Windshield Washer Fluid”… -
Page 387
Maintenance and Care • Remove the inspection cover on the If the warning light illuminates right engine bank (3.8 V8 GTS version and the related message of low oil only). level displays, or during scheduled services (see “Scheduled Maintenance Service” in this section) it is necessary to check the engine oil level. -
Page 388
Maintenance and Care Engine Oil Level Check — Diesel Engine is an engineered product, and its performance may be impaired by To assure proper lubrication of your supplemental additives. vehicle’s engine, the engine oil must be maintained at the correct level. •… -
Page 389
Maintenance and Care Engine Air Filters Replacement • If a refilling is necessary: open the Fuel Filter Service (Diesel only) inspection door and unscrew the Contact the Service Network to Contact the Service Network to have filler neck cap. perform this service. the air filters replaced. -
Page 390
Maintenance and Care to lift the arms for cleaning or replacing the wiper blades. WARNING! It is dangerous to operate or service the wiper blades with the windshield wipers in an active position (any position different from “OFF”) and with the ignition switch in the RUN position. -
Page 391
Maintenance and Care Operation of the wipers on dry glass for long periods may cause deterioration of the wiper blades. Always use washer fluid when using the wipers to remove salt or dirt from a dry windshield. Avoid using the wiper blades to remove frost or ice from the windshield. -
Page 392
Maintenance and Care Body Lubrication Locks and all body pivot points, including such items as seat tracks, door hinge pivot points and rollers, liftgate, sliding parts of power sunroof (if foreseen) and hood hinges, should be lubricated periodically with a lithium-based grease. -
Page 393
Maintenance and Care Maintenance-Free Battery replaced with a component of the same type (vented). CAUTION! This vehicle is equipped with a sealed NOTE: • Before disconnecting the battery, type maintenance-free battery. You Remote battery terminals for start are open the liftgate and lower the will never have to add water, nor is located in the engine compartment windows a few centimetres, to… -
Page 394
Maintenance and Care • Cable clamps should be tight on the section “Dashboard Instruments and terminal posts and free of corrosion. Controls”). • Lift, release and lift again the lever After the battery has been on the central console to initialise the disconnected and re-connected electric parking brake. -
Page 395
Maintenance and Care • that manages the motor-driven season, to prevent the electrolyte from Never charge or recharge a frozen throttles to run a self-learning cycle. freezing. battery: it can explode due to At the same time, you can run the hydrogen trapped inside the ice This check should be carried out more date and time set up procedure for… -
Page 396
Maintenance and Care Fuse Replacement • Turn the charger on and follow the instructions on its user manual to Used Fuses Characteristics completely recharge the battery. • When the battery is recharged, When an electrical device is turn off the battery charger before not functioning, check that the disconnecting it from the battery. -
Page 397
Maintenance and Care inside the cover of the rear power distribution center. CAUTION! • Never replace a blown fuse with anything other than a new and suitable fuse (same rating). • After replacing a fuse, if the fault recurs, contact the Service Network. Position of Fuses The fuses are located in three parts of the vehicle, namely:… -
Page 398
Maintenance and Care The table points out the position as Type Function Ref. featured in the cover, the type and ABS-ESP valve function of the fuses included in the Maxi – 40A integrated power module. feed Urea (AdBlue) Mini – 25A system (Diesel CAUTION! only) -
Page 399
Maintenance and Care Type Function Type Function Type Function Ref. Ref. Ref. PTC heater ABS-ESP Engine Mini – 5A Maxi – 40A Mini – 15A 3 relay input module secondary load (Diesel only) (Gasoline only) AWD module, Mini – 5A Headlamp EPS and AQS Lambda sensor… -
Page 400
Maintenance and Care Type Function Ref. +30 PCM Mini – 15A module (Gasoline only) Fuel pump relay input (Gasoline only) Mini – 30A Fuel pump supply (Diesel The table points out the position as only) featured in the cover, the type and Starter function of the fuses on the rear area solenoid signal… -
Page 401
Maintenance and Care Type Function Type Function Type Function Ref. Ref. Ref. Start&Stop: “Premium” LH front seat Mini – 30A voltage stereo movement Maxi – 40A Maxi – 20A stabilizer, amplifier unit Trailer module dashboard LH side (not Mini – 15A Start&Stop: ELDOR coil for TROFEO… -
Page 402
Maintenance and Care Type Function Type Function Type Function Ref. Ref. Ref. Mini – 10A ASCM motor Blower front Sunroof Maxi – 40A Mini – 10A supply HVAC coil relay Power outlet – – Blower rear on central Mini – 10A Mini –… -
Page 403
Maintenance and Care Bulb Replacement function of the fuses in the box under Ref. Type Function the dashboard. Cluster The signal failure of an external light Mini – 15A module, clock (turn signal, low beam and high beam, number plate light, reverse light and DSRC and DTV brake light) is communicated to the Mini –… -
Page 404
Maintenance and Care Bi-Xenon Version Full-LED Version (optional) Bi-Xenon Version Full-LED Version Position light guide LED. Bi-Xenon low-beam/high-beam Low-beam light LED. Stop light LED. bulb (25W-No AFS, 35W-With Position, DRL and direction Direction indicator LED. AFS). indicator light LED. Reverse light LED. -
Page 405
Maintenance and Care Passenger Compartment A/C System Maintenance Interior Lights WARNING! For best performances, the air The Bi-Xenon bulbs are a type of high Lamps inside the glove box conditioning system should be checked voltage discharge tube. High voltage compartment of the dashboard, lamps and serviced by the Service Network at can remain in the circuit even with under the sun visors and those located… -
Page 406
Maintenance and Care Wheels Maintenance internal damage, which may even lead lubricants can cause the system to to the tire destruction. fail, requiring costly repairs. Tires Maintenance • The air conditioning system contains refrigerant under high pressure. CAUTION! To avoid risk of personal injury CAUTION! After inspecting or adjusting the tire or damage to the system, adding… -
Page 407
Maintenance and Care “Driving”). The thinner is the tread, Do not use scouring pads, steel wool, a the greater is the risk of skidding. bristle brush, or metal polishes. Do not WARNING! • use oven cleaner that may involve and Drive carefully on wet roads to •… -
Page 408
In the the roads are spread with anti-freeze event of abrasions or deep scratches, On this vehicle, Maserati has adopted salt, it is advisable to wash the vehicle we recommend to have the necessary the best technological solutions to more frequently. -
Page 409
Maintenance and Care It is recommended to use water-based from the trees give the paint a dull • When grease spots and fingerprints products and neutral surfactants. appearance and increase the possibility are present, it is recommended using of originating corrosive processes. a special cleaner for matte finish Car Wash paint. -
Page 410
Maintenance and Care To minimize the possibility of that can destroy the protecting • Never polish and never use polishing scratching the lenses and reducing surface treatment. agents on the vehicle with matte light output, avoid wiping with a dry •… -
Page 411
Maintenance and Care • If enabled, disable the automatic upper edge of the glass window and engagement function of electric the door outline on the bodywork, WARNING! parking brake (see “Parking Brake” while the car is being washed, it is •… -
Page 412
“Car Care” products approved by the touch screen. If necessary, use damp soft cloth. Small particles of dirt Maserati for the maintenance and care a lint-free cloth dampened with a can act as an abrasive and damage of the interior. -
Page 413
(available from long periods of time, follow the below following operations. the Maserati Service Network). Do precautions: not use thick plastic sheets, which do • Check the tires for pressure and for •… -
Page 414
The warning light on the vehicle is not going to be used for one instrument cluster, will indicate any week or more, Maserati recommends malfunctions in the recharge circuit or connecting the vehicle to a battery an insufficient battery charge status charger, to save you the trouble of (example in figure). -
Page 415
NOTE: The Maserati Service Network can provide you with any information about the Maserati approved “Battery Charger and Conditioner”, available in the “Genuine Accessories” range. WARNING! -
Page 416
Maintenance and Care… -
Page 417
8 — Features and Specifications Refillings …………..418 Fuel Consumption and Exhaust Emission . -
Page 418
NOTE: Maserati reserves the right to change or revise specifications without prior notification. CAUTION! To guarantee vehicle’s integrity and maintain performance level Maserati recommends to use Maserati genuine products. Refillings and Recommended Products – Gasoline Engines Parts to be refilled… -
Page 419
Features and Specifications Parts to be refilled Quantity Product specifications Engine cooling circuit (3.8 14,3 litres/3.14 UK gal Mixture of water and coolant, proportionally 50/50%. (for dual-zone air conditioning Coolant: protective, antifreeze action and ethylene system) glycol-based with organic inhibitors compatible with regulations: 15,7 litres/3.45 UK gal (for four-zone air conditioning… -
Page 420
Synthetic multigrade lubricants SAE 5W-40 that meet 8,8 litres/1.93 UK gal (max) Engine: oil capacity API SL/CF and ACEA A3, B3, B4 specifications. (MIN – MAX difference: 1 litre/0.22 including filter cartridge Recommended oil: SHELL Helix Ultra Maserati 5W-40 UK gal) (1). -
Page 421
Features and Specifications Parts to be refilled Quantity Product specifications Mix of water and detergent fluid, in the proportions Windshield and headlight indicated on the product package. If the temperature 5 litres/1.1 UK gal washer fluid tank is below –20°C (–4°F), use pure detergent fluid. Detergent fluid: Mix of CUNA NC 956-II surfactants and alcohols. -
Page 422
Features and Specifications Parts to be refilled Quantity Product specifications Synthetic fluid: FMVSS 116 DOT 4, ISO 4925 Class 4, ENSAYOS INTA-UNE 26-109-88, SAE J1703, SAE J1704, CUNA NC 956-01. Recommended fluid: PETRONAS Tutela TOP 4/S. Braking system 0,88 litres/0.19 UK gal +/-4% CAUTION! For each oil refilling and/or replacement, please contact the Service Network. -
Page 423
Features and Specifications Fuel Consumption and Exhaust Emission The fuel consumption and CO2 exhaust emission values specified by the manufacturer were established based on homologation tests prescribed by the applicable Directives of the destination market ( EU: Austria, Belgium, Bulgaria, Croatia, Cyprus, Czech Republic, Denmark, Estonia, Finland, France, Germany, Greece, Hungary, Ireland, Italy, Latvia, Lithuania, Luxembourg, Malta, Netherlands, Poland, Portugal, Romania, Slovakia, Slovenia, Spain and Sweden — EFTA: Iceland, Liechtenstein, Norway and Switzerland). -
Page 424
Features and Specifications CAUTION! The type of route, traffic and weather conditions, driving style, general condition of the vehicle, equipment/accessories in the vehicle, use of the air conditioning system, vehicle load and other items or situations which may negatively affect the vehicle aerodynamics or wind resistance lead to consumption ratios differing from the indicated ones. -
Page 425
Features and Specifications Levante TROFEO Levante GTS Levante S Levante Urban cycle 435 g/km 435 g/km 348 g/km 343 g/km Extra urban cycle 243 g/km 243 g/km 199 g/km 194 g/km Combined cycle 313 g/km 313 g/km 253 g/km 249 g/km Exhaust Emission Data — Diesel Model The CO exhaust emission ratings shown (grams per km) were established based on homologation tests prescribed by… -
Page 426
Features and Specifications Technical Data NOTE: The technical data, values and specifications in this Owner’s Manual are provided as guidance only. The vehicle specific data can vary from the information provided, for example, as a result of optional or special equipment ordered with the vehicle, vehicle loads, and country specific measurement methods. -
Page 427
Features and Specifications Injection – Ignition High-pressure (200 bar) direct fuel injection system. Static ignition with digital electronic control system included and controlled by a single microprocessor ECU. Engine Data — Diesel Model Data Levante Diesel Cylinder number and position 6 — 60°… -
Page 428
NOTE: • Maserati recommends Maserati Genuine Tires marked with “MGT” logo specifically designed for its models. • In order to maintain high performance and safety level, Maserati recommends to use tires equivalent to the original size. • In case of staggered tires, front and rear rims cannot be swapped. -
Page 429
Features and Specifications WARNING! • The maximum speed reachable with the tires is indicated by the tire manufacturer. Always comply with the regulations in force in the Country you are driving in. • Never exceed the maximum speed indicated for the tires: failure to respect the max. speed may damage these tires. Danger: risk of accident! •… -
Page 430
Features and Specifications Allowed tires size Levante TROFEO Levante GTS Light alloy rims 21” x 9J (front) 20” x 9J (front) 21” x 10,5J (rear) 20” x 10,5J (rear) — Front tires 265/40 ZR21 101Y 265/45 ZR20 104Y — Rear tires 295/35 ZR21 103Y 295/40 ZR20 106Y Spare rim… -
Page 431
Features and Specifications Allowed tires size Levante (Basic version) Levante (GranLusso) Levante (GranSport) — Rear tires — All season 295/45 R19 113W M+S 295/45 R19 113W M+S 295/45 R19 113W M+S Light alloy rims 20” x 9J (front and rear) 20”… -
Page 432
Features and Specifications Allowed tires size Levante S (Basic version — GranLusso) Levante S (GranSport) Light alloy rims 19” x 8,5J (front) 19” x 8,5J (front) 19” x 10,5J (rear) 19” x 10,5J (rear) — Front tires (Standard tire) 265/50 R19 110Y — Rear tires (Standard tire) 295/45 R19 113Y… -
Page 433
Features and Specifications Allowed tires size Levante TROFEO Levante GTS Light alloy rims 21” x 9J (front) 21” x 9J (front) 21” x 10,5J (rear) 21” x 10,5J (rear) — Front tires (Standard tire) 265/40 ZR21 101Y — Rear tires (Standard tire) 295/35 ZR21 103Y Light alloy rims… -
Page 434
Features and Specifications Optional Wheel Dimension — Gasoline Models (Australia market) Allowed tires size Levante (Basic version — GranLusso) Levante (GranSport) Light alloy rims 19” x 8,5J (front and rear) 19” x 8,5J (front and rear) — Front tires (Standard tire) 265/50 R19 110Y — Rear tires (Standard tire) -
Page 435
Features and Specifications Allowed tires size Levante S (Basic version — GranLusso) Levante S (GranSport) Light alloy rims 20” x 9J (front) 20” x 9J (front) 20” x 10,5J (Rear) 20” x 10,5J (Rear) — Front tires 265/45 ZR20 104Y (Standard tire) — Rear tires 295/40 ZR20 106Y… -
Page 436
Features and Specifications Allowed tires size Levante (Basic version) Levante (GranLusso) Levante (GranSport) — Rear tires (Standard tire) 255/60 R18 108W — Front tires — All season 255/60 R18 108W M+S 255/60 R18 108W M+S — Rear tires — All season 255/60 R18 108W M+S 255/60 R18 108W M+S Light alloy rims… -
Page 437
Features and Specifications Allowed tires size Levante (Basic version) Levante (GranLusso) Levante (GranSport) — Front tires — All season 265/45 R20 104W M+S 265/45 R20 104W M+S 265/45 R20 104W M+S — Rear tires — All season 295/40 R20 106W M+S 295/40 R20 106W M+S 295/40 R20 106W M+S Light alloy rims… -
Page 438
Features and Specifications Optional Wheel Dimension — Diesel Model (Australia market) Allowed tires size Levante (Basic version — GranLusso) Levante (GranSport) Light alloy rims 19” x 8,5J (front and rear) 19” x 8,5J (front and rear) — Front tires (Standard tire) 265/50 R19 110Y — Rear tires (Standard tire) -
Page 439
Features and Specifications Levante TROFEO Levante GTS Levante S Levante Accelerations from 0 to 3.9 seconds 4.0 seconds 5.2 seconds 6.0 seconds 100 km/h Values obtained with 98 RON unleaded gasoline. Performance Data — Diesel Model NOTE: The specifications described can change without prior notification. Maximum speed 230 km/h (143 mph) (*) 225 km/h (140 mph) -
Page 440
Features and Specifications Weights Weight Data — Gasoline Models NOTE: The specifications described can change without prior notification. Levante TROFEO — GTS Levante S — Levante Unladen vehicle weight (with tanks filled, 2170 kg / 4784 lb (*) 2109 kg / 4650 lb (*) tools and accessories) Approved Gross Vehicle Weight Rating 2825 kg / 6228 lb… -
Page 441
Features and Specifications • Follow trailer manufacturer recommendations, never exceed trailer tow weights provided. • On vehicles of Australia market the trailer towing weights are also indicated inside the driver’s door on the rear lower corner. Towable loads: trailer with brakes 2700 kg (5952 lb) (GTS: 1500 kg / 3306 lb) Towable loads: trailer without brakes… -
Page 442
Features and Specifications Dimensions Wheel base 3004 mm (118.2 in) 5005 mm (197 in) — GTS/TROFEO version: 5020 mm (197.6 Overall length Overall width without mirrors 1981 mm (77.9 in) Overall width with mirrors 2158 mm (85 in) Front track 1637 mm (64.4 in) Rear track 1699 mm (66.8 in) -
Page 443
Features and Specifications Tire Inflation Pressure NOTE: • For more information about the pressure check methods, see “Tires – General Information” in section “Driving”. • On vehicles of some markets the tire inflation pressure values are also indicated on the driver’s side rear door pillar. WARNING! •… -
Page 444
Features and Specifications Wheel size: All V6 Engines/Versions FLC /High 20″ (All-round 20″ (Staggered 21″ (All-round 21″ (Staggered Speed 18″ and 19″ Fitment) Tires) Fitment) Tires) Front Wheel 250 kPa (2,5 bar — 36 psi) 270 kPa (2,7 bar — 39 psi) Summer Tires Rear Wheel 270 kPa (2,7 bar — 39 psi) -
Page 445
Index Index Precautions while Driving with Fixed Air Vents … 149 ACC ….291 Air Conditioning System Radar Device — Regulatory Maintenance . -
Page 446
Use ….. 68 Bodywork Maintenance and Care Maserati Recommended Child Passenger Compartment Pre-Short Drop Function ..411 Interior Lights . -
Page 447
Index Console Driving Conditions … 331 Pedestrian Emergency Braking Power Outlet Inside the Central Before the Trip … 331 (PEB) System … . . 293 Console. -
Page 448
Index Highway Assist – HAS ..309 In case of a Punctured Tire ..355 Warning and Indicator Light on Hands Detection on Steering Using the Compact Spare Tachometer . -
Page 449
Index Vehicle Isofix Positions Chart on Headlight Time Delay ..109 To Reconnect the Battery ..394 Passenger Seats … . 71 Headlight with AFS . -
Page 450
Index Engine Turn Off … 228 Release the Liftgate and Enter ark Assist ….75 the Boot . -
Page 451
Index Auto-Up Feature with Anti- Remote Start System ..27 Scheduled Service Plan ..371 Pinch Protection … 36 Auto-On Comfort with Remote Exhaust Gas After-treatment Open and Close the Windows… -
Page 452
Index Passenger’s Air bag Tires — General Information ..316 Trailer Tongue Deactivation ….62 Compact Spare Tire ..320 Maintenance . -
Page 453
Index To disarm the System ..21 Vehicle Stored for Long Periods ….413 arnings when Driving . -
Page 454
Because of the evolutions of the MASERATI products, which are continually developed and perfected, MASERATI S.p.A. reserves the right to make modifications to this manual as well as to the technical contents, functions and equipment of the vehicles delivered. Therefore, the user is not entitled to any claims based on the contents (texts, data, illustrations, explanations and regulations) in this manual, which are based on the data known at the time of going to print.
Инструкции по эксплуатации
Укажите здесь торговую марку и тип
В настоящее время вы находитесь на странице с руководствами Maserati. Выберите одну из категорий продуктов, чтобы быстро найти нужное руководство Maserati. Не удалось найти нужный продукт Maserati? Тогда попробуйте вбить в строку поиска Maserati и модель, чтобы найти нужное руководство Maserati. На ManualsPDF.ru в настоящее время имеется 75 руководств Maserati, разделенных на 2. Самые популярные категории продуктов Maserati:
- автомобили
Самые популярные продукты из Maserati на сегодня:
- Maserati Ghibli (2015)
- Maserati Levante (2018)
- Maserati GranTurismo (2009)
- Acura
- Fault codes on the Acura mdx
- Acura RDX Service Repair Manuals PDF
- Acura RSX Service Repair Manual PDF
- Alfa Romeo
- Alfa Romeo fault codes
- Alfa Romeo GT 2003-2010 eLearn for free
- Alfa Romeo 147 2001-2004 E-Learn for free
- Alfa Romeo 156 fault codes
- Alfa Romeo 159 eLearn Free Download
- Alfa Romeo MiTo Service Repair Manuals PDF
- Aston Martin
- Audi
- AUDI 80 Workshop Manual Free Download
- AUDI 80 Schematic wiring diagram
- Audi 100 Service Repair Manuals PDF
- Audi A2 Service Repair Manuals PDF
- Audi A3 Electrical Wiring Diagrams
- Audi A3 workshop manual free download
- Audi A3 Fault Codes list
- Audi A4 Service Repair Manuals PDF
- Audi A7 Service Repair Manuals PDF
- Audi A8 Service Repair Manuals PDF
- Austin
- Bentley
- BMW
- Download repair manual BMW
- BMW5 (E39) fault codes
- BMW diagnostic trouble codes
- Types of diagnostic connectors and BMW fault codes
- Brilliance
- Bugatti
- Buick
- BYD
- Cadillac
- Download Cadillac Owners Manuals
- Chana
- Changan
- Chery
- Chevrolet
- Chevrolet service repair manuals PDF
- Chevrolet Aveo Service Repair Manuals PDF
- Chevrolet Captiva Service Repair Manuals PDF
- Chevrolet Lacetti Service Repair Manuals PDF
- Chevrolet Sonic Service Repair Manuals
- Chrysler
- Citroën
- Citroen Fault codes
- Citroen AX Service Repair Manuals PDF
- Citroen Berlingo Service Repair Manuals PDF
- Citroen BX Service Repair Manuals PDF
- Citroen C-Crosser Service Repair Manual PDF
- Citroen C-Elysée Service Repair Manuals PDF
- Citroen C-Zero Service Repair Manuals PDF
- Citroen C1 Service Repair Manuals PDF
- Citroen C2 Service Repair Manuals PDF
- Citroen C3 Service Repair Manuals PDF
- Citroen C4 Service Repair Manuals PDF
- Citroen C5 Service Repair Manuals PDF
- Citroen C6 Service Repair Manuals PDF
- Citroen C8 Service Repair Manuals PDF
- Citroen C25 Service Repair Manuals PDF
- Citroen CX Service Repair Manuals PDF
- Citroen DS Service Repair Manuals PDF
- Citroen E-Mehari Service Repair Manuals PDF
- Dacia
- Dadi
- Daewoo
- Daihatsu
- Datsun
- De Lorean
- Derways
- Dodge
- DongFeng
- DS
- Eagle
- FAW
- Ferrari
- Fiat
- Ford
- Ford Wire Diagram
- Replacing the cabin filter on the Ford Mustang V
- Repair of driving axles Ford. Models Ford gearboxes. Faults bridges Ford
- Foton
- GAC
- Geely
- The history of Geely. Part II
- Genesis
- Geo
- GMC
- Download PDF manuals for GMC car’s
- Great Wall
- Great Wall Safe fault codes
- Hafei
- Haima
- Ten ways to save on fuel
- Haval
- Holden
- Honda
- Hummer
- Hyundai
- Infiniti
- Iran Khodro
- Iran Khodro Samand
- Isuzu
- JAC
- Spare parts for cars of all models of JAC
- Spare parts for JAC cars (J5, S5)
- Spare parts for JAC cars 2
- Jaguar
- Jeep
- Kia
- Lamborghini
- Lancia
- Land Rover
- Lexus
- Fault Codes — Lexus RX / HARRIER I (1998-2003)
- Lifan
- Lincoln
- Lotus
- Luxgen
- Maserati
- Maybach
- Mazda
- Mercedes Benz
- Mercedes Benz Car PDF Owners Manual
- Mercury
- MG
- Mini
- Mitsubishi
- Replacement of the fuel filter on Mitsubishi Pajero 3
- How to decipher fault codes on Mitsubishi?
- Mitsubishi Lancer 9 Fault codes
- Nissan
- Oldsmobile
- Opel
- Peugeot
- Plymouth
- Pontiac
- Download more PDF manuals for Pontiac 1993-2008
- Porsche
- Ravon
- Renault
- Fault codes for diagnostics of Renault
- Renault Logan Fault Codes
- Change the salon filter to Renault Duster
- Renault Megane Fault Codes list
- Renault Trafic fault codes list
- Rolls-Royce
- Rover
- Saab
- Saab repair and service manuals
- Saturn
- Scion
- SEAT
- Skoda
- Smart
- SsangYong
- SsangYong Kyron Fault codes
- Subaru
- Suzuki
- Tesla
- Toyota
- New Toyota Prius will be more powerful
- Vauxhall
- Volkswagen
- Volvo
- Zotye
- Chinese cars
- USA cars
- Best automotive diagnostic scanner & PDF manuals
- Ford VCM II Diagnostic Scanner PDF Manuals
|
Title |
File Size |
Download Link |
|
Maserati 3500GT (Italian) Owners Manual.pdf |
3.4Mb |
Download |
|
Maserati 3500GT (with great engine diagrams — English) Owners Manual.pdf |
20.4Mb |
Download |
|
Maserati 3500GTi and Vignale spyder (Italian) Owners Manual.pdf |
4.8Mb |
Download |
|
Maserati 3500GTi, Vignale spyder and Sebring series 1 (English) Owners Manual.pdf |
1.7Mb |
Download |
|
Maserati Bora (Italian — English) Owners Manual.pdf |
6Mb |
Download |
|
Maserati Electrical diagrams (1964-1968 … Mistral, Mexico, QP1 and early Ghibli) Owners Manual.pdf |
1.3Mb |
Download |
|
Maserati Ghibli — early version Owners Manual.PDF |
3.1Mb |
Download |
|
Maserati Ghibli (Maserati Touch Control) Owners Manual.pdf |
16.3Mb |
Download |
|
Maserati Ghibli Owners Manual.pdf |
15.8Mb |
Download |
|
Maserati Ghibli SS Owners Manual.pdf |
8.9Mb |
Download |
|
Maserati Grandturismo Sport Owners Manual.pdf |
5.5Mb |
Download |
|
Maserati Indy 4.2, 4.7, 4.9 Owners Manual.pdf |
14.5Mb |
Download |
|
Maserati Khamsin Owners Manual.pdf |
12.6Mb |
Download |
|
Maserati Kyalami Owners Manual.pdf |
1.6Mb |
Download |
|
Maserati Merak Owners Manual.pdf |
7.3Mb |
Download |
|
Maserati Merak SS Owners Manual.pdf |
8.5Mb |
Download |
|
Maserati Mexico (English) Owners Manual.pdf |
6.8Mb |
Download |
|
Maserati Mistral — early car (Italian) Owners Manual.pdf |
4.6Mb |
Download |
|
Maserati Mistral (English) Owners Manual.pdf |
957.9kb |
Download |
|
Maserati Mistral (Most complete booklet — Italian) Owners Manual.pdf |
11.8Mb |
Download |
|
Maserati Mistral-QPI Dealer Technical Bulletin Owners Manual.pdf |
655.3kb |
Download |
|
Maserati Quattroporte 1 (English) Owners Manual.pdf |
2Mb |
Download |
|
Maserati Quattroporte 1 and Mexico (Italian) Owners Manual.pdf |
7.6Mb |
Download |
|
Maserati Quattroporte 3 Owners manual.pdf |
16.5Mb |
Download |
|
Maserati Quattroporte 3 Service Manual — Engine section only.pdf |
7.1Mb |
Download |
|
Maserati Quattroporte 3 Service Manual.pdf |
10.6Mb |
Download |
|
Maserati QUATTROPORTE Owners Manual.pdf |
30.4Mb |
Download |
|
Maserati Sebring series 2 (English) Owners Manual.pdf |
11.7Mb |
Download |
|
Connolly_PAC_samples.pdf |
550.8kb |
Download |
|
Dupont Paint codes.pdf |
558.5kb |
Download |
|
Maserati Bora and Merak paint chips.pdf |
6.7Mb |
Download |
|
Maserati GT paint colors and codes.pdf |
274.3kb |
Download |
|
Maserati Iso paint chips (some colors are the same).pdf |
596.5kb |
Download |
|
Maserati Khamsin paint chips.pdf |
4.1Mb |
Download |
|
Maserati Lancia paint chips (some colors are the same).pdf |
7.4Mb |
Download |
|
Maserati_leather_colors.pdf |
92.1kb |
Download |
|
Maserati_leather_samples.pdf |
1.8Mb |
Download |
|
Original factory paint chips.pdf |
3.8Mb |
Download |
|
PPG paint codes 1980 — 2001.pdf |
1.7Mb |
Download |
|
PPG paint codes.pdf |
41.5kb |
Download |
|
Maserati 3500GT Monoflux fuel pumps.pdf |
1.2Mb |
Download |
|
Maserati Bora — in Microsoft Excel format.xls |
74.5kb |
Download |
|
Maserati dealer price list circa 1969.pdf |
504.8kb |
Download |
|
Maserati Ghibli (late) Vitaloni stalk wiring.pdf |
41.1kb |
Download |
|
Maserati Ghibli announcement letter from Ghia.PDF |
2.7Mb |
Download |
|
Maserati Ghibli spyder conversion sales brochure.pdf |
2.9Mb |
Download |
|
Maserati Girling and Ansa part numbers.pdf |
1.2Mb |
Download |
|
Maserati Lucas fuel injection workshop manual.pdf |
427.7kb |
Download |
|
Maserati Salisbury Axle Service Manual (3500GT, Mistral, Ghibli, etc).pdf |
4.2Mb |
Download |
|
Maserati Service Manual Engine Rebuild.pdf |
4.7Mb |
Download |
|
Maserati Service Manual SM_Spare_parts_1.pdf |
11.9Mb |
Download |
|
Maserati Service Manual SM_Spare_parts_2.pdf |
13.7Mb |
Download |
|
Maserati Service Manual wiring diagram layout.pdf |
120.8kb |
Download |
|
Maserati Weber 38 DNCL 5 — as used on QPorte 1, Mexico and early Ghibli.pdf |
569.5kb |
Download |
|
Maserati ZF S5-20 service manual (late Sebring, Mistral, etc).pdf |
37.9Mb |
Download |
|
Maserati ZF S5-325 parts manual (Ghibli, Indy, etc).pdf |
6.1Mb |
Download |
|
Maserati ZF S5-325 service manual (Ghibli, Indy, etc).pdf |
304.8kb |
Download |
|
Maserati 3500GT, GTi, Vignale spyder, Sebring Parts Manual.pdf |
5.3Mb |
Download |
|
Maserati Bora Parts Manual.pdf |
4Mb |
Download |
|
Maserati Bora USA Supplement — 1972 Parts Manual.pdf |
1.7Mb |
Download |
|
Maserati Ghibli Parts Manual.pdf |
4.1Mb |
Download |
|
Maserati Ghibli spyder supplement Parts Manual.pdf |
65.9kb |
Download |
|
Maserati Ghibli USA parts supplement.pdf |
1.1Mb |
Download |
|
Maserati Indy 4.7 and 4.9 supplement Parts Manual.pdf |
1.5Mb |
Download |
|
Maserati Indy Parts Manual.pdf |
6.2Mb |
Download |
|
Maserati Khamsin Parts Manual.pdf |
3.7Mb |
Download |
|
Maserati Kyalami Parts Manual.pdf |
3.7Mb |
Download |
|
Maserati Merak Parts Manual.PDF |
3.9Mb |
Download |
|
Maserati Mexico (to be used with the QP1 manual) Parts Manual.pdf |
441.6kb |
Download |
|
Maserati Mistral Parts Manual.pdf |
2.5Mb |
Download |
|
Maserati Quattroporte 1 Parts Manual.pdf |
6.2Mb |
Download |
Despite the widespread belief that the company «Maserati» was founded in 1926, in fact it is a significant event in the history of the Italian automotive industry occurred much earlier — in 1914.
It was then resident in Bologna with his brothers, Alfieri Maserati occurred to register a company «Officine Alfieri Maserati», which is engaged in the development of vehicles and powertrains to
them. However, as before, and after, their activities are not carried Alfieri himself, and together with his brothers: Carlo, Bindo, Mario, Ettore and Ernesto. All of these six names in golden
letters entered in the history of Italian industry the beginning of XX century.
The eldest of the brothers, Carlo, died long before the start of production. However, it was his ideas were fundamental to the future activities of blood followers. The first major success of the
Maserati expected in 1925, when the family of 2-liter engine was created, which became the base for one of the most successful at that time racing cars models. The first launch of its own
offspring brothers dates back to April 1926 — it was a production car Maserati Gran Prix in 1500.
A special promotion of the company contributed to major victories in a variety of racing competitions, which are mainly Ernesto won a Maserati. The only specialization brothers work in the same
time period was the production of a purely racing cars and engines for them. This quickly gave good results. Already in 1929 Tipo V4 model has a top speed of 246 km / hour, which was a record at
that time.
Start 30-ies of the last century was marked by a small crisis is directly related to the tragic death of Alfieri Maserati, who died in a car accident. As often happens with great people, that
passion took the life of a genius. Nevertheless, the burden of responsibility for the success took the youngest brother, who began independent development of engines. It turned out that he is not
bad, but to pull all on his shoulders and Ernesto could not. In 1939 the company became part of the corporation «Orsi», as part of which moved from Bologna to Modena. It is from Modena plants
linked further progress automobile racing in Italy.
The Second World War is almost no way affected the company’s performance, but, ironically, it was after the end of remaining at the time living in the Maserati brothers founded a new company
specialized in the production of racing cars, which, however, little success is not earned.
In the same period, under the brand name «Maserati» launched GT class lineup. The first model debuted in 1500 A6, produced in a race, and in the road versions. However, to say that the issue was
carried out in a series, it is impossible, because every single instance had significant differences compared with his «brothers.» And in the mid-50s the company management announced the
termination of work on race cars. Thus, the «Maserati» changed its traditions, active hand in the production of mass-produced road cars. Firstborn was the model of the GT 3500, possessed a
6-cylinder 3.5-liter engine, and lasted until 1964. Over the years, the assembly line of the company produced more than 2000 Maserati 3500 GT car. Much less sympathy among motorists caused a 5000
GT.
60s — an era of prosperity. At this time actively worked on the design of a follow-up models and on their technical characteristics. Then the management decided to create the most comfortable car
class «lux», Kojima became the perfect sedan «the Quattroporte», equipped with a 4.2-liter engine the V8, first introduced in the mid-50s. In addition to the model «Quattroporte», designers
«Maserati» for a short period of time brought to mind and prepare to present cars like Maserati Mistral, Maserati Mexico (analogue Quattroporte) and the Maserati Ghibli. Each of these cars has
been something to be proud, and they confidently won the hearts of millions.
A new stage in the history of «Maserati», it would seem, was to begin in 1968, after the owner of a controlling stake in the company have become the leaders of the concern «Citroen». But it
existed until 1975 Partnership reminded about themselves only during the release of the model «Indy 2 + 2″ And in the next year in the light of published model «Quattroporte III», which
immediately was named best executive cars Italy for the entire automotive history. It should also be noted that all of the 70 years of the last century were marked by improved ergonomics. So
Maserati Bora became a car endowed with unprecedented convenience and luxury features. However, we are not affected by the speed of the car.
The new era of the company, after all, began. But it happened a little bit later — right after your purchase «Fiat» Company
Corporation. It happened in May 1993, and already in 1996 introduced a new model «Quattroporte IV Evoluzione», immediately became the sales leader among paying customers. However, in 1997 the
management «Maserati» lay their hands «the Ferrari» guide, once the main competitor brainchild of the great Italian brothers. Going into the new century was marked by the renewal of industrial
relics of the company and the issue of new cars. Especially noteworthy model Maserati 3200 GT and Spyder GT, released in 1998 and 2002 respectively.
Today, the activities of the Italian company with a rich history, several times changed its specialization, is aimed at the production of high-speed vehicles with unsurpassed design, high quality
manufacturing of parts and the highest level of comfort.
Руководство на английском и итальянском языках по техническому обслуживанию и ремонту автомобиля Maserati Biturbo 1983-1993 годов выпуска.
- Автор: —
- Издательство: Maserati S.p.A.
- Год издания: —
- Страниц: 597
- Формат: PDF
- Размер: 72,3 Mb
Руководство на английском и итальянском языках по техническому обслуживанию и ремонту двигателя V6-24V-4AC автомобиля Maserati Quattroporte.
- Автор: —
- Издательство: Maserati S.p.A.
- Год издания: —
- Страниц: 230
- Формат: PDF
- Размер: 110,4 Mb
Сборник руководств на английском языке по устройству, техническому обслуживанию и ремонту автомобиля Maserati Biturbo.
- Автор: —
- Издательство: Maserati S.p.A.
- Год издания: —
- Страниц: —
- Формат: MDF
- Размер: 1,5 Gb
Руководство на английском и итальянском языках по техническому обслуживанию и ремонту автомобиля Maserati Quattroporte.
- Автор: —
- Издательство: Maserati S.p.A.
- Год издания: —
- Страниц: 359
- Формат: PDF
- Размер: 11,5 Mb
Руководства пользователя, инструкции и руководства для продуктов MASERATI.
Найти
Откройте для себя руководство Maserati Quattroporte 2021 года с инструкциями по эксплуатации вашего автомобиля. От роскошного интерьера до мощного двигателя — узнайте свой Quattroporte внутри и снаружи. В этом всеобъемлющем руководстве вы найдете всю необходимую информацию, включая подробные сведения о системе manualplus. Изучите свой Maserati Quattroporte легко и уверенно благодаря этому подробному руководству.
Получите максимум от своего Maserati Levante 2021 года с официальным руководством пользователя. Узнайте о ключевых функциях, таких как коробка передач manualplus, и о том, как ими управлять. Скачайте прямо сейчас подробное руководство по вашему Maserati Levante.
Это руководство пользователя предназначено для Maserati Ghibli 2021 года, роскошной и мощной модели автомобиля. Узнайте, как управлять новейшими функциями, включая коробку передач ManualPlus, и в то же время получать максимум удовольствия от вождения. Получите подробные инструкции и советы по обслуживанию и уходу за Maserati Ghibli 2021 года. Скачайте прямо сейчас, чтобы получить подробное руководство по одному из самых захватывающих автомобилей года.
Откройте для себя полное руководство по Maserati MC2022 20 года с помощью этого подробного руководства пользователя. Благодаря подробным инструкциям и информации о последней модели, manualplus предоставляет все, что вам нужно знать об этом культовом автомобиле. Доступный в формате PDF, будьте готовы погрузиться в мир Maserati MC2022 20 года.
Откройте для себя полное руководство по Maserati Quattroporte 2022 года с помощью этого подробного руководства пользователя, предоставленного вам manualplus. Получите всю необходимую информацию о характеристиках и функциях вашего автомобиля, включая систему manualplus. С легкостью изучите различные элементы и элементы управления вашего Quattroporte. Загрузите руководство прямо сейчас и наслаждайтесь легким вождением.
Откройте для себя подробное руководство по использованию Maserati Levante 2022 года с официальным руководством пользователя. Узнайте о дополнительных функциях Levante 2022 года, включая Manualplus и другие передовые технологии. Загрузите сейчас для удобного доступа ко всей необходимой информации.
Ознакомьтесь с подробным руководством пользователя Maserati Ghibli 2022 года, в котором содержится основная информация о Ghibli и его функциях. Получите максимум от своего Maserati с помощью этого подробного руководства от ManualPlus. Загрузите свою копию сейчас.
Откройте для себя Maserati Grecale 2023 года с официальным руководством пользователя. Получите подробные инструкции по эксплуатации Grecale, включая передовую технологию manualplus. Загрузите PDF-файл сейчас.
Узнайте, как безопасно управлять своим Maserati MC-e-Scooter с помощью этого руководства пользователя. Следуйте всем инструкциям и предупреждениям, надевайте шлем и избегайте потенциальных опасностей. Общайтесь с другими гонщиками с помощью мобильного приложения. Идеально подходит для рекреационного использования.