- Manuals
- Brands
- Jialing Manuals
- Scooter
- JL50QT-18
Manuals and User Guides for Jialing JL50QT-18. We have 2 Jialing JL50QT-18 manuals available for free PDF download: Service And Repair Manual, Service Manual
Jialing JL50QT-18 Service And Repair Manual (201 pages)
4 stroke engine
Brand: Jialing
|
Category: Scooter
|
Size: 21.4 MB
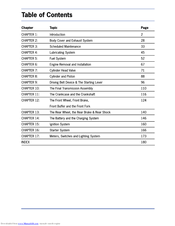
Table of Contents
-
Table of Contents
3
-
General Information
4
-
Engine Number/Frame Number Location
4
-
Product Specifications and Technical Data
5
-
Technical Tips
6
-
Definitions of Diagrams
13
-
Torque Settings
14
-
Tool Requirements
15
-
Lubrication Requirements: Engine
16
-
Chassis
17
-
Cable Routing Diagram
18
-
Wiring Diagram
23
-
Troubleshooting Guide
24
-
Starter Failure or Hard Starting
24
-
Under Speed, no Power
25
-
High Speed
27
-
Improper Battery Charging — Battery Overdischarge or Overcharge
28
-
No Spark
29
-
Body Exploded View
30
-
Body Cover and Exhaust System
31
-
Body Cover Removal
32
-
Front Panel Removal
32
-
Front Cover Removal
32
-
Front and Rear Handlebar Cover Removal
32
-
Right and Left Side Mold Removal
34
-
Body under Cover Removal
34
-
Floor Panel Removal
34
-
Front Box Removal
35
-
Front and Rear Fenders Removal
35
-
Exhaust Pipe Removal
35
-
Scheduled Maintenance
36
-
Maintenance Chart
38
-
Fuel Filter
39
-
Throttle Lever Operation
39
-
Air Filter Replacement
40
-
Spark Plug
40
-
Valve Adjustment
41
-
Carburetor Idle Speed
41
-
Ignition Time
42
-
Cylinder Pressure
42
-
Remove Spark Plug
42
-
Final Check of Gear Engine Oil Reduction
43
-
Changing Gear Oil
43
-
Transmission Belt
43
-
Rear Brake Arm
44
-
Brake System-Front Brake
44
-
Rear Brake Check
44
-
Front Lamp Adjustment
45
-
Clutch Engagement
45
-
Front Suspension
45
-
Rear Suspension
45
-
Nut and Bolt Tightness
46
-
Collar Rim Tire
46
-
Air Pressure
46
-
Tire Standards
46
-
Steering
47
-
Lubricating System
48
-
Overall Engine Requirements
49
-
Engine Oil/Filter Screen
50
-
Oil Volume
50
-
Oil Change
50
-
Oil Pump Removal
51
-
Oil Pump Disassembly
52
-
Oil Pump Check
52
-
Oil Pump Assembly
53
-
Oil Pump Installation
53
-
Fuel System
55
-
Repairing Material (Fuel System)
56
-
Fuel System Troubleshooting
57
-
Disassembly of Carburetor
58
-
Checking Auto Choke
58
-
Air Cut off Valve
60
-
Carburetor Assembly
60
-
Vacuum Chamber-Break down
61
-
Float Bowl Disassembling
62
-
Float Bowl Checking
63
-
Accelerator Pump
64
-
Assembly of Carburetor
65
-
Disassembling Fuel Tank
66
-
Assembly of Fuel Tank
66
-
Carburetor Adjustment
67
-
Automatic Fuel Valve
68
-
Fuel Meter Sending Unit
68
-
Air Filter Inspection
69
-
Engine Removal and Installation
70
-
Cylinder Head Valve
74
-
Camshaft Disassembly
77
-
Checking of Camshaft Bearing Rocker Arm
80
-
Cylinder Head Disassembly
80
-
Breaking down of Cylinder Head
82
-
Checking Cylinder Head
82
-
Valve and Valve Guide
83
-
Valve Guide Replacement
83
-
Valve Seat Chamber Cutting Tools
85
-
Valve Seat Cutting
85
-
Building up of Cylinder Head
86
-
Installing Cylinder Head
87
-
Camshaft Assembly
88
-
Camshaft Chain Regulator Assembling
89
-
Cylinder and Piston
91
-
Removing the Cylinder
93
-
Removing the Piston
93
-
Checking the Cylinder
95
-
Assembling the Piston
97
-
Assembling the Cylinder
98
-
Driving Belt Device and the Starting Lever
99
-
Detaching the Left Crankcase Cover
101
-
Removing the Starting Pivot
101
-
Checking the Starting Pivot
102
-
Installing the Starting Assembly
102
-
Assembling the Left Crankcase Cover
103
-
Checking the Driving Belt
104
-
Replacing the Driving Belt
104
-
Assembling the Driving Belt
105
-
The Driving Pulley-Dismounting
105
-
Taking the Driving Pulley Apart
105
-
Checking the Driving Pulley
106
-
Driving Pulley
107
-
The Overrunning Clutch (Starter Pinion) Removal
107
-
Checking and Assembling
107
-
The Clutch/Transmission Pulley Removing the Clutch/Transmission Pulley
108
-
Disassembling the Clutch/Transmission Pulley
108
-
Checking the Clutch Transmission Pulley
109
-
Replacing the Transmission Pulley and the Bearing
110
-
The Clutch/Transmission Pulley Assembly
111
-
Assembling the Clutch Housing
112
-
The Final Transmission Assembly
113
-
Dismantling the Final Transmission Assembly
115
-
Detach the Final Transmission Gearbox Cover
115
-
Replacing Bearing (on the Side of the Transmission Gearbox Cover)
116
-
Replacing the Bearing (on the Side of the Crankcase)
117
-
Assembling the Final Gear Set
117
-
The Crankcase and the Crankshaft
119
-
Abnormal Noise from the Engine
120
-
Dismantling the Crankcase
121
-
Assembling the Crankcase
123
-
The Front Wheel, Front Brake, Front Buffer and the Front Fork
127
-
Poor Brake Function
129
-
The Front Wheel Wobbles
129
-
The Front Shock Is too Weak
129
-
The Front Shock Is Producing Abnormal Noise
129
-
Removing the Steering Handlebars
130
-
Assembling the Steering Handlebars
130
-
Front Wheel Removal and Check
131
-
Dismantling of Wheel
132
-
Assembly of Wheel
133
-
Assembling the Front Wheel
134
-
Dismounting the Front Shock
135
-
Dismantling the Front Shock
136
-
Front Fork Removal
138
-
Replacing the Ball Cone Race
138
-
Replacing the Upper Race
138
-
Assembling the Upper Race
139
-
Checking the Brake Lining
140
-
Dismantling the Front Brake
140
-
Assembling the Front Brake
140
-
The Rear Wheel, the Rear Brake and Rear Shock
143
-
Detaching the Rear Wheel
145
-
Checking the Rear Wheel
145
-
Assembling the Rear Wheel
145
-
Dismantling the Rear Brake
146
-
Assembling the Rear Brake
146
-
Dismounting the Rear Shock
147
-
Assembling the Rear Shock
148
-
The Battery and the Charging System
150
-
No Power Supply
152
-
Unstable Current
152
-
Low Voltage
152
-
Poor Charging System
152
-
Detaching the Battery
153
-
Checking the Charging Condition (Open Circuit Volt)
153
-
Charging
153
-
Testing Short Circuit
155
-
The Rectifying Voltage Stabilizer
156
-
Checking the Rectifying Voltage Regulator
156
-
The Magneto Charging Coil Check
157
-
Checking the Resistor
157
-
Dismounting the Magneto
157
-
Assembling the Magneto
159
-
Ignition System
163
-
High Tension Voltage too Low
165
-
High Tension Voltage Intermittent
165
-
High Tension Voltage Normal but no Spark
165
-
Intermittent High Tension Voltage
165
-
CDI Inspection
166
-
Ignition Coil Removal Steps
167
-
Magneto Pickup Coil Inspection
168
-
Charging Coil Inspection
168
-
Spark Advance Angle Inspection
168
-
Starter System
169
-
Starter Motor Does Not Turn
170
-
Starter Motor Turns over Slowly
170
-
Starter Motor Turns — Engine Does Not Rotate
170
-
Starter Motor Removal
171
-
Starter Disassembly
171
-
Starter Inspection
171
-
Starter Relay Inspection
173
-
To Inspect Starter Relay
174
-
Starter Motor Installation
174
-
Meters, Switches and Lighting System
177
-
If the Fuel Indicator Fails to Come on
177
-
If Light Is DIM
177
-
If the Dimmer Switch Does Not Operate Properly
177
-
Fuel Sensor Removal
178
-
Fuel Sensor Installation
178
-
Fuel Sensor Testing
178
-
Fuel Gauge Inspection
178
-
Handlebar Switches Inspection
179
-
Replacing the Horn Switch
180
-
Main Switch Inspection and Replacement
180
-
Brake Light Switch Inspection
181
-
Horn Inspection
181
-
To Replace the Horn Switch
181
-
Speedometer Removal and Reinstallation
181
-
Headlight Removal and Installation
182
-
Bulb Replacement and Installation
182
-
Taillight, Brake Light, Rear Position Light or License Light
182
-
Electric Scooter Assembly
183
-
Electric Scooter Assembly — Scheduled Maintenance
185
-
Electric Scooter Assembly Specifications
186
-
Electric Scooter Assembly Troubleshooting
186
-
Dismantling and Removing Rear Wheel Assembly
187
-
Rear Brake Assembly
188
-
Electric Motor Removal
190
-
Motor Disassembly
192
-
Motor Inspection
194
-
Battery Access and Power
195
-
Recharging Batteries
198
-
Retro Model Scooter Panels
199
-
Scooter Panels View
200
Advertisement
Jialing JL50QT-18 Service Manual (198 pages)
Brand: Jialing
|
Category: Scooter
|
Size: 23.82 MB
Advertisement
Related Products
-
Jialing JL50QT-X1/8
-
Jialing JL50QT-14
Jialing Categories
Scooter
More Jialing Manuals
Above on the page there are several PDF Manuals for JIALING Motorcycles, Mopeds.
Jialing is one of the leading motorcycle and scooter manufacturers in China.
The Jialing factory produces scooters, motorcycles and mopeds.
The history of the Jialing motorcycle company goes back to 1981, even then the engineers and workers of the plant began to produce their new motor vehicles using the
technology of the famous manufacturer HONDA.
Technologies for the production of motor vehicles have been improved over the years and even now we can say that the developments that have been achieved in Jialing are quite
comparable to their Japanese counterparts.
This is confirmed by the long-term practice of selling Jialing scooters.
The Jialing scooter range will satisfy any 2-wheeled vehicle driver.
Your choice on Jialing scooters should be determined by the following criteria — Japanese technology, guarantee, low fuel consumption, modern design, reasonable prices, wide
model range, reliability.
Some JIALING Motorcycle Service Manuals PDF above the page — CJ50F, JH600.
Since 1981, the cooperation between the Chinese corporation China Jialing Industrial and the Japanese Honda
Corporation led to the organization of scooter production at Jialing‘s facilities.
Scooters under the Jialing brand are not a Chinese copy of Japanese models, but the technology created by the second — after Quingi concern — in terms of the volume of motorcycle equipment production in China by a company using modern developments of the Japanese corporation
Honda in the field of design and technology.
In addition to scooters, Jialing produces, for example, the Jialing ATV-150E-2 ATV, equipped with a power unit with a working volume of 150 cc.
File Specifications:1277/1277239-jl50qt18.pdf file (10 Jun 2023) |
Accompanying Data:
Jialing JL50QT-18 Scooter PDF Service Manual (Updated: Saturday 10th of June 2023 06:01:55 AM)
Rating: 4.4 (rated by 92 users)
Compatible devices: Miku Max, Sprint, Redmi 1S, Mobility, SMART WHEELS, KX-FS6.5A, GULLIVER 50, D35.
Recommended Documentation:
Service Manual (Text Version):
(Ocr-Read Summary of Contents of some pages of the Jialing JL50QT-18 Document (Main Content), UPD: 10 June 2023)
-
Jialing JL50QT-18 User Manual
-
Jialing JL50QT-18 User Guide
-
Jialing JL50QT-18 PDF Manual
-
Jialing JL50QT-18 Owner’s Manuals
Recommended: Gryphon I GFS4400, SBHS100A — SPEAKER SYSTEM — MULTI LANGUAGE, VC30, 46-137, DX-TL4516U
Links & Tools
-
APRILIA WOULD LIKE TO THANK YOUfor choosing one of its products. We have compiled this booklet to provide a comprehensive overview of your vehicle’s quality features. Please, read itcarefully before riding the vehicle for the first time. It contains information, tips and precautions for using your vehi …
MOJITO 125 155
-
Mod Agent Scooter Owners Manual Safety warning: For your safety we recommend that you read the entire manual before assembling or using this scooter. Mod Scooters also recommends periodically reviewing all the information in this manual with any younger rider who may use this scooter. It is also good practice to …
Agent 2
-
OPERATING INSTRUCTIONSANDPARTS LIST FORMOTOR SCOOTER,———MODEL NUMBERS788.102 788.103788.104OneoftheabovenumbersistheModelNumberoftheAllstateMotorScooter.It willbefoundonaplateattachedtotheoutsideofthehingeddoordirectlyundertheseat.AlwaysmentiontheModelNumberinallcorrespondenceregardingtheScooterorwhenorder …
788.102 33
-
Ahora con APP SmartGyro Xtremecon función de bloqueoel patinete eléctrico más divertido y funcionalPotente MotorBrushlessBatería de litiode 8.8 Ah BMSHasta 30kmde autonomía*Velocidad máx.25 kms/horaTransmisiónDirectaSistema cierre 2.0nueva generaciónAPP por bluetoothcon función bloqueoFreno de disco Fabri …
Ziro 86
Product Types by Jialing:
- Scooter
Operating Impressions, Questions and Answers:
-
Bookmarks
Quick Links