Последнее обновление: 04.05.2023
-
Глава 1. Введение в Angular
-
Что такое Angular. Первый проект
-
Построение проекта
-
Первое приложение
-
-
Глава 2. Основы Angular
-
Компоненты
-
Модули
-
Загрузка приложения
-
Стили и шаблоны компонента
-
Привязка данных
-
Работа с компонентами
-
Взаимодействие между компонентами
-
Привязка к событиям дочернего компонента
-
Жизненный цикл компонента
-
Шаблонные переменные, ViewChild, ContentChild
-
Взаимодействие между модулями
-
-
Глава 3. Директивы
-
ngClass и ngStyle
-
Создание атрибутивных директив
-
Взаимодействие с пользователем, HostListener и HostBinding
-
Получение параметров в директивах
-
Структурные директивы ngIf, ngFor, ngSwitch
-
Создание структурных директив
-
-
Глава 4. Сервисы и dependency injection
-
Сервисы
-
Внедрение сервиса в другой сервис
-
Опциональные сервисы
-
Один сервис для всех компонентов
-
Иерархия сервисов
-
-
Глава 5. Работа с формами
-
Модуль FormsModule и директива NgModel
-
Получение и изменение модели
-
Состояние модели и валидация
-
Директива NgForm
-
Reactive Forms
-
-
Глава 6. HTTP и взаимодействие с сервером
-
HttpClient и отправка запросов
-
Объект Observable и библиотека RxJS
-
Обработка ошибок
-
Отправка данных в запросе
-
POST-запросы
-
-
Глава 7. Маршрутизация
-
Определение маршрутов
-
Создание ссылок
-
Параметры маршрута
-
Параметры строки запроса
-
Программная навигация
-
Дочерние маршруты
-
Guards
-
-
Глава 8. Pipes
-
Работа с pipes
-
Создание своих pipes
-
Pure и Impure Pipes
-
AsyncPipe
-
-
Глава 9. Дополнительные статьи
-
Webpack
-
Grid и CRUD-операции
-
- Глава 1. Введение в Angular
- Что такое Angular. Первый проект
- Построение проекта
- Первое приложение
- Глава 2. Основы Angular
- Компоненты
- Модули
- Загрузка приложения
- Стили и шаблоны компонента
- Привязка данных
- Работа с компонентами
- Взаимодействие между компонентами
- Привязка к событиям дочернего компонента
- Жизненный цикл компонента
- Шаблонные переменные, ViewChild, ContentChild
- Взаимодействие между модулями
- Глава 3. Директивы
- ngClass и ngStyle
- Создание атрибутивных директив
- Взаимодействие с пользователем, HostListener и HostBinding
- Получение параметров в директивах
- Структурные директивы ngIf, ngFor, ngSwitch
- Создание структурных директив
- Глава 4. Сервисы и dependency injection
- Сервисы
- Внедрение сервиса в другой сервис
- Опциональные сервисы
- Один сервис для всех компонентов
- Иерархия сервисов
- Глава 5. Работа с формами
- Модуль FormsModule и директива NgModel
- Получение и изменение модели
- Состояние модели и валидация
- Директива NgForm
- Reactive Forms
- Глава 6. HTTP и взаимодействие с сервером
- HttpClient и отправка запросов
- Объект Observable и библиотека RxJS
- Обработка ошибок
- Отправка данных в запросе
- POST-запросы
- Глава 7. Маршрутизация
- Определение маршрутов
- Создание ссылок
- Параметры маршрута
- Параметры строки запроса
- Программная навигация
- Дочерние маршруты
- Guards
- Глава 8. Pipes
- Работа с pipes
- Создание своих pipes
- Pure и Impure Pipes
- AsyncPipe
- Глава 9. Дополнительные статьи
- Webpack
- Grid и CRUD-операции
YooMoney:
410011174743222
Перевод на карту
Номер карты:
4048415020898850
Время на прочтение
7 мин
Количество просмотров 270K
Содержание
1 Введение в AngularJS
2 Engineering concepts in JavaScript frameworks
3 Modules
4 Understanding $scope
5 Controllers
6 Services and Factories
7 Templating with the Angular core
8 Directives (Core)
9 Directives (Custom)
10 Filters (Core)
11 Filters (Custom)
12 Dynamic routing with $routeProvider
13 Form Validation
14 Server communication with $http and $resource
1 Введение в AngularJS
Angular – MVW-фреймворк для разработки качественных клиентских веб-приложений на JavaScript. Он создан и поддерживается в Google и предлагает взглянуть на будущее веба, на то, какие новые возможности и стандарты он готовит для нас.
MVW означает Model-View-Whatever (модель – вид – что угодно), то есть гибкость в выборе шаблонов проектирования при разработке приложений. Мы можем выбрать модели MVC (Model-View-Controller) или MVVM (Model-View-ViewModel).
Этот обучающий материал задумывался как отправная точка для изучения AngularJS, его концепций и API, чтобы помочь вам создавать великолепные веб-приложения современным способом.
AngularJS позиционирует себя как фреймворк, улучшающий HTML. Он собрал концепции из разных языков программирования, как JavaScript, так и серверных, и делает из HTML также нечто динамическое. Мы получаем подход, основанный на данных, к разработке приложений. Нет нужды обновлять Модель, DOM или делать какие-то другие затратные по времени операции, например, исправлять ошибки браузеров. Мы концентрируемся на данных, данные же заботятся об HTML, а мы просто занимаемся программированием приложения.
Инженерные концепции в фрейморках JavaScript
Позиция AngularJS по работе с данными и другими инженерными концепциями отличается от таких фреймворков, как Backbone.js and Ember.js. Мы довольствуемся уже известным нам HTML, а Angular самостоятельно его улучшает. Angular обновляет DOM при любых изменениях Модели, которая живёт себе в чистых Объектах JavaScript с целью связи с данными. Когда обновляется Модель, Angular обновляет Объекты, которые содержат актуальную информацию о состоянии приложения.
2.1 MVC и MVVM
Если вы привыкли делать статичные сайты, вам знаком процесс создания HTML вручную, кусочек за кусочком, когда вы вписываете в страницу нужные данные и повторяете сходные части HTML снова и снова. Это могут быть столбцы решётки, структура для навигации, список ссылок или картинок, и т.п. Когда меняется одна маленькая деталь, приходится обновлять весь шаблон, и все последующие его использования. Также приходится копировать одинаковые куски кода для каждого элемента навигации.
Держитесь за кресло – в Angular существует разделение обязанностей и динамический HTML. А это значит, что наши данные живут в Модели, наш HTML живёт в виде маленького шаблона, который будет преобразован в Вид, а Контроллер мы используем для соединения двух этих понятий, обеспечивая поддержку изменений Модели и Вида. То есть, навигация может выводиться динамически, создаваясь из одного элемента списка, и автоматически повторяться для каждого пункта из Модели. Это упрощённая концепция, позже мы ещё поговорим о шаблонах.
Разница между MVC и MVVM в том, что MVVM специально предназначен для разработки интерфейсов. Вид состоит из слоя презентации, ВидМодель содержит логику презентации, а Модель содержит бизнес-логику и данные. MVVM была разработана для облегчения двусторонней связи данных, на чём и процветают фреймворки типа AngularJS. Мы сосредоточимся на пути MVVM, так как в последние годы Angular склоняется именно туда.
2.2 Двусторонняя связь данных
Двусторонняя связь данных – очень простая концепция, предоставляющая синхронизацию между слоями Модели и Вида. Изменения Модели передаются в Вид, а изменения Вида автоматически отражаются в Модели. Таким образом, Модель становится актуальным источником данных о состоянии приложения.
Angular использует простые Объекты JavaScript для синхронизации Модели и Вида, в результате чего обновлять любой из них легко и приятно. Angular преобразовывает данные в JSON и лучше всего общается методом REST. При помощи такого подхода проще строить фронтенд-приложения, потому что всё состояние приложения хранится в браузере, а не передаётся с сервера по кусочкам, и нет опасения, что состояние будет испорчено или потеряно.
Связываем мы эти значения через выражения Angular, которые доступны в виде управляющих шаблонов. Также мы можем связывать Модели через атрибут под названием ng-model. Angular использует свои атрибуты для разных API, которые обращаются к ядру Angular.
2.3 Инъекция зависимостей (Dependency Injection, DI)
DI – шаблон разработки программ, который определяет, как компоненты связываются со своими зависимостями. Инъекция — это передача зависимости к зависимому Объекту, и эти зависимости часто называют Сервисами.
В AngularJS мы хитрым образом используем аргументы функции для объявления нужных зависимостей, а Angular передаёт их нам. Если мы забудем передать зависимость, но сошлёмся на неё там, где она нужна нам, Сервис будет не определен и в результате произойдёт ошибка компиляции внутри Angular. Но не волнуйтесь, angular выбрасывает свои ошибки и они очень просты в отладке.
2.4 Приложения на одну страницу (Single Page Application, SPA), управление состоянием и Ajax (HTTP)
В приложении на одну страницу (SPA) либо весь необходимый код (HTML, CSS and JavaScript) вызывается за одну загрузку страницы, либо нужные ресурсы подключаются динамически и добавляются к странице по необходимости, обычно в ответ на действия пользователя. Страница не перезагружается во время работы, не передаёт управление другой странице, хотя современные технологии из HTML5 позволяют одному приложению работать на нескольких логических страницах. Взаимодействие с SPA часто происходит при помощи фонового общения с сервером.
В более старых приложениях, когда состояние программы хранилось на сервере, случались различия между тем, что видит пользователь и тем, что хранилось на сервере. Также ощущалась нехватка состояния приложения в модели, так как все данные хранились в шаблонах HTML и динамичными не являлись. Сервер подготавливал статичный темплейт, пользователь вводил туда информацию и браузер отправлял её обратно, после чего происходила перезагрузка страницы и бэкенд обновлял состояние. Любое несохранённое состояние терялось, и браузеру нужно было скачивать все данные после обновления страниц заново.
Времена изменились, браузер хранит состояние приложение, сложная логика и фреймворки приобрели популярность. AngularJS хранит состояние в браузере и передаёт изменения при необходимости через Ajax (HTTP) с использованием методом GET, POST, PUT и DELETE. Красота в том, что сервер может быть независим от фротенда, а фронтенд – от сервера. Те же самые сервера могут работать с мобильными приложениями с совершенно другим фронтендом. Это даёт нам гибкость, так как на бэкенде мы работаем с JSON-данными любым удобным нам способом на любом серверном ЯП.
2.5 Структура приложения
У Angular есть разные API, но структура приложения обычно одна и та же, поэтому почти все приложения строятся сходным образом и разработчики могут включаться в проект без усилий. Также это даёт предсказуемые API и процессы отладки, что уменьшает время разработки и быстрое прототипирование. Angular построен вокруг возможности тестирования («testability»), чтобы быть наиболее простым как в разработке, так и в тестировании.
Давайте изучать.
3 Модули
Все приложения создаются через модули. Модуль может зависеть от других, или быть одиночным. Модули служат контейнерами для разных разделов приложения, таким образом делая код пригодным для повторного использования. Для создания модуля применяется глобальный Object, пространство имён фреймворка, и метод module.
3.1 Сеттеры (setters).
У приложения есть один модуль app.
angular.module('app', []);
Вторым аргументом идёт [] – обычно этот массив содержит зависимости модуля, которые нам нужно подключить. Модули могут зависеть от других модулей, которые в свою очередь тоже могут иметь зависимости. В нашем случае массив пустой.
3.2 Геттеры (Getters)
Для создания Controllers, Directives, Services и других возможностей нам надо сослаться на существующий модуль. В синтаксисе есть незаметное различие – мы не используем второй аргумент.
angular.module('app');
3.3 Работа модулей
Модули могут храниться и вызываться и через переменную. Вот пример хранения модуля в переменной.
var app = angular.module('app', []);
Теперь мы можем использовать переменную app для построения приложения.
3.4 HTML бутстрап
Для описания того, где приложение находится в DOM, а обычно это элемент <html>, нам надо связать атрибут ng-app с модулем. Так мы сообщаем Angular, куда подгрузить наше приложение.
<html ng-app="app">
  <head></head>
  <body></body>
</html>
Если мы грузим файлы с JavaScript асинхронно, нам надо подгрузить приложение вручную через angular.bootstrap(document.documentElement, [‘app’]);.
4 Разбираемся со $scope
Одно из основных понятий в программировании – область видимости. В Angular область видимости – это один из главных объектов, который делает возможным циклы двусторонней связи данных и сохраняет состояние приложения. $scope – довольно хитрый объект, который не только имеет доступ к данным и значениям, но и предоставляет эти данные в DOM, когда Angular рендерит наше приложение.
Представьте, что $scope – это автоматический мост между JavaScript и DOM, хранящий синхронизированные данные. Это позволяет проще работать с шаблонами, когда мы используем при этом синтакс HTML, а Angular рендерит соответствующие значения $scope. Это создаёт связь между JavaScript и DOM. В общем, $scope играет роль ViewModel.
$scope используется только внутри Контроллеров. Там мы привязываем данные Контроллера к Виду. Вот пример того, как мы объявляем данные в Контроллере:
$scope.someValue = 'Hello';
Чтобы это отобразилось в DOM, мы должны присоединить Контроллер к HTML и сообщить Angular, куда вставлять значение.
<div ng-controller="AppCtrl">
  {{ someValue }}
</div>
Перед вами концепция области видимости Angular, подчиняющаяся некоторым правилам JavaScript в плане лексических областей видимости. Снаружи элемента, к которому присоединён Контроллер, данные находятся вне области видимости – так же, как переменная вышла бы за область видимости, если б мы сослались на неё снаружи её области видимости.
Мы можем привязать любые типы JavaScript $scope. Таким образом мы берём данные от сервиса, общающегося с сервером, и передаём их во View, слой презентации.
Чем больше мы создадим Контроллеров и связей с данными, тем больше появляется областей видимости. Разобраться в их иерархии ничего не стоит – здесь нам поможет переменная $rootScope
Часть 2
Добро пожаловать в Angular!
Этот учебник познакомит вас с основными возможностями Angular и поможет создать сайт электронной коммерции с каталогом, корзиной и формой оформления заказа.
Чтобы помочь вам сразу же начать работу, в этом уроке используется готовое приложение, которое вы можете изучить и изменить в интерактивном режиме на StackBlitz — без необходимости создания локальной рабочей среды. StackBlitz — это браузерная среда разработки, в которой вы можете создавать, сохранять и совместно использовать проекты, используя различные технологии.
Предварительные условия
Чтобы извлечь максимальную пользу из этого учебника, вы должны иметь базовое представление о следующем.
- HTML
- JavaScript
- TypeScript
Ознакомьтесь с примером приложения
Вы создаете приложения Angular с помощью компонентов. Компоненты определяют области ответственности в пользовательском интерфейсе, которые позволяют вам повторно использовать наборы функциональных возможностей пользовательского интерфейса.
Компонент состоит из трех элементов:
| Часть компонента | Детали |
|---|---|
| Класс компонента | обрабатывает данные и функциональность |
| HTML-шаблон | Определяет пользовательский интерфейс |
| Стили, специфичные для компонента | Определяют внешний вид и функциональность |
Это руководство демонстрирует создание приложения со следующими компонентами:
| Компоненты | Детали |
|---|---|
<app-root> |
Первый загружаемый компонент и контейнер для других компонентов |
<app-top-bar> |
Название магазина и кнопка оформления заказа |
<app-product-list> |
Список товаров |
<app-product-alerts> |
Компонент, содержащий оповещения приложения |
Для получения дополнительной информации о компонентах смотрите Введение в компоненты.
Создайте проект примера
Чтобы создать образец проекта, сгенерируйте готовый образец проекта в StackBlitz. Чтобы сохранить свою работу:
- Войдите в StackBlitz.
- Создайте проект, который вы сгенерировали.
- Периодически сохраняйте.
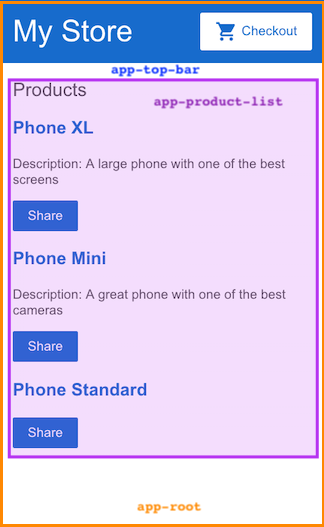
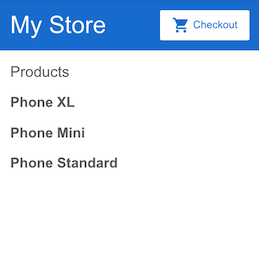
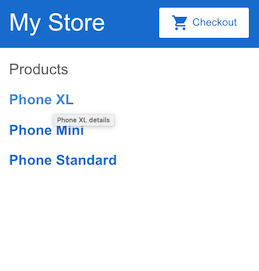
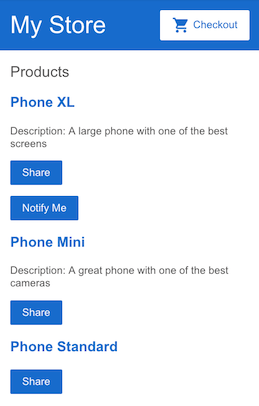
В StackBlitz панель предварительного просмотра справа показывает начальное состояние примера приложения. Предварительный просмотр включает две области:
- Верхняя панель с названием магазина,
My Store, и кнопкой оформления заказа - Заголовок для списка товаров,
Products.
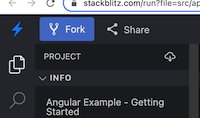
В разделе проекта слева показаны исходные файлы, из которых состоит приложение, включая инфраструктуру и файлы конфигурации.
Когда вы создаете примеры приложений StackBlitz, которые сопровождают учебные пособия, StackBlitz создает для вас исходные файлы и макеты данных. Файлы, которые вы используете на протяжении всего учебника, находятся в папке src.
Более подробную информацию о том, как использовать StackBlitz, см. в документации по StackBlitz.
Создание списка продуктов
В этом разделе вы обновите приложение для отображения списка товаров. Вы будете использовать предопределенные данные продуктов из файла products.ts и методы из файла product-list.component.ts.
Этот раздел поможет вам отредактировать HTML, также известный как шаблон.
1. В папке product-list откройте файл шаблона product-list.component.html.
2. Добавьте структурную директиву *ngFor для <div>, как показано ниже.
|
При использовании *ngFor, <div> повторяется для каждого товара в списке.
Структурные директивы формируют или изменяют структуру DOM, добавляя, удаляя и манипулируя элементами.
Более подробную информацию о структурных директивах смотрите в Structural directives.
3. Внутри <div> добавьте <h3> и {{ product.name }}.
Утверждение {{ product.name }} является примером синтаксиса интерполяции Angular.
Интерполяция {{ }} позволяет отобразить значение свойства в виде текста.
|
Панель предварительного просмотра обновляется для отображения названия каждого продукта в списке.
4. Чтобы сделать каждое название товара ссылкой на его подробную информацию, добавьте элемент <a> вокруг {{ product.name }}.
5. Установите заголовок как название продукта, используя синтаксис связывания свойств [ ], как показано ниже:
|
На панели предварительного просмотра наведите курсор на название продукта, чтобы увидеть связанное значение свойства name, которое представляет собой название продукта плюс слово «details».
Привязка свойства [ ] позволяет использовать значение свойства в выражении шаблона.
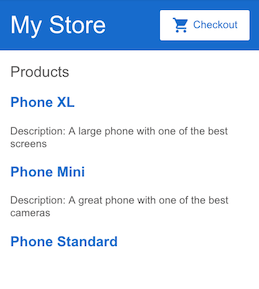
6. Добавьте описания товаров.
В элементе <p> используйте директиву *ngIf, чтобы Angular создавал элемент <p> только в том случае, если у текущего товара есть описание.
1 2 3 4 5 6 7 8 9 10 11 12 13 |
|
Теперь приложение отображает название и описание каждого продукта в списке.
Обратите внимание, что у последнего продукта нет параграфа описания.
Angular не создает элемент <p>, потому что свойство description продукта пустое.
7. Добавьте кнопку, чтобы пользователи могли поделиться товаром. Привяжите событие click кнопки к методу share() в product-list.component.ts. Привязка события использует набор круглых скобок, ( ), вокруг события, как в событии (click) для элемента <button>.
1 2 3 4 5 6 7 8 9 10 11 12 13 14 15 |
|
Каждый продукт теперь имеет кнопку Поделиться.
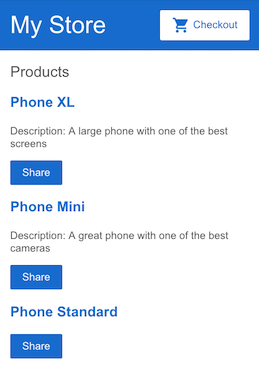
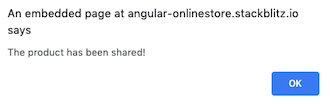
Нажатие на кнопку Share вызывает оповещение, в котором говорится: «Продуктом поделились!».
Редактируя шаблон, вы изучили некоторые из наиболее популярных возможностей шаблонов Angular. Для получения дополнительной информации смотрите Введение в компоненты и шаблоны.
Передача данных дочернему компоненту
В настоящее время список продуктов отображает название и описание каждого продукта. Компонент ProductListComponent также определяет свойство products, которое содержит импортированные данные для каждого продукта из массива products в products.ts.
Следующим шагом будет создание новой функции оповещения, которая использует данные о продукте из ProductListComponent. Оповещение проверяет цену продукта и, если цена превышает $700, отображает кнопку Notify Me, которая позволяет пользователям подписаться на уведомления, когда продукт поступит в продажу.
В этом разделе мы рассмотрим создание дочернего компонента ProductAlertsComponent, который может получать данные от своего родительского компонента ProductListComponent.
1. Нажмите на знак плюс над текущим терминалом, чтобы создать новый терминал для выполнения команды создания компонента.

2. В новом терминале создайте новый компонент с именем product-alerts, выполнив следующую команду:
|
Генератор создает начальные файлы для трех частей компонента:
product-alerts.component.tsproduct-alerts.component.htmlproduct-alerts.component.css
3. Откройте product-alerts.component.ts.
Декоратор @Component() указывает, что следующий класс является компонентом.
@Component() также предоставляет метаданные о компоненте, включая его селектор, шаблоны и стили.
|
Ключевые особенности @Component() следующие:
selector,app-product-alerts, идентифицирует компонент. По соглашению, селекторы компонентов Angular начинаются с префиксаapp-, за которым следует имя компонента.- Имена файлов шаблона и стиля ссылаются на HTML и CSS компонента.
- Определение
@Component()также экспортирует классProductAlertsComponent, который управляет функциональностью компонента.
4. Чтобы настроить ProductAlertsComponent для получения данных о продукте, сначала импортируйте Input из @angular/core.
|
5. В определении класса ProductAlertsComponent определите свойство product с декоратором @Input().
Декоратор @Input() указывает, что значение свойства передается от родителя компонента, ProductListComponent.
|
6. Откройте product-alerts.component.html и замените абзац placeholder на кнопку Notify Me, которая появляется, если цена товара превышает $700.
|
7. Генератор автоматически добавил ProductAlertsComponent в AppModule, чтобы сделать его доступным для других компонентов приложения.
1 2 3 4 5 6 7 8 9 10 11 12 |
|
8. Наконец, чтобы отобразить ProductAlertsComponent в качестве дочернего компонента ProductListComponent, добавьте элемент <app-product-alerts> в product-list.component.html. Передайте текущий продукт в качестве входных данных компоненту, используя привязку свойств.
|
Новый компонент оповещения о продукте принимает продукт из списка продуктов. После ввода он показывает или скрывает кнопку Уведомить меня, основываясь на цене товара. Цена Phone XL превышает $700, поэтому кнопка Notify Me появляется на этом продукте.
Передача данных родительскому компоненту
Чтобы кнопка Notify Me работала, дочерний компонент должен уведомлять и передавать данные родительскому компоненту. Компонент ProductAlertsComponent должен испускать событие, когда пользователь нажимает Notify Me, а компонент ProductListComponent должен реагировать на это событие.
В новые компоненты Генератор Angular включает пустой constructor(), интерфейс OnInit и метод ngOnInit(). Поскольку в этих шагах они не используются, в следующих примерах кода они опущены для краткости.
1. В product-alerts.component.ts импортируйте Output и EventEmitter из @angular/core.
|
2. В классе компонента определите свойство notify с декоратором @Output() и экземпляром EventEmitter().
Настройка ProductAlertsComponent с @Output() позволяет ProductAlertsComponent испускать событие при изменении значения свойства notify.
|
3. В product-alerts.component.html обновите кнопку Notify Me с привязкой к событию для вызова метода notify.emit().
|
4. Определите поведение, которое происходит, когда пользователь нажимает на кнопку.
Родитель, ProductListComponent — не ProductAlertsComponent— действует, когда дочерний компонент поднимает событие.
В product-list.component.ts определите метод onNotify(), аналогичный методу share().
1 2 3 4 5 6 7 8 9 10 11 12 13 |
|
5. Обновите ProductListComponent для получения данных от ProductAlertsComponent.
В product-list.component.html, привяжите <app-product-alerts> к методу onNotify() компонента списка продуктов.
<app-product-alerts> — это то, что отображает кнопку Notify Me.
|
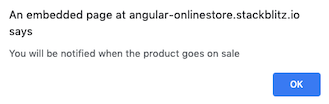
6. Нажмите кнопку Уведомить меня, чтобы запустить оповещение следующего содержания: «Вы будете уведомлены, когда товар поступит в продажу».
Для получения дополнительной информации о взаимодействии между компонентами смотрите Взаимодействие компонентов.
Что дальше
В этом разделе вы создали приложение, которое итерирует данные и содержит компоненты, взаимодействующие друг с другом.
Чтобы продолжить изучение Angular и разработку этого приложения:
- Перейдите к разделу In-app navigation, чтобы создать страницу подробностей о продукте.
- Перейдите к Развертывание, чтобы перейти к локальной разработке или развернуть приложение на Firebase или собственном сервере.
 28.02.2022
Angular is unequivocally one of the most widely-used and popular JavaScript web application frameworks. Apart from the fact that Angular is loaded with powerful features, another big reason for its widespread popularity is that it is developed and maintained by Google.
Before proceeding further, one important thing that you should be clear about is that we are talking about the Angular framework, which represents the Angular version2 and above. The first-ever version of Angular is known as AngularJS and is quite different from Angular.
It simply indicates that you are interested in learning Angular for you to be reading this guide. If you want to make a career in web development and that too with JavaScript as your main programming language, then you are on the right path.
However, before you start learning Angular, you must understand that this JS framework has a steep learning curve. Also, while Angular works completely fine with JavaScript, the programming language preferred for Angular web development is TypeScript, a JS version developed by Microsoft.
To put it simply, all the JavaScript programs are also TypeScript programs, but the opposite is not true. It’s similar to saying that every square is a rectangle, but every rectangle is not a square. Here, the square is a JavaScript program, and the rectangle is a TypeScript program.
In all, if you want to master Angular, you will need serious determination and perseverance, especially if you are an aspiring web developer.
Whether you are looking for some good reasons to learn Angular or want guidance on how you can start learning Angular, you have landed just at the right place. This detailed blog covers all the essential aspects that one should know for learning Angular effectively. So, without wasting any more time, let’s get started.
Why Should You Learn Angular?
A beginner who is willing to build a promising future in web development must have suggestions to learn Angular. Also, you may have wondered if it would be a good idea to learn Angular in the first place.
To be honest, there is no straightforward answer to this as it completely depends on your requirements. For instance, if you are ready to go through a challenging learning experience, and want to code and manage projects in a highly organized manner, then Angular can be your best pick.
Here are some of the key features of Angular that often become the reasons why many geeks pick this leading JS framework as their tool of choice for front-end development:
1. Ideal for Developing SPAs (Single-Page Applications)
Building responsive and high-performance single-page applications become easier with Angular. If you don’t know, a SPA is a web application that does not require loading multiple HTML pages as all the data and content are injected dynamically in a single HTML page. The content or elements are displayed or removed according to the user’s actions on the page.
Single-page applications are extremely fast, easy to develop and debug, highly reusable, and offer a better user experience. All these characteristics have made SPAs a popular choice among businesses and developers alike. Angular streamlines the process of developing SPAs, making this framework of great value for developers.
2. Better Management With Components
Angular helps you to streamline the process of web development and also allows sound management of all the application code through components. A component is considered to be the basic building block of an Angular application. Every component has 3 main elements that are:
- An HTML Template: defines the structure of the component that is to be rendered within the app,
- A CSS Stylesheet:decides the look and feel of the component, and
- A TypeScript File: This contains the code that defines the behavior of the component.
Usually, a component is created for each application to make it easier to keep the whole application well-organized and easy to manage.
3. Quick Production with the Angular CLI
Creating the basic structure of an Angular application and even adding new components and services could have been quite difficult and time-consuming without the Angular CLI.
With the Angular command-line interface, creating a new project with all the basic dependencies, files and directories are just a command away. To create a new project, you simply need to use the ng new command followed by the project’s name.
Also, you can easily add new components and services to your project by simply executing single-line commands in the Angular CLI. Also, you can build your Angular app, run it on a local server, and do more by using various Angular CLI commands. All this leads to quicker app production and ensures more focus on writing code rather than setting up project files.
4. Animation Support
With Angular, one can build modern apps with a myriad of functionalities. However, there’s one more thing that you can add to your apps without any significant challenge, and that is animation. Angular comes with native support for complex animations that allow you to enhance your apps’ overall appearance and user experience.
The animation API offered by the JS web framework is easy to use and offers a variety of functions. So, you can introduce animations in the various sections of your app that tend to gain users’ attention and prompt them to engage with the app in a better way.
5. Cross-Platform Framework
Being a cross-platform framework is one of the most notable reasons for developers to shower Angular with love. It not only lets you create innovative and progressive web applications but also native mobile apps as well as desktop apps.
By gaining the knowledge and experience working with Angular, you can create applications for almost all the major platforms, be it Android, iOS, Windows, macOS, or Linux. Surely, you have to take assistance from various other technologies, but Angular will play a pivotal role in developing apps for these platforms right from scratch.
This feature gives you the flexibility to expand your horizons when it comes to app development. Also, all this concludes that Angular is one of the most power-packed and versatile JS frameworks out there.
6. Type Checking Minimizes Coding Errors
As mentioned earlier, the programming language used by Angular is TypeScript. As you know, Angular completely supports JavaScript code as well as all other libraries like jQuery. The intention of using TypeScript is to curtail code error to the minimum possible.
TypeScript is a strongly typed language that allows you to declare the type of variables and data structures. This allows the detection of errors before the code enters execution. The type of declared variables and data structures are validated in runtime so that no conflicts occur later during code execution.
In all, TypeScript allows faster development and, at the same time, reduces the chances of errors in code that come in handy, especially when creating large and complex applications.
So, these are some of the most common reasons that make Angular a viable choice for developing top-notch applications. Now, if you have decided to learn the popular JS framework, it’s time to move forward and see how you can actually embark on the journey to become an Angular developer.
Prerequisites for Learning Angular
Angular is widely used for web development, and there are certain requirements that you must meet to learn Angular. By checking off all the prerequisites, you can make sure that you proceed in the right direction and learn the popular web framework in the best possible way. The prerequisites for learning Angular are as follows:
- Sound knowledge of HTML, CSS, and JavaScript.
- The basic idea of the MVC (Model-View-Controller) architecture.
- Basic knowledge of Node.js and npm (Node Package Manager).
- Experience working with the command line.
- Exposure to TypeScript.
The first prerequisite mentioned above, i.e., knowledge of HTML, CSS, and JavaScript, is essential for learning Angular. The other prerequisites can be easily satisfied, and you can learn the basics of MVC, Node.js, npm, and command-line pretty quickly. Also, if you know JavaScript quite well, picking up the fundamentals of TypeScript won’t be an issue.
Nonetheless, as soon as you meet all the requirements stated above, take a step ahead and choose an IDE to work with Angular.
IDE
As you might already know, the need for a source code editor for writing code and an IDE (Integrated Development Environment) comes with it. Also, IDE combines various tools and features, including a debugger, compiler, version control, code completion and refactoring, and syntax highlighting that makes it a complete package for developing, testing, and deploying apps.
You can undoubtedly use a dedicated source-code editor like Visual Studio Code or Atom to write Angular code. Still, eventually, you may need to switch to an IDE to ensure faster and efficient development. So, it would be a little better to start your journey with some IDE; else, you can go with a source-code editor too.
Below are 3 of the most popular IDEs to use for Angular development:
1. Angular IDE
Anyone looking for a dedicated IDE for Angular can consider using Angular IDE. It is one of the most powerful IDEs out there for developing Angular applications of any scale.
The best thing about this IDE is that it is utterly suitable for beginners who want to build small projects to test their skills to expert professionals required to develop and maintain enterprise-grade web applications. Also, you need to note that this is a paid IDE, and its pricing starts at $5 per user per month.
Key Features
- Comes integrated with Angular CLI, which allows you to generate components and services for your app quickly.
- The Angular control panel makes it possible to work and manage a complete project from one single place.
- Auto-completion and real-time validation of code.
- Supports TypeScript debugging.
- Offers a free 45-day trial.
2. WebStorm
This is probably one of the most popular and widely used paid IDEs for web development and supports Angular. WebStorm is a product of the world-renowned IT company JetBrains. While WebStorm is a dedicated JavaScript IDE, many professionals worldwide use it for developing Angular applications.
One needs to integrate the Angular and AngularJS plugin to start developing apps using the integrated development environment. Nonetheless, WebStorm has a very intuitive user interface, allowing beginners to use it with complete ease.
Key Features
- Supports HTML, CSS, and JavaScript.
- Its smart editor comes with auto-code completion and code refactoring features.
- You can even create, run, and debug the backend of your Angular application developed with Node.js.
- IT allows integration with popular version control systems, including Git and Mercurial.
3. StackBlitz
StackBlitz is different from the two IDEs mentioned above because it is a cloud-based or, you can say, online IDE. As such, you do not need to install it on your system for using it to develop Angular apps. All you need is a web browser and an active internet connection for using StackBlitz to create Angular projects.
Also, it is worth noting that Visual Studio Code powers StackBlitz online IDE, so you can always expect reliable performance from it. Going for this IDE is a great choice for you if you do not want the hassle of downloading, installing, and managing an IDE for Angular on your system.
Key Features
- Allows setting up an Angular project with only a few clicks.
- Adding or removing dependencies is quite easy.
- The Preview screen allows you to visualize all the changes that you made to code in real-time.
- You can share project links with others collaboratively.
- Offers a free version, which comes with all the features that you need as a beginner.
How to Learn Angular?
Learning Angular can become a mess if you don’t have the right set of resources. As you know, there is plenty of study material and guides available on the internet that can help you get familiar with the underlying concepts of Angular. However, you should know that not all of them are easy to understand.
You will likely need to go through many resources and follow them to see which one works best for you. Obviously, this is time-consuming, and you may lose interest in learning Angular if you do not find some learning material that you can stick to.
To ensure that you start learning with the right set of resources, check out the list of best Angular tutorials available out there. The biggest advantage of these tutorials is that they are laid out in a well-planned manner, which is especially helpful for beginners to ingest the concepts in Angular. Here are the best tutorials that you can consider for learning Angular effectively:
Top 5 Angular Tutorials
1. Angular — The Complete Guide (2023 Edition) — Udemy
Udemy is probably the best online learning platform that you can rely on for learning several skills, and the same stands true when it comes to Angular development. This tutorial available on Udemy is exclusively crafted for beginners who want to develop a deep understanding of the Angular framework.
Created by Maximilian Schwarzmüller, this Angular tutorial has an average rating of 4.6 stars out of 5, and the total number of students enrolled for it stands at an impressive count of 495K. Also, it is a 34+ hours long tutorial that combines several video lessons, tests, and PDF resources. Along with the basics, you will learn how to debug Angular code, make HTTP requests, add animations, and much more with this tutorial.
2. The Complete Angular Course: Beginner to Advanced — Udemy
This is yet another valuable Angular tutorial that you will find on the Udemy platform. This tutorial is created by Mosh Hamedani, who is a professional software engineer. Whether you want to learn the basics of Angular or want to move a step further and master the advanced concepts, this tutorial can help you with both.
The total length of this tutorial is more than 29 hours, and it has been divided into 25 sections. Various topics covered by this tutorial include TypeScript and Angular fundamentals, directives, reactive forms, routing and navigation, animation, unit testing, and integration testing. Also, it will guide you through creating multiple projects so that you can implement Angular concepts and observe how they are useful in real-world situations.
3. Angular Fundamentals — Pluralsight
To master Angular, it is extremely important to grasp its basics, and this tutorial can help you with that. Being one of the top-rated Angular tutorials on Pluralsight, you can rely on it to develop a solid understanding of various concepts of Angular. You will learn about components, services, pipes, routing and navigation, directives, unit testing, and more.
The Angular tutorial has been designed collectively by two Pluralsight authors, namely Jim Copper and Joe Earnes. The tutorial has been divided into several sections to ease the learning, and the overall run time is more than 9 hours. Also, each section contains short-length video lectures that will help you learn effectively.
4. An Angular 5 Tutorial: Step by Step Guide to Your First Angular 5 App — Toptal
This is among the most popular Angular tutorials available over the web. This tutorial leverages Angular 5, which is older compared to the current version of Angular, i.e., Angular 12. However, this tutorial is good if you want to learn Angular’s basics and create a basic application to see the concepts in action.
This Angular tutorial is created by Sergey Moiseev, who is a full-stack software engineer. This tutorial will get familiar with TypeScript, Angular CLI, components, and reactive forms. Also, you will use Firebase to create the back-end and Nginx to serve the application that you’ll be developing with this tutorial.
You will be able to learn many things that’ll be helpful in your quest to become an Angular developer. However, you need to keep in mind that the whole tutorial is available as text embedded on a single web page. So, if you are someone who is not in favor of reading a lot, this tutorial might not be the best pick for you.
5. Complete Angular Tutorial For Beginners — TekTutorialsHub
This tutorial offered by TekTutorialsHub is another great option for you to learn the basics of Angular. Although there are no video lectures included, the way concepts are explained commendable and can prove to be of great help for anyone new to Angular. The tutorial comprises text and is divided into several sections to ensure a fruitful learning experience.
The tutorial covers almost everything you need to start developing functional Angular apps, from introducing Angular to explaining core concepts like components, directives, pipes, services and dependency injection, and modules. Moreover, the concepts are explained and examples to help you observe how things work on the ground level.
Free Tutorials
While many of us believe that tutorials available for free are not very effective, the reality is quite different. While there are plenty of free tutorials that promise an exceptional learning experience, there’s one particular tutorial that you should consider and is mentioned below:
1. Learn Angular Step-by-step — YouTube
This tutorial or video playlist available on YouTube will help you learn Angular efficiently. 19 videos will guide you through the basic concepts of Angular, and also you will be creating a web app with the help of Firebase and Reactive programming.
At the end of this tutorial, you will learn about DOM manipulation, components, services, and RxJs observables. Also, you will be making http requests to get data from an API and render it on your Angular app; however, you need to keep in mind that Angular 2 and Angular 4 are utilized in the tutorial, but the concepts are pretty much the same even if you consider the latest Angular version.
Official Documentation
If you want to dive deep into Angular concepts, check out the official Angular documentation. You can get a quick introduction to Angular, learn how to set up a local environment on your system for Angular development, and dig into the fundamental concepts of Angular with this documentation.
The documentation is well-managed and explains everything required to take your Angular development skills to the next level. Also, some tutorials are provided within the documentation to learn by practice and get a good head start working with the Angular code.
Angular Projects
Being an aspiring Angular developer, you must polish your skills and showcase them to grab a good job; however, merely getting familiar with the fundamentals of Angular will not do much good. So, what’s important is that you work on some projects on your own to hone your skills and add your experience developing these projects on your resume.
So, if you are ready to test your learning and need some good project ideas to work on, don’t worry; we’ve got you covered. Following are some of the most popular Angular projects that you can consider working on to gain hands-on experience:
1. Notepad Web Application
This is one of the simplest Angular projects that are quite popular among beginners. The Notepad application allows users to create, modify, and delete notes. It is completely up to you how you want to sort the notes, but it is advisable to organize them per the time they’ve been added or modified.
While working on this project, you can either use mock APIs or create a backend with Node.js and use MongoDB as your database. This is important because the notes data you’ll create need to be accessed and rendered within the app using REST APIs. This will also help you to become familiar with the backend development using Node.js and MongoDB.
2. Chat App
Chat applications are highly popular, and Angular is a preferable choice for making a fully functional chat app, but as a beginner, you need to create a simple chat app to learn how things work. Once you get a good idea of how things work, you can add more functionality to your chat app.
While creating a chat app, you need to use concepts like services, dependency injection, RxJS, observables, and more. Your chat app should allow two users to connect and send messages in real-time. Also, create a server that will establish a connection between users and deliver messages.
If you want to make this project a bit more challenging and interesting, you can add functionalities like user login and authentication, chat rooms, etc. You can use popular libraries like socket.io to enable your chat app with real-time, event-based communication.
3. Simple Blogging App
As a beginner, this is another project that you will love working with. The concept of a blogging app is straightforward; it should allow users to add, delete, modify blogs having a title and the main content. Creating a basic blogging app is quite easy, but you will be implementing many Angular concepts, which is why this project can prove advantageous for you.
While developing this app, allow users to create and log in to their accounts to add blogs. Create an admin account that will be responsible for managing users and their content. The admin should have the authority to remove the content of other users.
To create the blogging app, you have to use various fundamental concepts of Angular, including form validation, services, pipes, routing and navigation, HttpClient, etcetera. Also, you need to enable CRUD operations in your app to deal with the blog data, such as adding or modifying blog content.
4. Responsive Admin Dashboard
The next project that we have is a responsive admin dashboard that can display an array of information handy for managing an online store, a marketing tool, etc. The basic purpose of an admin dashboard is to collect the desired data and display it in such a way that the admins can use it to make informed decisions.
But before you start working on this project, understandthat this project is complicated and challenging. So, it would be better to work on this project if you have already worked on a few Angular projects.
You can build an admin dashboard for an online store that sells some sort of product. So, the information that you need to track and display within the admin panel would be the number of visitors, products sold, sources of traffic, total revenue generated, etc. Also, you can use bar charts, pie charts, etc., to display the data in a meaningful way.
Angular Certification
Once you have done all your basic learning about Angular, your next aim would be to grab a well-paying job. For that, your knowledge alone about the technology is not going to be enough. So, what you need is a valid certification that will attest to your skills and achievements.
When you apply for the Angular developer job role, your resume will be scrutinized by recruiters. They will try to figure out if you have the skills that they are looking for or not. Also, you may have the right set of knowledge as an Angular developer, but how will your resume testify that?
So, it’s advisable to enroll yourself in an Angular certification program. A certification program is very much like a course that will help you learn Angular, but it also awards you with a certificate after you complete the program successfully. In such a case, having a valid certification will be of great help.
The biggest advantage of having a certification highlighted on your resume is that it will help you stand out from the crowd. Consequently, your chances of making it to the interview round will increase many times. So, if you are ready to get certification in Angular, all you need to do is explore some of the best Angular certifications on the web and enroll yourself with the one that seems the best.
Angular Interview Questions
You might be able to make it to the interview round for your dream job as an Angular developer, but the thought of how you would prepare yourself for the interview in the best way is something that can haunt you.
As you know, Angular is a complex web framework and has a wide array of concepts that will make it difficult for beginners to figure out what they should focus on while appearing for an interview.
However, you need not worry as certain Angular interview questions are asked quite commonly, and getting to know them will come in handy for you. Here are 10 popular interview questions that might give you a good idea of how interviewers test your knowledge about Angular:
- What is Angular?
- Why was Angular introduced as a client-side framework?
- Define the ng-content Directive.
- Please explain the various features of Angular.
- State some advantages of Angular over other frameworks.
- What is the difference between Angular and AngularJS?
- What are Lifecycle hooks in Angular? Explain some life cycle hooks.
- Could we make an Angular application to render on the server-side?
- Demonstrate navigating between different routes in an Angular application.
- What is the AOT (Ahead-Of-Time) Compilation? What are its advantages?
If you want to know more questions like these, you can check out our Top Angular Interview Questions blog. Also, you will get succinct answers for each question so that you do not have to go through the trouble of finding the answers on your own.
To Wrap it Up
Angular is surely among the most difficult JS frameworks to master. However, its wide range of features allows the creation of powerful and modern web apps. Also, being backed by the tech giant Google, you can expect that this framework to be endowed with more and more outstanding features in the future.
For learning Angular, it’s important to have at least some exposure to HTML, CSS, and Javascript. Also, there are some more prerequisites for learning Angular, including basic knowledge of Node.js and npm. To start coding with Angular, you can use a source-code editor, but choosing to work with an IDE can be more beneficial for you in the long run.
To get familiar with the Angular concepts, follow one or more tutorials that are easily available online. Be consistent as well as determined to make sure that learning is smooth and fruitful. Also, it’s advisable to undertake a couple of projects once you have learned the fundamentals of Angular and are ready to write some code on your own.
You can improve the chances of getting hired by a reputable organization for the role of Angular developer by going for a certification program. A certification in Angular will attest to your skills and convince recruiters that you are ready to take up the responsibilities as an Angular developer. Also, don’t forget to go through the most common Angular interview questions, as this may come in handy for cracking an interview and getting your dream job.
Finally, I hope you are now well-equipped with all the essential knowledge and resources you need to learn and master Angular. If you are still stuck up with something and need guidance, drop your comments below.
Good luck! ?
People are also reading:
- Difference between Angular vs React
- Angular IDE
- Best Angular Alternatives
- Difference between Node JS vs Angular
- Jquery Interview Questions and Answers
- How do I learn Javascript Quickly?
- Javascript Interview Questions & Answers
- Best Javascript Books
- React Interview Questions and Answers
- Difference between Python vs Javascript

animations
- @angular/animations
- animate
- animateChild
- AnimateChildOptions
- AnimateTimings
- animation
- AnimationAnimateChildMetadata
- AnimationAnimateMetadata
- AnimationAnimateRefMetadata
- AnimationBuilder
- AnimationEvent
- AnimationFactory
- AnimationGroupMetadata
- AnimationKeyframesSequenceMetadata
- AnimationMetadata
- AnimationMetadataType
- AnimationOptions
- AnimationPlayer
- AnimationQueryMetadata
- AnimationQueryOptions
- AnimationReferenceMetadata
- AnimationSequenceMetadata
- AnimationStaggerMetadata
- AnimationStateMetadata
- AnimationStyleMetadata
- AnimationTransitionMetadata
- AnimationTriggerMetadata
- AUTO_STYLE
- @angular/animations/browser
- AnimationDriver
- @angular/animations/browser/testing
- MockAnimationDriver
- MockAnimationPlayer
- group
- keyframes
- NoopAnimationPlayer
- query
- sequence
- stagger
- state
- style
- transition
- trigger
- useAnimation
common
- @angular/common
- APP_BASE_HREF
- AsyncPipe
- CommonModule
- CurrencyPipe
- DATE_PIPE_DEFAULT_TIMEZONE
- DatePipe
- DecimalPipe
- DOCUMENT
- formatCurrency
- formatDate
- formatNumber
- formatPercent
- FormatWidth
- FormStyle
- getCurrencySymbol
- getLocaleCurrencyCode
- getLocaleCurrencyName
- getLocaleCurrencySymbol
- getLocaleDateFormat
- getLocaleDateTimeFormat
- getLocaleDayNames
- getLocaleDayPeriods
- getLocaleDirection
- getLocaleEraNames
- getLocaleExtraDayPeriodRules
- getLocaleExtraDayPeriods
- getLocaleFirstDayOfWeek
- getLocaleId
- getLocaleMonthNames
- getLocaleNumberFormat
- getLocaleNumberSymbol
- getLocalePluralCase
- getLocaleTimeFormat
- getLocaleWeekEndRange
- getNumberOfCurrencyDigits
- HashLocationStrategy
- @angular/common/http
- HTTP_INTERCEPTORS
- HttpBackend
- HttpClient
- HttpClientJsonpModule
- HttpClientModule
- HttpClientXsrfModule
- HttpContext
- HttpContextToken
- HttpDownloadProgressEvent
- HttpErrorResponse
- HttpEvent
- HttpEventType
- HttpHandler
- HttpHeaderResponse
- HttpHeaders
- HttpInterceptor
- HttpParameterCodec
- HttpParams
- HttpParamsOptions
- HttpProgressEvent
- HttpRequest
- HttpResponse
- HttpResponseBase
- HttpSentEvent
- HttpStatusCode
- HttpUploadProgressEvent
- HttpUrlEncodingCodec
- HttpUserEvent
- HttpXhrBackend
- HttpXsrfTokenExtractor
- JsonpClientBackend
- JsonpInterceptor
- @angular/common/http/testing
- HttpClientTestingModule
- HttpTestingController
- RequestMatch
- TestRequest
- XhrFactory
- I18nPluralPipe
- I18nSelectPipe
- IMAGE_LOADER
- ImageLoader
- ImageLoaderConfig
- isPlatformBrowser
- isPlatformServer
- isPlatformWorkerApp
- isPlatformWorkerUi
- JsonPipe
- KeyValue
- KeyValuePipe
- Location
- LOCATION_INITIALIZED
- LocationChangeEvent
- LocationChangeListener
- LocationStrategy
- LowerCasePipe
- NgClass
- NgComponentOutlet
- NgForOf
- NgForOfContext
- NgIf
- NgIfContext
- NgLocaleLocalization
- NgLocalization
- NgOptimizedImage
- NgPlural
- NgPluralCase
- NgStyle
- NgSwitch
- NgSwitchCase
- NgSwitchDefault
- NgTemplateOutlet
- NumberFormatStyle
- NumberSymbol
- PathLocationStrategy
- PercentPipe
- PlatformLocation
- Plural
- PopStateEvent
- PRECONNECT_CHECK_BLOCKLIST
- provideCloudflareLoader
- provideCloudinaryLoader
- provideImageKitLoader
- provideImgixLoader
- registerLocaleData
- SlicePipe
- @angular/common/testing
- MOCK_PLATFORM_LOCATION_CONFIG
- MockLocationStrategy
- MockPlatformLocation
- MockPlatformLocationConfig
- SpyLocation
- Time
- TitleCasePipe
- TranslationWidth
- @angular/common/upgrade
- $locationShim
- $locationShimProvider
- AngularJSUrlCodec
- LOCATION_UPGRADE_CONFIGURATION
- LocationUpgradeConfig
- LocationUpgradeModule
- UrlCodec
- UpperCasePipe
- ViewportScroller
- WeekDay
- XhrFactory
core
- @angular/core
- AbstractType
- AfterContentChecked
- AfterContentInit
- AfterViewChecked
- AfterViewInit
- ANALYZE_FOR_ENTRY_COMPONENTS
- ANIMATION_MODULE_TYPE
- APP_BOOTSTRAP_LISTENER
- APP_ID
- APP_INITIALIZER
- ApplicationInitStatus
- ApplicationModule
- ApplicationRef
- asNativeElements
- assertPlatform
- Attribute
- BootstrapOptions
- ChangeDetectionStrategy
- ChangeDetectorRef
- ClassProvider
- ClassSansProvider
- Compiler
- COMPILER_OPTIONS
- CompilerFactory
- CompilerOptions
- Component
- ComponentFactory
- ComponentFactoryResolver
- ComponentMirror
- ComponentRef
- ConstructorProvider
- ConstructorSansProvider
- ContentChild
- ContentChildren
- createComponent
- createEnvironmentInjector
- createNgModule
- createNgModuleRef
- createPlatform
- createPlatformFactory
- CUSTOM_ELEMENTS_SCHEMA
- DebugElement
- DebugEventListener
- DebugNode
- DEFAULT_CURRENCY_CODE
- DefaultIterableDiffer
- defineInjectable
- destroyPlatform
- Directive
- DoBootstrap
- DoCheck
- ElementRef
- EmbeddedViewRef
- enableProdMode
- ENVIRONMENT_INITIALIZER
- EnvironmentInjector
- ErrorHandler
- EventEmitter
- ExistingProvider
- ExistingSansProvider
- FactoryProvider
- FactorySansProvider
- forwardRef
- ForwardRefFn
- getDebugNode
- getModuleFactory
- getNgModuleById
- getPlatform
- GetTestability
- @angular/core/global
- ComponentDebugMetadata
- DirectiveDebugMetadata
- Listener
- ng.applyChanges
- ng.getComponent
- ng.getContext
- ng.getDirectiveMetadata
- ng.getDirectives
- ng.getHostElement
- ng.getInjector
- ng.getListeners
- ng.getOwningComponent
- ng.getRootComponents
- Host
- HostBinding
- HostListener
- ImportedNgModuleProviders
- importProvidersFrom
- ImportProvidersSource
- Inject
- Injectable
- InjectableProvider
- InjectableType
- InjectFlags
- InjectionToken
- InjectOptions
- Injector
- InjectorType
- Input
- isDevMode
- IterableChangeRecord
- IterableChanges
- IterableDiffer
- IterableDifferFactory
- IterableDiffers
- KeyValueChangeRecord
- KeyValueChanges
- KeyValueDiffer
- KeyValueDifferFactory
- KeyValueDiffers
- LOCALE_ID
- MissingTranslationStrategy
- ModuleWithComponentFactories
- ModuleWithProviders
- <ng-container>
- <ng-content>
- <ng-template>
- NgIterable
- NgModule
- NgModuleFactory
- NgModuleRef
- NgProbeToken
- NgZone
- NO_ERRORS_SCHEMA
- OnChanges
- OnDestroy
- OnInit
- Optional
- Output
- PACKAGE_ROOT_URL
- Pipe
- PipeTransform
- PLATFORM_ID
- PLATFORM_INITIALIZER
- platformCore
- PlatformRef
- Predicate
- Provider
- ProviderToken
- Query
- QueryList
- reflectComponentType
- ReflectiveInjector
- ReflectiveKey
- Renderer2
- RendererFactory2
- RendererStyleFlags2
- RendererType2
- ResolvedReflectiveFactory
- ResolvedReflectiveProvider
- resolveForwardRef
- Sanitizer
- SchemaMetadata
- SecurityContext
- Self
- setTestabilityGetter
- SimpleChange
- SimpleChanges
- SkipSelf
- StaticClassProvider
- StaticClassSansProvider
- StaticProvider
- TemplateRef
- Testability
- TestabilityRegistry
- @angular/core/testing
- async
- ComponentFixture
- ComponentFixtureAutoDetect
- ComponentFixtureNoNgZone
- discardPeriodicTasks
- fakeAsync
- flush
- flushMicrotasks
- getTestBed
- inject
- InjectSetupWrapper
- MetadataOverride
- ModuleTeardownOptions
- resetFakeAsyncZone
- TestBed
- TestBedStatic
- TestComponentRenderer
- TestEnvironmentOptions
- TestModuleMetadata
- tick
- waitForAsync
- withModule
- TrackByFunction
- TRANSLATIONS
- TRANSLATIONS_FORMAT
- Type
- TypeDecorator
- TypeProvider
- ValueProvider
- ValueSansProvider
- Version
- ViewChild
- ViewChildren
- ViewContainerRef
- ViewEncapsulation
- ViewRef
elements
- @angular/elements
- createCustomElement
- NgElement
- NgElementConfig
- NgElementConstructor
- NgElementStrategy
- NgElementStrategyEvent
- NgElementStrategyFactory
- WithProperties
forms
- @angular/forms
- AbstractControl
- AbstractControlDirective
- AbstractControlOptions
- AbstractFormGroupDirective
- AsyncValidator
- AsyncValidatorFn
- CheckboxControlValueAccessor
- CheckboxRequiredValidator
- COMPOSITION_BUFFER_MODE
- ControlConfig
- ControlContainer
- ControlValueAccessor
- DefaultValueAccessor
- EmailValidator
- Form
- FormArray
- FormArrayName
- FormBuilder
- FormControl
- FormControlDirective
- FormControlName
- FormControlOptions
- FormControlState
- FormControlStatus
- FormGroup
- FormGroupDirective
- FormGroupName
- FormRecord
- FormsModule
- MaxLengthValidator
- MaxValidator
- MinLengthValidator
- MinValidator
- NG_ASYNC_VALIDATORS
- NG_VALIDATORS
- NG_VALUE_ACCESSOR
- NgControl
- NgControlStatus
- NgControlStatusGroup
- NgForm
- NgModel
- NgModelGroup
- NgSelectOption
- NonNullableFormBuilder
- NumberValueAccessor
- PatternValidator
- RadioControlValueAccessor
- RangeValueAccessor
- ReactiveFormsModule
- RequiredValidator
- SelectControlValueAccessor
- SelectMultipleControlValueAccessor
- UntypedFormArray
- UntypedFormBuilder
- UntypedFormControl
- UntypedFormGroup
- ValidationErrors
- Validator
- ValidatorFn
- Validators
localize
- @angular/localize
- clearTranslations
- @angular/localize/init
- $localize
- loadTranslations
- MessageId
- TargetMessage
platform-browser
- @angular/platform-browser
- @angular/platform-browser/animations
- ANIMATION_MODULE_TYPE
- BrowserAnimationsModule
- BrowserAnimationsModuleConfig
- NoopAnimationsModule
- provideAnimations
- provideNoopAnimations
- ApplicationConfig
- bootstrapApplication
- BrowserModule
- BrowserTransferStateModule
- By
- createApplication
- disableDebugTools
- DomSanitizer
- enableDebugTools
- EVENT_MANAGER_PLUGINS
- EventManager
- HAMMER_GESTURE_CONFIG
- HAMMER_LOADER
- HammerGestureConfig
- HammerLoader
- HammerModule
- makeStateKey
- Meta
- MetaDefinition
- platformBrowser
- provideProtractorTestingSupport
- SafeHtml
- SafeResourceUrl
- SafeScript
- SafeStyle
- SafeUrl
- SafeValue
- StateKey
- @angular/platform-browser/testing
- BrowserTestingModule
- platformBrowserTesting
- Title
- TransferState
platform-server
- @angular/platform-server
- BEFORE_APP_SERIALIZED
- @angular/platform-server/init
- INITIAL_CONFIG
- PlatformConfig
- platformDynamicServer
- platformServer
- PlatformState
- renderApplication
- renderModule
- renderModuleFactory
- ServerModule
- ServerTransferStateModule
- @angular/platform-server/testing
- platformServerTesting
- ServerTestingModule
router
- @angular/router
- ActivatedRoute
- ActivatedRouteSnapshot
- ActivationEnd
- ActivationStart
- BaseRouteReuseStrategy
- CanActivate
- CanActivateChild
- CanActivateChildFn
- CanActivateFn
- CanDeactivate
- CanDeactivateFn
- CanLoad
- CanLoadFn
- CanMatch
- CanMatchFn
- ChildActivationEnd
- ChildActivationStart
- ChildrenOutletContexts
- convertToParamMap
- createUrlTreeFromSnapshot
- Data
- DebugTracingFeature
- DefaultTitleStrategy
- defaultUrlMatcher
- DefaultUrlSerializer
- DetachedRouteHandle
- DisabledInitialNavigationFeature
- EnabledBlockingInitialNavigationFeature
- Event
- EventType
- ExtraOptions
- GuardsCheckEnd
- GuardsCheckStart
- InitialNavigation
- InitialNavigationFeature
- InMemoryScrollingFeature
- InMemoryScrollingOptions
- IsActiveMatchOptions
- LoadChildren
- LoadChildrenCallback
- Navigation
- NavigationBehaviorOptions
- NavigationCancel
- NavigationCancellationCode
- NavigationEnd
- NavigationError
- NavigationExtras
- NavigationStart
- NoPreloading
- OutletContext
- ParamMap
- Params
- PreloadAllModules
- PreloadingFeature
- PreloadingStrategy
- PRIMARY_OUTLET
- provideRouter
- provideRoutes
- QueryParamsHandling
- Resolve
- ResolveData
- ResolveEnd
- ResolveFn
- ResolveStart
- Route
- RouteConfigLoadEnd
- RouteConfigLoadStart
- Router
- ROUTER_CONFIGURATION
- ROUTER_INITIALIZER
- RouterConfigOptions
- RouterConfigurationFeature
- RouteReuseStrategy
- RouterEvent
- RouterFeature
- RouterFeatures
- RouterLink
- RouterLinkActive
- RouterLinkWithHref
- RouterModule
- RouterOutlet
- RouterOutletContract
- RouterPreloader
- RouterState
- RouterStateSnapshot
- ROUTES
- RoutesRecognized
- RunGuardsAndResolvers
- Scroll
- @angular/router/testing
- RouterTestingModule
- setupTestingRouter
- setupTestingRouterInternal
- TitleStrategy
- @angular/router/upgrade
- RouterUpgradeInitializer
- setUpLocationSync
- UrlCreationOptions
- UrlHandlingStrategy
- UrlMatcher
- UrlMatchResult
- UrlSegment
- UrlSegmentGroup
- UrlSerializer
- UrlTree
- withDebugTracing
- withDisabledInitialNavigation
- withEnabledBlockingInitialNavigation
- withInMemoryScrolling
- withPreloading
- withRouterConfig
service-worker
- @angular/service-worker
- NoNewVersionDetectedEvent
- ServiceWorkerModule
- SwPush
- SwRegistrationOptions
- SwUpdate
- UnrecoverableStateEvent
- UpdateActivatedEvent
- UpdateAvailableEvent
- VersionDetectedEvent
- VersionEvent
- VersionInstallationFailedEvent
- VersionReadyEvent
upgrade
- @angular/upgrade
- @angular/upgrade/static
- downgradeComponent
- downgradeInjectable
- downgradeModule
- getAngularJSGlobal
- getAngularLib
- setAngularJSGlobal
- setAngularLib
- @angular/upgrade/static/testing
- createAngularJSTestingModule
- createAngularTestingModule
- UpgradeComponent
- UpgradeModule
- UpgradeAdapter
- UpgradeAdapterRef
Guide
- Доступность под углом
- УгловойJS к угловым концепциям:Быстрая ссылка
- Опции углового компилятора
- Формат пакета Angular
- Введение в угловые анимации
- Сборник «Впереди времени» (AOT)
- Ошибки метаданных AOT
- App shell
- Введение в угловые понятия
- Введение в компоненты и шаблоны
- Введение в модули
- Следующие шаги:инструменты и методики
- Attribute binding
- Attribute directives
- Understanding binding
- Binding syntax
- Запуск вашего приложения с помощью корневого модуля
- Browser support
- Строительство и обслуживание Угловые приложения
- Built-in directives
- Обнаружение изменений в Angular и оптимизация во время выполнения
- Пропуск поддеревьев компонентов
- Slow computations
- Решение проблемы загрязнения зоны
- Cheat Sheet
- Привязка к классу и стилю
- Угловые строители КЛИ
- Наблюдаемые данные по сравнению с другими методами
- Сложные анимационные последовательности
- Component interaction
- Обзор угловых компонентов
- Component styles
- Content projection
- Руководство для вкладчиков документации
- Создание инжектируемой услуги
- Creating libraries
- Понимание инъекции зависимостей
- Инъекция зависимостей в действии
- Инъекция зависимостей в угловой
- Настройка поставщиков зависимостей
- Deployment
- Устаревшие API и функции
- Руководства для разработчиков Angular
- DevTools Overview
- Разрешение сообщений линтера документации
- Руководство по стилю угловой документации
- Динамический компонентный погрузчик
- Строительные динамические формы
- Обзор угловых элементов
- Entry components
- Event binding
- Как работает привязка событий
- Example applications
- Feature modules
- Рабочее пространство и файловая структура проекта
- Валидирующий ввод формы
- Построение формы,основанной на шаблонах
- Введение в формы в Угловой
- Frequently-used modules
- Glossary
- Hierarchical injectors
- Взаимодействие со службами бэкэнда с помощью HTTP
- Добавить пакет локализации
- Развертывание нескольких локалей
- Формат данных на основе локали
- Обратитесь к местам по ID
- Объединить переводы в приложение
- Общие задачи интернационализации
- Подготовка компонента к переводу
- Работа с файлами перевода
- Пример приложения Angular Internationalization
- Импорт глобальных вариантов данных локали
- Управление отмеченным текстом с помощью пользовательских идентификаторов
- Установите локаль времени выполнения вручную
- Необязательные практики интернационализации
- Angular Internationalization
- Начало работы с NgOptimizedImage
- Настройка NgOptimizedImage
- Обмен данными между дочерними и родительскими директивами и компонентами
- Отображение значений с интерполяцией
- Служба английского языка
- Функциональные модули с лёгкостью загрузки
- Обзор угловых библиотек
- Lifecycle hooks
- Оптимизация размера клиентского приложения с легкими жетонами для инъекций
- Localized documentation
- Руководство по локализации документации Angular
- Руководство по созданию NgМодулей
- NgModule API
- NgModule FAQ
- Модули JavaScript против NgModules
- NgModules
- Зависимости рабочего пространства npm
- Использование наблюдаемых для передачи значений
- Наблюдаемые под углом
- Использование трубы в шаблоне
- Understanding Pipes
- Трансформация данных с параметрами и цепочечными трубами
- Практически наблюдаемое использование
- Предпросмотр статических страниц
- Property binding
- Обязательные для исполнения лучшие практики
- Обеспечение зависимостей в модулях
- Reactive forms
- Угловое версионирование и выпуски
- Reusable animations
- Reviewing documentation
- Angular Roadmap
- Анимации перехода к следующему маршруту
- Общие задачи маршрутизации
- Router reference
- Использование угловых маршрутов в одностраничном приложении
- Учебник маршрутизатора:тур героев
- Angular Routing
- Учебное пособие:Создание пользовательских соответствий маршрутов
- Библиотека RxJS
- Генерация кода с использованием схем
- Authoring schematics
- Схемы для библиотек
- Security
- Связь работника службы
- Конфигурация работника сервисной службы
- Обслуживающий персонал на производстве
- Начало работы с сервисными работниками
- Введение работника сервисной службы под углом
- Уведомления работников службы
- Настройка локальной среды и рабочего пространства
- Sharing modules
- Singleton services
- Начало работы с автономными компонентами
- Strict mode
- Structural directives
- Руководство по стилю углового кодирования
- SVG в качестве шаблонов
- Understanding templates
- Понимание переменных шаблонов
- Template statements
- Template syntax
- Проверка типа шаблона
- Debugging tests
- Testing
- Директивы по тестированию атрибутов
- Узнайте, сколько кода вы тестируете
- Основы тестирования компонентов
- Сценарии тестирования компонентов
- Testing Pipes
- Testing services
- Тестирование API утилиты
- Анимационные переходы и триггеры
- Two-way binding
- Typed Forms
- TypeScript configuration
- Understanding Angular
- Рендеринг на стороне сервера (SSR)с угловым универсалом
- Update Angular
- Поддержка ваших угловых проектов в актуальном состоянии
- Обновление тем через пользовательский интерфейс GitHub
- Обновление ключевых слов для поиска
- Модернизация с AngularJS на Angular
- Модернизация для повышения производительности
- Настройка для обновления с AngularJS
- Использование библиотек Angular,опубликованных на npm
- View encapsulation
- Обработка фона с использованием веб-работников
- Что такое Angular?
- Угловая конфигурация рабочего пространства
Miscellaneous
- Обзор CLI и справочник команд
- ng add
- ng analytics
- ng build
- ng cache
- ng completion
- ng config
- ng deploy
- ng doc
- ng e2e
- ng extract-i18n
- ng generate
- ng lint
- ng new
- ng run
- ng serve
- ng test
- ng update
- Сбор и просмотр аналитики использования
- ng version
- Errors List
- NG0100:Выражение изменилось после проверки
- NG0200:Циклическая зависимость в DI обнаружена при инстанцировании провайдера
- NG0201:Провайдер для {token}не найден!
- NG0203:`inject()` должен быть вызван из контекста инъекции,такого как конструктор,фабричная функция,инициализатор поля или функция,используемая с `EnvironmentInjector#runInContext`.
- NG0300:Несколько компонентов совпадают с одним и тем же именем tagname
- NG0301:Экспорт не найден!
- NG0302:Труба не найдена!
- NG1001:Аргумент декоратора не является литералом объекта
- NG1003:Асинхронный валидатор должен возвращать Promise или Observable
- NG2003:Нет подходящего маркера инъекции для параметра
- NG2009:Селектор компонентов не соответствует требованиям теневого DOM
- NG2200:Невозможно найти отличие для объекта в ngFor
- NG3003:Для компиляции этого компонента необходимо будет создать циклы импорта
- NG6100:Установка NgModule.id в module.id является распространенным антипаттерном
- NG6999:Неверные метаданные @NgModule()
- NG8001:Неизвестный элемент или компонент HTML
- NG8002:Неизвестный атрибут или вход
- NG8003:Не найдена директива с экспортом
- Extended Diagnostics
- NG8101:Неверный банан в коробке
- NG8102: Nullish coalescing not nullable
- Начало работы с Angular
- Managing data
- Развертывание приложения
- Использование форм для ввода данных пользователем
- Adding navigation
Tutorial
- Приложение и учебник Tour of Heroes
- 0.Создайте новый проект
- 1.Редактор героев
- 2.Отображение списка выбора
- 3.Создайте компонент функции
- 4.Добавить услуги
- 5.Добавьте навигацию с помощью маршрутизации
- 6.Получение данных с сервера