39,6 Мб
Руководство по эксплуатации комбайнов Claas Jaguar 830,
Формат: djvu
-
Год:
2010
-
Страниц:
551
-
Язык:
русский
-
Размер:
39,6 Мб
-
Категории:
Claas
16,9 Мб
Руководство по эксплуатации комбайнов Claas Jaguar 820,
Формат: djvu
-
Год:
2000
-
Страниц:
258
-
Язык:
русский
-
Размер:
16,9 Мб
-
Категории:
Claas
10,1 Мб
Руководство по ремонту комбайнов Claas Jaguar 682S, 682SL,
Формат: djvu
-
Год:
1994
-
Страниц:
351
-
Язык:
русский
-
Размер:
10,1 Мб
-
Категории:
Claas
3,66 Мб
Руководство по эксплуатации комбайнов Claas Lexion 510,
Формат: djvu
-
Год:
2013
-
Страниц:
104
-
Язык:
русский
-
Размер:
3,66 Мб
-
Категории:
Claas
28,7 Мб
Руководство по эксплуатации комбайнов Claas Mega 350, 360,
Формат: djvu
-
Год:
2013
-
Страниц:
452
-
Язык:
русский
-
Размер:
28,7 Мб
-
Категории:
Claas
18 Мб
Руководство по эксплуатации комбайнов Claas Dominator 130,
Формат: pdf
-
Год:
2013
-
Страниц:
307
-
Язык:
русский
-
Размер:
18 Мб
-
Категории:
Claas
-
Contents
-
Table of Contents
-
Bookmarks
Quick Links
Information and Basic Field
Settings for LEXION 670 — 620
Related Manuals for Claas LEXION 670
Summary of Contents for Claas LEXION 670
-
Page 1
Information and Basic Field Settings for LEXION 670 — 620… -
Page 3: Table Of Contents
Content Introduction Safety Overview Cab Controls, Layout Cab Controls, CEBIS Service Maintenance Settings Losses EASY CRUISE PILOT EASY Steering Frequent Questions Wet Harvest Recommendations Recommendations…
-
Page 4: Introduction
This guide does not replace the operator’s manual. More in depth information is available within the operator’s manual. Your CLAAS combine is designed for output and efficiency but this can only be achieved with the correct operation and maintenance of the machine.
-
Page 5: Safety
The operator’s manual is an integral part of the machine. It addresses the user and contains safety relevant information. Only procedures specified in the operator’s manual are safe. Read and observe the operator’s manual before starting work. If you need help understanding the content, contact your local CLAAS Dealer.
-
Page 6: Overview
Overview: Safety — Dimensions with front wheels Length up to tailgate 8950 Length up to safety frame of straw spreader 9330 Length up to safety frame of radial spreader 9370 Length, with XL grain tank unloading tube 9320 Length, with XXL grain tank unloading tube 9900 Length, with 3XL grain tank unloading tube 10500…
-
Page 7
Overview: Safety — Dimensions with TERRA TRAC Length up to tailgate 8950 Length up to safety frame of straw spreader 9330 Length up to safety frame of radial spreader 9370 Length, with XL grain tank unloading tube 9320 Length, with XXL grain tank unloading tube 9900 Length, with 3XL grain tank unloading tube 10500… -
Page 8
Overview: 670 — 620 Function Description The feeder chains (1) accept the crop from the front attachment and convey Collecting thecrop. it to the accelerator drum. -
Page 9
Overview: 670 — 620 The stone trap (2) can collect stones and foreign objects. The accelerator drum (3) accelerates the crop and feeds it to the threshing drum (5). The preconcave (4) deposits some of the grain, chaff and broken straw on the preparation floor (10). -
Page 10: Cab Controls, Layout
Cab Controls: Layout CEBIS rotary switch Gear selection switch HOTKEY rotary switch Park brake Main menu rotary switch LASER PILOT left & right switch ESC button Overdrive switch Value select rotary switch POWER TRAC/4TRAC switch Information button Engine speed switch Quick access button Grain tank extension Front attachment engagement…
-
Page 11
Cab Controls: Layout MONTANA Front attachment TIP. Before starting combining Threshing engagement in the field make sure the MONTANA automatic is active. Front attachment reverse Press the button once and the Left rape knife switch light will turn on. Front attachment cross levelling/ HOTKEY/VARIO adjustment TIP. -
Page 12
Cab Controls: Layout Hazard warning lights Road travel switch Front attachment folding LED working main beam… -
Page 13
Cab Controls: Layout Symbols for steering column: Engine fault 15. Turn signal indicator Urea indicator light. 16. 24 V charge light Minimum level 17. No function No function 18. Main beam 10. Engine output reduction 19. Trailer turn signal indicator 11. -
Page 14
Cab Controls: C-MOTION Multifunction Lever Lower reel 11. Manual cross levelling, HOTKEY Reel forward adjustment, table in and out Raise reel 12. Grain tank unloading Reel back 13. Swing out the unloading tube AUTOPILOT on 14. Swing in the unloading tube Raise front attachment, slow and fast Cutting height control… -
Page 15
Notes… -
Page 16: Cab Controls, Cebis
Cab Controls: CEBIS Main menu Vehicle control display Engine RPM Drive status Speedometer 10. Message fields 4. Time 11. Coolant temperature Operating hours 12. Fuel (pointer) Ground speed urea level* (green bar) Ground speed units *Engine HP is reduced if urea tank is below 20%…
-
Page 17
Cab Controls: CEBIS – Harvest Display Main menu 13. Drive status Returns meter 14. Variable display GRAINMETER 15. Variable display Separation performance monitor 16. Variable display Cleaning performance monitor 17. Message fields 6. Area counter 18. Cutting height control 7. Area work rate display 19. -
Page 18
Cab Controls: CEBIS Keys Using the CEBIS rotary switch (1) the combine settings can be adjusted. The picture shows the operating settings that can be adjusted. To navigate through the settings, turn the CEBIS rotary switch (1). Inside the CEBIS display there are two large numbers. -
Page 19
Cab Controls: HOTKEY The HOTKEY (2) is used to adjust the more frequently changing settings on the combine for example all the AUTOCONTOUR settings. To adjust any of the HOTKEY values turn the rotary switch (2) and the HOTKEY dial will appear on CEBIS which is shown in the picture below. -
Page 20
Cab Controls: CEBIS Symbols Exits the menu and returns to CEBIS main screen Manual reel speed adjustment Upper sieve adjustment Lower sieve adjustment Front attachment speed adjustment (if fitted) CEBIS screen brightness adjustment Drum speed adjustment Fan speed adjustment Concave clearance adjustment Cleaning throughput monitor adjustment (sieve loss) Separation throughput monitor adjustments (rotor loss) -
Page 21
Cab Controls: HOTKEY Symbols Cutting height, VARIO length, end snapping plate adjustment Partial working width adjustment LASER PILOT adjustment Hectolitre weight adjustment Flagging function for yield mapping Left / Right chopper bias, working width, central overlap (only with power spreader) and crosswind compensation if fitted Favourite crop settings CRUISE PILOT Automatic reel speed, reel height, reel fore &… -
Page 22
Cab Controls: CEBIS Menu Navigation To navigate through the CEBIS menu turn the switch (3) shown below and the different icons at the top of the CEBIS screen will be highlighted in black (8). When the desired menu is highlighted push switch (3) to enter it, with any menu turn switch (3) to select the required section and push it to enter it. -
Page 23: Service Maintenance
Service Maintenance When carrying out any service operation make sure that the correct procedures are followed. See operator’s manual chapter 9.1 for the complete service requirements. TIP. When blowing down the whole combine taking extra care in the following areas •…
-
Page 24
Service Maintenance 1.End to end guides Correct tension is achieved when the ends of “D” are end to end. To tension the belt, slacken nut K from M and wind M in a clockwise direction until the ends of D meet then lock nuts M and K. -
Page 25
Service Maintenance 4. Sieve box drive The sieve box drive belt differs slightly from the others on the machine in that to check the tension of the belt the nut, B, needs slackening, then the spring length F can be set to the guide D. -
Page 26: Settings
Settings: CEBIS Calibration To allow the machine to display accurate information, certain parameters need to be learnt either on a daily or seasonal basis. Daily zeroing This should be carried out with the machine running with threshing engaged at maximum no load speed.
-
Page 27
Settings: CEBIS Calibration 1. Learn the AUTOCONTOUR end stops at the start of the season. TIP. Learn the working position of the cutterbar within CEBIS. This may also need to be changed when combining different crops. 2. At the start of each crop make sure you have selected the correct crop type, or your personal crop settings. -
Page 28
Set the height the same as the stubble. Lifters It is recommended that lifters should be fitted to CLAAS cutterbars. The lifters should be fitted by placing the first one on the fifth finger from the RHS of the cutterbar and then on every fourth one thereafter. -
Page 29
Settings: Cutterbar Check that the knife is in good condition in order for it to work effectively. This involves replacing damaged or broken sections. TIP. Remove any knife play by adjusting the keeps, and make sure that the fingers are not rounded or bent. A cleaner cutting knife will reduce stress on the knife drive. -
Page 30
Settings: Cutterbar Adjustments TIP. Check the height of the auger within the trough of the cutterbar. There should be a minimum gap of 20mm between the trough and the auger flights. TIP. Remove the intermediate retractable fingers along the length of the auger leaving just the middle ones. -
Page 31
Settings: Side Knife/Divider Both the side knife and the divider use the new fork locating and locking device. For the side knife simply slide into the lock and turn the handle to lock in place. Make sure the lever has locked into the locking device. -
Page 32
Settings: Pre-Separation De-awning De-awning can be carried out by operating the lever by the right hand front wheel of the machine, which in turn closes or opens a set of plates under the APS concave. This gives the crop an extra ‘rub’… -
Page 33
Settings: Threshing To obtain initial settings it is recommended that the ‘CLAAS settings’ are loaded through CEBIS, these are to only be used as a starting point, then adjustments should be made from there. TIP. Only make one adjustment at a time. -
Page 34
Settings: Cleaning The preparation pan (1) is the first part of the cleaning system that the grain will come into contact with. Its function is to separate the grain and the chaff. The grain is heavier and therefore goes to the bottom, the lighter chaff goes to the top. -
Page 35
Cleaning The fan speed is shown on the CEBIS screen. The speed range of the fan is 750rpm – 1600rpm. With the standard cleaning on the LEXION 670-620 machines there are two other adjustments. • The wind board • The wind throttle TIP. -
Page 36
Settings: Cleaning Both the top (1) and bottom (2) sieves are adjustable from 0 – 20mm in the cab. The sieves need to be open enough to cope with high volumes of grain. With wide sieve settings there is a need for high wind speed. TIP. -
Page 37
Settings: Straw and Chaff Management The chaff spreader can be adjusted to spread chaff wider. See operator’s manual for adjustments. The straw chopper can be engaged and disengaged from work by operating the buttons on the rear of the machine or via CEBIS. -
Page 38
Settings: Straw and Chaff Management The width that the POWERSPREADER spreads can be adjusted from the cab in CEBIS. TIP. Make sure that the spreader is not spreading too wide and that it is not in the standing crop. TIP. Make one adjustment at a time. -
Page 39
Settings: Grain Tank 1. Increase fan speed Pieces of straw 2. Open concave 3. Reduce drum speed 4. Close both sieves Unthreshed heads 1. Close the lower sieve 2. Increase the drum speed 3. Close the concave Broken grains 1. Reduce the drum speed High sieve losses Grain Tank 1. -
Page 40: Losses
Losses When deciding what to adjust on the combine to reduce the amount of loss, it is important to understand where the loss is coming from and what is acceptable. At the front of the machine — • Is the loss happening before or after the cutterbar? •…
-
Page 41
Losses Where are the losses coming from? To work out what is coming from the rotors engage the chaff spreader and carry out a check behind the combine, count the grains on the floor. To check the losses from the sieves disengage the chaff spreader and engage the chopper and spread this as wide as possible and then count the… -
Page 42
Losses Straw 1. Increase drum speed Grains in the ears 2. Close the concave 1. Open the concave Poor straw quality 2. Reduce drum speed Returns Unthreshed heads 1. Increase drum speed 2. Close the concave Pieces of straw 1. Increase fan speed 2. -
Page 43
Notes… -
Page 44: Easy Cruise Pilot
EASY: CRUISE PILOT CRUISE PILOT adjusts the ground speed while combining. There are three different driving strategies that can be selected with CRUISE PILOT. CRUISE CONTROL (constant ground speed) Performance (constant throughput) Throughput (throughput with control) TIP. It is important that the “zero throughput” value is learnt after long periods at standstill/idle or after adjustment to the feeder housing.
-
Page 45
EASY: CRUISE PILOT To engage CRUISE PILOT press the AUTOPILOT button on the joystick. The symbols in the HOTKEY direct menu will have the colours inverted on activation. TIP. Make sure that the combine has crop going through it before pressing the AUTOPILOT button on the joystick. -
Page 46
EASY: CRUISE PILOT Symbols The symbol displayed in the HOTKEY section (1) is the limiting factor for CRUISE PILOT. Now adjust the relevant limiting value. Maximum throughput is reached Maximum diesel engine load reached Ground speed limit, the maximum pre-set ground speed has been reached The separation loss limit has been reached The sieve loss limit has been reached… -
Page 47
EASY: CRUISE PILOT To set throughput, drive the combine into the standing crop so that the loss monitors are full. Now check the losses. Are these losses acceptable? If not then increase or decrease the sensitivity to show what is acceptable. Adjust the walker loss sensitivity so that the loss triangles are shown 3/4 up… -
Page 48: Easy Steering
EASY: Steering To activate LASER PILOT make sure it is turned on in CEBIS (1) and that LASER PILOT is selected (2). Line up with the crop edge before pressing the AUTOPILOT buttonon the joystick. To set up the LASER PILOT, make sure the combine has a straight edge and is lined up with the crop.
-
Page 49
EASY: Steering — S10 To activate GPS turn it on in CEBIS (1). Make sure that the screen is on and that GPS is selected (2). Press the AUTOPILOT button on the joystick when you are near the A=B line. If a new AB line is required use the corresponding screen to set your AB line. -
Page 50
EASY: Steering — S7 To activate GPS turn it on in CEBIS (1). Make sure that the screen is on and that GPS is selected (2). Press the AUTOPILOTbutton on the joystick when you are near the A=B line. For the S7 screen to set a new A=B line press 1 then press 2 and after a short… -
Page 51: Frequent Questions
Frequent Questions Threshing won’t engage and none of the hydraulics are working. Check that the road travel switch is not engaged. Threshing has engaged but the engine will not go to full rpm when the engine speed dial is turned. Check that the combine is not in 3rd gear.
-
Page 52: Wet Harvest Recommendations
Wet Harvest Recommendations In wet and laid crops It is even more important to get a good cut and feed into the combine. Check the knife and fingers regularly, paying particular attention to the knife to finger gap. To pick up laid crops The skids under the bar must be raised into their highest position.
-
Page 53
Wet Harvest Recommendations When unloading wet grain Reduce the flow into the unloading auger by shutting down the slides on both the cross augers in the grain tank. This will reduce the load on the unloading system, bringing it down to a ‘normal’ level. If wet and dirty grain is being unloaded It is also likely that dirt will build up in the turret auger. -
Page 54: Recommendations
Recommendations Seasonal calibration At the beginning of the season before the combine is used, it is advised that the following items are learnt: A. Learn AUTOCONTOUR limits (1), VARIO (2) and reel (3) ‘end stops’ in the cutterbar section of CEBIS. B.
-
Page 56
CLAAS Telematics CLAAS CEMOSAdvisor CLAAS U.K. Ltd Saxham Bury St. Edmunds Suffolk IP28 6QZ Tel: 01284 763100 Fax: 01284 769839 www.claas.co.uk © 2018 All Rights Reserved by CLAAS…
![]()
Combine harvesters
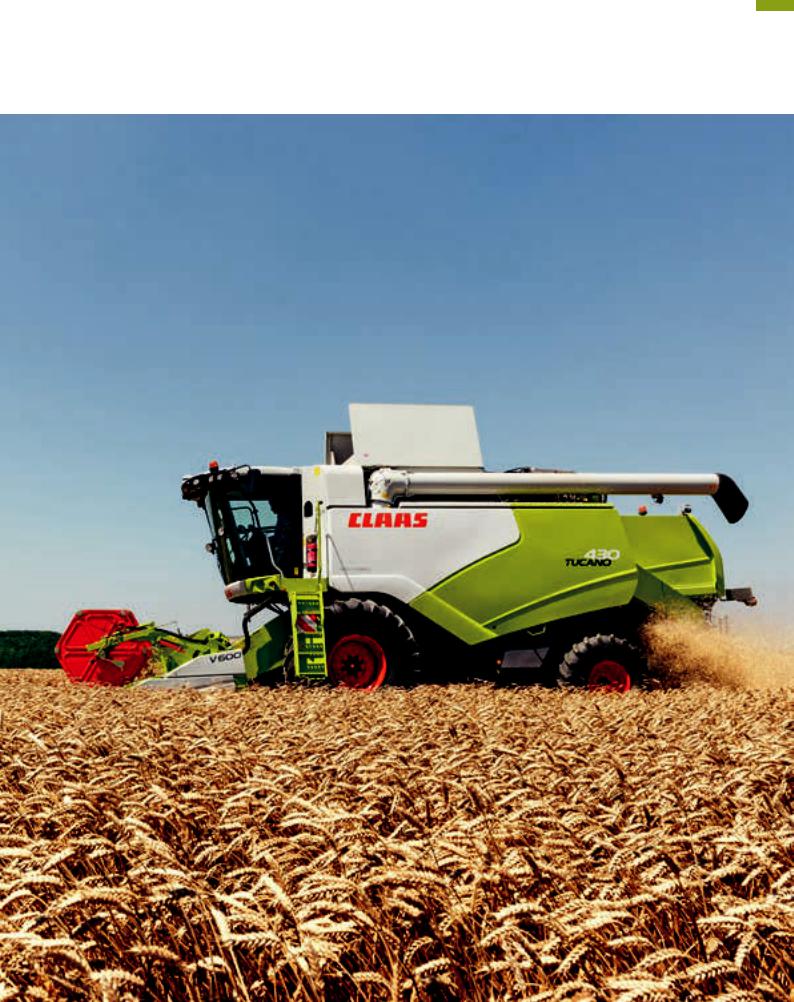
TUCANO
450 440 430 420 340 320

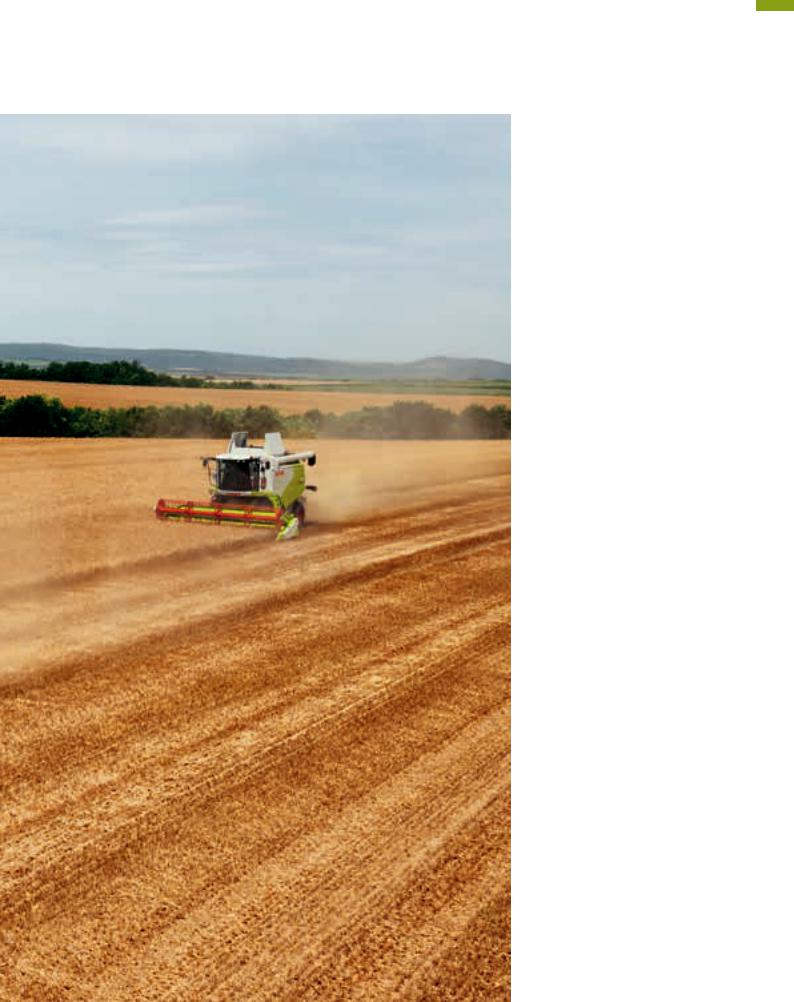
Time to grow.
The new TUCANO.
Healthy growth is the basis of every successful harvest. It was with this principle in mind that we developed the new TUCANO. As well as growing to incorporate the intelligence and comfort of the large combine segment, it has a design which immediately announces a new dimension of excellence and gives you the capacity you need for the future:
Time to grow.
tucano400-300.claas.com
2
TUCANO
3

TUCANO 450 / 440 / 430 / 420 / 340 / 320.
4
Contents
|
Cab |
6 |
|
|
EASY |
11 |
|
|
CEBIS |
12 |
|
|
CEBIS, multifunction control lever, |
||
|
CMOTION |
14 |
|
|
TELEMATICS |
16 |
|
|
Yield mapping, job management |
18 |
|
|
Automatic guidance systems |
20 |
|
|
Front attachments |
22 |
|
|
Cutterbar |
25 |
|
|
VARIO cutterbar, rapeseed cutterbar |
26 |
|
|
VARIO 930 / 770, CERIO cutterbars |
28 |
|
|
CONSPEED, CONSPEED LINEAR |
30 |
|
|
SUNSPEED, SWATH UP |
32 |
|
|
Rice cutterbar, FLEX |
34 |
|
|
Automated cutterbar control |
36 |
|
|
Threshing system |
38 |
|
|
APS threshing system |
40 |
|
|
CLAAS threshing system |
42 |
|
|
Straw walker technology |
44 |
|
|
Crop cleaning |
46 |
|
|
Grain tank, QUANTIMETER, |
||
|
PROFI CAM |
48 |
|
|
Straw management |
50 |
|
|
CLAAS POWER SYSTEMS |
52 |
|
|
Engine, drive train |
54 |
|
|
All-wheel drive, |
||
|
central lubrication system |
56 |
|
|
Tyres, maintenance |
58 |
|
|
First CLAAS Service |
60 |
|
|
Technology in detail |
62 |
|
|
Benefits |
66 |
|
|
Technical data |
67 |
|
5
Well-being at work.
Deluxe comfort in your working environment.
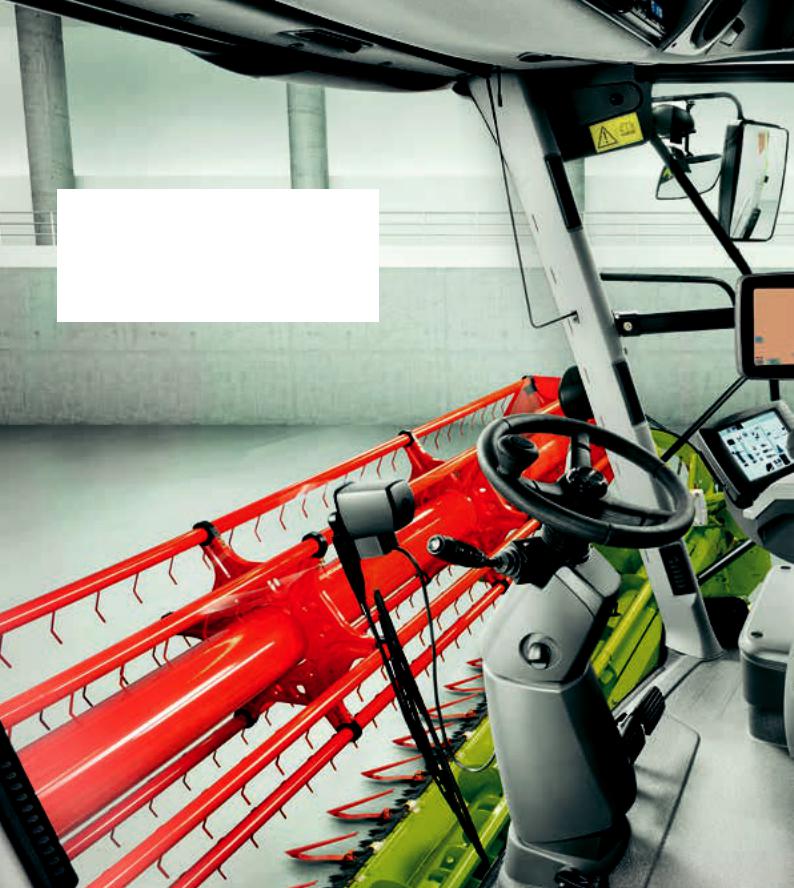
At CLAAS, comfort and convenience mean that everything is designed to enable you to work with optimal efficiency. From the flawless 360° view to the smallest action.
6
Cab
7
More space. More comfort.
A more productive workplace.
For optimal working conditions.
The TUCANO gives the operator freedom of movement, a clear control layout and excellent visibility on all sides. The air conditioning maintains a consistent, comfortable atmosphere, which together with superb soundproofing and a threeposition adjustable steering column provides first-class working conditions.
The steering column is adjustable three ways.
8
Cab
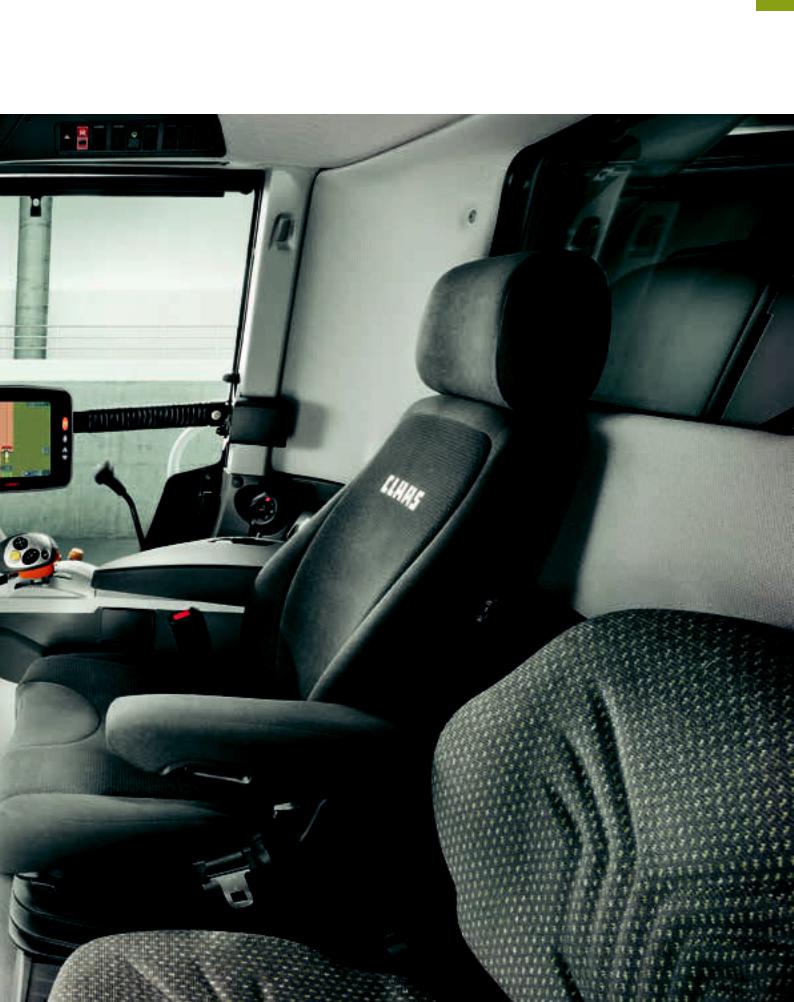
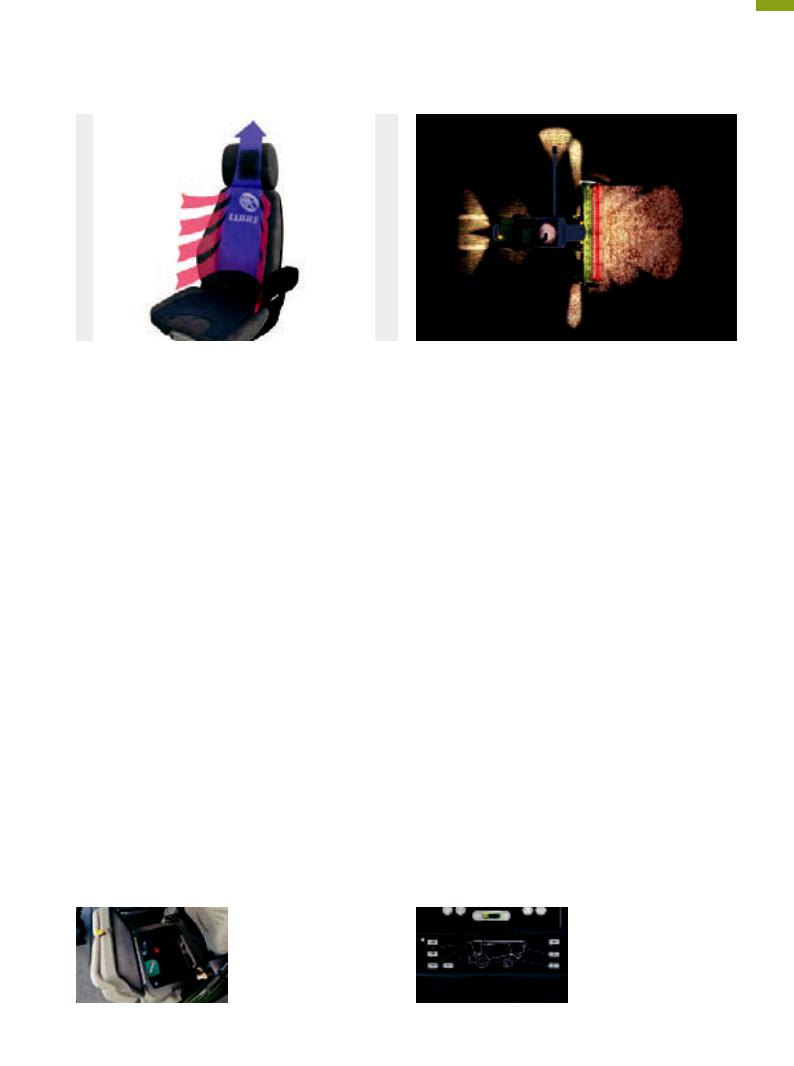
Cushions, supports, ventilates and keeps you warm: the deluxe operator’s seat.
Full support for dynamic, active work while seated. Active comfort control ensures optimal ventilation and sweat removal without subjecting the operator to unhealthy draughts. The air suspension seat with automatic height control adjusts automatically to the operator’s weight and effectively attenuates vibrations by up to 40%. A pneumatic, two-part lumbar support keeps your back in shape while the automatic thermostat for the seat’s heating keeps you warm and comfortable.
Fully featured: trainee’s seat with integrated cooler.
−−Integrated armrest at left on door
−−Foldable backrest as a table
−−Large in-cab refrigerator, with capacity of 43 litres and a bottle holder
−−Many other stowage compartments
Turns night into day at the flick of a switch.
The lighting systems ensure the best visibility for the entire work area and machine parts even at night. Intelligent features, such as the afterlight function, make for a complete package. Powerful H9 and xenon lights turn night into day.
−−Up to ten work lights
−−Lighting for folding front attachments
−−Side lights, stubble lights, steering axle lights
−−Automatic lighting of the discharge auger tube
−−Automatic reversing lights
−−Lighting for the cleaning system, grain tank and returns
−−Service lights below the side panels
−−Mobile work light
|
The operating panel gives a good |
|
|
overview and enables simple control |
|
|
of the working lights. The light |
|
|
Refrigerator box integrated in |
settings can be adjusted easily in |
|
trainee’s seat |
CEBIS. |
9

EASY. Simply more.
10
![]()
EASY – Efficient Agriculture Systems by CLAAS
The name says it all.
All the electronics expertise of CLAAS can be summarised in a word: EASY.
That stands for Efficient Agriculture Systems, and it lives up to the name. Equipment settings, guidance systems, software solutions and more: EASY makes it all simple. Your systems can be matched perfectly with each other, enabling you to get the best performance from your combines and top results for your operation.
Go on. Go easy.
The EASY concept is made up of four components, each providing specialist competence and together forming a strong team.
−−on board – Control and performance optimisation of the combine from the cab
−−on field – Increased productivity directly in the field
−−on track – Equipment monitoring and remote diagnostics
−−on farm – Software solutions for your operation
11
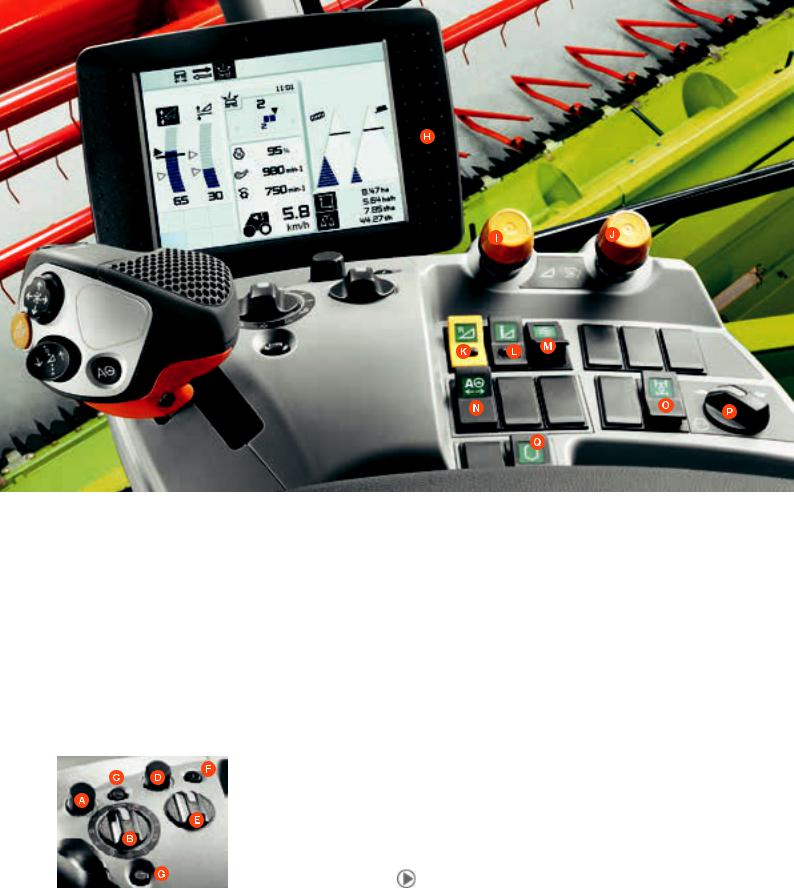
More informed, more monitoring.
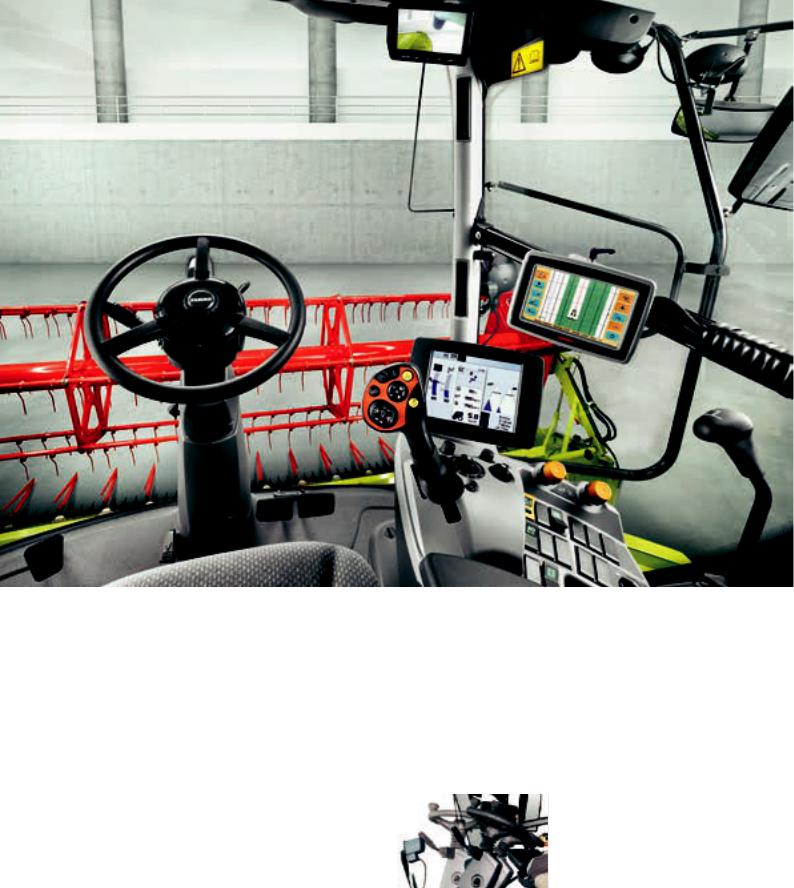
All’s clear on the operating panel!
Integrated with the operator’s seat, its flexible functions can be adapted as needed. Function switches include:
AMenu selection rotary/push switch
BCEBIS direct menu rotary switch
CEscape button
DHOTKEY rotary/push switch
EHOTKEY direct menu rotary switch
FInformation button
GDIRECT ACCESS button
HCEBIS screen
IFront attachment on/off
JThreshing unit on/off
KFront attachment reverser
LRapeseed knife, left, on/off
MLateral adjustment of cutterbar / changes to values in HOTKEY menu / longitudinal position of VARIO cutterbar table
NLASER PILOT left/right preselection
OAll-wheel drive
PDiesel engine speed (three steps)
QGrain tank cover open
|
CEBIS controls and HOTKEY |
For more information, please visit: tucano400-300.claas.com |
12
CEBIS
Keeping the operator in the picture at all times. Clear, simple and fast operation.
Information, registration, control and monitoring are the tasks of the CEBIS electronic on-board information system. It is distinguished by its clear, logical organisation of functions in the menu structure.
A brief glance at the CEBIS display gives an overview of the current processes and conditions: all the relevant information for driving or harvesting is summarised clearly on the screen. Warning messages are given audibly as a buzz tone and visually as icons and text.
An eye-catching 21 cm screen.
The 8.4″ colour CEBIS screen offers an ideal view thanks to its ball coupling mount which enables the monitor to be adjusted as required by the operator. It can be adjusted for angle as well as horizontally and vertically.
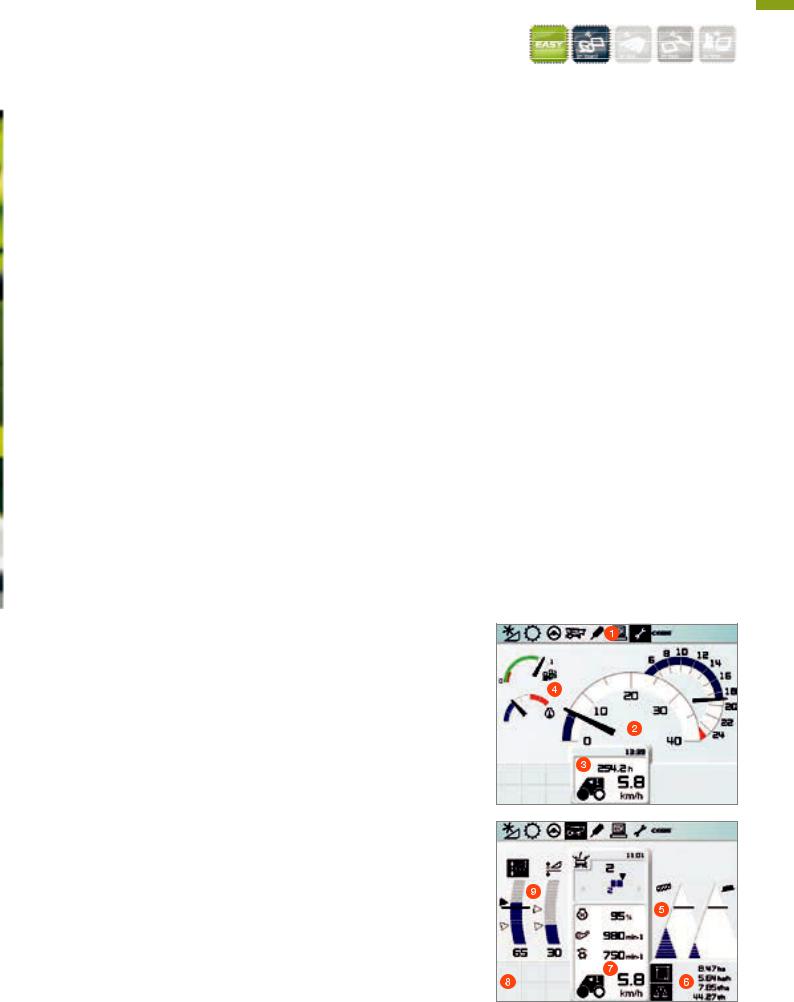
CEBIS on the road.
1Menu bar
2Travel speed and rpm
3Operating hours
4Fuel level and temperature display as well as AdBlue level
CEBIS in the field.
5Throughput monitoring
6Area scaling and yield metering
7Driving information (up to 40 displays freely selectable)
8Message window (for alarms and information)
9Front attachment position (AUTO CONTOUR/ cutting height)
−The basic machine settings in working mode are made via the CEBIS rotary switch (B)
−An additional HOTKEY rotary switch allows fast access to other functions (E)
−The position of the rotary switch is shown on the CEBIS display (H)
−The CEBIS and HOTKEY rotary/push switches (A / D) are used for menu navigation and making changes to settings
−A Compact Flash Card makes data exchange particularly easy
−The DIRECT ACCESS button provides direct access to the last menu setting. It also offers fast access to the image from the camera
13
NEW
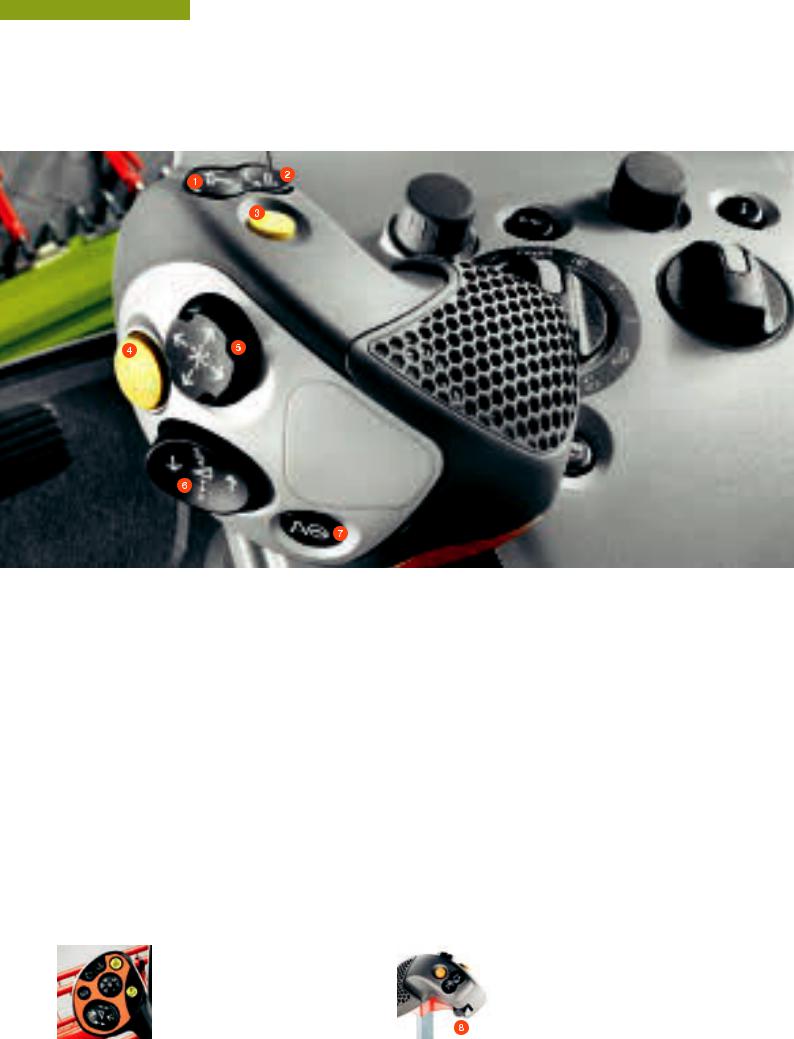
More functions at your fingertips.
CMOTION. Greater comfort.
The multifunction control lever, which is integrated in the right armrest of the operator’s seat, plays a key role in making the TUCANO so user-friendly and comfortable for the operator.
The CMOTION has been specially developed for ergonomic operation by the right hand. The innovative, three-finger control concept allows several functions to be controlled intuitively without having to reposition one’s hand.
1Extend grain tank discharge auger
2Retract grain tank discharge auger
3Grain tank offloading on / off
4Cutterbar stop
5Reel operation
6Front attachment height control
7AUTO PILOT, LASER PILOT, GPS PILOT
Another toggle switch (8) is situated on the back of the multifunction control lever. With three functions assigned to it, this switch enables manual lateral control of the cutterbar, changes to values in the HOTKEY menu or manual adjustment of the VARIO cutterbar table.
|
The choice is yours: multifunction control |
Three-function |
|
|
lever or CMOTION |
toggle switch (8) |
|
14
CEBIS | Multifunction control lever | CMOTION
Comprehensive information.
CEBIS is simple to use, allowing a wealth of equipment information to be displayed and printed in addition to performing full control and monitoring.
−−Automatic crop setting
−−GPS PILOT, LASER PILOT, AUTO PILOT – automatic guidance
−−Automated cutterbar control
−−QUANTIMETER – yield determination / moisture measurement
−−Area counter
−−Fuel consumption measurement
−−Yield mapping – crop log
−−Performance display – remaining diesel running time / range / grain tank fill level
−−Job management
−−Maintenance interval display and tasks
−−On-board diagnostics, alarm lists and alarm history
−−Speed monitoring, slippage display (for the threshing drum, for example)
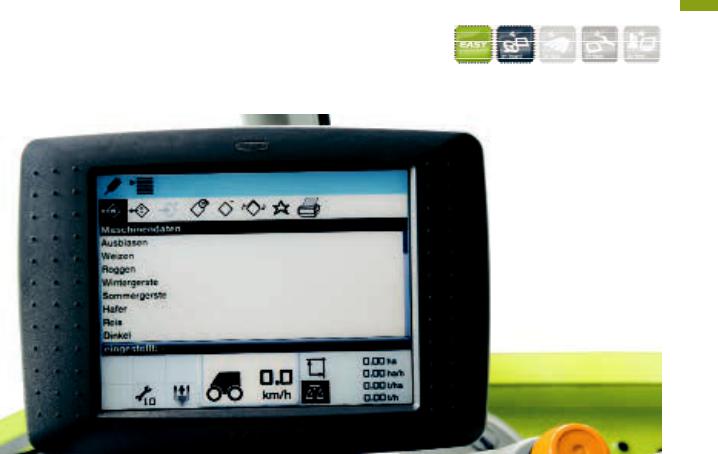
NEW: Automatic machine setup.
Factory-programmed settings for over 35 crop types are available. In addition, users’ own settings based on experience (especially relating to specific varieties) can be stored and called up whenever required. Furthermore, favourite settings can be stored and recalled quickly by means of the hotkey rotary switch. The following machine parameters are set:
−−Threshing drum speed
−−Concave gap
−−Fan speed
−−Upper and lower sieve opening
−−Sieve throughput monitoring sensitivity
−−Residual grain separation throughput monitoring sensitivity
−−Specific crop weight (bulk density)
−−Crop-specific calibration factor
15

TELEMATICS.
Makes good operators even better.
|
A full overview with just a click of the mouse. |
Improve work processes. |
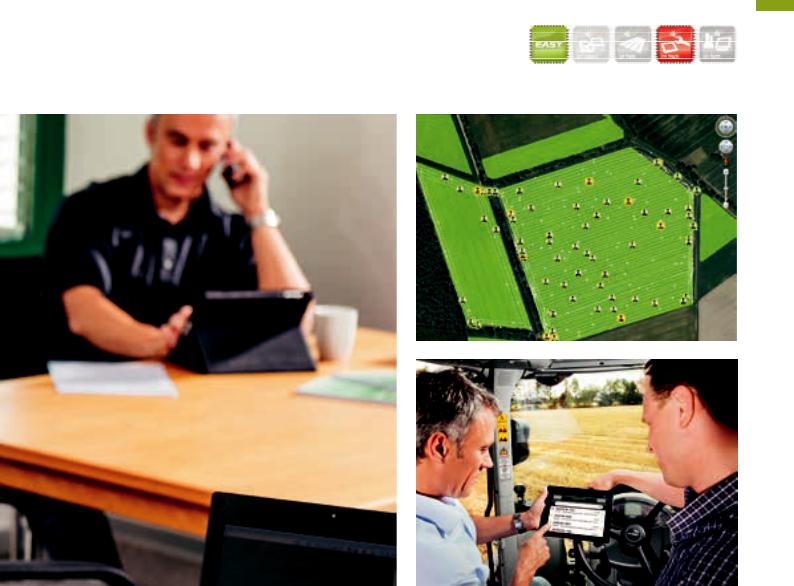
The CLAAS TELEMATICS feature enables you to access all the important data for your combine any time, anywhere via the internet. Enjoy the benefits of TELEMATICS.
Optimise your settings.
Use your personal access to the TELEMATICS web server to quickly compare the performance and harvesting data for your machines so that you can fine tune the settings for the best results under all conditions every day.
A report with the operating time analysis and other important evaluations of the machine is sent to you by e-mail each day. This enables you to review the specific data from the previous day and determine when and how efficiently the combine operated before you start work again. In addition, the working tracks of the machine can be viewed together with the event log in order to optimise the transport logistics. TELEMATICS enables planned fleet management and helps avoid unprofitable idle time.
A range of packages to meet your requirements.
TELEMATICS is available in three different packages: basic, advanced and professional.
16
TELEMATICS
|
Simplify documentation. |
Automatic documentation. |
Use TELEMATICS to export the relevant data to your field catalogue and save valuable time. Transfer data on areaspecific yields, for example.
Faster service with CLAAS remote diagnostics.
With your consent, TELEMATICS can transmit maintenance and repair data to your CLAAS sales partner. This enables your CLAAS partner to carry out an initial analysis via
CDS Remote — when required — to find the causes of faults more quickly and to make optimum preparations to assist you on site as quickly as possible.
This function automatically documents and processes all process data. As an extension to TELEMATICS, automatic documentation transfers (without any intervention by the machine operator) the work data relating to the specific field deployment to the server, where they are interpreted and processed. Data interpretation and processing are based on the field boundaries previously uploaded from your system. Further processing is straightforward, as all machine-relevant data can be exported in IsoXML format.
17
More potential when you need it.
Fast data processing.
With its extremely fast on-board network, the TUCANO is already prepared to meet the far-reaching challenges of the future.
A wealth of information can be printed whenever required.
The working tracks picked up by GPS can also be displayed in CEBIS.
18
Yield mapping | Job management
|
Yield mapping. |
Job management. |
Building on the foundation of the job management functions, you can use your TUCANO to perform yield mapping. Sensors in the TUCANO measure the yield and grain moisture while CEBIS adds geographic coordinates using GPS satellite data.
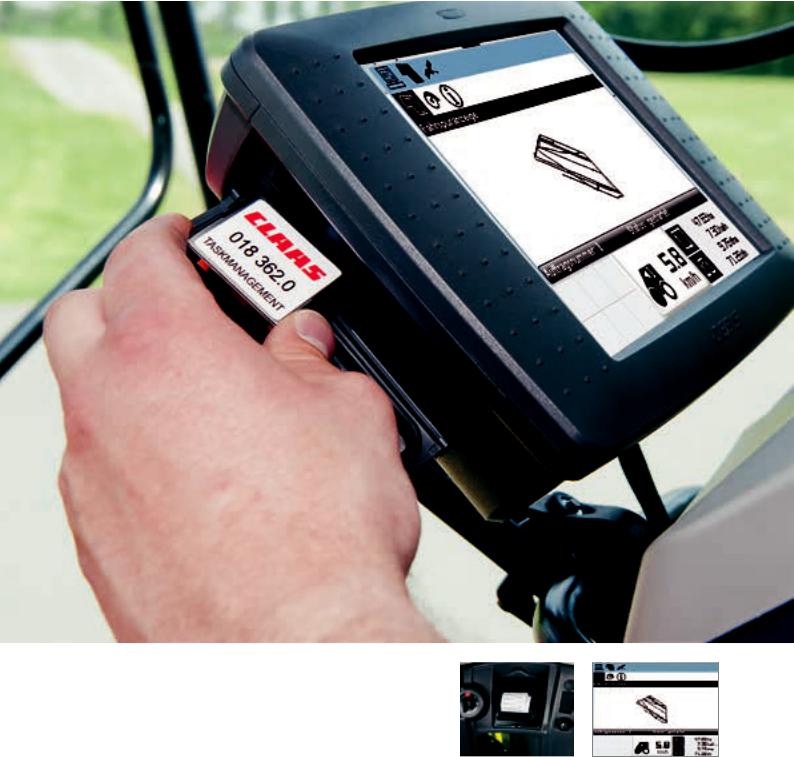
All measurements are stored on portable chip cards to facilitate transfer. AGROCOM MAP START software is included to enable you to produce informative yield maps to use as a basis for your future production strategy.
You can manage your jobs with CEBIS. Moreover, with AGROCOM MAP START software from CLAAS you can prepare customer and parcel data to be run and processed with CEBIS.
−−All data is backed up when a specific task is completed or the working day comes to an end
−−The data can be printed out on the combine or transferred with a data card
−−All data can be viewed and processed further on a PC
−−Daily counts, crop counts and total counts can also be displayed and printed in CEBIS
19
More precise guidance.
LASER PILOT.
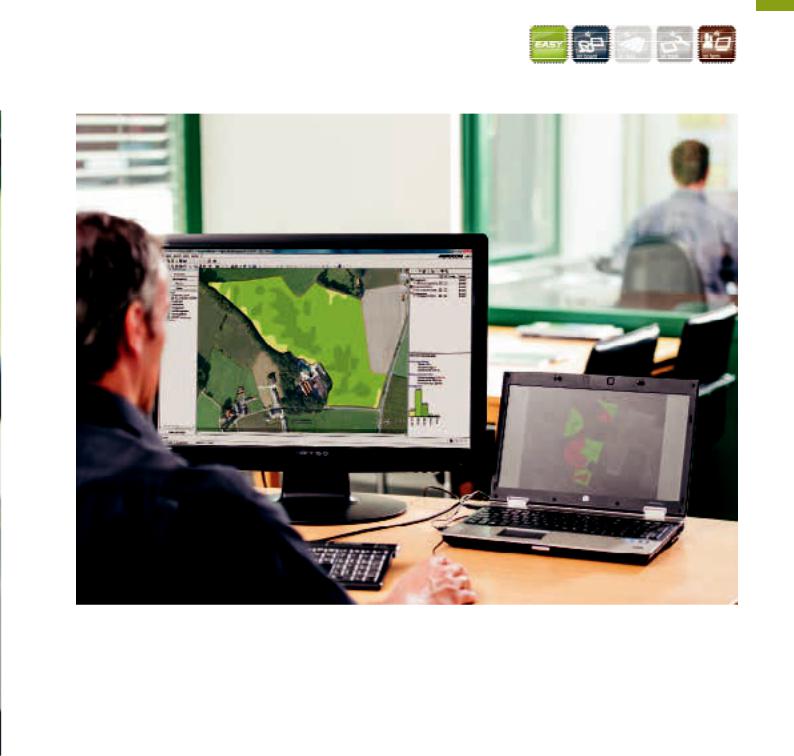
The electro-optical sensors of the LASER PILOT use pulses of light to scan between the crop and stubble and guide the TUCANO automatically along the edge.
The LASER PILOT can be folded away for transport and is available for both the left and right side of the cutterbar. Its optimal positioning on the cutterbar side close to the crop edge enables a good viewing angle and ensures high functional reliability even with laid crops and slopes.
Choose from three automatic guidance systems.
All the TUCANO models can be factory-fitted with three automatic guidance systems which can be selected as needed according to application.
−−GPS PILOT – the satellite-supported guidance system
−−LASER PILOT – the electro-optical guidance system
−−AUTO PILOT – the electro-mechanical guidance system
AUTO PILOT.
Two digital sensors, incorporated in one of the picker units, record the position of the TUCANO and automatically guide it on the best path through the rows of maize in all field conditions. In this way, AUTO PILOT contributes to greater performance and efficiency.
The way you want it.
Portable displays from CLAAS offer a flexible control option for ISOBUS and guidance systems. The terminal can also be moved from one tractor or self-propelled harvester to another, depending on the season or job in hand. Fit your TUCANO with the equipment you need, straight from the factory or as a retrofit option:
−−S10: high-resolution 10.4″ touchscreen terminal with guidance and ISOBUS functions: up to four cameras can be viewed
−−S7: high-resolution 7″ touchscreen terminal with guidance functions
20
![]()
Automatic guidance systems
|
Automatic steering at the headland. |
GPS PILOT FLEX. |
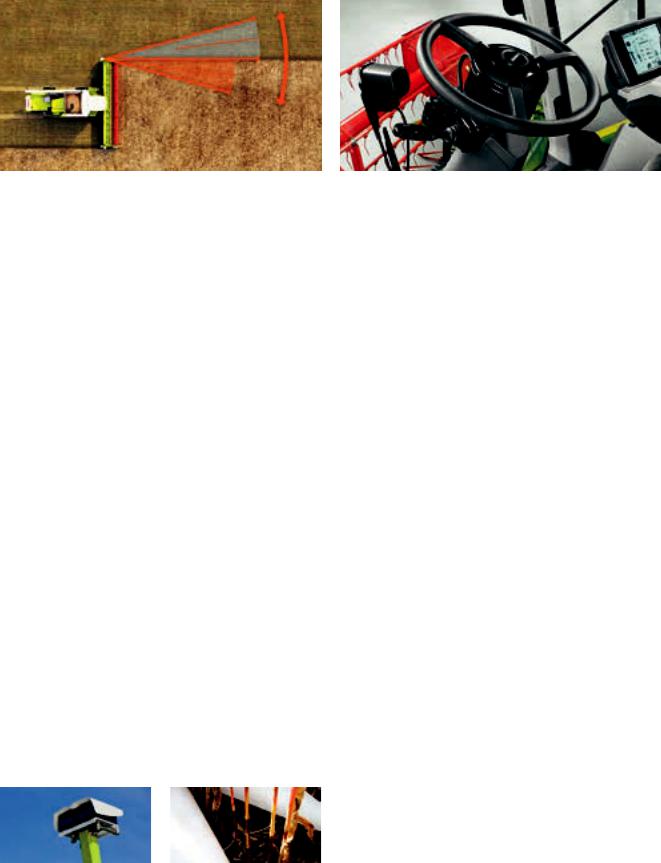
The AUTO TURN function takes care of turning manoeuvres at the headland. The direction of the turn and the next track to be worked are pre-selected on the terminal. The steering system does the rest.
How you benefit.
−High functional reliability and safety regardless of visibility conditions
−Optimal use of the full width of the cutterbar
−Greater precision for mapping areas and yields
−Reduced fuel consumption
−Reduced turning times
−Increased seasonal performance
−Significant reduction in workload for the operator, enabling greater concentration on threshing
The GPS PILOT can be used not only with hydraulically actuated steering, but also with the GPS PILOT FLEX automatic steering wheel. This steering wheel allows you to operate the machine with a high degree of accuracy. The great advantage of the GPS PILOT FLEX is its versatility.
−No need to touch the hydraulics
−Guidance system can quickly be moved between different machines
The electric steering wheel transfers steering commands from the terminal and navigation controller to the steering axle in order to steer the machine
GPS PILOT FLEX steering wheel
21
 Loading…
|
Title |
File Size |
Download Links |
|
Claas Ag Belt Programme [PDF] |
16.2Mb |
Download |
|
Claas Agri Manual [PDF] |
836.2kb |
Download |
|
Claas ARES 546, 556, 566, 616, 656, 696 Operators and Maintenance Manual [PDF] |
9.2Mb |
Download |
|
Claas ARES 547, 557, 5342, 5352 Operators and Maintenance Manual [PDF] |
3.4Mb |
Download |
|
Claas Arion 510 / 520 / 530 / 540 / 610 / 620 / 630 / 640 Service & Parts Manual |
75.2kb |
Download |
|
Claas ARION PDF Service Manuals [PDF] |
29.1Mb |
Download |
|
Claas Axion 9 Series Service Manual [PDF] |
10.5Mb |
Download |
|
Claas C490-C370 Repair Manual [PDF] |
535.8kb |
Download |
|
Claas CELTIS 426, 436, 446, 456 Service Manual [PDF] |
5.7Mb |
Download |
|
Claas Columbus Series Service Manual [PDF] |
13.5Mb |
Download |
|
Claas Consul Harvest Belts [PDF] |
76.7kb |
Download |
|
Claas CROP TIGER 30 Operator / s Manual PDF [PDF] |
14.4Mb |
Download |
|
Claas DISCO, CORTO, VOLTO, LINER — Technical Systems, Hydraulic System PDF manual [PDF] |
4.8Mb |
Download |
|
Claas Dominator 140 150 — Technical Systems, Hydraulic System PDF manual [PDF] |
2.8Mb |
Download |
|
Claas Dominator 150-140-130 Operators manual PDF [PDF] |
19.8Mb |
Download |
|
Claas DOMINATOR 204 / 208 MEGA III Operator’s Manual [PDF] |
683.7kb |
Download |
|
Claas DOMINATOR 68 S Operator’s Manual [PDF] |
615kb |
Download |
|
Claas Dominator-58-48-38 Service Manual [PDF] |
7.1Mb |
Download |
|
Claas ELIOS 240-210 Repair Manual [PDF] |
3.9Mb |
Download |
|
Claas Jaguar 2 Service Manual [PDF] |
9.5Mb |
Download |
|
Claas Jaguar 830 / 850 / 860 / 870 [PDF] |
7.1Mb |
Download |
|
Claas JAGUAR 830-900 PDF Service Manuals [PDF] |
54.2Mb |
Download |
|
Claas Jaguar 830, 850, 860, 870 Information Basic Field Settings [PDF] |
7.1Mb |
Download |
|
Claas JAGUAR 930 Information And Basic Field Settings [PDF] |
6.7Mb |
Download |
|
Claas Jaguar Service Manual [PDF] |
7.9Mb |
Download |
|
Claas Lexion 470-420 Technical Systems, Hydraulic System PDF manual [PDF] |
7.2Mb |
Download |
|
Claas Lexion 480 Repair Manual PDF [PDF] |
34.1Mb |
Download |
|
Claas Lexion 480 Service Manual [PDF] |
10.3Mb |
Download |
|
Claas Lexion 480-405 Technical Systems, Hydraulic System PDF manual [PDF] |
8.4Mb |
Download |
|
Claas Lexion 500 R Service Manual [PDF] |
1.2Mb |
Download |
|
Claas Lexion 570 Technical Systems, Hydraulic System PDF manual [PDF] |
10.4Mb |
Download |
|
Claas LEXION 620 / 670 Manual [PDF] |
3.9Mb |
Download |
|
CLAAS Lexion 700 Series Steering Ready Combine — Installation Manual [PDF] |
1.2Mb |
Download |
|
Claas LEXION Repair Manual [PDF] |
541kb |
Download |
|
Claas Lexion Service Manual [PDF] |
5Mb |
Download |
|
Claas Liner 3000 with Communicator — Technical Systems, Hydraulic System PDF manual |
3Mb |
Download |
|
Claas Markant 650 [PDF] |
1.6Mb |
Download |
|
Claas OPTIMISING OUTPUT FROM YOUR COMBINE [PDF] |
554.3kb |
Download |
|
Claas QUADRANT 2100 RC — Technical Systems, Hydraulic System PDF manual [PDF] |
2.4Mb |
Download |
|
Claas QUADRANT 2200 RC- Technical Systems, Hydraulic System PDF manual [PDF] |
412.4kb |
Download |
|
Claas Quantum 3500-6800 Technical Systems [PDF] |
5.5Mb |
Download |
|
Claas Rollant 160 — Electric System, Hidraulic System — Service Repair Manual [PDF] |
609.6kb |
Download |
|
Claas Rollant 240-250 — Electric System, Hidraulic System — Service Repair Manual [PDF] |
3.2Mb |
Download |
|
Claas Rollant 250-255-254 Diagnosis PDF [PDF] |
661kb |
Download |
|
Claas ROLLANT 66 Repair Manual [PDF] |
481kb |
Download |
|
Claas Scorpion Manual PDF [PDF] |
5Mb |
Download |
|
Claas Targo C Service Manual [PDF] |
5.8Mb |
Download |
|
Claas Targo K50 K60 K70 — Electric System, Hidraulic System — Service Repair Manual |
8.5Mb |
Download |
|
Claas Tractor Parts Catalog [PDF] |
36.7Mb |
Download |
|
Claas TUCANO 2017 [PDF] |
2.8Mb |
Download |
|
Claas Tucano 3 and 4 Series Service Manual [PDF] |
5.1Mb |
Download |
|
Claas TUCANO 400-300 Information And Basic Field Settings [PDF] |
3.1Mb |
Download |
|
Claas TUCANO 500 [PDF] |
17.3Mb |
Download |
|
Claas UNIWRAP — Technical Systems, Hydraulic System PDF manual [PDF] |
2.8Mb |
Download |
|
Claas VARIANT 260 — 280- Technical Systems, Hydraulic System PDF manual [PDF] |
1.6Mb |
Download |
|
Claas XERION 3300 — Technical Systems, Hydraulic System PDF manual [PDF] |
3Mb |
Download |
|
Class Parts Doc EPC Agricultural 2022 [PDF] |
67.3kb |
Download |
![]()
Claas Axion 9 Series Service Manual [PDF, ENG, 13.8 MB]
Claas Axion 9 Series Service Manual [PDF
Adobe Acrobat Document
13.5 MB
![]()
Claas Dominator-58-48-38 Service Manual [PDF, ENG, 7.3 MB]
Claas Dominator-58-48-38 Service Manual
Adobe Acrobat Document
7.1 MB
![]()
Claas Columbus Series Service Manual [PDF, ENG, 13.7 MB]
Claas Columbus Series Service Manual [PD
Adobe Acrobat Document
13.5 MB
![]()
Claas Jaguar Service Manual [PDF, ENG, 9.3 MB]
Claas Jaguar Service Manual [PDF, ENG, 9
Adobe Acrobat Document
9.1 MB
![]()
Claas Lexion 480 Service Manual [PDF, ENG, 10.5 MB]
Claas Lexion 480 Service Manual [PDF, EN
Adobe Acrobat Document
10.3 MB
![]()
CLAAS Lexion 700 Series Steering Ready Combine — Installation Manual [PDF, ENG, 1.3 MB]
CLAAS Lexion 700 Series Steering Ready C
Adobe Acrobat Document
1.2 MB
![]()
Claas OPTIMISING OUTPUT FROM YOUR COMBINE [PDF, ENG, 563 KB]
Claas OPTIMISING OUTPUT FROM YOUR COMBIN
Adobe Acrobat Document
562.5 KB
![]()
Claas Lexion 500 R Service Manual [PDF, ENG, 1.2 MB]
Claas Lexion 500 R Service Manual [PDF,
Adobe Acrobat Document
1.2 MB
![]()
Claas Lexion Service Manual [PDF, ENG, 5.8 MB]
Claas Lexion Service Manual [PDF, ENG, 5
Adobe Acrobat Document
5.7 MB
![]()
Claas Tucano 3 and 4 Series Service Manual [PDF, ENG, 6.6 MB]
Claas Tucano 3 and 4 Series Service Manu
Adobe Acrobat Document
6.5 MB
1993
The powerful tractor CLAAS XERION 2000 was first introduced to the public. XERION as its own development CLAAS combines the requirements for a modern tractor with the
requirements for a system agricultural vehicle. The cab is installed in three different positions, providing different applications: first, as a classic tractor with a central position of the
cab, and secondly as a system vehicle with a 180 ° rotatable driver’s cabin with a middle and rear position in the middle and, thirdly , As a vehicle that has a cab above the engine and is
therefore convenient for transporting semi-trailers. The adapters offered for XERION further extend the scope of application. Another feature of the XERION is the award-winning and continuously
developed HM-8 gearbox developed by CLAAS specialists.

2003
With the purchase of a controlling stake in Renault Agriculture, CLAAS complements the range of products produced by standard tractors. In the same year, from the former Renault tractor plant in
Le Mans, France, the first green-painted CLAAS tractors, first presented to the public at the Agritechnica exhibition, are descending. The four models include a line of tractors
in the traditional CLAAS salad color: the universal model CELTIS, the top class ARES tractor, the large ATLES tractor, and the Harzwinkel «royal» class XERION.
2004
The new large XERION 3300 tractor is entering the market. The revised CLAAS XERION 3300 is a universal tractor in three versions. The XERION TRAC version with 335 hp, the
stepless ZF Eccom 3.5 gearbox, the RABA-controlled axles and the electronic all-wheel drive system with six control programs. Version of the XERION TRAC VC, which is distinguished primarily by
the turntable. And the version of the XERION SADDLE TRAC, the cabin of which is rigidly mounted on the front axles.
2006
Offered in five different versions from 163 to 260 hp. CLAAS AXION is the first tractor from the former Renault tractor plant in Le Mans, which from start to finish is the creation of CLAAS. Its
development began in late 2003, shortly after the CLAAS family was enlarged with tractors. The first place in the design of the new AXION was a high level of comfort, improved handling comfort,
as well as high power combined with economical fuel consumption and high reliability.
Installed on the CLAAS AXION, the 6.8 liter 6.8 liter DPS engine not only meets the TIER 3a exhaust emissions standards, but also thanks to modern technology it provides less
fuel consumption than the TIER 2 standard. As a result, CLAAS has got another modern tractor for large Agricultural enterprises, contractors and machine parks.
2007
In the tractors segment, CLAAS presented the new ARION 500 and 600 series at Agritechnica. Due to a wide range of power tractor from 112 to 155 hp. CLAAS has managed to reach a significant part
of the international clientele. CLAAS POWER MANAGEMENT in large models ARION 540 and ARION 640 allows you to release an additional 20 horsepower for the most difficult tasks. The new ARION series
is equipped with a convenient HEXASHIFT transmission, which automates the group change and is switched without the aid of a clutch. All ARION tractors develop a final speed of 40 km / h or 50 km
/ h (optional) at an economical 1900 rpm.
CLAAS AXION with infinitely variable transmission CMATIC. The AXION is offered in five different versions from 163 to 225 hp. (From 120 to 165 kW ECE R24) and fills a niche between ARES 600 and
ATLES. The main components of this modern tractor were developed from scratch. This is the first tractor, which from the beginning to the end is the creation of CLAAS. Its development began in
late 2003, shortly after the CLAAS family was enlarged with tractors.
A powerful XERION 3800 tractor is presented. The 378 horsepower XERION tractor equipped with the new CLAAS SEQUENCE MANAGEMENT, steering system for GPS coordinates and the ISOBUS connector, turns
into a true universal talent. Thanks to the already proven TRAC VC rotary cab, the driver retains the familiar perfect circular view.
2009
CLAAS presents the compact ARION 400 tractor. Six new engines of this new compact class cover the power range from 90 hp / 66 kW to 125 hp / 92 kW (according to ECE R24).
Features and dimensions allow the ARION 400 to purposefully fill a niche between the ARION 500 and the AXOS.
At the Agritechnica in 2009, CLAAS first introduced two new XERION 5000 and 4500. Along with the XERION 3800 and 3300 models in the class up to 400 hp. With these two models, CLAAS extends the
range of tractors up to 500 hp. and higher.
2011
In the pavilion 6 at the SIMA exhibition at the CLAAS booth the preliminary premiere of the new AXION 900 tractor is noted. Four models with a 280-400 hp capacity. Complemented the already
well-known series AXION 800 with 164-260 hp. And the XERION 3300-5000 with 330-530 hp. The AXION 900 is the first model of the CLAAS tractor, which complies with the TIER 4 exhaust emission
standards. The CLAAS POWER SYSTEMS (CPS) technology is first used in the AXION 900. CPS represents the optimal combination of innovative components and technologies in the drive.
2012
With the release of the ARION 500/600 series, CLAAS can offer customers the technology and comfort of powerful tractors also in the power range of 140-184 hp.
The 4-cylinder models of the ARION 500 series feature versatility and potential power, especially when working with a power take-off shaft and a front loader. The 6-cylinder models of the ARION
600 series are convincing with high tractive effort and smooth running on the field and during transportation works on the roads.
2013
The new CLAAS AXION 800 is presented. This is a completely new development in the CLAAS family of tractors, equipped with engines from 200 to 270 horsepower. It is also the first
series produced at the Le Mans plant, the engine of which complies with the Stage IV (Tier 4f) standard, and thus already meets all future requirements for gas toxicity.
Successful basic concepts, embodied in the first 800 series, CLAAS remained true to the design of the new AXION 800: a compact design with a long wheelbase, as well as various components and
control systems CIS and CEBIS. At the first stage the tractor is equipped with a HEXASHIFT gearbox, a bit later the CMATIC continuously variable transmission will be added to it.

Claas Service Manuals
Claas Agri Manual Download
Claas ARION PDF Service Manuals Download
Claas Axion 9 Series Service Manual Download
Claas Columbus Series Service Manual Download
Claas CROP TIGER 30 Operator’s Manual PDF Download
Claas DISCO, CORTO, VOLTO, LINER — Technical Systems, Hydraulic System PDF manual Download
Claas Dominator 140 150 — Technical Systems, Hydraulic System PDF manual Download
Claas Dominator 150-140-130 Operators manual PDF Download
Claas Dominator-58-48-38
Service Manual Download
Claas Jaguar 2 Service Manual Download
Claas JAGUAR 830-900 PDF Service Manuals Download
Claas Jaguar Service Manual Download
Claas Lexion 470-420 Technical Systems, Hydraulic System PDF manual Download
Claas Lexion 480 Repair Manual PDF Download
Claas Lexion 480 Service Manual Download
Claas Lexion 480-405 Technical Systems, Hydraulic System PDF manual Download
Claas Lexion 500 R Service Manual Download
Claas Lexion 570 Technical Systems, Hydraulic System PDF manual Download
CLAAS Lexion 700 Series Steering Ready Combine — Installation Manual Download
Claas Lexion Service Manual Download
Claas Liner 3000 with Communicator — Technical Systems, Hydraulic System PDF manual Download
Claas OPTIMISING OUTPUT FROM YOUR COMBINE Download
Claas QUADRANT 2100 RC — Technical Systems, Hydraulic System PDF manual Download
Claas QUADRANT 2200 RC- Technical Systems, Hydraulic System PDF manual Download
Claas Rollant 160 — Electric System, Hydraulic System — Service Repair Manual Download
Claas Rollant 240-250 — Electric System, Hydraulic System — Service Repair Manual Download
Claas Rollant 250-255-254 Diagnosis PDF Download
Claas Scorpion Manual PDF Download
Claas Targo C Service Manual Download
Claas Targo K50 K60 K70 — Electric System, Hydraulic System — Service Repair Manual Download
Claas Tucano 3 and 4 Series Service Manual Download
Claas UNIWRAP — Technical Systems, Hydraulic System PDF manual Download
Claas VARIANT 260 — 280- Technical Systems, Hydraulic System PDF manual Download
Claas XERION 3300 — Technical Systems, Hydraulic System PDF manual Download
QUANTUM 3500 — 6800 Download
LIST OF ERROR CODES Download
Claas Electric System
CLAAS Apps | Assistance and management.

Repair and diagnostics
Regulation engine (M003), belt (R48) — Download pdf
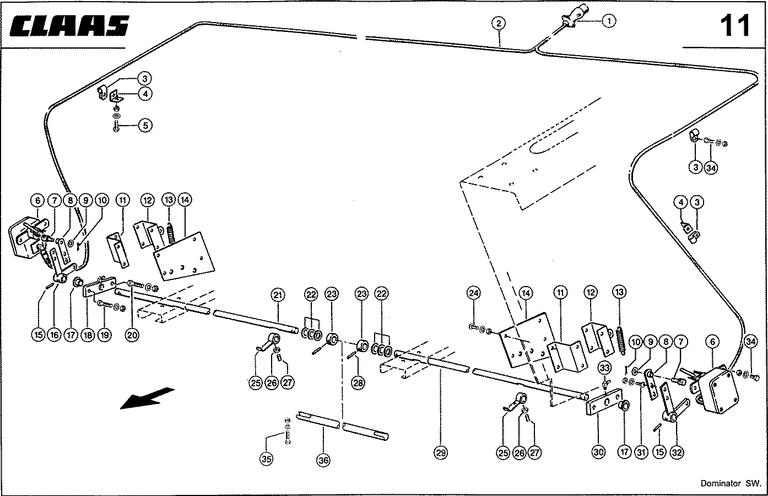
2 00110072 KPL. CABLE 1
2 00110011 KPL. CABLE 1
3 02154030 TUBE BAR 14
3 02154040 PIPE BUCKET 1
4,06864010 CORNER 4
5 02374530 BOLT 6-GR. 2
5 02361710 NUT 6-GR. 2
5 02393880 WASHER CONTACT 2
6 06163312 POTENTIOMETER 2
7 06509061 GUIDE 2
8 06163900 LEVER 2
9 02379900 WASHER 2
10 02350890 SPLINT 2
11 06163630 PROFILE Z-OBR. 2
12 06163641 PLATE P-OBR. 2
13 09294560 THE SPRING IS STRETCHED. 2
14 06163620 REINFORCEMENT 2
15 02377992 PIN FITTED 2
16 06163891 LEVER RIGHT 1
17 02342950 WASHER 2
18 06668270 BEARING 1
19 02378740 BOLT 6-GR. 2
19 02361710 NUT 6-GR. 2
19 02393880 WASHER CONTACT 2
20 02374620 BOLT 6-GR. 2
20 02361720 NUT 6-GR. 2
20 02393890 WASHING CONTACT 2
21 06668183 TOUCH SONSORSHAFT 1
21 06668143 TOUCH SONSORSHAFT 1
21 06668163 TOUCH SONSORSHAFT 1
21 06668122 TOUCH SONSORSHAFT 1
21 06668112 TOUCH SONSORSHAFT 1
22 02342340 WASHER 0
23 06668330 SET RING. 2
24 06100981 SCREW SEPTEMBER 8 SCREW
24 02361700 NUT 6-GR. eight
24 02393870 WASHERS CONTACT 8
25 06668061 SENSOR 6
26 02393860 WASHER CONTACT 6
27 02352411 BOLT 6-GR. 6
28 02356502 PIN FITTED 2
29 06668171 TOUCH SONSORSHAFT 1
29 06668101 TOUCH SONSORSHAFT 1
29 06668152 TOUCH SONSORSHAFT 1
29 06668132 TOUCH SONSORSHAFT 1
29 06668101 TOUCH SONSORSHAFT 1
30 06668270 BEARING 1
31 02364750 SCREW TAPE 4 SCREW
31 02361690 NUT 6-GR. four
31 02393920 WASHING PIN 4
32 06163860 LEVER LEFT 1
33 02369440 MASS MEAT 2
34 02374390 BOLT 6-GR. 12
34 02361700 NUT 6-GR. 12
34 02393870 WASHER CONTACT 12
35 02352411 BOLT 6-GR. 2
35 02393860 WASHER CONTACT 4
35 02361690 NUT 6-GR. 2
37 06668261 COUPLING PIECE 1
39 02387860 WASHER 2

1 02374390 BOLT 6-GR. eight
1 02361700 NUT 6-GR. eight
1 02393870 WASHER CONTACT 8
2 06668050 BRACKET 4
3 02374660 BOLT 6-GR. four
3 02379830 NUT STOPPED 4
3 02361800 WASHER 8
4 06668191 SENSING BAND 4
5 02352411 BOLT 6-GR. eight
6 02393860 WASHERS CONTACT 8