- Manuals
- Brands
- idp Manuals
- Printer
- Smart Series
- User manual
-
Contents
-
Table of Contents
-
Troubleshooting
-
Bookmarks
Quick Links
SMART Series
SMART-30S, SMART-30R, SMART-30D,
SMART-50S, SMART-50D, SMART-50L
User Manual
1
Related Manuals for idp Smart Series
Summary of Contents for idp Smart Series
-
Page 1
SMART Series SMART-30S, SMART-30R, SMART-30D, SMART-50S, SMART-50D, SMART-50L User Manual… -
Page 2
IDP Reseller. The IDP Reseller will bear the costs of shipping and insuring the printer from the repair location to the address from which the printer was shipped. -
Page 3: Table Of Contents
Table of Contents 1. Introduction …………… 7 Printer outside features …………..7 1.1.1 SMART-30 outside feature…………..7 1.1.2 SMART-50 outside feature…………..9 1.2 Printer inside features …………….11 1.2.1 SMART-30 inside feature…………..11 1.2.2 SMART-50 inside feature…………..12 1.3 Ribbon cartridge features …………..
-
Page 4
Table of Pictures Pic.1 SMART-30 front features ………………7 Pic.2 SMART-30 back features ………………7 Pic.3 SMART-30S (Standard) ………………8 Pic.4 SMART-30R (Rewritable) ………………8 Pic.5 SMART-30D (Dual) ………………..8 Pic.6 SMART-50 front features ………………9 Pic.7 SMART-50 rear features ………………9 Pic.8 SMART-50S …………………. -
Page 5
Pic.51 Install XP printer driver 21 ……………… 29 Pic.52 Install XP printer driver 22 ……………… 29 Pic.53 Install XP printer driver 23 ……………… 30 Pic.54 Install XP printer driver 24 ……………… 30 Pic.55 Install XP printer driver 25 ……………… 30 Pic.56 Install Win7 driver 1 ………………. -
Page 6
Pic.106 Color Management ………………. 52 Pic.107 Service ………………….52 Pic.108 Laminator ………………….53 Pic.109 CardPrinterSetup Log-in ……………… 54 Pic.110 CardPrinterSetup start ………………54 Pic.111 CardPrinterSetup – Card Printer Basic Setup ………… 55 Pic.112 SMART-30 R density ………………56 Pic.113 Color density ………………..57 Pic.114 Resin Black density ……………… -
Page 7: Introduction
1. Introduction 1.1 Printer outside features 1.1.1 SMART-30 outside feature. For the user’s convenience, SMART-30 status can be seen through LED and the printer can be controlled by a button. It takes a power via the 24V adaptor provided with the printer. Using USB and Network port, it is communicated with the user’s PC The following shows the outside functional features found on the printer.
-
Page 8: Pic.3 Smart-30S (Standard)
SMART-30S (Pic.5) is the standard card printer. It can be printed in single side with the encoding. This manual is prepared based on SMART-30S. SMART-30R (Pic.6) is the rewritable card printer. It can rewrite on rewritable card in single side with encoding.
-
Page 9: Smart-50 Outside Feature
1.1.2 SMART-50 outside feature. For the user’s convenience, SMART-50 status can be seen through LCD with LED and the printer can be controlled by two LED buttons. It takes a power via the 24V adaptor provided with the printer. Using USB and Network port, it is communicated with the user’s PC The following shows the outside functional features found on the printer.
-
Page 10: Pic.8 Smart-50S
There are five models in SMART-50 card printer series such as SMART-50S, SMART-50D, SMART- 50L. SMART-50S (Pic.8) is the standard card printer. It can be printed in single side with the encoding. This manual is prepared based on SMART-50S. SMART-50D (Pic.9) have a flipper which can enable to print in both side. SMART-50D can print the both side of the card with the encoding.
-
Page 11: 1.2 Printer Inside Features
1.2 Printer inside features 1.2.1 SMART-30 inside feature. In SMART-30 printer, the ribbon is installed by a ribbon cartridge which can be used semipermanently. The following shows the inside functional features found on your SMART-30 printer. ⑤ ④ ② ③ ①…
-
Page 12: 1.2.2 Smart-50 Inside Feature
1.2.2 SMART-50 inside feature. In SMART-50 printer, the ribbon is installed by a ribbon cartridge which can be used semipermanently. The following shows the inside functional features found on your SMART-50 printer. ⑥ ① Output hopper ⑤ ② Input hopper ③…
-
Page 13: 1.3 Ribbon Cartridge Features
1.3 Ribbon cartridge features ① Ribbon cartridge ④ ② ② ③ Take up parts ③ Supply parts ④ ① Disposable cleaning roller Pic.13 Ribbon cartridge features ① Ribbon cartridge -. Install a ribbon and a disposable cleaning roller provided with the ribbon. -.
-
Page 14: 1.4 Lcd Panel Display & Button Operation
1.4 LCD panel display & button operation SMART-50 printer can show the real-time process status to user. SMART-30’s status is displayed in windows tray. Button LCD Display State Description Left Right Left Right Ver X.XX… Initializing Initializing with the indication of SMART-50 firmware version Initialize……
-
Page 15
Button LCD Display State Description Left Right Left Right S M A R T Reading or writing the Magnetic encoder is reading or writing the magnetic stripe Magnetic stripe information. Mag R/W Spool Error! Cancel & Cancel & Printing data is not Shown it when error occurs in a printing data transmission. -
Page 16
Description of printer error code Error code Description Card in error Card move center error Card out error Card move magnetic error Card move contact encoder error Card move contactless encoder error Card move error from the printer to the flipper Card move error form the flipper to the printer Print head up error Print head down error… -
Page 17
Description of laminator error code Error code Description Laminator head up error Laminator head down error Laminator card in error Laminator card move error Laminator card front out error Laminator card rear out error Flipper error Error while laminating Laminator initializing error Laminator film zero error Laminator film search error No laminating film… -
Page 18: Printer Installation
2. Printer installation 2.1. Fitting the ribbon Before printing, prepare the related items such as a card, a ribbon and a cleaning roller. In this section we invite you to know the proper method of installing the ribbon and the cleaning roller into the printer.
-
Page 19: Pic.16 Loading The Ribbon 1
2.1.4. Install a ribbon into the ribbon cartridge as left picture. Pic.16 Loading the ribbon 1 2.1.5. Insert the supply side of the ribbon ① ③ to no.1 hole and press the opposite (no.2). Insert the take-up side of the ribbon same method to no.3 and no.4.
-
Page 20: Pic.20 Installing The Ribbon Cartridge
2.1.8. Install the ribbon cartridge into the printer after installing the ribbon with a cleaning roller to the cartridge. Pic.20 Installing the ribbon cartridge 2.1.9. Close the top cover (If it is not closed properly, check the installation state of the ribbon cartridge.) Pic.21 Close Top Cover…
-
Page 21: 2.2. Loading The Cards
2.2. Loading the cards This section shows how to load the plastic cards. 2.2.1. Open the input hopper cover. 2.2.2. Adjust the card thickness with the card thickness control lever. (Caution! If the adjustment is not correct, it will make some error. Use the type of cards in the specification of this manual.
-
Page 22: Pic.25 Loading The Cards 1
2.2.5. Stand the stack of cards vertically after separating. Pic.25 Loading the cards 1 2.2.6. Load the cards on the input hopper properly and close the hopper cover. Pic.26 Loading the cards 2 2.2.7. When insert each one card, insert the card to the end as left picture Pic.27 Loading the cards 3 Pic.28 Loading the cards 4…
-
Page 23: 2.3. The Withdrawal Of Printed Cards
2.3. The withdrawal of printed cards. Printed cards are passed out to the stacker of rear bottom side of SMART printer. SMART-30’s stacker can be divided as following image. Pic.29 SMART-30 Stacker SMART-50’s stacker sticks out of the device so you can withdraw the printed cards easily.
-
Page 24: Driver Installation (Windows Xp, 2000, 2003)
2.4. Driver installation (Windows XP, 2000, 2003) 2.4.1. Insert the installation CD provided with the printer. 2.4.2. Choose the language and click “Driver Install”. Pic.31 Install XP printer driver 1 2.4.3 STEP 1: If the printer is connected to the PC and turned on, turn off the power of the printer.
-
Page 25: Pic.35 Install Xp Print Driver 5
2.4.4. STEP 2: Click “Next” ready installation of the printer driver. Pic.35 Install XP print driver 5 2.4.5. If there is a pop-up window for the software installation, click “Continue Anyway”. Pic.36 Install XP print driver 6 2.4.6. STEP 3: Click “Next”…
-
Page 26: Pic.39 Install Xp Printer Driver 9
2.4.7. Please connect a power supply to the printer. (For the network printer, refer to “2.5 Network Printer” section.) Pic.39 Install XP printer driver 9 2.4.8. Please connect USB cable provided with the printer to PC and the printer. (For the network printer, refer to “2.5 Network Printer”…
-
Page 27: Pic.42 Install Xp Printer Driver 12
2.4.10. Select “Install software automatically (Recommended)”and click “Next”. Pic.42 Install XP printer driver 12 2.4.11. Click “Continue Anyway” Software Installation window. Pic.43 Install XP printer driver 13 2.4.12. Click “Finish” in Completing the Found Hardware Wizard window. Pic.44 Install XP printer driver 14 2.4.13.
-
Page 28: Pic.46 Install Xp Printer Driver 16
Card Printer” is generated in Printers and Faxes window. Pic.46 Install XP printer driver 16 2.4.15. After selecting the icon of “IDP SMART-50 Card Printer”, click the right mouse button and select the “Properties”. Pic.47 Install XP printer driver 17 2.4.16.
-
Page 29: Pic.49 Install Xp Printer Driver 19
2.4.17. Printer will start the printing and there will be the window which asks the printing success. If the printing is normal, click the “OK” (If the printing is abnormal or the printer error is occurred, remove the problem refer to “Trouble Shooting”…
-
Page 30: Pic.53 Install Xp Printer Driver 23
2.4.21. Choose the destination location and click “Next”. Pic.53 Install XP printer driver 23 2.4.22. Click “Install” begin installation. Pic.54 Install XP printer driver 24 2.4.23. Smart Design/DB program installed successfully. Pic.55 Install XP printer driver 25…
-
Page 31: Driver Installation (Windows Vista, 7,
2.5. Driver installation (Windows Vista, 7,
2.5.1. Please insert the installation CD. 2.5.2. Please choose language and click “Driver Install”. Pic.56 Install Win7 driver 1 2.5.3. When “User Account Control” window is opened, click “Yes” Pic.57 Install Win7 driver 2 2.5.4 STEP 1: Please turn off printer if it is…
-
Page 32: Pic.60 Install Win7 Driver 5
Pic.60 Install Win7 driver 5 2.5.5. STEP 2: When you click “Next”, the driver installation will be ready. Pic.61 Install Win7 driver 6 2.5.6. Please click “Install this driver software anyway” case “Windows Security” window comes out. Pic.62 Install Win7 driver 7 2.5.7.
-
Page 33: Pic.64 Install Win7 Driver 9
Pic.64 Install Win7 driver 9 2.5.8. Please connect a power supply to the printer. (If your printer is for network, please refer “2.5 Network Configuration”.) Pic.65 Install Win7 driver 10 2.5.9. Please connect USB cable to the printer. (If your printer is for network, please refer “2.5 Network Configuration”.) Pic.66 Install Win7 driver 11 2.5.10.
-
Page 34: Pic.68 Install Win7 Driver 13
“Hardware Sound”. Please check “IDP SMART-50 Card Printer” is created. Pic.69 Install Win7 driver 14 2.5.13. Please click the right mouse button after cursor is placed on “IDP SMART-50 Card Printer” icon. Click “Printer properties”. Pic.70 Install Win7 driver 15…
-
Page 35: Pic.71 Install Win7 Driver 16
2.5.14. Please select “general” tab and click “Printer test page” in “IDP SMART-50 Card Printer Properties” window. Pic.71 Install Win7 driver 16 2.5.15. Please check test card if it is printed properly and click “Close” if a card is printed properly.
-
Page 36: Pic.75 Install Win7 Driver 20
2.5.18. Please agree “I accept the terms of the license agreement” and click “Next”. Pic.75 Install Win7 driver 20 2.5.19. Please select directory program installation click “Next”. Pic.76 Install Win7 driver 21 2.5.20. Please click “Installation”. Pic.77 Install Win7 driver 22 2.5.21.
-
Page 37: 2.5. Network Configuration
2.5. Network configuration 2.5.1 Connecting network port printer which installed with network option has a port for network connection as shown in the left picture. ① Power Switch ② Power Supply Connector ③ Network Port ④ USB Port ① ② ③ ④ Pic.79 Rear view of SMART-50 printer 1 Please connect network cable (RJ45) to a printer.
-
Page 38: Pic.81 Running The Netadmin
2.5.2 Network configuration DHCP (Dynamic Host Configuration Protocol) which automatically assigns IP address to the SMART-50 network printer on the same network is default for IP configuration. If you don’t have DHCP server, you need to set static IP. Please run NetAdmin.exe in the SMART-50 installation CD to set or change network configuration. NetAdmin is run as the Pic74 after ①…
-
Page 39: Pic.83 Connecting To Usb Port
If you are unable to find printer in local network, please connect printer by USB. You can setup network by USB. When you click Refresh, you can find a printer connected by USB as shown in the left picture.. You don’t need to install device driver for network configuration by USB.
-
Page 40: Pic.85 Dynamic Ip Configuration
If you setup network automatically, please choose DHCP. Please select DHCP click “Set Configuration”. “DHCP” is default for SMART-50 printer. DHCP server should be in local network to use DHCP function. Static IP is recommended. DHCP server assigns IP address automatically but this IP address is temporary, so the IP address may be changed.
-
Page 41: Pic.87 Network Service Configuration
You can change Service Configuration. SMART-50 network printer provides 3 kinds of service (change “USB Spool”, “Network Spool” and “Network SDK”). You can select and change the service according to the need. In “Network SDK”, you can control the printer and print a card well, and the printer supports (Secure Sockets…
-
Page 42: Pic.89 Network User Configuration
You can add, change, delete User and change its password. “admin” is administrator and you can’t delete this account. Please don’t forget password for “admin” “Get User”: shows available users “Add User”: makes new user “Del User”: deletes selected user …
-
Page 43: Pic.91 Rebooting The Network Module
“Reboot module” reboots network module. Please click “Yes” when pop-up window comes out for reboot. It takes 1 minute to reboot. Please click “Refresh” after reboot. When proper printer shown, please connect printer by clicking “Connect”. Pic.91 Rebooting the network module “Reset to default”…
-
Page 44: Pic.93 Upgrading The Firmware 1
“Upgrade firmware” enables upgrade firmware of network module. You can choose a firmware file. Pic.93 Upgrading the firmware 1 Warning box will be shown during firmware upgrade for network module. It is recommended not to do other work during firmware upgrade for system reliability.
-
Page 45: Pic.95 Upgrading The Firmware 3
When firmware upgrade is completed, pop-up comes out for reboot. Please click “Yes”. It takes 1 minute to reboot. Please click “Refresh” after reboot. When proper printer shown, please connect printer by clicking “Connect”. Pic.95 Upgrading the firmware 3…
-
Page 46: Driver Configuration
3.1. Checking printer properties To check printer properties, you need to open printer driver. Please open “Drivers and Printers” and right-click “IDP SMART-50 Card Printer”. Click “Properties”. For Windows 7 or 8, please click “Printer Properties”. When you click “Printer Properties” as like left picture, a device driver of “IDP SMART-50…
-
Page 47: Pic.98 Layout
3.2.1.1. Layout — You can select either horizontal or vertical printing direction. To apply your selection, click “OK”. Pic.98 Layout…
-
Page 48: Pic.99 Advanced Setup
3.2.1.2. Advanced setup Reset Default Values: Reset to default. Color Correction: You can correct gamma for colors. You need to use CardPrinterSetup to adjust color densities. Resin Black (K) Processing: Set criteria for resin black processing. Text: to set density criteria for extracting black objects Dot: to set density criteria for extracting black dots Threshold: to set density criteria on dithering…
-
Page 49: Pic.100 Paper / Ribbon / Printing
3.2.1.3. Paper / Ribbon / Printing Pic.100 Paper / Ribbon / Printing Supply Tray Supply Please select “CR-80” because SMART-50 has 1 input hopper. Tray Please select “Auto” because SMART-50 supports CR80 cards only. Ribbon Ribbon It shows the type of installed ribbon.
-
Page 50: Pic.101 Side / Media
3.2.1.4. Side / Media To set printing side and printing mask. — Print Side You can select one side printing or both sides printing (It is possible only when you have a flipper.) — Front / Back You can use a predefined mask or user defined mask (white card, smartcard, Magnetic stripe card, etc.) on front or back side.
-
Page 51: Other Settings
3.3. Other settings 3.3.1. Sharing You can share a printer with Sharing tab via Network. Default is “Not sharing” Pic.103 Printer sharing 3.3.2. Ports Port tab shows which port is connected with SMART- 50. SMART-50 has connection with USB Virtual printer port as left picture.
-
Page 52: Pic.105 Advanced
3.3.3. Advanced It is available for Working Time setting, Priority order, Spool print etc. in “Advanced” tab. “Advanced” setting follows MS Windows standard. If you want to change the setting, please refer to the Window manual. (It is recommended to maintain default.) Pic.105 Advanced 3.3.4.
-
Page 53: Pic.108 Laminator
3.3.6. Laminator This tap will be shown only when SMART-50L printer is connected to PC. You can recognize laminator film’s type, balance, laminator’s version, serial number status. Pic.108 Laminator…
-
Page 54: Utilities
4. Utilities 4.1. Card Printer Setup SMART-50 is produced with optimized setting. You need to adjust setting value if required or spare parts are replaced using CardPrinterSetup in our Installation CD. You can adjust following settings with CardPrinterSetup. 4.1.1. Run CardPrinterSetup Password input window is displayed when you run this program.
-
Page 55: Pic.111 Cardprintersetup — Card Printer Basic Setup
Pic.111 CardPrinterSetup – Card Printer Basic Setup ① To show connected printers Device: You can select a printer using pull-down menu. “IDP SMART-50 Card Printer” is a name of printer. “SMART228” is printer ID, “USB001” is connected port. ② To set administrator password and user password.
-
Page 56: Pic.112 Smart-30 R Density
⑥ To set print area. Please set it properly to print on an entire card because SMART-50 is a direct thermal card printer. When you click “⑦ Print”, a card is printed as like “④ example”. Please set values properly that all circles of each corner are printed and blank spaces are 0.4mm ~ 0.5mm in the top and the bottom of a card.
-
Page 57: Pic.113 Color Density
Pic.113 Color density Black Density: To set resin black density. In the picture, barcode is printed to express density. When density is too strong, barcode is printed too thick. When density is too weak, barcode is too thin. Please adjust resin black density to express clear barcode. Please refer following pictures.
-
Page 58
Set Config. : to set values to current printer Load from File: to load values from file Save to File : to save values to file Load Default : to load default. Please adjust values again after load default. Close : to close CardPrinterSetup… -
Page 59: Pic.116 Cardprintersetup — Card Printer Advanced Setup
.1.2.2. Advanced Setup You can set more values. ① ② ③ ④ ⑤ Pic.116 CardPrinterSetup – Card Printer Advanced Setup ① You can set Printer ID, PC serial, Print head and Magnetic encryption key. Change Printer ID: When SMART-50 is used by SDK, you can set unique ID for SMART-50 printer regardless of whether it is connected by USB or what IP address is.
-
Page 60
⑤ Please refer as below for other values. Reserved: Not used Warming Up Display: If you use SMART-30 R, LED buttons are blinked during print head is warming up. You can adjust the timing of LED blinking by adjusting values of “Warming Up Display”. -
Page 61: Pic.117 Cardprintersetup — Laminator Basic Setup
4.1.3. Laminator .1.3.1. Basic Setup ① ② ③ ⑥ ④ ⑤ ⑦ Pic.117 CardPrinterSetup – Laminator Basic Setup ① The combo box shows connected printers ② Click Laminator Tap. ③ It shows the information of installed laminator such as firm-ware version, serial number. If you click “Change Serial No.”…
-
Page 62: Pic.118 Cardprintersetup — Laminator Advanced Setup
Heater Temperature : It is for laminating temperature. Laminating PPS : Laminating speed. Laminating Move Pulse : The distance of laminating movement. Separation with Card : After laminating and removing film, the value changes the distance of card movement Separation with Film : After laminating and removing film, the value changes the Distance of film movement.
-
Page 63
② The values are for setting motor torque of film movement. Torque Move Max : Change Maximum motor torque Torque Move Min : Change Minimum motor torque ③ The values are for setting motor torque of laminating. You can set the values of each section. -
Page 64: Card Printer Test
⑦ Pic.119 CardPrinterTest ① Select Printer: select printer to test. In the picture, “IDP SMART-50 Card Printer” is the Printer name, SMART228 is the Printer ID, and USB001 is the connected port. ② Control : To execute each step to test ③…
-
Page 65
4.2.2 Select printer and control When you execute CardPrinterTest, it will search connected printers by USB and Network automatically and SMART-50 printer connected to USB has higher priority. Other printers could be selected by pull-down menu. You can test all function with connected printer. . -
Page 66: Pic.120 Magnetic Stripe Encoding
test and eject the card. But if not, encoding test will be done only by one card. At that time, if there is no card in the printer, the printer bring a card into the printer from input hopper and repeat the encoding test on the card, and if there is a card in the printer, the encoding test is performed on the card repeatedly.
-
Page 67: Pic.121 Contact Smartcard Encoding
“ICH Discontact” is to separate the encoder head from the IC chip of smartcard physically. “Init” is to recognize and display the installed contact smartcard reader. The recognized encoder will be displayed at the pull down control. “Contact” is to contact with the smartcard electrically and initialize. “Reset”…
-
Page 68: Pic.122 Contactless Smartcard Encoding
“Clear” is to clear the displayed data (ATR, Name, Address and Phone). In case the data is read and written using APDU, Read/Write can be done by APDU commands. “Load APDU” is to read the stored APDU commands. “Save APDU” is to save the displayed APDU commands. “Clear APDU”…
-
Page 69
#define SMSC_M_ROTATORBOTTOM 0x0000000000020000 // Rotate Card down #define SMSC_S_HOPPERHASCARD 0x0000000000040000 // Card in hopper #define SMSC_S_THUP 0x0000000000080000 // Thermal head up #define SMSC_S_CARDIN 0x0000000000100000 // Detect Card in #define SMSC_S_CARDOUT 0x0000000000200000 // Detect Card out #define SMSC_S_ROTATORTOP 0x0000000000400000 // Card front side up in Flipper #define SMSC_S_EQUIPROTATOR 0x0000000000800000… -
Page 70: Firmware Upgrade
#define LMSC_S_CARDOUTSENSOR 0x0000000040000000 // Caught by card out sensor #define LMSC_S_OUTDOORSENSOR 0x0000000080000000 // Caught by stacker open sensor Laminator’s Error Code #define LMSC_E_HEATHDRLIFTUP 0x0000000100000000 // Error while lifting up Heat-header #define LMSC_E_HEATHDRLIFTDOWN 0x0000000400000000 // Error while lifting down Heat-header #define LMSC_E_CARDIN 0x0000001000000000 // Error while moving card in…
-
Page 71: Pic.124 Ready For Firm-Ware Upgrade
4.3.1. Card Printer Firm-ware Upgrade. If you click “Browse” and select the new firmware, “Manual Update” and ”Update” are activated. At that time, click “Update” button to upgrade automatically, then the printer is upgraded after rebooting. (Caution: Please do not close upgrade dialog box until it is completed successfully and do not turn off the printer.) Pic.124 Ready for firm-ware upgrade In case there are some problems in the automatic upgrade, you click “Manual Update”…
-
Page 72: Pic.126 Ready For Laminator Firm-Ware Upgrade
4.3.2. Laminator Firm-ware Upgrade. This function is only for card printer firm-ware version 1.00.60 and laminator should be installed to the printer. If you click “Browse” and select the new firmware, “Manual Update” and ”Update” are activated. At that time, click “Update” button to upgrade automatically, then the printer is upgraded after rebooting. (Caution: Please do not close upgrade dialog box until it is completed successfully and do not turn off the printer.) Pic.126 Ready for laminator firm-ware upgrade…
-
Page 73: Optional Device Driver Installation
5. Optional device driver installation In SMART-50 printer, you can install the optional devices that encode contact smartcard or contactless smartcard. If your purchased SMART-50 printer has optional devices, you should also install the smart card reader drivers. 5.1. Contact smartcard reader In SMART-50 printer, you can install the two types of optional devices which are contact smartcard reader and mobile SIM smartcard reader.
-
Page 74: Pic.129 License Agreement
5.1.2. License agreement The license agreement window is shown. Check at the agreement and click “Next”. Pic.129 License agreement 5.1.3. Installation The installation message is shown as the picture. Click “Install” to install driver. Pic.130 Installing the contact smartcard reader driver 5.1.4.
-
Page 75: Pic.131 Completing The Smartcard Reader Driver Installation
When the installation is completed, the window is shown. Click the “Finish” to complete the installation steps. Pic.131 Completing the smartcard reader driver installation…
-
Page 76: Pic.132 Found New Hardware Wizard
5.2. Contactless smartcard reader In SMART-50 printer, you can install the two types of smartcard reader which are internal contactless smartcard reader and external contactless smartcard reader. If you have one or more contactless smartcard reader devices on your printer, you should install the contactless smartcard device driver as in the following, and connect SMART-50 printer to your PC.
-
Page 77: Pic.134 Driver Location
5.2.3. Driver location Insert the smartcard installation CD and find “\Options\ Omnikey 5121” directory on your CD. Find the right directory which is installed OS version on your PC, and select the directory as the picture, and click “Next”. Pic.134 Driver location 5.2.4.
-
Page 78: Troubleshooting
6. Troubleshooting 6.1. Cleaning the printer To maintain the best condition of SMART-50 printer, you must clean the printer periodically. If you use the exclusive cleaning card as the picture, you can clean the printer easily. For purchase the exclusive cleaning card, ask to SMART-50 printer provider. Pic.136 Exclusive cleaning card for SMART-50 printer If the exclusive cleaning card is ready, click the “Clean Printer”…
-
Page 79: Pic.138 Printer Cleaning Step 1
Pic.138 Printer cleaning Step 1 Step 2. Open the hopper and top cover and remove the card and ribbon cartridge. Pic.139 Printer cleaning Step 2…
-
Page 80: Pic.140 Printer Cleaning Step 3
Step 3. Insert the exclusive cleaning card into the printer through input hopper. When the exclusive cleaning card is inserted to the cleaning roller, it will be move automatically. It is normal that the exclusive cleaning card is inserted to the ends and rollers are moving to clean. Pic.140 Printer cleaning Step 3 Step 4.
-
Page 81: Pic.142 Printer Cleaning Step 5
Step 5. Wait until the cleaning is completed. When the cleaning is completed, the exclusive cleaning card will be ejected automatically as the picture. Pic.142 Printer cleaning Step 5 Step 6. Remove the exclusive cleaning card and install ribbon cartridge into the printer. Pic.143 Printer cleaning Step 6…
-
Page 82: Tph (Thermal Print Head) Replacement
6.2 TPH (Thermal Print Head) replacement Check the serial number and the resistance of new Thermal Print Head as the Picture. TPH type: A = KEE, B = KPE Serial No.: see the red box. TPH resistance: see the green box. Pic.144 Thermal Print Head 2.
-
Page 83: Card Movement
Pic.146 Print head replacement 4. Setup the print position and the color density. After installing the new TPH, you must reset the print position and the color density using CardPrinterSetup utility. Refer to “4.1.2 Default setting” 5. Calibration of Print Head Angle To get the best print quality, the TPH should be located vertically with card surface.
-
Page 84: Printing Quality
6.3.3. An Error occurs while the card is being transferred. First of all, check the Error message at LCD display. Open the top cover and remove the card by LED buttons. If this problem occurs frequently, check the followings. Non-standard cards or bad cards. Change the cards.
-
Page 85: Magnetic Stripe Encoding
6.4.4. Not aligned color print. Non-standard cards or bad cards. Change the cards. You can use only ISO CR-80 card (54mm x 86mm). Uneven or bad card surface. Change the card. transfer roller printing roller contaminated with the dust and dirt. Clean the rollers with the cleaning kit as section 6.1.
-
Page 86
6.6.2. LCD display “Ribbon Not Found” Press the left LED button to retry. If it occurs frequently, check the followings Not genuine ribbon. Change to the genuine ribbon. Ribbon is consumed. Printing is not possible if ribbon is used up. Change the ribbon. … -
Page 87: Printer Specification
7. Printer specification Product Specification SMART-30S SMART-30R Printing Print Type Dye-Sublimation / Resin Thermal Transfers Direct Thermal Printing & Erasing Edge to Edge Print Area Resolution 300 dpi Dual Side Printing Option Cards Card Feeding Automatic ISO CR-80 (54mm x 86mm / 2.12″ x 3.38″) Card Size Card Thickness 0.38mm (15mil) ~ 0.76mm (30mil)
-
Page 88: Pic.154 Printer Specification 2
SMART-30D Product Specification Printing Dye-Sublimation / Resin Thermal Transfers Print Type Print Area Edge to Edge 300 dpi Resolution Dual Side Printing Cards Automatic Card Feeding ISO CR-80 (54mm x 86mm / 2.12″ x 3.38″) Card Size 0.38mm (15mil) ~ 0.76mm (30mil) Card Thickness PVC, Composit PVC, PET Card Type…
-
Page 89: Pic.155 Printer Specification 3
Product Specification SMART-50S SMART-50D Printing Print Type Dye-Sublimation / Resin Thermal Transfers Edge to Edge Print Area 300 dpi Resolution Dual Side Printing Option Cards Card Feeding Automatic ISO CR-80 (54mm x 86mm / 2.12″ x 3.38″) Card Size 0.38mm (15mil) ~ 1.0mm (40mil) Card Thickness PVC, Composit PVC, PET Card Type…
-
Page 90: Pic.156 Printer Specification 4
SMART-50L Product Specification Printing Dye-Sublimation Print Type Edge to Edge Print Area 300 dpi Resolution Dual Side Printing Laminating Single & Double with flip-over Laminating Mode Laminates 0.6mil, 1.0mil, Clear and Holographic Cards Automatic Card Feeding ISO CR-80 (54mm x 86mm / 2.12″ x 3.38″) Card Size 0.76mm (29.9mil) ~ 1.0mm (40mil) Card Thickness…
СОДЕРЖАНИЕ ►
- Учебники по Ардуино в формате pdf
- Книги по Ардуино для начинающих
- 25 крутых проектов с Ардуино
- С чего начать изучение Ардуино
- Что купить для изучения Ардуино
Чтобы начать изучать программирование Arduino с нуля, вам требуется набор литературы или проверенные источники в Интернете (как наш сайт), где размещены Уроки для начинающих на Ардуино с подробными инструкциями и комментариями. На этой странице вы узнаете, что лучше купить для изучения Ардуино в первую очередь, с чего начать изучать Ардуино и какие книги можно скачать для первых шагов.
Arduino книги с уроками и проектами на русском
Выполнив первые уроки, а большинство знакомство с микроконтроллером начинает с самого простого задания — подключения светодиода к плате, вы поймете, что сделать какое-то устройство или проект на Ардуино своими руками довольно просто. Суть микроконтроллеров в том, что они рассчитаны на любителей, у которых нет больших знаний в программирование и они даже полные чайники в электротехнике.
Учебники и книги по Ардуино для начинающих
 |
Быстрый старт с набором Arduino (PDF) Книга содержит полезную информацию для ознакомления с Arduino и практические эксперименты с иллюстрациями. Авторы пособия подробно рассказали, как установить программное обеспечение на компьютер и изложили 14 простых проектов, где для работы необходимо минимум первоначальных электронных компонентов. |
 |
Практическая энциклопедия Arduino Учебник содержит уже 33 урока по программированию Ардуино с использованием различных модулей и датчиков. Российские авторы изложили в своем учебнике практические уроки с цветными иллюстрациями и подробными комментариями, все скетчи из книги можно скачать из Интернета по ссылкам, указанным в уроках. |
 |
Джереми Блум. Изучаем Arduino Учебник переведен на русский и содержит подробные уроки для программирования микроконтроллера от известного автора. К плюсам данной книги можно отнести ссылки на информационный сайт, а также наличие видео уроков от Джереми Блума на YouTube (они тоже переведены на русский язык и озвучены). |
 |
Arduino и Raspberry Pi в проектах IoT (PDF) Книга рассчитана на опытных пользователей и содержит уроки по Ардуино для создания проектов с использованием Intemet of Things (Интернета вещей). Показана организация доступа к сети Интернет, отправка и получение данных с использованием IoT сервисов. Уделено внимание обмену данными с помощью GPRS/GSM Shield. |
Книги с интересными проектами на Ардуино
 |
25 крутых проектов с Arduino (PDF) Книга содержит описание и руководство по сборке 25 крутых проектов на Ардуино. Марк Геддес написал руководство, где подробно расписано начало программирования в среде Arduino IDE, правила сборки электрических схем на макетной плате, даны инструкции с примерами интересных проектов для начинающих с нуля. |
 |
Проекты с использованием Arduino (PDF) Учебник с наиболее глубоким изучением языка программирования Arduino, каждая команда разобрана автором в отдельном разделе с примером скетча. В учебнике есть раздел с обзором различных плат Arduino и подробно рассмотрено подключение радио модулей для создания проектов на дистанционном управлении. |
 |
77 проектов для Arduino (PDF) Книга «77 проектов для Arduino» автор Петин В.А. подойдет как, для начинающих программистов, так и для тех, кто хорошо освоил Ардуино и хочет сделать самостоятельно интересные проекты на микроконтроллере. Начните сборку проектов на Ардуино с подборкой литературы от лучших авторов на нашем сайте. |
Скачать книги можно, как на компьютер, так и на телефон. Так как язык Arduino основан на языке программирования C++, то на мобильном устройстве можно начать изучать основы, а на компьютер скачать учебник по Ардуино на русском бесплатно и без регистрации. Первым делом рекомендуем вам прочитать, что такое Ардуино и что с ним можно сделать, особенно если вы еще не работали с этими платами.
С чего начать изучать Ардуино с нуля
Книга или учебник по Arduino на русском — это лишь теория и без практики здесь не обойтись. До того, как вы приступите к программированию микроконтроллера необходимо получить базовые знания по схемотехнике. Следует изучить основные радиоэлементы, их назначение, принцип работы, условные обозначения, как собирать электрические схемы. Для этого поможет следующая информация на нашем сайте:
- Основные законы электричества
- Радиоэлементы с фото и названиями
- Как собирать схемы на макетной плате
- Характеристики контроллеров Arduino
Для того чтобы программировать микроконтроллер Arduino следует установить на компьютере необходимое программное обеспечение, а также иметь всегда под рукой справочники по языку Arduino и описание ошибок в программе (скетче) для микроконтроллеров (они всегда будут появляться первое время). Для этого обратите внимание на следующую очень полезную информацию на нашем сайте:
- Установка Arduino на Windows
- Установка библиотек в Arduino
- Язык программирования Arduino
- Ошибки при компиляции Arduino
Что купить для изучения Ардуино с нуля
Совсем маленьким детям до 10 лет рекомендуем для начала купить наборы по сборке простых электрических схем без программирования, например, Знаток (есть различные комплектации конструктора) или Микроник. Если у ребенка появится интерес к электронике, то уже можно приобретать бесплатные учебники и заказывать стартовые наборы (эти комплекты в интернет магазинах называют Starter KIT).
Для детей можно заказать стартовые наборы на Алиэкспресс, где есть все необходимое для начала. Также можно посмотреть в интернете русские наборы на Arduino от Амперки и других производителей. Они будут стоить значительно дороже, но во многих есть инструкции на русском языке и уроки. С другой стороны, ничего не мешает выполнять уроки по Arduino на русском, используя недорогой набор из Китая.
Коды ко всем 30 урокам и все необходимые библиотеки в одном архиве (.zip)
Библиотеки
<DS1302.h> (для урока 17)
<IRremote.h> (для уроков 18 и 19)
<DHT.h> (для уроков 24 и 25)
<OneWire.h> и <DallasTemperature.h> (для урока 26)
Коды к урокам
Урок 1. Светодиод
Урок 2. Светодиодная гирлянда
Урок 3. RGB-светодиод
Урок 4. Потенциометр
Урок 5. Кнопка
Урок 6. Яркость светодиода
Урок 7. Фоторезистор
Урок 8. Звонок
Урок 9. Пианино
Урок 10. Пешеходный переход
Урок 11. Коллекторный мотор
Урок 12. Шаговый мотор
Урок 13. Сервопривод
Урок 14. Реле
Урок 15. Секундомер
Урок 16. LCD-экран
Урок 17. Часы
Урок 18. Пульт управления
Урок 19. Управление сервоприводом
Урок 20. Семерочка
Урок 21. Датчик движения
Урок 22. Сдвиговый регистр
Урок 23. Светодиодная матрица
Урок 24. Датчик температуры и влажности
Урок 25. Климат-контроль
Урок 26. Датчик температуры DS18b20
Урок 27. Ультразвуковой дальномер
Урок 28. Парктроник
Урок 29. Шумометр
Урок 30. «Умный» светильник
* Коды и библиотеки, приведенные на данной странице, действительны для 1-го и 2-го изданий Руководства пользователя
Ардуино
конструктор
–
фото
коробки
лицо
В
детстве,
когда
ещё
транзистор
для
меня
был
в
диковинку,
мне
на
День
рождения
папа
подарил
конструктор
–
радиоприемник
прямого
усиления.
Сколько
радости
было!
Пожалуй,
для
меня
это
–
самый
запоминающийся
подарок
из
детства!
А
сколько
усердных
часов
я
провёл
с
этим
подарком!
А
сколько
нового
узнал
–
буквенная
и
цветовая
маркировка
резисторов
(с
тех
пор
помню
наизусть),
цоколевка
транзисторов,
пайка,
настройка!
Сегодня
статья
о
другом
конструкторе,
который
ещё
более
увлекателен
и
полезен
для
развития
творческого
мышления
и
технических
навыков.
Это
конструкторы
на
основе
системы
Ардуино.
Думаю,
многие
слышали
об
Arduino,
а
кто-то
даже
активно
работал
или
работает
с
ними.
Сегодня
я
предоставлю
вашему
вниманию
обзор
готовых
стартовых
наборов
линейки
«Смарт»
на
базе
микроконтроллерных
плат
Arduino/Genuino.
В
двух
словах
о
том,
что
это
такое.
Arduino/Genuino
–
уникальные
аппаратно-программные
средства
для
построения
систем
автоматики
и
робототехники,
ориентированные
как
на
профессиональных
пользователей,
так
и
новичков.
Главное
–
можно
не
только
познавать
электронику,
но
и
изучать
и
программировать
контроллеры.
А
ведь
сейчас
вся
электроника
построена
на
контроллерах
и
программах.
Не
могу
сказать,
что
увлекательнее
–
конструировать
устройства
или
писать
для
них
программы)
Иными
словами
–
это
небольшая
плата
с
собственным
процессором
и
памятью,
снабженная
множеством
выводов,
к
которым
можно
подключить
различную
периферию
и
управлять
ей
по
заданному
алгоритму,
будь
то
простой
светодиод,
либо
сложный
модуль
навигации
или
GSM
связи.
Платы
выпускаются
с
открытой
архитектурой
и
исходным
кодом,
что
позволяет
различным
производителям
копировать,
дорабатывать,
совершенствовать
исходную
продукцию,
но,
тем
не
менее,
базовые
функции
остаются
неизменными.
Представленные
конструкторы
Ардуино
будут
интересны
как
тем
кто
уже
занимается
изучением
мира
микроконтроллеров,
так
и
тем
кто
еще
только
делает
в
этом
первые
шаги.
Наборы
не
только
наглядно
продемонстрируют,
как
работают
различные
устройства,
окружающие
нас
в
повседневной
жизни,
но
и
позволят
быстро
освоить
основные
приемы
работы
с
Arduino/Genuino
и
самостоятельно
собрать
собственные
устройства.
Наборы
выпускаются
в
различных
комплектациях,
а
цены
на
них
начинаются
всего
от
1590
рублей.
Комплектации
наборов
отличаются
друг
от
друга
тем,
какая
микроконтроллерная
плата
(оригинальная
или
копия)
входит
в
комплект,
а
также
количеством
электронных
компонентов
из
которых
можно
собирать
устройства.
Я
расскажу
вам
о
самой
полной
комплектации
набора
«Смарт
30,
Genuino»
с
оригинальным
контроллером
Genuino.
Его
актуальная
цена
на
момент
написания
статьи
–
4890
рублей
–
и
это
самая
максимальная
цена
в
линейке
наборов.
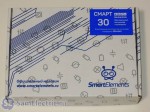
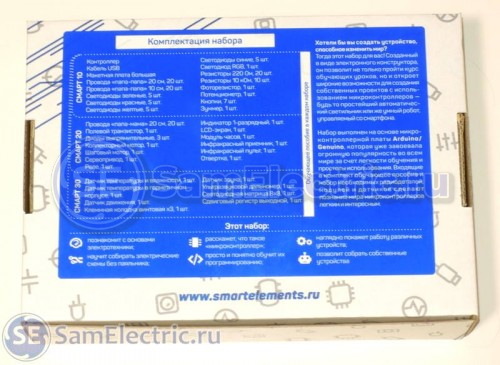
фото
коробки
с
конструктором
Ардуино
–
оборот
Итак,
начнем.
Приятная
упаковка
и
внешний
вид
–
несомненный
плюс
–
может
послужить
отличным
подарком
для
любого
подростка,
интересующегося
техникой.
Первое,
что
мы
видим
–
небольшая
брошюра
–
руководство
на
русском
языке.
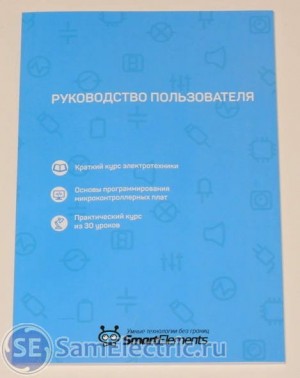
фото
книги
–
руководство
по
сборке
на
Ардуино
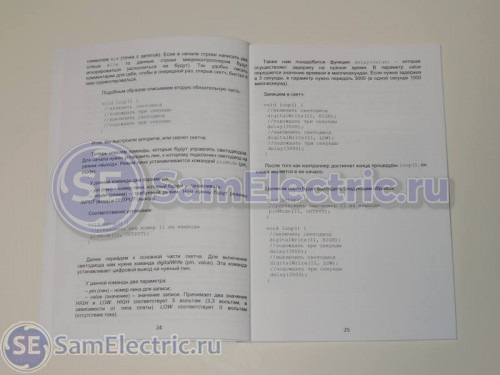
Выполнено
в
виде
компактной
брошюры
с
цветной
печатью.
Состоит
из
трех
разделов:
курс
теории,
основы
программирования
микроконтроллерных
плат
и
практические
уроки.
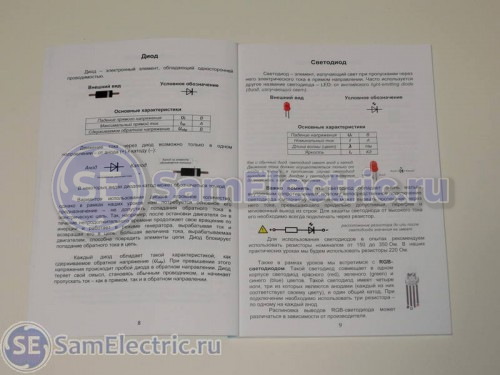
Конструктор
Ардуино
–
фото
книги
теория
В
теории
кратко
описано
об
основных
электронных
элементах,
входящих
в
состав
набора
–
что
это
такое
и
зачем
нужно.
Описано
на
простом
и
понятном
языке
–
разберется
даже
ребенок,
а
для
взрослых
будет
неплохой
повод
вспомнить
школьный
курс
электротехники.
Конструктор
Ардуино
–
фото
книги
программирование
В
разделе
об
основах
программирования
микроконтроллерных
плат
показаны
принципы
работы
с
платами
Arduino/Genuino.
Первый
раз
может
показаться
непонятно,
однако
поверьте,
все
намного
проще,
чем
кажется.
фото
книги
уроки
по
Ардуино
Ну
и
самое
главное
–
то
ради
чего
создан
набор
–
практические
уроки.
Всего
их
30.
В
зависимости
от
комплектации
набора,
компонентов
будет
достаточно,
чтобы
пройти
10,
20
или
30
уроков.
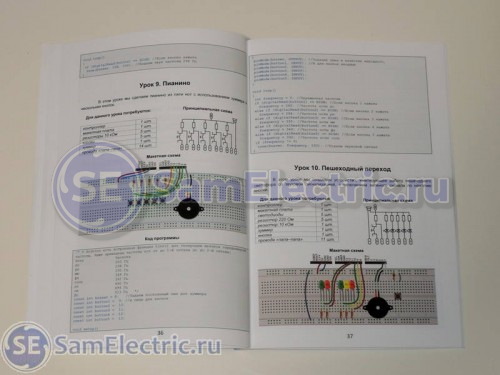
Все
уроки
имеют
описание,
схемы
подключения
и
соединения
компонентов,
а
также
код
программы,
которая
загружается
в
контроллер
для
управления
компонентами.
Уроки
построены
от
простого
к
сложному.
Так,
например,
первые
10
уроков
посвящены
базовым
элементам,
таким
как
светодиод,
кнопка,
фоторезистор,
зуммер
и
т.п.
Уроки
с
11
по
20
охватывают
механику
(моторы
и
сервоприводы),
вывод
информации
на
дисплей
или
индикатор,
дистанционное
управление
компонентами
и
др.
И,
наконец,
уроки
с
21
по
30
–
самые
интересные.
Это
использование
различных
датчиков:
температуры,
влажности,
движения,
расстояния,
звука
и
др.
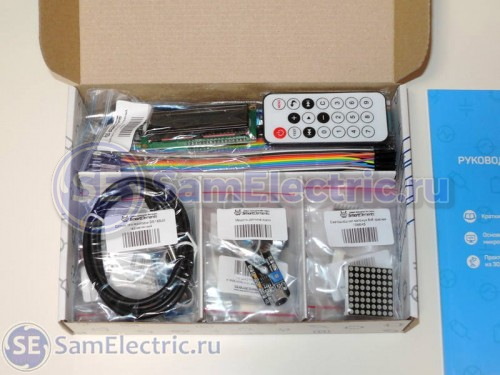
фото
набора
внутри
Могу
сказать,
что
если
бы
у
меня
в
14
лет
был
бы
такой
набор,
я
был
бы
самым
счастливым
ребенком!
И
знал
бы
многие
вещи
на
10-20
лет
раньше!
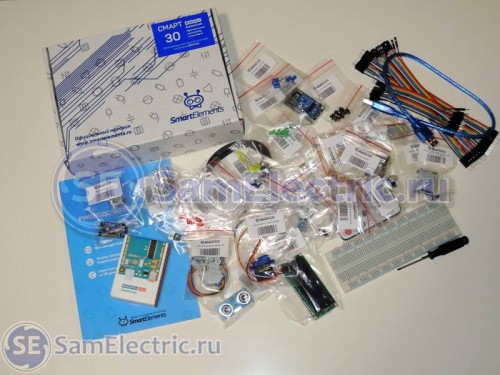
фото
состав
набора
для
Ардуино
Все
компоненты
добротно
упакованы,
каждая
деталь
подписана,
так
что
проблем
с
их
идентификацией
не
возникнет.
Все
схемы
собираются
с
использованием
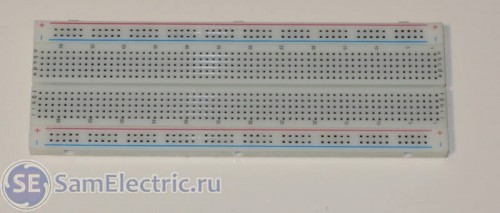
макетной
платы,
входящей
в
комплект
–
значит
паяльник
абсолютно
не
нужен,
а
любая
ошибка
исправляется
быстро
и
без
усилий.
фото
макетной
платы
И
еще
небольшой
приятный
момент.
После
изучения
всех
уроков,
набор
не
пополнит
коллекцию
использованных
и
ненужных
вещей,
ведь
абсолютно
все
компоненты
можно
многократно
использовать
уже
в
своих
собственных
проектах,
в
которых
границы
ограничены
лишь
собственной
фантазией.
Более
подробно
ознакомиться
с
наборами
можно
на
сайте
официального
продавца
наборов для
сборки
Ардуино
– компании
«Умные
Элементы».
А
у
меня
можно
задать
вопросы
и
поделиться
опытом,
добро
пожаловать
в
комментарии!
Понравилось?
Поставьте
оценку,
и
почитайте
другие
статьи
блога!
Загрузка…
Внимание!
Автор
блога
не
гарантирует,
что
всё
написанное
на
этой
странице
—
истина.
За
ваши
действия
и
за
вашу
безопасность
ответственны
только
вы!

BHV.RU Publishing House
Download PDF
-
Publications :
315 -
Followers :
28
Руководство к набору «Умный дом на базе Arduino_Большой набор»
Руководство к набору «Умный дом на базе Arduino_Большой набор»
View Text Version
Category : 40
-
Follow
-
1
-
Embed
-
Share
-
Upload


