Silver Reed
Инструкция к вязальной машине Silver Reed SK-270,SK-280,SK-155 на русском языке
Инструкция по эксплуатации передней игольницы Silver Reed SRP-60N на руссском языке
Инструкция на сменнику цвета Silver Reed YC-6 на русском языке
Инструкция по эксплуатации ажурная каретка Silver Reed LC2 на русском языке
Инструкция к вязальной машине Silver Reed SK-830,SK-840,SK-860,SK-890 на русском языке
Инструкция к вязальной машине Silver Reed SRP60N на русском языке
Инструкция к лекальному устройству Silver Reed KR-7 на русском языке
Brother
Инструкция к вязальной машине Brother KH800 на английском языке
Инструкция по эксплуатации лекальное устройство Brother КН881 на английском языке
Инструкция к вязальной машине Brother KH868 на русском языке
Инструкция к вязальной машине Brother KR-838 на русском языке
Инструкция к нижней фонтуре Brother KR850 на русском языке
Инструкция по эксплуатации робот-каретка Brother KG93 на русском языке
Инструкция по эксплуатации четырехцветник Brother KRC 900 на русском языке
Toyota
Инструкция к вязальной машине Toyota KS858 на английском языке
Инструкция к вязальной машине Toyota KS901 на русском языке
Нева, Ладога
Инструкция к вязальной машине Нева 2 на русском языке
Инструкция к вязальной машине Нева 4 на русском языке
Инструкция к вязальной машине Нева 5 на русском языке
Инструкция к ластичная приставка к Нева 1 на русском языке
Инструкция к ластичная приставка Ладога 4 на русском языке
Северянка
Инструкция к вязальной машине Северянка на русском языке
Иналса
Инструкция к вязальной машине Иналса на русском языке
Если вы не нашли подходящей инструкции,но у вас есть инструкция на другом языке — посмотрите ролик нижеи не забудьте подписаться
Город:
Москва
Русский
-
English
-
Русский
- Доставка и оплата

- О компании
- Блог
- Отзывы
- Инструкции
- Политика конфиденциальности
- Карта сайта
Каталог товаров
- Главная страница

Все товары
Акция дня
Лупы и светильники
Деккеры
5 класс
3 класс
7 класс 3,6 мм Silver Reed
7 класс 3,5 мм Brother
4 класс
Комплекты для вязальных машин
Аксессуары
Оттяжные Гребенки
Поролон, прижимные планки
Грузы (Подвески)
Иглы
Перфокарты
Запчасти
Brother
Silver reed
Литература
Каталоги перфокарт
Книги по рукоделию
Книги Инструкции
Крепления
Доп. оборудование
Вязальные машины
Мастер-классы
Упаковка. Наклейки. Бирки
- Комплекты для вязальных машин
- Деккеры
5 класс 4,5 мм
3 класс 9 мм
7 класс 3,6 мм Silver Reed
7 класс 3,5 мм Brother
4 класс 6,5 мм
4 класс 6 мм lecle
5 класс 5 мм Северянка
- Оттяжные Гребенки
5 класс 4,5 мм
Однофонтурные гребенки
Двухфонтурные гребенки
3 класс 9 мм
7 класс 3,6 мм Silver Reed
4 класс 6 мм lecle
5 класс 5 мм Северянка
- Аксессуары

Оттяжные Гребенки
Ограничители
Иглы
Поролон, прижимные планки
Щетки
Перфокарты
Листами
Рулонами
Наборы
Перфораторы
Грузы (Подвески)
Моталки
Прутки
Ленты
Лекальные листы
Счётчики для вязальных машин
Линейки
Челноки
- Доп. оборудование
- Запчасти
- Инструкции
- Литература
- Моталки
- Лупы и светильники
- Скидки
- Вязальные машины
- Акция дня
0Корзина
Корзина
Корзина
Оформить заказ
Аккаунт
- Заказы
- Список сравнения
- Отложенные товары
Отслеживание заказа
Отслеживание заказа
ВойтиРегистрация
ПарольЗабыли пароль?
Создать учетную запись
Войти через соц. сеть:
![]()
![]()
![]()
![]()
Запомнить
/Инструкции для вязальных машин
Инструкции для вязальных машин
Brother
Инструкция к вязальной машине Brother KH120 на русском языке ➞ Деккеры для этой машинки
Инструкция к вязальной машине Brother KH230 на русском языке ➞ Деккеры для этой машинки
Инструкция к вязальной машине Brother KH260 на русском языке ➞ Деккеры для этой машинки
Инструкция к вязальной машине Brother KH800 (англ)
Инструкция к вязальной машине Brother KH868 на русском языке ➞ Деккеры для этой машинки
Инструкция к вязальной машине Brother KH 893 на русском языке ➞ Деккеры для этой машинки
Инструкция к вязальной машине Brother KH940 на русском языке ➞ Деккеры для этой машинки
Инструкция к вязальной машине Brother KH950 на русском языке ➞ Деккеры для этой машинки
Инструкция к вязальной машине Brother KH950i на русском языке ➞ Деккеры для этой машинки
Инструкция к второй фонтуре Brother KR260 на русском языке
Инструкция к второй фонтуре Brother KR838 на русском языке
Инструкция к второй фонтуре Brother KR850 на русском языке
Инструкция к четырехцветнику Brother KRC 900 на русском языке
Инструкция к робот каретке Brother KG95 на русском языке
Инструкция к Лекальному устройству Brother KL116 на русском языке
Инструкция к встроенному Лекальному устройству Brother КН881 на русском языке
Инструкция по эксплуатации каретки интарсия ka8210 на русском языке
Инструкция к Лекальному устройству Brother КRC 1000e на русском языке
Silver Reed
Инструкция к вязальной машине Silver Reed SK-280 на русском языке (SK-270,SK-155) ➞ Деккеры SK280
➞ Деккеры SK155 ➞ Деккеры SK270
Инструкция к вязальной машине Silver Reed SK-840 на русском языке (SK-860,SK-890 SK-830) ➞ Деккеры SK840
➞ Деккеры SK830 ➞ Деккеры SK860 ➞ Деккеры SK890
Инструкция вторая фонтура Silver Reed SRP-60N на русском языке
Инструкция к Лекальному устройству Silver Reed KR7 Knitradar на русском языке
Инструкция по эксплуатации ажурной каретки Silver Reed LC2 на русском языке
Инструкция сменник цвета Silver Reed YC-6 на русском языке
Остальные
Инструкция к вязальной машине Toyota KS901 на русском языке ➞ Деккеры для этой машинки
Инструкция к вязальной машине Toyota KS858 (англ) ➞ Деккеры для этой машинки
Инструкция к вязальной машине Северянка
-
инструкции
-
Инструкция
-
инструкция к вязальной машине
-
Четырехцветник
Моя учетная запись
- Войти
- Создать учетную запись
Магазин
- О нас
- Обратная связь
- Подарочные сертификаты
- Торговые марки
- Карта сайта
- Блог
Покупательский сервис
- Ваши заказы
- Отложенные
- Список сравнения
Контакты
- г. Москва,
- (звонок бесплатный)
- Пн-Вс 9.00 — 18.00
- zakaz@dekkep.ru
- Посмотреть на карте
© 2020 Вязальные машины и Аксессуары от Екатерины Егоровой.
Инструкции
Здесь вы сможете скачать pdf-файлы инструкций к технике из нашего каталога.

Инструкция для вязальной машины Silver Reed LK 150
Универсальное руководство по эксплуатации
Язык: русский

Инструкция для вязальной машины Silver Reed SK 280
Универсальное руководство по эксплуатации
Язык: русский

Инструкция для вязальной машины Silver Reed SK 840
Универсальное руководство по эксплуатации
Язык: русский

Инструкция для нижней фонтуры Silver Reed SRP60N
Универсальное руководство по эксплуатации
Язык: русский
The store will not work correctly in the case when cookies are disabled.
Toggle Nav
![]()
-
Home
-
Brother-KnitKing
- Machine Manuals
Brother KnitKing Machine Manuals
We can’t find products matching the selection.
_________________________________
Advertisement
_________________________________
Advertisement
Copyright © 2013-present Magento, Inc. All rights reserved.
- Manuals
- Brands
- Stoll Manuals
- Sewing Machine
- CMS ADF-3
- Instruction manual
-
Contents
-
Table of Contents
-
Bookmarks
Quick Links
Instruction manual for a safe operation of the
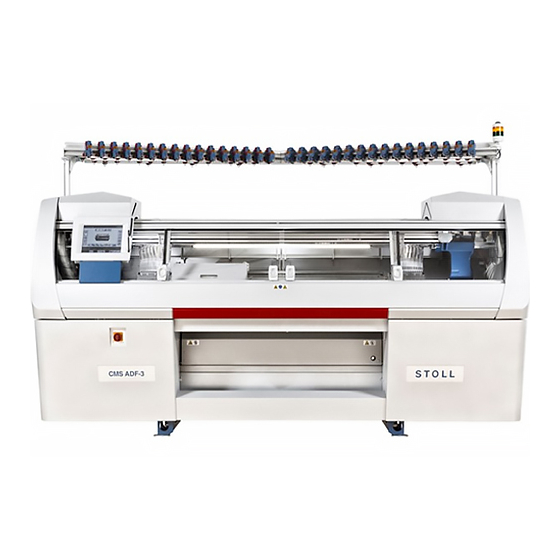
CMS ADF-3
ID 264 847
knitting machine
Type
Computer type
681
OKC3.0
Component type
000 — 002
US
Related Manuals for Stoll CMS ADF-3
Summary of Contents for Stoll CMS ADF-3
-
Page 1
Instruction manual for a safe operation of the knitting machine Type Computer type Component type CMS ADF-3 OKC3.0 000 — 002 ID 264 847… -
Page 2
Translation of the original operating instructions Operating system of the machine: V_OKC_006.000.000_STOLL (or higher) H. STOLL AG & Co. KG, Stollweg 1, D-72760 Reutlingen, Germany Our products are being developed further continuously. They are therefore subject to technical modifications. -
Page 3: Table Of Contents
Table of Contents Documentation DVD Safety instructions Intended use ……………………..7 Organizational measures ………………….8 Personnel qualifications and selection ………………9 2.3.1 Personnel qualification ………………..9 2.3.2 Selection of personnel………………..10 Warning ……………………..11 2.4.1 Warnings used ………………….11 2.4.2 Explanation to the pictogram (ANSI) …………….
-
Page 4
Security relevant operating elements Main switch ……………………..37 Engaging rod ……………………. 38 Optical and acoustic signal elements Signal light ……………………..39 Touch screen ……………………. 40 Horn ……………………….41 Lamps on the yarn control device ………………42 Assembly and setting up Preparing assembly ………………….. -
Page 5: Documentation Dvd
Documentation DVD 1 Documentation DVD Included in the accessories you will find a DVD with documents about your machine. Operating instructions Safety instructions Spare Parts Catalog Circuit diagram Brochure «Cleaning, maintenance, care» Pocket Card …
-
Page 6
Documentation DVD… -
Page 7: Safety Instructions
The translations are carried out very carefully. Should you have any doubts about the accuracy of the translation, please compare this with the accompanying original document. In case of queries, please call the Stoll Helpline. Additional information is available via: …
-
Page 8: Organizational Measures
No modifications, additions or conversions may be made on the machine that are not authorized by Stoll. Use only the original Stoll spare parts during repairs and maintenance. No arbitrary changes are to be made in the program in the operating system of the computer, the machine software and the controlling system/controls.
-
Page 9: Personnel Qualifications And Selection
Safety instructions 2.3 Personnel qualifications and selection 2.3 Personnel qualifications and selection Any work on and with the machine must be executed by reliable personnel only. Observe the country-specific laws and regulations. 2.3.1 Personnel qualification In order that the knitting machine can be operated correctly and safely, it must be set up and operated by reasonably skilled (qualified) personnel: …
-
Page 10: Selection Of Personnel
Safety instructions Personnel qualifications and selection 2.3 Knitting expert A knitting expert will be considered a person who can assess and execute the jobs assigned to him and can identify possible dangers. The expert possesses the following characteristics: technical qualification on the knitting machine and the pattern design system …
-
Page 11: Warning
Safety instructions 2.4 Warning 2.4 Warning In this chapter you will find explanations to the warnings on the machine and in the documentation. 2.4.1 Warnings used Warnings on the machines correspond to the standard ANSI Z 535.4. Scope of validity: USA and Canada A warning instruction as per ANSI Z 535.4 comprises of the following elements: …
-
Page 12
Safety instructions Warning 2.4 List of warnings on the Warnings have to be maintained in a complete and legible machine condition at all times. The order numbers of the labels are found in the following table. Warning Explanation Warning on the rear panel (sliding board) … -
Page 13
Safety instructions 2.4 Warning Warning Explanation Warning on the comb take-down and on the sliding board on the right and on the left ID 244 272 Warning under the covers ID 244 276 ID 244 269 Warning on the panelling of the light curtain … -
Page 14: Explanation To The Pictogram (Ansi)
Safety instructions Warning 2.4 2.4.2 Explanation to the pictogram (ANSI) Pictograms on the machine Following pictograms are used on the machine: Pictograph Explanation General warning indication Dangerous electrical voltage Danger of crushing and cutting Danger from flying-off mechanical parts or lubricating materials Danger of suction Pictographs used on the knitting machine…
-
Page 15
Safety instructions 2.4 Warning Warning steps for warning A warning step comprises of the following parts: instructions as per ANSI Safety sign The safety sign warns about the danger of injury and death. In order to avoid death and injuries, all measures that are indicated along with the safety sign are to be followed. -
Page 16: Warnings In The Documentation
Safety instructions Warning 2.4 2.4.3 Warnings in the documentation The warnings in the documentation have the following structure: Safety sign (display the danger of injury) Signal word (DANGER, WARNING, CAUTION, IMPORTANT) Text comprises of: – Type and source of danger –…
-
Page 17: Safety Precautions Regarding The Machine’s Life Phases
Safety instructions 2.5 Safety precautions regarding the machine’s life phases 2.5 Safety precautions regarding the machine’s life phases Avoid any operational mode that might be prejudicial to safety. Take the necessary precautions to ensure that the machine is used only when in a safe and reliable state.
-
Page 18: Safety Instructions For Installing
We advise you with emphasis to the fact that the Co. H. Stoll GmbH & Co. KG will take no guarantee or responsibility for damages in this conjunction. For further…
-
Page 19: Safety Precautions For Production
Observe the country-specific laws and regulations. Observe the manufacturer’s specifications (safety data sheet). For any further queries please contact Stoll. Fire hazard by fluff, dust and Fluff, dust and other impurities to be removed other impurities. regularly from the entire machine depending upon the degree of dirt at least once in every shift.
-
Page 20: Additional Safety Instructions For The Operation With Open Covers
Safety instructions Safety precautions regarding the machine’s life phases 2.5 2.5.6 Additional Safety Instructions for the Operation with Open Covers If the covers are open the engaging rod cannot be locked into it’s highest position (production). The user must hold the engaging rod in this position so that the machine works at the set speed «MSECCO»…
-
Page 21: Safety Instructions For Lubrication, Cleaning And Maintenance
Safety instructions 2.5 Safety precautions regarding the machine’s life phases 2.5.7 Safety Instructions for Lubrication, Cleaning and Maintenance Type of risks Measures Danger of crushing and cutting by the Switch off machine at main switch. carriage, the autarkic yarn carriers, the Secure the machine against being racking, the needle beds, the clamping switched on again.
-
Page 22: Safety Instructions For The Repair
Safety instructions Safety precautions regarding the machine’s life phases 2.5 2.5.8 Safety instructions for the repair Danger by mechanical parts Reason Measures Danger of injury by rotating or moving Do not reach into the running machine. parts. Always stop the machine during an intervention.
-
Page 23
Safety instructions 2.5 Safety precautions regarding the machine’s life phases Danger by electrical energy Reason Measures Danger to life by electrical shock Work is to be done only by an electrician. during work on the electrical Switch off machine. assembly of the machine. Remove building fuses. -
Page 24
Safety instructions Safety precautions regarding the machine’s life phases 2.5 Other dangers Reason Measures Danger of damage by usage of Only cleaning materials that have been unsuitable cleaning materials. mentioned in the Operating Instructions for e.g. Alcohol are to be used. Do not use cleansing materials that can cause health hazards or are corrosive. -
Page 25
Safety instructions 2.5 Safety precautions regarding the machine’s life phases Pictograph Safety precautions and protective measures Battery contains lead (Pb) Do not dispose the battery as household waste. Dispose the battery in an environmentally responsible manner. Bring the battery to a collection facility for used batteries. Mounting and checking After the repair work all the protective devices are to be remounted and fully protective devices… -
Page 26: Safety Instructions For Dismantling Work (Dismantling)
Safety instructions Safety precautions regarding the machine’s life phases 2.5 2.5.9 Safety instructions for dismantling work (dismantling) Dismantling for a longer Type of risks Measures storage or for evacuation Danger to life because of electrical Get the machine disconnected from the shock during work on the electrical mains supply by an electrician.
-
Page 27: Electrical Data Of The Machine
The back-and-forth movement of the carriage causes the dynamic loads listed above to occur at the set screws. Weight Dynamic (kg) weight (kg) CMS ADF-3 with additional bobbin board: 128 77,5 1490 without additional bobbin board: 100 Dimensions, weight and dynamic weight…
-
Page 28: Electrical Data
If the knitting machine is operated with a generator, make sure that the voltage supplied by the generator meets the requirements of the EN 60204- 1, Parag. 4.3.1. In case of queries, please call the Stoll Helpline.
-
Page 29: Gauge Ranges
Electrical data of the machine 3.3 Gauge ranges 3.3 Gauge ranges Gauge Area Needle number Nominal width: Nominal width: Nominal width: Nominal width: Nominal width: Nominal width: 114 cm (45″) 127 cm (50″) 183 cm (72″) 213 cm (84″) 218 cm (86″) 244 cm (96″) E 3.5 E 5…
-
Page 30: Operating Conditions
When yarns are being processed, electrostatic charges can be produced if the relative humidity is not at least 50 % In the case of deviating operating conditions please contact Stoll helpline. 3.5 Storage conditions If the knitting machine is to be stored for a longer period of time the following tasks must be carried out: 1.
-
Page 31: Noise Emissions
3.6 Noise emissions The measuring has been performed on a representative basis for the series CMS ADF-3 on a CMS ADF-3 E7.2. The machines of the CMS ADF-3 series emit a sound pressure level which is not higher than the specified values under comparable conditions.
-
Page 32
Electrical data of the machine Noise emissions 3.6… -
Page 33: Main Components Of The Knitting Machine
Main components of the knitting machine 4.1 Front side 4 Main components of the knitting machine 4.1 Front side Front view of the knitting machine Label Label Carriage Main switch and emergency stop switch Needle bed (front) Fabric collection chamber Yarn control units Fabric take-down (main take- down, auxiliary take-down, comb…
-
Page 34
Main components of the knitting machine Front side 4.1 Inner view Inner view of the knitting machine Label Label Carriage Determine yarn Front Needle Bed Yarn carrier rail Left clamping and cutting bed… -
Page 35: Rear Side
Main components of the knitting machine 4.2 Rear side 4.2 Rear side Rear side (without rear panel segments) Label Label Carriage Fluff absorption Rear Needle Bed Control unit on the right Trailing cable (energy chain) Main drive Transformer (Fuses) Racking device…
-
Page 36
Main components of the knitting machine Rear side 4.2… -
Page 37: Security Relevant Operating Elements
Security relevant operating elements 5.1 Main switch 5 Security relevant operating elements 5.1 Main switch Main switch The main switch (1) is located on the front of the machine above the left control unit. In position «1 — On» the main switch is switched on, in position «0 — Off» it is switched off.
-
Page 38: Engaging Rod
Security relevant operating elements Engaging rod 5.2 5.2 Engaging rod Engaging rod 1 Carriage stopped 2 reduced speed 3 normal speed The carriage assembly, and therefore also knitting, is started and stopped with the engaging rod. The engaging rod can be moved into three positions.
-
Page 39: Optical And Acoustic Signal Elements
Optical and acoustic signal elements 6.1 Signal light 6 Optical and acoustic signal elements The knitting machine control constantly controls the yarn, the fabric, all movable parts of machine, the motors and the electronic components. If an error occurs, the machine stops. The signal light glows yellow, a pictogram appears on the touch screen and a horn goes off.
-
Page 40: Touch Screen
Optical and acoustic signal elements Touch screen 6.2 6.2 Touch screen The most common error causes are shown in the pictographs on the touch screen. If an error occurs, one pictograph appears (on a yellow background), and in the case of several errors the corresponding pictographs appear consecutively.
-
Page 41: Horn
Optical and acoustic signal elements 6.3 Horn Pictographs Front racking Rear racking Lubrication Power failure Needle stop left Needle stop centre Needle stop right Piece counter Light curtain Grease linear guidance miscellaneous causes of stop motion Pictographs for the display of stop motions 6.3 Horn An alarm signal is produced in the following situations: …
-
Page 42: Lamps On The Yarn Control Device
Optical and acoustic signal elements Lamps on the yarn control device 6.4 6.4 Lamps on the yarn control device Lamps on the yarn control device In the case of a yarn breakage or yarn end, the yarn break control of the yarn control device switches off the knitting machine.
-
Page 43: Assembly And Setting Up
Assembly and setting up 7.1 Preparing assembly 7 Assembly and setting up 7.1 Preparing assembly 7.1.1 Preparing installation location Installation location The installation location of the knitting machine must fulfill the following conditions: flat, firm surface in a building …
-
Page 44: Transporting Machine To Installation Location
Assembly and setting up Preparing assembly 7.1 7.1.3 Transporting machine to installation location DANGER Heavy knitting machine! Danger of injury for persons and damage of the knitting machine. ➜ Country-specific regulations for the prevention of industrial accidents for the transport of heavy loads are to be observed.
-
Page 45: Assembling Machine
Assembly and setting up 7.2 Assembling machine 7.2 Assembling machine 7.2.1 Putting up knitting machine Lift the knitting machine with a ground conveyor (e.g. fork lift) and transport In this case the following things have to be taken care of: …
-
Page 46
Assembly and setting up Assembling machine 7.2 2. Lift the knitting machine with a fork lift from the transport surface. 3. Bring the knitting machine to the site of installation. 4. Lay Washers (1) from the accessories under the knitting machine foot. Place the washers in such a manner that the cavity comes exactly under the grub screw (2). -
Page 47
Assembly and setting up 7.2 Assembling machine 10. Remove the safety nut (6). It does not move easily since the safety nut is self-locking. 11. Unscrew the distance bolt (7). 12. Screw the screw (5) into the holder until it protrudes on the back side of the holder and the safety nut can completely be screwed-on. -
Page 48
Assembly and setting up Assembling machine 7.2 Fixing spots for transport locks Transport lock for: Carriage (front and rear) Cover at comb take-down Touch screen Comb take-down (rear of machine) Drive Comb take-down (rear of machine) Autarkic yarn carriers Preserve the transport locks. -
Page 49: Connecting The Knitting Machine If The Mains Voltage Is Not 400 V
EN 60204- 1, Parag. 4.3.1. In case of queries, please call the Stoll Helpline. Supply voltage 400 V The machine is set for a mains voltage of 400 V as standard. With another mains voltage you need to use a series transformer.
-
Page 50
Assembly and setting up Assembling machine 7.2 Supply voltage Protective motor switch «Q1» 340 V 9.0 A 240 V 10.0 A 220 V 10.0 A 200 V 10.0 A Connection data of the knitting machine Set the protective motor switch: DANGER Life-threatening high voltage! Electrical shock may cause death or serious injuries. -
Page 51
Assembly and setting up 7.2 Assembling machine Connect mains supply to the DANGER main switch Life-threatening high voltage! Electrical shock may cause death or serious injuries. ➜ The knitting machine must be connected by an electrician. ➜ Country-specific laws and regulations are to be followed. The knitting machine must be connected in the right-hand rotating field. -
Page 52
Assembly and setting up Assembling machine 7.2 Correction of the error «4272 Power Supply Phase Sequence Wrong»: DANGER Life-threatening high voltage! Electrical shock may cause death or serious injuries. ➜ Interrupt the mains supply to the machine. It is not sufficient to simply switch off the machine at the main switch! ➜… -
Page 53: Plug In Battery Pack
Plug in battery pack: The main switch is switched off. 1. Open the cover on the control unit. CMS 530 CMS 520 C CMS 502 CMS ADF-3 CMS 530 MT B CMS 530 T CMS 730 S CMS 730 T CMS 803…
-
Page 54: Mounting The Yarn Guide Device
Assembly and setting up Assembling machine 7.2 7.2.4 Mounting the yarn guide device Push the supports of the yarn guide device upward together with another mechanic to prevent the supports from jamming. ✔ The main switch is set to «0» and secured against being switched on again.
-
Page 55
Assembly and setting up 7.2 Assembling machine Mounting the rear track of the The additional equipment of your machine can deviate from this description yarn guide device and the depending on the machine type (type of machine, scope of supply, special additional bobbin boards equipment). -
Page 56: Mounting Signal Light
Assembly and setting up Assembling machine 7.2 7.2.5 Mounting signal light The power supply for the signal light is laid in the support when the knitting machine is shipped. The signal light from the accessories needs only be connected and screwed into place.
-
Page 57: Set Date And Time
Assembly and setting up 7.2 Assembling machine 7.2.6 Set date and time 1. Switch on main switch. 2. The «BootOKC» window appears and simultaneously also a message indicating that time and date are not correct. 3. Tap the «OK» key. …
-
Page 58: Aligning Knitting Machine
Assembly and setting up Assembling machine 7.2 7.2.7 Aligning knitting machine «Reference runs» window 1. Tap the «S>» key in the «Direction of movement» field. DANGER Danger by moving carriage! Danger of crushing and cutting by the carriage. ➜ Close the covers. 2.
-
Page 59
Assembly and setting up 7.2 Assembling machine 6. Align the knitting machine with the grub screws. Execute this at the front and rear. The grub screws for aligning are in the accessories of the machine. Grub screws for aligning the machine 7. -
Page 60: Carry Out Reference Runs
Assembly and setting up Carry out reference runs 7.3 7.3 Carry out reference runs Two reference runs are necessary: The position of the carriage towards the needles is determined during the carriage reference run. During the yarn carrier reference run the autarkic yarn carriers are synchronized.
-
Page 61
Assembly and setting up 7.3 Carry out reference runs DANGER Danger by moving carriage! Danger of crushing and cutting by the carriage. ➜ Close the covers. 2. Pull up the engaging rod and release it. The carriage moves at creep speed to the left and carries out a reference run. -
Page 62
Assembly and setting up Carry out reference runs 7.3 4. If a yarn carrier is referenced, the icon changes from «Yarn carrier not referenced» to «Yarn carrier ready to knit». 5. After completing the yarn carrier reference run all the yarn carriers are ready to knit. -
Page 63: Glue On Measuring Tape
Assembly and setting up 7.4 Glue on measuring tape 7.4 Glue on measuring tape The measuring tape is used to check the fabric length on the machine. It can, for example, be glued on above the engaging rod. You will find the self- adhesive measuring tape in the accessories.
-
Page 64: How To Bring The Carriage To An Immediate Standstill
Assembly and setting up How to bring the carriage to an immediate standstill 7.6 7.6 How to bring the carriage to an immediate standstill In order to stop the movement of the carriage immediately, carry out one of the following functions: 1.
-
Page 65: Checking Protective Devices
Assembly and setting up 7.7 Checking protective devices 7.7 Checking protective devices The protective devices must be checked at least once every 24 hours: DANGER Defective protective device! Death or serious injury. ➜ If a protective device does not stop the machine, it must be stopped for safety reasons and secured against being started up again.
-
Page 66
Assembly and setting up Checking protective devices 7.7 Protective device Checking Pull engaging rod to highest position and release. Covers (2) The carriage pulls out. Open cover. The carriage must be stopped immediately The engaging rod falls to zero position simultaneously. … -
Page 67
Assembly and setting up 7.7 Checking protective devices Protective device Checking Pull engaging rod to highest position and release. Machine with comb take-down: The carriage pulls out. Comb safety door (5) Slide the comb safety door to the left. A recessed grip is located on the right-hand side of the comb cover plate. -
Page 68
Assembly and setting up Checking protective devices 7.7 Protective device Checking Light curtain (6) Condition: The carriage has stopped. Check the light curtain with the test rod. The test rod is located in the accessories of the machine. Hold the test rod so that it is at a right angle to the protective area.
This manual is also suitable for:
681