- Manuals
- Brands
- CITROEN Manuals
- Automobile
- BERLINGO MULTISPACE
- Handbook
-
Contents
-
Table of Contents
-
Bookmarks
Quick Links
HANDBOOK
https://www.automotive-manuals.net/
Related Manuals for CITROEN BERLINGO MULTISPACE
Summary of Contents for CITROEN BERLINGO MULTISPACE
-
Page 1
HANDBOOK https://www.automotive-manuals.net/… -
Page 2
Access to the Handbook The Handbook is available on the CITROËN website, in the «MyCitroën» section or at the following address: http://service.citroen.com/ddb/ Select: — the language, From the appropriate Store, download the Scan MyCitroën — the vehicle, its body style, application for smartphone. -
Page 3
This allows you to identify the special features of your vehicle: In this document you will find all of the instructions and Berlingo Multispace passenger vehicle only recommendations on use that will allow you to enjoy your vehicle to the fullest. -
Page 4
Contents Overview Ease of use and comfort Lighting and visibility Steering wheel adjustment Lighting control Mirrors Automatic illumination of headlamps Surveillance mirror LED daytime running lamps Eco-driving Front seats Guide-me-home lighting Individual passenger seat Cornering lighting Extenso cab Direction indicators Rear bench seat Headlamp beam Instruments… -
Page 5: Table Of Contents
Contents Driving Practical information Technical data Driving recommendations Fuel General points Starting and stopping Fuel system cut-off Petrol engines/weights Electronic engine immobiliser Compatibility of fuels Diesel engines/weights Parking brake Snow chains Dimensions Identification markings Manual gearbox Removable snow shield 6-speed electronic gearbox Changing a wiper blade Gear shift indicator Towing device…
-
Page 6
Overview Instruments and controls Lighting and direction indicator control stalk. Instrument panel with display. Wiper/screenwash/trip computer control stalk. Ignition. Audio system controls. Driver’s front airbag/horn. Steering wheel height and reach adjustment. Cruise control/speed limiter controls. Control plate: parking assist, headlamp beam adjustment, ESC, Stop &… -
Page 7
Eco-driving Eco-driving Eco-driving is a range of everyday practices that allow the motorist to optimise their fuel consumption and CO emissions. Optimise the use of your Drive smoothly gearbox Maintain a safe distance between vehicles, Unless it has automatic regulation, switch off With a manual gearbox, move off gently and use engine braking rather than the brake the air conditioning as soon as the desired… -
Page 8
Eco-driving Limit the causes of excess Observe the recommendations consumption on maintenance Spread loads throughout the vehicle; place Check the tyre pressures regularly, when cold, Have your vehicle serviced regularly (engine the heaviest items in the bottom of the boot, referring to the label in the door aperture, oil, oil filter, air filter, passenger compartment as close as possible to the rear seats. -
Page 9
Instruments Instrument panel Displays Screens Level 1 The format of the information presented in the Level 2 with the touch screen tablet screen depends on the vehicle’s equipment level. Dials Distance recorder in kilometres/miles. Display screen. Fuel gauge, coolant temperature gauge. Rev counter. -
Page 10
Instruments Warning and indicator lamps Operation indicator lamps Warning lamps Visual indicators informing the driver that If one of the following indicator lamps comes on When the engine is running or the vehicle is in the instrument panel and/or instrument panel a system is in operation, switched off (on/ being driven, illumination of one of the following off indicator lamps) or has developed a fault… -
Page 11
Instruments Warning/indicator lamp State Cause Action/Observations Red warning lamps STOP On, associated with Major faults linked with the «Brake You must stop as soon as it is safe to do so. another warning lamp fluid level», «Engine oil pressure Park, switch off the ignition and call a CITROËN and accompanied and temperature», «Coolant dealer or qualified workshop. -
Page 12
Instruments Warning/indicator lamp State Cause Action/Observations Seat belt not Fixed, then flashing. The driver and/or front passenger Pull the strap then insert the tongue in the buckle. fastened has not fastened their seat belt. Accompanied by an The vehicle is moving with the Check that the seat belt is fastened correctly by pulling audible signal, then driver’s and/or front passenger’s… -
Page 13
Instruments Warning/indicator lamp State Cause Action/Observations Orange warning lamps Service On temporarily. Minor faults or warnings. Refer to the alert log on the display or screen. For more information on the trip computer, refer to the corresponding section. Major faults are present. Contact a CITROËN dealer or a qualified workshop. -
Page 14
Instruments Warning/indicator lamp State Cause Action/Observations The anti-lock braking system has The vehicle retains conventional braking capabilities. a fault. Drive carefully at reduced speed and contact a CITROËN dealer or a qualified workshop without delay. Flashing. Triggering of the ASR or DSC The system optimises traction and allows improved regulation. -
Page 15
Instruments Warning/indicator lamp State Cause Action/Observations Particle filter A malfunction of the particle filter Have the filter checked by a CITROËN dealer or a (level of diesel additive, risk of qualified workshop. blockage, etc.). For more information on Checking levels, refer to the corresponding section. -
Page 16
Instruments Warning/indicator lamp State Cause Action/Observations SCR emissions On, since switching A temporary fault with the SCR This alert disappears once the exhaust emissions control system on the ignition, emissions control system has return to normal levels. (BlueHDi Diesel) associated with the been detected. -
Page 17
Instruments Warning/indicator lamp State Cause Action/Observations Rear foglamps A manual selection. The lamps only operate when the sidelamps or dipped beam headlamps are on. In normal visibility, please switch them off to avoid being booked. This lamp is dazzling red. Green indicator lamps When the vehicle stops (red The indicator lamp goes off and the engine restarts… -
Page 18
Instruments Warning/indicator lamp State Indicates Action/Observations Dipped beam A manual selection or automatic Rotate the lighting control stalk ring to the second headlamps/daytime illumination. position. running lamps Activation of the dipped beam headlamps from ignition: daytime running lamps (depending on country of sale). Blue warning/indicator lamps Main beam The lighting control stalk has… -
Page 19
Instruments Warning/indicator lamp in State Indicates Action/Observation the display screen Diesel pre-heater The climatic conditions mean that Wait until the indicator lamp goes off before starting pre-heating is necessary. the engine. Water in diesel On, accompanied The diesel filter contains water. Have the filter purged immediately by a CITROËN fuel filter by a message in the… -
Page 20
Instruments Indicators More than 1,000 miles/km remain resumes its normal operation. The spanner symbol remains on as a reminder that a service before the next service is due Service indicator is required soon. Example: there are 4,800 miles/km remaining before the next service is due. For a few This adjusts the service interval based on the Service overdue seconds after the ignition is switched on, the… -
Page 21
Instruments F Press the trip distance recorder reset button Low oil level Trip recorder reset and keep it pressed, button F switch on the ignition. The distance recorder display begins a F With the ignition on, press countdown. the button until zeros When the display indicates «=0», release the The flashing OIL together with the service appear. -
Page 22
Instruments What to do if the warning lamp lights up: AdBlue ® fluid range For more information on Fuel, refer to the F stop immediately, switch off the ignition. The indicators corresponding section. fan may continue to operate for a certain time up to approximately ten minutes, Alert settings and display F wait for the engine to cool down in order… -
Page 23
Instruments In the event of the risk of non- Starting prevented, breakdown related to a ® For more information on AdBlue lack of AdBlue ® starting related to a lack of (BlueHDi engines), and, in particular, AdBlue ® ® on topping up the AdBlue , refer to the The 0 fluid level is reached. -
Page 24
Instruments In the event of the detection of a fault If a fault with the SCR system is confirmed (after You have exceeded the authorised driving 30 miles (50 km) covered with the permanent limit: the starting inhibition system does display of the message signalling a fault), these not allow the engine to be started. -
Page 25
Instruments Each press of the button on the end of the When the range falls below 19 miles (30 km), Date and time setting windscreen wiper stalk allows you to scroll dashes are displayed. After filling with at least through the various trip computer information 10 litres of fuel, the range is recalculated and is Centre console without displayed if it exceeds 62 miles (100 km). -
Page 26
Instruments F With the arrows, select the function F In the secondary page, press Centre console with screen PERSONALISATION CONFIGURATION. «Time/Date». F Press the OK button to confirm the selection. F With the arrows, select the function DISPLAY CONFIGURATION. F Press the OK button to confirm the selection. -
Page 27
Access Unlocking the cab or vehicle An initial press on this button unlocks the front doors. A second press on this button unlocks all the vehicle’s doors. The direction indicators flash two times. If you do not press the button, there is a risk of damaging the key’s mechanism. -
Page 28
Access F Press this button to lock the If deadlocking is activated from inside the Only use identical batteries or batteries of vehicle using the remote control, it will change vehicle fully. an equivalent type to those recommended to normal locking when the vehicle is started. by CITROËN dealers. -
Page 29
Access F Insert the key into the ignition switch with Lost keys, remote control Anti-theft protection the remote control buttons (padlocks) facing Go to a CITROËN dealer, taking with you the Do not make any modifications to the electronic you. vehicle’s registration certificate, your personal engine immobiliser system;… -
Page 30
Access Front doors Sliding side door(s) From outside F Pull the handle towards you, then From outside backwards and open the side door, guiding it as it slides backwards until it passes the point of resistance and it stays open. A mechanical system prevents the left side door being opened when the fuel filler flap is open. -
Page 31
Access Operation in the event of Tailgate a battery failure Opening Front and side passenger From outside doors The tailgate is locked and unlocked with the remote control. Take care not to block the guide space on the floor to allow the door to slide correctly. -
Page 32
Access From inside Opening Side-hinged rear doors (emergency control) In the event of a central locking operating fault, this allows you to unlock the tailgate from the inside. F After unlocking the vehicle with the remote control or the key, press the control and lift the rear screen to open it. -
Page 33
Access From outside With the rear roof flap, the rear bumper It is possible to drive with the right-hand is reinforced to serve as a step to get into door open to make it easier to transport F To open, pull the handle towards you. the vehicle. -
Page 34
Access To open the rear roof flap: When parked with the rear F lift the black paddle of the toggle, doors open to 90°, the doors F relax the toggle by pressing on the rear roof conceal the rear lamps. To flap (downwards) then release the hook, signal your position to other F lift the rear roof flap,… -
Page 35
Access The control is not active when the vehicle has Never drive without the support bar in been locked using the remote control or the key place. from the outside. The rear doors will only lock when the The doors can still be opened from the inside. support bar is installed. -
Page 36
Access Anti-intrusion protection Alarm Locking the vehicle with exterior protection only Locking while driving If, while you are away from the vehicle, you When the vehicle moves off, as soon as you wish to leave a window partially open or a pet If fitted on your vehicle, this provides two types reach approximately 6 mph (10 km/h), the inside the vehicle, you should choose exterior… -
Page 37
Access When the alarm has been triggered ten times To prevent triggering of the alarm when a door Electric windows in succession (when triggered for the eleventh is opened, you must first press the unlocking time) it is deactivated. Repeat the procedure for button on the remote control again. -
Page 38
Access The electrical functions of the electric windows In the event of contact (pinching) during are deactivated: operation of the windows, you must approximately 45 seconds after the ignition reverse the movement of the window. To is switched off, do this, press the switch concerned. after one of the front doors is opened, if the When operating the passenger electric ignition is off. -
Page 39
Ease of use and comfort Steering wheel adjustment Mirrors Adjusting the electric door mirrors Adjusting the manual door mirrors F Move the control to the right or to the left to select the corresponding mirror. F Move the lever in any of the four directions F Move the control in all four directions to adjust. -
Page 40
Ease of use and comfort Defrosting the mirrors Surveillance mirror Front seats Mirrors that can be adjusted and folded/ Adjustments unfolded electrically can be defrosted. Forwards-backwards F Press the heated rear screen button. Forced folding If the mirror unit has come out of its initial position, with the vehicle stationary, push it back into place manually or use the electric F Raise the control and slide the seat… -
Page 41
Ease of use and comfort F To remove the head restraint, press the Seat height (driver) Front heated seats control button and pull the head restraint upwards. F To install the head restraint, engage the rods of the head restraint in the holes, keeping it in line with the backrest. -
Page 42
Ease of use and comfort Individual passenger seat Extenso cab Do not use the function when the seat is not occupied. Prolonged use is not recommended for those with sensitive skin. There is a risk of burns for people whose The backrest of the individual passenger seat perception of heat is impaired (illness, can be folded to enable very long equipment to… -
Page 43
Ease of use and comfort F To return the backrest to the sitting position, Side seat When retracted, the maximum weight on the backrest is 50 kg. pull the tongue and guide the backrest until it locks. To return the seat to the sitting position, lift the During manipulations, take care not to jam the backrest until the seat locks into position on tongue under the seat. -
Page 44
Ease of use and comfort Rear bench seat High position: lift and raise the head restraint. Low position: press on the head restraint to lower it. To remove the head restraint after raising it, press the tab and lift the head restraint. To re-install the head restraint, engage the rods of the head restraint in the holes, keeping it in line with the backrest. -
Page 45
Ease of use and comfort Returning the seat to the sitting position Refitting the bench seat F Offer up the bench seat (1/3 section and/or 2/3 section) vertically. F Place the hooks between the two bars. F Fold the bench seat backwards. To return the bench seat (1/3 section and/ or 2/3 section) to «passenger transport»… -
Page 46
Ease of use and comfort Each seat can be removed individually. Adjusting the angle of the backrest Returning the backrest to Each time the seat is returned to the sitting the sitting position position or after having removed and then refitted it, check that it is locked properly to the F Release the backrest by pulling the control, floor. -
Page 47
Ease of use and comfort F Fold the seat to fix the rear anchorage Returning the seat to the sitting position points. F Pull the control to return the backrest to its initial position. F Refit the head restraint. Before folding it, check that no object is obstructing the anchorage points and preventing correct locking of the seats. -
Page 48
Ease of use and comfort Rear seats (7 seats) This is of the rounded type. Row 2 seat adjustments High position: press the tab, lift and raise the head restraint. Adjusting the angle of the backrest Low position: push the tab and press the top of the head restraint to lower it. -
Page 49
Ease of use and comfort Returning the backrest to the Returning the seat to the sitting position sitting position F Release the backrest by pulling the lever, then return it to its original position. F Ensure that it has correctly locked into place. -
Page 50
Ease of use and comfort F Lift the bar, fitted with a red strap, located Entering, exiting from row 3 behind the seat, to release the feet of the seat from their anchorage in the floor. F Tilt the entire seat forwards. Entering Returning the seat to the sitting position… -
Page 51
Ease of use and comfort F Place the hooks of the feet between the two Operating the row 2 seats bars. F Fold the seat back to secure the rear anchorage points. Removing the seat F Operate the control to raise the seat backrest to its initial position. -
Page 52
Ease of use and comfort F Lower the head restraint. Crew cab Do not place hard or heavy objects on F Place the seat in fully folded position. the backrests forming a table. They could F Tilt the assembly forwards. become dangerous projectiles in the event F Take hold of each side of the uprights of the of emergency braking or collision. -
Page 53
Ease of use and comfort Placing the seat in the fully folded position Returning the seat to the sitting position F With the same hand, fold the backrest and associated grille onto the seat. F If necessary, move the front seats forward F In a single movement, take hold of the red and fasten the central seat belt. -
Page 54
Ease of use and comfort Seat modularity and configurations Head restraints and seat belts The various operations must be carried The three seats are equipped with seat belts out when stationary. with inertia reels. The seat belts of the side seats are secured on the panels, while the seat 5-seat configuration belt of the central seat is secured on the back… -
Page 55
Ease of use and comfort 7-seat configuration Load space layout Examples of various layouts for both pleasure and convenience: https://www.automotive-manuals.net/… -
Page 56
Ease of use and comfort Centre storage console Storage tray and bottle holder (1.5 L). Side storage. Bag hook. Only flexible bags which are not too heavy bags can be hung on this hook. Upper glove box This is located in the dashboard, behind the steering wheel. -
Page 57
Ease of use and comfort Seating area fittings Overhead storage unit Under-seat storage Floor boxes This is located above the sun visors and can There is storage space, with or without lid, on accommodate various items (a sweater, folder, the floor under the front seats. gloves, etc.). -
Page 58
Ease of use and comfort Aircraft style tables Side blinds Modutop The multifunction roof extends the overhead storage unit. It consists of the following elements. Storage compartments Side blinds may be available on the sliding side F To put the table in place, pull it upwards and doors. -
Page 59
Ease of use and comfort Courtesy lamp Air vents F From the rear seats, slide the flaps to open A 3-position control allows you to adjust the air the box. flow through the vents. The air vents are also fitted with a fragrance diffuser. -
Page 60
Ease of use and comfort F Press the button while turning it a quarter Flow adjustment The fragrance diffuser button A can only be attached to the multifunction roof by using a turn to the left up to the stop. F Remove the fragrance diffuser from the cartridge. -
Page 61
Ease of use and comfort Courtesy lamps Light is permanently on, ignition on. Front courtesy lamp In the front: light comes on upon opening one of the front doors. In the rear: light comes on upon opening one of the rear doors. If the doors remain open for a few minutes, the courtesy lamps go off. -
Page 62
Ease of use and comfort Rear fittings (5 seats) To remove it Load space cover F Slide it vertically between the side guides located mid-height of the backrests. F Insert the hinge first with the floating folds F Fold it. facing upwards. -
Page 63
Ease of use and comfort F Open the cover located in the hook support. The connection of an electrical device Liquids carried in an open vessel (a cup or F Secure the top of the net in the notches, not approved by CITROËN, such as a mug) could be spilt, presenting a risk. -
Page 64
Ease of use and comfort The seat belt anchorages must not be used for The recess immediately next to the boot sill this purpose. is intended to accommodate the rolled tube containing the load space cover. It is recommended that the load be Roller-blind type load space secured firmly using the stowing rings on the floor. -
Page 65
Ease of use and comfort The reel has three flaps to conceal the boot, whether the seats of the second row are in normal or comfort position. Each flap has two clamps that snap to the rods of each head restraint. To remove it F Compress it, and then place the right lug F Compress the reel to the left to remove it… -
Page 66
Ease of use and comfort Trim The connection of an electrical device not approved by CITROËN, such as a USB charger, may adversely affect the operation of vehicle electrical systems, causing faults such as poor telephone reception or interference with displays in the screens. -
Page 67
Ease of use and comfort Partition with flap Bars Half-height partition Full glazed partition Removable flap The flap located on the panelled section of the mid-height partition, behind the passenger seat(s), can be removed to enable long items to be loaded. F Turn the control at the top of the flap to release it. -
Page 68
Ease of use and comfort Heating/Manual air Temperature the windscreen and the footwells, conditioning Control positioned: the windscreen. in the blue, delivers cool air, The air distribution can be adapted by placing the control in one of the in the red, triggers heating of the intermediate positions marked with ambient air. -
Page 69
Ease of use and comfort Air conditioning A/C When the engine is cold, the air flow will only For maximum cooling or heating of the reach its optimum level gradually to prevent too passenger compartment, it is possible to The air conditioning only works with the engine much cold air being distributed. -
Page 70
Ease of use and comfort Manual operation Deactivating the system Air conditioning On/Off F Press the small fan air flow If you wish, you can make a different choice F Once this button is pressed, the button until the fan symbol from that offered by the system by changing a disappears. -
Page 71
Ease of use and comfort Recommendations for ventilation and air conditioning If after an extended stop in sunshine, the interior temperature is very high, first F To ensure correct operation of the In order for these systems to be fully effective, ventilate the passenger compartment for follow the operation and maintenance a few moments. -
Page 72
Ease of use and comfort Demisting and defrosting Automatic mode: visibility Defrosting the rear screen program and/or door mirrors The comfort program (AUTO) may not be Manual mode sufficient to quickly demist or defrost the Pressing this button, with the engine windows (humidity, several passengers, frost, running, activates rapid demisting/ etc.). -
Page 73
Lighting and visibility Lighting control Reminder, lights on They are selected by rotating the push ring forwards to switch on and to the rear to switch off. When switching off the ignition, all of the lights The state is indicated by the indicator lamp in the Front and rear lights turn off, except for dipped beam if the guide- instrument panel. -
Page 74
Lighting and visibility Automatic illumination of Deactivation Guide-me-home lighting headlamps F Turn the ring forwards or rearwards. The Keeping the dipped beam headlamps on temporarily after switching the ignition off makes deactivation of the function is accompanied The sidelamps and dipped beam headlamps by a message on the screen. -
Page 75
Lighting and visibility Cornering lighting Programming Empty. Partial load. The function is activated or deactivated via the Medium load. vehicle configuration menu. Maximum authorised load. This system is activated by default. The initial setting is position 0. Direction indicators (flashers) Travelling abroad If using your vehicle in a country that Left: lower the lighting control stalk passing the… -
Page 76
Lighting and visibility Manual wiping Activation The fluid level should be checked F Press the control downwards. Activation of regularly, particularly during winter. Fast wiping (heavy rain). the function is accompanied by a message For more information on Checking the on the screen. -
Page 77
Lighting and visibility Rear wiper F Turn the ring as far as the first notch. Rear screenwash F Turn the ring beyond the first notch; the washer and wiper then work for a preset time. In winter, if it is snowing or there is a severe frost, start the defrosting of the rear screen. -
Page 78
Safety General safety We draw your attention to the following Installation of accessory radio recommendations points: communication transmitters The fitting of electrical equipment Before installing a radio communication or accessories not approved by transmitter, you must contact a CITROËN CITROËN may cause excessive dealer for the specification of transmitters current consumption and faults and which can be fitted (frequency, maximum… -
Page 79
Safety Hazard warning lamps Emergency or assistance The green LED remains on (without flashing) when communication is established. call It goes off at the end of the call. For Russia, Belarus and Kazakhstan. «Localised Emergency Call» immediately locates your vehicle, contacts you in your own language** and –… -
Page 80
Safety Localised Assistance Call Emergency Call» and «Localised Assistance If you benefit from the Citroën Connect Call» buttons, followed by pressing «Localised Box offer with the SOS and assistance Assistance Call» to confirm. Press this button for more than pack included, there are additional 2 seconds to request assistance if services available to you in your personal the vehicle breaks down. -
Page 81
Safety Anti-lock braking system If this warning lamp comes on To maintain operation of the emergency accompanied by an audible signal (ABS/EBFD) braking assistance system, press very and a message in the screen, it firmly on the brake pedal, maintaining this indicates a malfunction of the ABS The ABS and EBFD (electronic brake force pressure. -
Page 82
Safety If there is a difference between the path followed Operating fault Grip control by the vehicle and that required by the driver, the ESC system automatically acts on the brake of Special patented traction control system which one or more wheels and on the engine to return improves traction on snow, mud and sand. -
Page 83
Safety Standard (ESC) All terrain (mud, damp grass, Your vehicle is designed principally to etc.) drive on tarmac roads but it allows you to This mode is calibrated for a low occasionally drive on other less passable level of wheel spin, based on the This mode, when moving off, allows terrain. -
Page 84
Safety Seat belts Rear seat belts (7 seat In row 3 version) Front seat belts The front seats are fitted with pyrotechnic pretensioners and force limiters. In row 2 The seat belt for the centre seat in the front bench seat has no pyrotechnic pretensioner. -
Page 85
Safety The row 3 seat belts which are not in use can Fastening be stored to clear the load space and to make use of the load space cover easier. Hook the spring hook into the location provided on the rear pillar trim. Height adjustment F Pull the strap then insert the tongue in the buckle. -
Page 86
Safety Advice The driver must ensure that passengers use In order to be effective, a seat belt must: Recommendations for children the seat belts correctly and that they are all be tightened as close to the body as Use a suitable child seat if the passenger is fastened before setting off. -
Page 87
Safety Airbags If a collision occurs, the electronic detectors The passenger’s front airbag must be record and analyse the front and side impacts deactivated if a rearward facing child seat General sustained in the impact detection zones: is installed. in the event of violent impact, the airbags are deployed instantly and help better Impact detection zones protect the occupants of the vehicle;… -
Page 88
Safety Front airbags Operating fault Activation If this warning lamp comes on, The lateral airbag is deployed unilaterally in accompanied by an audible warning the event of a severe side impact covering all and a message on the screen, contact or part of side impact zone B, perpendicular to a CITROËN dealer or a qualified the longitudinal centreline of the vehicle in a… -
Page 89
Safety Curtain airbags This system protects the driver and passengers (with the exception of the centre seat in row two) in the event of a severe side impact in order to limit the risk of injury to the head. Each curtain airbag is built into the pillars and the upper passenger compartment area. -
Page 90
Safety Advice Front airbags Curtain airbags For the airbags to be fully effective, observe the safety recommendations Do not drive holding the steering wheel by its Do not fix or attach anything to the roof, as spokes or resting your hands on the centre this could cause head injuries if the curtain below. -
Page 91
Safety General points relating to Child seat at the front Ensure that the seat belt is correctly child seats tensioned. «Rearward facing» For child seats with a support leg, ensure that this is in firm contact with the floor. If The regulations on carrying children are necessary, adjust the passenger seat. -
Page 92
Safety Child seat at the rear «Forward facing» sufficient, remove these row 2 seats so that the child seat or the child’s legs do not touch the seats in row 2. «Rearward facing» A child seat with a support leg must never be installed on a passenger seat in row 3. -
Page 93
Safety In line with current legislation, you will find this To ensure your child’s safety, it is warning in all the required languages in the essential to deactivate the passenger’s following tables. front airbag when you install a rearward facing child seat on the front passenger seat. -
Page 94
Safety НИКОГА НЕ инсталирайте детско столче на седалка с АКТИВИРАНА предна ВЪЗДУШНА ВЪЗГЛАВНИЦА. Това може да причини СМЪРТ или СЕРИОЗНО НАРАНЯВАНЕ на детето. NIKDY neumisťujte dětské zádržné zařízení orientované směrem dozadu na sedadlo chráněné AKTIVOVANÝM čelním AIRBAGEM. Hrozí nebezpečí SMRTI DÍTĚTE nebo VÁŽNÉHO ZRANĚNÍ. Brug ALDRIG en bagudvendt barnestol på… -
Page 95
Safety NIEKADA neįrenkite vaiko prilaikymo priemonės su atgal atgręžtu vaiku ant sėdynės, kuri saugoma VEIKIANČIOS priekinės ORO PAGALVĖS. Išsiskleidus oro pagalvei vaikas gali būti MIRTINAI arba SUNKIAI TRAUMUOTAS. NEKAD NEuzstādiet uz aizmuguri vērstu bērnu sēdeklīti priekšējā pasažiera sēdvietā, kurā ir AKTIVIZĒTS priekšējais DROŠĪBAS GAISA SPILVENS. -
Page 96
Safety Recommended child Groups 2 and 3: from 15 to 36 kg seats Approved range of recommended child seats which are secured using a three-point seat belt. Group 0+: from birth to 13 kg «RÖMER KIDFIX» Can be fitted to the vehicle’s ISOFIX mountings. -
Page 97
Safety If the support leg is long enough, you can If you cannot position the support leg as adjust it so that it is in contact with the bottom described above, you must not fit a child of the storage compartment. Remove all seat with a support leg on this seat. -
Page 98
Safety Weight of the child and indicative age Under 13 kg 9-18 kg 15-25 kg 22-36 kg (groups 0 (b) and Seat(s) (group 1) (group 2) (group 3) From 1 to about From 3 to about From 6 to about Up to about 1 year 3 years old 6 years old… -
Page 99
Safety Weight of the child and indicative age Under 13 kg 9-18 kg 15-25 kg 22-36 kg (groups 0 (b) and Seat position (group 1) (group 2) (group 3) From 1 to about From 3 to about From 6 to about Up to about 1 year 3 years old 6 years old… -
Page 100
Safety (d) When a «rearward facing» child seat is Place the backrests of the outer seats installed on the front passenger seat, and the central seat of row 2, located in the passenger’s front airbag must be front of the seat occupied by the child deactivated without fail. -
Page 101
Safety The ISOFIX child seats are fitted with two Recommended ISOFIX seat Locations of ISOFIX child latches which are secured on the two front seats rings A. Some also have an upper strap which is In line with European regulations, this table RÖMER Duo Plus ISOFIX attached to rear ring B. -
Page 102
Safety Weight of the child/indicative age Under 10 kg Under 10 kg (group 0) 9-18 kg (group 0) Under 13 kg (group 1) Up to about 6 months (group 0+) From about 1 to 3 years old Up to about 1 year Type of ISOFIX child seat Carry-cot rearward facing… -
Page 103
Safety Instructions for child seats When a child seat is installed in row 3, place Installing a booster cushion The incorrect installation of a child seat in a vehicle compromises the child’s protection in the backrests of the outer seats and the The chest part of the seat belt must be positioned on the child’s shoulder without the event of an accident. -
Page 104
Safety Child lock Electric This prevents the sliding side doors from being opened from inside. Manual F With the ignition on, press this button. Indicator lamp on = child lock active. This system is independent of the central locking control. Always remove the key from the ignition when leaving the vehicle, even for a short time. -
Page 105: Driving Recommendations
Driving Driving recommendations If you are obliged to drive through water: Never leave a vehicle unsupervised with check that the depth of water does not the engine running. If you have to leave exceed 15 cm, taking account of waves that Observe the Highway Code and remain vigilant your vehicle with the engine running, apply might be generated by other users,…
-
Page 106: Starting And Stopping
Driving In some cases of particularly demanding use Starting position. For more information on Headlamp (when towing the maximum load on a steep The starter is operated. the engine turns over, beam height adjustment, refer to the gradient in high temperatures), the engine release the key.
-
Page 107: Electronic Engine Immobiliser
Driving Electronic engine When you leave the vehicle, check Apply the parking brake only when the immobiliser that the lights are off and do not leave vehicle is stationary. valuables visible. In the exceptional case of use of the All of the keys contain an electronic immobiliser As a safety precaution (with children on parking brake when the vehicle is moving, device.
-
Page 108: 6-Speed Electronic Gearbox
Driving Engaging reverse gear Automated mode: selector in position A. The movement must be carried out slowly Manual mode: selector in position M. to reduce noise. To engage reverse gear, wait until the vehicle is stationary. For safety: Position N can only be released if the brake pedal is pressed.
-
Page 109
Driving F Move the gear selector to R. Changing gear Acceleration Only engage it when the vehicle is For optimum acceleration (for example, when stationary. overtaking another vehicle), simply press Neutral the accelerator pedal firmly past the point of resistance at the end of its travel. Engaging neutral F Press the «+»… -
Page 110: Gear Shift Indicator
Driving Gear shift indicator The information appears in the instrument Operation panel in the form of an arrow. It may be accompanied by a recommended gear. Going into engine STOP mode This system helps reduce fuel consumption by recommending the most appropriate gear. The system adapts its gear shift The «ECO»…
-
Page 111
Driving some special conditions (battery charge, With a 6-speed electronic gearbox, for With a manual gearbox in STOP mode, if engine temperature, braking assistance, your convenience when parking, the a gear is engaged without fully pressing ambient temperature, etc.) are present STOP mode is not available for the few the clutch pedal, a warning lamp comes which require the engine to be running to… -
Page 112
Driving Manual deactivation The system is reactivated automatically at every new start using the key. In certain circumstances, such as the need to maintain a comfortable temperature in the Operating fault passenger compartment, it may be preferable to deactivate the Stop & Start system. The Stop &… -
Page 113: Hill Start Assist
Driving Hill start assist Operation Do not leave the vehicle while it is being held in the hill start assist phase. This system keeps your vehicle briefly If you need to get out of the vehicle with stationary (for approximately 2 seconds) when the engine running, apply the parking making a hill start, while you transfer your foot brake manually then ensure that the…
-
Page 114: Under-Inflation Detection
Driving Under-inflation detection In the event of a puncture, use the The tyre pressure specifications for your temporary puncture repair kit or the spare vehicle can be found on the tyre pressure wheel (depending on equipment). This system automatically monitors the tyre label.
-
Page 115
Driving Operating fault The system monitors the pressure in all four The inflation pressures specified for your tyres, as soon as the vehicle is moving. vehicle can be found on the tyre pressure It compares the information given by the label. -
Page 116
Driving Screen C The loss of pressure detected does not Before reinitialising the system, ensure always cause visible bulging of the tyre. that the pressures of the four tyres are F Press the MENU button to access the main Do not satisfy yourself with just a visual correct for the use of the vehicle and in menu. -
Page 117: Speed Limiter
Driving Dashboard button Operating fault The flashing and then constant illumination of the under-inflation warning lamp accompanied by illumination of the Service warning lamp Speed limiter mode Selection/Off. F Hold this button down. indicates a fault in the system. Decreases the set value. In this case, under-inflation monitoring of the Reinitialisation is confirmed by a high-pitched Increases the set value.
-
Page 118
Driving The speed limiter selection status and the Selecting the function Pressing and holding increases the setting in programmed speed are displayed in the control steps of 3 mph (5 km/h). panel. To memorise a speed lower than the previous one: Function selected, F Press the SET –… -
Page 119: Cruise Control
Driving Pressing the accelerator pedal in order to Operating fault «CRUISE» cruise control exceed the programmed speed will have no effect unless you press the pedal firmly beyond the point of resistance. System which automatically The speed limiter is deactivated temporarily maintains the speed of the vehicle and the programmed speed setting flashes, at the value programmed by the…
-
Page 120
Driving Function selected, Selecting the function Temporarily exceeding the «Cruise control» symbol speed displayed. Function deactivated, F Turn the knob to CRUISE position. The It is possible to accelerate and drive cruise control is selected but is not yet momentarily at a speed faster than the active and no speed has been programmed. -
Page 121
Driving Reactivation Without using the accelerator Cancelling the programmed speed value F Press the SET + button. A short press increases the speed setting by When the vehicle stops, after the ignition is 1 mph (km/h). switched off, the system no longer stores any Pressing and holding increases the setting in speeds. -
Page 122: Active City Brake
Driving If necessary, the vehicle’s braking system is When changing the programmed This system has been designed to operated automatically to avoid a collision with reference speed by means of a maintained improve driving safety. the vehicle ahead. press, remain vigilant as the speed can The driver must always check the traffic increase or decrease rapidly.
-
Page 123
Driving Operation During automatic braking, the driver can When weather conditions are difficult always obtain a higher rate of deceleration (extremely heavy rain, snow, fog, hail, When your vehicle is too close to or than that controlled by the system, by etc.), braking distances increase, which approaches the vehicle ahead too quickly, the pressing firmly on the brake pedal. -
Page 124: Parking Sensors
Driving With monochrome screen C Operating faults Do not attempt to remove, adjust or test the sensor. F Press the MENU button for access to the Only a CITROËN dealer or a qualified main menu. Sensor fault workshop is able to work on the system. F Select «Personalisation-Configuration».
-
Page 125
Driving Certain objects detected at the beginning of the Display in the screen Stopping the assistance manoeuvre will no longer be detected at the Change to neutral. end of the manoeuvre due to the blind spots between and below the sensors. Examples: stake, roadworks cone or pavement Activation/Deactivation post. -
Page 126: Reversing Camera
Driving The representation with overlaid lines helps The system will be deactivated with the manoeuvre. automatically if a trailer is being towed or if They are represented as lines marked «on the a bicycle carrier is fitted (vehicle fitted with ground»…
-
Page 127
FILL UP WITH CONFIDENCE WITH TOTAL QUARTZ LUBRICANTS For more than 45 years, TOTAL and CITROËN have shared common values: excellence, creativity and technological innovation. It is in this same spirit that TOTAL has developed a range of TOTAL QUARTZ lubricants adapted to CITROËN engines, making them even more fuel efficient and environmentally friendly. -
Page 128: Practical Information
Practical information Fuel When filling the fuel tank, do not continue after the 3 cut-off of the nozzle. This could cause Low fuel level malfunctions. When the low fuel level is reached The capacity of the tank is approximately this warning lamp comes on. 60 litres (53 litres for BlueHDi Diesel version).
-
Page 129: Fuel System Cut-Off
Practical information Fuel system cut-off In the event of a severe collision, a device automatically cuts off the fuel supply to the engine. The flashing warning lamp is accompanied by a message on the screen. Verify the absence of any odour and fuel leaks outside the vehicle and restore the power supply: F switch off the ignition (STOP position),…
-
Page 130: Compatibility Of Fuels
Practical information Compatibility of fuels Fuel used for petrol engines Diesel fuel that meets standard The use of any other type of (bio) fuel EN590 mixed with a biofuel that (vegetable or animal oils, pure or diluted, meets standard EN14214 (possibly The petrol engines are compatible with biofuels domestic fuel, etc.) is strictly prohibited containing up to 7% Fatty Acid…
-
Page 131: Snow Chains
Practical information Travelling abroad Installation advice The snow chains must be fitted only to the driving wheels. They must never be fitted Certain fuels could damage your vehicle’s F If you have to fit the chains during a journey, to «space-saver» type spare wheels. engine.
-
Page 132: Removable Snow Shield
Practical information Removable snow shield Fitting plug F Put the removable snow shield in front of its centring pin A on the front bumper. F Fit it in place by pressing every clip B at the four corners. F Within one minute after switching off the ignition, move the wiper stalk down Removal to position the wiper blades along the…
-
Page 133: Towing Device
Practical information F Raise the wiper arm. Towing device Observe the maximum authorised towable F Unclip the wiper blade and remove it. weight, indicated on your vehicle’s F Install the new blade. Load distribution registration certificate, the manufacturer’s F Distribute the load in the trailer so that the F Return the wiper arm to the normal position.
-
Page 134
Practical information Instructions for fitting and before each use Check that the swan neck is correctly locked by verifying the following points: the green mark on the locking wheel is visible. the safety lock on the locking wheel is During use facing rearward. -
Page 135: Roof Bars
Practical information If you install transverse bars on these bars, Maintenance refer to the weight values indicated by the manufacturer and do not exceed: 75 kg. Correct operation is only possible if the swan neck and its carrier remain clean. Modutop roof bars Before cleaning the vehicle with a high- pressure jet wash, the swan neck must be…
-
Page 136: Other Accessories
Practical information Recommendations for Other accessories loading the roof These accessories and parts, having been tested and approved for reliability and safety, This procedure requires the use of the spanner are all adapted to your vehicle. A wide range of supplied with the tools for changing a wheel.
-
Page 137: Bonnet
Practical information F Raise the bonnet slightly by reaching in a their compatibility with the capacities of the Bonnet standard equipment of your vehicle. Please flat hand, palm down, to make access to the check this with a CITROËN dealer in advance. Opening lever easier.
-
Page 138: Engines
Practical information Engines Engine oil filler cap. Do not discard used oil or fluids into Power steering fluid reservoir. sewers or onto the ground. Petrol Priming pump (except BlueHDi engine). Take used oil to a CITROËN dealer or a qualified workshop and dispose of it in the containers reserved for this purpose.
-
Page 139
Practical information Oil change Brake fluid level When the engine is hot, the temperature of the coolant is regulated by the electric fan. This This must be done at the intervals specified in may operate with the ignition off; furthermore, the manufacturer’s servicing schedule. -
Page 140: Checks
Practical information Screenwash fluid level If the message is still displayed and the service Brake pads warning lamp remains lit, consult a CITROËN For optimal cleaning quality and safety, we dealer or a qualified workshop. Brake wear depends on the style recommend that you use the CITROËN range of driving, particularly in the case Topping up…
-
Page 141
Practical information Carbon filter and passenger We recommend the use of a combined When accelerating after prolonged operation passenger compartment filter. Thanks to its of the vehicle at very low speed or at idle, you compartment filter second special active filter, it contributes may, in exceptional circumstances, notice the to the purification of the air breathed by emission of water vapour at the exhaust. -
Page 142: Adblue (Bluehdi Engines)
Practical information ® Manual gearbox AdBlue (BlueHDi The AdBlue ® is contained in a special tank with a capacity of around 17 litres. An alert system engines) is triggered automatically once the reserve The gearbox does not require any level is reached: you can then drive for a further maintenance (no oil change).
-
Page 143
Practical information In certain conditions (high ambient ® ® Freezing of AdBlue Never top up from an AdBlue dispenser temperature, for example), the risk of ammonia AdBlue ® freezes at temperatures below reserved for heavy goods vehicles. being released cannot be discounted: do not around -11°C. -
Page 144
Practical information F Obtain an AdBlue Procedure ® container or bottle. After Once the AdBlue tank has been filled first checking the use-by date, read the after a breakdown due to running out Before topping up, ensure that the vehicle is instructions on the label carefully before of AdBlue, you must wait for at least parked on a flat and level surface. -
Page 145: In The Event Of A Breakdown
In the event of a breakdown F Tick the deflated wheel on the speed limit Puncture repair kit Please note, the sealant product is sticker provided and affix it to the vehicle’s harmful if swallowed and causes irritation steering wheel to remind you that a wheel is to the eyes.
-
Page 146
In the event of a breakdown If the vehicle is equipped with a towbar, it is However, if the vehicle is not sometimes necessary to raise the vehicle equipped with a spare wheel, the slightly to make it easier to remove the spare towing eye will be located in the Spanner for Modutop roof bars and rear wheel from its carrier. -
Page 147
In the event of a breakdown F Remove the wheel trim. F Loosen the wheel bolts and start unscrewing them. F Unscrew the bolt using the wheelbrace until the carrier is lowered fully. F Detach the carrier from the hook and place the spare wheel near the wheel to be F Raise the vehicle until there is sufficient changed. -
Page 148
In the event of a breakdown F Carry out an initial tightening of the bolts Fitting the spare wheel Ensure that the jack is stable. The foot using the wheelbrace. of the jack must be in contact with the ground and directly below the jacking point used. -
Page 149: Fitting The Wheel Trim On The Rim
In the event of a breakdown For more information on identification markings, including the tyre label, refer to the corresponding section. For more information on tyre under- inflation detection, including recommendations after changing a wheel with a tyre under-inflation detection sensor, refer to the corresponding section.
-
Page 150
In the event of a breakdown Incorrect valve position: below the ring. Incorrect wheel trrim position. Briskly hit with the palm of the hand the tab opposite the valve (the last fixing tab, always in the clipping direction). Be sure to pre-clip all fixing tabs except the Distortion of the edge of the wheel trim at the last (opposite the valve cut-out). -
Page 151: Changing A Bulb
In the event of a breakdown Changing a bulb Type B Types of bulb Bayonet bulb: press on the bulb then turn it anti-clockwise. Type C Correct valve position: above the ring. Comply with the wheel trim fitting procedure to avoid breaking of the Halogen bulb: release the retaining spring from fixing tab and distortion the edge of Various types of bulb are fitted to your vehicle.
-
Page 152
In the event of a breakdown Open the bonnet. To access the bulbs, reach Front lamps Dipped beam headlamps/Main behind the headlamp unit. beam headlamps Carry out the operations in reverse order to Type C, H4 – 55W refit each bulb and check that the bonnet is F Remove the centre cover by pulling on the closed securely. -
Page 153
In the event of a breakdown F Remove the bulb by pressing lightly on it, Side repeater then turning it anti-clockwise. F Change the bulb. Type A, WY5W – 5W (amber) F Ensure that the cover is refitted correctly all around to ensure correct sealing. -
Page 154
In the event of a breakdown Courtesy lamps Rear lamps High pressure jet wash When using this type of washer on Type A, 12V5W – 5W stubborn dirt, do not persist on the headlamps, the lamps and their edges to avoid damaging their coating and seals. -
Page 155
In the event of a breakdown F Remove the faulty bulb by pressing it lightly F Remove the plastic lens using a while turning it anti-clockwise. screwdriver. F Change the bulb. F Change the bulb. F Refit the plastic lens and press on it. When removing the lamp unit: F with tailgate, pull the lamp unit towards the With side-hinged doors… -
Page 156: Changing A Fuse
In the event of a breakdown Third brake lamp Removing and fitting a fuse Type A, W16W – 16W in the lower dashboard on the left-hand side Good Failed (behind the cover). under the bonnet (near the battery). Before changing a fuse, the cause of the fault must be found and rectified.
-
Page 157
In the event of a breakdown Dashboard fuses Fuses Amps Allocation Tilt the cover to access the fuses. Rear wiper – Free Central locking Airbags Air conditioner, diagnostic socket, rearview mirror control, headlamp beam. Electric windows Locks Rear courtesy lamp, front map reading lamps, ceiling lamp. Audio system, display screen, under-inflation detection, alarm and siren Front and rear 12 V socket Centre console… -
Page 158
In the event of a breakdown Passenger compartment fuses Towing/towbar/ coachbuilder/platform cab fuses The designations given are only indicative, as this additional box relates to other information which depends on converter/coachbuilder, for which the handbook cannot provide technical support. Fuses Amps Allocation Free… -
Page 159
In the event of a breakdown Underbonnet fuses Fuses Amps Allocation After opening the bonnet, unclip and tilt the Engine management corresponding box to access the fuses. Horn Front and rear screenwash pump – Free Engine components Steering wheel angle sensor, ESC Brake switch, clutch switch Starter Headlamp adjustment motor, vehicle data recording control unit… -
Page 160: Battery
In the event of a breakdown F Connect the other end of the green or black Battery Charging the battery using cable to an earth point on the broken down a battery charger Procedure for starting the engine using another vehicle, as far away as possible from the battery or charging a discharged battery.
-
Page 161: Economy Mode
In the event of a breakdown Economy mode Towing your vehicle Vehicles fitted with a manual gearbox (diesel version) When the engine is switched off and the key is For vehicles fitted with a manual gearbox, left in the ignition on position, certain functions the gear lever must be in neutral.
-
Page 162: Running Out Of Fuel (Diesel)
In the event of a breakdown From the rear Running out of fuel General recommendations (diesel) Observe the legislation in force in your country. The system must be primed if you run out of Ensure that the weight of the towing fuel.
-
Page 163: Technical Data
Technical data Characteristics of engines The GTW values and the towed loads listed are If the exterior temperature is high, it is valid for a maximum altitude of 1,000 metres. and towed loads recommended that the engine is allowed The towed load must be reduced by steps of to idle for 1 to 2 minutes after the vehicle 10% for each additional 1,000 metres.
-
Page 164: Petrol Engines/Weights
Technical data Petrol engines/weights Five seats Engine oil capacity with Recommended nose Engines Gearbox Unbraked trailer (kg) filter replacement (litres) weight (kg) 1.6 110 hp Manual 5-speed 3.25 1.6 VTi 100 hp Manual 5-speed 4.25 1.6 VTi 120 hp Manual 5-speed 4.25 1.6 VTi 120 hp Euro 6 Manual 5-speed…
-
Page 165: Diesel Engines/Weights
Technical data Diesel engines/weights Five seats Engine oil capacity with Recommended nose Engines Gearbox Unbraked trailer (kg) filter replacement (litres) weight (kg) 1.6 HDi 75 hp Manual 5-speed 1.6 HDi 75 hp PF Manual 5-speed BlueHDi 75 hp Euro 6 Manual 5-speed 1.6 HDi 90 hp Manual 5-speed…
-
Page 166
Technical data Seven seats Engine oil capacity with Recommended nose Engines Gearbox Unbraked trailer (kg) filter replacement (litres) weight (kg) 1.6 HDi 92 hp PF Manual 5-speed 3.75 1.6 BlueHDi 100 hp Euro 6 Manual 5-speed 3.75 1.6 BlueHDi 100 hp Euro 6 Manual 5-speed 3.75 S&S… -
Page 167: Dimensions
Technical data Dimensions https://www.automotive-manuals.net/…
-
Page 168
Technical data Overall length 4,380 Overall height 1,801-1,862 Wheelbase 2,728 Front overhang Rear overhang without mirrors 1,810 Width over panels with mirrors 2,112 Front track width 1,505-1,507 Rear track width 1,554-1,556 Row 2 Length of the loading surface up to the seat Row 2, seat in the fully folded position 1,343 With front passenger seat folded… -
Page 169
Technical data Rear doors (mm) Side-hinged doors Tailogate Small Large Maximum boot sill height with 205/65 R15 tyres and tailgate trim Useable height of the opening 1,118 (under under panel) Useable width 1,582 https://www.automotive-manuals.net/… -
Page 170
Technical data Sliding side doors (mm) Useable height 1,009 Useable width Height under raised tailgate 1,892 https://www.automotive-manuals.net/… -
Page 171
Technical data Van (mm) Your vehicle is available in two lengths (L1 and L2). L1: 3.3 m³ L2: 3.7 m³ https://www.automotive-manuals.net/… -
Page 172
Technical data Short – L1 Long – L2 Overall length 4,380 4,628 Overall height 1,805-1,834 Wheelbase 2,728 Front overhang Rear overhang without mirrors 1,810 Width over panels with mirrors 2,112 Front track width 1,505 Rear track width 1,554 Rear floor useable length 1,800 2,050 Useable length with front passenger seat folded… -
Page 173
Technical data Rear doors (mm) L1 – 625 L1 – 850 Maximum boot sill height with tyres 195/65 R15 Side-hinged doors Tailgate Small Large Useable height of the opening 1,148 1,313 (under panel) Width 1,582 https://www.automotive-manuals.net/… -
Page 174
Technical data Sliding side door (mm) Useable height 1,100 Useable width Height under raised tailgate 1,892 https://www.automotive-manuals.net/… -
Page 175
Technical data Platform cab (mm) Overall length 4,237 Overall height 1,821-1,822 Wheelbase 2,728 Front overhang Rear overhang Width over panels (without mirrors) 1,810 Front track width 1,505 Rear track width 1,554 https://www.automotive-manuals.net/… -
Page 176: Identification Markings
Technical data Identification markings B. Serial number This is engraved on the front right wheel arch. C. Tyres and paint colour code The label C, on the front door specifies: the wheel and tyre sizes, the tyre pressures, unladen and laden, the spare tyre pressure, the paint colour code.
-
Page 177
7-inch touch screen tablet 7-inch touch screen tablet First steps Use the buttons provided above the touch screen tablet to access the menu carousel, then press the virtual buttons in the touch screen tablet. Each menu is displayed in one or two pages (primary page and secondary page). -
Page 178
7-inch touch screen tablet FM/DAB*/AM* radio stations. Restore the sound by pressing one of the two Steering mounted controls USB stick. volume buttons. Smartphone via MirrorLink or CarPlay ® Radio: select previous/next preset ® Telephone connected via Bluetooth station. In very hot conditions, the volume may be and Bluetooth ®… -
Page 179
7-inch touch screen tablet Increase volume. Connected services Telephone ® (Depending on equipment) Connect a telephone by Bluetooth Access the CarPlay ® function after Decrease volume. Operate certain applications on connection of your smartphone by your smartphone via MirrorLink USB cable. ®… -
Page 180
7-inch touch screen tablet Driving Select Save to save the address entered as a To a recent destination contact. Access the trip computer. The system allows up to two hundred contacts. Activate, deactivate or configure Press Navigation to display the certain vehicle functions. -
Page 181
7-inch touch screen tablet Press on the secondary page. Select the criteria then «Confirm» or Select «Search for POI». press «Show route on map» to start Select «Enter destination». navigation. Select «All POIs», Select «Contacts». To a point on the map «Vehicle», Select the desired destination from the Press Navigation to display the… -
Page 182
7-inch touch screen tablet It is now possible to activate Risk areas alerts «Around», Select: then: — «Be advised of new messages», «Near destination», to fine-tune the list of «Audible warning» — «Speak messages», messages. «Alert only when navigating» Then enter the filter radius. «Alert only for overspeed»… -
Page 183
7-inch touch screen tablet Select a radio station from the list offered. The TA (Traffic Announcement) function Radio reception may be affected by the gives priority to TA alert messages. use of electrical equipment not approved Select «Update list» to refresh the To operate, this function needs good by CITROËN, such as a USB charger list. -
Page 184
7-inch touch screen tablet «AM Radio». A long press on a number saves (presets) the RDS, if activated, allows you to station. continue listening to the same station by automatically retuning to alternative frequencies. However, in certain conditions, A press on the button in the upper-right part of coverage of an RDS station may not be Press Radio Media to display the the screen presets all of the stations one after… -
Page 185
7-inch touch screen tablet Select «List» in the primary page. If «DAB/FM station tracking» is activated, To protect the system, do not use a USB there is a delay of a few seconds when the hub. Select «Radio list» on the system switches to analogue radio «FM», secondary page. -
Page 186
7-inch touch screen tablet Connect the portable device (MP3 player, etc.) Information and advice To protect the system, do not use a USB to the jack socket using an audio cable (not hub. supplied). The audio equipment will only play audio files with «.wma», «.aac», «.flac», «.ogg»… -
Page 187
7-inch touch screen tablet Connecting Apple ® players Settings The audio settings (Ambience, Bass, Treble and Loudness) are different and Audio settings independent for each sound source. The settings for «Distribution» and Press Settings to display the «Balance» are common to all sources. primary page. -
Page 188
7-inch touch screen tablet Select «Colour schemes». Select «Delete data» to delete the list of recent The system does not automatically destinations, personal points of interest, manage the change between winter and contacts in the directory. summer time (depending on country). Select the colour scheme in the list Tick the settings then select then «Confirm». -
Page 189
7-inch touch screen tablet When connecting a smartphone If only one application has been downloaded to The synchronisation of a smartphone to the system, it is recommended the smartphone, it starts automatically. allows users to display the smartphone’s that Bluetooth ®… -
Page 190
7-inch touch screen tablet Voice recognition The synchronisation of a smartphone Connect a USB cable. The allows users to display the smartphone’s Press the end of the lighting control stalk to smartphone charges when applications adapted to the start thye voice recognition of your smartphone connected by the USB cable. -
Page 191
Enter a code of at least 4 figures for off is automatically reconnected, if this Visit www.citroen.co.uk for more information the connection then «Confirm». connection mode was activated during the (compatibility, more help, etc.). -
Page 192
7-inch touch screen tablet Manual connection Select the device in the list. Making a call Select «Search for devices» Press Telephone to display the primary page Using the telephone is not recommended while driving. «Connect/Disconnect» to start or end the Park the vehicle. -
Page 193
7-inch touch screen tablet Select «Call». «Edit» to edit the selected contact. Calling a recently used number «Delete» to delete the selected contact. Press Telephone to display the primary page. «Delete all» to delete all information for the Select «Call log». selected contact. -
Page 194
7-inch touch screen tablet Navigation QUESTION RESPONSE SOLUTION The route calculation is not successful. The guidance criteria may be in conflict with the Check the route settings in the «Navigation» current location (exclusion of toll roads on a toll menu. road). -
Page 195
7-inch touch screen tablet Radio QUESTION RESPONSE SOLUTION The reception quality of the tuned radio station The vehicle is too far from the transmitter of Activate the «RDS» function by means of the gradually deteriorates or the stored stations are the station or no transmitter is present in the short-cut menu to enable the system to check not working (no sound, 87.5 MHz is displayed,… -
Page 196
7-inch touch screen tablet Media QUESTION RESPONSE SOLUTION Playback of my USB memory stick starts only Some files supplied with the memory stick Delete the files supplied with the memory stick after a very long wait (around 2 to 3 minutes). may greatly slow down access to reading and limit the number of sub-folders in the file the memory stick (multiplication by 10 of the… -
Page 197
7-inch touch screen tablet Settings QUESTION RESPONSE SOLUTION When changing the setting of treble and bass The selection of an ambience imposes the Change the treble and bass or ambience the ambience setting is deselected. treble and bass settings. settings to obtain the desired musical ambience. When changing the ambience, the treble and Changing one without the other is not possible. -
Page 198
You can check the compatibility of your the system telephone at www.citroen.co.uk (services). No sound can be heard from the connected The sound depends on both the system and the Increase the volume of the audio system, to Bluetooth ®… -
Page 199
Audio system Audio system First steps On/Off, volume adjustment. Select the source: Radio; USB; AUX; CD; Streaming. Adjust audio options: Front/rear balance; left/right; bass/ treble; loudness; audio ambience. Display of the list of local stations. Long press: CD tracks or MP3 folders (CD/USB). -
Page 200: Steering Mounted Controls
Audio system Cancel the current operation. Eject CD. Radio: automatic search for a lower frequency. CD/MP3/USB: selection of the Select AM/FM wavebands. previous track. Display main menu. CD/USB: press and hold: fast back. Skip in the list. Buttons 1 to 6 Select a preset radio station.
-
Page 201: Radio
Audio system Audio functions Press the BAND AST button to Press the MENU button. Radio; CD; USB; AUX. select a waveband. Select «Audio functions». Trip computer Briefly press one of the buttons to Distance input; alerts; function Press OK. carry out an automatic search of the status.
-
Page 202: Media
Audio system Playing TA messages Insert the USB memory stick into the USB port Press OK to select the desired or connect the USB device to the USB port classification, then press OK again using a suitable cable (not supplied). to confirm.
-
Page 203
Audio system Auxiliary Socket (AUX) Some anti-pirating systems on original discs On a single disc, the CD player can or CDs copied using a personal recorder may read up to 255 MP3 files spread cause faults which are not related to the quality over 8 directory levels. -
Page 204: Telephone
Audio system Information and advice Connecting Apple ® players It is recommended that you use genuine Apple ® USB cables for correct operation. ® The audio system will only play files with Connect the Apple player to the USB port the «.mp3″…
-
Page 205
Audio system Visit www.citroen.co.uk for more information The «Telephone» menu permits access to the Receiving a call (compatibility, more help, etc.). following functions in particular: «Directory», if your telephone is fully compatible, «Calls list», An incoming call is announced by a ring and a superimposed display in the screen. -
Page 206: Frequently Asked Questions
Audio system Press this button for more than two Frequently asked questions seconds for access to your directory, then navigate using the thumbwheel. The following information puts together the answers to the most frequently asked questions concerning your audio system. QUESTION RESPONSE SOLUTION…
-
Page 207
Audio system Radio QUESTION RESPONSE SOLUTION There is a difference in sound quality between To allow for optimal listening quality, the audio Check that the audio settings (volume, bass, the different audio sources (radio, CD, etc.). settings (Volume, Bass, Treble, Ambience, treble, ambience, loudness) are adapted to Loudness) can be tailored to different the sources listened to. -
Page 208
Audio system Media QUESTION RESPONSE SOLUTION The message «USB device error» is displayed in The battery of the device may not be sufficiently Charge the battery of the peripheral device. the screen. charged. The Bluetooth ® connection is cut off. The USB memory stick is not recognised. -
Page 209
Alphabetical index Accessories ……..76, 134-135 Cab, crew ……….50-52 Doors, side-hinged ……..30-32 Active City Brake ……..120-121 Cable, audio …………9 Driving abroad……….73 AdBlue ® ……….13, 140-141 Cable, Jack …………9 DSC …………..12 Dynamic stability control (DSC) ….12, 80 Adjusting seat ……….38 Cartridge, fragrance ……..58 Adjusting the date ………..24 CD …………..5… -
Page 210
Alphabetical index Gearbox, automatic ……108-109 Levels …………136 Pre-tensioning seat belts ……..84 Gearbox, electronic …….108-110 Levels and checks ………136-139 Priming the fuel system ……..160 Gearbox, electronic ~ Lighting …………71 Protecting children …… 89-90, 99, 101 Gearbox, electronic ….. 106-107, 110 Lighting, directional ………73 Gearbox, manual … -
Page 211
Alphabetical index Snow chains ……….129 Under-inflation (detection) ….. 112-113 Socket, 12 V …………64 Updating risk areas ………..5 Socket, auxiliary ……….9, 5 Updating the date ……….24 Socket, Jack ……….9, 5 Updating the time ……..23-24 Sockets, auxiliary ……….55 UREA …………..21 Speed limiter ………. 115-117 USB …………9-10, 4, 6 Stability control (ESC)……..80 Starting a Diesel engine …….128… -
Page 212
https://www.automotive-manuals.net/… -
Page 213
https://www.automotive-manuals.net/… -
Page 214
https://www.automotive-manuals.net/… -
Page 215
CONDUENT 4Dconcept Automobiles CITROËN declares, by application XEROX of the provisions of the European legislation (Directive 2000/53) relating to End of Life Vehicles, that it achieves the objectives set by this legislation and that recycled materials are used in the manufacture of the products that it sells. -
Page 216
*17BGO.0040* ANG. 17BGO.0040 https://www.automotive-manuals.net/…
This manual is also suitable for:
Berlingo
Посмотреть инструкция для Citroën Berlingo Multispace (2017) бесплатно. Руководство относится к категории автомобили, 6 человек(а) дали ему среднюю оценку 7.7. Руководство доступно на следующих языках: русский. У вас есть вопрос о Citroën Berlingo Multispace (2017) или вам нужна помощь? Задайте свой вопрос здесь
Не можете найти ответ на свой вопрос в руководстве? Вы можете найти ответ на свой вопрос ниже, в разделе часто задаваемых вопросов о Citroën Berlingo Multispace (2017).
Как перевести мили в километры?
1 миля равна 1,609344 километрам, а 1 километр — 0,62137119 милям.
Где я могу узнать идентификационный номер транспортного средства Citroën?
Место размещения идентификационного номера транспортного средства зависит от марки и типа транспортного средства. Номер может быть выбит на раме транспортного средства или указан на номерном знаке. Чтобы узнать место расположения идентификационного номера транспортного средства лучше всего ознакомиться с руководством по эксплуатации Citroën Berlingo Multispace (2017).
Что такое идентификационный номер транспортного средства (VIN)?
Идентификационный номер транспортного средства — уникальный для каждого транспортного средства идентификационный номер. Аббревиатура VIN расшифровывается как «Vehicle Identification Number» (Идентификационный номер транспортного средства).
Когда транспортному средству Citroën требуется техническое обслуживание?
Регулярное техническое обслуживание необходимо всем транспортным средствам. С информацией о том, как часто необходимо проходить техническое обслуживание и чему именно стоит уделять особое внимание можно ознакомиться в инструкции по техническому обслуживанию. Как правило, транспортное средство требует технического обслуживания каждые 2 года или 30 000 километров пробега.
Когда следует заменять тормозную жидкость на Citroën?
Тормозную жидкость рекомендуется менять каждые два года.
В чем разница между топливом E10 и E5?
В топливе E10 содержится до десяти процентов этанола, в то время как в E5 содержится менее пяти процентов. Соответственно, топливо E10 менее вредит окружающей среде.
Одна или несколько дверей не открываются изнутри. Что мне делать?
Скорее всего, замок оснащен защитой от детей и поэтому не может быть открыт изнутри. Процедура открытия замка с защитой от детей зависит от марки и типа замка.
Автомобильный радиоприемник не включается, что делать?
Если автомобильный радиоприемник не включен, на него не будет подаваться питание. Убедитесь, что красный провод подключен к контактному источнику питания, а желтый провод — к источнику питания постоянной мощности.
Инструкция Citroën Berlingo Multispace (2017) доступно в русский?
Да, руководствоCitroën Berlingo Multispace (2017) доступно врусский .
Не нашли свой вопрос? Задайте свой вопрос здесь
6,55 Мб
Руководство по эксплуатации Citroen Berlingo First 2011
Формат: pdf
-
Год:
2011
-
Страниц:
136
-
Язык:
русский
-
Размер:
6,55 Мб
-
Категории:
В руководстве по эксплуатации Citroen Berlingo First 2011 модельного года, огромное внимание уделено обслуживанию и уходу за автомобилем данной марки.
13,5 Мб
Руководство по эксплуатации Citroen Berlingo Multispace 2014
Формат: pdf
-
Год:
2014
-
Страниц:
268
-
Язык:
русский
-
Размер:
13,5 Мб
-
Категории:
В руководстве по эксплуатации Citroen Berlingo Multispace 2014 модельного года, есть масса полезной информации для автолюбителей. В каждой категории вы найдете десятки изображений, которые покажут как устроен ваш автомобиль.
9,39 Мб
Руководство по эксплуатации Citroen Berlingo Multispace 2013
Формат: pdf
-
Год:
2013
-
Страниц:
268
-
Язык:
русский
-
Размер:
9,39 Мб
-
Категории:
Руководство по эксплуатации Citroen Berlingo Multispace 2013 модельного года расскажет о том, как правильно ухаживать за автомобилем и когда лучше всего проводить техобслуживание.
12,2 Мб
Руководство по эксплуатации Citroen Berlingo 2014
Формат: pdf
-
Год:
2014
-
Страниц:
240
-
Язык:
русский
-
Размер:
12,2 Мб
-
Категории:
Руководство по эксплуатации Citroen Berlingo 2014 модельного года — это отличное руководство, которое должно быть у каждого владельца данного автомобиля.
8,37 Мб
Руководство по эксплуатации Citroen Berlingo 2013
Формат: pdf
-
Год:
2013
-
Страниц:
236
-
Язык:
русский
-
Размер:
8,37 Мб
-
Категории:
Руководство по эксплуатации Citroen Berlingo 2013 модельного года содержит подробные рекомендации, которые помогут использовать ваш автомобиль таким образом, чтобы избежать поломок.
7,08 Мб
Руководство по эксплуатации Citroen Berlingo 2012
Формат: pdf
-
Год:
2012
-
Страниц:
208
-
Язык:
русский
-
Размер:
7,08 Мб
-
Категории:
Руководство по эксплуатации Citroen Berlingo 2012 модельного года содержит огромное количество подробных описаний, а также множество иллюстраций.
23,6 Мб
Руководство по эксплуатации Citroen Berlingo 2010
Формат: pdf
-
Год:
2010
-
Страниц:
232
-
Язык:
русский
-
Размер:
23,6 Мб
-
Категории:
В руководстве по эксплуатации Citroen Berlingo 2010 модельного года представлены рекомендации и подробные инструкции, которые пригодятся любому владельцу.
2,36 Мб
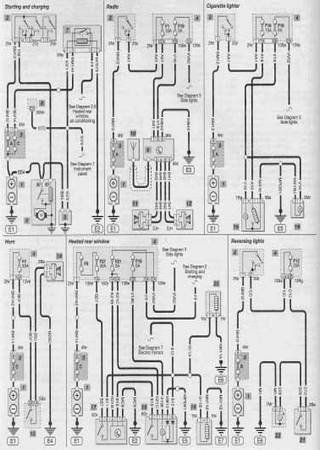
Электросхемы автомобилей Citroen Berlingo и Peugeot Partner
Формат: pdf
-
Год:
2006
-
Страниц:
12
-
Язык:
английский
-
Размер:
2,36 Мб
-
Категории:
Электросхемы автомобилей Citroen Berlingo и Peugeot Partner (1996-2005) дают достоверные и подробные ответы на все вопросы, которые могут возникнуть в процессе использования данных автомобилей.
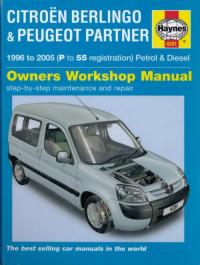
Руководство на английском языке по техническому обслуживанию и ремонту Citroen Berlingo и Peugeot Partner 1996-2005 годов выпуска с бензиновыми и дизельными двигателями.
- Автор: John S. Mead
- Издательство: Haynes Publishing
- Год издания: 2006
- Страниц: 370
- Формат: PDF
- Размер: 88,8 Mb
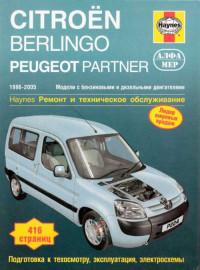
Руководство по ремонту и техническому обслуживанию Citroen Berlingo и Peugeot Partner 1996-2005 годов выпуска с бензиновыми и дизельными двигателями.
- Автор: Джон С. Мид
- Издательство: Алфамер Паблишинг
- Год издания: —
- Страниц: 416
- Формат: —
- Размер: —
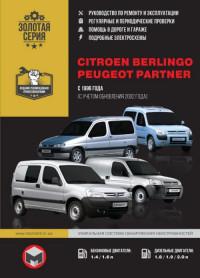
Руководство по ремонту и эксплуатации Citroen Berlingo и Peugeot Partner с 1996 года выпуска с бензиновыми и дизельными двигателями.
- Автор: —
- Издательство: Монолит
- Год издания: —
- Страниц: 400
- Формат: —
- Размер: —
Руководство по эксплуатации и ремонту автомобилей Peugeot Partner/Partner Tepee и Citroen Berlingo B9 с 2008 года выпуска с бензиновыми и дизельными двигателями объемом 1,6 л.
- Автор: —
- Издательство: Монолит
- Год издания: —
- Страниц: 428
- Формат: —
- Размер: —
Руководство по эксплуатации и ремонту автомобилей Peugeot Partner/Partner Tepee и Citroen Berlingo B9 с 2008 года выпуска с бензиновыми и дизельными двигателями объемом 1,6 л.
- Автор: —
- Издательство: Монолит
- Год издания: —
- Страниц: 438
- Формат: —
- Размер: —

Руководство по эксплуатации Citroen Berlingo First.
- Автор: —
- Издательство: Citroen
- Год издания: 2011
- Страниц: 136
- Формат: PDF
- Размер: 1,9 Mb
Подборка руководств по эксплуатации Citroen Berlingo и Citroen Berlingo Multispace.
- Автор: —
- Издательство: Citroen
- Год издания: 2010-2014
- Страниц: —
- Формат: PDF
- Размер: 56,3 Mb
Руководство по ремонту и эксплуатации Citroen Berlingo и Peugeot Partner 1996-2002 годов выпуска с бензиновыми и дизельными двигателями.
- Автор: —
- Издательство: Арго-Авто
- Год издания: —
- Страниц: 512
- Формат: —
- Размер: —

Руководство по ремонту и эксплуатации Citroen Berlingo и Peugeot Partner с 2002 года выпуска с бензиновыми и дизельными двигателями.
- Автор: —
- Издательство: Арго-Авто
- Год издания: —
- Страниц: 504
- Формат: —
- Размер: —

Руководство по ремонту и эксплуатации Citroen Berlingo и Peugeot Partner/Partner Tepee с 2008 года выпуска с бензиновыми и дизельными двигателями.
- Автор: —
- Издательство: Арго-Авто
- Год издания: —
- Страниц: 408
- Формат: —
- Размер: —
Руководство по эксплуатации, техническому обслуживанию и ремонту Citroen Berlingo и Peugeot Partner с 1996 года выпуска с бензиновыми и дизельными двигателями.
- Автор: —
- Издательство: Автомастер
- Год издания: —
- Страниц: 376
- Формат: —
- Размер: —
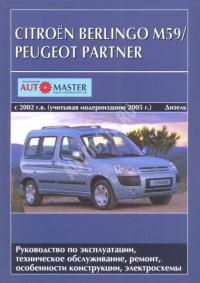
Руководство по эксплуатации, техническому обслуживанию и ремонту Citroen Berlingo и Peugeot Partner с 2002 года выпуска с дизельными двигателями.
- Автор: —
- Издательство: Автомастер
- Год издания: —
- Страниц: 420
- Формат: —
- Размер: —
Руководство на французском языке по эксплуатации, техническому обслуживанию и ремонту Citroen Berlingo и Peugeot Partner с 2002 года выпуска.
- Автор: —
- Издательство: —
- Год издания: —
- Страниц: 203
- Формат: PDF
- Размер: 31,9 Mb
Поддержка и продвижение сайта — Avada.ru
Обращаем Ваше внимание на то, что вся представленная на сайте информация, носит информационный характер и ни при каких условиях не является публичной офертой, определяемой положениями Статьи 437 (2) Гражданского кодекса Российской Федерации. Наличие конкретных комплектаций, опций и оборудования по доступным автомобилям уточняйте у продавцов консультантов.
Предоставляя свои персональные данные и используя настоящий веб-сайт, Вы даете согласие на обработку Ваших персональных данных и принимаете условия их обработки. Политика конфиденциальности.
Для повышения удобства работы с сайтом и обеспечения его корректной работы компания АвтоГЕРМЕС использует файлы cookie. Эти файлы содержат данные о предыдущих посещениях Вами сайта. Cookie не идентифицируют Ваши личные данные. Вся информация является сугубо конфиденциальной. При необходимости Вы можете отключить cookie с помощью настроек браузера.


