- Manuals
- Brands
- Skoda Manuals
- Automobile
- ROOMSTER
- Owner’s manual
-
Contents
-
Table of Contents
-
Bookmarks
Quick Links
SIMPLY CLEVER
ŠkodaRoomster
OWNER´ S MANUAL
Related Manuals for Skoda Roomster
Summary of Contents for Skoda Roomster
-
Page 1
SIMPLY CLEVER ŠkodaRoomster OWNER´ S MANUAL… -
Page 2
Introduction You have opted for a Škoda — our sincere thanks for your confidence in us. Your new Škoda offers you a vehicle featuring the most modern engineering and a wide range of equipment which you will undoubtedly wish to use to the full during your daily motoring. That is why, we recommend that you read this Owner’s Manual attentively to enable you to become familiar with your car and all that it offers as quickly as possible. -
Page 3
Introduction On-board literature The Brief instruction The on-board literature for your vehicle consists of this “Owner’s includes an overview of the most important controls of your vehicle. Manual” as well as the brochures “Quick Reference Guide”, “Service The Service schedule Schedule”… -
Page 4: Table Of Contents
Contents Contents Layout of this Owner’s Manual Visibility ……..Automatic gearbox .
-
Page 5
Contents General Maintenance Airbag system Fuses and light bulbs …….. -
Page 6
Contents… -
Page 7: Layout Of This Owner’s Manual (Explanations)
Layout of this Owner’s Manual (explanations) Layout of this Owner’s Manual (explanations) The Owner’s Manual has been systematically designed, in order to make it easy for WARNING you to find and absorb the information you require. The most important notes are marked with the heading Warning. These Chapters, table of contents and subject index Warning notes draw your attention to a serious risk of accident or injury.
-
Page 8: Using The System
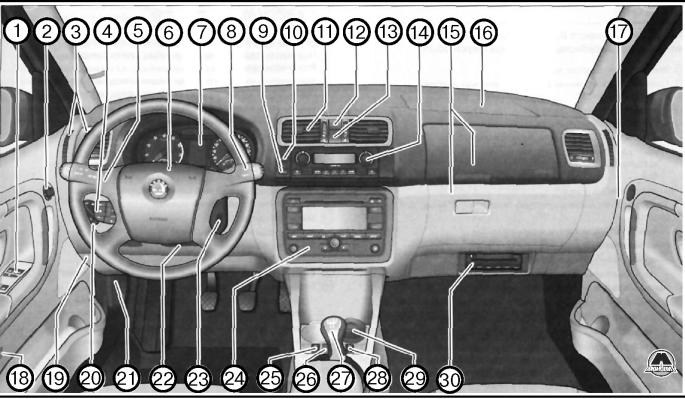
Cockpit Using the system Fig. 1 Certain items of equipment shown in the illustration are only fitted to particular model versions or are optional items of equipment.
-
Page 9: Cockpit
Cockpit Cockpit General view Switch depending on equipment fitted: − Unlocking the boot lid* ……..This general view is designed to help you to quickly become familiar −…
-
Page 10: Instruments And Indicator/Warning Lights
Instruments and Indicator/Warning Lights Instruments and Indicator/Warning Lights General view of the instrument cluster Fig. 2 Instrument cluster Engine revolutions counter ⇒ page 9 When the lights are switched on, the instrument cluster is illuminated. Display: The version of the instrument cluster can differ depending on the equipment. −…
-
Page 11: Coolant Temperature Gauge
Instruments and Indicator/Warning Lights Avoid high engine speeds during the running-in period ⇒ page 153. WARNING Pay attention to the warning notes ⇒ page 174, “Working in the engine Caution compartment” before opening the bonnet and inspecting the coolant level. The needle of the revolutions counter must on no account move into the red zone of the scale — risk of engine damage! Caution…
-
Page 12: Counter For Distance Driven
Instruments and Indicator/Warning Lights Counter for distance driven Warning against excessive speeds* An acoustic warning signal will sound when the vehicle speed exceeds 120 kilome- tres per hour. The acoustic warning signal will switch off again when the vehicle speed goes below this speed limit. This function is only valid for some countries.
-
Page 13
Instruments and Indicator/Warning Lights • Service Interval Display resets the memory of the display after the appropriate inspection, • A key symbol appears in the counter display for distance driven about 30 days makes an entry in the Service schedule, ⇒… -
Page 14: Digital Clock
Instruments and Indicator/Warning Lights Digital clock Note In certain national versions the displays appear in the Imperial system of A reset button is installed on the left below beside the speedometer for measures. ⇒ page 9, fig. adjusting the clock Set hours Memory –…
-
Page 15
Instruments and Indicator/Warning Lights Total-trip memory (memory 2) Selecting the functions The total distance driven memory gathers data from any number of indvidual jour- – Press the rocker switch up or down. This will cause the individual neys up to a total of 100 hours driving or 10 000 kilometres driven. The memory is functions of the multi-functional indicator to appear in the display deleted when either of these limits is reached and the calculation starts from anew. -
Page 16: Outside Temperature
Instruments and Indicator/Warning Lights Outside temperature Range The estimated range in kilometres is shown on the display. It indicates the distance you can still drive with your vehicle based on the present level of fuel in the tank for the same style of driving. The readout is shown in steps of 10 km. The fuel consumption for the last 50 km is taken as a basis for calculating the range.
-
Page 17: Information Display
Instruments and Indicator/Warning Lights Information display* Driving time The driving time which has elapsed since the memory was last erased, appears in Introduction the display ⇒ page 13. If you wish to calculate the driving time from a particular time of day you must first erase the memory at this moment in time by pressing the ⇒…
-
Page 18
Instruments and Indicator/Warning Lights ⇒ fig. 10 – You can activate the menu by pressing the rocker switch ⇒ page 17 Menu for more than 1 second. ⇒ page 18 Door, luggage compartment door and bonnet ajar – You can select the menu through the rocker switch . -
Page 19: Auto Check Control
Instruments and Indicator/Warning Lights Door, luggage compartment door and bonnet ajar warning Radio display Fig. 11 Information Fig. 12 Information display: Door warning display: Radio display The door, luggage compartment door and bonnet ajar warning lights up when at These displays appear in addition to the normal information in the radio display. least one of the three items door, luggage compartment or bonnet are not closed when the ignition is turned on.
-
Page 20
Instruments and Indicator/Warning Lights There is at least one error message to be read when the term VEH. STATUS is Coolant level too low/coolant temperature flashing in the main menu. The display will show STATUS 1/2 (for example) if a ⇒… -
Page 21: Navigation System
Instruments and Indicator/Warning Lights One warning signal will sound if a yellow symbol appears. Navigation system* If several operational faults of priority 2 exist, the symbols appear one after the The controls for the navigation system, radio, CD player are located in the centre other and are each illuminated for about 10 seconds.
-
Page 22
Instruments and Indicator/Warning Lights ⇒ page 25 Brake pad wear* ⇒ page 22 Turn signal lights (to the left) ⇒ page 25 Open door* ⇒ page 22 Turn signal lights (to the right) ⇒ page 26 Fluid level in windshield washer system* ⇒… -
Page 23
Instruments and Indicator/Warning Lights Rear fog light WARNING (continued) compartment, e.g. inspecting and replenishing oil and other fluids. It is also comes on when the rear fog lights are operating ⇒ page 46. The warning light essential to observe all warnings ⇒ page 174. Alternator … -
Page 24
Instruments and Indicator/Warning Lights EPC fault light (petrol engine) WARNING (Electronic Power Control) warning light comes on for a few seconds when f there is a fault in the cornering lights, the headlights are automatically the ignition is switched on. lowered to the emergency position. -
Page 25: Electronic Immobiliser
Instruments and Indicator/Warning Lights The indicator light does not flash if a turn signal light on the trailer or on the WARNING vehicle is not operating. • If you must stop for technical reasons, then park the vehicle at a safe distance from the traffic and switch off the engine and switch on the hazard Coolant temperature/coolant level …
-
Page 26: Open Door
Instruments and Indicator/Warning Lights Engine oil The warning light flashes yellow* (engine oil level sensor faulty) A fault on the engine oil level sensor is indicated additionally by an audible signal and the warning light coming on several times after the ignition has been switched The warning light …
-
Page 27
Instruments and Indicator/Warning Lights The warning light comes on even when the ignition is switched off. The warning If the warning light comes on immediately after starting the engine, the TCS light goes out 5 minutes after switching off the ignition if one or several doors, the system can be switched off for technical reasons. -
Page 28: Selector Lever Lock* (Automatic Gearbox)
Instruments and Indicator/Warning Lights The warning light comes on for a few seconds after the ignition has been switched Note on or when starting the engine. The warning light goes out after an automatic check sequence has been completed. If the battery has been disconnected, the warning light …
-
Page 29: Brake System
Instruments and Indicator/Warning Lights Brake system WARNING (continued) • If the brake system warning light does not go out a few seconds after The warning light flashes or comes on if the brake fluid level is too low, if there is a fault in the ABS or if the handbrake is applied.
-
Page 30: Seat Belt Warning Light
Instruments and Indicator/Warning Lights WARNING (continued) WARNING • Always adjust your speed to suit weather, road, region and traffic condi- Have the airbag system checked immediately by a specialist garage if a fault tions. The route indicated by the warning light must not tempt you to disre- exists.
-
Page 31: Unlocking And Locking
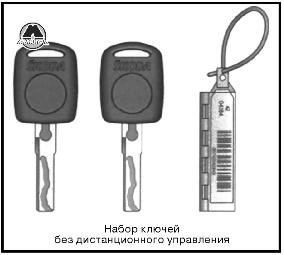
Unlocking and locking Unlocking and locking Key ring The key ring only has the key number on it which is essential for producing other keys. This number can be used to order replacement keys from the Škoda Service Description Partners. The key ring with the number should be separately and securely kept in safe keeping since keys can only be replaced if they are lost or damaged by giving this number.
-
Page 32
Unlocking and locking Changing the key battery – Take the used battery out of the housing cover. – Insert the new battery. Ensure that the “+” symbol on the battery is facing downwards. The correct polarity is also shown on the cover of the transmitter housing. -
Page 33: Locking
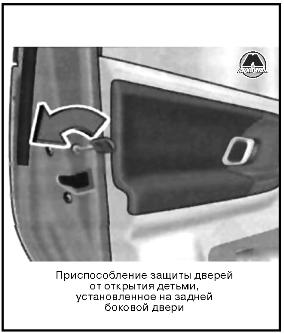
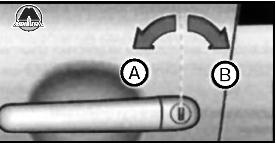
Unlocking and locking Locking Child safety lock The child safety lock prevents the rear door from being opened from Valid for vehicles without a central locking system: the inside. Locking from outside The securing head will move upwards or downwards in the door when unlocking or locking.
-
Page 34: Central Locking System
Unlocking and locking Central locking system* Opening a single door* This function allows one to just unlock the driver’s door. The other doors remain locked and are only unlocked when the command is repeated. The single door Description opening function can be first activated by recoding the control unit of the central locking system.
-
Page 35
Unlocking and locking Safe securing Unlocking the vehicle using the key The central locking system is equipped with a safe securing system. Locking the vehicle from the outside causes the door locks to be automatically blocked. The indicator light in the driver’s door flashes. It is not possible to open the doors with the door handle either from the inside or from the outside. -
Page 36: A 26 Buttons For Central Locking
Unlocking and locking Closing the vehicle with the key Locking all doors and the boot lid ⇒ fig. – Press button 22. The symbol in the button comes on. – Turn the key in the lock of the driver door to the right into the closing ⇒…
-
Page 37: A 18 Switch Depending On Equipment Fitted: − Unlocking The Boot Lid
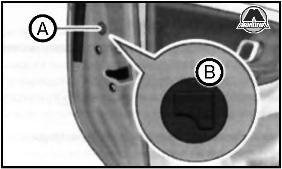
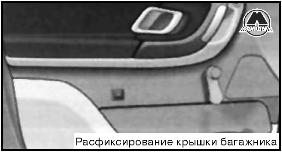
Unlocking and locking Emergency locking of the doors Luggage compartment door Fig. 23 Emergency Fig. 24 Unlocking the locking of the door boot lid An emergency locking mechanism which is visible only after opening the Opening the boot lid door is located on the face end of the rear doors (applies only for vehicles –…
-
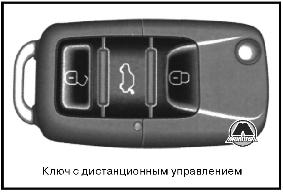
Page 38: Remote Control
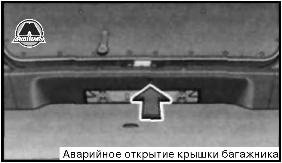
Unlocking and locking – Move the operating lever A with the aid of a narrow object e.g. screw- WARNING (continued) driver up to the stop in the direction of arrow; the boot lid is then • Do not press on the rear window when closing the boot lid, it could crack unlocked.
-
Page 39
Unlocking and locking Unlocking and locking car The turn signal lights flash twice as confirmation that the vehicle has been unlocked. The vehicle will lock again automatically if you unlock the vehicle using button but do not open a door or the boot lid within the next 30 seconds. This function is intended to prevent the car being unlocked unintentionally. -
Page 40: Anti-Theft Alarm System
Unlocking and locking • Synchonisation of the remote control Bonnet, • Boot lid, • If the vehicle cannot be unlocked by actuating the remote control system then it is Doors, possible that the code in the key and the control unit in the vehicle are no longer •…
-
Page 41: Interior Monitor* And Towing Protection
Unlocking and locking Interior monitor* and Towing protection* Note • The interior monitor and the towing protection detect movements You can also switch off the interior monitor and the towing protection, by deac- inside the vehicle interior and then trigger the alarm. tivating the safe securing system ⇒…
-
Page 42
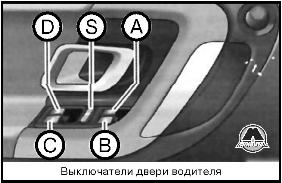
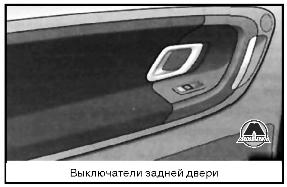
Unlocking and locking The power windows operate only when ignition is switched on. WARNING Opening a window • If you lock the vehicle from the outside, do not leave any person in the vehicle since it is no longer possible to open the windows from the inside in –… -
Page 43
Unlocking and locking You must try to close the window again within 10 seconds, even if the obstacle was WARNING (continued) not yet removed, the closing process is stopped. During this time it is not possible • to automatically close the window. The force limiter is still switched on. You should take particular care when closing the windows! You may otherwise suffer severe injuries as a result of getting an arm, for example, The force limiter is only switched off, if you attempt to close the window within the… -
Page 44: Panorama Roof
Unlocking and locking Panorama roof* Fig. 30 Panorama roof: Open sun screen The interior compartment can be brightened through the panorama roof out of tinted glass. The panorama roof can be exposed or covered over ⇒ fig. with the sun screen 30.
-
Page 45: Lights And Visibility
Lights and Visibility Lights and Visibility Lights – Press the main beam lever forward in order to switch on the main ⇒ page 47, fig. beam Switching lights on and off Switching off all lights – Turn the light switch into position O. Switching on daylight driving lights* –…
-
Page 46
Lights and Visibility WARNING WARNING Never drive with side lights on — risk of accident! The side lights are not If there is a fault in the cornering lights, the warning light flashes in the bright enough to light up the road sufficiently in front of you or to be seen by instrument cluster. -
Page 47
Lights and Visibility Fog lights with integrated turning light* Caution The turning light is intended for a better illumination of the vehicle The rear fog light should only be switched on if visibility is particularly poor close range when turning, parking etc. (conform with any varying legal provisions) to avoid dazzling vehicles behind your vehicle. -
Page 48: A 12 Switch For Hazard Warning Lights
Lights and Visibility The turn signal and main beam lever Caution The parking lights and headlight flasher are also switched on and off Set the headlight beam adjustment in such a way as to avoid dazzling oncoming using the turn signal and main beam lever.
-
Page 49: Interior Lighting
Lights and Visibility Interior lighting Headlight flasher – Pull on the lever of the steering wheel (sprung position) — the main Front interior lighting and storage compartment on front beam and warning light in the instrument cluster come on. passenger side Parking light …
-
Page 50: Visibility
Lights and Visibility Lighting of storage compartment on the front passenger side Note – When opening the flap of the storage compartment on the front We recommend having the bulb replaced by a specialist garage. passenger side the lighting in the storage compartment comes on. –…
-
Page 51: Windshield Wiper And Wash System
Lights and Visibility Windshield wiper and wash system For the sake of the environment You should switch off the rear window heater as soon as the rear window is clear. Windshield wiper The reduced current consumption will have a favourable effect on fuel economy ⇒…
-
Page 52
Lights and Visibility Top up with wash liquid ⇒ page 186. Fast wipe – Position the lever up into position WARNING Automatic wipe/wash for windscreen • Properly maintained windscreen wiper blades are essential for clear visi- – Pull the lever towards the steering wheel into position and the bility and safe driving ⇒… -
Page 53
Lights and Visibility Replacing wiper blades for the windscreen wipers WARNING • If the windscreen wipers are handled carelessly, there is a risk of damage to the windscreen. • You should clean the wiper blades regularly with a windscreen cleaner in order to avoid any smears. -
Page 54: Rear Mirror
Lights and Visibility Attaching a wiper blade Adjusting the left-hand exterior mirror* – Position the wiper blade onto the wiper arm and lock the locking – Turn the rotary knob to position . The movement of the mirror surface button is identical to the movement of the rotary knob.
-
Page 55: Seats And Stowage
Seats and Stowage Seats and Stowage Front seats WARNING (continued) • It is important for the driver and front passenger to maintain a distance Basic information of at least 25 cm from the steering wheel or dash panel. Not maintaining this minimum distance will mean that the airbag system will not be able to prop- The front seats have a wide range of different settings and can thus be matched to erly protect you — hazard! The front seats and the head restraints must…
-
Page 56: Head Restraints
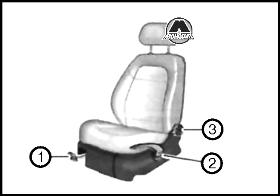
Seats and Stowage Head restraints Adjusting height of seat* – Lift the seat if required by pulling or pumping lever upwards. – Lower the seat if required by pushing or pumping lever down- wards. Adjust the angle of the seat backrest –…
-
Page 57: Heating The Front Seats
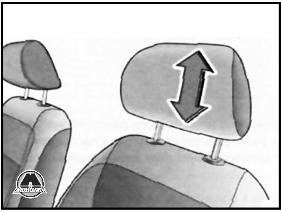
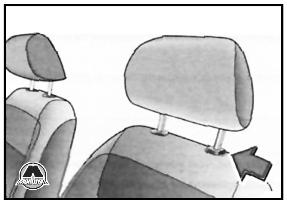
Seats and Stowage Heating the front seats* – Move the head restraint downwards if required by pressing the locking ⇒ fig. 47 button and by pressing with the other hand the head restraint downwards. Removing and installing a head restraint –…
-
Page 58: Rear Seats
Seats and Stowage Caution • You should not kneel on the seats or otherwise apply pressure at specific points in order to avoid damaging the heating elements of the seat heaters. • Do not clean the seats moist ⇒ page 168. Note The seat heating should only be switched on when the engine is running.
-
Page 59
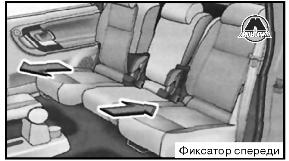
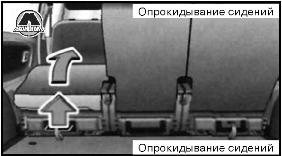
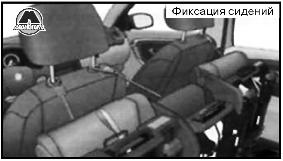
Seats and Stowage Adjusting the seat backrest Fig. 53 Secure folded forward seats Fig. 51 Adjusting the seat backrest Fold seats fully forwards and secure – Open the guide loop for the seat belt on the side of the outer seats and Adjust the angle of the seat backrest put the belt tongue into the opening of the respective side trim panel ⇒… -
Page 60
Seats and Stowage Note Please refer to the following guidelines ⇒ page 120, “Correct seated position for the occupants on the rear seats”. Using the system Safety Driving Tips General Maintenance Breakdown assistance Praktik Technical Data… -
Page 61
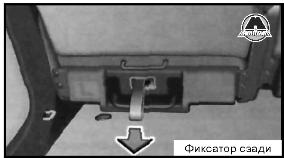
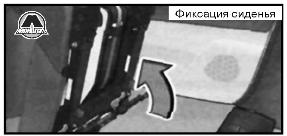
Seats and Stowage Removing seats Note Please refer to the following guidelines ⇒ page 120. Adjusting seats in crosswise direction Fig. 54 Unlocking the folded forward seat Fig. 56 Locking the seat Moving seats in crosswise direction – Remove the middle seat ⇒ page 60. –… -
Page 62
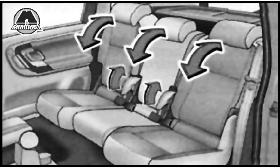
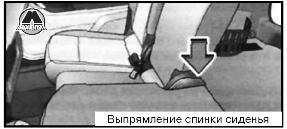
Seats and Stowage Folding the rear seats back into position WARNING (continued) • When folding the seat backrest always make sure that it has safely locked into position, this is confirmed by the position and a visible marking on the cover of the lever. -
Page 63: Pedals
Seats and Stowage Pedals kinetic energy depends on the speed at which the vehicle is travelling and on the weight of the object. The speed at which the vehicle is travelling is in this case the more significant factor. You should use only footmats which do not obstruct the movement of the pedals and have an anti-slip protection.
-
Page 64: Folding Hooks
Seats and Stowage The fixing nets* and the installation instruction are located in the luggage compart- WARNING (continued) ment. • On no account exceed the permissible axle loads and the permissible gross weight of the vehicle — risk of accident! WARNING •…
-
Page 65
Seats and Stowage Fixing nets — Net programme* WARNING (continued) • The load to be transported must be fixed in place in such a way that it cannot move during the journey and when braking. Caution Do not place any objects with sharp edges in the nets — risk of net damage. Fixing floor covering of the luggage compartment Fig. -
Page 66
Seats and Stowage The luggage compartment cover – Install again by pushing the luggage compartment cover forwards into the holder and hanging the support straps on the boot lid. You can use the luggage compartment cover behind the head restraints for storing light and soft items. The luggage compartment cover can also be put into the lower position on the ⇒… -
Page 67: Bicycle Carrier
Seats and Stowage Bicycle carrier* WARNING Install cross member When transporting the bicycles in the luggage compartment, ensure the safety of the passengers transported on the rear seats ⇒ page 120, “Correct seated position for the occupants on the rear seats”. Install bicycle carrier Fig.
-
Page 68
Seats and Stowage Put bicycle into the bicycle carrier Note If the front wheel is equipped with disc brake, attach the wheel in such a way that the brake disc is opposite the frame. Secure the stability of the bicycles with a strap Fig. -
Page 69: The Roof Luggage Rack System
Note The roof luggage rack system* A roof rail is obtainable from a Skoda Service Partner if hasn’t been fitted onto a vehicle at the works. Roof rail* Roof load Distribute weight evenly over the roof luggage rack system.
-
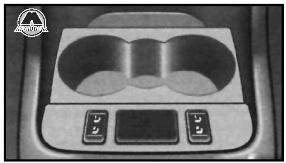
Page 70: Front Cup Holder
Seats and Stowage WARNING (continued) WARNING • • Do not use any cups or beakers which are made of brittle material (e.g. The items which you transport on the roof bar system must be reliably glass, porcelain). You might be injured by them in the event of an accident. attached — risk of accident! •…
-
Page 71: Note Holder
Seats and Stowage Ashtray* Caution Do not open the beverages in the cup holder while driving. There is a risk of spilling e.g. when braking and therefore the electrical components or the seat upholstery can be damaged. Note holder Fig. 75 Centre console: Front ashtray Fig.
-
Page 72: Cigarette Lighter* And Power Sockets
Seats and Stowage Cigarette lighter* and power sockets* WARNING • Cigarette lighter Take care when using the cigarette lighter! Not paying proper attention or incorrect use the cigarette lighter in an uncontrolled manner may result in You can also use the socket on the cigarette lighter for other elec- burns.
-
Page 73: Storage Compartments
Seats and Stowage It fulfils the requirements of DIN standard ISO 4165 and must only be used for WARNING (continued) connecting approved electrical accessories with a power uptake of up to 240 watts. may distract you from concentrating on the traffic situation — risk of acci- The vehicle battery will be discharged in the process if the engine is stationary.
-
Page 74
Seats and Stowage Storage compartment on the driver’s side WARNING The storage compartment must always be closed when driving for safety reasons. Cooling of storage compartment on front passenger side* The storage compartment can be fitted for vehicles with an air- conditioning system with a closable inlet for cooled air. -
Page 75: Storage Compartment
Seats and Stowage The storage compartment is foreseen for storing small objects of up to 1 WARNING kg. in weight. The storage compartment must always be closed when driving for safety ⇒ fig. – Tilt the lock to open the flap and pull out the flap reasons — risk of head injury.
-
Page 76
Seats and Stowage Fold the armrest WARNING ⇒ page 74, – Press the lower button on the end face of the armrest ⇒ fig. 87 Use the area of the storage compartment only for storing fig. 85 in order to fold the armrest. Fold the armrest forwards and objects which do not project so that the effectiveness of the side airbag is not release the button. -
Page 77
Seats and Stowage Installing storage box Caution – In order to create a better access to the middle seat, fold one outer Do not open the beverages in the cup holder while driving. There is a risk of spilling backrest forwards. e.g. -
Page 78
Seats and Stowage Flexible storage compartment* Clothes hooks* Fig. 91 Flexible storage Fig. 92 Area above rear compartment doors: Clothes hooks A flexible storage compartment is located on the right side of the luggage ⇒ fig. A clothes hook is located above the rear doors compartment. -
Page 79: Heating
Heating and air conditioning system Heating and air conditioning system Heating causes the recirculating air system ⇒ – Pressing button to be switched on. Using the system Control for air distribution The heating system delivers air into the interior of the vehicle and –…
-
Page 80
Heating and air conditioning system • Set heating Open the air outlet vents 4, • Set the air distribution regulator as required between positions Recommended settings of heating controls for: if the windscreen gets misted up again. Defrosting the windscreen and side windows Fresh air mode — ventilation •… -
Page 81: Climatic (Semi-Automatic Air Conditioning System)
Heating and air conditioning system You can set the air supply to the individual vents with the air distribution control WARNING ⇒ page 78, fig. 93. Air outlet vents 3 and 4 can also be opened or closed individu- ally. You should not leave recirculated air mode on over a longer period of time, as “stale”…
-
Page 82
Heating and air conditioning system Using the system Air at a temperature of about 5°C may flow out of the vents under certain circum- stances when the cooling system is operating. Lengthy and uneven distribution of the air flow out of the vents (in particular at the leg area) and large differences in temperature, for example when getting out of the vehicle, can result in chills in sensitive persons. -
Page 83
Heating and air conditioning system switching cooling on and off Defrosting the windscreen and side windows • ⇒ page 81, fig. 95 Put the control dial to the temperature selected as usual – Press the button . The symbol in the switch comes on. -
Page 84
Heating and air conditioning system Cooling down the inside of the vehicle as rapidly as possible Switching recirculated air mode off • close all windows – Press button again, the button symbol goes out. • Control dial at the desired heat temperature •… -
Page 85: Climatronic (Automatic Air Conditioning)
Heating and air conditioning system • Close air outlet vents The fuse of the Climatic is defective. Check the fuse, replace it if necessary ⇒ page 207. – Turn the rotary knob into the lower position. • The cooling system has switched off automatically for a short time because the coolant temperature of the engine is too hot ⇒…
-
Page 86
Heating and air conditioning system The heating effect is dependent upon the coolant temperature, thus full heat Note output only occurs when the engine has reached its operating temperature. • If the cooling system has not been switched on for a lengthy period, odours may It is possible to briefly activate recirculated air mode in order to enhance the be produced at the evaporator because of deposits. -
Page 87: Automatic Mode
Heating and air conditioning system Buttons / control dial Automatic mode Setting the blower speed The automatic mode is used in order to maintain a constant temper- The displays ature and to keep the windows in the interior of the car dry. Set blower speed Switching automatic mode on The outside temperature…
-
Page 88
Heating and air conditioning system Please refer to the information regarding recirculated air mode ⇒ page 87. WARNING (continued) accident increases. Switch recirculated air mode off as soon as the windows Defrosting windscreen begin misting up. • After 15 minutes of constant recirculated air mode, the symbol … -
Page 89
Heating and air conditioning system ⇒ page 85, fig. 97 – Turn the control dial to the left (reduce blower Close air outlet vents speed) or right (increase blower speed). – Turn the rotary knob into the lower position. Switch off the blowers, the Climatronic is switched off and in the display shows OFF. Redirecting air flow The set blower speed is displayed next to the control dial when the respective… -
Page 90: Setting Steering Wheel Position
Starting-off and Driving Starting-off and Driving Setting steering wheel position* – Set the steering wheel to the desired position (concerning height and forward/back position). – Then push the lever up against the steering column until it locks into place. WARNING •…
-
Page 91: Ignition Lock
Starting-off and Driving Ignition lock Move the steering wheel back and forward a little if the ignition key cannot, or cannot easily be turned into this position, in order to release the steering lock. Position The engine is started in this position. At the same time switched on low beam or main beam or other electrical components with major power consumption are briefly switched off.
-
Page 92: Petrol Engines
Starting-off and Driving • Petrol engines Let go of the key as soon as the engine starts otherwise there may be damage to the starter. These engines are fitted with a starter system which selects the correct fuel/air The engine running noises may louder at first be louder for a short time after mixture for every external air temperature.
-
Page 93: Switching Off The Engine
Starting-off and Driving • • Contact the nearest specialist garage to obtain professional assistance. This is why particular care is required when carrying out any work in the engine compartment ⇒ page 174, “Working in the engine compartment”. Starting the engine after fuel tank has run dry It may take longer than normal to start the engine after refuelling if the fuel tank has Shifting (manual gearbox) run completely dry — up to one minute.
-
Page 94: Handbrake
Starting-off and Driving Handbrake WARNING • Please note that the handbrake must be fully released. A handbrake which is only partially released can result in the rear brakes overheating which will have a negative effect on the operation of the brake system — risk of accident! In addition this can result in premature wear of the rear brake pads.
-
Page 95: Cruise Control System (Ccs)
Starting-off and Driving Cruise control system (CCS)* Range of sensors The clearance warning begins at a distance of about 160 cm from the obstacle (area ⇒ page 93, fig. 104). The interval between the warning signals becomes shorter Introduction as the clearance is reduced. A continuous tone sounds from a clearance of just 30 cm (Bereich ) — danger The cruise control system (CCS) maintains a constant speed, more than 30 km/h,…
-
Page 96
Starting-off and Driving Storing a speed WARNING First ensure that it is not too high for the traffic conditions which exist at that moment before resuming the stored speed. Changing a stored speed You can also change the speed of the vehicle without depressing the accelerator. -
Page 97
Starting-off and Driving Switching off the cruise control system temporarily – You can switch off temporarily the cruise control system, if you depress the brake or clutch pedal. The set speed remains stored in the memory. Press the rocker button in the position RES+ for the resumptionof the stored speed after releasing the clutch or brake pedal. -
Page 98: Automatic Gearbox
Automatic gearbox Automatic gearbox 6-speed automatic gearbox* Stopping for a short time – The selector lever position N does not have to be selected when stop- Introduction ping just for a short time, such as at a cross roads. It is sufficient to hold the vehicle stationary using the foot brake.
-
Page 99: Selector Lever (6-Speed Automatic Gearbox)
Automatic gearbox ⇒ fig. 107. In the positions D and S the gear you have already engaged will be addi- WARNING (continued) tionally displayed on the display. • When the engine is running and the vehicle is stationary, it is necessary P — Parklock to hold the car with the brake pedal in all the positions of the selector lever The driven wheels are locked mechanically in this position.
-
Page 100: Kickdown Function
Automatic gearbox You must depress the brake pedal ⇒ Selector lever lock if you wish to move the selector lever into position D from N when the vehicle is travelling at less than 5 km/hour or is stationary. Automatic selector lever lock …
-
Page 101
Automatic gearbox Tiptronic gearbox does not shift up into the highest gear until the engine has reached its maximum revolutions for this gear range. The Tiptronic allows the driver to also shift gears manually. WARNING Please note that using the kickdown function can result in the driven wheels spinning on a smooth or slippery road surface — risk of skidding! Dynamic shift programme The automatic gearbox of your vehicle is controlled electronically. -
Page 102
Automatic gearbox Shifting down gears Towing a vehicle Please pay attention to the following information if it comes necessary to tow-in – One-touch back of the selector lever (in the Tiptronic position) your car ⇒ page 203. It is possible to switch over to manual both when the car is stationary and also when driving. -
Page 103: Communication
Communication Communication Operating the radio Button Radio Reading the Frequency search back previous CD Frequency search forward Reading the following CD Mute switch The buttons apply for the respective operating mode of the current radio system. Fig.
-
Page 104: Radio And Mobile Phone Operation
Communication Radio and mobile phone operation The driver can set the basic functions of the radio and telephone system by simply operating the buttons on the multi-functional module* behind the steering wheel so that he can concentrate on the traffic situation without being distracted as little ⇒…
-
Page 105: Universal Telephone Preinstallation With Voice Control
Communication Universal telephone preinstallation with voice back and guides you if necessary through the relevant functions. You can start or end the dialogue at any time by pressing the PTT button. You can also end the control* dialogue with the voice command CANCEL. The dialogue is always automatically ended after carrying out an operation, e.g.
-
Page 106: Inserting The Mobile Phone And Adapter
Communication Inserting the mobile phone and adapter Caution ⇒ fig. 113 – First of all push the adapter in the direction of arrow up to Taking the mobile phone out of the adapter during the call can lead to interruption the stop into the mount.
-
Page 107: Voice Commands
Communication When inserting the mobile phone the next time only perform an update of the rele- Activity Read out in display vant phone book. The updating takes a few minutes, first of all the last read phone- book appears on the information display. Newly stored telephone numbers are Call terminated INCOMING CALL TERMINATED only shown after the updating has ended.
-
Page 108: Enter Pin Code
Communication Voice commands for operating the phone phone book Voice command Activity Voice command Activity The entered name or the last entered order of digits is erased. Previously entered groups of digits are SAVE/STORE After this command a name with its telephone BACK repeated.
-
Page 109: Select Number
Communication • When entering an incorrect PIN code, the system indicates “The PIN is incor- The digits zero to nine are permitted. The system detects no continuous digit rect”. combinations such as twenty-three, but only individually spoken digits (two, three). •…
-
Page 110: Phone Voice Phonebook
Communication Example of redial Example for storing in the phone voice phonebook Voice command Announcement Voice command Announcement REDIAL “The number is being dialed” SAVE/STORE “The name please” NAMES/NAME/NUMBER You can interrupt the dialogue at any time by pressing the PTT button or with the COMPANY XYZ “Please repeat the name”…
-
Page 111
Communication Example for selecting an entry out of the phone voice phonebook Example for erasing an entry out of the phone voice phonebook Voice command Announcement Voice command Announcement SELECT NAMES/NAME “The name please” DELETE NAMES/NAME “The name please” COMPANY XYZ “Company XYZ”… -
Page 112: Bluetooth
– If the hands-free system on the display of the mobile telephone If no entry is put in, the following announcement is made after about 5 sec- announces Skoda UHV, enter the PIN 1234 within 30 seconds and onds. wait, until the connection is established.
-
Page 113: Mobile Phones And Two-Way Radio Systems
Communication In the modern business world as well as within the private sector the mobile Note communication gains increasingly on importance. Mobile phones from different • manufacturers can be connected with the hands-free system by means of Blue- Not valid for all mobile phones which enable a communication via Bluetooth. •…
-
Page 114: Input Aux-In
Communication Input AUX-IN* you with details about the technical possibilities for retrofitting of mobile tele- phones and radio transmitters. Operation of mobile phones or two-way radio systems may interfere with func- The input for external audio sources AUX-IN is located on the right next to the hand- tioning of the electronic systems of your vehicle.
-
Page 115
Communication • Loading a CD After loading a CD into the CD-changer, you must wait until the LED of the corresponding button lights up. Then the CD-case is free to load the next – Touch the button and guide the CD (compact disc) into the CD- case . -
Page 116
Communication The laser used for equipment of category 1 is to such an extent energy-poor and/or shielded that there is no risk of danger when used in accordance with the regula- tion. WARNING Please always pay full attention to the traffic situation around you! Note Do not remove the equipment cover. -
Page 117
Communication… -
Page 118: Safety
Passive Safety Safety Passive Safety • Basic information Three-point seat belts for all the seats, • belt force limiter for front seats, • Driving the safe way belt tensioner for front seats, • seat belt height adjuster for front seats, Passive safety measures reduce the risk of injury in accident situa- •…
-
Page 119
Passive Safety • Before setting off Never drive when your driving ability is impaired, e.g. through medication, alcohol, drugs. The driver is always fully responsible for his occupants and for the • Keep to the traffic regulations and the permissible speed limit. operating safety of the vehicle. -
Page 120: Correct Seated Position
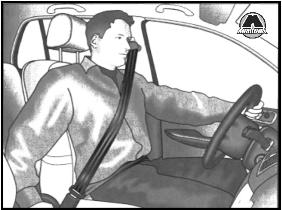
Passive Safety • Correct seated position Adjust the backrest so that you are able to reach the highest point of the steering wheel with your arms at a slight angle. • Adjust the head restraint so that the top edge of the head restraint is at the same Correct seated position for the driver ⇒…
-
Page 121
Passive Safety Correct seated position for the front passenger Correct seated position for the occupants on the rear seats The front passenger must maintain a distance of at least 25 cm from Occupants on the rear seats must sit upright, keep the feet in the the dash panel so that the airbag offers the greatest possible safety footwell and must have their seat belts correctly fastened. -
Page 122
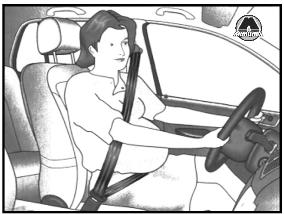
Passive Safety Examples of an incorrect seated position WARNING An incorrect seated position can lead to severe injuries or death for • If the occupant adopts an incorrect seated position, he is exposed to life- the occupants. threatening injuries, in case he is hit by a deployed airbag. •… -
Page 123: Seat Belts
Seat belts Seat belts Why seat belts? It is important that you pay attention to safety measures, particularly when trans- porting children in the vehicle ⇒ page 137, “Transporting children safely”. WARNING • Fasten your seat belt each time before setting off, also when driving in town! This also applies to the people seated at the rear — risk of injury! •…
-
Page 124: The Physical Principle Of A Frontal Collision
Seat belts The physical principle of a frontal collision the greater the amount of energy which has to be absorbed in the event of an acci- dent. The speed of the vehicle is, nevertheless, the most important factor. Doubling the speed of the vehicle from 25 km/h up to 50 km/hour increases the kinetic energy four times.
-
Page 125: How Are Seat Belts Correctly Fastened
Seat belts How are seat belts correctly fastened? WARNING (continued) • No two persons (also not children) should ever use a single seat belt Fastening three-point seat belts together. Fasten your seat belt before starting! • The maximum protection which seat belts can offer is only achieved if you are correctly seated ⇒…
-
Page 126
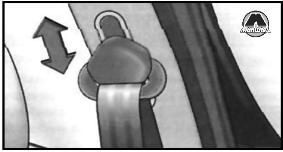
Seat belts – Slowly pull the belt webbing at the tongue of the lock over your chest Seat belt height adjuster on the front seats and pelvis ⇒ – Insert the tongue of the lock into the seat belt buckle belonging to the seat until it is heard to lock in place. -
Page 127: Belt Tensioner
Seat belts Taking seat belts off – Pull the second lock tongue, which is moveable on the seat belt, over the chest and insert it into the belt buckle on the right side until it is heard to lock in place. –…
-
Page 128
Seat belts WARNING • Any work on the belt tightener system, including removal and installa- tion of system components because of other repair work, must only be carried out by a specialist garage. • The protective function of the system is only adequate for a single acci- dent. -
Page 129: Airbag System
Airbag system Airbag system • Description of the airbag system an airbag indicator light showing a switched-off front passenger airbag* in the middle of the dash panel flashes. General information on the airbag system WARNING The front airbag system is complementary to the three-point seat belts and offers •…
-
Page 130
Airbag system When are the airbags deployed? Note • A grey white or red, non harmful gas is released when airbag is inflated. This is The airbag system is designed in such a way that the driver and the front passenger perfectly normal and is not an indication of a fire in the vehicle. -
Page 131: Front Airbags
Airbag system Front airbags event of a frontal collision ⇒ in “Important safety information regarding the front airbag system” on page 131. Description of the front airbags The airbag is not a substitute for the seat belt, but is part of the complete passive vehicle safety concept.
-
Page 132
Airbag system In certain accident situations both the front airbags as well as the head and side WARNING airbags may be deployed together. • Never transport children on the front seat of a vehicle without using a If the airbags are deployed, the airbags are filled with a propellant gas and inflated ⇒… -
Page 133: Side Airbags
Airbag system Side airbags* Function of the side airbags Risk of injury to the upper part of the body is reduced by fully inflated Description of side airbags side airbags. The side airbag increases protection of the passenger concerned in the case of a side impact.
-
Page 134: Head Airbags
Airbag system Important safety information on the side airbag WARNING (continued) Correct use of the airbag system considerably reduces the risk of • Any seat or protective covers which you fit to the driver or front injury! passenger seats must only be of the type expressly authorized by Škoda Auto.
-
Page 135
Airbag system The head airbags are positioned above the doors on both sides in the interior of the If the head airbag is deployed, the airbag is filled with propellant gas and covers the ⇒ fig. ⇒ fig. 131. The installation positions of the head airbags are each marked with entire area of the side window including the door pillars 132. -
Page 136: Deactivating An Airbag
Airbag system On vehicles equipped with the switch for deactivation of the airbags, you can deac- WARNING (continued) tivate the front passenger airbag or passenger side airbag by means of this switch clothing. In addition, it is not permitted to use clothes hangers for hanging ⇒…
-
Page 137: A 17 Switch For The Front Seat Passenger Airbag(S)
Airbag system Switch for the front seat passenger airbag(s)* Switching on an airbag – Switch off the ignition. – Turn the slot of the airbag switch using the ignition key in the direction ⇒ fig. of the arrow to the position ON 133.
-
Page 138: Transporting Children Safely
Transporting children safely Transporting children safely What you should know about transporting children! WARNING An introduction to the subject Always comply with national legal provisions and instructions from the rele- vant child safety seat manufacturer when installing and using a child seat Accident statistics have revealed that children are generally more ⇒…
-
Page 139
Transporting children safely Use of child safety seats on the front passenger seat WARNING (continued) Child safety seats should always be attached to the rear seats. • Certain outside climatic conditions can cause life-threatening tempera- tures in the vehicle. • Never allow your child to be transported in a vehicle without the use of a suitable restraint system. -
Page 140
Transporting children safely Child safety and side airbag* WARNING (continued) Children must never be seated in the deployment area of the side • It is essential to always switch off ⇒ page 135, “Deactivating an airbag” airbags and head airbags. the front passenger airbag when attaching a child safety seat on the front passenger seat where the child is seated with its back facing in direction of travel (in some countries also when the child is facing the direction of travel). -
Page 141: Child Seat
Transporting children safely This applies particularly to children if they are not transported in accordance Child safety seats which have been tested for conformity with ECE-R 44 have a non- with legal requirements. detachable test seal (a large E within a circle and below this the test number) attached to the seat.
-
Page 142
Transporting children safely Universal category — seat is suitable for all approved types of child safety seats. WARNING (continued) The seat can be fitted with fixing eyes for the “ISOFIX*”system. • In certain countries national legal provisions require that besides the The seat is equipped as standard with the fixing system “Top Tether”. -
Page 143
Transporting children safely WARNING WARNING • • It is essential to always switch off the front passenger airbag (airbags) at When transporting a child on the front passenger seat, please comply a specialist garage or with the switch for front passenger airbag(s)* when with the appropriate national regulations regarding the use of child safety attaching in exceptional circumstances a child safety seat on the front seats. -
Page 144: Attaching A Child Seat Using The «Isofix» System
Transporting children safely Children of more than 150 cm in height may use the seat belts fitted to the vehicle without a seat bolster. WARNING • When transporting a child on the front passenger seat, please comply with the appropriate national regulations regarding the use of child safety seats.
-
Page 145: Attaching Child Seat Using The «Top Tether» System
Transporting children safely the backrest for enhancing the child safety. Always perform the installation and WARNING removal as stated in the instructions from the manufacturer of the child seat. • The locking eyes have just been developed for child safety seats which use the “ISOFIX”…
-
Page 146: Driving Tips
Intelligent Technology Driving Tips Intelligent Technology Electronic stability programme (ESP)* Operating principle The ESP switches on automatically when the engine is started and then conducts a self-test. The ESP control unit processes data from the individual systems. It also General processes additional measurement data which are supplied by highly sensitive sensors: the rotational velocity of the vehicle about its vertical axis, the lateral accel- eration of the vehicle, the braking pressure and the steering angle.
-
Page 147: Switch For The Tcs
Intelligent Technology • Traction control system (TCS)* when driving with snow chains, • when driving in deep snow or on a loose surface, The traction control system prevents the driven wheels from spinning • when it is necessary to rock a car free when it has become stuck. when accelerating.
-
Page 148
Intelligent Technology Operating principle The TCS should normally always be switched on. It may be good practice in certain exceptional cases, such as when you wish to have wheel slip, to switch off the The EDL is activated automatically, that is without any action on the part of the system. -
Page 149: Brakes
Intelligent Technology Brakes Low brake fluid level An insufficient level of brake fluid may result in problems in the brake system. The What has a negative effect on braking efficiency? level of the brake fluid is monitored electronically ⇒ page 28, “Brake system ”. Wear-and-tear Wear-and-tear to the brake pads is greatly dependent on the operating conditions WARNING…
-
Page 150: Antilock Brake System (Abs)
Intelligent Technology WARNING WARNING • • Never switch off the engine before the vehicle is stationary. The ABS can also not overcome the physical limits of your vehicle. Please • do not forget this, particularly when driving on icy or wet road surfaces. If the The brake booster only operates when the engine is running.
-
Page 151: Electrohydraulic Power Steering
Intelligent Technology pedal firmly and hold it in this position in order to achieve the shortest possible The power steering operates again if the battery is charged to a specific range when braking distance. engine is running. It also operates again, if the engine can be started with its own battery.
-
Page 152
Intelligent Technology • the wheels of an axle are loaded heavily (e.g. when towing a trailer or when WARNING (continued) driving uphill or downhill), • without delay at the nearest possible stop and inspect the tyres and their the vehicle is operated in unfavourable winter conditions or on an unfirm inflation pressures. -
Page 153: Diesel Particle Filter* (Diesel Engine)
Intelligent Technology Diesel particle filter* (diesel engine) WARNING (continued) In the diesel particle filter the resulting soot particles are collected • Never use additional underbody protection or corrosion-protection and burnt during the combustion of diesel fuel. agents for the exhaust pipes, catalytic converters, diesel particle filter or heat shields.
-
Page 154: Driving And The Environment
Driving and the Environment Driving and the Environment The first 1 500 kilometres and then afterwards Caution All the speed and engine revolution figures apply only when the engine is at its A new engine normal operating temperature. Never rev up an engine which is cold, neither when The engine has to be run in during the first 1 500 kilometres.
-
Page 155: Catalytic Converter
Driving and the Environment Catalytic converter misfiring. Unburnt fuel may get into the exhaust system and damage the catalytic converter. Proper operation of the emission control system (catalytic converter) • Filling the tank even only once with leaded petrol will result in the catalytic is of major significance for driving your vehicle in an environmen- converter being destroyed.
-
Page 156: Manual Gearbox
Driving and the Environment Manual gearbox The fuel consumption can naturally also be influenced by factors which are beyond the driver’s control. It is, for example, normal for the fuel consumption to increase – Drive no more than about one length of your vehicle in first gear. in winter and under worsened conditions such as poor road conditions, towing a Always shift up into the next higher gear at approx.
-
Page 157
Driving and the Environment Also check the oil level after refueling. Oil consumption is dependent to a consid- Sensitive use of the accelerator will not only significantly reduce fuel consumption but also positively influence environmental pollution and wear of your vehicle. erable extent on the load and speed of the engine. -
Page 158: Environmental Compatibility
Driving and the Environment The cold engine vehicle consumes approx. 15 — 20 litres/100 km of fuel immediately causes it to use about 1 l more fuel than normal at a speed of 100 — 120 km/h, even after starting. Fuel consumption drops to 10 litres/100 km after just 1 kilometre. The when you are not carrying a load on the roof.
-
Page 159: Motoring Abroad
Headlight stickers can be obtained as a spare part from the Skoda Service Partners. Headlights with module are designed for driving in countries with traffic on the subject to fulfilment of the national legal regulations…
-
Page 160: Avoiding Damage To Your Vehicle
Driving and the Environment Note You can obtain further information regarding masking over or converting the head- lights from your Škoda Service Partner. Avoiding damage to your vehicle When driving on poor roads and lanes or when driving over kerbstones, steep ramps etc., you must pay particular attention to ensuring that any low-slung parts of the vehicle, such as spoiler and exhaust, do not touch the ground and get damaged.
-
Page 161: Towing A Trailer
Towing a trailer Towing a trailer Towing a trailer General Maintenance There are a number of points to pay attention to when towing a Technical requirements trailer. The towing device must satisfy certain technical requirements. Trailer load The permissible trailer load must on no account be exceeded. Your vehicle is designed primarily for transporting persons and luggage.
-
Page 162
Towing a trailer Distribution of weight should be attached to folding arms. Adjust the mirrors so that they provide you with an adequate field of view to the rear. The distribution of the weight is very poor if your vehicle is unladen and the trailer is laden. -
Page 163
Towing a trailer of the engine speed. One should also not drop a gear for this reason when towing a trailer as long as the engine can manage the slope without any drop in speed. -
Page 164: General Maintenance
Taking care of your vehicle and cleaning the vehicle General Maintenance Taking care of your vehicle and cleaning the vehicle General Care of the exterior of vehicle Proper care retains the value of your vehicle. Washing the vehicle Regular and proper care retains the value of your vehicle. It may also be one of the Frequent washing protects your vehicle.
-
Page 165
Taking care of your vehicle and cleaning the vehicle Automatic vehicle wash systems Rinse off the vehicle well after giving it a wash and dry it off using a chamois leather. The paintwork of the vehicle is sufficiently resistant that the vehicle can be washed WARNING normally in automatic vehicle wash plants without any problem. -
Page 166
Taking care of your vehicle and cleaning the vehicle WARNING Caution • You must not treat mat painted parts or plastic with polishing products or hard It is particularly important that you do not clean tyres with circular spray wax. jets. -
Page 167
Taking care of your vehicle and cleaning the vehicle Plastic parts The headlight lenses External plastic parts are cleaned by normal washing. Plastic parts and synthetic Please do not use any aggressive cleaning or chemical solvent products — risk of leather can also be treated with special solvent-free plastic cleaning agents if a damage to the plastic lenses Please use soap and clean warm water. -
Page 168: Underbody Protection
Taking care of your vehicle and cleaning the vehicle Wheels Underbody protection Steel wheels The underside of your vehicle is protected for life against chemical and mechanical influences. You should also thoroughly wash the wheels and wheel trims when giving your vehicle its regular wash.
-
Page 169: Care Of The Interior Of Vehicle
Taking care of your vehicle and cleaning the vehicle Engine compartment Upholstery cloth and cloth trim on the doors, luggage compartment cover, head- liner etc. are best treated with special cleaning products, using if necessary a dry foam and a soft sponge or brush. Good corrosion protection is very important, particularly in winter when one often drives over its salt-strewn roads.
-
Page 170
Taking care of your vehicle and cleaning the vehicle Removing stains Note – Remove fresh stains which are water-based (e.g. coffee, tea, juices, • Use a care cream with light blocker and impregnation effect regularly and each blood etc.) with an absorbent cloth or household paper or use the time after cleaning the leather. -
Page 171: Fuel
Fuel Fuel Petrol The handling, performance and life of your engine are determined to a significant extent by the quality of the fuel. Do not use any petrol additives. Use a fuel complying with the standard. Grades of petrol You can find further information on refuelling ⇒ page 171. There are various grades of petrol.
-
Page 172: Refuelling
Fuel • Refuelling Your vehicle is not adapted for use of biofuel (RME), therefore this fuel must not be refuelled and driven. Using this fuel (RME) can lead to damage to the engine or the fuel system. Operation in winter Winter-grade diesel fuel A different grade of diesel fuel is available at filling stations in winter than during the summer.
-
Page 173
Fuel – Lock the fuel filler cap on the fuel filler tube to the right using the vehicle key. – Press the fuel tank flap closed. The correct grades of fuel for your vehicle are stated on a sticker affixed to the inside of the fuel filler flap. -
Page 174: Inspecting And Replenishing
Inspecting and Replenishing Inspecting and Replenishing Engine compartment Opening and closing the bonnet. Bonnet remote release Fig. 155 Radiator grille: Fuse Fig. 154 Bonnet release lever Bonnet remote release ⇒ fig. – Pull the unlocking lever on the left below the dash panel 154.
-
Page 175
Inspecting and Replenishing – Grip the bonnet and lift it up. this reason, it is essential to comply with the warning instructions stated below and with the general applicable rules of safety. The engine compart- – Take the bonnet support out of its holder and set it in the opening ment of your car is a hazardous area ⇒… -
Page 176: Overview Of The Engine Compartment
Inspecting and Replenishing Overview of the engine compartment WARNING (continued) The main inspection points ribbed belt, alternator, radiator fan) and from the high-voltage ignition system. Please observe in addition the following: − Never touch the electrical cables of the ignition system. −…
-
Page 177: Engine Oil
Inspecting and Replenishing Engine oil Engine oil specifications for models with flexible service intervals (QG1) Engine oil specifications Engine oil specifications VW 504 00 Petrol engines The grade of engine oil should be selected in accordance with alternative VW 503 00 precise specifications.
-
Page 178
Inspecting and Replenishing Check engine oil level Oil level within range – You must top up the oil. It is sufficient, once this is done, to keep the The dipstick indicates the level of oil in the engine. oil level is within range It is normal for the engine to consume oil. -
Page 179: Cooling System
Inspecting and Replenishing Replenishing engine oil WARNING (continued) • – Inspect the oil level ⇒ page 177. Read and observe the warning notes ⇒ page 174, “Working in the engine compartment” before working in the engine compartment. – Unscrew the cap of the engine oil filler opening. •…
-
Page 180
Inspecting and Replenishing Inspecting the coolant level also protects the cooling and heating system from corrosion. It also prevents the formation of scale and significantly increases the boiling point of the coolant. You must therefore not reduce the concentration of antifreeze agent in the coolant by adding water, also not during the summer months or in countries with a warm climate. -
Page 181
Inspecting and Replenishing Losses can only occur through the pressure relief in the cap of the coolant expan- Do not fill up over the “MAX” marking! Excess coolant which is heated up is forced sion bottle which is completely free of leaks if the coolant boils as a result of over- out of the cooling system through the pressure relief valve in the cap of the coolant heating and is forced out of the cooling system. -
Page 182: Brake Fluid
Inspecting and Replenishing Radiator fan The brake fluid reservoir is located on the left of the engine compartment. The brake fluid reservoir on right-hand steering models is positioned on The radiator fan may switch on suddenly. the other side of the engine compartment. The radiator fan is driven by an electric motor and controlled by a thermostat –…
-
Page 183: Battery
Inspecting and Replenishing Battery One may only use new genuine brake fluid from Škoda Auto a.s. The specification for the brake fluid is “FMVSS 116 DOT 4”. We recommend that you have the brake fluid replaced by a Škoda Service Partner Working on the battery as part of an Inspection Service.
-
Page 184
Inspecting and Replenishing WARNING (continued) WARNING • • Never charge a frozen or thawed battery — risk of explosion and caustic The battery acid is strongly corrosive and must, therefore, be handled burns! Replace a frozen battery. with the greatest of care. Always wear protective gloves, eye and skin •… -
Page 185
Inspecting and Replenishing Battery with a charge level indicator, the so-called magic eye* Inspecting the electrolyte level The battery is practically maintenance-free under normal operating conditions. We do, however, recommend that you have the electrolyte level inspected from time to time by a Škoda Service Partner when outside temperatures are high or when driving on long trips. -
Page 186
Inspecting and Replenishing – When charging is completed: switch the charger off and unplug the Operation Operating measure mains cable from the power socket. ⇒ page 42 Electrical power window (operational – Only then should you disconnect the terminal clamps of the charger. faults) –… -
Page 187: Windshield Washer System
Inspecting and Replenishing Windshield washer system Caution • On no account should you add radiator antifreeze or other additives to the windscreen washer fluid. • If the vehicle is fitted with headlight cleaning system, you should only add cleaning products which do not attack the polycarbonate coating of the headlights to the windscreen washer fluid.
-
Page 188: Wheels And Tyres
Wheels and Tyres Wheels and Tyres Wheels Further information concerning the use of unidirectional tyres ⇒ page 191. General comments WARNING • New tyres during the first 500 km do not offer optimal grip and should • New tyres do not offer optimal grip at first and should therefore be run in for therefore be run appropriately — risk of accident! about 500 km at a moderate speed and an appropriately cautious style of driving.
-
Page 189
Wheels and Tyres setting off on a long trip. Please do not forget the spare wheel when checking the For the sake of the environment tyres. Tyres which are insufficiently inflated increase your fuel consumption. The tyre inflation pressures for summer tyres are indicated on the inside of the fuel ⇒… -
Page 190
Wheels and Tyres Changing wheels around What this means is: Tyre width in mm If significantly greater wear is present on the front tyres, we recommend changing the front wheels around with the rear wheels. You will then obtain approximately Height/width ratio in % the same life for all the tyres. -
Page 191
Wheels and Tyres therefore also use the matching wheel bolts of the correct length and shape of WARNING spherical cap. This is essential to ensure that the wheels are tightly fitted and that • the brake system operates properly. Only use those tyres or wheel rims which have been approved for your model of Škoda Auto a.s. -
Page 192: Unidirectional Tyres
Wheels and Tyres You must only fit those types of winter tyre which are approved for your vehicle. The Note permissible sizes of winter tyres are stated in your vehicle documents. Approvals may differ because of national legislation. Please observe the various differing legal requirements regarding tyres. Please remember that the tyres should be inflated to 20 kPa (0.2 bar) more than is the case for summer tyres ⇒…
-
Page 193
Wheels and Tyres Remove the full wheel trims before installing the snow chains. Observe the national legal requirements relating to the use of snow chains and the maximum vehicle speed with snow chains. WARNING Please pay attention to the information in the supplied fitting instructions of the snow chain manufacturer. -
Page 194: Accessories, Changes And Replacement Of Parts
• tional faults. This interference can also impair not directly affected systems because Škoda Genuine Accessories which have been released for use and Skoda orig- of the networking of the electronic components. This means that the operating inal parts can be obtained from Škoda Service Partners. They will install them safety of your vehicle can be considerably jeopardized, a greater wear of vehicle professionally and correctly.
-
Page 195
Accessories, changes and replacement of parts… -
Page 196: Breakdown Assistance
Breakdown assistance Breakdown assistance Breakdown assistance First-aid box* and Warning triangle* Fire extinguisher* The fire extinguisher is attached with straps under the driver seat. Please read carefully the instructions which are attached to the fire extin- guisher. The fire extinguisher must be checked by an authorised person or company annu- ally (please observe the various differing national legal requirements).
-
Page 197: Vehicle Tool Kit
Breakdown assistance Vehicle tool kit Tyre repair kit* The tyre repair kit is intended for the repair of minor tyre defects. The tyre repair kit contains a compressor, inflation bottle, operating instructions and accessories. The repair with the tyre repair kit is not at all intended to replace a permanent repair on the tyre, this repair only serves to reach the next workshop.
-
Page 198: Changing A Wheel
Breakdown assistance • The spare wheel provided with a car fitted with unidirectional tyres has different WARNING dimensions. The wheel is provided with a warning sticker. • • After fitting on the wheel, the warning sticker must not be concealed (e.g. by the If you find yourself in flowing traffic switch on the hazard warning lights wheel trim).
-
Page 199
Breakdown assistance – Fit on the spare wheel and tighten the wheel bolts slightly. Note – Lower the car. • If you find, when changing the wheel, that the wheel bolts are corroded and difficult to turn, the bolts must be replaced before checking the tightening torque. –… -
Page 200
Breakdown assistance Wheel bolts with caps* Caution The caps are designed to protect the wheel bolts. • Use the pressure of your hand, do not knock on the full wheel trim! Heavy knocks mainly on the points where the full wheel trim has not been inserted into the wheel, can result in damage to the guide and centering elements of the full wheel trim. -
Page 201
Breakdown assistance Slackening and tightening wheel bolts Note Slacken the wheel bolts before jacking up the vehicle. • apply pressure carefully with your foot to the end of the wheel wrench if it proves difficult to slacken the wheel bolts. Hold tight on the vehicle when doing this and ensure that you have a steady position. -
Page 202
Breakdown assistance – Turn the lifting jack up further until the wheel is just clear of the Securing wheels against being stolen* ground. You need a special adapter for slackening the safety wheel bolts. Ground below the lifting jack which is soft and slippery can cause the vehicle to slip off the jack. -
Page 203: Jump-Starting
Breakdown assistance We recommend that you always carry the adapter for the wheel bolts with you in WARNING the vehicle. It should be stowed in the vehicle tool kit. • A discharged battery may already freeze at temperatures just below 0°C. In case of frozen battery carry out no jump-starting — risk of explosion! Also Caution after thawing of the battery there is a risk of caustic burns due to leaking…
-
Page 204: Tow-Starting And Towing Vehicle
Breakdown assistance Connecting positive terminals WARNING (continued) ⇒ page 202, fig. 175 – Attach one end to the positive terminal of the battery being ignited by the strong spark which results from the engine discharged battery being started. • – Attach the other end to the positive terminal of the battery Do not affix the cable end to parts of the fuel and brake system.
-
Page 205
Breakdown assistance – Note that the brake servo unit and power steering only operate if the Front towing eye engine is running. You will require significantly greater physical force The towing eye is stored in the box for the vehicle tool kit. to depress the brake pedal and to steer the vehicle if the engine is not running. -
Page 206
Breakdown assistance Removal of the towing eye – Switch on the ignition. – Unscrew the towing eye. – Wait until both vehicles are moving then release the clutch pedal slowly. – Put the protective grille in place on the side opposite the marking. –… -
Page 207
Breakdown assistance • The maximum permissible towing distance is 50 km. The gear oil pump does not operate when the engine is not running; the gearbox would not be adequately lubricated at higher speeds and over longer towing distance. Caution If the vehicle is towed in by a recovery vehicle, it should only be towed in with the front wheels raised. -
Page 208: Technical Data
Fuses and light bulbs Fuses and light bulbs Electric fuses – Insert the fuse cover into the dash panel in such a way that the guide lugs are guided into the openings of the dash panel and then lock them by pressing. Replacing fuses in the dash panel Defect fuses must be replaced.
-
Page 209
Fuses and light bulbs No. Power consumer Amperes Note Operating controls for the heating, control unit for air We recommend that you have these fuses replaced by a specialist garage. conditioning system, parking aid, control unit for corner- ing lights Fuse assignment in the dash panel PCV valve Electrically adjustable rear mirror, power windows… -
Page 210
Fuses and light bulbs No. Power consumer Amperes No. Power consumer Amperes Fuel pump — petrol engine Electrical power window (at the front and rear on the left) Lambda probe Electrical power window (at the front and rear on the right) Diesel engine: Switch for brake light and clutch pedal, cruise control system, fuel pump relay and glow plug sys-… -
Page 211
Fuses and light bulbs Replaces fuses at the battery – Defect fuses can be detected by their melted metal strips. Replace the defect fuse by a new fuse of the same ampere number. Caution • Never attempt to “repair” fuses and also do not replace them with a fuse of a higher amperage — risk of fire! This may also cause damage at another part of the electrical system. -
Page 212: Bulbs
Fuses and light bulbs We therefore recommend that you have any bulbs changed by a Škoda Service No. Power consumer Amperes Partner or, in exceptional cases, by calling on other professional assistance. Dynamo Please note that the engine compartment is a hazardous area ⇒ page 174, “Working in the engine compartment”.
-
Page 213
Fuses and light bulbs Front headlight Others Bulb Side turn signal lights WY5W Licence plate light 3. Brake light Interior lighting front / rear C10W Reading lights Luggage compartment light Storage compartment light — front passen- Fig. 184 Front headlight: ger side Installing the light bulbs WARNING… -
Page 214
– We recommend that you have the headlight setting checked by a Skoda Service Partner after replacing the light bulb. Fig. 187 Structure of the light bulb of the fog light… -
Page 215: Storage Compartment Lighting
Fuses and light bulbs – Remove the grille next to the fog light (for turning light) or the grille – Replace the defective light bulb. around the round fog light (for fog light) ⇒ page 204. – Recreate the plug connection. ⇒…
-
Page 216
Fuses and light bulbs Licence plate light Fig. 192 Disconnect plug connection Fig. 190 Remove the licence plate light – Open the boot lid/luggage compartment door. ⇒ fig. – Unscrew the rear light unit 191. – Open the boot lid and unscrew the light glass. –… -
Page 217
Fuses and light bulbs Changing light bulbs in the rear light unit – Screw the middle part of the rear light unit onto the housing ⇒ fig. 193. – Connect the plug connection and re-insert the rear light unit. ⇒ page 215, fig. –… -
Page 218
Fuses and light bulbs – Recreate the plug connection. – Insert the light from the rear and press it forwards up to the stop. Using the system Safety Driving Tips General Maintenance Breakdown assistance Praktik Technical Data… -
Page 219
Fuses and light bulbs… -
Page 220: Praktik
Praktik Praktik Praktik Lashing eyes Adjustable safety partition behind the front seats Fig. 196 Loading area: Fig. 197 Adjustable Lashing eyes safety partition Eyes are located on the sides of the loading area for lashing the load to be loaded The adjustable safety partition behind the front seats can be adjusted up ⇒…
-
Page 221: Fixing Of The Loading Floor
Praktik Fixing of the loading floor Adjustment of the safety partition Fig. 200 Top support of Fig. 198 Loop for raising the safety partition the loading floor Fig. 199 Fixing the Fig. 201 Bottom support loading floor with a of the safety partition plastic hook –…
-
Page 222: Emergency Unlocking Of The Loading Area Door
Praktik – Have the tightening torque of the bolts checked with a torque wrench as soon as possible. The tightening torque must be 20 Nm. – Fold the part of the loading floor again towards the bottom. Emergency unlocking of the loading area door Fig.
-
Page 223
Praktik… -
Page 224: Technical Data
Technical Data Technical Data Technical Data General comments Performances The details given in the official vehicle registration documents always take prece- The listed performance values were determined without performance-reducing dence over the details in the Owner’s Manual. Please refer to the official vehicle equipment, e.g.
-
Page 225: Fuel Consumption According To The Regulations (99/100/Eu)
Technical Data Fuel consumption according to the regulations Vehicle data sticker ⇒ page 223, fig. 203 The vehicle data sticker is located on the floor of the luggage (99/100/EU) compartment and is also stated in the Service schedule. The vehicle data sticker contains the following data: Depending on the range of the special equipment, style of driving, traffic situation, weather influences and vehicle condition, the consumption values which in prac- Vehicle identification number (VIN)
-
Page 226: Dimensions
Technical Data Dimensions Dimensions (mm) Roomster Praktik Scout Length 4205 4205 4219 Width 1684 1684 1695 Width including exterior mirror 1867 1867 1867 Height 1607 1607 1650 Wheel base 2617 2617 2617 Track gauge front / rear 1436/1500 1436/1500 1430/1494…
-
Page 227: 1.2 L/51 Kw — Eu 4/Eu 2Ddk
Technical Data 1.2 l/51 kW — EU 4/EU 2DDK Engine Power output kW per rpm 51/5400 Maximum torque Nm per rpm 112/3000 3/1198 Number of cylinders/Displacement (cm Fuel — unleaded petrol min. RON Performances Maximum speed km/h Acceleration 0 — 100 km/h 15,9 Fuel consumption (in ltr./100 km) and CO emission (in g/km)
-
Page 228
Cooling system of the vehicle Oil capacity with oil filter change. Inspect oil level when filling; do not fill up too much. The oil level must be between the markings ⇒ page 177. Weight (in kg) Roomster Praktik Permissible gross weight… -
Page 229: 1.4 L/63 Kw — Eu 4/Eu 2Ddk
63/5000 Maximum torque Nm per rpm 132/3800 4/1390 Number of cylinders/Displacement (cm Fuel — unleaded petrol min. RON Performances Roomster Praktik Scout Maximum speed km/h Acceleration 0 — 100 km/h 13,0 13,0 13,0 Fuel consumption (in ltr./100 km) and CO…
-
Page 230
Cooling system of the vehicle Oil capacity with oil filter change. Inspect oil level when filling; do not fill up too much. The oil level must be between the markings ⇒ page 177. Weight (in kg) Roomster Praktik Scout Permissible gross weight… -
Page 231: 1.6 L/77 Kw — Eu 4/Eu 2Ddk
Maximum torque Nm per rpm 153/3800 153/3800 4/1598 4/1598 Number of cylinders/Displacement (cm Fuel — unleaded petrol min. RON Performances Roomster Scout Maximum speed km/h Acceleration 0 — 100 km/h 10,9 12,5 10,9 12,5 Fuel consumption (in ltr./100 km) and CO…
-
Page 232
Cooling system of the vehicle Oil capacity with oil filter change. Inspect oil level when filling; do not fill up too much. The oil level must be between the markings ⇒ page 177. Weight (in kg) Roomster Scout Permissible gross weight… -
Page 233: L/51 Kw Tdi Pd — Eu
Maximum torque Nm per rpm 155/1600-2800 3/1422 Number of cylinders/Displacement (cm Fuel Diesel Performances Maximum speed km/h Acceleration 0 — 100 km/h 16,5 Fuel consumption (in ltr./100 km) and CO emission (in g/km) Roomster Praktik Urban Non-urban Combination emission — combination…
-
Page 234
Cooling system of the vehicle Oil capacity with oil filter change. Inspect oil level when filling; do not fill up too much. The oil level must be between the markings ⇒ page 177. Weight (in kg) Roomster Praktik Permissible gross weight… -
Page 235: L/59 Kw Tdi Pd — Eu
59/4000 Maximum torque Nm per rpm 195/2200 3/1422 Number of cylinders/Displacement (cm Fuel Diesel Performances Roomster Scout Praktik Maximum speed km/h Acceleration 0 — 100 km/h 14,7 14,7 14,7 Fuel consumption (in ltr./100 km) and CO emission (in g/km)
-
Page 236
Cooling system of the vehicle Oil capacity with oil filter change. Inspect oil level when filling; do not fill up too much. The oil level must be between the markings ⇒ page 177. Weight (in kg) Roomster Scout Praktik Permissible gross weight… -
Page 237: L/77 Kw Tdi Pd — Eu 4
Maximum torque Nm per rpm (240/1900) 4/1896 Number of cylinders/Displacement (cm Fuel Diesel EU4 + DPF Performances Roomster Scout Maximum speed km/h Acceleration 0 — 100 km/h 11,5 11,5 Fuel consumption (in ltr./100 km) and CO emission (in g/km) EU 4…
-
Page 238
Cooling system of the vehicle Oil capacity with oil filter change. Inspect oil level when filling; do not fill up too much. The oil level must be between the markings ⇒ page 177. Weight (in kg) Roomster Scout Permissible gross weight… -
Page 239
Technical Data… -
Page 240: Index
Index Index Auto Computer ……13 Brake fluid ……..181 Automatic gearbox .
-
Page 241
Index Child safety seat Cornering lights ……. 45 on the front passenger seat ….138 Warning light . -
Page 242
Index Exhaust gas Fuse Warning light ……26 Assignment ……208 Ignition . -
Page 243
Index Lighting Operation in winter Interior light and reading light … . . 214 Battery ……..184 Storage compartment lighting . -
Page 244
Index Radio systems ……112 Seat belts ……..122 Switch in the driver door Cleaning . -
Page 245
Index Trailer ……..160 Warning symbols . -
Page 246
Škoda Auto pursues a policy of constant product and model development. We trust Škoda Auto expressly reserves all rights relating to copyright laws. that you will understand that changes to models in terms of shape, equipment and We reserve the right to make changes to this document. engineering, may be introduced at any time. -
Page 247
SIMPLY CLEVER ŠkodaService ŠkodaGenuine Parts ŠkodaGenuine Accessories… -
Page 248
Please also refer to all the texts identified with a ; in this Owner ´ s Manual. Make your contribution — for the sake of the environ- ment. www.skoda-auto.com Návod k obsluze Roomster anglicky 05.07 S80.5610.03.20 5J7 012 003 AP…
Глава 3. ИНСТРУКЦИЯ ПО ЭКСПЛУАТАЦИИ
ВНУТРЕННЕЕ ПРОСТРАНСТВО АВТОМОБИЛЯ
1. Электрический стеклоподъемник* 2. Устройство регулирования электроуправляемых наружных зеркал заднего вила* 3. Отверстия для впуска воздуха 4. Многофункциональный модуль* 5. Рычаг многофункционального переключателя (указатели поворота, фары дальнего света, стояночные огни, предупредительная световая сигнализация посредством фар, устройство «Tempomat»*) 6. Звуковой сигнал, надувная подушка безопасности «Airbag» для водителя 7. Панель приборов 8. Рычаг многофункционального переключателя (многофункциональный указатель*, стеклоочистители и стеклоомыватели) 9. Выключатель для обогрева заднего стекла 10. Выключатель «ESP»* или выключатель ASR* (в зависимости от оснащения) 11. Отверстия для впуска воздуха 12. Выключатель для системы аварийной световой сигнализации 13. Сигнализатор выключенной надувной подушки безопасности «Airbag» для пассажира переднего сиденья* 14. Устройство для управления отопителем или устройство для управления «Climatic»*, устройство для управления «Climatronic»* (в зависимости от оснащения) 15. Вещевые ящики на стороне пассажира переднего сиденья* 16. Надувная подушка безопасности «Airbag» для пассажира переднего сиденья* 17. Выключатель надувной подушки (надувных подушек) безопасности «Airbag» для пассажира переднего сиденья* 18. Выключатели в зависимости от оснащения: расфиксирование крышки багажника* или наблюдение за внутренним пространством автомобиля* 19. Коробка предохранителей в панели приборов 20. Выключатель освещения и устройство для регулирования угла наклона основных фар 21. Рычаг для расфиксирования капота двигателя 22. Ручка регулируемой рулевой колонки 23. Замок зажигания 24. Автомобильный радиоприемник* 25. Выключатель устройства обогрева сидений водителя* 26. Выключатели системы замков с центральным управлением* 27. Рычаг переключения передач (механическая коробка передач) или рычаг селектора (автоматическая коробка передач) (в зависимости от оснащения) 28. Выключатель устройства обогрева сиденья пассажира рядом с водителем* 29. Пепельница* или вещевой ящик (в зависимости от оснащения) 30. Устройство для смены компакт-дисков
* — составные части оборудования, которые устанавливаются серийно только на некоторые модели или же их поставляют только в качестве специального оборудования.
Вместе с автомобилем поставляются всегда два ключа. В зависимости от оснащения, в Вашем автомобиле можете располагать ключами без дистанционного устройства или ключами с дистанционным устройством.
К одному из ключей прикреплен пластмассовый брелок с обозначенным номером ключа. По этому обозначению сможете когда-либо попросить у станций сервисного техобслуживания запасной ключ. Брелок с номером следует беречь с особой осторожностью, ибо в случае утери или же повреждения ключа, возможно заказать запасной ключ только по этому номеру. По этой причине просим передать при продаже автомобиля брелок новому владельцу.
ВНИМАНИЕ
Если покидаете автомобиль, даже на очень короткое время, не оставляйте ключи в автомобиле. Это действует особенно в том случае, если внутри автомобиля остаются дети. Дети могли бы завести двигатель или включить электрооборудование (напр., электрический стеклоподъемник) — опасность получения травмы!
Вытягивайте ключ из замка зажигания только после полной остановки автомобиля. Иначе может внезапно заблокироваться замок вала рулевого колеса опасность аварии!
В каждом ключе содержатся электронные детали, поэтому следует защищать его от сырости и мощных толчков.
Шлицы ключа нужно содержать в идеальной чистоте, так как загрязнения (текстильные волокна, пыль и т.п.) оказывают отрицательное воздействие на работу замков, замка зажигания и т.п.
Примечание:
В случае утери ключа обратитесь на станцию сервисного техобслуживания, где Вам предоставят запасной ключ.
ПРОТИВОУГОННОЕ УСТРОЙСТВО, ПРЕДОТВРАЩАЮЩЕЕ ПУСК АВТОМОБИЛЯ ПОСТОРОННИМИ ЛИЦАМИ (ИММОБИЛАЙЗЕР)
В головку ключа встроен электронный чип. При вводе ключа в замок зажигания происходит дезактивация электронного иммобилайзера через этот чип. Как только извлечете ключ из замка зажигания, наступает автоматическая активация электронного иммобилайзера.
Примечание:
Двигатель возможно заводить только оригинальным кодированным ключом.
ПРИСПОСОБЛЕНИЕ, ОБЕСПЕЧИВАЮЩЕЕ ПАССИВНУЮ БЕЗОПАСНОСТЬ ДЕТЕЙ
Задние боковые двери снабжены приспособлением защиты дверей от открытия детьми. Включайте и выключайте приспособление ключом автомобиля.
Для включения: Поверните щель приспособления по направлению стрелки на двери.
Выключение приспособления защиты дверей от открытия детьми: поверните щель приспособления против направления стрелки на двери.
Когда включено приспособление защиты дверей от открытия детьми, тогда заблокировано открытие двери ручкой изнутри автомобиля. Дверь возможно открыть только снаружи.
ЗАМКИ ДВЕРЕЙ И КРЫШКИ БАГАЖНИКА
Поверните ключ в замке двери водителя в левую сторону в положение на отпирание (А).
— потянув ручку, откройте дверь с повышенной осторожностью.
— все двери отпираются.
— расфиксировывается крышка багажника.
— загораются фонари внутреннего освещения, настроенные на включение дверным выключателем освещения в кузове.
— выводится из действия защитное блокирующее приспособление.
— окна открываются, пока ключ в положении на «отпирание».
— сигнализатор двери водителя перестает вспыхивать в том случае, если автомобиль не оборудован устройством противоугонной сигнализации
Примечание:
Если автомобиль оборудован устройством противоугонной сигнализации, то Вам нужно в течение 15 сек. с момента отпирания двери всунуть ключ в замок зажигания и включить зажигание с целью выключения устройства противоугонной сигнализации. Если в течение 15 сек. Не включите зажигание, раздается тревога.
— поверните ключ в замке двери водителя в правую сторону в положение на запирание (В) (см. рисунок выше).
— двери и крышка багажника запираются.
— фонари внутреннего освещения, настроенные на включение дверным выключателем освещении в кузове, гаснут.
— окна закрываются, пока держите ключ в положении на «запирание».
— сразу активируется защитное блокирующее приспособление.
— сигнализатор в двери водителя начинает вспыхивать.
Примечание:
Открытую переднюю дверь нельзя запереть. После закрытия нужно запереть ее самостоятельно.
СИСТЕМА ЗАМКОВ С ЦЕНТРАЛЬНЫМ УПРАВЛЕНИЕМ
В случае применения системы центрального управления замками для запирания или же отпирания одновременно запираются или же отпираются все двери и крышка наливной горловины топливного бака. Крышка багажника при отпирании расфиксировывается. Крышку багажника затем сможете открыть нажатием ручки под углублением для номерного знака.
Обслуживание системы центрального управления замками возможно:
— снаружи — ключом от автомобиля;
— выключателями системы замков с центральным управлением;
— с применением устройства дистанционного управления.
Сигнализатор в двери водителя у автомобилей без устройства противоугонной сигнализации
После запирания дверей автомобиля сигнализатор начинает вспыхивать примерно через 2 сек. После запирания дверей автомобиля с выведенным из действия защитным блокирующим приспособлением сигнализатор начинает вспыхивать примерно через 30 сек.
Сигнализатор в двери водителя у автомобилей с устройством противоугонной сигнализации
После того, как двери автомобиля заперты, мерцает сигнализатор около 2-х сек. быстро, а затем — медленно.
Если автомобиль заперт при выведенном из действия защитном блокирующем приспособлении, то сигнализатор в двери водителя вспыхивает сначала около 2-х сек. быстро, затем гаснет и примерно через 30 сек. начинает вспыхивать медленно.
Если сигнализатор сначала вспыхивает ок. 2-х сек. быстро, затем загорается постоянным светом и примерно через 30 сек. начинает вспыхивать медленно, то это означает наличие неисправности в системе центрального управления замками или в устройстве для наблюдения за внутренним пространством автомобиля. Обратитесь за помощью на станциях сервисного техобслуживания «Skoda».
Система комфортабельного управления стеклами окон
Отпирая и запирая автомобиль, возможно открывать и закрывать окна с электроуправляемым стеклоподъемником. Эта избираемая функция позволяет отдельное отпирание только двери водителя. Остальные двери и крышка наливной горловины топливного бака остаются запертыми и отпираются только в результате последующей команды (отпирания).
При желании Вам можно заказать включение функции отпирания отдельных дверей на какой-нибудь из станций сервисного техобслуживания «Skoda».
На скорости около 15 км/ч все двери автомобиля и крышка багажника автоматически запираются. Автомобиль снова автоматически отпирается в результате извлечения ключа из замка зажигания. Кроме того, водитель может отпирать автомобиль нажатием выключателя системы замков с центральным управлением или потягиванием дверной ручки.
При желании Вам можно заказать включение функции автоматического запирания на какой-нибудь из специализированных станций сервисного техобслуживания.
ВНИМАНИЕ
Фиксированием дверей препятствуется их самовольному открытию в экстренных обстоятельствах (транспортное происшествие). Запертые двери также препятствуют насильственному проникновению в автомобиль извне, напр., при остановке на перекрестке перед светофором. С другой стороны, однако, запертые двери затрудняют спасателям доступ к внутреннему пространству автомобиля для оказания помощи при транспортных происшествиях — опасность для жизни!Примечание:
В случае транспортного происшествия, связанного со срабатыванием системы надувных подушек безопасности, двери автоматически отпираются, чтобы спасатели смогли попасть внутрь автомобиля.
В случае отказа системы центрального управления замками сможете открыть ключом только передние двери, оснащенные цилиндром замка. С остальными дверьми и крышкой багажника возможно манипулировать вручную.
ЗАЩИТНОЕ БЛОКИРУЮЩЕЕ ПРИСПОСОБЛЕНИЕ
Система замков с центральным управлением снабжена защитным блокирующим приспособлением. В результате запирания автомобиля снаружи наступает автоматическое блокирование замков дверей. Ни одну из дверей невозможно открыть ручкой ни изнутри, ни извне. Этим самым затрудняется нежелательное проникновение в автомобиль.
Запирая автомобиль ключом или же с применением дистанционного устройства, возможно вывести из действия защитное блокирующее приспособление двукратным запиранием в течение 2-х сек. Если защитное блокирующее приспособление выведено из действия:
— сигнализатор в двери водителя вспыхивает сначала около 2-х сек. быстро, затем гаснет и примерно через 30 сек. начинает вспыхивать медленно;
— крышка наливной горловины топливного бака расфиксирована.
В результате последующего отпирания и запирания автомобиля защитное блокирующее приспособление снова вводится в действие. Если автомобиль заперт и защитное блокирующее приспособление выведено из действия, возможно открыть автомобиль изнутри следующим образом:
— в результате одного потягивания ручки двери отпираются;
— в результате второго потягивания ручки двери открываются.
ВНИМАНИЕ
Если автомобиль заперт и защитное блокирующее приспособление введено в действие (активировано), то нельзя, чтобы внутри автомобиля оставались какие-либо лица и животные, ибо изнутри невозможно ни отпереть двери ни открыть окна. Двери, которые заперты таким образом, затрудняют спасателям доступ в случае крайней необходимости опасность для жизни!Примечание:
Устройство противоугонной сигнализации активируется тоже в случае запирания автомобиля с выведенной из действия функцией защитного блокирующего приспособления. Однако, наблюдение за внутренним пространством автомобиля не активируется.
АВАРИЙНОЕ ЗАПИРАНИЕ ДВЕРЕЙ
На боковой стороне двери находится механизм аварийного запирания двери, видимый только после открытия двери (распространяется только на автомобили с системой замков с центральным управлением).
— удалите колпачок (А).
— вставьте ключ в отверстие под колпачком и вдавите рычаг стопора до упора внутрь.
— снова наденьте колпачок.
После закрытия двери более невозможно открыть ее снаружи. Если не включено приспособление защиты дверей от открытия детьми, возможно открыть дверь изнутри, потянув два раза дверную ручку Если приспособление защиты дверей от открытия детьми включено, нужно помимо двойного потягивания внутренней ручки еще и открыть дверь извне.
— нажимая на верхнюю часть отштампованного углубления для номерного знака, поднимите одновременно крышку.
Закрытие крышки багажника
Опустив крышку вниз, слегка прихлопните ее.
У автомобилей без системы замков с центральным управлением расфиксируйте крышку нажатием кнопки в двери водителя.
У автомобилей с системой замков с центральным управлением расфиксируйте крышку нажатием кнопки в верхней части отштампованного углубления для номерного знака.
На внутренней обивке крышки багажника имеется ручка, облегчающая опускание крышки.
ВНИМАНИЕ
Убедитесь в том, что после закрытия крышки багажника фиксатор замка действительно вошел прочно в защелку. В противном случае возможно внезапное самопроизвольное открытие крышки багажника на ходу автомобиля даже в том случае, когда замок заперт — опасность аварии!
Никогда не езжайте с полностью открытой или неплотно закрытой крышкой багажника, т.к. во внутреннее пространство автомобиля могут в таком случае попасть отработавшие газы опасность отравления!
Запирая крышку багажника, не надавливайте рукой на стекло, а то оно может разбиться — опасность травмы!Примечание
После закрытия крышки багажника крышка запирается в течение 1 сек. и устройство противоугонной сигнализации активируется.
Сказанное действует только в том случае, если автомобиль заперли до закрытия крышки.
После разгона или же на скорости, превышающей 5 км/ч, дезактивируется действие ручки, находящейся в верхней части отштампованного углубления для номерного знака. После остановки автомобиля и открытия какой-нибудь боковой двери функция ручки вновь активируется. Открывая крышку багажника, придерживайте ее рукой.
АВАРИЙНОЕ ОТКРЫТИЕ КРЫШКИ БАГАЖНИКА
Если в системе центрального управления замками появилась неисправность, возможно расфиксировать крышку багажника следующим образом:
— опрокиньте крайнее заднее сиденье.
— при помощи тонкого предмета, напр., отвертки, вдавите ручку управления до упора по направлению стрелки; крышка расфиксировывается.
— откройте снаружи крышку багажника.
ЭЛЕКТРИЧЕСКОЕ УПРАВЛЕНИЕ СТЕКЛОПОДЪЕМНИКОМ
Выключатели электрического стеклоподъемника
Электрическим стеклоподъемником возможно пользоваться только при включенном зажигании.
Окно открывается после легкого нажатия кнопки соответствующего выключателя. После отпускания кнопки выключателя открытие окна останавливается.
К тому же возможно открывать окна автоматически (полное открытие) нажатием кнопки выключателя до упора. После повторного нажатия кнопки выключателя окно немедленно останавливается.
Окно закроете, вытягивая немного соответствующую кнопку выключателя за верхний шлиц. После отпускания кнопки выключателя закрытие окна прекращается.
К тому же возможно закрыть окна автоматически (полное закрытие) вытаскиванием кнопки выключателя до упора. После повторного вытягивания кнопки выключателя окно немедленно останавливается.
Выключатели для отдельных окон располагаются в панели управления в двери водителя, в двери пассажира переднего сиденья и в задних дверях.
Если выключатели в задних дверях выведены из действия, то горит сигнализатор в предохранительном блокирующем выключателе (S).
ВЫКЛЮЧАТЕЛИ ДЛЯ УПРАВЛЕНИЯ СТЕКЛОПОДЪЕМНИКАМИ В ПАНЕЛИ УПРАВЛЕНИЯ В ДВЕРИ ВОДИТЕЛЯ
А — выключатель для управления стеклом окна в двери водителя.
В — выключатель для управления стеклом окна в двери пассажира переднего сиденья.
С — выключатель для управления стеклом окна в правой задней двери.
D — выключатель для управления стеклом окна в левой задней двери.
S — предохранительный блокирующий выключатель.
ПРЕДОХРАНИТЕЛЬНЫЙ БЛОКИРУЮЩИЙ ВЫКЛЮЧАТЕЛЬ
Нажатием предохранительного блокирующего выключателя возможно вывести из действия выключатели в задних дверях. После повторного нажатия предохранительного блокирующего выключателя выключатели для регулирования задних окон будут снова работоспособные.
ВНИМАНИЕ
Когда запираете автомобиль снаружи, проследите за тем, чтобы внутри никто не оставался, так как в случае крайней необходимости невозможно будет открыть окна изнутри.
Система оборудована защитным устройством от внезапного зажатия. В случае зажатия части тела человека смещение стекла останавливается и стекло возвращается на несколько см назад.
Если на задних сиденьях перевозятся дети, рекомендуется ради их безопасности применить предохранительный блокирующий выключатель, который выведет из действия выключатели для управления окнами задних боковых дверей.
В том случае, если стекла замерзли, устраните сначала обледенение, и только после этого управляйте стеклоподъемниками — опасность повреждения механизмов стеклоподъемника.Примечание:
После выключения зажигания сможете открывать и закрывать окна еще около 10 минут. В это время не работает устройство автоматического управления стеклоподъемником. Только после открытия двери водителя или же пассажира переднего сиденья устройство управления стеклоподъемником выключается полностью.
Для проветривания внутреннего пространства автомобиля на ходу автомобиля пользуйтесь в максимально возможной мере системой отопления и системой охлаждения автомобиля. Если окна открыты, то в автомобиль могут попадать пыль и другие загрязнения и на определенной скорости автомобиля могут появляться неприятные звуки.
ЗАЩИТНОЕ УСТРОЙСТВО ОТ ВНЕЗАПНОГО ЗАЖАТИЯ
Электроуправляемые стеклоподъемники оснащены защитным устройством от внезапного зажатия. Это снижает опасность ранения во время закрытия окон.
Если какое-нибудь препятствие мешает закрытию, смещение стекла останавливается и стекло возвращается на несколько см назад.
Если в течение 10 сек. снова попытаетесь закрыть окно, а препятствие не было устранено, смещение стекла остановится. В это время невозможно закрывать окна автоматически. Однако, защитное устройство от внезапного зажатия работоспособно.
Защитное устройство от внезапного зажатия будет выведено из действия, если в течение последующих 10 сек. снова попытаетесь окно закрыть — окно закрывается полной силой.
Если подождете дольше, чем 10 сек., защитное устройство от внезапного зажатия становится снова работоспособным.
ВНИМАНИЕ
Закрывайте окна осторожно! Иначе можете причинить серьезные травмы!
СИСТЕМА «КОМФОРТ» ДЛЯ УПРАВЛЕНИЯ СТЕКЛАМИ ОКОН
Отпирая и запирая автомобиль, Вам можно открывать и закрывать окна с электроуправляемым стеклоподъемником следующим образом:
Подержите ключ в замке двери водителя в положении на отпирание до тех пор, пока не откроются все окна.
Подержите ключ в замке двери водителя в положении на запирание до тех пор, пока все окна не закроются.
Закрытие и открытие окон можете немедленно прекратить, отпуская ключ.
ВНИМАНИЕ
Во время комфортабельного управления защитное устройство от внезапного зажатия не вводится в действие.
Закрывайте окна осторожно! Иначе можете причинить серьезные травмы!
Автоматика работы стеклоподъемника не работает
После отсоединения и повторного присоединения аккумуляторной батареи автоматика работы стеклоподъемника не работает. Систему нужно активировать. Работоспособность системы следует возобновить следующим образом:
— подержите ключ в замке двери водителя в положении на запирание до тех пор, пока все окна не закроются;
— отпустите ключ;
— снова подержите ключ в положении на запирание еще прибл. 3 сек.
Зимой возможно наблюдать при закрытии окон повышенное сопротивление вследствие обледенения и окно в ходе закрытия останавливается, возвращаясь на несколько см обратно. Чтобы обеспечить закрытие окна, необходимо придерживаться нижеследующей методики:
— если закрытие окна остановится, нужно повторить цикл.
ВНИМАНИЕ
Во время закрытия окон защитное устройство от внезапного зажатия не вводится в действие.
Закрывайте окна осторожно! Иначе можете причинить серьезные травмы.
РЕМЕНЬ БЕЗОПАСНОСТИ С ПРЕДНАТЯЖИТЕЛЕМ (ПРИ НАЛИЧИИ)
СИСТЕМА РЕМНЕЙ БЕЗОПАСНОСТИ
Прежде чем застегнуть ремень безопасности, отрегулируйте сиденье и подголовник в правильное положение.
Держа ремень за язычок, перекиньте его медленно через грудную клетку и таз.
Вставьте язычок ремня в замок возле соответствующего сиденья таким образом, чтобы он вошел со щелчком в фиксированное положение.
Потягивая ремнем, проверьте, вошел ли ремень надежно в замок.
Каждый ремень безопасности с трехточечным креплением снабжен автоматическим втягивающим устройством. Автоматические ремни безопасности предоставляют полную свободу движения при медленном вытягивании. При внезапном торможении движение ремней автоматически блокируется механизмом втягивания. Движение ремней блокируется тоже при ускорении автомобиля, при движении под гору и на поворотах.
ВНИМАНИЕ
Плечевая часть ремня не должна проходить ни в коем случае через шею, а примерно через середину плеча, и должна плотно обтягивать верхнюю часть туловища. Поясная пента ремня должна вести через тазобедренную часть тела, а не через живот, и должна всегда плотно обтягивать тело. В случае необходимости поправьте положение ремня.
У беременной женщины должен поясной ремень обтягивать тазобедренный участок ее тела как можно ниже с целью предотвращения давления ремня на нижнюю часть живота.
Проследите за правильным прохождением ремней безопасности. Неправильно проходящие ремни безопасности могут даже при легких происшествиях причинить травмы.
Слишком свободно проходящий ремень безопасности может причинить ранения, так как тело во время аварии двигается из-за кинетической энергии далее вперед а лишь затем вдруг подхватывается ремнем.
Всовывайте язычок только в замок того ремня безопасности, который принадлежит к данному сиденью. В противном случае ограничивается защитное действие ремня и повышается опасность нанесения травм.
РЕГУЛИРОВАНИЕ ВЫСОТЫ РЕМНЕЙ НА ПЕРЕДНИХ СИДЕНЬЯХ
Регулирование высоты позволяет приспособить прохождение передних ремней безопасности с трехточечным креплением на участке плеча к росту и размерам тела водителя и пассажира переднего сиденья.
Нажав на верхнюю петлю крепления ремня, сдвиньте место крепления ремня в требуемом направлении вверх или вниз.
Настроив высоту, проверьте коротким рывком, вошло ли верхнее крепление ремня надежно в фиксированное положение.
ВНИМАНИЕ
Отрегулируйте высоту ремня таким образом, чтобы плечевая часть ремня проходила приблизительно через середину плеча, а ни в коем случае не через шею.Примечание:
Высоту ремня безопасности у передних сидений возможно тоже регулировать путем регулирования высоты основания сиденья.
ВНИМАНИЕ
Чтобы добиться максимальной эффективности защиты лиц внутри автомобиля при введении системы в действие, нужно правильно отрегулировать передние сиденья по росту тела сидящего на нем лица.
Если на ходу автомобиля не пользуетесь ремнями безопасности, наклоняетесь слишком вперед или же сидите в ином неправильном положении, в случае аварии подвергаетесь повышенной опасности получения травмы.
В случае появления неисправности проверьте систему безотлагательно на какой-нибудь из специализированных станций сервисного техобслуживания. Иначе имеется опасность того, что система «Airbag» в случае происшествия не сработает.
На частях системы надувных подушек безопасности «Airbag» Вам нельзя осуществлять никаких видоизменений.
Запрещено манипулировать с отдельными частями системы надувных подушек безопасности «Airbag», так как модули системы «Airbag» могли бы сработать.
Защитное действие системы надувных подушек безопасности «Airbag» предусмотрено всего лишь для одного дорожного происшествия. После происшедшей активации системы «Airbag» нужно заменить ее.
Система надувных подушек безопасности «Airbag» не требует никакого ухода на протяжении всего срока службы.
При продаже автомобиля передайте покупателю полный набор бортовой литературы автомобиля. Помните о том, что к ней тоже относятся документальные данные по возможному отключению надувной подушки безопасности «Airbag» для пассажира переднего сиденья!
Система надувных подушек безопасности «Airbag» не активируется при:
— выключенном зажигании;
— легких лобовых ударах;
— легких боковых ударах;
— ударах сзади;
— опрокидывании автомобиля.
ВНИМАНИЕ
После срабатывания передней подушки безопасности для пассажира переднего сиденья необходимо заменить панель приборов.
В случае транспортного происшествия, сопровожденного срабатыванием системы надувных подушек безопасности «А1гЬад»:загорается внутреннее освещение кузова (если внутреннее освещение настроено на включение через дверной выключатель), загорается система аварийной световой сигнализации, отпираются все двери.
СИДЕНЬЯ И МЕСТА ДЛЯ УКЛАДЫВАНИЯ ВЕЩЕЙ
Положение передних сидений возможно регулировать различными способами, приспосабливая их к размерам тела водителя и пассажира переднего сиденья. Правильное регулирование положения сидений особо важно для:
— безопасного и быстрого доступа к органам управления;
— непринужденной, неутомительной осанки;
— максимального защитного действия ремней безопасности и системы Airbag.
ВНИМАНИЕ
Никогда не перевозите больше лиц, чем имеется мест для сидения.
Каждый пассажир должен быть правильно пристегнут ремнем безопасности, принадлежащим к его сиденью. Детей нужно предохранять подходящими приспособлениями, удерживающими ребенка на сиденье.
Передние сиденья, подголовники и ремни безопасности необходимо всегда отрегулировать по росту человека, чтобы они предоставили Вам и Вашим пассажирам идеальную степень защиты.
На ходу автомобиля Вам нужно располагать ноги всегда в пространстве для ног — никогда их не кладите на панель приборов, в окна или же на сиденья! Это касается особенно пассажира переднего сиденья. А то, в противном случае, подвергаетесь при торможении или в случае дорожного происшествия повышенной опасности получения травмы. В случае срабатывания системы Airbag возможно при неправильном сидение получить ранение со смертельным исходом!
Важно, чтобы как водитель, так и пассажир переднего сиденья все время сохраняли расстояние от рулевого колеса и, соотв., от панели приборов по крайней мере 25 см. В случае несоблюдения этого минимального расстояния система надувных подушек безопасности может не оказывать свое защитное действие — в случае срабатывания может оказаться опасной для жизни! Кроме того, положение передних сидений и подголовников должно быть всегда правильно отрегулировано в зависимости от роста сидящего на нем лица.
В пространство для ног нельзя класть никаких предметов, так как в случае осуществления внезапного маневра или торможения они могут попасть на участок педалей. Впоследствии может случиться, что не сможете выжать сцепление, затормозить или добавить газа.
Регулирование положения передних сидений
Регулирование положения сиденья в продольном направлении:
— потянув ручку управления (1) вверх, сдвиньте сиденье в требуемое положение.
— освободив ручку (1), сдвиньте сиденье в требуемое положение таким образом, чтобы фиксатор положения сиденья вошел слышно в защелку.
Регулирование высоты сиденья:
— несколько раз потяните рычаг управления (2) вверх и отпустите, повторяя этот процесс до тех пор, пока не добьетесь требуемого повышения положения сиденья.
— несколько раз потяните рычаг управления (2) вниз и отпустите, повторяя этот процесс до тех пор, пока не добьетесь требуемого понижения положения сиденья.
Регулирование угла наклона спинки сиденья:
— регулируя спинку сиденья, снимите с нее нагрузку (не опирайтесь об нее) и поворачивайте маховичок (3) таким образом, чтобы отрегулировать требуемый угол наклона спинки.
ВНИМАНИЕ
Регулируйте положение сиденья водителя только в стоящем на месте автомобиле — опасность аварии!
Высоту сиденья регулируйте осторожно! При невнимательном регулировании возможно причинение ранения.
Во время движения автомобиля спинки сидений не должны наклоняться слишком далеко назад, а то ослабляется.
Наиболее действенную защиту предоставляет подголовник в том случае, если его верхний край находится на одной прямой с теменем Вашей головы.
Настройка высоты подголовников
Взяв подголовник обеими руками со сторон, сдвиньте его вверх или вниз, согласно необходимости, по направлению стрелки, указанной на рисунке выше.
При желании сдвинуть вниз подголовник передних сидений нужно еще и нажать на фиксатор, указанный на рисунке.
Подголовник, возможно приспособить к голове человека путем его наклона. В результате приспособления подголовника увеличивается комфортабельность для пассажира.
ВНИМАНИЕ
Подголовники должны быть правильно отрегулированы, чтобы не подвергнуть опасности здоровье человека при транспортном происшествии.
Поверхности подушек и спинок сидений для водителя и для пассажира, сидящего радом с ним, возможно при включенном зажигании обогревать.
Поворачиванием регулятора возможно включить и регулировать обогрев сидений на стороне водителя или же пассажира переднего сиденья.
Обогрев выключают, поворачивая соответствующий регулятор в исходное положение «0».
ВНИМАНИЕ
Чтобы не повредить нагревательные элементы устройства для обогрева сидений, не положено стоять на коленях на сиденьях и оказывать на них иную точечную нагрузку.
Не очищайте сиденья методом мокрой очистки.
Примечание:
Рекомендуется включать выключатели для обогрева сидений только после пуска двигателя. Этим самым существенно экономится емкость аккумуляторной батареи.
В случае падения напряжения в электрической бортовой сети автомобиля автоматически отключается обогрев передних сидений с целью обеспечения достаточного количества электроэнергии для управления двигателем.
Пространство для груза возможно увеличить откидыванием задних сидений вперед или же извлечением подушки сиденья. У автомобилей с отдельными задними сиденьями возможно откидывать эти сиденья также и в отдельности, в меру необходимости.
Смещение сидений в продольном направлении
Потяните ручку управления вверх или потяните за петлю разблокировки и сдвиньте сиденье в требуемое положение.
Регулирование спинки сиденья
Потяните ручку управления и отрегулируйте требуемый наклон спинки сиденья.
Освободите из прижимного зажима на верхнем участке боковой стороны крайних сидений петлю, придерживающую ремни безопасности, всуньте удерживающий выступ ремня в отверстие на соответствующей боковой стенке внутреннего пространства автомобиля — положение безопасности.
Сдвиньте сиденье как можно больше назад.
Потяните ручку управления и откиньте спинку сиденья полностью вперед.
Потяните ручку управления вверх и затем опрокиньте целое сиденье вперед.
Зафиксируйте откинутое сиденье при помощи привязного ремня за направляющий стержень подголовника переднего сиденья.
ВНИМАНИЕ
Откинутое сиденье следует зафиксировать при помощи привязного ремня за направляющий стержень подголовника переднего сиденья немедленно — грозит опасность получения травмы при разгоне автомобиля.
Если сиденье не будет находиться в заднем крайнем положении, то при расфиксировании сиденья могут повредиться стопорные болты.
Регулирование положения сидений в поперечном направлении
Извлеките среднее сиденье.
Откиньте крайнее сиденье и расфиксируйте его.
Сдвиньте откинутое и зафиксированное крайнее сиденье до упора по направляющим стержням по направлению к середине автомобиля.
В конце направляющих стержней сиденье зафиксируйте.
Возвращение сидений в первоначальное положение
Если сиденье извлечено, то его следует сначала установить на направляющие стержни и зафиксировать фиксаторами. Проверьте потягиванием, что сиденье невозможно извлечь.
Откиньте сиденье в горизонтальное положение, должен послышаться звук вошедшего в фиксированное положение сиденья. Проверьте потягиванием, что сиденье невозможно поднять.
Нажав на ручку управления, верните в первоначальное положение спинку сиденья. Проверьте потягиванием, что спинку невозможно откинуть вперед.
Извлеките удерживающий выступ ремня из положения безопасности.
Зафиксируйте ремень безопасности петлей на верхнем участке боковой стороны спинки сиденья таким образом, чтобы она вошла со щелчком в фиксированное положение.
Примечание:
Ремни безопасности при крайних сиденьях должны быть всегда продеты под петлями рядом с подголовниками. Иначе ремни безопасности могли бы соскользнуть за сиденья.
На обеих боковых сторонах багажника находятся ушки для крепления багажа.
На ушки в багажнике возможно тоже закрепить ограничительные закрепительные сети для придерживания небольших мест багажа.
Ограничительные закрепительные сети уложены вместе с инструкцией по закреплению в багажнике.
ВНИМАНИЕ
Перевозимый груз нужно закрепить таким образом, чтобы он не мог смещаться на ходу автомобиля и при торможении.
Если закрепить места багажа или предметы к ушкам для увязки неподходящими или поврежденными закрепительными ремнями, то в случае торможения или происшествия пассажиры могут получить ранение. Чтобы места багажа или предметы не могли сдвигаться вперед, пользуйтесь всегда подходящими закрепительными ремнями, которые следует надежно прикрепить к ушкам для увязки.
К ушкам для увязки никогда не прикрепляйте специальное сиденье для ребенка!
На обеих сторонах багажника расположен откидной крюк для закрепления небольших мест багажа, напр., сумок и т.п.
На крюк возможно повесить груз весом до 10 кг.
Руководство по эксплуатации и ремонту автомобилей Skoda Praktik и Scoda Roomster с 2006 года выпуска с бензиновыми и дизельными двигателями.
- Автор: —
- Издательство: Монолит
- Год издания: —
- Страниц: 366
- Формат: —
- Размер: —
Сборник руководств по эксплуатации и техническому обслуживанию автомобиля Skoda Roomster.
- Автор: —
- Издательство: Skoda Auto
- Год издания: -/2009/2010
- Страниц: —
- Формат: PDF
- Размер: 68,4 Mb
Схемы на немецком языке по электрооборудования автомобиля Skoda Roomster 2006 года выпуска.
- Автор: —
- Издательство: Skoda Auto
- Год издания: —
- Страниц: 634/74
- Формат: PDF
- Размер: 5,4 Mb
инструкцияSkoda Roomster (2008)

ŠkodaRoomster
SIMPLY CLEVER
РУКОВОДСТВО ПО ЭКСПЛУАТАЦИИ
Návod k obsluze
Roomster rusky 05.07
S80.5610.03.75
5J7 012 003 BJ
Roomster rusky 05.07 S80.5610.03.75
Вы тоже можетe помочъ окружающей среде!
Расход топлива в Вашем автомобиле „Škoda“ и, тем самым,
содержание вредных веществ в выпускаемых отработавшых газах
в решающей мере обусловлены Вашей техникой вождения.
Шумность автомобиля и его износ зависят от способа Вашего
обращения с ним.
О том, как пользоваться Вашим автомобилем „Škoda“ с
максимальным учетом защиты окружающей среды, а при этом
ездить економично, Вы сможете узнать на страницах настоящего
Руководсва по обслуживанию.
Кроме того следует уделять большое внимание тем разделам
Руководства, которые обозначены симболом цветочка ;.
Сотрудничайте с нами — в деие защиты окружающей
среды.
www.skoda-auto.com
NKO A05 all.indd 1NKO A05 all.indd 1 8.2.2007 8:49:428.2.2007 8:49:42
Посмотреть инструкция для Skoda Roomster (2008) бесплатно. Руководство относится к категории автомобили, 2 человек(а) дали ему среднюю оценку 7.3. Руководство доступно на следующих языках: русский. У вас есть вопрос о Skoda Roomster (2008) или вам нужна помощь? Задайте свой вопрос здесь

Skoda Roomster (2008) — автомобиль, выпущенный компанией Skoda Auto. Данный автомобиль относится к классу компактных минивэнов и предлагает просторный салон и комфортное оснащение.
Skoda Roomster (2008) построен на платформе PQ24 от Volkswagen Group, что обеспечивает ему надежность и качество. Длина автомобиля составляет примерно ХХХ миллиметров, ширина — ХХХ миллиметров и высота — ХХХ миллиметров. Благодаря таким размерам, Румстер имеет прекрасную маневренность и возможность парковки в ограниченном пространстве.
Салон Skoda Roomster (2008) предлагает комфортное пространство для водителя и пассажиров. Дизайн салона сочетает функциональность и удобство. ХХХ и ХХХ миллиметров высокие сиденья позволяют создать удобную посадку и обеспечивают отличную видимость дороги.
При выборе двигателя, Skoda Roomster (2008) предоставляет несколько вариантов, включая бензиновые и дизельные модификации. Мощность двигателя составляет от ХХХ л.с.
Автомобиль оснащен передним приводом и предлагает плавную и уверенную езду. Размеры колес составляют ХХХ дюймов для обеспечения стабильности на дороге.
Skoda Roomster (2008) предлагает также множество функций безопасности, включая системы контроля стабильности и тормозной силы, а также фронтальные и боковые подушки безопасности.
В целом, Skoda Roomster (2008) — просторный и комфортный автомобиль, отлично подходящий для семейного использования.
Главная
Не можете найти ответ на свой вопрос в руководстве? Вы можете найти ответ на свой вопрос ниже, в разделе часто задаваемых вопросов о Skoda Roomster (2008).
Как перевести мили в километры?
1 миля равна 1,609344 километрам, а 1 километр — 0,62137119 милям.
Где я могу узнать идентификационный номер транспортного средства Skoda?
Место размещения идентификационного номера транспортного средства зависит от марки и типа транспортного средства. Номер может быть выбит на раме транспортного средства или указан на номерном знаке. Чтобы узнать место расположения идентификационного номера транспортного средства лучше всего ознакомиться с руководством по эксплуатации Skoda Roomster (2008).
Что такое идентификационный номер транспортного средства (VIN)?
Идентификационный номер транспортного средства — уникальный для каждого транспортного средства идентификационный номер. Аббревиатура VIN расшифровывается как «Vehicle Identification Number» (Идентификационный номер транспортного средства).
Когда транспортному средству Skoda требуется техническое обслуживание?
Регулярное техническое обслуживание необходимо всем транспортным средствам. С информацией о том, как часто необходимо проходить техническое обслуживание и чему именно стоит уделять особое внимание можно ознакомиться в инструкции по техническому обслуживанию. Как правило, транспортное средство требует технического обслуживания каждые 2 года или 30 000 километров пробега.
Когда следует заменять тормозную жидкость на Skoda?
Тормозную жидкость рекомендуется менять каждые два года.
В чем разница между топливом E10 и E5?
В топливе E10 содержится до десяти процентов этанола, в то время как в E5 содержится менее пяти процентов. Соответственно, топливо E10 менее вредит окружающей среде.
Одна или несколько дверей не открываются изнутри. Что мне делать?
Скорее всего, замок оснащен защитой от детей и поэтому не может быть открыт изнутри. Процедура открытия замка с защитой от детей зависит от марки и типа замка.
Автомобильный радиоприемник не включается, что делать?
Если автомобильный радиоприемник не включен, на него не будет подаваться питание. Убедитесь, что красный провод подключен к контактному источнику питания, а желтый провод — к источнику питания постоянной мощности.
Инструкция Skoda Roomster (2008) доступно в русский?
Да, руководствоSkoda Roomster (2008) доступно врусский .
Не нашли свой вопрос? Задайте свой вопрос здесь


