From Synfig Studio :: Documentation
Jump to: navigation, search
- Введение
- Что такое Synfig
- Первые шаги
- Первое знакомство
- Основы анимации
- Работа со слоями
- Создание Фигур
- Анимация Фигур
- Интерфейс
- Элементы интерфейса
- Interface
- Импорт изображений
- Импорт из GIMP
- Импорт SVG
- Импорт файла .lst (импорт последовательности изображений)
- Создание изображений
- BLine Tool/ru
- Контуры (Outline Layer)
- Области (Region Layer)
- Диалог «Цвета» (Color Editor)
- Векторный карандаш (Draw Tool)
- Коррекция Толщины (Width Tool)
- Paste Canvas Layer/ru
- Запереть потомков (Children Lock)
- Градиент
- Gradient Editor
- Метод смешивания (Blend Method)
- Маскинг (Masking)
- Панель «Группы» (Groups)
- Направляющие
- Grid
- Связывание
- Linking
- Export
- Convert
- Sewing_BLines
- Link to BLine
- ValueNodes
- Reusing Exported Value Nodes
- Switching Scenes
- Для продвинутых …
- Создание слайдшоу
- Duplicate Layer
- Brushes
- Анимация
- Keyframe
- Time Track Panel
- Waypoint
- Повторное использование анимации
- Editing Lock Keyframes
- Onion Skin
- Doc:Following a BLine/ru
- Z-Depth
- Time Loop Layer
- Rescale Animations
- Time Offset Parameter
- Анимационные техники
- Морфинг (на примере цикла ходьбы)
- Cut-out
- Рендеринг (Вывод видео)
- Preview
- Render options
- Render Dialog
- SVG export
- Настройка Synfig
- Setup_Dialog
- Unit System
- Image_Dimensions
- Canvas Properties
- Environment Variables
- Дополнительно
- Synfig Studio vs Synfig
- Synfig CLI syntax
- Doc:Build Instructions
- How Do I…
- FAQ
- Window_Manager_Hints (merge to FAQ?)
- Keyboard Shortcuts
- Mouse Shortcuts
- Examples
Содержание занятия
1. Презентация программы
2. Подготовка рабочей папки
Необходимо скачать архив с рабочими файлами (ссылка ниже) и распаковать его.
Скачать архив с рабочими файлами
Рядом с распакованной папкой нужно создать папку с именем «tasks» — в этой папке мы будем сохранять файлы выполненных заданий.
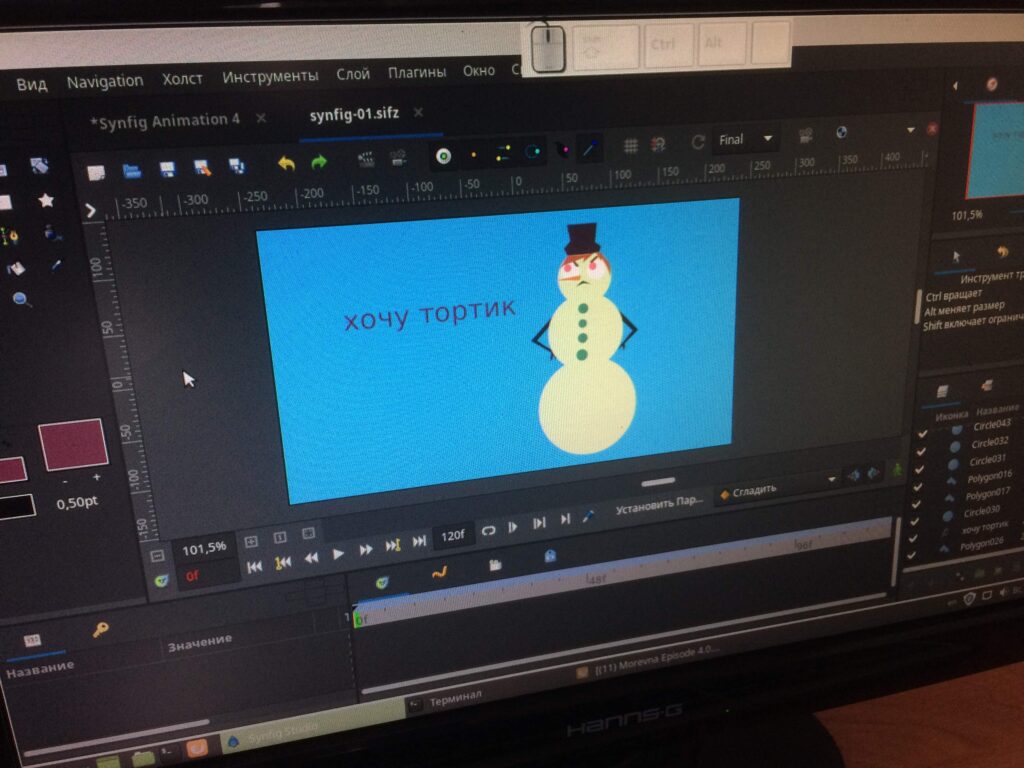
3. Смотрим видео и выполняем задание
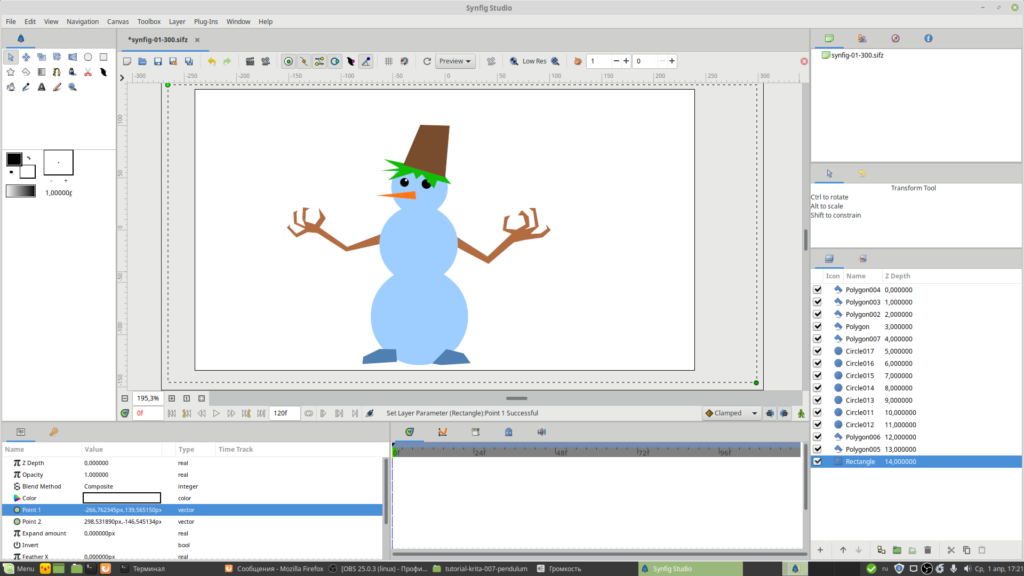
Задание: Нарисовать снеговика с использованием инструментов «Окружность» и «Многоугольник». У снеговика должны быть руки, на голове ведро и волосы. Сохранить файл под именем «Synfig-01.sifz».
Примеры выполненного задания
Если вы нашли ошибку, пожалуйста, выделите фрагмент текста и нажмите Ctrl+Enter.
As you probably know, animation is the rapid display of a sequence of
images in order to create an illusion of movement. Traditionally 2D
animation is created by drawing each displayed image individually. Those
images are called “frames” and thus such method is called
“frame-by-frame animation”. To create a good illusion of movement you
need to draw many frames, that’s why this method requires a lot of time
and resources.

A traditional frame-by-frame animation, taken from : http://flipily.com
Synfig Studio is an open-source 2D vector
animation software. It is designed to produce film-quality animation
with less people and resources.
Synfig Studio is built to eliminate the need to draw each frame
individually. There are two techniques for that:
-
Morphing animation
-
Cutout animation
Morphing

Morphing animation of a rose, by Rore
Morphing is a technique that
takes two images and creates a smooth transition between them. In the
process of morphing, one shape is deformed into another and this
transformation is usually defined by control points.
In Synfig Studio images are constructed from vector shapes and the
morphing is done automatically. This allows us to create animations by
drawing only the key positions at relatively wide time intervals. You
need only to draw a few frames as needed to create a basic sense of
motion for the scene, and Synfig Studio will create the in-between
frames.
Cutout animation

Cutout animation in Synfig’s tutorials
Cutout animation is created
by splitting objects into parts and applying some simple transformations
to them (like translation, rotation or scale) at different moments of
time.
Synfig Studio uses those values to interpolate the motion for
in-between frames. Cutout animation can be produced from bitmap images
or vector graphics.
Synthesis and other functionalities
In both cases the role of Synfig Studio is to fill the gaps between the
drawn frames (also called “keyframes”) and produce smooth and fluid
animations. This process is called “tweening”.
Although Synfig Studio is not directly intended to draw animation
frame-by-frame, it can be used to bring your hand-drawn frame-by-frame
animation to the film-quality level by converting bitmap data of each
frame into vector format. This process is called “tracing” and usually
done by hand by constructing vector shapes on top of bitmap images. In
the process of construction you can apply a lot of fascinating effects
built into Synfig Studio to achieve a professional look for your
animations.
Whether you do frame-by frame animation or not, Synfig Studio gives you
flexible control over the repeated data, such as colors, outline
characteristics, textures, images and many more, even animation
trajectories and their sets (actions). Reusing repeated data is achieved
via linking. This is a power of Synfig Studio, which is especially
important for big animation projects.
Among the plain linking pieces of artwork data you can also define
relations between them using a set of functions. That allows to create
automatic animation based on the defined laws and bring whole animation
process to the next level.

Parabolic shot in Synfig’s tutorials
All those features of Synfig Studio are covered in detail in the
chapters of this manual.
User interface
The screenshot below displays Synfig Studio’s window layout:
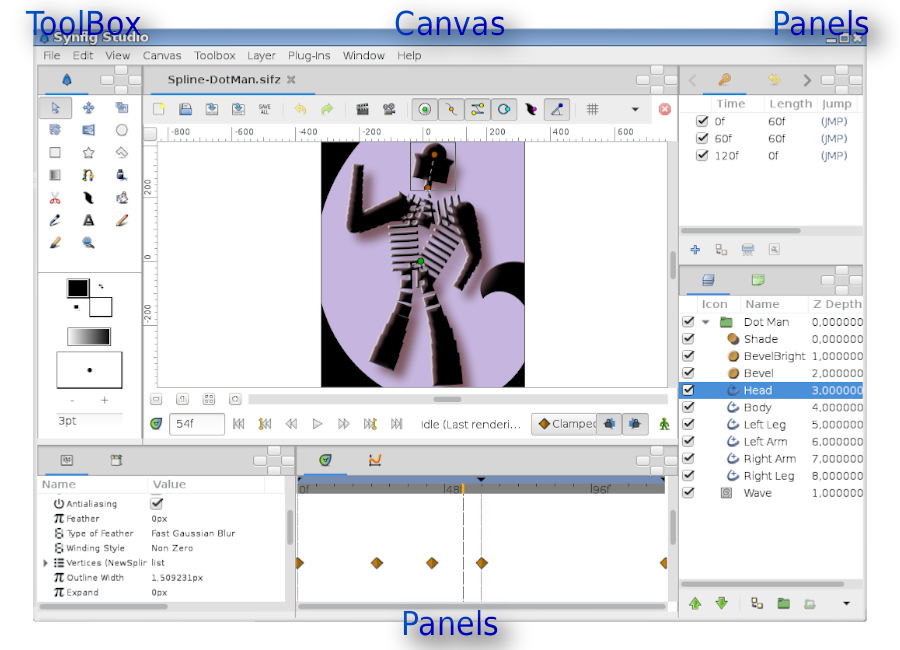
Default interface layout of Synfig Studio
Synfig Studio main interface components are:
-
Toolbox — is the main Synfig Studio window. It contains
tools and more to create and edit your artwork. -
Canvas — displays your artwork and animation.
-
Panels — contain tools and information about certain elements of your
project. Some panels will allow you to modify those elements.
Note
Synfig Studio can be reset to its default window arrangement (as shown in the screenshot).
In the File menu select«Window -> Workspace -> Default«.
The center of the window is the Canvas. A new Canvas Window appears each time
Synfig Studio starts. The window represents the Root Canvas, not that it means much to you at the moment,
but that’s OK — we’re just trying to show you around. In the upper left
corner of the Canvas Window, you’ll see a button with a
caret. If you click on this caret button, the
canvas window menu will pop up. If you
right-click in the canvas area and there is no Layers under
the mouse position, this menu will also appear. So now you know where
the most important canvas menu is.
The other part of the window (on the bottom/top, to the right/left) are
customizable dock panels. Each dock contains a set of Panels, arranged horizontally or
vertically. Some panels share the same space inside the dock and you can
switch between them by clicking on their panel tab. You can
rearrange the contents of dock panels as you wish by dragging the panel
tab to where you want it. You can even create a new dock by dragging a
tab out.
If you accidentally close a panel (by dragging it out, and
closing the new dock that gets created), no worries. Simply go to the Main Menu,
select Window Menu there and then click on the name of the panel you need.
The most important panels are:
-
Layers Panel — shows you the hierarchy of the
layer of your working canvas. It also allows you to manipulate these
layers. -
Parameters Panel — shows you the parameters of
the layer currently selected. When multiple layers are selected, only
the parameters that the selected layers have in common are displayed. -
Tool Options Panel — shows you any options
specific to the currently selected tool. -
Navigator panel — shows a thumbnail image of what the
currently selected canvas looks like. You can also zoom in and move
the focus around with this panel. -
History Panel — shows you the history stack for
the current composition. You can also edit the actions in history.
There are also many other panel in Synfig Studio. If you
have no idea what a panel does, simply hold your mouse over its icon and
a tooltip will pop up describing its function.
Under the hood
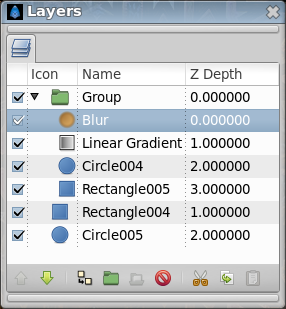
Layers Panel
Synfig Studio, like most every other competent graphics program, breaks
down individual elements of a Canvas into
Layers. However, it differs from other programs in two major
ways:
-
An individual layer in Synfig usually represents a single
“Primitive”. I.e. a single region, an outline of a region, an
imported image, etc… This allows you to have a great deal of
flexibility and control. It is not uncommon for a composition to have
hundreds of layers (organized into a hierarchy for the artist’s
sanity of course). -
A layer can not only add information on top of the image below it, it
can also distort and/or modify it in some other way. In this sense,
Synfig’s Layers act much like filters do in Adobe Photoshop or GIMP.
For example, we have a Blur Layer, Radial Blur Layer, Spherize Layer,
Bevel Layer, etc…
Each layer has a set of parameters which determine how it behaves. When
you click on a layer (either in the Canvas Window, or in the illustrated
Layers Panel), you will see its parameters in the
Parameters Panel.
First steps
Let’s create something fun so that we can play with it!
First, go over to the toolbox and click on the Circle Tool (if you don’t know which one it is, just mouse
over them until you find the one with the tooltip that says “Circle
Tool”).
When you click on the Circle Tool, you should notice that the Tool Options Panel changed. But we’ll get to that
later.
With the Circle Tool selected, you can now create circles in the The Canvas window . This
works as you might expect — click on the canvas, drag to change length
of the radius, and release the mouse button when you are done. Go ahead
and create two circles (or more, if you fancy). If you accidentally
release the mouse button before dragging, you end up creating a circle
with 0 radius and it is effectively invisible! No need to worry, you can
easily fix this. In the Parameters Panel, you can change the parameters
of the selected object. If you just made a 0 radius circle, it should be
the current selected object. You can change its radius to some value
other than 0, say 10, and manipulate it to your liking with the handles
later.
Note
Some users might experience the following problem: when you
click and drag on the canvas using the Circle Tool, either nothing seems
to happen or you end up making insanely huge circles. To fix this go to
File|Input Devices and disable all the devices you can find
there. If you have an extended input device that you want to use, such
as a pressure-sensitive pen, then enable it in this screen. After this
change Synfig will work as expected.
Now go back to the toolbox and
click on the Transform Tool (the button with the
arrow on it). After you do this, click on one of your circles. You will
see a “bounding_box” (which is kind of useless at
this point in time, but we digress), a green dot at the center, and a
cyan dot on the radius. Those dots are called “handle”. If
you want to modify the circle, grab a handle and drag it around. Easy!
You can select a Layers by clicking on it. If you want to
select more than one layer, hold down ctrl key while you are
clicking — this works in both the Canvas Window and the Layers Panel. Try it!
You can also select multiple handles. You can do this in several ways.
First, you can hold down ctrl and individually click the handles
that you want selected, but this can be tedious. However, there is a
much faster method — just create a selection box by clicking the mouse
and dragging it over the handles that you want.
Go ahead, select two circles and select all of their handles. With
several handles selected, moving one handle will move all of them.
Note
Synfig Studio has an autorecovery feature. If it crashes,
even if the current file has not been saved, you will not lose more than
5 minutes of work. At restart it will automatically prompt to recover
the unsaved changes. Unfortunately history isn’t recovered yet.
The Rotate Tool and Scale Tool tools work much like
the Transform Tool, except in the case where you have multiple handles
selected. It is much easier just to try, than read about it. Select a
few circles, select all of their handles, and try using the rotate and
scale tools.
Note that tools manipulating with handles have options associated with
them. If a particular tool isn’t doing what you want, take a look at the
Tool Options Panel to see available options.
Linking
Now let’s try Linking. Suppose we always want these two
circles to be the same size. Select two circles, and then select both of
their radius handles (the cyan dots).
To select multiple handles, either drag a rectangle around them, or
select the first one, then hold the ctrl key while selecting the
rest. Once you have the two radius handles selected, right click on
either of them and a menu will pop up. Select Link. Boom. The
parameters are linked together. You can prove it to yourself by
selecting just one of the circles and changing its radius — the other
one will change as well. Neat stuff, eh? This is how
Outline Layer are attached to their
Region Layer — but we’re getting ahead of to the chapter.
Linking is a fundamental concept in Synfig. You can create links not
only for handles, but also between parameters as well by selecting
multiple layers, right clicking on the parameter in the Parameters
panel, and selecting Link.
Color selection
Let’s say you want one of the circles to be a different color. If you
look in the toolbox below the tools, you’ll see the outline/fill color
selector, the outline width selector, and some other stuff like the
default blend method and gradient. The outline/fill color widget works
exactly as you might expect — you can click on the fill color, and a
modest color chooser will appear. Now you can change the color pretty
easily.
But sometimes you just want to click on a color and go. This is where
the palette editor tab comes in.
Click on the Palette Editor panel tab and have a look — it’s the one
with the palette-ish looking icon. Clicking on colors with the left
mouse button will immediately change the default outline color and
clicking with the middle mouse button will change fill color.
That’s all great, but we still haven’t changed the color of the circle.
There are three ways to do this. The first is to click on the
Fill Tool from the toolbox, and then click on the circle in the
Canvas Window. Boom. Circle changes color. This works with more than
just circles. Also, you can select the circle layer you want to modify,
go to the Parameters panel, right-click on the Color parameter and
select Apply Fill Color or Apply Outline Color at you
preference. Or simply double-click on the Color parameter — a color
selector dialog will show up, and you can just tweak away.
Try playing around with the circles for a bit. Muck around with the
parameters, and see what happens. To get you started, try out to set the
Feather Parameter to 5.
Digging deeper
Of course, so far you just found out how to use the basic features of
Synfig Studio but not how you animate a drawing. This is covered in the
next section .
You can download an archive which contains the project used for wiki illustration
Interface.sfg
You can download the project used for the illustration of the illustration
Spline-DotMan.sifz
Будем на связи!
Введите свой адрес email в поле ниже, чтобы получать уведомления о важных обновлениях и выходе новых версий. Мы не передаем ваши данные третьим лицам и вы можете отписаться в любое время.
Будем на связи!
Введите свой адрес email в поле ниже, чтобы получать уведомления о важных обновлениях и выходе новых версий. Мы не передаем ваши данные третьим лицам и вы можете отписаться в любое время.
Нет, спасибо, хочу просто скачать программу