-
Contents
-
Table of Contents
-
Troubleshooting
-
Bookmarks
Quick Links
USER’S MANUAL
➢
To ensure safe usage and full performance of this product, please be sure to read through this
manual completely.
➢
To ensure immediate access whenever needed, store this manual in a safe location.
➢
Unauthorized copying, quotation, or translation of this manual, in whole or in part, without the
written approval of Roland DG Corp., is prohibited.
➢
The contents of this document and the specifications of this product are subject to change without
notice.
➢
Roland DG Corp. assumes no responsibility for any loss or damage relating to this product, regard-
less of any defect in this product or this manual. Such loss or damage, whether direct or indirect,
includes, but is not limited to, that arising from the specifications or performance of this product,
that due to failure of the product to perform, and that arising from any article made using this
product.
Troubleshooting
Summary of Contents for Roland EGX-350
-
Contents
-
Table of Contents
-
Troubleshooting
-
Bookmarks
Quick Links
USER’S MANUAL
➢
To ensure safe usage and full performance of this product, please be sure to read through this
manual completely.
➢
To ensure immediate access whenever needed, store this manual in a safe location.
➢
Unauthorized copying, quotation, or translation of this manual, in whole or in part, without the
written approval of Roland DG Corp., is prohibited.
➢
The contents of this document and the specifications of this product are subject to change without
notice.
➢
Roland DG Corp. assumes no responsibility for any loss or damage relating to this product, regard-
less of any defect in this product or this manual. Such loss or damage, whether direct or indirect,
includes, but is not limited to, that arising from the specifications or performance of this product,
that due to failure of the product to perform, and that arising from any article made using this
product.
Troubleshooting
Summary of Contents for Roland EGX-350
Для просмотра и скачивания инструкций нужно авторизоваться !
Инструкция EGX-20
Размер: 2.9 мб
Инструкция EGX-350
Размер: 2.7 мб
Уроки EndgraveStudio
Размер: 16.1 мб
Инструкция EGX-400 и EGX-600
Размер: 4.8 мб
Есть у моих хороших знакомых такой аппарат, года три назад помогал им запускать его, если так можно выразиться :).
Система команд у него простецкая, на тот момент я пользовался SolidWorks, а программы готовил в SurfCAM. А вообще, подойдет любой комплект CAD/CAM если Вы сделаете для своего станка постпроцессор.
Если не торопитесь, могу к ним зайти и попросить комплект софта которым они пользуются сейчас. Мой друг как раз и работает на нем. Несмотря на то что машинка никчемная (ИМХО), он на ней вытворяет красивые вещи Делает формы из фторопласта для заливки полиуретана.
ЗЫ Собственно, уже подзабыл. Там же система команд HPGL, модифицированная до 3Д Пишется программка и ее в командной строке например copy file.txt prn: или copy file.txt lpt: . Станок же видится виндой как принтер/плоттер.
Изменено 03.12.2010 13:21 пользователем Demon54
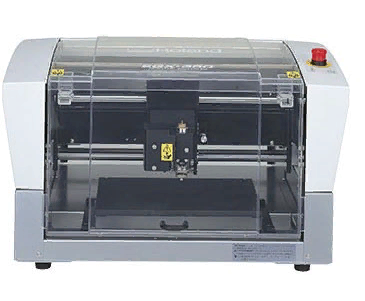
В нашем новом обзоре рассказываем о профессиональном гравере Roland EGX-350. Этот аппарат предназначен для обработки дерева, пластика и различных металлов, в том числе инструментальной стали. Одним из достоинств модели является обработка цилиндрических предметов.
Это хорошо себя зарекомендовавшая модель японского производителя, высочайшее качество работы которой могут подтвердить специалисты из разных областей. Сейчас ей на смену пришла очень похожая, но более современная, усовершенствованная модель Roland DE-3, о которой мы подробно расскажем в одном из ближайших обзоров.
Читайте статью, чтобы узнать о характеристиках и примерах использования Roland EGX-350.
Содержание
О компании Roland
Roland — знаменитая японская корпорация, подразделения которой производят различные устройства для профессионального использования. Более всего известны синтезаторы и другие музыкальные инструменты. Также под брендом Roland выпускаются промышленные станки для крупноформатной печати, для печати на виниле и аппараты для плоттерной резки. С 1986 года Roland DG разрабатывает станки с ЧПУ, преимущественно для коммерческого использования. Компания является одним из законодателей моды на рынке современного фрезерного оборудования.
На заре компьютеризации в каталоге Roland DG появились передовые высокоточные станки, и на протяжении прошедших 30 лет специалисты компании развивают существующие и осваивают новые сегменты рынка. Среди последних разработок Roland DG можно отметить фрезерные станки для стоматологии, которые предназначены для создания высокоточных челюстных моделей, а также многочисленные аппараты для применения в полиграфии, широкоформатные плоттеры и принтеры печатающие по синтетическим материалам. В авангард современной техники входят и граверы Roland.
Характеристики Roland EGX-350
Источник: https://www.rolanddg.ru/
-
Двигатель шпинделя
бесщеточный двигатель, мощность 50 Вт
Держатель инструмента
Цанговый
-
Количество осей
3
Механическое разрешение
по осям XY: 0.0025 ммпо оси Z: 0.00125 мм
-
Мощность шпинделя
50 Вт, 20000 об/мин
Перемещение
по осям XYZ 305 x 230 x 40 мм
-
Потребляемая мощность
122 Вт
Привод
шаговые двигатели
-
Программное разрешение
0,01 мм
Размер рабочего поля
305 x 230 х 40 мм
-
Скорость перемещения каретки
по осям XY: от 0.1 до 60 мм/спо оси Z: от 0.1 до 30 мм/с
Специализация
Металообрабатывающие
-
Уровень шума
при перемещении (без резки): 60 дБ или менеев режиме ожидания 40 дБ или менее(в соответствии с ISO 7779)
Условия эксплуатации
Рабочая температура 5°С — 40°СРабочая влажность 35 — 80%
-
Электропитание
AC 220÷240 В / ±10%, 50/60 Гц
Язык команд
RML-1
-
Гравировка кольца
нет
Гравировка цилиндра
есть
-
Гравировка ручек
есть
Максимальная скорость перемещения, мм/мин
X,Y — 3600, Z — 1800
-
Интерфейсы
USB или RS-232C
Точность обработки (разрешение), мм
0,01
-
Размеры, мм
616 x 591 x 393
Вес, кг
34
Описание
Источник: rolanddg.com
Roland EGX-350 предназначен для нанесения гравировки на плоские и изогнутые поверхности. Настольный аппарат позволяет гравировать по пластику, акрилу, дереву, древесным и полимерным композитам. Это его основное назначение.
Изредка и с небольшой глубиной допустима гравировка по алюминию, латуни, меди и даже нержавеющей стали, хоть аппарат для этого и не предназначен, и часто в таком режиме его эксплуатировать не стоит — это чревато ускорением износа, который приведет к потере точности и увеличению вероятности поломки.
Размеры обрабатываемой поверхности — 305×230 мм. На практике это означает, что пользователь может наносить гравировку на различные изделия: бокалы, металлические фляги, дверные таблички и т.д. Также на Roland EGX-350 можно создавать шаблоны для термического прессования страз на предметах одежды. Гравер оснащен мощным мотором, максимальная скорость вращения шпинделя составляет 20 000 об./мин. Еще один важный параметр — точность. Механическое разрешение Roland EGX-350 составляет 0,025 мм/шаг.
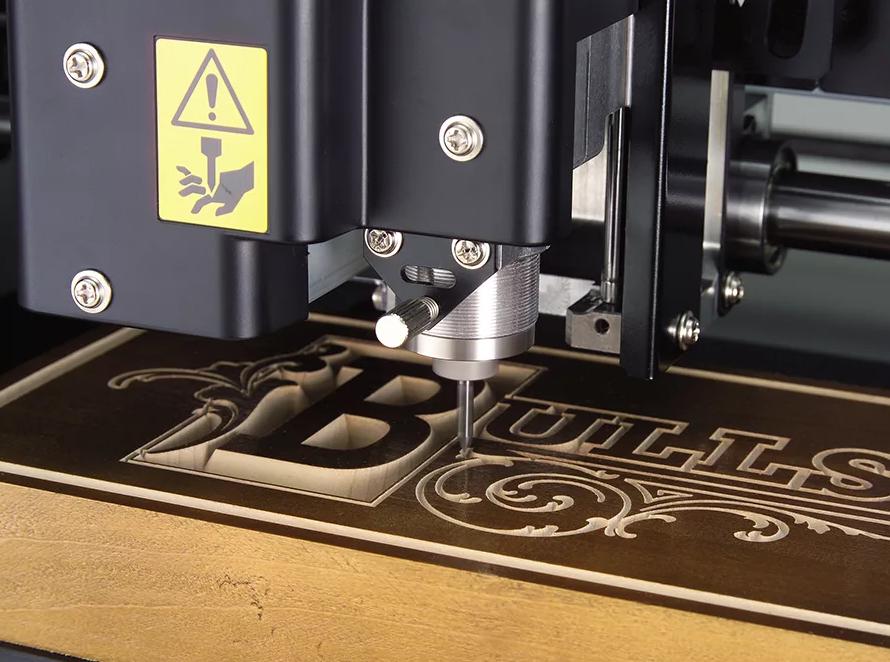
В Roland EGX-350 реализовано несколько примечательных функций. Например — в процессе работы гравер автоматически определяет положение обрабатываемой поверхности. Это, в частности, обеспечивает простой и быстрый процесс нанесения надписей и изображений на поверхности сложной формы, такие как стеклянные бокалы. Еще одна особенность устройства — режим работы V-Carving. Режим позволяет с высокой точностью обработать углы и тонкие линии. Специалисты компании Roland сравнивают процесс с ручной гравировкой, когда ремесленник точно контролирует силу нажатия и вектор приложенного усилия. Результаты работы особенно явно проявляются при гравировке шрифтов с засечками: засечки выглядят аккуратно, с острыми окончаниями, как напечатанные на бумаге.
Для работы с гравером предназначается фирменное программное обеспечение Roland Engrave Studio, о нем — далее, в разделе “ПО”.
Комплект поставки
C гравером Roland EGX-350 поставляются: шестигранник, отвертка, два гаечных ключа, вакуумный шланг, две концевые фрезы, наконечник, две цанги, силовой кабель, выносная панель управления, инструкция.
Источник: sdgmag.com
Подготовка к работе
Перед первым включением необходимо снять транспортировочные фиксаторы, расположенные внутри рабочей камеры. Пользователь подключает гравер через USB-кабель к компьютеру и подключает к граверу выносную панель управления.
Калибровка аппарата выполняется в ручном режиме. Пользователь устанавливает цангу в патрон и двумя гаечными ключами фиксирует её. Затем вручную устанавливается фиксирующий наконечник, в левый ближний угол рабочего стола кладется лист бумаги, поверх которого кладут металлическую заготовку. Через выносную панель пользователь настраивает гравер таким образом, чтобы наконечник располагался над левым ближним углом рабочего стола. Затем необходимо закрутить все фиксирующие винты на патроне.
ПО
Для работы на гравере Roland EGX-350 предназначено фирменное программное обеспечение Roland Engrave Studio. Пользователь импортирует в программу файл с проектом (DXF, EPS, AI, PDF), уточняет область для гравировки, устанавливает тип используемой фрезы, что позволяет программе рассчитать ход фрезы, и указывает габариты заготовки. При подключении станка к компьютеру выполняется настройка рабочих параметров гравера и экспорт исполняемого файла. Для контроля рабочего процесса Roland EGX-350 оснащен выносной панелью управления.
Расходные материалы
Источник: rolanddga.com
В процессе работы на гравере необходимо менять цанги и фрезы. С прибором совместимо около двух десятков фрез различного диаметра, формы и типа. Закономерно, что для гравировки необходимо сырье — заготовки, по которым будет производиться работа. Это могут быть, например, пластиковые или деревянные детали для изготовления табличек, или готовые продукты, на которые необходимо нанести лого, надпись и/или рисунок.
Пример использования
Изготовление монетного штемпеля
YouTube-пользователь Ettore Maria Bar опубликовал видеозапись изготовления монетного штемпеля. В качестве рабочего материала использована углеродистая сталь с высоким содержанием хрома X210Cr12. На видео показан процесс гравировки негативного изображения реверса.
Изготовление барельефа
На гравере Roland EGX-350 можно, например, создать барельеф по фотографии. В представленном примере, по мотивам фотоснимка была создана восковая фигура. Оцифрованную лазером фигуру преобразовали в компьютерной программе в объект для гравировки. В итоге, из металла была сделана брошь с рельефным изображением.
Гравировка на цилиндрических объектах
В 2018 году на рынке появилось опциональное устройство для Roland EGX-350 — Roland DG ROTO-350 Rotary Axis. Этот механизм позволяет зафиксировать предмет в горизонтальной плоскости и вращать его вокруг продольной оси, для нанесения гравировки на поверхность. Поскольку гравер автоматически определяет положение обрабатываемой поверхности, нанести изображение можно на предметы с переменным диаметром.
Сравнение Roland EGX-350 и Roland EGX-30a
Источник: rolanddga.com
Функциональность гравера Roland EGX-350 закономерно предопределяет сравнительно высокую стоимость аппарата. Если при выборе техники цена имеет значение, можно найти устройства дешевле, в том числе и в каталоге Roland. Например, Roland EGX-30a. Механическое разрешение гравировки — 0,01 мм/шаг. Размеры рабочего поля — 305 x 205 мм. По указанным параметрам, оба гравера сравнимы. У EGX-30a есть три принципиальных отличия от старшей модели: во-первых, это открытая конструкция, не имеющая закрытой рабочей области; во-вторых — эта модель не предназначена для гравировки по стали, даже теоретически; в-третьих, более бюджетный аппарат не предусматривает такой опции, как поворотная ось для гравировки на цилиндрических объектах.
Для многих пользователей достаточно указанных материалов. Если нанесение гравировки на сталь или гравировка на цилиндрах — вопросы принципиальной важности, то очевиден выбор Roland EGX-350.
Плюсы и минусы
Подытожим основные преимущества и недостатки Roland EGX-350:
Плюсы:
-
Обработка пластика, дерева и металлов;
-
Надежная закрытая конструкция;
-
Удобная программа для подготовки проектов;
-
Обработка цилиндрических предметов;
-
Высокая точность гравировки.
Минусы:
-
Цена;
-
Небольшая рабочая область.
Итого
Гравер Roland EGX-350 предоставляет необходимые возможности для работы с разными предметами и разными материалами. Это универсальный аппарат для специализированных компаний, которые производят различную сувенирную продукцию. Хотя это сложный высокоточный аппарат, он достаточно удобен в эксплуатации, что не в последнюю очередь связано с удобной программой для подготовки проектов Roland Engrave Studio.
Узнайте больше о возможностях усовершенствовать ваше производство интеграцией нового оборудования:
USER’S MANUAL
➢
To ensure safe usage and full performance of this product, please be sure to read through this
manual completely.
➢
To ensure immediate access whenever needed, store this manual in a safe location.
➢
Unauthorized copying, quotation, or translation of this manual, in whole or in part, without the
written approval of Roland DG Corp., is prohibited.
➢
The contents of this document and the specifications of this product are subject to change without
notice.
➢
Roland DG Corp. assumes no responsibility for any loss or damage relating to this product, regard-
less of any defect in this product or this manual. Such loss or damage, whether direct or indirect,
includes, but is not limited to, that arising from the specifications or performance of this product,
that due to failure of the product to perform, and that arising from any article made using this
product.
-
Страница 1
USER’S MANU AL ➢ T o ensure safe usage and full performance of this product, please be sure to read through this manual completely . ➢ T o ensure immediate access whenev er needed, store this manual in a safe location. ➢ Unauthorized copying, quotation, or tr anslation of this manual, in whole or in part, without the written approv al of[…]
-
Страница 2
For the USA FEDERAL COMMUNICATIONS COMMISSION RADIO FREQUENCY INTERFERENCE STATEMENT This equipment has been tested and found to comply with the limits for a Class A digital device, pursuant to Part 15 of the FCC Rules. These limits are designed to provide reasonable protection against harmful interference when the equipment is operated in a commer[…]
-
Страница 3
1 Contents T o Ensure Saf e Use ……………………………………………………………………………………………… ……….. 4 P our utiliser en toute sécurité ………………………………………………………………………………….. … 11 Important Notes on Handling and Use …………………[…]
-
Страница 4
Contents 2 4-3 Selection of the Cutter (Usage Examples) ………………………………………………………………………. …………….. 55 4-4 Cutter Installation Method 1 (With Nose Unit) ………………………………………………………………….. ……….. 56 Installing a Character Cutter (With Nose Unit) […]
-
Страница 5
Contents 3 Operations are ignored. ………………………………………………………………………………………….. ……. 101 Abnormal cutting is performed …………………………………………………………………………………….. .. 101 T he spindle doesn’t rotate during engra ving. ………….[…]
-
Страница 6
4 T o Ensur e Safe Use Improper handling or operation of this machine ma y result in injury or damage to pr oper ty . P oints which must be observed to pre vent such injury or damage ar e described as follo ws. About W ARNING and CA UTION Notices Used for instructions intended to alert the user to the risk of death or sev ere injur y should the uni[…]
-
Страница 7
T o Ensur e Safe Use 5 Incorr ect operation ma y cause injur y . W ARNING Be sure to f ollo w the operation proce- dures described in this documentation. Ne ver allo w any one unfamiliar with the usag e or handling of the machine to touch it. Incorr ect usage or handling may lead to an acci- dent. K eep childr en a wa y fr om the machine . The mach[…]
-
Страница 8
T o Ensur e Safe Use 6 This machine w eighs 34 kg (75 lb .) CA UTION Unloading and emplacement ar e opera- tions that must be perf ormed b y 2 per — sons or mor e . T asks that require undue eff or t when performed by a small number of persons ma y result in ph ysi- cal injur y . Also, if dropped, such items ma y cause injur y . CA UTION Install in[…]
-
Страница 9
T o Ensur e Safe Use 7 Dang er of pinching, entanglement, and burns. W ARNING Ne ver attempt operation while wearing a necktie, necklace, loose clothing, or glo ves. Bind long hair securel y . Such items ma y become caught in the machine, resulting in injury . Securely fasten the cutting tool and w ork- piece in place. After securing in place, mak […]
-
Страница 10
T o Ensure Safe Use 8 W ARNING Connect to an electrical outlet that com- plies with this machine’ s ratings (for v olt- ag e, frequency , and current). Incorr ect voltage or insufficient curr ent ma y cause fire or electrical shock. Ne ver use out of doors or in any location where e xposure to water or high humid- ity ma y occur . Nev er touch wi[…]
-
Страница 11
T o Ensure Safe Use 9 Important notes about the pow er cord, plug, and electrical outlet Ne ver place any object on top or subject to damage. Ne ver bend or twist with undue f orce. Ne ver pull with undue for ce . Ne ver bundle , bind, or roll up . Ne ver allo w to get wet. Ne ver mak e hot. Dust ma y cause fire.[…]
-
Страница 12
T o Ensure Safe Use 10 Caution: Sharp T ool Inadvertent contact ma y cause injur y . Caution: Pinching Hazard Be careful not to allo w the fingers to become pinched when loading media or closing cov ers. Nev er use a pneumatic blo wer . This machine is not compatible with a pneumatic blow er . Cutting waste ma y get inside the machine and cause fir[…]
-
Страница 13
11 P our utiliser en toute sécurité La manipulation ou l’utilisation inadéquates de cet appar eil peuvent causer des blessur es ou des dommag es matériels. Les précautions à pr endre pour prév enir les blessur es ou les dommages sont décrites ci-dessous. Utilisé pour a vertir l’utilisateur d’un risque de décès ou de blessu[…]
-
Страница 14
P our utiliser en toute sécurité 12 L ’utilisation incorr ecte peut causer des b lessures A TTENTION S’assurer de suivr e les procédur es d’utilisation décrites dans la documenta- tion. Ne jamais permettre à quiconque ne connaît pas le fonctionnement ou la manutention de l’appar eil de le toucher . L ’utilisation ou la manutention i[…]
-
Страница 15
P our utiliser en toute sécurité 13 Le poids de cet appar eil est de 34 kg (75 lb.) PR UDENCE Le déchargement et la mise en place doivent êtr e faits par au moins **** personnes. Les tâches qui exigent un effort trop grand si elles sont exécutées par un petit nombr e de personnes peuvent êtr e cause de blessures. La chute d’articles très[…]
-
Страница 16
P our utiliser en toute sécurité 14 Cer tains éléments peuv ent présenter un risque de pincement, d’emmêlement, de brûlure ou d’autr es dang ers. A TTENTION Ne jamais fair e fonctionner l’appar eil si on porte une cravate, un collier ou des vêtements amples. Bien attacher les che veux longs. Ces vêtements ou ces objets peuvent êtr e[…]
-
Страница 17
P our utiliser en toute sécurité 15 A TTENTION Brancher à une prise électrique conforme aux caractéristiques de cet appar eil (ten- sion, fréquence et courant). Une tension incorr ecte ou un courant insuffisant peuvent causer un incendie ou un choc électrique. Ne ver use out of doors or in any location where e xposure to water or high humid-[…]
-
Страница 18
P our utiliser en toute sécurité 16 Remarques importantes à propos du câble d’alimentation, de la fiche et de la prise électrique Ne jamais déposer aucun objet sur le câble, sur la fiche ou sur la prise car cela risque de les endommag er . Ne jamais plier ni tordr e le câble a vec une for ce excessive. Ne jamais tirer sur le câb le ou[…]
-
Страница 19
P our utiliser en toute sécurité 17 Attention : outil coupant Un contact imprudent risque d’entraîner une blessure. Attention : Risque de pincement Faire attention de ne pas coincer les doigts pendant le chargement du support ou lors de la fermeture du couver cle . Ne jamais utiliser d’air sous pression. Cet appar eil n’est pas conçu pour[…]
-
Страница 20
18 Impor tant Notes on Handling and Use This machine is a precision de vice. T o ensure the full performance of this machine, be sur e to obser ve the follo wing important points. Failure to observe these ma y not only result in loss of perf ormance, but ma y also cause malfunction or breakdo wn. This machine is a precision de vice. ➢ Handle car […]
-
Страница 21
19 About the Documentation f or This Machine Documentation Included with the Machine T he following documentation is included with the machine. User’s Manual (this man ual) T his describes important notes for ensuring safe use, and explains how to install and operate the mac hine. Be sure to read it first. It does not describe how to oper ate […]
-
Страница 22
20[…]
-
Страница 23
21 Chapter 1 Getting Star ted[…]
-
Страница 24
22 Chapter 1 Getting Star ted 1-1 Machine Highlights F eatures ➢ Engra ving and relief-cutting on a single machine T his machine achieves expressi ve, high-quality engra ving of a wide range of types, from flat engra ving to three- dimensional reliefs. ➢ Outstanding basic performance T he spacious oper ating area measuring 40 millimeters high b[…]
-
Страница 25
23 Chapter 1 Getting Star ted 1-2 P ar t Names and Functions F r ont and Interior Emergency Stop but- ton Pressing this stops operation of the machine. ☞ P . 38, «T ypes of Emer — gency Stops to Ensure Safety» Fr ont cov er T o ensure safety , opening this during engra ving or spindle rotation causes an emergency stop to occur . ☞ P .[…]
-
Страница 26
1-2 P ar t Names and Functions 24 Chapter 1 Getting Star ted Side Right side Left side P ow er switch P ow er -cord connector Expansion port This is a connector for external equipment. ☞ P . 111, “Expansion Connector” Serial connector This is for connecting a serial (RS-232C- compliant) cable. ☞ P . 32, “Connecting a Computer V ia a Com- […]
-
Страница 27
25 Chapter 2 Installation and Setup[…]
-
Страница 28
26 Chapter 2 Installation and Setup 2-1 Checking the Included Items T he following items are included with the machine. Make sure they are all present and accounted for . Retaining scre w Spring Noes-unit retainer Roland Engra ve Studio CD-R OM *1: This is for diameter -4.36 mm character or flat cutters. It cannot be used with diamond scr apers or […]
-
Страница 29
27 Chapter 2 Installation and Setup 2-2 Installation About Emplacement and Installation W ARNING Unloading and emplacement are operations that must be perf ormed b y 2 persons or more. T asks that requir e undue effort when performed by a small n umber of persons may r esult in ph ysical injur y . Also , if dropped, such items ma y cause injur y . […]
-
Страница 30
2-2 Installation 28 Chapter 2 Installation and Setup Installation Space Ensure that at least the following amount of space is a vailable. Height of Installation The height of installation should be 0.6 m (23.7 in.) or higher abov e the work floor . T his mac hine is desktop type. Please decide the height of installation so that y ou can easily reac[…]
-
Страница 31
2-2 Installation 29 Chapter 2 Installation and Setup Unpacking Retaining materials are attached to protect the mac hine from vibration during shipment. Remo ve these after emplace- ment. ➢ Remove all Retaining materials. Any that remain ma y cause faulty operation or breakdown w hen the power is switc hed on. ➢ T he Retaining materials are requ[…]
-
Страница 32
30 Chapter 2 Installation and Setup 2-3 Cable Connections Connecting the Handy P anel Make sure the power to the mac hine is switched off before attempting to connect or disconnect cables. Connecting the handy panel w hile the power is on makes the handy panel unusable. Insert fully and securel y . Handy panel Left side Cable clamp[…]
-
Страница 33
2-3 Cable Connections 31 Chapter 2 Installation and Setup Connecting the P o w er Cord W ARNING Connect to an electrical outlet that complies with this machine’s ratings (for volt- ag e and frequency). Incorr ect voltage or insufficient curr ent may cause fir e or electrical shock. W ARNING Handle the pow er cord, plug, and electrical outlet c[…]
-
Страница 34
2-3 Cable Connections 32 Chapter 2 Installation and Setup Connecting a Computer Via a Communication Cab le USB cable At this time, keep the cab le unconnected until you carry out this operation. F ollow the instructions in the separate Roland Softw are P ackage Softw are Guide to make the connection. ☞ P . 19, «About the Documentation for Th[…]
-
Страница 35
33 Chapter 2 Installation and Setup 2-4 Selecting the Langua ge Selecting the Languag e Used for T ext on the Displa y Scr een Pr ocedure ➊ Close the fr ont cover . ➋ Hold down and turn on the pow er switch. ➌ ➀ Use or to select the language. ➁ Pr ess to confirm. ON ➀➁[…]
-
Страница 36
2-4 Selecting the Languag e 34 Chapter 2 Installation and Setup ➍ Switch off the pow er switch. OFF[…]
-
Страница 37
35 Chapter 2 Installation and Setup 2-5 Befor e Star ting Operations Spindle Run-in (W arm-up) In any of the follo wing cases, perform run-in (warm-up) operation for the spindle. F ailure to do so may result in unstable spindle rotation. ➢ When using for the first time after purchase ➢ After moving the machine and reinstalling it at a different[…]
-
Страница 38
36[…]
-
Страница 39
37 Chapter 3 Basic Oper ation[…]
-
Страница 40
38 Chapter 3 Basic Operation 3-1 T ypes of Emerg ency Stops to Ensur e Saf ety Ho w to P erform an Emerg ency Stop Pr ess the Emergency Stop button. Operation stops immediately . T o Cancel an Emergency Stop Pr ocedure ➊ Switch off the pow er switch. ➋ T urn the button in the dir ection of the arr ows. Emergency Stop button OFF Emergency Stop b[…]
-
Страница 41
3-1 T ypes of Emergency Stops to Ensur e Safety 39 Chapter 3 Basic Oper ation Emerg ency Stop Due to Opening or Closing the F r ont Co v er T o ensure safety , opening the front cover during engr a ving or spindle rotation causes an emergenc y stop to occur , and the message shown below appears on the displa y screen. Operation cannot be resumed b […]
-
Страница 42
40 Chapter 3 Basic Operation 3-2 Star ting and Quitting Ho w to Star t the Machine F ollow the procedure below to start the mac hine. When startup is complete, the machine is ready for use. Pr ocedure ➊ Close the fr ont cov er . ➋ Switch on the pow er switch. A message like the one shown in the figure appears on the handy panel’ s display scr[…]
-
Страница 43
3-2 Starting and Quitting 41 Chapter 3 Basic Oper ation ➌ When the screen sho wn in the figure at left appears after appr oximately thr ee seconds, press . T he spindle head moves to a location on the inner -left side of the machine. T his operation is called “initialization. ” T he default for the language used for on-screen display is Engli[…]
-
Страница 44
42 Chapter 3 Basic Operation MENU Button Pressing this changes the menu screen. Also, pressing this when at the origin-setting menu returns the screen to the coordinate displa y view (the main menu). Indication used in this manual: Enter/Pause button T his executes a selected on-screen item or confirms a selected item or v alue. Confirming an item […]
-
Страница 45
43 Chapter 3 Basic Oper ation 3-4 Mo ving the Cutter T erms Indicating the Cutter P osition T his manual uses the following terms to indicate the position of the cutter . ➢ Coordinates Numerical v alues indicating the location of the cutter ➢ Origin T he point of origin for the coordinates ➢ X-axis coordinate T he distance along the X axis fr[…]
-
Страница 46
3-4 Mo ving the Cutter 44 Chapter 3 Basic Operation Manual Mo v ement When the screen on the handy panel displa ys any one of the messages sho wn in the figure below , you can mov e the cutter manually using the movement buttons. ☞ P . 84, «Menu List» ➢ Each single press of , , , , or performs movement b y 0.01 millimeter . ➢ Holdin[…]
-
Страница 47
3-4 Mo ving the Cutter 45 Chapter 3 Basic Oper ation Mo ving to a Specific P osition Automatically Pr ocedure ➊ Close the fr ont cover . ➋ At the main screen, press twice . ➌ Pr ess , , , or to select the mov e- ment destination. ➢ HOME T his is the location where the X- and Y -axis coordinates are both “0” (the XY origin point). When m[…]
-
Страница 48
3-4 Mo ving the Cutter 46 Chapter 3 Basic Operation ➍ Press . T he cutter moves to the selected location. When the front cover is open, the screen sho wn in the figure below is display ed, and the cutter doesn’t mo ve. After three seconds the message disappears and the screen returns to the original menu.[…]
-
Страница 49
47 Chapter 3 Basic Oper ation 3-5 Spindle Operation Star ting and Stopping Spindle Rotation T his manually starts and stops rotation of the spindle. Y ou perform the operation using the handy panel. ☞ P . 35, «Spindle Run-in (W arm-up)» Pr ocedure ➊ Close the fr ont cover . ➋ At the main screen, press and hold for one second or long[…]
-
Страница 50
3-5 Spindle Operation 48 Chapter 3 Basic Operation Fast Slow Spindle speed Adjusting the Spindle Speed T o adjust the speed of spindle rotation, turn on the handy panel. T he setting for the spindle speed can be made only on the machine. Any setting made on the computer is ig- nored.[…]
-
Страница 51
49 Chapter 3 Basic Oper ation 3-6 P ausing and Stopping Cutting P ausing and Resuming Cutting T his pauses cutting through operation using the hand y panel. T his enables you to mov e the cutter to the VIEW position and chec k the status of the workpiece, then resume cutting at the location where y ou paused operation. Pr ocedure ➊ While cutting […]
-
Страница 52
3-6 P ausing and Stopping Cutting 50 Chapter 3 Basic Operation Impor tant! Before opening the front cover w hile operation is paused, first make sure that rotation of the spindle is stopped. F or safety , opening the front cover w hile the spindle is turning makes the mac hine perform an emergenc y stop. Be sure to note that if this happens, it’ […]
-
Страница 53
51 Chapter 4 Engr aving[…]
-
Страница 54
52 Chapter 4 Engraving 4-1 Flo w of Engra ving Operations 1. Startup Switch on the po wer switch to start the machine. ☞ P . 40, “How to Start the Machine” 2. Mounting the W orkpiece Mount the workpiece to engr a ve on the table. ☞ P . 54, “Mounting a W orkpiece” T o next page ON[…]
-
Страница 55
4-1 Flo w of Engraving Operations 53 Chapter 4 Engraving 5. P erforming Engra vings When all the preparations are complete, send the engr a ving data from the computer and carry out engra ving. ☞ P . 76, “Performing Engra ving” 4. Setting the XY Origin P oint Set the engra ving origin point for the X and Y axes. ☞ P . 75, “Setting the XY […]
-
Страница 56
54 Chapter 4 Engraving 4-2 Mounting a W orkpiece W ARNING Never inadv er tently touch the computer or handy panel while performing this task. Unintended operation of the machine ma y result in injury . CAUTION Caution: cutting tool. The cutting tool is sharp . T o a void injury , ex ercise caution. When Using an Adhesiv e Sheet Affix the adhesive s[…]
-
Страница 57
55 Chapter 4 Engraving 4-3 Selection of the Cutter (Usa g e Examples) T his machine can use cutters of a wide v ariety of types that ha ve a diameter of 3.175 millimeters or 4.36 millimeters. Use an appropriate collet for the cutter’ s diameter and type. F or other cutters that can be used with the machine, contact your authorized Roland DG Corp.[…]
-
Страница 58
56 Chapter 4 Engraving 4-4 Cutter Installation Method 1 (With Nose Unit) Installing a Character Cutter (With Nose Unit) W ARNING Never inadv er tently touch the computer or handy panel while performing this task. Unintended operation of the machine ma y result in injury . W ARNING Securely fasten the cutting tool and in place. After securing in pla[…]
-
Страница 59
4-4 Cutter Installation Method 1 (With Nose Unit) 57 Chapter 4 Engraving ➋ Install the solid collet. ➀ Loosely tighten the solid collet. Insert the solid collet into the spindle unit from below , then, while holding the spindle unit immobile with a wrench, tighten loosely . Use an appropriate solid collet for the cutter’ s diameter . ➁ Full[…]
-
Страница 60
4-4 Cutter Installation Method 1 (With Nose Unit) 58 Chapter 4 Engraving 2. Set the lock le ver . Set the lock lev er at the or posi- tion. F or detailed information about the setting position for the lock lev er , refer to the page indicated below . ☞ P . 82, “The Position of the Lock Lev er” 3. Mak e the settings for spindle speed and Z-axi[…]
-
Страница 61
4-4 Cutter Installation Method 1 (With Nose Unit) 59 Chapter 4 Engraving 4. Install the cutter and mak e the setting for the cutting-in depth. ➊ Use , , , and to mov e the spindle head to the area abov e the workpiece, then press to low er the spindle head. Descent stops automatically when the tip of the nose unit touches the w orkpiece table. ?[…]
-
Страница 62
4-4 Cutter Installation Method 1 (With Nose Unit) 60 Chapter 4 Engraving ➌ Secure the cutter in place. T ighten the mounting screw for the cutter holder . ➍ Mak e the setting for the cutting-in depth. ➀ Tighten the nose unit to match the desired cutting-in depth. T he amount of extension of the cutter is the cutting-in depth. 1 scale tick = 0[…]
-
Страница 63
4-4 Cutter Installation Method 1 (With Nose Unit) 61 Chapter 4 Engraving Impor tant Notes When Using the Nose Unit Amount of Height Displacement That Can Be T racked When automatic Z control is set to “ON, ” then as long as the tip of the nose unit is in contact with the surface of the workpiece, the cutting-in depth can be kept uniform ev en i[…]
-
Страница 64
62 Chapter 4 Engraving 4-5 Cutter Installation Method 2 (No Nose Unit) Installing a Character Cutter (With No Nose Unit) W ARNING Never inadv er tently touch the computer or handy panel while performing this task. Unintended operation of the machine ma y result in injury . W ARNING Securely fasten the cutting tool and in place. After securing in pl[…]
-
Страница 65
4-5 Cutter Installation Method 2 (No Nose Unit) 63 Chapter 4 Engraving ➋ Install the solid collet. ➀ Loosely tighten the solid collet. Insert the solid collet into the spindle unit from below , then, while holding the spindle unit immobile with a wrench, tighten loosely . Use an appropriate solid collet for the cutter’ s diameter . ➁ Fully […]
-
Страница 66
4-5 Cutter Installation Method 2 (No Nose Unit) 64 Chapter 4 Engraving 3. Mak e the settings for spindle speed and Z-axis contr ol. ➊ Press sev eral times to displa y the screen shown at left. Use and to select [O THERS]. Press . ➋ Use to select “ON. ” Press to confirm. ➌ Press . Use to select “OFF . ” Press to confirm. T he message s[…]
-
Страница 67
4-5 Cutter Installation Method 2 (No Nose Unit) 65 Chapter 4 Engraving ➌ Secure the cutter in place. T ighten the mounting screw for the cutter holder . ➍ Pr ess . ➎ Use and to select [Z0]. ➏ Pr ess to confirm. T he Z-axis origin is set. ➐ Pr ess . T he main display appears. T he coordinate values for Z is set to 0. T his completes the in[…]
-
Страница 68
4-5 Cutter Installation Method 2 (No Nose Unit) 66 Chapter 4 Engraving Storag e methods for diameter -3.175 mm cutters When you w ant to perform repeated use while keeping the amount of extension of the cutter tip constant, then once you’ ve decided on the amount of extension, we recommend remo ving the cutter holder and cutter from the spindle u[…]
-
Страница 69
67 Chapter 4 Engraving 4-6 Cutter Installation Method 3 (Diamond Scraper) Installing a Diamond Scraper W ARNING Never inadv er tently touch the computer or handy panel while performing this task. Unintended operation of the machine ma y result in injury . W ARNING Securely fasten the cutting tool and in place. After securing in place, mak e sur e n[…]
-
Страница 70
4-6 Cutter Installation Method 3 (Diamond Scraper) 68 Chapter 4 Engraving ➋ Install the solid collet. ➀ Loosely tighten the solid collet. Insert the solid collet into the spindle unit from below , then, while holding the spindle unit immobile with a wrench, tighten loosely . Diameter -4.36 millimeter diamond scrap- ers cannot be used with the i[…]
-
Страница 71
4-6 Cutter Installation Method 3 (Diamond Scraper) 69 Chapter 4 Engraving 3. Mak e the settings for spindle speed and Z-axis contr ol. ➊ Pr ess several times to displa y the screen shown at left. Use and to select [O THERS]. Pr ess . ➋ Use to select “OFF . ” Pr ess to confirm. ➌ Pr ess . Use to select “ON. ” T he mac hine automaticall[…]
-
Страница 72
4-6 Cutter Installation Method 3 (Diamond Scraper) 70 Chapter 4 Engraving ➋ Secure the diamond scra per in place . T ighten the mounting screw for the cutter holder . For the amount of extension of the tip of the diamond scraper , a value of about 10 millimeters ma y work well. T his completes the installation of the cutter . Go on to page 75, ?[…]
-
Страница 73
71 Chapter 4 Engraving 4-7 Cutter Installation Method 4 (End mill) Installing a End Mill W ARNING Never inadv er tently touch the computer or handy panel while performing this task. Unintended operation of the machine ma y result in injury . W ARNING Securely fasten the cutting tool and in place. After securing in place, mak e sur e no wrenches or […]
-
Страница 74
4-7 Cutter Installation Method 4 (End mill) 72 Chapter 4 Engraving ➋ Install the collet with the attached end mill. ➀ Loosely tighten the collet with end mill. Insert the collet with end mill into the spindle unit from below , then, w hile hold- ing the spindle unit immobile with a wrench, tighten loosely . ➁ Fully tighten the collet with end[…]
-
Страница 75
4-7 Cutter Installation Method 4 (End mill) 73 Chapter 4 Engraving 3. Mak e the settings for spindle speed and Z-axis contr ol. ➊ Pr ess several times to displa y the screen shown at left. Use and to select [O THERS]. Pr ess . ➋ Use to select «ON.» Pr ess to confirm. ➌ Pr ess . Use to select «OFF .» Pr ess to confirm. T he[…]
-
Страница 76
4-7 Cutter Installation Method 4 (End mill) 74 Chapter 4 Engraving ➎ Press . ➏ Use and to select [Z0]. ➐ Press to confirm. T he Z-axis origin point is set. ➑ Press . T he main display appears. T he coordinate values for Z is set to 0. T his completes the installation of the end mill. Go on to page 75, “Setting the XY Origin P oint (Home P[…]
-
Страница 77
75 Chapter 4 Engraving 4-8 Setting the XY Origin P oint Setting the XY Origin P oint (Home P osition) T his sets the X- and Y -axis coordinates used as the origin point for cutting. This location is termed the XY origin point, whic h on this machine is called the “home position. ” On this machine, you can set the XY origin an ywhere within the […]
-
Страница 78
76 Chapter 4 Engraving 4-9 P erforming Engra ving P erforming Engra ving Make sure the following tasks ha ve all been completed, then sent the engra ving data from the computer and perform engra ving. ➢ Mounting a Workpiece ☞ P . 54, “Mounting a W orkpiece” ➢ Cutter Installation ☞ P . 56 through 71, “Cutter Installation Method 1” th[…]
-
Страница 79
4-9 P erforming Engra ving 77 Chapter 4 Engraving Adjusting the Cutter F eed Rate During Engra ving (Override) While engra ving is in progress, you can pause oper ation and adjust the feed rate for the cutter . Y ou adjust the feed rate by specifying a r atio of change relative to the present feed r ate. T his feature is called “override. ” T h[…]
-
Страница 80
4-9 P erforming Engra ving 78 Chapter 4 Engraving Ex ecuting Repeated Cutting A single set of cutting data is sa ved in the mac hine’ s memory until the next set of data is sent from the computer . Y ou can use this data to repeat the same cutting by oper ating just the machine. Note, however , that cutting data that exceeds the machine’ s memo[…]
-
Страница 81
79 Chapter 5 F eatur e refer ence[…]
-
Страница 82
80 Chapter 5 Featur e refer ence 5-1 Attaching the V acuum Adapter f or Chip Cleaning W ARNING Exer cise caution to pre vent fir e or dust explosion. T aking up fine cuttings using an ordinary vacuum cleaner ma y cause danger of fire or explosion. Check with the manufacturer of the vacuum cleaner . When the safety of use cannot be determined, never[…]
-
Страница 83
5-1 Attaching the V acuum Adapter for Chip Cleaning 81 Chapter 5 Featur e refer ence Move the spindle head to the front left of the w orkpiece table, then attach the vacuum adapter for c hip cleaning as shown in the figure. Using the v acuum adapter for c hip cleaning enables the v acuum cleaner to take up cutting waste during cutting, whic h can h[…]
-
Страница 84
82 Chapter 5 Featur e refer ence 5-2 The P osition of the Lock Le v er Y ou change the position at w hich the loc k lever is set to match the setting for automatic Z control. ☞ P . 56 through 71, “Cutter Installation Method 1” thr ough “Cutter Installation Method 4, ” and p. 85, “Submenus” Setting P osition of the Lock Lev er ➣ or W[…]
-
Страница 85
83 Chapter 5 Featur e refer ence 5-3 Surface Le v eling of the W orkpiece T ab le T his adjusts the flatness of the surface of the workpiece table by cutting the table surface to a uniform depth. T his operation is called “surface leveling” or “surfacing. ” T his can be useful in cases where rigorously precise flatness is required, suc h as[…]
-
Страница 86
84 Chapter 5 Featur e refer ence 5-4 Menu List Main Menu ☞ P . 88, “Main Menu” (Descriptions of Menu Items)[…]
-
Страница 87
5-4 Menu List 85 Chapter 5 Featur e refer ence Submenus ☞ P . 91, «Adjustment Menu» ☞ P . 89, «I/O Menu» ☞ P . 90, «Others Menu»[…]
-
Страница 88
5-4 Menu List 86 Chapter 5 Featur e refer ence Origin-setting Menu ☞ P . 92, «Origin-setting Menu» (Descriptions of Menu Items) P ause Menu ☞ P . 93, «Pause Menu» (Descriptions of Menu Items)[…]
-
Страница 89
5-4 Menu List 87 Chapter 5 Featur e refer ence Cop y Menu ☞ P . 93, «Cop y Menu» (Descriptions of Menu Items)[…]
-
Страница 90
88 Chapter 5 Featur e refer ence 5-5 Description of Men u Items Main Menu ☞ P . 84, «Main Menu» (Menu List) T his is the main screen. T his screen is display ed at startup and when executing cutting. When [AUT O Z CONTROL] is set to “ON, ” the Z-axis coordinate display changes to “ AUT O. ” When [REV OLUTION] is set to “OFF , […]
-
Страница 91
5-5 Description of Menu Items 89 Chapter 5 Featur e refer ence I/O Menu (Submen u) T his selects the communication port for communication with the computer and makes the settings for the communi- cation parameters w hen using a serial connection. When you’ re using a USB connection, simply selecting the com- munication port completes the settings[…]
-
Страница 92
5-5 Description of Menu Items 90 Chapter 5 Featur e refer ence Others Menu (Submen u) ☞ P . 85, «Submenus» T his determines whether the spindle is rotated during cutting. When this is set to “OFF , ” scribing (cutting without rotation of the spindle) is performed. ➢ Default setting: ON Set this to “ON” in cases such as w hen y[…]
-
Страница 93
5-5 Description of Menu Items 91 Chapter 5 Featur e refer ence T his selects whether the Z0, Z1, and Z2 locations are sa ved in memory on the machine. ➢ Default setting: ON ☞ P . 78,»Executing Repeated Cutting,» p.92,»Origin-setting Men u» T his displays the working time of the spindle motor . Use it as a guide for deter — m[…]
-
Страница 94
5-5 Description of Menu Items 92 Chapter 5 Featur e refer ence Origin-setting Menu ☞ P . 86, «Origin-setting Menu» XY Origin-setting Menu T his makes the setting for the X- and Y -axis origin point. On this machine, this location is called the “home position. ” ☞ P . 75, «Setting the XY Origin Point (Home P osition)» Z O[…]
-
Страница 95
5-5 Description of Menu Items 93 Chapter 5 Featur e refer ence P ause Menu ☞ P . 86, «Pause Menu» Pressing while a cutting operation is in progress pauses cutting and displa ys the screen shown in the figure at left. Y ou can select an operation suc h as resuming or quitting cutting. ☞ P . 49, » Pausing and Stopping Cutting»[…]
-
Страница 96
94[…]
-
Страница 97
95 Chapter 6 Maintenance[…]
-
Страница 98
96 Chapter 6 Maintenance 6-1 Daily Car e Cleaning W ARNING Never use a pneumatic b lo wer . This machine is not compatible with a pneumatic blow er . Cutting waste ma y get inside the machine and cause fire or electrical shock. W ARNING Never use a solv ent such as gasoline , alcohol, or thinner to perform cleaning. Doing so ma y cause fir e. W ARN[…]
-
Страница 99
6-1 Daily Car e 97 Chapter 6 Maintenance Cleaning Around the Spindle Cleaning the Spindle Nose Uninstall the nose unit, collet, and cutter , and remove any cutting w aste that has collected in areas such as the spindle nose. Cleaning Inside the Spindle Unit Co ver Detach the spindle unit co ver and clean a way an y buildup of cutting waste inside. […]
-
Страница 100
98 Chapter 6 Maintenance 6-2 Maintenance and Inspection Spindle Maintenance T he spindle unit and the belt are parts that wear out. T he replacement cycle v aries according to usage conditions, but as a general guide, y ou should replace them after every 2,000 hours of use. T his machine is provided with a feature for displa ying the total working […]
-
Страница 101
99 Chapter 7 T r oubleshooting[…]
-
Страница 102
100 Chapter 7 T roubleshooting 7-1 T r oub leshooting (Engra ving) The cutting-in depth is not unif orm (when using the nose unit). T ry revising the cutting parameters as described below . ➢ Is automatic Z control set to»ON» with the lock lev er at position or ? ☞ P . 82, «The P osition of the Lock Lev er ,» p. 85, «Su[…]
-
Страница 103
101 Chapter 7 T roubleshooting 7-2 T r oub leshooting (Operation) The po wer does not come on Hasn’ t the emergency stop button been pr essed? Pressing the emergency stop button automatically turns off the power . Cancel the emergency stop. ☞ P . 38, “T o Cancel an Emergency Stop” Initialization is not perf ormed or initialization fails Isn[…]
-
Страница 104
7-2 T roubleshooting (Operation) 102 Chapter 7 T roubleshooting The USB cable came loose during engra ving. If the machine succeeded in recei ving all the engraving data, the engra ving is carried out to the end of the operation. If the machine did not recei v e all the engr a ving data, engra ving is carried out for the portion receiv ed, and then[…]
-
Страница 105
103 Chapter 7 T roubleshooting 7-3 Responding to a Messa g e These are the most common messages that a ppear on the machine’ s displa y to prompt corr ect operation. They do not indicate any er ror . F ollow the prompts and tak e action accordingly . [Please close the co ver] Close the front cover . T o ensure safety , the machine does not oper a[…]
-
Страница 106
104 Chapter 7 T roubleshooting 7-4 Responding to an Er r or Messa g e This describes the err or messages that ma y appear on the machine’ s displa y screen, and how to take action to r em- edy the problem. If the action described here does not corr ect the problem, or if an error message not described here a ppears, contact your authorized Roland[…]
-
Страница 107
7-3 Responding to an Err or Message 105 Chapter 7 T roubleshooting [Command Not Recogniz ed] An emergency stop occur red because the machine receiv ed a command that could not be interpreted from the computer . Pressing pauses the machine. Because unin- tended operation ma y occur , we recommend using the “pause” menu displa yed on the screen t[…]
-
Страница 108
106[…]
-
Страница 109
107 Chapter 8 Appendix[…]
-
Страница 110
108 Chapter 8 Appendix 8-1 Examples of Settings f or Cutting P arameters Example Settings T his machine lets you perform cutting using a wide v ariety of workpiece materials and cutters. Howev er , the optimal cutting parameters that yield the desired cutting results for these combinations v ary widely . T he table below shows suggested cutters and[…]
-
Страница 111
109 Chapter 8 Appendix 8-2 Location of P o w er Rating and Serial Number Label P ow er Rating Use an electrical outlet that meets the re- quirements for voltage, frequenc y , and ca- pacity given here. Serial Number T his is required when you seek maintenance or support. Never peel off.[…]
-
Страница 112
110 Chapter 8 Appendix 8-3 Interface Specifications Serial Connector RS-232C specification Asynchronous, duplex data tr ansmission 4800, 9600, 19200, 38400 Odd, Even, None 7 or 8 bits 1 or 2 bits Hardw are or Xon/Xoff Standard T ransmission method T ransmission speed Parity check Data bits Stop bits Handshake Serial connector (RS-232C) NC NC NC NC […]
-
Страница 113
8-2 Interface Specifications 111 Chapter 8 Appendix Expansion Connector This cir cuit works during spindle motor r otation. Note: We are not responsible for devices connected to this connector . ◆ Be sure to use the connector within the rated range shown abo ve. ◆ Do not apply an additional voltage to the con- nector . ◆ Do not short-circuit […]
-
Страница 114
112 Chapter 8 Appendix 8-4 Main Unit Specification Dimensions of Outline Unit: mm[…]
-
Страница 115
8-4 Main Unit Specification 113 Chapter 8 Appendix W ork ar ea XY work ar ea Z work ar ea Note: Maximum workpiece thic kness when the nose unit is used is 38 mm. Note: The area in w hich engra ving can actually be performed (the engraving area) is restricted b y the length of the installed cutter and the location where the nose unit is installed, a[…]
-
Страница 116
8-4 Main Unit Specification 114 Chapter 8 Appendix W orkpiece-table Installation-ar ea Dimensional Dra wing Unit: mm[…]
-
Страница 117
8-4 Main Unit Specification 115 Chapter 8 Appendix Main Specifications W orkpiece-table size X, Y , and Z operation strok es X-, Y -, and Z-axis drive system Operating speed Software r esolution Mechanical resolution Spindle motor Spindle speed T ool chuck Loadable workpiece thickness Interface Internal memor y capacity Control command set Required[…]
-
Страница 118
116[…]
-
Страница 119
117[…]
-
Страница 120
118[…]
-
Страница 121
119[…]
-
Страница 122
120[…]
-
Страница 123
[…]
-
Страница 124
R1-070626[…]
USER’S MANUAL
➢
To ensure safe usage and full performance of this product, please be sure to read through this
manual completely.
➢
To ensure immediate access whenever needed, store this manual in a safe location.
➢
Unauthorized copying, quotation, or translation of this manual, in whole or in part, without the
written approval of Roland DG Corp., is prohibited.
➢
The contents of this document and the specifications of this product are subject to change without
notice.
➢
Roland DG Corp. assumes no responsibility for any loss or damage relating to this product, regard-
less of any defect in this product or this manual. Such loss or damage, whether direct or indirect,
includes, but is not limited to, that arising from the specifications or performance of this product,
that due to failure of the product to perform, and that arising from any article made using this
product.
На чтение 12 мин. Просмотров 1 Опубликовано
Содержание
- Гравировальный станок Roland EGX-350
- Панель управления
- Гравировка по неровным поверхностям
- Контроль перегрузок
- Программное обеспечение
- EGX-350 — гравировальный станок
- Гравировальный станок EGX-350
- Особенности гравировального станка EGX-350:
- Легкость использования
- Высокое качество гравировки
- Программное обеспечение
- Стол для гравировки
- Программа R-Wear Studio — простой инструмент для вашего бизнеса
- Безопасность и низкий уровень шума
Гравировальный станок Roland EGX-350


- Размер рабочего стола, мм 305 х 230
- Рабочие перемещения по осям 305(X) x 230(Y) 40(Z)мм
- Привода по осям X/Y/Z Шаговые двигатели
- Подача по осям В плоскости XY: 0,1 — 60 мм/с (6 — 3600 мм/мин)
- По оси Z: 0.1 — 30мм/с (6 — 1800 мм/мин)
- Программное разрешение 0.01 мм
- Механическое разрешение В плоскости XY: 0.0025 мм/шаг По оси Z: 0.00125 мм/шаг
- Двигатель шпинделя бесщеточный двигатель, мощность 50 Вт
- Частота вращения шпинделя 5’000 — 20’000 об/мин
- Крепление инструмента Цанговое (Цанги формата ZC-23)
- Интерфейс USB или COM порт (RS-232C)
- Язык команд RML-1
- Электропитание AC 220 to 240 V ±10%, 0.6 A, 50/60 Hz
- Уровень шума перемещения по осям (без резки): 60 дБ или менее
- режим ожидания 40 дБ или менее (в соответствии с ISO 7779)
- Габаритные размеры
- С закрытой крышкой: 616 x 591 x 393 мм
- С открытой крышкой: 598 x 545 x 685 мм
- Требования к окружающей среде
- Температура: 5°С — 40°С
- Влажность: 35 — 80%
Гравировальные станки серии CAMM-2- это начало абсолютно нового поколения среди подобных универсальных устройств профессионального уровня, и это неудивительно! Для сравнения, данная модель обладает более высоким уровнем мощности и производительности за счёт лучшей оборотности шпинделя. В случае, если Вам приходится работать с искривлёнными, неровными поверхностями, на помощь придёт функция регулятора глубины гравировки. К слову, станок настолько универсален, что спектр возможных для работы материалов поражает своей обширностью. Пластики, древесина, воски, акрил, цветные металлы — только представьте, как широки возможности EGX-350!
Установленная программная точность в 0,01 мм позволяет выполнять гравировку мельчайших деталей с высокой степенью детализации, что делает станок незаменимым в создании гравировальных штампов, медальонов, бирок, приборных панелей, 3D-надписей, именных табличек.
Шпиндель 50 Вт и частота вращения 20.000 оборотов в минуту делает EGX-350 идеальным в работе по изготовлению ювелирных изделий, клише, полиграфических штампов, сувенирной и рекламной продукции.
Для Вашего удобства подключение гравировального станка к компьютеру производится через USB-порт без каких-либо дополнительных настроек, а с помощью пульта управления становится возможным вносить изменения в работу шпенделя прямо в процессе обработки!
Итак, какие главные преимущества мы можем выделить из всего вышеперечисленного?
1. Доступная цена;
2. Широкий спектр материалов для использования в работе: древесина, пластики, воски, акрил, цветные металлы(алюминий, медь, латунь, магний и т.д.);
3. Превосходство уровня мощности(50Вт) и максимальной частоты вращения шпенделя (20.000 оборотов в минуту), в сравнении с предыдущей моделью;
4. Упрощение процесса и повышение качества обработки за счёт регулятора глубины гравировки и автоматического определения поверхности;
5. Безопасность, которую обеспечивает кнопка экстренной остановки машины;
6. Низкий уровень шума благодаря защитному кожуху, закрывающему зону обработки и уменьшающему шум. Так же данная функция делает процесс максимально аккуратным — кожух не даёт разлетаться стружке и пыли;
7. Востребованность и возможность применения в различных отраслях, будь то ювелирное дело, изготовление сувенирной продукции или же полиграфия;
8. USB-порт для максимально легкого и быстрого подключения;
9. Программный пакет для гравировки Roland EngraveStudio идёт в комплекте. С данным мощным программным пакетом совсем не сложно создавать уникальные сложные изображения или же просто импортировать их из векторных программ. Создание текстур, визуализация обработки, выбор стратегии и оценка времени гравировки — все это Вы получаете с EngraveStudio. Если вдруг Вы захотите использовать другой программный пакет Roland, то Вы сможете это сделать без каких-либо препятствий: здесь подходят любые профессиональные САМ-пакеты.
Панель управления
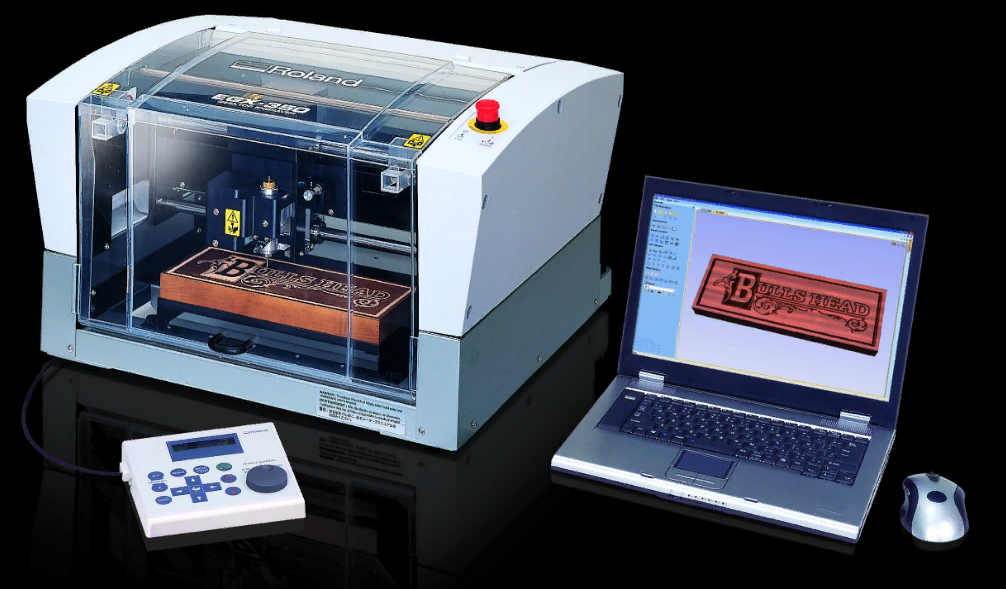
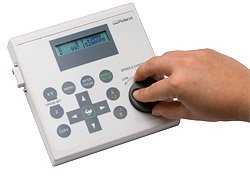
Для удобства работы, Roland EGX-350 оснащен выносным пультом управления, с которого выполняются основные операции по настройке станка: устанавливаются начальные точки, задаются обороты шпинделя, выставляется требуемый режим работы (например работа с алмазным скребком или отслеживания поверхности). Кроме того в процессе обработки с пульта можно регулировать подачу станка, ставить станок в паузу и отменять обработку. При изготовлении серийных изделий возможен запуск повторной гравировки, без использования компьютера. А чтобы вы могли отслеживать срок проведения техобслуживания в пульте есть специальный счетчик отслеживающий наработку станка.

Гравировка по неровным поверхностям
В EGX-350 предусмотрен специальный режим работы, при котором шпиндель переводится в плавающее положение, а регулятор глубины надеваемый на шпиндель отслеживает неровную поверхность, позволяя обеспечивать равномерную глубину гравировку по всей поверхности детали. Данный режим особенно актуален при выполнении гравировки и маркировки не калиброванных деталей, полученных, к примеру, методами литья и штамповки. При работе в данном режиме, регулятор глубины ползает по поверхности, а режущий инструмент выставлен на глубину гравировки. Чтобы в процессе обработки стружка не царапала заготовку, предусмотрено использование отсоса стружки. Для этого специальный вакуумный адаптер надевается на регулятор глубины и подключается к пылесосу удаляя большую часть стружки из зоны гравировки. При этом и регулятор глубины и вакуумный адаптер поставляются в комплекте со станком.
Контроль перегрузок
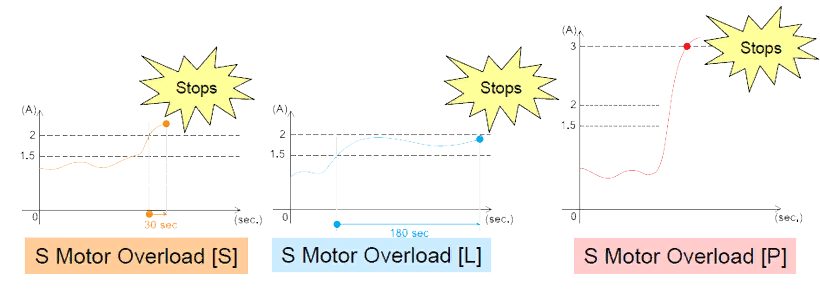
Для того чтобы минимизировать риск слома инструмента, в EGX-350 предусмотрен «умный» контроль перегрузок. Отслеживая нагрузку на двигателях, электроника выдает разные виды ошибок в зависимости от типа перегрузки. Так, к примеру, при определенного вида перегрузках станок встанет в паузу и вы сможете продолжить работу снизив подачу с пульта, в других придется полностью перезапустить обработку исправив критическую ошибку. Хотя данный подход не может полностью защитить инструмент от поломки, он значительно снижает риск повреждения инструмента и практически полностью исключает риск поломок станка от перегрузок.
Программное обеспечение
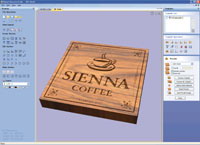
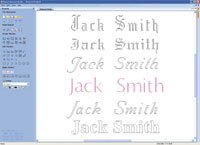
Roland EGX-350 является полностью законченным решением для гравировки и поставляется в комплекте со специально разработанной программой Roland Engrave Studio. В программе предусмотренна как возможность создавать собственные векторные изображения, так и готовить профессиональные управляющие программы для гравировки. Большой выбор стратегий обработки позволяит выполнять гравировку клише, выполнять раской, заниматься изготовлением деталей, а также использовать «однопроходные» шрифты, что является обязательным при выполнении промышленной маркировки по требованиям ГОСТ. Кроме того открытая архитектура станка, позволяет ему работать не только с родным софтом, но и с любыми сторонними CAM-программами, в том числе ArtCAM, Fusion 360, Type3 и т.д. А драйвера, поставляемые в комплекте с EGX-350, позволят выполнять гравировку из таких любых векторных программ, например из CorelDraw или AutoCAD, используя станок практически как настольный принтер.
- Станок Roland EGX-350;
- Шнур питания,;
- Регулятор глубины;
- Винт;
- Ключи: 2шт (на 10 и 17мм);
- Гравер Roland: 2шт;
- Шестигранник;
- Неразрезные цанги для крепления граверов Roland: 2шт;
- Шестигранная отвертка;
- Отсос стружки;
- Руководство пользователя (на русском языке);
- CD-ROM Roland Software;
- CD-ROM Roland EngraveStudio.
В комплекте со станком нет цанг
Источник
EGX-350 — гравировальный станок
Гравировальный станок EGX-350
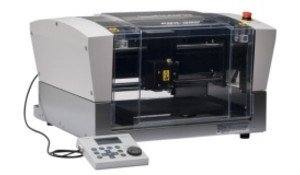 |
Гравировальный станок EGX-350EGX-350 улучшенный гравировальный станок японского производителя Roland . Станок EGX-350 превосходит предыдущую модель в 1,5 раза по частоте вращения и по мощности шпинделя. EGX-350 оснащен шпинделем мощностью 50 Вт с частотой вращения 20.000 об/мин. На шпинделе установлен регулятор глубины, который может автоматически определять гравируемую поверхность по оси Z. Это значительно упрощает гравировку неровных криволинейных поверхностей. В комплекте со станком поставляется мощная программа для 2D и 3D гравировки — Roland EngraveStudio , которая поможет вам легко и быстро выполнить даже самые сложные заказы на гравировку. За короткое время гравировальный станок EGX-350 стал незаменимым инструментом многих пользователей во всем мире. EGX-350 успешно используется для изготовления рекламной и сувенирной продукции, полиграфических клише и штампов для тиснения и конгрева, производства печатных плат, промышленной маркировки, для ювелирного производства и много другого. Особенности гравировального станка EGX-350:
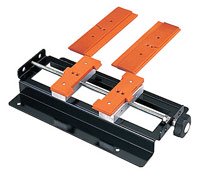
Легкость использованияВысокое качество гравировкиEGX-350 имеет сниженные вибрации и минимальное биение шпинделя. Основные механические узлы собраны на оборудовании со строгим контролем точности. Все это позволяет выполнять гравировку текста и графики с высокой точностью, а также получать высокое качество поверхности при трехмерной обработки. Программное обеспечениеEGX-350 поставляется в комплекте с мощным программным обеспечением Roland EngraveStudio для гравировки, созданной на базе широко распространенного профессионального пакета ArtCAM. EngraveStudio позволяет как создавать собственные сложные изображения, так и импортировать изображения из различных векторных программ, таких как Adobe Illustrator и CorelDraw. В EngraveStudio вы можете задавать различные типы инструментов, выбирать стратегии обработки, создавать текстуры и делать визуализацию обработки, а также оценить время гравировки до отправки задания на станок. Помимо EngraveStudio EGX-350 комплектуется и другими программами Roland. EGX-350 как и все станки Roland обладает открытой архитектурой, что позволяет его использовать не только с родным программным обеспечением, но и любыми профессиональными CAM-пакетами. Стол для гравировкиEGX-350 поставляется в комплекте со столом для гравировки, но при необходимости он может быть заменен, на вакуумный стол, центровочные тиски или Т-образный стол.
Программа R-Wear Studio — простой инструмент для вашего бизнесаС помощью технологии Roland R-Wear вы можете создавать изображения и рисунки из страз и наносить их на одежду, рекламные и сувенирные изделия. Безопасность и низкий уровень шумаКомпактные размеры позволяют установить EGX-350 на вашем рабочем столе. Защитный кожух закрывает зону обработки, уменьшает шум и не дает разлетаться стружке и пыли. Кнопка экстренной остановки гарантирует безопасное использование машины. CAMM-2 EGX-350
ZTT-35, Т-образный стол для EGX-350, EGX-300 ZV-23A, вакуумный стол для EGX-350 ZC-23, комплект цанг (3, 4, 5, 6 мм) ZS-35S Шпиндель для гравировального станка DE-3, EGX-350 Магний калиброванный 610 x 457 x 6.35 мм Магний калиброванный 650 x 500 x 4 мм Латунь калиброванная 609 x 406 x 6.35 мм ZDC-A2000 Алмазный скребок Dia=3.175x127L ZEC-A2013 Конический гравер (для пластиков) Dia=3.175x114Lx0.13W ZEC-A2013-BAL Конический гравер (для цвет. металл.) Dia=3.175x114Lx0.13W ZEC-A2013-QR Конический гравер (для пластиков) Dia=3.175x114Lx0.13W ZEC-A2025 Конический гравер (для пластиков) Dia=3.175x114Lx0.25W ZEC-A2025-BAL Конический гравер (для цвет. метт.) Dia=3.175x114Lx0.25W ZEC-A2051 Конический гравер (для пластиков) Dia=3.175x114Lx0.51W ZEC-A2076 Конический гравер (для пластиков) Dia=3.175x114Lx0.76W ZEC-A2150 Торцевой гравер (для пластиков) Dia=3.175x114Lx1.52W ZEC-A2190 Торцевой гравер (для пластиков) Dia=3.175x114Lx1.91W ZEC-A2230 Торцевой гравер (для пластиков) Dia=3.175x114Lx2.29W
С технологией нанесения страз Roland R-Wear, вы можете украшать одежду уникальными узорами и рисунками, добавляя невероятное разнообразие в линейку вашей продукции. Создавайте собственные уникальные сувениры и награды, нанося гравировку на кубки, награды, подвески, жетоны, зажигалки и многое другое с помощью фотопринтеров и гравировальных станков Roland. Гравируйте одно- и двухсторонние печатные платы, в течении нескольких минут прямо на вашем рабочем столе вместе с гравировальными станками Roland. С гравировальными станками Roland вы сможете быстро гравировать даже самые сложные клише непосредственно на вашем рабочем столе Магний калиброванный 650 x 500 x 4 мм ZEC-A2013-BAL Конический гравер (для цвет. металл.) Dia=3.175x114Lx0.13W ZS-35S Шпиндель для гравировального станка DE-3, EGX-350 Источник Эллис питерс воробей под святой кровлей Книга « 0 Элементы кровли конек для кровли Конек – это элемент 0 Эластомерик 720 для кровли Выбор материала для кровли — 0 Эластичный материал для кровли 4 буквы Выбор качественного 0 |








 С гравировальными станками серии EGX можно легко и быстро изготавливать рельефные таблички, шильдики, номерки, брелоки, указатели и многое другое.
