
Руководство
Возможности этого аппарата
Пользователя
Начало работы
Копир
Факс
Печать
Сканирование
Web Image Monitor
Добавление бумаги и тонера
Устранение неполадок
Приложение
По поводу информации, которой нет
в данном руководстве, см. файлы
HTML/PDF на поставляемом диске.
Для безопасного и правильного использования
обязательно прочтите раздел «Техника безопасности»
руководства «Прочтите это в первую очередь».


СОДЕРЖАНИЕ
Как пользоваться руководствами…………………………………………………………………………………………………… 5
Обозначения, используемые в руководствах…………………………………………………………………………….. 5
Информация по моделям……………………………………………………………………………………………………………….. 6
Наименования основных функций…………………………………………………………………………………………………..7
1. Возможности этого аппарата
Я хочу экономить бумагу………………………………………………………………………………………………………………… 9
Я хочу легко преобразовывать документы в электронные форматы……………………………………………. 10
Я хочу зарегистрировать адресатов……………………………………………………………………………………………..11
Я хочу использовать аппарат более эффективно………………………………………………………………………….12
Для копирования можно использовать разнообразные функции…………………………………………………13
Выводить данные на печать можно с применением различных функций……………………………………… 14
Сканер можно использовать в сетевой среде……………………………………………………………………………… 15
Утечки информации можно предотвратить (функции безопасности)……………………………………………16
Мониторинг состояния устройства и настройка аппарата с помощью компьютера…………………… 17
2. Начало работы
Перечень названий и функций компонентов……………………………………………………………………………….. 19
Руководство по компонентам…………………………………………………………………………………………………….19
Описание функций опций аппарата……………………………………………………………………………………………..24
Описание функций внешних опций аппарата ………………………………………………………………………….24
Описание названий и функций элементов панели управления аппарата…………………………………… 25
Изменение языка дисплея……………………………………………………………………………………………………………..28
Включение/выключение питания…………………………………………………………………………………………………. 29
Включение основного питания…………………………………………………………………………………………………. 29
Выключение основного питания………………………………………………………………………………………………..29
Размещение оригиналов……………………………………………………………………………………………………………….31
Размещение оригиналов на стекле экспонирования…………………………………………………………………31
Размещение оригиналов в автоматическом податчике документов………………………………………….31
3. Копир
Основные операции…………………………………………………………………………………………………………………….. 33
Уменьшение или увеличение оригиналов……………………………………………………………………………………..35
Предустановленный коэффициент уменьшения/увеличения…………………………………………………… 35
Масштаб……………………………………………………………………………………………………………………………………36
Автовыбор масштаба………………………………………………………………………………………………………………..37
1

Двустороннее копирование…………………………………………………………………………………………………………. 38
Объединенное копирование…………………………………………………………………………………………………………40
Объединение на одной стороне………………………………………………………………………………………………. 41
Объединение на двух сторонах……………………………………………………………………………………………….. 43
Копирование на бумагу нестандартного размера из обходного лотка……………………………………….45
Копирование на конверты…………………………………………………………………………………………………………….46
Сортировка………………………………………………………………………………………………………………………………….. 47
4. Факс
Основная процедура передачи документов (Передача из памяти)…………………………………………….. 49
Отправка оригиналов с использованием АПД………………………………………………………………………… 50
Отправка оригиналов с использованием стекла экспонирования……………………………………………51
Регистрация адресата факса…………………………………………………………………………………………………….52
Удаление адресата факса……………………………………………………………………………………………………….. 53
Отмена передачи………………………………………………………………………………………………………………………….55
Отмена передачи до сканирования оригинала……………………………………………………………………….. 55
Отмена передачи во время сканирования оригинала………………………………………………………………55
Отмена передачи после окончания сканирования (во время передачи)………………………………….56
Отмена передачи после окончания сканирования (до начала передачи)………………………………..56
Печать журнала вручную………………………………………………………………………………………………………………58
5. Печать
Быстрая установка для USB…………………………………………………………………………………………………………..59
Быстрая установка сети……………………………………………………………………………………………………………….. 60
Просмотр свойств драйвера принтера…………………………………………………………………………………………
Стандартная печать……………………………………………………………………………………………………………………… 62
С использованием драйвера PCL 6………………………………………………………………………………………….. 62
61
6. Сканирование
Основная процедура использования функции сканирования в папку………………………………………… 63
Использование сканирования в папку в среде Windows………………………………………………………….64
Регистрация папки SMB……………………………………………………………………………………………………………. 66
Удаление зарегистрированной папки SMB……………………………………………………………………………… 68
Задание пути к папке посредством ручного ввода………………………………………………………………….. 69
Основная процедура отправки отсканированных файлов по электронной почте………………………. 70
Регистрация электронной почты адресата……………………………………………………………………………….. 71
2

Удаление электронной почты адресата…………………………………………………………………………………….71
Задание адреса электронной почты посредством ручного ввода…………………………………………….72
Настройка параметров отправки………………………………………………………………………………………………… 73
Разрешение……………………………………………………………………………………………………………………………….73
Ориентация оригинала……………………………………………………………………………………………………………..73
Установки оригинала……………………………………………………………………………………………………………….. 74
Размер сканирования………………………………………………………………………………………………………………. 74
Тип файла………………………………………………………………………………………………………………………………….74
7. Web Image Monitor
Отображение начальной страницы………………………………………………………………………………………………77
8. Добавление бумаги и тонера
Загрузка бумаги в лотки для бумаги……………………………………………………………………………………………. 79
Загрузка бумаги в обходной лоток……………………………………………………………………………………………… 83
Печать из обходного лотка с помощью функции принтера……………………………………………………… 85
Загрузка двусторонней бумаги или бумаги с фиксированной ориентацией………………………………. 87
Рекомендуемые размеры и типы бумаги……………………………………………………………………………………….88
Плотная бумага…………………………………………………………………………………………………………………………93
Конверты……………………………………………………………………………………………………………………………………94
Добавление тонера……………………………………………………………………………………………………………………… 97
Передача факсов или отсканированных документов при отсутствии тонера…………………………..99
Утилизация отработанного тонера……………………………………………………………………………………………99
9. Устранение неполадок
Индикаторы……………………………………………………………………………………………………………………………….. 101
Звук с панели………………………………………………………………………………………………………………………………102
Действия при возникновении неполадок во время эксплуатации аппарата……………………………… 103
Вывод сообщений на панели управления………………………………………………………………………………….. 107
Сообщения, отображаемые при использовании функции копирования………………………………..107
Сообщения, выводимые при использовании функции факса………………………………………………… 108
Сообщения, выводимые при использовании функции принтера…………………………………………….110
Сообщения, выводимые при использовании функции сканера………………………………………………115
Сообщения, выводимые на экран компьютера…………………………………………………………………………..120
Сообщения, выводимые при использовании функции сканера………………………………………………120
3

10. Приложение
Товарные знаки…………………………………………………………………………………………………………………………..127
ИНДЕКС…………………………………………………………………………………………………………………………………… 129
4

Как пользоваться руководствами
Обозначения, используемые в руководствах
В данном руководстве используются следующие обозначения:
Обозначает информацию, на которую следует обратить внимание при эксплуатации аппарата, а
также сведения о наиболее вероятных причинах замятия бумаги, повреждения оригиналов или
потери данных. Обязательно прочитайте эти пояснения.
Обозначает дополнительные сведения о функциях аппарата и указания по устранению ошибок
пользователя.
Этот символ располагается в конце разделов. Он обозначает места, где содержится
дополнительная информация по теме.
[ ]
Обозначает названия клавиш, отображаемых на дисплее изделия или на панелях управления.
Отображает последовательность нажатия клавиш на панели управления.
Пример:
Выберите [Система] Нажмите [OK]
(Выберите [Система] и нажмите клавишу [[OK]].)
(главным образом страны Европы и Азии)
(главным образом страны Северной Америки)
Различие в функциях региона A и региона Б обозначается двумя символами. Прочтите
информацию, обозначенную символом, соответствующим региону, в котором используется
данная модель. Для получения более подробной информации о символе, относящемся к
используемой модели, см. стр. 6 «Информация по моделям».
5

Информация по моделям
В данной главе описано, каким образом можно определить регион, к которому относится
аппарат.
На задней стороне аппарата имеется наклейка, расположение которой указано ниже. На
наклейке приведены данные, определяющие регион, к которому относится аппарат. Прочтите
данные на наклейке.
Следующая информация зависит от региона. Прочтите информацию под символом, который
соответствует региону использования аппарата.
(главным образом страны Европы и Азии)
Если на этикетке имеется следующая информация, устройство относится к региону A:
• КОД XXXX -27
220-240 В
•
(главным образом страны Северной Америки)
Если на наклейке имеется следующая информация, аппарат относится к региону Б:
• КОД XXXX -17
120-127 В
•
• Размеры в этом руководстве даются в двух системах единиц измерения: метрической и
дюймовой. Если аппарат относится к региону A, используется метрическая система. Если
аппарат относится к региону Б, используется дюймовая система.
6

Наименования основных функций
В данном руководстве основные функции аппарата обозначаются следующим образом:
• Устройство автоматической подачи документов АПД
7

8
1. Возможности этого аппарата
Найти описание можно путем ввода желаемого действия.
Я хочу экономить бумагу
Печать многостраничных документов на обеих сторонах листа (Дупл.копия)
См. руководство «Копирование» .
Печать многостраничных документов на одном листе (Комбинир.)
См. руководство «Копирование» .
Печать полученных факсов на обеих сторонах листа (2-стороняя печать)
См. «Факс» .
Отправка файлов с компьютера без выполнения их печати (LAN-Fax)
См. «Факс» .
9

1. Возможности этого аппарата
Я хочу легко преобразовывать документы в
электронные форматы
Отправка файлов сканирования
См. руководство «Сканирование» .
Хранение отсканированных файлов в общей папке
См. руководство «Сканирование» .
Хранение отсканированных файлов на носителях
См. руководство «Сканирование» .
10
Я хочу зарегистрировать адресатов
Я хочу зарегистрировать адресатов
Использование панели управления для регистрации адресатов в блоке Адрес.книга
См. руководство «Подключение аппарата/Параметры системы» .
Загрузка зарегистрированных в устройстве адресатов в список адресатов драйвера ЛВСФакс
См. руководство «Факс» .
11
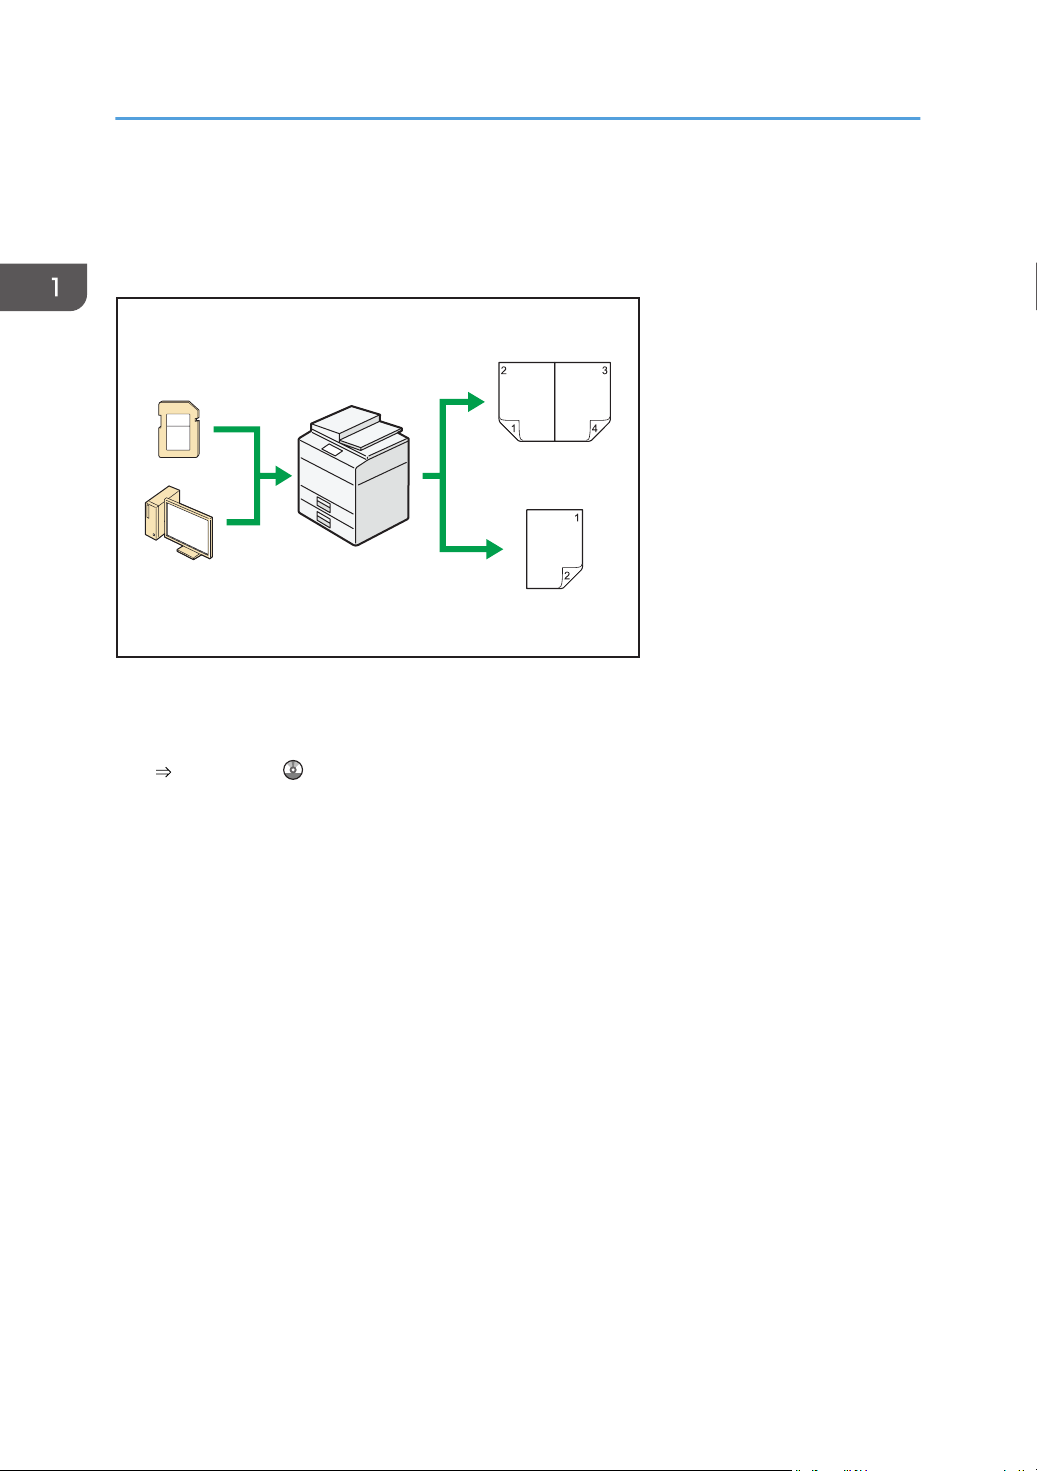
1. Возможности этого аппарата
Я хочу использовать аппарат более
эффективно
Регистрация часто используемых параметров печати в драйвере принтера
См. руководство «Печать» .
Замена исходных настроек драйвера принтера на часто используемые параметры
печати
См. руководство «Печать» .
12

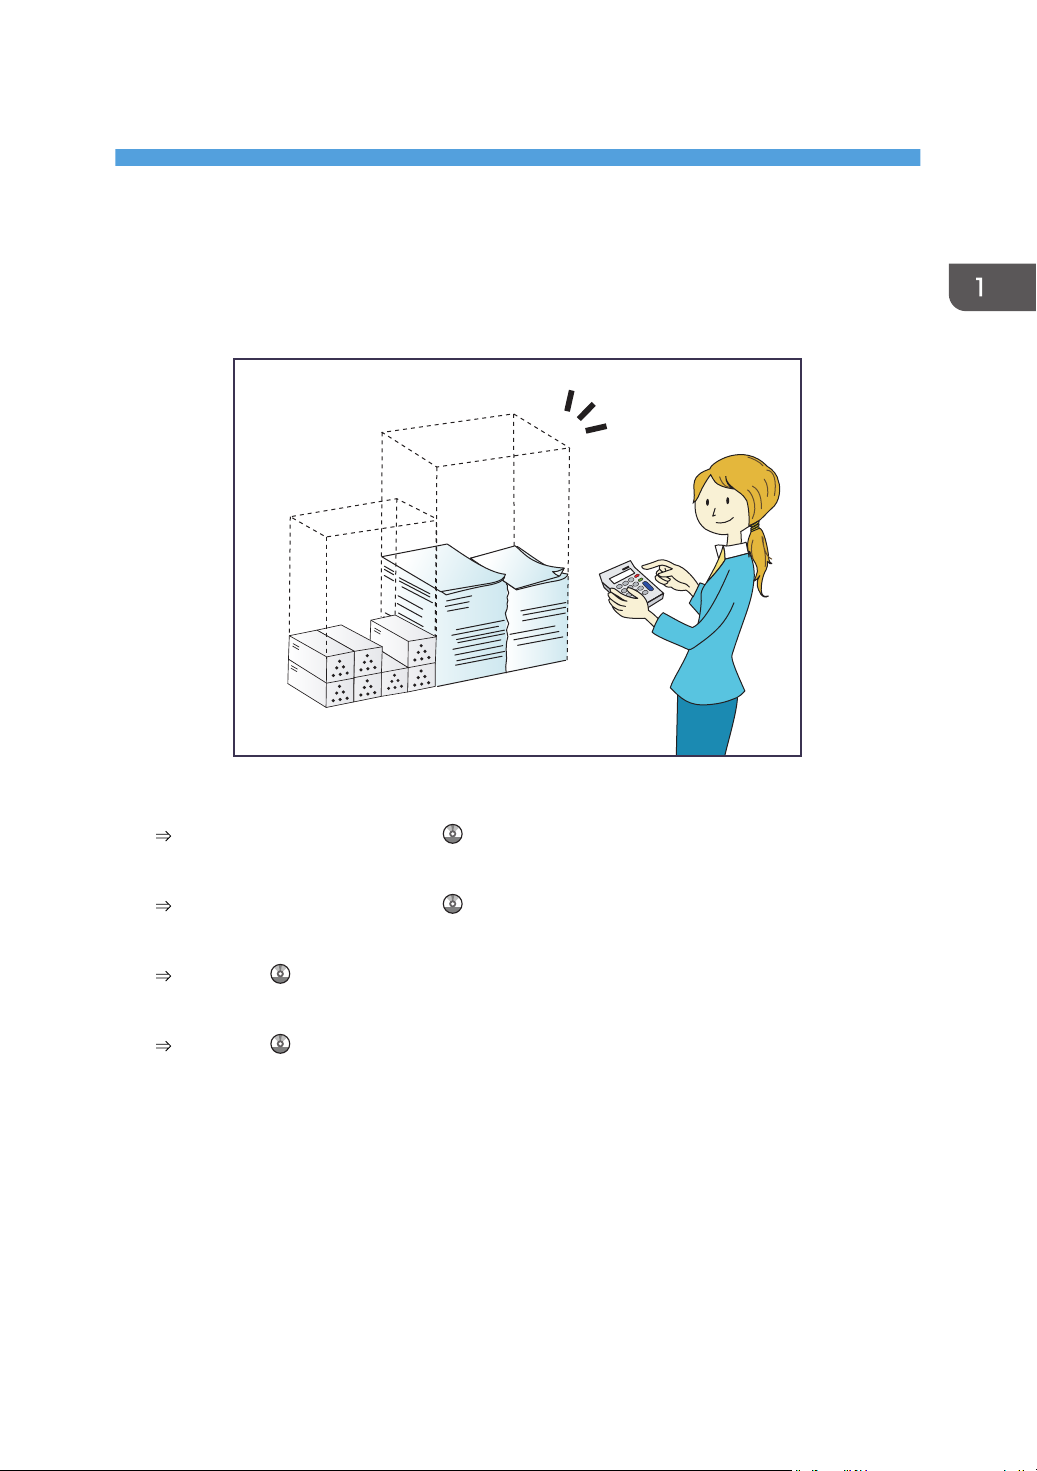
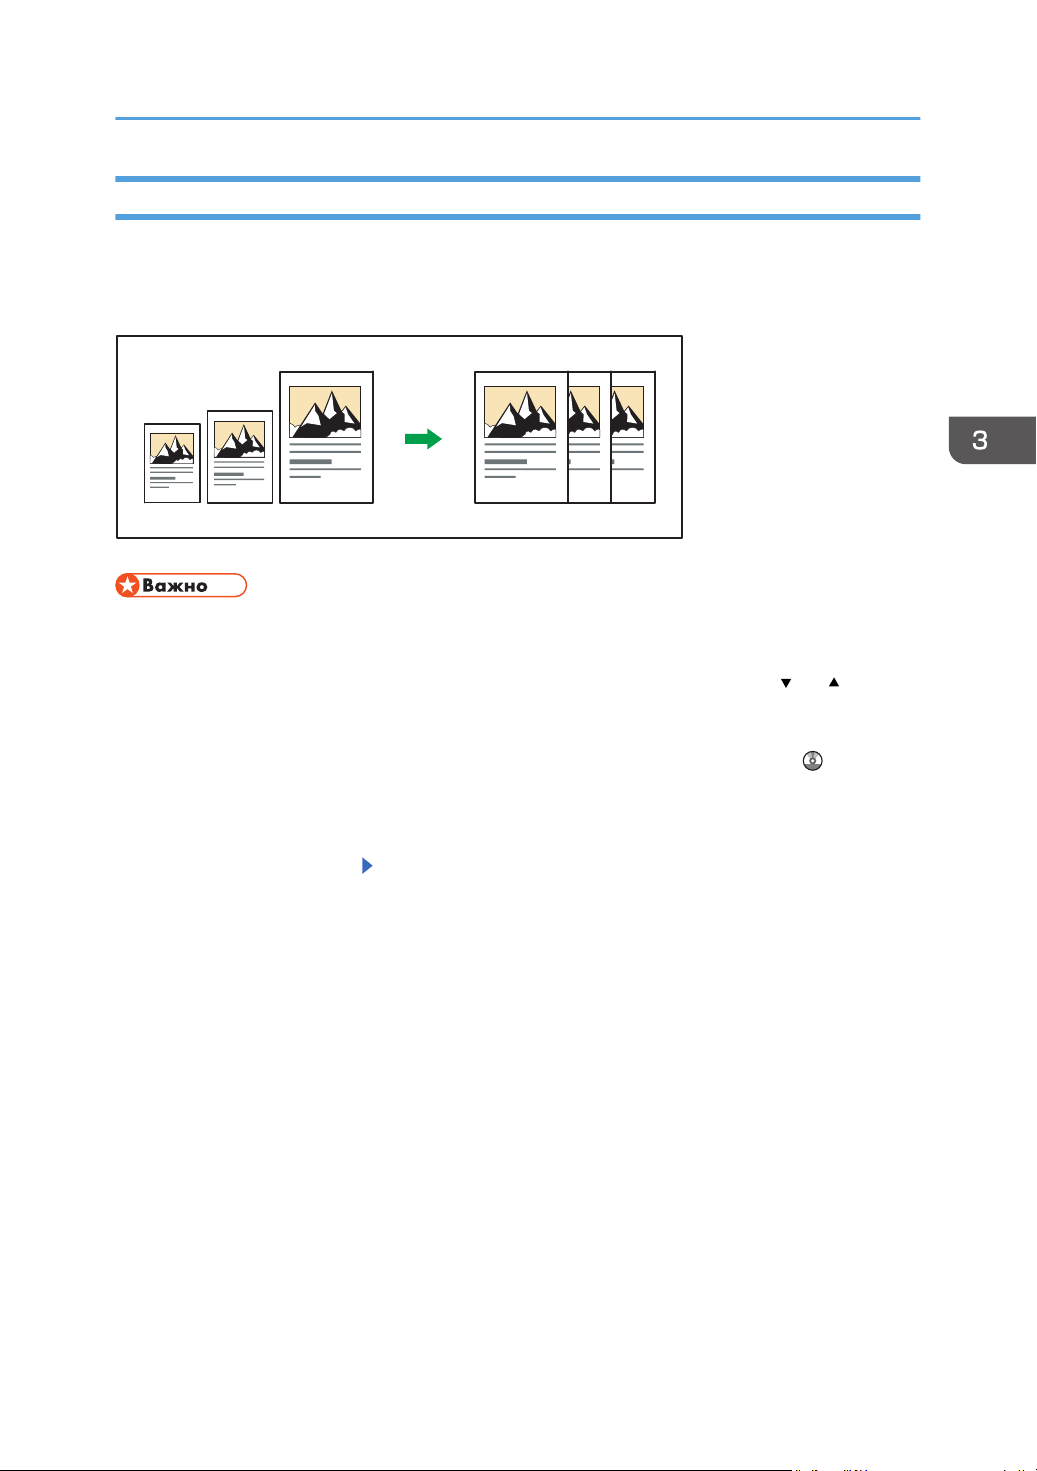
Для копирования можно использовать разнообразные функции
Для копирования можно использовать
разнообразные функции
• Копируемое изображение можно уменьшить или увеличить. С помощью функции Авто
ум./Ув. аппарат автоматически вычисляет формат печати, соотнося размеры оригиналов и
выбранного типа бумаги.
См. руководство «Копирование» .
• Такие функции копирования, как Двуст.печ. и Объедин., позволяют экономить бумагу
посредством копирования нескольких страниц на один лист.
Для получения более подробной информации о дуплексном копировании см. руководство
«Копирование» .
Для получения более подробной информации об объединенном копировании см.
руководство «Копирование» .
• Можно копировать на различные типы бумаги, в частности, на конверты.
См. руководство «Копирование» .
• Есть возможность сортировки копий.
См. руководство «Копирование» .
13
1. Возможности этого аппарата
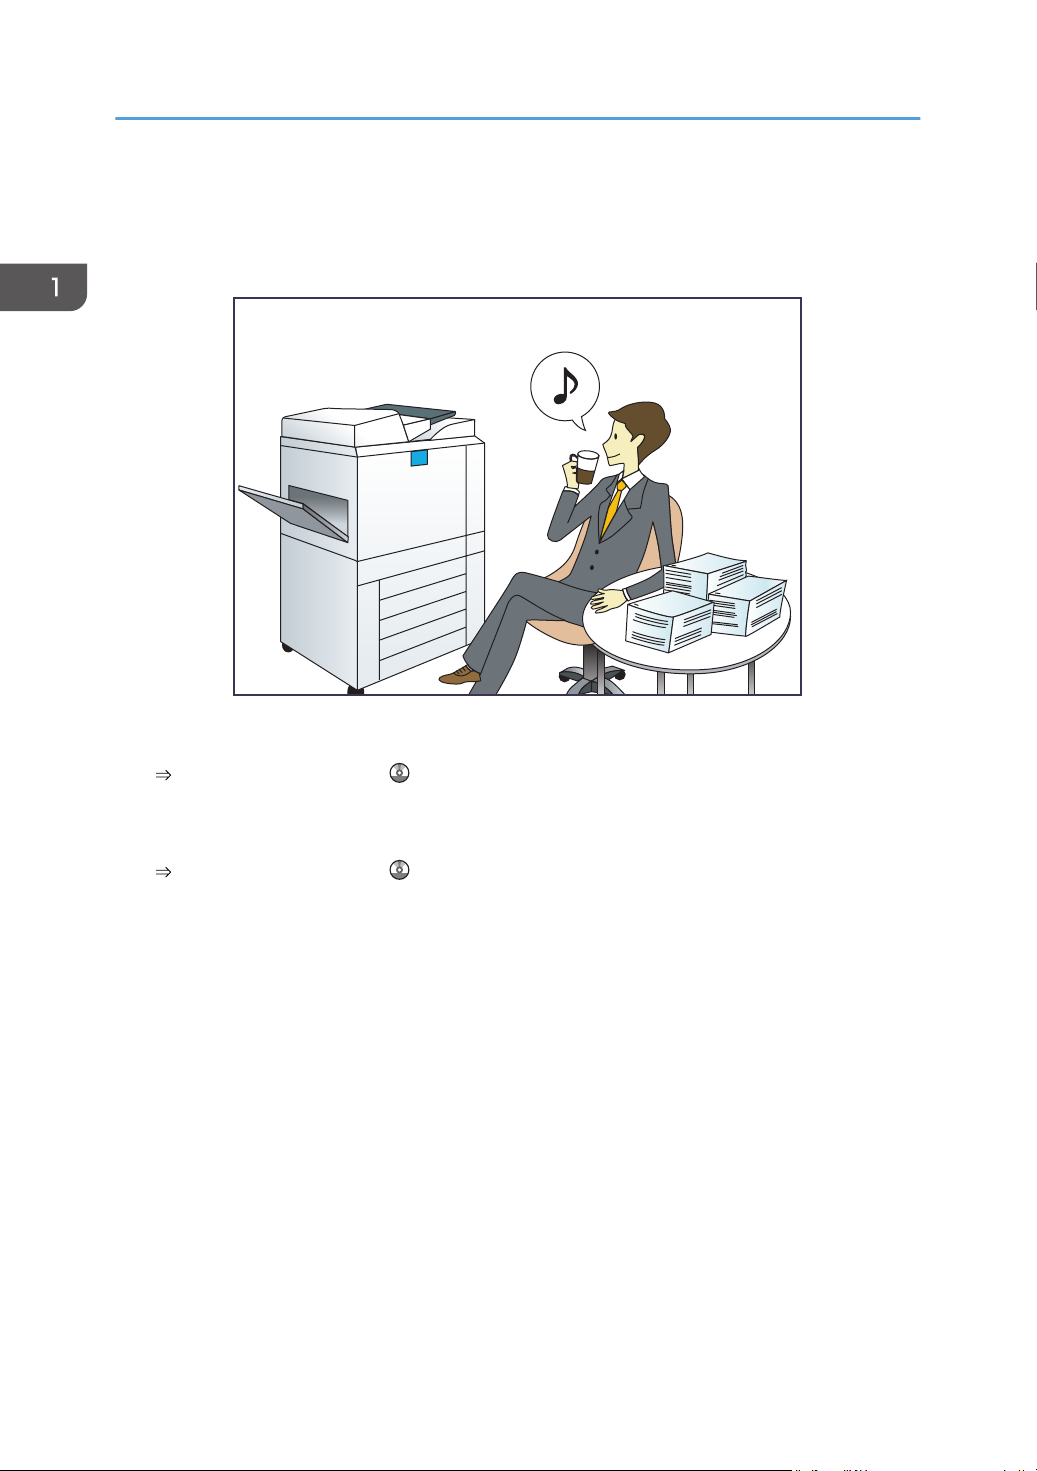
Выводить данные на печать можно с
применением различных функций
• Данное устройство поддерживает локальные и сетевые подключения.
• Есть возможность сортировки напечатанных листов.
См. «Печать» .
14
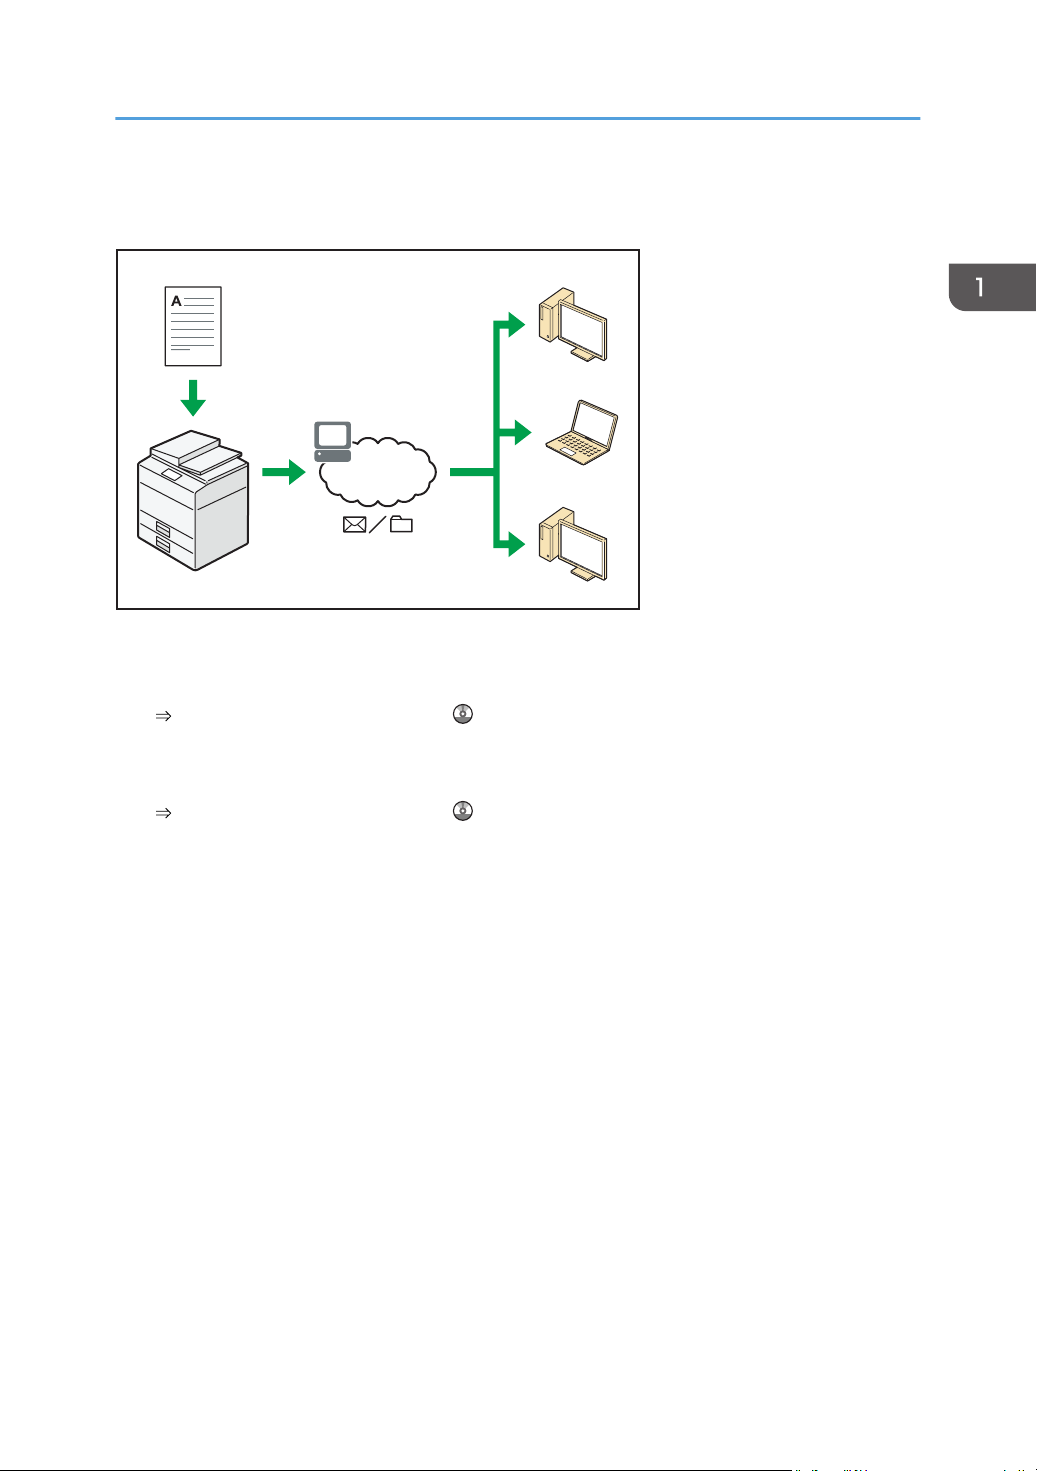
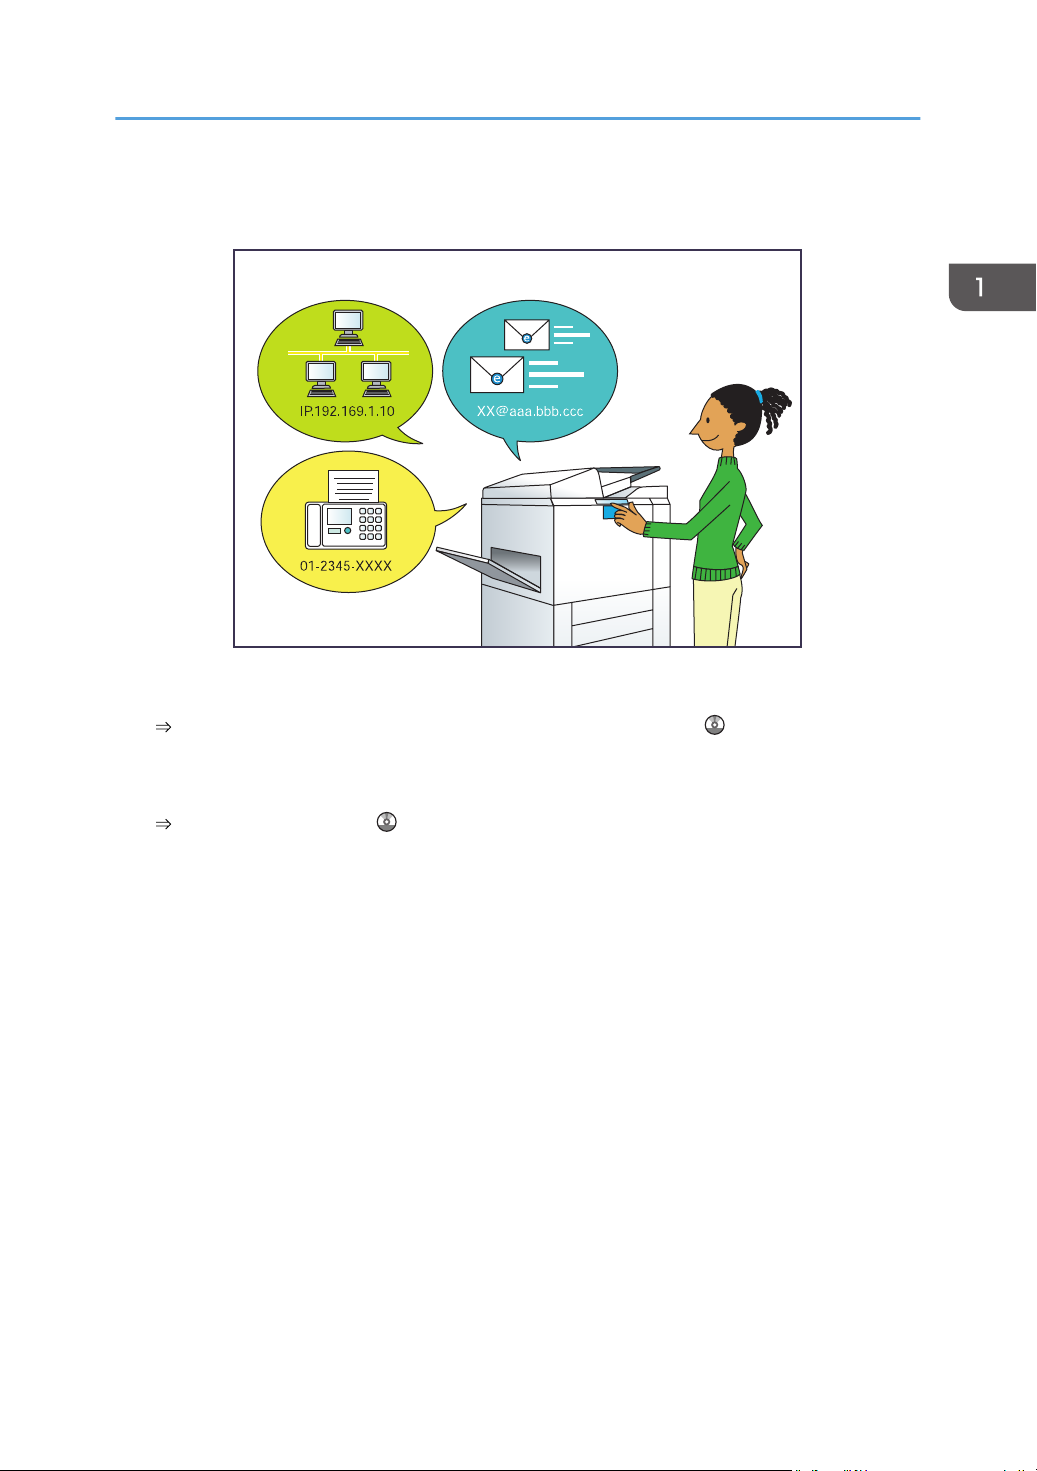
Сканер можно использовать в сетевой среде
Сканер можно использовать в сетевой среде
• Отсканированные файлы можно отправить по электронной почте на указанный адрес
(отправка отсканированных файлов по электронной почте).
См. руководство «Сканирование» .
• Отсканированные файлы можно отправлять непосредственно в папки (отправка
отсканированных файлов с помощью функции сканирования в папку).
См. руководство «Сканирование» .
15
1. Возможности этого аппарата
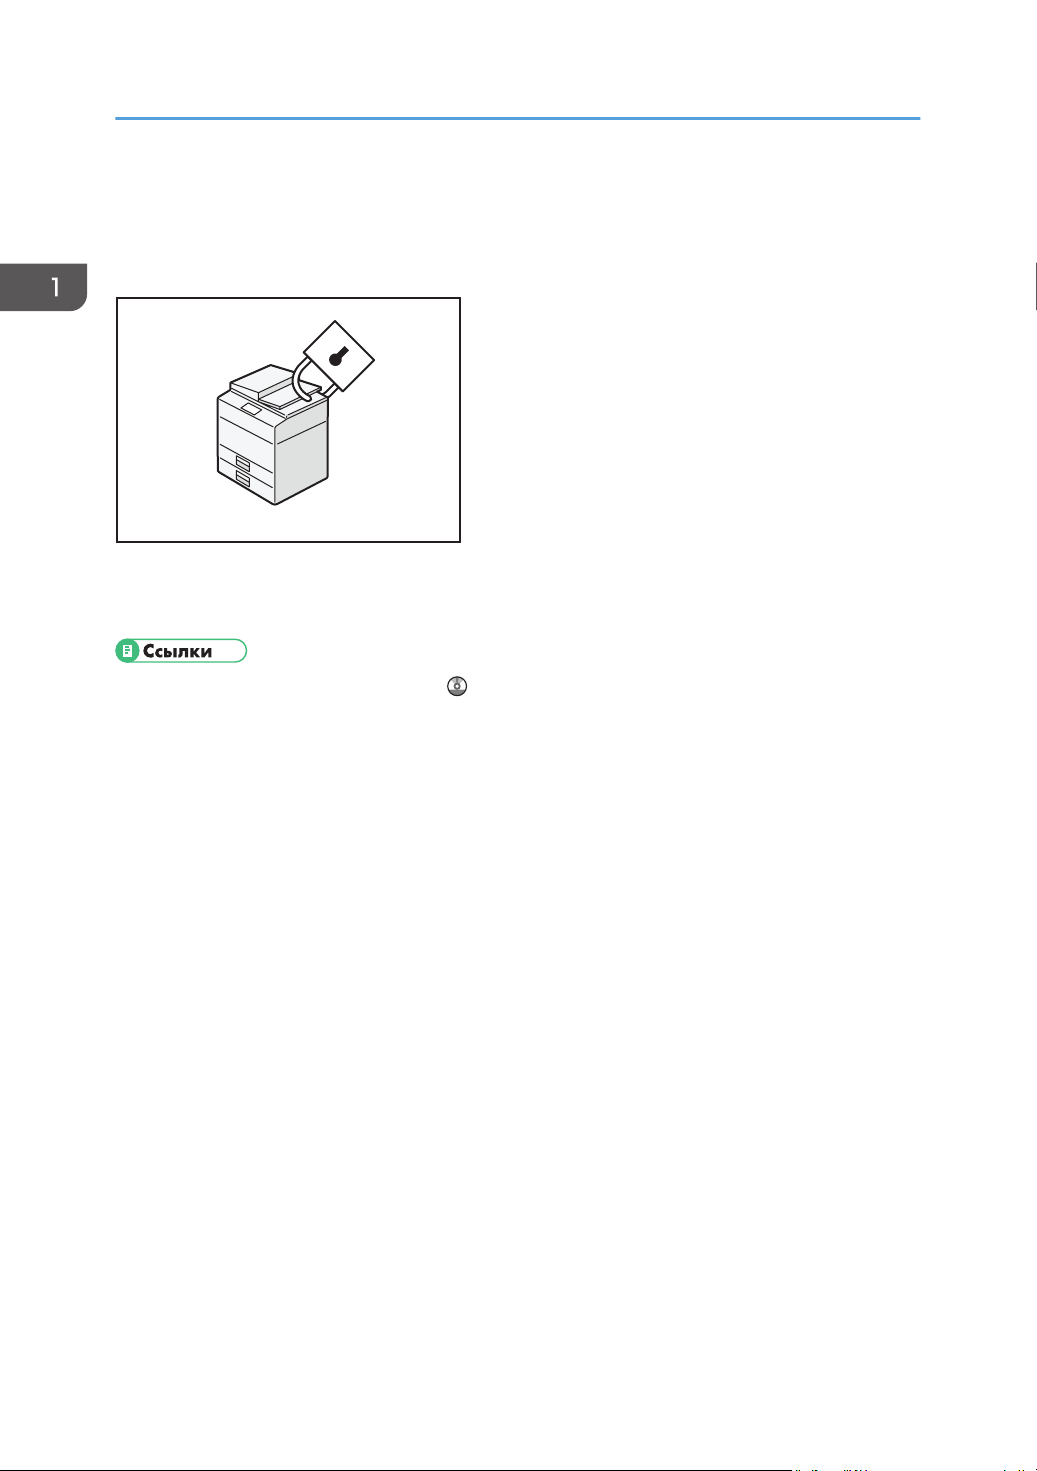
Утечки информации можно предотвратить
(функции безопасности)
• Кроме того, с помощью политики паролей можно предотвратить несанкционированный
доступ через сеть.
• См. «Руководство по безопасности» .
16
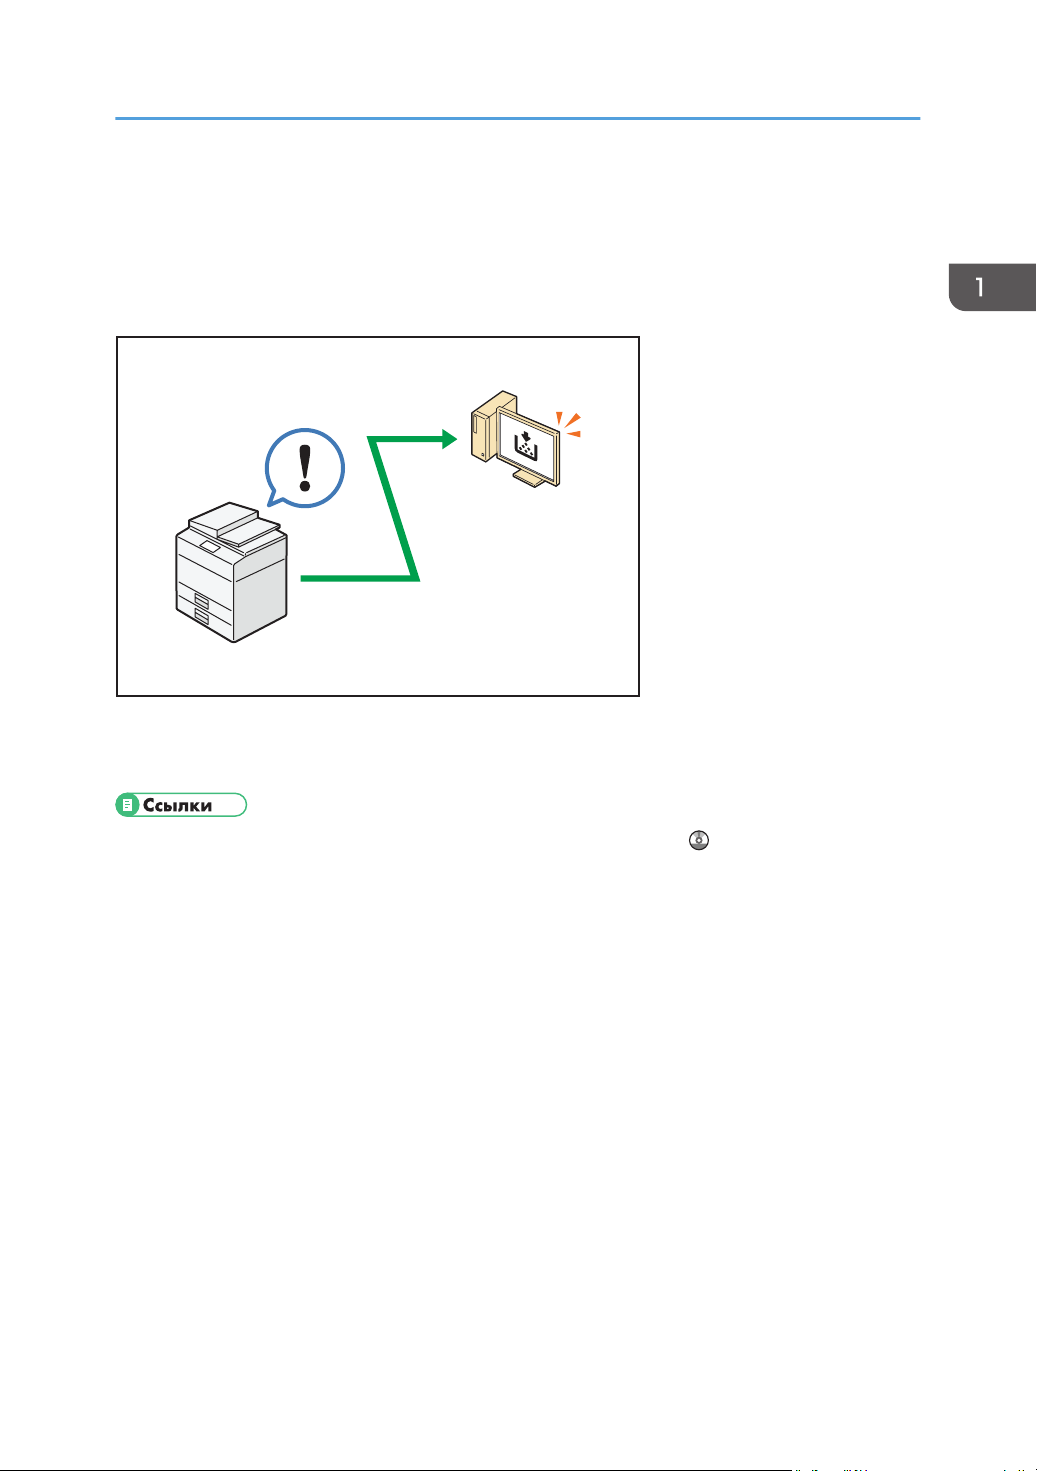
Мониторинг состояния устройства и настройка аппарата с помощью компьютера
Мониторинг состояния устройства и
настройка аппарата с помощью компьютера
С помощью Web Image Monitor можно проверить состояние аппарата и изменить настройки.
Можно проверить, в каком лотке заканчивается бумага, зарегистрировать информацию в Адрес.
книга, задать параметры настройки сети и системы.
• См. руководство «Подключение устройства/Настройки системы» .
• Cм. справку по Web Image Monitor.
17

1. Возможности этого аппарата
18
2. Начало работы
22
20
12
14
13
12 34
56
8
7
9
12
11
10
21
17
18
15
16
19
DBH030
В этом разделе описывается начало работы с данным устройством.
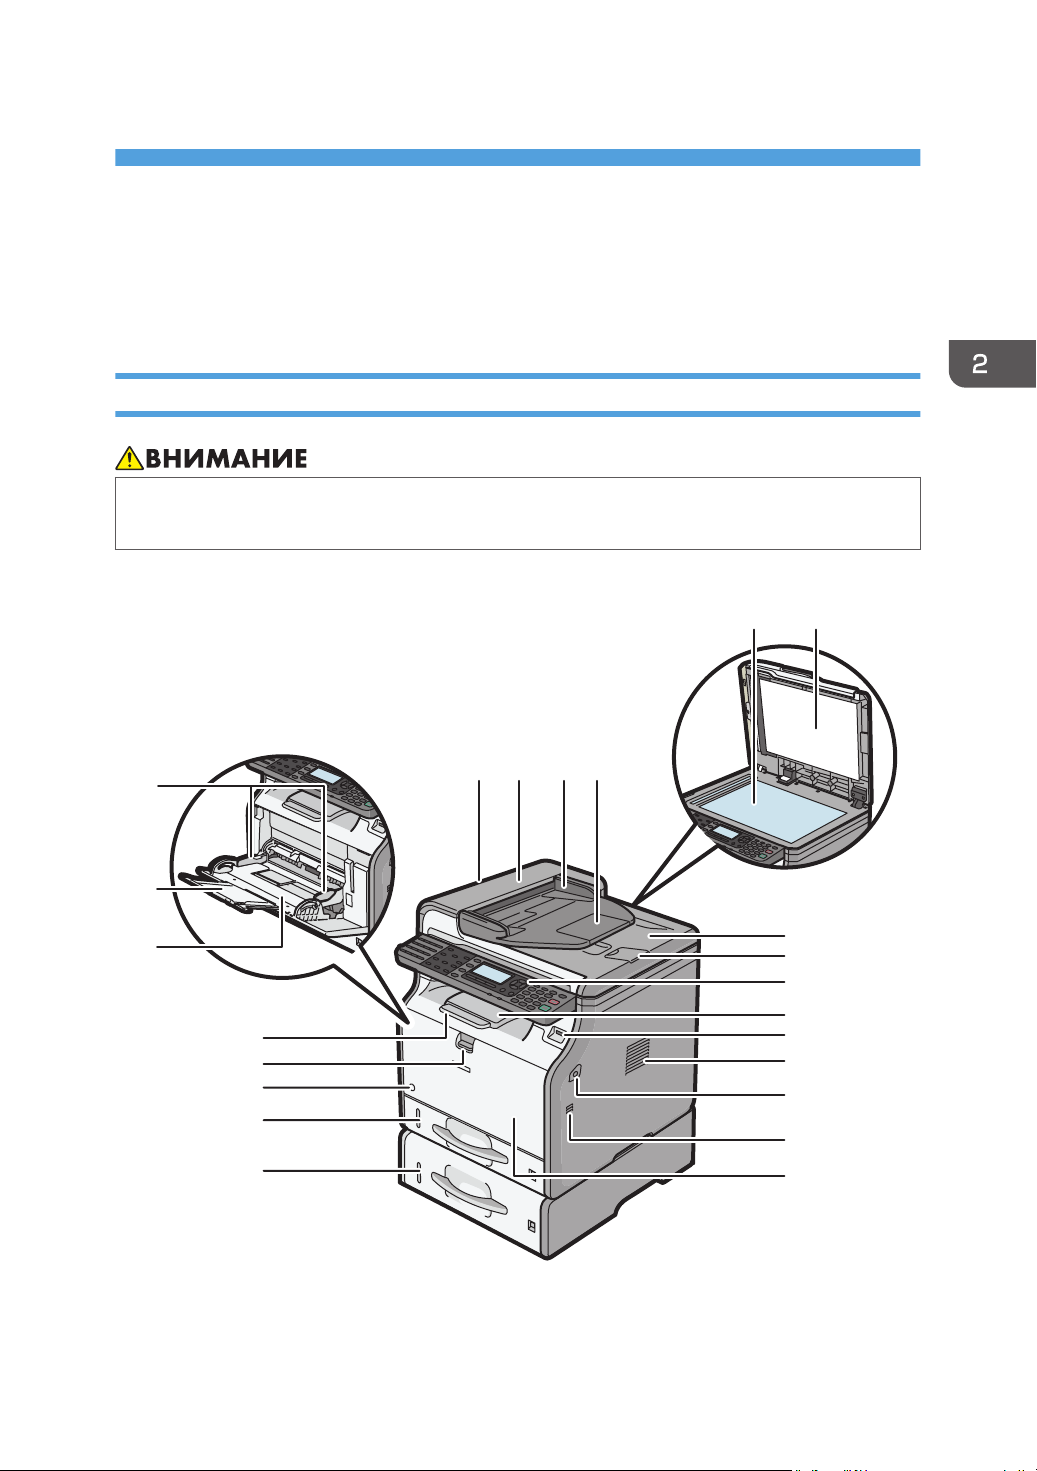
Перечень названий и функций компонентов
Руководство по компонентам
• Не закрывайте вентиляционные отверстия устройства. Это может привести к возгоранию в
результате перегрева внутренних частей устройства.
Наружная часть: вид спереди
19

2. Начало работы
1. АПД
Опустите устройство АПД на оригиналы, помещенные на стекло экспонирования.
При загрузке стопки оригиналов в АПД документы будут автоматически подаваться один за одним.
2. Крышка АПД
Откройте эту крышку, чтобы извлечь оригиналы, замятые в устройстве автоматической подачи
документов (АПД).
Входной лоток для устройства АПД
3.
Помещайте сюда стопки оригиналов.
4. Удлинитель лотка АПД
Выдвигайте удлинитель, помещая во входные лотки АПД бумагу, размер которой превышает формат
A4.
5. Стекло экспонирования
Сюда помещаются оригиналы лицевой стороной вниз.
6. Крышка стекла экспонирования
Откройте эту крышку, чтобы поместить оригинал на стекло экспонирования.
7. Выходной лоток для устройства АПД
Сюда выводятся оригиналы, отсканированные с помощью АПД.
8. Ограничитель для АПД
Вытяните этот ограничитель, чтобы предотвратить выпадение оригиналов.
9. Панель управления
См. стр. 25 «Описание названий и функций элементов панели управления аппарата».
10. Стандартный лоток
Сюда выводятся копии, напечатанные документы и факсимильные сообщения.
11. Разъем для носителей
Вставьте флэш-накопитель USB.
12. Вентиляционные отверстия
Предотвращают перегрев устройства.
13. Кнопка открытия передней крышки
Нажмите эту кнопку, чтобы открыть переднюю крышку.
14. Передняя крышка
Откройте для доступа к внутренним узлам аппарата и извлечения замятой бумаги.
Откройте для замены тонер-картриджа и блока барабана.
15. Нижний лоток для бумаги (опция)
Место для загрузки бумаги.
16. Лоток 1
Место для загрузки бумаги.
20
DBH031
1
3
4
5
6
8
7
9
10
2
Перечень названий и функций компонентов
17. Основной переключатель питания
Чтобы использовать аппарат, необходимо включить главный переключатель. Если он выключен,
включите выключатель.
18. Ручка открытия обходного лотка
Нажмите на эту ручку для открытия обходного лотка.
Удлинение лотка
19.
Вытяните этот ограничитель, чтобы предотвратить выпадение бумаги.
20. Обходной лоток
Используется для копирования или печати на плотной бумаге, прозрачных пленках, конвертах и
бумаге для этикеток (наклеек).
21. Удлинитель обходного лотка
Вытяните данный удлинитель при загрузке бумаги формата А4
, 81/2 × 11 или большего размера в
обходной лоток.
22. Направляющие для бумаги
При укладке бумаги в обходной лоток выровняйте направляющие по листам бумаги.
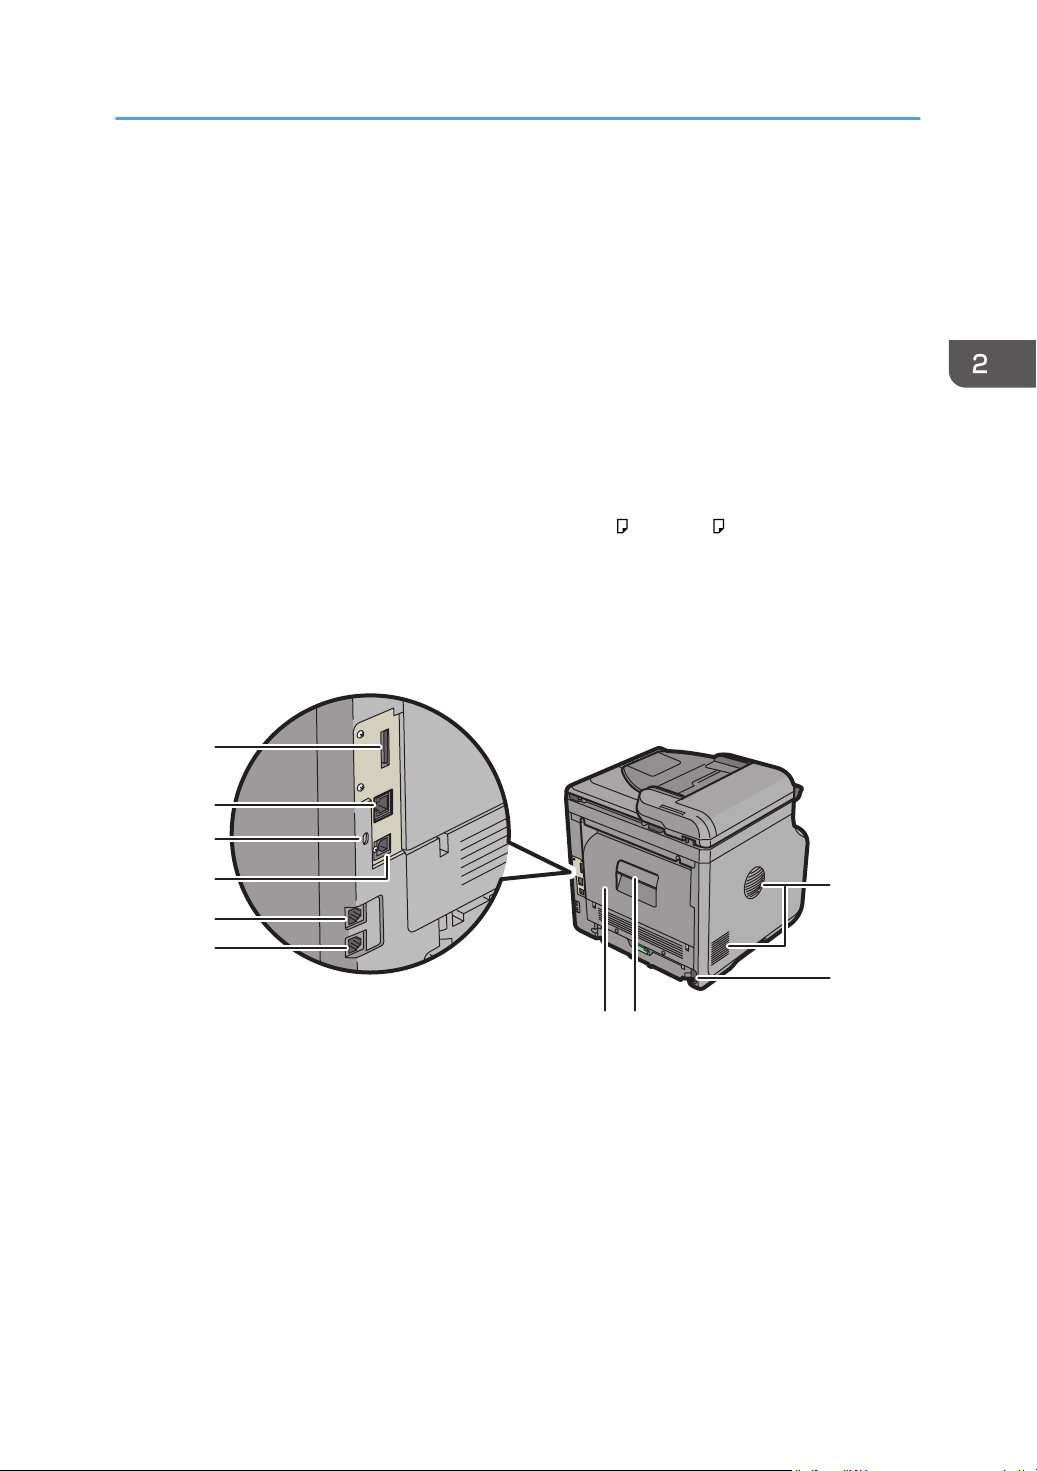
Наружные компоненты: вид сзади
1. Вентиляционные отверстия
Предотвращают перегрев устройства.
2. Гнездо электропитания
Подключите шнур питания к аппарату. Вставьте другой конец в розетку.
Ручка открытия задней крышки
3.
Потяните рычаг, чтобы открыть заднюю крышку.
4. Задняя крышка
Откройте для доступа к внутренним узлам аппарата и извлечения замятой бумаги.
21
2. Начало работы
Откройте здесь, чтобы заменить блок термозакрепления.
5. Разъем для внешнего телефона
Для подключения внешнего телефона.
Разъем линейного интерфейса
6.
Для подключения телефонной линии.
7. Порт USB 2.0 [тип B]
Используйте USB-кабель для подключения аппарата к компьютеру.
8. Гнездо блокировочного тросика
Присоедините тросик для предотвращения кражи.
9. Порт Ethernet
Подключите аппарат к сети при помощи сетевого кабеля.
10. Разъем
Может быть подключен дополнительный блок интерфейса беспроводной локальной сети.
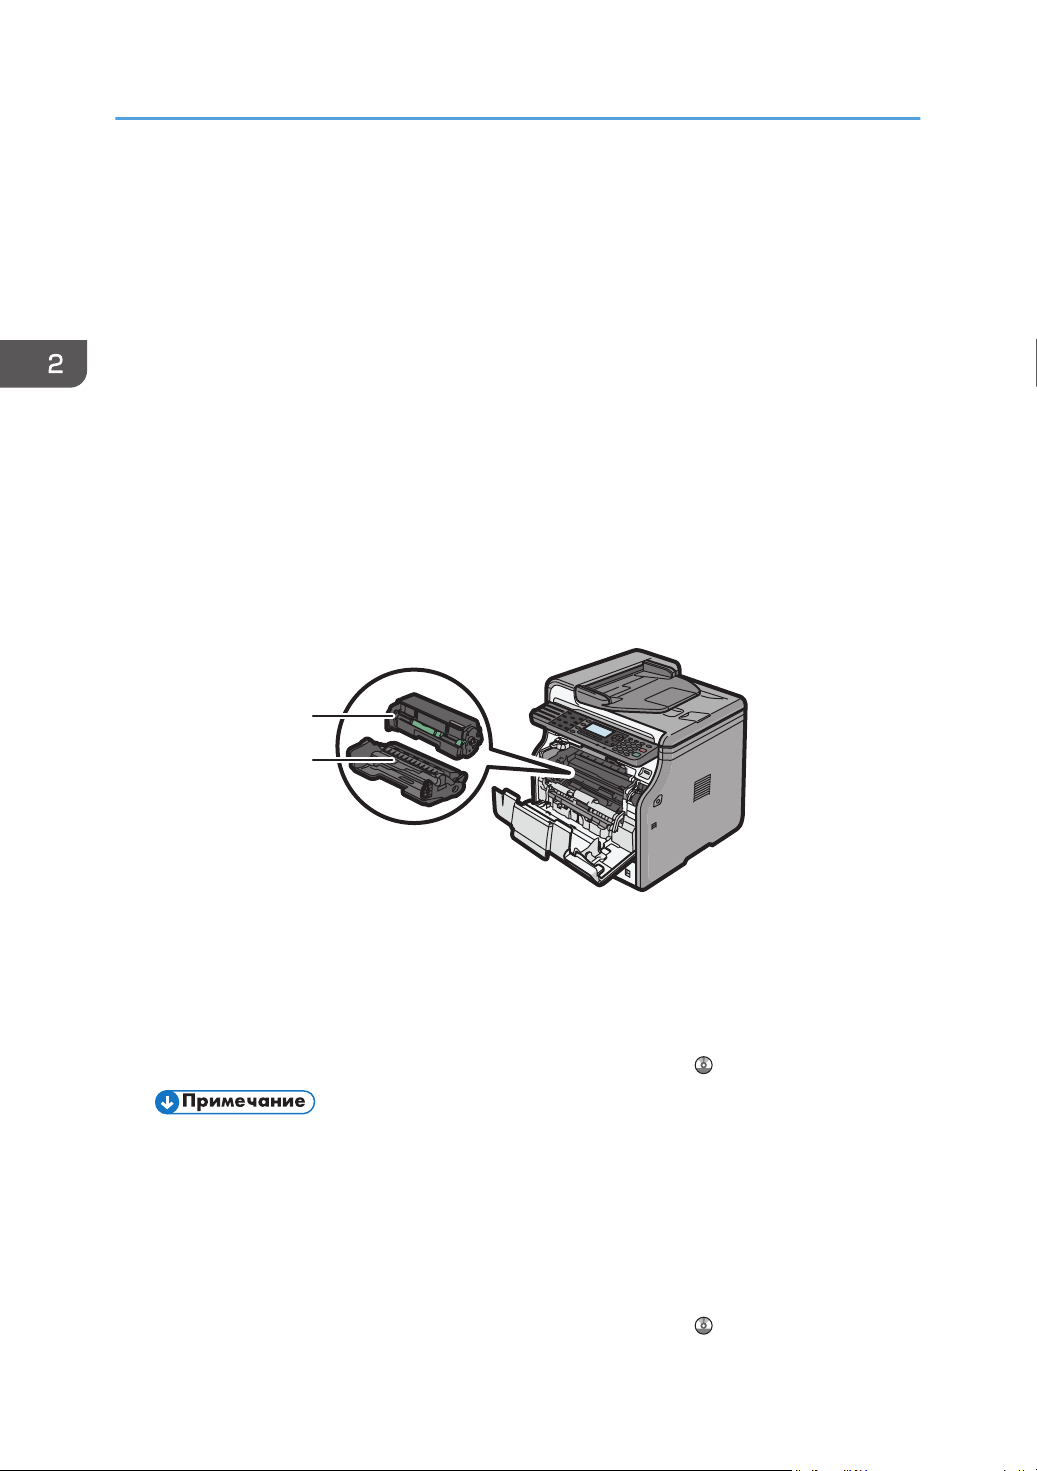
Внутренняя часть: вид спереди
1. Тонер-картридж
Извлеките тонер-картридж и удалите замятую бумагу.
При необходимости замены или подготовки нового тонер-картриджа на экране появляются
соответствующие сообщения.
Для получения сведений о сообщениях, появляющихся на дисплее при необходимости замены
расходных материалов, см. руководство Обслуживание и спецификации .
• При удалении замятой бумаги извлеките тонер-картридж c блоком барабана. Если нужно извлечь
только тонер-картридж, потяните вниз рычаг с правой стороны картриджа, а затем извлеките
картридж.
2. Блок барабана
При необходимости замены или подготовки нового блока барабана на экране появляются
соответствующие сообщения.
Для получения сведений о сообщениях, появляющихся на дисплее при необходимости замены
расходных материалов, см. руководство Обслуживание и спецификации .
22
Перечень названий и функций компонентов
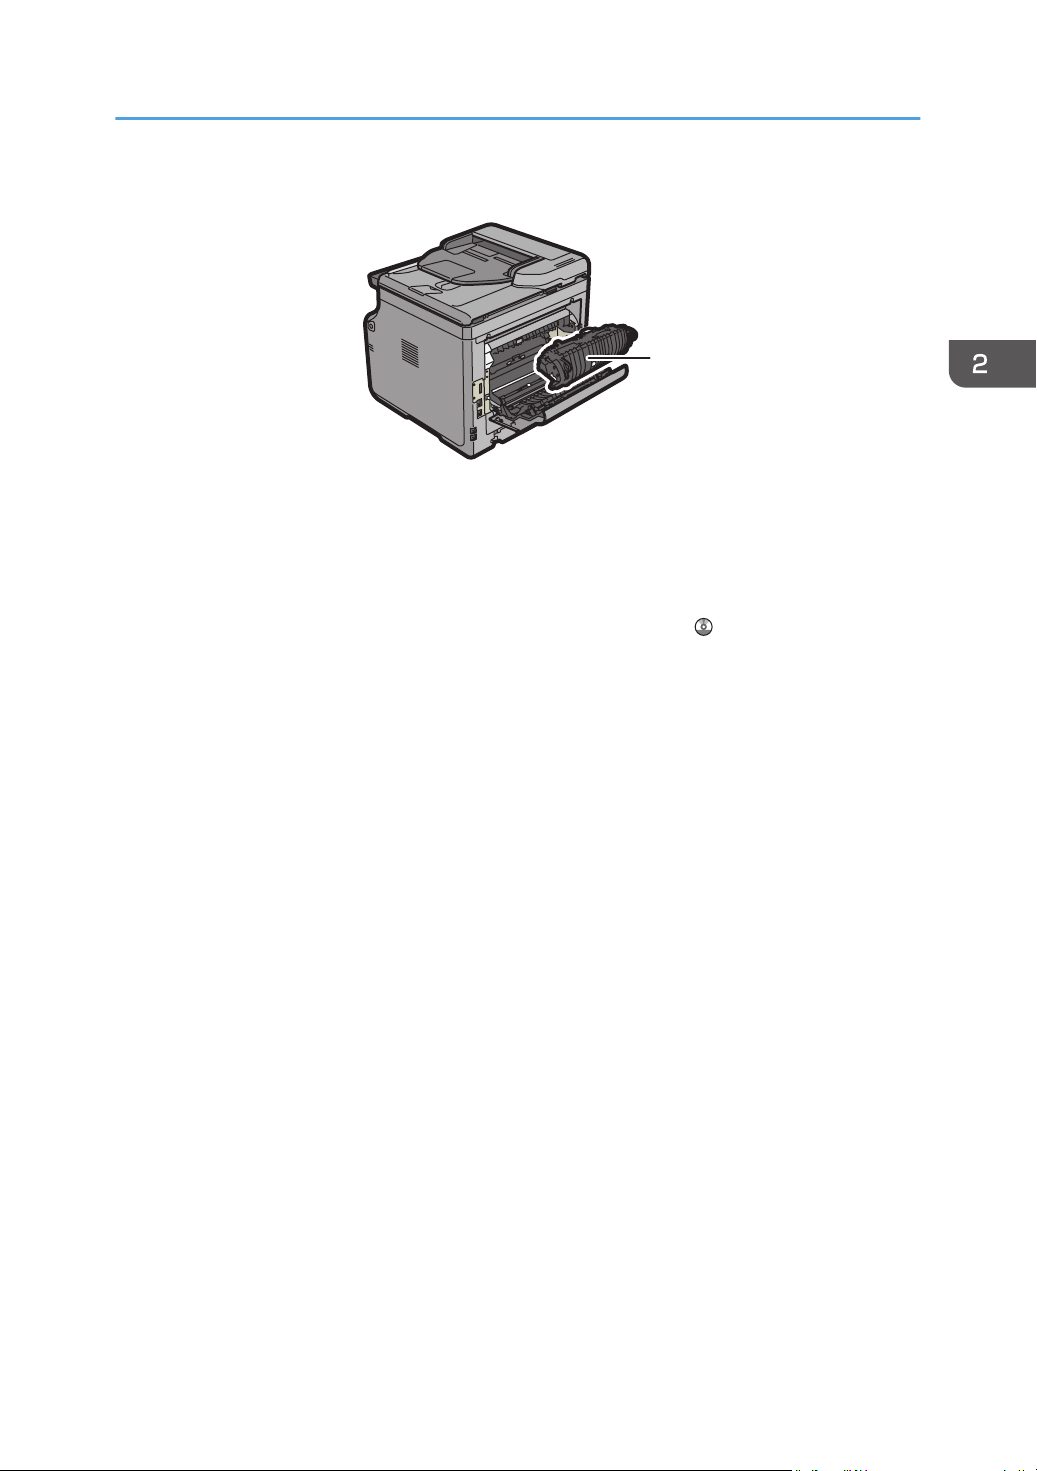
Внутренняя часть: вид сзади
1. Блок термозакрепления
Извлеките блок закрепления и удалите замятую бумагу.
При необходимости замены или подготовки нового блока термозакрепления на экране появляются
соответствующие сообщения.
Для получения сведений о сообщениях, появляющихся на дисплее при необходимости замены
расходных материалов, см. руководство Обслуживание и спецификации .
Блок термозакрепления входит в комплект обслуживания.
23
2. Начало работы
Описание функций опций аппарата
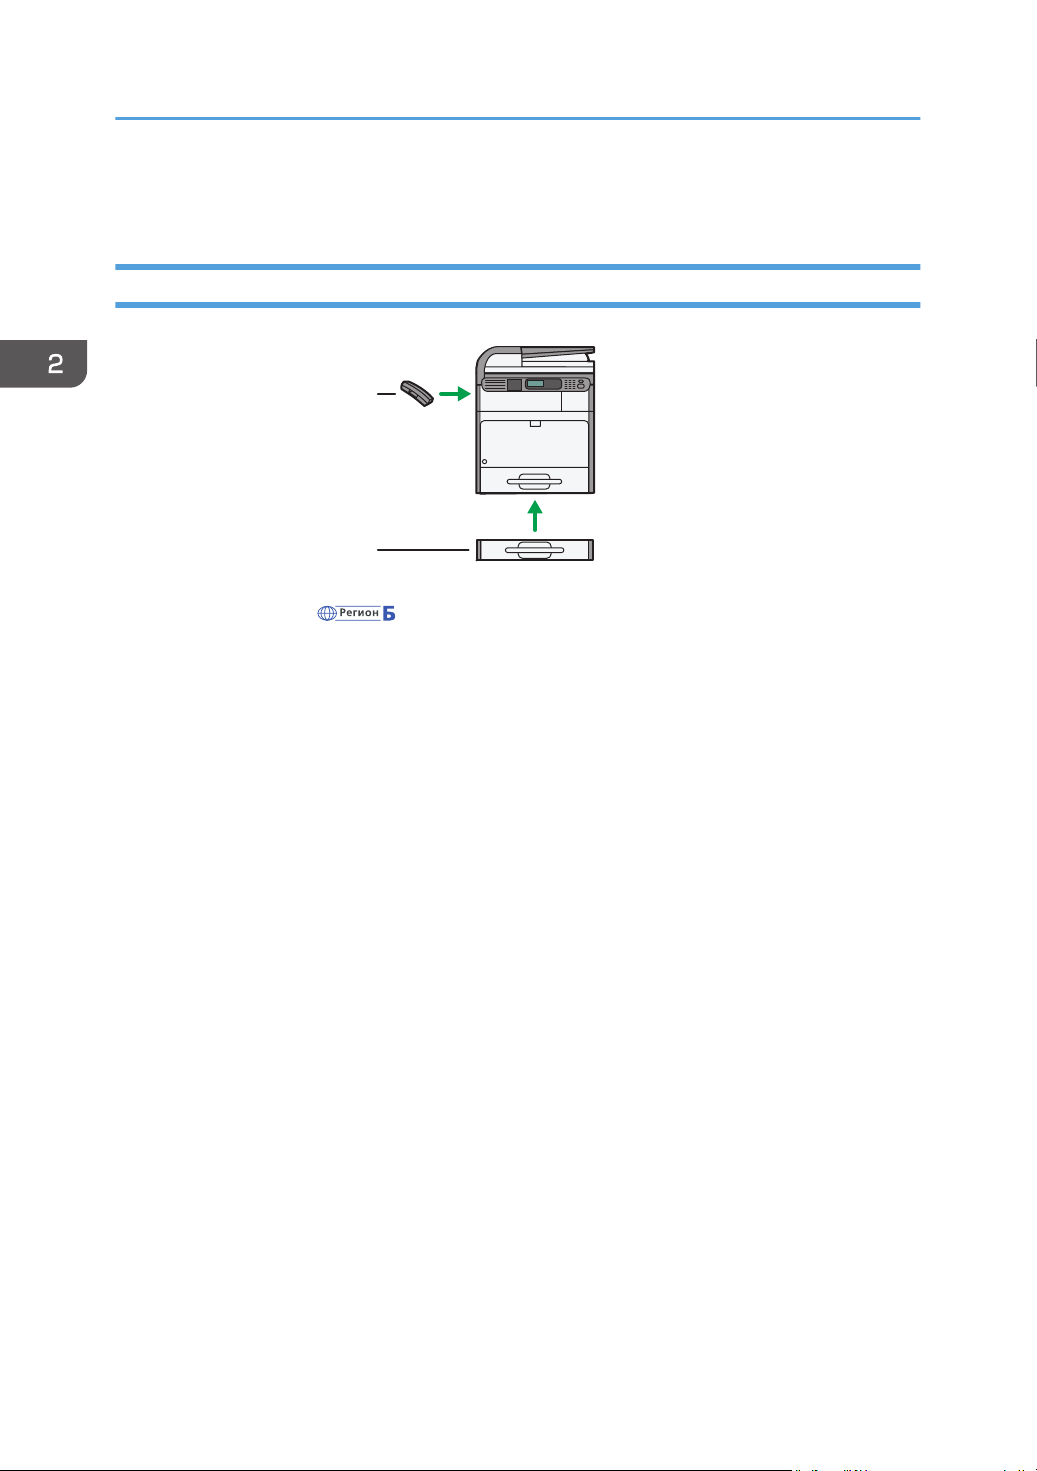
Описание функций внешних опций аппарата
1. Телефонная трубка (главным образом Северная Америка)
Используется в качестве приемника.
Использование функций ручного набора. Позволяет также использовать аппарат в качестве телефона.
2. Нижний лоток для бумаги
Предусмотрена возможность установки блока подачи бумаги на 250 или 500 листов.
24
Обмен данными
Принят факс
Регистр
Пробел
Символы
Информация
о задании
Поиск
адресата
Проверка
адресата
Мелкие
Standard
Пауза/
Пвт.нбр
Б/снят.
трубки
12 345678 9 1011121314
15 16 17 18 19 20 21 22 23 24 25 26 28 29 31
30 3227
RU DBH001
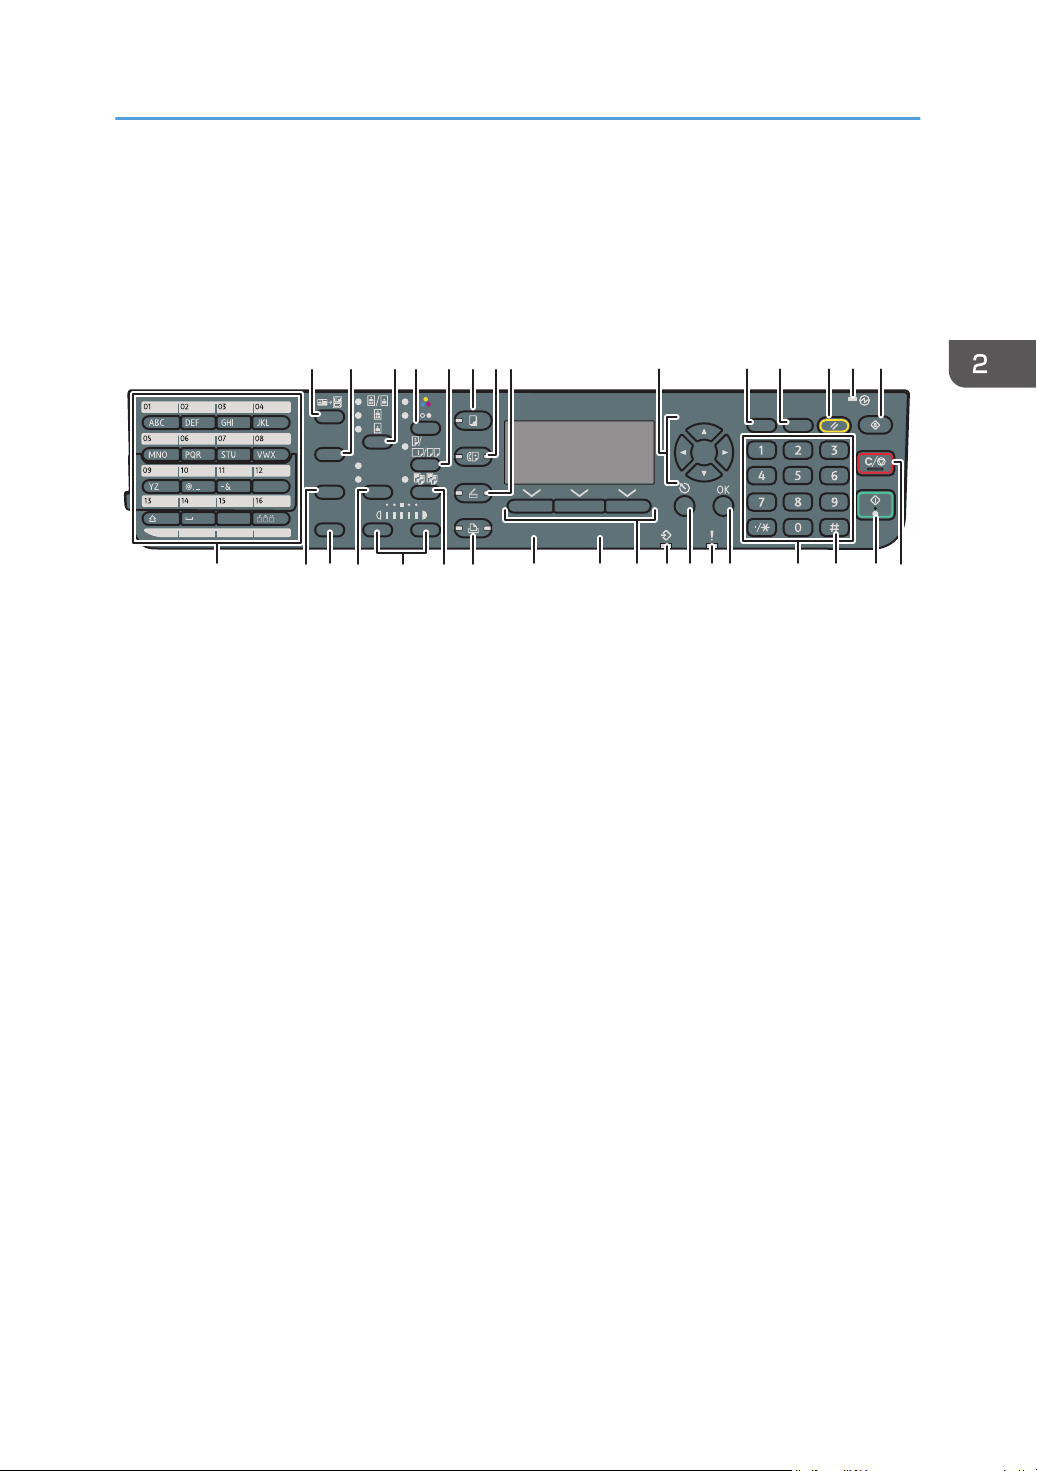
Описание названий и функций элементов панели управления аппарата
Описание названий и функций элементов
панели управления аппарата
На этом рисунке показана панель управления устройства со всеми установленными опциями.
1. Клавиша [Копия удостоверения личности]
Нажмите, чтобы перейти к меню настройки копирования удостоверений личности.
2. Клавиша [Информация о задании] (режим сканера и факса)
Нажмите для получения информации о состоянии отправленных данных.
Клавиша «Выбор оригинала» (режим копира, сканера и факса)
3.
Нажмите для выбора наиболее подходящего метода сканирования оригинала.
4. Клавиша «Выбор цвета»
Нажмите для сканирования оригинала в полноцветном режиме.
5. Клавиша [2сторонняя/Объединенная/Последовательная] (режим копира)
• Двусторонняя печать
Выполнение двусторонней печати при копировании многостраничного оригинала.
• Объединенная
Печатает многостраничный оригинал на одном листе.
• Последовательная
Печатает все страницы двухстраничного разворота на одной странице.
6. Клавиша [Копия]
Нажмите, чтобы активировать режим копирования
7. Клавиша [Факс]
Нажмите, чтобы активировать функцию факса
8. Клавиша [Сканер]
Нажмите, чтобы активировать функцию сканера
25

2. Начало работы
9. Клавиши прокрутки
Используйте эти клавиши для перемещения курсора в различных направлениях.
Когда в этом руководстве упоминаются клавиши [ ] [ ] [ ] [ ] нажимайте клавишу, указывающую в
нужном направлении для перемещения курсора.
10. Клавиша [Пауза/Пвт. нбр] (режим факса)
Пауза
•
Нажмите, чтобы вставить паузу при наборе номера факса. Пауза обозначается как «-«.
• Повторный набор
Нажмите для выбора недавно набранного номера.
11. Клавиша [Б/снят.трубки] (режим факса)
Нажмите для использования набора без снятия трубки.
12. Клавиша [Сброс]
Служит для сброса текущих параметров.
13. Индикатор основного питания
Индикатор основного питания светится при включении основного выключателя питания.
14. Клавиша [Инструменты пользователя]
Служит для изменения заданных по умолчанию параметров в соответствии с требованиями
пользователя.
15. Клавиши быстрого набора
Нажмите для ввода букв и символов.
Нажмите для выбора ранее введенного адресата одним нажатием.
16. Клавиша [Поиск адресата] (режим сканера и факса)
Нажмите для поиска адресата в списке адресатов.
17. Клавиша [Проверка адресата] (режим сканера и факса)
Нажмите для проверки заданного адресата.
18. Клавиша «Выбор разрешения» (режим факса)
Нажмите для выбора разрешения факса.
19. Клавиши выбора плотности (режим копира, сканера и факса)
Нажмите, чтобы отрегулировать плотность сканирования при использовании функций копира, сканера
и факса.
20. Клавиша [Сортировка] (режим копира)
Нажмите для автоматической сортировки распечатанных копий.
21. Клавиша [Принтер]
Нажмите, чтобы активировать функцию принтера
22. Индикатор «Принят факс» (режим факса)
Постоянно светится в процессе приема и сохранения данных в памяти факса (кроме данных
персонального ящика или файла блокировки памяти).
26

Описание названий и функций элементов панели управления аппарата
23. Индикатор соединения (режим факса)
Во время передачи и приема данных светится постоянно.
24. Клавиши выбора
Соотносится с пунктами, отображаемыми на экране. Нажмите, чтобы выбрать соответствующий пункт.
Индикатор поступления данных
25.
Мигает при получении заданий на печать или документов по LAN-факсу от компьютера.
26. Клавиша [Выход]
Нажмите для отмены операции или возврата к предшествущему окну.
27. Индикаторы предупреждения
Загораются при возникновении ошибок в работе аппарата.
Немигающий красный: печать либо невозможна, либо возможна, но при этом ее качество не
гарантируется.
Мигающий желтый: в ближайшее время понадобится замена расходных материалов аппарата.
28. Клавиша [OK]
Нажмите, чтобы подтвердить выбор пункта или ввод числового значения.
29. Цифровые клавиши
Используется для ввода числа копий, факсимильных номеров и данных для выбранной функции.
30. Клавиша [
Используется для подтверждения введенных значений или выбранных элементов.
31. Клавиша [Пуск]
Используется для запуска процесса копирования, печати, сканирования или отправки.
Клавиша [Сброс/Стоп]
32.
• Пусто
Предназначена для удаления введенного числового значения.
• Стоп
Прекращает выполнение текущего задания, такого как копирование, сканирование,
факсимильная связь или печать.
] (Клавиша «Ввод»)
27

2. Начало работы
Изменение языка дисплея
Можно изменить язык, используемый для отображения информации на дисплее. Значение по
умолчанию: Английский.
Нажмите клавишу [Инструменты пользователя] и выберите соответствующие настройки с
помощью клавиши [ ] или [ ].
1. Выберите [Язык] Нажмите [OK]
2. Выберите нужный язык Нажмите [OK]
28
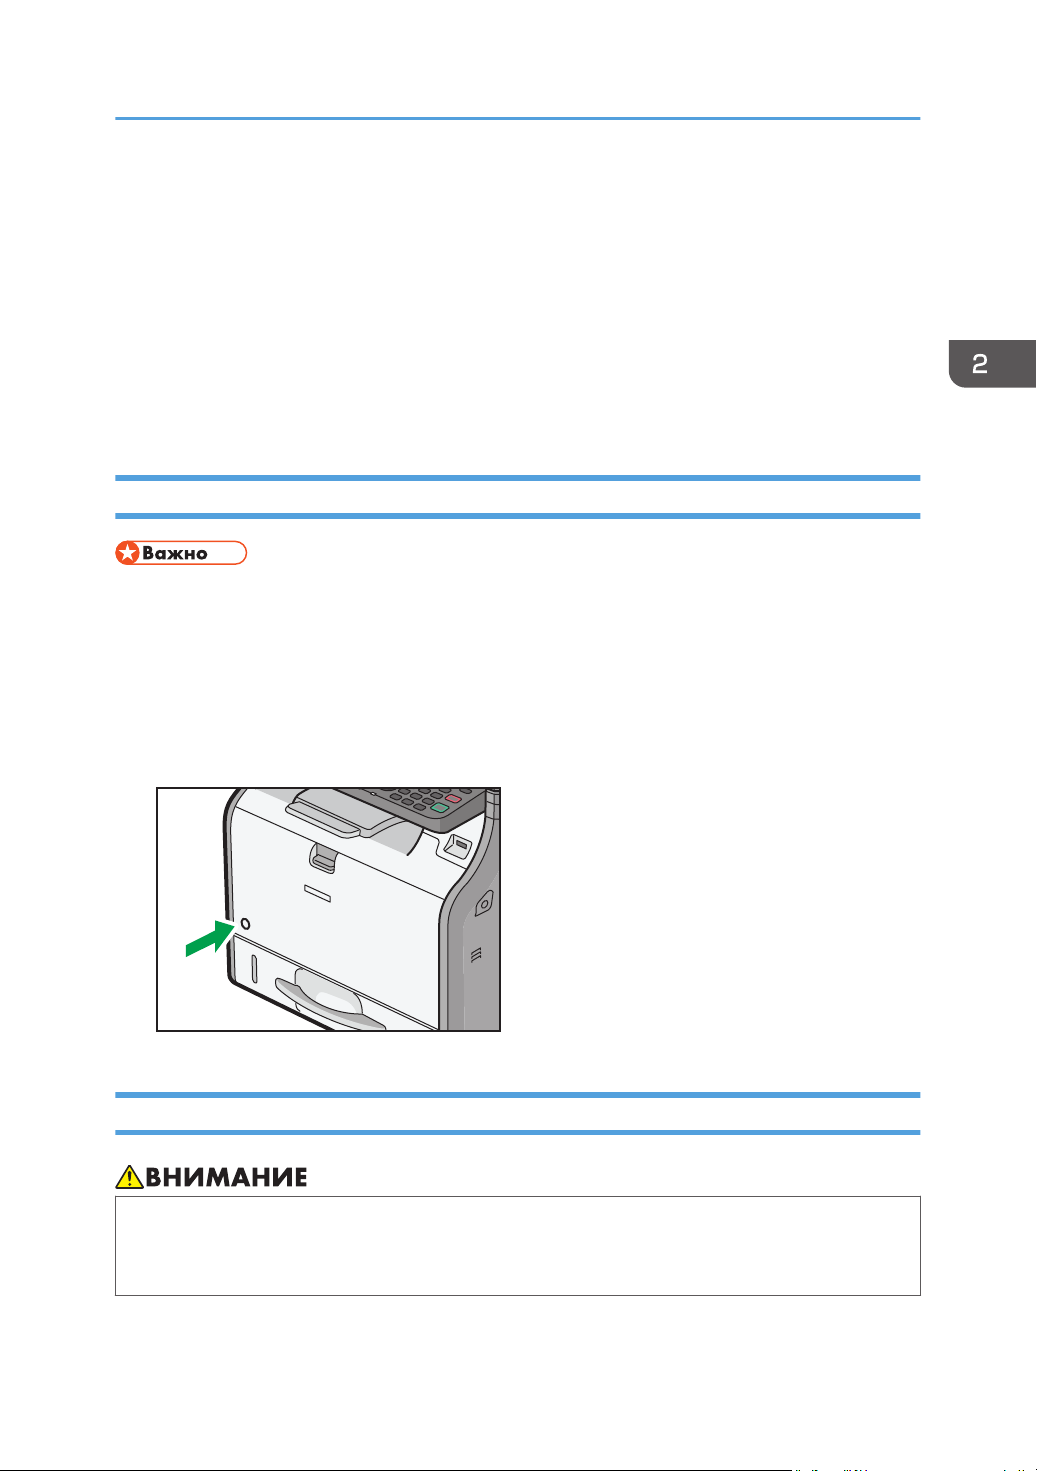
Включение/выключение питания
Включение/выключение питания
Главный выключатель питания расположен на фронтальной части аппарата. Если этот
переключатель включен, включается основное питание и загорается индикатор основного
питания на правой стороне панели управления. Если этот переключатель выключен, выключается
основное питание и гаснет индикатор основного питания на правой стороне панели управления.
После этого отключается электропитание аппарата. Если выключить этот выключатель, файлы
факсимильной связи, хранящиеся в памяти, могут быть утрачены. Используйте этот выключатель
только в случае необходимости.
Включение основного питания
• Не выключайте основной выключатель питания сразу после его включения. Это может
привести к повреждению памяти и стать причиной возникновения неполадок.
1. Убедитесь, что вилка кабеля питания надежно вставлена в розетку сети
электропитания.
2. Нажмите основной переключатель питания.
Загорается индикатор основного питания.
Выключение основного питания
• При отсоединении сетевого кабеля от стенной розетки тяните только за вилку, а не за
кабель. В противном случае можно повредить кабель. Использование поврежденных
сетевых кабелей может привести к возгоранию или поражению электрическим током.
29

2. Начало работы
• После выключения питания устройства подождите, как минимум, несколько секунд перед его
повторным включением.
• Перед тем, как отсоединить вилку кабеля электропитания, выключите основной
переключатель питания и убедитесь, что индикатор основного питания выключен. Это может
привести к повреждению памяти и стать причиной возникновения неполадок.
Не отключайте питание во время работы устройства. Это может привести к повреждению
•
памяти и стать причиной возникновения неполадок.
• Не удерживайте переключатель основного питания при выключении основного питания. В
этом случае питание аппарата выключается принудительно, что может повредить память и
вызвать сбой в работе аппарата.
1. Нажмите основной переключатель питания.
Индикатор основного питания гаснет.
30
Размещение оригиналов
Размещение оригиналов
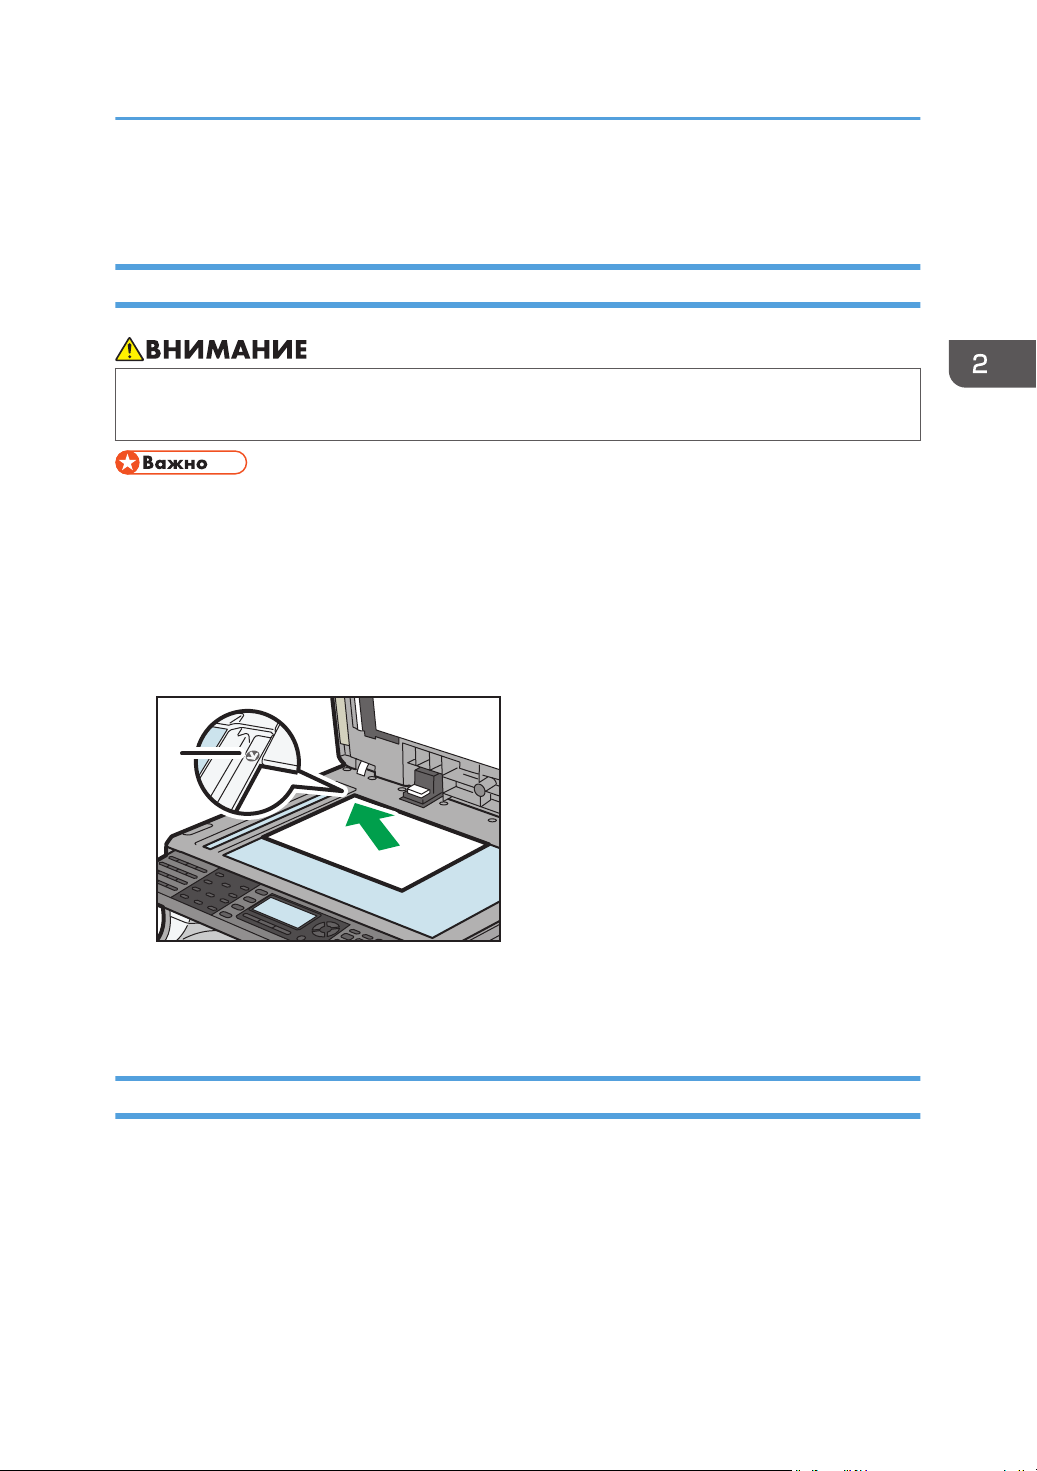
Размещение оригиналов на стекле экспонирования
• Опуская АПД, не касайтесь креплений и стекла экспонирования. Несоблюдение этого
правила может привести к травме вследствие защемления кистей рук или пальцев.
• Не пытайтесь поднять АПД с применением силы. В противном случае крышка устройства
АПД может открыться или сломаться.
1. Поднимите АПД.
2. Разместите оригинал на стекле экспонирования лицевой стороной вниз. Размещайте
оригинал впритык к левому дальнему углу.
Начните с первой сканируемой страницы.
1. Метка расположения
3. Опустите АПД.
Размещение оригиналов в автоматическом податчике документов
Убедитесь, что вы загружаете оригинал аккуратно. В противном случае может появиться
сообщение о замятии бумаги в аппарате. Кроме того, не оставляйте на верхней крышке
оригиналы или посторонние предметы. Неправильная загрузка может привести к неисправности.
1. Настройте направляющие оригинала в соответствии с форматом оригинала.
31
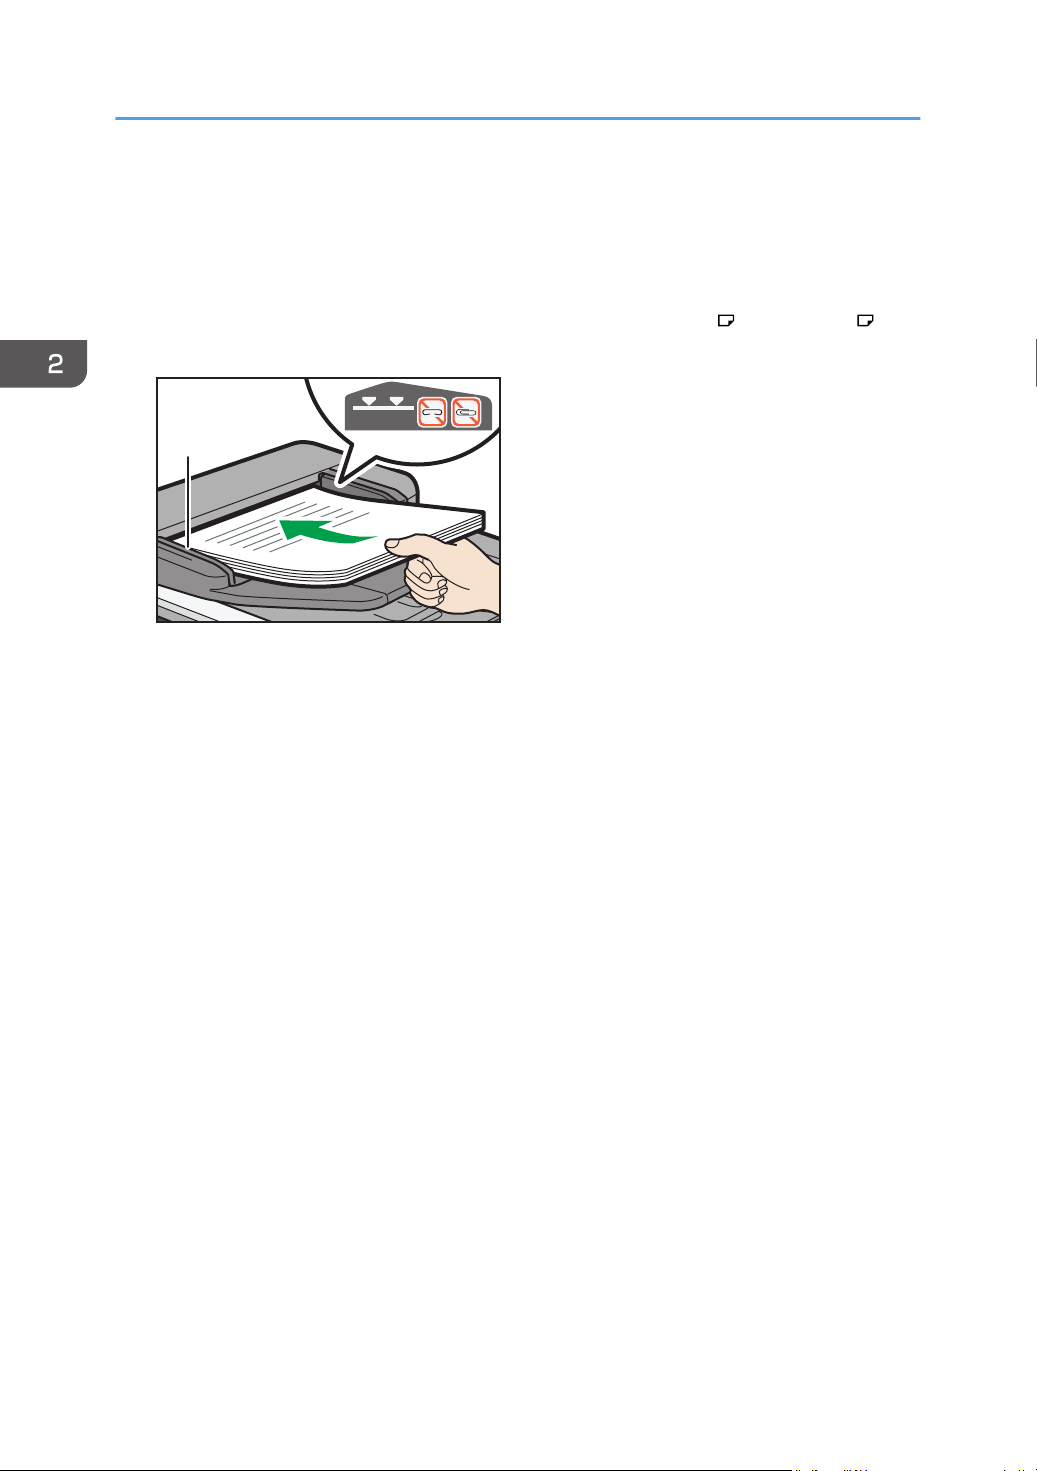
2. Начало работы
2. Размещайте выровненные оригиналы в АПД лицевой стороной вверх.
Следите за тем, чтобы стопка оригиналов не превышала по высоте ограничительную
отметку.
Первая страница должна находиться наверху.
При размещении оригиналов, длина которых превышает формат A4 или 81/2 × 11 ,
откройте удлинители.
1. Ограничитель
2. Направляющие для оригиналов
32
3. Копир
В этой главе описываются часто используемые функции и операции копира. Для получения
сведений, не включенных в эту главу, см. руководство «Копирование» на прилагающемся
компакт-диске.
Основные операции
Чтобы сделать копии, поместите оригиналы на стекло экспонирования или в АПД.
Размещая оригиналы на стекле экспонирования, начинайте с первой страницы. При размещении
оригиналов в АПД первая страница должна быть сверху.
Для получения более подробной информации о процедуре размещения оригинала на стекле
экспонирования см. стр. 31 «Размещение оригиналов на стекле экспонирования».
Для получения более подробной информации о процедуре размещения оригинала в АПД см.
стр. 31 «Размещение оригиналов в автоматическом податчике документов».
При копировании на нестандартную бумагу укажите ее тип в меню Инструм.польз. в соответствии
с плотностью используемой бумаги. Для получения подробных сведений см. руководство
«Подсоединение аппарата/Настройки системы» .
Описанная ниже процедура иллюстрирует процесс копирования на бумагу, формат и
ориентация которой в точности совпадают с форматом и ориентацией оригиналов.
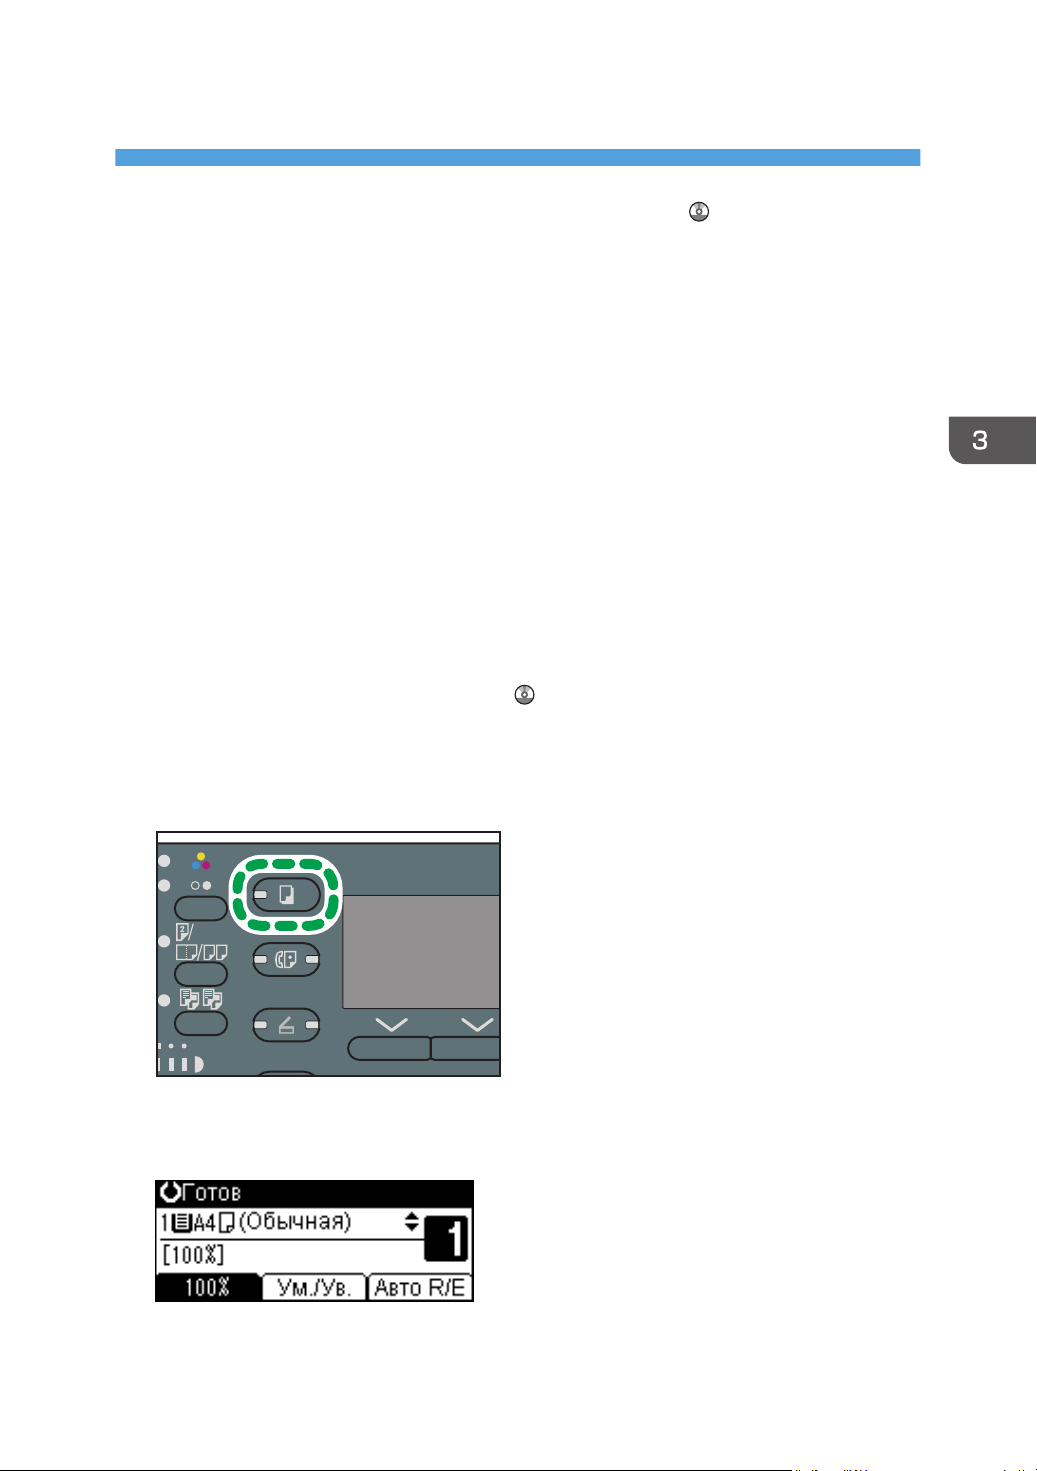
1. Нажмите клавишу [Копия]
2. Убедитесь, что предыдущие настройки не сохранились
Если они сохранились, нажмите клавишу [Перезапуск].
3. Разместите оригиналы
33
Пауза/
Пвт.нбр
Б/снят.
трубки
RU DBH019
3. Копир
4. Настройте необходимые параметры
5. С помощью цифровых клавиш укажите необходимое количество копий
6. Выберите лоток для бумаги
7. Нажмите клавишу [Пуск]
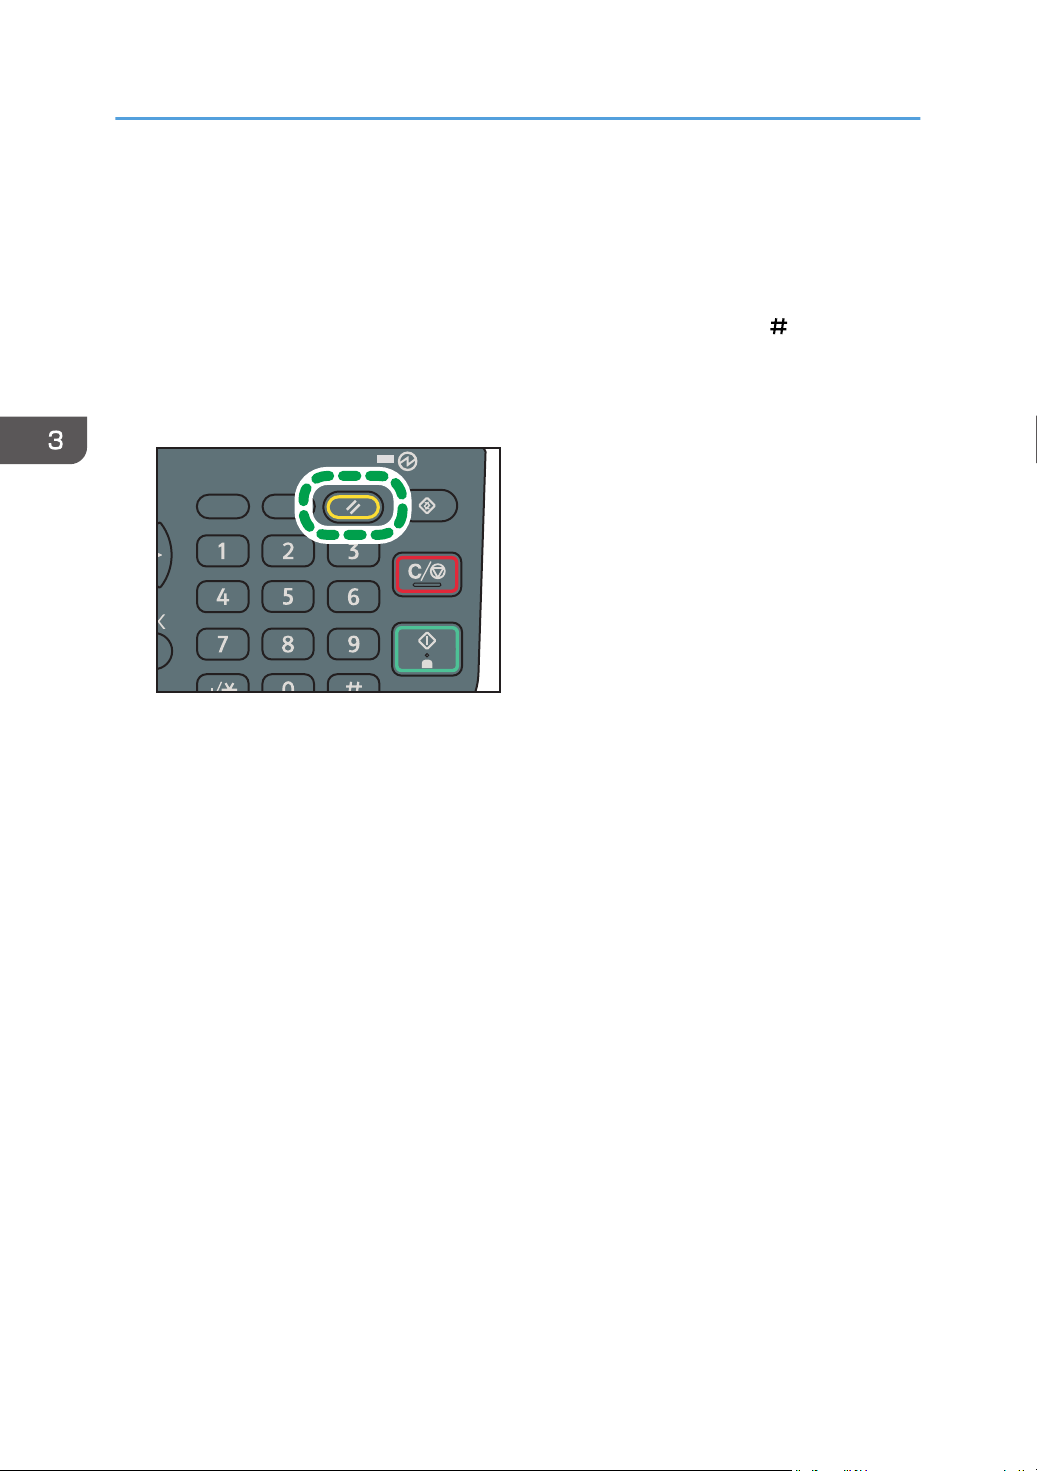
Если оригинал размещается на стекле экспонирования, нажмите клавишу [ ] по окончании
сканирования всех оригиналов.
8. По завершении копирования нажмите клавишу [Перезапуск], чтобы сбросить
настройки
34
Уменьшение или увеличение оригиналов
Уменьшение или увеличение оригиналов
В этом разделе описываются способы уменьшения или увеличения изображений с помощью
установки коэффициента масштабирования или формата бумаги.
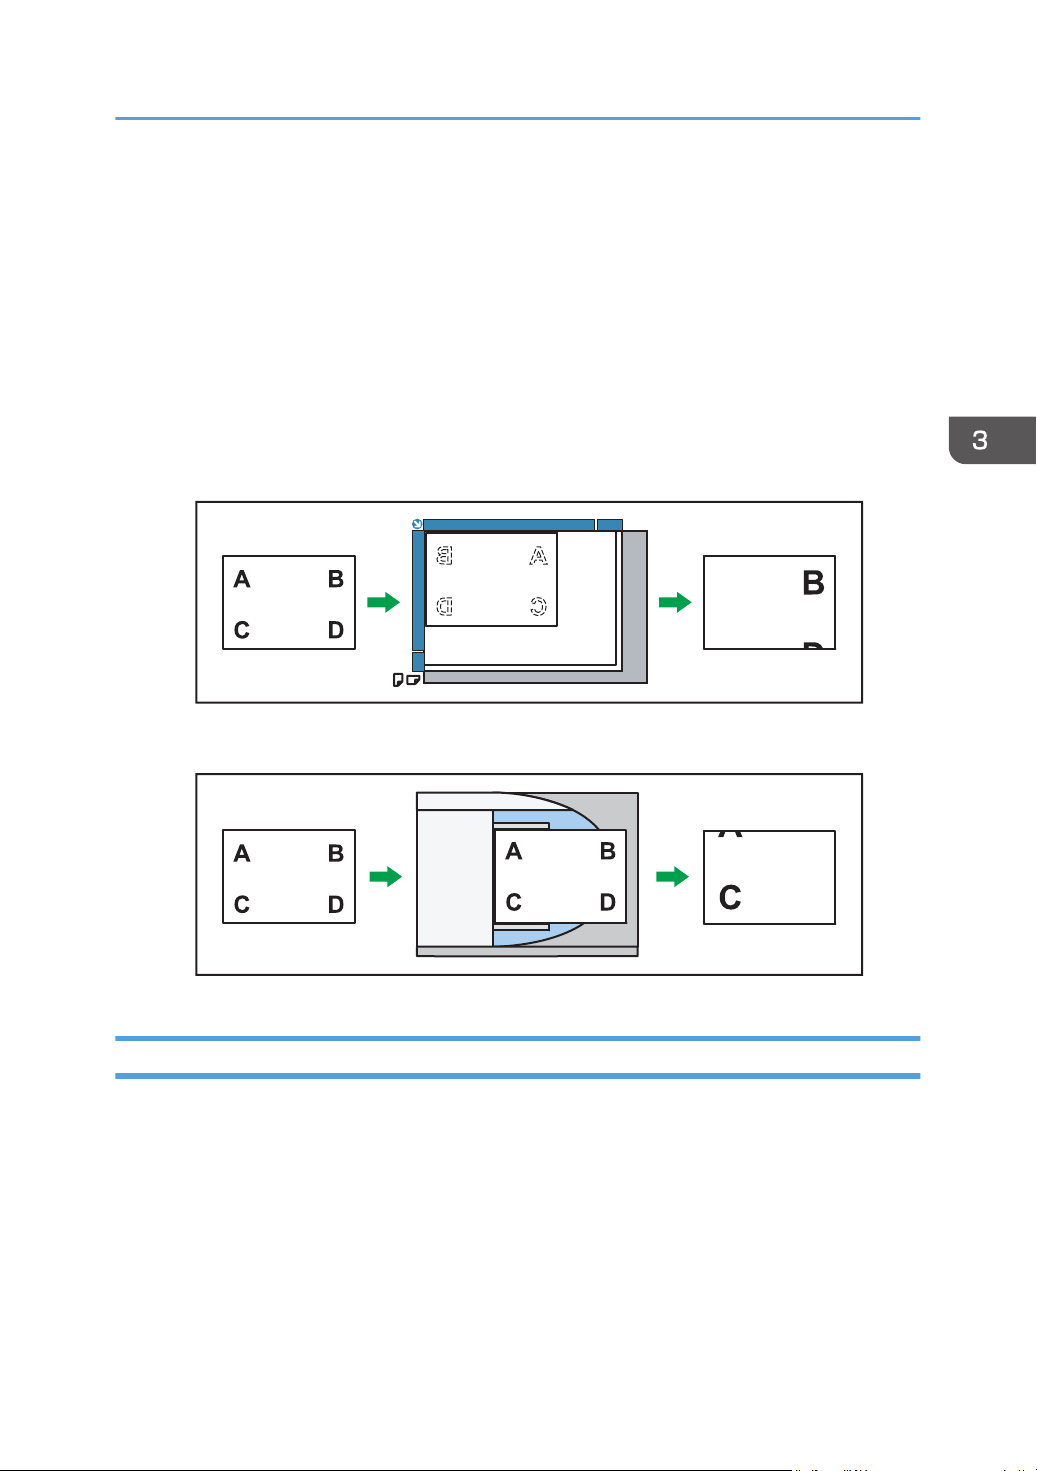
Исходная точка
Местонахождение исходной точки для функции «Уменьш./увелич.» зависит от метода
сканирования оригиналов. Если оригинал размещается на стекле экспонирования, исходной
точкой является верхний левый угол. Если оригинал размещен в АПД, исходной точкой будет
нижний левый угол.
• Размещение оригинала на стекле экспонирования
• Размещение оригинала в АПД
Предустановленный коэффициент уменьшения/увеличения
Эта функция позволяет уменьшать или увеличивать изображения с помощью предустановленных
коэффициентов масштабирования.
35
3. Копир
Нажмите клавишу [Копия] и выберите параметры настройки с помощью клавиш [ ] и [ ].
1. Нажмите [Ум./Ув.]
2. Нажмите [Увелич.] или [Уменьш.]
3. Выберите коэффициент масштабирования Нажмите [OK]
4. Выберите лоток для бумаги
5. Разместите оригиналы Нажмите [Пуск]
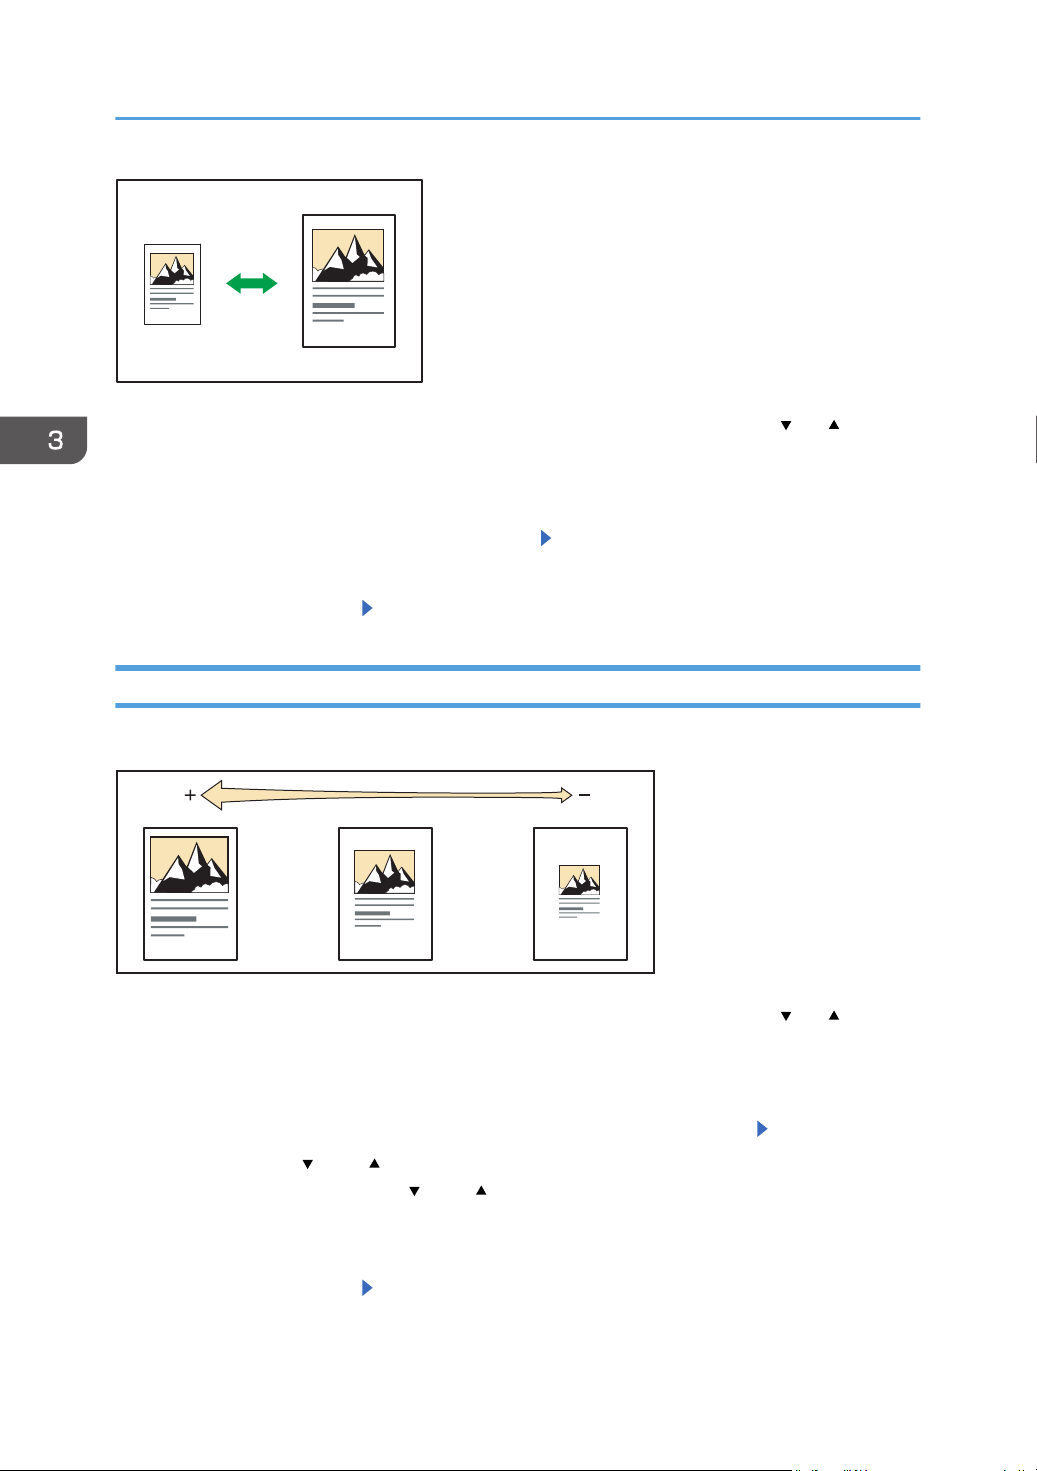
Масштаб
Коэффициент масштабирования можно устанавливать с шагом в 1%.
Нажмите клавишу [Копия] и выберите параметры настройки с помощью клавиш [ ] и [ ].
1. Нажмите [Ум./Ув.].
2. Нажмите [Масш.].
3. Введите необходимый коэффициент с помощью цифровых клавиш Нажмите [OK]
Нажимая кнопку [ ] или [ ], можно изменять коэффициент масштабирования с шагом 1 %.
Нажимая и удерживая кнопку [ ] или [ ], можно изменять коэффициент масштабирования с
шагом 10 %.
4. Выберите лоток для бумаги
36
5. Разместите оригиналы Нажмите [Пуск]
Уменьшение или увеличение оригиналов
Автовыбор масштаба
Аппарат автоматически вычисляет коэффициент масштабирования на основе размера оригинала
и указанного формата бумаги и автоматически увеличивает или уменьшает изображение
оригинала до размера бумаги для копирования.
• Если после нажатия клавиши [Авто Ум./Ув.] указать коэффициент масштабирования,
функция автоматического увеличения/уменьшения отменяется.
Нажмите клавишу [Копия] и выберите параметры настройки с помощью клавиш [ ] и [ ].
1. Укажите размер оригинала
Для получения более подробной информации см. руководство «Копирование» .
2. Нажмите [Авто Ум./Ув.]
3. Выберите лоток для бумаги
4. Разместите оригиналы Нажмите [Пуск]
37
3. Копир
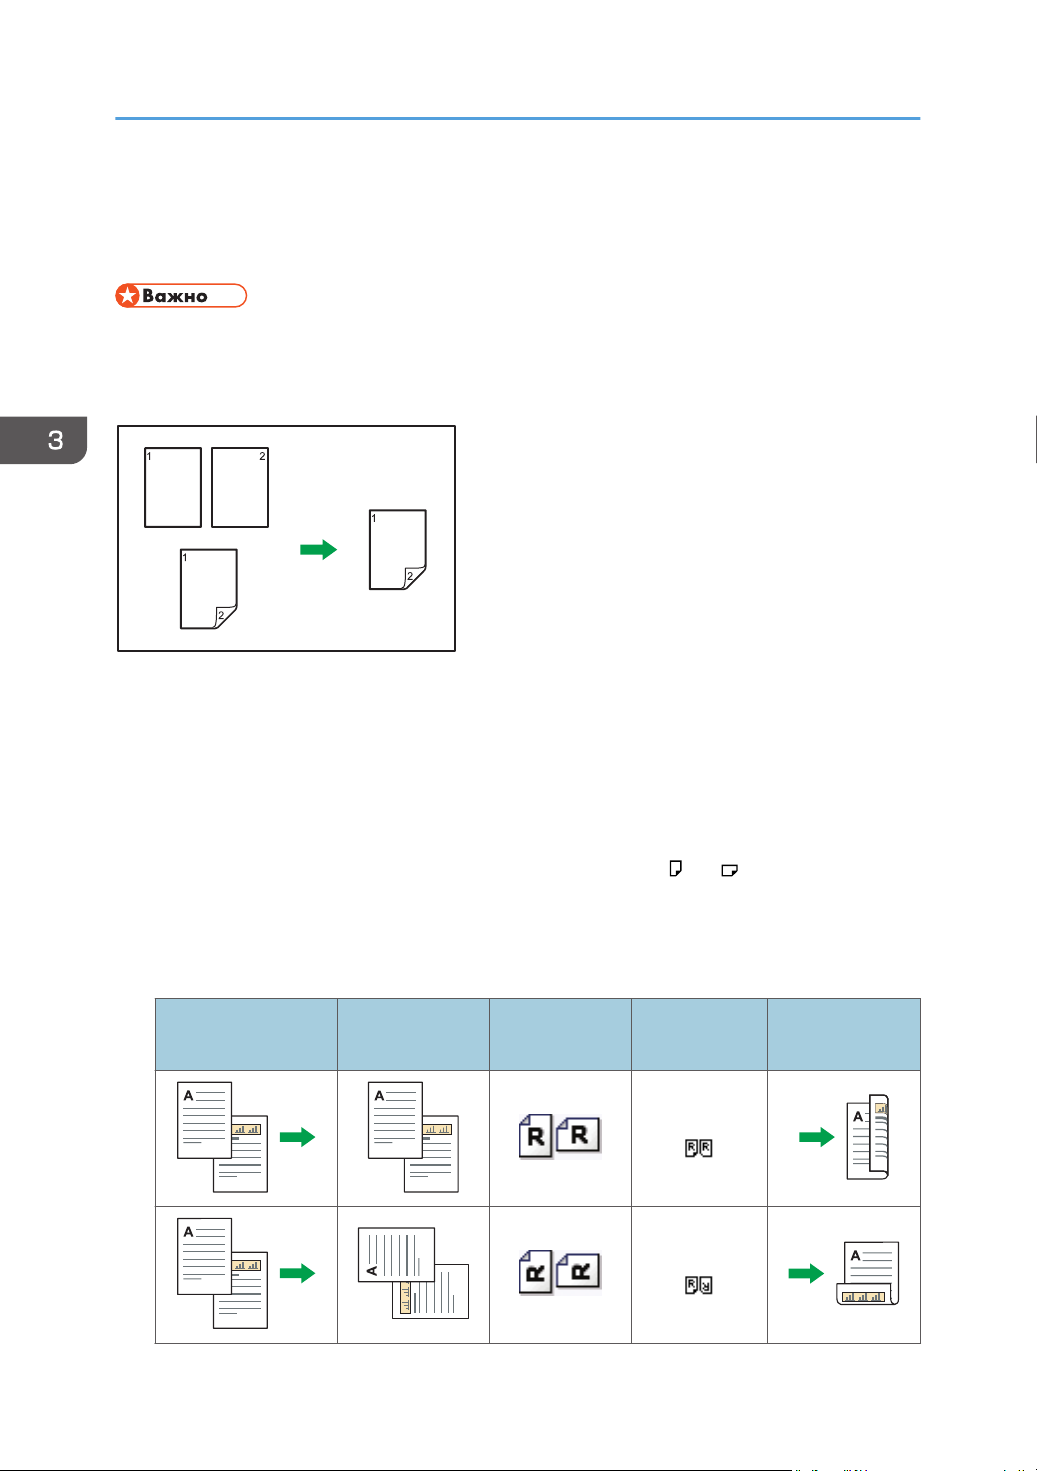
Двустороннее копирование
Копирование двух односторонних или одной двусторонней страницы на одну двустороннюю.
• Функция копирования одной двусторонней страницы на одну двустороннюю страницу
поддерживается только в модели SP 3610SF.
• Использование обходного лотка с этой функцией невозможно.
Для модели SP 3610SF доступны два типа Темнее.
1-стор.ориг ->дупл.копир.
Копирование двух односторонних страниц на одну двустороннюю.
2-стор.ориг. ->дупл.копир.
Копирование одной двусторонней страницы на одну двустороннюю страницу.
Конечный вид копии зависит от выбранной ориентации оригинала ( или ).
Ориентация оригинала и готовые копии
Для копирования на обеих сторонах бумаги выберите ориентацию оригинала и копии в
соответствии с тем, как должен выглядеть отпечаток.
Оригинал
Размещение
оригиналов
Ориент.ориг.
Ориент.дупле
кса
Верх к верху
Верх к низу
Результат
38
Мелкие
Standard
RU DBH008
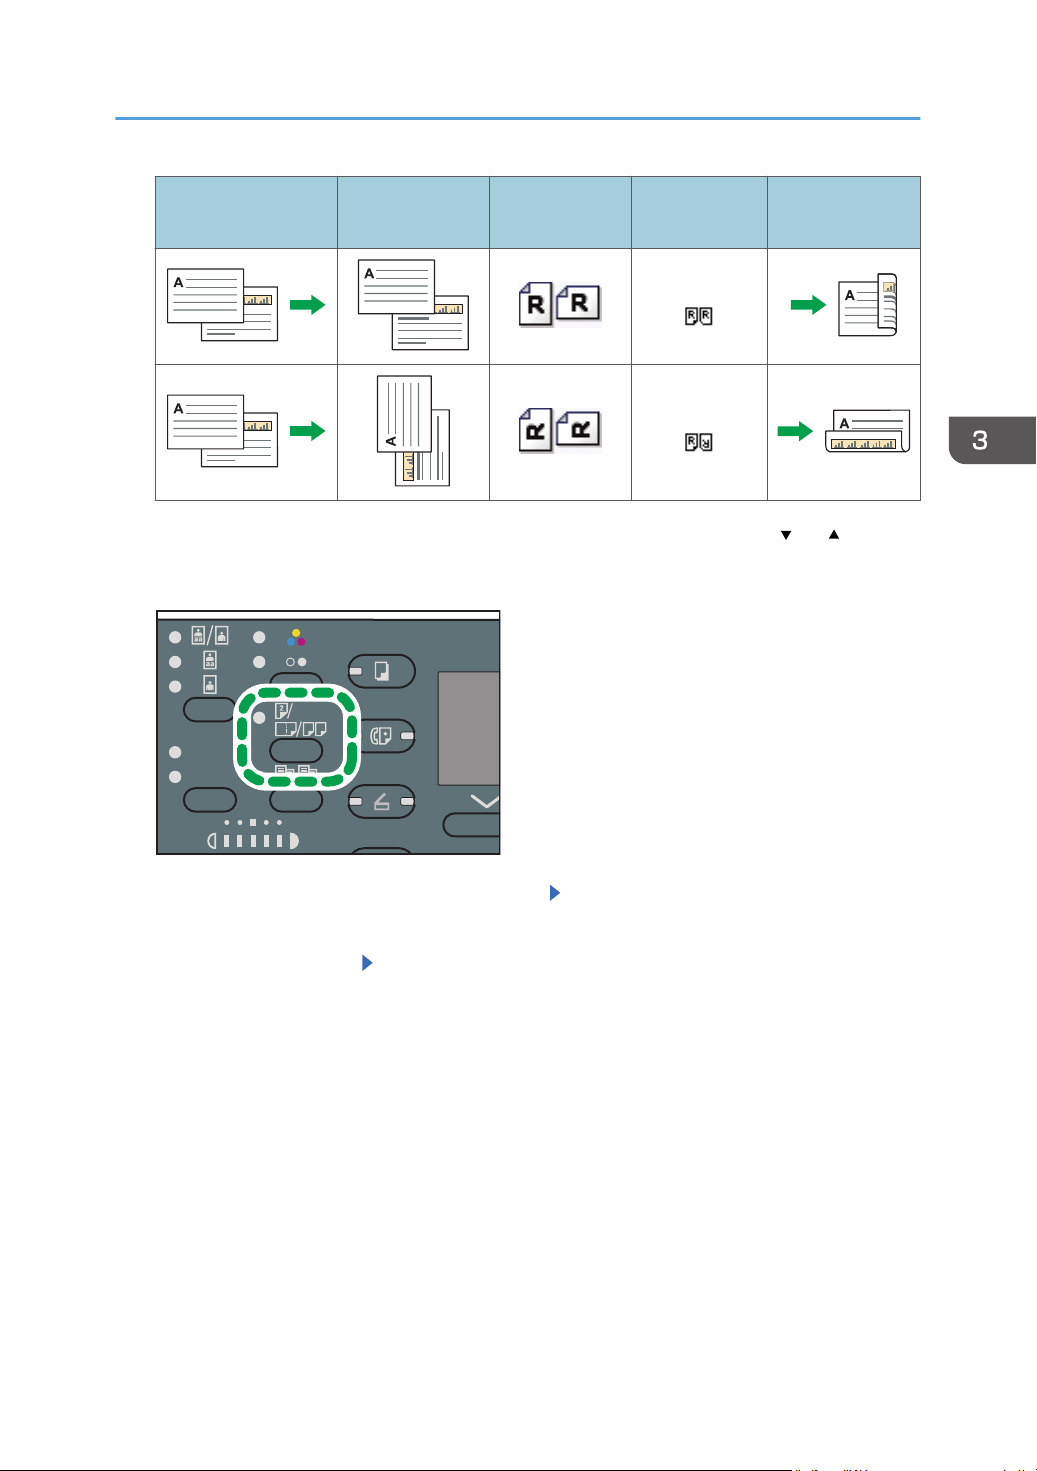
Двустороннее копирование
Оригинал
Размещение
оригиналов
Ориент.ориг.
Ориент.дупле
кса
Результат
Верх к верху
Верх к низу
Нажмите клавишу [Копия] и выберите параметры настройки с помощью клавиш [ ] и [ ].
1. Нажмите [2сторонняя/Объединенная/Последовательная].
2. Выберите режим дуплексного копирования Нажмите [OK]
3. Выберите лоток для бумаги
4. Разместите оригиналы Нажмите [Пуск]
39
 Loading…
-
Страница 1
For safe and corr ect use, be sur e to read the Safety Information in «Read This First» before using the machine. For information not in this manual, refer to the HTML/PDF files on the supplied CD-ROM. Appendix T roubleshooting Adding Paper and T oner Web Image Monitor Scan Print Fax Copy Getting Started What Y ou Can Do with This Machin[…]
-
Страница 2
[…]
-
Страница 3
TABLE OF CONTENTS How to Read the Manuals …………………………………………………………………………………………………………………5 Symbols used in the manuals …………………………………………………………………………………………………………5 Model-Specific Information […]
-
Страница 4
Duplex Copying …………………………………………………………………………………………………………………………….. 38 Combined Copying ……………………………………………………………………………………………………………………….. 40 One-Sided Combine …………[…]
-
Страница 5
Deleting an E-mail Destination …………………………………………………………………………………………………….. 71 Specifying an E-mail Address by Entering It Manually …………………………………………………………………. 72 Specifying Send Options ……………………………………[…]
-
Страница 6
10. Appendix Trademarks ………………………………………………………………………………………………………………………………….. 121 INDEX ……………………………………………………………………………………………………………………………………….. 123 4[…]
-
Страница 7
How to Read the Manuals Symbols used in the manuals This manual uses the following symbols: Indicates points to pay attention to when using the machine, and explanations of likely causes of paper misfeeds, damage to originals, or loss of data. Be sure to read these explanations. Indicates supplementary explanations of the machine’s functions, […]
-
Страница 8
Model-Specific Information This section explains how you can identify the region your machine belongs to. There is a label on the rear of the machine, located in the position shown below. The label contains details that identify the region your machine belongs to. Read the label. DBH040 The following information is region-specific. Read the informa[…]
-
Страница 9
Names of Major Features In this manual, major features of the machine are referred to as follows: • Auto Document Feeder ADF 7[…]
-
Страница 10
8[…]
-
Страница 11
1. What You Can Do with This Machine You can search for a description by what you want to do. I Want to Save Paper BRL059S Printing multi-page documents on both sides of sheets (Duplex Copy) See «Duplex Copying», Copy . Printing multi-page documents on a single sheet (Combine) See «Combined Copying», Copy . Printing received fax[…]
-
Страница 12
I Want to Convert Documents to Electronic Formats Easily BQX138S Sending scan files See «Basic Procedure for Sending Scan Files by E-mail», Scan . Storing scan files in a shared folder See «Basic Procedure for Using Scan to Folder», Scan . Storing scan files on media See «Storing the Scanned Documents on a USB Flash Memory […]
-
Страница 13
I Want to Register Destinations BRL060S Using the control panel to register destinations in the Address Book See «Registering Addresses and Users for Facsimile/Scanner Functions «, Connecting the Machine/ System settings . Downloading destinations registered in the machine to the LAN-Fax driver destination list See «Using the machine[…]
-
Страница 14
I Want to Operate the Machine More Effectively BQX139S Registering frequently-used printing settings to the printer driver See «Using One Click Presets», Print . Changing the initial settings of the printer driver to frequently-used printing settings See «Displaying the Printing Preferences Dialog Box», Print . 1. What You Can D[…]
-
Страница 15
You Can Make Copies Using Various Functions CMQ002 • You can reduce or enlarge the copy image. With the Auto Reduce/Enlarge function, the machine automatically calculates the reproduction ratio based on the sizes of the originals and the paper you have specified. See «Reducing or Enlarging Originals», Copy . • Copier functions such as[…]
-
Страница 16
You Can Print Data Using Various Functions CMQ004 • This machine supports network and local connections. • You can collate printed paper. See «Collate», Print . 1. What You Can Do with This Machine 14[…]
-
Страница 17
You Can Use the Scanner in a Network Environment CJQ607 • You can send scan files to a specified destination using e-mail (Sending scan files by e-mail). See «Basic Procedure for Sending Scan Files by E-mail», Scan . • You can send scan files directly to folders (Sending scan files by Scan to Folder). See «Basic Procedure for Usi[…]
-
Страница 18
You Can Prevent Information Leakage (Security Functions) CJQ608 • By setting passwords, you can prevent unauthorized access via the network. • See Security Guide . 1. What You Can Do with This Machine 16[…]
-
Страница 19
You Can Monitor and Set the Machine Using a Computer Using Web Image Monitor, you can check the machine’s status and change the settings. CJQ609 You can check which tray is running out of paper, register information in the Address Book, specify the network settings, and configure the system settings. • See «Using Web Image Monitor»[…]
-
Страница 20
1. What You Can Do with This Machine 18[…]
-
Страница 21
2. Getting Started This chapter describes how to start using this machine. Guide to Names and Functions of Components Guide to Components • Do not obstruct the machine’s vents. Doing so risks fire caused by overheated internal components. Exterior: Front view 22 20 12 14 13 12 3 4 56 8 7 9 12 11 10 21 17 18 15 16 19 DBH030 19[…]
-
Страница 22
1. ADF Lower the ADF over originals placed on the exposure glass. If you load a stack of originals in the ADF, the ADF will automatically feed the originals one by one. 2. ADF cover Open this cover to remove originals jammed in the ADF. 3. Input tray for the ADF Place stacks of originals here. 4. Extender for the ADF tray Extend this when placing p[…]
-
Страница 23
18. Bypass tray open lever Push this lever to open the bypass tray. 19. Tray Extension Pull this fence to prevent paper from falling off. 20. Bypass tray Use to copy or print on thick paper, OHP transparencies, envelopes, and label paper (adhesive labels). 21. Extender for the bypass tray Pull this extender out when loading A4 , 8 1 / 2 × 11 or la[…]
-
Страница 24
7. USB 2.0 [Type B] port Use a USB cable to connect the machine to a computer. 8. Security slot Connect a security cable to prevent theft. 9. Ethernet port Use a network interface cable to connect the machine to a network. 10. Slot Optional wireless LAN interface unit can be inserted. Interior: Front view DBH032 1 2 1. Toner cartridge Pull out the […]
-
Страница 25
Interior: Rear view DBH033 1 1. Fusing unit Pull out the fusing unit and remove jammed paper. Messages appear on the screen when the fusing unit needs to be replaced, or a new fusing unit needs to be prepared. For details about the messages that appear on the screen when consumables need to be replaced, see «Replenishing and Replacing Consumab[…]
-
Страница 26
Guide to Functions of the Machine’s Options Guide to Functions of the Machine’s External Options 1 2 DBH086 1. Handset (mainly North America) Used as a receiver. Allows you to use the Manual Dial functions. It also allows you to use the machine as a telephone. 2. Lower paper tray You can install a 250-sheet paper feed unit or a 500-sheet […]
-
Страница 27
Guide to the Names and Functions of the Machine’s Control Panel This illustration shows the control panel of the machine with options fully installed. 12 3 4 5 6 7 8 9 1 0 1 11 2 1 3 1 4 15 16 17 18 19 20 21 22 23 24 25 26 28 29 31 30 32 27 DBH001 1. [ID Card Copy] key Press to jump to the ID card copy setting menu. 2. [Job Information] key (s[…]
-
Страница 28
9. Scroll keys Press these keys to move the cursor in each direction. When the [ ] [ ] [ ] [ ] keys appear in this manual, press the applicable key for the direction that you want to move the cursor. 10. [Pause/Redial] key (facsimile mode) • Pause Press to insert a pause in a fax dialing sequence. The pause is indicated by “-”. • Redial Pre[…]
-
Страница 29
24. Selection keys Correspond to items on the display. Press to select the corresponding item. 25. Data In indicator Flashes when the machine is receiving print jobs or LAN-Fax documents from a computer. 26. [Escape] key Press to cancel an operation or return to the previous display. 27. Alert Indicators Lights up when a machine error occurs. Stead[…]
-
Страница 30
Changing the Display Language You can change the language used on the display. English is set as default. Press the [User Tools] key, and then select the setting items using the [ ] or [ ] key. 1. Select [Language] Press [OK] 2. Select the language you want to use Press [OK] 2. Getting Started 28[…]
-
Страница 31
Turning On/Off the Power The main power switch is on the front side of the machine. When this switch is turned on, the main power turns on and the main power indicator on the right side of the control panel lights up. When this switch is turned off, the main power turns off and the main power indicator on the right side of the control panel goes ou[…]
-
Страница 32
• Before unplugging the power cord plug, turn off the main power switch and make sure the main power switch indicator turns off. Not doing so may result in damage to the memory, leading to malfunctions. • Do not turn off the power while the machine is in operation. Doing so may result in damage to the memory, leading to malfunctions. • Do not[…]
-
Страница 33
Placing Originals Placing Originals on the Exposure Glass • Keep your hands away from the hinges and exposure glass when lowering the ADF. Not doing so may result in an injury if your hands or fingers are pinched. • Do not lift the ADF forcefully. Otherwise, the cover of the ADF might open or be damaged. 1. Lift the ADF. 2. Place the original f[…]
-
Страница 34
When placing originals that are longer than A4 or 8 1 / 2 × 11 , open the extenders. 1 2 2 DBH075 1. Limit mark 2. Original guides 2. Getting Started 32[…]
-
Страница 35
3. Copy This chapter describes frequently used copier functions and operations. For the information not included in this chapter, see Copy on the supplied CD-ROM. Basic Procedure To make copies of originals, place them on the exposure glass or in the ADF. When placing the original on the exposure glass, start with the first page to be copied. When […]
-
Страница 36
5. Enter the number of copies with the number keys 6. Select the paper tray 7. Press [Start] When placing the original on the exposure glass, press the [ ] key after all originals are scanned. 8. When the copy job is finished, press [Reset] to clear the settings DBH019 3. Copy 34[…]
-
Страница 37
Reducing or Enlarging Originals This section describes methods of reducing or enlarging images by specifying a reproduction ratio, or a paper size. Base Point The base point of reduce/enlarge differs depending on how the original is scanned. When the original is placed on the exposure glass, the upper left corner will be the base point. When it is […]
-
Страница 38
Press the [Copy] key, and then select the setting items using the [ ] or [ ] key. 1. Press [R/E] 2. Press [Enlarge] or [Reduce] 3. Select a ratio Press [OK] 4. Select the paper tray 5. Place the originals Press [Start] Zoom You can specify the reproduction ratio in increments of 1%. CKN007 Press the [Copy] key, and then select the setting items usi[…]
-
Страница 39
CKN008 • If you select a reproduction ratio after pressing [Auto R/E], the Auto Enlarge/Reduction function is canceled. Press the [Copy] key, and then select the setting items using the [ ] or [ ] key. 1. Specify the original size For details, see «Specifying Original Sizes», Copy . 2. Press [Auto R/E] 3. Select the paper tray 4. Place […]
-
Страница 40
Duplex Copying Copies two one-sided pages or one two-sided page onto a two-sided page. • Copying one two-sided page on one two-sided page is available for SP 3610SF only. • You cannot use the bypass tray with this function. CKN009 For SP 3610SF, two types of Duplex are available. 1Sided Orig.->Duplex Copy Copies two one-sided pages on one tw[…]
-
Страница 41
Original Placing originals Orig. Orientation Dup. Orientation Output Top to Top Top to Bottom Press the [Copy] key, and then select the setting items using the [ ] or [ ] key. 1. Press [Duplex/Combine/Series]. DBH008 2. Select the duplex mode Press [OK] 3. Select the paper tray 4. Place the originals Press [Start] Duplex Copying 39[…]
-
Страница 42
Combined Copying This mode can be used to select a reproduction ratio automatically and copy the originals onto a single sheet of copy paper. The machine selects a reproduction ratio between 25 and 400%. Orientation of the original and image position of Combine The image position of Combine differs according to original orientation and the number o[…]
-
Страница 43
CKN010 • Originals read from right to left CKN017 One-Sided Combine Combine several pages onto one side of a sheet. • Combine Copies function from two-sided originals is available for SP 3610SF only. CKN014 There are following types of One-Sided Combine. For SP 3610SF Combine: 2 Orig. Copies two one-sided originals to one side of a sheet. Combi[…]
-
Страница 44
Combine 1 Orig. Copies one two-sided originals to one side of a sheet. Combine: 2 Orig. Copies two two-sided originals to one side of a sheet. For SP 3600SF Combine 1 Side (2 Orig.) Copies two one-sided originals to one side of a sheet. Combine 1 Side (4 Orig.) Copies four one-sided originals to one side of a sheet. Press the [Copy] key, and then s[…]
-
Страница 45
Two-Sided Combine Combines various pages of originals onto two sides of one sheet. • The Combine Copies function for two-sided originals is available for SP 3610SF only. • You cannot use the bypass tray with this function. CKN074 There are following types of Two-Sided Combine. For SP 3610SF Combine: 4 Orig. Copies four one-sided originals to on[…]
-
Страница 46
1. Press [Duplex/Combine/Series] DBH008 2. Select the combine mode Press [OK] 3. Select the paper tray 4. Place the originals Press [Start] • The default setting for the original orientation is unreadable direction ( ). When placing originals in unreadable direction, specify the original orientation. To specify the orientation, select [Always Spe[…]
-
Страница 47
Copying onto Custom Size Paper from the Bypass Tray Paper that has a horizontal length of 60.0–216.0 mm (2.37–8.50 inches) and a vertical length of 127.0–900.0 mm (5.00–35.43 inches) can be fed in from the bypass tray. Press the [Copy] key, and then select the setting items using the [ ] or [ ] key. 1. Load the paper face up in the bypass t[…]
-
Страница 48
Copying onto Envelopes This section describes how to copy onto regular size envelopes. Place the original on the exposure glass and place the envelope in the bypass tray. Specify the thickness of the paper according to the weight of the envelopes you are printing on. For details about the relationship between paper weight and paper thickness and th[…]
-
Страница 49
Sort The machine assembles copies as sets in sequential order. CKN018 Press the [Copy] key, and then select the setting items using the [ ] or [ ] key. 1. Press [Sort]. DBH009 2. Enter the number of copy sets using the number keys 3. Select the paper tray 4. Place the originals Press [Start] Sort 47[…]
-
Страница 50
3. Copy 48[…]
-
Страница 51
4. Fax This chapter describes frequently used facsimile functions and operations. For the information not included in this chapter, see Fax on the supplied CD-ROM. Basic Procedure for Transmissions (Memory Transmission) This section describes the basic procedure for transmitting documents using Memory Transmission. Transmission starts automatically[…]
-
Страница 52
Sending Originals Using the ADF 1. Press [Facsimile] DBH012 2. Make sure «Ready» appears on the screen 3. Place the originals into the ADF For details about how to place originals, see «Placing Originals in the Auto Document Feeder», Paper Specifications and Adding Paper . For details about how to place originals to send using t[…]
-
Страница 53
Sending Originals Using the Exposure Glass 1. Press [Facsimile] DBH012 2. Make sure «Ready» appears on the screen 3. Place the first page of the original face down on the exposure glass For details about the originals you can set, see «Placing Originals on the Exposure Glass», Paper Specifications and Adding Paper . For details […]
-
Страница 54
9. When all originals are scanned, press [ ] DBH089 The machine dials the destination and starts transmission. Registering a Fax Destination Press the [User Tools] key, and then select the setting items using the [ ] or [ ] key. DBH020 1. Select [Address Book Management] Press [OK] 2. Select [Program/Change] Press [OK] 3. Enter the registration num[…]
-
Страница 55
9. Press [OK] Deleting a Fax Destination This section describes how to delete a registered fax destination. • If you delete a destination that is a specified delivery destination, messages to its registered Personal Box, for example, cannot be delivered. Be sure to check the settings in the fax function before deleting any destinations. Press the[…]
-
Страница 56
Canceling a Transmission This section explains how to cancel a fax transmission. Canceling a Transmission Before the Original Is Scanned Use this procedure to cancel a transmission before pressing the [Start] key. 1. Press [Reset] DBH019 Canceling a Transmission While the Original Is Being Scanned Use this procedure to cancel scanning or transmitti[…]
-
Страница 57
Press the [Clear/Stop] key, and then select the setting items using the [ ] or [ ] key. DBH022 1. Select the file you want to cancel Press [Stop TX] 2. Press [Delete] 3. Press [Escape] DBH015 Canceling a Transmission After the Original Is Scanned (Before a Transmission Is Started) Use this procedure to delete a file stored in memory before its tran[…]
-
Страница 58
1. Select [Check/Stop TX File] Press [OK] 2. Select the file you want to cancel Press [Stop TX] 3. Press [Delete] 4. Press [Escape] twice DBH015 4. Fax 56[…]
-
Страница 59
Printing the Journal Manually You can print the Journal manually. Press the [Job Information] key, and then select the setting items using the [ ] or [ ] key. DBH003 1. Select [Print Journal] Press [OK] 2. Press [Start] To cancel printing after pressing the [Start] key, press the [Clear/Stop] key. 3. Press [Escape] DBH015 Printing the Journal Manua[…]
-
Страница 60
4. Fax 58[…]
-
Страница 61
5. Print This chapter describes frequently used printer functions and operations. For the information not included in this chapter, see Print on the supplied CD-ROM. Quick Install for USB You can install the printer drivers easily from the CD-ROM provided with this machine. Using USB Quick Install, the PCL 6 printer driver is installed for use with[…]
-
Страница 62
Quick Install for Network You can install the printer drivers easily from the CD-ROM provided with this machine. Using Network Quick Install, the PCL 6 printer driver is installed under network environment, and the Standard TCP/IP port will be set. • Manage Printers permission is required to install the drivers. Log on as an Administrators group […]
-
Страница 63
Displaying the Printer Driver Properties This section explains how to open the printer driver properties from [Devices and Printers]. • Manage Printers permission is required to change the printer settings. Log on as an Administrators group member. • You cannot change the machine default settings for individual users. Settings made in the print[…]
-
Страница 64
Standard Printing • The default setting is duplex printing. If you want to print on only one side, select [Off] for the duplex setting. • If you send a print job via USB 2.0 while the machine is in Sleep mode, an error message might appear when the print job is complete. In this case, check if the document was printed. When Using the PCL 6 Prin[…]
-
Страница 65
6. Scan This chapter describes frequently used scanner functions and operations. For the information not included in this chapter, see Scan on the supplied CD-ROM. Basic Procedure for Using Scan to Folder • Before performing this procedure, refer to «Preparing to Send by Scan to Folder», Scan and confirm the details of the destination c[…]
-
Страница 66
If you are scanning multiple originals, place them on the machine, and then press the [Start] key. Repeat this step until all originals are scanned, and then press the [ ] key. • When scanning from the ADF Transmission starts immediately after originals are scanned. Using Scan to Folder in the Windows Environment The following procedures explain […]
-
Страница 67
1. Create a folder, just as you would create a normal folder, in a location of your choice on the computer 2. Right-click the folder, and then click [Properties] 3. On the [Sharing] tab, select [Advanced Sharing…] When using Windows XP, on the [Sharing] tab, select [Share this folder]. Proceed to step 5. 4. Select the [Share this folder] check bo[…]
-
Страница 68
9. Press [OK] twice Registering an SMB Folder This section describes how to register an SMB folder. Press the [User Tools] key, and then select the setting items using the [ ] or [ ] key. DBH020 1. Select [Address Book Management] Press [OK] 2. Select [Program/Change] Press [OK] 3. Enter the registration number you want to register using the number[…]
-
Страница 69
14. Press [Escape] DBH015 15. Select [Folder Info] Press [OK] 16. Select [SMB] Press [OK] 17. Select [Manual Entry] or [Browse Network] Press [OK] To specify a folder, you can either enter the path manually or locate the folder by browsing the network. 18. Press [Com.Test] to check the path is set correctly. Locating the SMB folder manually This se[…]
-
Страница 70
5. Press [OK] Deleting an SMB Registered Folder This section describes how to delete the registered SMB folder. Press the [User Tools] key, and then select the setting items using the [ ] or [ ] key. 1. Select [Address Book Management] Press [OK] 2. Select [Program/Change] Press [OK] 3. Enter the registration number you want to delete using the num[…]
-
Страница 71
3. Enter the path for the folder Press [OK] In the following example path, the shared folder name is «user» and the computer name is «desk01»: desk01user 4. Depending on the destination setting, enter the user name for logging in to the computer Press [OK] 5. Depending on the destination setting, enter the password for loggin[…]
-
Страница 72
Basic Procedure for Sending Scan Files by E- mail 1. Press [Scanner] DBH013 2. Make sure that no previous settings remain If a previous setting remains, press the [Reset] key. 3. If the Scan to Folder screen is displayed, press [ ] to switch to the E-mail screen 4. Place originals 5. If necessary, specify scan settings according to the original you[…]
-
Страница 73
Registering an E-mail Destination This section describes how to register an e-mail destination. Press the [User Tools] key, and then select the setting items using the [ ] or [ ] key. DBH020 1. Select [Address Book Management] Press [OK] 2. Select [Program/Change] Press [OK] 3. Enter the registration number you want to register using the number key[…]
-
Страница 74
3. Enter the registration number you want to delete using the number keys or the Quick Dial keys Press [OK] You can automatically specify registration numbers 001 — 032 by pressing the Quick Dial key. Press [Search] to specify by name, destination list, registration number, fax number, e-mail address, or folder destination. 4. Press [OK] 5. Press [[…]
-
Страница 75
Specifying Send Options Resolution Select resolution for scanning originals. Select [100dpi], [200dpi], [300dpi], [400dpi], or [600dpi] as the scanning resolution. Press [Options] , and then select the setting items using the [ ] or [ ] key. 1. Select [Send Options] Press [OK] 2. Select [Resolution] Press [OK] 3. Select a resolution Press [OK] 4. P[…]
-
Страница 76
Original Setting This section explains how to specify the page opening orientation and whether both sides of the original are scanned. • This function is available for SP 3610SF only. Press [Options], and then select the setting items using [ ] or [ ] key. 1. Select [Send Options] Press [OK] 2. Select [Original Setting] Press [OK] 3. Select [1 Si[…]
-
Страница 77
• [Single Page:TIFF/JPEG], [Single Page:PDF] If you select a single-page file type when scanning multiple originals, one file is created for single page and the number of files sent is the same as the number of pages scanned. • [Multi-page:PDF] If you select a multi-page file type when scanning multiple originals, scanned pages are combined and[…]
-
Страница 78
6. Scan 76[…]
-
Страница 79
7. Web Image Monitor This chapter describes frequently used Web Image Monitor functions and operations. For the information not included in this chapter, see Connecting the Machine/ System Settings on the supplied CD-ROM or Web Image Monitor Help. Displaying the Top Page There are two modes available with Web Image Monitor: guest mode and administr[…]
-
Страница 80
DBH225 1 2 4 5 3 7 6 1. Menu area Displays the content of a selected menu item. 2. Header area Displays the dialog box for switching to the user mode and administrator mode and the menu for each mode. Also displays the link to Help. 3. Help Clicking the Help button ( ) in the header area displays the contents of Help. Clicking the Help button ( ) i[…]
-
Страница 81
8. Adding Paper and Toner This chapter describes how to load paper into the paper tray and recommended paper sizes and types. Loading Paper into Paper Trays Every paper tray is loaded in the same way. In the following example procedure, paper is loaded into Tray 1. • Be sure to select the correct paper size and feed direction using the paper size[…]
-
Страница 82
1. Check that paper in the paper tray is not being used, and then pull out the paper tray carefully. Adjust the paper size dial to match the size and feed direction of the paper in the paper tray. DBH053 2. Pull the tray carefully until it stops, lift the front side of the tray, and then pull it out of the machine. DBH054 Place the tray on a flat s[…]
-
Страница 83
4. Pinch the end guide and slide it inward to match the standard size. CXC614 5. Fan the paper before loading it in the tray. CBK254 6. Load the new paper stack print side down. Make sure paper is not stacked higher than the upper limit (upper line) marked inside the tray. CXC666 7. Adjust the paper guides to close any gaps. Do not move paper loade[…]
-
Страница 84
8. Lift the front side of the tray, and then slide it into the machine carefully until it stops. DBH055 To avoid paper jams, make sure the tray is securely inserted. • When loading paper larger than A4 or 8 1 / 2 × 11 into Tray 1, extend the tray. For details, see «Extending Tray 1», Paper Specifications and Adding Paper . • Letterhe[…]
-
Страница 85
Loading Paper into the Bypass Tray Use the bypass tray to use OHP transparencies and paper that cannot be loaded in the paper trays. • The maximum number of sheets you can load at the same time depends on paper type. Do not stack paper over the limit mark. For the maximum number of sheets you can load, see page 88 «Recommended Paper Sizes an[…]
-
Страница 86
2. Slide both sides of the paper guide outward, and then load paper print side up until it stops. 1 1 2 DBH078 3. Adjust both sides of the paper guide to match the paper width. DBH079 • When using the bypass tray, it is recommended that you set the paper direction to . • When loading thick paper or OHP transparencies, specify the paper size and[…]
-
Страница 87
Printing from the Bypass Tray Using the Printer Function • If you select [Machine Setting(s)] in [Bypass Tray] under [Tray Setting Priority] in [System] of the [Printer Features] menu, the settings made using the control panel have priority over the printer driver settings. For details, see «System», Print . • The default of [Bypass T[…]
-
Страница 88
Specifying thick paper or OHP transparencies for paper type using the control panel • Usually only one side of OHP transparencies can be used for printing. Be sure to load them with the print side up. • When printing onto OHP transparencies, remove printed sheets one by one. Press the [User Tools] key, and then select the setting items using th[…]
-
Страница 89
Loading Orientation-fixed Paper or Two-sided Paper Orientation-fixed (top to bottom) or two-sided paper (for example, letterhead paper, punched paper, or copied paper) might not be printed correctly, depending on how the originals and paper are placed. Settings for the User Tools Specify [Auto Detect] for [Letterhead Setting] in [System] under the […]
-
Страница 90
Recommended Paper Sizes and Types This section describes recommended paper sizes and types. • If you use paper that curls, either because it is too dry or too damp, a paper jam may occur. • Do not use paper designed for inkjet printers, as these may stick to the fusing unit and cause a misfeed. • When you load OHP transparencies, check the fr[…]
-
Страница 91
*1 When a print job is performed on A5 or 5 1 / 2 » X 8 1 / 2 » paper, it is recommended to set the paper horizontally. While a print job is performed on paper that is loaded vertically, smearing may occur near the edges of the printed paper. Also, use the bypass tray when printing on paper that is set horizontally. *2 Do not stack over t[…]
-
Страница 92
Paper type and weight Paper size Paper capacity 52–162 g/m 2 (14 lb. Bond– 90 lb. Index) Thin Paper–Thick Paper 2 Set the paper size dial on the tray to » «, and select the paper size with the control panel: A5 , B5 JIS , B6 JIS , 8 1 / 2 × 13 , 8 1 / 4 × 14 , 8 1 / 4 × 13 , 8 × 13 , 8 × 10 1 / 2 , 8 × 10 , 7 1 / 4 × 10 1 / 2[…]
-
Страница 93
Paper type and weight Paper size Paper capacity OHP transparencies Select the paper size *1*2 : A4 , A5 , A6 , B5 JIS , B6 JIS , 8 1 / 2 × 14 , 8 1 / 2 × 13 , 8 1 / 2 × 11 , 8 1 / 4 × 14 , 8 1 / 4 × 13 , 8 × 13 , 8 × 10 1 / 2 , 8 × 10 , 7 1 / 4 × 10 1 / 2 , 5 1 / 2 × 8 1 / 2 , 16K Custom size *4 : (mainly Europe and Asia) Vertical: 127.0?[…]
-
Страница 94
Paper Thickness *1 Paper weight Plain Paper 66–74 g/m 2 (18–20 lb. Bond) Plain Paper 2 75–90 g/m 2 (20–24 lb. Bond) Middle Thick 91–105 g/m 2 (24–28 lb. Bond) Thick Paper 1 106–130 g/m 2 (28–35 lb. Bond) Thick Paper 2 131–162 g/m 2 (35 lb. Bond–90 lb. Index) *1 Print quality will decrease if the paper you are using is close to t[…]
-
Страница 95
Thick Paper This section gives you various details about and recommendations concerning thick paper. When loading thick paper of 106–162 g/m 2 (28 lb. Bond–90 lb. Index) in the paper trays or bypass tray, follow the recommendations below to prevent misfeeds and loss of image quality. • Jams and misfeeds can occur when printing on thick smooth[…]
-
Страница 96
• Fan the envelopes before loading them to separate them and prevent the glue on them from causing them to stick together. • Some kinds of envelope might cause misfeeds, wrinkles or print poorly. • When loading envelopes in the orientation, load them with flaps closed. • Before loading envelopes, press down on them to remove any air from in[…]
-
Страница 97
How to load envelopes Types of envelopes Tray 1 Bypass tray Side-opening envelopes • Flaps: closed • Bottom side of envelopes: toward the right of the machine • Side to be printed: face down • Flaps: closed • Bottom side of envelopes: toward the right of the machine • Side to be printed: face up When loading envelopes, select «Enve[…]
-
Страница 98
Adding Toner Refer to the maintenance guide provided with the new items for the replacement. This section explains precautions when adding toner, how to send faxes or scanned documents when the toner has run out, and how to dispose of used toner. • Do not incinerate toner (new or used) or toner containers. Doing so risks burns. Toner will ignite […]
-
Страница 99
• When removing jammed paper or replacing toner, avoid getting toner (new or used) on your skin. If toner comes into contact with your skin, wash the affected area thoroughly with soap and water. • When replacing a toner or waste toner container or consumables with toner, make sure that the toner does not splatter. Put the waste consumables in […]
-
Страница 100
• Any reports are not printed. • If the fax or scanner screen does not appear in step 1, press the [Facsimile] key or the [Scanner] key. Disposing of Used Toner This section describes what to do with used toner. Toner cannot be re-used. Pack used toner containers in the container’s box or a bag to prevent the toner from leaking out of the […]
-
Страница 101
9. Troubleshooting This chapter describes basic troubleshooting procedures. Indicators This section describes the indicators displayed when the machine requires the user to remove misfed paper, to add paper, or to perform other procedures. Indicator Status : Paper Misfeed indicator Appears when a paper misfeed occurs. For details about removing jam[…]
-
Страница 102
Panel Tone The following table describes the meaning of the various beep patterns that the machine produces to alert users about left originals and other machine conditions. Beep pattern Meaning Causes Single short beep Panel/screen input accepted. A control panel or screen key was pressed. Short, then long beep Panel/screen input rejected. An inva[…]
-
Страница 103
When You Have Problems Operating the Machine This section describes common problems and messages. If other messages appear, follow the instructions displayed. Problem Causes Solutions The machine has just been turned on and the User Tools screen is displayed, but the User Tools menu has items missing. Functions other than the copier function are no[…]
-
Страница 104
Problem Causes Solutions An error message remains, even if misfed paper is removed. • When a misfeed message appears, it remains until you open and close the cover as required. • Paper is still jammed in the tray. After removing misfed paper, fully open the front cover, and then close it. For details about removing jammed paper, see «Remov[…]
-
Страница 105
Problem Causes Solutions Misfeeds occur frequently. The tray’s side or end fences may not be set properly. • Remove misfed paper. For details about removing jammed paper, see «Removing Jammed Paper», Troubleshooting . • Check that the side or end fences are set properly. Also, check that the side fences are locked. For details ab[…]
-
Страница 106
When Messages Are Displayed on the Control Panel Messages Displayed When Using the Copy Function This section describes the machine’s main messages. If other messages appear, follow their instructions. • If you cannot make copies as you want because of the paper type, paper size or paper capacity problems, use recommended paper. For details […]
-
Страница 107
Message Causes Solutions «Max. number of sets is nn.» (A figure is placed at nn.) The number of copies exceeds the maximum copy quantity. You can change the maximum copy quantity from [Max. Number of Sets] under [Copier Features]. For details about Max. Copy Quantity, see «Copier Features», Copy . «Original with this length[…]
-
Страница 108
Message Causes Solutions «Error occurred, and transmission was cancelled.» A problem occurred in the machine, or noise occurred on the telephone line. Press [Exit], and then send the documents again. » Func. Problems Data will be initialized.» There is a problem with the fax. Record the code number shown on the screen, and then […]
-
Страница 109
If you reconnect the machine to the network, be sure to set «Display» by configuring the appropriate User Parameter. Messages Displayed When Using the Printer Function This section describes the principal messages that appear on the display panel, error logs or reports. If other messages appear, follow their instructions. Status messages […]
-
Страница 110
Message Causes Solutions » (A1) Remove misfeed in Trays. Opn & cls Frt. Cov.» Open the front cover and remove the jammed paper from the paper feed path. For details, see «Removing Jammed Paper», Troubleshooting . » (A2) Open Front Cover and remove the paper.» Remove the jammed paper from the bypass tray. To reset t[…]
-
Страница 111
Message Causes Solutions «Cannot connect=>Comm.Serv. Check proxy user/ password.» The proxy user name or password is incorrect. Check the proxy server settings, and then change the user name and/or password if they are incorrect. «Change (Tray name) to the following settings:» The size of the paper in the tray does not match […]
-
Страница 112
Message Causes Solutions «Replcmnt Requrd Drum Unit» You need to replace the drum unit. For details, see «Replacing Drum Unit», Maintenance and Specifications . «Repl Requrd Soon Maint. Kit» You will need to replace the maintenance kit soon. Contact your sales or service representative to obtain a new unit. «Rplcm[…]
-
Страница 113
Message Causes Solutions «Authentication with the destination has failed. Check the settings.» The user name and password entered when sending to a folder were incorrect. Enter the correct user name and password, and try again. «Cannot write on memory device because remain. space is insufficient.» The memory device is insufficie[…]
-
Страница 114
Message Causes Solutions «Connection with the destination has failed. Check the status and connection.» The correct network settings are not made. • Check the network settings of the client computer. • Check that components such as the LAN cable are connected properly. • Check that the server settings are correct and the server is w[…]
-
Страница 115
Message Causes Solutions «Exceeded max. page capacity. Do you want to send the scanned data?» The number of scanned pages exceeded maximum page capacity. Select whether to send the data so far. «Exceeded max. pg. per file. Press [Write] to wrt. scanned data to mem. device. Or press [Cancel] to delete.» The scan could not be comp[…]
-
Страница 116
Message Causes Solutions «Transmission has failed. Insufficient memory in the destination hard disk.» There is not enough space on the receiver’s hard disk. Contact the receiver’s administrator. 9. Troubleshooting 114[…]
-
Страница 117
When Messages Are Displayed on Your Computer Screen Messages Displayed When Using the Scanner Function This section describes likely causes of and possible solutions for the main error messages displayed on the client computer when using the TWAIN driver. If a message not described here appears, act according to the message. Message Causes Solution[…]
-
Страница 118
Message Causes Solutions «Clear Misfeed(s) in ADF.» A paper misfeed has occurred inside the ADF. • Remove jammed originals, and then insert them again. For details about how to remove jammed paper, see «Removing Jammed Paper», Troubleshooting . • When a misfeed occurs, replace the jammed originals. • Check whether the orig[…]
-
Страница 119
Message Causes Solutions «Insufficient memory. Reduce the scanning area.» Scanner memory is insufficient. • Reset the scan size. • Lower the resolution. • Set with no compression. For details about the settings, see TWAIN driver Help. The problem may also be due to the following causes: • Scanning cannot be performed if large valu[…]
-
Страница 120
Message Causes Solutions «Scanner is in use for other function. Please wait.» A function of the machine other than the Scanner function is being used such as the Copier function. • Wait for a while, and then reconnect. • Cancel the job that is being processed. For example, press [Exit], and then press the [OK] key. Next, press the [Co[…]
-
Страница 121
Message Causes Solutions «Scanner is not ready. Check the scanner and the options.» The ADF cover is open. Check whether the ADF cover is closed. «The name is already in use. Check the registered names.» You tried to register a name that is already in use. Use another name. When Messages Are Displayed on Your Computer Screen 119[…]
-
Страница 122
9. Troubleshooting 120[…]
-
Страница 123
10. Appendix This chapter describes the trademarks. Trademarks PostScript and PostScript 3 are either registered trademarks or trademarks of Adobe Systems Incorporated in the United States and/or other countries. Microsoft and Windows are either registered trademarks or trademarks of Microsoft Corp. in the United States and/or other countries. The […]
-
Страница 124
10. Appendix 122[…]
-
Страница 125
INDEX 2 Sided Print ……………………………………………………. 9 A Address book ……………… 11, 52, 53, 66, 67, 68, 71 ADF …………………………………………………….. 7, 20, 31 ADF cover …………………………………………………….. 20 Alert Indicators………………………………[…]
-
Страница 126
M Main power indicator ……………………………………. 26 Main power switch ………………………………….. 20, 29 Media slot …………………………………………………….. 20 Memory ……………………………………………………… 105 Memory Transmission ………………………… 49, 50, 51[…]
-
Страница 127
Turning off the power …………………………………….. 29 Turning on the power …………………………………….. 29 Two-sided Combine ………………………………………. 43 Two-sided paper …………………………………………… 87 U USB 2.0 [Type B] port ……………………………………. 22 U[…]
-
Страница 128
MEMO 126[…]
-
Страница 129
MEMO 127[…]
-
Страница 130
MEMO 128 EN GB EN US M173-7600A[…]
-
Страница 131
© 2014[…]

Для безопасного и правильного использования
обязательно прочтите раздел «Техника безопасности»
руководства «Прочтите это в первую очередь».
По поводу информации, которой нет
в данном руководстве, см. файлы
HTML/PDF на поставляемом диске.
Приложение
Устранение неполадок
Добавление бумаги и тонера
Web Image Monitor
Сканирование
Печать
Факс
Копир
Начало работы
Возможности этого аппарата
Руководство
Пользователя


СОДЕРЖАНИЕ
Как пользоваться руководствами…………………………………………………………………………………………………… 5
Обозначения, используемые в руководствах…………………………………………………………………………….. 5
Информация по моделям……………………………………………………………………………………………………………….. 6
Наименования основных функций…………………………………………………………………………………………………..7
1. Возможности этого аппарата
Я хочу экономить бумагу………………………………………………………………………………………………………………… 9
Я хочу легко преобразовывать документы в электронные форматы……………………………………………. 10
Я хочу зарегистрировать адресатов……………………………………………………………………………………………..11
Я хочу использовать аппарат более эффективно………………………………………………………………………….12
Для копирования можно использовать разнообразные функции…………………………………………………13
Выводить данные на печать можно с применением различных функций……………………………………… 14
Сканер можно использовать в сетевой среде……………………………………………………………………………… 15
Утечки информации можно предотвратить (функции безопасности)……………………………………………16
Мониторинг состояния устройства и настройка аппарата с помощью компьютера…………………… 17
2. Начало работы
Перечень названий и функций компонентов……………………………………………………………………………….. 19
Руководство по компонентам…………………………………………………………………………………………………….19
Описание функций опций аппарата……………………………………………………………………………………………..24
Описание функций внешних опций аппарата ………………………………………………………………………….24
Описание названий и функций элементов панели управления аппарата…………………………………… 25
Изменение языка дисплея……………………………………………………………………………………………………………..28
Включение/выключение питания…………………………………………………………………………………………………. 29
Включение основного питания…………………………………………………………………………………………………. 29
Выключение основного питания………………………………………………………………………………………………..29
Размещение оригиналов……………………………………………………………………………………………………………….31
Размещение оригиналов на стекле экспонирования…………………………………………………………………31
Размещение оригиналов в автоматическом податчике документов………………………………………….31
3. Копир
Основные операции…………………………………………………………………………………………………………………….. 33
Уменьшение или увеличение оригиналов……………………………………………………………………………………..35
Предустановленный коэффициент уменьшения/увеличения…………………………………………………… 35
Масштаб……………………………………………………………………………………………………………………………………36
Автовыбор масштаба………………………………………………………………………………………………………………..37
1

Двустороннее копирование…………………………………………………………………………………………………………. 38
Объединенное копирование…………………………………………………………………………………………………………40
Объединение на одной стороне………………………………………………………………………………………………. 41
Объединение на двух сторонах……………………………………………………………………………………………….. 43
Копирование на бумагу нестандартного размера из обходного лотка……………………………………….45
Копирование на конверты…………………………………………………………………………………………………………….46
Сортировка………………………………………………………………………………………………………………………………….. 47
4. Факс
Основная процедура передачи документов (Передача из памяти)…………………………………………….. 49
Отправка оригиналов с использованием АПД………………………………………………………………………… 50
Отправка оригиналов с использованием стекла экспонирования……………………………………………51
Регистрация адресата факса…………………………………………………………………………………………………….52
Удаление адресата факса……………………………………………………………………………………………………….. 53
Отмена передачи………………………………………………………………………………………………………………………….55
Отмена передачи до сканирования оригинала……………………………………………………………………….. 55
Отмена передачи во время сканирования оригинала………………………………………………………………55
Отмена передачи после окончания сканирования (во время передачи)………………………………….56
Отмена передачи после окончания сканирования (до начала передачи)………………………………..56
Печать журнала вручную………………………………………………………………………………………………………………58
5. Печать
Быстрая установка для USB…………………………………………………………………………………………………………..59
Быстрая установка сети……………………………………………………………………………………………………………….. 60
Просмотр свойств драйвера принтера…………………………………………………………………………………………
61
Стандартная печать……………………………………………………………………………………………………………………… 62
С использованием драйвера PCL 6………………………………………………………………………………………….. 62
6. Сканирование
Основная процедура использования функции сканирования в папку………………………………………… 63
Использование сканирования в папку в среде Windows………………………………………………………….64
Регистрация папки SMB……………………………………………………………………………………………………………. 66
Удаление зарегистрированной папки SMB……………………………………………………………………………… 68
Задание пути к папке посредством ручного ввода………………………………………………………………….. 69
Основная процедура отправки отсканированных файлов по электронной почте………………………. 70
Регистрация электронной почты адресата……………………………………………………………………………….. 71
2

Удаление электронной почты адресата…………………………………………………………………………………….71
Задание адреса электронной почты посредством ручного ввода…………………………………………….72
Настройка параметров отправки………………………………………………………………………………………………… 73
Разрешение……………………………………………………………………………………………………………………………….73
Ориентация оригинала……………………………………………………………………………………………………………..73
Установки оригинала……………………………………………………………………………………………………………….. 74
Размер сканирования………………………………………………………………………………………………………………. 74
Тип файла………………………………………………………………………………………………………………………………….74
7. Web Image Monitor
Отображение начальной страницы………………………………………………………………………………………………77
8. Добавление бумаги и тонера
Загрузка бумаги в лотки для бумаги……………………………………………………………………………………………. 79
Загрузка бумаги в обходной лоток……………………………………………………………………………………………… 83
Печать из обходного лотка с помощью функции принтера……………………………………………………… 85
Загрузка двусторонней бумаги или бумаги с фиксированной ориентацией………………………………. 87
Рекомендуемые размеры и типы бумаги……………………………………………………………………………………….88
Плотная бумага…………………………………………………………………………………………………………………………93
Конверты……………………………………………………………………………………………………………………………………94
Добавление тонера……………………………………………………………………………………………………………………… 97
Передача факсов или отсканированных документов при отсутствии тонера…………………………..99
Утилизация отработанного тонера……………………………………………………………………………………………99
9. Устранение неполадок
Индикаторы……………………………………………………………………………………………………………………………….. 101
Звук с панели………………………………………………………………………………………………………………………………102
Действия при возникновении неполадок во время эксплуатации аппарата……………………………… 103
Вывод сообщений на панели управления………………………………………………………………………………….. 107
Сообщения, отображаемые при использовании функции копирования………………………………..107
Сообщения, выводимые при использовании функции факса………………………………………………… 108
Сообщения, выводимые при использовании функции принтера…………………………………………….110
Сообщения, выводимые при использовании функции сканера………………………………………………115
Сообщения, выводимые на экран компьютера…………………………………………………………………………..120
Сообщения, выводимые при использовании функции сканера………………………………………………120
3

10. Приложение
Товарные знаки…………………………………………………………………………………………………………………………..127
ИНДЕКС…………………………………………………………………………………………………………………………………… 129
4
Как пользоваться руководствами
Обозначения, используемые в руководствах
В данном руководстве используются следующие обозначения:
Обозначает информацию, на которую следует обратить внимание при эксплуатации аппарата, а
также сведения о наиболее вероятных причинах замятия бумаги, повреждения оригиналов или
потери данных. Обязательно прочитайте эти пояснения.
Обозначает дополнительные сведения о функциях аппарата и указания по устранению ошибок
пользователя.
Этот символ располагается в конце разделов. Он обозначает места, где содержится
дополнительная информация по теме.
[ ]
Обозначает названия клавиш, отображаемых на дисплее изделия или на панелях управления.
Отображает последовательность нажатия клавиш на панели управления.
Пример:
Выберите [Система] Нажмите [OK]
(Выберите [Система] и нажмите клавишу [[OK]].)
(главным образом страны Европы и Азии)
(главным образом страны Северной Америки)
Различие в функциях региона A и региона Б обозначается двумя символами. Прочтите
информацию, обозначенную символом, соответствующим региону, в котором используется
данная модель. Для получения более подробной информации о символе, относящемся к
используемой модели, см. стр. 6 «Информация по моделям».
5
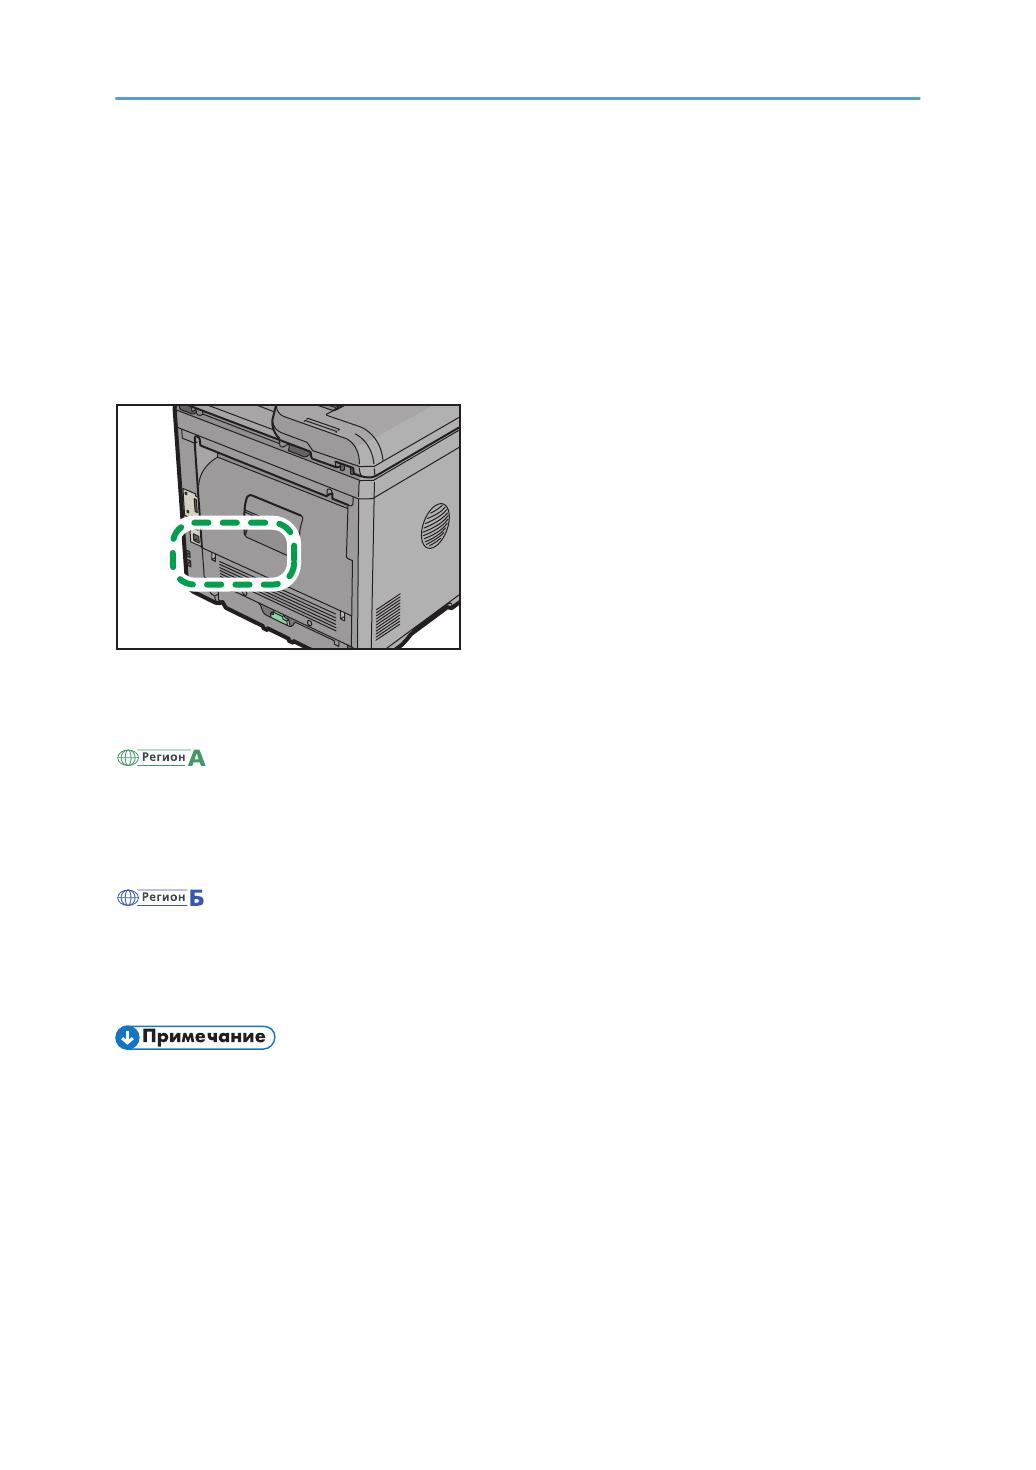
Информация по моделям
В данной главе описано, каким образом можно определить регион, к которому относится
аппарат.
На задней стороне аппарата имеется наклейка, расположение которой указано ниже. На
наклейке приведены данные, определяющие регион, к которому относится аппарат. Прочтите
данные на наклейке.
Следующая информация зависит от региона. Прочтите информацию под символом, который
соответствует региону использования аппарата.
(главным образом страны Европы и Азии)
Если на этикетке имеется следующая информация, устройство относится к региону A:
• КОД XXXX -27
•
220-240 В
(главным образом страны Северной Америки)
Если на наклейке имеется следующая информация, аппарат относится к региону Б:
• КОД XXXX -17
•
120-127 В
• Размеры в этом руководстве даются в двух системах единиц измерения: метрической и
дюймовой. Если аппарат относится к региону A, используется метрическая система. Если
аппарат относится к региону Б, используется дюймовая система.
6

Наименования основных функций
В данном руководстве основные функции аппарата обозначаются следующим образом:
• Устройство автоматической подачи документов АПД
7

8

1. Возможности этого аппарата
Найти описание можно путем ввода желаемого действия.
Я хочу экономить бумагу
Печать многостраничных документов на обеих сторонах листа (Дупл.копия)
См. руководство «Копирование» .
Печать многостраничных документов на одном листе (Комбинир.)
См. руководство «Копирование» .
Печать полученных факсов на обеих сторонах листа (2-стороняя печать)
См. «Факс» .
Отправка файлов с компьютера без выполнения их печати (LAN-Fax)
См. «Факс» .
9
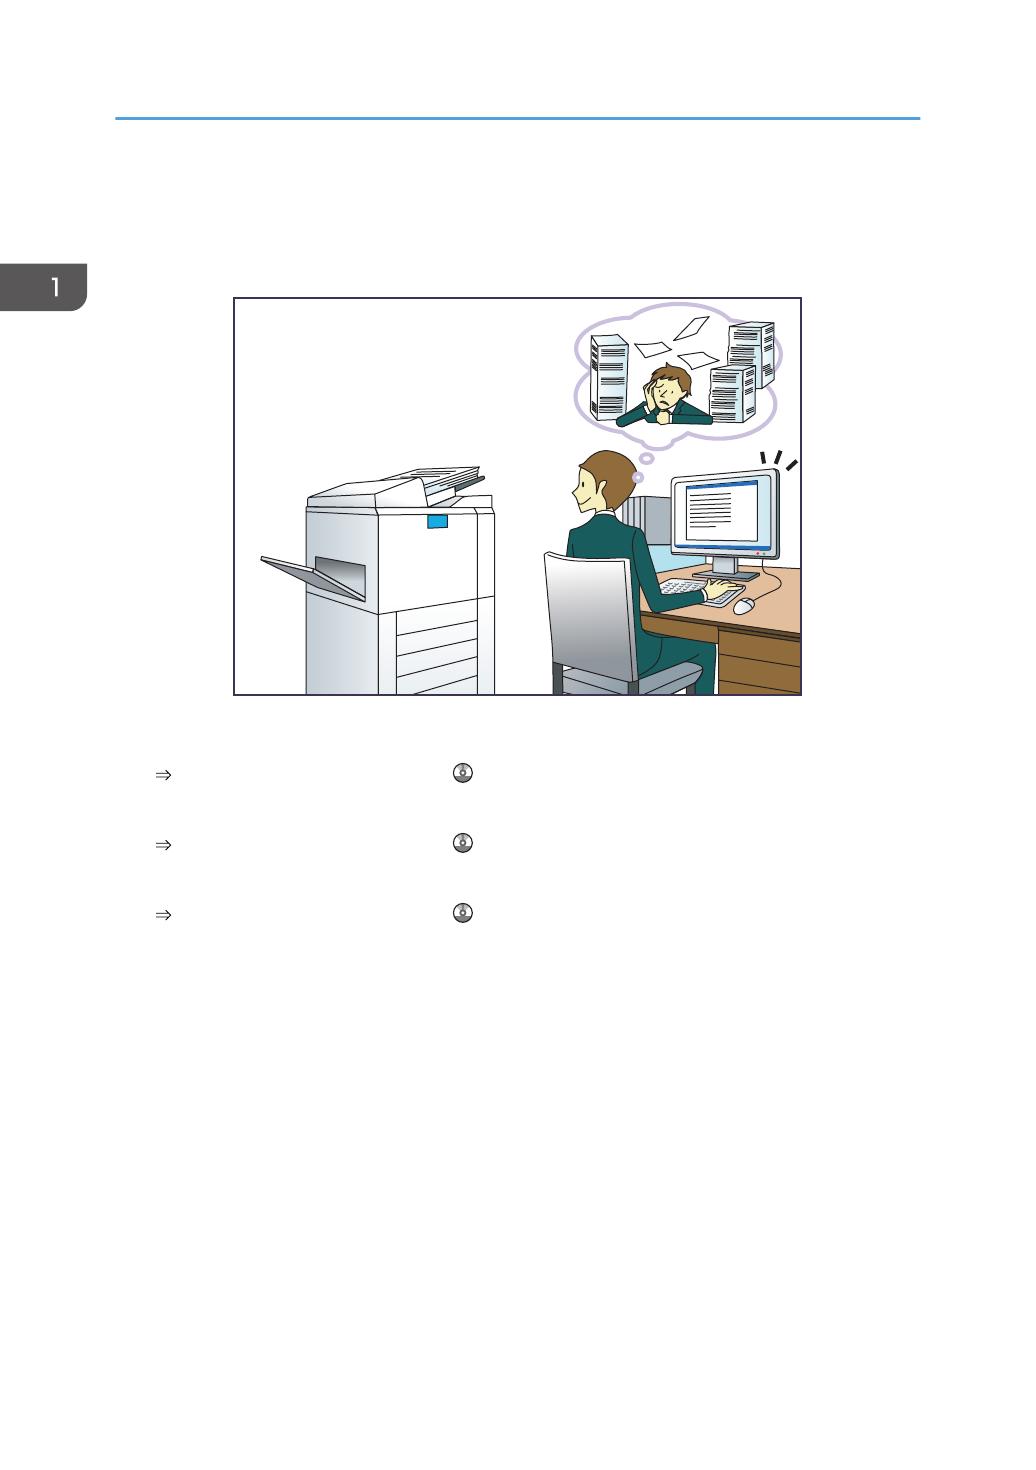
Я хочу легко преобразовывать документы в
электронные форматы
Отправка файлов сканирования
См. руководство «Сканирование» .
Хранение отсканированных файлов в общей папке
См. руководство «Сканирование» .
Хранение отсканированных файлов на носителях
См. руководство «Сканирование» .
1. Возможности этого аппарата
10

Я хочу зарегистрировать адресатов
Использование панели управления для регистрации адресатов в блоке Адрес.книга
См. руководство «Подключение аппарата/Параметры системы» .
Загрузка зарегистрированных в устройстве адресатов в список адресатов драйвера ЛВС-
Факс
См. руководство «Факс» .
Я хочу зарегистрировать адресатов
11

Я хочу использовать аппарат более
эффективно
Регистрация часто используемых параметров печати в драйвере принтера
См. руководство «Печать» .
Замена исходных настроек драйвера принтера на часто используемые параметры
печати
См. руководство «Печать» .
1. Возможности этого аппарата
12
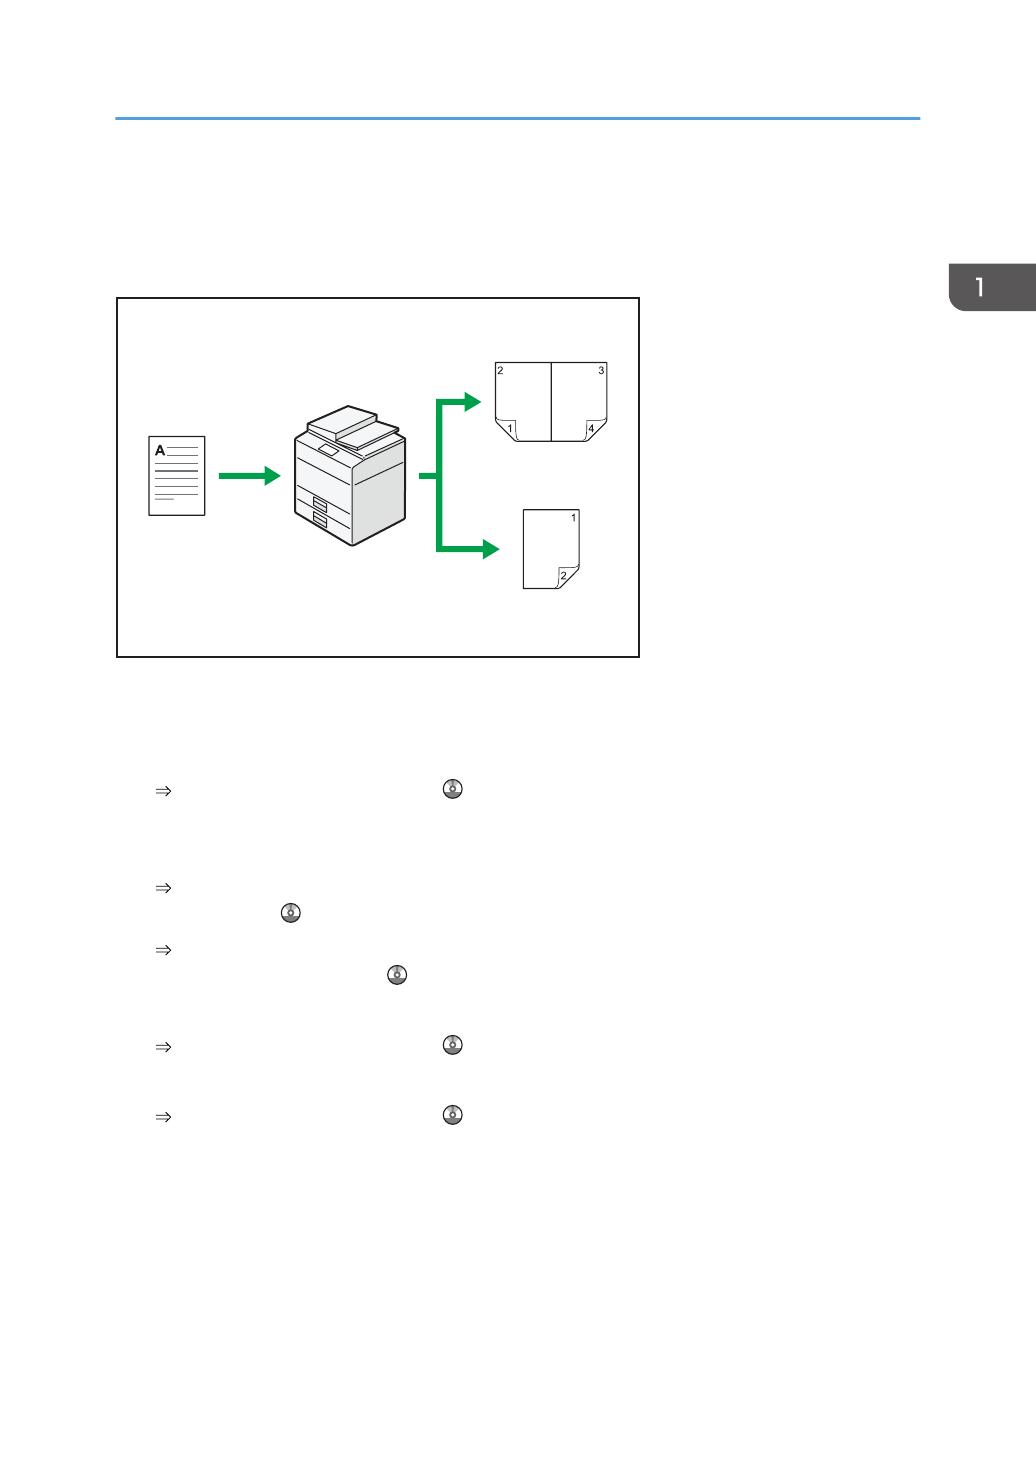
Для копирования можно использовать
разнообразные функции
• Копируемое изображение можно уменьшить или увеличить. С помощью функции Авто
ум./Ув. аппарат автоматически вычисляет формат печати, соотнося размеры оригиналов и
выбранного типа бумаги.
См. руководство «Копирование» .
• Такие функции копирования, как Двуст.печ. и Объедин., позволяют экономить бумагу
посредством копирования нескольких страниц на один лист.
Для получения более подробной информации о дуплексном копировании см. руководство
«Копирование» .
Для получения более подробной информации об объединенном копировании см.
руководство «Копирование» .
• Можно копировать на различные типы бумаги, в частности, на конверты.
См. руководство «Копирование» .
• Есть возможность сортировки копий.
См. руководство «Копирование» .
Для копирования можно использовать разнообразные функции
13
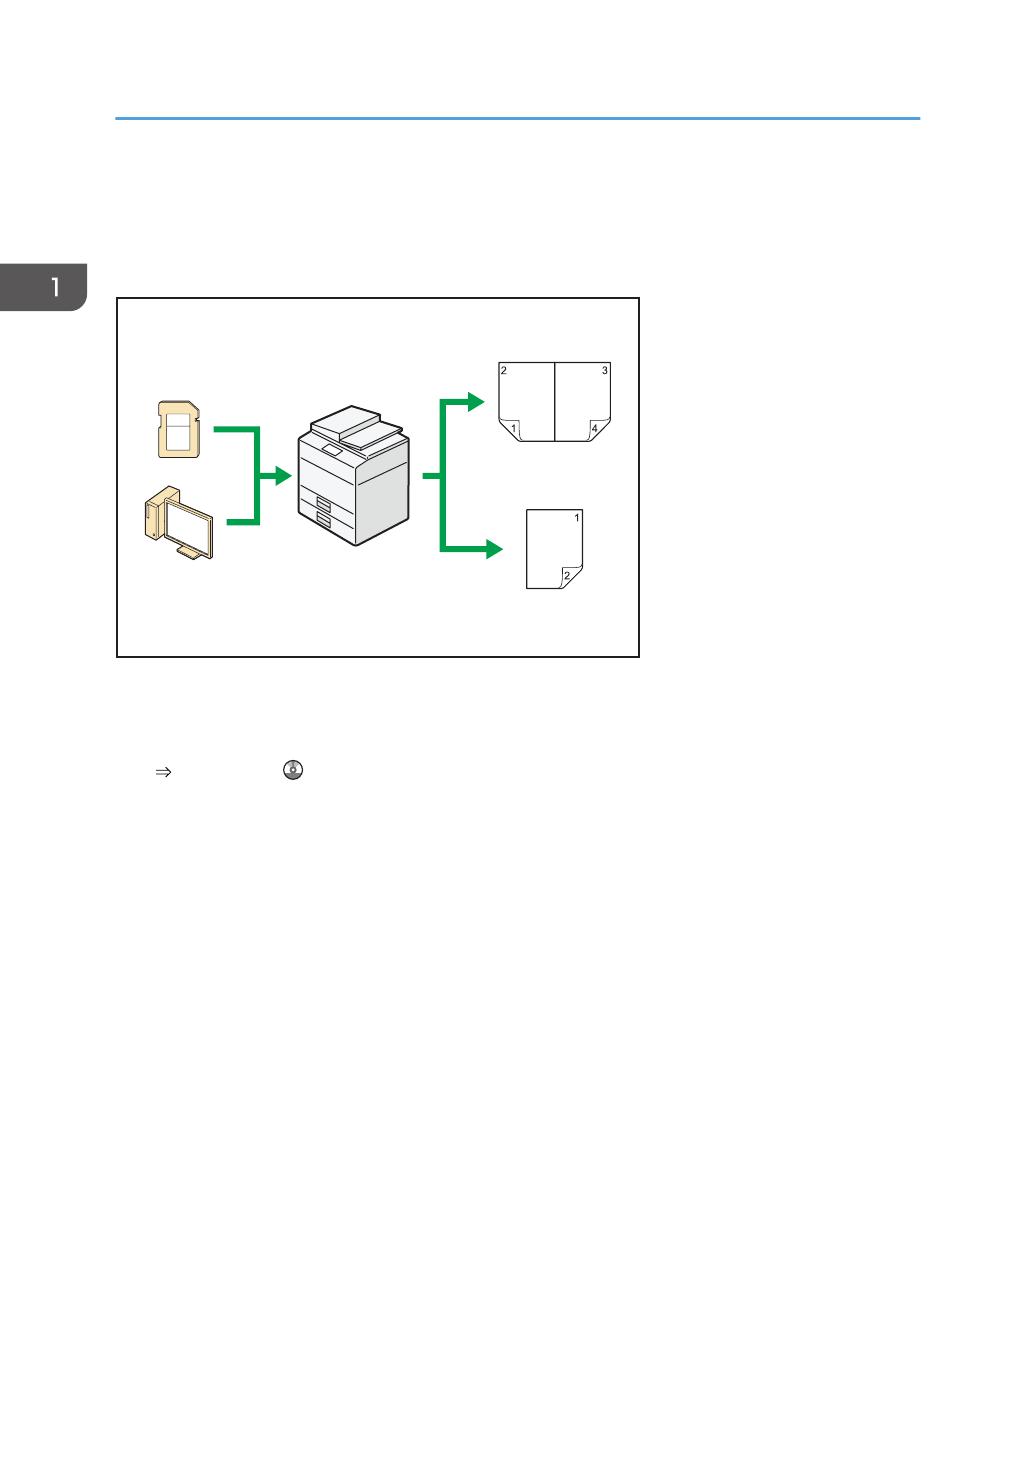
Выводить данные на печать можно с
применением различных функций
• Данное устройство поддерживает локальные и сетевые подключения.
• Есть возможность сортировки напечатанных листов.
См. «Печать» .
1. Возможности этого аппарата
14

Сканер можно использовать в сетевой среде
• Отсканированные файлы можно отправить по электронной почте на указанный адрес
(отправка отсканированных файлов по электронной почте).
См. руководство «Сканирование» .
• Отсканированные файлы можно отправлять непосредственно в папки (отправка
отсканированных файлов с помощью функции сканирования в папку).
См. руководство «Сканирование» .
Сканер можно использовать в сетевой среде
15
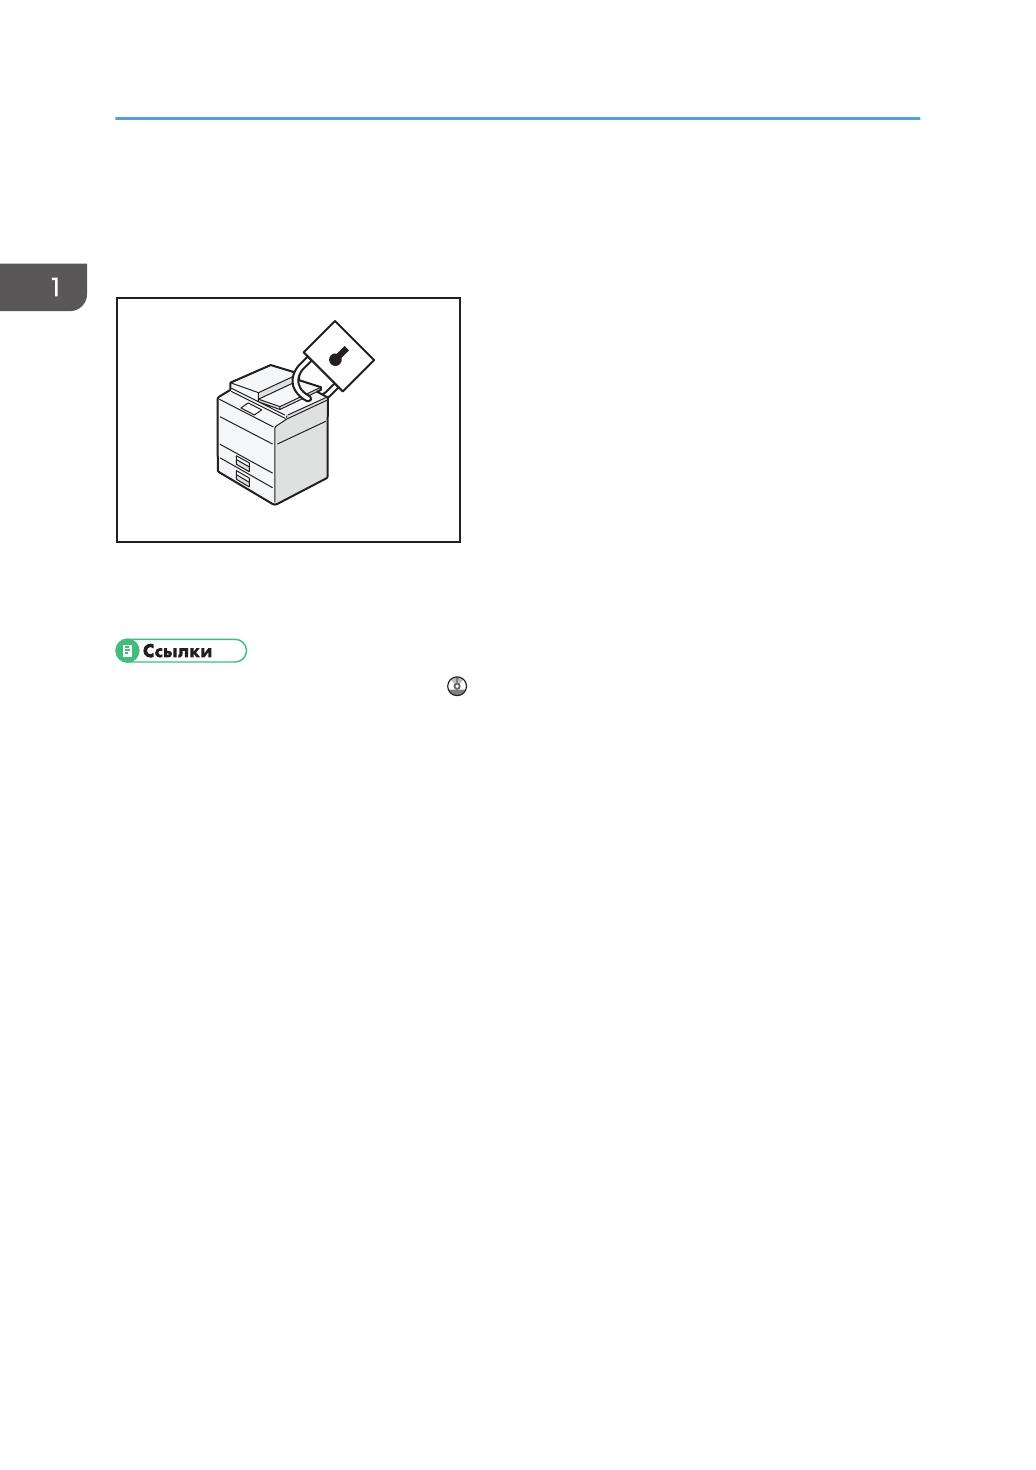
Утечки информации можно предотвратить
(функции безопасности)
• Кроме того, с помощью политики паролей можно предотвратить несанкционированный
доступ через сеть.
• См. «Руководство по безопасности» .
1. Возможности этого аппарата
16
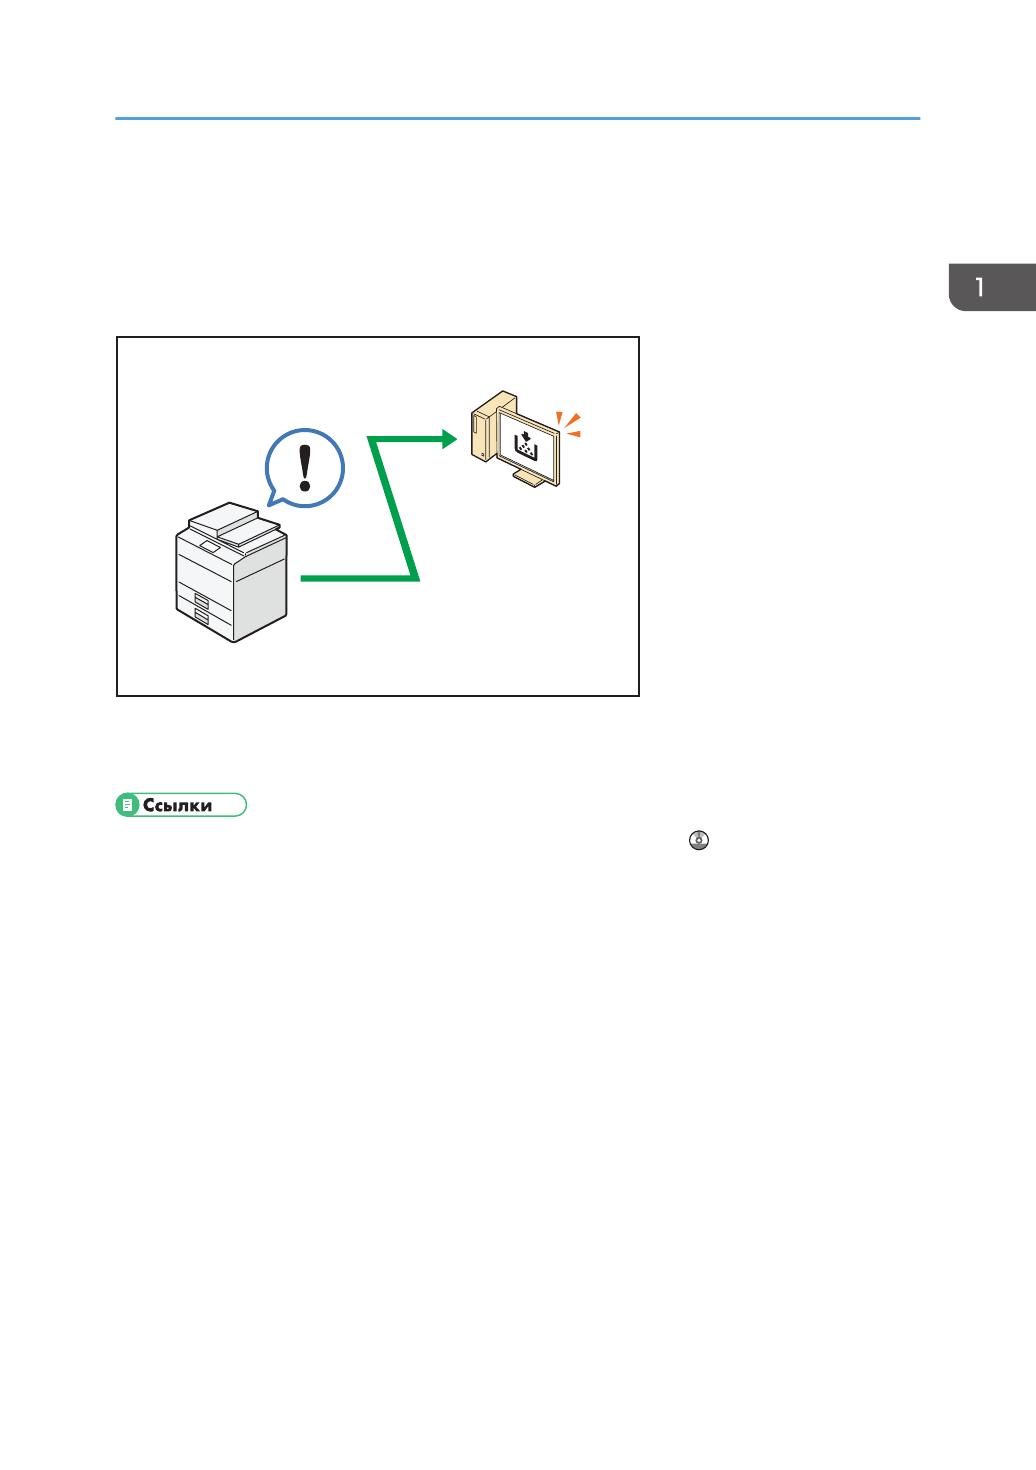
Мониторинг состояния устройства и
настройка аппарата с помощью компьютера
С помощью Web Image Monitor можно проверить состояние аппарата и изменить настройки.
Можно проверить, в каком лотке заканчивается бумага, зарегистрировать информацию в Адрес.
книга, задать параметры настройки сети и системы.
• См. руководство «Подключение устройства/Настройки системы» .
• Cм. справку по Web Image Monitor.
Мониторинг состояния устройства и настройка аппарата с помощью компьютера
17

1. Возможности этого аппарата
18
/
Инструкцию для Ricoh SP 3610SF (407306/906386) на русском языке, в формате pdf можно скачать с нашего сайта. Наш каталог предоставляем Вам инструкцию производителя фирмы Ricoh, которая была взята из открытых источников. Ознакомившись с руководством по эксплуатации от Ricoh, Вы на все 100% и правильно сможете воспользоваться всеми функциями устройства.
Для сохранения инструкции «Струйное МФУ Ricoh SP 3610SF (407306/906386)» на русском языке на вашем компьютере либо телефоне, нажмите кнопку «Скачать инструкцию». Если активна кнопка «Инструкция онлайн», то Вы можете просмотреть документ (manual), в своём браузере онлайн.
Если у Вас нет возможности скачать инструкцию по эксплуатации либо просмотреть её, Вы можете поделиться ссылкой на эту страницу в социальных сетях и при удобном моменте скачать инструкцию. Либо добавьте эту страницу в закладки Вашего браузера, нажав кнопку «Добавить страницу в закладки браузера».
-
Page 1: Ricoh SP 3610SF
For safe and corr ect use, be sur e to read the Safety Information in «Read This First» before using the machine. For information not in this manual, refer to the HTML/PDF files on the supplied CD-ROM. Appendix T roubleshooting Adding Paper and T oner Web Image Monitor Scan Print Fax Copy Getting Started What Y ou Can Do with This Machin[…]
-
Page 2: Ricoh SP 3610SF
[…]
-
Page 3: Ricoh SP 3610SF
TABLE OF CONTENTS How to Read the Manuals …………………………………………………………………………………………………………………5 Symbols used in the manuals …………………………………………………………………………………………………………5 Model-Specific Information […]
-
Page 4: Ricoh SP 3610SF
Duplex Copying …………………………………………………………………………………………………………………………….. 38 Combined Copying ……………………………………………………………………………………………………………………….. 40 One-Sided Combine …………[…]
-
Page 5: Ricoh SP 3610SF
Deleting an E-mail Destination …………………………………………………………………………………………………….. 71 Specifying an E-mail Address by Entering It Manually …………………………………………………………………. 72 Specifying Send Options ……………………………………[…]
-
Page 6: Ricoh SP 3610SF
10. Appendix Trademarks ………………………………………………………………………………………………………………………………….. 121 INDEX ……………………………………………………………………………………………………………………………………….. 123 4[…]
-
Page 7: Ricoh SP 3610SF
How to Read the Manuals Symbols used in the manuals This manual uses the following symbols: Indicates points to pay attention to when using the machine, and explanations of likely causes of paper misfeeds, damage to originals, or loss of data. Be sure to read these explanations. Indicates supplementary explanations of the machine’s functions, […]
-
Page 8: Ricoh SP 3610SF
Model-Specific Information This section explains how you can identify the region your machine belongs to. There is a label on the rear of the machine, located in the position shown below. The label contains details that identify the region your machine belongs to. Read the label. DBH040 The following information is region-specific. Read the informa[…]
-
Page 9: Ricoh SP 3610SF
Names of Major Features In this manual, major features of the machine are referred to as follows: • Auto Document Feeder ADF 7[…]
-
Page 10: Ricoh SP 3610SF
8[…]
-
Page 11: Ricoh SP 3610SF
1. What You Can Do with This Machine You can search for a description by what you want to do. I Want to Save Paper BRL059S Printing multi-page documents on both sides of sheets (Duplex Copy) See «Duplex Copying», Copy . Printing multi-page documents on a single sheet (Combine) See «Combined Copying», Copy . Printing received fax[…]
-
Page 12: Ricoh SP 3610SF
I Want to Convert Documents to Electronic Formats Easily BQX138S Sending scan files See «Basic Procedure for Sending Scan Files by E-mail», Scan . Storing scan files in a shared folder See «Basic Procedure for Using Scan to Folder», Scan . Storing scan files on media See «Storing the Scanned Documents on a USB Flash Memory […]
-
Page 13: Ricoh SP 3610SF
I Want to Register Destinations BRL060S Using the control panel to register destinations in the Address Book See «Registering Addresses and Users for Facsimile/Scanner Functions «, Connecting the Machine/ System settings . Downloading destinations registered in the machine to the LAN-Fax driver destination list See «Using the machine[…]
-
Page 14: Ricoh SP 3610SF
I Want to Operate the Machine More Effectively BQX139S Registering frequently-used printing settings to the printer driver See «Using One Click Presets», Print . Changing the initial settings of the printer driver to frequently-used printing settings See «Displaying the Printing Preferences Dialog Box», Print . 1. What You Can D[…]
-
Page 15: Ricoh SP 3610SF
You Can Make Copies Using Various Functions CMQ002 • You can reduce or enlarge the copy image. With the Auto Reduce/Enlarge function, the machine automatically calculates the reproduction ratio based on the sizes of the originals and the paper you have specified. See «Reducing or Enlarging Originals», Copy . • Copier functions such as[…]
-
Page 16: Ricoh SP 3610SF
You Can Print Data Using Various Functions CMQ004 • This machine supports network and local connections. • You can collate printed paper. See «Collate», Print . 1. What You Can Do with This Machine 14[…]
-
Page 17: Ricoh SP 3610SF
You Can Use the Scanner in a Network Environment CJQ607 • You can send scan files to a specified destination using e-mail (Sending scan files by e-mail). See «Basic Procedure for Sending Scan Files by E-mail», Scan . • You can send scan files directly to folders (Sending scan files by Scan to Folder). See «Basic Procedure for Usi[…]
-
Page 18: Ricoh SP 3610SF
You Can Prevent Information Leakage (Security Functions) CJQ608 • By setting passwords, you can prevent unauthorized access via the network. • See Security Guide . 1. What You Can Do with This Machine 16[…]
-
Page 19: Ricoh SP 3610SF
You Can Monitor and Set the Machine Using a Computer Using Web Image Monitor, you can check the machine’s status and change the settings. CJQ609 You can check which tray is running out of paper, register information in the Address Book, specify the network settings, and configure the system settings. • See «Using Web Image Monitor»[…]
-
Page 20: Ricoh SP 3610SF
1. What You Can Do with This Machine 18[…]
-
Page 21: Ricoh SP 3610SF
2. Getting Started This chapter describes how to start using this machine. Guide to Names and Functions of Components Guide to Components • Do not obstruct the machine’s vents. Doing so risks fire caused by overheated internal components. Exterior: Front view 22 20 12 14 13 12 3 4 56 8 7 9 12 11 10 21 17 18 15 16 19 DBH030 19[…]
-
Page 22: Ricoh SP 3610SF
1. ADF Lower the ADF over originals placed on the exposure glass. If you load a stack of originals in the ADF, the ADF will automatically feed the originals one by one. 2. ADF cover Open this cover to remove originals jammed in the ADF. 3. Input tray for the ADF Place stacks of originals here. 4. Extender for the ADF tray Extend this when placing p[…]
-
Page 23: Ricoh SP 3610SF
18. Bypass tray open lever Push this lever to open the bypass tray. 19. Tray Extension Pull this fence to prevent paper from falling off. 20. Bypass tray Use to copy or print on thick paper, OHP transparencies, envelopes, and label paper (adhesive labels). 21. Extender for the bypass tray Pull this extender out when loading A4 , 8 1 / 2 × 11 or la[…]
-
Page 24: Ricoh SP 3610SF
7. USB 2.0 [Type B] port Use a USB cable to connect the machine to a computer. 8. Security slot Connect a security cable to prevent theft. 9. Ethernet port Use a network interface cable to connect the machine to a network. 10. Slot Optional wireless LAN interface unit can be inserted. Interior: Front view DBH032 1 2 1. Toner cartridge Pull out the […]
-
Page 25: Ricoh SP 3610SF
Interior: Rear view DBH033 1 1. Fusing unit Pull out the fusing unit and remove jammed paper. Messages appear on the screen when the fusing unit needs to be replaced, or a new fusing unit needs to be prepared. For details about the messages that appear on the screen when consumables need to be replaced, see «Replenishing and Replacing Consumab[…]
-
Page 26: Ricoh SP 3610SF
Guide to Functions of the Machine’s Options Guide to Functions of the Machine’s External Options 1 2 DBH086 1. Handset (mainly North America) Used as a receiver. Allows you to use the Manual Dial functions. It also allows you to use the machine as a telephone. 2. Lower paper tray You can install a 250-sheet paper feed unit or a 500-sheet […]
-
Page 27: Ricoh SP 3610SF
Guide to the Names and Functions of the Machine’s Control Panel This illustration shows the control panel of the machine with options fully installed. 12 3 4 5 6 7 8 9 1 0 1 11 2 1 3 1 4 15 16 17 18 19 20 21 22 23 24 25 26 28 29 31 30 32 27 DBH001 1. [ID Card Copy] key Press to jump to the ID card copy setting menu. 2. [Job Information] key (s[…]
-
Page 28: Ricoh SP 3610SF
9. Scroll keys Press these keys to move the cursor in each direction. When the [ ] [ ] [ ] [ ] keys appear in this manual, press the applicable key for the direction that you want to move the cursor. 10. [Pause/Redial] key (facsimile mode) • Pause Press to insert a pause in a fax dialing sequence. The pause is indicated by “-”. • Redial Pre[…]
-
Page 29: Ricoh SP 3610SF
24. Selection keys Correspond to items on the display. Press to select the corresponding item. 25. Data In indicator Flashes when the machine is receiving print jobs or LAN-Fax documents from a computer. 26. [Escape] key Press to cancel an operation or return to the previous display. 27. Alert Indicators Lights up when a machine error occurs. Stead[…]
-
Page 30: Ricoh SP 3610SF
Changing the Display Language You can change the language used on the display. English is set as default. Press the [User Tools] key, and then select the setting items using the [ ] or [ ] key. 1. Select [Language] Press [OK] 2. Select the language you want to use Press [OK] 2. Getting Started 28[…]
-
Page 31: Ricoh SP 3610SF
Turning On/Off the Power The main power switch is on the front side of the machine. When this switch is turned on, the main power turns on and the main power indicator on the right side of the control panel lights up. When this switch is turned off, the main power turns off and the main power indicator on the right side of the control panel goes ou[…]
-
Page 32: Ricoh SP 3610SF
• Before unplugging the power cord plug, turn off the main power switch and make sure the main power switch indicator turns off. Not doing so may result in damage to the memory, leading to malfunctions. • Do not turn off the power while the machine is in operation. Doing so may result in damage to the memory, leading to malfunctions. • Do not[…]
-
Page 33: Ricoh SP 3610SF
Placing Originals Placing Originals on the Exposure Glass • Keep your hands away from the hinges and exposure glass when lowering the ADF. Not doing so may result in an injury if your hands or fingers are pinched. • Do not lift the ADF forcefully. Otherwise, the cover of the ADF might open or be damaged. 1. Lift the ADF. 2. Place the original f[…]
-
Page 34: Ricoh SP 3610SF
When placing originals that are longer than A4 or 8 1 / 2 × 11 , open the extenders. 1 2 2 DBH075 1. Limit mark 2. Original guides 2. Getting Started 32[…]
-
Page 35: Ricoh SP 3610SF
3. Copy This chapter describes frequently used copier functions and operations. For the information not included in this chapter, see Copy on the supplied CD-ROM. Basic Procedure To make copies of originals, place them on the exposure glass or in the ADF. When placing the original on the exposure glass, start with the first page to be copied. When […]
-
Page 36: Ricoh SP 3610SF
5. Enter the number of copies with the number keys 6. Select the paper tray 7. Press [Start] When placing the original on the exposure glass, press the [ ] key after all originals are scanned. 8. When the copy job is finished, press [Reset] to clear the settings DBH019 3. Copy 34[…]
-
Page 37: Ricoh SP 3610SF
Reducing or Enlarging Originals This section describes methods of reducing or enlarging images by specifying a reproduction ratio, or a paper size. Base Point The base point of reduce/enlarge differs depending on how the original is scanned. When the original is placed on the exposure glass, the upper left corner will be the base point. When it is […]
-
Page 38: Ricoh SP 3610SF
Press the [Copy] key, and then select the setting items using the [ ] or [ ] key. 1. Press [R/E] 2. Press [Enlarge] or [Reduce] 3. Select a ratio Press [OK] 4. Select the paper tray 5. Place the originals Press [Start] Zoom You can specify the reproduction ratio in increments of 1%. CKN007 Press the [Copy] key, and then select the setting items usi[…]
-
Page 39: Ricoh SP 3610SF
CKN008 • If you select a reproduction ratio after pressing [Auto R/E], the Auto Enlarge/Reduction function is canceled. Press the [Copy] key, and then select the setting items using the [ ] or [ ] key. 1. Specify the original size For details, see «Specifying Original Sizes», Copy . 2. Press [Auto R/E] 3. Select the paper tray 4. Place […]
-
Page 40: Ricoh SP 3610SF
Duplex Copying Copies two one-sided pages or one two-sided page onto a two-sided page. • Copying one two-sided page on one two-sided page is available for SP 3610SF only. • You cannot use the bypass tray with this function. CKN009 For SP 3610SF, two types of Duplex are available. 1Sided Orig.->Duplex Copy Copies two one-sided pages on one tw[…]
-
Page 41: Ricoh SP 3610SF
Original Placing originals Orig. Orientation Dup. Orientation Output Top to Top Top to Bottom Press the [Copy] key, and then select the setting items using the [ ] or [ ] key. 1. Press [Duplex/Combine/Series]. DBH008 2. Select the duplex mode Press [OK] 3. Select the paper tray 4. Place the originals Press [Start] Duplex Copying 39[…]
-
Page 42: Ricoh SP 3610SF
Combined Copying This mode can be used to select a reproduction ratio automatically and copy the originals onto a single sheet of copy paper. The machine selects a reproduction ratio between 25 and 400%. Orientation of the original and image position of Combine The image position of Combine differs according to original orientation and the number o[…]
-
Page 43: Ricoh SP 3610SF
CKN010 • Originals read from right to left CKN017 One-Sided Combine Combine several pages onto one side of a sheet. • Combine Copies function from two-sided originals is available for SP 3610SF only. CKN014 There are following types of One-Sided Combine. For SP 3610SF Combine: 2 Orig. Copies two one-sided originals to one side of a sheet. Combi[…]
-
Page 44: Ricoh SP 3610SF
Combine 1 Orig. Copies one two-sided originals to one side of a sheet. Combine: 2 Orig. Copies two two-sided originals to one side of a sheet. For SP 3600SF Combine 1 Side (2 Orig.) Copies two one-sided originals to one side of a sheet. Combine 1 Side (4 Orig.) Copies four one-sided originals to one side of a sheet. Press the [Copy] key, and then s[…]
-
Page 45: Ricoh SP 3610SF
Two-Sided Combine Combines various pages of originals onto two sides of one sheet. • The Combine Copies function for two-sided originals is available for SP 3610SF only. • You cannot use the bypass tray with this function. CKN074 There are following types of Two-Sided Combine. For SP 3610SF Combine: 4 Orig. Copies four one-sided originals to on[…]
-
Page 46: Ricoh SP 3610SF
1. Press [Duplex/Combine/Series] DBH008 2. Select the combine mode Press [OK] 3. Select the paper tray 4. Place the originals Press [Start] • The default setting for the original orientation is unreadable direction ( ). When placing originals in unreadable direction, specify the original orientation. To specify the orientation, select [Always Spe[…]
-
Page 47: Ricoh SP 3610SF
Copying onto Custom Size Paper from the Bypass Tray Paper that has a horizontal length of 60.0–216.0 mm (2.37–8.50 inches) and a vertical length of 127.0–900.0 mm (5.00–35.43 inches) can be fed in from the bypass tray. Press the [Copy] key, and then select the setting items using the [ ] or [ ] key. 1. Load the paper face up in the bypass t[…]
-
Page 48: Ricoh SP 3610SF
Copying onto Envelopes This section describes how to copy onto regular size envelopes. Place the original on the exposure glass and place the envelope in the bypass tray. Specify the thickness of the paper according to the weight of the envelopes you are printing on. For details about the relationship between paper weight and paper thickness and th[…]
-
Page 49: Ricoh SP 3610SF
Sort The machine assembles copies as sets in sequential order. CKN018 Press the [Copy] key, and then select the setting items using the [ ] or [ ] key. 1. Press [Sort]. DBH009 2. Enter the number of copy sets using the number keys 3. Select the paper tray 4. Place the originals Press [Start] Sort 47[…]
-
Page 50: Ricoh SP 3610SF
3. Copy 48[…]
-
Page 51: Ricoh SP 3610SF
4. Fax This chapter describes frequently used facsimile functions and operations. For the information not included in this chapter, see Fax on the supplied CD-ROM. Basic Procedure for Transmissions (Memory Transmission) This section describes the basic procedure for transmitting documents using Memory Transmission. Transmission starts automatically[…]
-
Page 52: Ricoh SP 3610SF
Sending Originals Using the ADF 1. Press [Facsimile] DBH012 2. Make sure «Ready» appears on the screen 3. Place the originals into the ADF For details about how to place originals, see «Placing Originals in the Auto Document Feeder», Paper Specifications and Adding Paper . For details about how to place originals to send using t[…]
-
Page 53: Ricoh SP 3610SF
Sending Originals Using the Exposure Glass 1. Press [Facsimile] DBH012 2. Make sure «Ready» appears on the screen 3. Place the first page of the original face down on the exposure glass For details about the originals you can set, see «Placing Originals on the Exposure Glass», Paper Specifications and Adding Paper . For details […]
-
Page 54: Ricoh SP 3610SF
9. When all originals are scanned, press [ ] DBH089 The machine dials the destination and starts transmission. Registering a Fax Destination Press the [User Tools] key, and then select the setting items using the [ ] or [ ] key. DBH020 1. Select [Address Book Management] Press [OK] 2. Select [Program/Change] Press [OK] 3. Enter the registration num[…]
-
Page 55: Ricoh SP 3610SF
9. Press [OK] Deleting a Fax Destination This section describes how to delete a registered fax destination. • If you delete a destination that is a specified delivery destination, messages to its registered Personal Box, for example, cannot be delivered. Be sure to check the settings in the fax function before deleting any destinations. Press the[…]
-
Page 56: Ricoh SP 3610SF
Canceling a Transmission This section explains how to cancel a fax transmission. Canceling a Transmission Before the Original Is Scanned Use this procedure to cancel a transmission before pressing the [Start] key. 1. Press [Reset] DBH019 Canceling a Transmission While the Original Is Being Scanned Use this procedure to cancel scanning or transmitti[…]
-
Page 57: Ricoh SP 3610SF
Press the [Clear/Stop] key, and then select the setting items using the [ ] or [ ] key. DBH022 1. Select the file you want to cancel Press [Stop TX] 2. Press [Delete] 3. Press [Escape] DBH015 Canceling a Transmission After the Original Is Scanned (Before a Transmission Is Started) Use this procedure to delete a file stored in memory before its tran[…]
-
Page 58: Ricoh SP 3610SF
1. Select [Check/Stop TX File] Press [OK] 2. Select the file you want to cancel Press [Stop TX] 3. Press [Delete] 4. Press [Escape] twice DBH015 4. Fax 56[…]
-
Page 59: Ricoh SP 3610SF
Printing the Journal Manually You can print the Journal manually. Press the [Job Information] key, and then select the setting items using the [ ] or [ ] key. DBH003 1. Select [Print Journal] Press [OK] 2. Press [Start] To cancel printing after pressing the [Start] key, press the [Clear/Stop] key. 3. Press [Escape] DBH015 Printing the Journal Manua[…]
-
Page 60: Ricoh SP 3610SF
4. Fax 58[…]
-
Page 61: Ricoh SP 3610SF
5. Print This chapter describes frequently used printer functions and operations. For the information not included in this chapter, see Print on the supplied CD-ROM. Quick Install for USB You can install the printer drivers easily from the CD-ROM provided with this machine. Using USB Quick Install, the PCL 6 printer driver is installed for use with[…]
-
Page 62: Ricoh SP 3610SF
Quick Install for Network You can install the printer drivers easily from the CD-ROM provided with this machine. Using Network Quick Install, the PCL 6 printer driver is installed under network environment, and the Standard TCP/IP port will be set. • Manage Printers permission is required to install the drivers. Log on as an Administrators group […]
-
Page 63: Ricoh SP 3610SF
Displaying the Printer Driver Properties This section explains how to open the printer driver properties from [Devices and Printers]. • Manage Printers permission is required to change the printer settings. Log on as an Administrators group member. • You cannot change the machine default settings for individual users. Settings made in the print[…]
-
Page 64: Ricoh SP 3610SF
Standard Printing • The default setting is duplex printing. If you want to print on only one side, select [Off] for the duplex setting. • If you send a print job via USB 2.0 while the machine is in Sleep mode, an error message might appear when the print job is complete. In this case, check if the document was printed. When Using the PCL 6 Prin[…]
-
Page 65: Ricoh SP 3610SF
6. Scan This chapter describes frequently used scanner functions and operations. For the information not included in this chapter, see Scan on the supplied CD-ROM. Basic Procedure for Using Scan to Folder • Before performing this procedure, refer to «Preparing to Send by Scan to Folder», Scan and confirm the details of the destination c[…]
-
Page 66: Ricoh SP 3610SF
If you are scanning multiple originals, place them on the machine, and then press the [Start] key. Repeat this step until all originals are scanned, and then press the [ ] key. • When scanning from the ADF Transmission starts immediately after originals are scanned. Using Scan to Folder in the Windows Environment The following procedures explain […]
-
Page 67: Ricoh SP 3610SF
1. Create a folder, just as you would create a normal folder, in a location of your choice on the computer 2. Right-click the folder, and then click [Properties] 3. On the [Sharing] tab, select [Advanced Sharing…] When using Windows XP, on the [Sharing] tab, select [Share this folder]. Proceed to step 5. 4. Select the [Share this folder] check bo[…]
-
Page 68: Ricoh SP 3610SF
9. Press [OK] twice Registering an SMB Folder This section describes how to register an SMB folder. Press the [User Tools] key, and then select the setting items using the [ ] or [ ] key. DBH020 1. Select [Address Book Management] Press [OK] 2. Select [Program/Change] Press [OK] 3. Enter the registration number you want to register using the number[…]
-
Page 69: Ricoh SP 3610SF
14. Press [Escape] DBH015 15. Select [Folder Info] Press [OK] 16. Select [SMB] Press [OK] 17. Select [Manual Entry] or [Browse Network] Press [OK] To specify a folder, you can either enter the path manually or locate the folder by browsing the network. 18. Press [Com.Test] to check the path is set correctly. Locating the SMB folder manually This se[…]
-
Page 70: Ricoh SP 3610SF
5. Press [OK] Deleting an SMB Registered Folder This section describes how to delete the registered SMB folder. Press the [User Tools] key, and then select the setting items using the [ ] or [ ] key. 1. Select [Address Book Management] Press [OK] 2. Select [Program/Change] Press [OK] 3. Enter the registration number you want to delete using the num[…]
-
Page 71: Ricoh SP 3610SF
3. Enter the path for the folder Press [OK] In the following example path, the shared folder name is «user» and the computer name is «desk01»: desk01user 4. Depending on the destination setting, enter the user name for logging in to the computer Press [OK] 5. Depending on the destination setting, enter the password for loggin[…]
-
Page 72: Ricoh SP 3610SF
Basic Procedure for Sending Scan Files by E- mail 1. Press [Scanner] DBH013 2. Make sure that no previous settings remain If a previous setting remains, press the [Reset] key. 3. If the Scan to Folder screen is displayed, press [ ] to switch to the E-mail screen 4. Place originals 5. If necessary, specify scan settings according to the original you[…]
-
Page 73: Ricoh SP 3610SF
Registering an E-mail Destination This section describes how to register an e-mail destination. Press the [User Tools] key, and then select the setting items using the [ ] or [ ] key. DBH020 1. Select [Address Book Management] Press [OK] 2. Select [Program/Change] Press [OK] 3. Enter the registration number you want to register using the number key[…]
-
Page 74: Ricoh SP 3610SF
3. Enter the registration number you want to delete using the number keys or the Quick Dial keys Press [OK] You can automatically specify registration numbers 001 — 032 by pressing the Quick Dial key. Press [Search] to specify by name, destination list, registration number, fax number, e-mail address, or folder destination. 4. Press [OK] 5. Press [[…]
-
Page 75: Ricoh SP 3610SF
Specifying Send Options Resolution Select resolution for scanning originals. Select [100dpi], [200dpi], [300dpi], [400dpi], or [600dpi] as the scanning resolution. Press [Options] , and then select the setting items using the [ ] or [ ] key. 1. Select [Send Options] Press [OK] 2. Select [Resolution] Press [OK] 3. Select a resolution Press [OK] 4. P[…]
-
Page 76: Ricoh SP 3610SF
Original Setting This section explains how to specify the page opening orientation and whether both sides of the original are scanned. • This function is available for SP 3610SF only. Press [Options], and then select the setting items using [ ] or [ ] key. 1. Select [Send Options] Press [OK] 2. Select [Original Setting] Press [OK] 3. Select [1 Si[…]
-
Page 77: Ricoh SP 3610SF
• [Single Page:TIFF/JPEG], [Single Page:PDF] If you select a single-page file type when scanning multiple originals, one file is created for single page and the number of files sent is the same as the number of pages scanned. • [Multi-page:PDF] If you select a multi-page file type when scanning multiple originals, scanned pages are combined and[…]
-
Page 78: Ricoh SP 3610SF
6. Scan 76[…]
-
Page 79: Ricoh SP 3610SF
7. Web Image Monitor This chapter describes frequently used Web Image Monitor functions and operations. For the information not included in this chapter, see Connecting the Machine/ System Settings on the supplied CD-ROM or Web Image Monitor Help. Displaying the Top Page There are two modes available with Web Image Monitor: guest mode and administr[…]
-
Page 80: Ricoh SP 3610SF
DBH225 1 2 4 5 3 7 6 1. Menu area Displays the content of a selected menu item. 2. Header area Displays the dialog box for switching to the user mode and administrator mode and the menu for each mode. Also displays the link to Help. 3. Help Clicking the Help button ( ) in the header area displays the contents of Help. Clicking the Help button ( ) i[…]
-
Page 81: Ricoh SP 3610SF
8. Adding Paper and Toner This chapter describes how to load paper into the paper tray and recommended paper sizes and types. Loading Paper into Paper Trays Every paper tray is loaded in the same way. In the following example procedure, paper is loaded into Tray 1. • Be sure to select the correct paper size and feed direction using the paper size[…]
-
Page 82: Ricoh SP 3610SF
1. Check that paper in the paper tray is not being used, and then pull out the paper tray carefully. Adjust the paper size dial to match the size and feed direction of the paper in the paper tray. DBH053 2. Pull the tray carefully until it stops, lift the front side of the tray, and then pull it out of the machine. DBH054 Place the tray on a flat s[…]
-
Page 83: Ricoh SP 3610SF
4. Pinch the end guide and slide it inward to match the standard size. CXC614 5. Fan the paper before loading it in the tray. CBK254 6. Load the new paper stack print side down. Make sure paper is not stacked higher than the upper limit (upper line) marked inside the tray. CXC666 7. Adjust the paper guides to close any gaps. Do not move paper loade[…]
-
Page 84: Ricoh SP 3610SF
8. Lift the front side of the tray, and then slide it into the machine carefully until it stops. DBH055 To avoid paper jams, make sure the tray is securely inserted. • When loading paper larger than A4 or 8 1 / 2 × 11 into Tray 1, extend the tray. For details, see «Extending Tray 1», Paper Specifications and Adding Paper . • Letterhe[…]
-
Page 85: Ricoh SP 3610SF
Loading Paper into the Bypass Tray Use the bypass tray to use OHP transparencies and paper that cannot be loaded in the paper trays. • The maximum number of sheets you can load at the same time depends on paper type. Do not stack paper over the limit mark. For the maximum number of sheets you can load, see page 88 «Recommended Paper Sizes an[…]
-
Page 86: Ricoh SP 3610SF
2. Slide both sides of the paper guide outward, and then load paper print side up until it stops. 1 1 2 DBH078 3. Adjust both sides of the paper guide to match the paper width. DBH079 • When using the bypass tray, it is recommended that you set the paper direction to . • When loading thick paper or OHP transparencies, specify the paper size and[…]
-
Page 87: Ricoh SP 3610SF
Printing from the Bypass Tray Using the Printer Function • If you select [Machine Setting(s)] in [Bypass Tray] under [Tray Setting Priority] in [System] of the [Printer Features] menu, the settings made using the control panel have priority over the printer driver settings. For details, see «System», Print . • The default of [Bypass T[…]
-
Page 88: Ricoh SP 3610SF
Specifying thick paper or OHP transparencies for paper type using the control panel • Usually only one side of OHP transparencies can be used for printing. Be sure to load them with the print side up. • When printing onto OHP transparencies, remove printed sheets one by one. Press the [User Tools] key, and then select the setting items using th[…]
-
Page 89: Ricoh SP 3610SF
Loading Orientation-fixed Paper or Two-sided Paper Orientation-fixed (top to bottom) or two-sided paper (for example, letterhead paper, punched paper, or copied paper) might not be printed correctly, depending on how the originals and paper are placed. Settings for the User Tools Specify [Auto Detect] for [Letterhead Setting] in [System] under the […]
-
Page 90: Ricoh SP 3610SF
Recommended Paper Sizes and Types This section describes recommended paper sizes and types. • If you use paper that curls, either because it is too dry or too damp, a paper jam may occur. • Do not use paper designed for inkjet printers, as these may stick to the fusing unit and cause a misfeed. • When you load OHP transparencies, check the fr[…]
-
Page 91: Ricoh SP 3610SF
*1 When a print job is performed on A5 or 5 1 / 2 » X 8 1 / 2 » paper, it is recommended to set the paper horizontally. While a print job is performed on paper that is loaded vertically, smearing may occur near the edges of the printed paper. Also, use the bypass tray when printing on paper that is set horizontally. *2 Do not stack over t[…]
-
Page 92: Ricoh SP 3610SF
Paper type and weight Paper size Paper capacity 52–162 g/m 2 (14 lb. Bond– 90 lb. Index) Thin Paper–Thick Paper 2 Set the paper size dial on the tray to » «, and select the paper size with the control panel: A5 , B5 JIS , B6 JIS , 8 1 / 2 × 13 , 8 1 / 4 × 14 , 8 1 / 4 × 13 , 8 × 13 , 8 × 10 1 / 2 , 8 × 10 , 7 1 / 4 × 10 1 / 2[…]
-
Page 93: Ricoh SP 3610SF
Paper type and weight Paper size Paper capacity OHP transparencies Select the paper size *1*2 : A4 , A5 , A6 , B5 JIS , B6 JIS , 8 1 / 2 × 14 , 8 1 / 2 × 13 , 8 1 / 2 × 11 , 8 1 / 4 × 14 , 8 1 / 4 × 13 , 8 × 13 , 8 × 10 1 / 2 , 8 × 10 , 7 1 / 4 × 10 1 / 2 , 5 1 / 2 × 8 1 / 2 , 16K Custom size *4 : (mainly Europe and Asia) Vertical: 127.0?[…]
-
Page 94: Ricoh SP 3610SF
Paper Thickness *1 Paper weight Plain Paper 66–74 g/m 2 (18–20 lb. Bond) Plain Paper 2 75–90 g/m 2 (20–24 lb. Bond) Middle Thick 91–105 g/m 2 (24–28 lb. Bond) Thick Paper 1 106–130 g/m 2 (28–35 lb. Bond) Thick Paper 2 131–162 g/m 2 (35 lb. Bond–90 lb. Index) *1 Print quality will decrease if the paper you are using is close to t[…]
-
Page 95: Ricoh SP 3610SF
Thick Paper This section gives you various details about and recommendations concerning thick paper. When loading thick paper of 106–162 g/m 2 (28 lb. Bond–90 lb. Index) in the paper trays or bypass tray, follow the recommendations below to prevent misfeeds and loss of image quality. • Jams and misfeeds can occur when printing on thick smooth[…]
-
Page 96: Ricoh SP 3610SF
• Fan the envelopes before loading them to separate them and prevent the glue on them from causing them to stick together. • Some kinds of envelope might cause misfeeds, wrinkles or print poorly. • When loading envelopes in the orientation, load them with flaps closed. • Before loading envelopes, press down on them to remove any air from in[…]
-
Page 97: Ricoh SP 3610SF
How to load envelopes Types of envelopes Tray 1 Bypass tray Side-opening envelopes • Flaps: closed • Bottom side of envelopes: toward the right of the machine • Side to be printed: face down • Flaps: closed • Bottom side of envelopes: toward the right of the machine • Side to be printed: face up When loading envelopes, select «Enve[…]
-
Page 98: Ricoh SP 3610SF
Adding Toner Refer to the maintenance guide provided with the new items for the replacement. This section explains precautions when adding toner, how to send faxes or scanned documents when the toner has run out, and how to dispose of used toner. • Do not incinerate toner (new or used) or toner containers. Doing so risks burns. Toner will ignite […]
-
Page 99: Ricoh SP 3610SF
• When removing jammed paper or replacing toner, avoid getting toner (new or used) on your skin. If toner comes into contact with your skin, wash the affected area thoroughly with soap and water. • When replacing a toner or waste toner container or consumables with toner, make sure that the toner does not splatter. Put the waste consumables in […]
-
Page 100: Ricoh SP 3610SF
• Any reports are not printed. • If the fax or scanner screen does not appear in step 1, press the [Facsimile] key or the [Scanner] key. Disposing of Used Toner This section describes what to do with used toner. Toner cannot be re-used. Pack used toner containers in the container’s box or a bag to prevent the toner from leaking out of the […]
-
Page 101: Ricoh SP 3610SF
9. Troubleshooting This chapter describes basic troubleshooting procedures. Indicators This section describes the indicators displayed when the machine requires the user to remove misfed paper, to add paper, or to perform other procedures. Indicator Status : Paper Misfeed indicator Appears when a paper misfeed occurs. For details about removing jam[…]
-
Page 102: Ricoh SP 3610SF
Panel Tone The following table describes the meaning of the various beep patterns that the machine produces to alert users about left originals and other machine conditions. Beep pattern Meaning Causes Single short beep Panel/screen input accepted. A control panel or screen key was pressed. Short, then long beep Panel/screen input rejected. An inva[…]
-
Page 103: Ricoh SP 3610SF
When You Have Problems Operating the Machine This section describes common problems and messages. If other messages appear, follow the instructions displayed. Problem Causes Solutions The machine has just been turned on and the User Tools screen is displayed, but the User Tools menu has items missing. Functions other than the copier function are no[…]
-
Page 104: Ricoh SP 3610SF
Problem Causes Solutions An error message remains, even if misfed paper is removed. • When a misfeed message appears, it remains until you open and close the cover as required. • Paper is still jammed in the tray. After removing misfed paper, fully open the front cover, and then close it. For details about removing jammed paper, see «Remov[…]
-
Page 105: Ricoh SP 3610SF
Problem Causes Solutions Misfeeds occur frequently. The tray’s side or end fences may not be set properly. • Remove misfed paper. For details about removing jammed paper, see «Removing Jammed Paper», Troubleshooting . • Check that the side or end fences are set properly. Also, check that the side fences are locked. For details ab[…]
-
Page 106: Ricoh SP 3610SF
When Messages Are Displayed on the Control Panel Messages Displayed When Using the Copy Function This section describes the machine’s main messages. If other messages appear, follow their instructions. • If you cannot make copies as you want because of the paper type, paper size or paper capacity problems, use recommended paper. For details […]
-
Page 107: Ricoh SP 3610SF
Message Causes Solutions «Max. number of sets is nn.» (A figure is placed at nn.) The number of copies exceeds the maximum copy quantity. You can change the maximum copy quantity from [Max. Number of Sets] under [Copier Features]. For details about Max. Copy Quantity, see «Copier Features», Copy . «Original with this length[…]
-
Page 108: Ricoh SP 3610SF
Message Causes Solutions «Error occurred, and transmission was cancelled.» A problem occurred in the machine, or noise occurred on the telephone line. Press [Exit], and then send the documents again. » Func. Problems Data will be initialized.» There is a problem with the fax. Record the code number shown on the screen, and then […]
-
Page 109: Ricoh SP 3610SF
If you reconnect the machine to the network, be sure to set «Display» by configuring the appropriate User Parameter. Messages Displayed When Using the Printer Function This section describes the principal messages that appear on the display panel, error logs or reports. If other messages appear, follow their instructions. Status messages […]
-
Page 110: Ricoh SP 3610SF
Message Causes Solutions » (A1) Remove misfeed in Trays. Opn & cls Frt. Cov.» Open the front cover and remove the jammed paper from the paper feed path. For details, see «Removing Jammed Paper», Troubleshooting . » (A2) Open Front Cover and remove the paper.» Remove the jammed paper from the bypass tray. To reset t[…]
-
Page 111: Ricoh SP 3610SF
Message Causes Solutions «Cannot connect=>Comm.Serv. Check proxy user/ password.» The proxy user name or password is incorrect. Check the proxy server settings, and then change the user name and/or password if they are incorrect. «Change (Tray name) to the following settings:» The size of the paper in the tray does not match […]
-
Page 112: Ricoh SP 3610SF
Message Causes Solutions «Replcmnt Requrd Drum Unit» You need to replace the drum unit. For details, see «Replacing Drum Unit», Maintenance and Specifications . «Repl Requrd Soon Maint. Kit» You will need to replace the maintenance kit soon. Contact your sales or service representative to obtain a new unit. «Rplcm[…]
-
Page 113: Ricoh SP 3610SF
Message Causes Solutions «Authentication with the destination has failed. Check the settings.» The user name and password entered when sending to a folder were incorrect. Enter the correct user name and password, and try again. «Cannot write on memory device because remain. space is insufficient.» The memory device is insufficie[…]
-
Page 114: Ricoh SP 3610SF
Message Causes Solutions «Connection with the destination has failed. Check the status and connection.» The correct network settings are not made. • Check the network settings of the client computer. • Check that components such as the LAN cable are connected properly. • Check that the server settings are correct and the server is w[…]
-
Page 115: Ricoh SP 3610SF
Message Causes Solutions «Exceeded max. page capacity. Do you want to send the scanned data?» The number of scanned pages exceeded maximum page capacity. Select whether to send the data so far. «Exceeded max. pg. per file. Press [Write] to wrt. scanned data to mem. device. Or press [Cancel] to delete.» The scan could not be comp[…]
-
Page 116: Ricoh SP 3610SF
Message Causes Solutions «Transmission has failed. Insufficient memory in the destination hard disk.» There is not enough space on the receiver’s hard disk. Contact the receiver’s administrator. 9. Troubleshooting 114[…]
-
Page 117: Ricoh SP 3610SF
When Messages Are Displayed on Your Computer Screen Messages Displayed When Using the Scanner Function This section describes likely causes of and possible solutions for the main error messages displayed on the client computer when using the TWAIN driver. If a message not described here appears, act according to the message. Message Causes Solution[…]
-
Page 118: Ricoh SP 3610SF
Message Causes Solutions «Clear Misfeed(s) in ADF.» A paper misfeed has occurred inside the ADF. • Remove jammed originals, and then insert them again. For details about how to remove jammed paper, see «Removing Jammed Paper», Troubleshooting . • When a misfeed occurs, replace the jammed originals. • Check whether the orig[…]
-
Page 119: Ricoh SP 3610SF
Message Causes Solutions «Insufficient memory. Reduce the scanning area.» Scanner memory is insufficient. • Reset the scan size. • Lower the resolution. • Set with no compression. For details about the settings, see TWAIN driver Help. The problem may also be due to the following causes: • Scanning cannot be performed if large valu[…]
-
Page 120: Ricoh SP 3610SF
Message Causes Solutions «Scanner is in use for other function. Please wait.» A function of the machine other than the Scanner function is being used such as the Copier function. • Wait for a while, and then reconnect. • Cancel the job that is being processed. For example, press [Exit], and then press the [OK] key. Next, press the [Co[…]
-
Page 121: Ricoh SP 3610SF
Message Causes Solutions «Scanner is not ready. Check the scanner and the options.» The ADF cover is open. Check whether the ADF cover is closed. «The name is already in use. Check the registered names.» You tried to register a name that is already in use. Use another name. When Messages Are Displayed on Your Computer Screen 119[…]
-
Page 122: Ricoh SP 3610SF
9. Troubleshooting 120[…]
-
Page 123: Ricoh SP 3610SF
10. Appendix This chapter describes the trademarks. Trademarks PostScript and PostScript 3 are either registered trademarks or trademarks of Adobe Systems Incorporated in the United States and/or other countries. Microsoft and Windows are either registered trademarks or trademarks of Microsoft Corp. in the United States and/or other countries. The […]
-
Page 124: Ricoh SP 3610SF
10. Appendix 122[…]
-
Page 125: Ricoh SP 3610SF
INDEX 2 Sided Print ……………………………………………………. 9 A Address book ……………… 11, 52, 53, 66, 67, 68, 71 ADF …………………………………………………….. 7, 20, 31 ADF cover …………………………………………………….. 20 Alert Indicators………………………………[…]
-
Page 126: Ricoh SP 3610SF
M Main power indicator ……………………………………. 26 Main power switch ………………………………….. 20, 29 Media slot …………………………………………………….. 20 Memory ……………………………………………………… 105 Memory Transmission ………………………… 49, 50, 51[…]
-
Page 127: Ricoh SP 3610SF
Turning off the power …………………………………….. 29 Turning on the power …………………………………….. 29 Two-sided Combine ………………………………………. 43 Two-sided paper …………………………………………… 87 U USB 2.0 [Type B] port ……………………………………. 22 U[…]
-
Page 128: Ricoh SP 3610SF
MEMO 126[…]
-
Page 129: Ricoh SP 3610SF
MEMO 127[…]
-
Page 130: Ricoh SP 3610SF
MEMO 128 EN GB EN US M173-7600A[…]
-
Page 131: Ricoh SP 3610SF
© 2014[…]