Код: 112428
105 380
рублей
Бесплатная доставка
по Красноярску
?
![]() под заказ
под заказ
(7-14 дней)
Новости интернет-магазина «Лаукар»:
Дополнительная информация в категории МФУ:
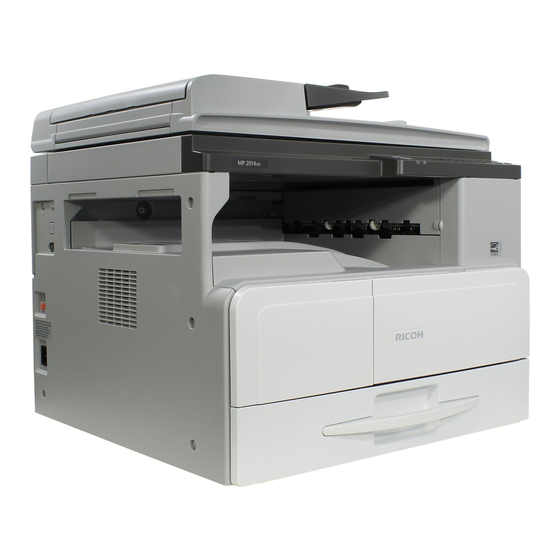
В интернет-магазине бытовой техники «Лаукар» Вы можете скачать инструкцию к товару МФУ Ricoh MP 2014AD совершенно бесплатно.
Все инструкции, представленные на сайте интернет-магазина бытовой техники «Лаукар», предоставляются производителем товара.
Перед началом использования товара рекомендуем Вам ознакомиться с инструкцией по применению.
Для того чтобы скачать инструкцию, Вам необходимо нажать на ссылку «скачать инструкцию», расположенную ниже, а в случае, если ссылки нет,
Вы можете попробовать обратиться к данной странице позднее,
возможно специалисты интернет-магазина бытовой техники «Лаукар» еще не успели загрузить для скачивания инструкцию к товару:
МФУ Ricoh MP 2014AD.

Фирма-производитель оставляет за собой право на внесение изменений в конструкцию, дизайн и комплектацию товара: МФУ Ricoh MP 2014AD. Пожалуйста, сверяйте информацию о товаре с информацией на
официальном сайте компании производителя.
- Manuals
- Brands
- Ricoh Manuals
- All in One Printer
- MP 2014 Series
- Operating instructions manual
-
Contents
-
Table of Contents
-
Troubleshooting
-
Bookmarks
Quick Links
Operating Instructions
For safe and correct use, be sure to read the Safety Information in Read This First before using the machine.
Related Manuals for Ricoh MP 2014 series
Summary of Contents for Ricoh MP 2014 series
-
Page 1: Operating Instructions
Operating Instructions For safe and correct use, be sure to read the Safety Information in Read This First before using the machine.
-
Page 3: Table Of Contents
TABLE OF CONTENTS How to Read This Manual……………………..9 Introduction…………………………9 Legal Prohibition……………………….. 9 Disclaimer…………………………..9 Differences in Functions between Different Models……………… 10 Note to Administrator……………………..10 1. Getting Started Overview of This Machine……………………..11 Name of Major Option……………………..11 Model-Specific Information……………………11 Functions Requiring Optional Configurations………………..12 Guide to Components……………………….13 Exterior: Front View……………………….13…
-
Page 4
What You Can Do with Smart Organizing Monitor Lt…………….34 Supported languages and operating systems……………….34 Installing Smart Organizing Monitor Lt…………………. 34 Launching Smart Organizing Monitor Lt………………..35 Deleting the Smart Organizing Monitor Lt………………..35 Important Safety Instructions (mainly Europe)…………….36 User Information on Electrical & Electronic Equipment…………….36 Environmental Advice for Users……………………36 Note for the Battery and/or Accumulator Symbol (For EU countries only)……….37 Information on Environmental Regulations…………………39… -
Page 5
Placing Originals on the Exposure Glass………………..73 Placing Originals in the Auto Document Feeder………………73 4. Copying Originals Copier Mode Screen……………………….75 Basic Operation…………………………. 76 Canceling a Copy……………………….77 Making Enlarged or Reduced Copies………………….79 Specifying Reduce/Enlarge……………………79 Copying Single-Sided Originals with 2-Sided and Combined Printing…………81 Specifying Combined and 2-sided Copies……………….. -
Page 6
Basic Operation for TWAIN Scanning………………..111 Using TWAIN Scanner……………………..111 TWAIN Scanning……………………….111 Basic Operation for WIA Scanning………………….113 Using SANE scanning……………………..113 Preparing to Use Send to Folder……………………114 Preparation for Sending by Scan to Folder………………..115 Creating a Shared Folder on a Computer Running Windows/Confirming a Computer’s Information……………………………. -
Page 7
Scanner Features Settings……………………..143 System Settings………………………….145 Administrator Settings……………………….151 Printing Lists/Reports……………………….. 155 Printing the Configuration Page……………………155 Types of Lists/Reports……………………..155 Network Settings……………………….156 8. Configuring the Machine Using Web Image Monitor Using Web Image Monitor………………………159 Displaying Top Page……………………….. 160 Checking the System Information……………………. 162 Status Tab…………………………162 Counter Tab…………………………. -
Page 8
IPsec Global Settings Tab…………………….179 IPsec Policy List Tab……………………… 179 Printing Lists/Report……………………….183 Configuring the Administrator Settings………………….184 Administrator Tab……………………….184 Reset Settings Tab……………………….184 Backup Setting Tab……………………… 184 Restore Setting Tab……………………….185 Set Date/Time Tab……………………….186 Energy Saver Mode Tab…………………….. 187 9. Maintaining the Machine Installing the Machine……………………… -
Page 9
Paper Feed Problems………………………..205 Print Quality Problems……………………… 207 Checking the Condition of the Machine………………..207 Checking the printer driver settings………………….207 Printer Problems……………………….. 209 When You Cannot Print Properly………………….209 When You Cannot Print Clearly…………………..211 When Paper Is Not Fed Properly………………….212 When You Cannot Print Test Page………………….212 Copier Problems………………………. -
Page 10
Printer Function Specifications……………………236 Copier Function Specifications…………………….236 Scanner Function Specifications…………………..237 Specifications of Options……………………..239 Paper Feed Unit……………………….239 Trademarks…………………………240 INDEX …………………………..243… -
Page 11: How To Read This Manual
How to Read This Manual Introduction This manual contains detailed instructions and notes on the operation and use of this machine. For your safety and benefit, read this manual carefully before using the machine. Keep this manual in a handy place for quick reference.
-
Page 12: Differences In Functions Between Different Models
Differences in Functions between Different Models The differences in main functions between different models are as follows: (mainly Europe and Asia) Type 1 Type 2 Type 3 Not available Not available Available Duplex function Not available Available Available (mainly Latin America) Type 1 Type 2 Not available…
-
Page 13: Getting Started
1. Getting Started Overview of This Machine Name of Major Option Major option of this machine are referred to as follows in this manual: • Paper Feed Unit PB2020 Paper Feed Unit • DDST Unit Type M16 DDST Unit Model-Specific Information This section explains how you can identify the region your machine belongs to.
-
Page 14: Functions Requiring Optional Configurations
1. Getting Started • Dimensions in this manual are given in two units of measure: metric and inch. If your machine is a Region A model, refer to the metric units. If your machine is a Region B model, refer to the inch units.
-
Page 15: Guide To Components
Guide to Components Guide to Components This section introduces the names of the various parts on the front and rear side of the machine and outlines their functions. Exterior: Front View DJC011 1. ADF Cover Open this cover to remove originals jammed in the ADF. 2.
-
Page 16: Exterior: Rear View
1. Getting Started 7. Tray 2 (option) This tray can hold up to 500 sheets of plain paper. 8. Exposure Glass Place originals here sheet by sheet. 9. Cover for the Exposure Glass Open this cover to place originals on the exposure glass. 10.
-
Page 17: Control Panel
Guide to Components 2. USB Port For connecting the machine to a computer using a USB cable. 3. Power Socket For connecting the power cord to the machine. 4. Power Switch Use this switch to turn the power on or off. Control Panel 14 13 17 16…
-
Page 18: Changing The Language
1. Getting Started 8. [Clear/Stop] key • While the machine is processing a job: press to cancel the current job. • While configuring the machine settings: press to cancel the current setting and return to standby mode. • While in standby mode: press to cancel temporary settings such as image density or resolution. 9.
-
Page 19
Guide to Components Press the [User Tools] key. DJC033 Select [Admin.Tools] using the [ ] or [ ] key, and then press the [OK] key. Select [Language] using the [ ] or [ ] key, and then press the [OK] key. Select the language using the [ ] or [ ] key, and then press the [OK] key. -
Page 20: About Operation Tools
1. Getting Started About Operation Tools This section explains the operation tools of this machine. Control Panel The control panel contains a screen and keys for controlling the machine. Using the control panel, you can configure the machine’s various settings. For details about how to use the control panel, see page 135 «Configuring the Machine Using the Control Panel».
-
Page 21: Changing Operation Modes
Changing Operation Modes Changing Operation Modes You can switch between copier and scanner modes by pressing the corresponding keys. Press the [Copy] or [Scanner] key to switch to each mode. While operating in each mode, the corresponding key lights up. DJC034 Function Priority By default, the machine switches to the copier mode when it is turned on, or if the preset [System…
-
Page 22: Multi-Access
1. Getting Started Multi-access This machine can perform multiple jobs using different functions at the same time. Performing multiple functions simultaneously is called «Multi-access». The scanner and printer functions can be used simultaneously. • If you try to use a function that cannot be performed simultaneously, you will hear a beep sound from the machine or see a failure message pop up on your computer screen.
-
Page 23: Assigning A Setting To The Short Cut Keys
Assigning a Setting to the Short Cut Keys Assigning a Setting to the Short Cut Keys You can access a frequently-used setting with a single keystroke by assigning the setting to the Short cut keys. You can configure settings for the following seven function: •…
-
Page 24
1. Getting Started Close the Web browser. • For details about [Administrator], see page 184 «Configuring the Administrator Settings». -
Page 25: Turning On/Off The Power
Turning On/Off the Power Turning On/Off the Power Turning On/Off the Power • Do not turn off the main power switch immediately after turning it on. Doing so may result in damage to the memory, leading to malfunctions. The main power switch is on the left side of the machine. •…
-
Page 26
1. Getting Started Push the main power switch. The main power turns off automatically when the machine shuts down. If the screen on the control panel does not disappear, contact your service representative. -
Page 27: Setting The Date And Time
Setting the Date and Time Setting the Date and Time Press the [User Tools] key. DJC033 Press the [ ] or [ ] key to select [Admin. Tools], and then press the [OK] key. If you are requested to enter a password, enter the password using the number keys, and then press the [OK] key.
-
Page 28: Entering Characters
1. Getting Started Entering Characters To enter characters, use keys as follows: To enter a digit Press a number key. To delete a character Press the [ ] key. • Characters you can enter depend on the setting you are configuring. •…
-
Page 29: Connecting To The Interface
Connecting to the Interface Connecting to the Interface Connecting to the Ethernet Interface • Make sure the main power is off. See page 23 «Turning On/Off the Power». The network interface board supports 10BASE-T or 100BASE-TX connections. Turn off the main power switch. Connect the network interface cable to the 10BASE-T/100BASE-TX port.
-
Page 30
1. Getting Started Follow the procedure below to connect the machine to the host computer using a USB interface cable. Connect the USB 2.0 interface cable to the USB port. DJC018 Connect the other end to the USB port on the host computer. The machine and computer are now connected. -
Page 31: Configuring Network Settings
Configuring Network Settings Configuring Network Settings This section describes configuring the settings required to use the machine on a network. In this manual, «IP address» covers both IPv4 and IPv6 environments. Read the instructions that are relevant to the environment you are using. Configuring the IP Address Settings The procedure for configuring network settings differs depending on whether the IP address is assigned automatically by the network (DHCP), is specified manually.
-
Page 32
1. Getting Started Press the [ ] or [ ] key to select [IPv4 Configuration], and then press the [OK] key. Press the [ ] or [ ] key to select [DHCP], and then press the [OK] key. Press the [ ] or [ ] key to select [Active], and then press the [OK] key. Press the [User Tools] key to return to the initial screen. -
Page 33
Configuring Network Settings Enter the subnet mask using the number keys, and then press the [OK] key. Press the [ ] and [ ] keys to move between fields. Press the [ ] or [ ] key to select [Gateway Address], and then press the [OK] key. The current gateway address is shown. -
Page 34
1. Getting Started Press the [ ] or [ ] key to select [Active], and then press the [OK] key. Press the [User Tools] key to return to the initial screen. If you are requested to reboot the machine, turn off the machine, and then turn it back on. Print the configuration page to confirm the setting. -
Page 35: Sharing The Printer On A Network
Configuring Network Settings Enter the gateway address using the number keys, and then press the [OK] key. Press the [User Tools] key to return to the initial screen. If you are requested to reboot the machine, turn off the machine, and then turn it back on. Print the configuration page to confirm the setting.
-
Page 36: Using Smart Organizing Monitor Lt
1. Getting Started Using Smart Organizing Monitor Lt Smart Organizing Monitor Lt is a useful tool that allows users to check the machines’s status from a computer. • When the SC code is displayed on the screen, reboot the machine. If the SC code does not disappear, contact your sales or service representative.
-
Page 37: Launching Smart Organizing Monitor Lt
Using Smart Organizing Monitor Lt Decompress the file downloaded from our Web site, and double-click the setup.exe file. Select an interface language, and then click [Next>]. Click [Next>]. Read the software license agreement carefully. If you agree, click [Yes]. Specify a folder to install Smart Organizing Monitor Lt, and click [Next>]. Specify a program folder, and click [Next>].
-
Page 38: Important Safety Instructions (Mainly Europe)
1. Getting Started Important Safety Instructions (mainly Europe) User Information on Electrical & Electronic Equipment Users in the countries where this symbol shown in this section has been specified in national law on collection and treatment of E-waste Our Products contain high quality components and are designed to facilitate recycling. Our products or product packaging are marked with the symbol below.
-
Page 39: Note For The Battery And/Or Accumulator Symbol (For Eu Countries Only)
For details about the return program, please refer to the Web page below or consult your service person. https://www.ricoh-return.com/ Energy efficiency The amount of electricity a machine consumes depends as much on its specifications as it does on the way you use it.
-
Page 40
1. Getting Started In the EU, there are separate collection systems for not only used electrical and electronic products but also batteries and accumulators. Please dispose of them correctly at your local community waste collection/recycling centre. Contact your sales or service representative to change the battery. -
Page 41: Information On Environmental Regulations
Information on Environmental Regulations Information on Environmental Regulations ENERGY STAR Program ® ENERGY STAR Program Requirements for Imaging Equipment ® This company is a participant in the ENERGY STAR Program. This machine is compliant with the regulations specified by the ®…
-
Page 42
1. Getting Started Energy Saver mode 2 The machine enters Energy Saver mode 2 after the period of time specified for this setting is passed. Power consumption is lower in Energy Saver mode 2 than in Energy Saver mode 1, but it takes longer to recover from Energy Saver mode 2 than from Energy Saver mode 1. -
Page 43
Information on Environmental Regulations *2 Achieves ENERGY STAR energy savings; product fully qualifies when packaged with (or used with) a duplex tray and the duplex function is enabled as an option. For details about Energy Saver modes, see page 151 «Administrator Settings». •… -
Page 44
1. Getting Started… -
Page 45: Supported Paper
2. Loading Paper Supported Paper Tray 1 Type Size Weight Capacity Thin Paper 52 to 105 g/m Plain Paper 1 (14 to 28 lb.) (80 g/m , 20 lb.) Plain Paper 2 B4 JIS Middle Thick Paper B5 JIS Recycled Paper Color Paper 11 ×…
-
Page 46: Loading Paper
2. Loading Paper Tray 2 and 3(option) Type Size Weight Capacity Plain Paper 1 60 to 105 g/m Plain Paper 2 (16 to 28 lb.) (80 g/m , 20 lb.) Middle Thick Paper B4 JIS Recycled Paper B5 JIS Color Paper Printed Paper B6 JIS Preprinted Paper…
-
Page 47
Supported Paper Type Size Weight Capacity Plain Paper 1 Custom size: 60 to 105 g/m Plain Paper 2 98 to 297 mm in width, (16 to 28 lb.) (80 g/m , 20 lb.) Middle Thick Paper 162 to 432 mm in length Recycled Paper (3.86 to 11.69 inches in width, Color Paper… -
Page 48
2. Loading Paper Bypass tray Type Size Weight Capacity Thin Paper 52 to 216 g/m Plain Paper 1 (14 to 58 lb.) (80 g/m , 20 lb.) Plain Paper 2 B4 JIS Middle Thick Paper B5 JIS Thick Paper 1 Thick Paper 2 Recycled Paper B6 JIS… -
Page 49: Specifications Of Paper Types
Supported Paper Type Size Weight Capacity Thin Paper Custom size: 52 to 216 g/m Plain Paper 1 90 to 305 mm in width, (14 to 58 lb.) (80 g/m , 20 lb.) Plain Paper 2 148 to 600 mm in length Middle Thick Paper (3.55 to 12.00 inches in width, Thick Paper 1…
-
Page 50
2. Loading Paper Item Description Duplex supported size A3 , A4 , A5 , B4 JIS , B5 JIS , 11 × 17 , 8.5 × 14 , 8.5 × 13.4 , 8.5 × 11 , 8.25 × 14 , 8 × 10.5 , 8.5 ×… -
Page 51
Supported Paper Item Description Supported paper tray Can be used with any of the paper trays. Duplex supported size A3 , A4 , A5 , B4 JIS , B5 JIS , 11 × 17 , 8.5 × 14 , 8.5 × 13.4 , 8.5 ×… -
Page 52
2. Loading Paper Color Paper Item Description Paper thickness 75 to 81 g/m (20 to 22 lb.) Supported paper tray Can be used with any of the paper trays. Duplex supported size A3 , A4 , A5 , B4 JIS , B5 JIS , 11 × 17 , 8.5 × 14 , 8.5 × 13.4 , 8.5 ×… -
Page 53
Supported Paper Item Description Duplex supported size A3 , A4 , A5 , B4 JIS , B5 JIS , 11 × 17 , 8.5 × 14 , 8.5 × 13.4 , 8.5 × 11 , 8.25 × 14 , 8 × 10.5 , 8 ×… -
Page 54
2. Loading Paper Item Description Duplex supported size A3 , A4 , A5 , B4 JIS , B5 JIS , 11 × 17 , 8.5 × 14 , 8.5 × 13.4 , 8.5 × 11 , 8.25 × 14 , 8 × 10.5 , 8 ×… -
Page 55
Supported Paper Cardstock Item Description Paper thickness 75 to 81 g/m (20 to 22 lb.) Supported paper tray Can be used with any of the paper trays. Duplex supported size A3 , A4 , A5 , B4 JIS , B5 JIS , 11 × 17 , 8.5 × 14 , 8.5 × 13.4 , 8.5 ×… -
Page 56
2. Loading Paper • If printed envelopes come out badly creased, load the envelopes in the opposite direction. Also, configure the printer driver to rotate the print object 180 degrees. For details about changing the orientation see the printer driver Help. •… -
Page 57
Supported Paper DAC574 • If the curl is severe, flatten out the envelopes using your fingers, as shown below. DAC575… -
Page 58: Non-Recommended Paper Types
2. Loading Paper Non-Recommended Paper Types Do not use the following types of paper: • Ink-jet printer paper • Bent, folded, or creased paper • Curled or twisted paper • Torn paper • Wrinkled paper • Damp paper • Dirty or damaged paper •…
-
Page 59: Paper Storage
Paper Storage Paper Storage • Store paper appropriately. If the paper is stored incorrectly, misfeeds, lower printing quality, or malfunctions may result. When storing paper: • Do not store paper in a humid place. • Do not store paper in direct sunlight. •…
-
Page 60: Print Area
2. Loading Paper Print Area The diagram below shows the area of the paper that the machine can print on. Paper DJC061 1. Print area 2. Feed direction 3. Approx. 3 mm (0.11 inches) 4. Approx. 5 mm (0.19 inches) 5.
-
Page 61
Print Area • Borderless printing is not supported. • The print area may vary depending on the paper size, printer language and printer driver settings. • For better envelope printing, we recommend you set the right, left, top, and bottom print margins to at least 15 mm (0.59 inches) each. -
Page 62: Loading Paper
2. Loading Paper Loading Paper Precautions for Loading Paper • When loading paper, take care not to trap or injure your fingers. • Do not stack paper over the limit mark. • To prevent multiple sheets from being fed at once, fan the paper before loading it. •…
-
Page 63: Loading Paper Into Paper Trays
Loading Paper DJC062 • If there are burrs on the edge of the paper when it is cut the surface on the leading edge of the paper may come off. If this happens, turn over the paper or change the direction in which it is being fed.
-
Page 64
2. Loading Paper While pressing down the release lever on the side fence, slide the side fences outward. DJC023 While pinching the release lever of the end fence, slide the end fence outward. DJC024 Square the paper and load it print side up. Do not stack paper over the limit mark. -
Page 65: Loading Paper Into Bypass Tray
Loading Paper Align the end fence gently against the paper you loaded. DJC026 Carefully slide the paper tray fully in. Loading Paper into Bypass Tray Use the bypass tray to print onto OHP transparencies, thick paper, envelopes and copy paper that cannot be loaded in the paper trays.
-
Page 66
2. Loading Paper Open the bypass tray. DJC027 Load the paper face down, and then adjust the paper guide with the paper size. Set the paper so its edges lightly touch the paper guides. 1 1 1 DJC028 1. Paper guides •… -
Page 67: Orientation-Fixed Paper Or Two-Sided Paper
Loading Paper • Load only as much paper as can be held between the guides on the bypass tray. Overloading the bypass tray can result in misfeeds and skewed images. • Pull the extender out to support paper sizes larger than A4 , 8.5 × 11 . Orientation-Fixed Paper or Two-Sided Paper Orientation-fixed (top to bottom) or two-sided paper (for example, letterhead paper, prepunched paper, or preprinted paper) might not print correctly, depending on how the originals and paper are…
-
Page 68
2. Loading Paper Original orientation Exposure glass Unreadable • Two-sided orientation • Paper orientation When placing originals in the ADF and copying on orientation-fixed paper from the bypass tray, specify the paper size. Copy side Paper trays Bypass tray Two-sided Unavailable… -
Page 69: Specifying Paper Type And Paper Size Using Control Panel
Specifying Paper Type and Paper Size Using Control Panel Specifying Paper Type and Paper Size Using Control Panel This section explains how to specify the paper size and paper type using the control panel. • Paper type and size can also be specified using the printer driver. For details, see the printer driver help.
-
Page 70: Specifying The Standard Paper Size
2. Loading Paper Press the [User Tools] key to return to the initial screen. Specifying the Standard Paper Size This section explains how to specify the standard paper size. Press the [User Tools] key. DJC033 Select [System Settings]. Press the [ ] or [ ] key to select [Tray Paper Settings], and then press the [OK] key. Press the [ ] or [ ] key to select the paper size setting for the desired tray, and then press the [OK] key.
-
Page 71
Specifying Paper Type and Paper Size Using Control Panel Press the [User Tools] key. DJC033 Select [System Settings]. Press the [ ] or [ ] key to select [Tray Paper Settings], and then press the [OK] key. Press the [ ] or [ ] key to select the paper size setting for the desired tray, and then press the [OK] key. -
Page 72
2. Loading Paper… -
Page 73: Placing Originals
3. Placing Originals About Originals This section describes the types of originals that can be placed and the parts of the original that are chipped in the scanned copy. Recommended Size of Originals This section describes the recommended size of the original. Exposure glass Up to 297 mm (11.69 inches) in width, up to 432 mm (17.00 inches) in length •…
-
Page 74: Unscannable Image Area
3. Placing Originals • Thin, highly flexible originals • Thick originals such as postcards • Bound originals such as books • Transparent originals such as OHP transparencies or translucent paper • Originals that are wet with toner or correction fluid Unscannable Image Area Even if you correctly place originals in the ADF or on the exposure glass, margins of a few millimeters on all four sides of the original might be chipped.
-
Page 75: Placing Originals
Placing Originals Placing Originals This section describes the procedure for placing originals on the exposure glass and in the ADF. • Do not place originals before any correction fluid and toner has completely dried. Doing so may make marks on the exposure glass that will appear on copies. •…
-
Page 76
3. Placing Originals • Straighten curled originals before placing them in the ADF. • To prevent multiple sheets from being fed at once, fan the originals before placing them in the ADF. • Make sure that the originals are not placed obliquely. •… -
Page 77: Copying Originals
4. Copying Originals Copier Mode Screen This section provides information about the screen when the machine is in copier mode. By default, the display shows the copier screen when the machine is turned on. If the scanner screen is shown on the display, press the [Copy] key on the control panel to switch to the copier screen.
-
Page 78: Basic Operation
4. Copying Originals Basic Operation • You must first specify a paper size and orientation. For details about specifying standard paper sizes, see page 68 «Specifying the Standard Paper Size». For details about specifying custom paper sizes, see page 68 «Specifying a Custom Paper Size». •…
-
Page 79: Canceling A Copy
Basic Operation • The maximum number of copies is 99. • You can change the paper tray for the current job by pressing the [ ] or [ ] key. You can change the paper tray automatically according to the paper size (A4 or Letter). •…
-
Page 80
4. Copying Originals Press the [Clear/Stop] key. DJC038… -
Page 81: Making Enlarged Or Reduced Copies
Making Enlarged or Reduced Copies Making Enlarged or Reduced Copies There are two ways to set the scaling ratio: using a preset ratio or manually specifying a customized ratio. Preset ratio DAC578 (mainly Europe and Asia) 50%, 71%, 82%, 93%, 122%, 141%, 200% (mainly Latin America) 50%, 65%, 78%, 93%, 121%, 129%, 155% Custom ratio…
-
Page 82
4. Copying Originals Press the [Copy] key. DJC036 Press [Scale]. Press [Reduce], [Enlarge], or [Zoom]. For [Reduce] or [Enlarge], press the [ ] or [ ] key to select the desired ratio. For [Zoom], specify the desired ratio using the number keys. Press the [OK] key. -
Page 83: Copying Single-Sided Originals With 2-Sided And Combined Printing
Copying Single-Sided Originals with 2-Sided and Combined Printing Copying Single-Sided Originals with 2-Sided and Combined Printing This section explains how to combine and print a multiple pages (two or four pages) on one side or both sides of paper. • To use 2-sided copy, the paper size used for printing copies must be set to A3, A4, A5, B4 JIS, B5 JIS, 11 ×…
-
Page 84
4. Copying Originals Original Copy Left to Right Left to Right DJC055 Combined copy on both sides In this mode, a multiple-page original is combined and printed on both sides of paper. • Comb 2S (2Orig) Original Copy Top to Top Top to Bottom Top to Top Top to Bottom… -
Page 85
Copying Single-Sided Originals with 2-Sided and Combined Printing Original Copy Left to Right, Top to Top Left to Right, Top to Bottom DJC056 Original Copy Left to Right, Top to Top Left to Right, Top to Bottom DJC057 1S->2S(NoComb) In this mode, one-sided pages are printed on the front and back sides of paper without being combined. -
Page 86: Specifying Combined And 2-Sided Copies
4. Copying Originals Original Copy Top to Top Top to Bottom Top to Top Top to Bottom CMF260 Specifying Combined and 2-sided Copies Press the [Duplex/Combine] key. Press the [ ] or [ ] key to select the desired copy mode, and then press the [OK] key. Press the [ ] or [ ] key to select paper orientation and page order, and then press the [OK] key.
-
Page 87: Copying 2-Sided Originals With 2-Sided And Combined Printing
Copying 2-Sided Originals with 2-Sided and Combined Printing Copying 2-Sided Originals with 2-Sided and Combined Printing This section explains how to make 2-sided copies of 2-sided originals, or copy two original pages to one sheet, or copy four original pages to one sheet with two pages per side. DAC602 DAC603 DAC603…
-
Page 88
4. Copying Originals 2S->2S(NoCom) Makes 2-sided copies of 2-sided originals. 2S->2S Comb(2Orig) Copies both sides of one 2-sided original to one side of a sheet, and both sides of another 2-sided original to the other side of the sheet. 2S->2S Comb(4Orig) Copies four 2-sided originals to one sheet with four pages per side. -
Page 89: Copying Both Sides Of An Id Card Onto One Side Of Paper
Copying Both Sides of an ID Card onto One Side of Paper Copying Both Sides of an ID Card onto One Side of Paper This section explains how to copy the front and back sides of an ID card or other small documents onto one side of a sheet of paper.
-
Page 90: Copying An Id Card
4. Copying Originals Copying an ID Card Press the [ID Card Copy] key. DJC039 Place the original face down on the exposure glass. Align the original to the rear left corner. DJC030 Press the [Start] key. A message prompting you to place the original back side down on the exposure glass appears on the display.
-
Page 91
Copying Both Sides of an ID Card onto One Side of Paper • When the machine’s mode is changed. • When the power is turned off. • When the machine’s default for the same setting is changed. -
Page 92: Storing Scanned Documents
4. Copying Originals Storing Scanned Documents You can store the scanned documents on the machine. Up to 3 documents can be stored on the machine. The stored documents can be accessed and printed with a single keystroke. This function is called «Folder Print».
-
Page 93: Deleting Documents
Storing Scanned Documents Deleting Documents Press the [ ] or [ ] key on the screen in scanner mode to access the Copy settings, and then press [Folder Print]. Select [Clear]. Press the [ ] or [ ] key to select a document to delete. Press the [OK] key.
-
Page 94: Specifying The Scan Settings
4. Copying Originals Specifying the Scan Settings This section explains how to specify image density and scan quality for the current job. Adjusting Image Density There are five image density levels. The higher the density level, the darker the printout. Press the [Copy] key.
-
Page 95: Specifying The Original Type
Specifying the Scan Settings Text Select this when the original contains only text and no photographs or pictures. Photo Select this when the original contains only photographs or pictures. Use this mode for the following types of original: • Photographs •…
-
Page 96
4. Copying Originals • When the machine’s default for the same setting is changed. -
Page 97: Scanning Originals
5. Scanning Originals Scanner Mode Screen This section provides information about the screen in scanner mode. By default, the display shows the copier screen when the machine is turned on. If the copier screen is shown on the display, press the [Scanner] key on the control panel to switch to the scanner screen. DJC040 Screen in standby mode Ready…
-
Page 98: Registering Scan Destinations
5. Scanning Originals Registering Scan Destinations This section explains how to register scan destinations in the Address Book. To send scanned files to an e-mail address (Scan to E-mail) or a shared folder on a network computer (Scan to Folder), you must first register the destination in the Address Book using Web Image Monitor.
-
Page 99
Registering Scan Destinations Scan to E-mail Settings Item Setting Description Required Select when setting the Scan destination. Name of the destination. The name specified here will Name Required be shown on the screen when selecting a scan destination. Can contain up to 16 characters. E-mail address of the destination. -
Page 100
5. Scanning Originals Item Setting Description Select the scanning mode from Color, Gray Scale, or Scanning Mode Required Black & White. Original Required Specify the orientation to scan the original. Select the scanning size for the original from A3, B4 JIS, A4, B5 JIS, A5, B6 JIS, 11 ×… -
Page 101
Registering Scan Destinations Item Setting Description Name of the destination. The name specified here will Name Required be shown on the screen when selecting a scan destination. Can contain up to 16 characters. Path to the directory where scanned files will be stored. Consists of the IP address or name of the destination Service Name Required… -
Page 102
5. Scanning Originals Item Setting Description Select the scan resolution from 100×100, 150×150, Resolution Required 200×200, 300×300, or 600×600 dpi. Specify the image density by clicking the right or left Density Required buttons. These keys increase or decrease the image density in single increments up to 5. -
Page 103
Registering Scan Destinations Item Setting Description File format of the scanned file when scanning in color. File Format (Color/Gray Required PDF or JPEG can be selected. PDF supports multiple Scale) pages in a document, but JPEG does not. File format of the scanned file when scanning in black File Format (Black &… -
Page 104
5. Scanning Originals Item Setting Description Name of the destination. The name specified here will Name Required be shown on the screen when selecting a scan destination. Can contain up to 16 characters. Path to the directory where scanned files will be stored. Consists of the IP address or name of the destination Service Name Required… -
Page 105: Modifying Scan Destinations
Registering Scan Destinations • To send files via e-mail, SMTP and DNS settings must be configured properly. For details about SMTP and DNS settings, see page 174 «DNS Tab» and page 177 «SMTP Tab». • If you are using the Scan to E-mail function, select a time zone according to your geographic location to send email with correct transmission date and time.
-
Page 106: Deleting Id Card Scan Destinations
5. Scanning Originals Click [Scan Destination]. Select the entry to delete, and then click [Delete]. Confirm that the entry you have selected is the entry that you want to delete. Enter the administrator password if required. Click [Apply]. Close the Web browser. Deleting ID Card Scan Destinations Start the Web browser, and access the machine by entering its IP address.
-
Page 107: Basic Operation
Basic Operation Basic Operation Scanning using the control panel allows you to send scanned files via e-mail (Scan to E-mail) or to the shared folder of a computer on a network (Scan to Folder). The Scan to E-mail and Scan to Folder functions are available only through a network connection. •…
-
Page 108
5. Scanning Originals Press the [Start] key. DJC037 Depending on the machine’s settings, you may see the following screen on the display when scanning from the exposure glass. Start Scanning Next? If you see this screen, proceed to the next step. If you have more originals to scan, place the next original on the exposure glass, and then press [Yes]. -
Page 109: Scanning Id Cards And Transmitting
Scanning ID Cards and Transmitting Scanning ID Cards and Transmitting This section explains how to scan both sides of an ID card and transmit the scanned image to an e-mail address or a folder. • This function is available only when the original is set on the exposure glass, not when it is set in the ADF.
-
Page 110: Specifying The Scan Settings
5. Scanning Originals Specifying the Scan Settings This section explains how to specify the scanning size, image density, and resolution for the current job. When a scan destination is specified When you specify a scan destination, the machine’s scan settings change automatically according to the information registered for that destination in the Address Book.
-
Page 111: Specifying The Scanning Mode, Density, Resolution, And Original
Specifying the Scan Settings Press the [ ] or [ ] key to select [mm] or [inch], and then press the [OK] key. Enter the width using the number keys, and then press the [OK] key. To enter a decimal point, press the [ ] key. Enter the length using the number keys, and then press the [OK] key.
-
Page 112
5. Scanning Originals Press the [ ] or [ ] key to select the setting and then press the [OK] key. Select the settings, and then press the [OK] key. • You can change the machine’s default setting. For details, see page 143 «Scanner Features Settings». -
Page 113: Scanning From A Computer
Scanning from a Computer Scanning from a Computer Scanning from a computer connected by the network or USB (TWAIN scanning, WIA scanning, and SANE scanning) allows you to operate the machine from your computer and scan originals into your computer directly. •…
-
Page 114: Settings You Can Configure In The Twain Dialog Box
5. Scanning Originals Settings you can configure in the TWAIN dialog box DJC058 1. Scanner: Select the scanner you want to use. The scanner you select becomes the default scanner. Click [Refresh] to discover all available scanners connected via USB or the network. 2.
-
Page 115: Basic Operation For Wia Scanning
Scanning from a Computer [Custom…] 4. Mode: Select from color, grayscale, or black-and-white. 5. Resolution: Select a resolution from the list. If you select [User defined], enter a resolution value directly in the edit box. Note that increasing the resolution also increases the file size and scanning time. Selectable resolutions vary depending on where the original is set.
-
Page 116: Preparing To Use Send To Folder
5. Scanning Originals Preparing to Use Send to Folder This section explains the preparation procedure to use the Send to Folder function. CKW009 1. Check the settings on the destination computer. Check the settings such as the computer name and IP address on the destination computer. 2.
-
Page 117: Preparation For Sending By Scan To Folder
Preparation for Sending by Scan to Folder Preparation for Sending by Scan to Folder To send scanned files by Scan to Folder, you must first perform the following: • Creating a shared folder on a computer running Windows/Confirming a computer’s information •…
-
Page 118
5. Scanning Originals Step 2: Creating a shared folder on a computer running Microsoft Windows Create a shared destination folder in Windows and enable sharing. In the following procedure, a computer which is running under Windows 7 Ultimate and participating in a domain is used as an example. -
Page 119
Preparation for Sending by Scan to Folder Specify one or more object types, select a location, and then click [Find Now]. From the list of results, select the groups and users you want to grant access to, and then click [OK]. In the [Select Users or Groups] window, click [OK]. -
Page 120
5. Scanning Originals… -
Page 121: Printing Documents
6. Printing Documents Configuring Option Settings for the Printer When bidirectional communication works correctly, your computer obtains information about option, paper size and paper feed direction settings from the machine automatically. Bidirectional communication also allows you to monitor machine status. Conditions for Bidirectional Communication To support bidirectional communication, the following conditions must be met: When connected with the network…
-
Page 122
6. Printing Documents • Windows 7, Windows Server 2008 R2: On the [Start] menu, select [Devices and Printers]. • Windows 8/8.1, Windows Server 2012/2012 R2: On the desktop, point to the bottom-right corner, click [Settings], [Control Panel], and then [View devices and printers]. Open the printer properties dialog box. -
Page 123: Displaying The Printing Preferences Dialog Box
Displaying the Printing Preferences Dialog Box Displaying the Printing Preferences Dialog Box Displaying the Printing Preferences Dialog Box from the [Start] Menu This section explains how to open the [Printing preferences] dialog box from [Devices and Printers]. • When the printer driver is distributed from the print server, the setting values specified by the server are displayed as the default for [Printing Defaults…].
-
Page 124: Installing The Driver And Software
6. Printing Documents Installing the Driver and Software Software and Utilities Included on the CD-ROM This section explains the software and utilities CD-ROM provided with this machine. • For the latest information on the corresponding operating system, see «Readme.txt» file in the root directory of the CD-ROM drive.
-
Page 125: Quick Install For Usb
Installing the Driver and Software *6 Microsoft Windows Server 2003 Standard Edition/Microsoft Windows Server 2003 Enterprise Edition/ Microsoft Windows Server 2003 R2 Standard Edition/Microsoft Windows Server 2003 R2 Enterprise Edition *7 Microsoft Windows Server 2008 Standard/Microsoft Windows Server 2008 Enterprise/Microsoft Windows Server 2008 R2 Standard/Microsoft Windows Server 2008 R2 Enterprise *8 Microsoft Windows Server 2012 Foundation/Microsoft Windows Server 2012 Essentials/Microsoft Windows Server 2012 Standard…
-
Page 126: Quick Install For Network
6. Printing Documents • Do not turn the machine on until you have read how to do so. • Do not connect the USB cable to the machine until a message to do so appears. Quit all applications. (Do not close this manual.) Insert the provided CD-ROM into the computer’s CD-ROM drive.
-
Page 127: Updating Or Deleting The Driver
Installing the Driver and Software Quit all applications. (Do not close this manual.) Insert the provided CD-ROM into the computer’s CD-ROM drive. If the [AutoPlay] dialog box appears, click [Run SETUP.EXE]. Select an interface language, and then click [OK]. For details about the languages supported in the printer drivers, see page 122 «Printer drivers». Click [Network Quick Install].
-
Page 128
6. Printing Documents Updating the printer driver You can download the most recent version of the driver from the manufacturer’s Web site. Download the latest driver, and then perform the following procedure. Open the printer window. • Windows Server 2003: On the [Start] menu, select [Printers and Faxes]. -
Page 129
Installing the Driver and Software Delete the old version of the driver first, and then install the new driver. For details about how to delete the driver, see page 128 «Deleting TWAIN driver». Deleting the printer driver Windows Server 2003/2003 R2 On the [Start] menu, click [Printers and Faxes]. -
Page 130
6. Printing Documents Select [Remove driver and driver package.], and then click [OK]. Click [Yes]. Click [Delete]. Click [OK]. Click [Close] to close the print server properties window. Windows 8/8.1, Windows Server 2012/2012 R2: On the desktop, point to the bottom-right corner, and then click [Settings]. Click [Control Panel]. -
Page 131
Installing the Driver and Software 3. Click [Programs and Features]. Remove the TWAIN driver. • Windows Server 2003/2003 R2: 1. Select [(model type) LAN] or [(model type) USB]. 2. Click [Change/Remove]. • Windows Vista/7, Windows Server 2008/2008 R2: 1. Select [(model type) LAN] or [(model type) USB]. 2. -
Page 132: Basic Operation
6. Printing Documents Basic Operation This section explains the basic printing procedure. • (mainly Europe and Asia) Only Type 2 and 3 can do duplex printing. Duplex printing is selected as the default setting. • (mainly Latin America) Only Type 2 can do duplex printing. Duplex printing is selected as the default setting. Open the [Printing Preferences] dialog box in your document’s application.
-
Page 133
Basic Operation Canceling a print job before printing has started Double-click the printer icon on the task tray of your computer. Select the print job you want to cancel, click the [Document] menu, and then click [Cancel]. • If you cancel a print job that has already been processed, printing may continue for a few pages before being canceled. -
Page 134: If A Paper Mismatch Occurs
6. Printing Documents If a Paper Mismatch Occurs The machine reports an error if: • The paper size or type does not match the print job’s settings when [Input Tray:] is set to [Auto Tray Select]. There are two ways to resolve these errors: Continue printing using mismatched paper Use the form-feed function to ignore the error and print using mismatched paper.
-
Page 135: Using Various Print Functions
Using Various Print Functions Using Various Print Functions This section briefly describes various print functions that you can configure with the printer driver to make printouts appropriate for your purposes. Print Quality Functions Some of the print quality settings you can configure are described below. Saving toner when printing (Economy printing) You can save toner by printing with lower toner consumption.
-
Page 136
6. Printing Documents When using this function, a suitable reduction ratio is selected automatically based on the paper size and the number of pages you want to fit on each sheet. Printing on both sides of paper (duplex printing) You can print on both sides of paper. Reducing or enlarging the document You can reduce or enlarge documents by a specific ratio, from 50% to 200% in 1% increments. -
Page 137: Configuring The Machine Using The Control Panel
7. Configuring the Machine Using the Control Panel Basic Operation There are two main ways to access the machine settings: • Press the [User Tools] key to access the System or Network settings. • Press the [ ] or [ ] key to access the Copy or Scan settings. To check which category the function you want to configure belongs to, see page 137 «Menu Chart».
-
Page 138
7. Configuring the Machine Using the Control Panel To go back to the previous item, press the [Escape] key. • To return to the initial screen, press the [Escape] key the same amount of times as the number of selected items, or press the [User Tools] key once. -
Page 139: Menu Chart
Menu Chart Menu Chart This section lists the parameters included in each menu. For details about configuring the machine using Web Image Monitor, see page 159 «Configuring the Machine Using Web Image Monitor». • Some items might not appear depending on the model type or machine’s configuration. •…
-
Page 140: Copier Features Settings
7. Configuring the Machine Using the Control Panel Copier Features Settings Select Paper Specifies the paper size used for printing copies. When a tray is selected, the machine prints from that tray only. When a paper size is selected, the machine prints from the trays that contain the paper of the specified size.
-
Page 141
Copier Features Settings • Vchr. Select this to scan documents using settings that are appropriate for invoices. • Diazo Select this to make a blueprint of the original. Density Specifies the image density for photocopying. Increase the level (black squares) to increase the density. Default: The default setting is the middle of 5 adjustment levels. -
Page 142
7. Configuring the Machine Using the Control Panel • Portrait: T to T • Portrait: T to B • Landscape: T to T • Landscape: T to B • Comb 2S (2Orig) Copies four 1-sided pages on two 2-sided pages. •… -
Page 143
Copier Features Settings • Lan: From LtoR, TtoB • 2S->2S(NoCom) Makes 2-sided copies of 2-sided originals. • 2S->2S Comb(2Orig) Copies two 2-sided originals to one sheet with two pages per side. • Portrait: T to T • Portrait: T to B •… -
Page 144
7. Configuring the Machine Using the Control Panel Resolution Specifies the resolution for scanning the original. Default: [Standard] • Standard • Fine Zoom Template Save a zoom setting together with the template so that zoom setting is always used when the template is opened. -
Page 145: Scanner Features Settings
Scanner Features Settings Scanner Features Settings Max. E-mail Size Specifies the maximum size of a file that can be sent by e-mail. Default: [1 MB] • 1 MB • 2 MB • 3 MB • 4 MB • 5 MB •…
-
Page 146
7. Configuring the Machine Using the Control Panel Scan Orientation Specify the orientation to scan the original. Default: [Always] • Always • Do not Specify… -
Page 147: System Settings
System Settings System Settings Adjust Sound Volume Specifies the volume of the sounds produced by the machine. Default: [On] • Panel Key Sound Specifies the volume of the beep that sounds when a key is pressed. • Off • On •…
-
Page 148
7. Configuring the Machine Using the Control Panel Plain Paper 1, Plain Paper 2, Middle Thick Paper, Recycled Paper, Color Paper, Printed Paper, Preprinted Paper, Prepunched Paper, Letterhead, Bond Paper, Cardstock, Special Paper • Paper Type: Tray 3 Specifies the paper type for Tray 3. Default: [Plain Paper 2] Plain Paper 1, Plain Paper 2, Middle Thick Paper, Recycled Paper, Color Paper, Printed Paper, Preprinted Paper, Prepunched Paper, Letterhead, Bond Paper, Cardstock, Special… -
Page 149
System Settings 8 × 10 , 8 × 13 , 8.5 × 13 , 8.25 × 13 , 8K , 16K , 11 × 15 , 11 × 14 , 10 × 15 , 10 × 14 , Custom Size •… -
Page 150
7. Configuring the Machine Using the Control Panel Printing proceeds even if the paper size/type settings of the machine and printer driver do not match. However, if the paper is too small for the print job, the printed image will be cropped. -
Page 151
System Settings • Copier Selects a tray to check first when [A4], or [8.5 × 11] is selected for [Select Paper] under copy settings and both Tray 1, Tray 2, Tray 3, or the bypass tray contain paper of that size, the machine starts to print from the specified tray. -
Page 152
7. Configuring the Machine Using the Control Panel Default: [Off] • Off You must install the printer driver separately for individual machines, because the machine other than the original will be recognized as a new device upon USB connection. • On The same printer driver you have installed in your computer can be used with any machine other than the one originally used for installation, if the machine is of the same model. -
Page 153: Administrator Settings
Administrator Settings Administrator Settings Set Date/Time Sets the date and time of the machine’s internal clock. • Set Date Specifies the date of the machine’s internal clock. Only dates that correspond with the year and month can be set. Incompatible dates will be refused.
-
Page 154
7. Configuring the Machine Using the Control Panel System Auto Reset Timer Sets the machine to return to the mode specified in [Function Priority]. This setting is also applied to the timeout for copying the next document while ID card copy and manual 2-sided copy is performed. -
Page 155
Administrator Settings Press [Yes] to execute. Press [No] to exit to the previous level of the menu tree without clearing the settings. • Reset Network Settings Resets the network settings to their defaults. Press [Yes] to execute. Press [No] to exit to the previous level of the menu tree without clearing the settings. -
Page 156
7. Configuring the Machine Using the Control Panel Default: [Off] • On (0000 to 9999) • Off IP Sec Configure the IP security setting. Default: [Inactive] • Inactive • Active… -
Page 157: Printing Lists/Reports
Printing Lists/Reports Printing Lists/Reports Printing the Configuration Page Press the [User Tools] key. DJC033 Press the [ ] or [ ] key to select [Print List/Report], and then press the [OK] key. Press the [ ] or [ ] key to select [Configuration Page], and then press the [OK] key. Press [Yes] in the confirmation screen.
-
Page 158: Network Settings
7. Configuring the Machine Using the Control Panel Network Settings • Depending on the settings you change, the machine might need to be restarted. Ethernet • MAC Address Displays the machine’s MAC address. • Ethernet Speed Displays the current Ethernet speed setting. •…
-
Page 159
Network Settings Use this menu to check the current IP address when DHCP is used. Default: XXX.XXX.XXX.XXX The numbers represented by «X» vary according to your network environment. • Subnet Mask Specifies the machine’s subnet mask when DHCP is not used. Use this menu to check the current subnet mask when DHCP is used. -
Page 160
7. Configuring the Machine Using the Control Panel • Manual Config. Address Specifies the machine’s IPv6 address when DHCP is not used. Can contain up to 39 characters. For details about entering characters, see page 26 «Entering Characters». • Prefix Length Specifies the prefix length, using a value between 0 and 128. -
Page 161: Configuring The Machine Using Web Image Monitor
8. Configuring the Machine Using Web Image Monitor Using Web Image Monitor • Some items might not appear, depending on the model type you are using. • Some items can also be configured using the control panel. Available operations The following operations can be performed remotely using Web Image Monitor on a computer: •…
-
Page 162: Displaying Top Page
8. Configuring the Machine Using Web Image Monitor Displaying Top Page When you access the machine using Web Image Monitor, the top page appears in your browser’s window. Launch the Web browser. In the Web browser’s address bar, enter «http://(machine’s IP address)/» to access the machine.
-
Page 163
Displaying Top Page Displays the contents of the item selected in the menu area. Information in the main area is not automatically updated. Click [Refresh] at the upper-right in the main area to update the information. Click the Web browser’s [Refresh] button to refresh the entire browser screen. -
Page 164: Checking The System Information
8. Configuring the Machine Using Web Image Monitor Checking the System Information Click [Home] to display the main page of Web Image Monitor. You can check the current system information on this page. This page contains three tabs: [Status], [Counter], and [Machine Information]. Status Tab Item Description…
-
Page 165: Counter Tab
Checking the System Information Counter Tab Page Counter Item Description Total Shows the following for pages printed using the printer, copier and lists/ report. Copier Shows the following for pages printed using the copier function: • Total number of pages Printer Shows the following for pages printed using the printer function: •…
-
Page 166
8. Configuring the Machine Using Web Image Monitor Item Description Total Memory Shows the total memory installed on the machine. -
Page 167: Configuring The System Settings
Configuring the System Settings Configuring the System Settings Click [System Settings] to display the page for configuring the system settings. This page contains the following tabs: [Sound Volume Adjustment], [Tray Paper Settings], [Copier], [Priority Tray], [Toner Management], [Interface], and [Shortcut to Function]. Sound Volume Adjustment Tab Sound Volume Adjustment Item…
-
Page 168
8. Configuring the Machine Using Web Image Monitor Tray 2 Item Description Paper Size Select the paper size for Tray 2 from the following: A3, A4, B4 JIS, B5 JIS, A5, B6 JIS, 11 × 17, 8 1/2 × 14, 8 1/2 × 13.4, 8 1/2 ×… -
Page 169
Configuring the System Settings Item Description Paper Type Select the paper type for the bypass tray from the following: Thin paper, Plain paper 1, Plain paper 2, Middle thick paper, Thick paper 1, Thick paper 2, Recycled paper, Color paper, Printed paper, Preprinted paper, Prepunched paper, Letterhead, Label paper, Bond paper, Cardstock, Special paper, OHP, Envelope Bypass Tray Setting Priority… -
Page 170: Copier Tab
8. Configuring the Machine Using Web Image Monitor Specified Tray Item Description Specified Tray Select how print jobs using the paper tray are handled. • Machine Settings The paper settings configured on the machine’s control panel are applied to all print jobs. An error occurs when the paper settings specified by the printer driver or the print command do not match the machine’s settings.
-
Page 171: Priority Tray Tab
Configuring the System Settings Separation Line Item Description Separation Line Specify whether or not to print a line through the copied document. • The information about Tray 2 and 3 appears only when it is installed. Priority Tray Tab Priority Tray Item Description Printer…
-
Page 172: Interface Tab
8. Configuring the Machine Using Web Image Monitor Interface Tab Interface Item Description Fixed USB Port Save the settings for the USB port. Shortcut to Function Tab Shortcut to Function Item Description Shortcut to Function for Assigns one of the following functions to the short cut key 3 on the control Key #3 panel.
-
Page 173: Registering Destinations
Registering Destinations Registering Destinations Scan destinations can be registered using Web Image Monitor. Up to 100 scan destinations can be registered. See the scan section for more information on registering destinations. • For details about registering scan destinations, see page 96 «Registering Scan Destinations».
-
Page 174: Configuring The Network Settings
8. Configuring the Machine Using Web Image Monitor Configuring the Network Settings Click [Network Settings] to display the page for configuring the network settings. This page contains the following tabs: [Network Status], [IPv6 Configuration], [Network Application], [DNS], [Auto E-mail Notification], [SNMP], [SMTP], and [POP3]. •…
-
Page 175: Ipv6 Configuration Tab
Configuring the Network Settings IPv6 Configuration Tab IPv6 Item Description IPv6 Select whether to enable or disable IPv6. You cannot disable IPv6 using Web Image Monitor if the machine is currently in use in an IPv6 environment. In this case, use the control panel to disable [IPv6] under network settings.
-
Page 176: Dns Tab
8. Configuring the Machine Using Web Image Monitor Network Print Setting Item Description Select to enable network printing using Internet Print Protocol (via TCP port 631/80). Select to enable network printing using an embedded FTP server in the machine (via TCP port 20/21). Select to enable network raw printing.
-
Page 177: Auto E-Mail Notification Tab
Configuring the Network Settings Item Description Secondary IPv6 DNS Enter the IPv6 address of the secondary IPv6 DNS server. Can contain up Server to 39 characters. IPv6 Domain Name Enter the IPv6 domain name of the machine. Can contain up to 32 characters.
-
Page 178: Snmp Tab
8. Configuring the Machine Using Web Image Monitor SNMP Tab SNMP Item Description SNMP Select whether to enable the machine to use SNMP services. Trap Item Description Target Trap Select whether to enable the machine to send traps to the management host (NMS).
-
Page 179: Smtp Tab
Configuring the Network Settings SMTP Tab SMTP Item Description Primary SMTP Server Enter the IP address or host name of the SMTP/POP3 server. Can contain up to 64 characters. Port No. Enter the port number for SMTP (1 to 65535). Authentication Method Select an authentication method from the following: [Anonymous]: The user name and password are not necessary.
-
Page 180: Pop3 Tab
8. Configuring the Machine Using Web Image Monitor POP3 Tab POP3 Settings Item Description POP3 Server Enter the IP address or host name of the POP3 server for e-mail reception. The POP3 server specified here will be used for [POP before SMTP]. Can contain up to 64 characters.
-
Page 181: Configuring The Ipsec Settings
Configuring the IPsec Settings Configuring the IPsec Settings Click [IPsec Settings] to display the page for configuring the IPsec settings. This page contains the following tabs: [IPsec Global Settings] and [IPsec Policy List]. • This function is available only when an administrator password is specified. IPsec Global Settings Tab Item Description…
-
Page 182
8. Configuring the Machine Using Web Image Monitor Item Description Status Displays the status of the IPsec policy as «Active» or «Inactive». To configure IPsec policies, select the desired IPsec policy, and then click [Change] to open the «IPsec Policy Settings» page. The following settings can be made on the «IPsec Policy Settings» page. IP Policy Settings Item Description… -
Page 183
Configuring the IPsec Settings IPsec Settings Item Description Encapsulation Type Specify the encapsulation type from the following: • [Transport]: Select this mode to secure only the payload section of each IP packet when communicating with IPsec compliant devices. • [Tunnel]: Select this mode to secure every section of each IP packet. We recommend this type for communication between security gateways (such as VPN devices). -
Page 184
8. Configuring the Machine Using Web Image Monitor Item Description Key Perfect Forward Select whether to enable or disable PFS (Perfect Forward Secrecy). Secrecy IKE Settings Item Description IKE Version Displays the IKE version. Encryption Algorithm Specify the encryption algorithm from the following: [DES], [3DES], [AES-128], [AES-192], [AES-256] Authentication Specify the authentication algorithm from the following:… -
Page 185: Printing Lists/Report
Printing Lists/Report Printing Lists/Report Click [Print List/Report] to display the page for printing reports. Then, select an item and click [Print] to print out information for that item. Print List/Report Item Description Configuration Page Prints general information about the machine and its current configuration. Test Page Prints a test page.
-
Page 186: Configuring The Administrator Settings
8. Configuring the Machine Using Web Image Monitor Configuring the Administrator Settings Click [Administrator Tools] to display the page for configuring the administrator settings. This page contains the following tabs: [Administrator], [Reset Settings], [Backup Setting], [Restore Setting], [Set Date/Time], and [Energy Saver Mode]. Administrator Tab Administrator Settings Item…
-
Page 187: Restore Setting Tab
Configuring the Administrator Settings Backup Setting Item Description Back up Network Backs up settings configured under the [Network Settings] and Settings [Administrator Tools]. Note that, however, [Max. E-mail Size] setting under [Network Application] will not be backed up here; it will be backed up by [Back up Menu Settings] instead.
-
Page 188: Set Date/Time Tab
8. Configuring the Machine Using Web Image Monitor Click [Browse…]. Navigate to the directory containing the backup file to restore. Select the backup file, and click [Open]. Enter the administrator password if required. Click [OK]. • If the settings are not restored successfully, an error message appears. Try again to restore the file completely.
-
Page 189: Energy Saver Mode Tab
Configuring the Administrator Settings Energy Saver Mode Tab Energy Saver Mode Item Description Energy Saver Mode 1 Select [Active] to set the machine to enter Energy Saver mode 1 if the machine has been idle for about 30 seconds. It takes less time to recover from Energy Saver mode 1 than from power-off state or Energy Saver mode 2, but power consumption is higher in Energy Saver mode 1 than in Energy Saver mode 2.
-
Page 190
8. Configuring the Machine Using Web Image Monitor… -
Page 191: Maintaining The Machine
9. Maintaining the Machine Installing the Machine Where to Put the Machine Be careful about where to place the machine, because environmental conditions greatly affect its performance. • Do not use flammable sprays or solvents in the vicinity of this machine. Also, avoid placing these items in the vicinity of this machine.
-
Page 192
9. Maintaining the Machine • Keep the machine away from salt-bearing air and corrosive gases. Also, do not install the machine in places where chemical reactions are likely (laboratories, etc.), as doing so will cause the machine to malfunction. Space Required for Installation The recommended (or minimum) space requirements are as follows: 24 cm (9.44 inches) -
Page 193
Installing the Machine Environments to Avoid • Areas exposed to direct sunlight or strong light • Dusty areas • Areas with corrosive gases • Areas that are excessively cold, hot, or humid • Areas directly exposed to currents of hot, cold, or room-temperature air from air conditioners •… -
Page 194: Replacing The Print Cartridge
9. Maintaining the Machine Replacing the Print Cartridge When appears, it is time to add toner. Handling Toner • Do not incinerate toner (new or used) or toner containers. Doing so risks burns. Toner will ignite on contact with naked flame. •…
-
Page 195: Toner Storage
Replacing the Print Cartridge • When removing jammed paper or replacing toner, avoid getting toner (new or used) on your skin. If toner comes into contact with your skin, wash the affected area thoroughly with soap and water. • When replacing a toner or waste toner container or consumables with toner, make sure that the toner does not splatter.
-
Page 196: Removing Toner
9. Maintaining the Machine Removing Toner • 1: Open the front cover of the machine. • 2: Lift the green lever. DJC043 • 3: Push the green lever, and then gently pull out the holder. DJC044 • 4: Press the toner bottle back to raise its top, and then gently pull it out.
-
Page 197
Replacing the Print Cartridge • 4: Push in the green lever until it clicks. DJC048 • 5: Press down the green lever. • 6: Close the machine’s front cover. DJC049… -
Page 198: Cautions When Cleaning
9. Maintaining the Machine Cautions When Cleaning Clean the machine periodically to maintain high print quality. Dry wipe the exterior with a soft cloth. If it is not sufficient, wipe with a soft, damp cloth that has been wrung out thoroughly. If you still cannot remove the stain or grime, use a neutral detergent, wipe over the area with a thoroughly-wrung damp cloth, and then dry wipe the area and allow it to dry.
-
Page 199: Cleaning The Exposure Glass, Exposure Glass Cover, And Adf
Cleaning the Exposure Glass, Exposure Glass Cover, and ADF Cleaning the Exposure Glass, Exposure Glass Cover, and ADF Cleaning the Exposure Glass Lift the ADF. Be careful not to hold the input tray. Doing so may damage the tray. Clean the parts indicated by arrows with a soft damp cloth and then wipe the same parts with a dry cloth to remove any remaining moisture.
-
Page 200
9. Maintaining the Machine Lift the ADF. Be careful not to hold the input tray when lifting the ADF. Doing so may damage the tray. Clean the cover for the exposure glass with a soft damp cloth and then wipe the same parts with a dry cloth to remove any remaining moisture. -
Page 201: Security
Security Security Confidential information is always at risk of being copied without permission or subject to unauthorized access through the network. To protect documents from such intrusion, not only can passwords be set, but also the Extended Security function can be used to strengthen security. For those who require increased document protection, we recommend the Extended Security function.
-
Page 202: Operating Environment And Notes
9. Maintaining the Machine Operating Environment and Notes Security for this machine is assured on the premises that the machine is used under the following conditions: Operating Environment • The condition of the machine is normal. (For example, it is not damaged, modified, or lacking components.) •…
-
Page 203: 10. Troubleshooting
10. Troubleshooting Clearing Misfeeds DJC053 • Some of this machine’s internal components get very hot. For this reason, take care when removing misfed paper. Not doing so could result in burns. • When removing jammed paper, make sure not to trap or injure your fingers. •…
-
Page 204: When Y Is Displayed
10. Troubleshooting When A, B, C, or Z is displayed . Lower the A lever . Lower the lever to . Open the right cover of and remove the open the right cover the machine and remove misfed paper. of the machine. the misfed paper.
-
Page 205: Common Problems
Common Problems Common Problems This section explains how to troubleshoot common problems that may occur while operating the machine. • When the SC code is displayed on the screen, reboot the machine. If the SC code does not disappear, contact your sales or service representative. Problem Possible cause Solution…
-
Page 206
10. Troubleshooting Problem Possible cause Solution The volume of the sounds The volume is set to the high Adjust the volume of the beep, produced by the machine is too level. ring, speaker, and alarm loud. sounds. For details, see page 145 «System Settings». -
Page 207: Paper Feed Problems
Paper Feed Problems Paper Feed Problems If the machine is operating but paper will not feed or paper jams frequently, check the condition of the machine and paper. Problem Solution Paper does not feed smoothly. • Use supported types of paper. See page 43 «Supported Paper».
-
Page 208
10. Troubleshooting Problem Solution The printed paper is wrinkled. • The paper being used may be damp. Use paper that has been stored properly. See page 43 «Supported Paper». • Paper is too thin. See page 43 «Supported Paper». • If there are gaps between the paper and the paper guides, adjust the paper guides to remove the gaps. -
Page 209: Print Quality Problems
Print Quality Problems Print Quality Problems Checking the Condition of the Machine If there is a problem with the print quality, first check the condition of the machine. Problem Solution There is a problem with the Make sure that the machine is on a level surface. Place the machine’s location.
-
Page 210
10. Troubleshooting Problem Solution Images are cut off, or excess is Use the same size paper selected in the application. If you printed. cannot load paper of the correct size, use the reduction function to reduce the image, and then print. For details about the reduction function, see the printer driver Help. -
Page 211: Printer Problems
Printer Problems Printer Problems This section describes printing problems and possible solutions. When You Cannot Print Properly Problem Solution An error occurs. If an error occurs when printing, change the computer or printer driver settings. • Check the printer icon name does not exceed 32 alphanumeric characters.
-
Page 212
10. Troubleshooting Problem Solution It takes too long to complete the print • Photographs and other data intensive pages take a long job. time to be processed so simply wait when printing such data. • Changing the settings with printer driver may help to speed up printing. -
Page 213: When You Cannot Print Clearly
Printer Problems When You Cannot Print Clearly Problem Solution The whole printout is blurred. • The paper being used may be damp. Use paper that has been stored properly. See page 43 «Supported Paper». • If you enable [Toner Saving] under [System Settings], printing is generally less dense.
-
Page 214: When Paper Is Not Fed Properly
10. Troubleshooting Problem Solution Fine dot patterns do not print. Change the [Dithering] setting in the printer driver’s dialog box. See the printer driver Help. If rubbed with your finger, the print The setting of the paper may not be correct. For example, smears.
-
Page 215: Copier Problems
Copier Problems Copier Problems When You Cannot Make Clear Copies Problem Solution The printed copy is blank. The original is not placed correctly. When using the exposure glass, place originals copy side down. When using the ADF, place them copy side up. See page 73 «Placing Originals».
-
Page 216: When You Cannot Make Copies As Wanted
10. Troubleshooting Problem Solution When copying from the exposure Place the original copy side down, making sure that it is glass, the print area of the copy is aligned to the rear left corner and pressed flat against the out of alignment with the original. exposure glass.
-
Page 217: Scanner Problems
Scanner Problems Scanner Problems When You Cannot Browse the Network to Send a Scan File Problem Solution The following machine settings may Check the settings. See page 29 «Configuring Network not be correct: Settings». • IP address • Subnet Mask When Scanning Is Not Done As Expected Problem Solution…
-
Page 218: Error And Status Messages On The Screen
10. Troubleshooting Error and Status Messages on the Screen Messages are listed in alphabetical order in the table below. «X» indicates the parts of the messages that appear differently depending on the situation, such as the paper size, paper type, and tray name. •…
-
Page 219
Error and Status Messages on the Screen Message Causes Solutions Cannot copy. 2-in-1, 4-in-1, or 2-sided copy • Use the ADF, even when copying a could not be performed single sheet. Set original to ADF. because the originals were not •… -
Page 220
10. Troubleshooting Message Causes Solutions Misfeed: Tray 2 Paper has been jammed in the Remove the jammed paper. See page 205 Tray 2 paper input area. «Paper Feed Problems». Misfeed: Tray 3 Paper has been jammed in the Remove the jammed paper. See page 205 Tray 3 paper input area. -
Page 221
Error and Status Messages on the Screen Message Causes Solutions Set Original to ADF Scanning could not be • Use the ADF, even when scanning performed because the originals A4/Letter or smaller size originals. Cannot use exposure were not placed in the ADF, glass •… -
Page 222
10. Troubleshooting… -
Page 223: 11. Appendix
11. Appendix Functions and Network Settings Available in an IPv6 Environment The functions and network settings of this machine that are available in an IPv6 environment differ from those available in an IPv4 environment. Make sure the functions you use are supported in an IPv6 environment, and then configure the necessary network settings.
-
Page 224: Transmission Using Ipsec
11. Appendix Transmission Using IPsec For securer communications, this machine supports the IPsec protocol. When applied, IPsec encrypts data packets at the network layer using shared key encryption. The machine uses encryption key exchange to create a shared key for both sender and receiver. To achieve even higher security, you can also renew the shared key on a validity period basis.
-
Page 225: Security Association
Transmission Using IPsec • For successful authentication, the sender and receiver must specify the same authentication algorithm and authentication key. The authentication algorithm and authentication key are specified automatically. AH Protocol + ESP Protocol When combined, the ESP and AH protocols provide secure transmission through both encryption and authentication.
-
Page 226: Specifying Encryption Key Exchange Settings
11. Appendix Machine 1. Set the same IPsec settings as the machine on 1. Set the IPsec settings on Web Image Monitor. 2. Enable IPsec settings. 2. Enable IPsec settings. 3. Confirm IPsec transmission. • After configuring IPsec, you can use «ping» command to check if the connection is established correctly.
-
Page 227: Specifying Ipsec Settings On The Computer
Transmission Using IPsec Specifying IPsec Settings on the Computer Specify exactly the same settings for IPsec SA settings on your computer as are specified for the IPsec Settings on the machine. Setting methods differ according to the computer’s operating system. The following procedure is based on Windows 7 in an IPv4 environment as an example.
-
Page 228
11. Appendix In [Description:], enter a name or a detailed explanation of the IP filter, and then click [Next]. You may click [Next] and proceed to the next step without entering any information in this field. Select «My IP Address» in «Source address», and then click [Next]. Select «A specific IP Address or Subnet»… -
Page 229: Enabling And Disabling Ipsec Using The Control Panel
Transmission Using IPsec In the Session key settings, select «Generate a new key every», and enter the same validity period (in [Seconds] or [Kbytes]) as that specified for [Life Time] on the machine. Click [OK], and then click [Next]. Click [Finish]. If you are using IPv6 under Windows Vista or a newer version of Windows, you must repeat this procedure from Step 12 and specify ICMPv6 as an exception.
-
Page 230: Notes About The Toner
11. Appendix Notes About the Toner • Proper operation cannot be guaranteed if any third-party toner is used. • Depending on printing conditions, there are cases where the printer cannot print the number of sheets indicated in the specifications. • Replace the print cartridge if the printed image suddenly becomes pale or blurred. •…
-
Page 231: Moving The Machine
Moving the Machine Moving the Machine This section describes precautions when moving the machine. Choose your machine’s location carefully. Environmental conditions greatly affect its performance. • Contact your service representative if you need to lift the machine (such as when relocating it to another floor).
-
Page 232
11. Appendix • Keep the machine level and carry it carefully, taking care not to jolt or tip it. Rough handling may cause a malfunction or damage the hard disk or memory, resulting in loss of stored files. • Protect the machine from strong shocks. Impact can damage the hard disk and cause stored files to be lost. -
Page 233: Consumables
Consumables Consumables • Our products are engineered to meet high standards of quality and functionality, and we recommend that you use only the expendable supplies available at an authorized dealer. Print Cartridge Print cartridge Average printable number of pages per cartridge Black Type1: •…
-
Page 234: Specifications Of The Machine
11. Appendix Specifications of the Machine This section lists the machine’s specifications. • We have obtained each author’s permission for the use of applications including open-source software applications. For details about the copyright information for these software applications, see «OSS.pdf» on the CD-ROM supplied with the machine. General Function Specifications Configuration Desktop…
-
Page 235
Specifications of the Machine A3 , A4 , A5 , B4 JIS , B5 JIS , 11 × 17 , 8.5 × 14 , 8.5 × 13.4 , 8.5 × 11 , 8.25 × 14 , 8 × 10.5 , 8 × 13 , 8.5 × 13 , 8.25 ×… -
Page 236
11. Appendix Memory 256 MB Power requirements • (mainly Europe and Asia) 220-240 V, 3.7 A, 50/60 Hz • (mainly Latin America) 120-127 V, 7 A, 60 Hz • (mainly Europe and Asia) When the voltage supplied to the machine is outside the guaranteed operating range, the machine shifts to Energy Saver Mode 1. -
Page 237
Specifications of the Machine Specification Stand-by 40 dB (A) or less Copying 63 dB (A) or less • Complete system Specification Stand-by 40 dB (A) or less Copying 67 dB (A) or less • Sound pressure level: • Main unit only Specification Stand-by 34 dB (A) or less… -
Page 238: Printer Function Specifications
11. Appendix Weight (machine body with consumables) (mainly Latin America) • Type 1 30 kg (67 lb.) or less • Type 2 35 kg (78 lb.) or less Printer Function Specifications Printing speed 20 pages per minute (A4/8.5 × 11) Resolution 600 ×…
-
Page 239: Scanner Function Specifications
Specifications of the Machine Reproduction ratio • (mainly Europe and Asia) Fixed ratio: 50%, 71%, 82%, 93%, 122%, 141%, 200% Zoom ratio: 25% to 200% • (mainly Latin America) Fixed ratio: 50%, 65%, 78%, 93%, 121%, 129%, 155% Zoom ratio: 25% to 200% Copy quantity Scanner Function Specifications Maximum scanning area (horizontal ×…
-
Page 240
11. Appendix Color: 24 bit ADF throughput • Black and white: 13.6 image per minute (200 dpi/A4 ) • Full Color: • Scan to E-mail, Scan to Folder: 7.01 image per minute (200 dpi/A4 ) • TWAIN: 5.78 image per minute (200 dpi/A4 ) Interface •… -
Page 241: Specifications Of Options
Specifications of Options Specifications of Options This section lists the specifications of the various options. Paper Feed Unit Paper capacity 500 sheets Paper size A3 , A4 , B4 JIS , B5 JIS , A5 , B6 JIS , 11 × 17 , 8.5 × 14 , 8.5 × 13.4 , 8.5 × , 8.25 ×…
-
Page 242: Trademarks
11. Appendix Trademarks Bonjour is trademarks of Apple Inc., registered in the U.S. and other countries. Java is a registered trademark of Oracle and/or its affiliates. LINUX is the registered trademark of Linus Torvalds in the U.S. and other countries. Microsoft, Windows, Windows Server, Windows Vista, and Internet Explorer are either registered trademarks or trademarks of Microsoft Corporation in the United States and/or other countries.
-
Page 243
Trademarks • The product names of Windows Server 2003 are as follows: ® ® Microsoft Windows Server 2003 Standard Edition ® ® Microsoft Windows Server 2003 Enterprise Edition ® ® Microsoft Windows Server 2003 Web Edition ® ® Microsoft Windows Server 2003 Datacenter Edition •… -
Page 244
11. Appendix ® ® Microsoft Windows Server 2012 R2 Standard ® ® Microsoft Windows Server 2012 R2 Datacenter Other product names used herein are for identification purposes only and might be trademarks of their respective companies. We disclaim any and all rights to those marks. Microsoft product screen shots reprinted with permission from Microsoft Corporation. -
Page 245: Index
INDEX Default settings………… Delete……….125, 127, 128 2-sided copy…………Density…………..DHCP…………… 29, 31 Differences in functions between different models.. Adding toner……………………….Address book…………Disclaimer…………..ADF…………11, 71, 197 DNS setting…………Administrator password……. 10, 184 Duplex…………..Administrator settings……… 151, 184 Authentication…………
-
Page 246
Introduction………….. Option settings…………. IPsec global settings……….Options…………..IPsec policy settings……….Orientation-fixed paper or two-sided paper..IPsec settings…………Original…………..IPsec transmission……….Original type…………IPv6 configuration……….IPv6 environment……….Page counter…………Paper Job cancel…………loading…………….Paper Feed Unit……….11, 239 Paper mismatch……….. Label paper…………Paper recommendations…….. -
Page 247
Scan destinations……… 96, 103, 171 storage…………….Scan size………….. used……………… Toner management……….Scan to E-mail……….96, 105 Toner storage…………Scan to Folder……….96, 105 Top page…………. Scan to FTP…………. Trademarks…………Scanner destination list……..Trap…………..Scanner Features Settings……..Tray 2…………..Scanner function……….Tray 3………….. -
Page 248
MEMO… -
Page 249
MEMO… -
Page 250
MEMO D245-7008B… -
Page 252
D245-7008B © 2015…
![]()
Руководства Пользователя
Для безопасного и правильного использования обязательно прочтите раздел Техника безопасности руководства «Read This First».

СОДЕРЖАНИЕ |
|
|
Как пользоваться данным руководством………………………………………………………………………………………… |
9 |
|
Введение…………………………………………………………………………………………………………………………………….. |
9 |
|
Правовой запрет………………………………………………………………………………………………………………………… |
9 |
|
Отказ от ответственности…………………………………………………………………………………………………………… |
9 |
|
Различия в функционале моделей…………………………………………………………………………………………….. |
10 |
|
Информация для администраторов………………………………………………………………………………………….. |
10 |
|
1. Начало работы |
|
|
Краткое описание аппарата………………………………………………………………………………………………………… |
13 |
|
Название основных опций……………………………………………………………………………………………………….. |
13 |
|
Информация, относящаяся к разным моделям………………………………………………………………………… |
13 |
|
Функции, требующие установки опций……………………………………………………………………………………. |
14 |
|
Руководство по компонентам……………………………………………………………………………………………………….. |
15 |
|
Наружная часть: вид спереди…………………………………………………………………………………………………… |
15 |
|
Наружная часть: вид сзади……………………………………………………………………………………………………….. |
16 |
|
Панель управления…………………………………………………………………………………………………………………… |
17 |
|
Изменение языка……………………………………………………………………………………………………………………… |
19 |
|
Инструменты управления……………………………………………………………………………………………………………… |
20 |
|
Переключение режима работы……………………………………………………………………………………………………. |
21 |
|
Многоцелевой доступ…………………………………………………………………………………………………………………… |
22 |
|
Назначение функции определенной клавише быстрого доступа………………………………………………… |
23 |
|
Назначение функции с помощью панели управления……………………………………………………………… |
23 |
|
Назначение параметра с помощью приложения Web Image Monitor……………………………………… |
23 |
|
Включение/выключение питания…………………………………………………………………………………………………. |
25 |
|
Включение/выключение питания……………………………………………………………………………………………… |
25 |
|
Установка даты и времени……………………………………………………………………………………………………………. |
27 |
|
Ввод символов………………………………………………………………………………………………………………………………. |
29 |
|
Подсоединение к интерфейсу………………………………………………………………………………………………………. |
30 |
|
Соединение посредством интерфейса Ethernet………………………………………………………………………… |
30 |
|
Подсоединение к интерфейсу USB…………………………………………………………………………………………… |
30 |
|
Настройка параметров сети………………………………………………………………………………………………………… |
32 |
|
Настройка параметров IP-адреса……………………………………………………………………………………………. |
32 |
|
Совместное использование принтера в сети……………………………………………………………………………. |
37 |
|
Использование Smart Organizing Monitor Lt…………………………………………………………………………………. |
38 |
1

|
Что можно делать с помощью Smart Organizing Monitor Lt………………………………………………………. |
38 |
|
|
Поддерживаемые языки и операционные системы………………………………………………………………….. |
38 |
|
|
Установка приложения Smart Organizing Monitor Lt…………………………………………………………………. |
38 |
|
|
Запуск приложения Smart Organizing Monitor Lt………………………………………………………………………. |
39 |
|
|
Удаление приложения Smart Organizing Monitor Lt………………………………………………………………….. |
40 |
|
|
Важные инструкции по безопасности |
(главным образом страны Европы)……………….. |
41 |
|
Информация для пользователя по электрическому и электронному оборудованию……………….. |
41 |
|
|
Информация об окружающей среде для пользователей…………………………………………………………. |
42 |
|
|
Примечание к символу батареек и/или аккумулятора (только для стран ЕС)…………………………. |
43 |
|
|
Информация об экологических нормах……………………………………………………………………………………….. |
44 |
|
|
Программа ENERGY STAR……………………………………………………………………………………………………….. |
44 |
|
|
Энергосбережение…………………………………………………………………………………………………………………… |
44 |
|
|
2. Загрузка бумаги |
||
|
Пригодная для использования бумага………………………………………………………………………………………….. |
47 |
|
|
Технические характеристики различных типов бумаги……………………………………………………………. |
51 |
|
|
Нерекомендуемые типы бумаги……………………………………………………………………………………………………. |
61 |
|
|
Хранение бумаги………………………………………………………………………………………………………………………….. |
62 |
|
|
Область печати…………………………………………………………………………………………………………………………….. |
63 |
|
|
Загрузка бумаги…………………………………………………………………………………………………………………………… |
65 |
|
|
Меры предосторожности при загрузке бумаги……………………………………………………………………….. |
65 |
|
|
Загрузка бумаги в лотки…………………………………………………………………………………………………………… |
66 |
|
|
Загрузка бумаги в обходной лоток………………………………………………………………………………………….. |
68 |
|
|
Бумага с фиксированной ориентацией или двусторонняя бумага…………………………………………… |
70 |
|
|
Настройка типа и формата бумаги с панели управления……………………………………………………………. |
72 |
|
|
Настройка типа бумаги……………………………………………………………………………………………………………. |
72 |
|
|
Настройка стандартного формата бумаги………………………………………………………………………………. |
73 |
|
|
Настройка нестандартного формата бумаги…………………………………………………………………………… |
73 |
|
|
3. Размещение оригиналов |
||
|
Информация об оригиналах………………………………………………………………………………………………………… |
75 |
|
|
Рекомендованный формат оригиналов…………………………………………………………………………………….. |
75 |
|
|
Типы оригиналов, которые не поддерживаются автоподатчиком документов…………………………. |
75 |
|
|
Область изображения, недоступная для сканирования…………………………………………………………… |
76 |
|
|
Размещение оригиналов………………………………………………………………………………………………………………. |
77 |
2

|
Размещение оригиналов на стекле экспонирования………………………………………………………………… |
77 |
|
Размещение оригиналов в устройстве автоматической подачи документов……………………………. |
77 |
|
4. Копирование оригиналов |
|
|
Экран режима копира………………………………………………………………………………………………………………….. |
81 |
|
Базовые операции……………………………………………………………………………………………………………………….. |
83 |
|
Отмена копирования……………………………………………………………………………………………………………….. |
85 |
|
Выполнение увеличенных или уменьшенных копий………………………………………………………………………. |
86 |
|
Настройка увеличения или уменьшения…………………………………………………………………………………… |
86 |
|
Копирование односторонних оригиналов в режиме двусторонней и объединенной печати………. |
88 |
|
Настройка объединенных и двусторонних копий…………………………………………………………………….. |
91 |
|
Копирование двусторонних оригиналов с двусторонней и объединенной печатью……………………. |
93 |
|
Копирование обеих сторон удостоверения личности на одну сторону листа бумаги…………………. |
95 |
|
Копирование удостоверения личности…………………………………………………………………………………….. |
96 |
|
Хранение отсканированных документов……………………………………………………………………………………… |
98 |
|
Хранение документов……………………………………………………………………………………………………………….. |
98 |
|
Печать документов……………………………………………………………………………………………………………………. |
98 |
|
Удаление документов……………………………………………………………………………………………………………….. |
99 |
|
Настройка параметров сканирования………………………………………………………………………………………. |
100 |
|
Настройка плотности изображения……………………………………………………………………………………….. |
100 |
|
Выбор типа документа в соответствии с оригиналом…………………………………………………………….. |
101 |
|
5. Сканирование оригиналов |
|
|
Экран режима сканера……………………………………………………………………………………………………………… |
103 |
|
Регистрация адресатов для отправки отсканированных файлов……………………………………………….. |
104 |
|
Изменение адресатов для отправки файлов с отсканированными изображениями……………… |
113 |
|
Изменение адресатов сканирования удостоверения личности……………………………………………… |
113 |
|
Удаление адресатов сканирования……………………………………………………………………………………….. |
113 |
|
Удаление адресатов сканирования удостоверения личности………………………………………………… |
114 |
|
Основные функции…………………………………………………………………………………………………………………….. |
115 |
|
Сканирование удостоверений личности и передача отсканированных изображений……………… |
118 |
|
Настройка параметров сканирования………………………………………………………………………………………. |
120 |
|
Настройка размеров сканирования в соответствии с размерами оригинала………………………. |
120 |
|
Настройка режима сканирования, плотности, разрешения и параметров оригинала…………. |
121 |
|
Сканирование с помощью компьютера…………………………………………………………………………………….. |
123 |
3

|
Основная операция для TWAIN-сканирования……………………………………………………………………… |
123 |
|
Использование TWAIN-сканера……………………………………………………………………………………………. |
123 |
|
Сканирование TWAIN……………………………………………………………………………………………………………. |
123 |
|
Базовые операции сканирования WIA………………………………………………………………………………….. |
125 |
|
Сканирование SANE……………………………………………………………………………………………………………… |
126 |
|
Подготовка к использованию функции отправки в папку………………………………………………………….. |
127 |
|
Подготовка к отправке с помощью функции сканирования в папку………………………………………….. |
128 |
|
Создание общей папки на компьютере с ОС Windows/Проверка информации компьютера……. |
|
|
……………………………………………………………………………………………………………………………………………….. |
128 |
|
6. Печать документов |
|
|
Настройка параметров принтера……………………………………………………………………………………………… |
131 |
|
Условия для двустороннего обмена данными………………………………………………………………………… |
131 |
|
Если режим двустороннего обмена данными отключен…………………………………………………………. |
131 |
|
Отображение диалогового окна настроек печати…………………………………………………………………….. |
133 |
|
Отображение диалогового окна настроек печати с помощью меню [Пуск]………………………….. |
133 |
|
Отображение диалогового окна настроек печати в приложении………………………………………….. |
133 |
|
Установка драйвера и программного обеспечения…………………………………………………………………… |
135 |
|
Программное обеспечение и утилиты, представленные на этом компакт-диске…………………… |
135 |
|
Быстрая установка USB………………………………………………………………………………………………………….. |
136 |
|
Быстрая установка сети………………………………………………………………………………………………………….. |
137 |
|
Обновление или удаление драйвера…………………………………………………………………………………….. |
139 |
|
Базовые операции……………………………………………………………………………………………………………………… |
143 |
|
Отмена задания печати………………………………………………………………………………………………………….. |
143 |
|
Действия при несоответствии параметров бумаги…………………………………………………………………….. |
145 |
|
Продолжение печати на бумаге, не соответствующей требованиям…………………………………….. |
145 |
|
Сброс задания печати……………………………………………………………………………………………………………. |
145 |
|
Использование различных функций печати………………………………………………………………………………. |
146 |
|
Функции, влияющие на качество печати………………………………………………………………………………… |
146 |
|
Функции, связанные с выводом на печать……………………………………………………………………………… |
146 |
|
7. Настройка аппарата с помощью панели управления |
|
|
Базовые операции……………………………………………………………………………………………………………………… |
149 |
|
Схема меню……………………………………………………………………………………………………………………………….. |
151 |
|
Параметры функции копира………………………………………………………………………………………………………. |
152 |
4

|
Настройка функций сканера……………………………………………………………………………………………………… |
157 |
|
Параметры системы…………………………………………………………………………………………………………………… |
159 |
|
Настройки администратора………………………………………………………………………………………………………. |
166 |
|
Печать списков и отчетов…………………………………………………………………………………………………………… |
170 |
|
Печать страницы конфигурации…………………………………………………………………………………………….. |
170 |
|
Типы списков и отчетов…………………………………………………………………………………………………………… |
170 |
|
Настройки сети………………………………………………………………………………………………………………………….. |
172 |
|
8. Настройка аппарата с помощью приложения Web Image Monitor |
|
|
Использование Web Image Monitor…………………………………………………………………………………………… |
175 |
|
Отображение главной страницы……………………………………………………………………………………………….. |
176 |
|
Просмотр сведений о системе…………………………………………………………………………………………………… |
178 |
|
Вкладка «Статус»…………………………………………………………………………………………………………………….. |
178 |
|
Вкладка «Счетчик»………………………………………………………………………………………………………………….. |
179 |
|
Вкладка «Информация об аппарате»……………………………………………………………………………………… |
180 |
|
Настройка параметров системы………………………………………………………………………………………………… |
181 |
|
Вкладка «Настройка громкости звука»…………………………………………………………………………………… |
181 |
|
Вкладка «Параметры лотка для бумаги»………………………………………………………………………………… |
181 |
|
Вкладка «Копир»…………………………………………………………………………………………………………………….. |
185 |
|
Вкладка «Приоритетный лоток»………………………………………………………………………………………………. |
185 |
|
Вкладка «Управление тонером»……………………………………………………………………………………………… |
186 |
|
Вкладка «Интерфейс»…………………………………………………………………………………………………………….. |
186 |
|
Вкладка «Краткий путь к функции»…………………………………………………………………………………………. |
187 |
|
Регистрация адресатов………………………………………………………………………………………………………………. |
188 |
|
Настройка параметров сети………………………………………………………………………………………………………. |
189 |
|
Вкладка «Статус сети»…………………………………………………………………………………………………………….. |
189 |
|
Вкладка «Конфигурация IPv6″………………………………………………………………………………………………… |
190 |
|
Вкладка «Сетевое приложение»……………………………………………………………………………………………… |
191 |
|
Вкладка «DNS»……………………………………………………………………………………………………………………….. |
192 |
|
Вкладка «Автоуведомление по эл.почте»………………………………………………………………………………… |
193 |
|
Вкладка «SNMP»…………………………………………………………………………………………………………………….. |
193 |
|
Вкладка «SMTP»………………………………………………………………………………………………………………………. |
194 |
|
Вкладка «POP3″………………………………………………………………………………………………………………………. |
195 |
|
Настройка параметров IPsec……………………………………………………………………………………………………… |
197 |
5

|
Вкладка «Глобальные настройки IPsec»………………………………………………………………………………….. |
197 |
|
Вкладка «Список политик IPsec»……………………………………………………………………………………………… |
197 |
|
Печать списков и отчетов…………………………………………………………………………………………………………… |
202 |
|
Настройка параметров администратора…………………………………………………………………………………… |
203 |
|
Вкладка «Администратор»………………………………………………………………………………………………………. |
203 |
|
Вкладка «Сбросить настройки»………………………………………………………………………………………………. |
203 |
|
Вкладка «Резервное копирование настроек»…………………………………………………………………………. |
204 |
|
Вкладка «Восстановление настроек»……………………………………………………………………………………… |
205 |
|
Вкладка «Установить дату/время»………………………………………………………………………………………….. |
205 |
|
Вкладка «Режим энергосбережения»………………………………………………………………………………………. |
206 |
|
9. Техническое обслуживание аппарата |
|
|
Установка аппарата…………………………………………………………………………………………………………………… |
207 |
|
Где размещать аппарат………………………………………………………………………………………………………….. |
207 |
|
Замена картриджа…………………………………………………………………………………………………………………….. |
211 |
|
Правила обращения с тонером……………………………………………………………………………………………… |
211 |
|
Хранение тонера……………………………………………………………………………………………………………………. |
212 |
|
Отработанный тонер……………………………………………………………………………………………………………… |
213 |
|
Извлечение тонера………………………………………………………………………………………………………………… |
213 |
|
Установка тонера…………………………………………………………………………………………………………………… |
214 |
|
Меры предосторожности во время очистки………………………………………………………………………………. |
215 |
|
Очистка стекла экспонирования, крышки стекла экспонирования и АПД………………………………… |
216 |
|
Очистка стекла экспонирования……………………………………………………………………………………………. |
216 |
|
Очистка крышки стекла экспонирования……………………………………………………………………………….. |
216 |
|
Очистка устройства АПД……………………………………………………………………………………………………….. |
216 |
|
Безопасность……………………………………………………………………………………………………………………………… |
218 |
|
Основные функции безопасности………………………………………………………………………………………….. |
218 |
|
Операционная среда и примечания………………………………………………………………………………………….. |
219 |
|
Операционная среда…………………………………………………………………………………………………………….. |
219 |
|
Администраторам………………………………………………………………………………………………………………….. |
219 |
|
Пользователям……………………………………………………………………………………………………………………….. |
219 |
|
10. Устранение неполадок |
|
|
Устранение замятия бумаги……………………………………………………………………………………………………….. |
221 |
|
Распространенные неполадки……………………………………………………………………………………………………. |
223 |
6

|
Неполадки, связанные с подачей бумаги…………………………………………………………………………………… |
225 |
|
Неполадки, связанные с качеством печати………………………………………………………………………………… |
228 |
|
Проверка состояния аппарата………………………………………………………………………………………………. |
228 |
|
Проверка настроек драйвера принтера………………………………………………………………………………… |
228 |
|
Неполадки, связанные с печатью……………………………………………………………………………………………….. |
230 |
|
Если не удается корректно выполнить печать…………………………………………………………………………. |
230 |
|
Нечеткая печать……………………………………………………………………………………………………………………… |
232 |
|
Неправильная подача бумаги………………………………………………………………………………………………… |
234 |
|
Если не удается напечатать пробную страницу……………………………………………………………………… |
234 |
|
Неполадки, связанные с копированием…………………………………………………………………………………….. |
235 |
|
Если не удается сделать четкие копии……………………………………………………………………………………. |
235 |
|
Если не удается сделать копии с нужными параметрами……………………………………………………….. |
236 |
|
Неполадки, связанные со сканированием…………………………………………………………………………………. |
237 |
|
Если не удается выполнить обзор сети для отправки отсканированного файла……………………. |
237 |
|
Если результат сканирования отличается от ожидаемого……………………………………………………… |
237 |
|
Сообщения о состоянии и ошибках, отображаемые на экране………………………………………………… |
239 |
|
11. Приложение |
|
|
Функции и настройки сети, доступные в среде IPv6………………………………………………………………….. |
245 |
|
Доступные функции………………………………………………………………………………………………………………… |
245 |
|
Передача c использованием IPsec……………………………………………………………………………………………… |
247 |
|
Шифрование и аутентификация с помощью IPsec…………………………………………………………………. |
247 |
|
Security Association (Сопоставление безопасности)………………………………………………………………. |
248 |
|
Процедура настройки параметров обмена ключом шифрования………………………………………… |
249 |
|
Установка настроек обмена ключом шифрования………………………………………………………………… |
249 |
|
Настройка параметров IPsec на компьютере………………………………………………………………………… |
250 |
|
Включение и отключение протокола IPsec с панели управления…………………………………………… |
252 |
|
Примечания по поводу тонера…………………………………………………………………………………………………… |
254 |
|
Перемещение аппарата…………………………………………………………………………………………………………….. |
255 |
|
Перемещение аппарата по этажу………………………………………………………………………………………….. |
255 |
|
Расходные материалы………………………………………………………………………………………………………………… |
257 |
|
Принт-картридж……………………………………………………………………………………………………………………… |
257 |
|
Технические характеристики аппарата……………………………………………………………………………………… |
259 |
|
Технические характеристики основных функций…………………………………………………………………… |
259 |
7

|
Технические характеристики функции принтера…………………………………………………………………… |
263 |
|
Технические характеристики функции копира………………………………………………………………………. |
263 |
|
Технические характеристики функции сканера…………………………………………………………………….. |
264 |
|
Технические характеристики Дополнительных компоненты………………………………………………………. |
266 |
|
Блок подачи бумаги……………………………………………………………………………………………………………….. |
266 |
|
Товарные знаки………………………………………………………………………………………………………………………….. |
267 |
|
ИНДЕКС…………………………………………………………………………………………………………………………………… |
271 |
8
![]()
Как пользоваться данным руководством
Введение
Это руководство содержит подробные инструкции и примечания по эксплуатации и использованию данного изделия. Для безопасности и удобства внимательно прочтите это руководство до начала эксплуатации данного изделия. Для быстрого получения справки храните данное руководство в доступном месте.
Правовой запрет
Копирование или печать любого материала, распространение которого недопустимо в соответствии с применимыми законодательными актами, запрещено.
Местными законодательными актами, как правило, запрещено копирование или печать следующего материала:
банкнот, гербовых марок, облигаций, акций, банковских тратт, чеков, паспортов, водительских прав.
Приведенный список является ориентировочным и не может рассматриваться как исчерпывающий. Производитель не несет ответственности за полноту и точность приведенного списка. В случае возникновения вопросов в отношении легальности копирования того или иного материала обратитесь в местную юридическую консультацию.
Отказ от ответственности
Информация, приведенная в данном руководстве, может быть изменена без предварительного уведомления.
В рамках действующего законодательства компания-производитель ни при каких обстоятельствах не несет ответственность за ущерб, возникший в результате поломки изделия, потери зарегистрированных данных, использования или неиспользования данного продукта и руководств пользователя, поставляемых с ним.
Всегда выполняйте резервные копии данных, зарегистрированных на данном изделии. Документы и данные могут стереться при операционных ошибках и сбоях в работе аппарата.
Компания-производитель ни при каких обстоятельствах не несет ответственность за документы, созданные при использовании данного изделия, или за результаты данных, оформленных вами.
Для обеспечения высокого качества готовых отпечатков производитель настоятельно рекомендует использовать оригинальный тонер, поставляемый производителем.
9

Производитель не несет ответственность за любой ущерб или затраты, вызванные использованием в офисном оборудовании любых деталей или частей, кроме оригинальных, поставляемых производителем.
Некоторые иллюстрации в данном руководстве могут слегка отличаться от поставляемого изделия.
В данном руководстве размеры указаны в двух системах измерения.
Некоторые иллюстрации или пояснения в этом руководстве могут отличаться от приобретенного продукта вследствие улучшения или изменения данного продукта.
Различия в функционале моделей
В таблице ниже представлены основные различия в функционале моделей: 


 (главным образом страны Европы и Азии)
|
Тип 1 |
Тип 2 |
Тип 3 |
|||
|
АПД |
Недоступно |
Недоступно |
Доступно |
||
|
Функция дуплексной печати |
Недоступно |
Доступно |
Доступно |
||
|
(главным образом страны Латинской Америки) |
|||||
|
Тип 1 |
Тип 2 |
||||
|
АПД |
Недоступно |
Доступно |
|||
|
Функция дуплексной печати |
Недоступно |
Доступно |
|||
Информация для администраторов
Пароль
Некоторые конфигурации этого аппарата могут быть защищены паролем для предотвращения внесения несанкционированных изменений другими пользователями. Настоятельно рекомендуется немедленно создать собственный пароль.
Паролем можно защитить следующие операции:
•Конфигурация меню [Настройки сети] или [Инструменты администратора] с помощью панели управления
В соответствии с заводскими параметрами по умолчанию эти меню доступны без пароля.
10

Средства для создания пароля находятся в меню [Инструменты администратора].
•Настройка меню [Параметры системы], [Адресат сканирования], [Настройки сети], [Настройки IPsec] или [Инструменты администратора] с помощью приложения Web Image Monitor
По умолчанию для доступа к аппарату через приложение Web Image Monitor пароль не требуется.
Средства для установки пароля находятся в меню [Настройки администратора].
•Для получения подробных сведений о создании пароля см. стр. 166 «Настройки администратора» или стр. 203 «Настройка параметров администратора».
11

12

1. Начало работы
Краткое описание аппарата
Название основных опций
Основные опции устройства обозначаются в данном руководстве следующим образом:
•Paper Feed Unit PB2020  Модуль подачи бумаги
•DDST Unit Type M16  Модуль DDST
Информация, относящаяся к разным моделям
В данной главе описано, каким образом можно определить регион, к которому относится аппарат.
На задней стороне аппарата имеется наклейка, расположение которой указано ниже. На наклейке приведены данные, определяющие регион, к которому относится аппарат. Прочтите данные на наклейке.
DJC010
Следующая информация зависит от региона. Прочтите информацию под символом, который соответствует региону использования аппарата.


 (главным образом страны Европы и Азии)
Устройство относится к региону A, если на этикетке имеется следующая информация:
•CODE XXXX -27, -29
•220-240 В


 (главным образом страны Латинской Америки)
Аппарат относится к региону Б, если на наклейке имеется следующая информация:
• CODE XXXX -17
13

1.Начало работы
•120-127 В
•Размеры в этом руководстве даются в двух системах единиц измерения: метрической и
дюймовой. Если аппарат относится к региону A, используется метрическая система. Если аппарат относится к региону Б, используется дюймовая система.
•Если аппарат является моделью для региона A и на наклейке указано «CODE XXXX -27″, см. также «


 (главным образом страны Европы)».
Функции, требующие установки опций
|
Функция |
Опция |
|
• Функция сканера |
Модуль DDST |
•Web Image Monitor
•Функции с использованием сети (печать документов по сети и т.д.)
|
Копирование двухсторонних оригиналов с |
АПД |
|
двухсторонней и комбинированной печатью |
14

Руководство по компонентам
Руководство по компонентам
В данном разделе приводятся названия различных компонентов, находящихся с передней и задней стороны аппарата, а также описание их функций.
Наружная часть: вид спереди
9
1
2
4
10
5
6
7
11
12
DJC011
1.Крышка устройства АПД
Откройте эту крышку, чтобы извлечь оригиналы, замятые в устройстве автоматической подачи документов (АПД).
2.Выходной лоток для АПД
Сюда выводятся оригиналы, отсканированные с помощью АПД.
3.Панель управления
Здесь находится экран и клавиши для управления аппаратом.
4.Внутренний лоток
В этот лоток выводятся готовые отпечатки. Здесь можно накапливать до 250 листов обычной бумаги.
5.Передняя крышка
Откройте крышку для замены бутыли с тонером.
15

1.Начало работы
6.Лоток 1
Вэтот лоток можно загрузить до 250 листов обычной бумаги.
7.Лоток 2 (опция)
Вэтот лоток можно загрузить до 500 листов обычной бумаги.
8.Стекло экспонирования
Поочередно помещайте сюда оригиналы.
9.Крышка стекла экспонирования
Откройте эту крышку, чтобы поместить оригинал на стекло экспонирования.
10.Правая крышка
Откройте эту крышку при замятии бумаги. Чтобы открыть эту крышку, сначала откройте обходной лоток.
11.Обходной лоток
Загружайте бумагу постепенно, лист за листом.
Во избежание попадания пыли на обходной лоток можно установить крышку. Дополнительную информацию см. стр. 68 «Загрузка бумаги в обходной лоток».
12.Правая крышка лотка 2
Откройте эту крышку при замятии бумаги.
•При выводе бумаги 11 х 17 во внутренний лоток снимайте ее с левой стороны аппарата. Следите за тем, чтобы не повредить бумагу о подпорку в левой части внутреннего лотка.
Наружная часть: вид сзади
1
4
2
3
DJC012
16

Руководство по компонентам
1.Порт Ethernet
Для подключения аппарата к сети с помощью кабеля сетевого интерфейса. Для использования порта необходимо установить модуль DDST.
2.USB-порт
Для подключения аппарата к компьютеру с помощью кабеля USB.
3.Штепсельная розетка
Для подключения шнура питания к аппарату.
4.Выключатель питания
Этот выключатель служит для включения и выключения питания.
Панель управления
|
1 2 |
3 |
4 |
5 |
6 |
7 |
8 |
9 |
|
17 |
16 |
15 |
14 |
13 |
12 |
11 |
10 |
DJC032 |
1.Клавиши быстрого доступа
Назначьте клавише часто используемую функцию, чтобы получить доступ к ней одним нажатием. Подробнее см. стр. 23 «Назначение функции определенной клавише быстрого доступа».
2.Клавиша [Дуплекс/Объединить]
Нажмите, чтобы сделать двухсторонние или объединенные копии. Некоторые аппараты позволяют делать только комбинированные копии.
3.Клавиша [Копия удостоверения личности]
Нажмите, чтобы перейти в режим копирования удостоверений личности для текущего задания.
4.Клавиша [Сканер]
Нажмите для перехода в режим сканирования. Клавиша остается подсвеченной до тех пор, пока аппарат находится в режиме сканирования.
5.Клавиша [Копия]
Нажмите для переключения в режим копира. Эта клавиша подсвечивается до тех пор, пока аппарат работает в режиме копира.
6.Экран
Здесь отображаются сообщения и сведения о текущем состоянии.
17

1.Начало работы
7.Клавиши прокрутки
Нажмите, чтобы переместить курсор в направлении, указанном на клавише прокрутки.
При нажатии клавиш [ ][
][ ] в режиме ожидания открывается меню настроек текущего режима работы аппарата (копир или сканер).
Спомощью клавиш [ ][
][ ] можно прокручивать экран и выбирать пункты в меню.
8.Клавиша [Сброс/Стоп]
•Пока аппарат обрабатывает задание печати: нажмите, чтобы отменить текущее задание.
•При настройке параметров аппарата: нажмите для отмены текущей настройки или возврата в режим ожидания.
•При нахождении в режиме ожидания: нажмите для отмены временных настроек, таких как плотность изображения или разрешение.
9.Клавиша [Энергосбережение]
Нажмите, чтобы включить или выключить режим энергосбережения 1 или режим энергосбережения 2. См. стр. 166 «Настройки администратора».
10.Клавиша [Инструменты пользователя]
Нажмите, чтобы отобразить меню для настройки параметров системы аппарата.
11.Клавиша [Пуск]
Нажмите, чтобы начать копирование или сканирование.
12.Цифровые клавиши
Используйте для ввода цифровых значений при настройке таких параметров, как количество копий, или для ввода букв при настройке имен.
13.Клавиша [OK]
Нажмите, чтобы подтвердить настройки или перейти к следующему уровню иерархии меню.
14.Клавиша [Выход]
Нажмите для отмены последней операции или выхода на предыдущий уровень иерархии меню.
15.Клавиши выбора
Чтобы выбрать пункт, отображаемый в нижней строке экрана, нажмите клавишу с соответствующим названием.
16.Индикатор предупреждения
Мигает желтым, если приближается время технического обслуживания аппарата (например, замена расходных материалов); светится красным, если обнаружена ошибка аппарата.
Если появляется предупреждение, проверьте сообщения на экране. Для получения сведений о сообщениях, появляющихся на экране, см. стр. 239 «Сообщения о состоянии и ошибках, отображаемые на экране».
17.Индикатор ввода данных.
Мигает при получении заданий печати с компьютера.
• При переходе аппарата в режим энергосбережения подсветка экрана выключается.
18
![]()
Руководство по компонентам
•До тех пор, пока аппарат не завершит выполнение текущего задания, отображение меню настройки аппарата невозможно. Определить состояние аппарата можно по сообщениям, отображаемым на экране. При появлении сообщений, таких как «Печать…», «Копирование…»
или «Обработка…» дождитесь окончания текущего действия.
Изменение языка
Можно изменить язык, используемый для отображения информации на дисплее. По умолчанию установлен английский.
1. Нажмите клавишу [Инструменты пользователя].
DJC033
2.Выберите пункт [Инструменты администратора] с помощью клавиш [ ] или [
 ] и нажмите клавишу [OK].
3.Выберите пункт [Язык] с помощью клавиш [ ] или [
 ] и нажмите клавишу [OK].
4.Выберите язык с помощью клавиш [ ] или [
 ] и нажмите клавишу [OK].
5.Нажмите клавишу [Инструменты пользователя].
19

1. Начало работы
Инструменты управления
В этом разделе приведены инструменты управления этим аппаратом. Панель управления
На панели управления размещается экран с клавишами управления аппаратом. С помощью панели управления можно настроить различные параметры аппарата. Для получения подробных сведений об использовании панели управления см. стр. 149 «Настройка аппарата с помощью панели управления».
Web Image Monitor
Можно проверить состояние аппарата или сконфигурировать его настройки непосредственно из приложения Web Image Monitor. Для получения подробных сведений об использовании приложения Web Image Monitor см. стр. 175 «Настройка аппарата с помощью приложения Web Image Monitor».
20

Переключение режима работы
Переключение режима работы
Переключаться между режимами копира и сканера можно нажатием соответствующих клавиш.
Нажмите клавишу [Копир] или [Сканер] для перехода в соответствующий режим. При включении каждого режима загорается соответствующая клавиша.
По умолчанию аппарат переходит в режим копира при включении или истечении времени, указанного в поле [Таймер автосброса системы], в течение которого отображается начальный экран другого режима. Выбрать режим, в который будет переходить аппарат при таких условиях, можно с помощью параметра [Приоритет функций] меню [Инструменты администратора].
•Пароль доступа к меню [Инструменты администратора] можно задать в поле [Блокировать инструм.админ.].
•Для получения подробных сведений о параметре [Таймер автосброса системы] или [Приоритет функций] см. стр. 166 «Настройки администратора».
21

1. Начало работы
Многоцелевой доступ
Данный аппарат может одновременно выполнять несколько заданий, используя разные функции. Выполнение нескольких функций одновременно называется «многоцелевым доступом».
Функциями сканера и принтера можно пользоваться одновременно.
•Если попытаться использовать одну из функций, совместное выполнение которых невозможно, аппарат подаст звуковой сигнал или выведет сообщение об ошибке на экран компьютера. В этом случае выполнение работы придется отложить до завершения текущей операции.
22

Назначение функции определенной клавише быстрого доступа
Назначение функции определенной клавише быстрого доступа
Чтобы получить доступ к часто используемой функции одним нажатием клавиши, назначьте эту функцию определенной клавише быстрого доступа.
Таким образом можно настроить параметры семи нижеперечисленных функций:
•Печать из папки
•A3 — A4
•A4 — A3
•Диазокопия
•Документ
•Сканирование уд. личности
•Адрес сканирования
Назначение функции с помощью панели управления
1.Нажмите клавишу [Инструменты пользователя].
2.С помощью клавиши [ ] или [
 ] выберите пункт [Инструменты администратора] и нажмите клавишу [OK].
3.Если предложено указать пароль, введите пароль с помощью цифровых клавиш и нажмите клавишу [OK].
4.С помощью клавиш [ ] или [
 ] выберите пункт [Краткий путь к функции] и нажмите клавишу [OK].
5.С помощью клавиш [ ] или [
 ] выберите функцию для настройки и нажмите клавишу
[OK].
6.Нажмите клавишу [User Tools] для возврата к начальному экрану.
•Пароль доступа к меню [Инструменты администратора] можно задать в поле [Блокировать инструм.админ.].
Назначение параметра с помощью приложения Web Image Monitor
1.Откройте веб-браузер и введите в адресной строке «http://(IP-адрес или имя хоста аппарата)/».
2.Нажмите кнопку [Параметры системы].
23

1.Начало работы
3.Откройте вкладку [Ярлык для функции].
4.Укажите в разделе [Ярлык для функции] параметр, который необходимо настроить.
5.Введите пароль администратора.
6.Нажмите [OK].
7.Закройте веб-браузер.
•Для получения подробных сведений о меню [Администратор] см. стр. 203 «Настройка параметров администратора».
24

Включение/выключение питания
Включение/выключение питания
Включение/выключение питания
•Не выключайте основной выключатель питания сразу после его включения. Это может привести к повреждению памяти и стать причиной возникновения неполадок.
Главный выключатель питания расположен на левой стороне аппарата.
•Если аппарат не используется на протяжении определенного периода времени, он автоматически переходит в режим энергосбережения 1 или режим энергосбережения 2. Дополнительную информацию см. стр. 166 «Настройки администратора».
Включение основного питания
1.Убедитесь, что вилка кабеля питания надежно вставлена в розетку сети электропитания.
2.Нажмите основной переключатель питания.
DJC014
Выключение основного питания;
•При отсоединении сетевого кабеля от стенной розетки тяните только за вилку, а не за кабель. В противном случае можно повредить кабель. Использование поврежденных сетевых кабелей может привести к возгоранию или поражению электрическим током.
25

1.Начало работы
•Не отключайте питание во время работы устройства.
1.Нажмите основной переключатель питания.
При завершении работы устройства отключение основного питания осуществляется автоматически. Если экран панели управления продолжает работать, свяжитесь с представителем сервисной службы.
26

Установка даты и времени
Установка даты и времени
1. Нажмите клавишу [Инструменты пользователя].
DJC033
2.С помощью клавиши [ ] или [
 ] выберите пункт [Инструменты администратора] и нажмите клавишу [OK].
3.Если предложено указать пароль, введите пароль с помощью цифровых клавиш и нажмите клавишу [OK].
4.С помощью клавиш [ ] и [
] и [ ] выберите пункт [Установить дату/время], затем нажмите клавишу [OK].
5.С помощью клавиш [ ] и [
] и [ ] выберите пункт [Установить дату] и нажмите клавишу
[OK].
6.С помощью клавиш [ ] и [
] и [ ] выберите необходимый формат даты, затем нажмите клавишу [OK].
Для получения сведений о формате отображения даты и времени см. стр. 166 «Настройки администратора».
7.Введите текущую дату при помощи цифровых клавиш и нажмите [OK].
Для перемещения между полями можно использовать клавиши [ ] и [
] и [ ].
].
8.С помощью клавиши [ ] или [
 ] выберите пункт [Установить время] и нажмите клавишу [OK].
9.С помощью клавиш [ ] и [
] и [ ] выберите необходимый формат времени, затем нажмите клавишу [OK].
10.Введите текущее время при помощи цифровых клавиш и нажмите [OK].
При выборе параметра [12-час. формат] используйте клавиши [ ] и [
] и [ ] для выбора значений [AM] или [PM].
Для перемещения между полями можно использовать клавиши [ ] и [
] и [ ].
].
11.Нажмите клавишу [User Tools] для возврата к начальному экрану.
27

1.Начало работы
•Чтобы использовать эту функцию, установите модуль DDST.
•Пароль доступа к меню [Инструменты администратора] можно задать в поле [Блокировать
инструм.админ.]. Для получения подробных сведений о параметре [Блокировать инструм.админ.] см. стр. 166 «Настройки администратора».
28
![]()
Ввод символов
Ввод символов
Для ввода символов используйте клавиши следующим образом:
Чтобы ввести цифру
Нажмите цифровую клавишу.
Чтобы удалить символ
Нажмите клавишу [ ].
].
•Состав символов, которые можно вводить, зависит от настраиваемого параметра.
•Если введенное число слишком велико или слишком мало для данного параметра, оно не будет принято. Если нажать клавишу [OK], аппарат удлинит или укоротит число для соответствия минимально или максимально допустимому для данного параметра значению.
29

1. Начало работы
Подсоединение к интерфейсу
Соединение посредством интерфейса Ethernet
• Убедитесь в том, что питание отключено. См. стр. 25 «Включение/выключение питания». Плата сетевого интерфейса поддерживает соединение в режиме 10BASE-T или 100BASE-TX.
1.Отключите основное питание.
2.Подсоедините кабель сетевого интерфейса к порту 10BASE-T/100BASE-TX.
DJC017
3.Подключите другой конец кабеля интерфейса Ethernet к устройству сетевого подключения, например, к концентратору.
4.Включите основное питание.
1


2


DJC035
1.Индикатор (зеленый)
Если используется порт 10BASE-T или 100BASE-TX, индикатор светится зеленым. Если аппарат не подключен к сети, он не светится.
2.Индикатор (оранжевый)
При передаче и приеме данных светодиод горит оранжевым. Если передача и прием данных не осуществляются, светодиод не горит.
Подсоединение к интерфейсу USB
Аппарат можно подсоединить к хост-компьютеру с помощью интерфейсного кабеля USB.
30

Подсоединение к интерфейсу
Чтобы подсоединить аппарат к хост-компьютеру с помощью интерфейсного кабеля USB, соблюдайте следующую процедуру.
1. Подключите кабель USB 2.0 к порту USB.
DJC018
2.Подсоедините другой конец кабеля к порту USB хост-компьютера.
Аппарат подсоединен к компьютеру.
31

1. Начало работы
Настройка параметров сети
Вэтом разделе описан процесс настройки параметров, необходимых для использования аппарата в сети.
Вданном руководстве термин «IP-адрес» охватывает обе среды: IPv4 и IPv6. Прочтите инструкции по используемой среде.
Настройка параметров IP-адреса
Процедура настройки зависит от того, определяется ли IP-адрес автоматически сетевой службой (DHCP) или назначается в ручном режиме.
•Пароль доступа к меню [Настройки сети] можно указать в разделе [Блокир. инстр.адм.].
•Если в сетевом окружении необходимо указать скорость передачи, которая не определяется автоматически, задайте скорость передачи в блоке [Устан.скорость Ethernet] меню [Настройки сети].
•Сначала задайте параметры IP-адреса, а затем установите драйвер. Для получения подробных сведений об установке драйвера см. стр. 135 «Установка драйвера и программного обеспечения».
•Для получения подробных сведений о печати страницы конфигурации см. стр. 170 «Печать списков и отчетов».
Настройка автоматического получения адреса IPv4
•Чтобы можно было получать адрес IPv4 для аппарата автоматически, в сети должен работать сервер DHCP.
1. Нажмите клавишу [Инструменты пользователя].
DJC033
32

Настройка параметров сети
2.С помощью клавиш [ ] и [
] и [ ] выберите пункт [Настройки сети], затем нажмите клавишу [OK].
3.Если предложено указать пароль, введите пароль с помощью цифровых клавиш и нажмите клавишу [OK].
4.С помощью клавиш [ ] и [
] и [ ] выберите пункт [Конфигурация IPv4], затем нажмите клавишу [OK].
5.С помощью клавиш [ ] и [
] и [ ] выберите пункт [DHCP], затем нажмите клавишу [OK].
6.С помощью клавиш [ ] и [
] и [ ] выберите пункт [Активн.] и нажмите клавишу [OK].
7.Нажмите клавишу [User Tools] для возврата к начальному экрану.
8.При получении запроса на перезагрузку отключите аппарат, затем включите его снова.
9.Распечатайте конфигурационную страницу, чтобы проверить настройки.
Адрес IPv4 отобразится на панели «TCP/IP» страницы конфигурации.
Установка адреса IPv4 аппарата в ручном режиме
•Адрес IPv4, присвоенный аппарату, не должен использоваться каким-либо другим устройством данной сети.
1. Нажмите клавишу [Инструменты пользователя].
DJC033
2.С помощью клавиш [ ] и [
] и [ ] выберите пункт [Настройки сети], затем нажмите клавишу [OK].
3.Если предложено указать пароль, введите пароль с помощью цифровых клавиш и нажмите клавишу [OK].
4.С помощью клавиш [ ] и [
] и [ ] выберите пункт [Конфигурация IPv4], затем нажмите клавишу [OK].
5.С помощью клавиш [ ] и [
] и [ ] выберите пункт [DHCP], затем нажмите клавишу [OK].
33

1.Начало работы
6.С помощью клавиш [ ] и [
] и [ ] выберите пункт [Неактивн.], а затем нажмите [OK].
7.С помощью клавиш [ ] и [
] и [ ] выберите пункт [IP-адрес], затем нажмите клавишу
[OK].
Отображается текущий адрес IPv4.
8.Введите адрес IPv4 аппарата с помощью цифровых клавиш, затем нажмите клавишу
[OK].
Для перемещения между полями используйте клавиши [ ] и [
] и [ ]
]
9.С помощью клавиш [ ] и [
] и [ ] выберите пункт [Маска подсети], затем нажмите клавишу [OK].
Отображается текущая маска подсети.
10.Введите маску подсети с помощью цифровых клавиш, затем нажмите клавишу [OK].
Для перемещения между полями используйте клавиши [ ] и [
] и [ ]
]
11.С помощью клавиш [ ] и [
] и [ ] выберите пункт [Адрес шлюза], а затем нажмите [OK].
Отображается текущий адрес шлюза.
12.Введите адрес шлюза с помощью цифровых клавиш и нажмите клавишу [OK].
Для перемещения между полями используйте клавиши [ ] и [
] и [ ]
]
13.Нажмите клавишу [User Tools] для возврата к начальному экрану.
14.При получении запроса на перезагрузку отключите аппарат, затем включите его снова.
15.Распечатайте конфигурационную страницу, чтобы проверить настройки.
Адрес IPv4 отобразится на панели «TCP/IP» страницы конфигурации.
•Если активирована служба [DHCP], заданные вручную настройки адреса IPv4 не используются.
Настройка автоматического получения адреса IPv6
•Чтобы можно было автоматически получать адрес IPv6 для аппарата, в сети должен работать сервер DHCP.
34

Настройка параметров сети
1. Нажмите клавишу [Инструменты пользователя].
DJC033
2.С помощью клавиш [ ] и [
] и [ ] выберите пункт [Настройки сети], затем нажмите клавишу [OK].
3.Если предложено указать пароль, введите пароль с помощью цифровых клавиш и нажмите клавишу [OK].
4.С помощью клавиш [ ] и [
] и [ ] выберите пункт [Конфигурация IPv6], затем нажмите клавишу [OK].
5.С помощью клавиш [ ] и [
] и [ ] выберите пункт [IPv6], затем нажмите клавишу [OK].
6.С помощью клавиш [ ] и [
] и [ ] выберите пункт [Активн.] и нажмите клавишу [OK].
7.С помощью клавиш [ ] и [
] и [ ] выберите пункт [DHCP], затем нажмите клавишу [OK].
8.С помощью клавиш [ ] и [
] и [ ] выберите пункт [Активн.] и нажмите клавишу [OK].
9.Нажмите клавишу [User Tools] для возврата к начальному экрану.
10.При получении запроса на перезагрузку отключите аппарат, затем включите его снова.
11.Распечатайте конфигурационную страницу, чтобы подтвердить настройки.
Параметры IPv6-адреса будут указаны в блоке «Конфигурация IPv6» на странице конфигурации.
Настройка IPv6-адреса аппарата в ручном режиме
•Адрес IPv6, присвоенный аппарату, не должен использоваться другим устройством в этой сети.
35

1.Начало работы
1.Нажмите клавишу [Инструменты пользователя].
DJC033
2.С помощью клавиш [ ] и [
] и [ ] выберите пункт [Настройки сети], затем нажмите клавишу [OK].
3.Если предложено указать пароль, введите пароль с помощью цифровых клавиш и нажмите клавишу [OK].
4.С помощью клавиш [ ] и [
] и [ ] выберите пункт [Конфигурация IPv6], затем нажмите клавишу [OK].
5.С помощью клавиш [ ] и [
] и [ ] выберите пункт [IPv6], затем нажмите клавишу [OK].
6.С помощью клавиш [ ] и [
] и [ ] выберите пункт [Активн.] и нажмите клавишу [OK].
7.С помощью клавиш [ ] и [
] и [ ] выберите пункт [DHCP], затем нажмите клавишу [OK].
8.С помощью клавиш [ ] и [
] и [ ] выберите пункт [Неактивн.], а затем нажмите [OK].
9.С помощью клавиш [ ] или [
 ] выберите пункт [Адрес конфиг.вручную], а затем нажмите [OK].
10.С помощью клавиш [ ] или [
 ] выберите пункт [Адрес конфиг.вручную], а затем нажмите [OK].
11.Введите IPv6-адрес аппарата с помощью цифровых клавиш и нажмите [OK].
12.С помощью клавиш [ ] или [
 ] выберите пункт [Длина префикса], а затем нажмите
[OK].
13.С помощью цифровых клавиш укажите длину префикса и нажмите клавишу [ОК].
14.С помощью клавиш [ ] и [
] и [ ] выберите пункт [Адрес шлюза], а затем нажмите [OK].
15.Введите адрес шлюза с помощью цифровых клавиш и нажмите клавишу [OK].
16.Нажмите клавишу [User Tools] для возврата к начальному экрану.
17.При получении запроса на перезагрузку отключите аппарат, затем включите его снова.
18.Распечатайте конфигурационную страницу, чтобы подтвердить настройки.
Параметры IPv6-адреса будут указаны в блоке «Конфигурация IPv6» на странице конфигурации.
36

Настройка параметров сети
Совместное использование принтера в сети
В этом разделе описана настройка аппарата в качестве сетевого принтера Windows.
Настройка сетевого принтера требуется для того, чтобы аппаратом могли пользоваться сетевые клиенты.
•Для изменения свойств принтера необходимо иметь привилегии доступа, предусматривающие управление принтером. Войдите в систему, используя учетную запись члена группы администраторов.
•Ниже описана процедура для ОС Windows 7. В другой операционной системе процедура может немного отличаться от описанной.
1.В меню [Пуск] нажмите [Устройства и принтеры].
При использовании компьютера на базе Windows 8/8.1 или Windows Server 2012/2012 R2 нажмите [Поиск] на панели экспресс-кнопок, а затем нажмите [Панель управления]. После появления окна [Панель управления] нажмите [Просмотр устройств и принтеров].
2.Правой кнопкой щелкните значок принтера, который нужно использовать, затем щелкните [Свойства принтера].
Откроется диалоговое окно свойств принтера.
3.Во вкладке [Совместное использование] нажмите [Общий доступ к данному принтеру].
•Чтобы использовать этот принтер совместно с пользователями другой версии Windows, продолжайте выполнение этой процедуры.
•Если при установке драйвера принтера был установлен другой драйвер посредством выбора опции [Общий доступ к данному принтеру], перейдите к шагу 8.
4.Нажмите [Дополнительные драйверы…].
5.Выберите версию ОС Windows, которой следует предоставить общий доступ к принтеру, и нажмите [OK].
6.Нажмите кнопку [Обзор…], выберите файл драйвера, затем нажмите кнопку [Открыть].
7.Нажмите [OK].
8.Во вкладке [Дополнительно] нажмите на кнопку [Печать по умолчанию…].
Укажите значения по умолчанию для драйвера принтера, которые будут использованы на клиентских компьютерах, и нажмите [ОК].
9.Нажмите [Применить].
10.Нажмите [OK].
37

1. Начало работы
Использование Smart Organizing Monitor Lt
Smart Organizing Monitor Lt – это полезное приложение, позволяющее пользователю проверять состояние аппарата с компьютера.
•Если на экране отображается код SC, перезагрузите аппарат. Если код SC не исчез после перезагрузки, обратитесь к торговому представителю или представителю сервисного центра.
Что можно делать с помощью Smart Organizing Monitor Lt
Проверка состояния аппарата
Можно проверять состояние аппарата, в частности, количество оставшегося тонера, подробные настройки каждого лотка для бумаги и т.п.
Отправка сообщений об ошибках или предупреждений в случае возникновения ошибки во время работы аппарата
Если во время работы приложения Smart Organizing Monitor Lt в аппарате возникнет ошибка или неисправность, на экране компьютера появится всплывающее сообщение. В этом сообщении будет содержаться информация об ошибке или неисправности. Это сообщение появится на экране через несколько секунд после возникновения ошибки или неисправности.
Поддерживаемые языки и операционные системы
•Поддерживаются следующие языки:
английский, французский, испанский, чешский, венгерский, польский, русский, португальский (бразильский), турецкий, упрощенный китайский
•Поддерживаются следующие операционные системы:
Windows Vista/7/8 и Windows Server 2003/2003 R2/2008/2008 R2/2012
Установка приложения Smart Organizing Monitor Lt
Smart Organizing Monitor Lt можно загрузить с веб-сайта нашей компании. Ниже приведено описание процедуры на примере ОС Windows 7.
•Для установки Smart Organizing Monitor Lt необходимы права администратора. Войдите в систему в качестве члена группы администраторов.
38
![]()
Использование Smart Organizing Monitor Lt
1.Закройте все приложения. (Не закрывайте это руководство).
2.Распакуйте загруженный с веб-сайта компании файл и дважды щелкните по файлу setup.exe.
3. Выберите язык интерфейса и нажмите кнопку [Next>].
4.Нажмите кнопку [Далее >].
5.Внимательно прочтите лицензионное соглашение об использовании программного обеспечения. В случае согласия нажмите [Да].
6.Выберите папку для установки Smart Organizing Monitor Lt и нажмите [Далее>].
7.Укажите программную папку и нажмите [Далее>].
8.Выберите драйвер принтера.
•Если для установки драйвера принтера указан порт USB, выберите этот аппарат из раскрывающегося меню в пункте [Выберите драйвер принтера:].
•Если для установки драйвера принтера указан стандартный порт TCP/IP, сначала нажмите пункт [Подключить принтер], выберите этот аппарат из списка на экране и нажмите [OK].
•Если IP-адрес указывается вручную, выберите из раскрывающегося меню в разделе [Выберите драйвер принтера:] пункт [Стандартный порт TCP/IP] и введите IP-адрес данного аппарата в поле [IP-адрес:].
9.Нажмите [OK].
Начнется процесс установки.
10.Нажмите [Готово].
Запуск приложения Smart Organizing Monitor Lt
Запуск Smart Organizing Monitor Lt дает возможность проверять состояние аппарата.
Если во время работы приложения Smart Organizing Monitor Lt в аппарате возникнет ошибка или неисправность, на экране компьютера появится всплывающее окно с подробными сведениями об ошибке или неисправности.
Нажмите [Пуск] и выберите [Smart Organizing Monitor Lt] и [Smart Organizing Lt Status] в пункте
[Все программы].
Когда откроется окно Smart Organizing Monitor Lt, в нижнем правом углу рабочего стола появится значок  .
.
Если нажать кнопку [Свернуть] во время работы Smart Organizing Monitor Lt, окно Smart Organizing Monitor Lt свернется. Чтобы снова открыть окно, нажмите на значок программы.
39

1. Начало работы
Удаление приложения Smart Organizing Monitor Lt
1.Закройте Smart Organizing Monitor Lt.
2.Нажмите [Пуск] и выберите [Smart Organizing Monitor Lt] и [Smart Organizing Lt for (тип модели) Uninstall] в пункте [Все программы].
3.Чтобы удалить Smart Organizing Monitor Lt, следуйте инструкциям на экране.
40

Важные инструкции по безопасности  (главным образом страны Европы)


 (главным образом страны Европы)
Важные инструкции по безопасности


 (главным образом страны Европы)
Информация для пользователя по электрическому и электронному оборудованию
Если в тексте инструкции, составленной для пользователей определенной страны, содержится этот символ, это означает, что пользователи должны следовать предписаниям национальных законов относительно сбора и утилизации электронных отходов
В наших изделиях используются высококачественные компоненты, предназначенные для облегчения вторичной переработки.
На наших изделиях и упаковке имеется маркировка в виде приведенного ниже символа.
Данный символ обозначает, что изделие нельзя утилизировать вместе с городскими отходами. Оно должно быть утилизировано отдельно через соответствующую систему сбора и утилизации. Соблюдая данные инструкции, вы обеспечиваете правильное обращение с изделием и помогаете сократить негативное влияние на окружающую среду и здоровье человека, которое возникает при несоответствующем обращении. Переработка изделий помогает сохранять природные ресурсы и защищать окружающую среду.
Дополнительную информацию о системах сбора и утилизации этой продукции можно получить в магазине, где было приобретено устройство, у местного дилера или торгового/сервисного представителя.
Все остальные пользователи
Если необходимо утилизировать это изделие, обратитесь к местной администрации, в магазин, где вы приобрели изделие, к местному дилеру или торговому/сервисному представителю.
41

1. Начало работы
Информация об окружающей среде для пользователей
Пользователи стран ЕС, Швейцарии и Норвегии
Ресурс расходных материалов
См. соответствующий раздел руководства пользователя или сведения на упаковке расходных материалов.
Переработанная бумага
В аппарат можно загружать переработанную бумагу, изготавливаемую в соответствии с европейским стандартом EN 12281:2002 или DIN 19309. При применении технологии печати EP возможна печать на бумаге плотностью 64 г/м2, которая содержит меньше первичного сырья и обеспечивает значительную экономию ресурсов.
Двусторонняя печать (если возможно)
Двусторонняя печать задействует обе стороны листа бумаги. Это приводит к экономии бумаги и снижению размера отпечатанного документа, так как используется меньшее количество листов. Мы рекомендуем использовать эту функцию при печати.
Программа возврата картриджей с тонером и чернилами
Картридж с тонером и чернилами для переработки будет приниматься бесплатно от пользователей в соответствии с местными требованиями.
Для получения подробной информации о программе возврата см. веб-страницу или обратитесь к представителю сервисной службы.
https://www.ricoh-return.com/
Эффективное использование электроэнергии
Потребление электроэнергии аппаратом зависит как от его технических характеристик, так
и от условий его эксплуатации. С целью экономии электроэнергии аппарат переходит в
режим готовности по завершении печати последней страницы. При необходимости он может немедленно приступить к печати из этого режима.
Если дополнительные оттиски не требуются и указанное время закончилось, устройство переключится в режим энергосбережения.
В этих режимах аппарат потребляет меньше электроэнергии (Ватт). Для выполнения следующего задания печати аппарату потребуется больше времени на выход из режима энергосбережения, чем из режима готовности.
Для максимальной экономии электроэнергии мы рекомендуем использовать настройку для контроля электроэнергии по умолчанию.
Продукты, которые соответствуют требованиям Energy Star, всегда эффективно используют электроэнергию.
42

Важные инструкции по безопасности 


 (главным образом страны Европы)
Примечание к символу батареек и/или аккумулятора (только для стран ЕС)
В соответствии с директивой об элементах питания 2006/66/EC (Ст. 20 Информирование конечных пользователей Приложение II) вышеуказанный символ печатается на элементах питания
и аккумуляторах.
Этот символ означает, что в пределах Европейского Союза использованные элементы питания и аккумуляторы должны утилизироваться отдельно от бытовых отходов.
В странах ЕС действует раздельная система сбора отходов не только для использованных электрических и электронных компонентов, но также и для элементов питания и аккумуляторов.
Утилизируйте их надлежащим образом в местном центре по сбору/переработке отходов.
По вопросу замены аккумулятора обратитесь к торговому представителю или представителю сервисного центра.
43

1. Начало работы
Информация об экологических нормах
Программа ENERGY STAR
Требования программы ENERGY STAR® к оборудованию по формированию изображений
Компания-производитель принимает участие в программе
ENERGY STAR®.
Данный аппарат соответствует правилам, установленным программой ENERGY STAR®.
Требования программы ENERGY STAR® к оборудованию по формированию изображений способствуют сбережению энергии посредством внедрения компьютеров и другого офисного оборудования с низким энергопотреблением.
Программа поддерживает развитие и распространение изделий с функциями энергосбережения.
Это открытая программа, в которой производители участвуют по своему желанию.
Программа распространяется на такие изделия, как компьютеры, мониторы, принтеры, факсимильные и копировальные аппараты, сканеры и многофункциональные устройства. Стандарты и логотипы программы Energy Star единообразны в международном масштабе.
Энергосбережение
В данный аппарат заложено два режима энергосбережения: Режим энергосбережения 1 и Режим энергосбережения 2. При бездействии в течение определенного времени аппарат переходит в режим энергосбережения.
При нажатии кнопки [Энергосбережение] аппарат выходит из режима энергосбережения.
Режим энергосбережения 1
Аппарат переходит в режим энергосбережения 1 после 30-секундного простоя. На выход из режима энергосбережения 1 требуется меньше времени, чем из режима отключения питания или режима энергосбережения 2, однако в режиме энергосбережения 1 расходуется больше энергии, чем в режиме энергосбережения 2.
44

Информация об экологических нормах
Режим энергосбережения 2
Аппарат переходит в режим энергосбережения 2 по истечении времени, заданного для этого параметра. В режиме энергосбережения 2 аппарат расходует меньше энергии, чем в режиме энергосбережения 1, однако для выхода из режима энергосбережения 2 требуется больше времени, чем из режима энергосбережения 1.
Технические характеристики
• 


 (главным образом страны Европы и Азии)
|
Тип 1 |
Тип 2, 3 |
||||
|
Режим |
Потребляемая |
49 |
Вт |
49 |
Вт |
|
энергосбережения 1 |
мощность*1 |
||||
|
Время по умолчанию |
30 |
секунд |
30 |
секунд |
|
|
Время возврата к |
10 |
секунд или |
10 |
секунд или |
|
|
работе*1 |
менее |
менее |
|||
|
Режим |
Потребляемая |
3,4 Вт |
3,4 Вт |
||
|
энергосбережения 2 |
мощность*1 |
||||
|
Время по умолчанию |
1 мин. |
1 мин. |
|||
|
Время возврата к |
30 |
секунд или |
30 |
секунд или |
|
|
работе*1 |
менее |
менее |
|||
|
Функция двусторонней печати*2 |
Стандартная |
*1 Время возврата к работе и потребляемая мощность могут различаться в зависимости от рабочих условий аппарата.
*2 Соблюдение стандартов ENERGY STAR по энергосбережению; продукт полностью соответствует требованиям, если оснащен (или используется вместе с) лотком для двусторонней печати, когда функция двусторонней печати включена в качестве опции.
• 


 (главным образом страны Латинской Америки)
|
Тип 1 |
Тип 2 |
||||
|
Режим |
Потребляемая |
48 |
Вт |
48 |
Вт |
|
энергосбережения 1 |
мощность*1 |
||||
|
Время по умолчанию |
30 |
секунд |
30 |
секунд |
|
|
Время возврата к |
10 |
секунд или |
10 |
секунд или |
|
|
работе*1 |
менее |
менее |
45

1. Начало работы
|
Тип 1 |
Тип 2 |
||
|
Режим |
Потребляемая |
2,9 Вт |
2,9 Вт |
|
энергосбережения 2 |
мощность*1 |
||
|
Время по умолчанию |
1 мин. |
1 мин. |
|
|
Время возврата к |
30 секунд или |
30 секунд или |
|
|
работе*1 |
менее |
менее |
|
|
Функция двусторонней печати*2 |
Стандартная |
*1 Время возврата к работе и потребляемая мощность могут различаться в зависимости от рабочих условий аппарата.
*2 Соблюдение стандартов ENERGY STAR по энергосбережению; продукт полностью соответствует требованиям, если оснащен (или используется вместе с) лотком для двусторонней печати, когда функция двусторонней печати включена в качестве опции.
Для получения подробных сведений о режимах энергосбережения см. стр. 166 «Настройки администратора».
•После непрерывного нахождения в режиме энергосбережения в течение суток аппарат автоматически возвращается в нормальное состояние и выполняет процедуру самостоятельного технического обслуживания.
46

2. Загрузка бумаги
Пригодная для использования бумага
Лоток 1
|
Тип |
Размеры |
Вес |
Емкость |
|
Тонкая бумага |
A3 |
52-105 г/м2 |
250 |
|
Стандартная бумага |
A4 |
(от 14 до 28 |
(80 г/м2, 20 |
|
1 |
B4 JIS |
фунтов) |
фунтов) |
|
Обычная бумага 2 |
B5 JIS |
||
|
Бумага средней |
A5 |
||
|
плотности |
|||
|
11 × 17 |
|||
|
Переработанная |
|||
|
8,5 × 14 |
|||
|
бумага |
|||
|
Цветная бумага |
8,5 × 13,4 |
||
|
Запечатанная бумага |
8,5 × 11 |
||
|
С напечатанным |
8,25 × 14 |
||
|
изображением |
8 × 10,5 |
||
|
Перфорированная |
5,5 × 8,5 |
||
|
бумага |
7,25 × 10,5 |
||
|
Бланки |
8 × 10 |
||
|
Высокосортная |
8 × 13 |
||
|
бумага |
8,5 × 13 |
||
|
Карточки |
|||
|
8,25 × 13 |
|||
|
Специальная бумага |
|||
|
8K |
|||
|
16K |
|||
|
11 × 15 |
|||
|
11 × 14 |
|||
|
10 × 15 |
|||
|
10 × 14 |
|||
47

2. Загрузка бумаги
Лотки 2 и 3 (дополнительно)
|
Тип |
Размеры |
Вес |
Емкость |
|
Стандартная бумага |
A3 |
от 60 до 105 |
500 |
|
1 |
A4 |
г/м2 |
(80 г/м2, 20 |
|
Обычная бумага 2 |
B4 JIS |
(от 16 до 28 |
фунтов) |
|
фунтов) |
|||
|
Бумага средней |
B5 JIS |
||
|
плотности |
|||
|
A5 |
|||
|
Переработанная |
|||
|
B6 JIS |
|||
|
бумага |
|||
|
Цветная бумага |
11 × 17 |
||
|
Запечатанная бумага |
8,5 × 14 |
||
|
С напечатанным |
8,5 × 13,4 |
||
|
изображением |
8,5 × 11 |
||
|
Перфорированная |
8,25 × 14 |
||
|
бумага |
8 × 10,5 |
||
|
Бланки |
5,5 × 8,5 |
||
|
Высокосортная |
7,25 × 10,5 |
||
|
бумага |
8 × 10 |
||
|
Карточки |
|||
|
8 × 13 |
|||
|
Специальная бумага |
|||
|
8,5 × 13 |
|||
|
8,25 × 13 |
|||
|
8K |
|||
|
16K |
|||
|
11 × 15 |
|||
|
11 × 14 |
|||
|
10 × 15 |
|||
|
10 × 14 |
|||
48
 Loading…
Руководства Ricoh MP 2014AD Размер файлов: 2207 KB, Язык: English, Формат: pdf, Платформа: Windows/Linux, Дата: 2017-02-23
На данной странице вы можете скачать руководства Ricoh MP 2014AD. Мы предлагаем вам ознакомиться с руководством пользователя, инструкцией по сервисному обслуживанию и ремонту.
Также здесь вы найдете список заказных номеров на комплектующие Ricoh MP 2014AD.
Все файлы предоставляются исключительно в ознакомительных целях. И не являютя руководством по ремонту, а направлены лишь на то чтобы помочь вам более детально ознакомиться с принципом построения устройства.
Содержимое представленных здесь руководств требуют от вас знания технического английского языка.
Если вы собираетесь скачать руководство по сервисному обслуживанию Ricoh MP 2014AD, иными словами сервис мануал, вы дожны обладать хотя бы минимальными познаниями в области электроники и пониманием базовых принципов работы электромеханических устройств.
Для просмотра руководств вам понадобится Adobe Acrobat Reader версии 9 и выше либо другая программа для просмотра pdf файлов.
В связи с популярностью информации представленной на сайте и ее бесплатного предоставления конечному пользователю, убедительная просьба использовать специальные программные продукты для многопотокового скачивания файлов.
Руководства для Ricoh MP 2014AD
- Руководство пользователя (User manual)
- Руководство по сервисному обслуживанию (Service manual)
- Руководство по ремонту (Repair manual)
- Перечень комплектующих (PartList)