-
Contents
-
Table of Contents
-
Troubleshooting
-
Bookmarks
Quick Links
EXPERT 24
CUTTING PLOTTER
User Manual
`
Great Computer Corporation ©
V.10 2013 Dec.
Related Manuals for GCC Technologies EXPERT 24
Summary of Contents for GCC Technologies EXPERT 24
-
Page 1
EXPERT 24 CUTTING PLOTTER User Manual Great Computer Corporation © V.10 2013 Dec. -
Page 2
NOTICE GCC reserves the right to modify the information contained in this user manual at any time without prior notice; un-authorised modification, copying distribution or display is prohibited. All comments, queries or suggestions concerning this manual please consult with your local dealer. V.10 2013 Dec. -
Page 3: Important Information
Expert 24 user manual Important Information Thank you for purchasing the Expert 24 Cutting Plotter. Before you use the cutting plotter, please make sure that you have read the safety precautions and instructions below. Caution SAFETY PRECAUTIONS! For safety concern, please always hold the cutter firmly from the bottom while moving it.
-
Page 4: Table Of Contents
3-10 4. Basic Maintenance Cleaning the cutting Plotter Cleaning the Grid Drum Cleaning the Pinch Rollers 5. Trouble Shooting What if Expert 24 cannot Operate? Light Indicators Cutting Quality Problems Appendix A-1 CorelDraw instruction A-2 Expert 24 Specification A-3 Blade Specification…
-
Page 5: General Information
Expert 24 user manual 1. General Information Package Items The package of Expert 24 contents the items listed below, please check carefully. If you find any item missing, please consult your local dealer for further assistance. Item Quantity Cutting Plotter…
-
Page 6: The Appearance
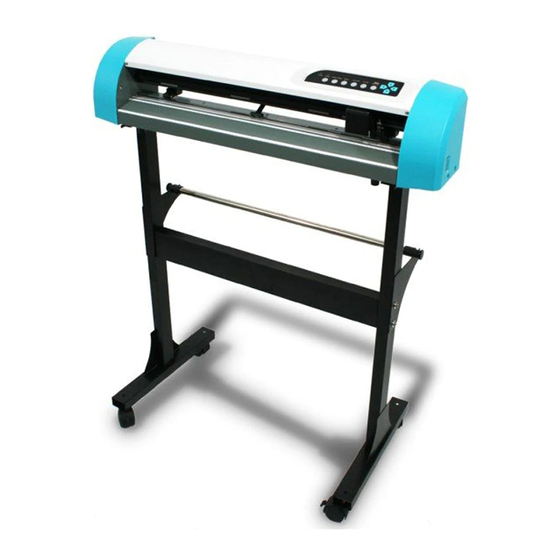
Expert 24 user manual The Appearance (EX-24) 1.3.1 The Front View 【 【 【 【 Figure 1-1】 】 】 】 Object Description Primary Pinch Roller To help hold the media during cutting. Slicing Groove To help slice off media. Alignment Ruler…
-
Page 7
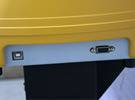
Expert 24 user manual 1.3.3 The Side Views 【 【 【 【 Figure 1-4】 】 】 】 【 【 【 【 Figure 1-3】 】 】 】 Object Description AC Power Connector To insert the AC power cord. Fuse 3Amp. Power Switch To turn on or off the machine. -
Page 8: Installation
Expert 24 User Manual 2. Installation Precaution Please read below information carefully before you start installation. Notice 1 Make sure the power switch is off before installing the cutting plotter. Carefully handle the cutter to prevent any injuries. Notice 2 Choosing a proper place before setting up the cutting plotter Before installing your cutting plotter, select a suitable location, which meets the following conditions.
-
Page 9
Step 1 Please examine the supplied items in the accessory box of the stand carton before you install: Stand is an optional item for Expert 24, Item List: : : : 1 Left side vertical stand 1 Right side vertical stand… -
Page 10
Expert 24 User Manual Step 3 Place the stand beam upright on the T-stand and put the screws into the holes but do not tighten them at this step. Stand Beam T-stand Figure 2-2 Step 4 Position both the left Support and right Support perpendicularly to the T-stand and put the screws into the holes and tighten them as shown in Figure 2-3. -
Page 11
Expert 24 User Manual Step 5 Remove the cutting plotter from the carton. Position the stand under the plotter, and insert the screws into the holes on the bottom of the plotter but do not tighten them up as shown in Figure 2-4. -
Page 12: Blade Installation
Expert 24 User Manual 2.3 Blade Installation Figure 2-6 is the illustrator of the blade Adjustment depth knob holder. Insert a blade into the bottom of the blade holder and remove the blade by pushing the pin. Make sure that your fingers Outward ring are away from the blade tip.
-
Page 13
Expert 24 User Manual Step 4 Insert the blade holder into tool carriage. Please note the outward ring of the holder must put into the grooves of carriage firmly (see Figure 2-10), fasten the case (Figure 2-11). Figure 2-10 Figure 2-11… -
Page 14: Media Loading
Expert 24 User Manual Media Loading 2.4.1 Loading the Sheet Media To load the media properly, please follow the below procedures: Step 1 Lift the 2 levers at the back side of cutter to raise pinch rollers ( Figure 2-12…
-
Page 15
Expert 24 User Manual CAUTION! Make sure the Primary and secondary pinch rollers are set to right positions. Position the Primary Pinch Rollers at the right and left sides of media. Position the Secondary Pinch Roller at the center of media. -
Page 16: Loading The Roll Media
Expert 24 User Manual Note: Always adjust the position with the pinch rollers raised. Please reposition the pinch roller by holding the center of the pinch roller and moving it from the rear end of the machine. (Figure 2-19) DO NOT move the pinch roller by holding its front rubber roller (Figure 2-20).
-
Page 17: Cable Connections
When USB connection is enabled, serial port will be disabled automatically. 2.5.1 USB Interface Expert 24 build-in USB interface are based on the Universal Serial Bus Specifications Revision 1.1. (Operation system of Windows 95, Windows NT don’t support USB ). USB driver installation…
-
Page 18
Expert 24 User Manual Step 2: Installing the software (1) Put the installation CD into your CD-ROM. Please make sure that the USB device is connected before you start the driver installation. (2) Choose the model you want to install from the driver list and click on Win 8/ 7/ Vista/ XP Driver (Manual Selection) or Win 8/ 7/ Vista/ XP Driver (Automatic detection) to start installing the Driver and AAS plugin. -
Page 19
Expert 24 User Manual (4) The installation will take a few minutes to complete and you will see a message below and click on “OK” upon completion. Enjoy your GCC cutter! Note: (1) If the driver is being installed for a second time, the user will be prompted as to whether a second copy of the driver installation is required. -
Page 20: Driver Un-Installation
Expert 24 User Manual 2.5.2 Driver Un-installation You have to remove previous version driver installed on your PC system completely before you can install the latest version successfully. Please refer to below steps. 1. Right click on the printer to remove the printer from system Printer page.
-
Page 21
Expert 24 User Manual 2. After removing the unit, right click on any empty space on the page and select “Server Property” 3. Select “Driver” page Installation 2-14… -
Page 22
Expert 24 User Manual Select the model and click on “Remove”. Installation 2-15… -
Page 23: Rs-232 Interface
Expert 24 User Manual Click on “OK” Click on “Yes” The driver installed on PC is completely removed. 2.5.3 RS-232 Interface Connecting to the RS-232 (Serial) Port For IBM PC, PS/2 users or compatibles, connect the RS-232C cable to the serial connector of the assigned serial port (COM1 or COM2) of your host computer.
-
Page 24
Expert 24 User Manual Step 1. Please set A-PC’s printer driver to shared printer. (Right-click on printer icon, choose “Printer properties”. Click “Sharing” tab then check “Share this printer”) Step 2. Click “Advanced” tab, then choose “Print directly to the printer” option. -
Page 25
Expert 24 User Manual Step 3. Send a job to the machine to check if A-PC is connected to the machine. Try to send a job to check if the port is working. Step 4. Activate A-PC’s Printer Driver from B-PC’s Network. -
Page 26: Operation
Expert 24 user manual 3. Operation 3.1 The Control Panel 3.1.1 The Outline of control panel Figure 3-1 Function POWER LED Indicates the power status ( LED ON: power on; LED OFF: power off ) ERROR LED Indicates the error status ( LED ON: error; LED OFF: normal ) Switches modes or stops cutting job (LED ON: on-line;…
-
Page 27: Vlcd
Expert 24 user manual Step 2 Press the ORIGIN SET button to reset origin. 3.1.3 Cut Test Note: Make sure the machine is in off-line mode to enable this function. It’s recommended to run this function until the cutting quality meets your demand before executing the cutting job.
-
Page 28
Expert 24 user manual Step 3 Choose the correct port setting that is used for connecting the cutter to your computer (Figure 3-2). If you are using the USB cable, choose USB0 from the pull down menu. If you are using a Serial cable, choose either COM1 or COM2. -
Page 29
Expert 24 user manual Poll Size Click on the Poll Size button to reveal the X/Y values. Paper length represents the maximum plotting length. Paper Width represents the distance between the farthest two pinch rollers. (Figure 3-4). Figure 3-4 Force Adjusts the blade force between 0 and 250 (Default = 50). -
Page 30
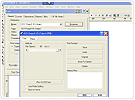
Expert 24 user manual 3.2.3 Restore factory default settings VLCD allows you to turn all parameters to factory-default settings. Step 1 Enter the USB-port switching mode by pressing “Pause”(2) after “On/Off line”(1) and then press “Origin Set” (3). Step 2 Press the left key (4) and then up (5) Step 3 You have now entered the Data clear and restoring default settings mode;… -
Page 31: File Uploader
Expert 24 user manual 3.3 File Uploader 3.3.1 Installation “File Uploader” is a tool to help loading files for direct output. The program ONLY supports HPGL format-files generated via GCC Cutter driver. Copy the GCC File Uploader.exe file in the Accessories folder of the Sable’s Installation CD onto your local drive to finish installation.
-
Page 32: Data Transmission
Expert 24 user manual Data Transmission There are two options to transmit the data from the computer to the cutting plotter: Option 1: With proper interface settings, the data can be transmitted from your application software package to the cutting plotters directly.
-
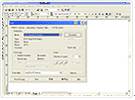
Page 33: Expert 24 Print Driver Setting
Expert 24 user manual 3.5 Expert 24 Print Driver setting 3.5.1 Expert 24 Print Driver setting>Option Page Die Cut The Die Cut function must be activated with the Kiss Cut function to avoid the falling of cut-through materials and material jam beneath the carriage. Die Cut helps you to cut through the backing of the material while Kiss Cut cuts through only the top layer but not the backing.
-
Page 34
Expert 24 user manual To activate the Die Cut function, go to “Option”, tick “Die Cut”, and enter the amount you wish for the “Length” and “Force” of both Die Cut and Kiss Cut, then click “OK” (see figure 2). -
Page 35: Reference Parameter Setting For Different Materials
Expert 24 user manual 3.6 Reference Parameter setting for different materials The following reference parameter is used on GCC verified materials shown in the table. Material Wall stickers Magnets Protective tint Blade green green Blade tip length (mm) Force (g)
-
Page 36: Basic Maintenance
Expert 24 user manual 4. Basic Maintenance This chapter explains the basic maintenance (i.e. cleaning the cutting plotter) required for the cutting plotter. Except 24 for the steps mentioned below, all the other maintenances must be performed by a qualified service technician.
-
Page 37: Cleaning The Pinch Rollers
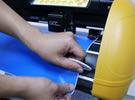
Expert 24 user manual Figure 4-1 4.3 Cleaning the Pinch Rollers If the pinch rollers need a thorough cleaning, use a lint-free cloth or cotton swab to wipe away the accumulated dust from the rubber portion of the pinch rollers. To prevent the pinch rollers from rotating while cleaning, use your fingers to hold the pinch rollers in place.
-
Page 38: Trouble Shooting
Why doesn’t the cutting plotter operate? 5.1 What if Expert 24 cannot operate? If your cutting plotter doesn’t plot, please check the following items first: Is the power cord plugged in properly?
-
Page 39
Expert 24 user manual 5.2.1 Warning Indicators When the ERROR LED flashes (as shown below), take the necessary actions according to the following instructions. When the problems are solved, the ERROR LED will turn off automatically. Pressing the ON/OFF LINE button can also turn off the ERROR LED. -
Page 40
Expert 24 user manual Warning 4 Cannot repeat cutting There are two possibilities: 1. There is no data in the buffer: please send the job again from your computer; 2. The buffer is full: please send the same job from your computer again. -
Page 41: Cutting Quality Problems
Expert 24 user manual Error 3 Check the media, drum or X-motor (Drum driven motor) This message indicates that there might be a problem on the X-axis. Please check that the drums are working normally and see that the media is well loaded. Then turn on the power and reboot the cutting plotter.
-
Page 42: Coreldraw Instruction
Expert 24 User Manual CorelDRAW Output Instruction The following is an example of how to output the file with CorelDRAW. User Instructions 1. Open CorelDRAW, finish editing all the files you wish to plot and select all the images at once.
-
Page 43
Expert 24 User Manual 4. Select “ File → Print” to output the file to your cutters. 5. Choose the correct model you have installed. CorelDRAW Plug-In… -
Page 44
Expert 24 User Manual 6. Choose the “Layout page” and click the “Reposition images to: → Bottom left corner”. Please note that you must put your image at the bottom left corner. 7. Go back to the General page and check that your image is at the bottom left corner. Click “Print”… -
Page 45: Expert 24 Specification
Expert 24 user manual Expert 24 Specification Model Model Model Model EX- — — — 24 Max. Cutting Width Max. Cutting Width 600mm (23.6″) Max. Cutting Width Max. Cutting Width Max. Media Width Max. Media Width Max. Media Width Max. Media Width 719mm (28.3″)
-
Page 46: Blade Specification
Expert 24 User Manual Blade Specification For cutting thick fluorescent and reflective vinyl. Also for cutting detailed work in standard vinyl. 20200159G The blade is 45° with Red Cap(5-unit package), 0.25 mm offset For cutting reflective vinyl, cardboard, sandblast, flock, and stencil sharp edge.
-
Page 47
Expert 24 User Manual About the Tool A generic term referring to the blade that cuts the sheet, the pen that does plotting, and the LED bombsight (option) used for pointing to the reference point. OFFSET is the distance that the blade tip is displaced from the centerline of the blade. -
Page 48: Directcut
Expert 24 user manual DirectCut Instruction DirectCut Mac AI Plug-in is compatible with MAC OS X 10.4-10.7 (operated with Adobe Illustrator CS2-CS5). If you want to use Adobe Illustrator CS6 on your MAC, you may need Parallels Desktop software, Window OS and Windows based Adobe Illustrator CS6 to install Windows OS in your MAC computer and run Windows based software under MAC computer.
-
Page 49
Expert 24 user manual You will be presented with this dialog below: Step 2. Create/ import your image/ file. For texts 1) Enter your texts in Adobe Illustrator, select the letters and click [Text outline] to outline the letters. A contour line will be created for your image. -
Page 50
Expert 24 user manual For Images 1) Open a new image on Illustrator and decide the size of your material. 2) Select the image and click [Make outline and offset] to create outlines of graphics. Outlines will be created for your image. -
Page 51
Expert 24 user manual 3) Click on the image and apply the AAS function by clicking the [Add registration marks] command and select the registration marks needed. The registration marks will be created as below. DriectCut… -
Page 52
Expert 24 user manual Step 3. Output 1) Click on [Plotter Setup] and select the correct model in [Plotter List]. 2) Tick Default Environment to create Pen No.1 in the Pen section. Double click Pen No.1 and complete your parameter settings. -
Page 53
Expert 24 user manual 3) Select the entire object and click [Plotter Output]. 4) Output the object by clicking [Export] and GCC Cutting Plotter will start cutting the image. DriectCut…
-
Contents
-
Table of Contents
-
Troubleshooting
-
Bookmarks
1.1
1.2
1.3
2. Installation
2.1
Precaution
2.2
2.3
2.4
2.4.3 How to change the poll size without turning off the
2.5
3.Operation
3.1
The Control Panel
3.2
3.3
3.4
3.5
3.6
4.1
4.2
4.3
5.1
5.2
Calibrating the System
5.3
5.4
5.4
5.5
Table of Contents
T
a
b
l
e
o
f
T
a
b
l
e
o
f
machine?
C
o
n
t
e
n
t
s
C
o
n
t
e
n
t
s
Expert 24 LX user manual
1-1
1-1
1-2
2-1
2-2
2-5
2-7
2-7
2-9
2-9
2-10
2-10
2-13
2-16
2-16
3-1
3-2
3-6
3-7
3-9
3-9
3-10
4-1
4-1
4-2
5-1
5-2
5-2
5-3
5-4
5-6
5-6
5-9
Related Manuals for GCC Technologies EXPERT 24 LX
Related Content for GCC Technologies EXPERT 24 LX
Table of Contents
Технические характеристики-Видео-Отзывы и вопросы
Новый плоттер Expert II-24LX имеет давление ножа 350 грамм и скорость резки до 705 мм/сек, он обеспечивает высокое качество резки и оснащен автоматической оптической системой позиционирования для резки по напечатанному! В этой недорогой машине использованы основные компоненты от плоттеров GCC профессиональных серий, что гарантирует высокое качество по доступной цене.
|
|
Гарантированная высокоточная протяжка до 3 м |
|
|
Два вида интерфейса (USBи COM) |
|
|
Передовой драйвер |
|
|
Удобная панель управления |
|
|
Удобный ручной отрезной нож |
|
|
Автоматическая система позиционирования для резки по напечатанному: Standard AAS II. Производство стикеров, наклеек, этикеток и пр. |

|
Модель |
Expert II-24LX |
|
Макс. ширинарезки |
600 мм |
|
Макс. заправляемая ширина материала |
719 мм |
|
Макс. толщина материала |
0.8 мм |
|
Тип двигателей |
Микрошаговые |
|
Давление ножа |
350 грамм |
|
Максимальная скорость (Диагональная) |
705 мм/сек. |
|
Механическое разрешение |
0.012 мм |
|
Программное разрешение |
0.025 мм |
|
Точность перемещения |
±0.254 ммили не более ±0.1% от расстояния |
|
Повторяемость |
±0.1 мм |
|
Подача материала |
3 м |
|
Буфер памяти |
500 KByte |
|
Интерфейс |
USB 2.0 (Скоростной) и RS-232 |
|
Язык команда |
HP-GL, HP-GL/2 |
|
Настройка начальной точки |
Да |
|
Панель управления |
6 светодиодов / 10 клавиш |
|
Напольный стенд |
Опционально |
|
Автоматическая система позиционирования для резки по напечатанному |
Standard AAS II |
Пример работы Режущего плоттера GCC Expert II-24LX
Описание-Технические характеристики-Отзывы и вопросы
Описание-Видео-Отзывы и вопросы
Макс. давление ножа(г): 350
Макс. скорость резки(мм/сек): 705
Тип двигателя: шаговый
Резка по напечатанному: есть
Макс. ширина рулона(мм): 600
Макс. ширина резки(мм): 719
Описание-Технические характеристики-Отзывы и вопросы
Описание-Технические характеристики-Видео
11.01.2018 Юлия
Добрый день! Подскажите, пжл, ответы на данные вопросы по плоттеру GCC Expert 24 LX
1. Он совместим с Corel, т.е. напрямую с ним работает?
2. Можно ли на нем резать пленку без подложки (без коврика)?
3. Инструкция и программное обеспечение на русском языке?
4. Могут ли резать пленку без коврика (кэрриер)
Ответ: Здравствуйте Юлия,
1. С корелом работает на прямую.
2. Можно резать без подложки, но нож будет тупиться гораздо быстрее и защитную полоску (марзан) придётся менять чаще
3. Инструкция на русском языке, программное обеспечение на английском (но вскоре будет на русском)
С уважением менеджер отдела продаж Филимонкина Альбина
-
leharzd
Кто-нибудь пользовался GCC Expert 24?
кто нибудь пользовался GCC Expert 24 напишите что это за такой плотер, стоит ли его покупать?
-
Diman55
Сообщение Diman55 » 06 апр 2010 15:20
Мне то же интересен этот плотер, люди ну хоть кто нить с ним работал?
Я уточнял, хотел взять его в forsign, консультатн говорит, что он ничем практически не отличается от sable 60, что то с трудом верится — может в нем устранили уже тот косяк что был в sable-60, который возникает при резке вместо 1м режет 990 мм, и.т.д
-
leharzd
Сообщение leharzd » 09 апр 2010 21:34
спустя неделю цена выросла на него почти на 10тысяч!!! уже 24 стоит.
-
maugli
Сообщение maugli » 25 апр 2010 14:40
Ну насчет что цена выросла не знаю Взяли за 24200, инструкцию на русскком ессно забыли положить, режет вроде нормально, Но еще не успели толком попользоваться ![]() Попользуемся отпишу…
Попользуемся отпишу…
-
Diman55
Сообщение Diman55 » 25 апр 2010 18:27
maugli писал(а): (→)Ну насчет что цена выросла не знаю Взяли за 24200, инструкцию на русскком ессно забыли положить, режет вроде нормально, Но еще не успели толком попользоваться
Попользуемся отпишу…
![]() попробуй порезать длинные полоски (прямоугольники) если размеры путает то проблема как у Sable осталась!
попробуй порезать длинные полоски (прямоугольники) если размеры путает то проблема как у Sable осталась!
-
mores
Сообщение mores » 20 май 2010 17:08
Сначала резал резал вроде нормально, затем начал подглючивать и останавливаться, не дорезав файл до конца. Пропадает соединение между ним и компом. Режу через его родную программу. Кто-нибудь знает как это лечится?(…если вообще лечится) ![]()
-
Diman55
Сообщение Diman55 » 22 май 2010 17:02
mores писал(а): (→)Сначала резал резал вроде нормально, затем начал подглючивать и останавливаться, не дорезав файл до конца. Пропадает соединение между ним и компом. Режу через его родную программу. Кто-нибудь знает как это лечится?(…если вообще лечится)
Он заземленный у тебя ? Как его подключил! USB COM ?
-
mores
Сообщение mores » 23 май 2010 07:38
Подключен через USB, по-поводу разеток не знаю, но думаю что не заземлены. Да и еще, в Plot Manager видна загрузка файла, если «тяжеловат» то тоже не догружает до 100% и останавливается. Может не хватает памяти самого плоттера и нужно разделить на части? Что бы читал файл прямо из компьютера- возможно? Бьюсь с настройками, но пока ничего не выходит.Думаю основная причина тут. Сорри за может дурацкие вопросы, новичокс…
-
maugli
Сообщение maugli » 25 май 2010 20:29
mores писал(а): (→)Подключен через USB, по-поводу разеток не знаю, но думаю что не заземлены. Да и еще, в Plot Manager видна загрузка файла, если "тяжеловат" то тоже не догружает до 100% и останавливается. Может не хватает памяти самого плоттера и нужно разделить на части? Что бы читал файл прямо из компьютера- возможно? Бьюсь с настройками, но пока ничего не выходит.Думаю основная причина тут. Сорри за может дурацкие вопросы, новичокс…
![]()
А зачем тебе плот манагер? GreatCut и боше ни чего ненадо. этот менджер вообще забрось, я неделю с ним разбирался. тоже пытался грузить через него..
Просто возми корел драв (прога такая) сделай какой тебе нужен рисунок( без заливки и сверх тонкая обрисовка) открой греткут родную прогу она на диске шла с ним, импортируй в него этот файл cdr или eps и нажми печать и всё….
Да и матерьял заправляй при вырубленом плотере, только потом вкл. тк он при включении проверяет ширину материала и потом если будешь перетаскивать с места на место валики он будет резать только там где они были первоначально,
если их перемещаешь перезагружай и плоттер.
-
mores
Сообщение mores » 26 май 2010 23:53
Спасибо за ответ! Похоже дело было не в плоттере, а в самом компе. Переустановил виндос, заново загрузил Грет кат и драйвера. Теперь все работает! А в грет кат файлы можно не импортировать, а просто из корела перетаскивать мышкой
-
maugli
Сообщение maugli » 16 июн 2010 19:11
![]()
![]()
![]() exp24 отказался резать, подключили инет скоростной и системка вся обновилась и плоттер перестал резать, бьюсь лбом уже два дня!!! Подскажите в чем может быть дело???
exp24 отказался резать, подключили инет скоростной и системка вся обновилась и плоттер перестал резать, бьюсь лбом уже два дня!!! Подскажите в чем может быть дело???
-
Дмитрий Советкин
Сообщение Дмитрий Советкин » 01 апр 2011 09:29
Кто-нибудь сталкивался с такой проблемой на GCC Expert 24. Вместо плавных буковок он режет остроугольные. Может в настройках плоттера ставить что-то типа сглаживание кривых?
-
web-jack
Сообщение web-jack » 25 окт 2012 15:06
или в настройках оператора ставить «с опытом работы» =)
![]()
![]()
в настройках корела ставьте рабочее поле поменьше по длине и ширине.
когда рамер поля большой он «типо менше DPI» режет
-
Avery
- Активный участник
- Сообщения: 410
- Зарегистрирован: 23 июн 2010 12:34
- Последний визит: 11 июл 2023 10:12
- Изменить репутацию:
Репутация:
Голосов: 5 - Откуда: Казань

Сообщение Avery » 26 окт 2012 13:28
А длинные и большие файлы что, нельзя резать? Зачем такой плоттер нужен? Предполгаю, что получится хорошо, если резать из GreatCut. Также есть информация, что у новых драйверов, с помощью которых можно резать («печатать») из Корела данная проблема решена наконец горе-программистами из GCC.
-
Hoodgran
- Новичок
- Сообщения: 1
- Зарегистрирован: 29 дек 2015 19:17
- Последний визит: 06 фев 2016 12:27
- Изменить репутацию:
Репутация: нет - Откуда: LVOV

Сообщение Hoodgran » 06 фев 2016 12:27
mores писал(а): (→)Спасибо за ответ! Похоже дело было не в плоттере, а в самом компе. Переустановил виндос, заново загрузил Грет кат и драйвера. Теперь все работает! А в грет кат файлы можно не импортировать, а просто из корела перетаскивать мышкой
web-jack писал(а): (→)или в настройках оператора ставить "с опытом работы" =)
в настройках корела ставьте рабочее поле поменьше по длине и ширине.
когда рамер поля большой он "типо менше DPI" режет
Падскажите как в Expert pro паминять прабег пльонки 10м стандартие настроикина 80 см в плотери
Вернуться в «Режущие плоттеры GCC»
Кто сейчас на конференции
Сейчас этот форум просматривают: нет зарегистрированных пользователей и 0 гостей